Follow along with our team of quilters as we show off our new projects, discuss new and exciting techniques, talk about new fabric collections, and share news about the latest and greatest happenings here at Connecting Threads.
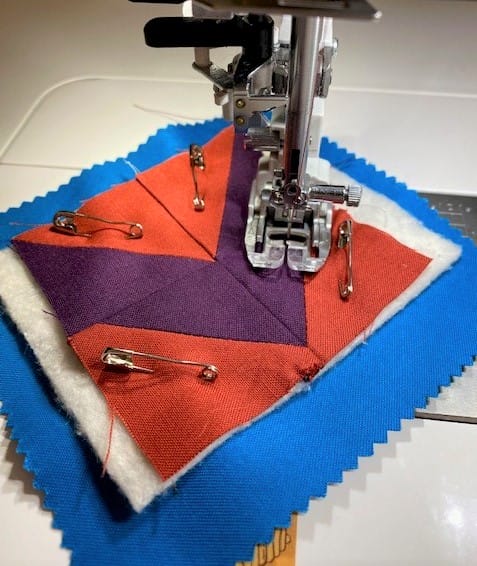
Sandwich your batting between the block and backing fabric. Spray baste to keep everything in place during quilting, or hand baste if you feel it needs it.
Step Three:
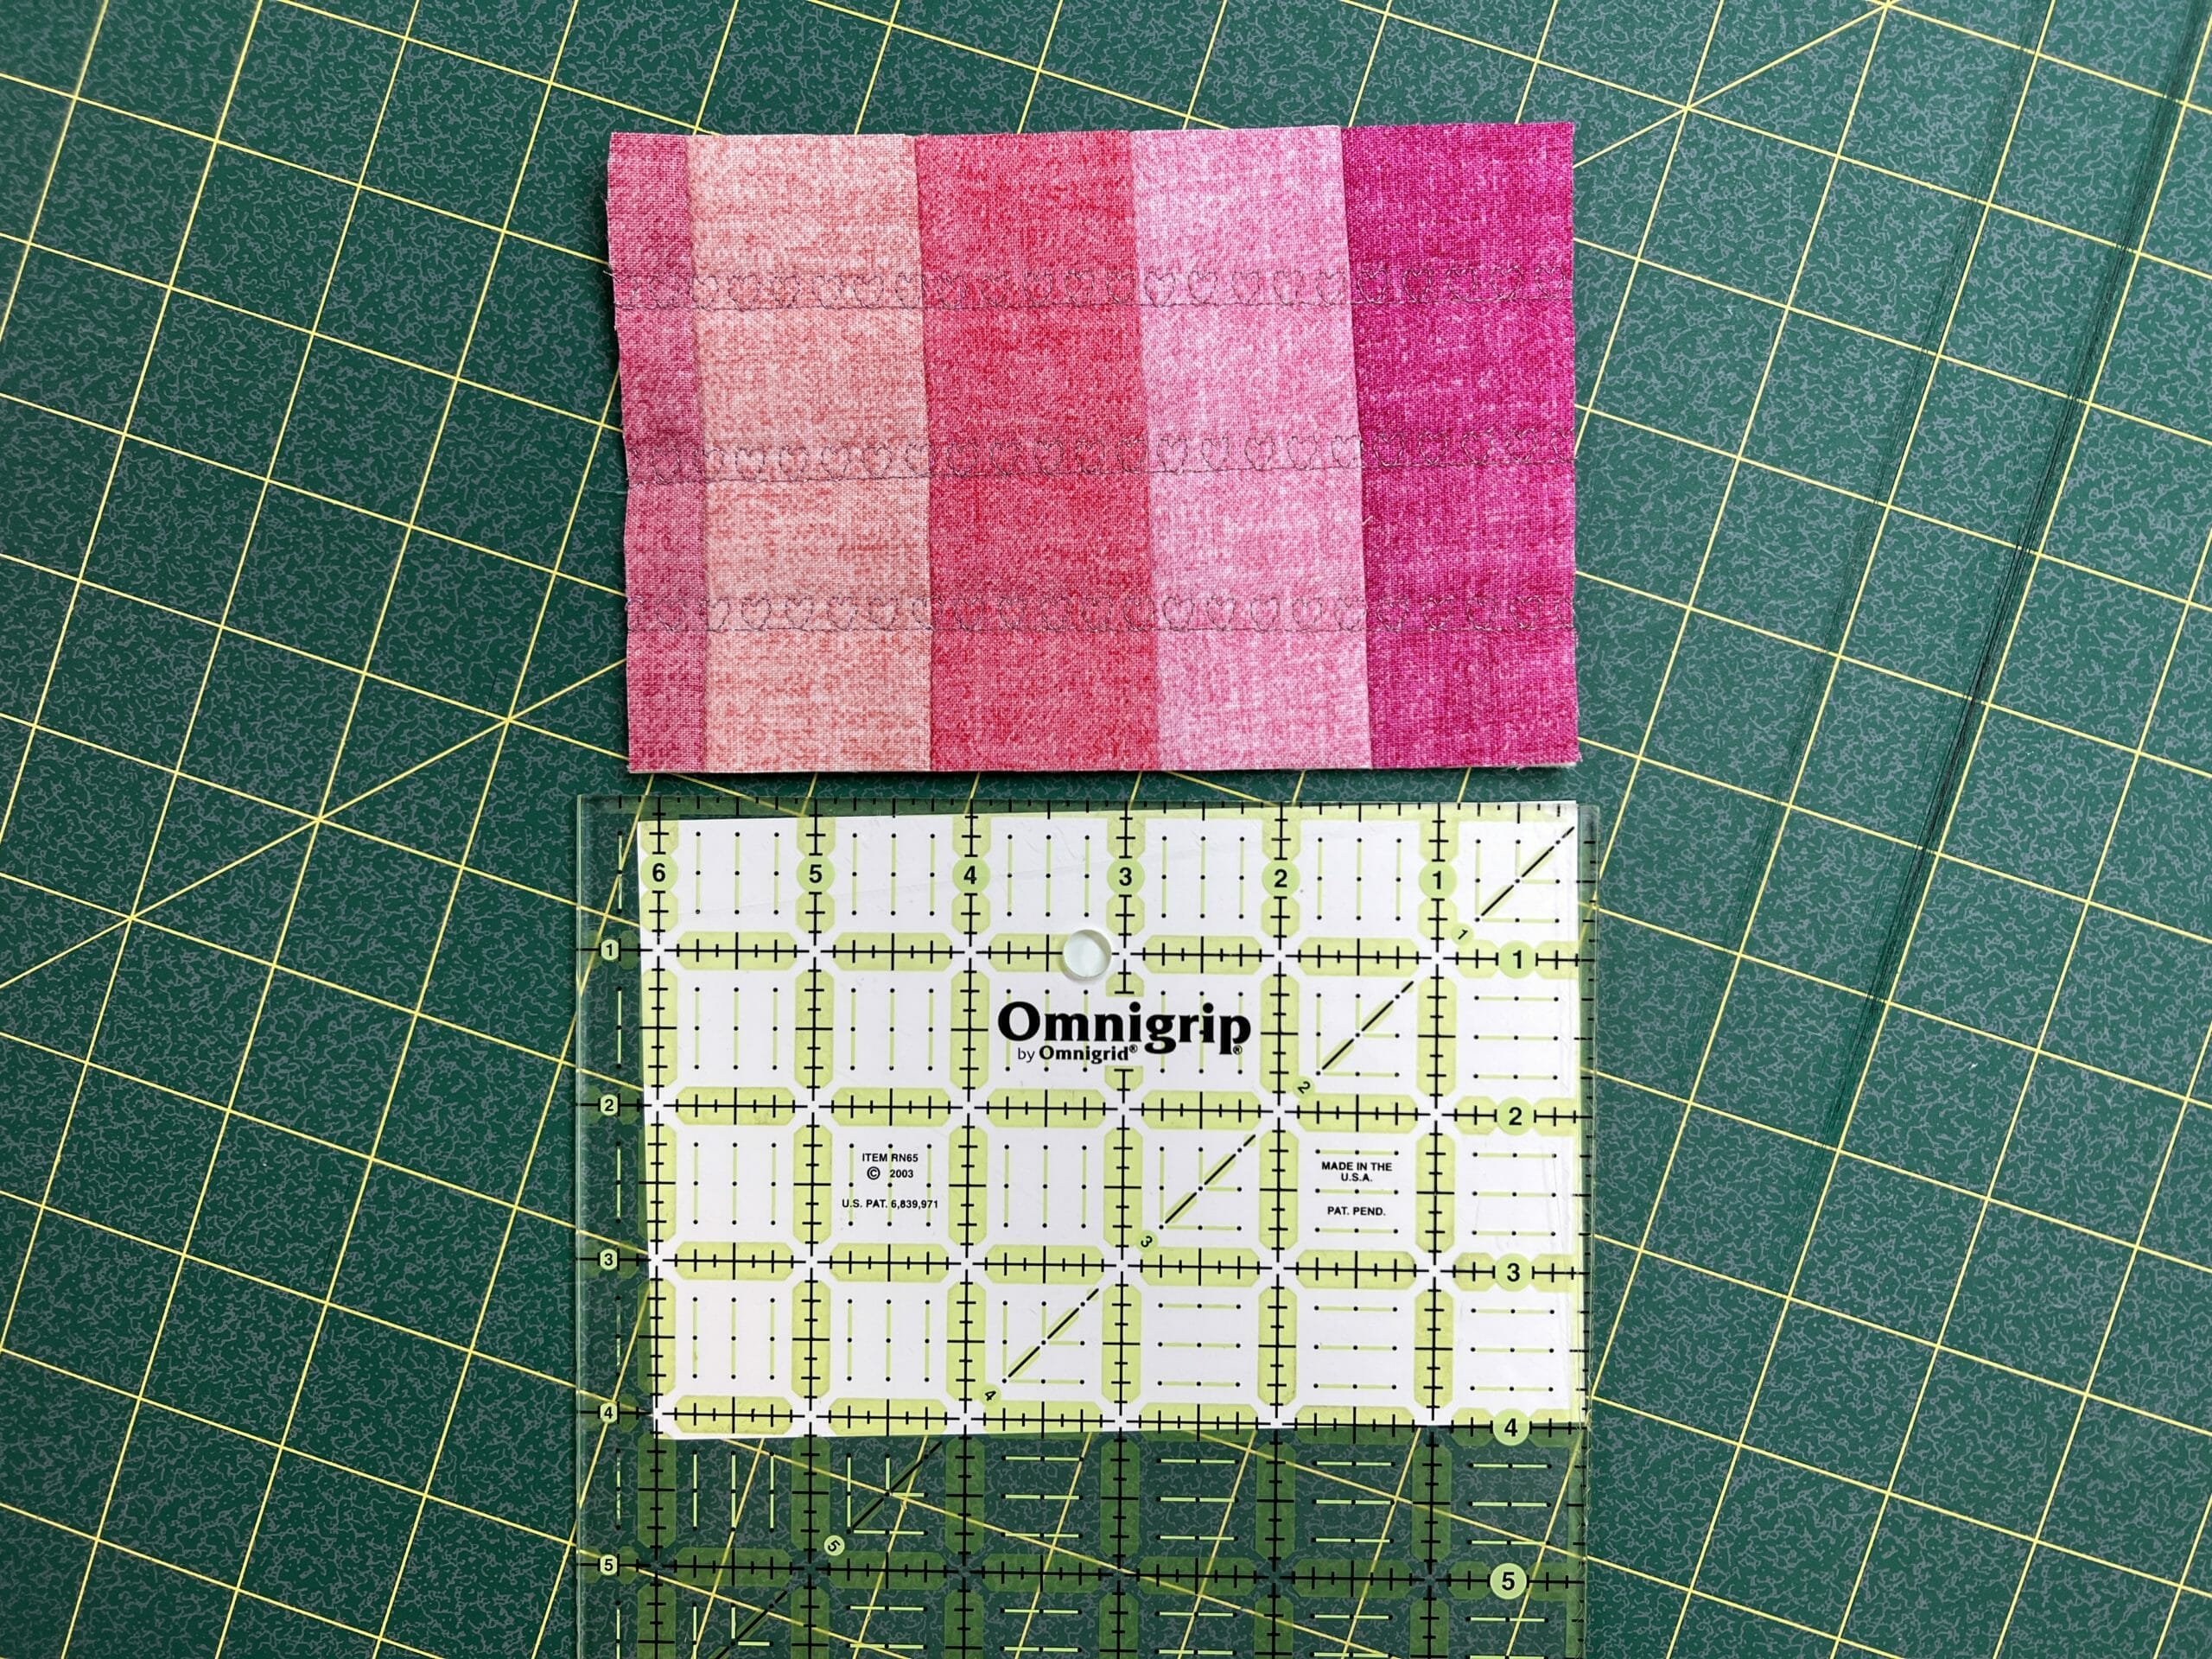
Trim the block down to size. 4×6″ Is the standard postcard size but if you plan to hand-deliver it there is no limit!
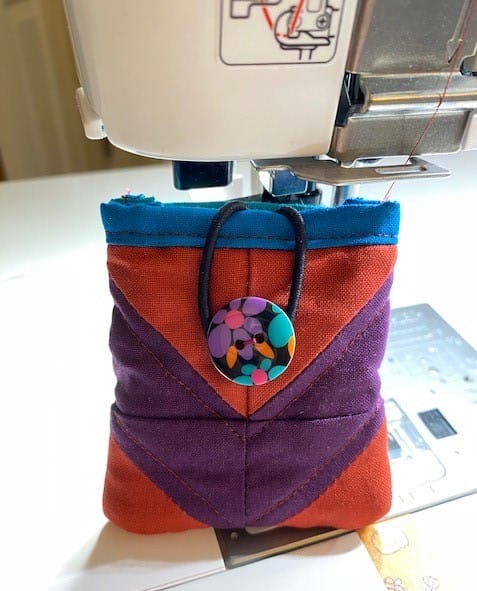
Step Four:
Time to attach your fabric to the cardstock or Bolt Boards. You want to make sure the card stock is sturdy enough to hold up during shipping, admiring, and reading! We spray-basted the paper to the back of the quilt and made sure all was lined up and fitting properly. Then, all you do is zig-zag stitch around the border. That’s it! It’s amazing how easy it is to attach and MAKE a homemade valentine!
Step 5:
Write your valentine note!
Step 6:
Time to mail or hand deliver your postcard! Postcards can be mailed as long as they are regulation size (4″ x 6″), no more than 1/8″ thick, and have the word ‘NON-MACHINABLE’ on it. Postage is currently $0.88 (as of January 2022). Or, speak with your mail person and make sure your postcard is in regulation. You could also put your card in an envelope and mail that as you normally would to prevent any damage during mailing.
Let us know in the comments if you’re making a valentine this year!
Hi everyone, and Happy New Year! I hope you all had a wonderful holiday and got some time to enjoy the sights and sounds of the season. Christmas time is my absolute favorite!
As for my family, we tried something completely different this year, and spent Christmas with our extended family on a Caribbean cruise, courtesy of my very wonderful and generous father. We had planned it way back in March, thinking we would be post-pandemic by now. We were a bit nervous to still go, but it all worked out well, and we had a blast! It was warm, sunny, and very relaxing. However, I must admit, it didn’t feel very “Christmas-y”. (Is that even a word?) We all agreed that as fun as it was, next year will be back to Christmas at home, complete with chilly evenings, lots of baking, and too many Hallmark movies.
Here’s a little snapshot of me and some of my family taken on Dec. 23rd. You’d never guess looking at this photo that it was two days before Christmas, haha! Shorts, tank tops, and sunglasses don’t exactly evoke that cozy holiday feeling, do they? In case any of you are wondering, this was taken at the Chacchoben Ruins in Mexico. It was fascinating!
Ok, enough about me. Let’s get on with talking about this Ruby quilt.
This month we will be making ANOTHER five Irish Chain blocks. I know, not very exciting, especially since we’ve done this before. And we will do it again! Since I’ve already written not one, but two blog posts about sewing up this block, I don’t think any of you need me to do it a third time. Feel free to refer back to blogposts for Month 2 and Month 4 if you want a refresher.
After getting these 5 additional blocks made this month, you should have a total of 15 finished. This means, if you’re counting, we have 10 more to go before we’re done with them.
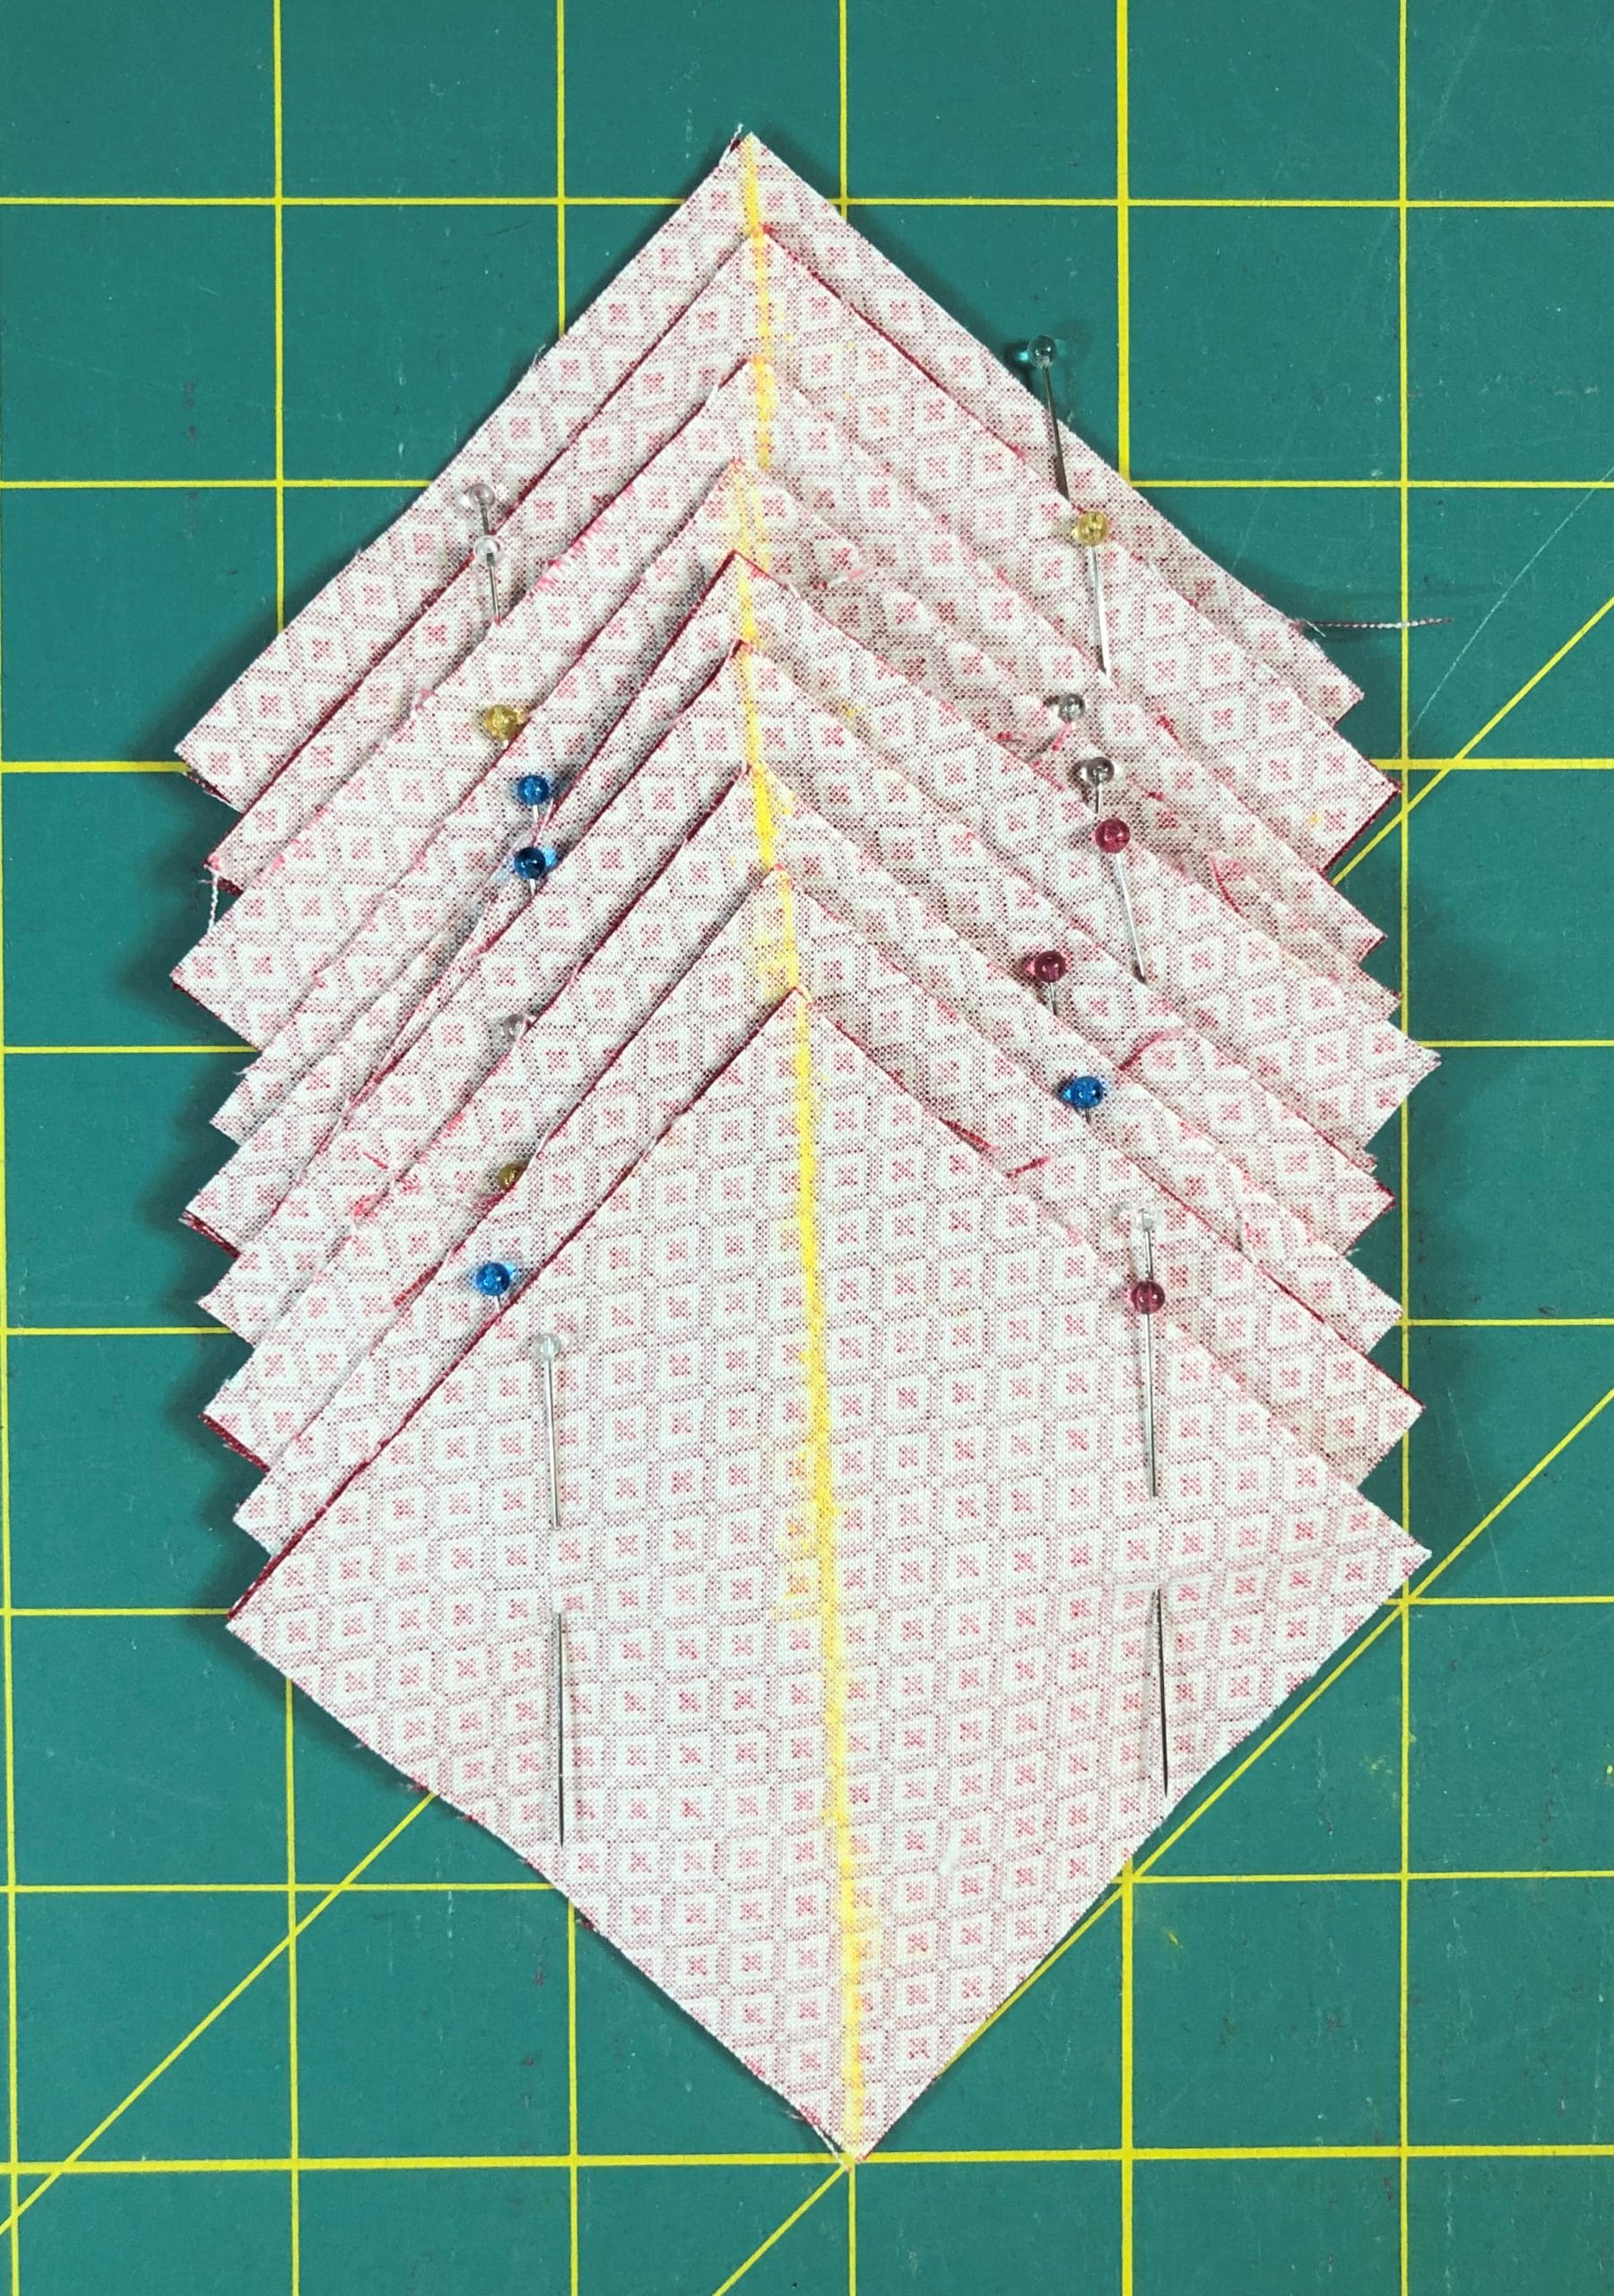
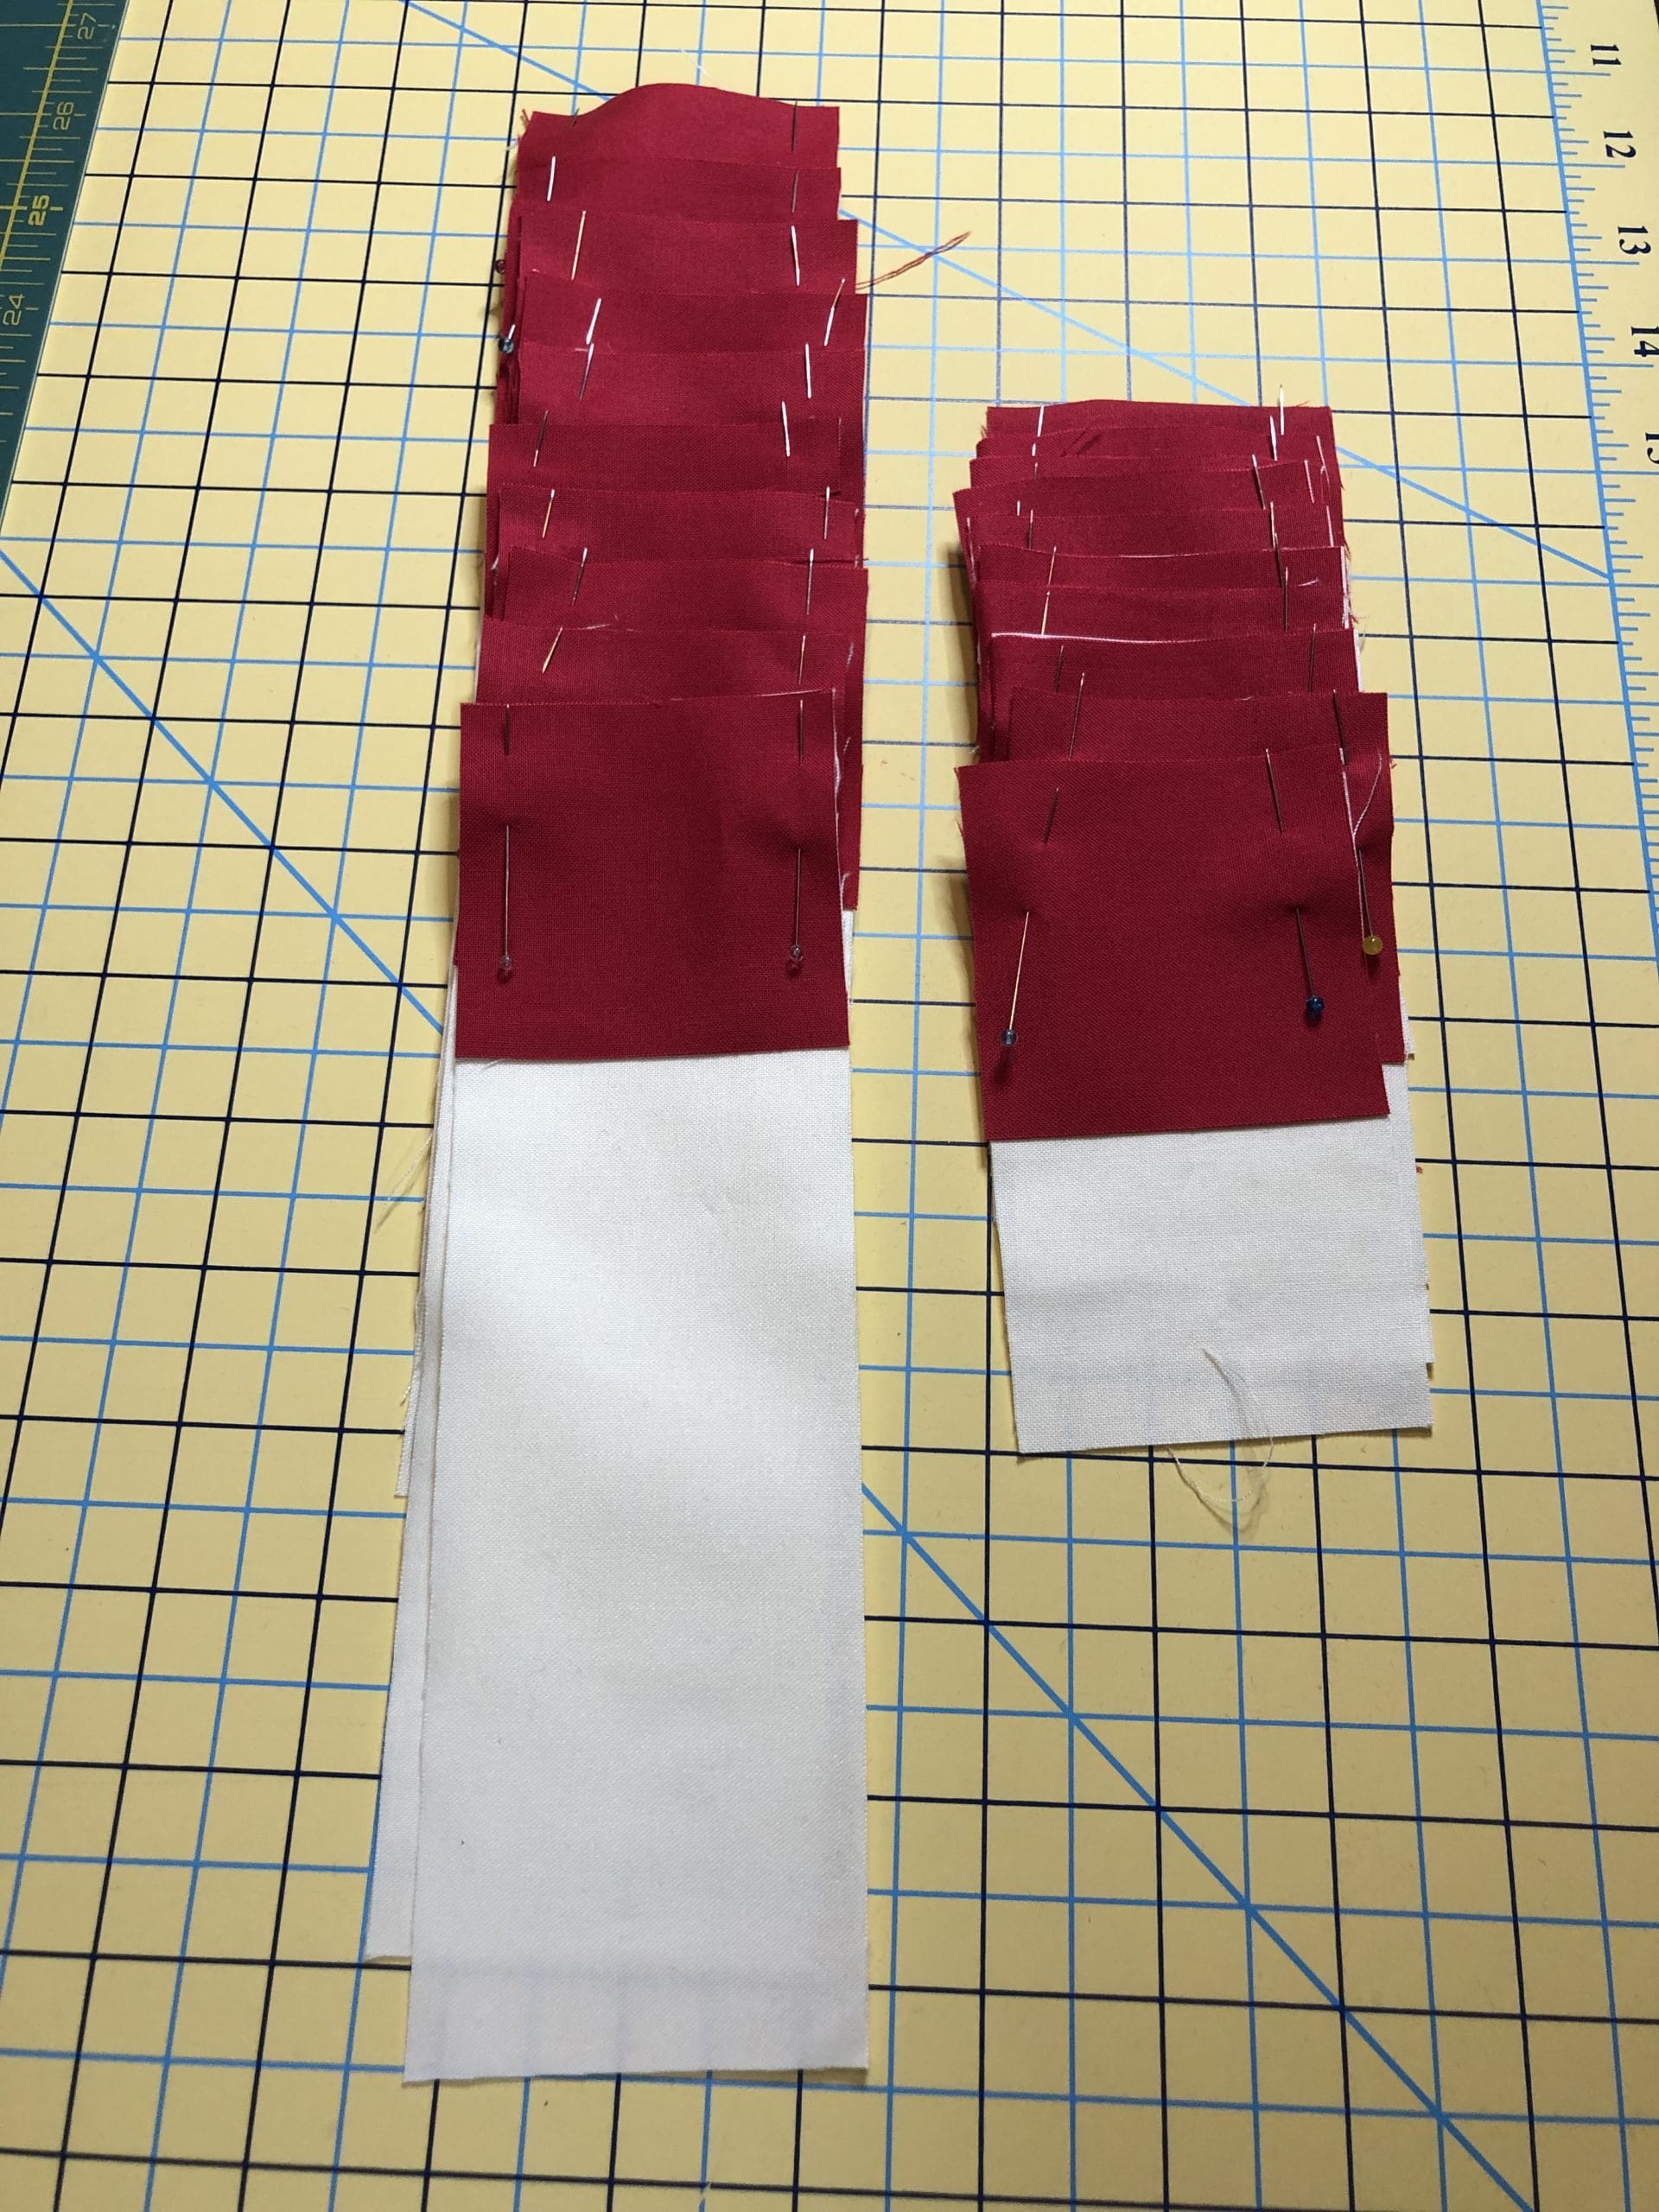
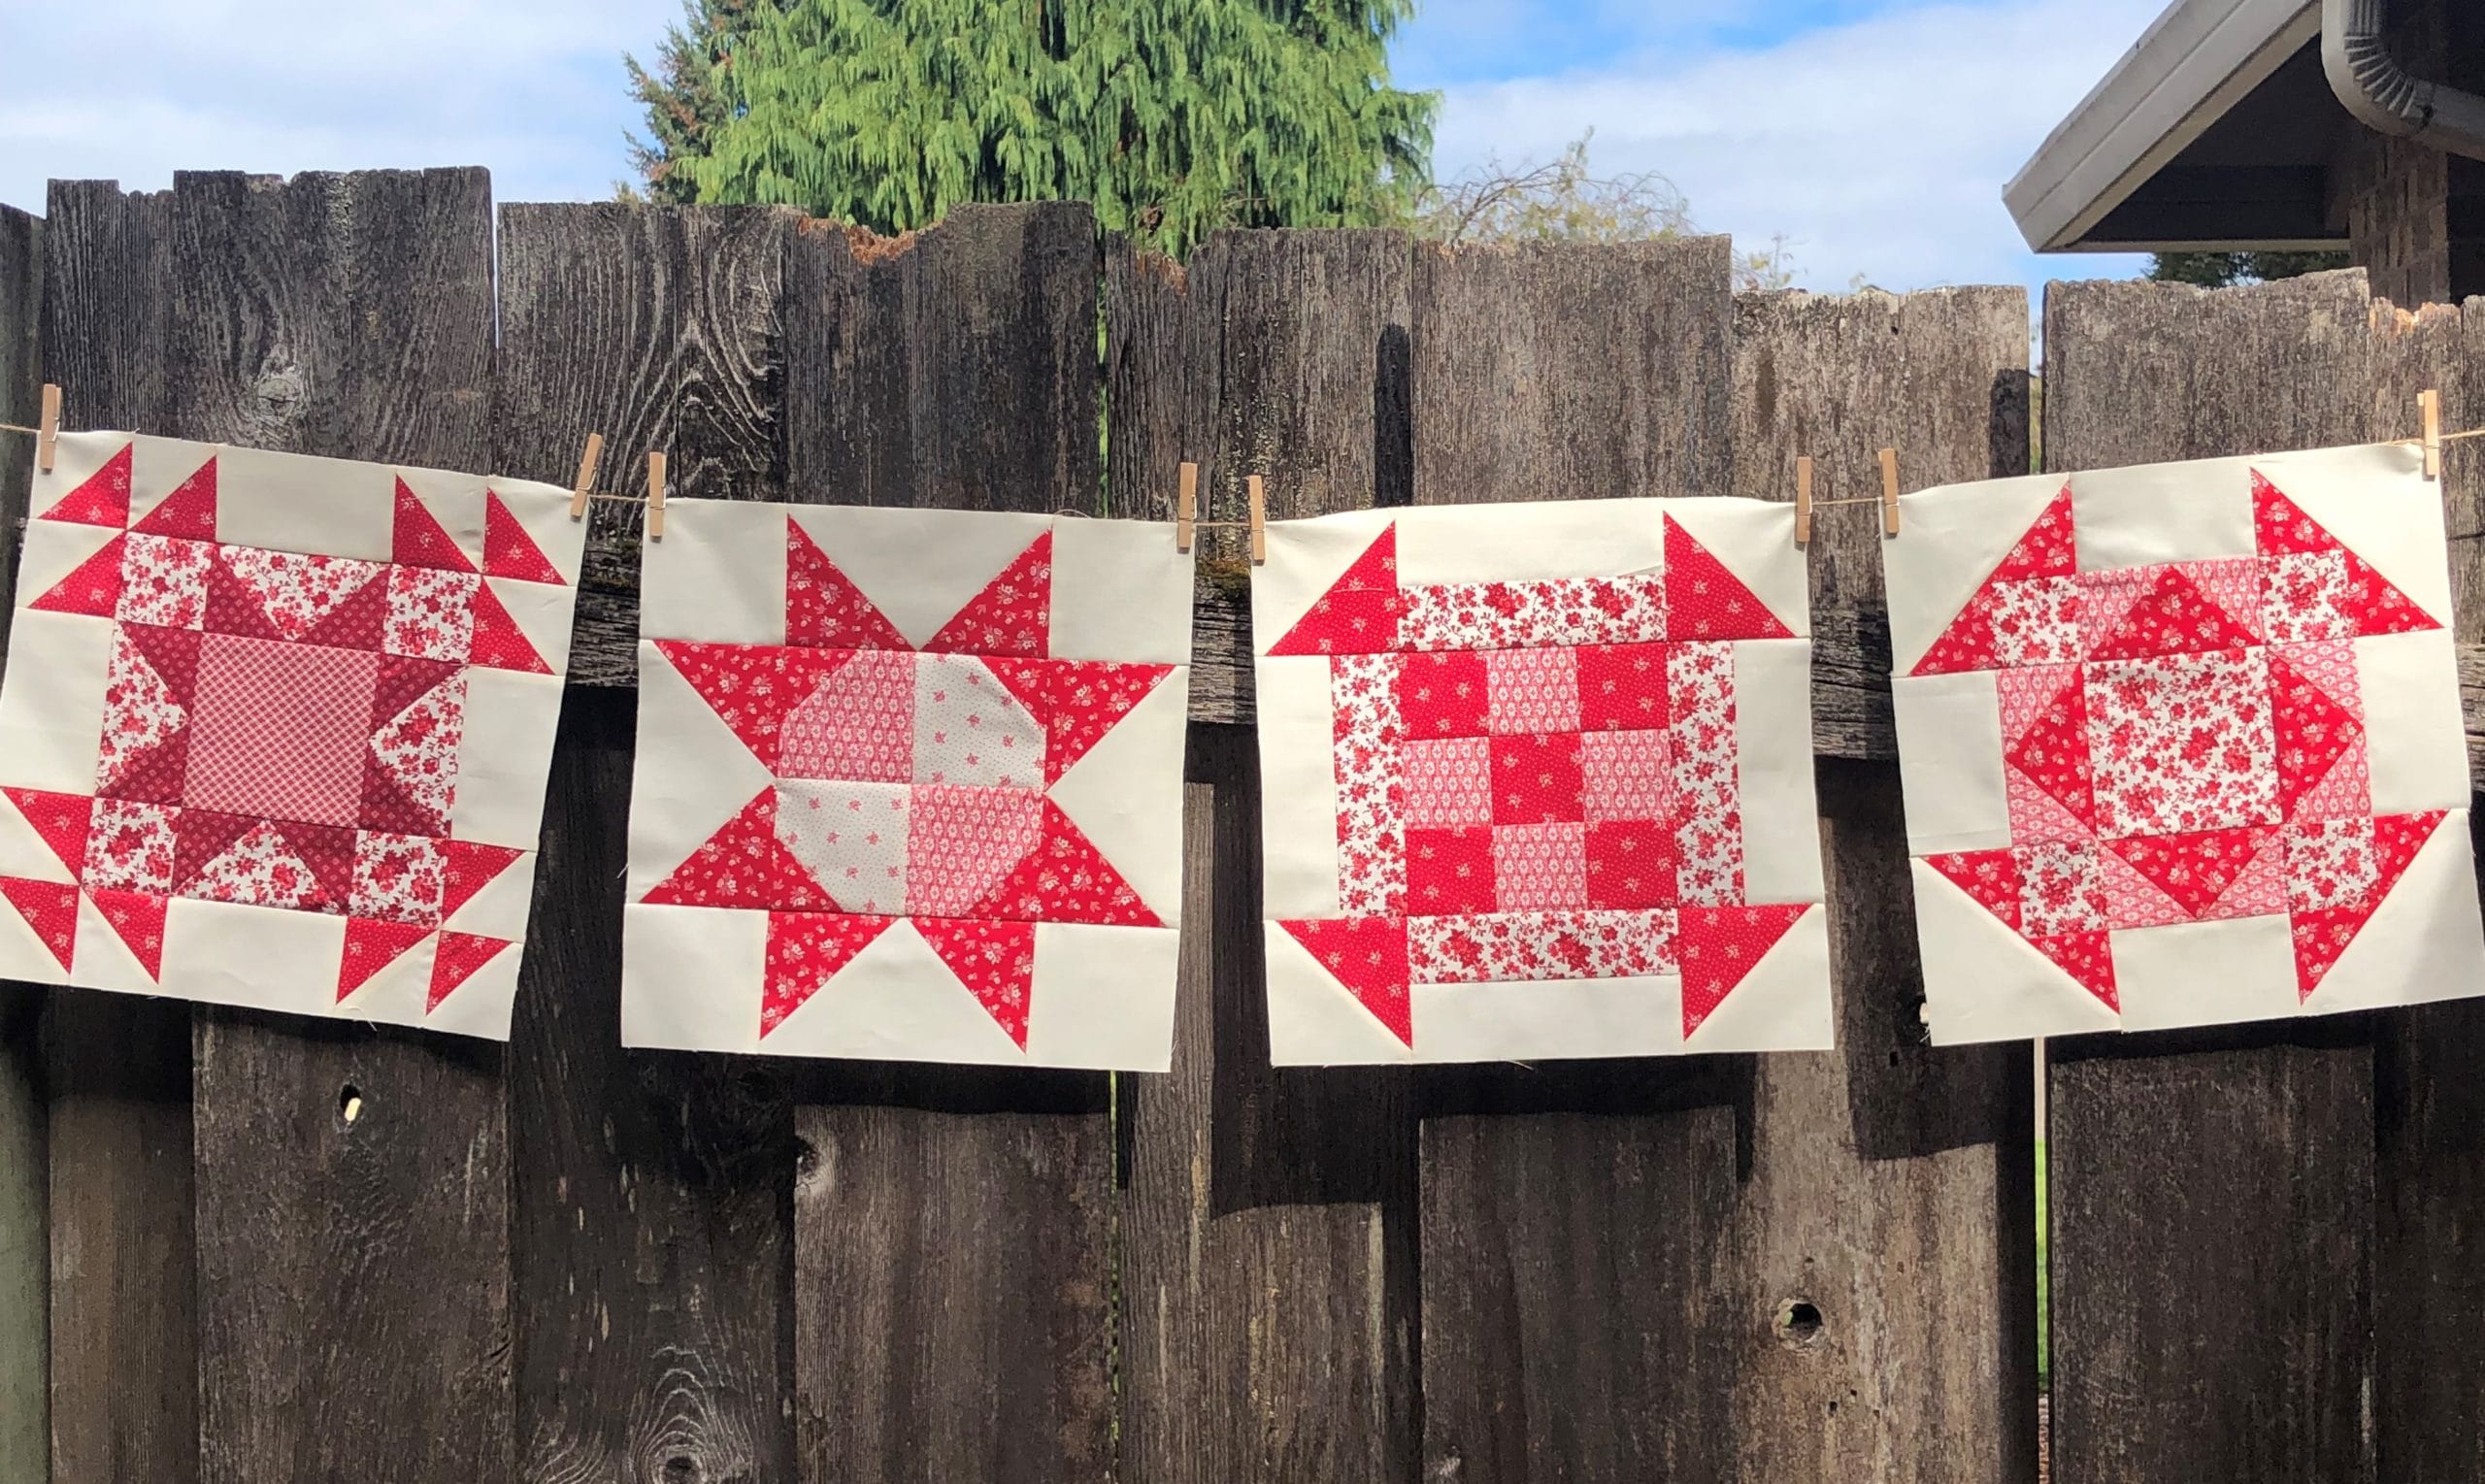
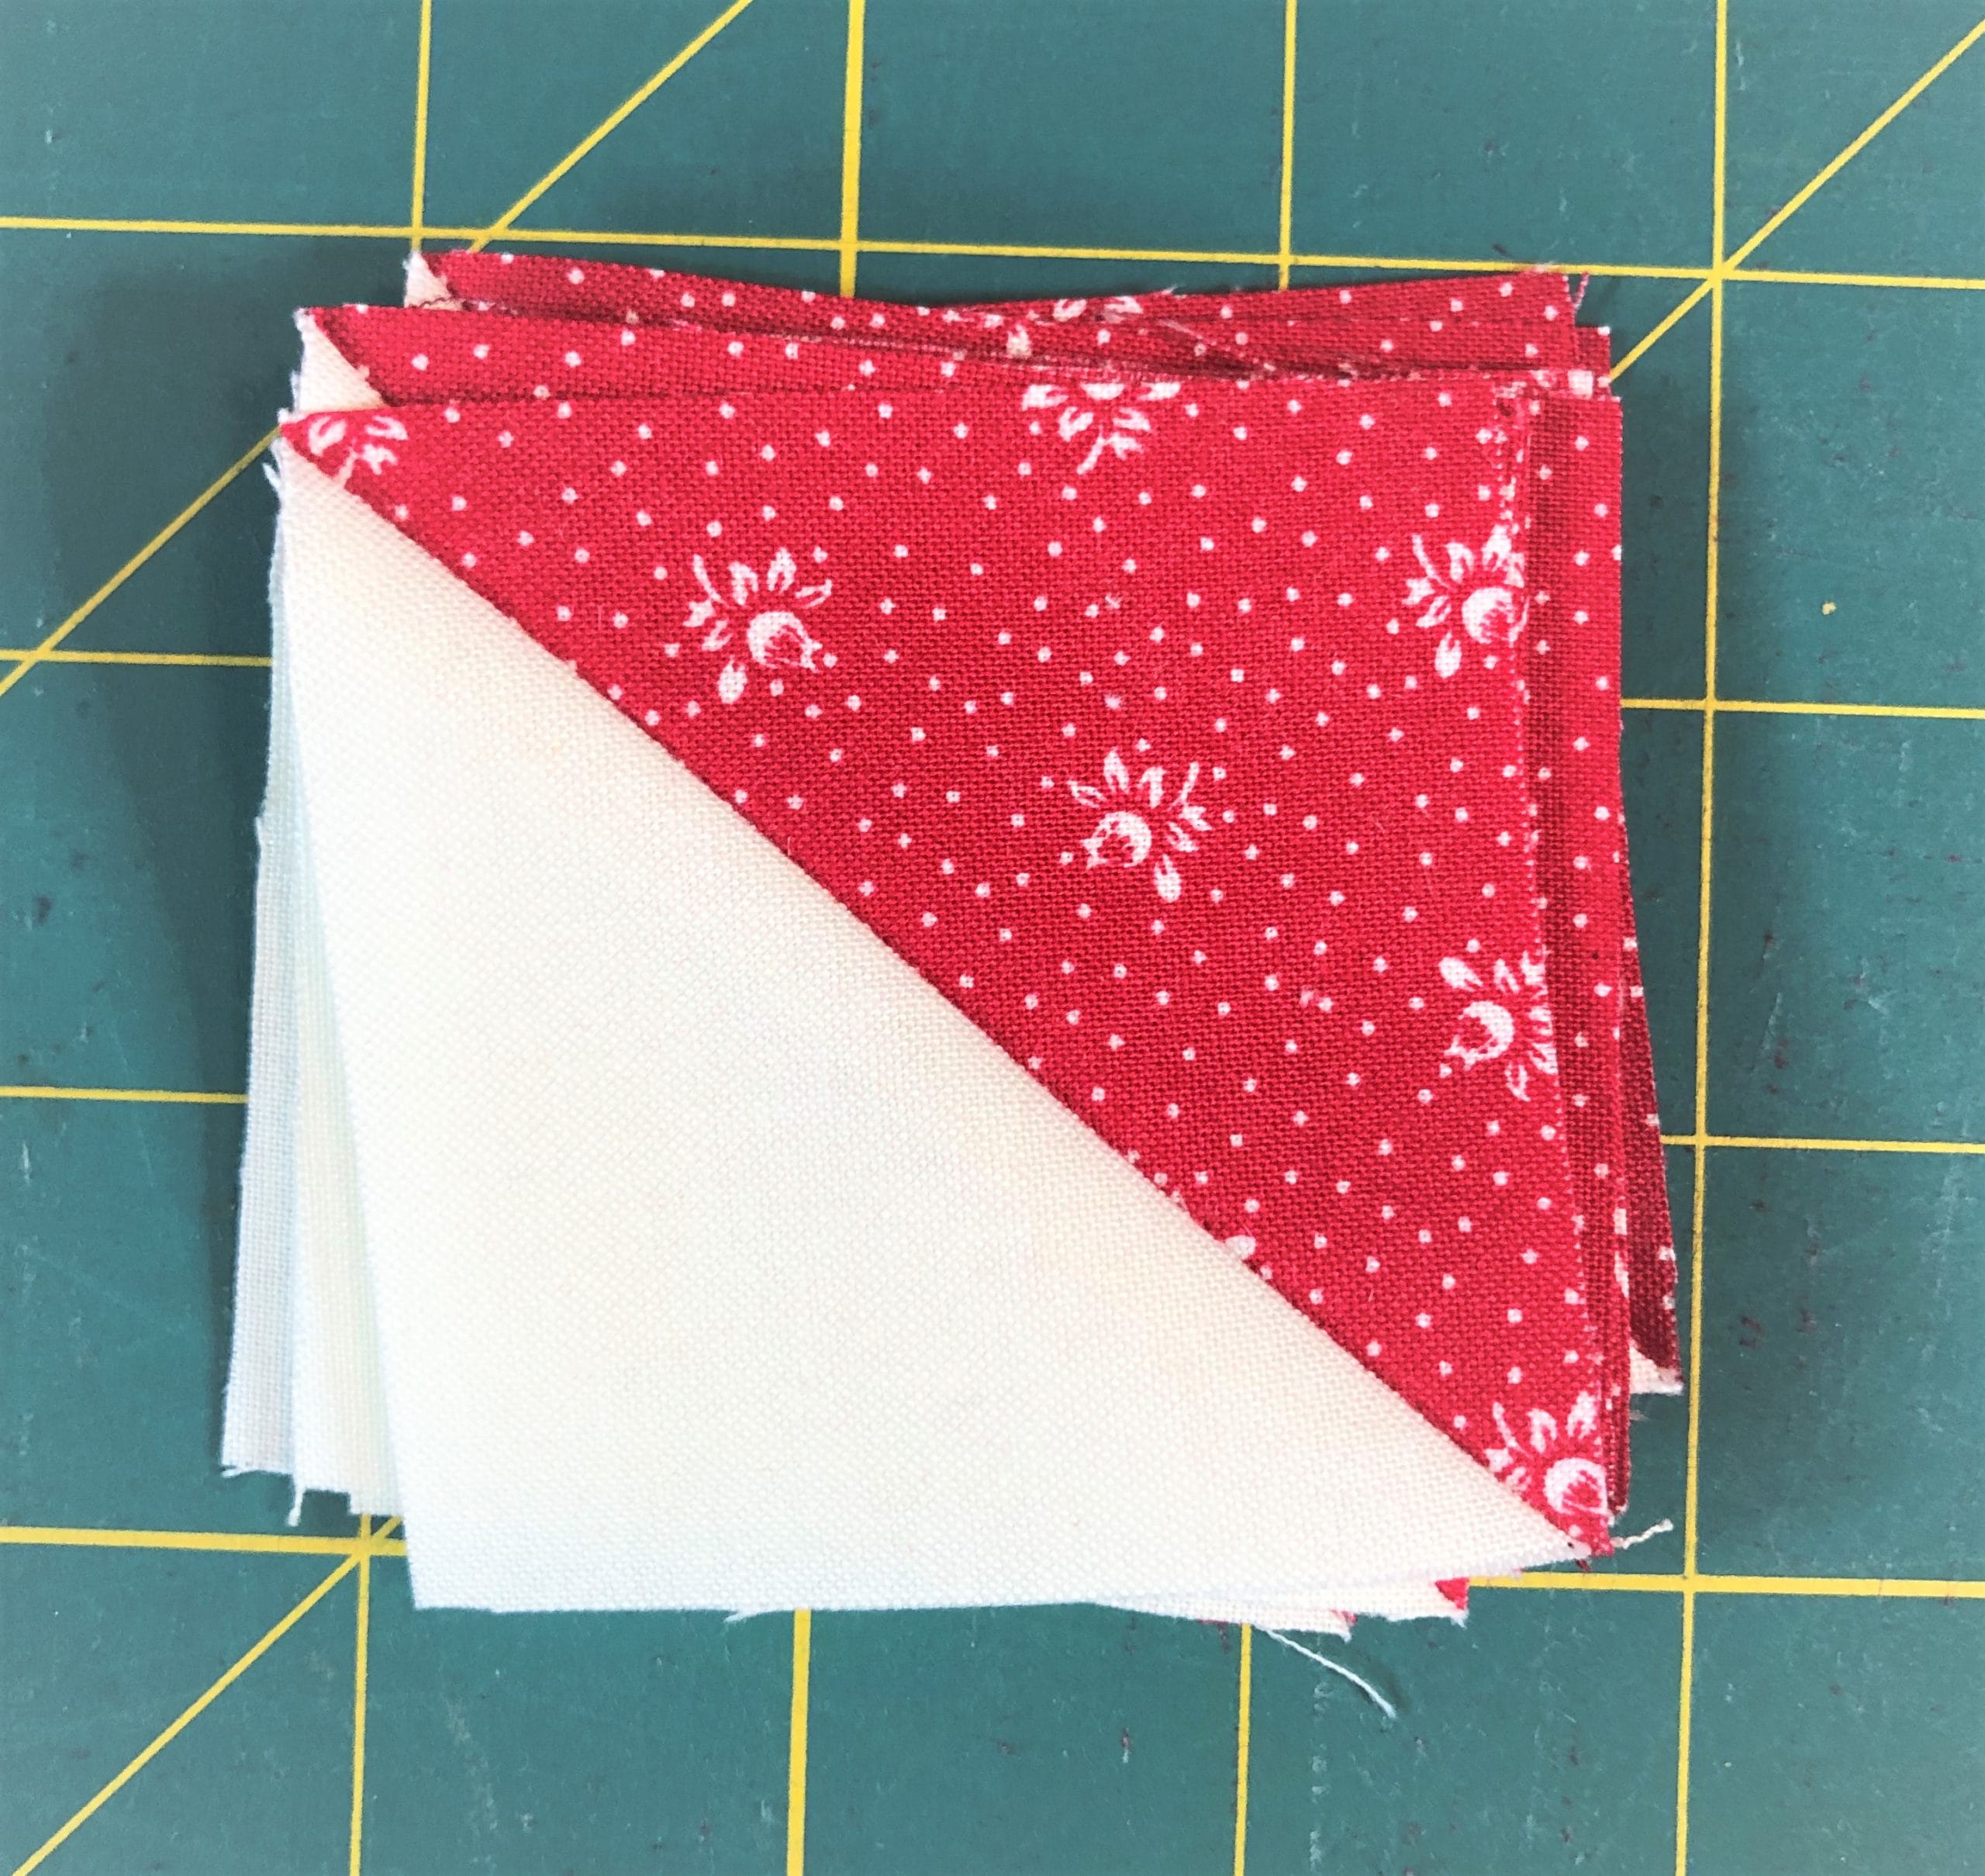
Here are my finished stacks to date: The left stack is just the Irish Chain blocks, and the stack on the right has all the unique blocks we’ve made thus far.
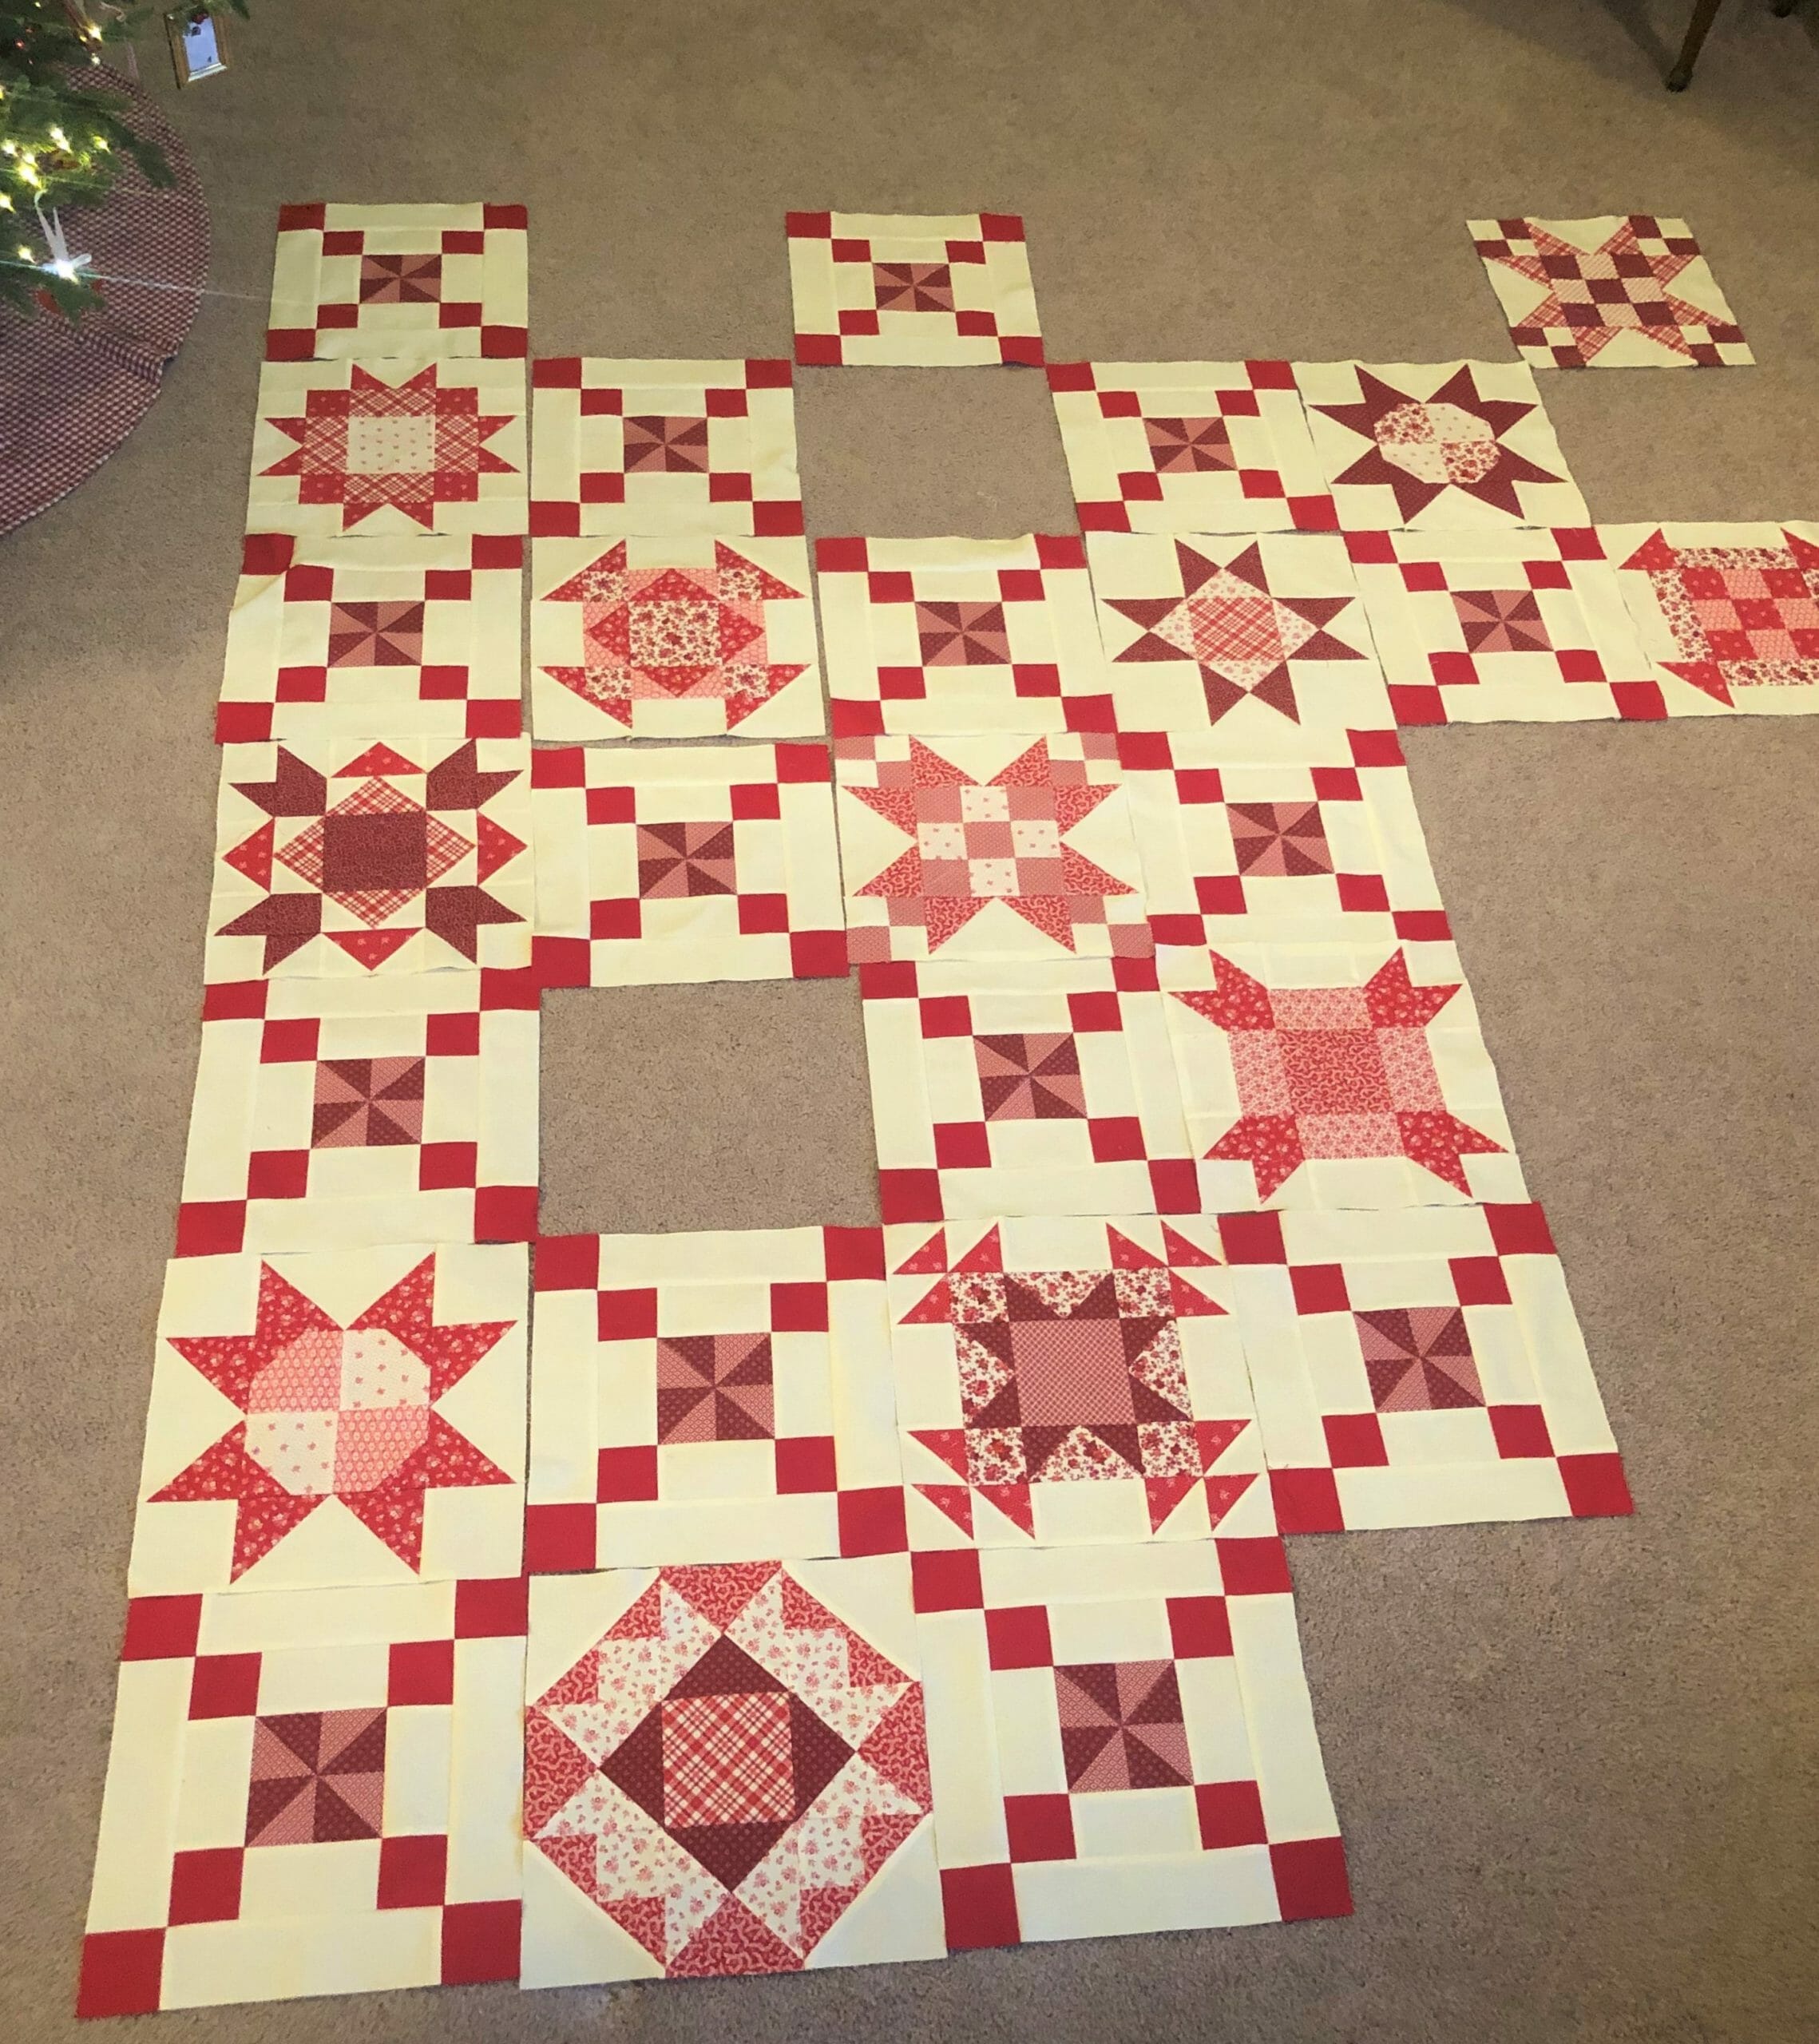
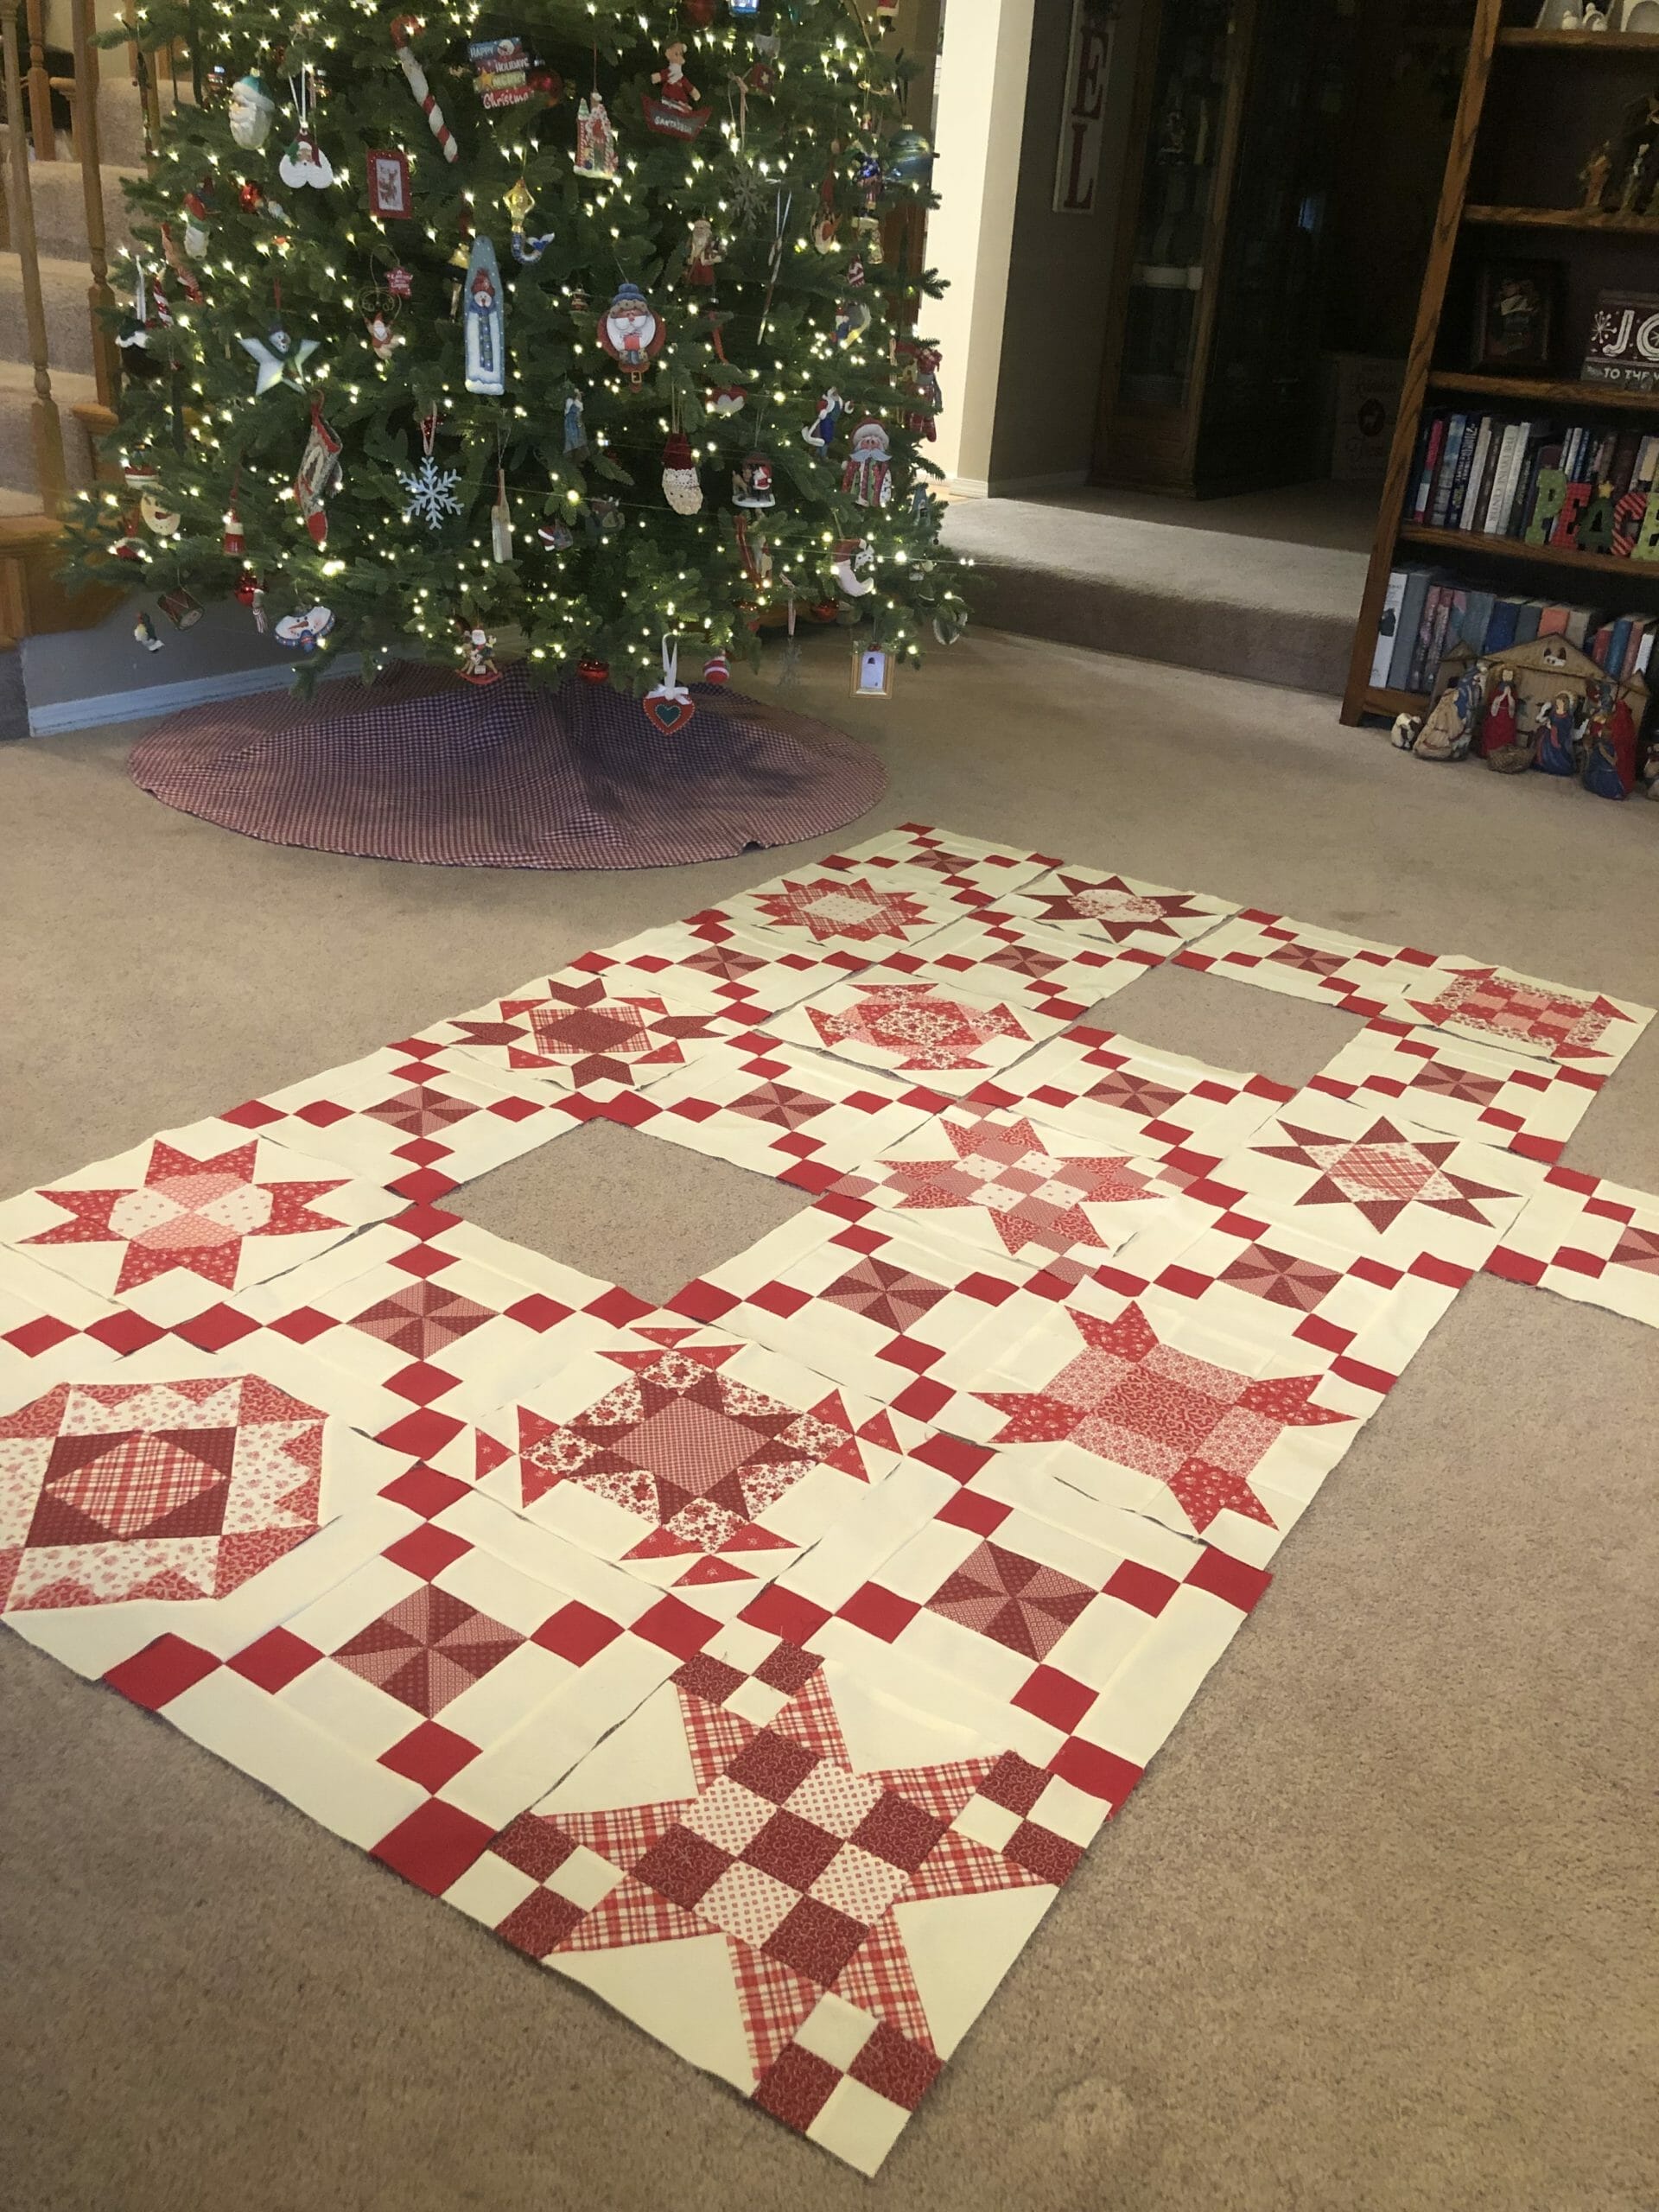
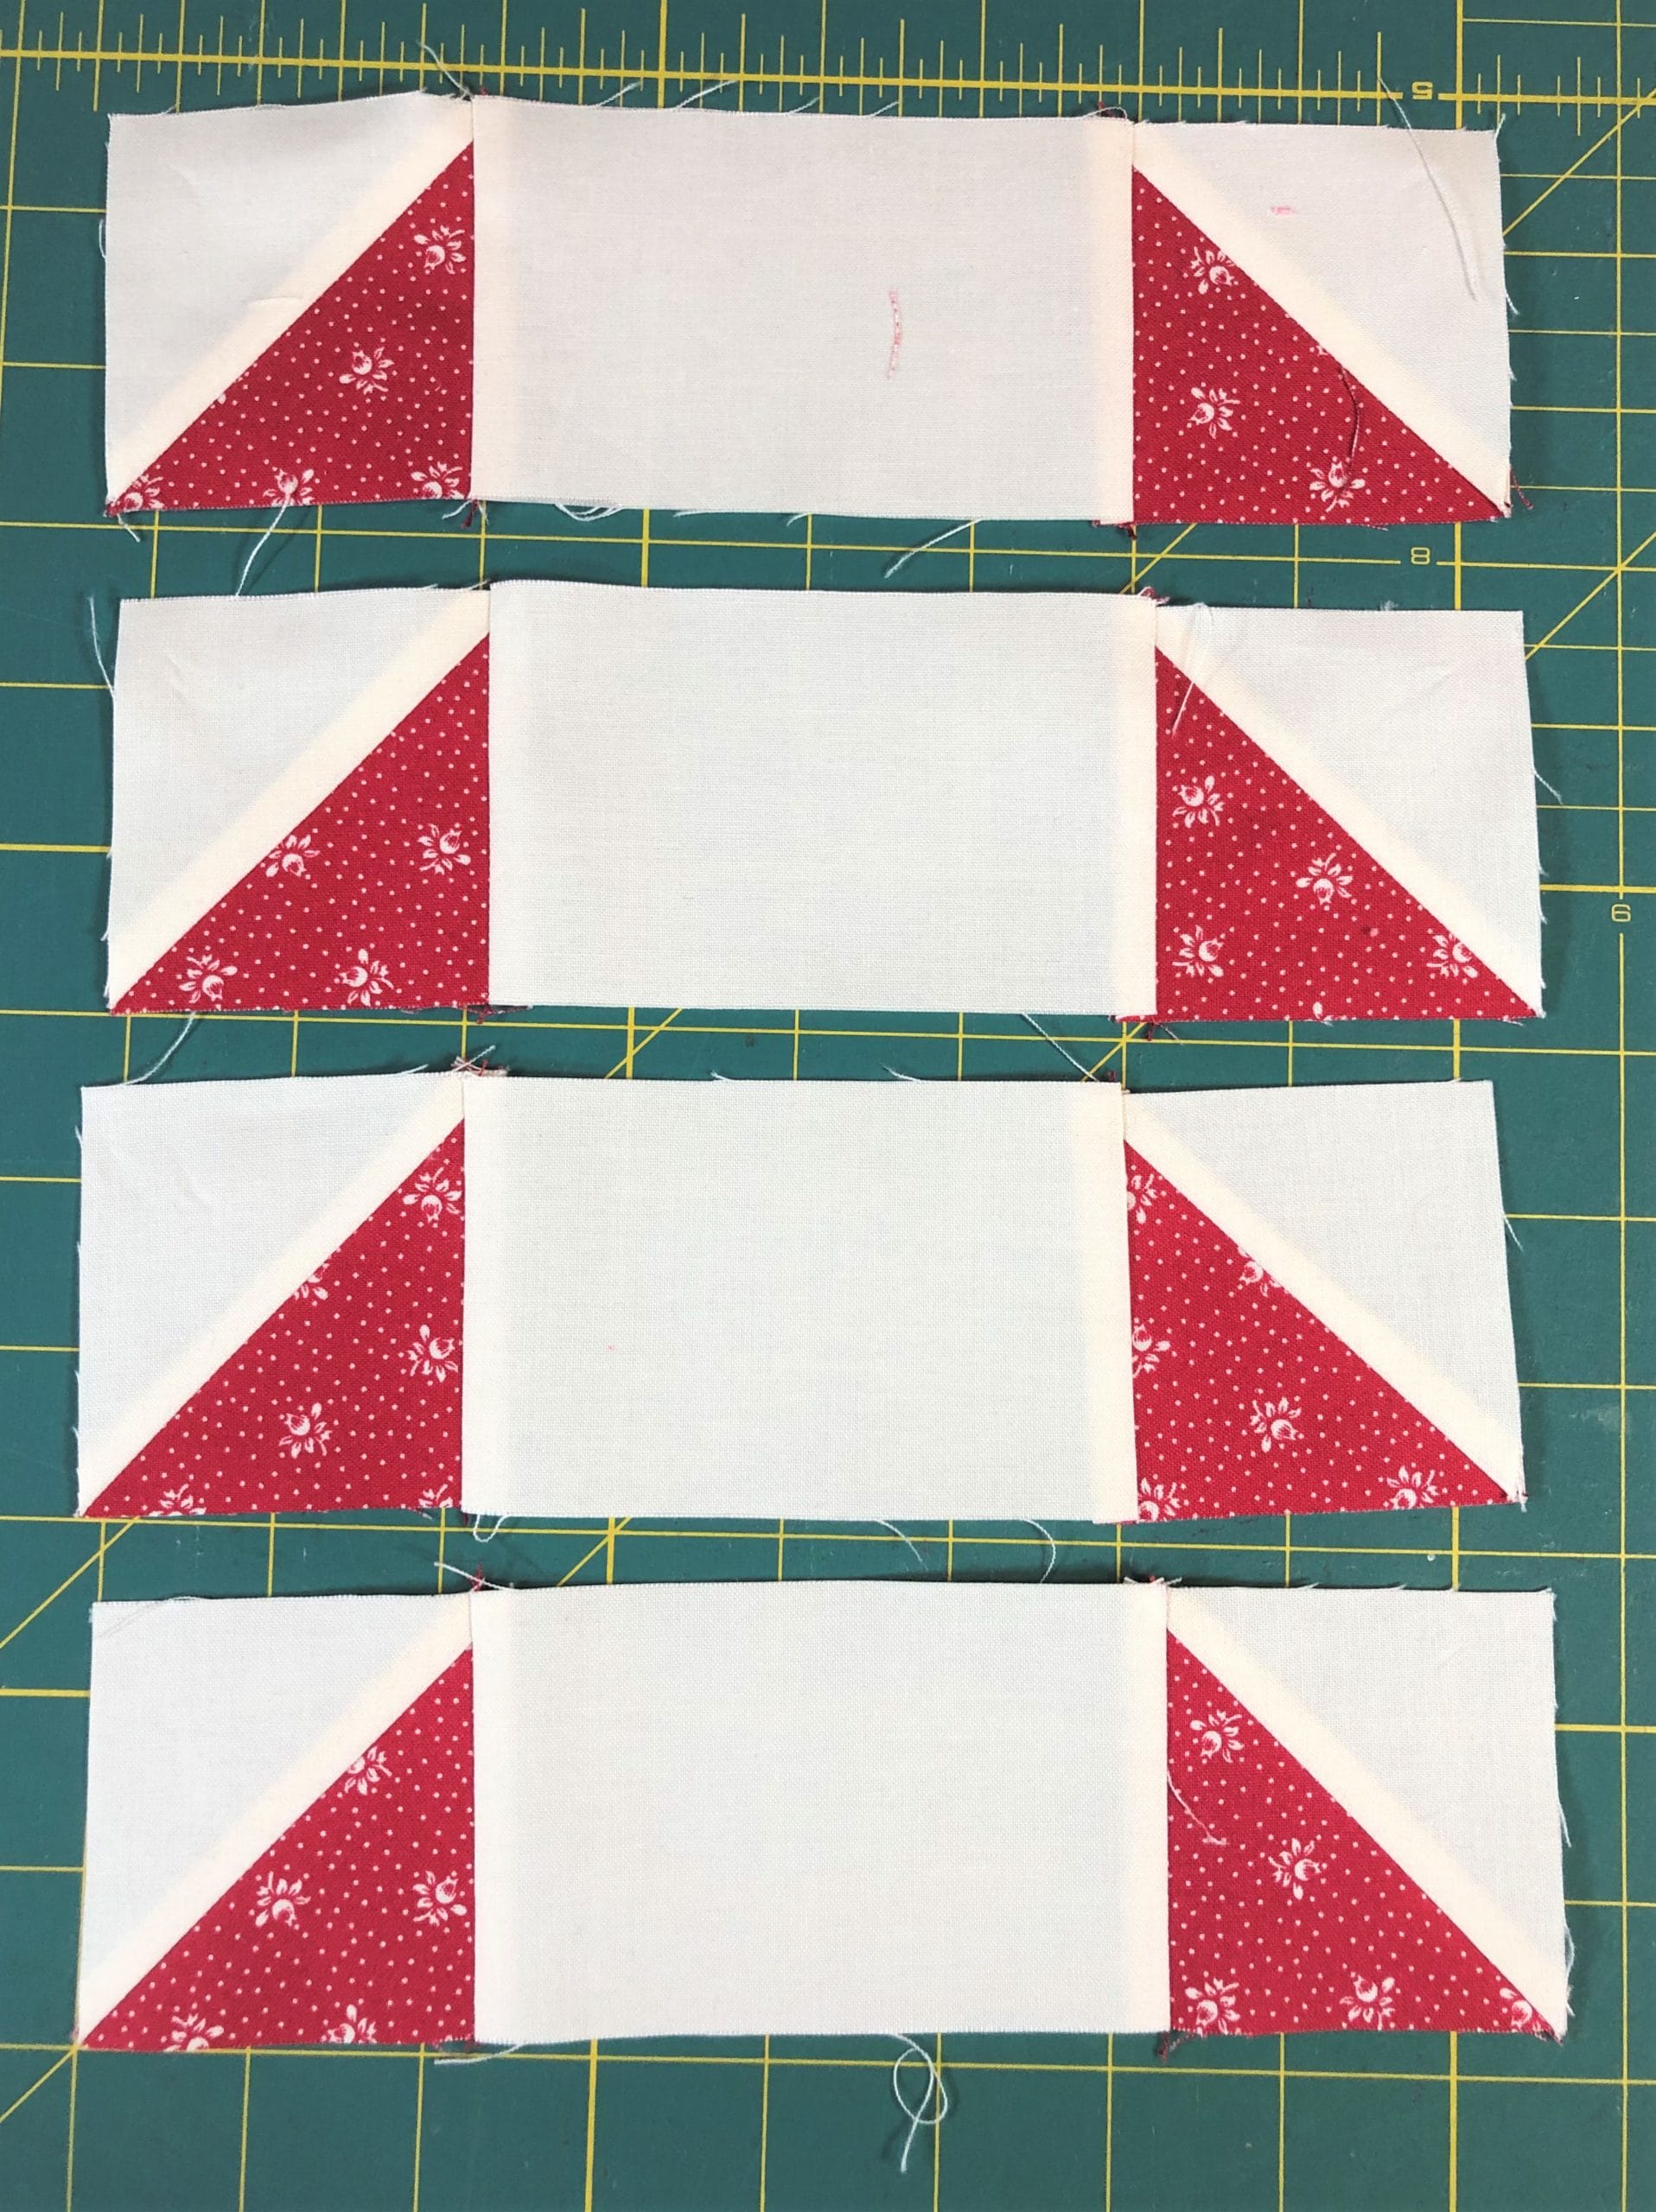
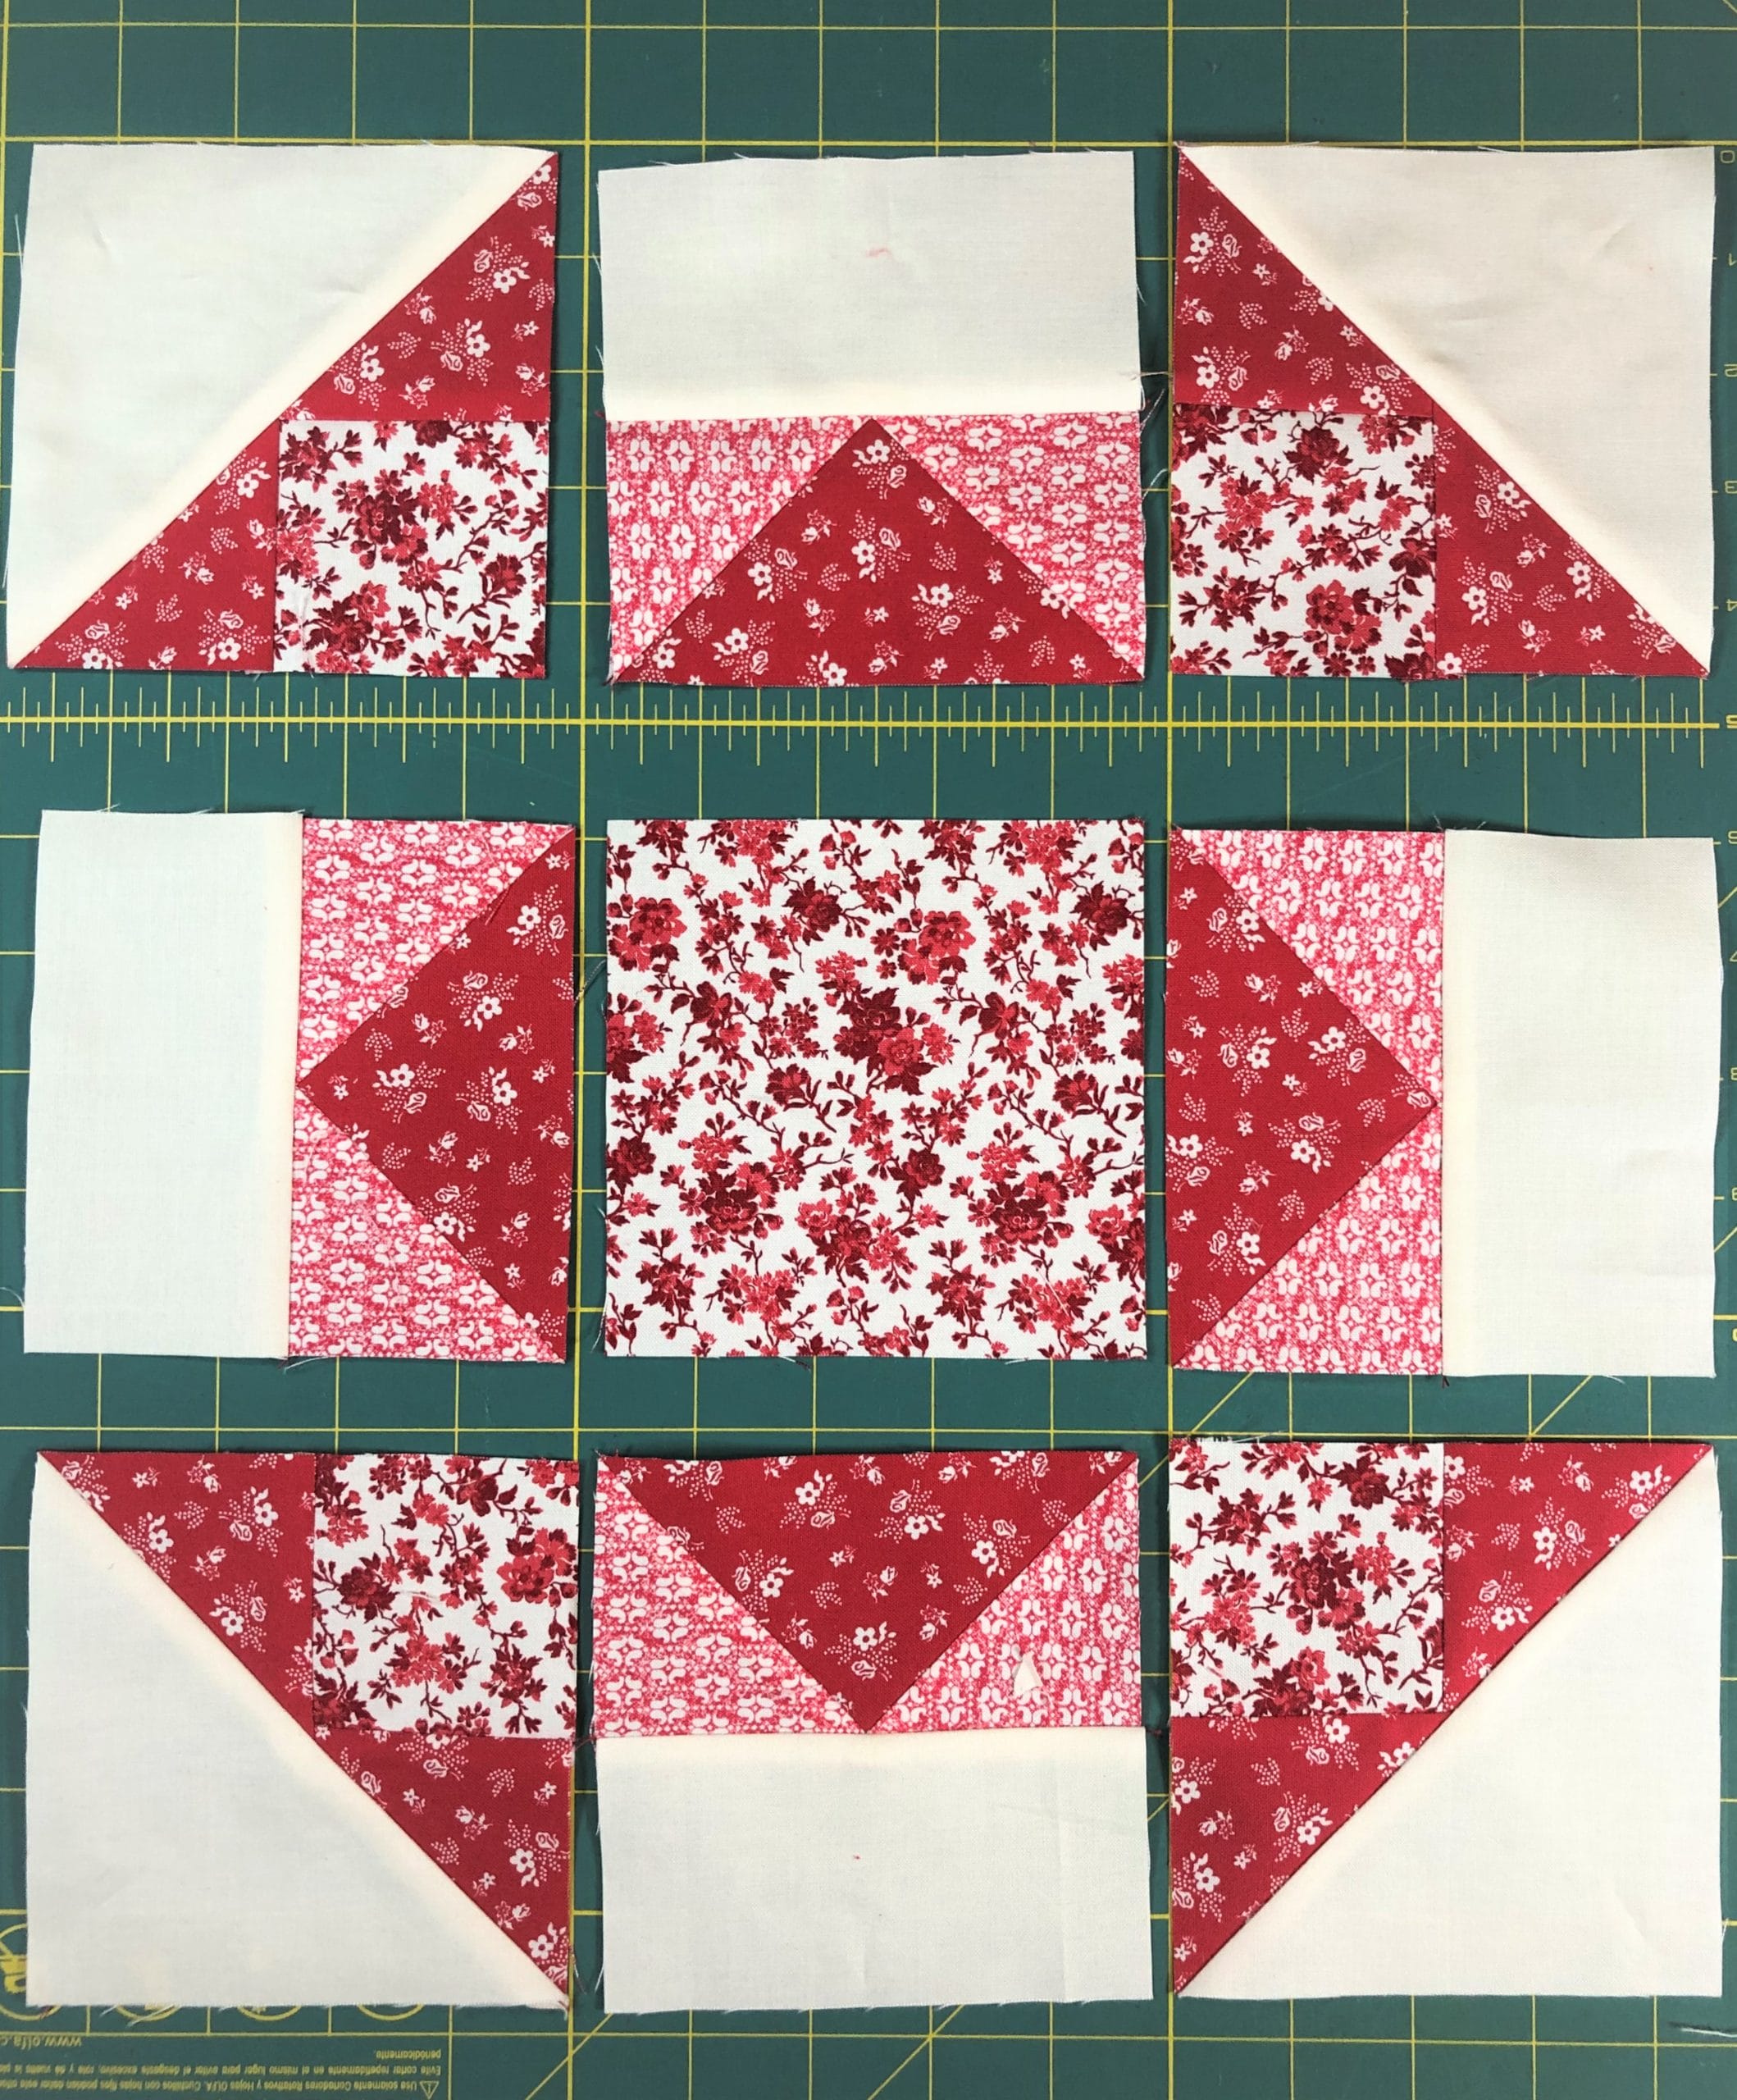
Since my design wall is currently occupied by another project, I decided to lay out everything we’ve done up to this point on my living room floor. As you can see, we still have some holes to fill in, even when I move some blocks around, as you’ll notice I did in the bottom photo. BUT, it is actually starting to look like a real quilt now, which is exciting.
And I must say, that the colors of this quilt do look quite festive, especially next to my Christmas tree. (Yes, I STILL decorated, even though I knew I would be gone. Did I mention I LOVE Christmas?)
So I guess finishing up this quilt over the coming months will help me feel like it’s Christmas all the time!
Can you guys believe it is already November?! I don’t know about you all but this year has flown by for me. And here we are, already working on month 4 for the Ruby BOM. Just think, after sewing these blocks, we will be 1/3 of the way done with this quilt!
This month may look a bit familiar to all of you, since it’s exactly the same as month 2. Surprise! For those with sharp memories, you may recall that we are making our 25 Irish Chain blocks in this quilt over the course of many months. This month we will be making another 5.
Since I previously did a blogpost with a tutorial for making the block, I won’t bore you again with the details. Please feel free to refer back to Ruby BOM month 2’s blogpost if you want a refresher.
This month I thought I would show you how I sew when I’m making multiples of the same block. Probably many of you already do this as well. It just makes things go so much faster!
Step One
Cutting and pinning.
I begin by cutting out everything for all 5 blocks and then get to work.
Whenever I’m piecing a quilt, I look at the entire pattern first. I try to see how much sewing I can do at the same time, even if that means skipping around a bit.
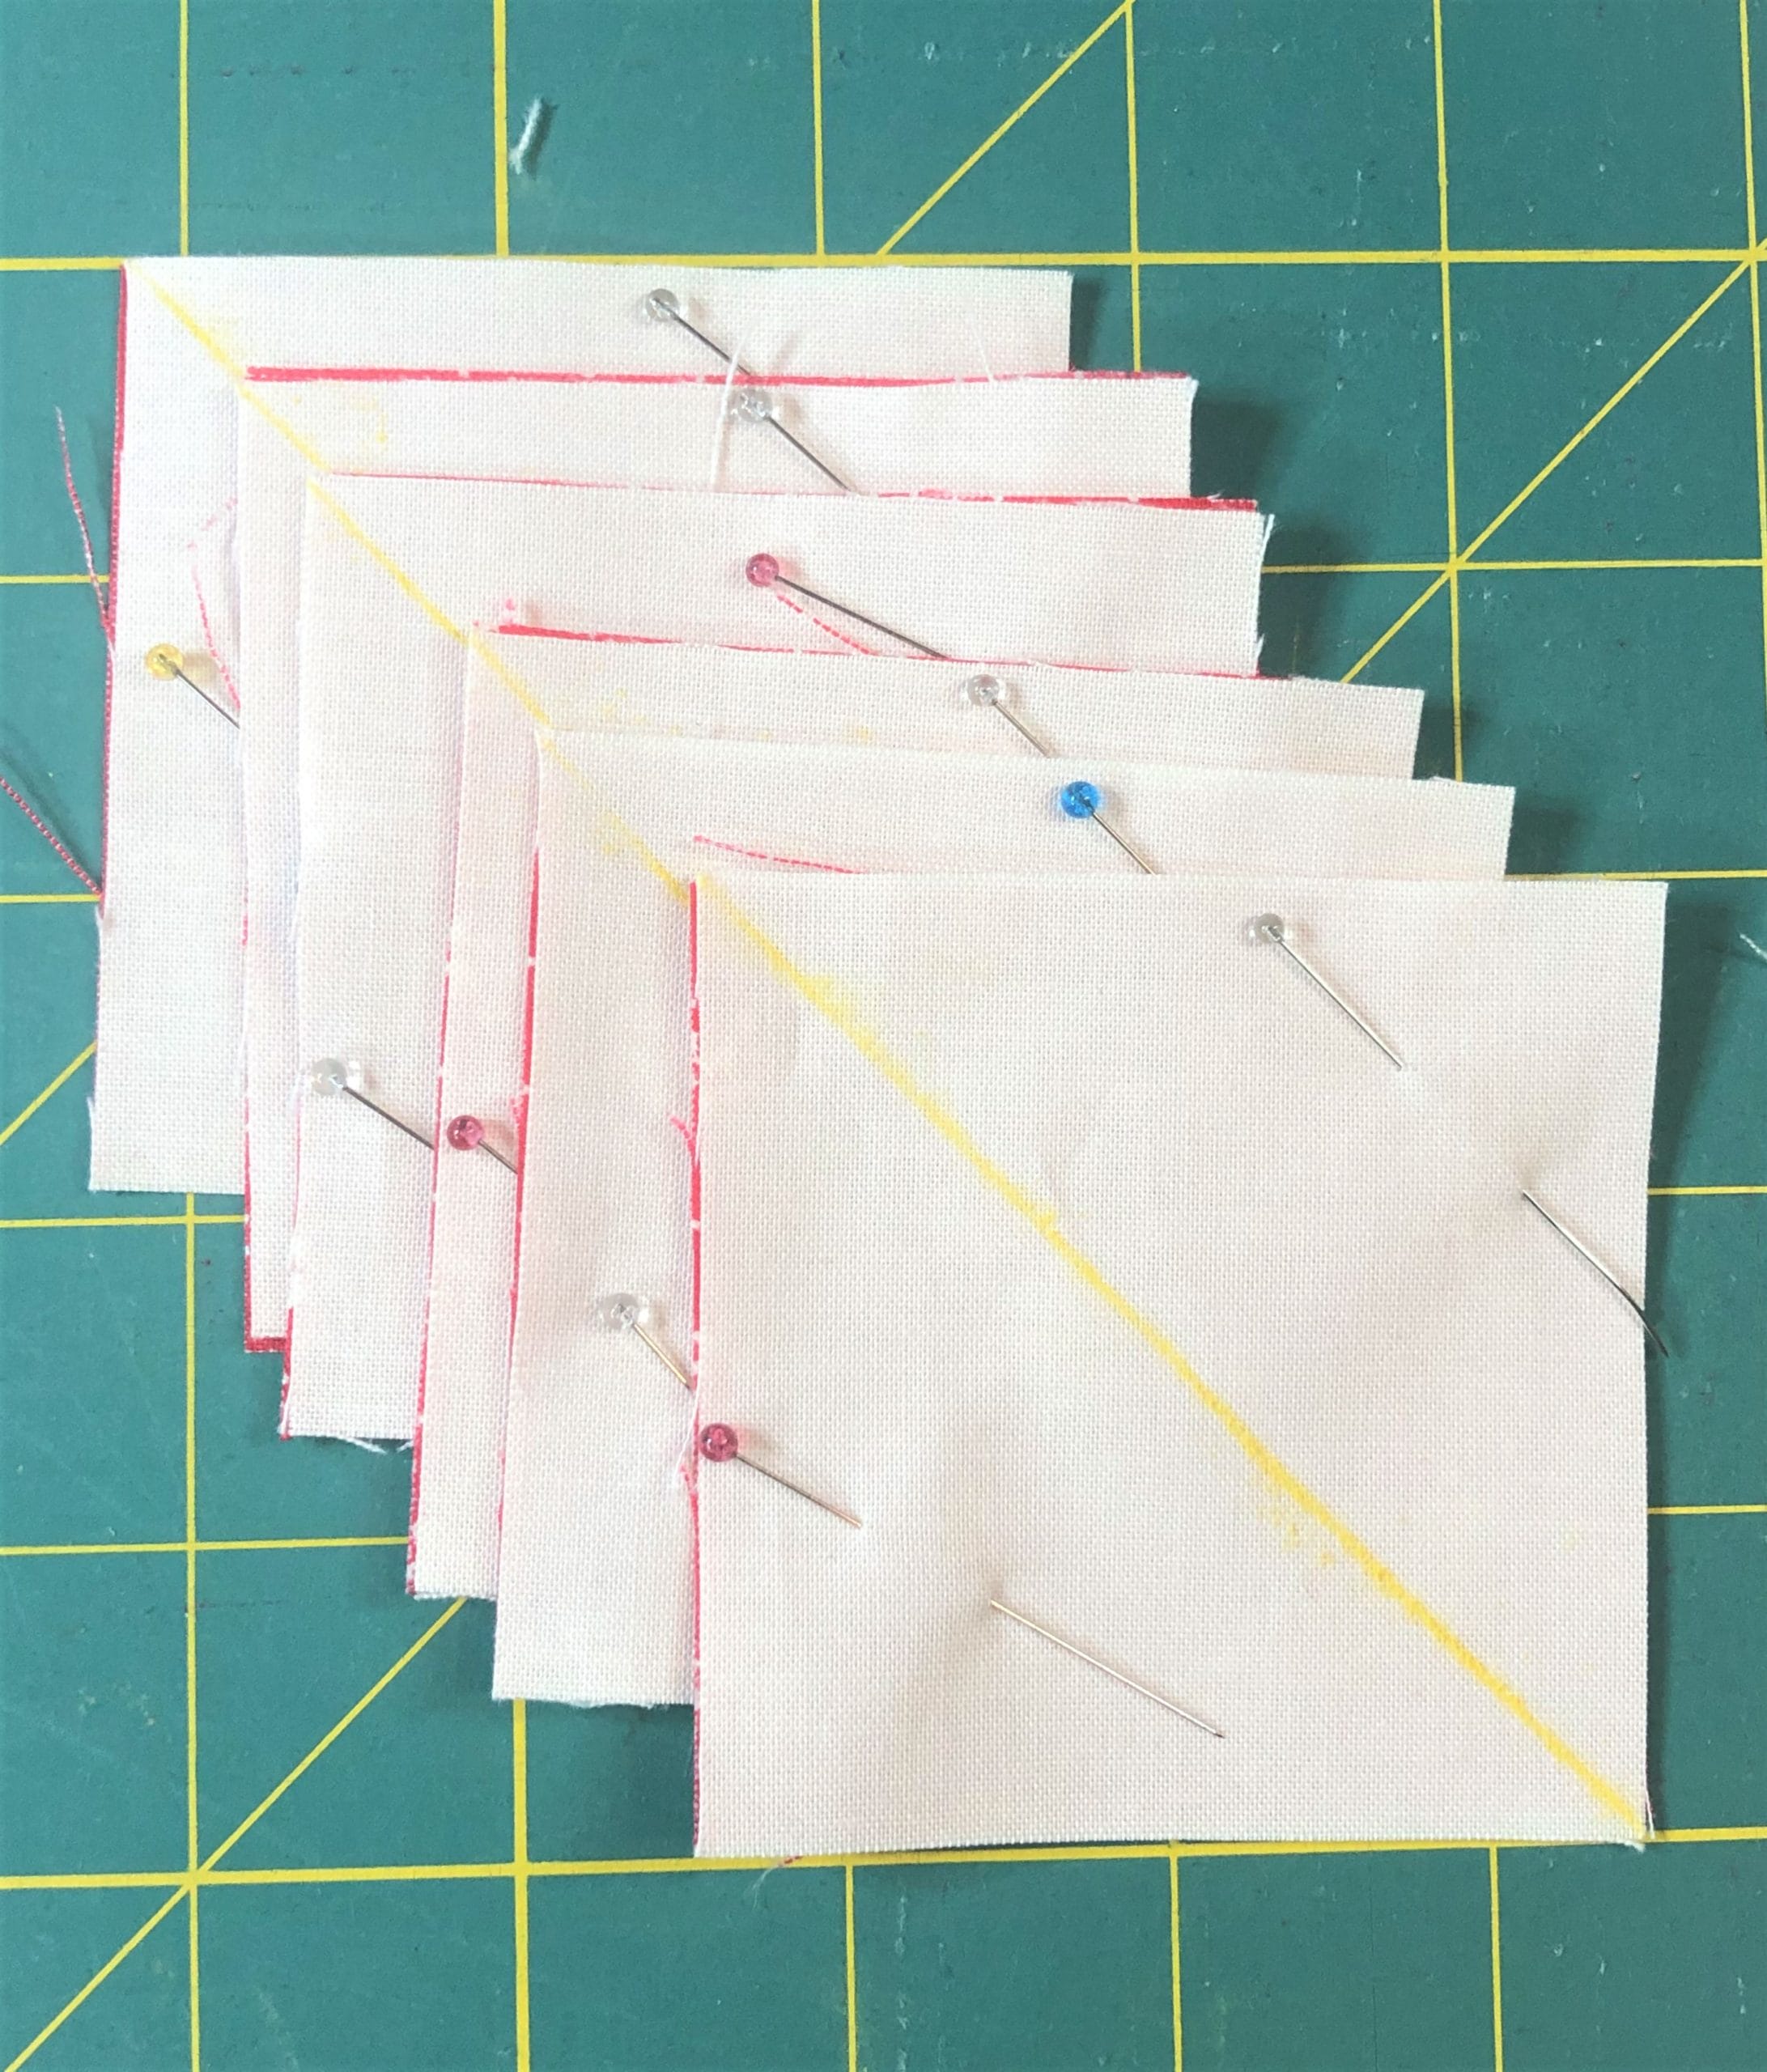
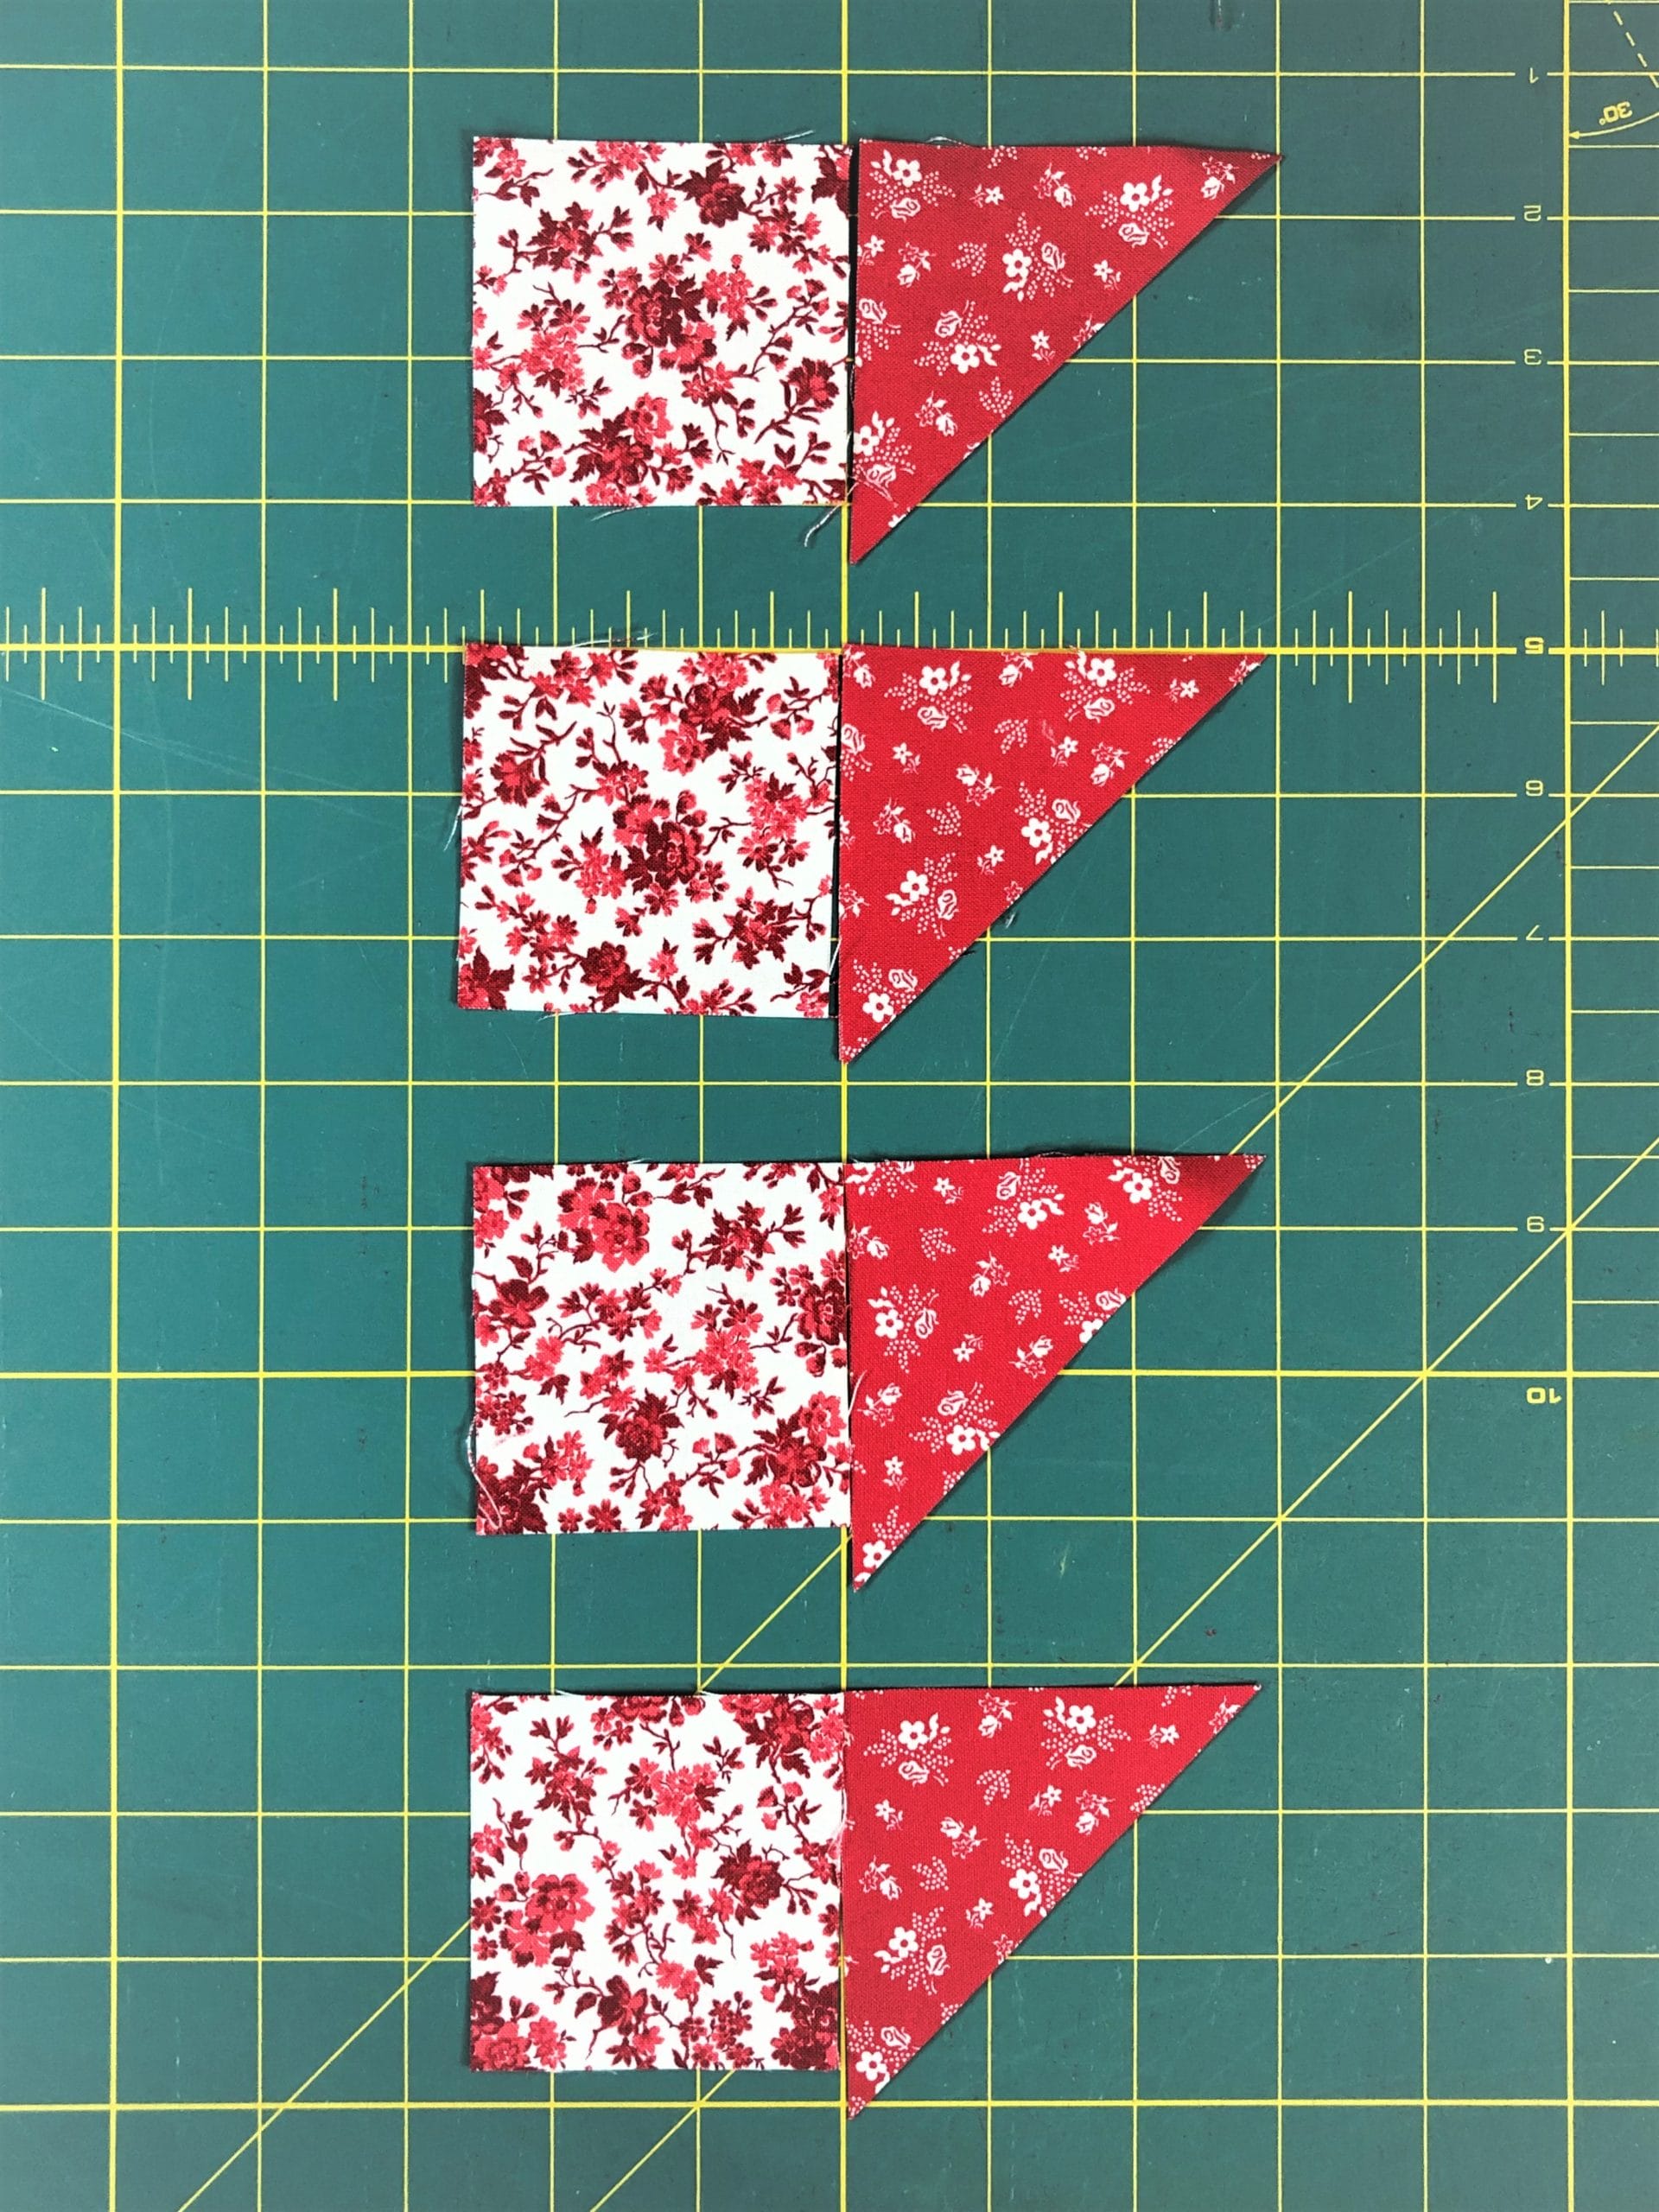
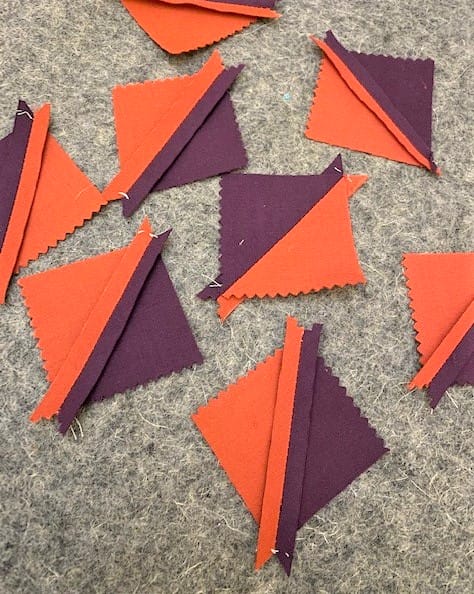
For these blocks, I know that I need to make the half-square triangles right off the bat, so I get those ready.
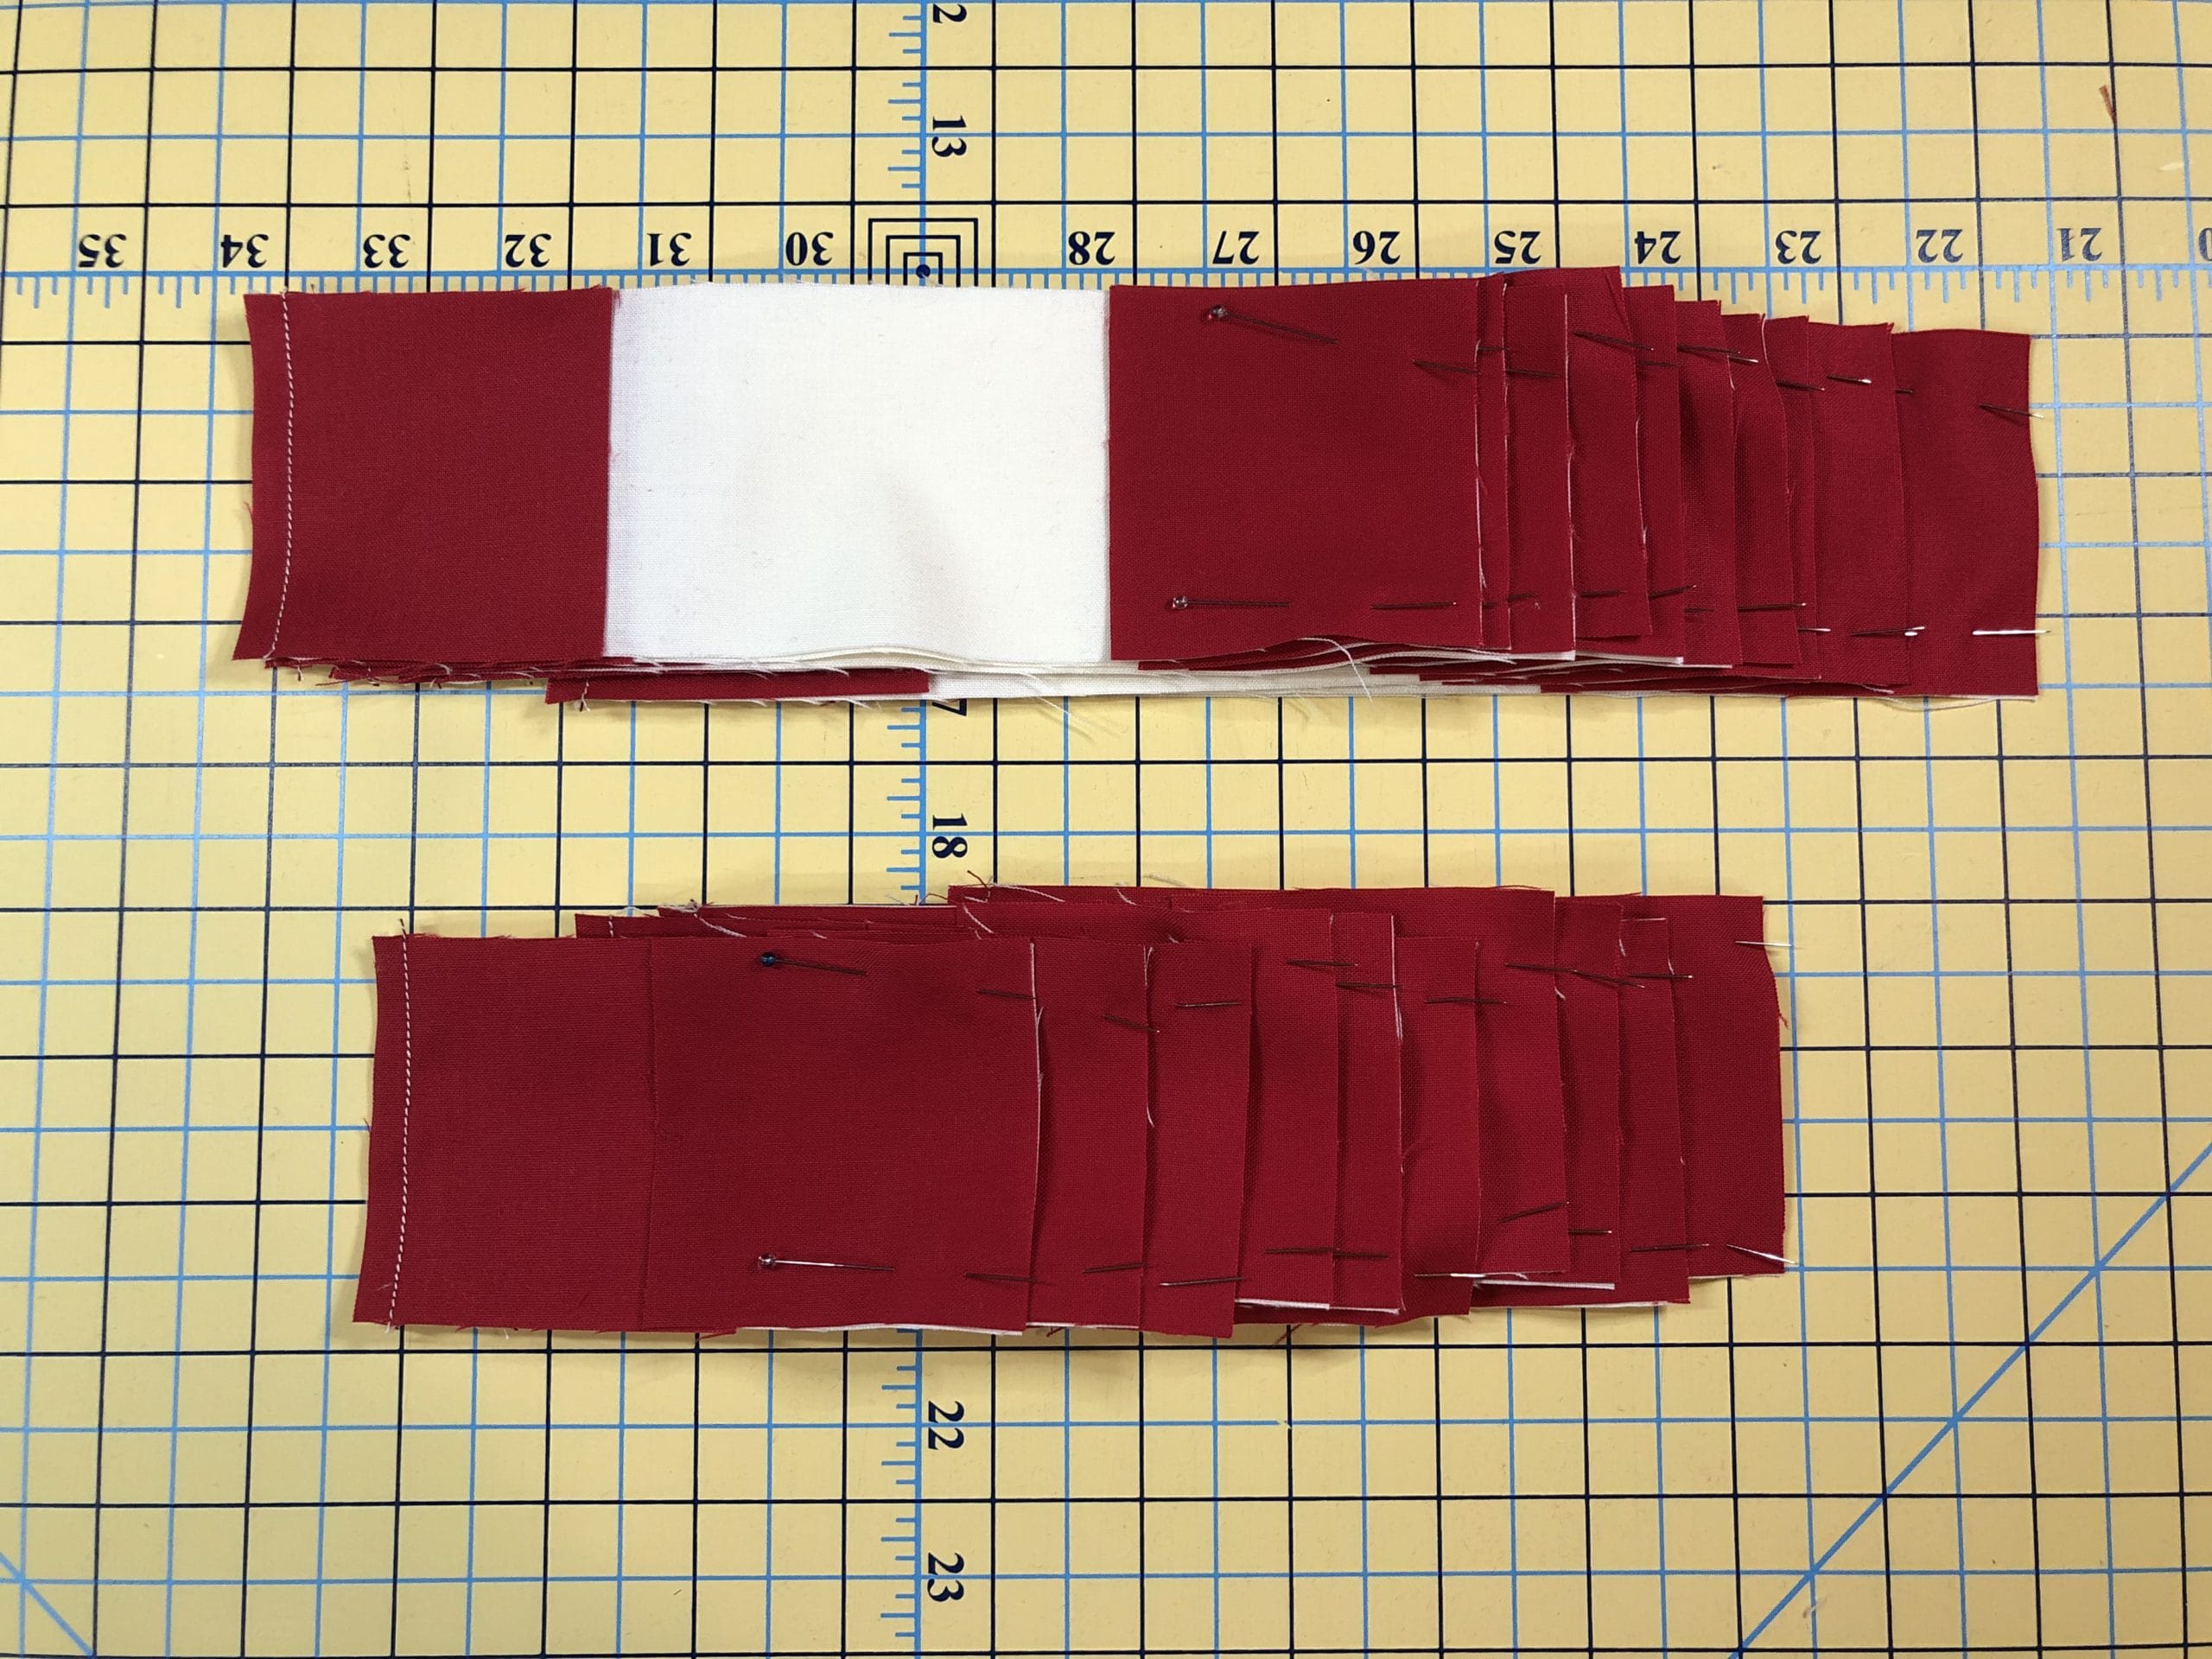
But I also know by looking ahead in step 3 where it says “Take the two remaining D strips and sew a C square to each end”, that I’ll need two of those C/D/C units for each of the 5 blocks. So I get all ten of those prepped and pinned for sewing too.
And then looking even FURTHER ahead in step 4, I see that each block also has two units with a C square being sewn to each end of an E strip, so I get all ten of those pinned as well.
Step Two
Piecing Squares, Strips, and HSTs
Then I sit down at my sewing machine and get to work.
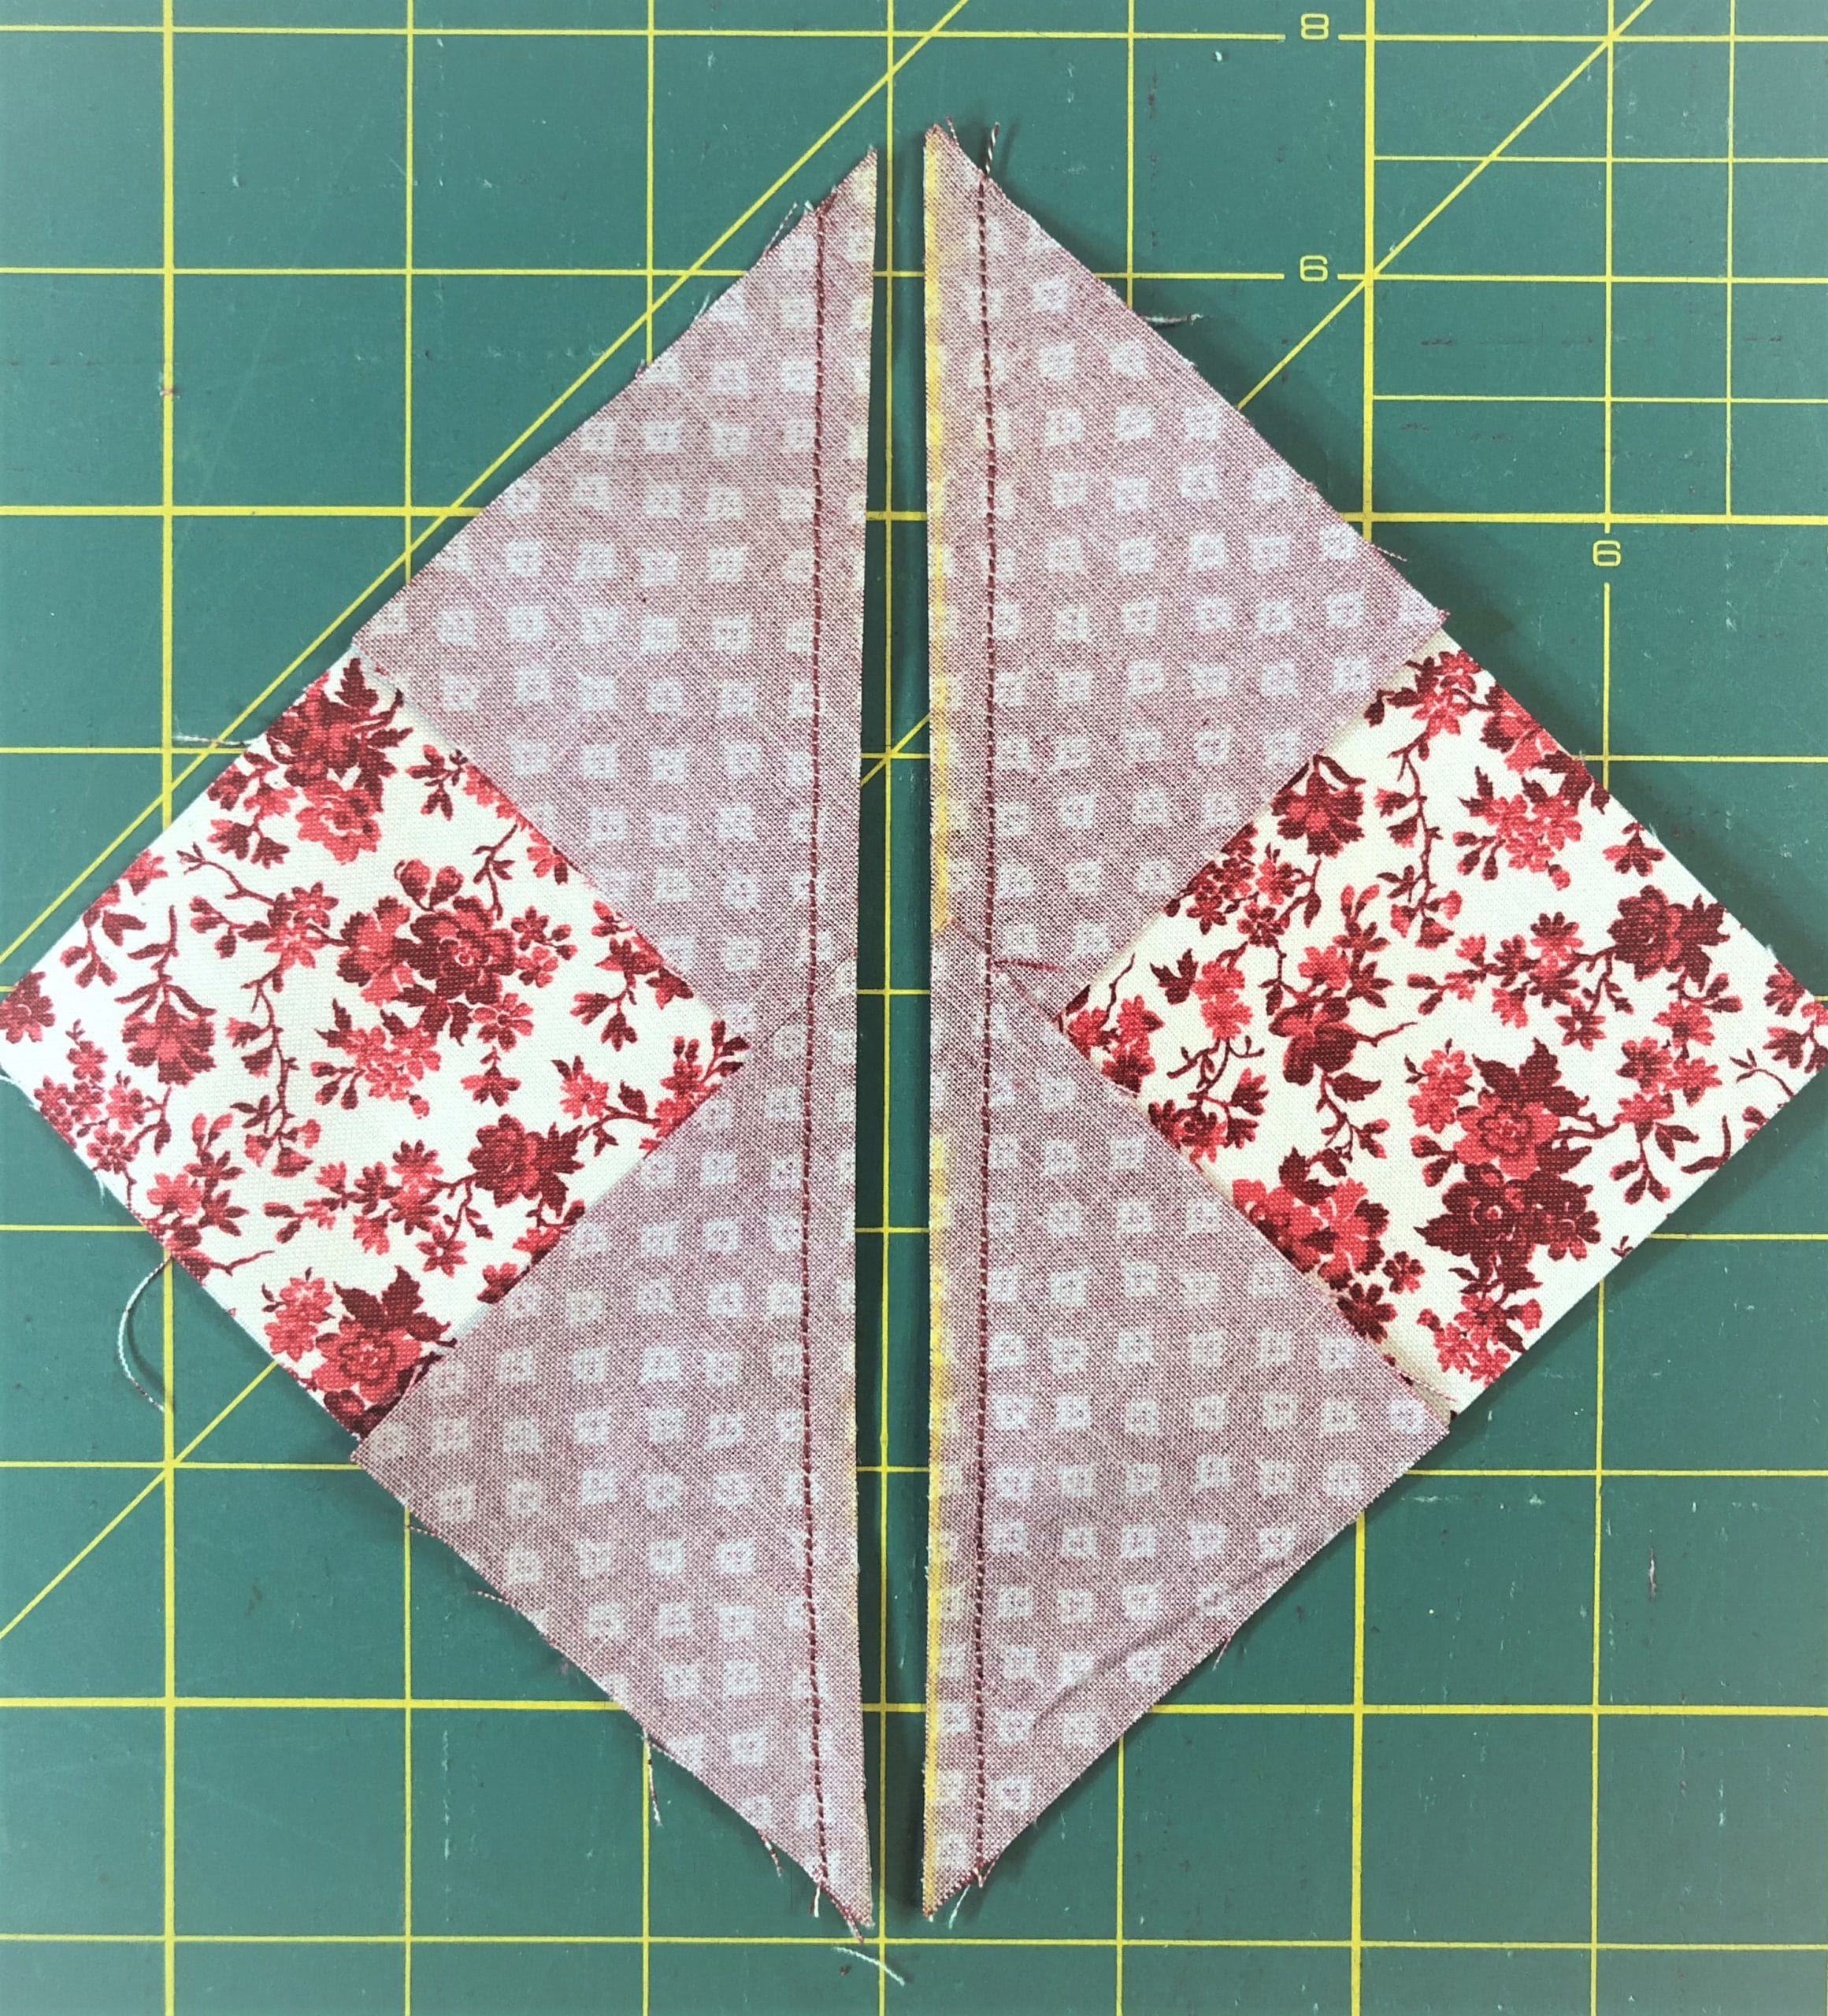
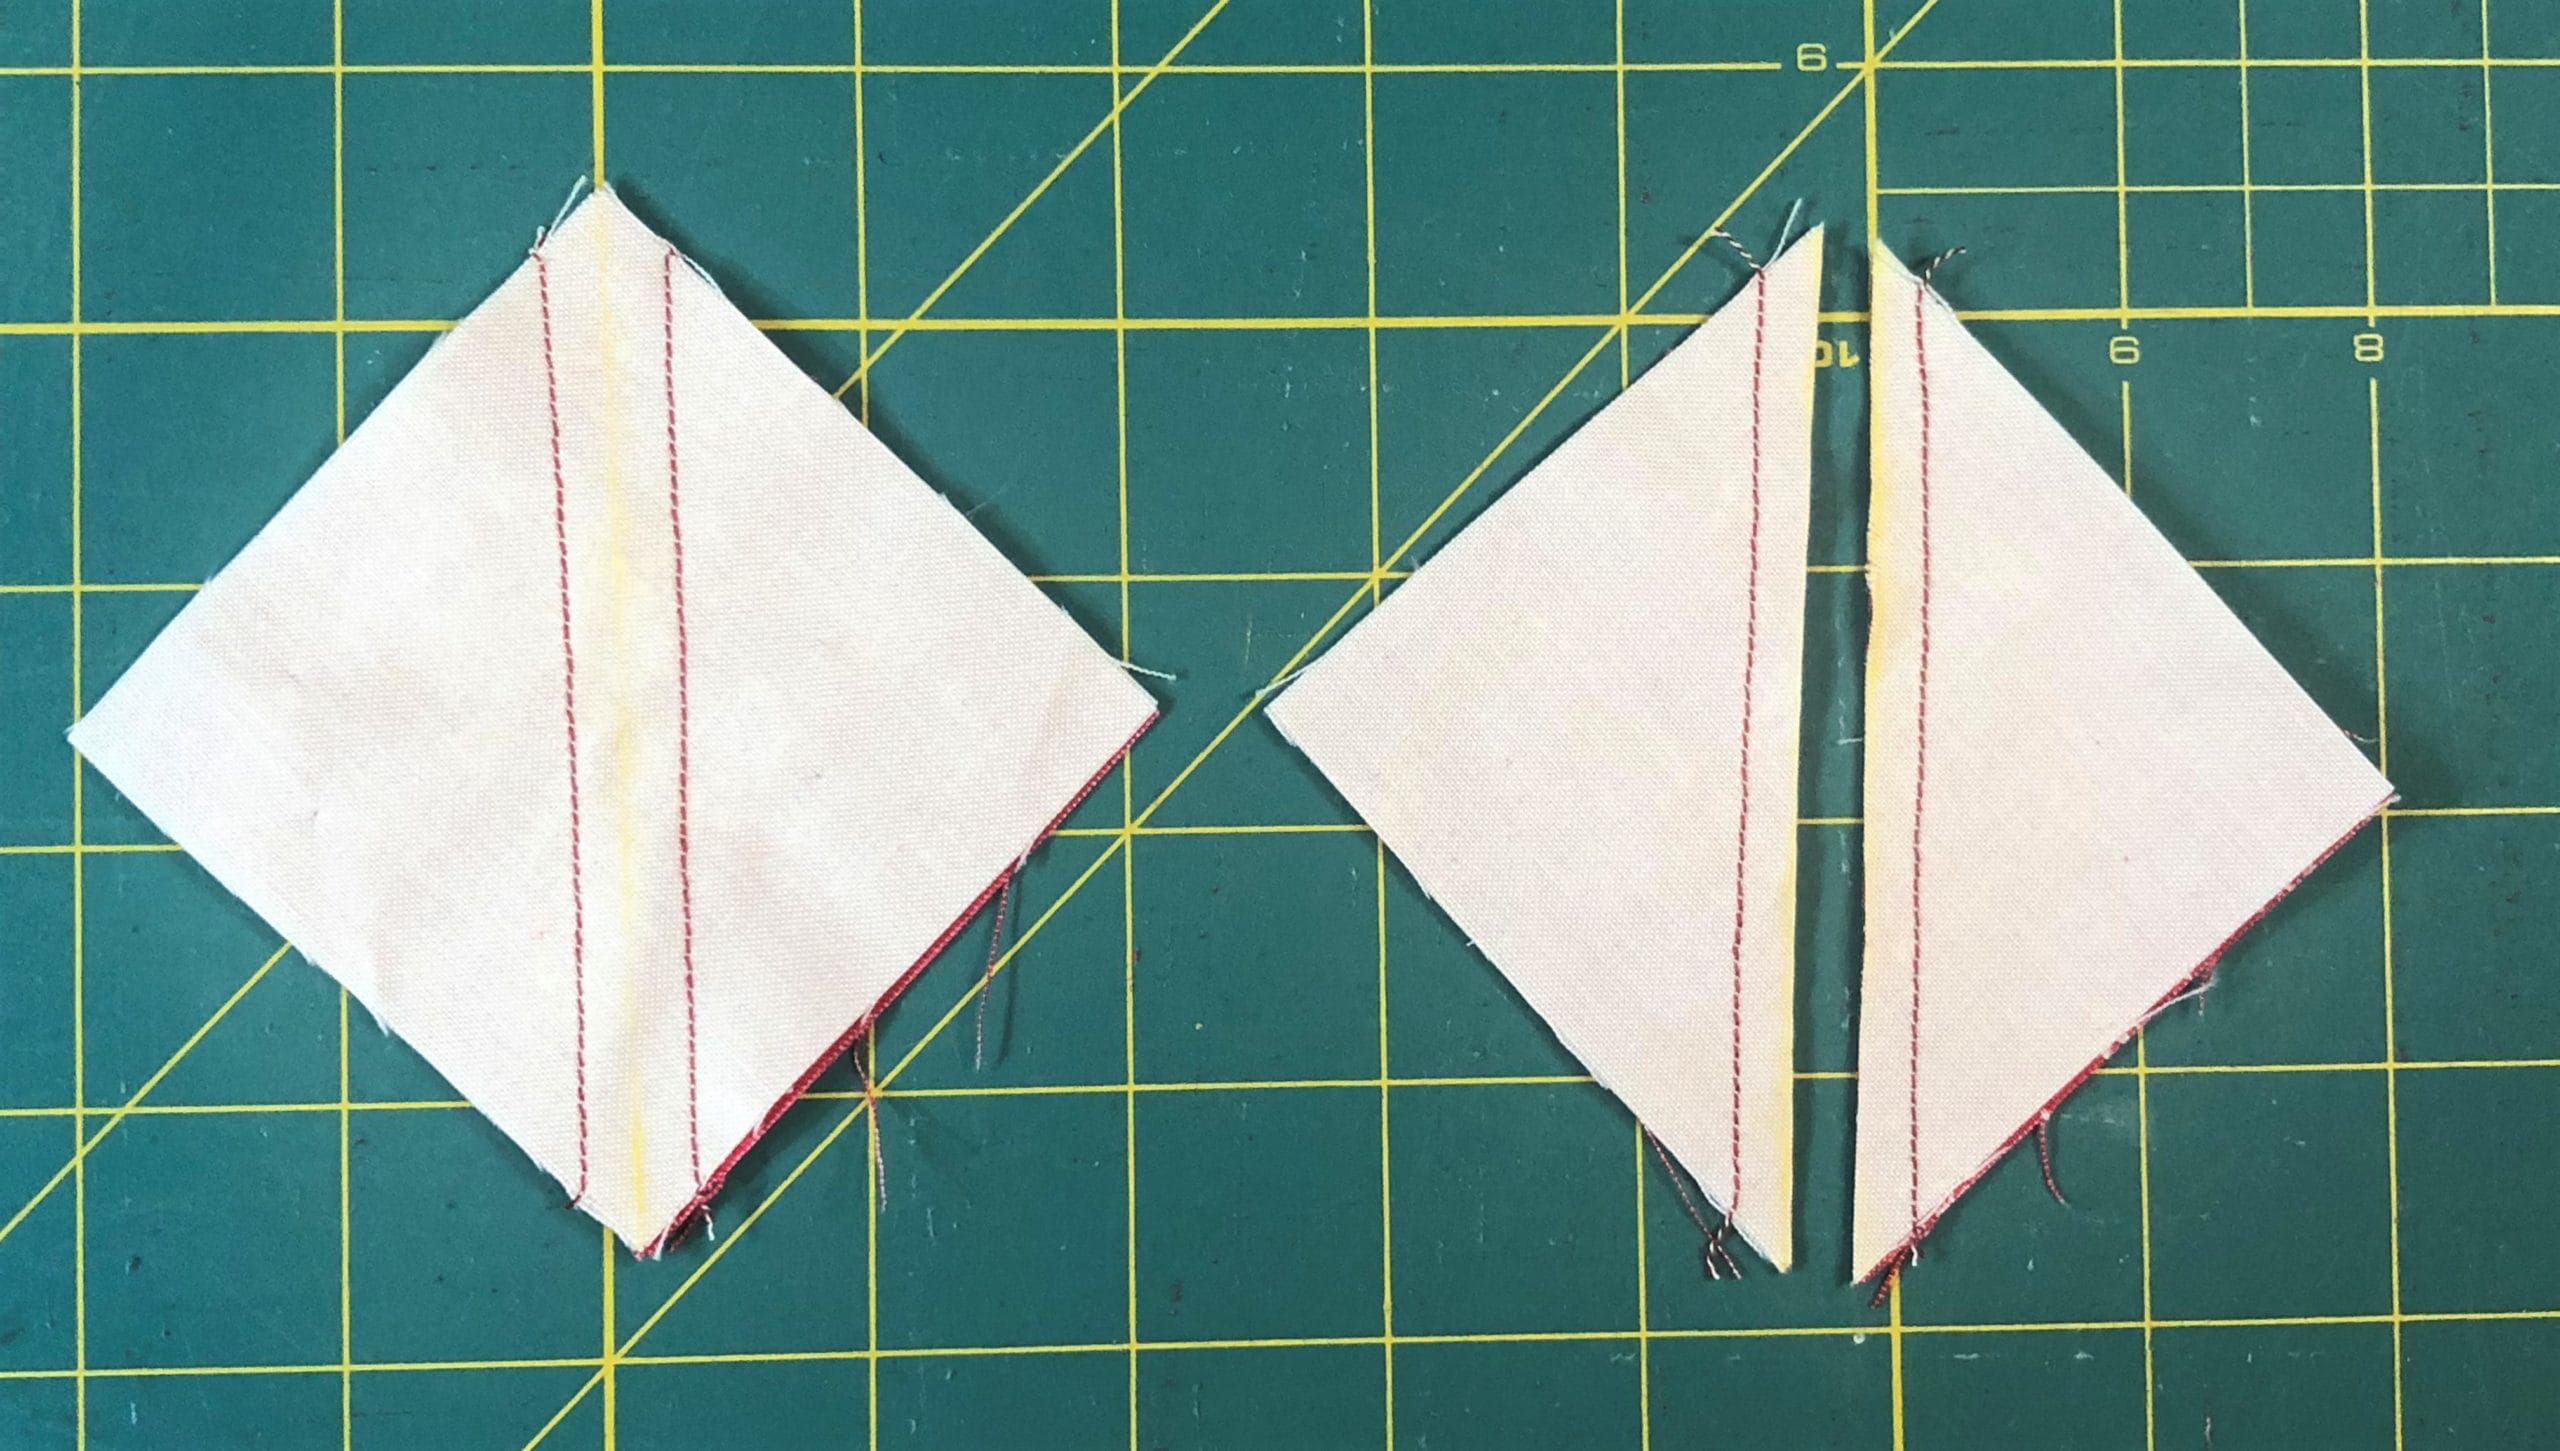
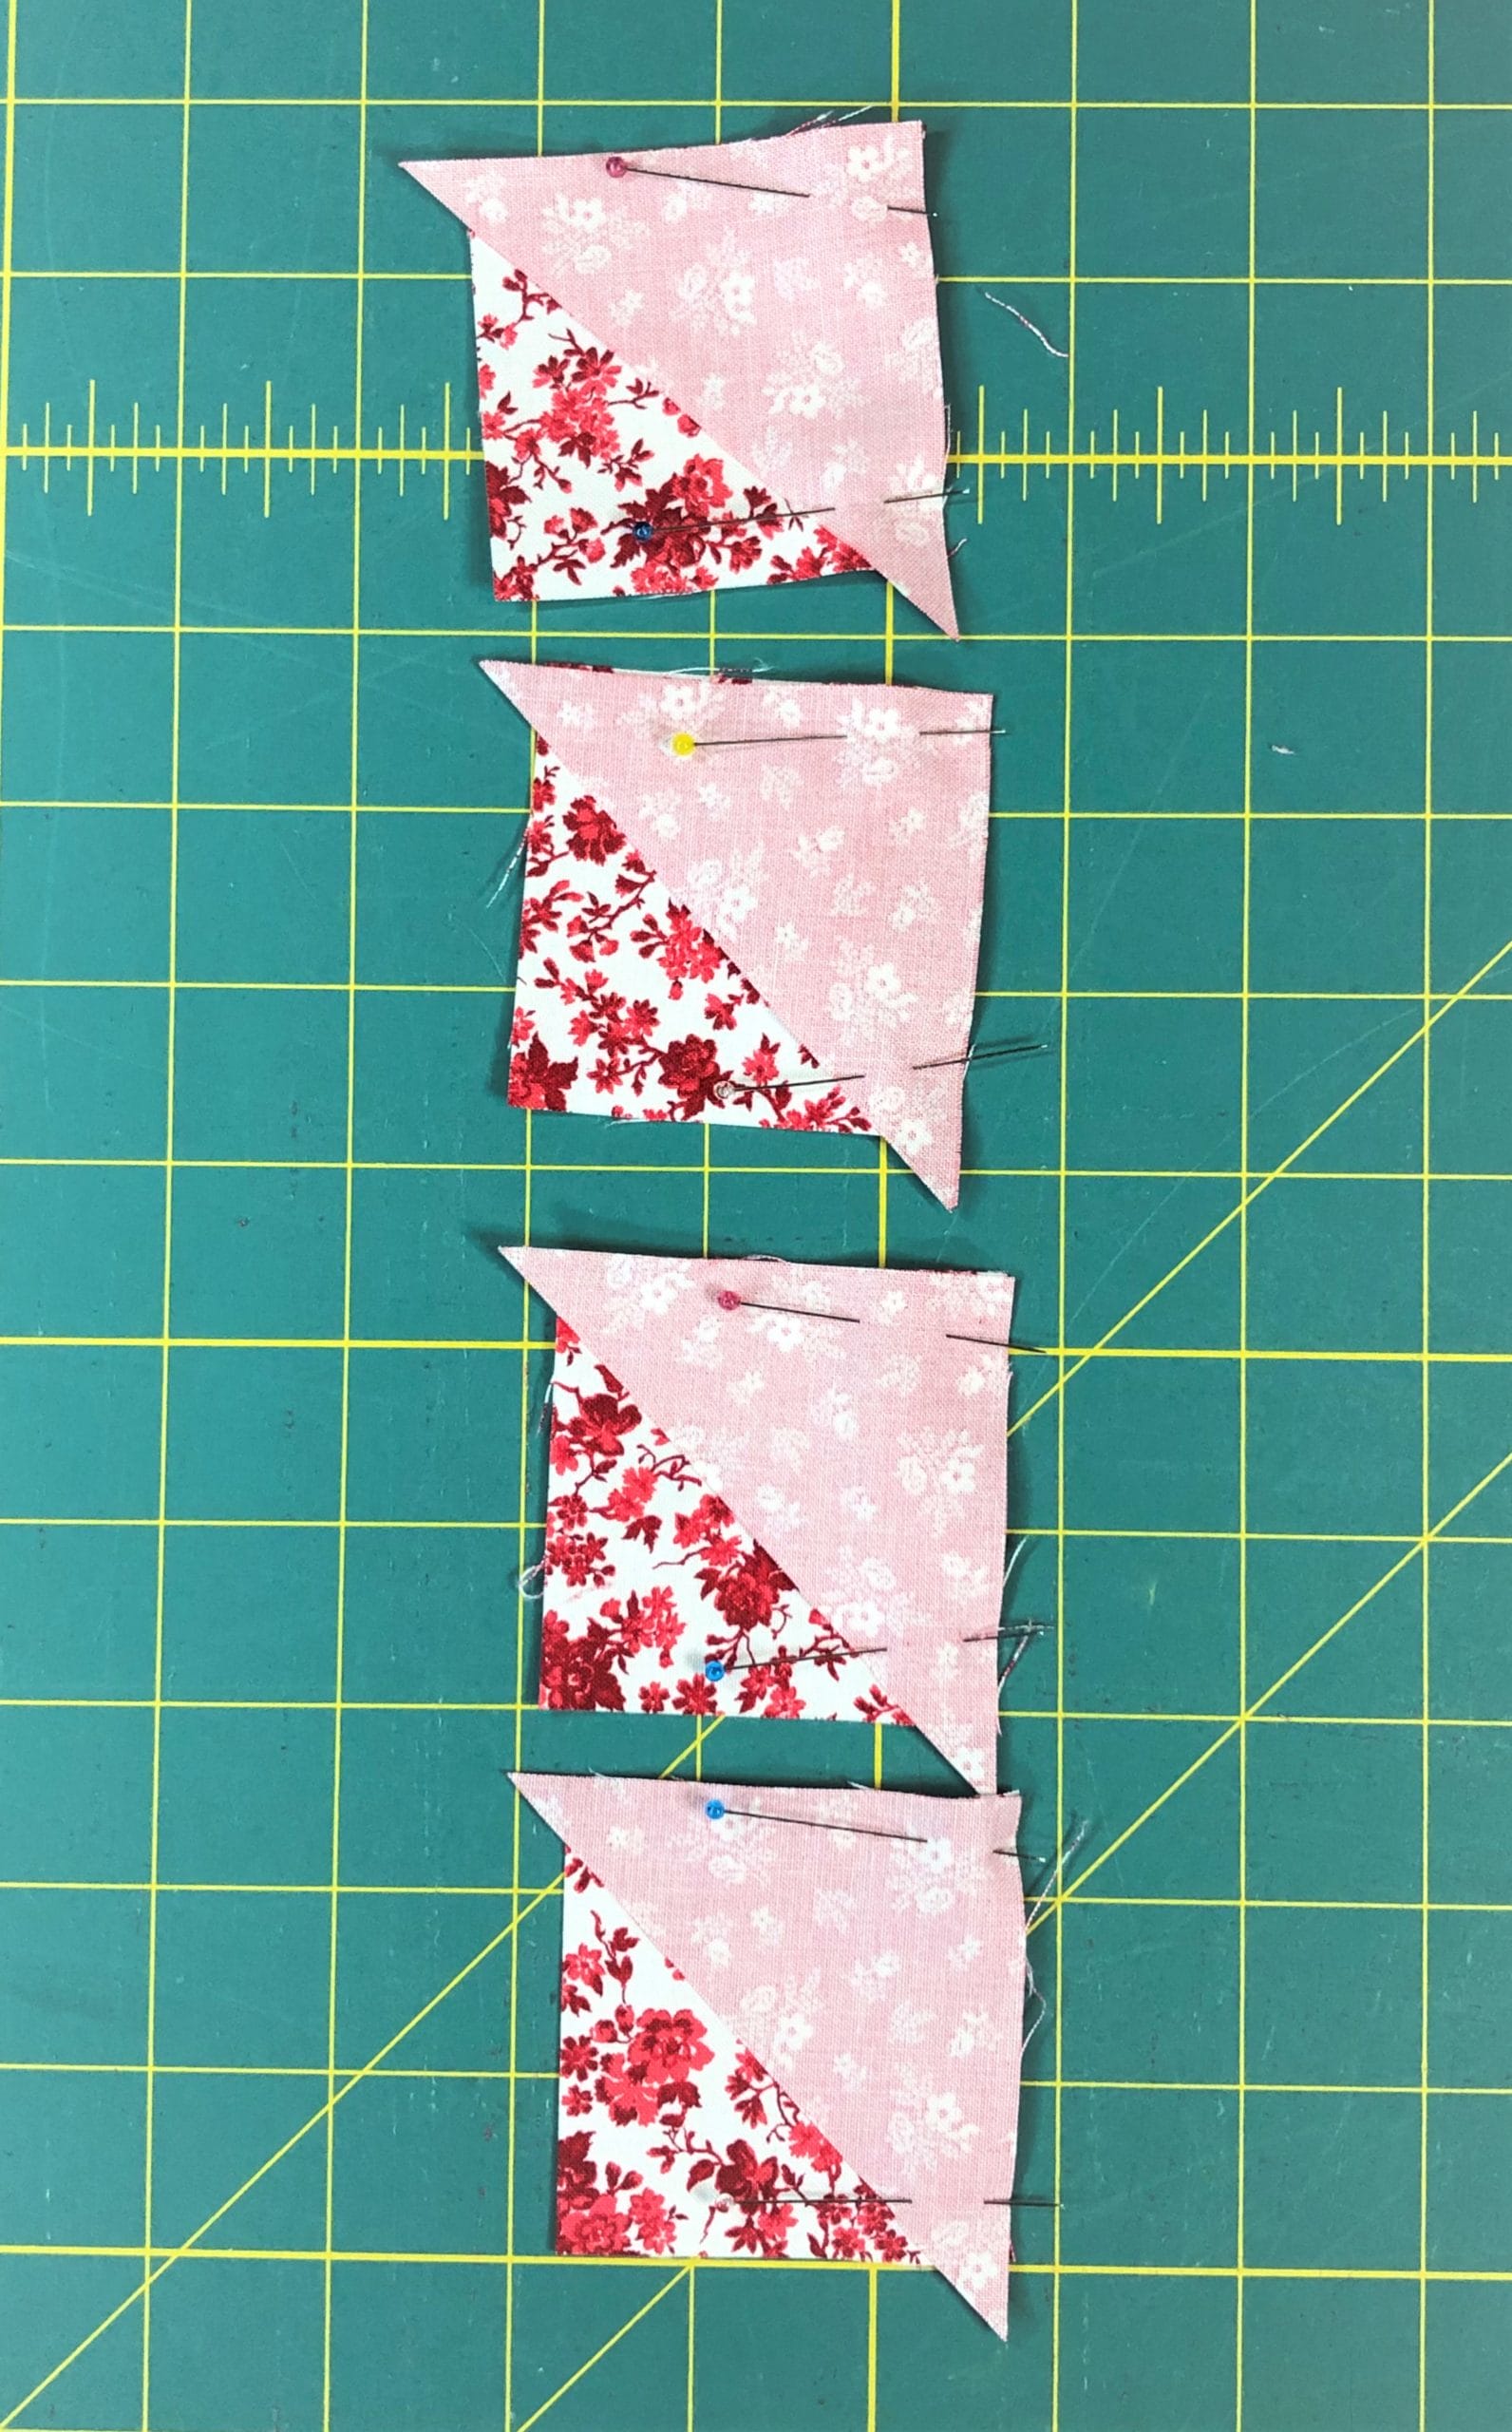
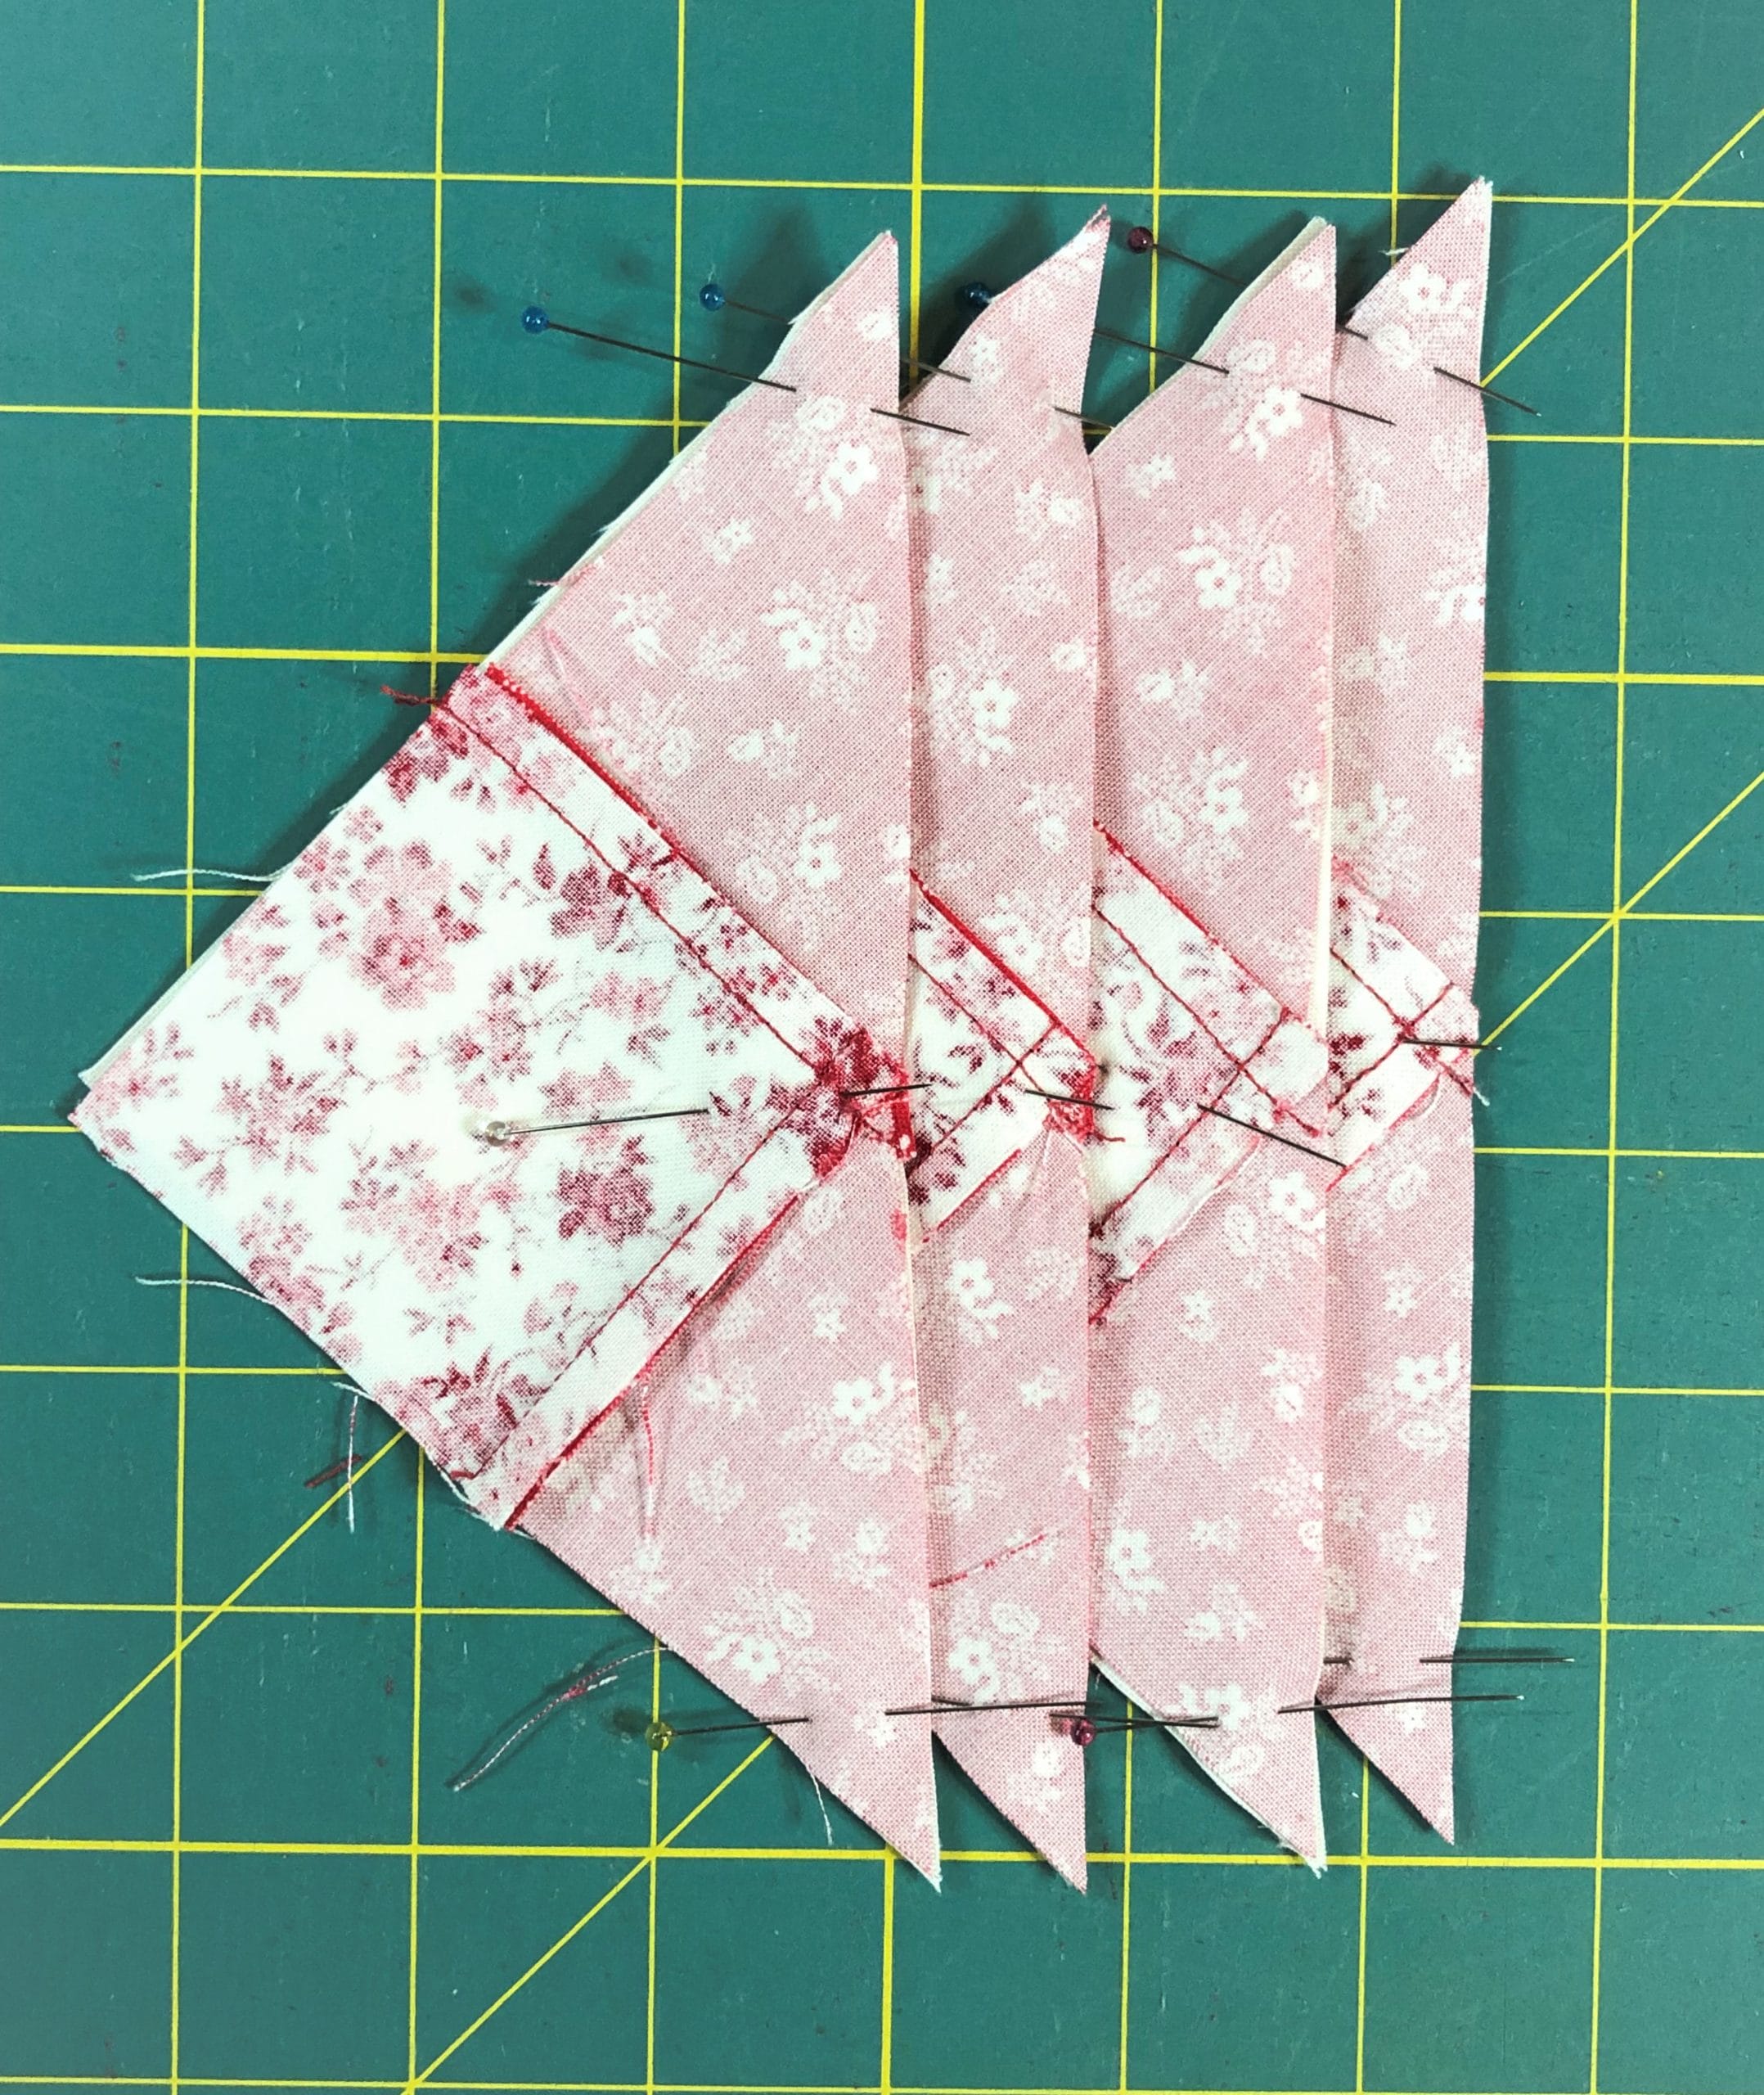
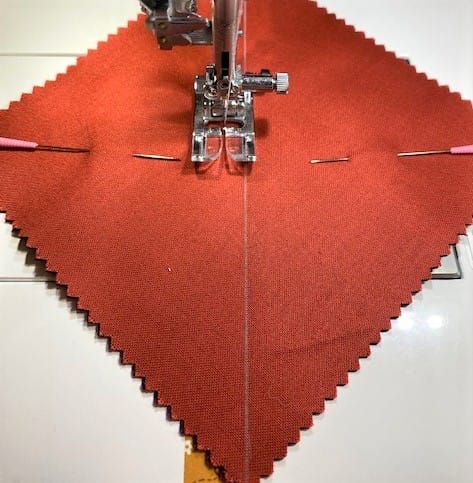
I always do chain piecing whenever possible. Below is a photo of my chain of half-square triangles after my first pass along one side. I don’t clip the strings, but just run the chain back through on the other side. I then clip everything when I’m done.
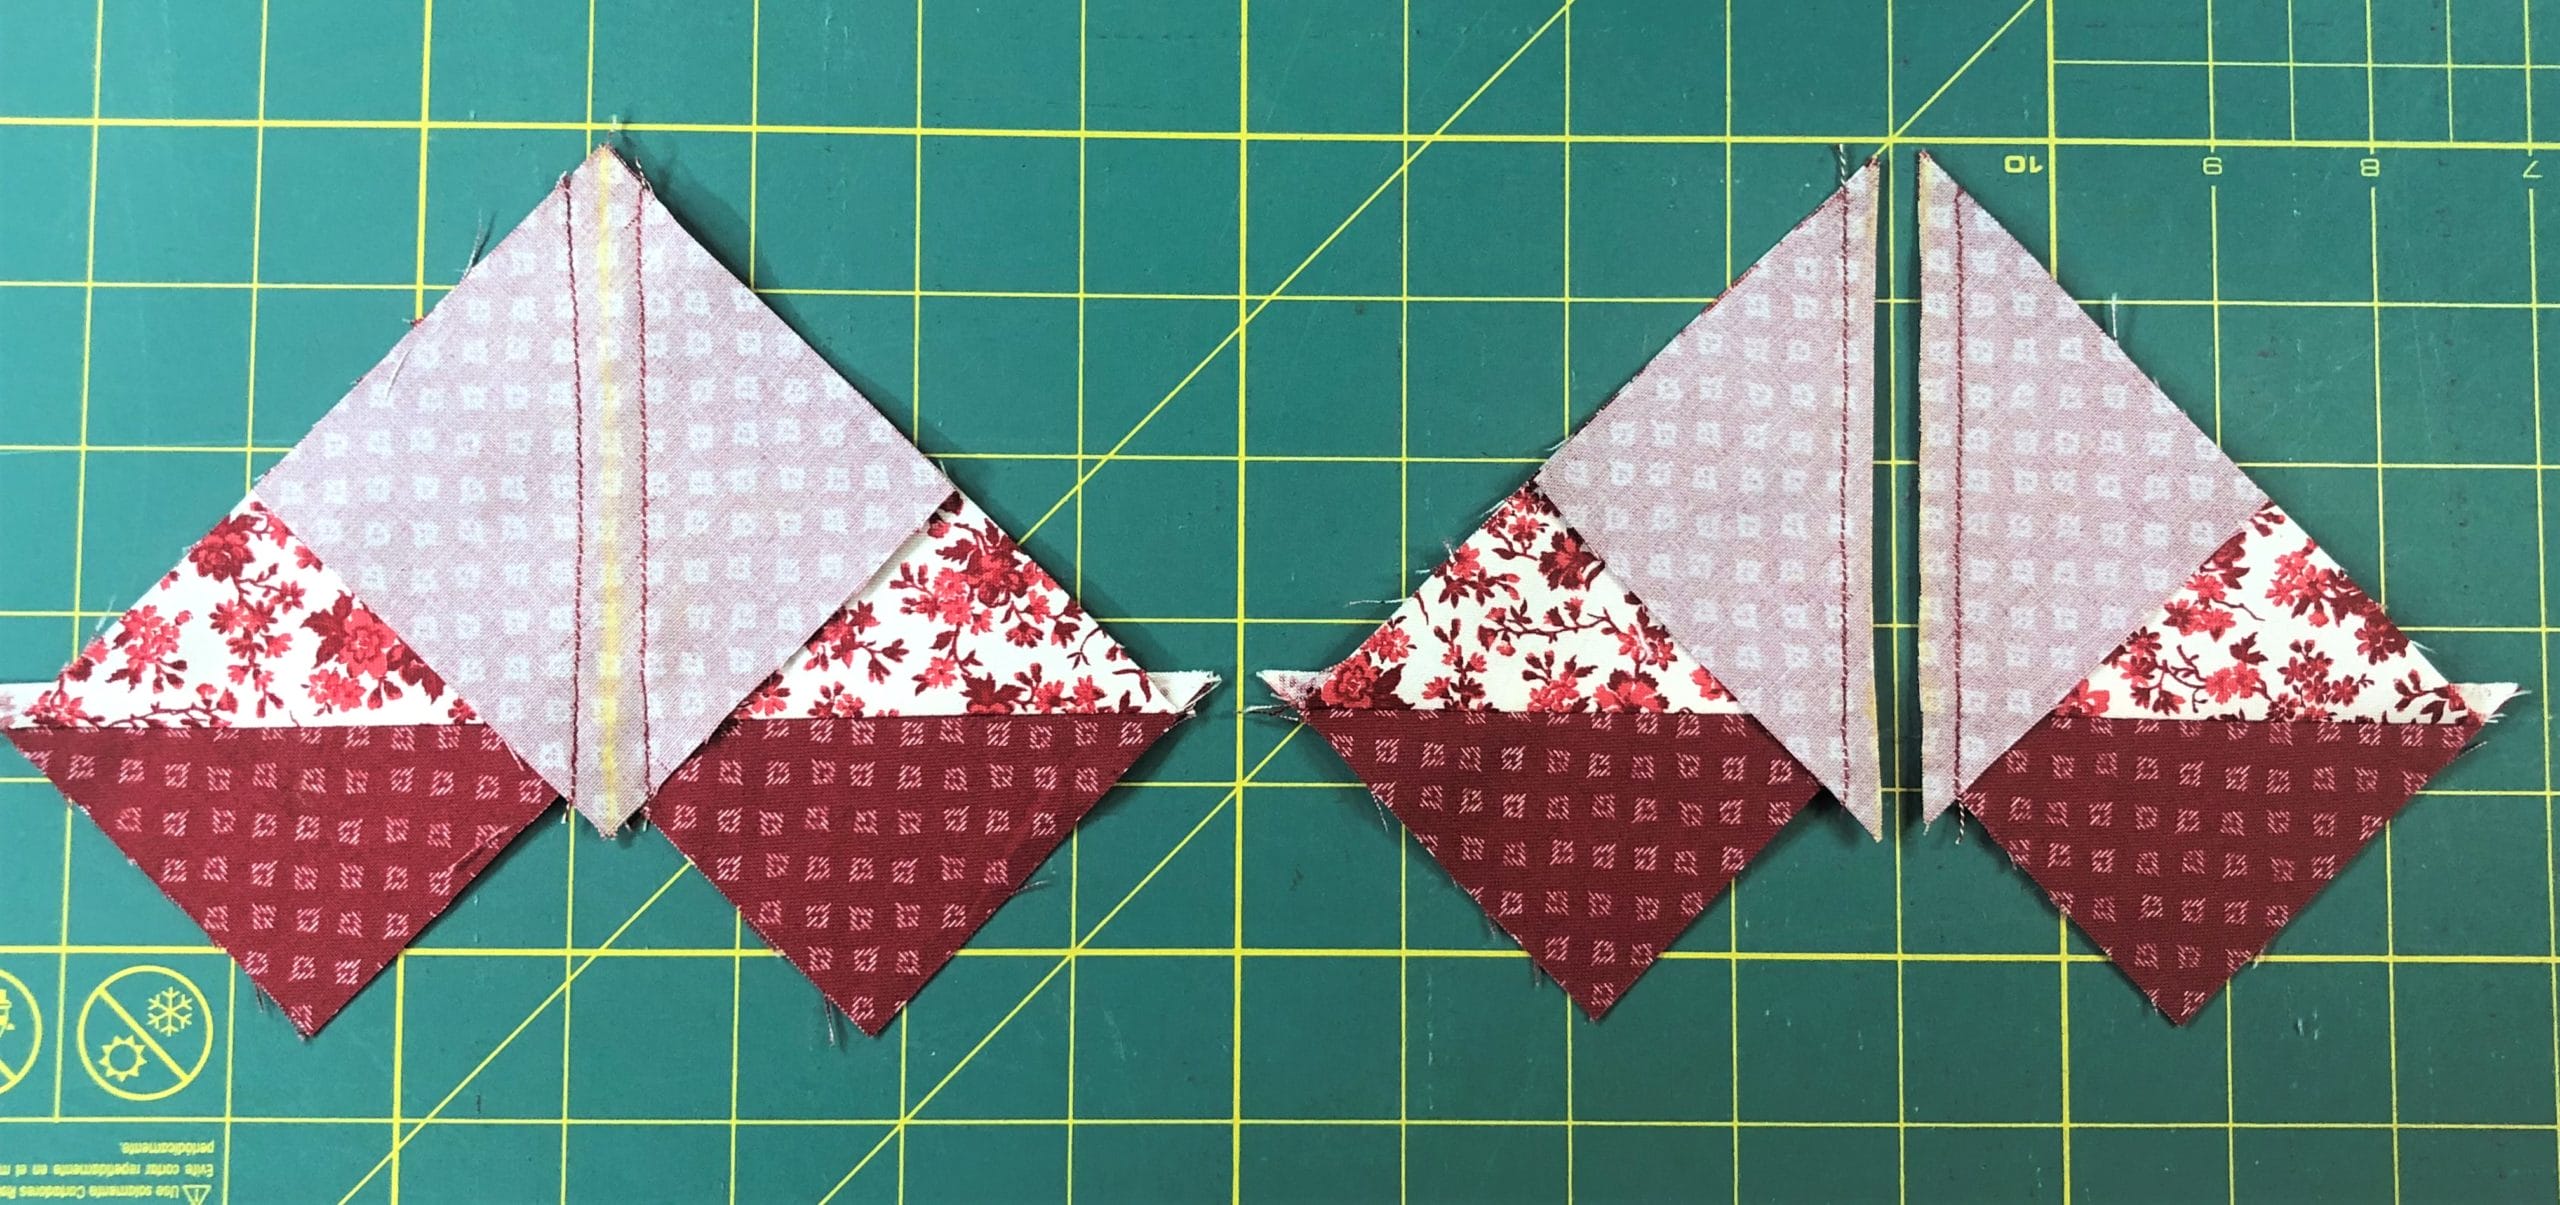
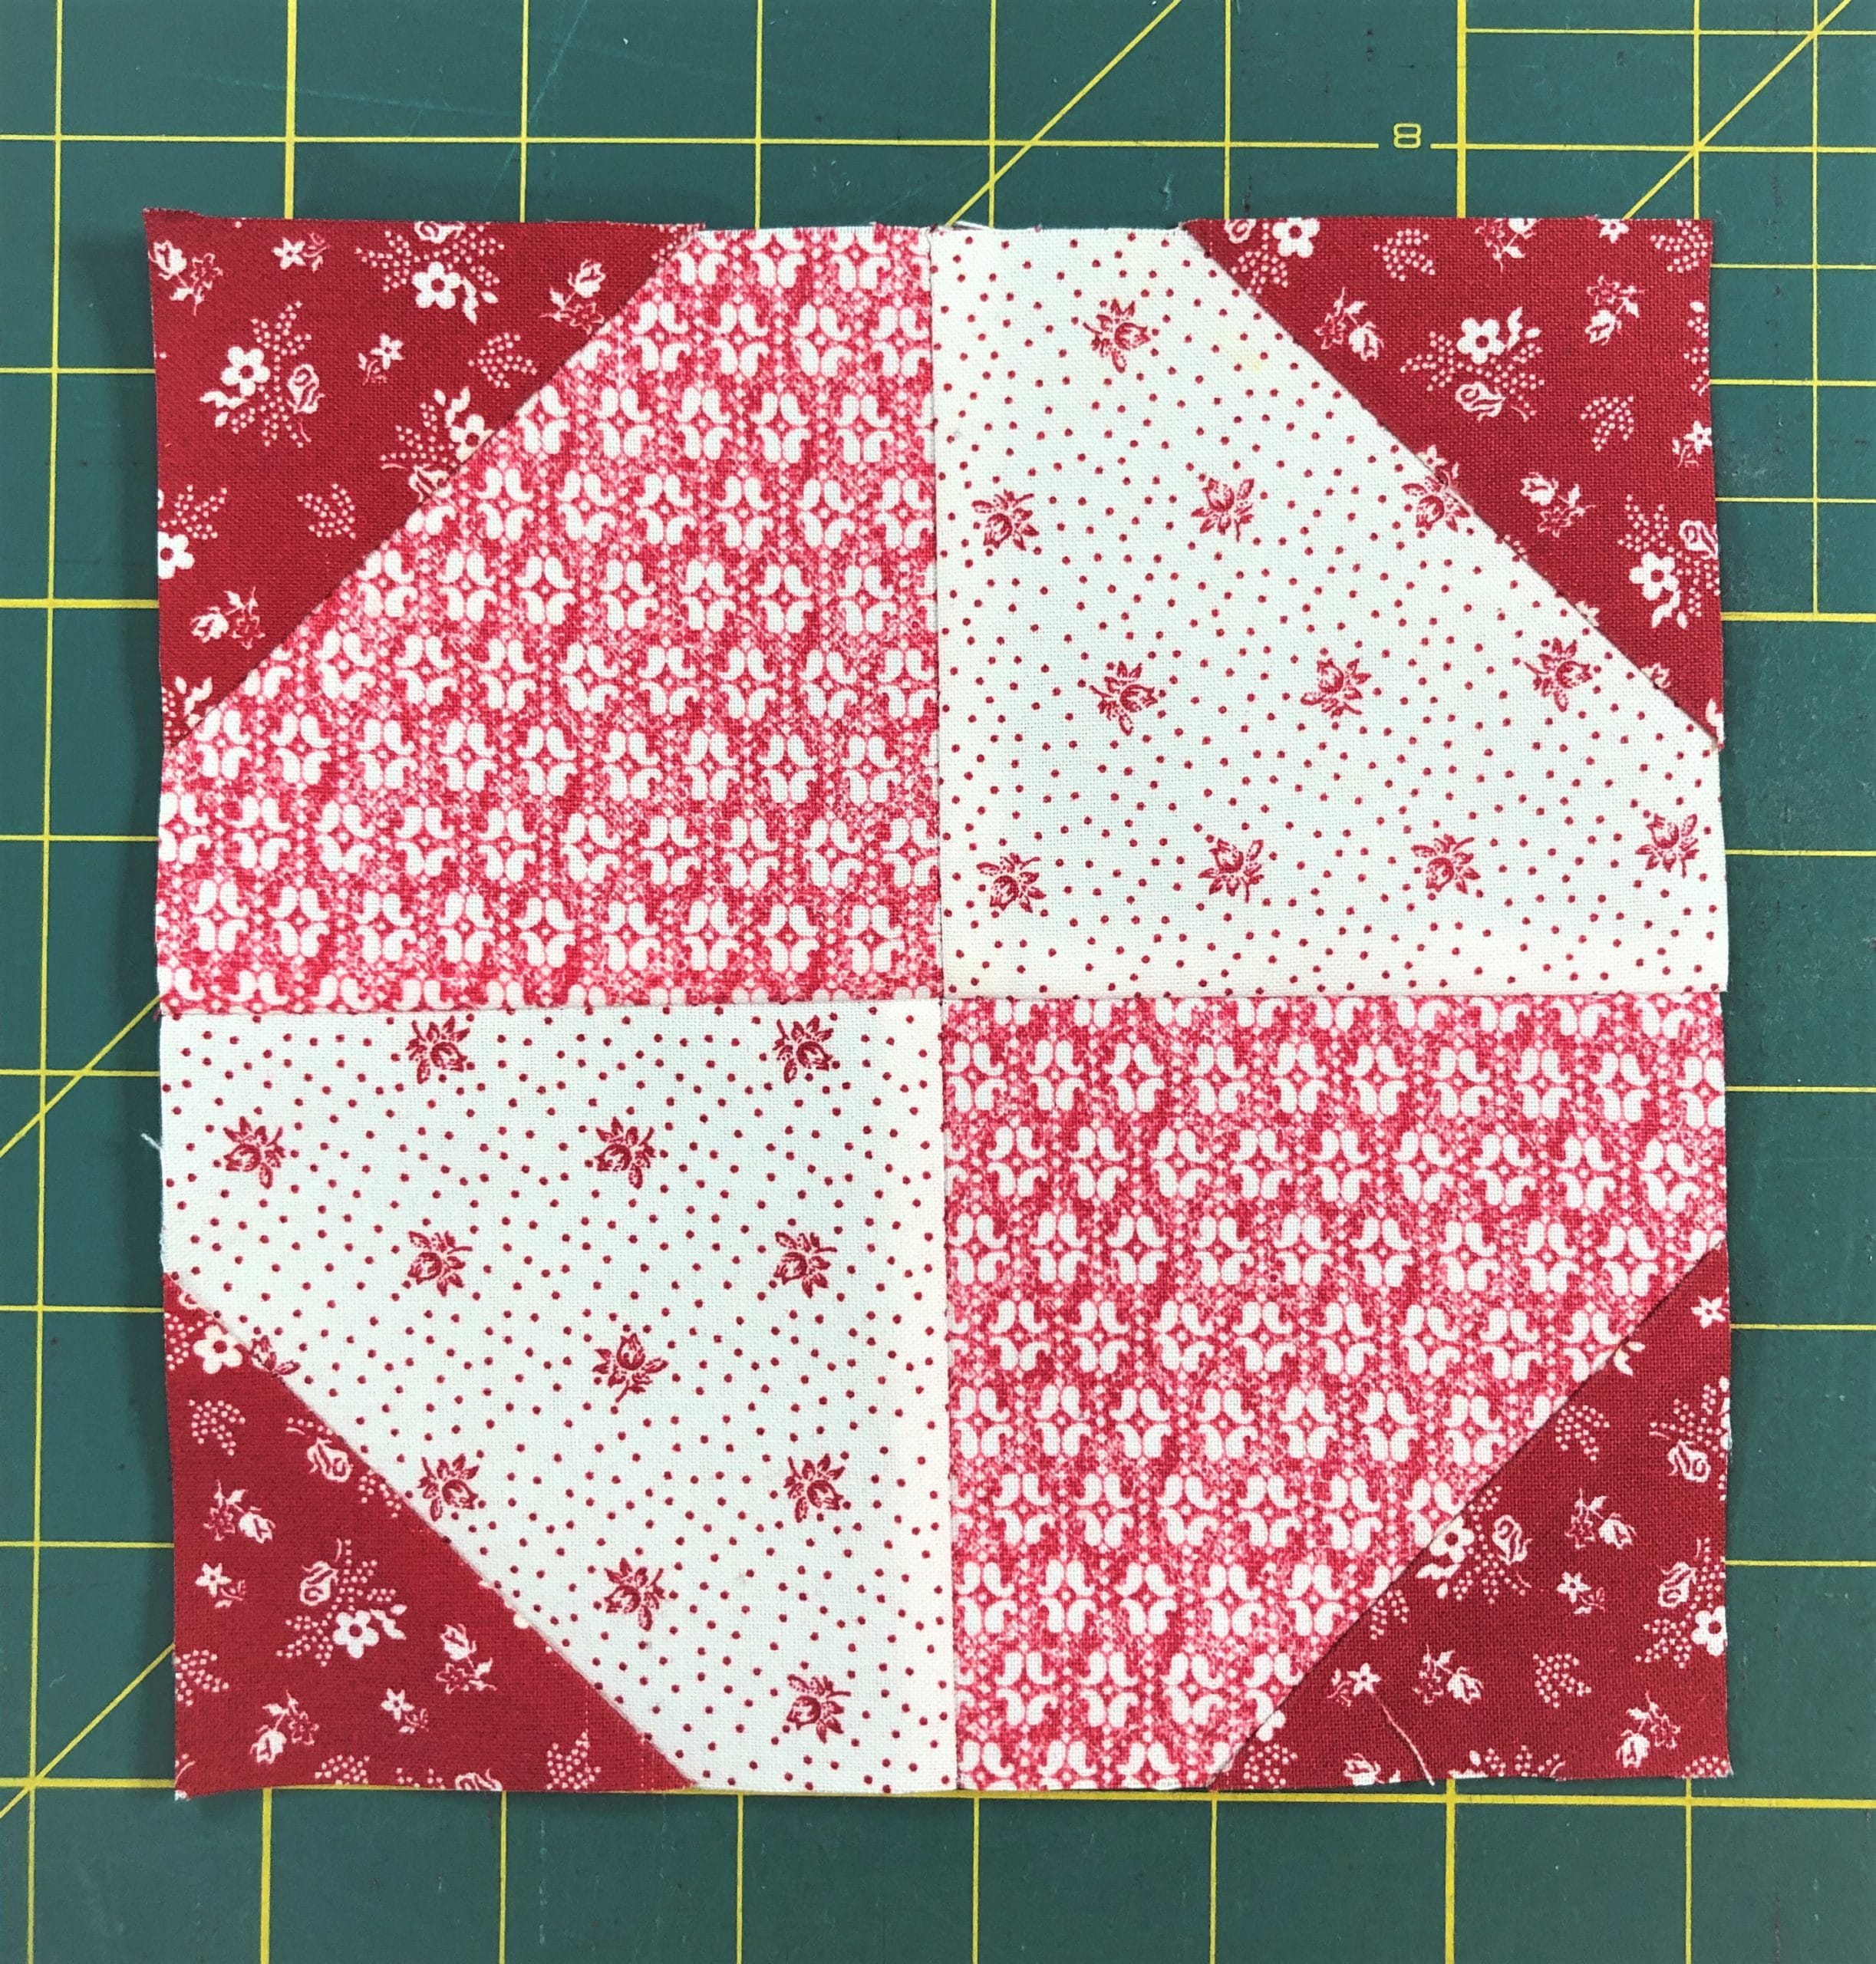
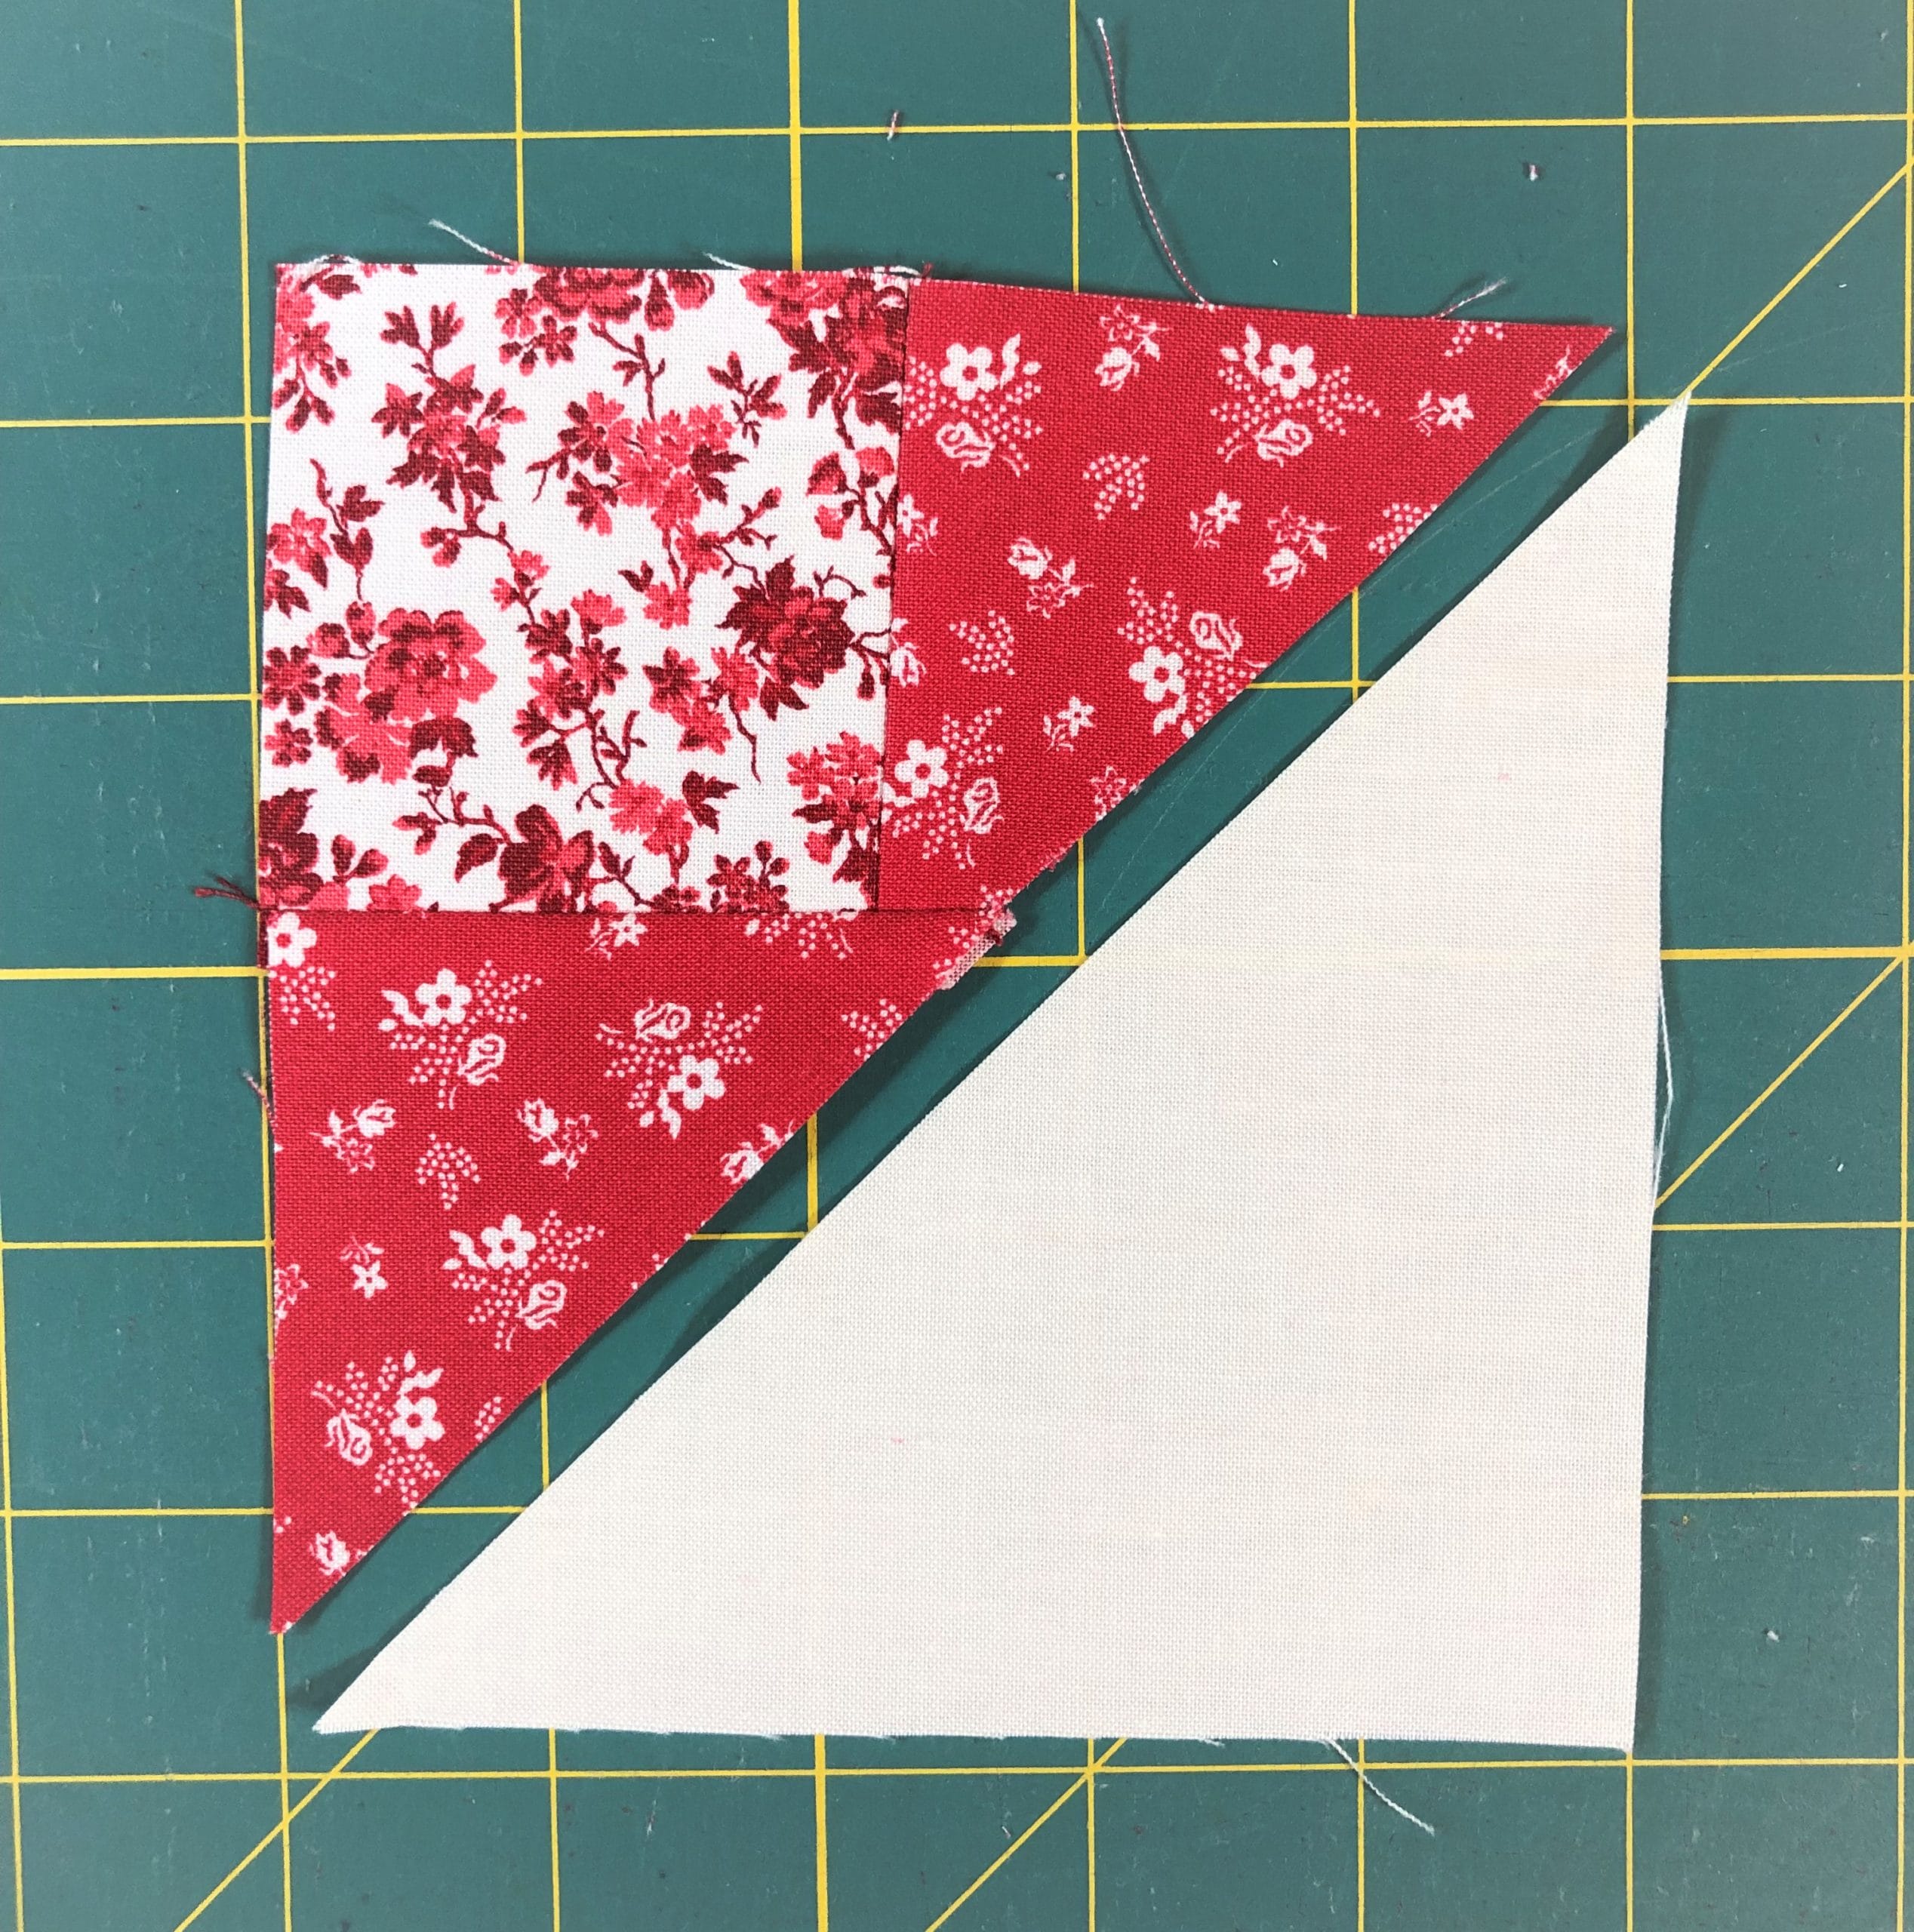
Once I have all that prep sewing done, I finish up my half-square triangles, square them up, and start making my pinwheel blocks.
Step Three
Piecing Pinwheels
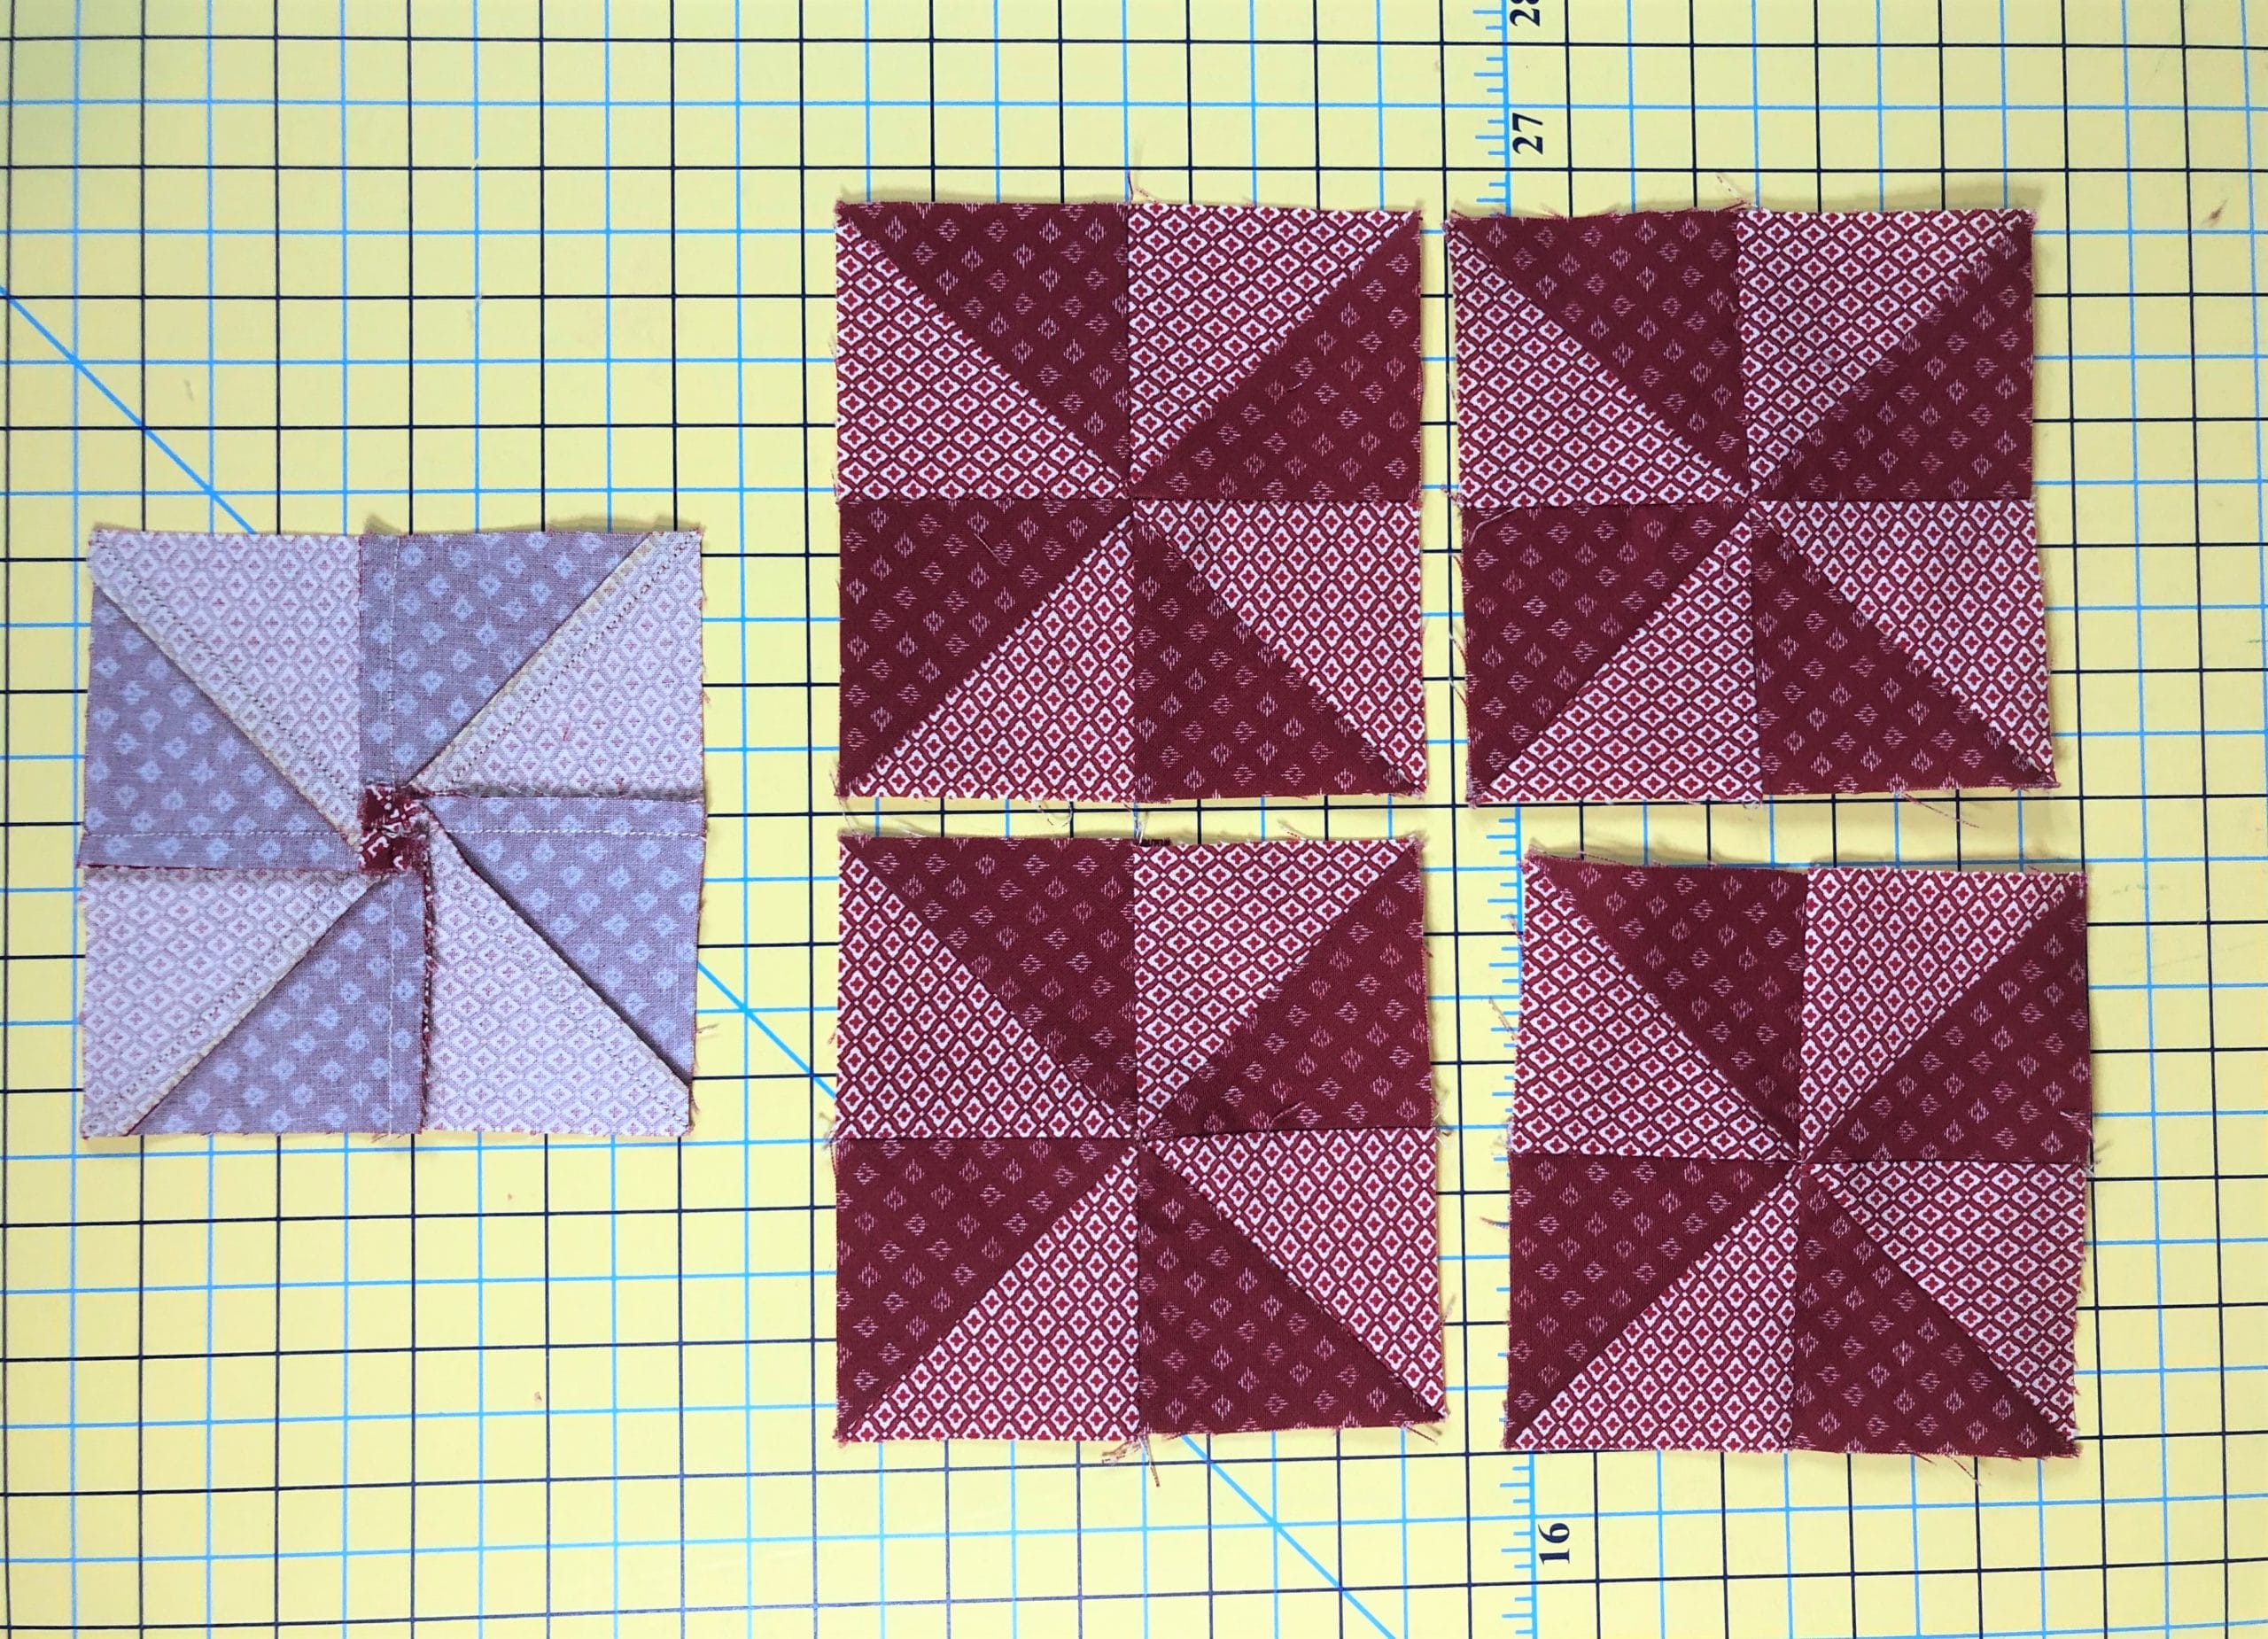
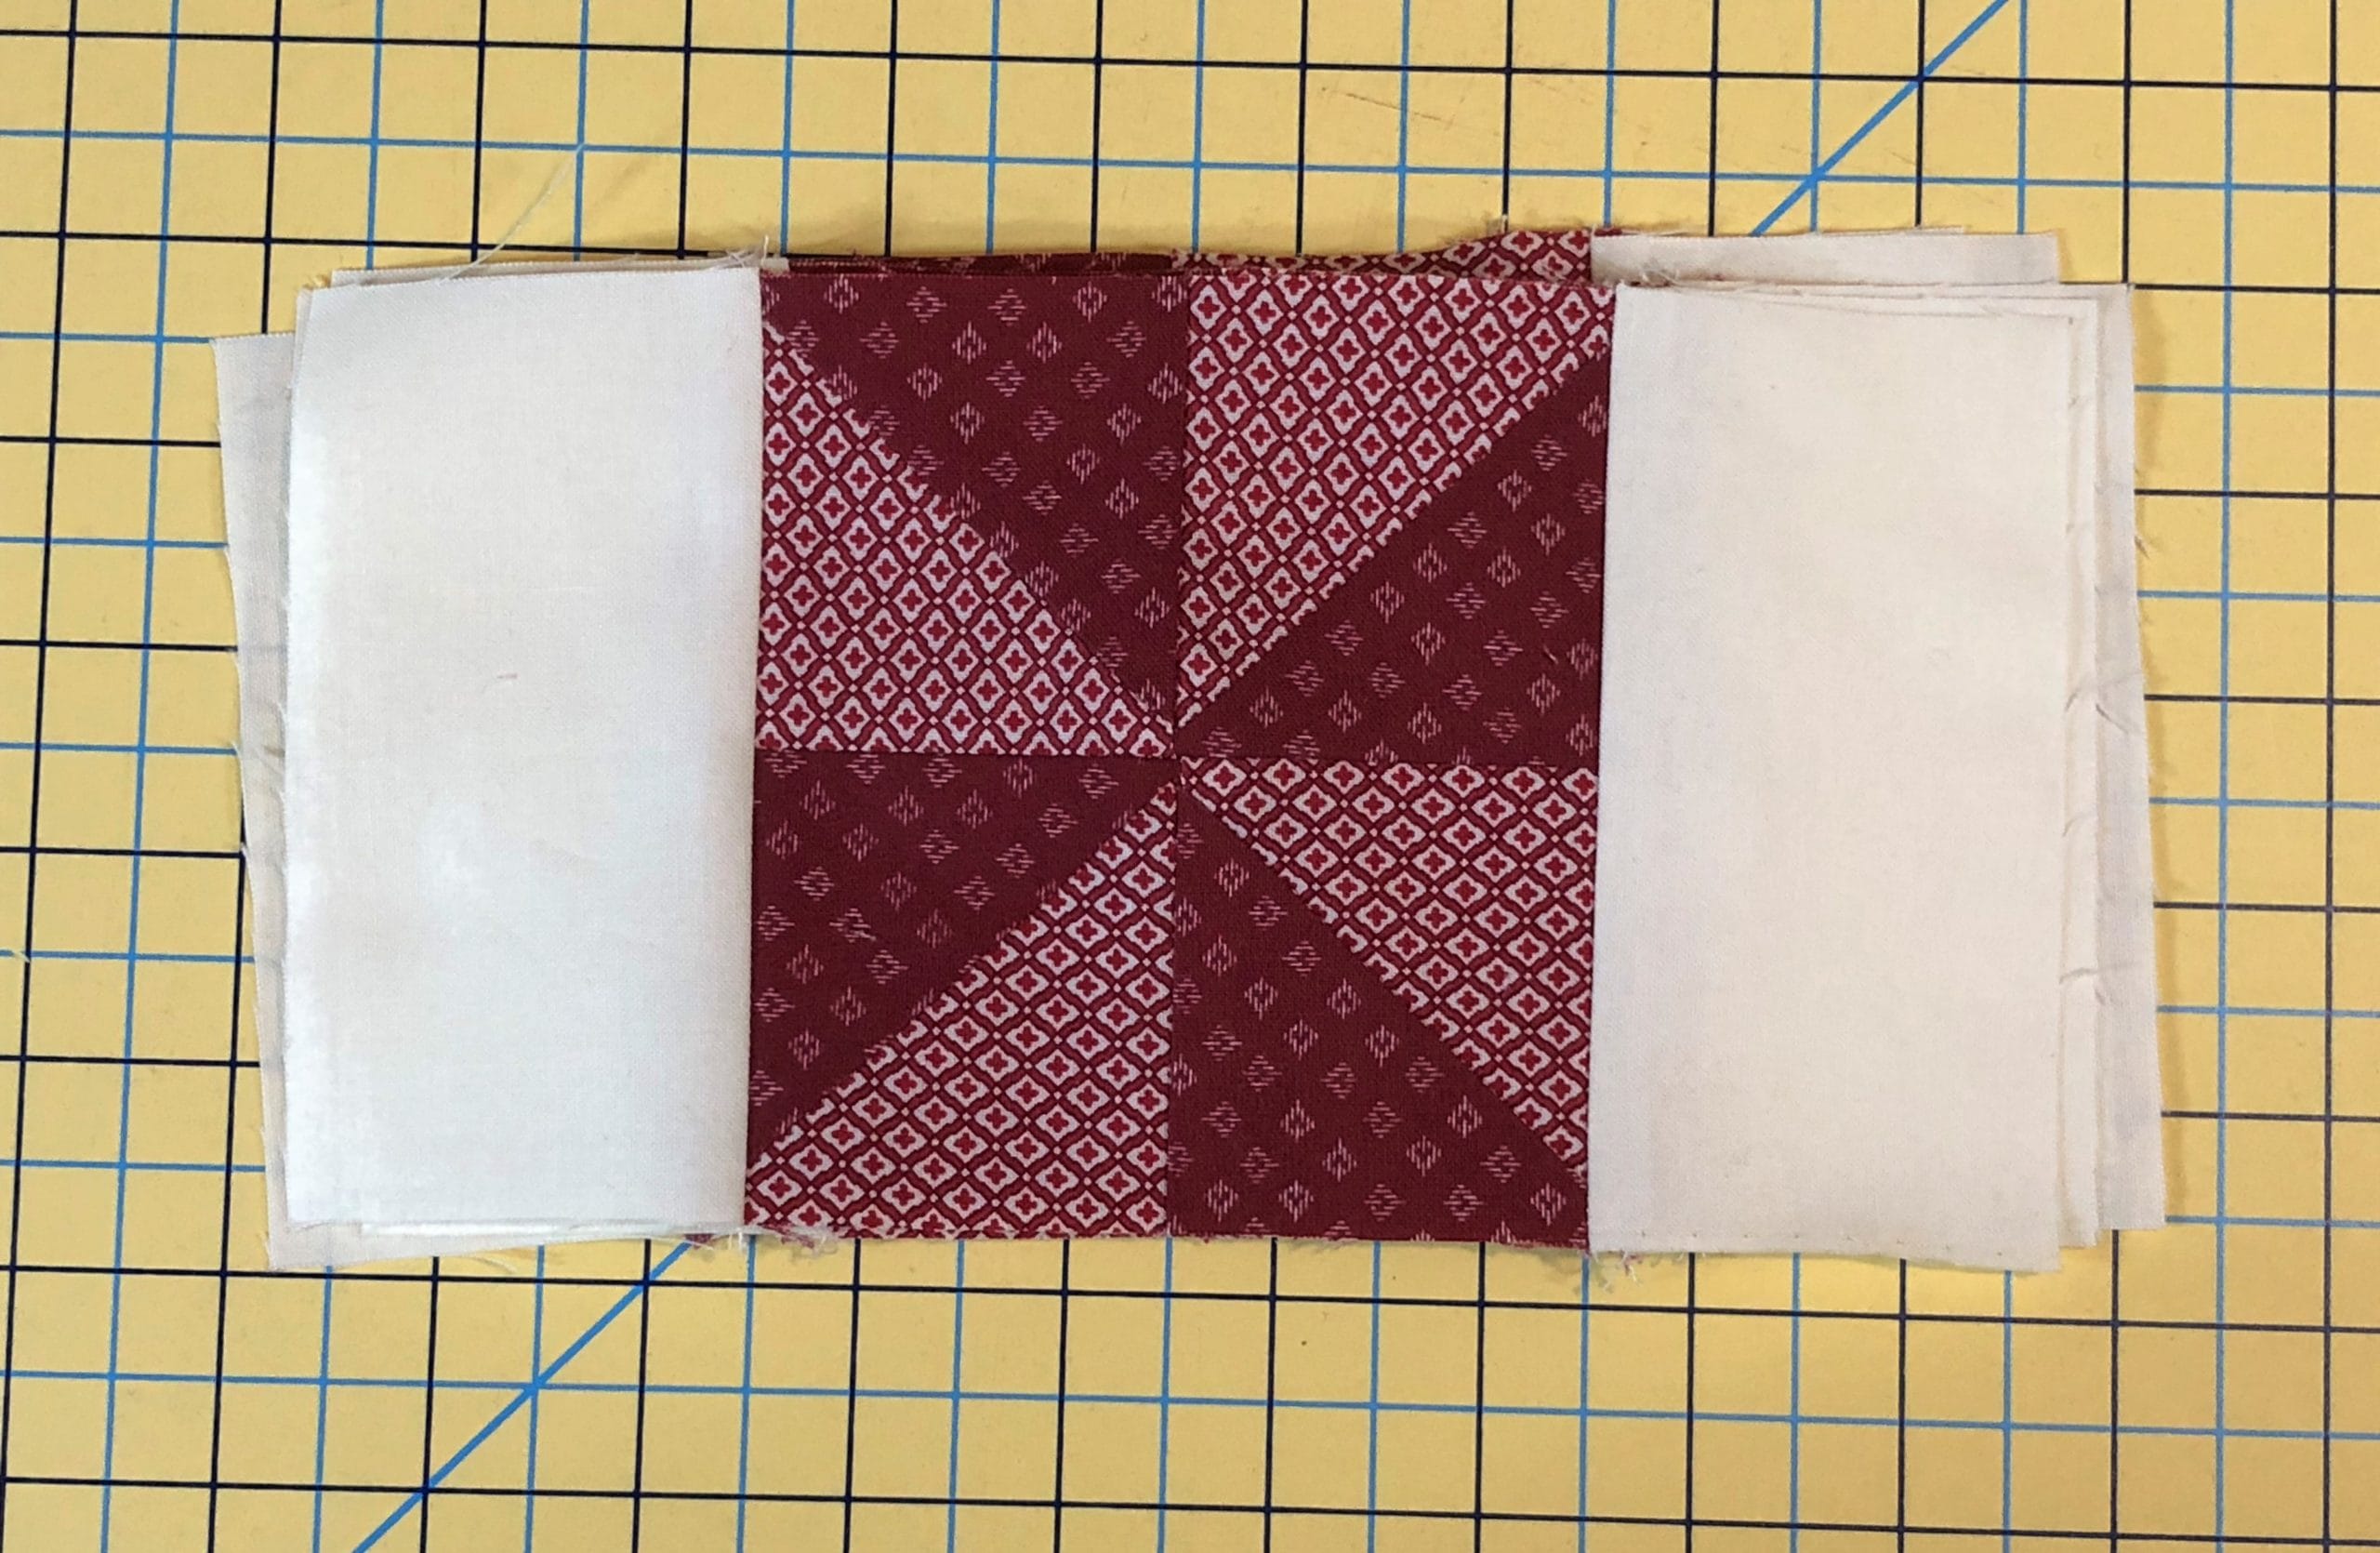
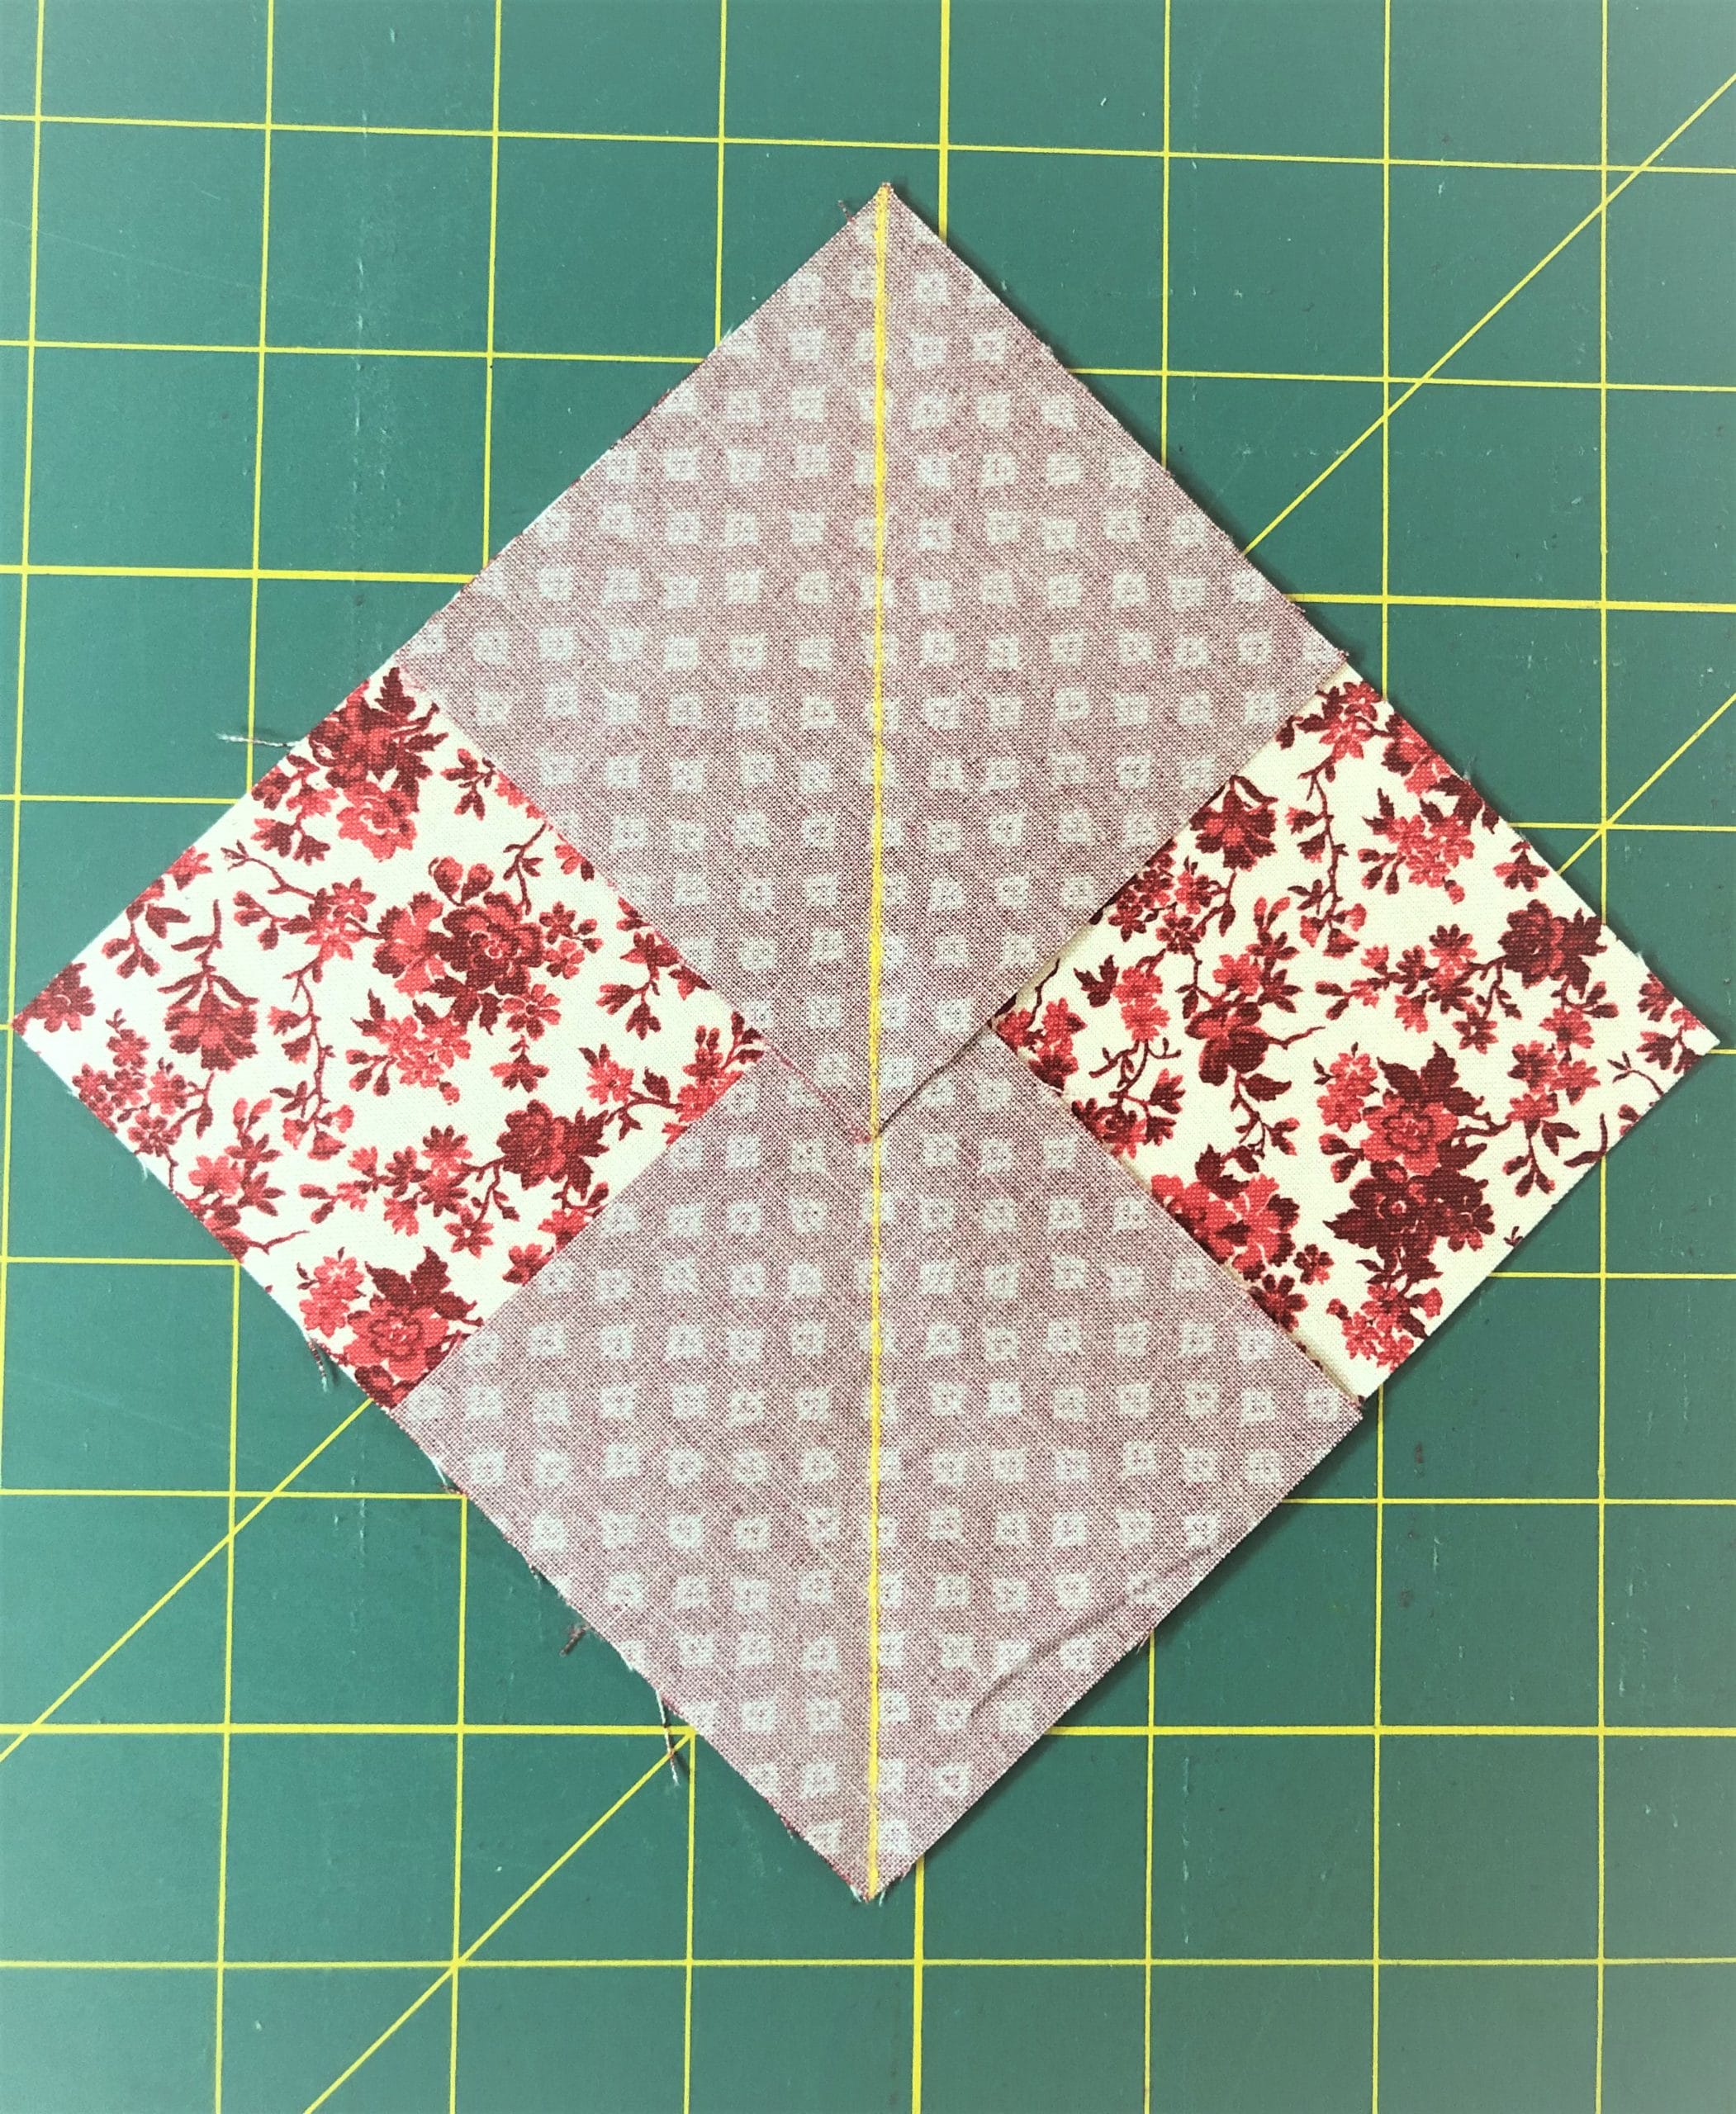
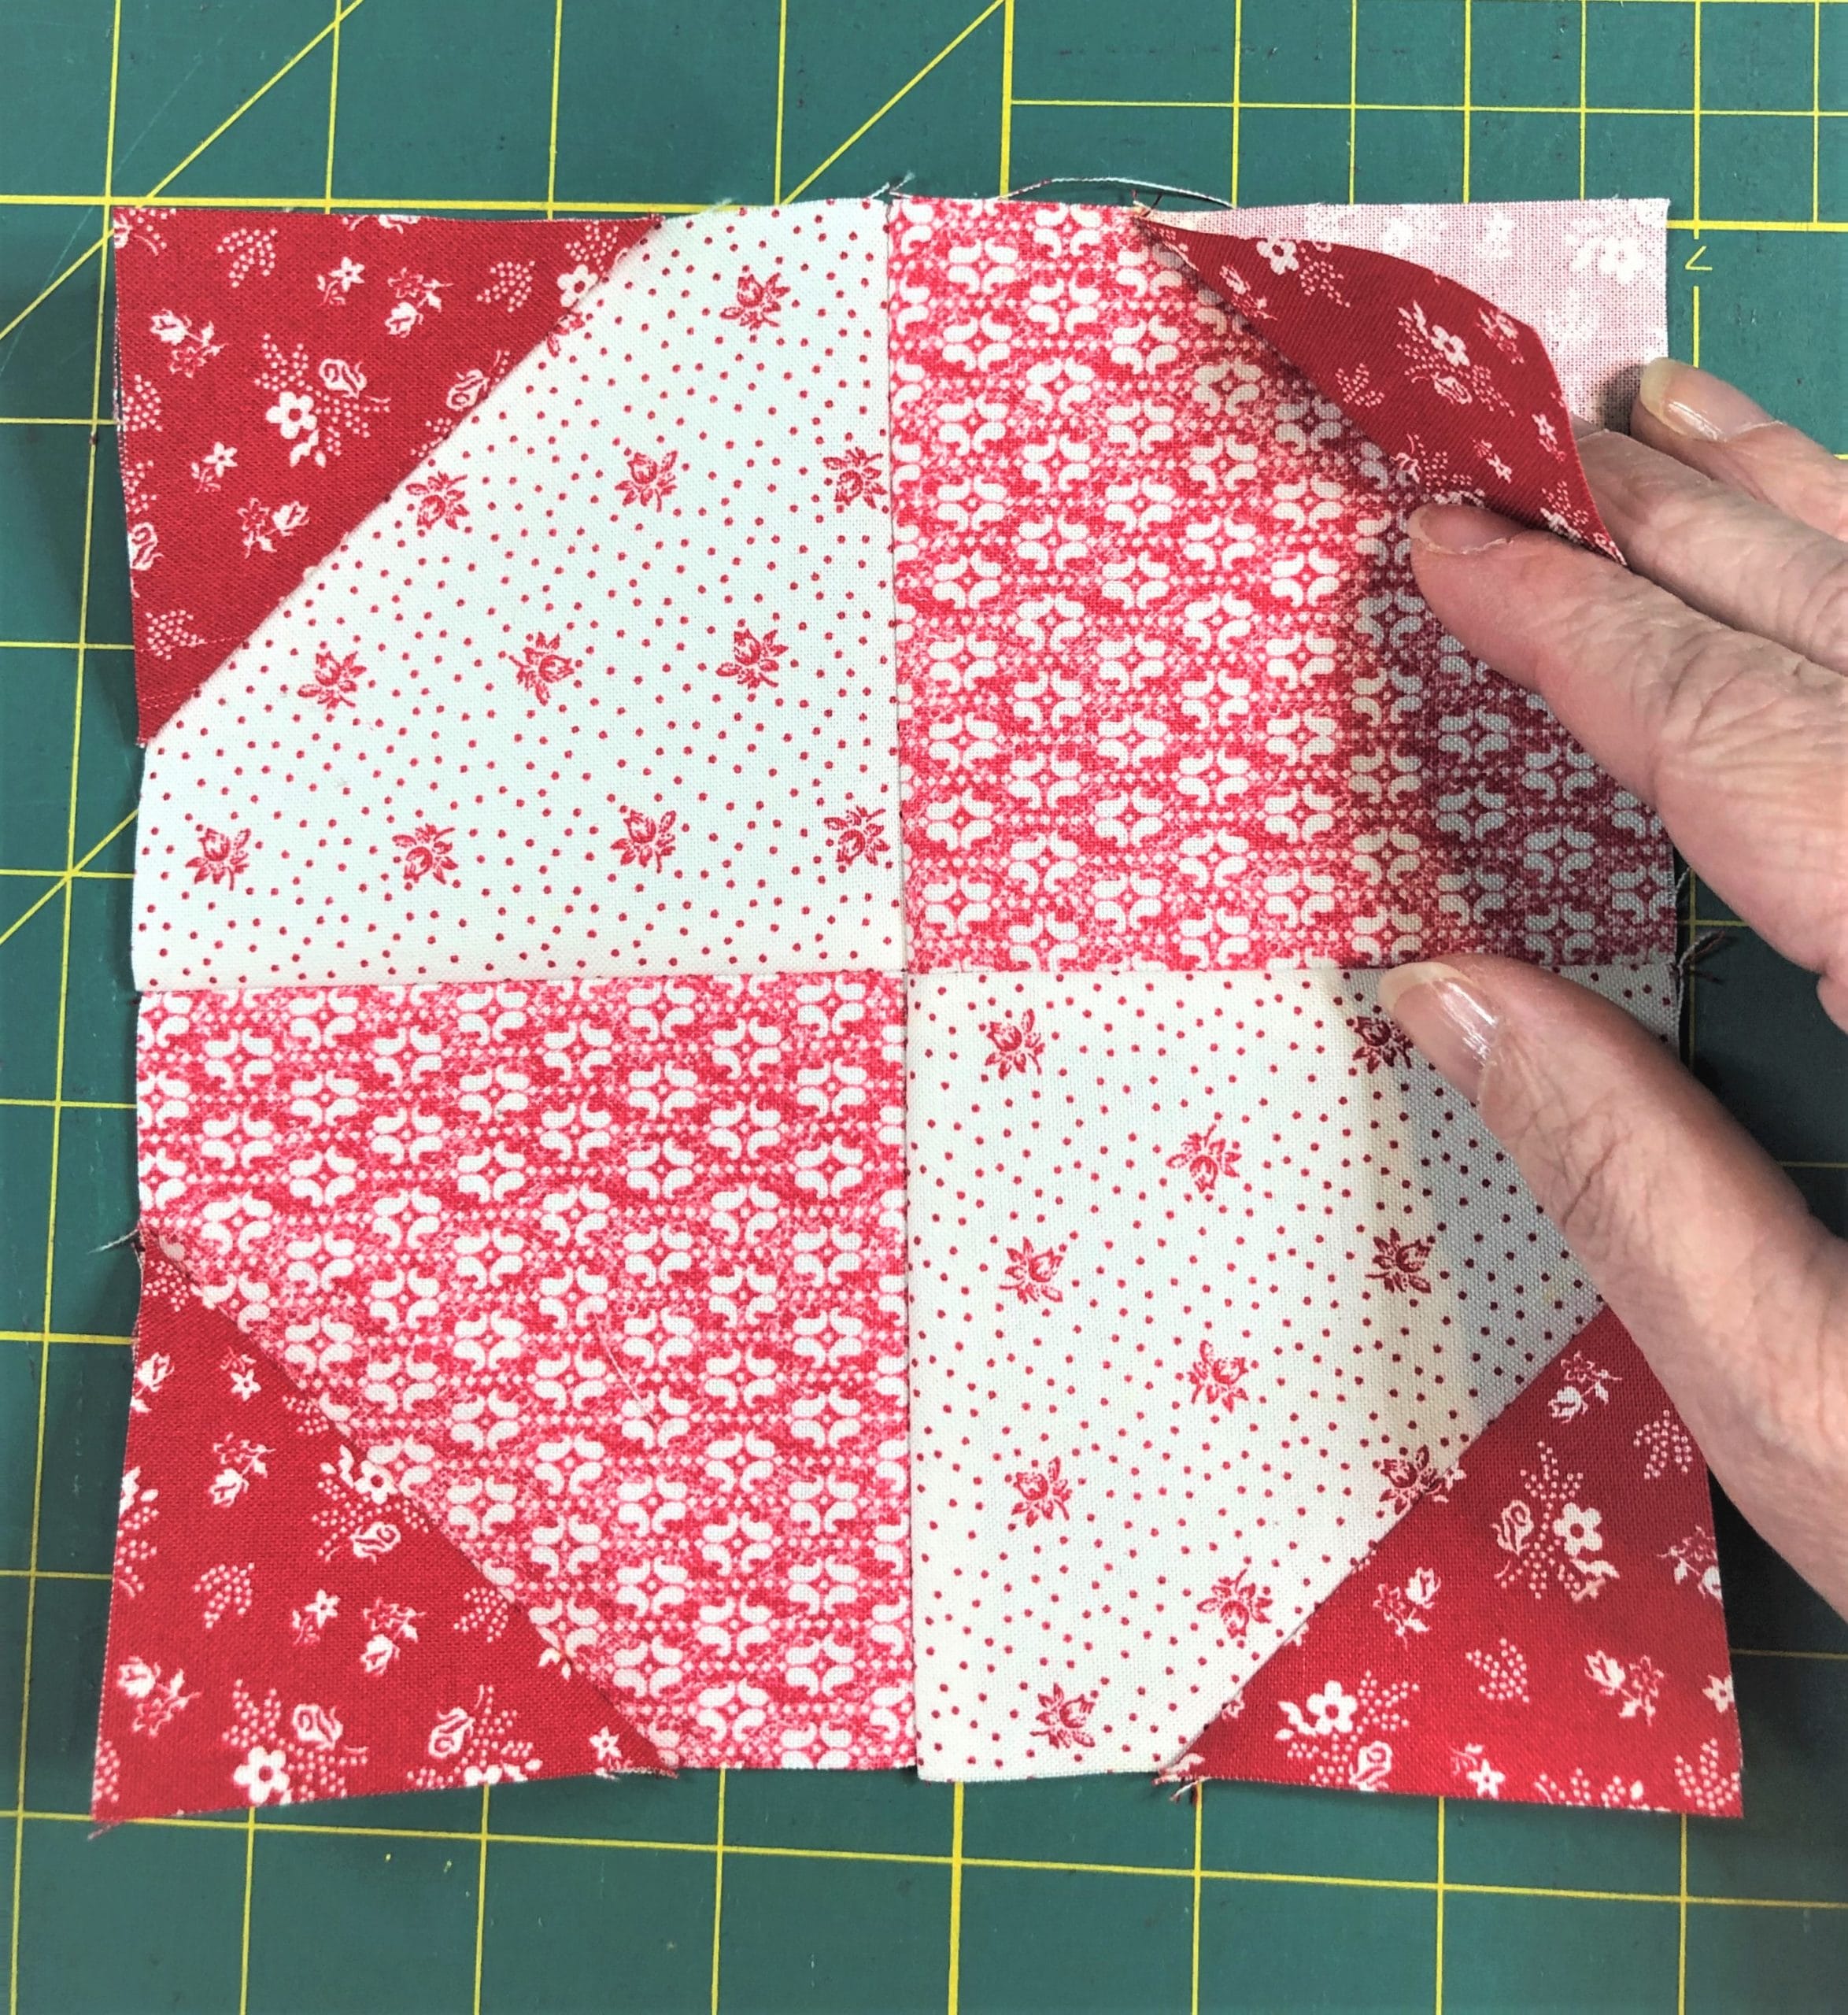
This time I paid attention to the orientation of the pinwheels, and laid everything out from the start (to make sure I didn’t mess those up like last time)! If you want the nitty-gritty of putting these together, you can refer back to Ruby BOM Month 2.
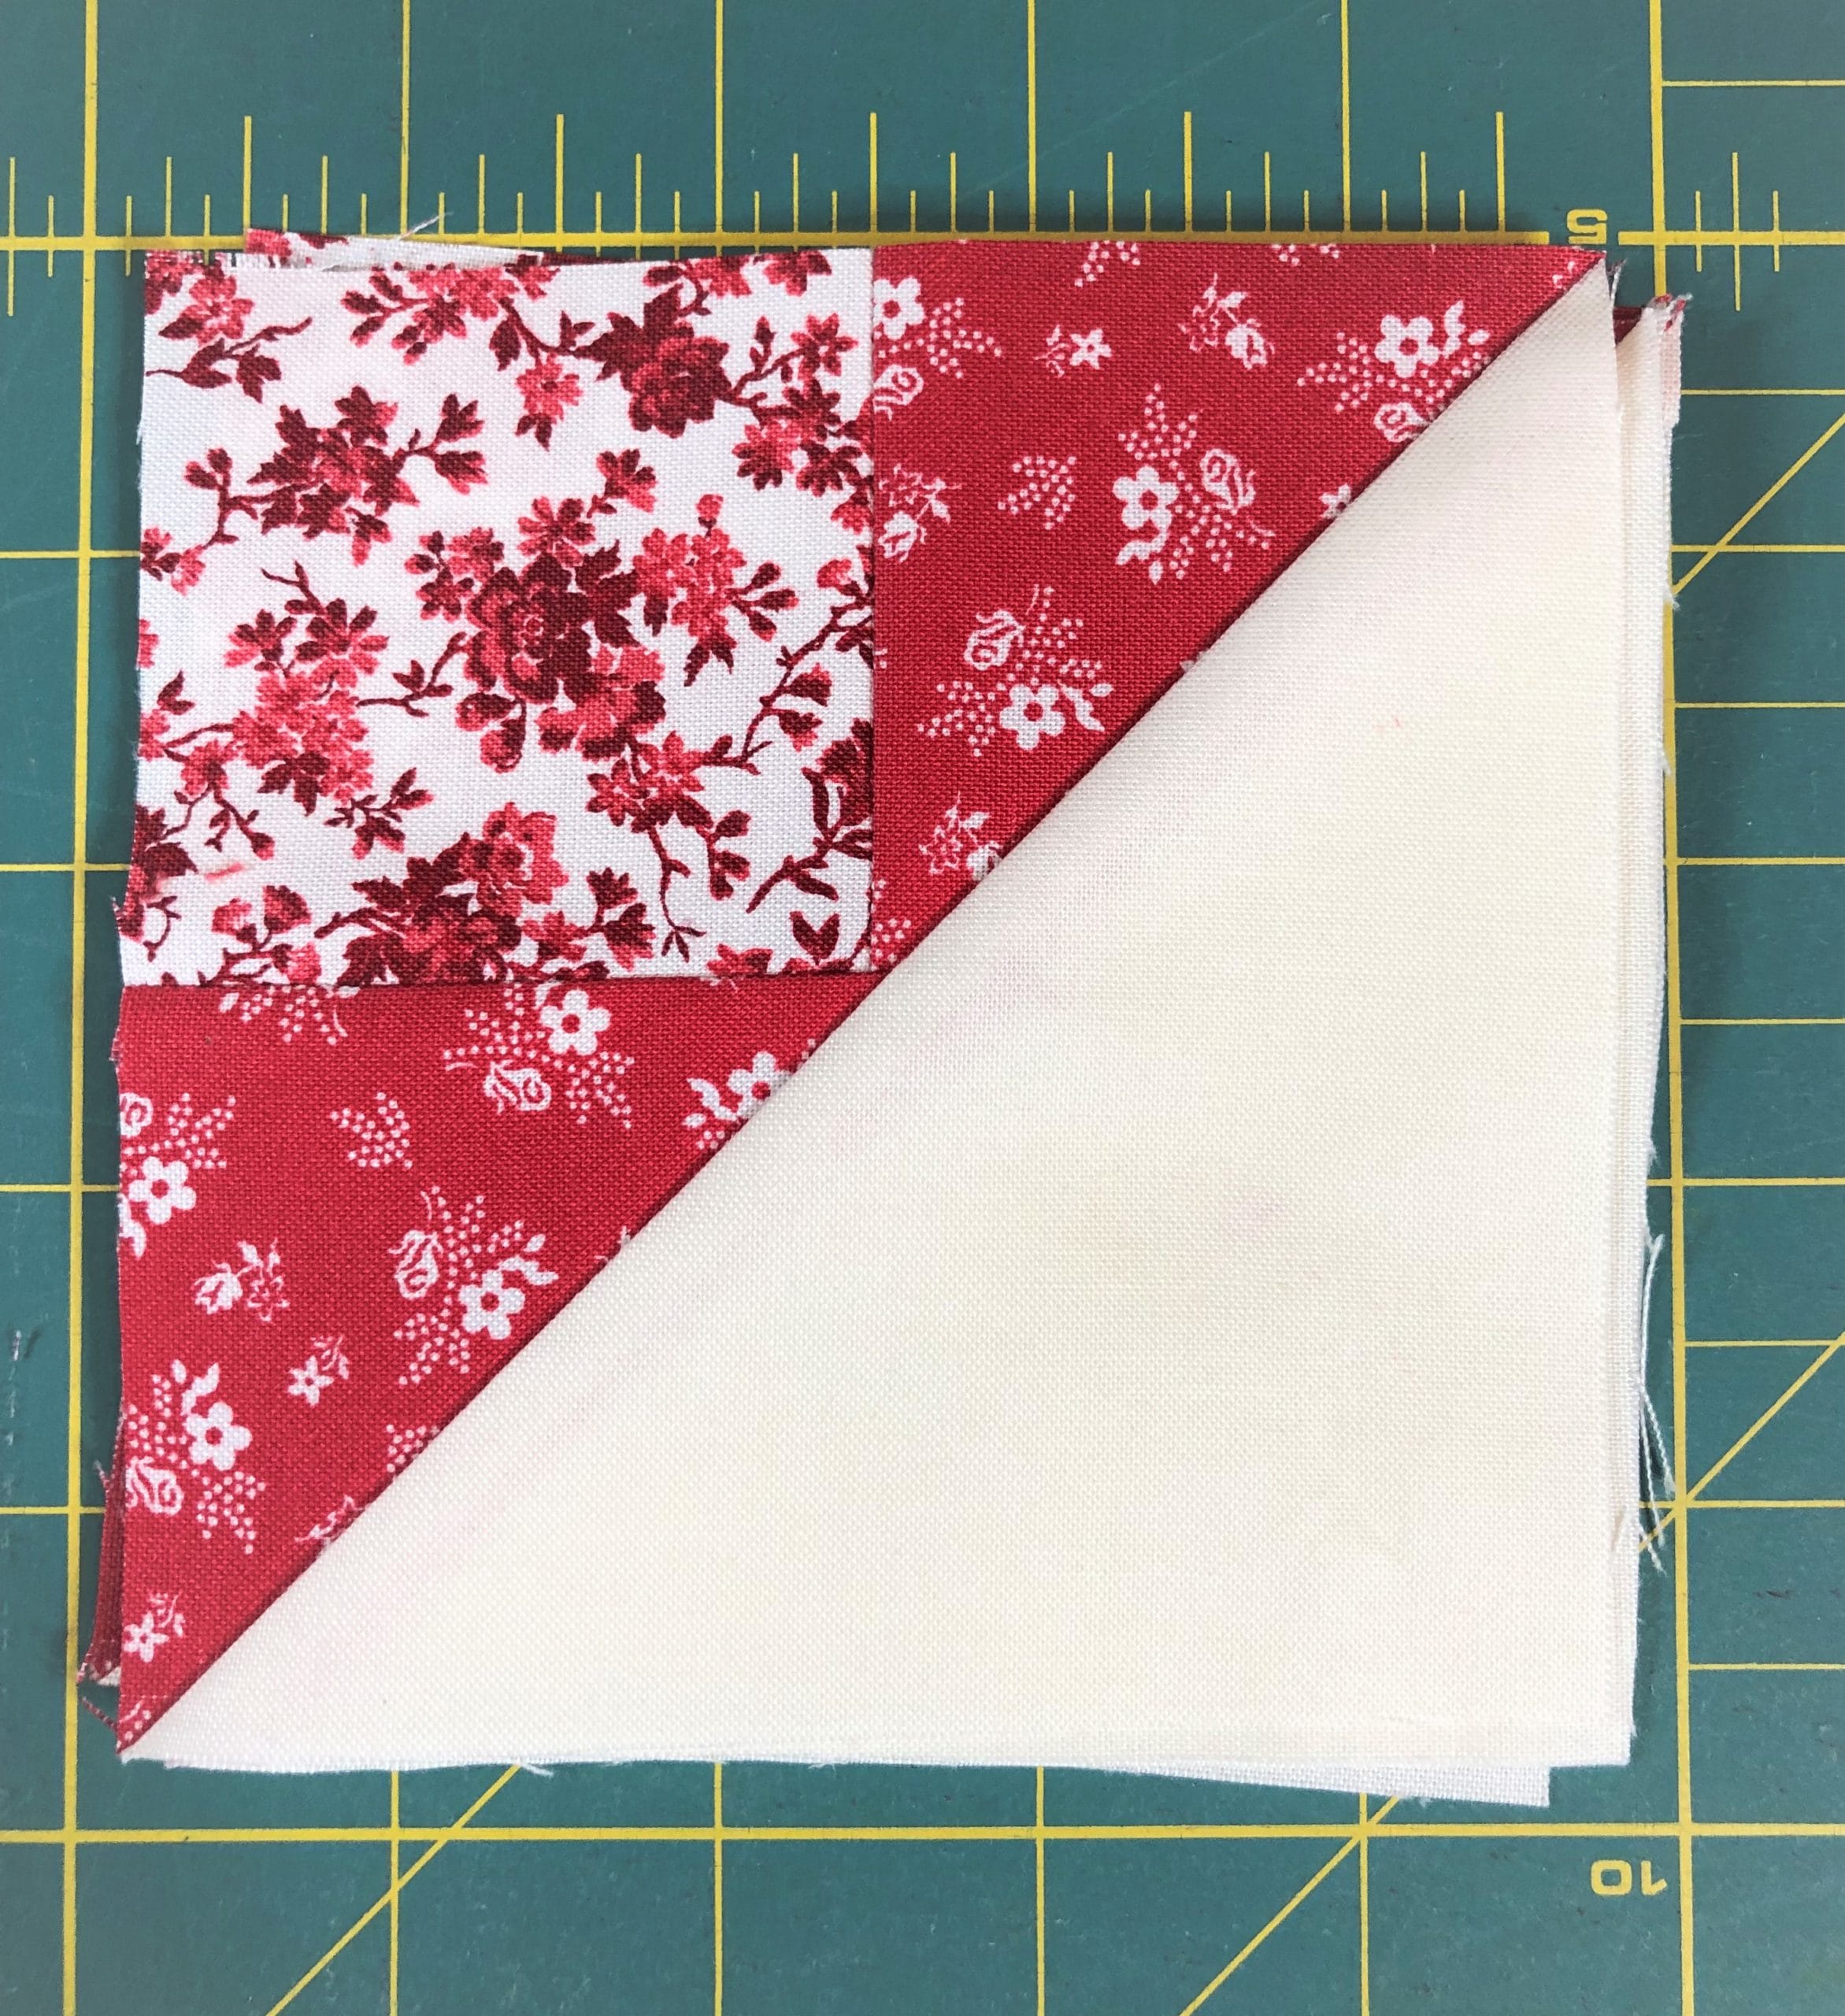
I’ve included a photo of the pinwheels with one showing the back side so you can see how I pressed the center open. This allows the block to lay flat. If you carefully press the center open, it should naturally push one seam up and the other seam down. You should also end up with a tiny pinwheel in the center where you’ve pressed open!
Step Four
Assemble Blocks
After the pinwheels are finished, there is more assembly line pinning and sewing to get all the D strips to the sides of the pinwheel.
Sew strips to pinwheels
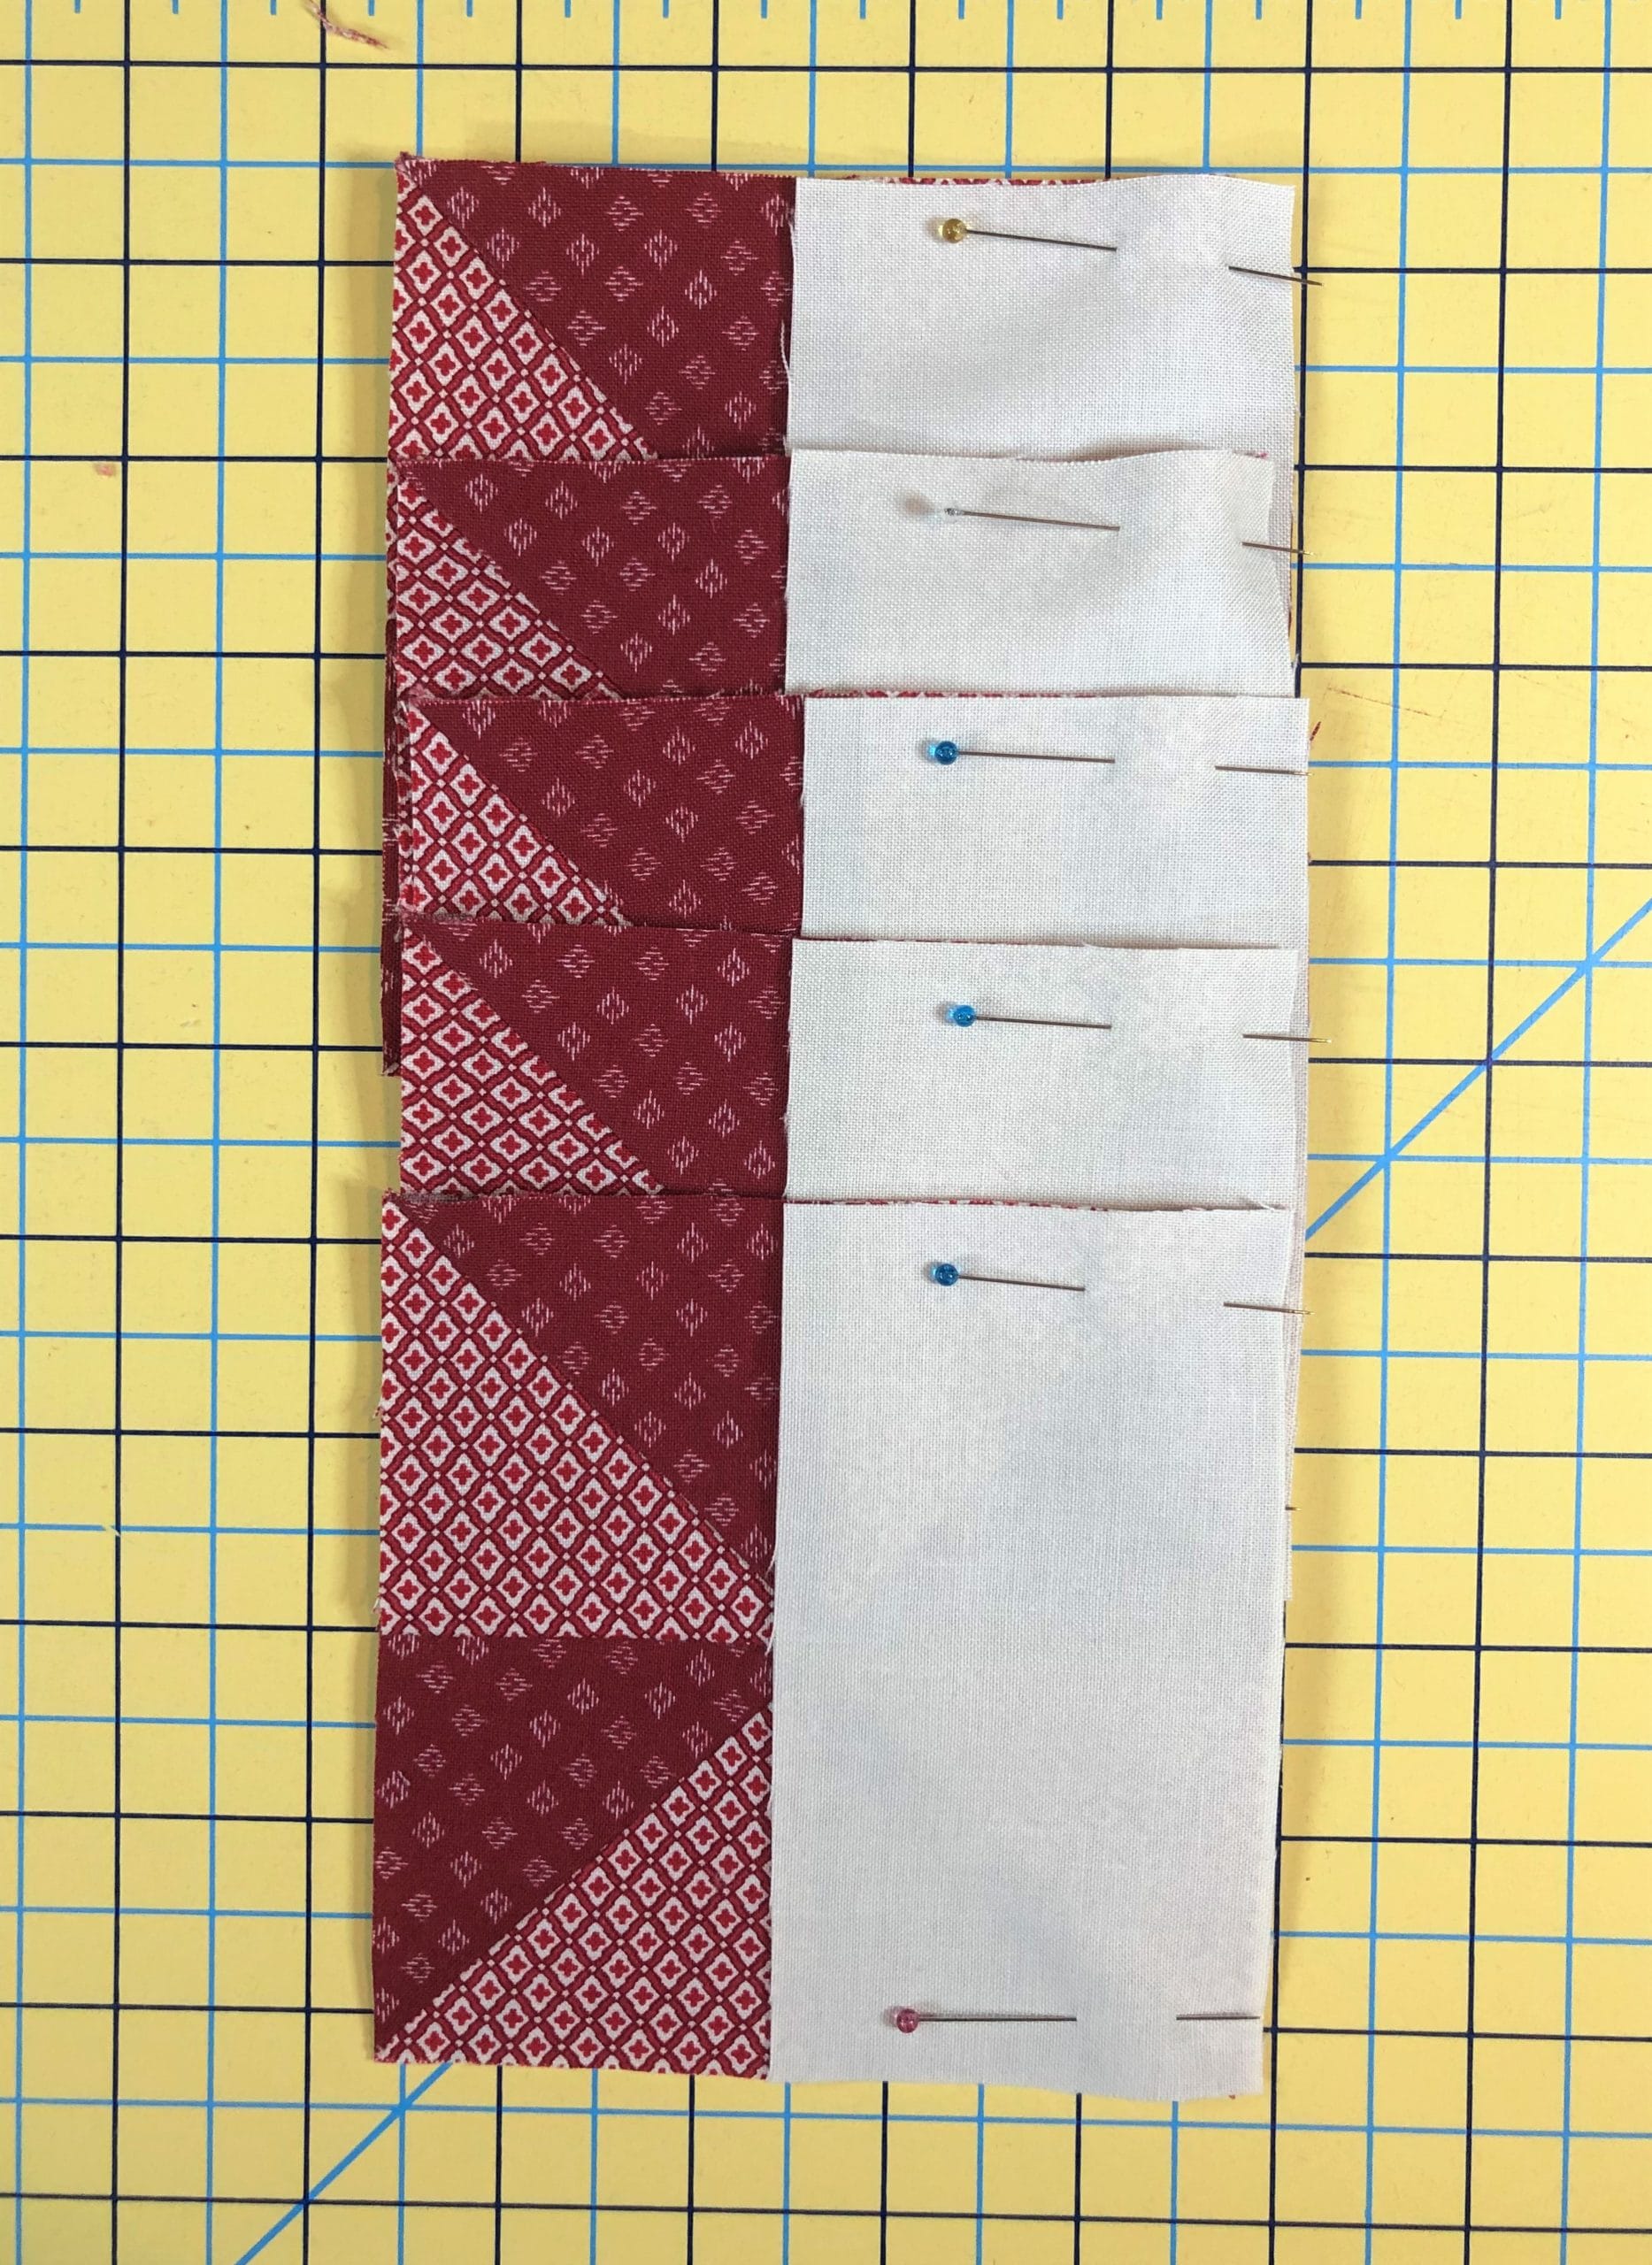
Now that the sides are pressed open, I can put those C/D/C strips I previously made on the top and bottom.I like to pin at each seam, especially when there is a seam I can’t see on the back side. The pins serve as a reminder, so that I can make sure my seams aren’t flipping up as I sew.
I usually don’t press things until I have both sides sewn on, as you see below.
Press and trim
After pressing everything, I like to go ahead and square up the units. Make sure they are all 8-1/2” square. As you can see from the photo, there isn’t much to trim off. I like having the edges all cleaned up for the next step.
Attach final strips
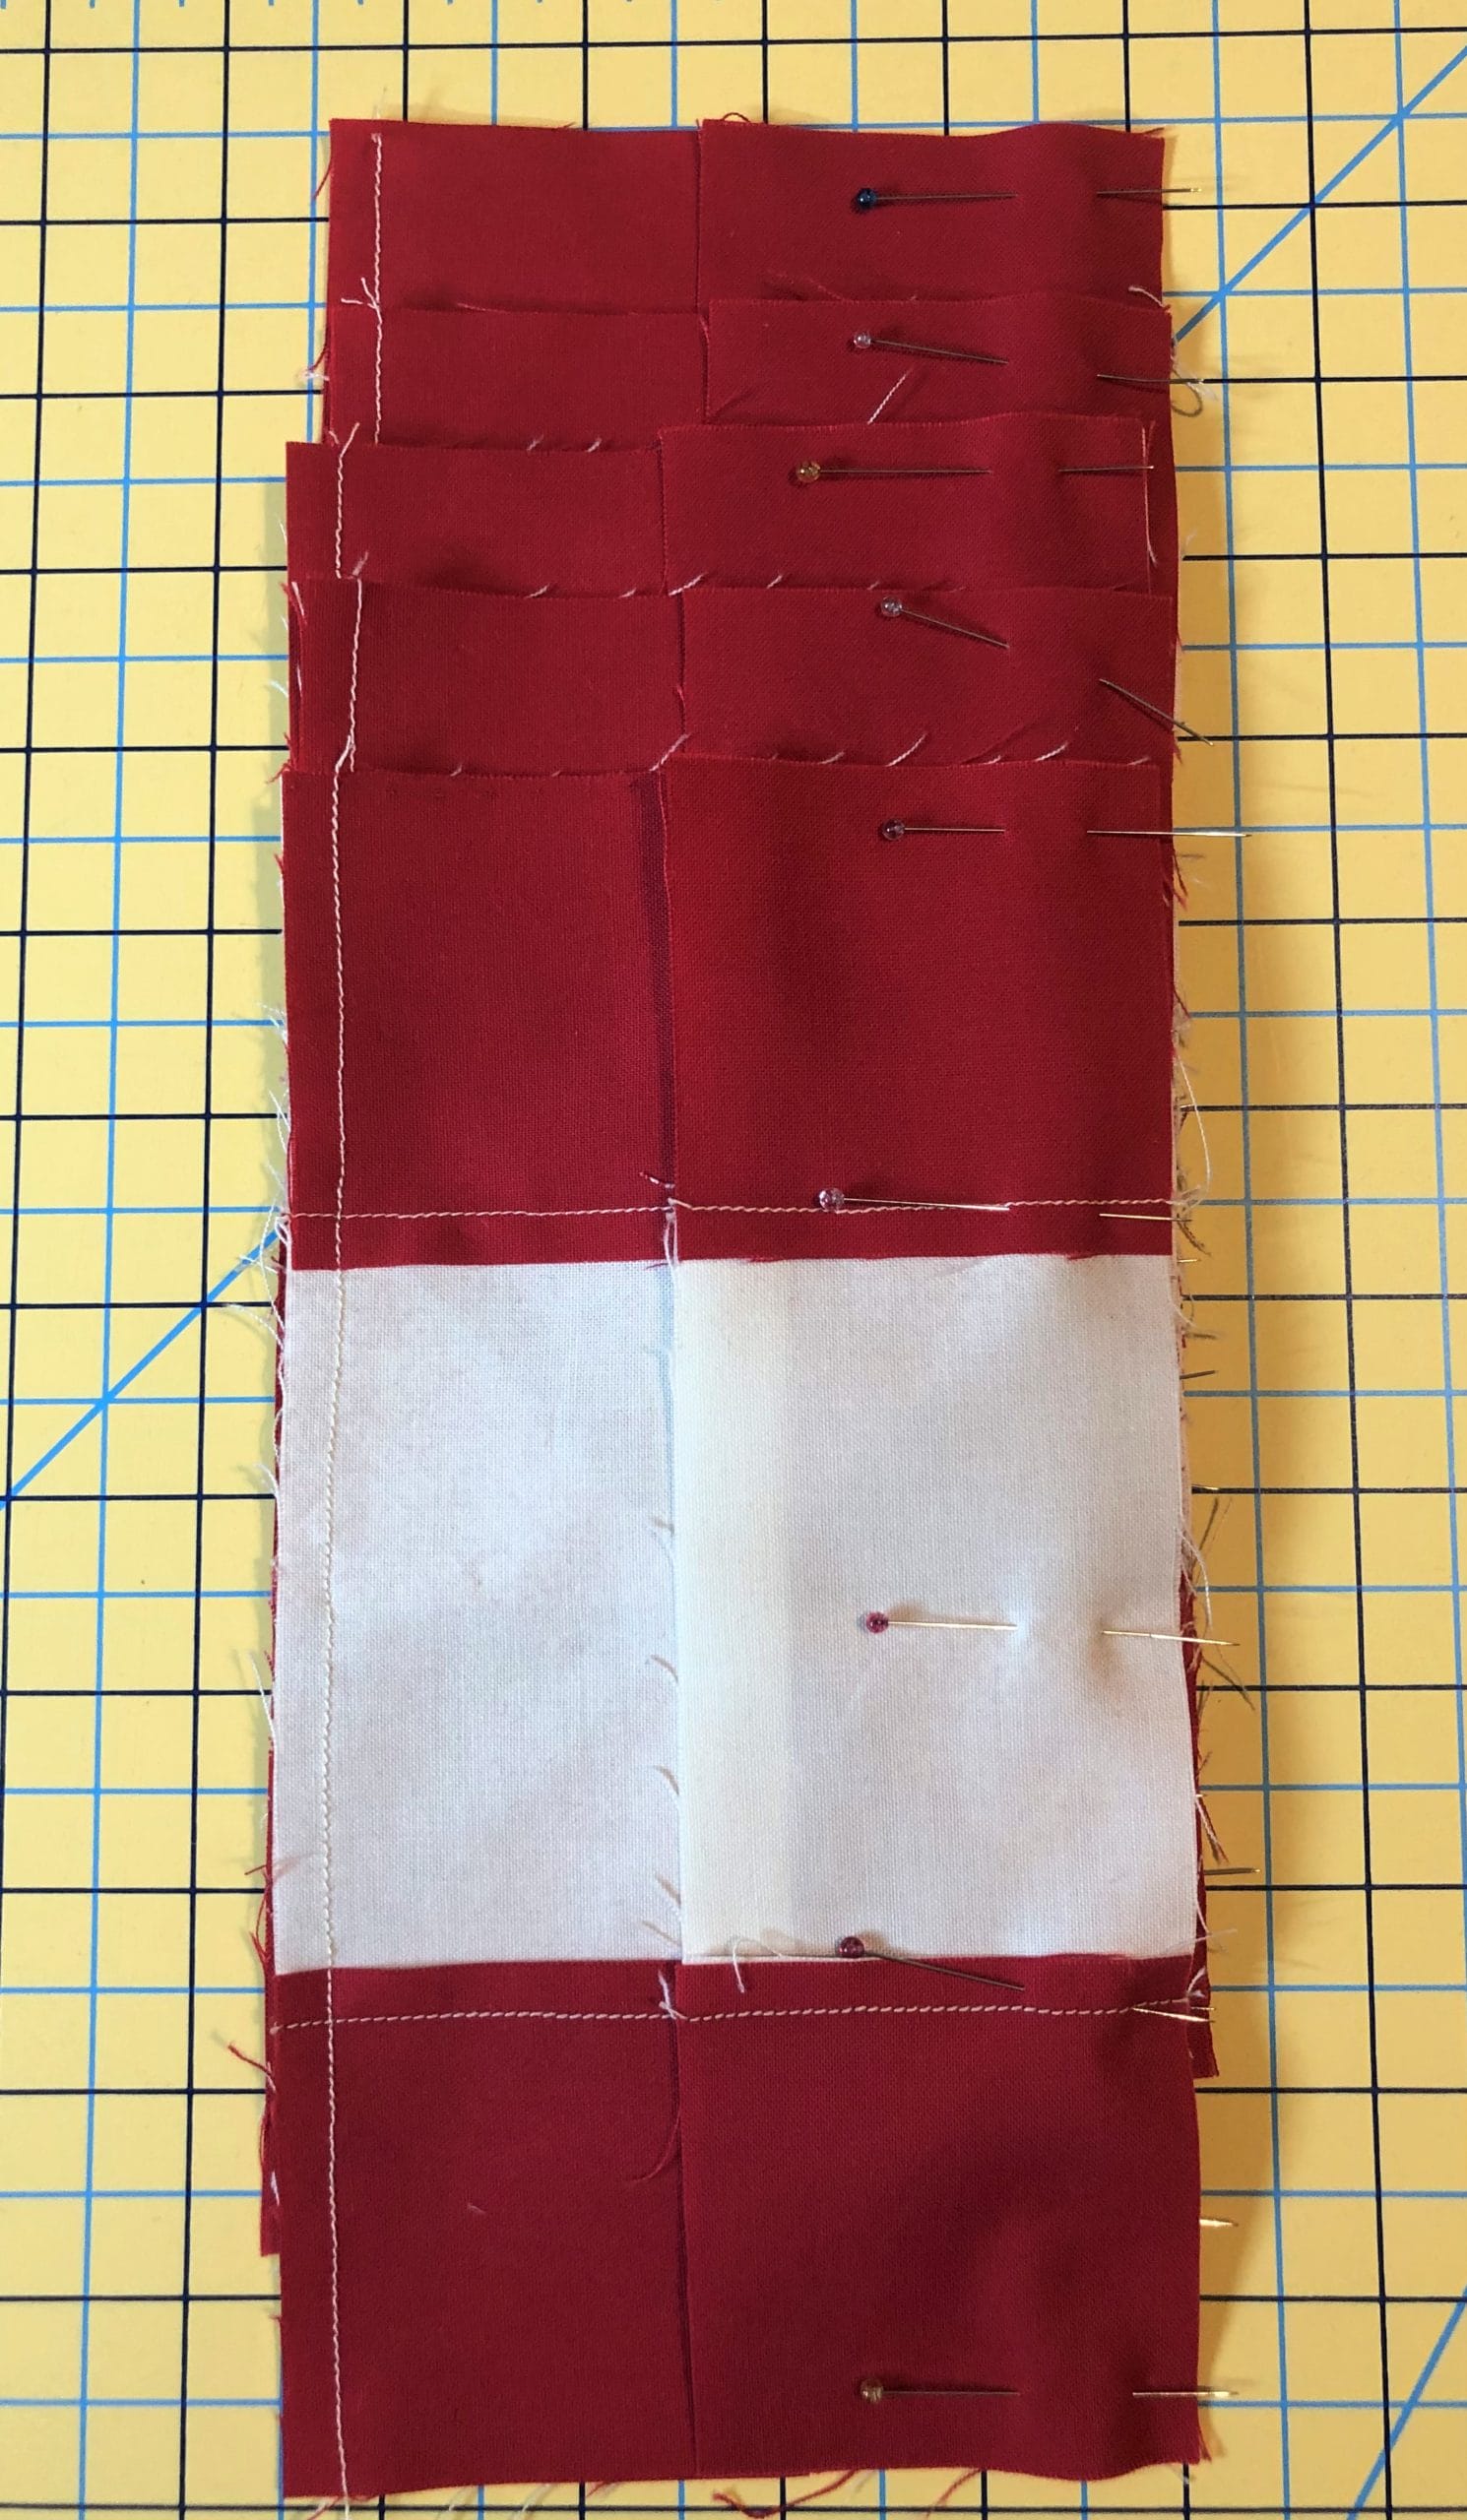
All that is left is to sew on the final E strips, along with the C/E unit’s I’d previously made. Sometimes I like to pin both sides at once, so I can stay at my machine and sew like crazy!
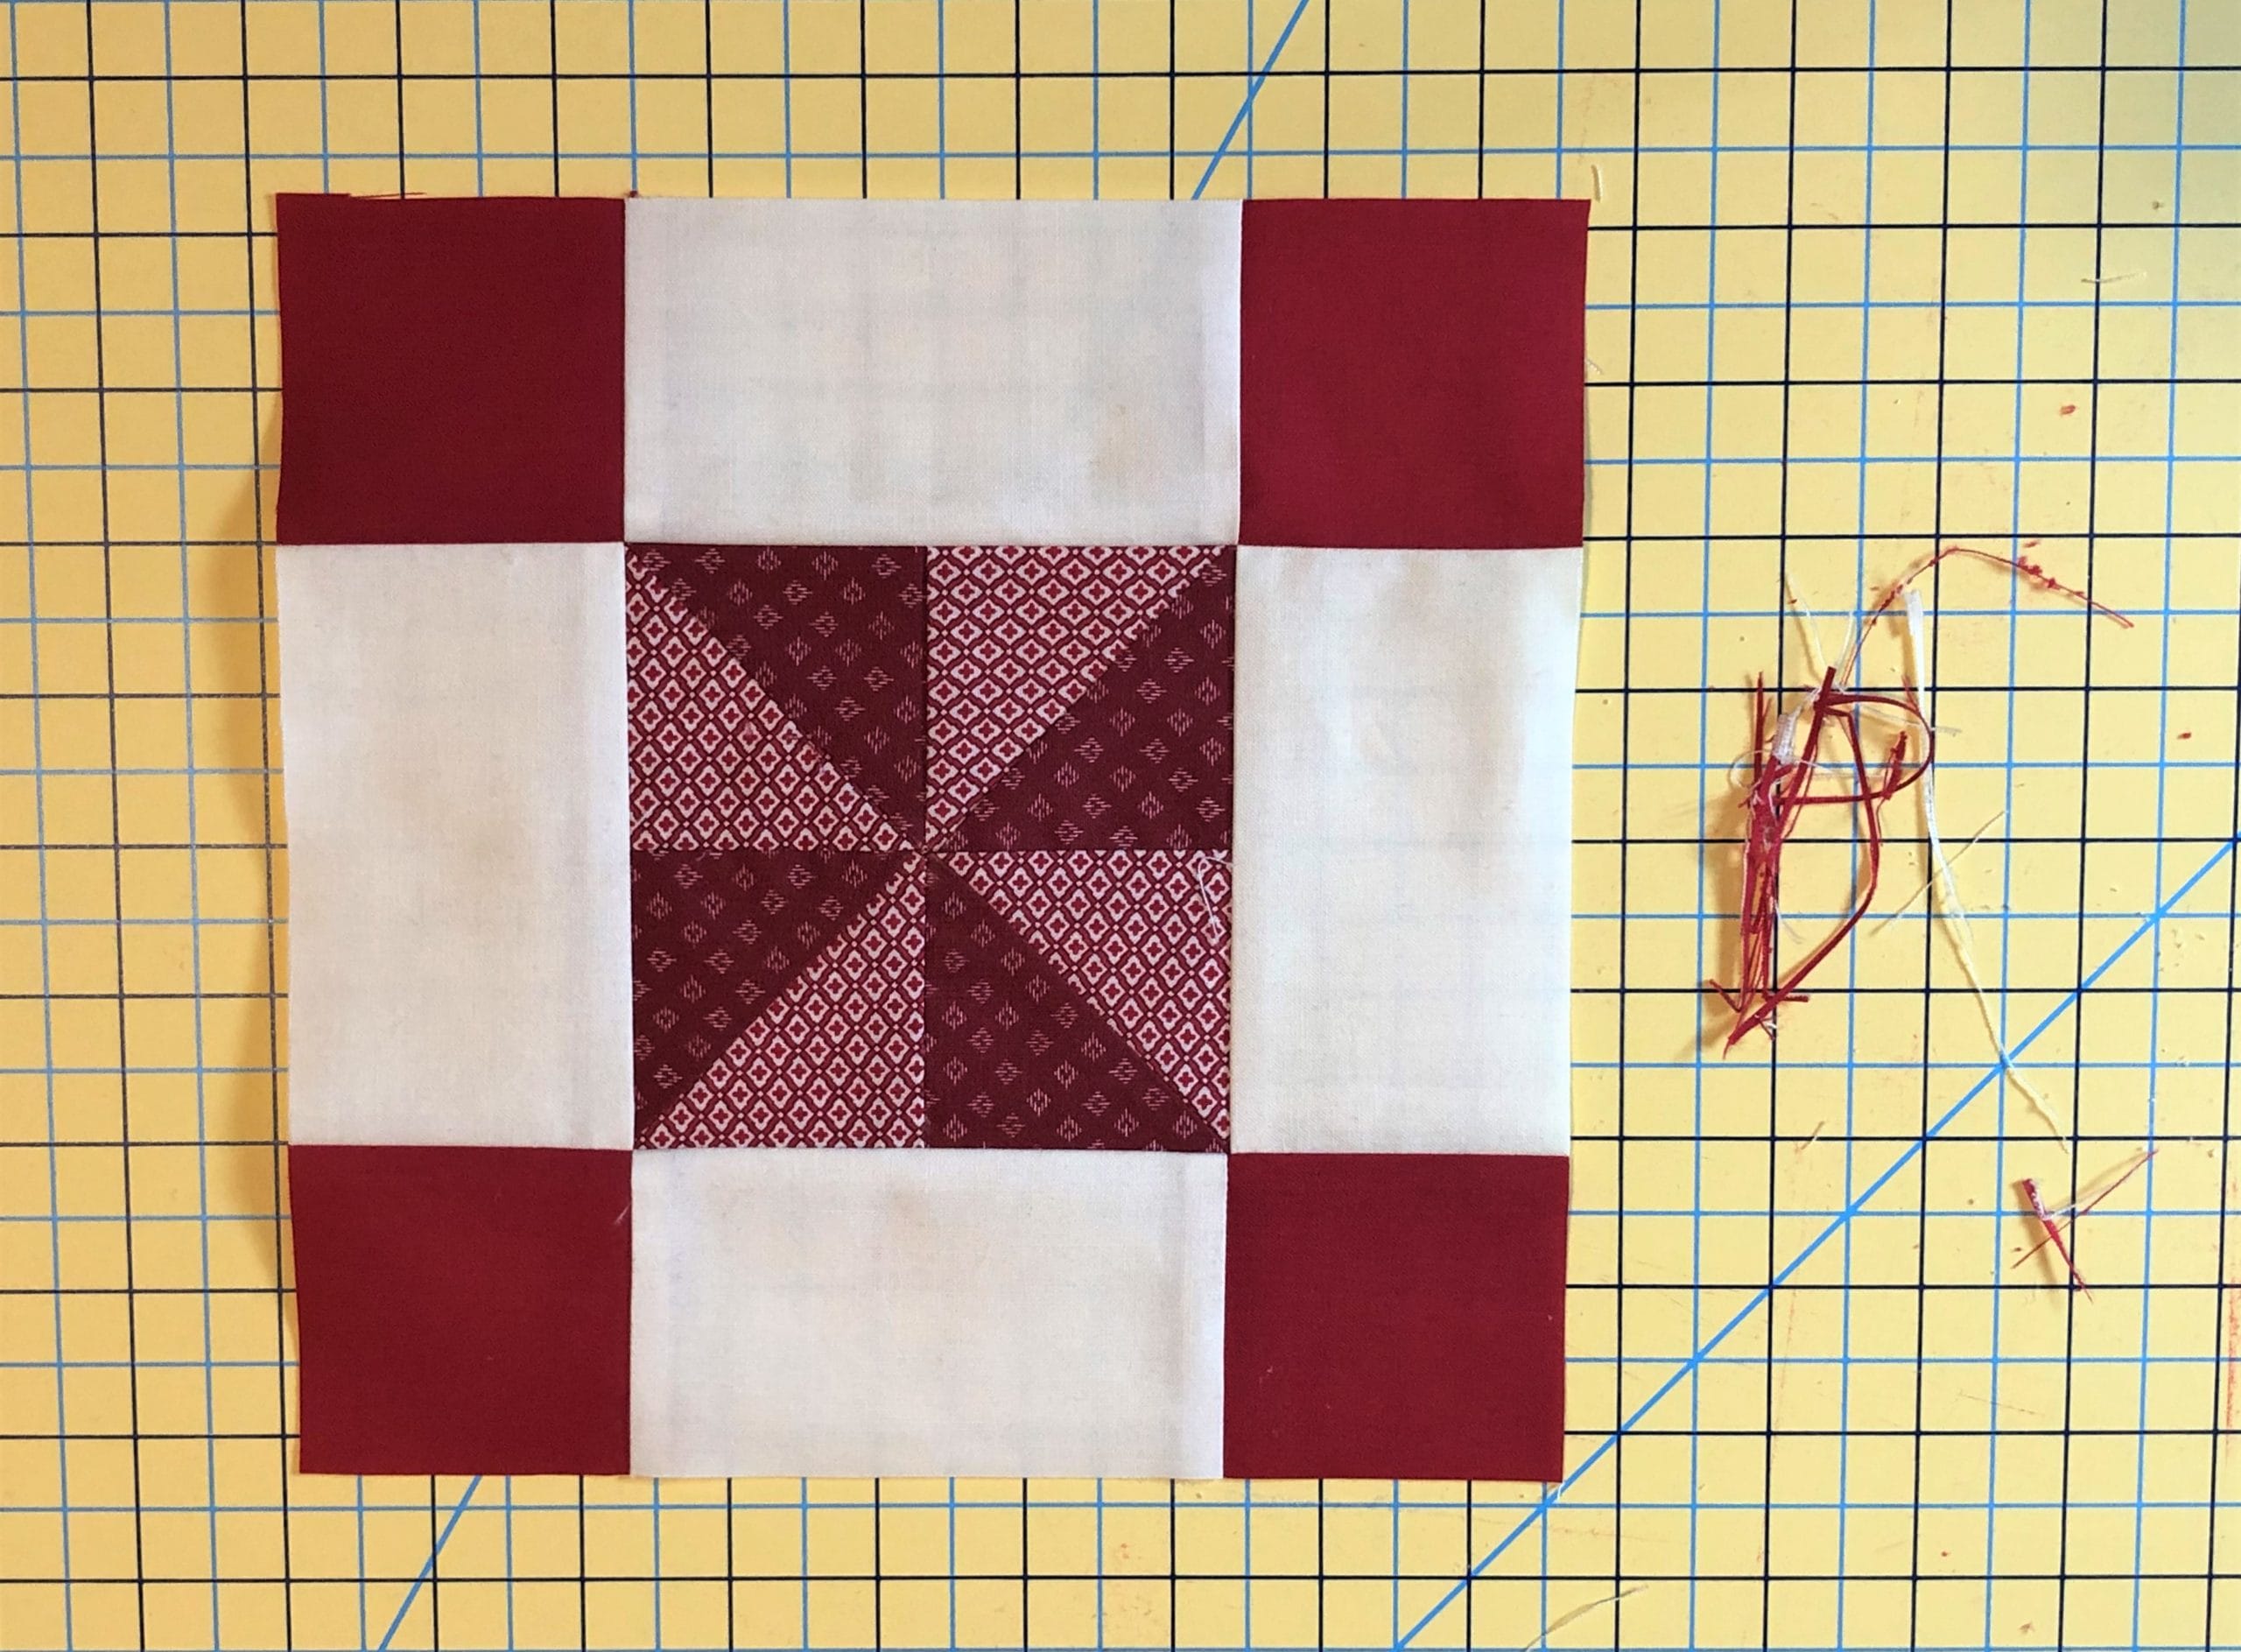
By sewing the blocks this way, I was able to get all 5 done in a matter of hours. I love it when things come together quickly! By the time we are done with this quilt, we will be able to make these blocks in a flash, right?!
I hope you all have a wonderful November, and I’ll catch you all next month for Ruby BOM Month 5! – Kristin
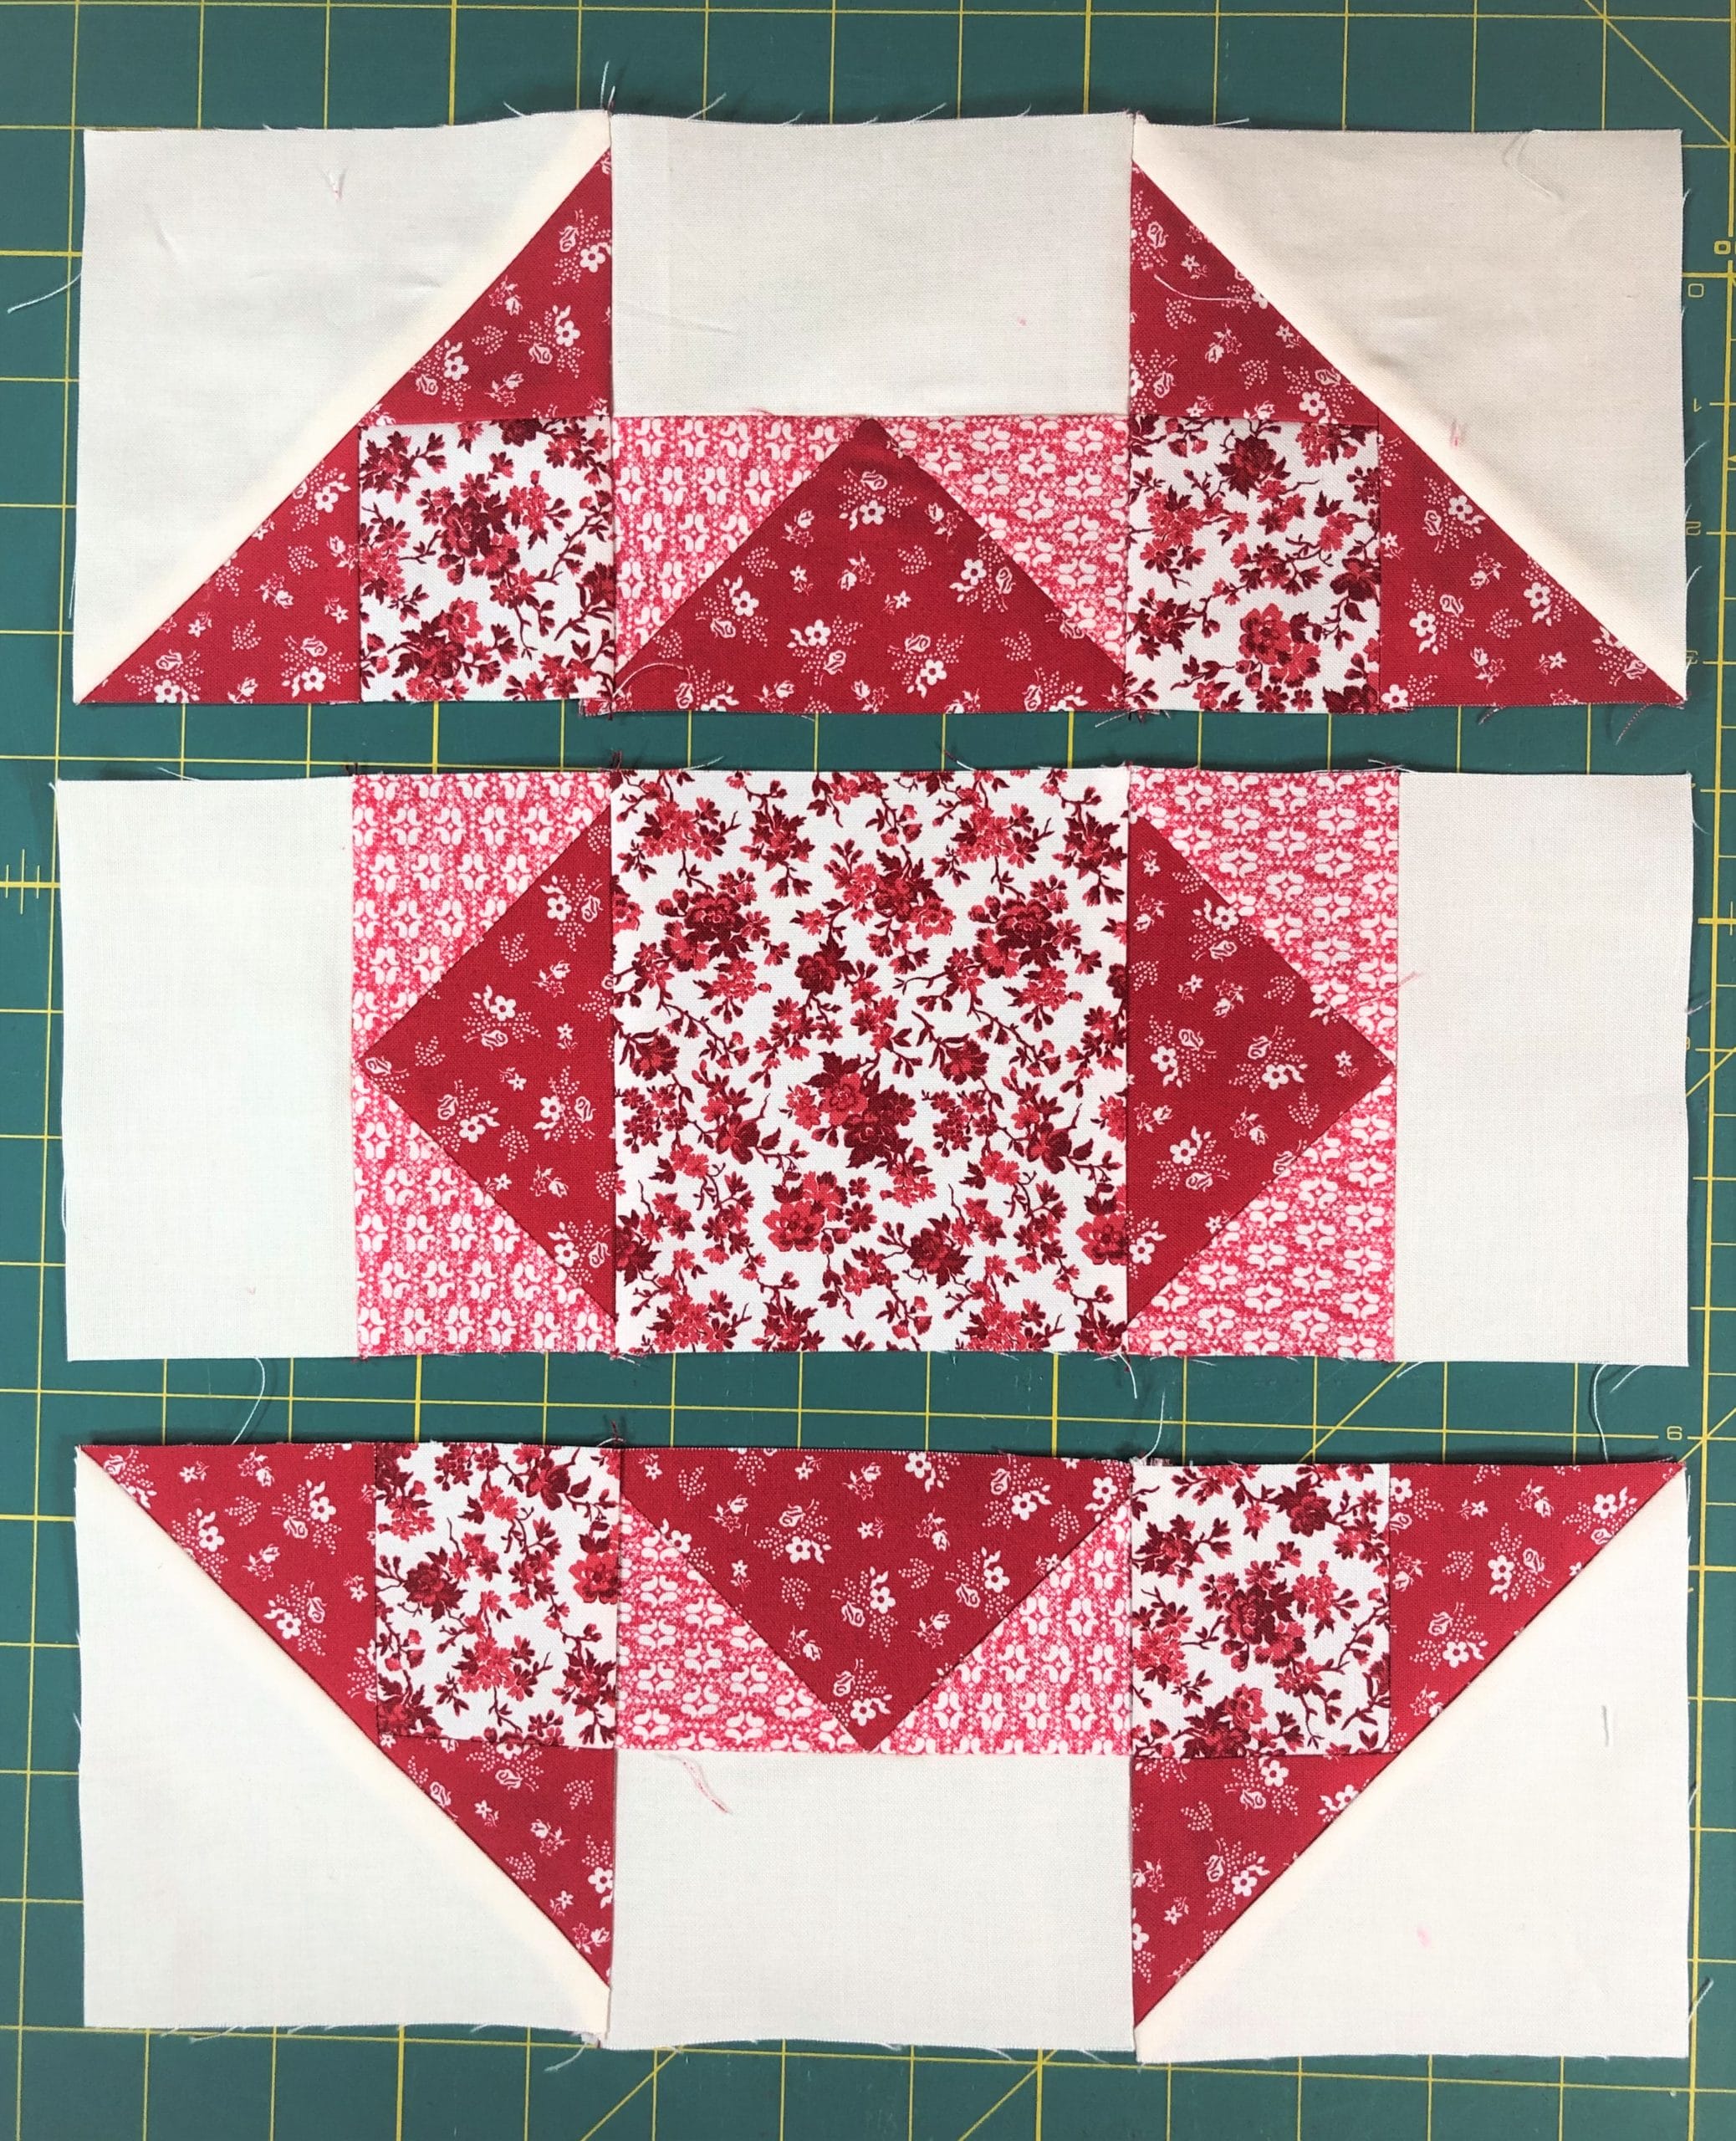
Happy Fall everyone! I’m so happy to join you all again, and provide a little tutorial for this month’s blocks (#6, #7, #15, and #17). Let’s dive right in!
Block #6
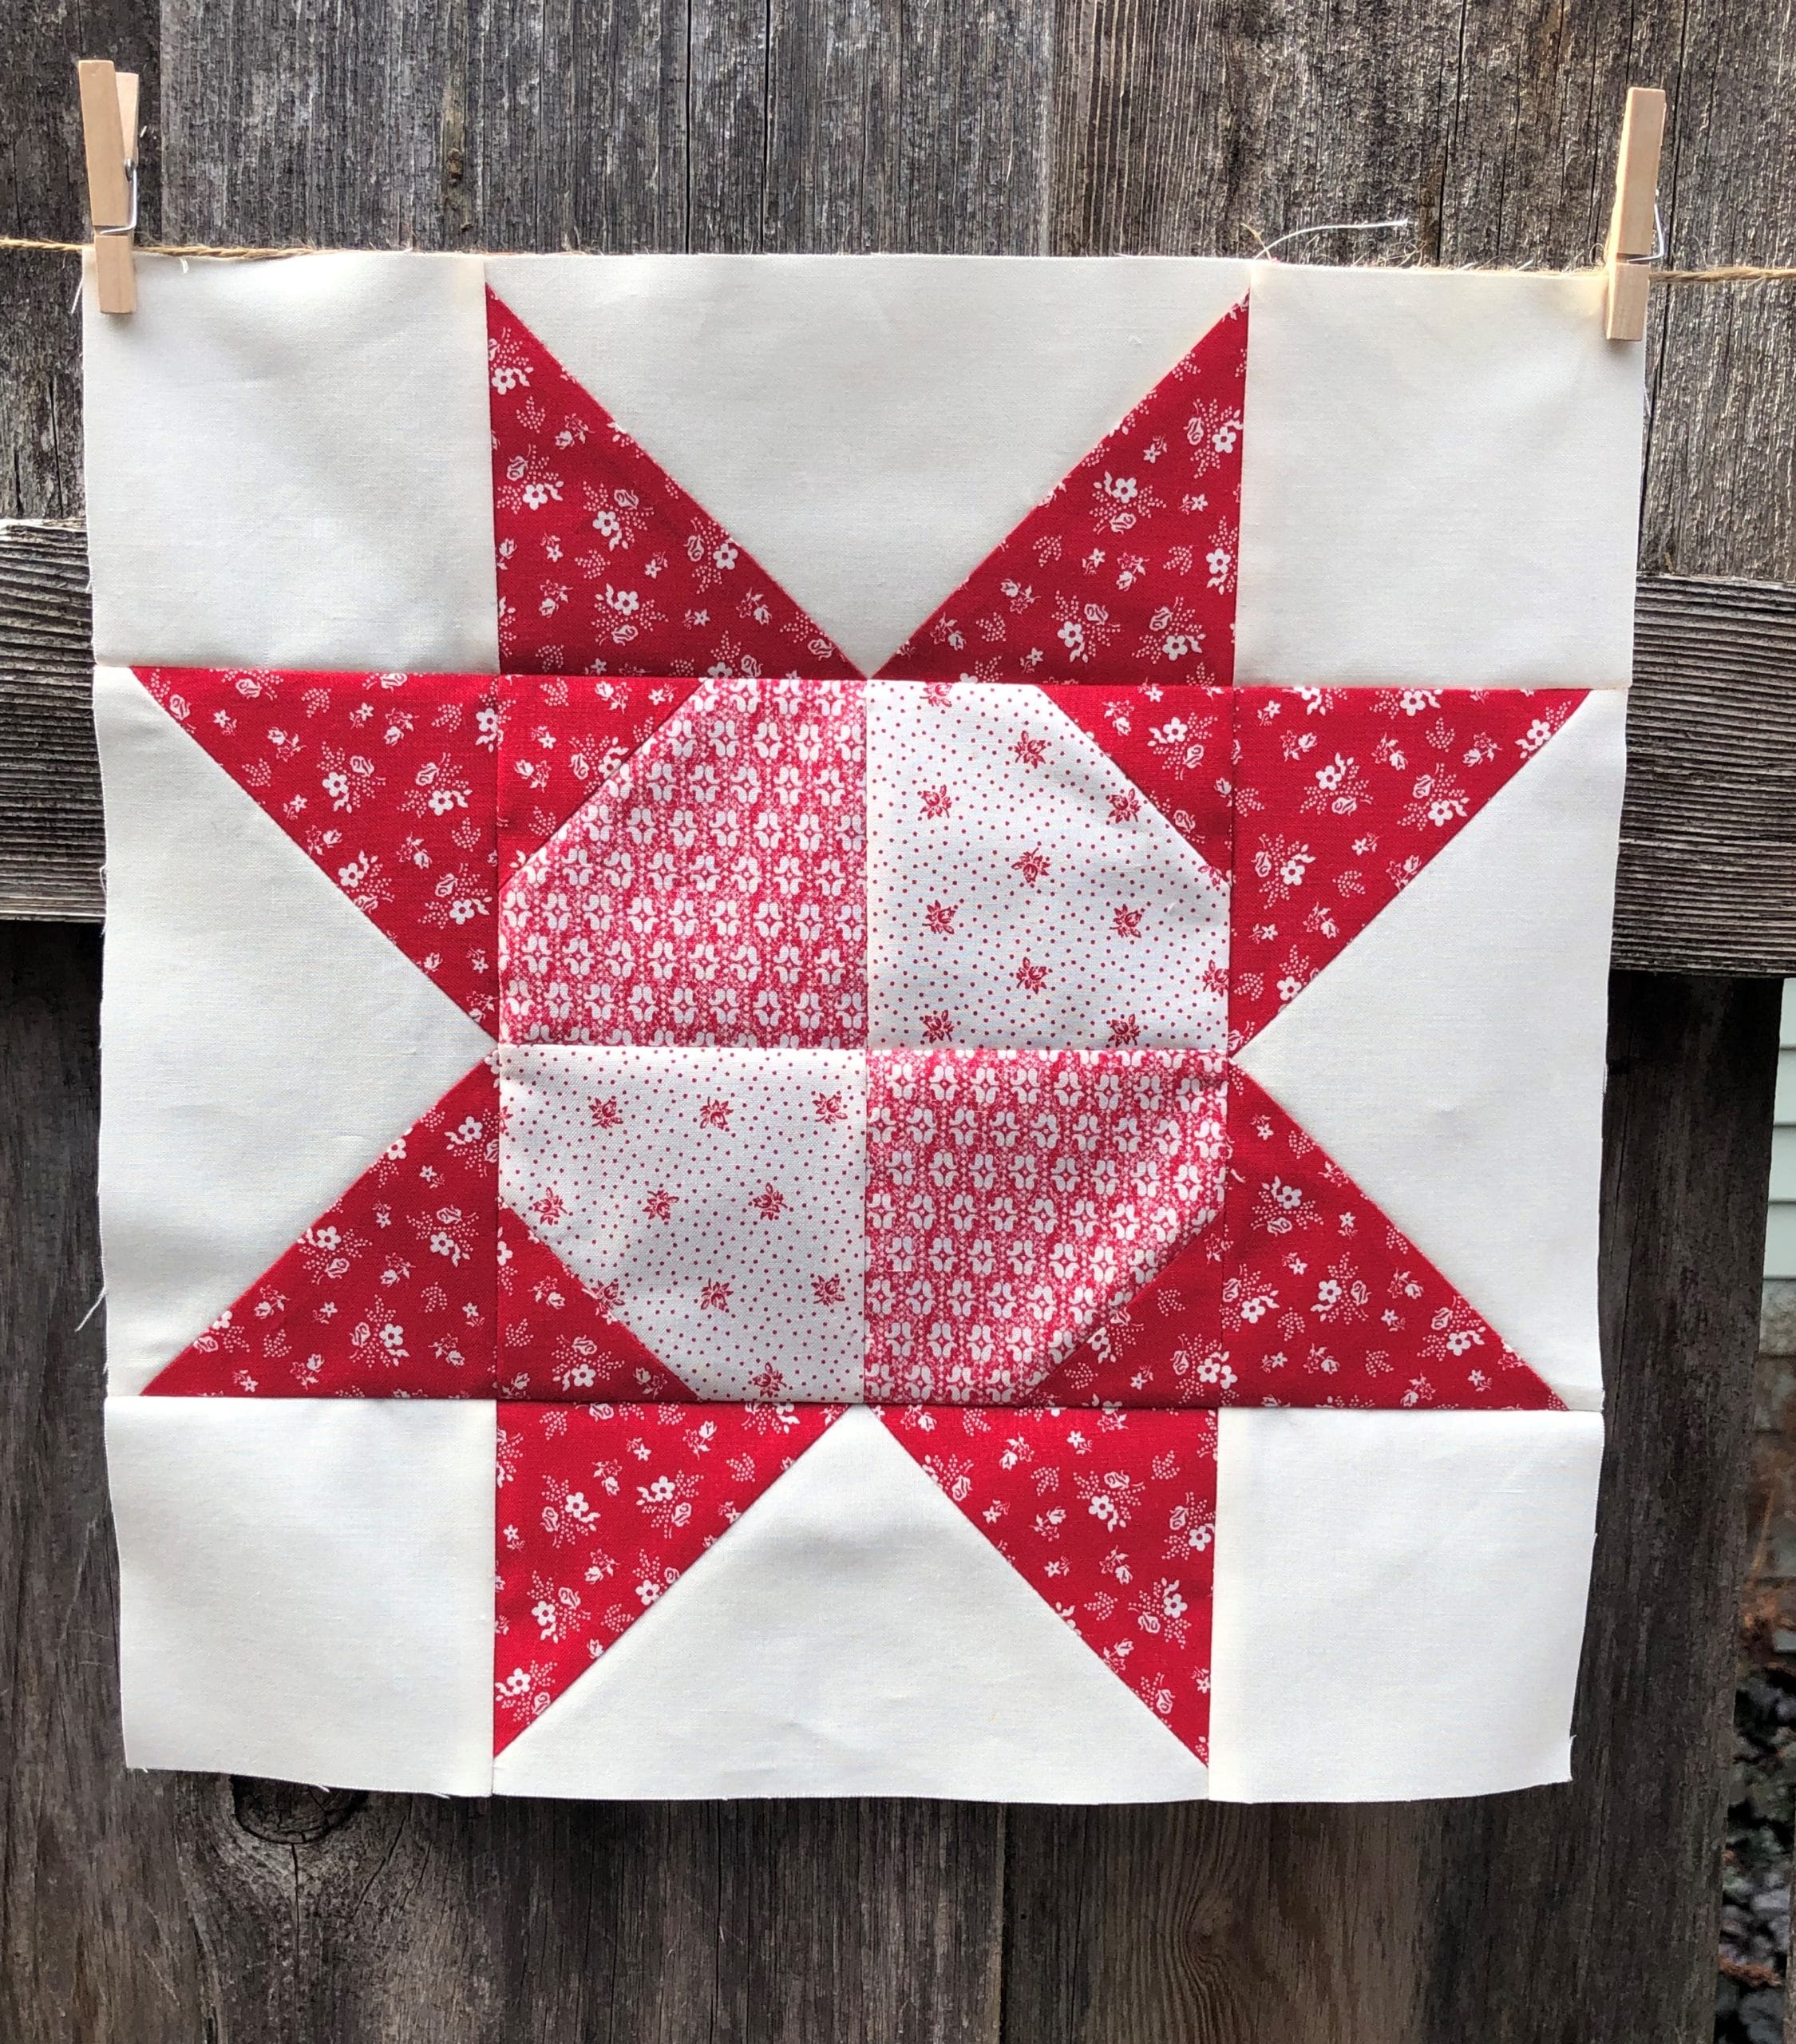
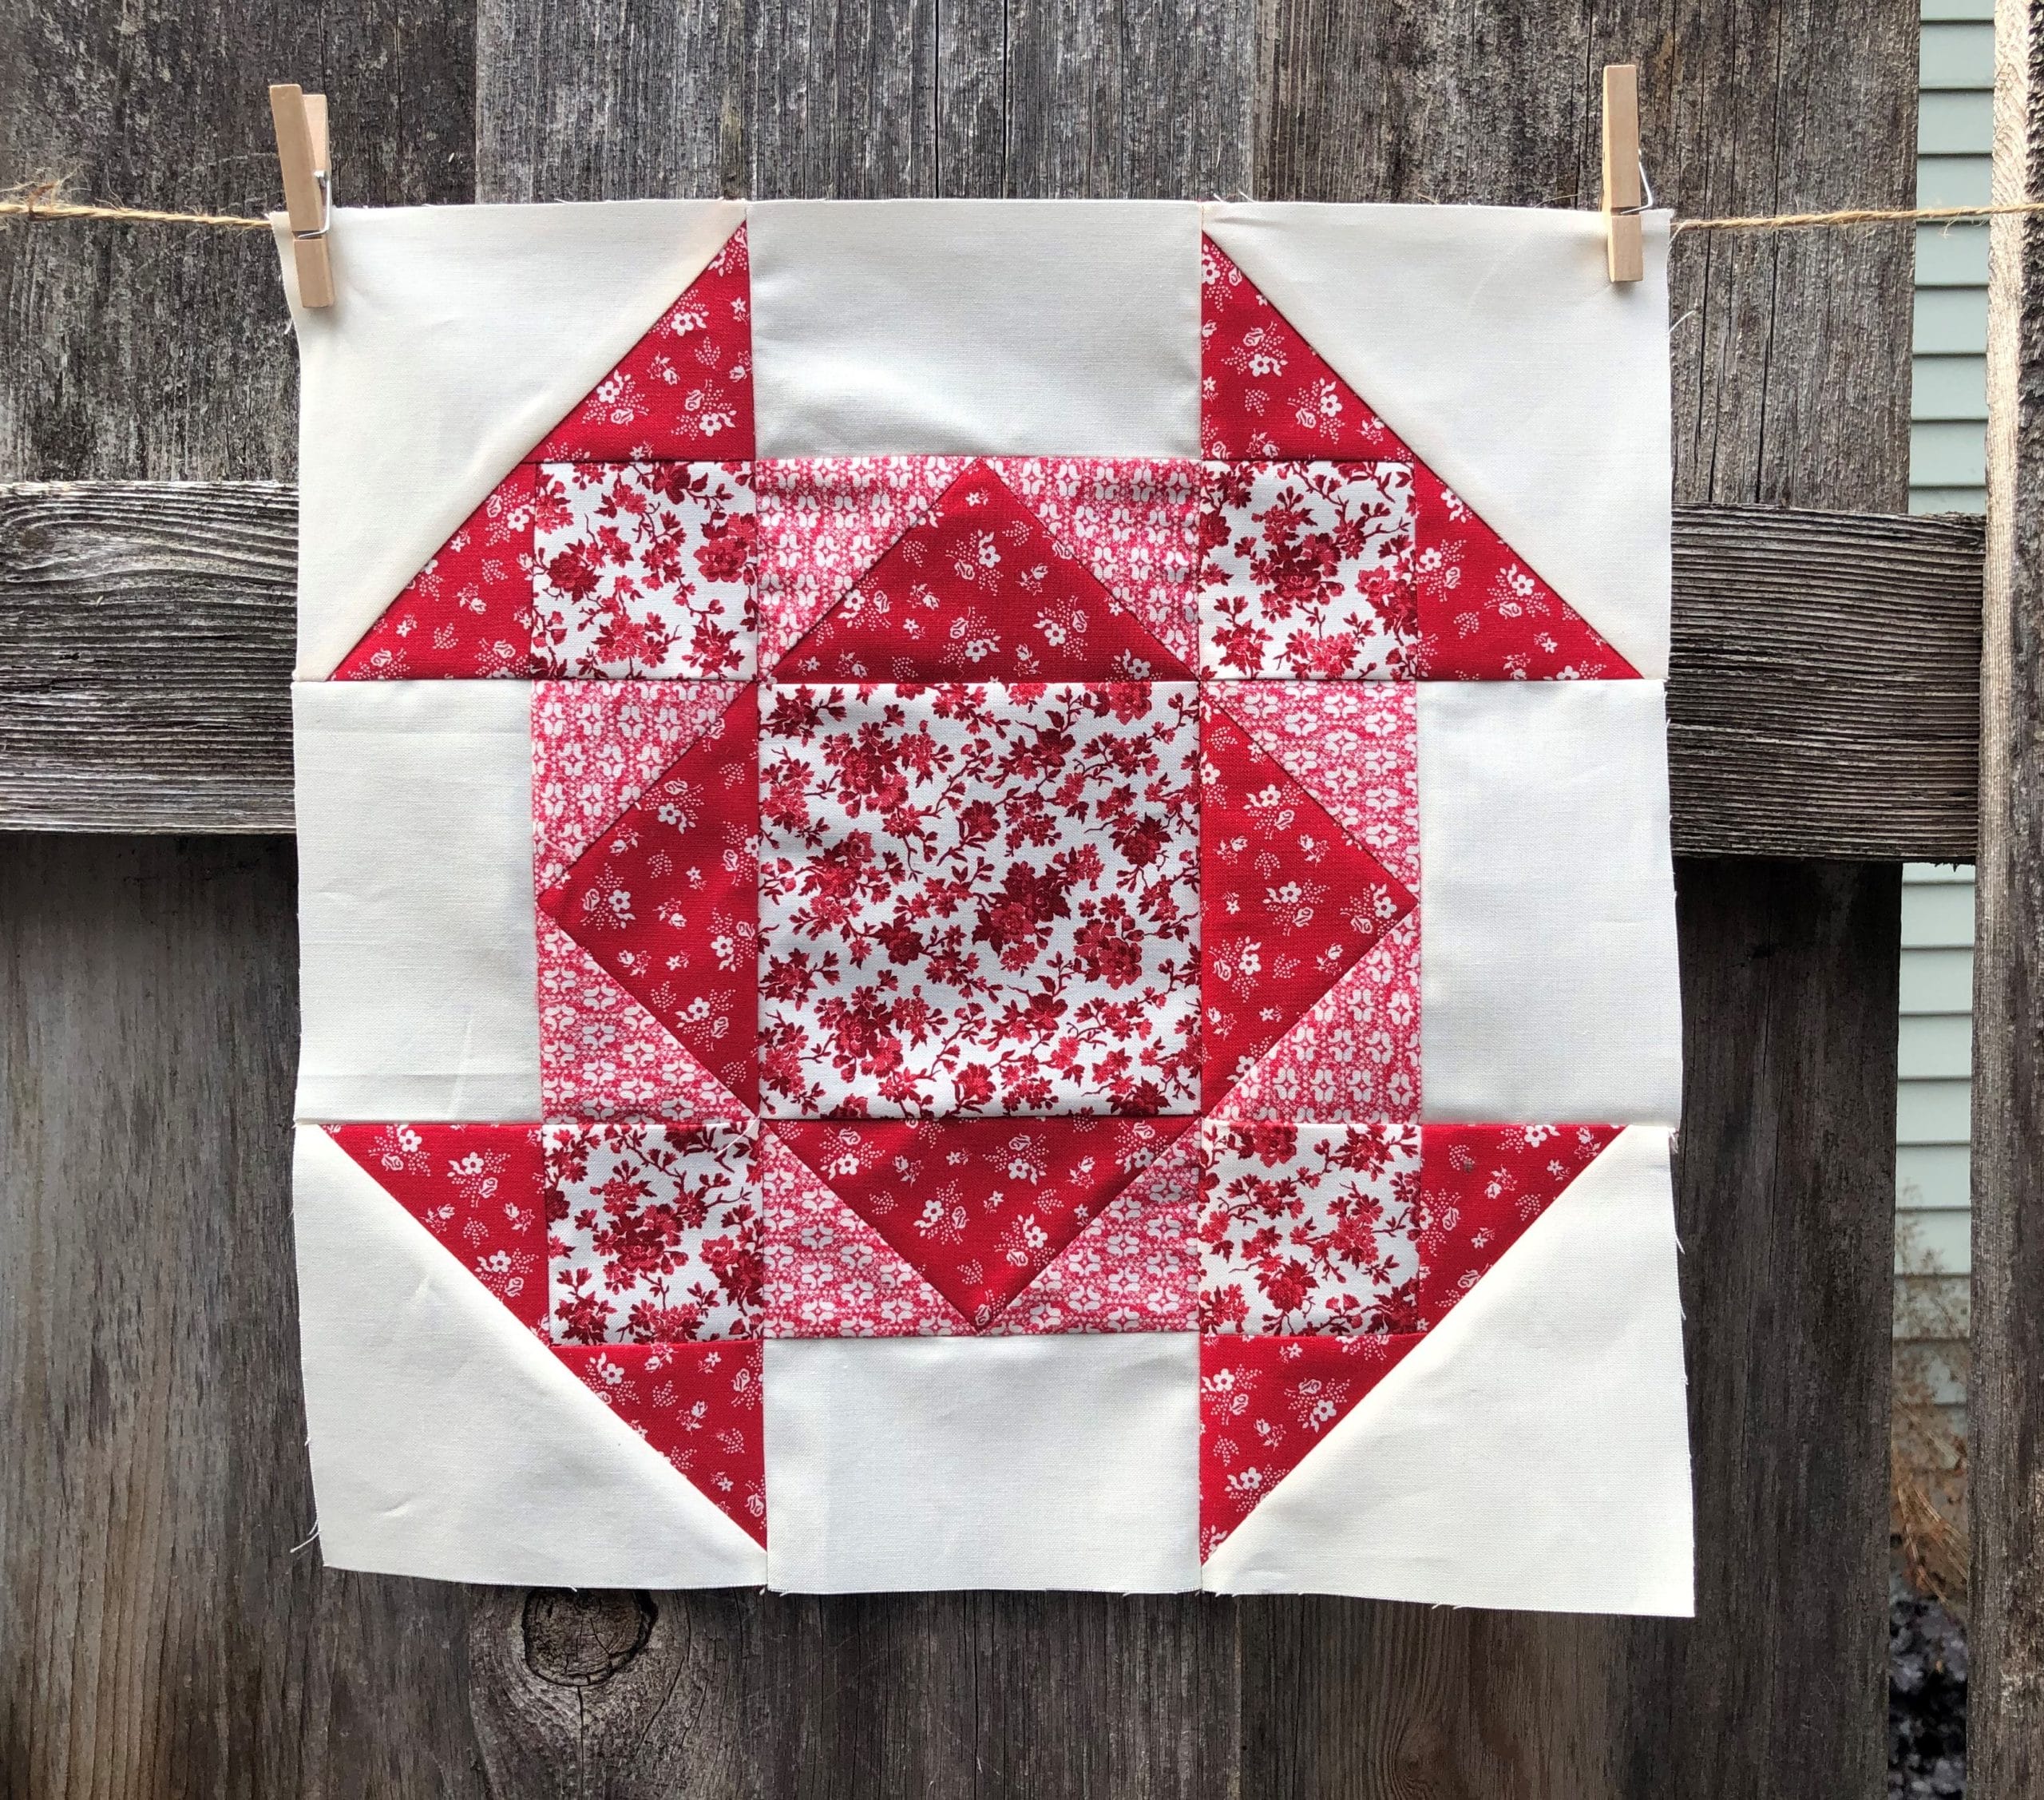
This block may look fancy, but it is really just a Sawtooth Star with some extra half square triangles around the border.
To make the Sawtooth Star center, we’ll begin in steps 1 and 2 by making some no-waste flying geese.
Step 1:
Step 2:
Place two B squares on the C square, with the marked lines matching up like you see above. After stitching a ¼” away from each side of the marked line, cut on the marked line and press the B – now triangles- downward.
Place an additional B square on each unit as you see here (down the center of C) and repeat the same process of stitching a ¼” away from each side of the marked line, then cutting on the line afterward. Press, trim, and you end up with 4 flying geese.
Step 3:
Now all you have to do is sew two of these to the center block, add the D squares to two more flying geese, then sew everything together. Check to make sure this measures 8-1/2” square, and trim if necessary.
Step 4:
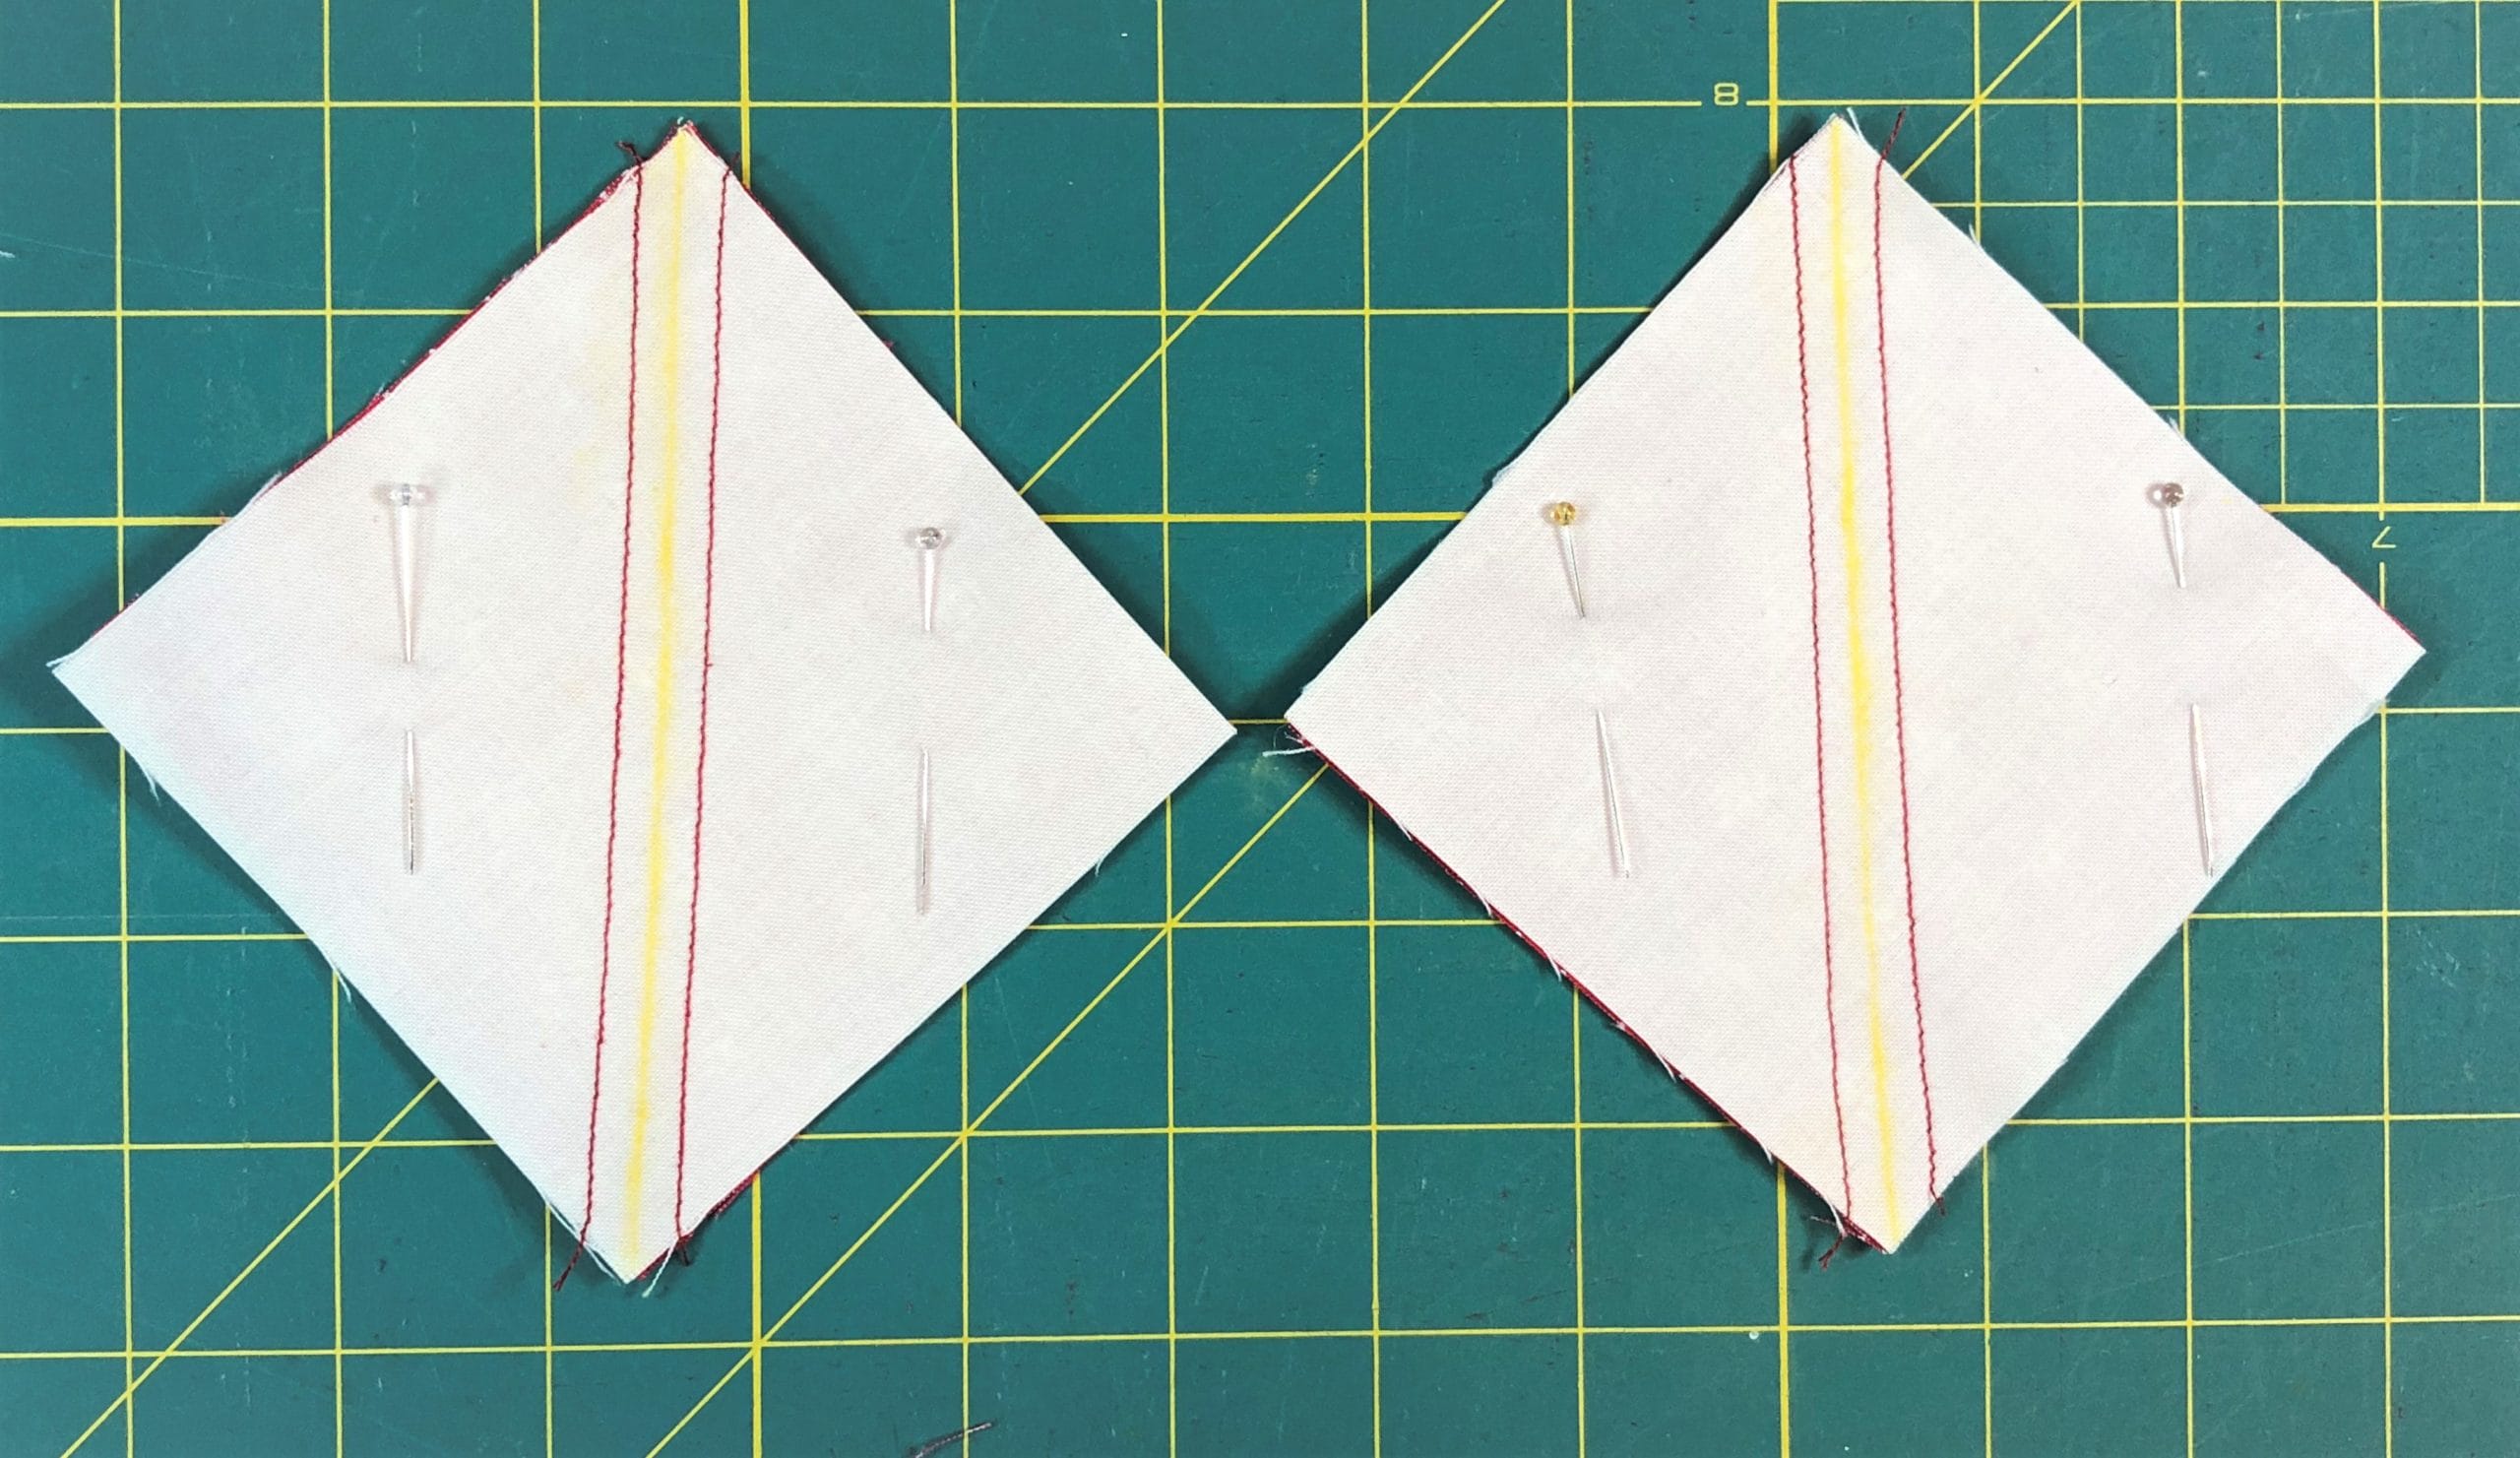
Next we’ll make 12 half square triangles by pairing up those E and F squares, and again stitching ¼” away from each side of the marked lines, then cutting on the line for each unit. Press toward the Solid Ivory (F). I know it’s customary to press toward the dark side, but trust me, doing the opposite this time will enable you to nest your seams together later.
A note about no-waste half square triangles: I give my half-square triangle cutting measurements to be mathematically correct, but please feel free to cut the squares slightly bigger if you want so you can trim them as needed. There’s nothing wrong with cutting your E and F squares at 3” square, and then after you are finished and they are pressed, you can trim them to be 2-1/2” square. My point is, you do what works for you. You won’t run out of fabric. Based on feedback from previous BOMs I’ve done, I was quite generous with the yardage you’ll be getting for this quilt.
Step 5:
In step 5 you’ll sew an E/F square to each side of a G strip like so: Make sure the red E triangles are facing inward.
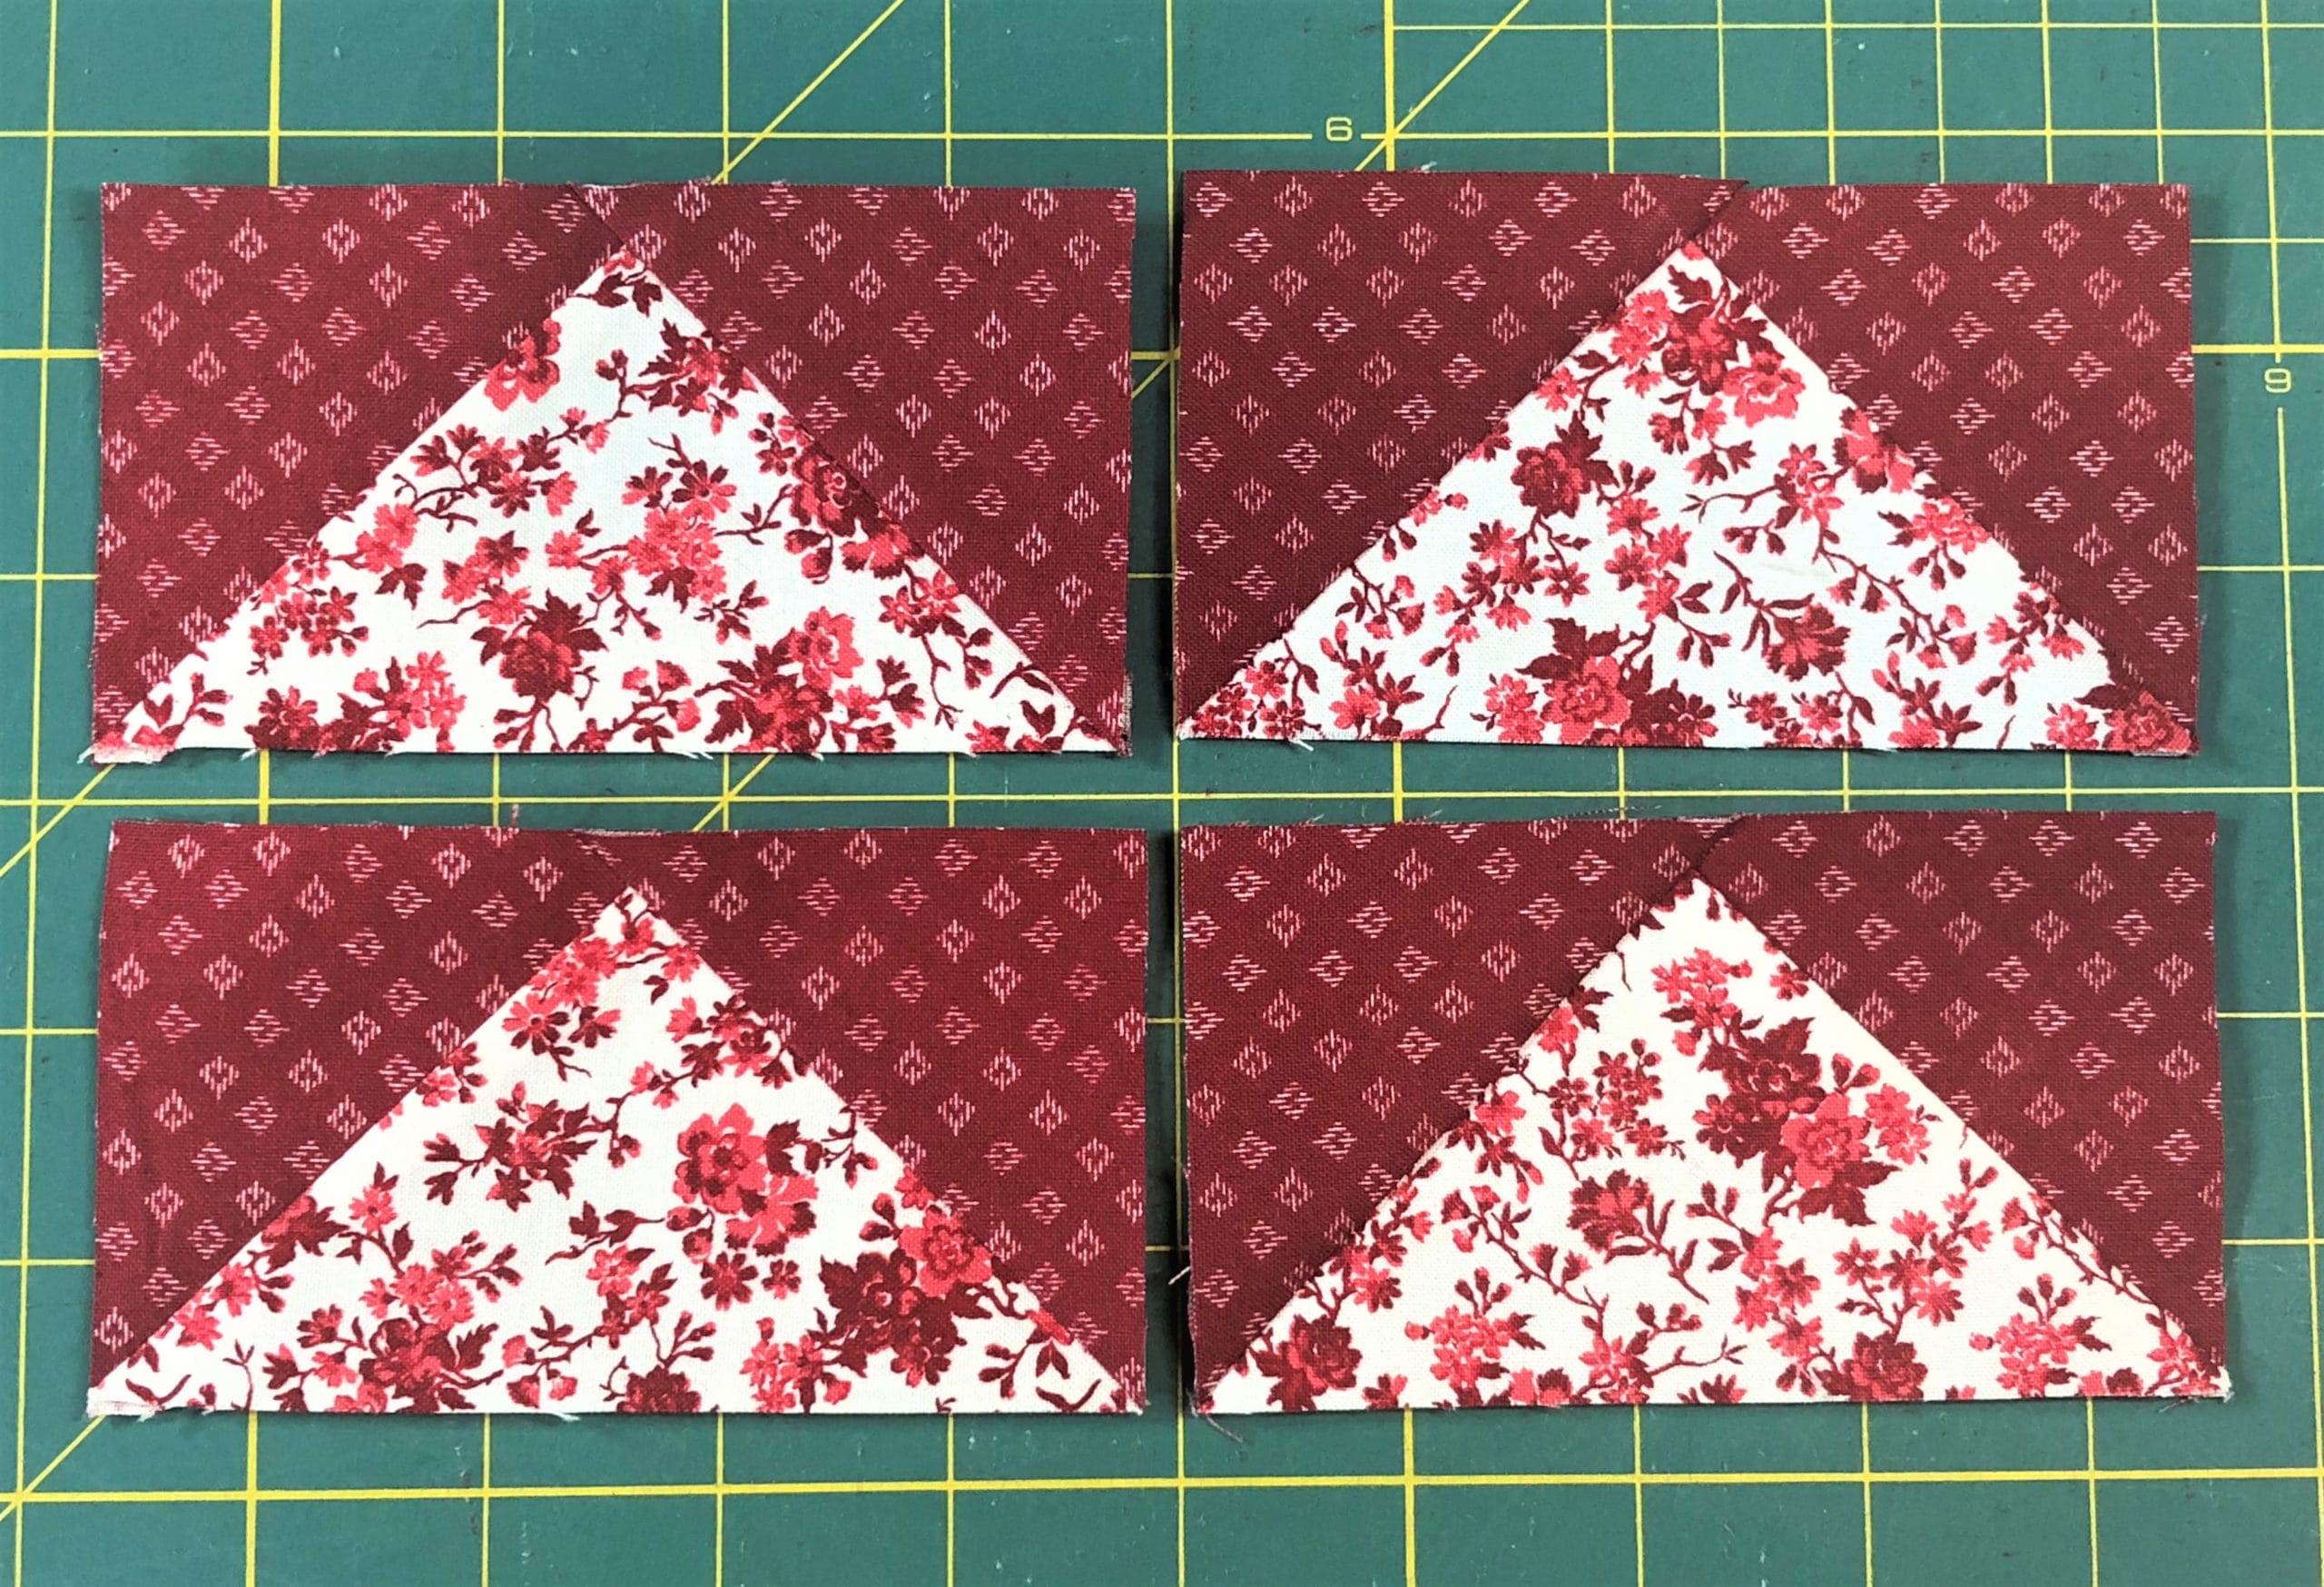
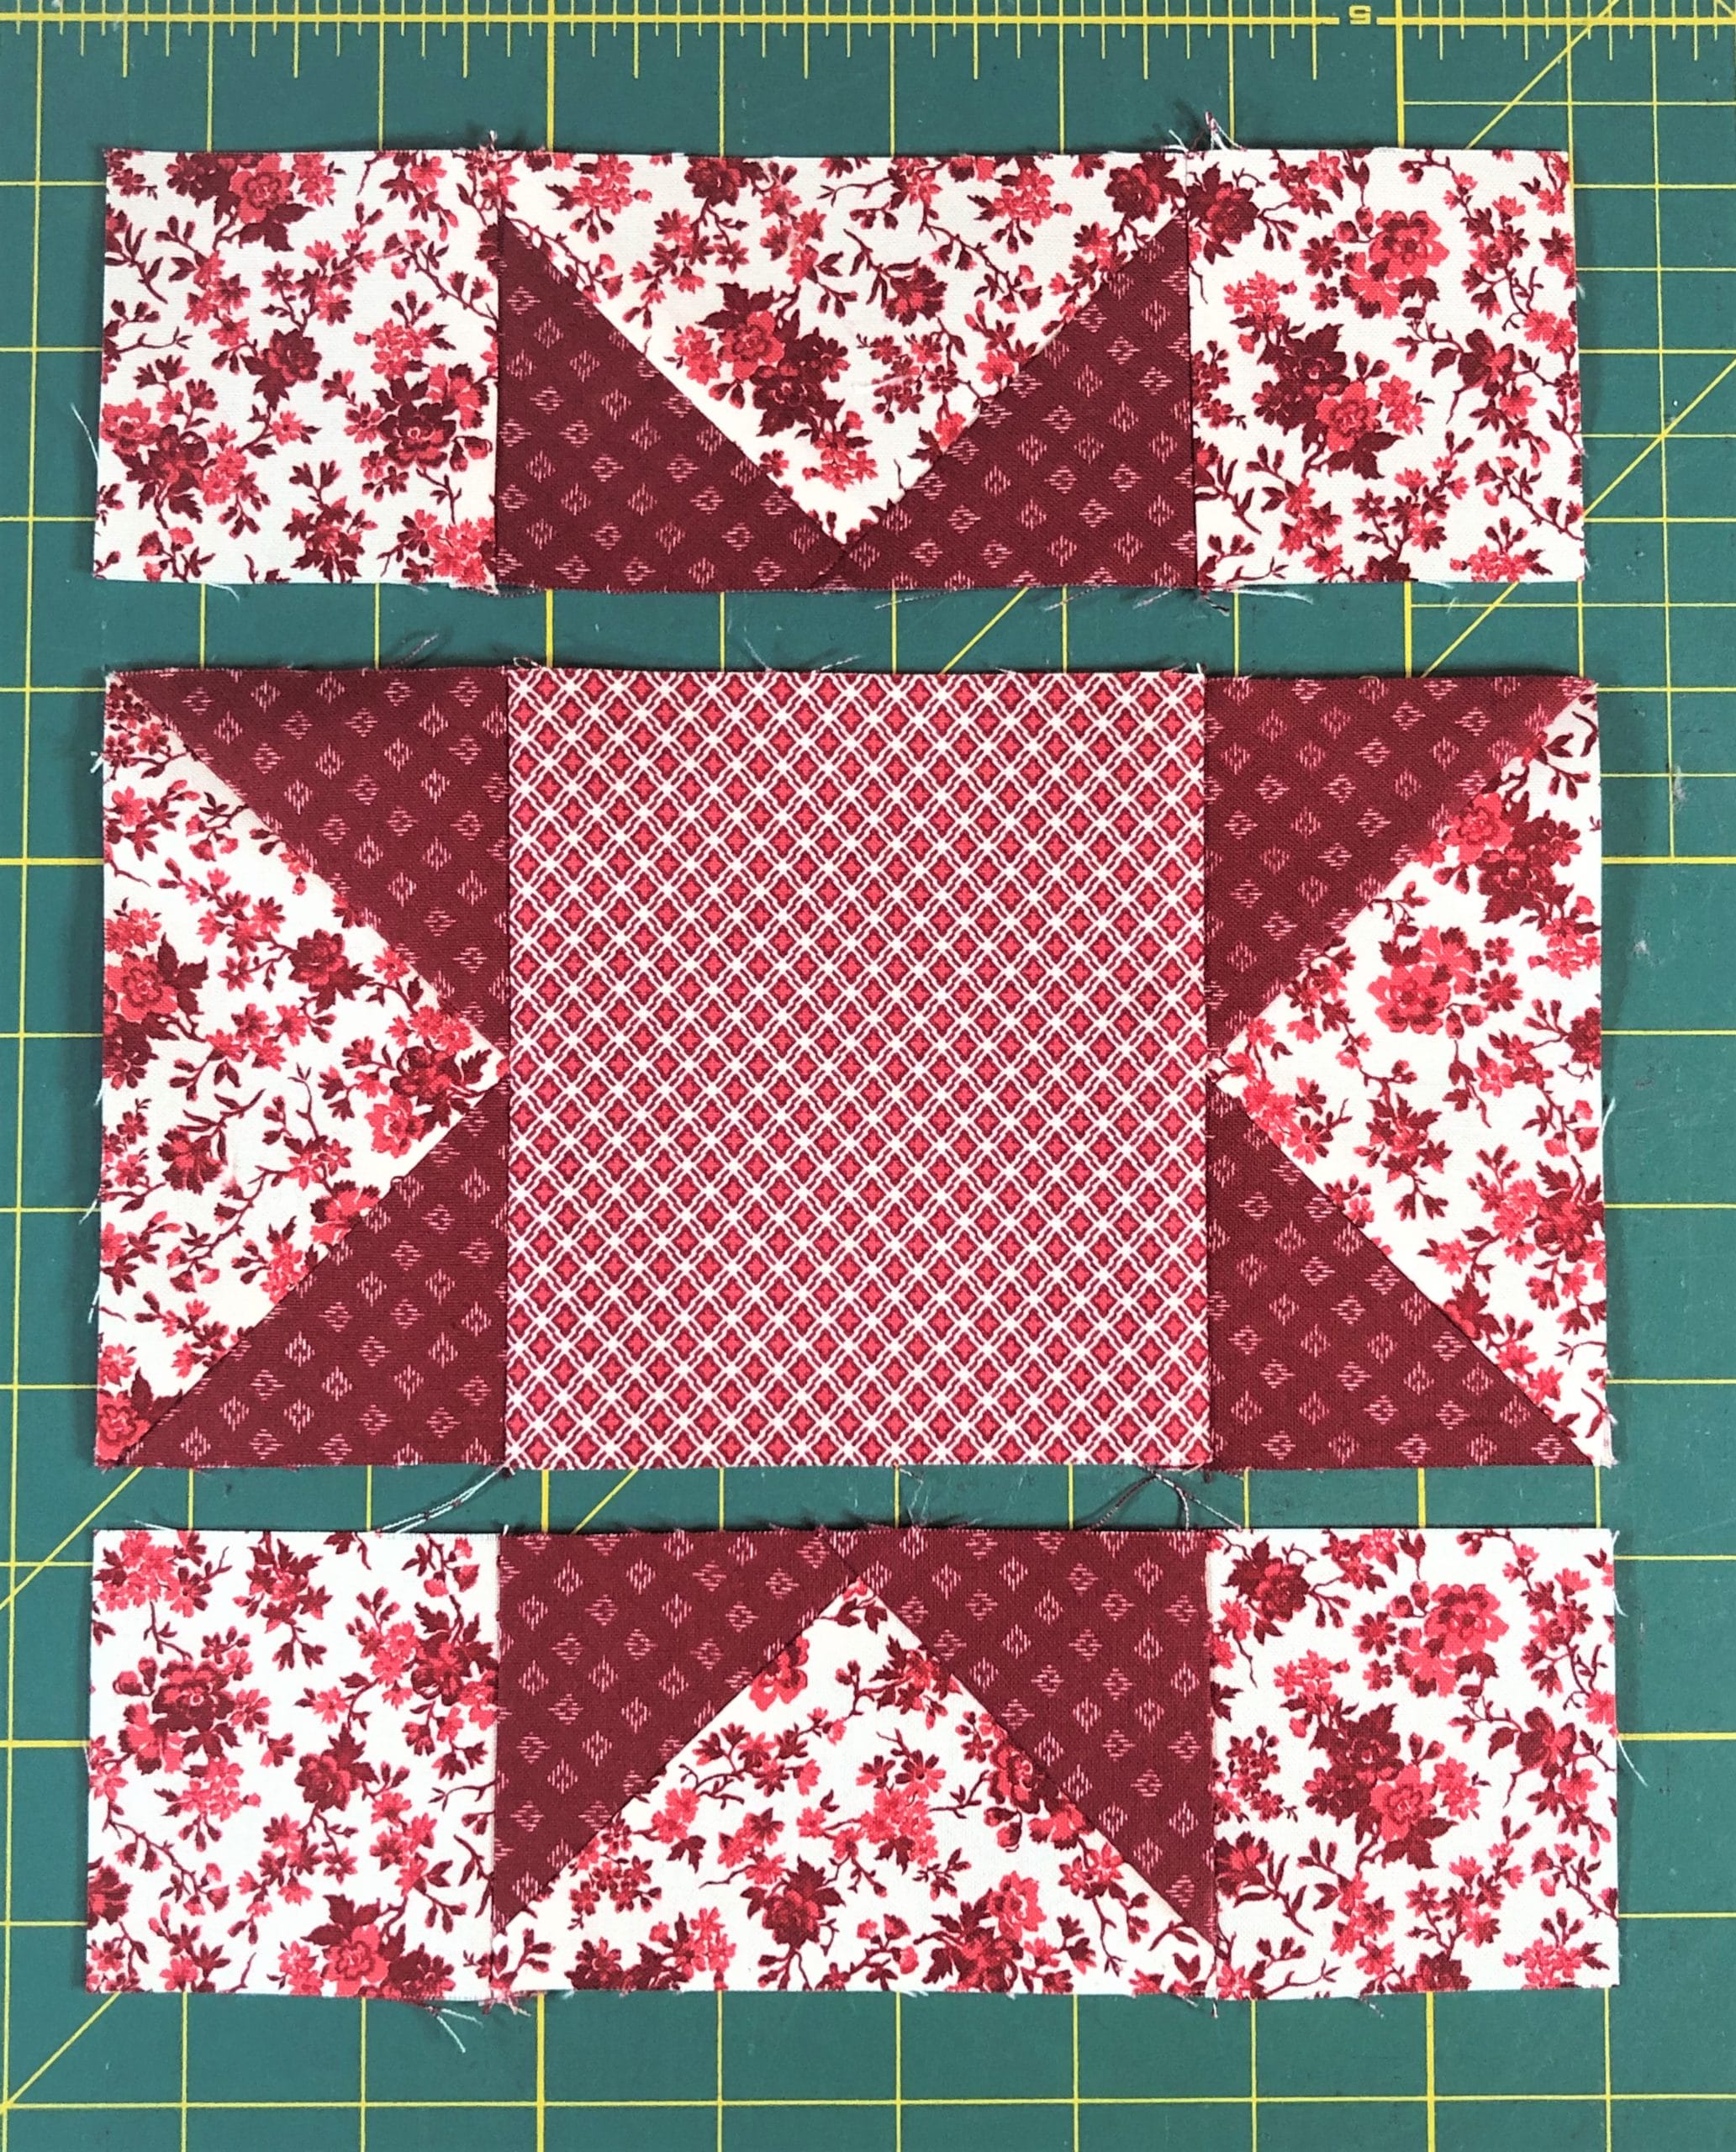
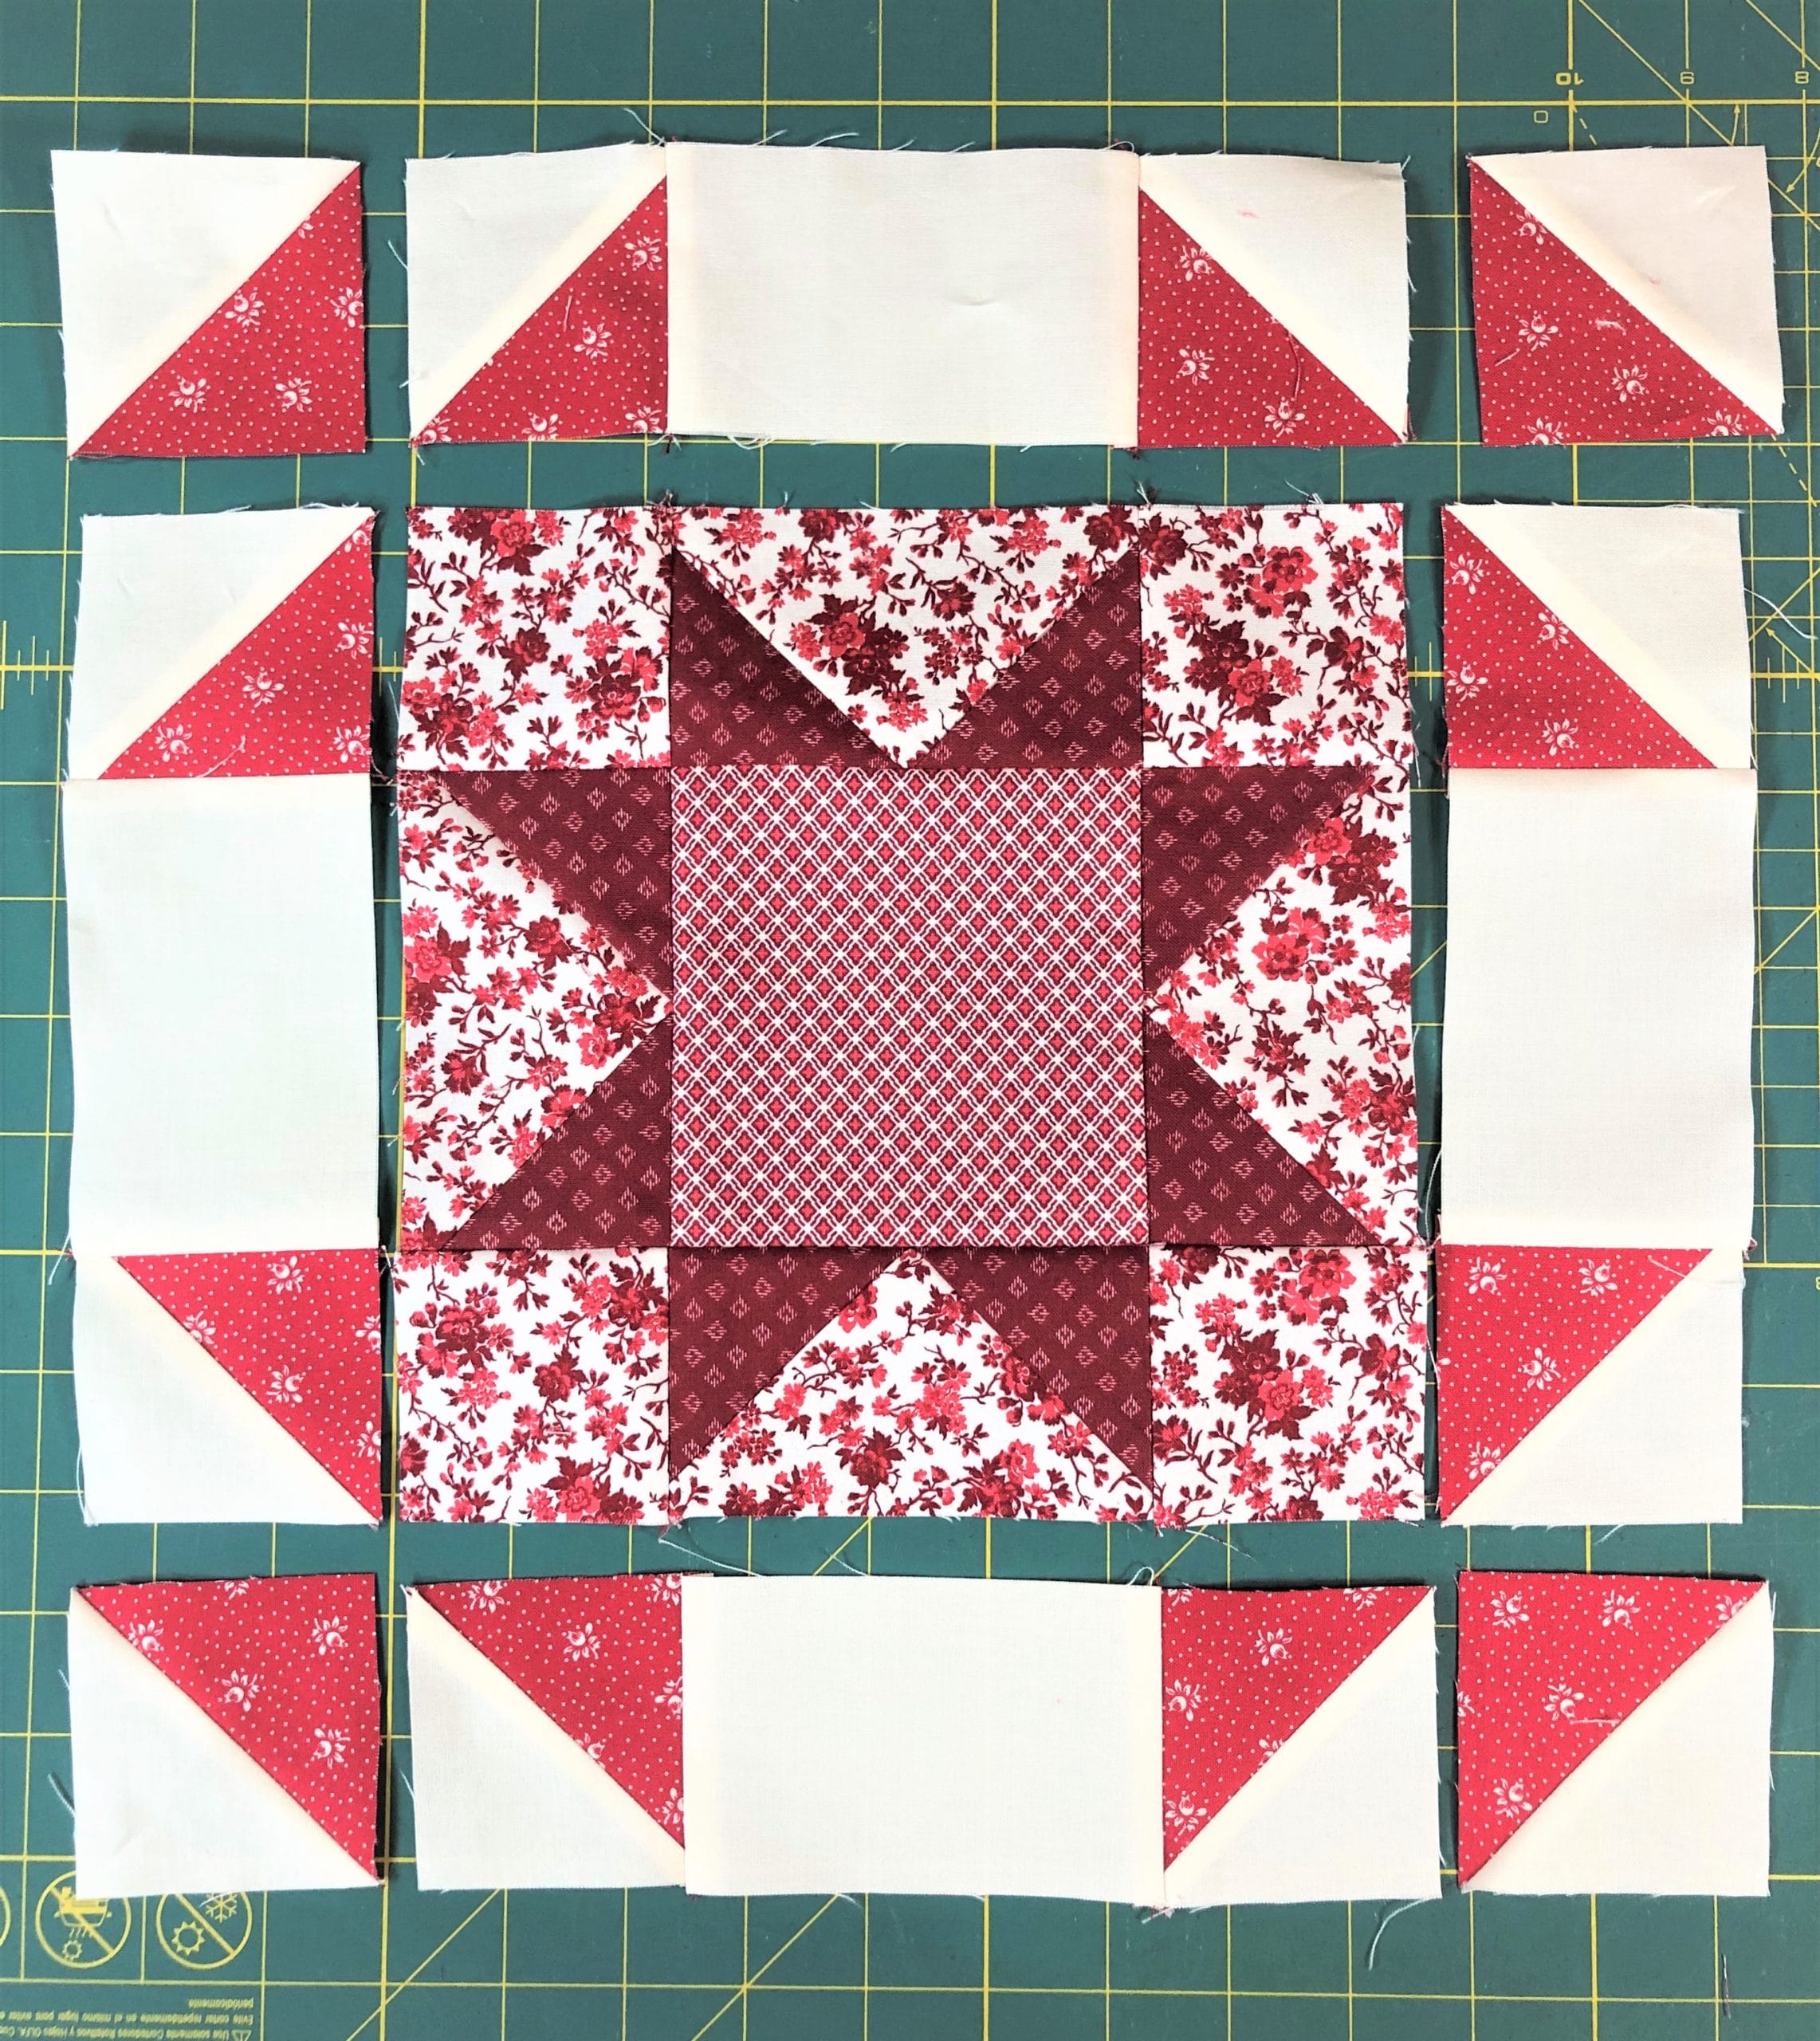
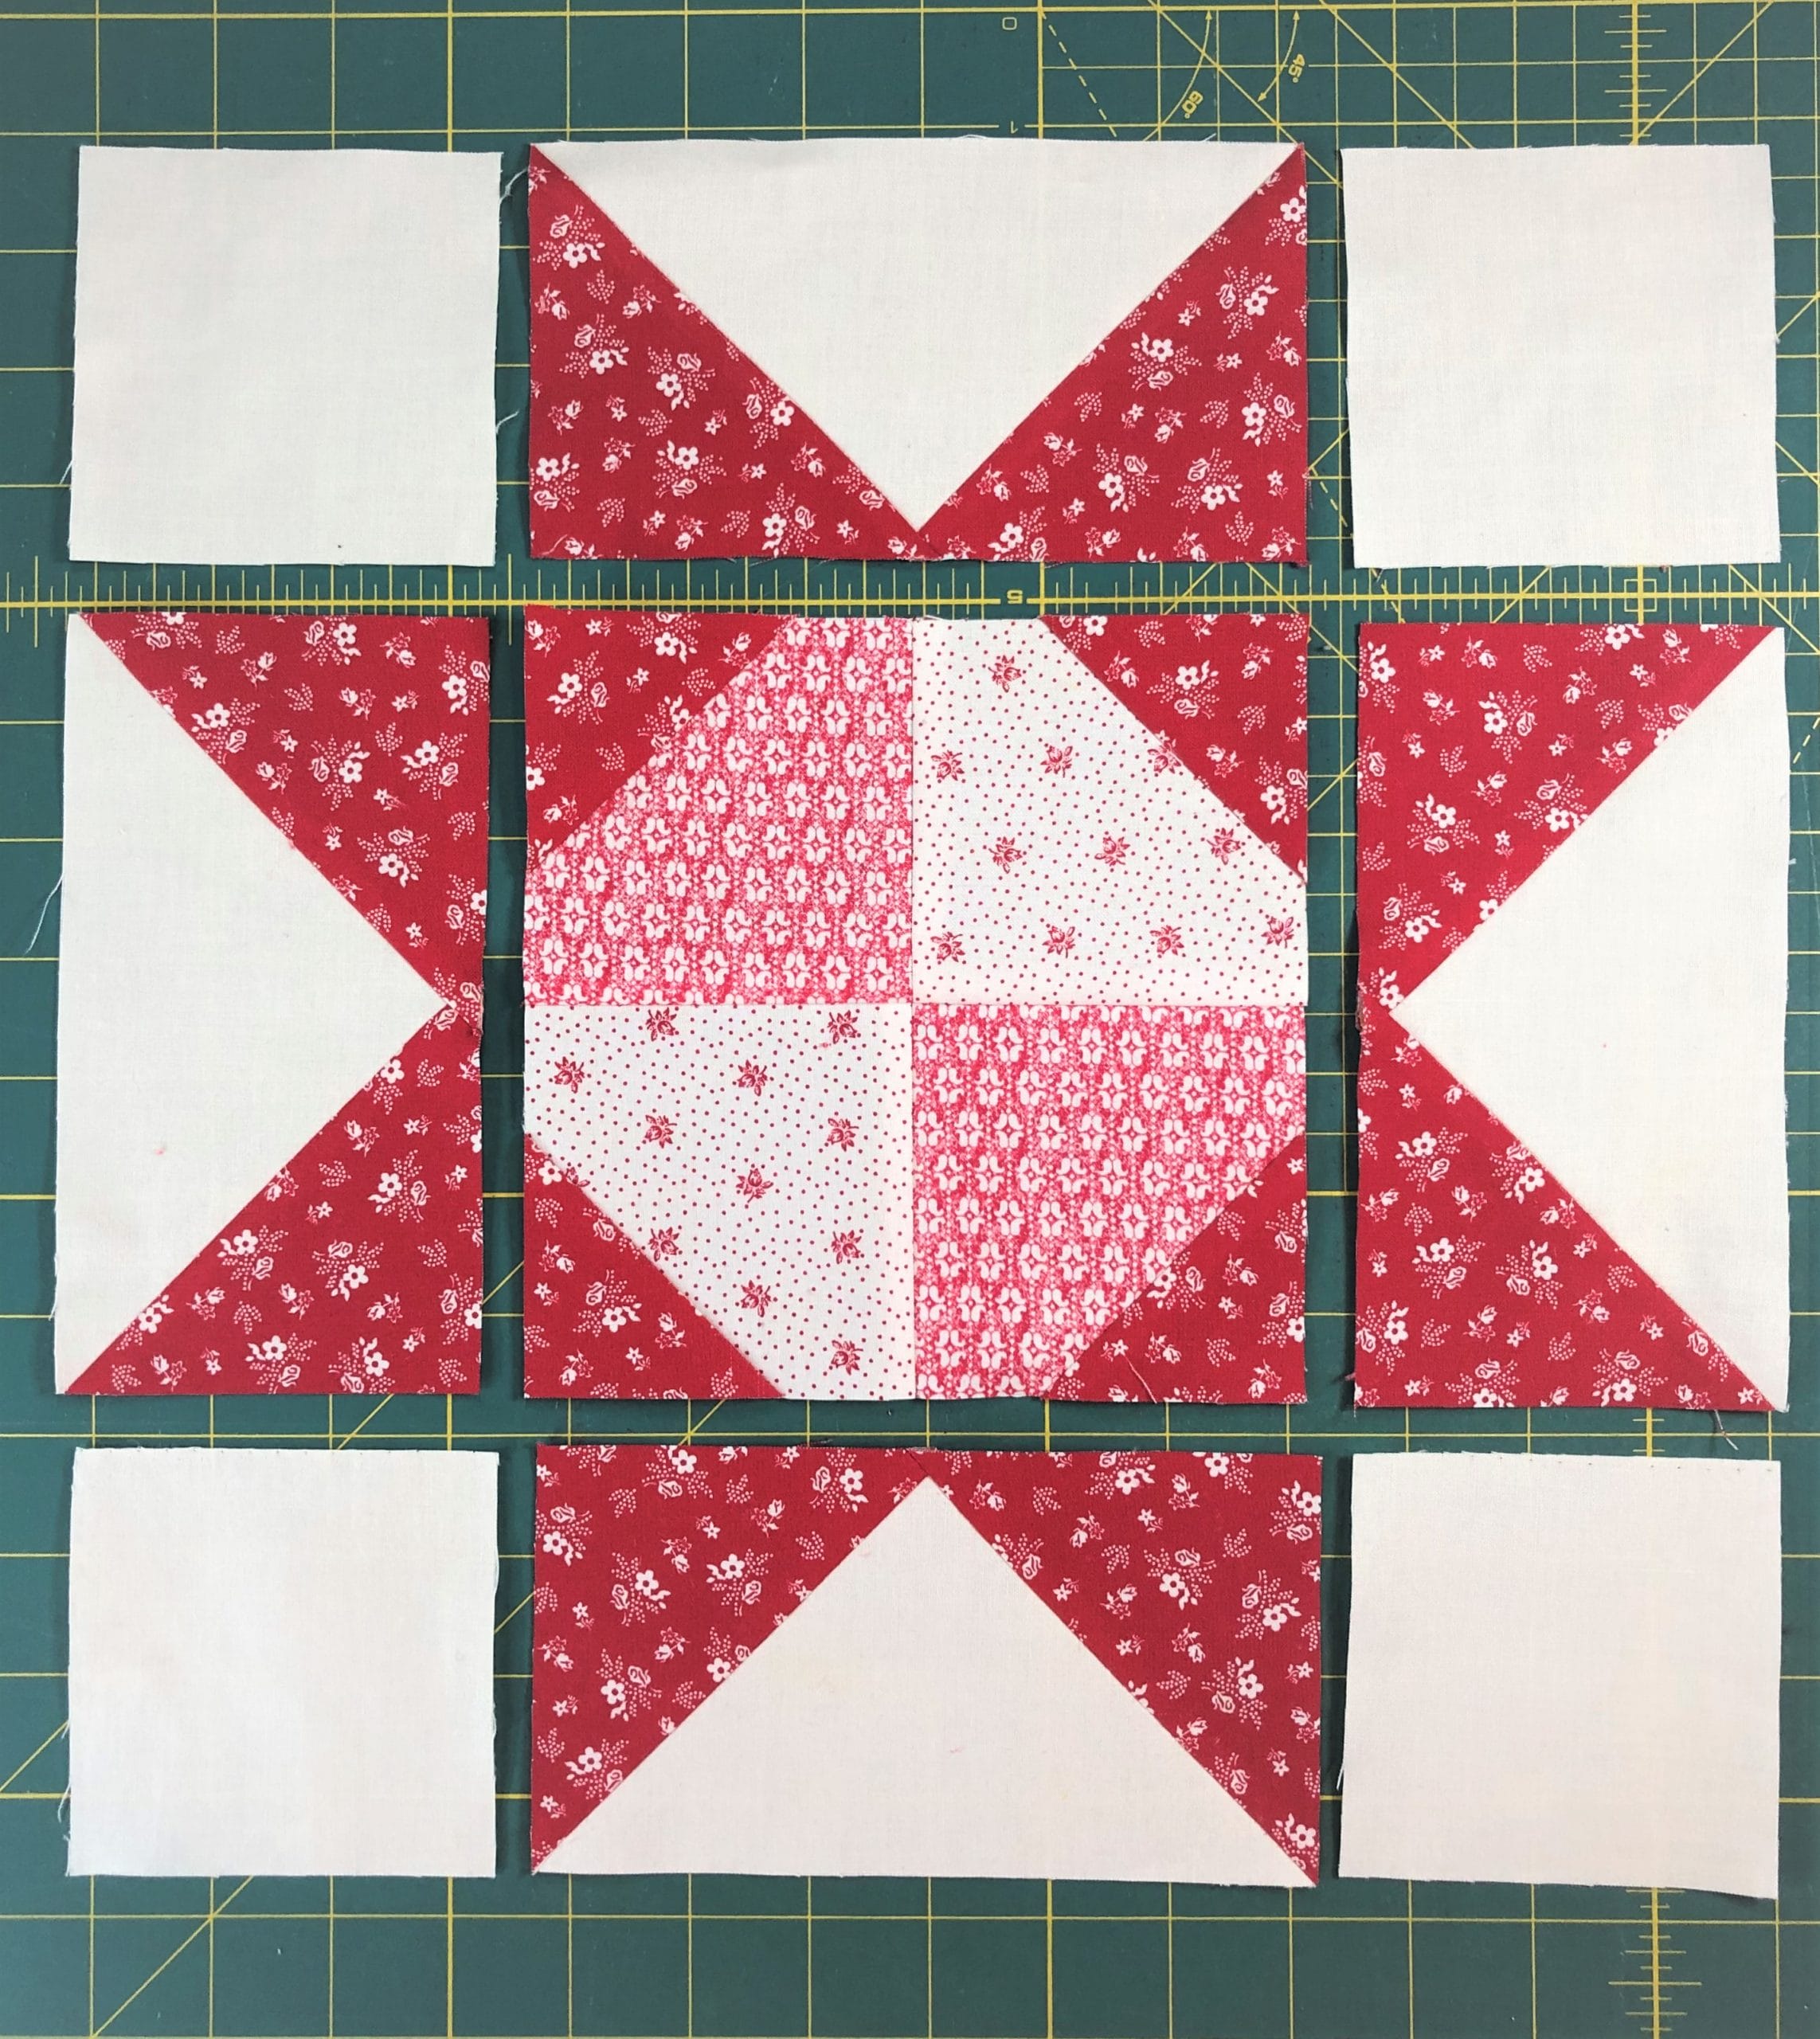
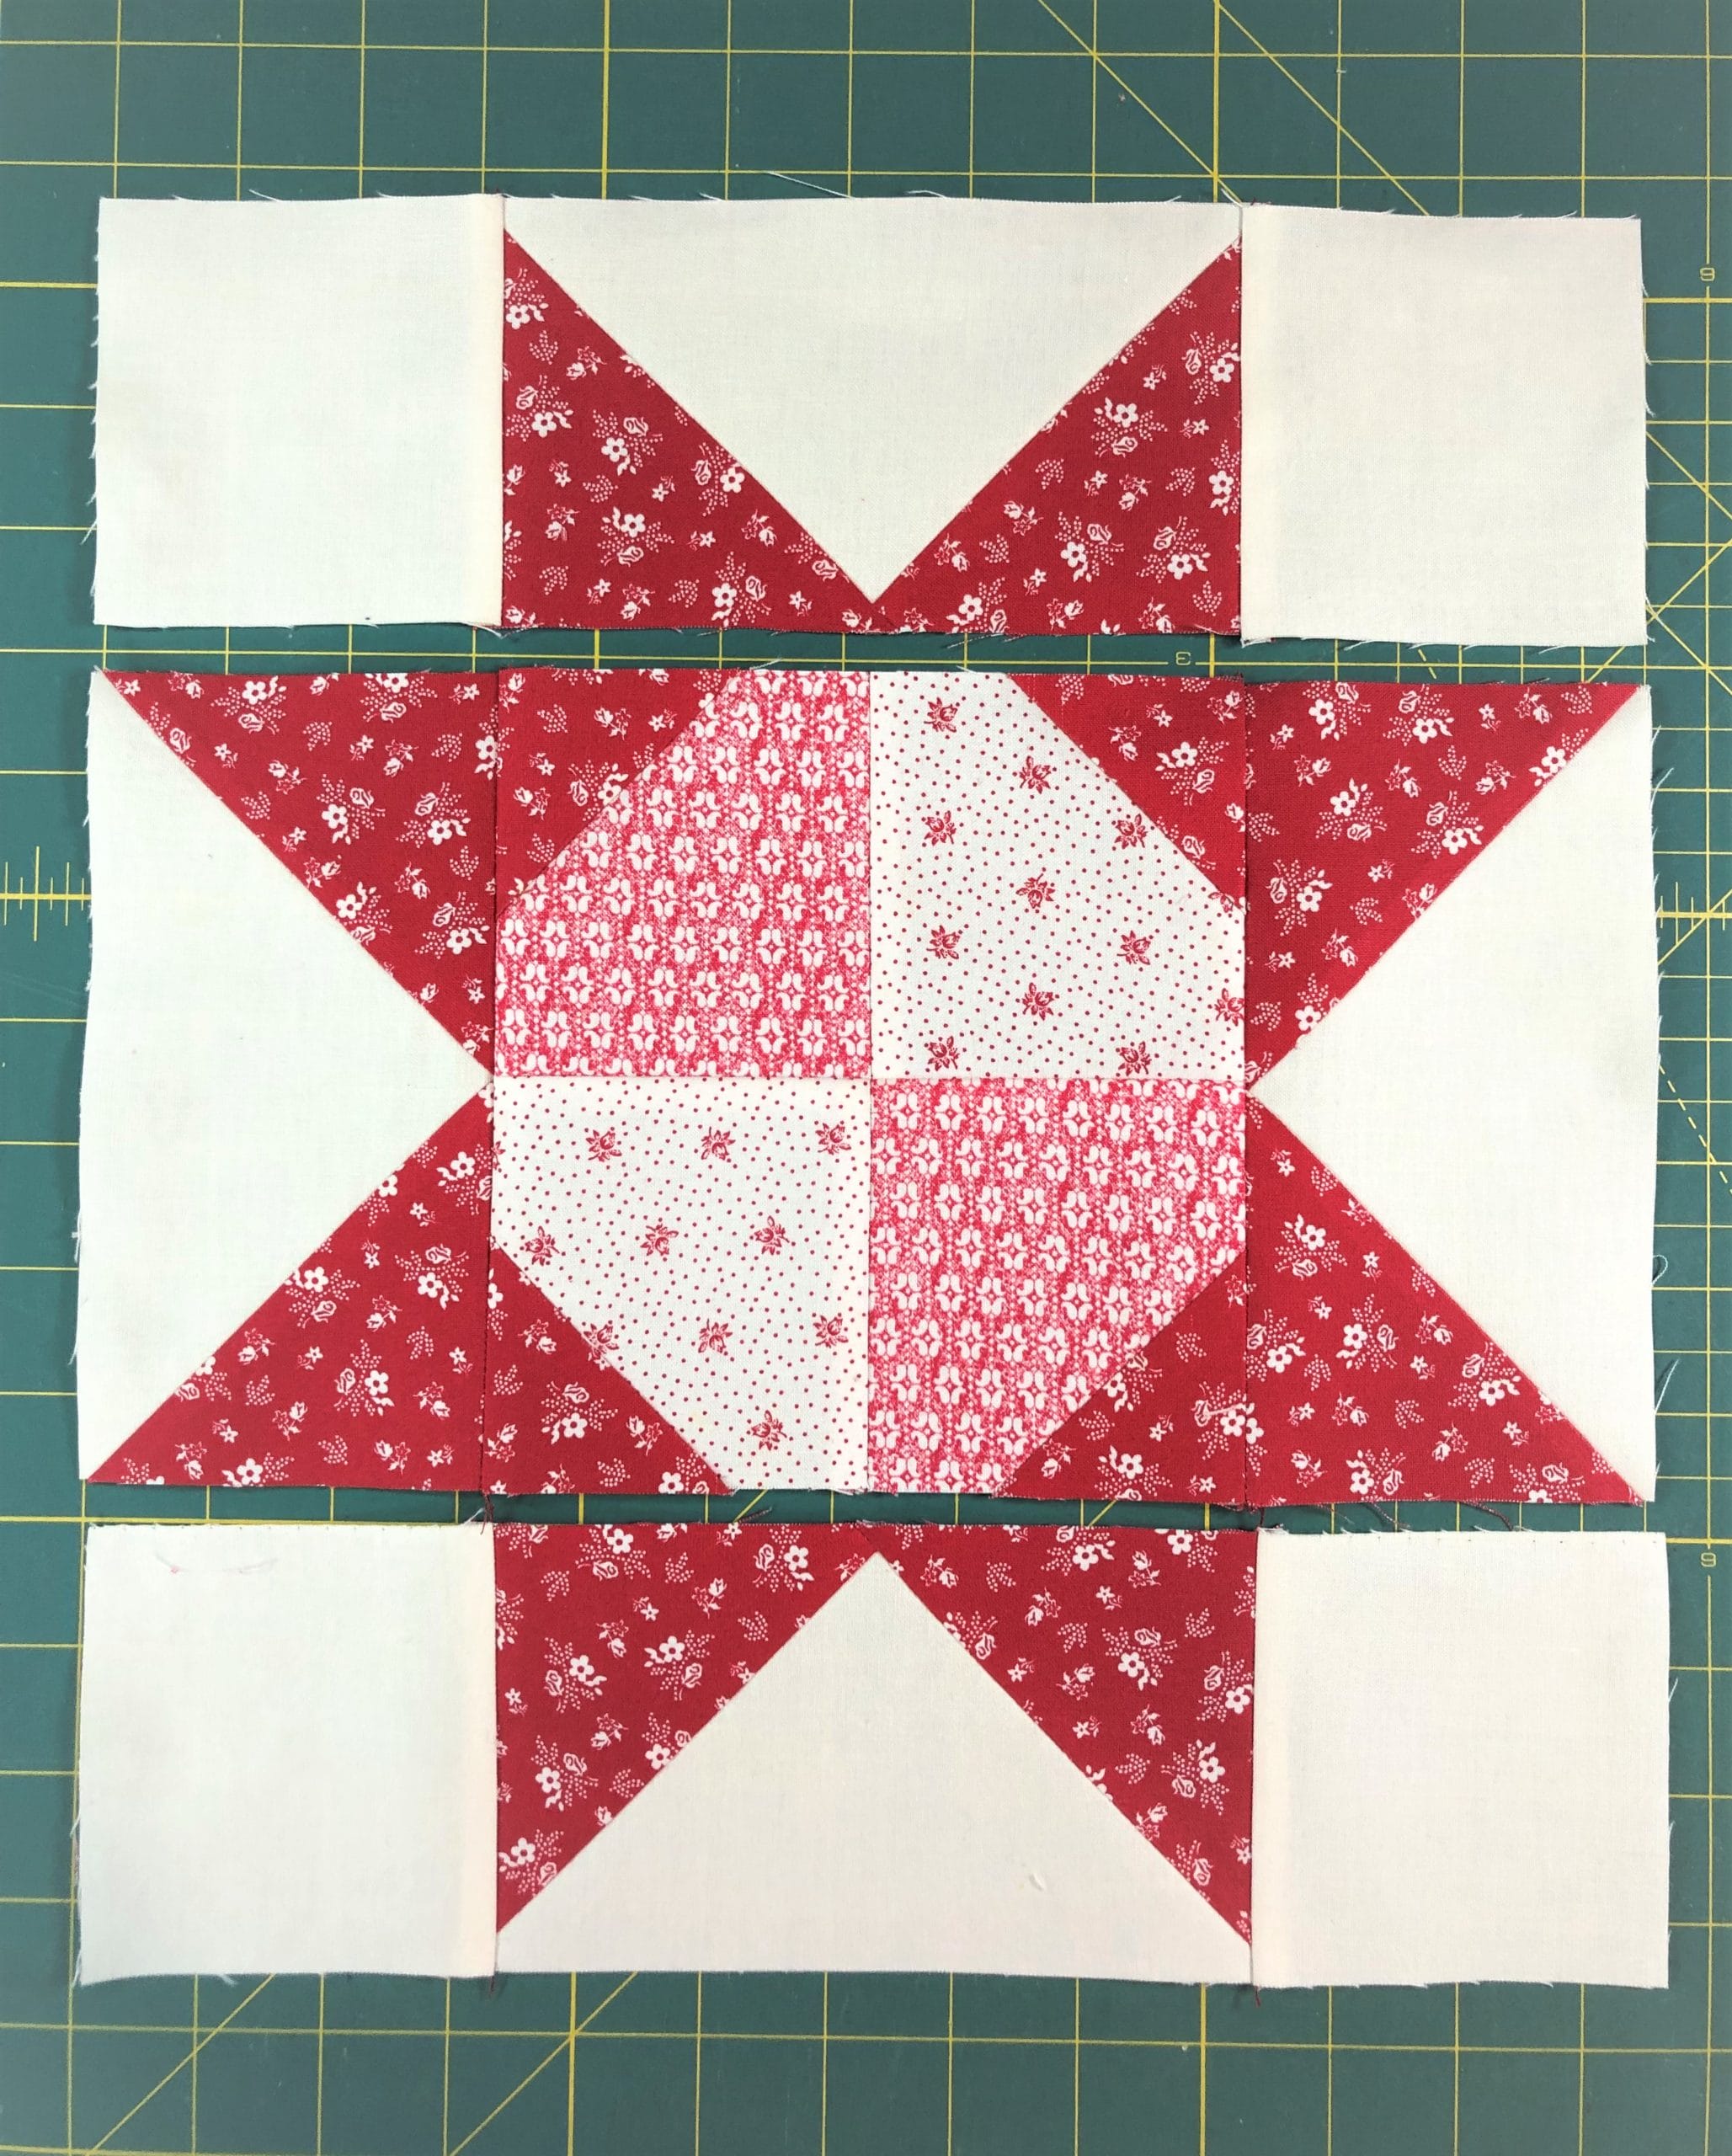
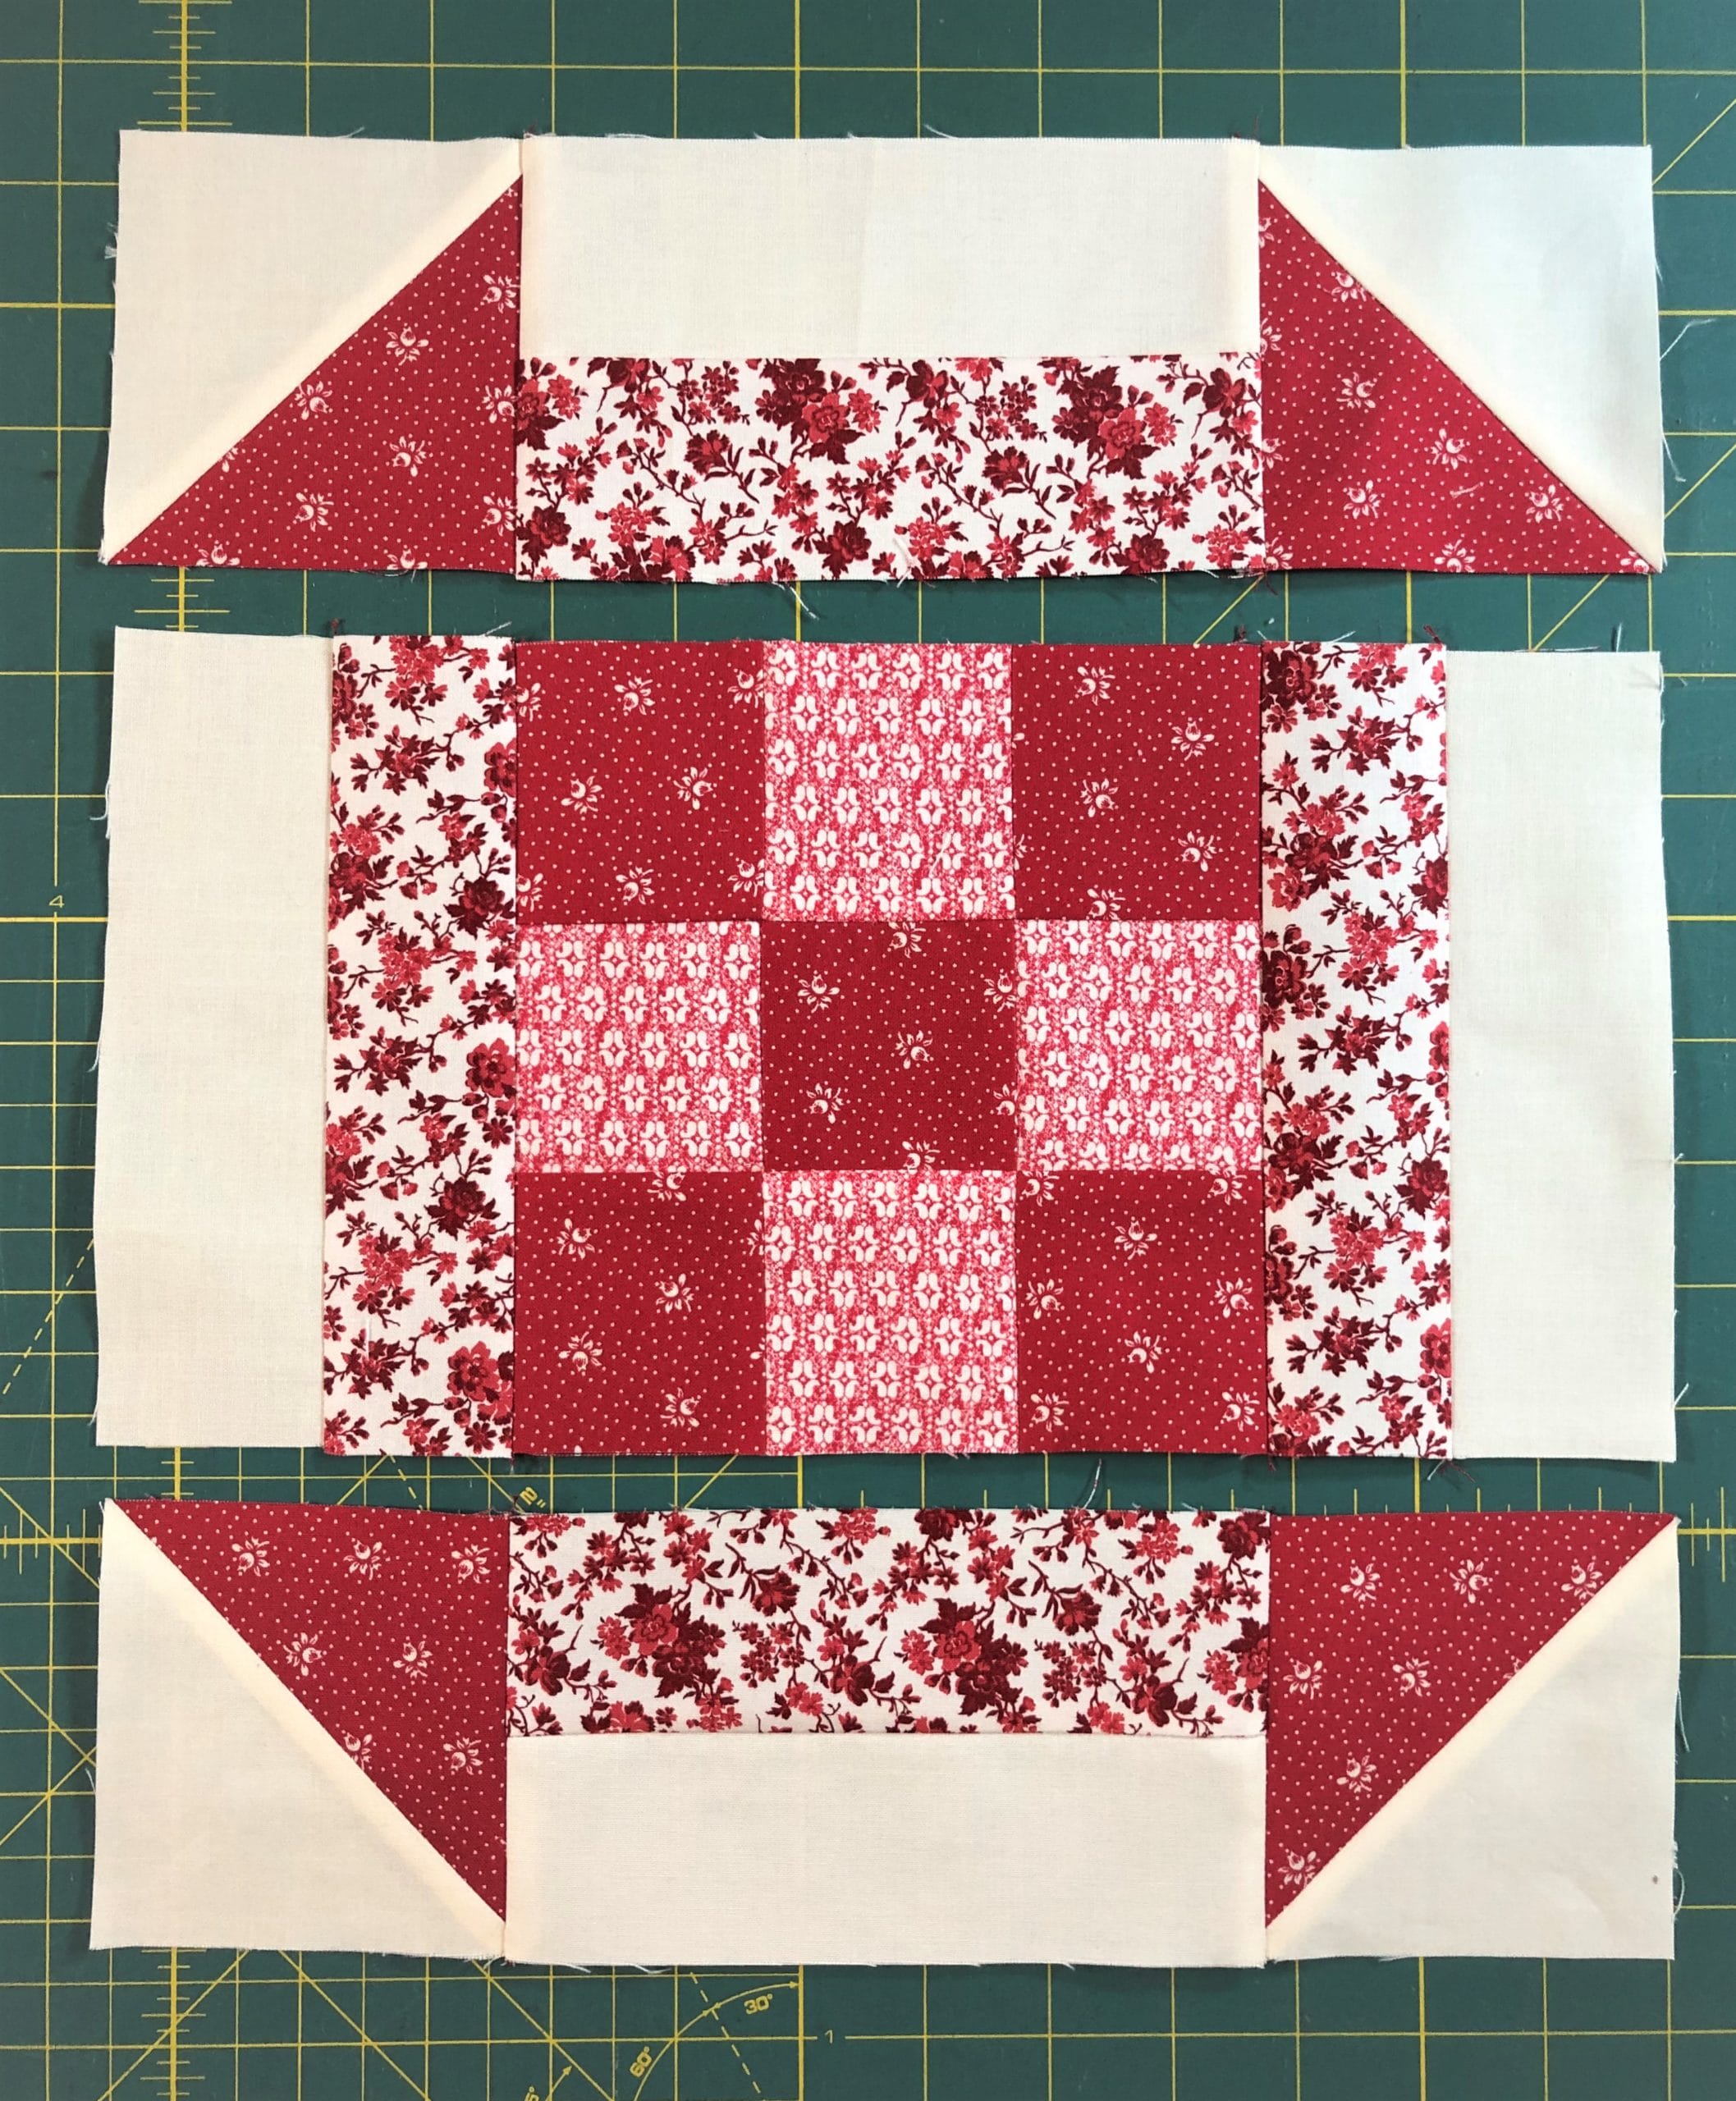
Now it’s time to put all the components together. Before I sew my block together, I like to lay everything out just to make sure I have everything going the right direction. I want to make sure I have all those half square triangles oriented correctly.
Follow the directions in step 6, and pay attention to the pressing arrows so that all your seams will fit together nicely.
Step 6:
Sew the center portion by taking two of those units you just made in step 5 and sewing them to each side of the Sawtooth star block, pressing the seams away from the center block.
Take the remaining units from step 5 and sew another E/F half-square triangle to each end, then sew those to the top and bottom to finish the block.
Now the block is finished!
Block #7
This is another Sawtooth star, but with a twist. I actually love this block, and while making it I kept thinking of all the fabrics in my stash I could use to make a scrappy quilt with just this block. But that will have to wait for another day!
Step 1:
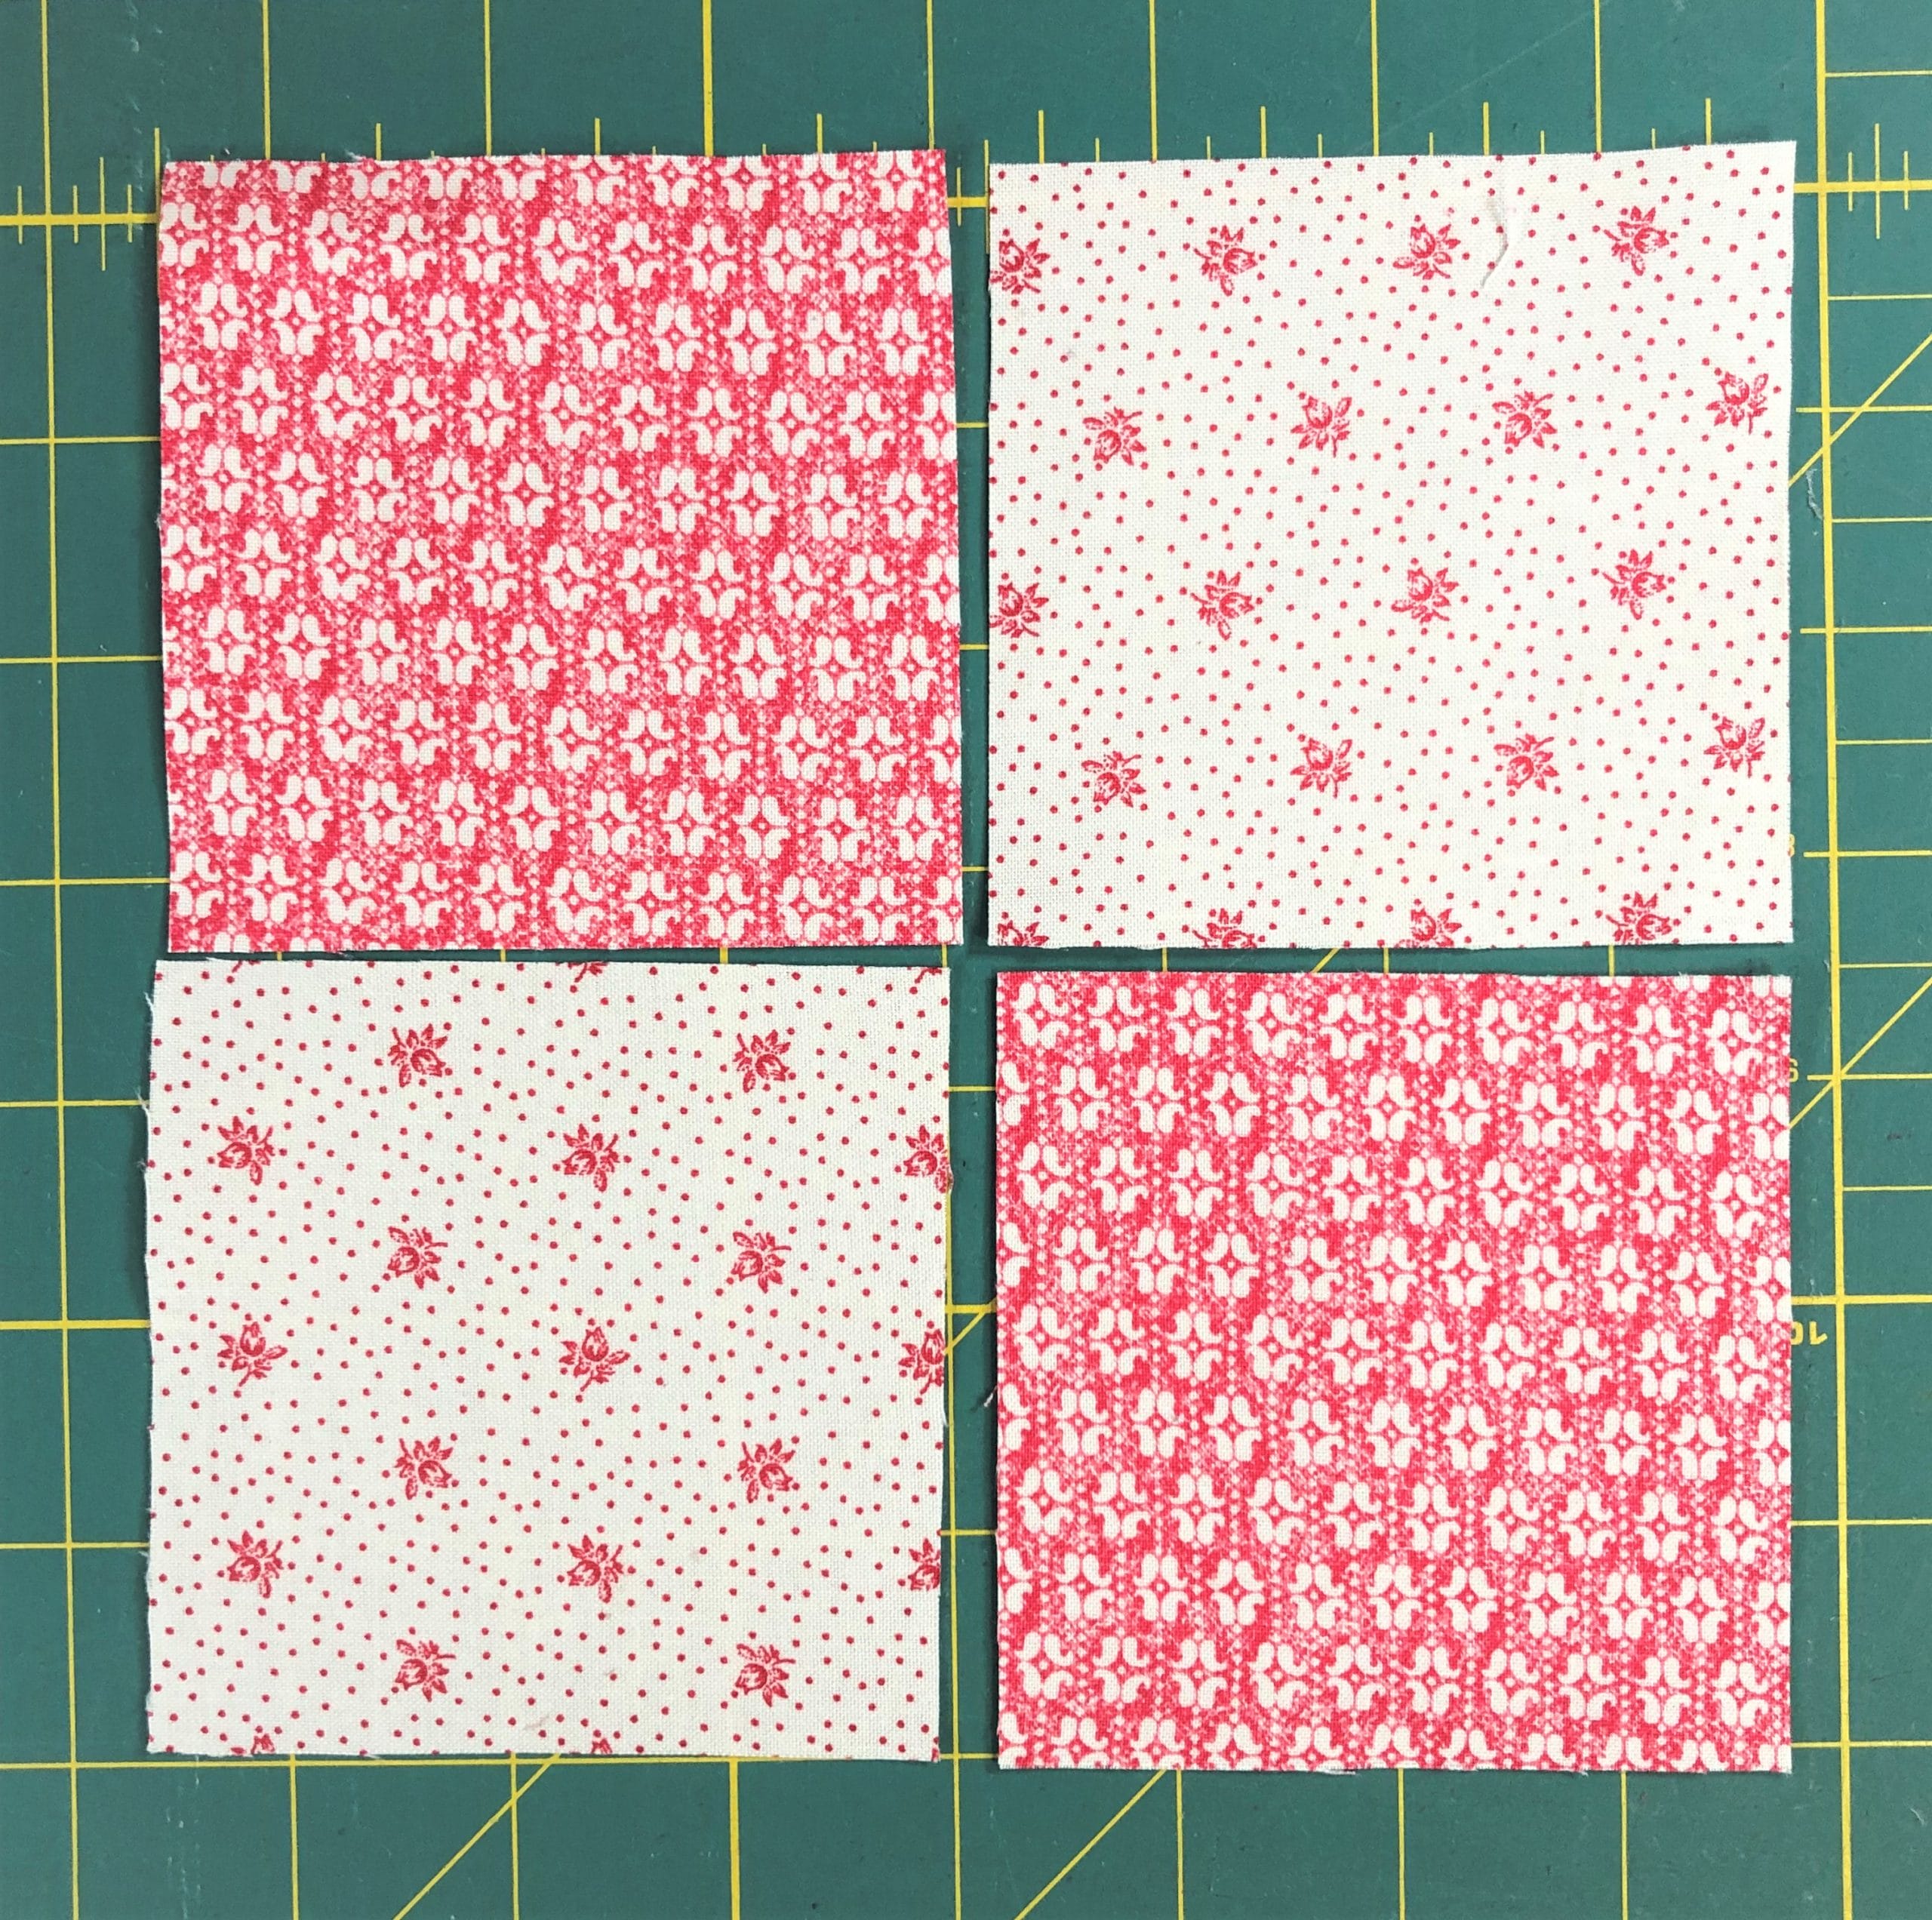
This block starts with a simple 4-patch unit. Please note that the Germanium Red fabric is DIRECTIONAL. While it really doesn’t matter if you have your fabrics oriented the same or not, I chose to have both of my B squares with the pattern in the fabric going up and down.
Step 2:
Next, I sewed on those D squares by placing them in the corners and sewing on the marked lines. Whenever I am doing this technique, I always flip up my squares and check them before trimming off the excess. They should match up with the existing corners of the 4-patch block. If the corners come up short, then I know I need to rip things out and re-stitch. To avoid this, I usually sew just a scooch outside the marked line, next to the side that is closest to the corner. Does that make sense?
It’s hard to tell here, but if you look closely, you can see that I’ve sewn just outside the yellow marked lines.Before trimming off the excess, I finger press the corners and make sure they line up. Now this unit trimmed and pressed.
In steps 3 and 4 we’ll make some more of those fabulous no-waste flying geese, only bigger than the ones we made in block 6. I won’t bore you with more detailed instructions.
This block is assembled the same way as the center portion of block 6. The only tricky part is making sure that those 4-patch seams line up with the points on the flying geese units. I usually start pinning from there, and then work my way out. Have I mentioned that I’m a prolific pinner? I admire those that can just sew without pinning. I think I’m just to particular to leave things un-pinned. Or maybe I just don’t sew well enough yet??? Haha! Maybe in another 30 years of sewing I’ll master the no-pinning thing.
Again, I lay everything out first before I begin pinning and sewing, because nothing is worse than thinking you’ve finished a block only to realize that you messed up and have to rip and re-sew.
Next I’ll just sew the block into the three sections, and then sew everything together.
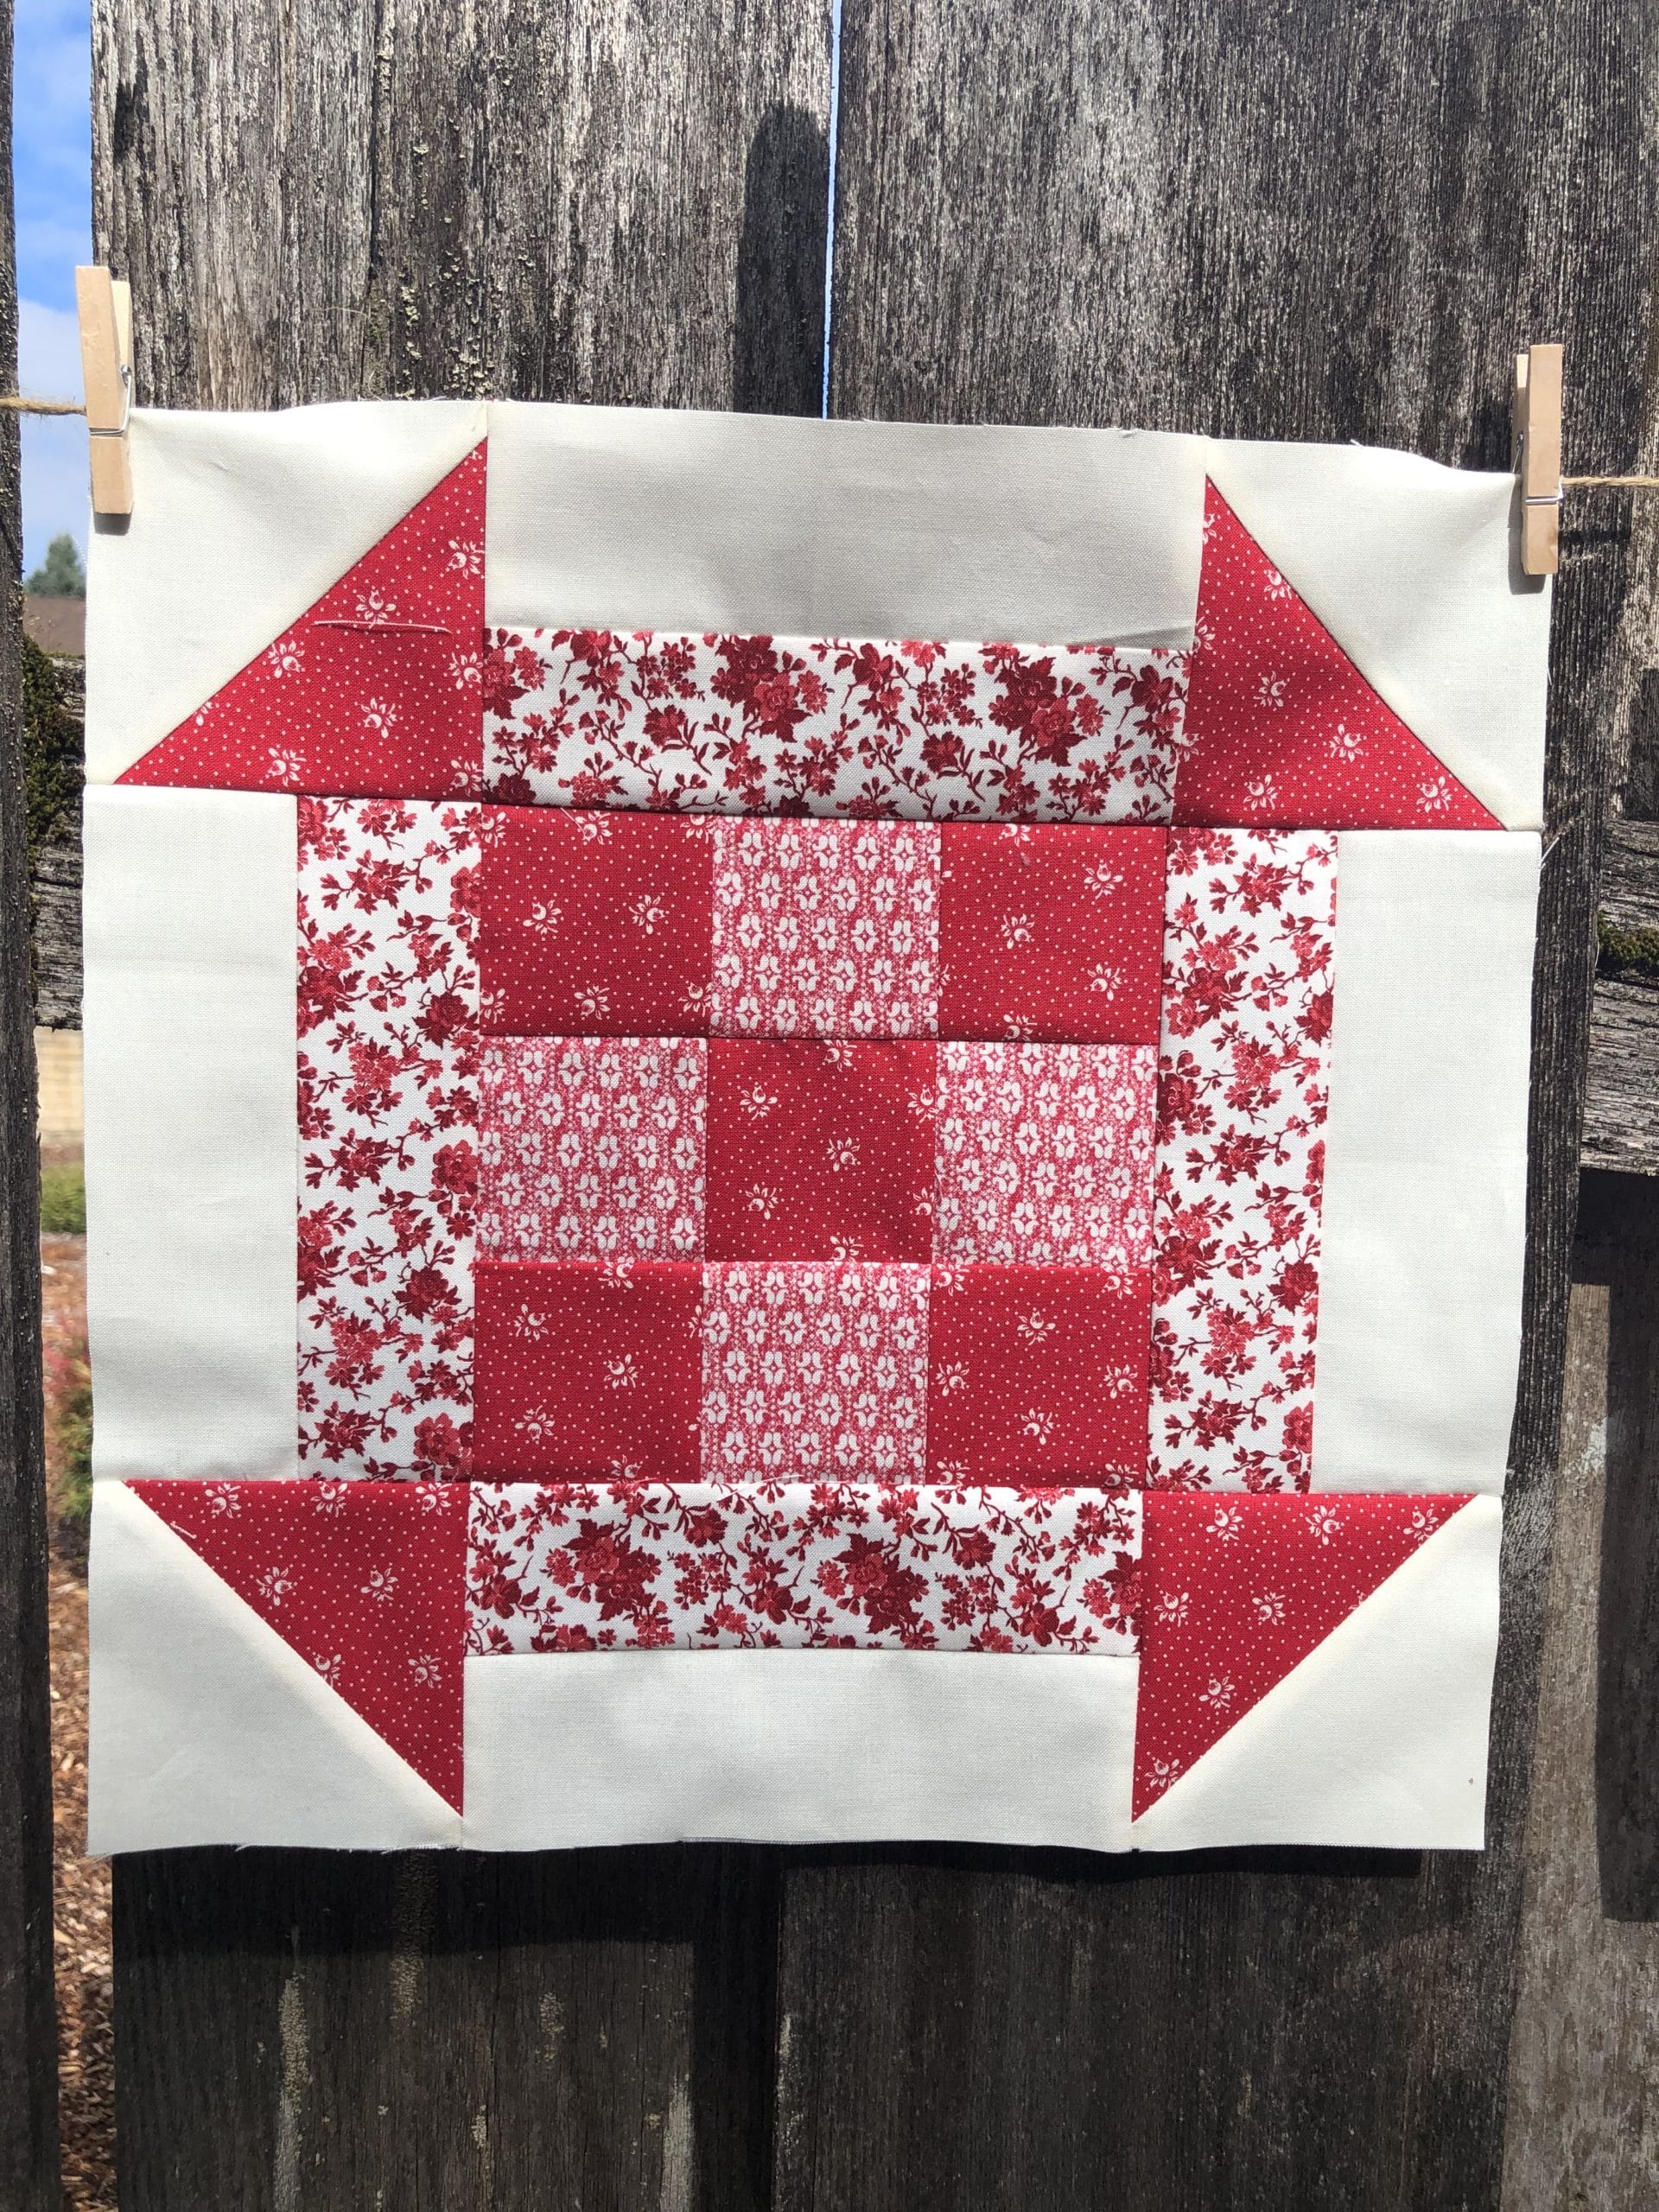
Block #15
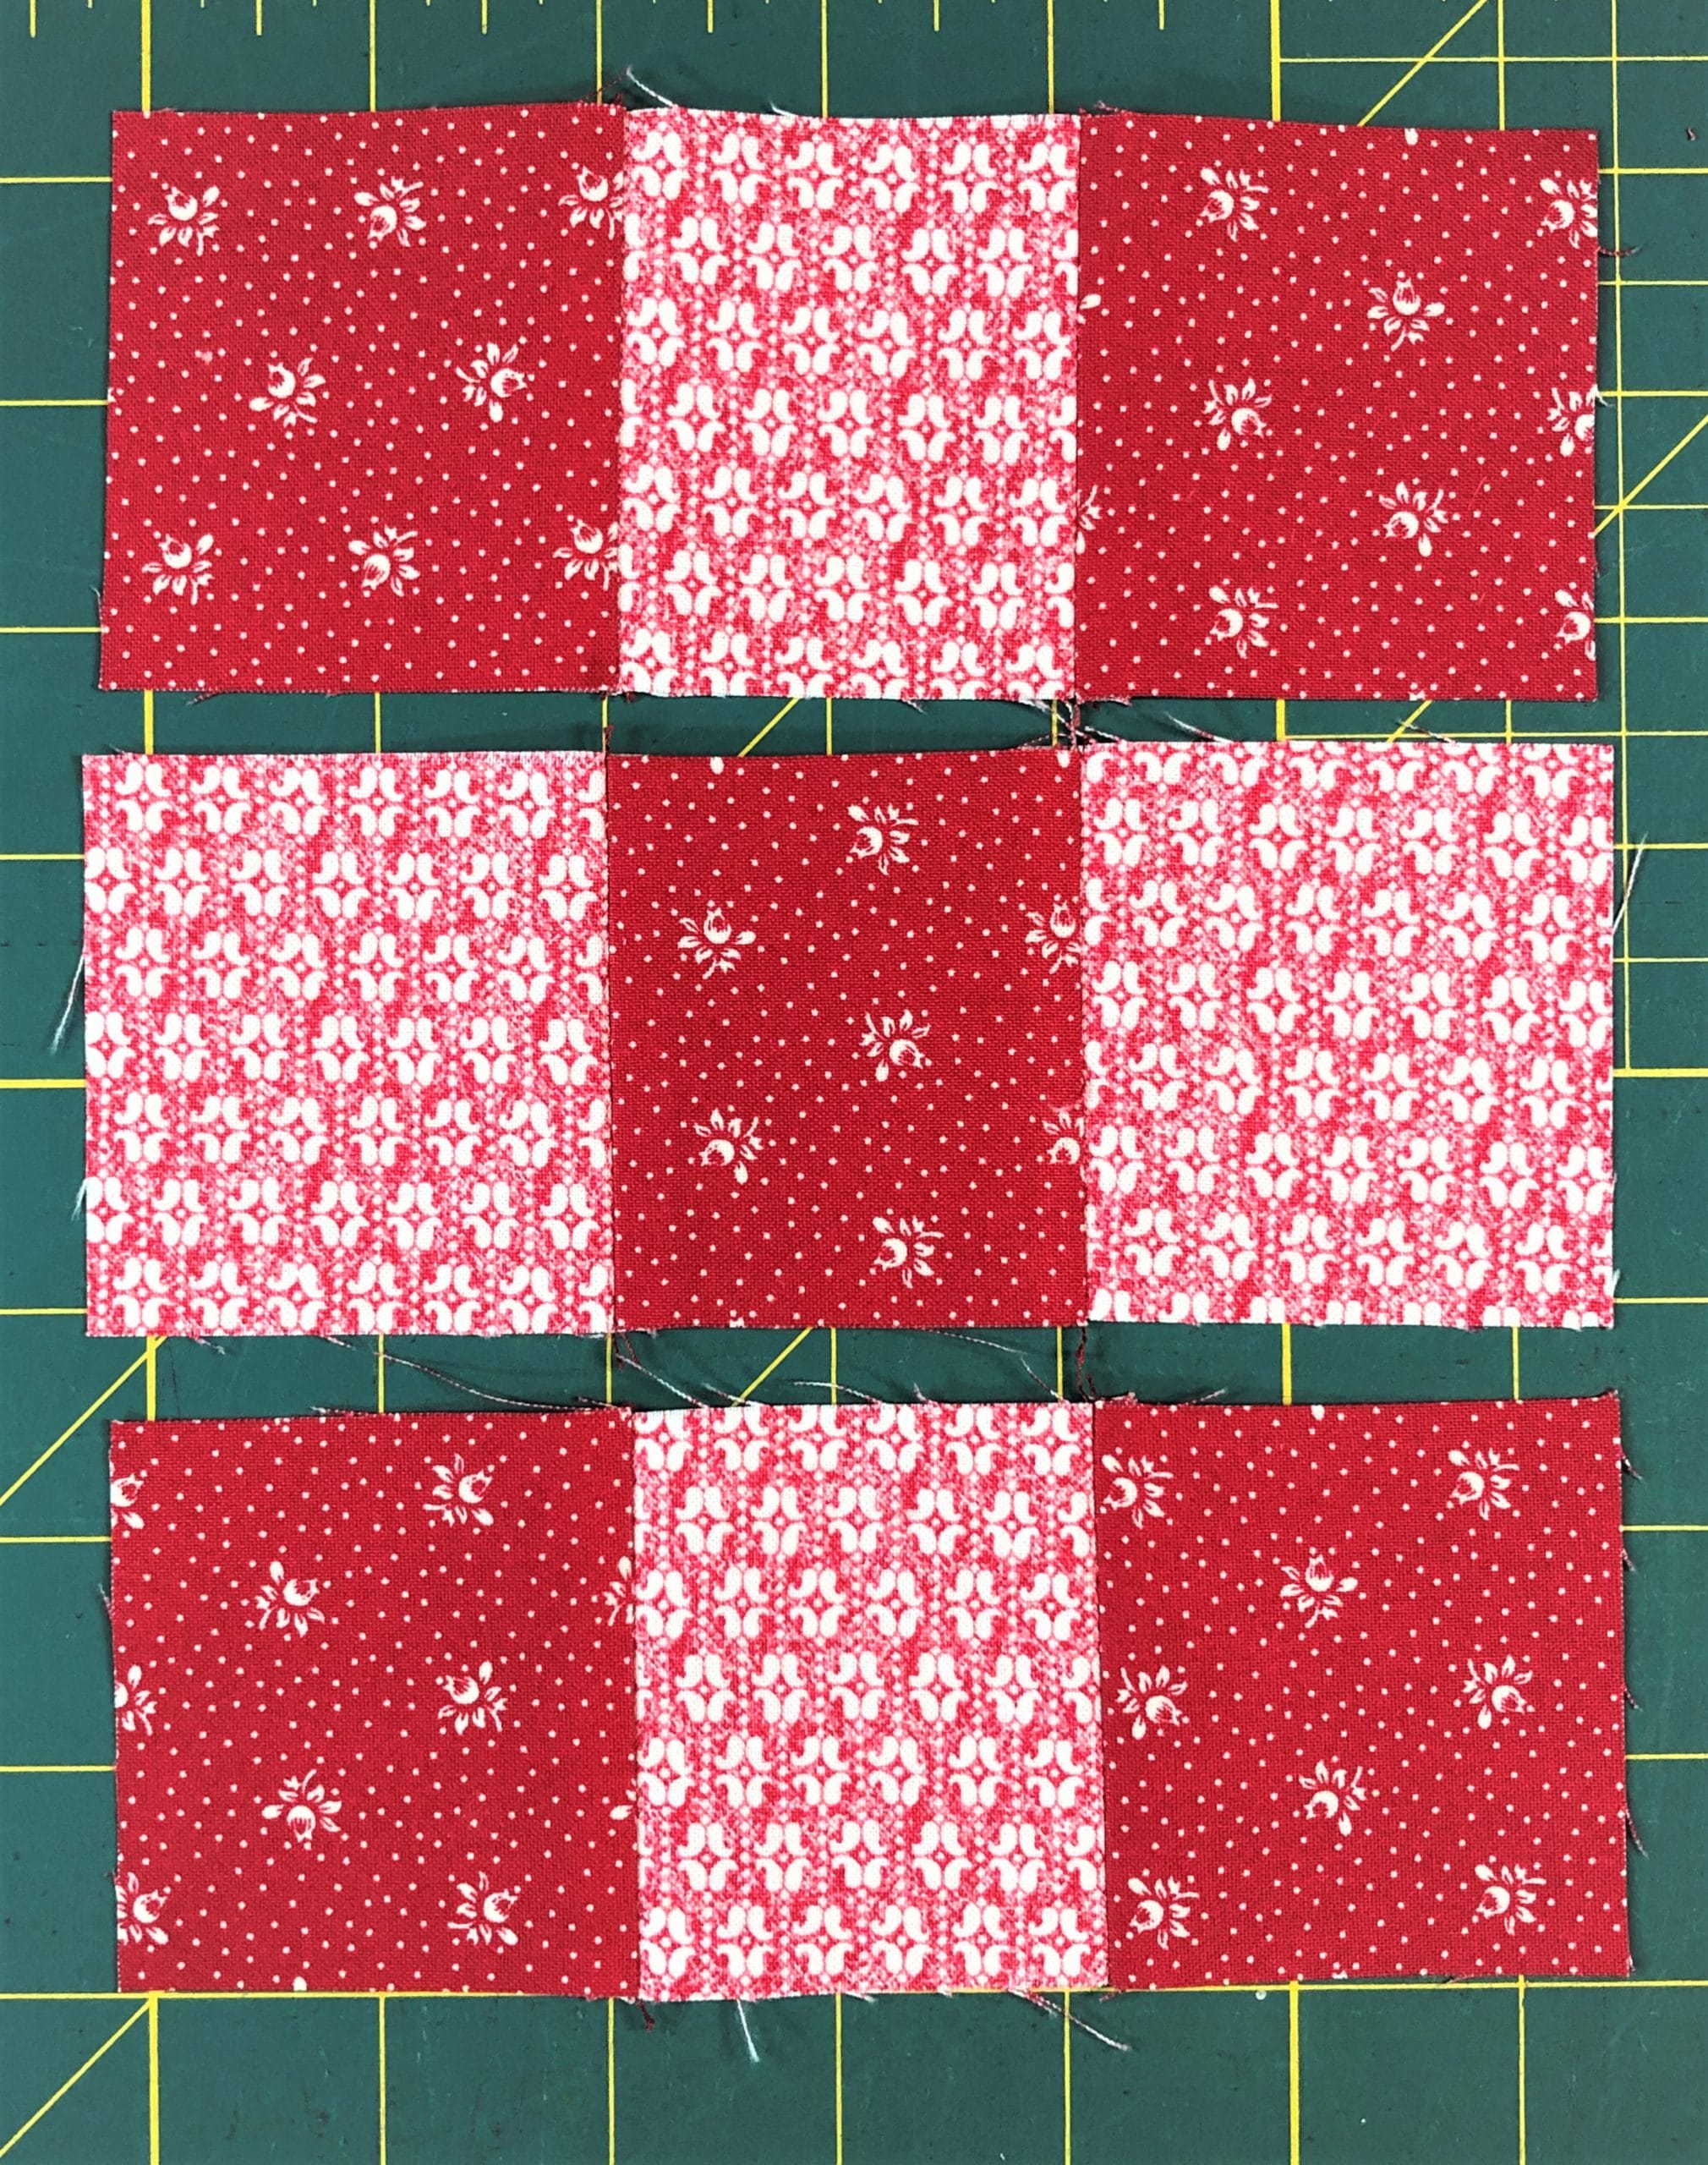
This little 9-patch Churn Dash block is a cinch to make, and goes pretty fast. Begin by sewing up a 9-patch unit for the center, and make sure it measures 6-1/2” square when done. Also make sure that you’ve ironed all your seams toward the darker A fabrics while sewing, so that everything nests together.
The rows are sewn together with all the seams pressed toward the Corsage II Red fabric.
Next you’ll make 4 half-square triangles, and trim them to be 3-1/2” square. Again, you can cut these B and F squares a smidge bigger if you like, in order to end up with the proper size when done. Somehow I got busy sewing and forgot to take pictures of the finished half-square triangles, so all I have is what you see below. I have a bad habit of doing that. Sorry!
Now you just need to sew each D strip to an E strip like I’ve shown here. The directions have you pressing your seam towards the E strip, but in this case, it doesn’t matter either way, since there isn’t anything to line it up with.
The block is ready to be sewn together now. Below you can see that I’ve sewn the three rows together and am almost done. I love that this block doesn’t have any tricky piecing or points to match up. So fun and easy!
Block #17
This block is perhaps the most challenging one of the month, not because any of the individual techniques are hard, but because it can be tricky to get everything to match up in the end. But have no fear, you CAN do it, and I will walk you through it!
Before cutting out all my pieces with this block, I used a liberal amount of starch on my fabric. This is especially helpful to use on the D and G pieces BEFORE you cut them diagonally into triangles. It will help them to keep their shape and not get distorted while sewing, which happens easily when sewing on a bias.
Another tip with this block is to REALLY make sure you’re measurements are exact as we go along, and that you’re pressing everything according to the instructions.
Step 1:
We begin with the same old steps of making our no-waste flying geese. Again, I won’t bore you with the details.
Step2:
After you’re finished with these, sew an F strip to the top of each one. And YES, even though it is counter-intuitive, press DOWN toward the flying geese unit. Trust me, it’s going to work out in the end. Make sure this unit is 4-1/2” square when done.
Here is the back so you can see that the seam is pressed toward the flying geese unit.
In step 3 we’ll make some fancy pieced triangle units. This is where that spray starch comes in handy.
Step 3:
I began by sewing the first D triangle to the right side of the B square. Make sure both units line up at the top, which will leave you a little triangle tail hanging down at the bottom.
This is how you want your pieces to line up before you flip and and pin them.
The picture below shows the first set of triangles pinned and ready for sewing.
After sewing the first set of triangles to the right side, trim those tails off before sewing on the next D square to the bottom. Again, you want to make sure that the B and D pieces line up, this time along the left side, which will leave a triangle tail on the right.
These are pinned and ready to sew along the bottom edge.
Step 4:
Once you’ve pressed these open you will want to trim off the last tail.
If you find that your triangle units aren’t straight along the D triangles, it’s okay to even them up just a tiny, tiny bit. Don’t trim too much though, or you’ll end up with a block that is too small, which will make worse.
Now you will sew these units to the G triangles, and if all has gone well, you should end up with four 4-1/2” squares. I like to starch these again at this point, just to keep them from stretching or warping.
Ready for the sewing machine!All squared up.
Step 5:
Here comes the fun/tricky part. First, you will take two of the units you made in step 3, and sew them to each side of the center A square, with the Ivory, Solid pieces on the outsides.
Step 6:
Take the blocks you made in step 4 and sew them to each side the remaining two units from step 3. If you’ve followed the pressing directions, the Potpourri Ivory B square and the Germanium Red E triangles should nest together perfectly. Pin that seam intersection first, and then work your way out to the ends of squares, easing things in as needed to make sure the tops and bottoms of the squares also match up.
Once you have the three units of the block sewn, you can pin and sew them together to finish the block. You want to continue to pin the seams together first, to make sure they will nest together and line up, and then pin the rest before sewing. The key here is to make sure the flying geese units match up where they meet up in the corners around the center square. I usually pin there first and peek to make sure it all lines up.
If you look carefully at the picture below, you’ll notice that my units on the top row don’t line up perfectly on the bottom. The difference is less than 1/8″, but it looks worse in the photo. Since the difference was very minimal (if it wasn’t I WOULD rip out and start again to protect the integrity of the piecing), rather than rip out and start over (ugh!), here’s what I did: When sewing the top row together, I made sure that the seams lined up where they should with the center unit, and that the tops also where aligned. I still wanted make sure I’d have the 1/4″ seam allowance at the triangle point on top. Then I stitched it to the middle unit as usual. When the block is completed, nobody knows but me….and everyone who reads this lol! Since the difference was minimal, it doesn’t affect the integrity of the block. Even “professionals” don’t sew perfectly. And I’m happy to show my mistakes and the tips I use to compensate. Because we ALL make them!
Phew! You did it! I hope you’ve enjoyed the challenge and are happy with the results.
Have a Happy October, and I’ll catch you all next month!
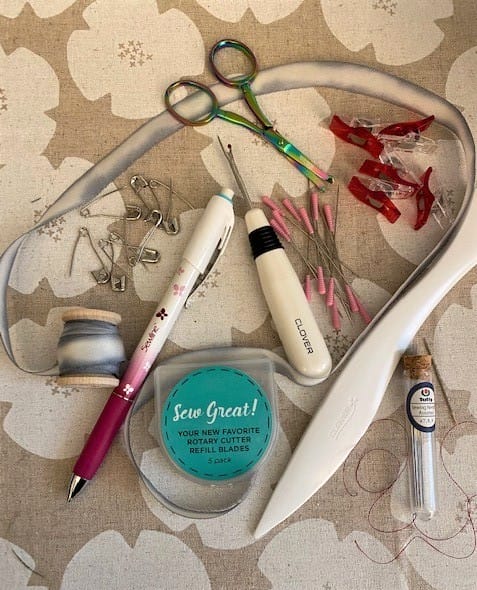
What is a notion? Essentially, a sewing notion is any tool used when completing a project that would not otherwise be classified as a sewing machine, fabric, nor thread. The world of notions is vast and can quickly become overwhelming. I’ve narrowed this down and compiled a list of multi-use essentials that are key for any successful sewing or quilting venture.
Regardless of the pattern selected, most projects rely on the same basic sets of foundation tools. These can be broken down into two flexible categories: preparation and process.
Preparation can be described as any tasks that need to be completed prior to the actual task of sewing. This predominantly encompasses cutting, but also marking and preparing the fabric for smooth stitching.
Process includes anything that takes place simultaneously with actual sewing or quilting. Ensuring fabric remains in the proper place and fixing any errors as you go are vital to the success of any creation.
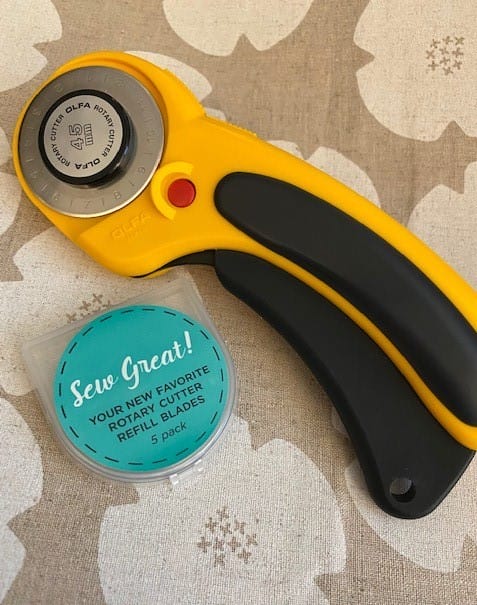
I’ll start this list off with my absolute favorite cutting tool. This is one of the few times I would recommend getting an upgraded version of something straight out of the gate- and it is so worth it. There are a huge variety of rotary cutting tools available, but this one outshines the rest by far. When not in use, the cutting tool automatically secures the blade and nestles it within the top of the tool. This safely retracts the sharp edge and keeps it from swiping against fabric or fingertips. The amount of accidents and miss-cuts I’ve avoided by this simple feature is astounding. When in use, a very lightly pressured squeeze pops the blade out and keeps it in place- ready to cut. Because the squeeze release is worked into the handle design, it takes no more pressure than just simply holding the handle. Even after hours of standing at my cutting table, the handle’s curved design helps prevent hand and wrist fatigue. It is also a delightfully bright yellow, so unless I carelessly place a pile of fabric on top of it, it is always easy to find.
While we would love for a rotary blade to last forever, they’ll eventually need to be replaced. The Sew Great refill blades are fabulously economical and vital to keep on hand when you finally realize you’ve been pushing harder than necessary to slice through that pile of half-square-triangles.
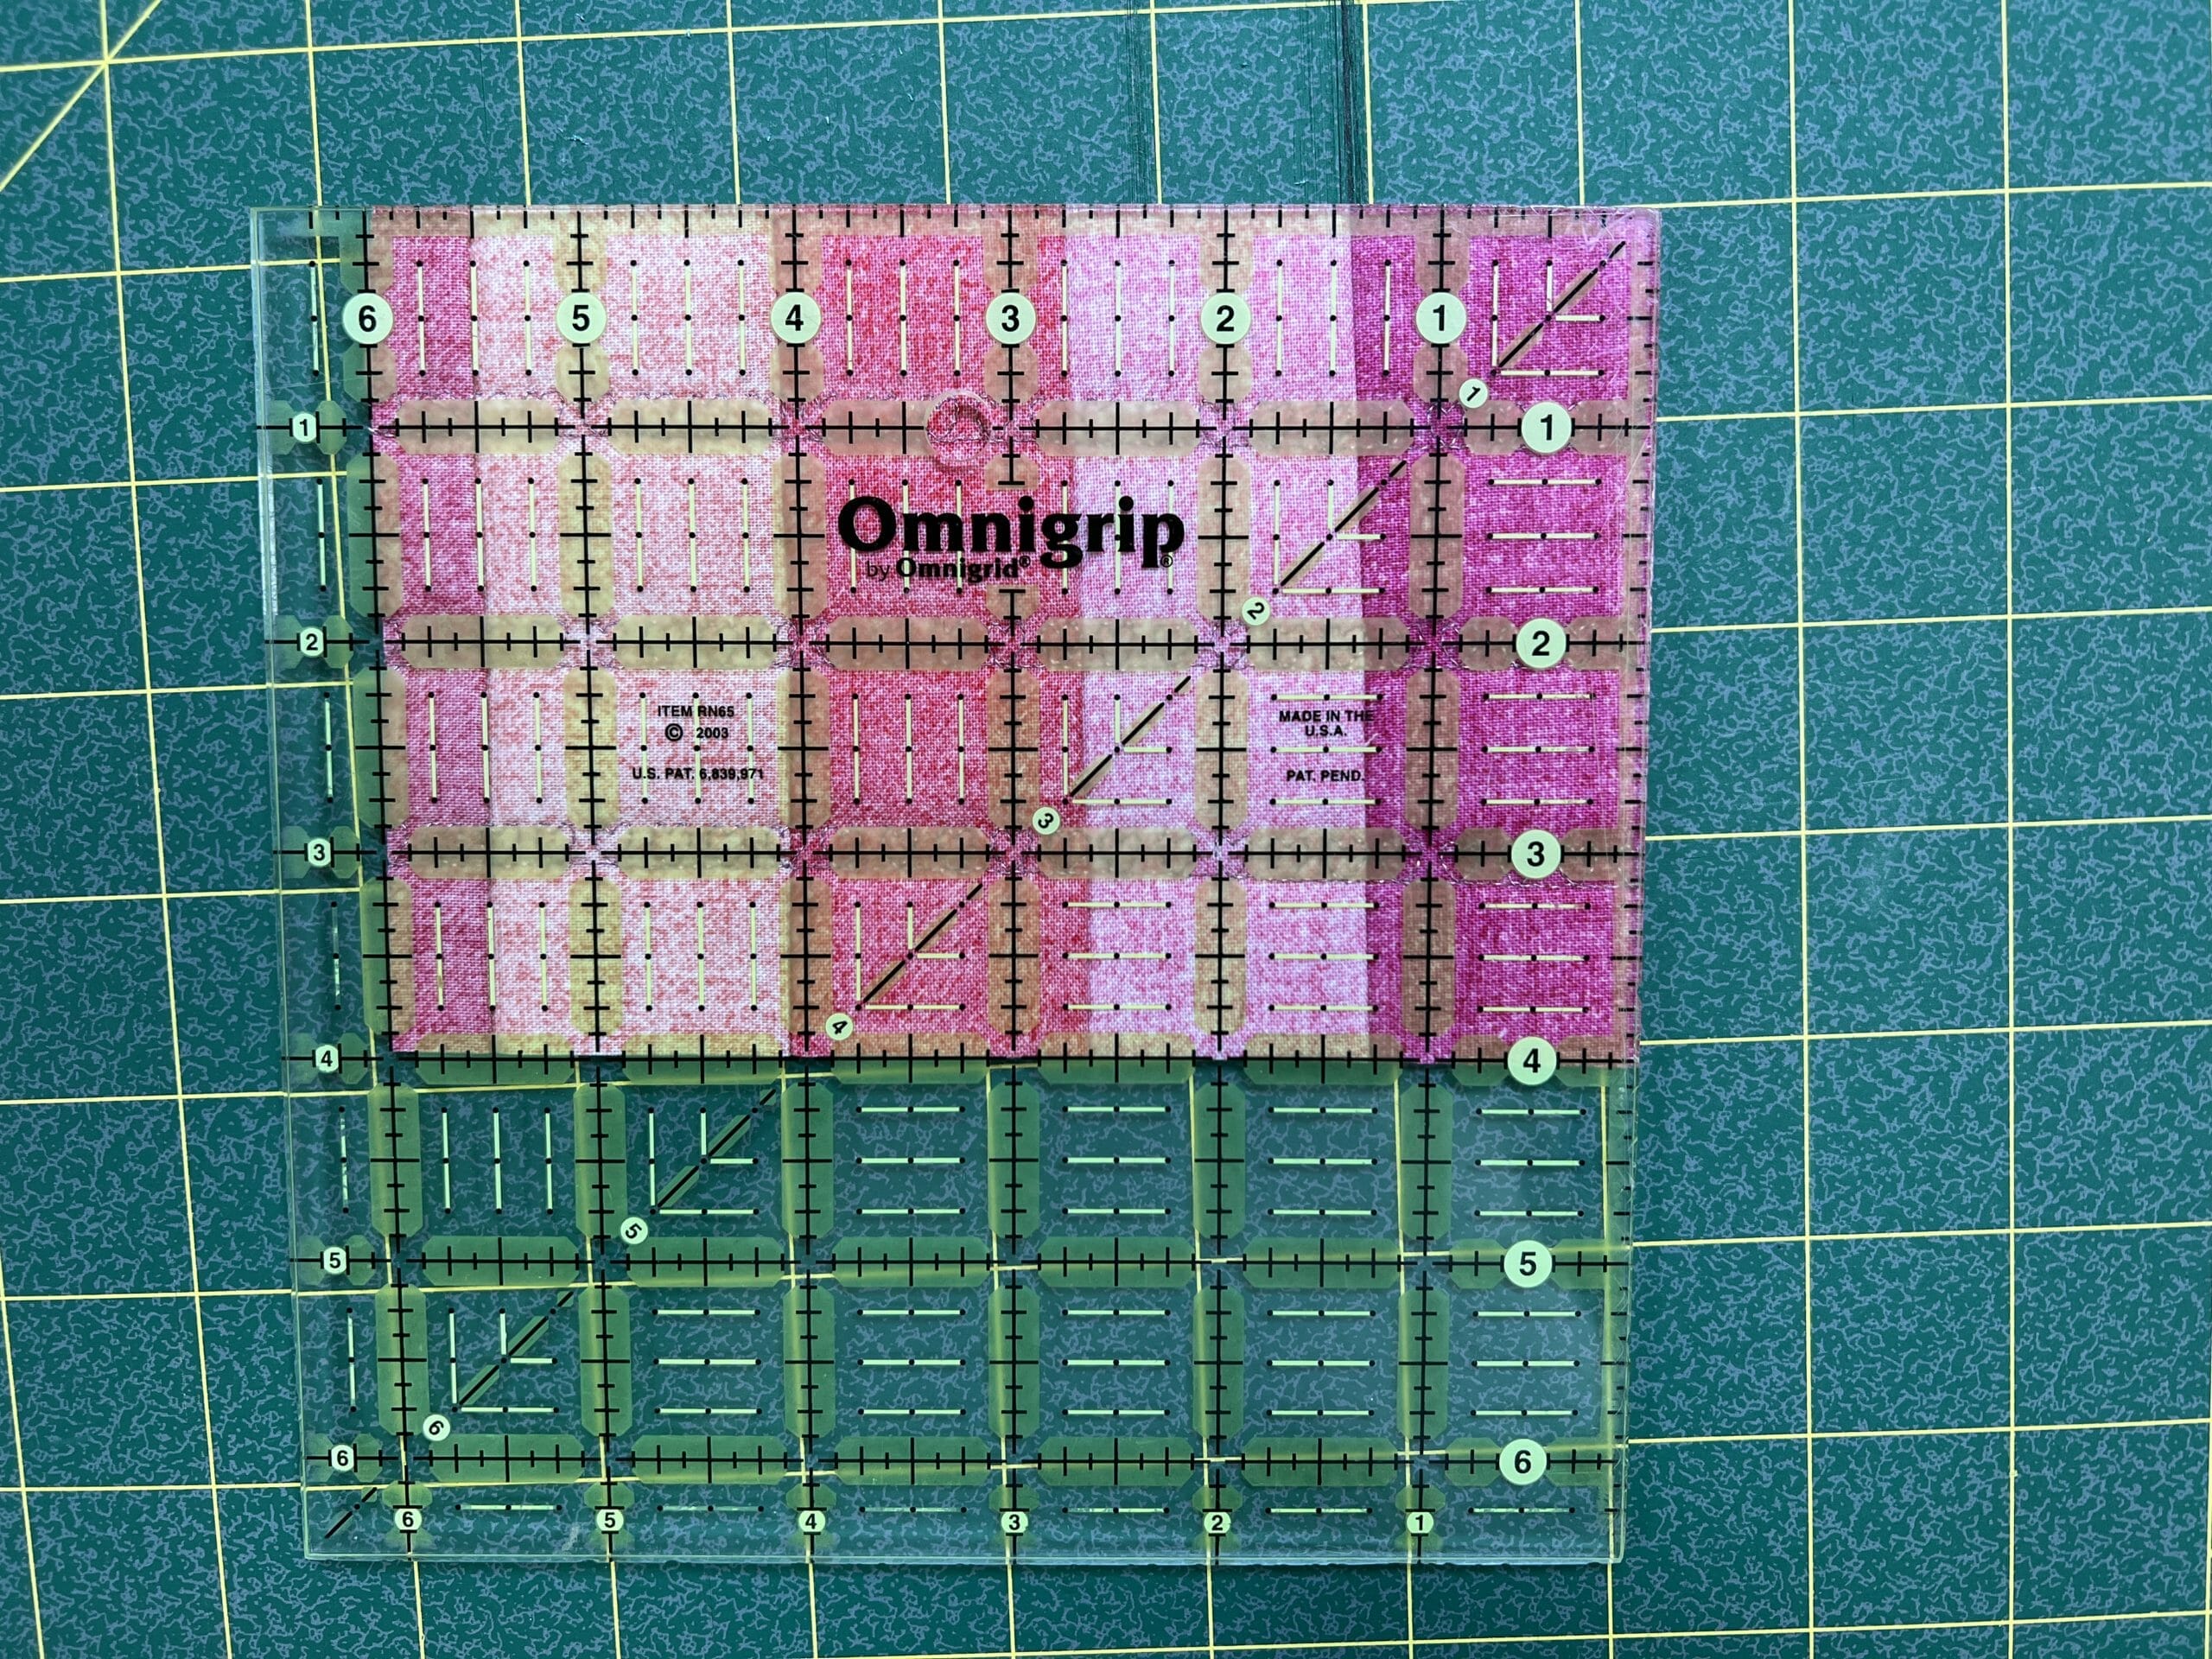
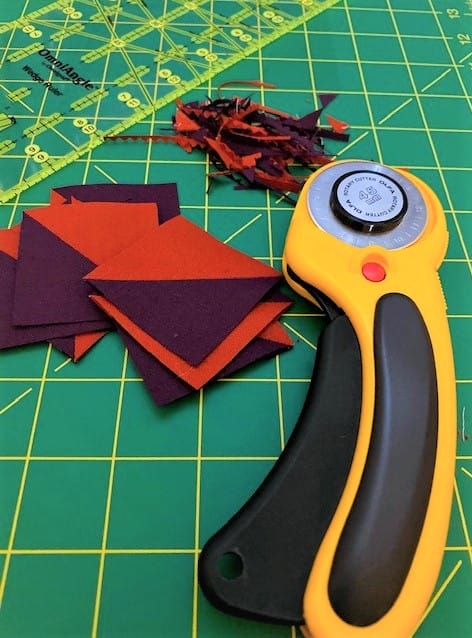
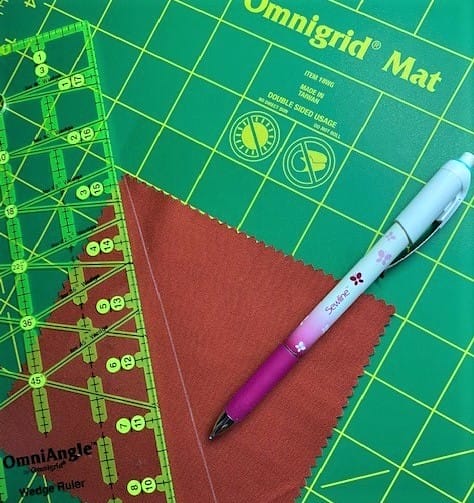
With precision measurement grids across the entire surface, in addition to multi-degree diagonal guide lines, this mat serves as a dual purpose of protecting table surfaces while also guiding rulers and cutting tools with expert precision. The 12”x18” size is absolutely ideal for fat quarters or smaller pre-cuts, but can also accommodate full yardage with a careful quarter fold. This size offers the most versatility of use without requiring a large amount of table space.
Carefully selected to coordinate with the 12”x18” cutting mat, this 4”x18” ruler makes use of the full length of the cutting space. With no need to fold, a fat quarter is truly this duo’s best friend. Once my blocks are assembled, I take them straight back to my mat and use this ruler to square everything up. The ruler acts as a guide for the rotary cutter, ensuring smooth, straight lines every time. With it’s clear design and guided grid lines, finding and staying on grain is a breeze while the 4” depth helps work as a thick pivot point to ensure enough overlap to verify all measurements are in-line and nestled right where they should be. Built-in angular guide lines creates a simple multi-purpose tool and eliminates the need for specified angle rulers.
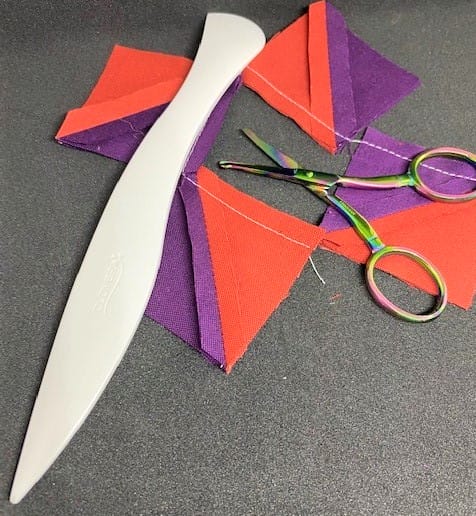
When something can be considered “multi-use,” it immediately holds a higher value within my notions box. This Point 2 Point Tuner is, without question, one of those things. A hera maker and blunt point combined, there are few projects that don’t have me reaching for this tool. When working with fabrics I don’t want to mark with a fabric pen/pencil, the flat rounded tip of this tool is sharp enough to contour creased dents that stay firm in fabric until I no longer need them. It is always my go-to for half square triangles or four-at-a-time flying geese when I need a quick seam-allowance guide as it can dent through multiple layers at once. The opposite end is absolutely perfect for poking out corners of zipper pouches or keeping your fingers out of the way when holding down binding. When ready for finger pressing, the smooth rounded end glides evenly across fabric and saves your fingertips from having to battle out the chain-piecing on their own.
The perfect companion to a set of stitch and flip strips or squares or anything else that needs an extra precise spot of placement. I also use these extensively with bag and pouch making to pre-mark pocket or hardware placements. While the refillable lead comes in a variety of colors to accommodate numerous fabric hues, I find myself reaching for the blue option more often than the others. The pencil markings wipe easily with a damp cloth or the built-in eraser. Generally, I find the damp cloth method a bit easier while also avoiding accidentally stretching my fabrics by rubbing at them. When it comes time to quilt, the pencil pairs beautifully with rulers or stencils to pre-mark stitch lines (though, I always test on a scrap of fabric first to ensure a full wipe off before starting!).
Few things are as magical as a wool pressing mat. At 9”x12”, this mat accommodates a variety of quilt blocks without needing too much movement or adjustment to get the full piece pressed. I keep this next to my sewing machine constantly – with an iron at the ready for pressing as I go. While a small iron is great for convenience, it isn’t entirely necessary as a standard house iron will do the job just fine. The magic is in the wool. It accommodates either dry or steam ironing depending on fabric type and preference. Buddy it up with a tailor’s clapper or a spare piece of wood for ultimate crispness.
While there is a bit of a division in the sewing world between clips and pins, my personal preference plops me right in the middle of this dispute. I absolutely prefer both and switch between the two for various projects. Where pins fall short, wonder clips pick up the slack and level the playing field. With these Wonder Clips, Clover has designed the ultimate tool. The clips stay put even with fine, slippery fabrics. The handy seam guide on the back allows me to double check my points before sewing. I can quickly clip my blocks and line up the ¼” seam guide on the clear bottom of the clip. Once secured, I flip open my pieces and make sure everything is precisely where I want it to be, or make any necessary adjustments without having to unpick stitches. Wonder clips are also my absolute favorite for thick seams and binding.
These heat-resistant beauties are a dream. Extra-long and thin enough to not damage fabrics, these pins are an obvious must-have for any notions box. After years of use, these pin tips have remained sharp, straight, and delightfully reliable. In tight spots where clips can become cumbersome, these pins will pick up the slack and keep everything ready and where it should be until pressed or stitched into place.
While I would love to pretend mistakes never cross my sewing table, this little seam ripper is there when I need it. The sharp edge slices smoothly through misplaced stitches as the red safety edge prevents accidental slips through the fabric. The light handle and ribbed grip makes it easy to hold for quick, precise unpicking that gets me back to my sewing table quick and efficiently.
Thread snips are vital for absolutely any project and I’m always sure to keep a set close at hand for trimming tails and tidying piecing. While these are no replacement for the rotary cutter when cutting fabric, they make quick work of small snips needed while at my machine. The blunt ends prevent accidental fabric damage and make separating chain-piecing a breeze. They’re also the cutest oil-slick color so they clearly stand out amongst the pile of threads I inevitably set them on.
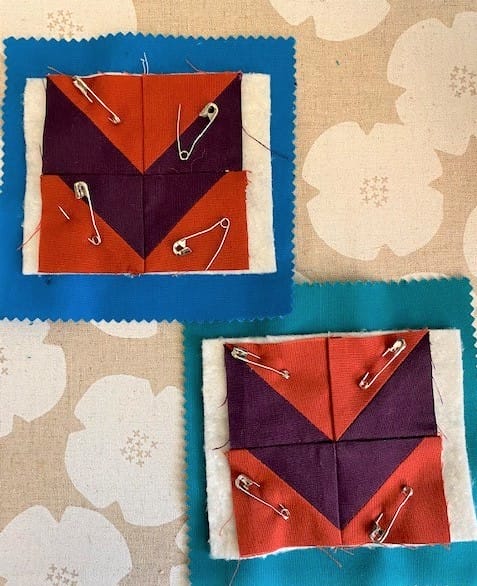
While everyone has their own personal basting preferences, these curved basting pins are my absolute favorite. At just over an inch long, they’re the perfect size for keeping that quilt sandwich in place. A single package is plenty for an entire Queen sized quilt, with a few left over for tidying up a few spots that may have been missed. They are perfectly sharp and poke through the multiple layers with ease, gliding back up to the top of the quilt with help from the curved shape. The nickel-plated steel stays sharp for years of repeat use.
Once quilting is finished and edges are trimmed, I like to machine sew my binding to the front, then curl it on over to the back (securing with wonder clips) and hand sew that final step for a nice, clean finish. Whether using a blind stitch or opting for big stitch binding, this needle assortment is ideal for accommodating a wide variety of threads. When I’m feeling overly ambitious and opt for hand-quilting, the largest size needle is perfect for the thicker, size 8 perle cotton. These needles are flexible and long, which makes a simple running stitch a breeze by catching 4-6 stitches in a single pass without dropping the backing.
One of the most delightful things about sewing is no two artists operate in precisely the same way. The only true necessary components to modern making are fabric, thread, and a sewing machine. Everything from there is built up with personal preferences and trying new things through the process of creation.
Before I discovered the Point 2 Point turner, I used a library card for creases and a capped pen for my blunt edge. Prior to discovering curved basting pins, I either used straight pins (with a lot of accidental palm-stabbing) or simply kept layers on the floor as I crouched over them, hand sewing every single quilt-line. None of these substitutions worked nearly as well as their proper notion counterparts, but they were the tools I had at my disposal as a very early beginner, just barely testing the waters.
If I were to start again today, these are the supplies I would deem absolutely essential and would have given me the opportunity to sew with confidence rather than struggling where I otherwise didn’t need to.
Looking over this list and glancing at your own collection of essential notions, are there any that you haven’t tried before, or any that you’d add? Leave us a comment below and continue the conversation!
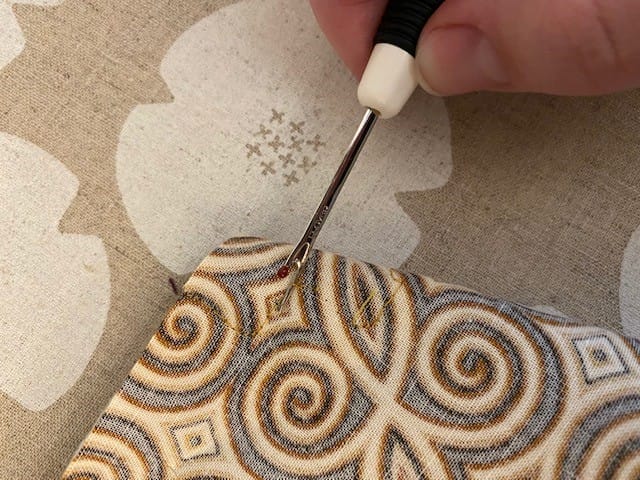
Featured Tool:Kwik Klip by Paula Jean Creations, Item #82219
What is this tool typically used for?
This tool is for anyone about to use safety pins to baste their backing, batting, and quilt top together.
Upon first glance, what were your initial thoughts?
At first glance it looks like a giant seam ripper.
How did you use it?
I took my safety pins and and inserted them down into the three quilting layers, coming up through the top. Then, I took the Kwik Klip and gently pushed the sharp end of the pin up and into the pin chamber.
What do you like best about the Kwik Klip?
I love that it was much easier to use than I thought it would be! It’s comfortable to hold, and goes pretty fast. Plus, it only took a minute to learn how to use it.
What did you like the least?
Nothing.
Why do you NEED one?
It’s fast, safe, and easy to use! Plus, it puts less stress on your hands and fingers–this would be great for anyone who has to work with a lot of safety pins on a regular basis. I recommend this tool for sure. There are also pin covers that go with this tool called Quilter’s Delight Safety Pin Grip Covers, #82218.
I use the Black Gold Needles for binding and when I am doing hand sewing. They’re great!
What do you like best about the Black Gold Needles?
I really like these needles for hand sewing and especially for binding. They are thin and glide through the fabric nicely. They also don’t bend as easily as some of the other needles I have used. Package 21201 has two needles of each size: 9, 10, and 12. It’s a great way to try them out and see what size works best–it’s usually dependent on the fabric you are sewing on and personal preference. The special black plating on the surface allows the needle to pierce effortlessly through fabric, enabling sewing with little resistance.
What did you like the least?
They are a little harder to see if you drop one.
Why do you NEED them?
Because we all need lots of needles.
Who would appreciate the Black Gold Needles – Appliqué/Sharps most?
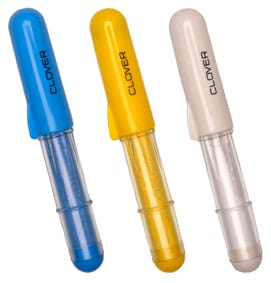
This tool helps trace lines perfectly to mark fabric prior to sewing or quilting.
What were your initial thoughts?
Well, I’ve known and used these for years now, but at first glance I thought they were just short and fat markers.
How did you use it?
First, I aligned my ruler onto my finished quilt top. I then ran the Chaco Liner down the side of the ruler to mark a straight line in preparation for quilting. You can also mark organic lines too (without a ruler).
How did using it go?
Wonderful! I love using these markers because they are chalk-based and it easily rubs off.
How long did it take you to learn how to use it?
Instantly.
What did you like best?
I love that it comes in three colors: yellow, blue, and white. No matter what color of fabric I’m working with, I can find a liner that shows up well. The chalk comes out easily and plus they are easy to hold.
What did you like the least?
There’s nothing negative to note about these liners!
Could you see another potential use for Chaco Liners?
You could use it for apparel marking and general sewing.
Why do you NEED it?
If you want a simple, easy-marking tool in a variety of colors, these Chaco Liner Pens are awesome. They are our go-to marking tool by our staff sewists.
Hanging quilts of various sizes on walls. The larger one can hang quilts between 35″ and 68″ and the smaller 21″ to 40″.
How did you use it?
I hung a 41″ square quilt in our bedroom with the larger Hang It Dang It.
How did using it go?
The Hang It Dang It does require a sleeve – which my quilt already had. The instructions were simple for centering the quilt on the rod. I did have a little trouble hanging the quilt at first. There is a grooved area nailed to the wall for the rod to clamp into. The rod fit well but the fabric of the sleeve bunched up so the quilt did not hang evenly. I found that making a small slit in the sleeve allowed the rod to fit in the clamp directly without any fabric involved.
How long did it take you to learn how to use it?
It took a bit to figure out the issue mentioned above – but overall it was quick and easy to install.
What did you like best?
One nail in the wall works for either size of hanger- and the flexibility to display wall hangings of different sizes as well.
What did you like the least?
Having to fuss a bit with getting the quilt to hang straight without bunching up the sleeve. It is so easy to fix with a little slit in the sleeve or making a two-part sleeve that it is a non-issue.
Could you see another potential use for Hang It Dang It?
It will hold up to 40 lbs so perhaps there are other applications, such as tapestries or banners.
Why do you NEED it?
The Hang It Dang It is a quick, flexible, and easy way to hang quilts up to 68″ wide. It is especially useful for quilters who like to change their wall hangings with the seasons, as new projects are completed, and with changes in decor. Having the two sizes increases the possibilities.
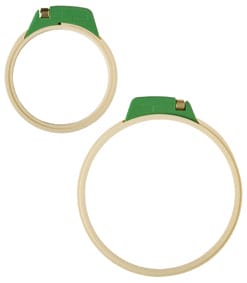
Keeping your fabric taut while you embroider. There is both a small (4-3/4″) and large (7″) size.
Upon first glance, what were your initial thoughts?
It has a very sturdy appearance; it’s made of thick plastic with a bulky, metal screw.
How did you use it?
I loosened the metal screw to separate the two hoops, which left me with an inner and an outer hoop. Then, I placed my fabric evenly over the inner hoop. The outer hoop was placed around the inner hoop and I pulled my fabric to tighten it. I adjusted the screw to keep the hoops and fabric tight and in place. Once it was set up, I was able to embroider a design onto the fabric.
How long did it take you to learn how to use it?
It took no time at all to learn to use. It is used exactly like any other embroidery hoop except it is sturdier and more solid.
What did you like best?
I liked how easy it was to tighten the screw, it is a very large metal screw. And I liked how it kept my fabric very secure and in place.
What did you like the least?
I was hesitant to use a plastic hoop, because I thought the fabric would slip – but it did not! I liked everything about this embroidery hoop.
Why do you NEED a Clover Embroidery Hoop?
You need it because it takes out all the problematic tension issues I’ve experienced with inferior hoops. It also made transporting my embroidery work easy because I could throw it in my bag and not worry about the hoop falling apart. It kept my work in place and very secure.
Who would appreciate a Clover Embroidery Hoop most?


 Tutorials
 1.26.2022