Tag Archives: sewing

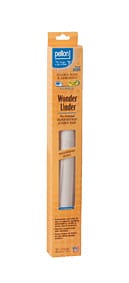
Wonder Under
1.17.2017

Featured Tool: Wonder Under by Pellon Consumer Products, Item #21206 

What is this tool typically used for?

Wonder Under is ideal for applique–it allows fabric to maintain its soft feel after fusing. It is also machine stitchable, fuses easily in seconds, and bonds to fabric or any porous surface.

How did you use it?

Since it is so light weight, it is really easy to trace your applique shapes. You need to remember to trace the mirror image of the pieces especially when applique letters. Because it comes on a roll, you can applique large pieces with only one sheet, which you can do when you are using the pre-cut sheets. Sometimes the paper can be hard to peel off especially on small pieces. I find scoring the back of the paper with my scissors really can help.

How long did it take you to learn how to use it?

The fusible part is super easy to use, but if you are having a hard time peeling off the paper, make sure you let it cool first.

What did you like best?

It is light weight so when you are sewing through it for finishing the edges or quilting it is easy and doesn’t gum up your needle. Also it is nice if using several different layers of applique.

What did you like the least?

Sometimes the paper is a little difficult to peel off, but for me the quality and light weight of the fusible is really worth a little difficulty.

Could you see another potential use for Wonder Under?

It can be used any where you would need a double sided fusible, including some crafts.

Who would appreciate Wonder Under most?

These are perfect for:

  • Intermediate and expert quilters
  • Someone acquiring the basics

YoYo Makers
12.13.2016

Featured Tool: YoYo Makers by Clover, Item # 81857, 81858, 81837, 81838

What is this tool typically used for?

The YoYo Makers are for making cute, sewn (cinched) fabric embellishments.

What was your first impression of Clover’s YoYo Makers?

They look like Mickey-Mouse ears!

How did you use it?

You cut fabric to fit 1/4″ around the plastic yo-yo maker, place the fabric inside, and snap the lid on. Yo-yo makers are a guide for stitching around your fabric so that when you cinch or pull the thread to tighten your yo-yo, the stitches are even. It also provides you something to hold onto. You’ll end up with a very nice yo-yo.

How long did it take you to learn how to use it?

Just a minute or so!

What did you like best?

I love using these yo-yo makers, it’s pretty fast and you can really crank out some yoyos in no time at all. There are four different sizes available: extra small, extra large, small, and large.

What did you like the least?

Nothing negative stood out to me about this tool.

Why do you NEED it?

They are FUN to use and super easy.

Who would appreciate YoYo Makers most?

These are perfect for:

  • Beginner, intermediate, and expert quilters
  • Someone acquiring the basics

Double-Sided Multi-Craft Carrier
11.15.2016

Featured Tool: Double-Sided Multi-Craft Carrier by Creative Options, Item #82068

dsmccarrier

What is this typically used for?

This is a carrier for quilting and craft supplies.

What was your first impression of the Double-Sided Multi-Craft Carrier?

What a great way to store our Essential Threads!

How did you use it?

Storing my assortment of Essential Threads spools.

How long did it take you to learn how to use it?

Instant – open it, put in spools, and close it up.

What did you like best?

Double-sided = double the storage. It is see-through so I can see what colors are in it. I have two carriers and my threads are arranged by color (like a rainbow). It is easy to see which colors are in each side. They can stack or sit upright. It closes securely and has held up to lots of use.

What did you like the least?

I need a third one – but that is not the carrier’s fault!

Why do you NEED it?

It stores my thread safely and easily. I love that my thread is now protected from light and dust.

Could you see another potential use for the Double-Sided Multi-Craft Carrier

It is a multi-craft carrier so other craft supplies could be stored in it. I am thinking about getting one to store my spools of pearl cotton and maybe embroidery threads. Perhaps scraps, EPP pieces like hexagons, or cut strips of various sizes for a Log Cabin or other scrappy quilts.

Who would appreciate the Double-Sided Multi-Craft Carrier most?

These are perfect for:

  • Beginner, intermediate, and expert quilters
  • Embroiderers
  • Someone acquiring the basics

Frixion Erasable Gel Pens
10.18.2016

Featured Tool: Frixion Erasable Gel Pens by Pilot, Item #82263, 82264, 82262

frixion

What is this typically used for?

Writing on (and erasing off) fabric.

What was your first impression of the Frixion Erasable Gel Pens?

I saw these demoed at a quilt show and immediately bought a pack!

How did you use them?

You think you have to use an eraser or the eraser on the back of the pen, but NO–it’s removed by friction (and heat) such as a hot iron!! The man that demoed it wrote some scribbles on some fabric and then ran over it with an iron and it disappeared! It was MAGIC!!

How did using them go?

I love them! I used them when I long arm quilt. I don’t mark out everything but, for example, if I’m planning on making a feather on a border, I don’t mark out the whole spine. I only mark out the outer edge points of where the spine should go, so maybe 2″ from the edge and then 8″ up and 2″ from the other edge and 8″ up etc. Then after I quilt the quilt I just iron over the feathers and the markings disappear.

How long did it take you to learn how to use them?

No time at all.

What did you like best? The least?

I liked how I can erase it easily and don’t need water like other pens. I think I only had one dark fabric not work well, but dark fabrics are hard to mark on in general. There was one fabric where I had a very faint line afterwards. I have heard that if you freeze the fabric the lines will show up again, but I haven’t tested that idea yet.

Why do you NEED to try them?

If you machine quilt, it’s great for marking

Who would appreciate the Frixion Erasable Gel Pens most?

These are perfect for:

  • Beginner, intermediate, and expert quilters

Bloc Loc HST Ruler
10.4.2016

Featured Tool: Bloc Loc Half Square Triangle Ruler by Bloc Loc

Bloc Loc HST

What is this typically used for?

Squaring up half-square triangles (HST) to the correct size.

What was your first impression of the Bloc Loc Half Square Triangle Ruler?

I was intrigued by the idea of a specialized ruler for HSTs.

How did you use it?

I started by using it to square up half-square triangles in a mini quilt. I was impressed how well it helped me keep the diagonal seam exactly in the corner which is important for precise piecing and points.

How long did it take you to learn how to use it?

Not long at all. It was easy to learn and get in a rhythm of cutting.

What did you like best?

The way it helped keep the diagonal seam exactly in the corner. The markings are clear and easy to read. I make my HSTs 1/8″ larger than the math requires; it helps square-up precisely to the unfinished size for piecing. You can make various size HSTs with one ruler (in 1/2″ increments).

What did you like the least?

I bought the 6-1/2″ Bloc Loc first, knowing I could trim many sizes of HSTS 6-1/2″ square and smaller. I wish I had bought the set of 3 because I prefer to use the size closest to the size of HST – I have them all now!

Why do you NEED it?

Precisely trimmed HSTs enable a quilter to maintain sharp points and straight diagonal lines between blocks – Bloc Loc does a great job helping me accomplish that. HSTs are in so many quilt designs.

Could you see another potential use for the tool?

Mainly for squaring-up HSTs but I do that a lot! It is now my favorite way of trimming HSTs.

Who would appreciate the Bloc Loc Half Square Triangle Ruler most?

These are perfect for:

  • Beginner, intermediate, and expert quilters
  • Any quilter who is intimidated by half-square triangles


LED Needle Threader
9.27.2016

Featured Tool: LED Needle Threader by Dritz, Item #82260

LED Needle Threader

What is this typically used for?

Increased visibility while threading needles.

What was your first impression of the LED Needle Threader?

“This looks so sturdy!”

How did you use it?

You put the filament part through the eye of your embroidery needle. The button illuminates a small LED light at the end so you can see better. Then, you insert your embroidery strands through the filament. Pull the LED needle Threader back out of the needle and voila, the needle is threaded.

How long did it take you to learn how to use it?

It was very intuitive!

What did you like best?

The LED light! It’s a really nice feature. I really love this tool.

Why do you NEED it?

When you are working with multiple embroidery thread colors and switching between colors a lot, this tool saves you time and frustration. Once you start using the needle threader it will become habit and it makes embroidery or handwork more enjoyable.

Who would appreciate the soft comfort thimbles most?

These are perfect for:

  • Anyone using a sewing needle by hand
  • Beginner, intermediate, and expert quilters
  • Embroiderers, paper-piecers, hand crafters
  • Anyone acquiring the essential quilting/sewing tools

Thimble Pad
8.16.2016

Featured Tool: Thimble Pad by Colonial Needle, Item # 80561

thimblepad

What is the Thimble Pad typically used for?

This is a thimble for people who hate wearing thimbles.

Why did you decide to give the Thimble Pad a try?

I normally can’t use thimbles. I have never been able to find one that is comfortable and usable. I can get by with one for about five minutes and then I get frustrated, take the thimble off, and hope my finger callous holds up.

What was your first impression?

“Ugh, I have to use something let me give this a try.”

What was your experience using the Thimble Pad like?

I was on a road trip binding a rather large quilt when my finger callous gave out and it was becoming quite painful to bind the quilt. Luckily, we drove by a small quilt shop and I had to get something. They had these little leather-like discs (the Thimble Pad). Many had recommended using these since I don’t like thimbles, so I thought it is better than nothing at this point. I LOVED it! I stuck it on my middle finger where I push in my needle and it was perfect. It was comfortable and the adhesive lasted all day even though I took it off and on from time to time. I have tried other adhesive disc thimbles, but this is by far my favorite.

How long did it take you to learn how to use it?

I had to position it a few time to find the “sweet spot,” but once I found the right spot for me, it was easy and natural to use.

What did you like best? Least?

I like the flexible to mold to my finger curve. The adhesive lasted all day, even through hand washing. The only thing I regret is that I didn’t try these sooner. Sometimes my thread would wrap around the disc, but it saves my fingers.

Why do you NEED it?

If you don’t like using thimbles, you need this. It will save your fingers.

Could you see another potential use for the tool?

The Thimble Pad also works great to grip a needle that is hard to pull through.

Who would appreciate the Thimble Pad most?

This would be perfectly suited for:

  • Beginner Quilters
  • Intermediate Quilters
  • Expert Quilters
  • Embroiders
  • Paper-piecers
  • Someone acquiring the “basics”

Fons & Porter Mechanical Fabric Pencil
7.12.2016

Featured Tool: Mechanical Fabric Pencil by Fons & Porter, Item # 81861Mechanical Fabric Pencil

What is the Mechanical Fabric Pencil typically used for?

This pencil allows you to make washable and erasable marks on dark fabric. I used it to mark my seam allowance and keep a steady line while hand-sewing.

What was your first impression?

“It’s a mechanical pencil–how is this supposed to leave any mark on fabric?”

What was your experience using the Mechanical Fabric Pencil like?

It was awesome! The white lead in particular made following everything so much simpler–the line was right there! It also comes with a darker lead color for when you want to use it on lighter fabrics.

How long did it take you to learn how to use it?

Not long at all. The first time using it, I just went over the original line I had made to ensure I was good to go.

Why do you NEED it?

It makes hand sewing SO MUCH easier! This helps keep your lines straight and consistent, which is absolutely necessary when hand-sewing. You could also easily use this to mark fabric for quilting and embroidery–it’d be a handy tool to have in your sewing room.

Who would appreciate the Simple Foundations Translucent Vellum Paper most?

This would be perfectly suited for:

  • Beginner Quilters
  • Intermediate Quilters
  • Expert Quilters
  • Embroiderers
  • Paper-Piecers

Clover Mini Iron
6.28.2016

Featured Tool: Mini Iron by Clover, Item # 81912

Clover Mini Iron

What is the Mini Iron typically used for?

It’s handy for applique and crafting; I use it for freezer paper appliqué and pressing small pieces.

What was your first impression?

I feared it wouldn’t work. It’s just so small I didn’t think it would get hot enough.

What was your experience using the Mini Iron like?

It is extremely effective in making the seam allowance on even the smallest pieces stay and the folded edges nice and crisp, and smooth. Just what you need for beautiful appliqué. I now use it all the time for preparing freezer paper appliqué pieces and liquid starch.

How long did it take you to learn how to use it?

The technique takes patience to perfect, so I will say a few days.

What did you like best?

I loved how well it pressed, but especially the smooth edges of even the smallest of appliqué pieces. I will only use this method of appliqué and the Clover Mini Iron.

What did you like least?

The iron gets extremely hot so I have to be very careful not to burn myself.

Could you see another potential use?

It would be fabulous for making doll clothes or having to press in very small places on garments.

Why do you NEED it?

I wouldn’t appliqué without it. If I don’t have this iron, I don’t appliqué (and I love to appliqué).

Who would appreciate the Mini Iron most?

These are perfect for:

  • Intermediate, and expert quilters
  • Paper-piecers
  • Those making small garments (such as doll clothes)

Pssst:

Want to protect your surfaces when using the Mini Iron? Try the Mini Iron Wooden Holder, available here.


Dritz Needle Storage Tubes
5.24.2016

Featured Tool: Needle Storage Tubes by Dritz, Item #82338

Dritz

What is this typically used for?

This tool is used to store and dispense all of your needles.

What was your first impression of the needle storage tubes?

How cool! It looks helpful in keeping me organized, and definitely clever!

What was your experience with them like?

I currently have my needles in wooden tubes right now and all the sizes are mixed up between two wooden tubes. I can’t see them either. With these tubes, I’m going to be able to re-organize all my needles! Wahoo! I can’t wait because I have needles for appliquéing cotton and needles for wool appliqué and ones English paper piecing, not to mention all the regular needles in my collection.

How long did it take you to learn how to use it?

No time at all–I figured it out immediately.

What did you like best?

I like that the needles don’t all come out at once and are contained by the magnet. For me, tools must fill a measurable need for me to buy them and this one definitely does!

What did you like least?

It takes some skill to manage the little needles. I threw the tube with the same force I use for the larger sizes and all the little needles flew out of the tube and all over my desk!

Why do you NEED it?

I do a lot of handwork, and I do mean a LOT! It is so frustrating to go through my wooden tubes trying to find the perfect needle. I also don’t know what sizes I have because once I’ve removed the needles from the original packaging, there is no way to tell. These tubes come with labels! Now I know what to buy next.

Who would appreciate these the most?

These are perfect for:

  • Beginner, intermediate, and expert quilters
  • Embroiderers, paper piecers, or anyone using hand or machine needles
  • Anyone acquiring the essential quilting tools