Tag Archives: Block of the Month

Seasons BOM Month #2
8.10.2020

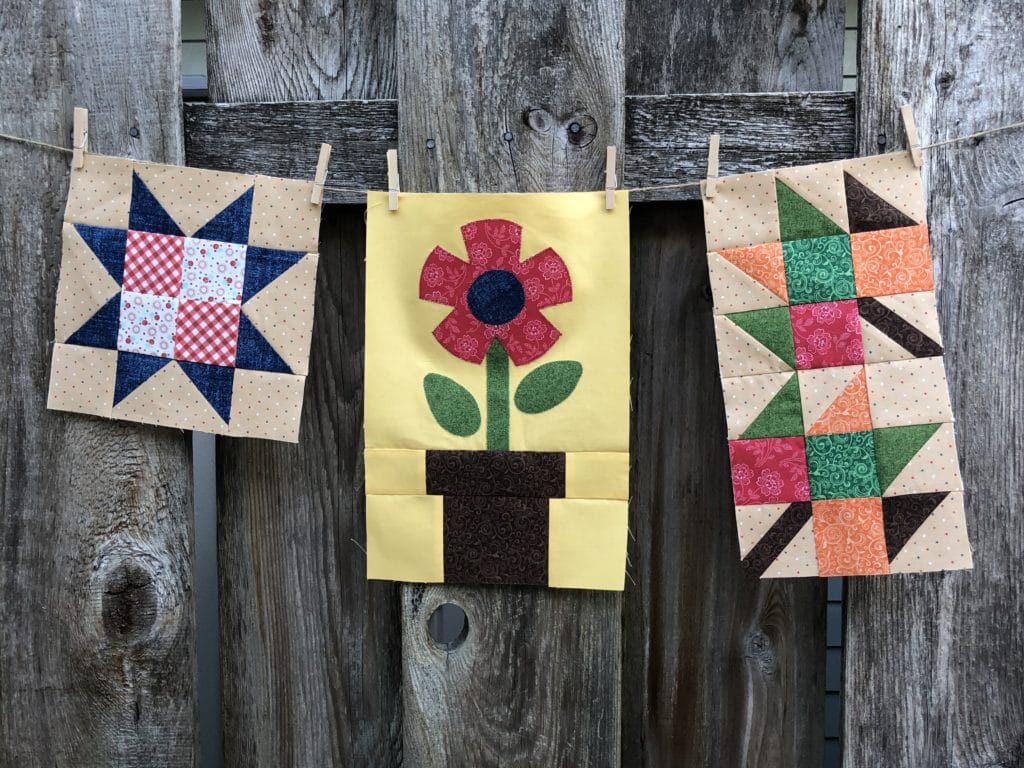
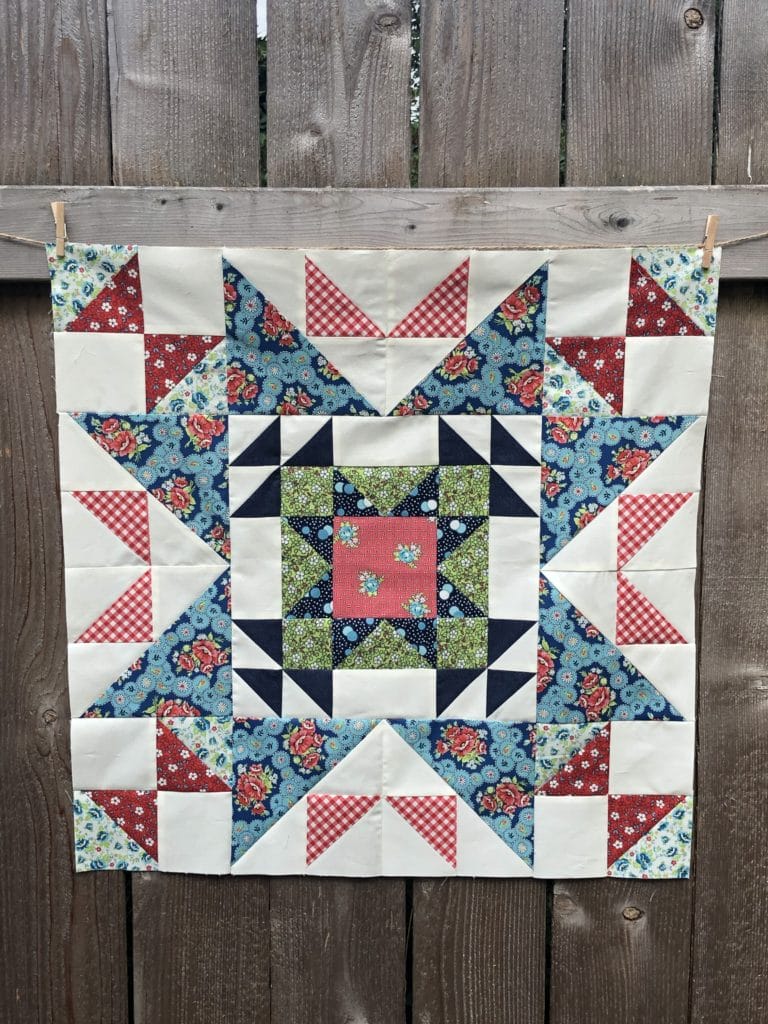
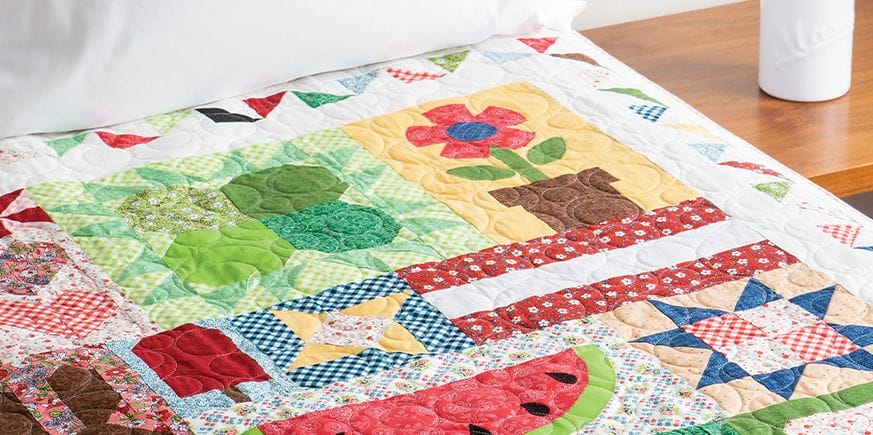
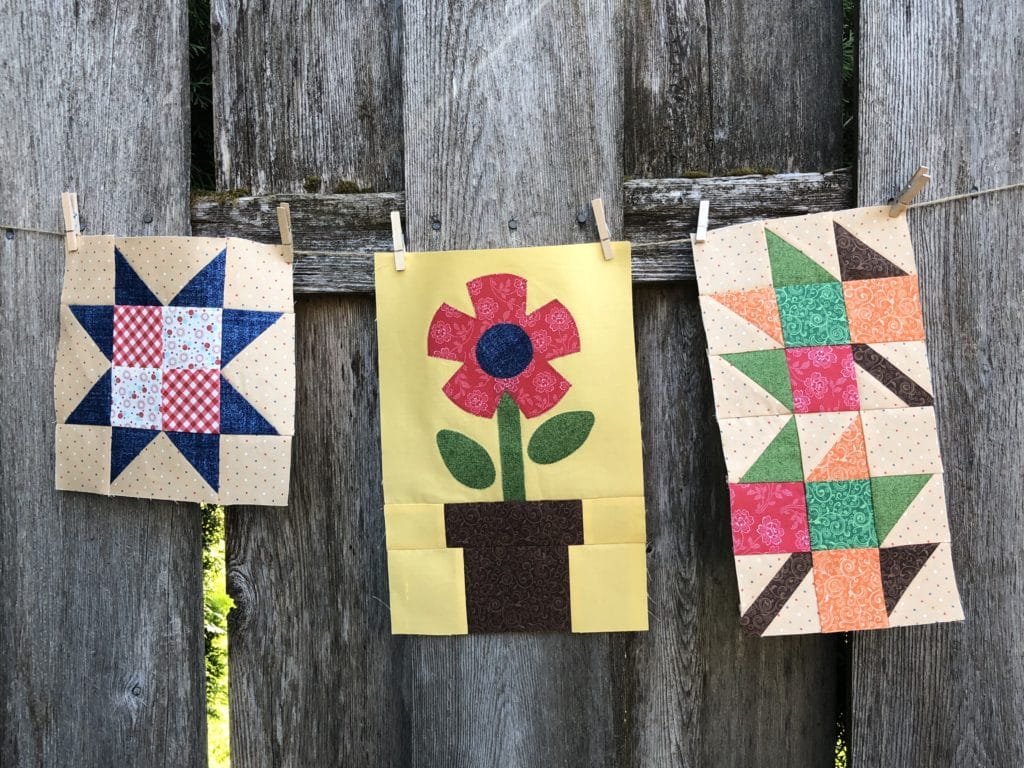
I’m so excited to get going on the second installment of the Season quilt! This month we will sew another three blocks. Two are entirely pieced, and one has some applique. Let’s get started!

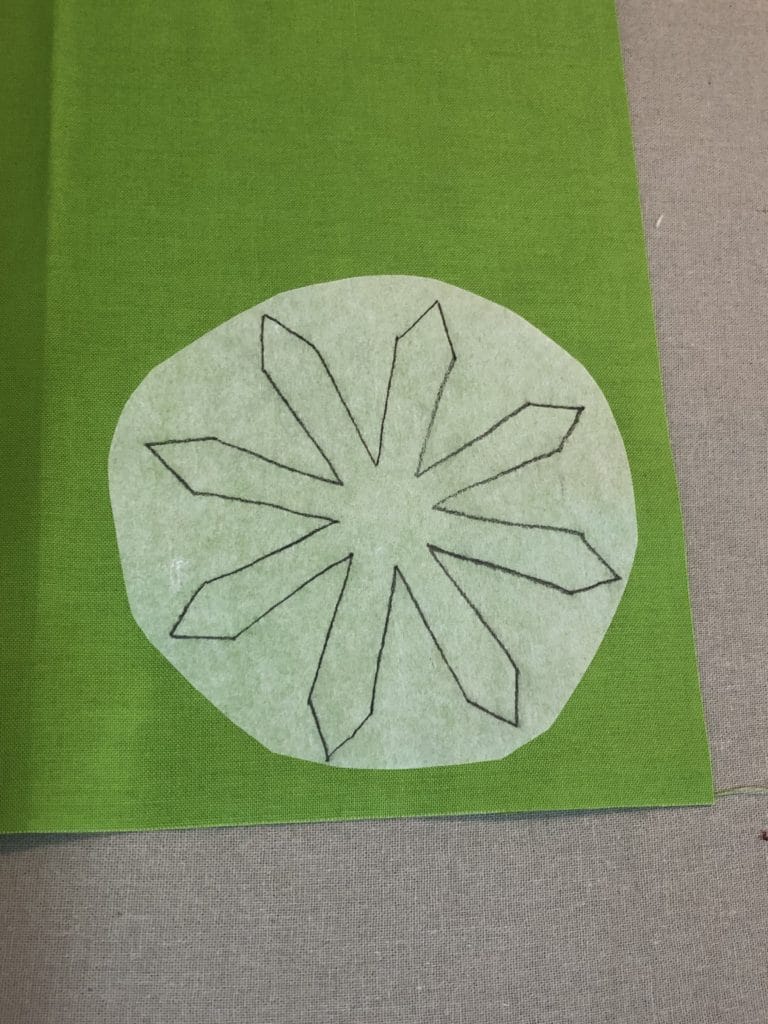
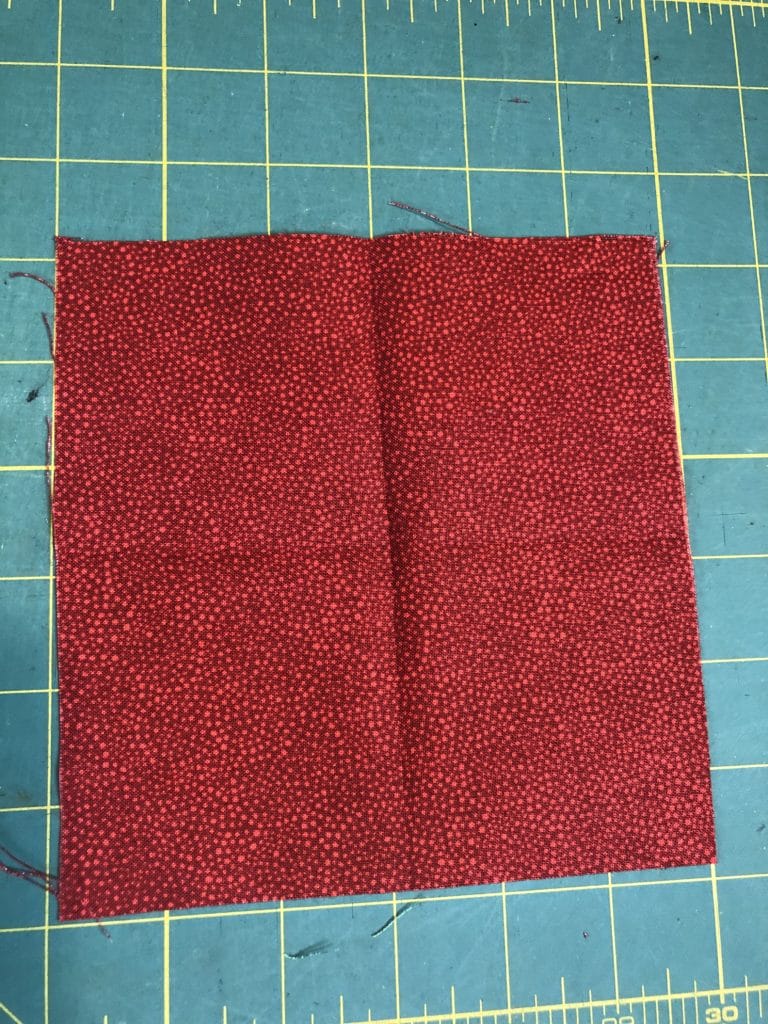
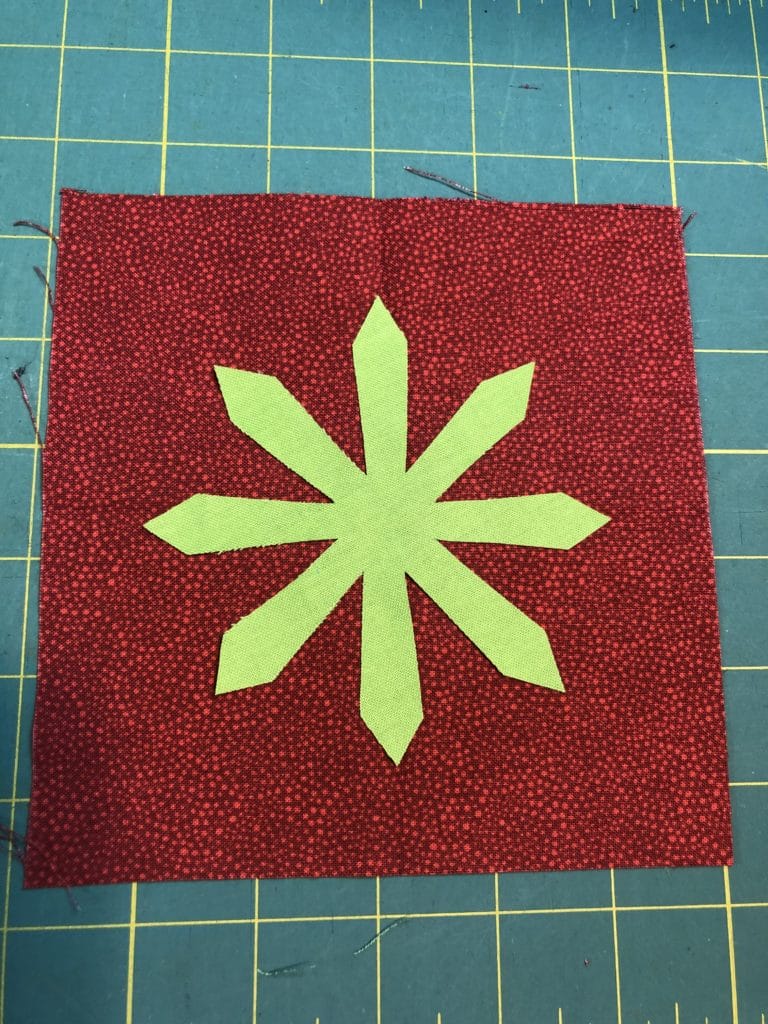
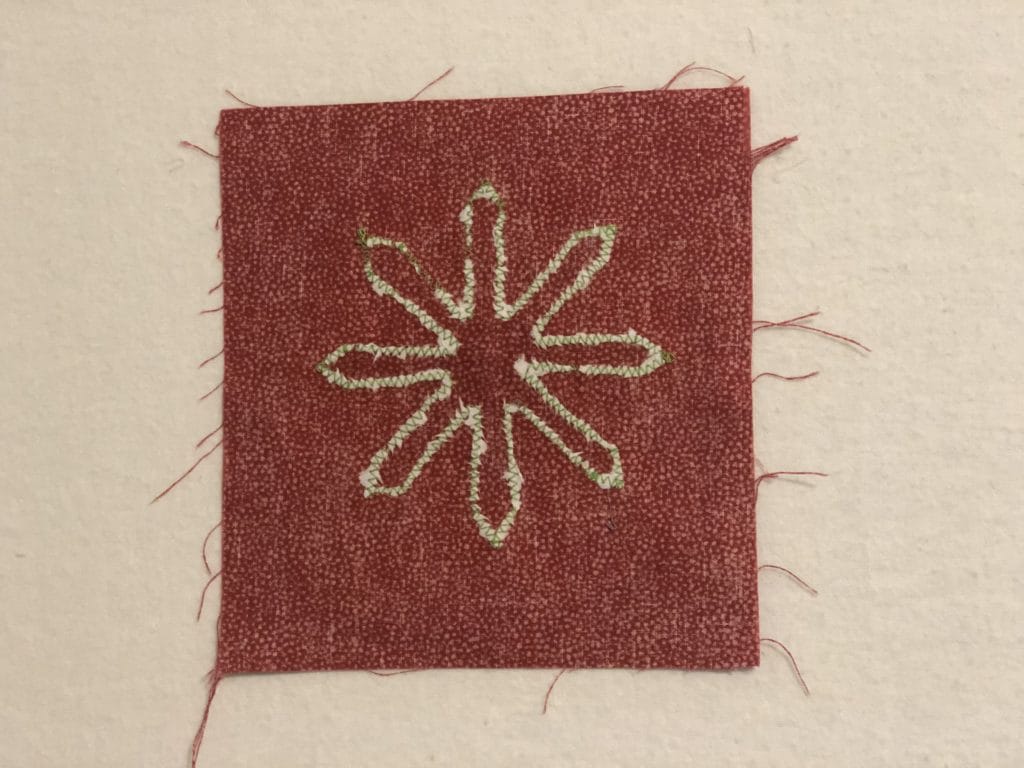
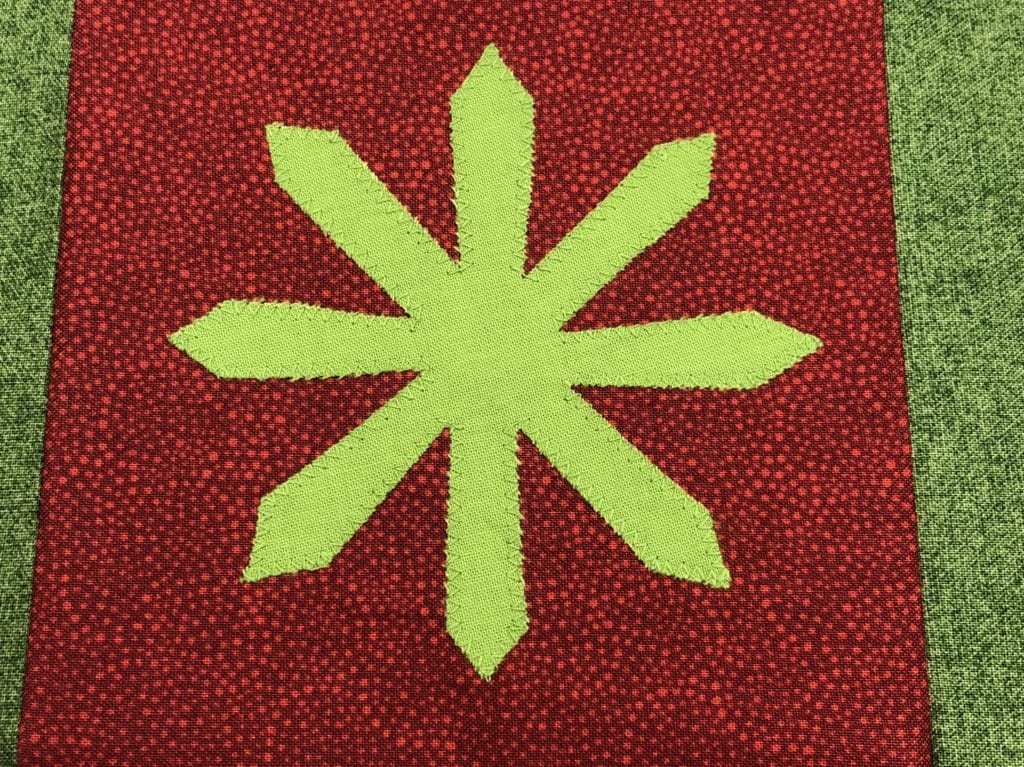
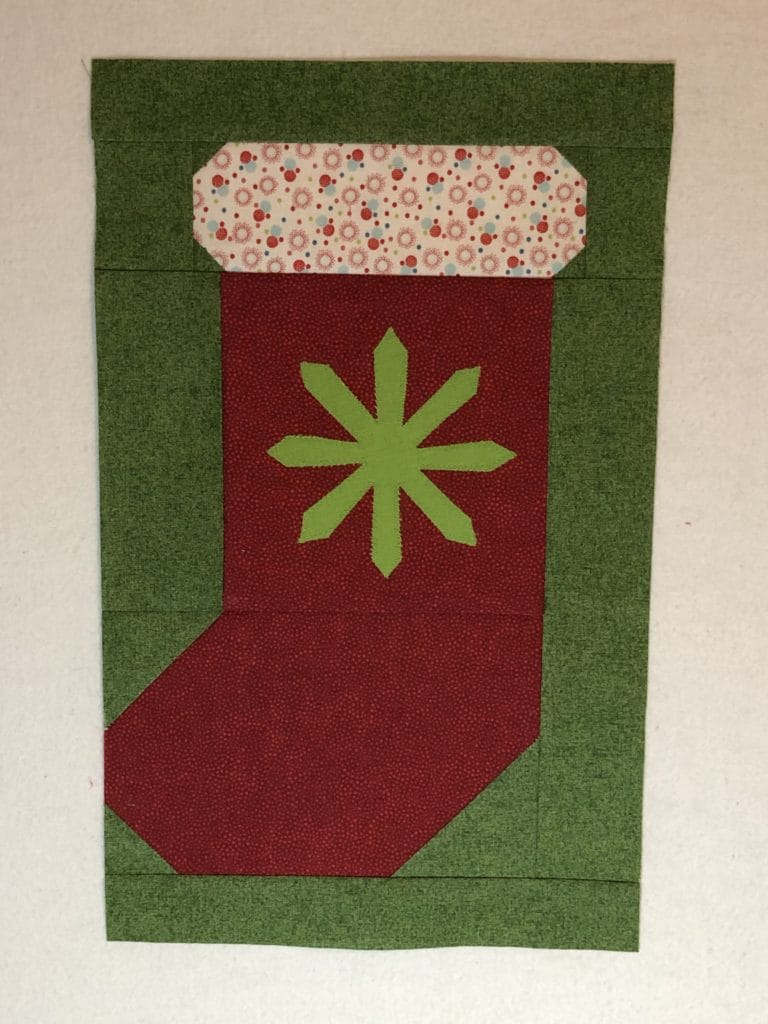
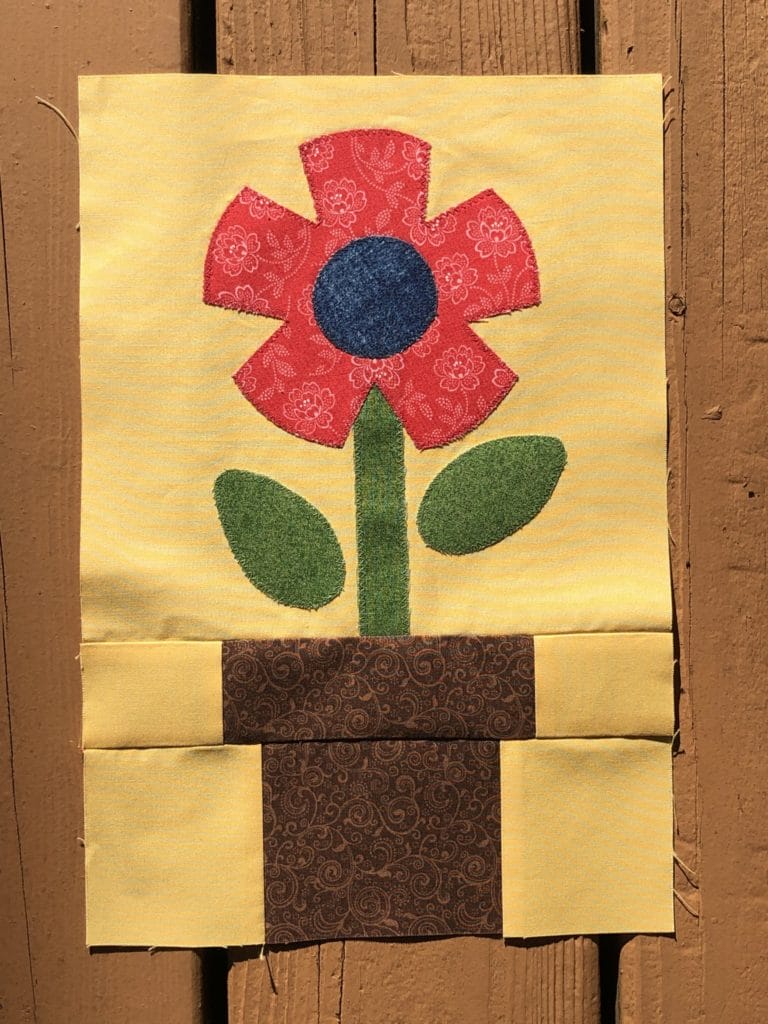
Our first block is the Potted flower. The potted base is pretty straight forward, but the applique this month involves some layering. You can go about this one of two ways: If you are using the fusible web to attach your pieces, you can do this all at once and then stitch everything once it’s all affixed. Or you can attach the stem and leaves first, stitch around those, and then add the flower petals and flower center to do afterward. Both ways work great! Just make sure your stem (piece F) is tucked underneath your flower petals and also goes to the edge of the block. If you need some tips on applique, please refer back to the Month #1 blogpost.

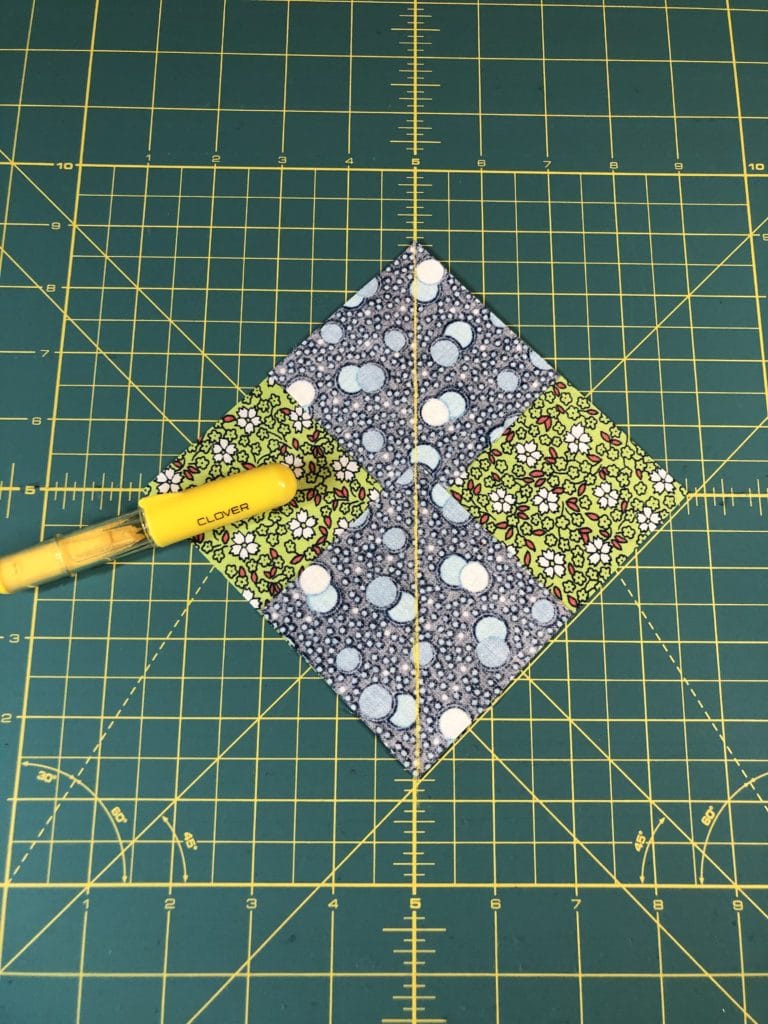
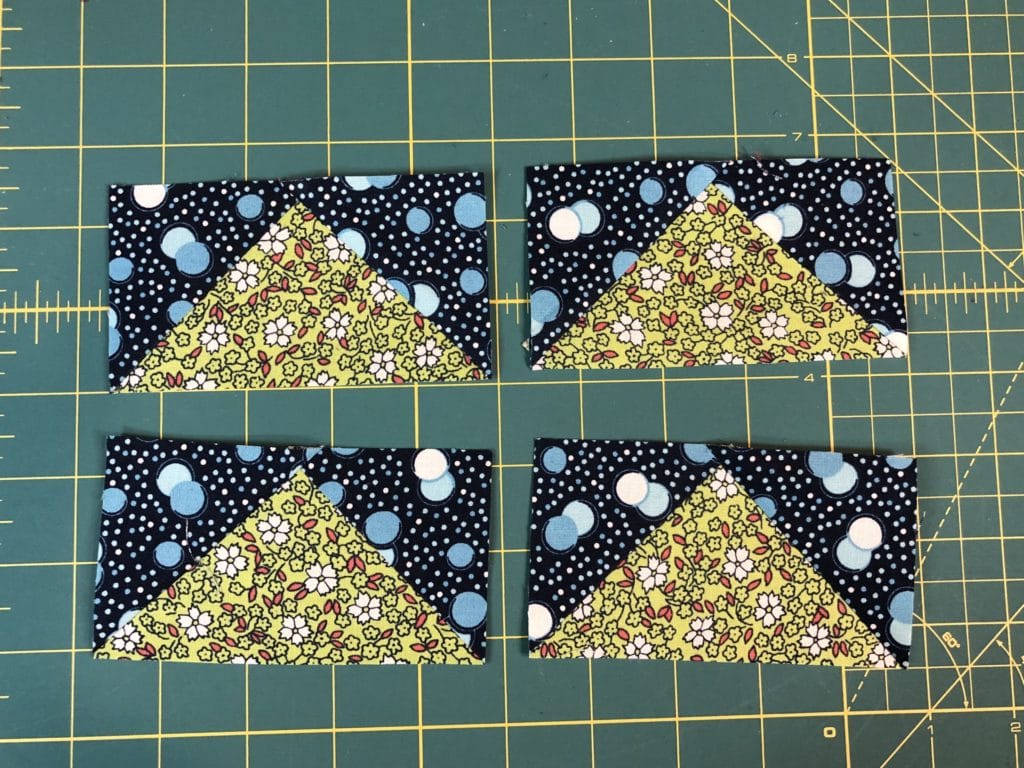
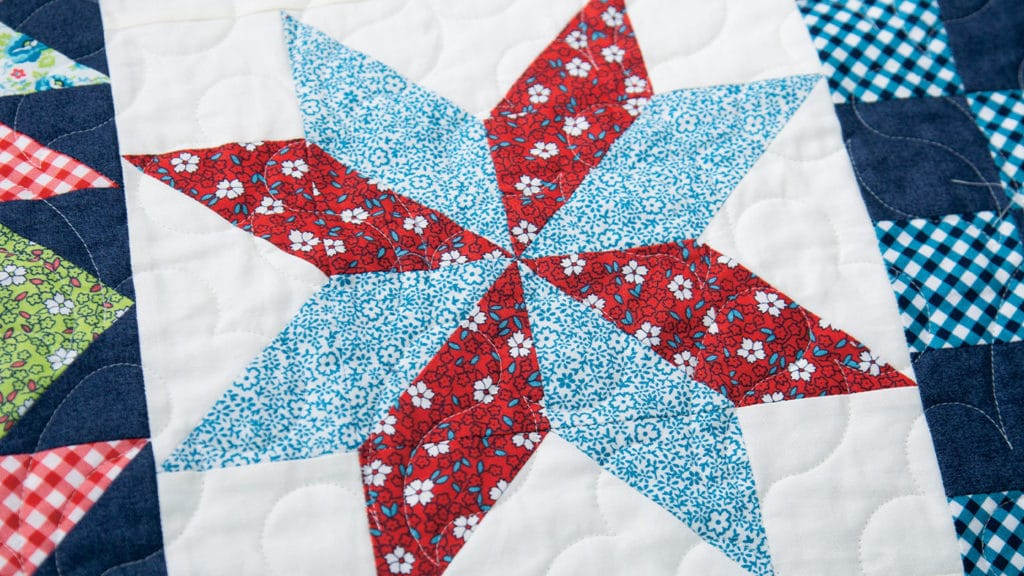
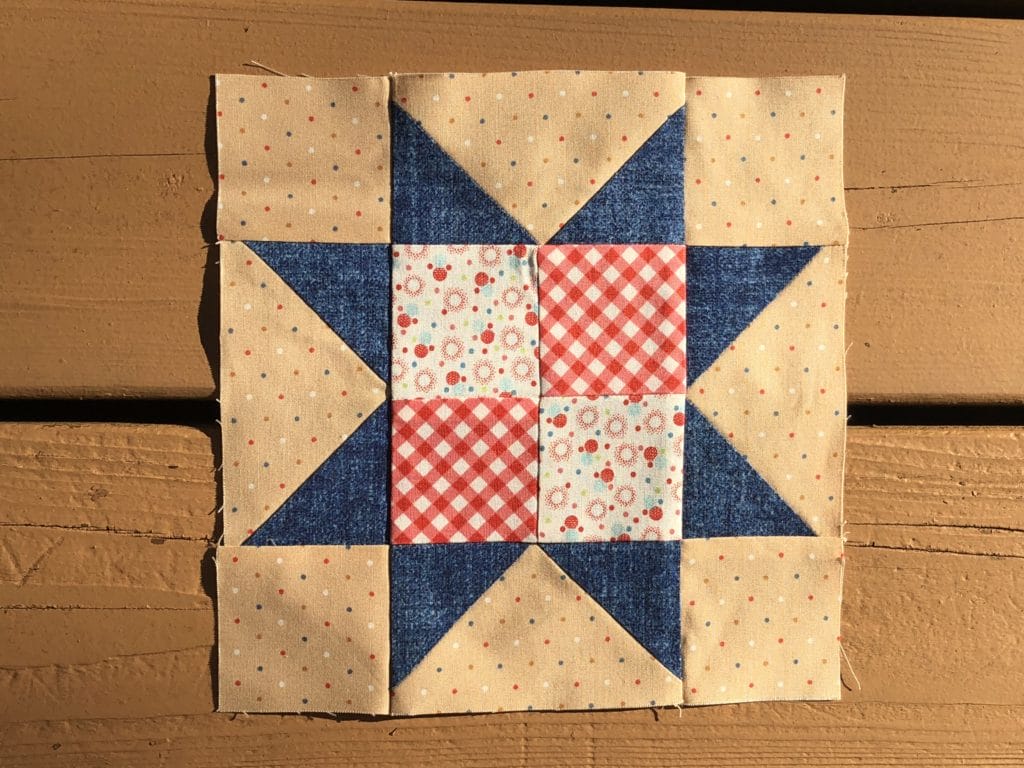
Our 2nd block is the Sawtooth Star – one of my all-time favorite easy blocks to make. Here are some pictures that will give a quick tutorial for making no-waste flying geese, which is my favorite way to make them.

Place your two C squares on to each D square just like you see below. You can draw your lines on ahead of time, or add them all at once after you lay them both on the D square. They will overlap in the middle, just like it says in the instructions.

I LOVE my Clover Chaco liner for marking lines. I also frequently use my “Add a Quarter” ruler for marking.

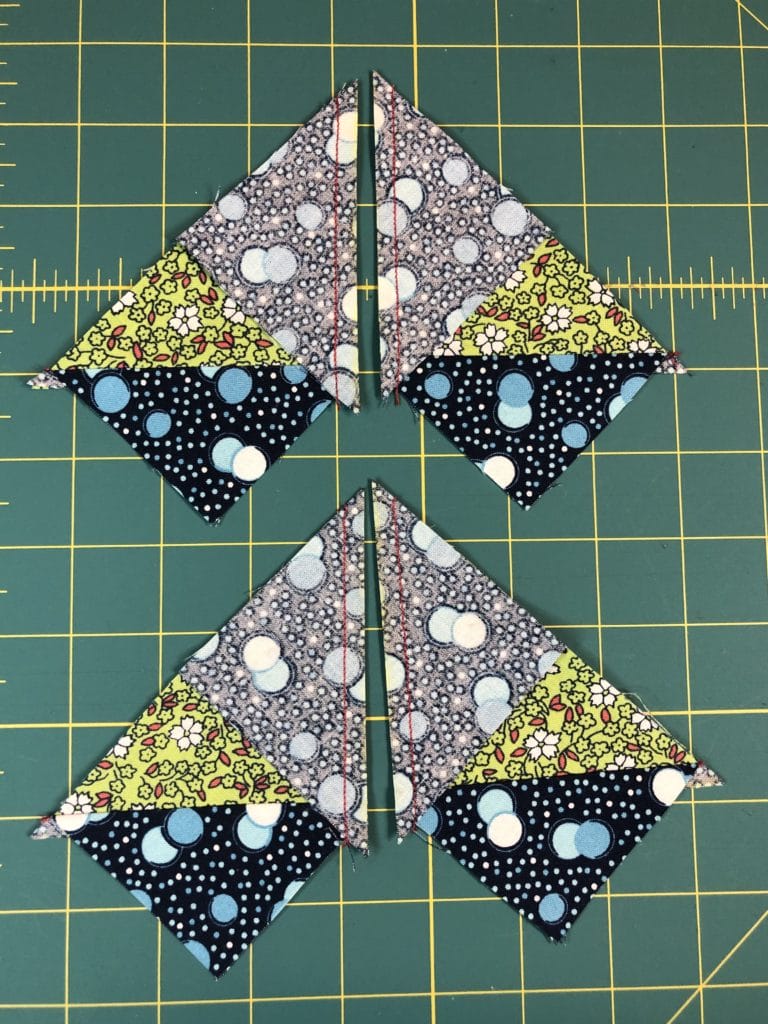
Now all you have to do is sew a 1/4″ seam on both sides of the marked line, and then cut directly on the marked line. This will give you two units like this:

Here is what it should look like after you’ve cut on the line and pressed the blue triangles down.

Now add and additional C square to each unit, and repeat the same process.

Here I’ve added the additional square to each unit, sewn a 1/4″ away from each marked line, and have cut on the line. All I have to do now is press the triangles down.

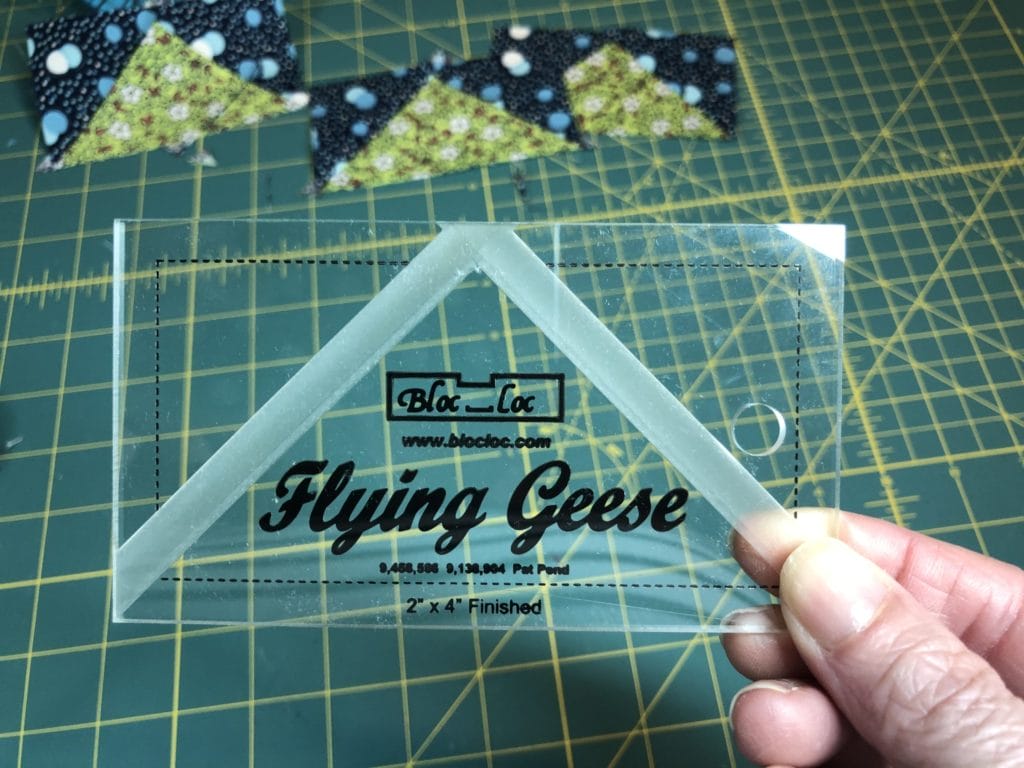
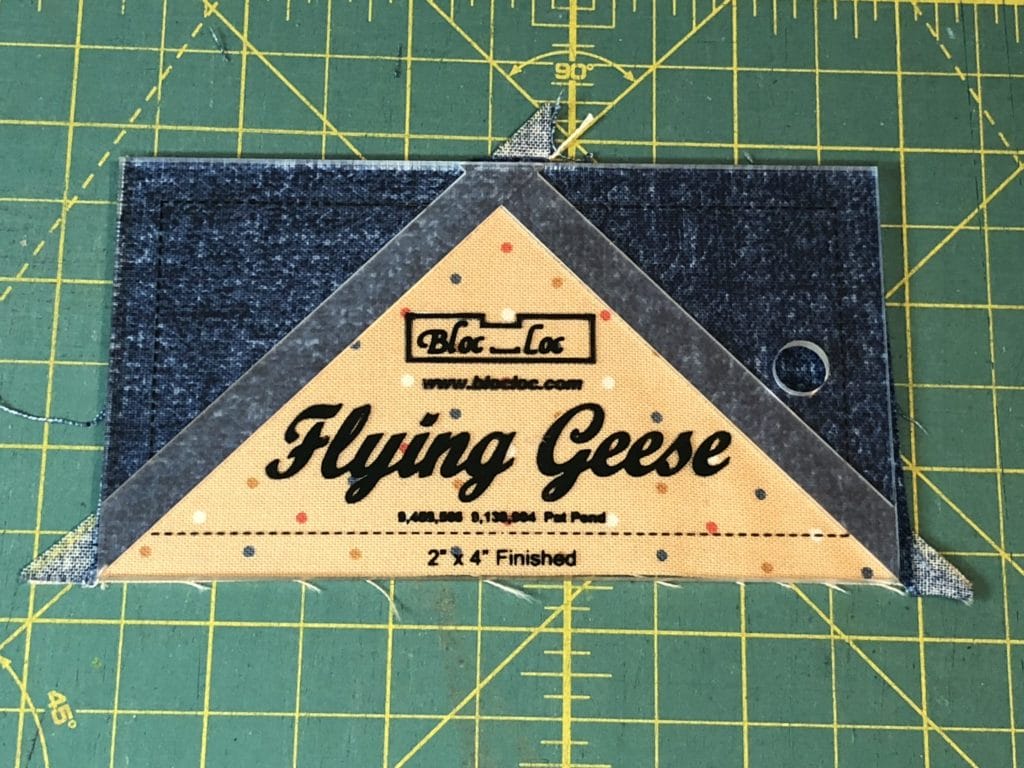
And now that they are pressed, all I have to do is square them up. My FAVORITE tool for doing this is the Bloc-Loc flying geese ruler. They make such quick work of trimming things up. I’m not sure who invented these amazing rulers, but they are a genius! It took me a while before I felt I could justify adding these to my ruler arsenal, but I’m SO glad I did! And no, I’m not a paid spokesperson, just a fan.

Here is one of my flying geese BEFORE trimming. As you can see, these handy bloc-loc rulers lock right into place, and all I have to do is run my rotary cutter around the perimeter of the ruler to make perfectly sized flying geese.

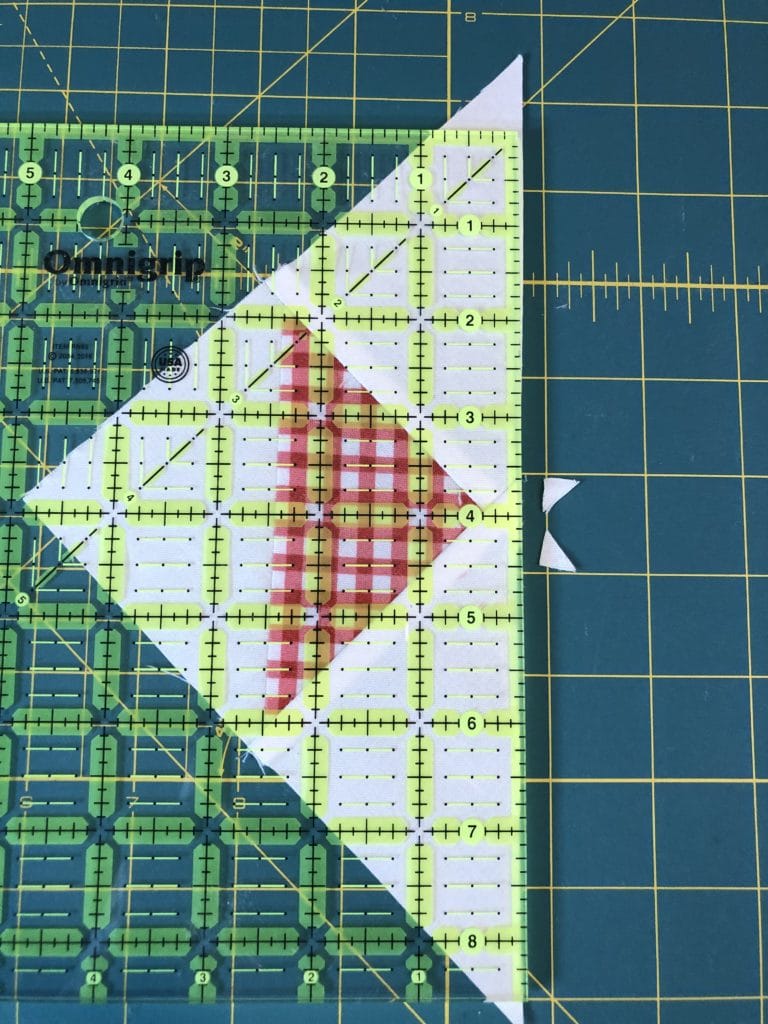
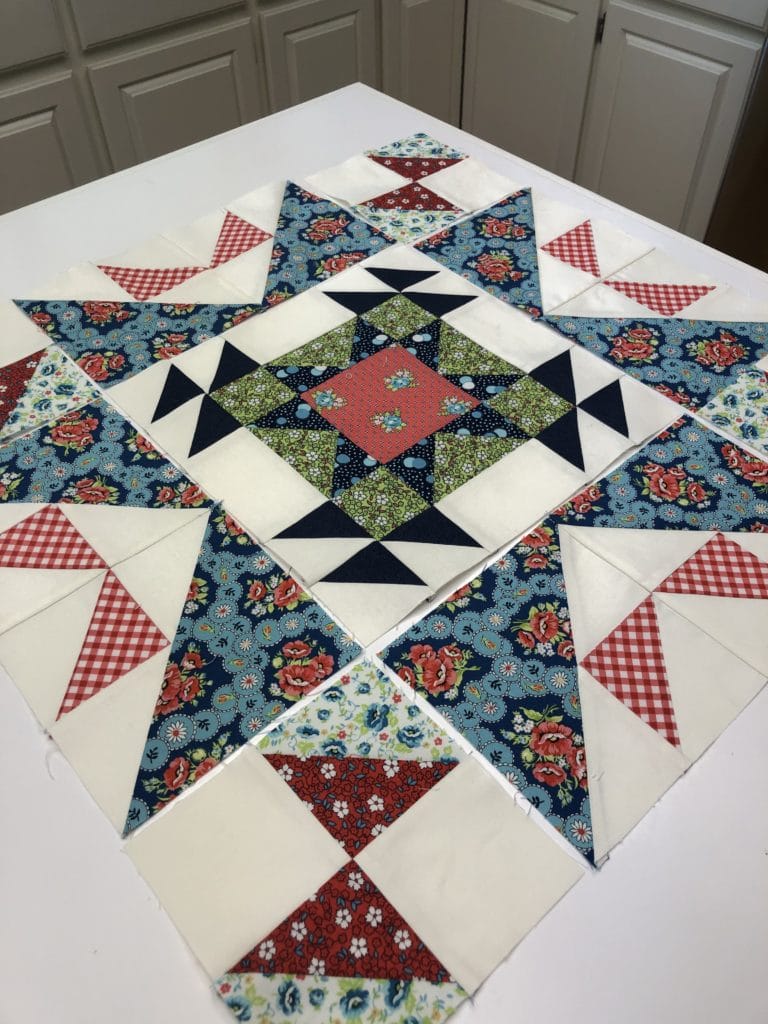
Our last block for this month is the Falling Leaves block. Fall is my FAVORITE season! I’m a sucker for sweaters, college football, and crisp cozy evenings. Plus, it means that the holidays are coming, which makes me downright giddy!

These blocks are mostly just a bunch of Half-Square Triangle units sewn together with a few plain squares. The most important thing to remember for this block is to follow the pressing arrows in the directions so that all your pieces will next together nicely.

Here are my Falling Leaves blocks in progress. I’ve got lots of happy half-square triangles waiting to be trimmed so they can join their plain square friends above.

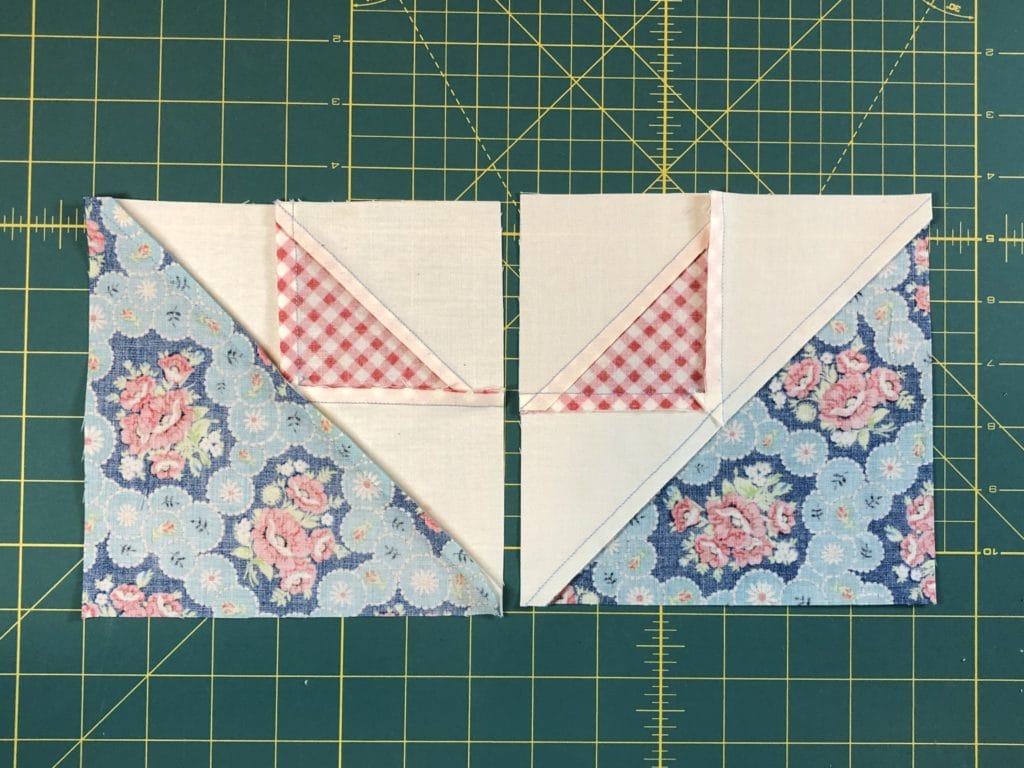
Feel free to mix and match the units around to give it a scrappy look. Or if you prefer, you can make both of the 6-1/2″ blocks exactly the same – it’s up to you! In fact, if you are extra observant you will notice that the picture I’m showing below doesn’t exactly match the Falling Leaves block made in the sample on the cover page. I mixed up the brown and green units on one of the blocks. Apparently I can’t even follow my own directions! But guess what? It doesn’t matter, because no one will know unless they read this blog post haha!

Here they are all finished and pretty!

I can’t wait to see everyone’s finished blocks! Have fun, and Happy Quilting! – Kristin


Welcome to the Annabelle Block of the Month!
8.5.2020

Hello and welcome! My name is Kristin Gassaway, and I’m the designer of the Annabelle quilt sold here at Connecting Threads. I’ll be posting tips and updates as we make this quilt together over the next 9 months.

For this first month we will start with a *bang* by making the center medallion portion of the quilt. This will probably be the most technically challenging part of the quilt, so everything should be smooth sailing after this.

I like to make no-waste flying geese whenever possible, and since we will be making A LOT of them over the next 9 months I figured I’d give you a quick photo tutorial of the process.

Before we begin I have a quick tip: After years of frustration in getting my pieces to be the “perfect” size while quilting, I finally got smart! Now whenever I’m making flying geese or half-square triangles, I cut my pieces just a scant larger than what is being asked (as in less than 1/16″ bigger, like a couple of threads larger), and then sew everything just a scant under a 1/4″ seam allowance. This way I always have room to trim and size everything to perfection.

To make flying geese that will measure 2-1/2″ x 4-1/2″ (which becomes 2″ x 4″ when sewn in the finished quilt), start by placing two 2-7/8″ squares corner to corner on a 5-1/4″ square. If you haven’t already done so, mark a line down the center. I LOVE Chaco liners by Clover, but use whatever marker you prefer.

Stitch a 1/4″ away from EACH side of the center marked line. I used red thread so you can see my stitching. Cut ON the marked line and then press the triangles downward.

Next, place another 2-7/8″ square on each unit as shown, draw a line down the center from corner to corner, and stitch a 1/4″ away from the marked lines.

Cut on the marked line again, and press. Voila! You now how 4 flying geese and no wasted fabric!

I always trim my flying geese to make sure they are accurate, and my MOST FAVORITE tool for this is the Bloc Log flying geese ruler. I get PERFECT flying geese every time, because this tool makes trimming them to size a breeze! I’m not paid to promote them, I just love them and I feel they are worth the investment because they take the guess work out of true-ing things up. Plus it goes much faster! We will be making a lot of the 2″ x 4″ size in this quilt, so if you were to buy just one, that would be the size I would recommend.

Bloc-Locs are amazing!

Next, we will be making a few Half Square triangles to add to our center star. FYI, at the end of step 5, your block should measure 12-1/2″ square. somehow I left that off the pattern. Oops!

12-1/2″ square

Now we can make the rest of the components we need to put this all together. For steps 6 and 7 we will make some fun triangle units. I always like to “trim the tails” off when sewing pieces like this, but its optional.

Tails have been trimmed!

A word about pressing directions: Most of the time when we sew, the quilt “tells” us which way to press the seams to reduce bulk. For example, in step 10, the obvious choice is to press the seams toward the N squares. But sometimes there is NO easy way to press seams when there are so many points coming together, and this center medallion was one of those times. I agonized over which way to tell you to press seams, because regardless of what you do, there is either a lot of unwanted bulk, or you end up sewing seams that don’t nest together well, especially with these outer borders in step 11. I ended up going with less bulk, and having some of the seams pressed open.

Seams are pressed open to reduce bulk.

That being said, you can choose to press the seams differently to have everything nest together, however you will end up with some slightly bulkier seams. For example, In step 7, you can choose to press the 2nd M triangle towards the L/G square, rather than away from it. You can also press HALF of the A triangles toward the L/G-M unit. This will allow all the seams to nest together when sewing the pairs together in step 8. However, this creates some bulk later on when those units are sewn to the sides of the quilt, so that is the trade-off you live with.

Here is an example of how to press the seams to allow for the pieces to nest together.
One of the M triangles is pressed up in both units, and the unit on the left has the A triangle pressed up as well.

And for step 11, no matter which way you have sewn or how you press the seams you will have some unavoidable awkward bulkiness, so it is entirely up to you which bulky seams you want to live with. Or you can also press them open if you prefer. Fortunately won’t matter either way moving forward with the quilt, so press those seams which ever way makes you happy.

Getting ready to sew it all together.

Next month we will add some fun little flying geese borders, which will be a snap! Thanks for popping by! – Kristin


Connecting Threads Podcast Episode 14 – Block of the Month
7.10.2020

On this episode of the Connecting Threads Podcast, Kate is taking a break from talking about her quilt to learn more about Block of the Month. Kate checks in with Kris and learns more about what even is a “Block of the Month” and learns more about quilting subscriptions. Later we hear from the designer of the Connecting Threads July Block of the Month, Kristin Gassaway, interviewed by Judy Reed.  

Annabelle is a 9-month Block of the Month that begins shipping in August 2020. Each month Connecting Threads will ship you everything you need to make a portion of the quilt. Subscribers will have access to a special Facebook Group where they can connect with other Block of the Month Quilters and share their progress along the way. Block of the Month is not only a subscription service but it is a club and it’s a community. There are many benefits of doing a Block of the Month and Kris and Kate discuss some of them.  

Next we on Meet the Connecting Threads Team, we meet Elise, Connecting Threads Buyer

Judy and Kristin Gassaway are old friends who connect to talk about Kristin’s work. She has been designing quilt patterns for 13 years and she now has over 200 patterns under her belt and hers are some of the most popular Connecting Threads have carried. Kristin discusses her somewhat reluctant journey into sewing and quilting as well as how she became a designer. Kristin wanted this quilt, the Annabelle quilt, to have a cheerful, vintage farmhouse vibe. It has all of the things she loves: star blocks, floral, and gingham prints, and checked border. 

Listen, rate, and review on Apple Podcasts!

Mentioned in this episode: 
Annabelle Block of the Month
Annie’s Apron Fabric Collection
Kristin Gassaway’s Connecting Threads designs
Other Quilting Kits

Timestamps: 
0:00 The introduction with Kate
0:49 Kate and Kris check in about what they’re up to this summer
1:39 Kate asks “What even is a Block of the Month?”
4:59 Kris talks about what’s fun about a Block of the Month
10:00 Meet the Connecting Threads Team! Meet Elise, Connecting Threads Buyer
12:08 Kate’s call – we’d love to hear from you! Send us your quilting questions
12:37 Judy interviews Kristin Gassaway about how she started sewing and quilting
19:10 Kristin talks about Annabelle Block of the Month
23:15 The credits


Welcome to the Seasons Block of the Month!
7.1.2020

Hello and welcome to the Seasons Block of the Month! I’m so excited to have you with on this 6 month journey as we make this happy little quilt together.

Before we get started I have some important information. I inadvertently left off a few of the pressing arrows in the instructions for this first month (YIKES!). Needless to say, I was mortified, and unfortunately those patterns were already being packed and shipped from the warehouse, which meant it was too late to fix. So if you’d like to shoot me a quick email at thrilledtopieces@gmail.com, I’ll be happy to send you a pdf with the updated diagrams. And please accept my profuse apologies. There is nothing worse than getting a pattern that isn’t all there! And rest assured that I’ve triple checked the remaining months, and all will be well for future installments. So, hopefully we are one and done with any pattern errors!

Now on to the fun part! For the first month’s installment, we will be making the Stocking and Peppermint blocks, as well as the checkerboard strip. It’s Christmas in July!

For this stocking block we have a little bit of applique. I know applique can be intimidating to a lot of people, but it doesn’t need to be! For all the applique in this quilt I use Wonder Under to fuse my pieces on to the fabric, and then stitch around with a zigzag stitch on my machine.  I thought I would briefly share with all of you how I go about this.

First, I begin by tracing my design on to the back side (paper side) of the Wonder Under. Then I cut around the shape, giving myself some extra room around the design to make sure all the edged get nice and ironed on.

Here I’ve traced my design onto the paper side of the Wonder Under and have ironed it on to my fabric.

Then I carefully cut out the shape on the marked lines I drew. Somehow I forgot to take a picture of this. I guess I was just too excited to get sewing!

Next, took the K block and folded it in half both directions, finger-pressing a horizontal and vertical seam to find the center of the K piece. This helped me to make sure the snowflake was centered properly.

Finger-pressed to help find the center.

Now I can place my snowflake on the center and iron it in place.


Also, I use a bit of freezer paper for stabilizer on the back before I begin sewing. I simply iron the shiny side of the freezer paper to the back side of the fabric before I begin stitching.

I usually go VERY slow on my machine, sometimes even turning my machine wheel by hand to make sure my stitches go right where I want them to be, especially when I get to the sharp turns.

Then when I’m all done, I GENTLY remove the paper. If I’m having trouble getting it off, I spritz the paper with a mist of water and then it picks off pretty easily. As you can see, there is still some residual paper on the back, but it’s just fine to leave it like this. No one will ever see this ugliness when it’s all done!

Yucky back side of my applique. And yes, I also need to trim the sides to get rid of the threads.
See, it looks just fine from the front. NO ONE will EVER know our secret!

And now your applique is finished! Yay!

I also thought this little snowflake would look darling if it was hand stitched with a blanket stitch using white embroidery floss. But I figured I’d better stick with what I did in the actual pattern for all of you.  But I was tempted….! Anyway, on to the rest of the stocking…

The rest of the block is pretty straight forward. I know those little corners on the stocking cuff are small, but it was a necessary evil to get the proportions I wanted.

Almost finished….
Finally done!

Hooray! You just finished the Stocking Block!

I love these cute little peppermints! (I guess that’s why I designed them, lol!) They would be so fun to make on their own as a cute little Christmas pillow too.

Here is a photo of the steps for sewing the peppermint wrapper ends (step 4 for this block). Don’t they look like they are just poorly sewn flying geese? Don’t worry! This is exactly how they are supposed to look and the finished product will turn out just fine, I promise! If you don’t believe me, refer to the picture above. 🙂

And finally, the checkerboard row. I always love me some checks in a quilt, so I found a way to sneak these in.

Here they are, all ready to be sewn together.

I hope you enjoyed making these blocks with me. Thanks so much for popping by, and be on the lookout for Month #2.

Happy Quilting! – Kristin