Follow along with our team of quilters as we show off our new projects, discuss new and exciting techniques, talk about new fabric collections, and share news about the latest and greatest happenings here at Connecting Threads.
This month is easy peasy, especially after all the work we did on this quilt last month!
All we have to do is sew on a simple border, and then make ourselves some flying geese.
I may have mentioned this before, but whenever I’m sewing borders I always give myself some wiggle room and cut the borders longer than necessary. This way I can trim them to the perfect size after they are sewn on.
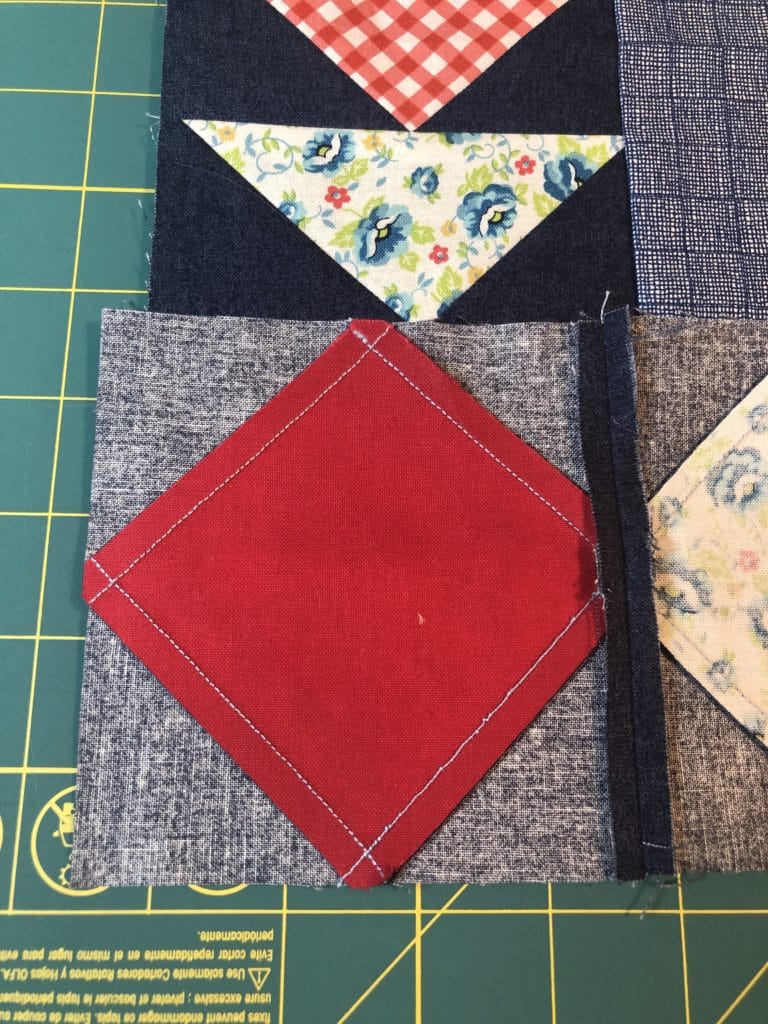
I also always pin my borders so that the solid border is on the bottom as I sew. This allows me to see all the the blocks to make sure I’m sewing on the points where they intersect. Also, you can see from the photo below that I’m a Lefty, so my pins are going the “wrong” way, haha!
I had enough fabric length to use two 2-1/2 x WOF strips for all four borders. The top and bottom borders didn’t have too much hanging over, as you can see below, but it was still enough to get the job done and have room to trim.
My favorite tool to trim my corners is a giant 20-1/2” square ruler. Using such a large ruler helps me to make sure the quilt is squared up nicely.
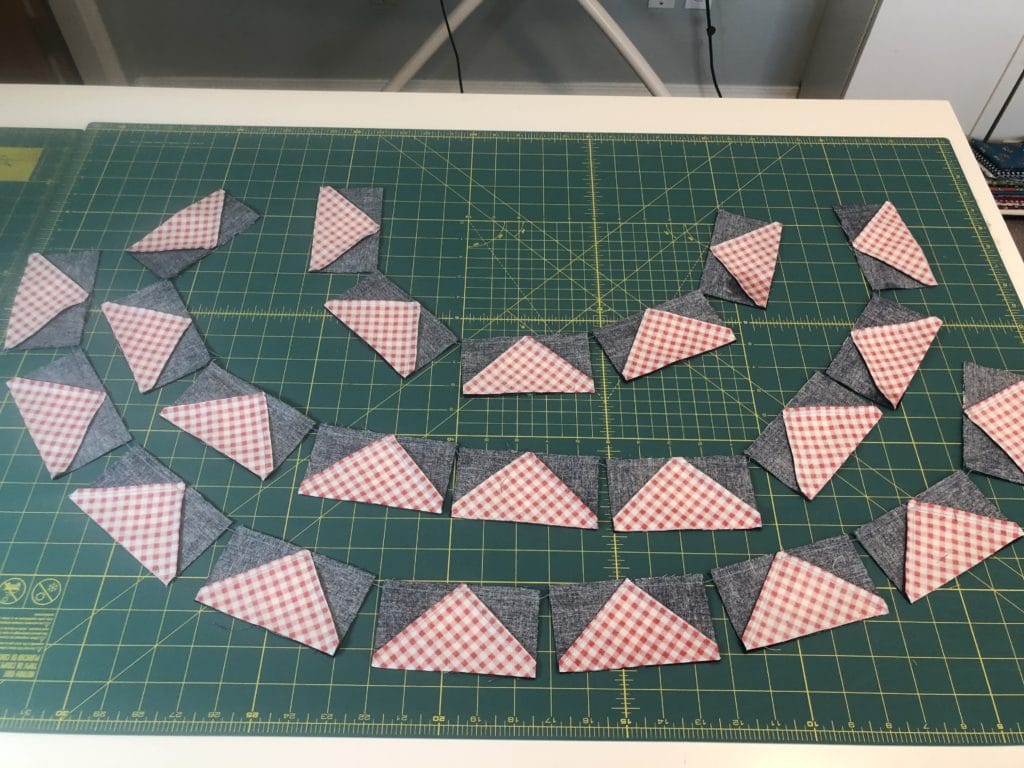
Now on to more flying geese! I’m sure you are all pros at this by now, since there are SO MANY in this quilt. I feel like I should almost apologize for all the flying geese I put in to this design. I think I’ve actually worn out my Bloc-Loc tool doing so much trimming! But to me, the work is worth it, because I absolutely love how this quilt turned out.
SO MUCH trimming to be done…
Always remember you can cut all your pieces just a hair bigger than necessary so that you have wiggle room to trim your pieces to perfection.
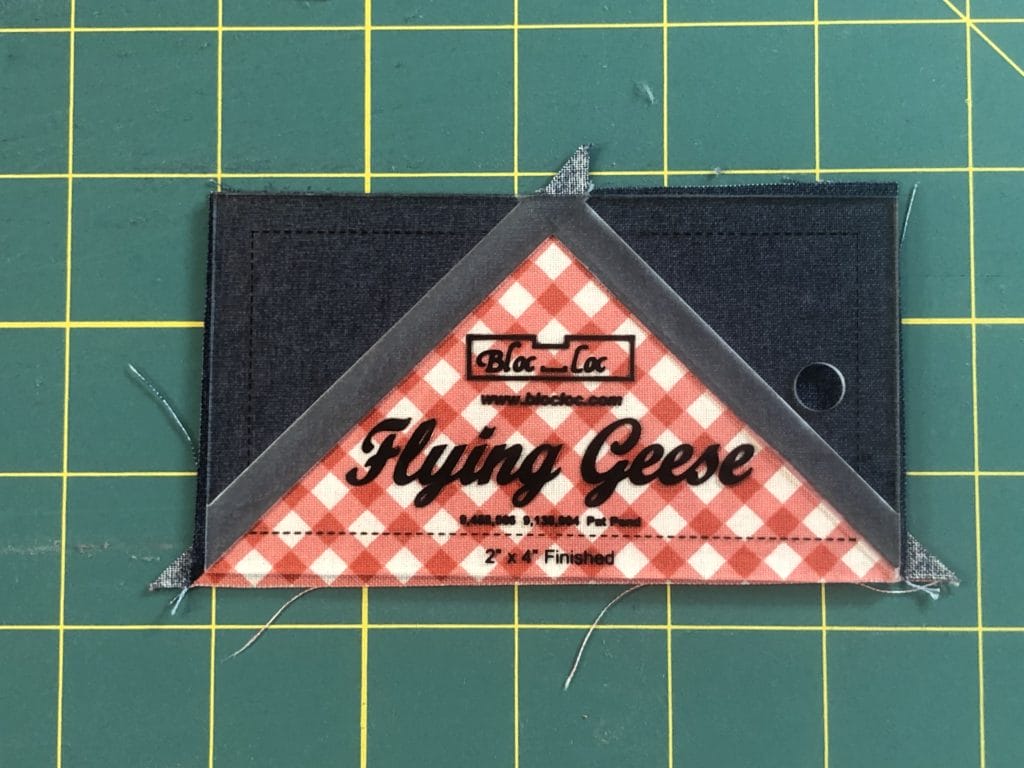
I won’t bore you all with another tutorial for no-waste flying geese, since this has been well covered in previous blog posts for this quilt.
Here are all my flying geese, trimmed up and waiting for next month, when we can finally finish this quilt! Hooray!
I’m not gonna lie – this month is A LOT. At least, it felt that way to me. We are making an additional 18 blocks, and then sewing those blocks together with the ones from last month, and then attaching all of it to the center portion. Phew! But we CAN DO IT.
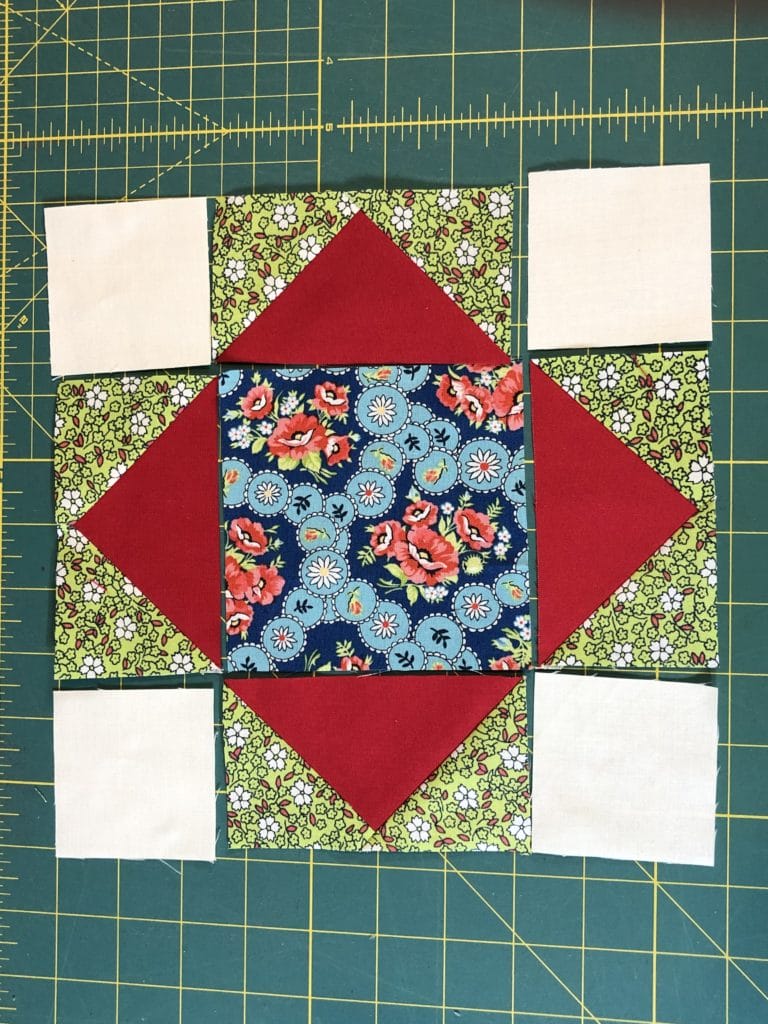
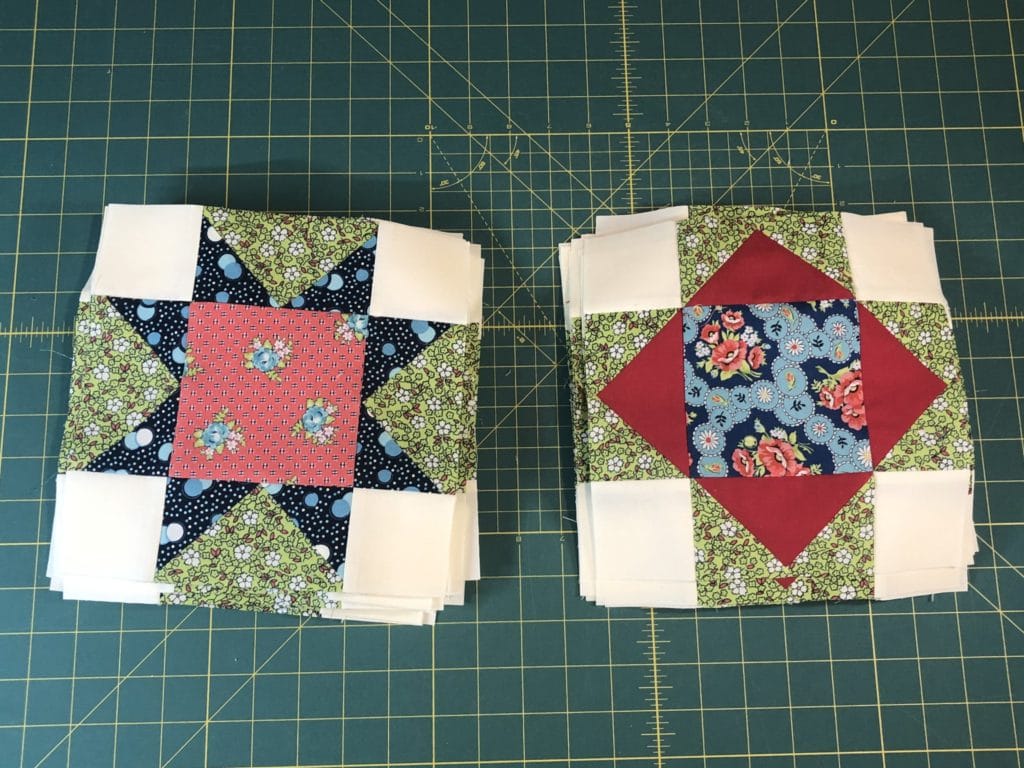
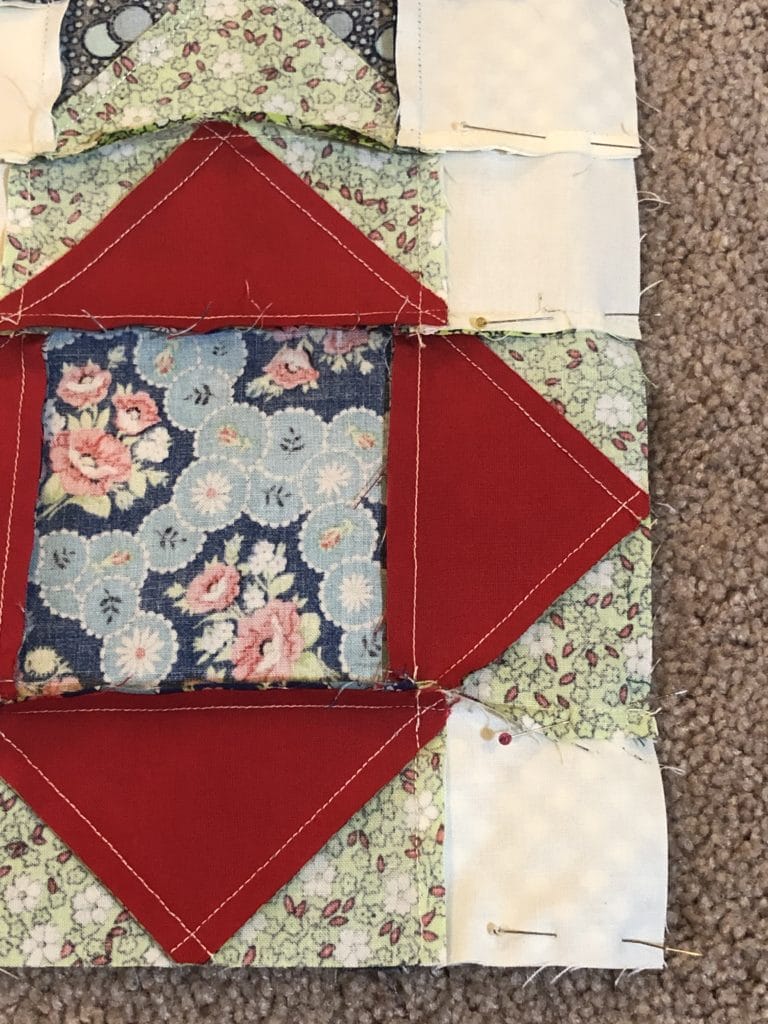
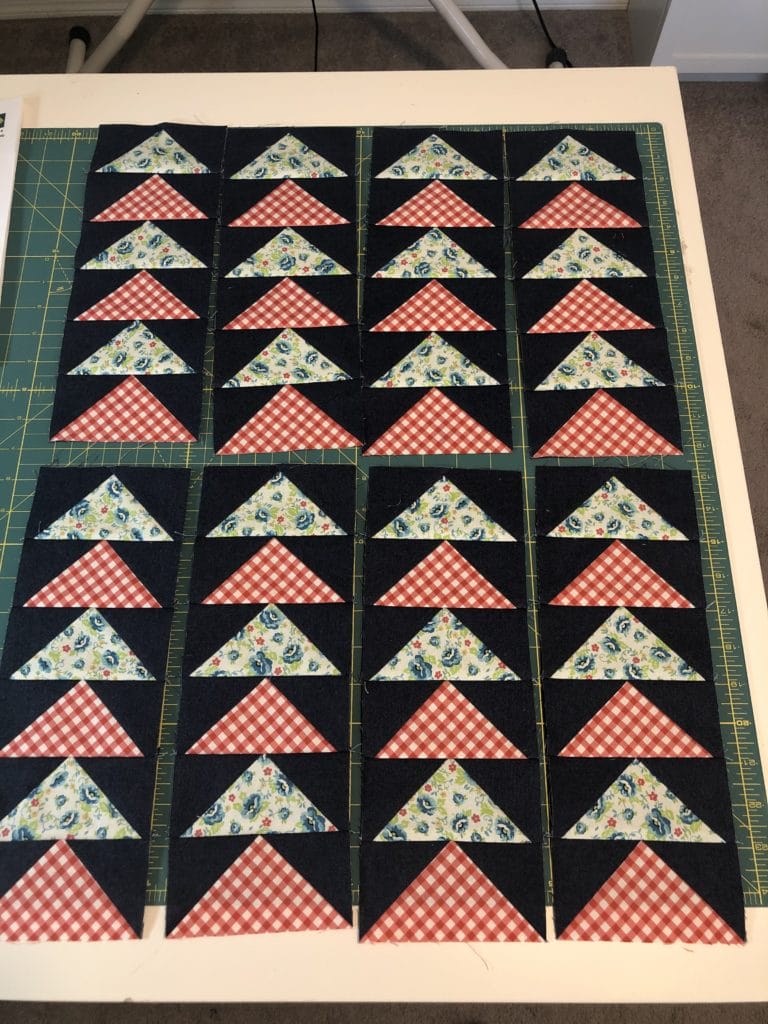
So let’s begin with those 18 blocks! They are basically the same block as last month, but with the flying geese units pointing away from the center square this time. I won’t bore you all with another tutorial on the no-waste flying geese method, but just remember you can always cut those pieces a tad bit bigger so you’ll have room to trim down. I always do.
Here is the layout for each block.
Once you have them all finished and trimmed up, you can begin sewing those rows together.
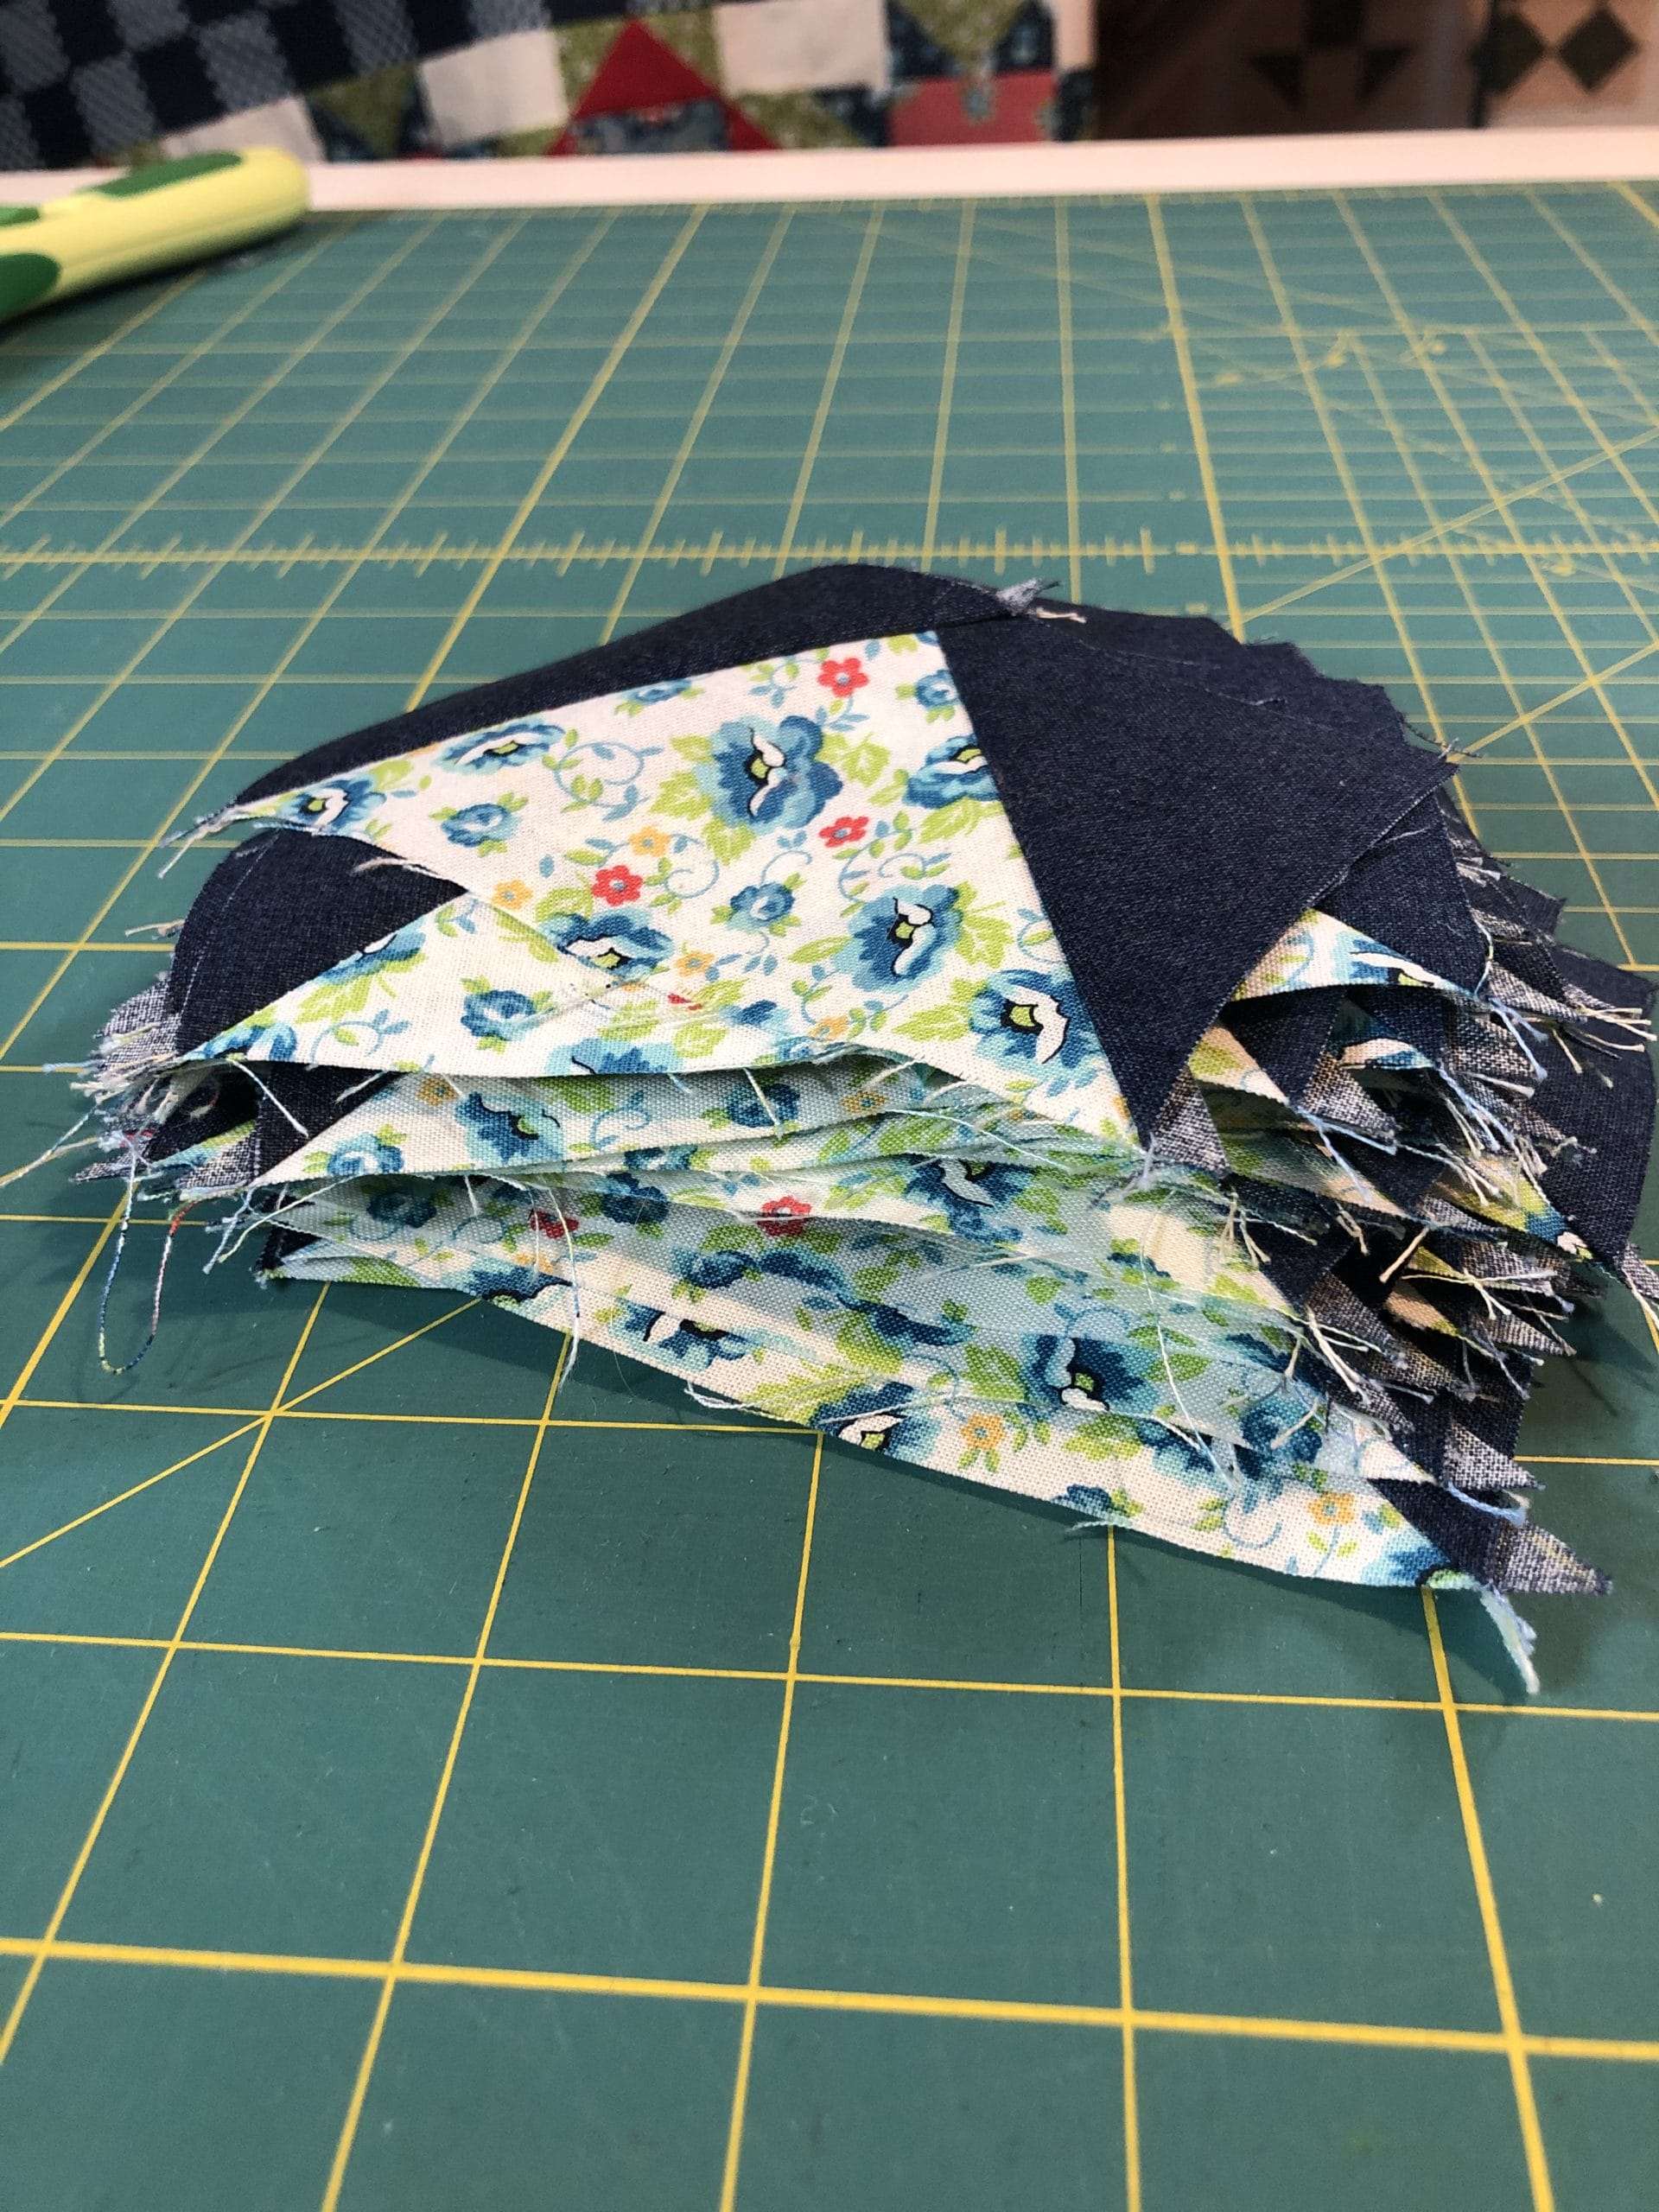
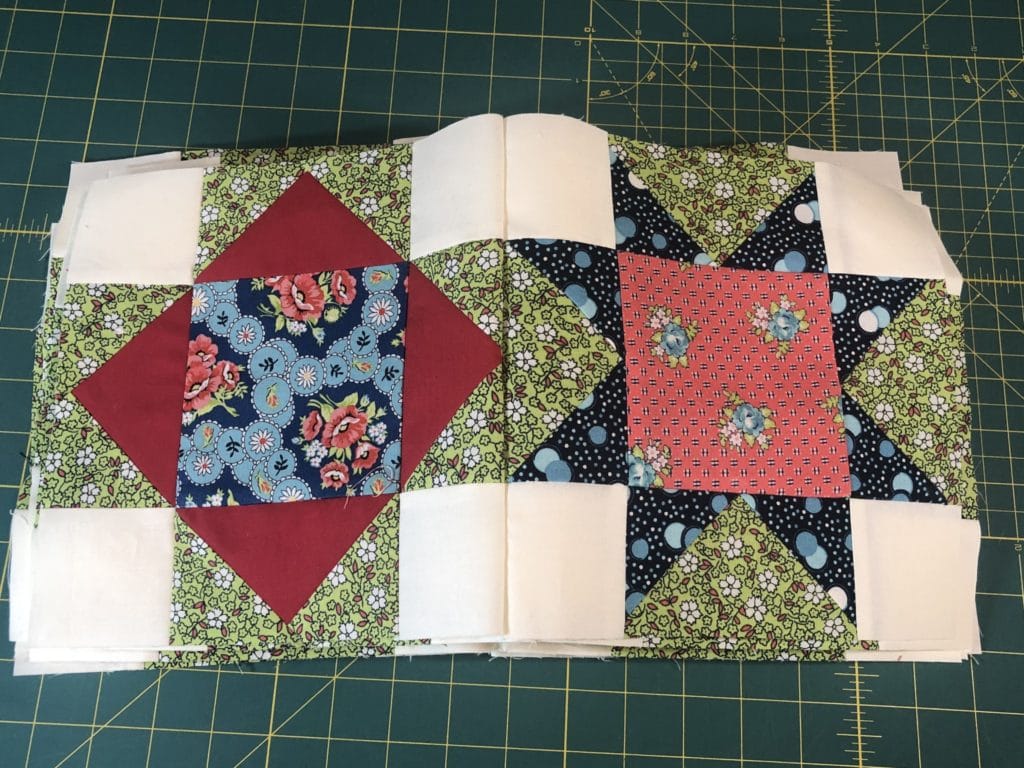
I started by sewing each Diamond block from this month to a Star block from last month. You can see my stack below.
I sewed all the blocks into pairs first.
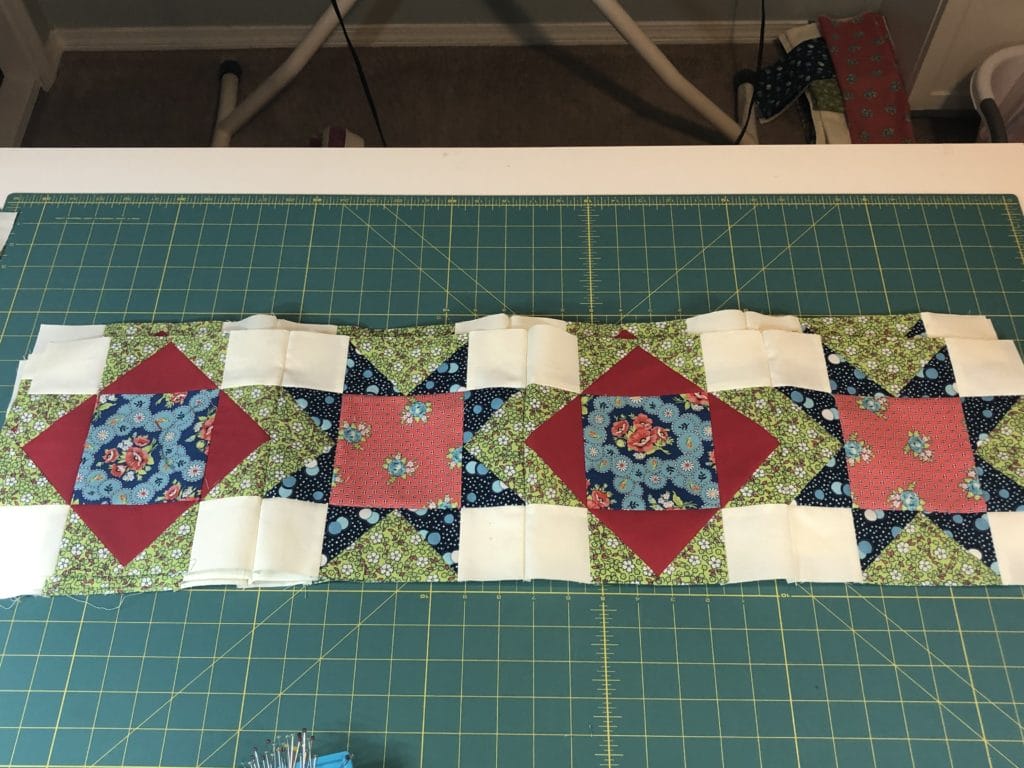
Then, realizing that the side borders needed 4 of these pairs each, I sewed those together. Then I sewed 5 pairs together for the top and bottom rows. Is that clear as mud?
Here are stacks of 4 blocks. I just have to sew two of these together to make each of the side borders. I’ll add an extra pair to make the top and bottom borders.
Now these border rows are ready to sew to the quilt.
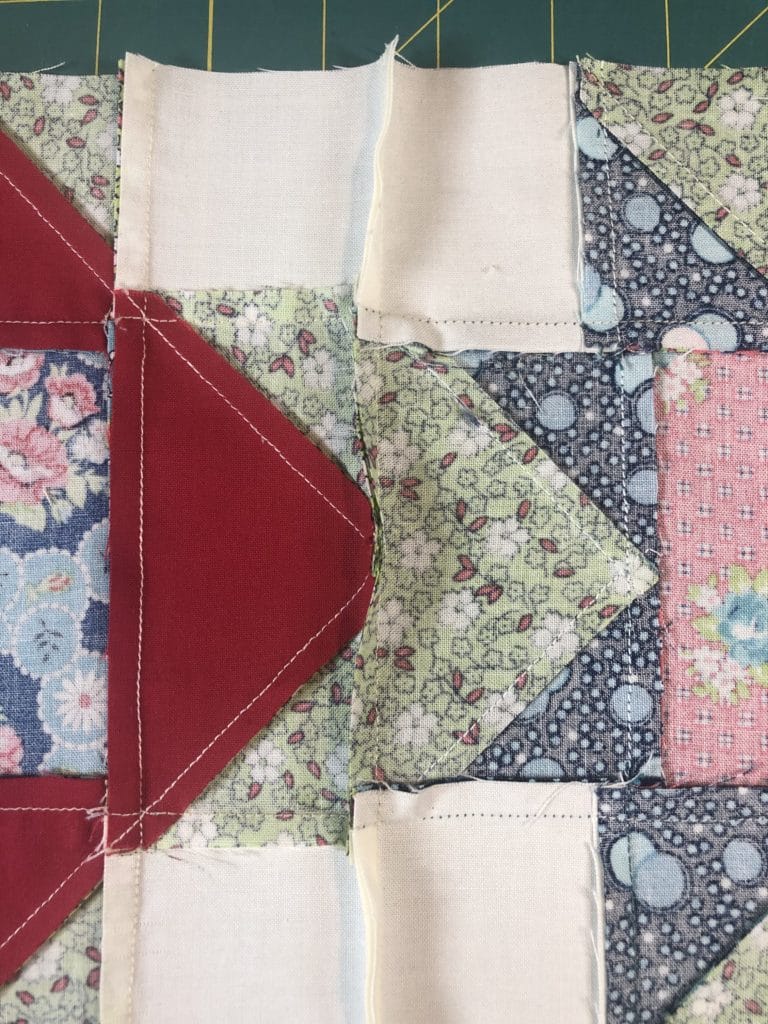
Please note that at this stage I DO NOT IRON THE SEAMS for the border rows. I pinned and sewed all the borders on first, and THEN ironed all the seams in their proper direction. By not pre-pressing the seams between each block I can pin the seams in their proper nesting direction and then go back and iron the joined seams accordingly.
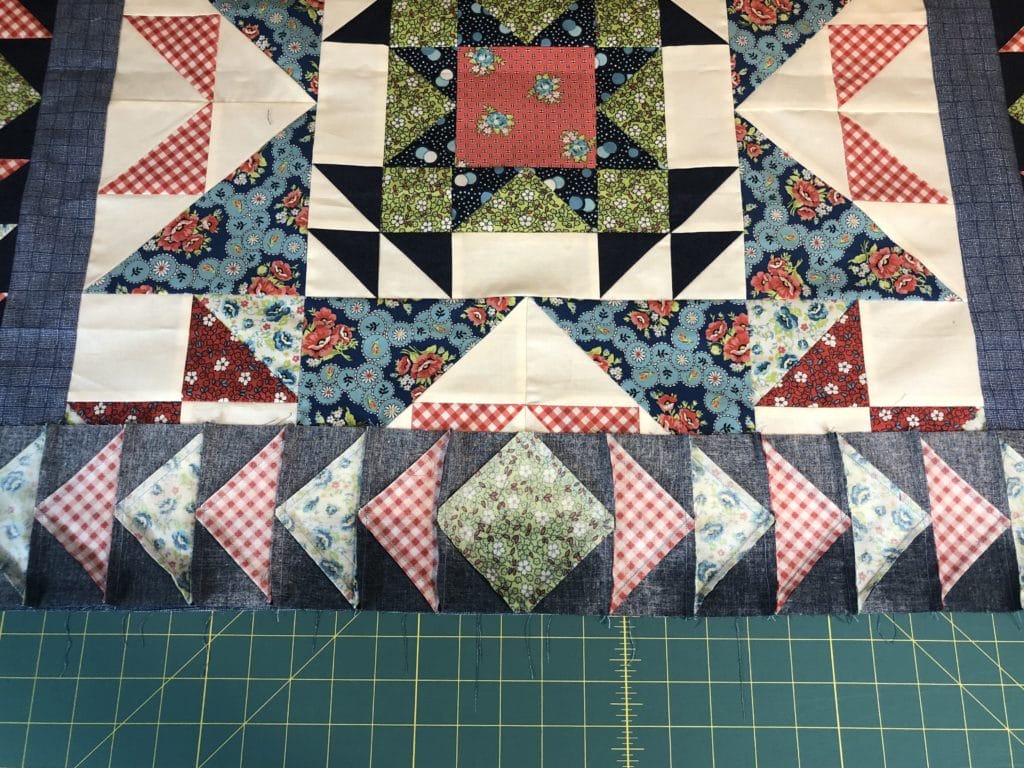
Here is the back side of my blocks, joined together but NOT PRESSED YET.
Now here is where things can get tricky – If you didn’t notice already, we have A LOT of seams to match up between these rows and the checkerboard border on the quilt. While I try my best to have the pressing directions allow for seams to nest together, sometimes that isn’t always possible.
While designing and writing this pattern I made myself crazy trying to figure out if there was a way I could tell you to iron those checkers so that they would nest perfectly when the block borders are sewn on. I won’t bore you with the details, but in a nutshell, after spending a few days trying to problem solve I realized there was no viable or easy pressing solution regardless of what I did.
But the good news is many of the seams should already nest together, especially if you re-pressed last month’s blocks like I recommended in the month 6 blog post. And for some of the blocks, you can simply re-press the seams going the other direction after you’ve pinned the rows on and determined the direction they need to go.
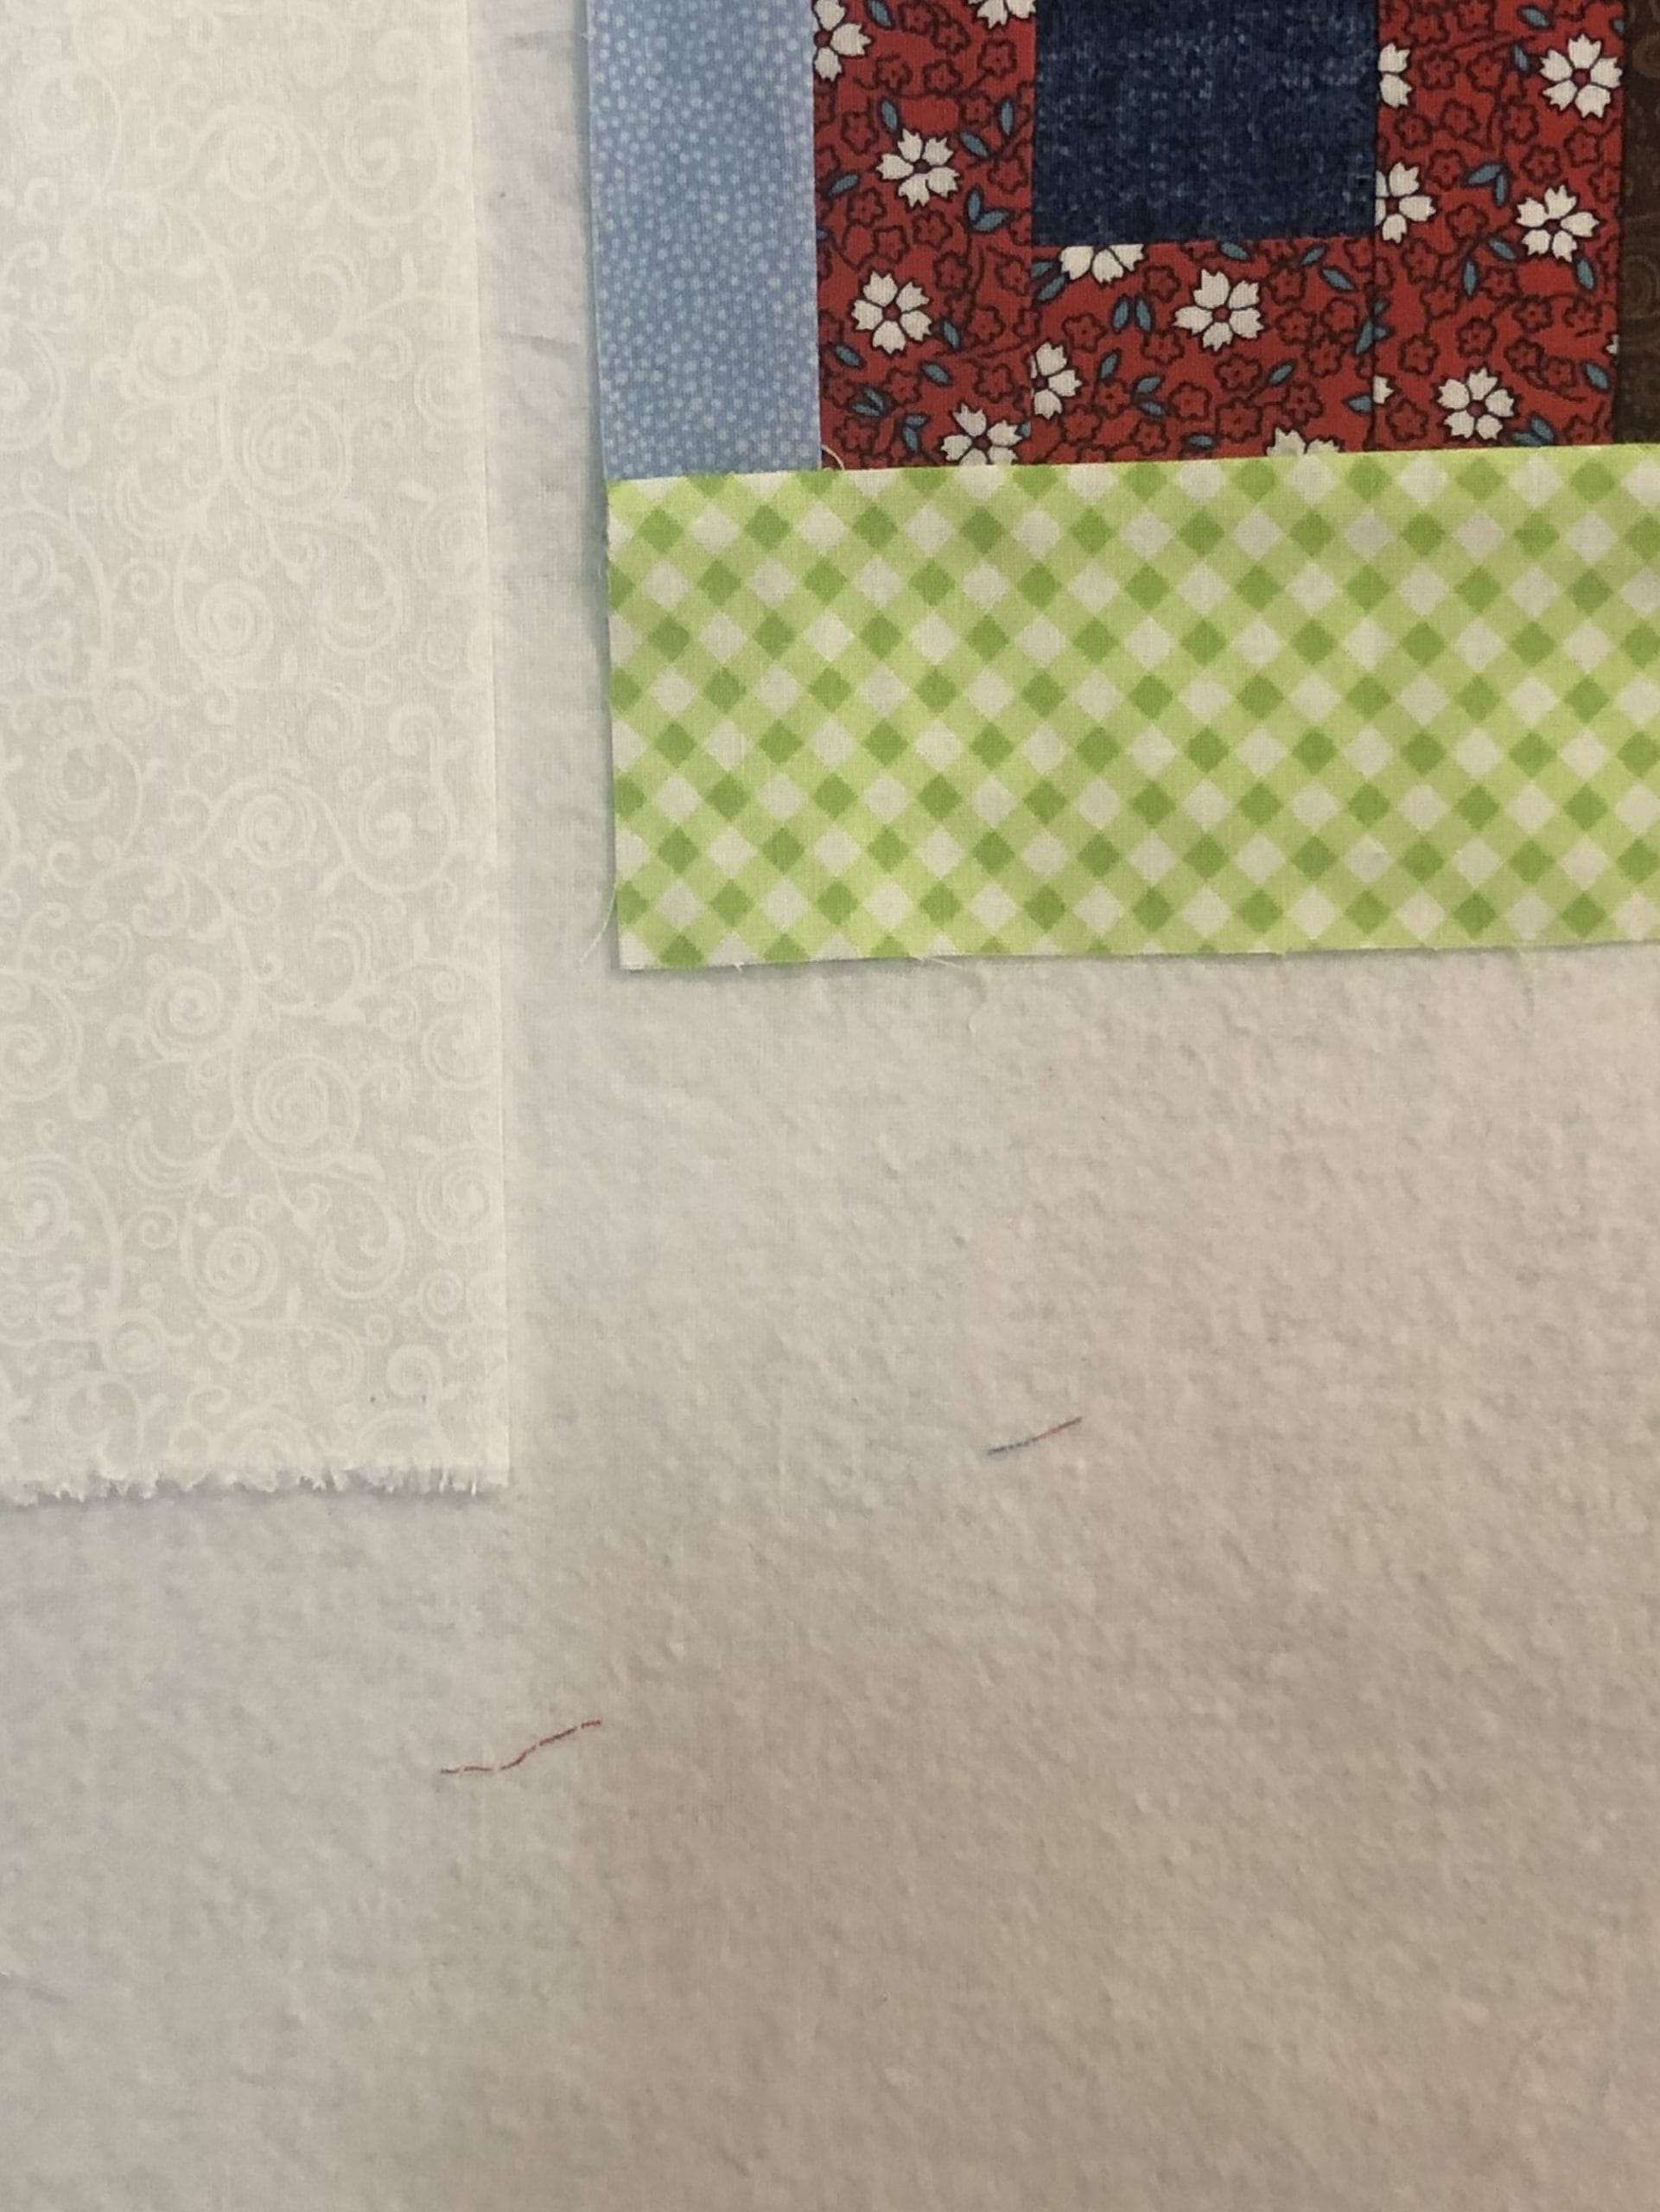
The top seam has yet to be ironed. Once I pin this, I will know which way to press the seam.
But some of the seams will be a bit persnickety when it comes to nesting. Pressing one or both adjoining seams open is always an option, or simply just lining the seams up as best you can with both seams going the same direction can also work.
However, I’m going to tell you my dirty little secret of what I do in this situation: Please don’t send me hate mail or sentence me to quilter’s purgatory for what I’m about to tell you….
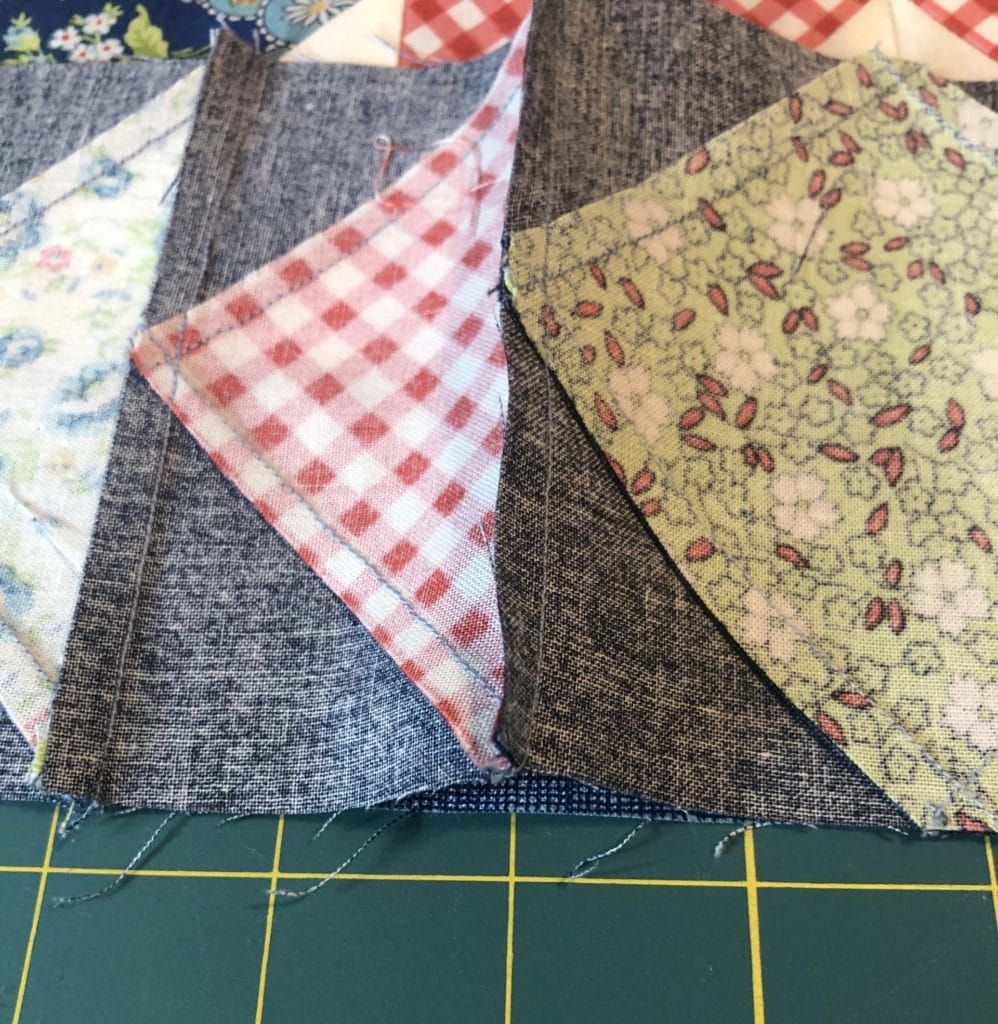
I flip the seams so they nest together, which creates a little fold in the seam, and then iron them as flat as I can where the fold is. You’ll see what I mean in the picture below.
I’ve pinned everything here and have my seams all nested together. Notice the flip in the bottom seam?
I know that you purists out there are probably yelling at your computer screens right now, but I know I’m not the only one who does this. Without naming names, I happen to know a couple other well known designers who do the same thing in this situation. I even called my mother who is a decades long professional quilt designer and long-armer, and she had to confess she does this too. So either we aren’t alone, or perhaps my quilting rebellion is inherited and can’t be helped, haha!
I only had a few seams that needed to be ironed with a fold in them like you see below. And unless I’m going to do stitch-in-the-ditch quilting (which I’m not), then those little occasional seam folds won’t matter, and won’t be seen by anyone once it’s quilted.
One little fold here and there won’t ruin the quilt….
So you all have permission to attach these borders and line up these seams however you see fit. And like my mom always says “There is only ONE rule in quilting that matters – DON’T CUT YOURSELF.” So as long as you don’t get injured, the rest doesn’t matter!
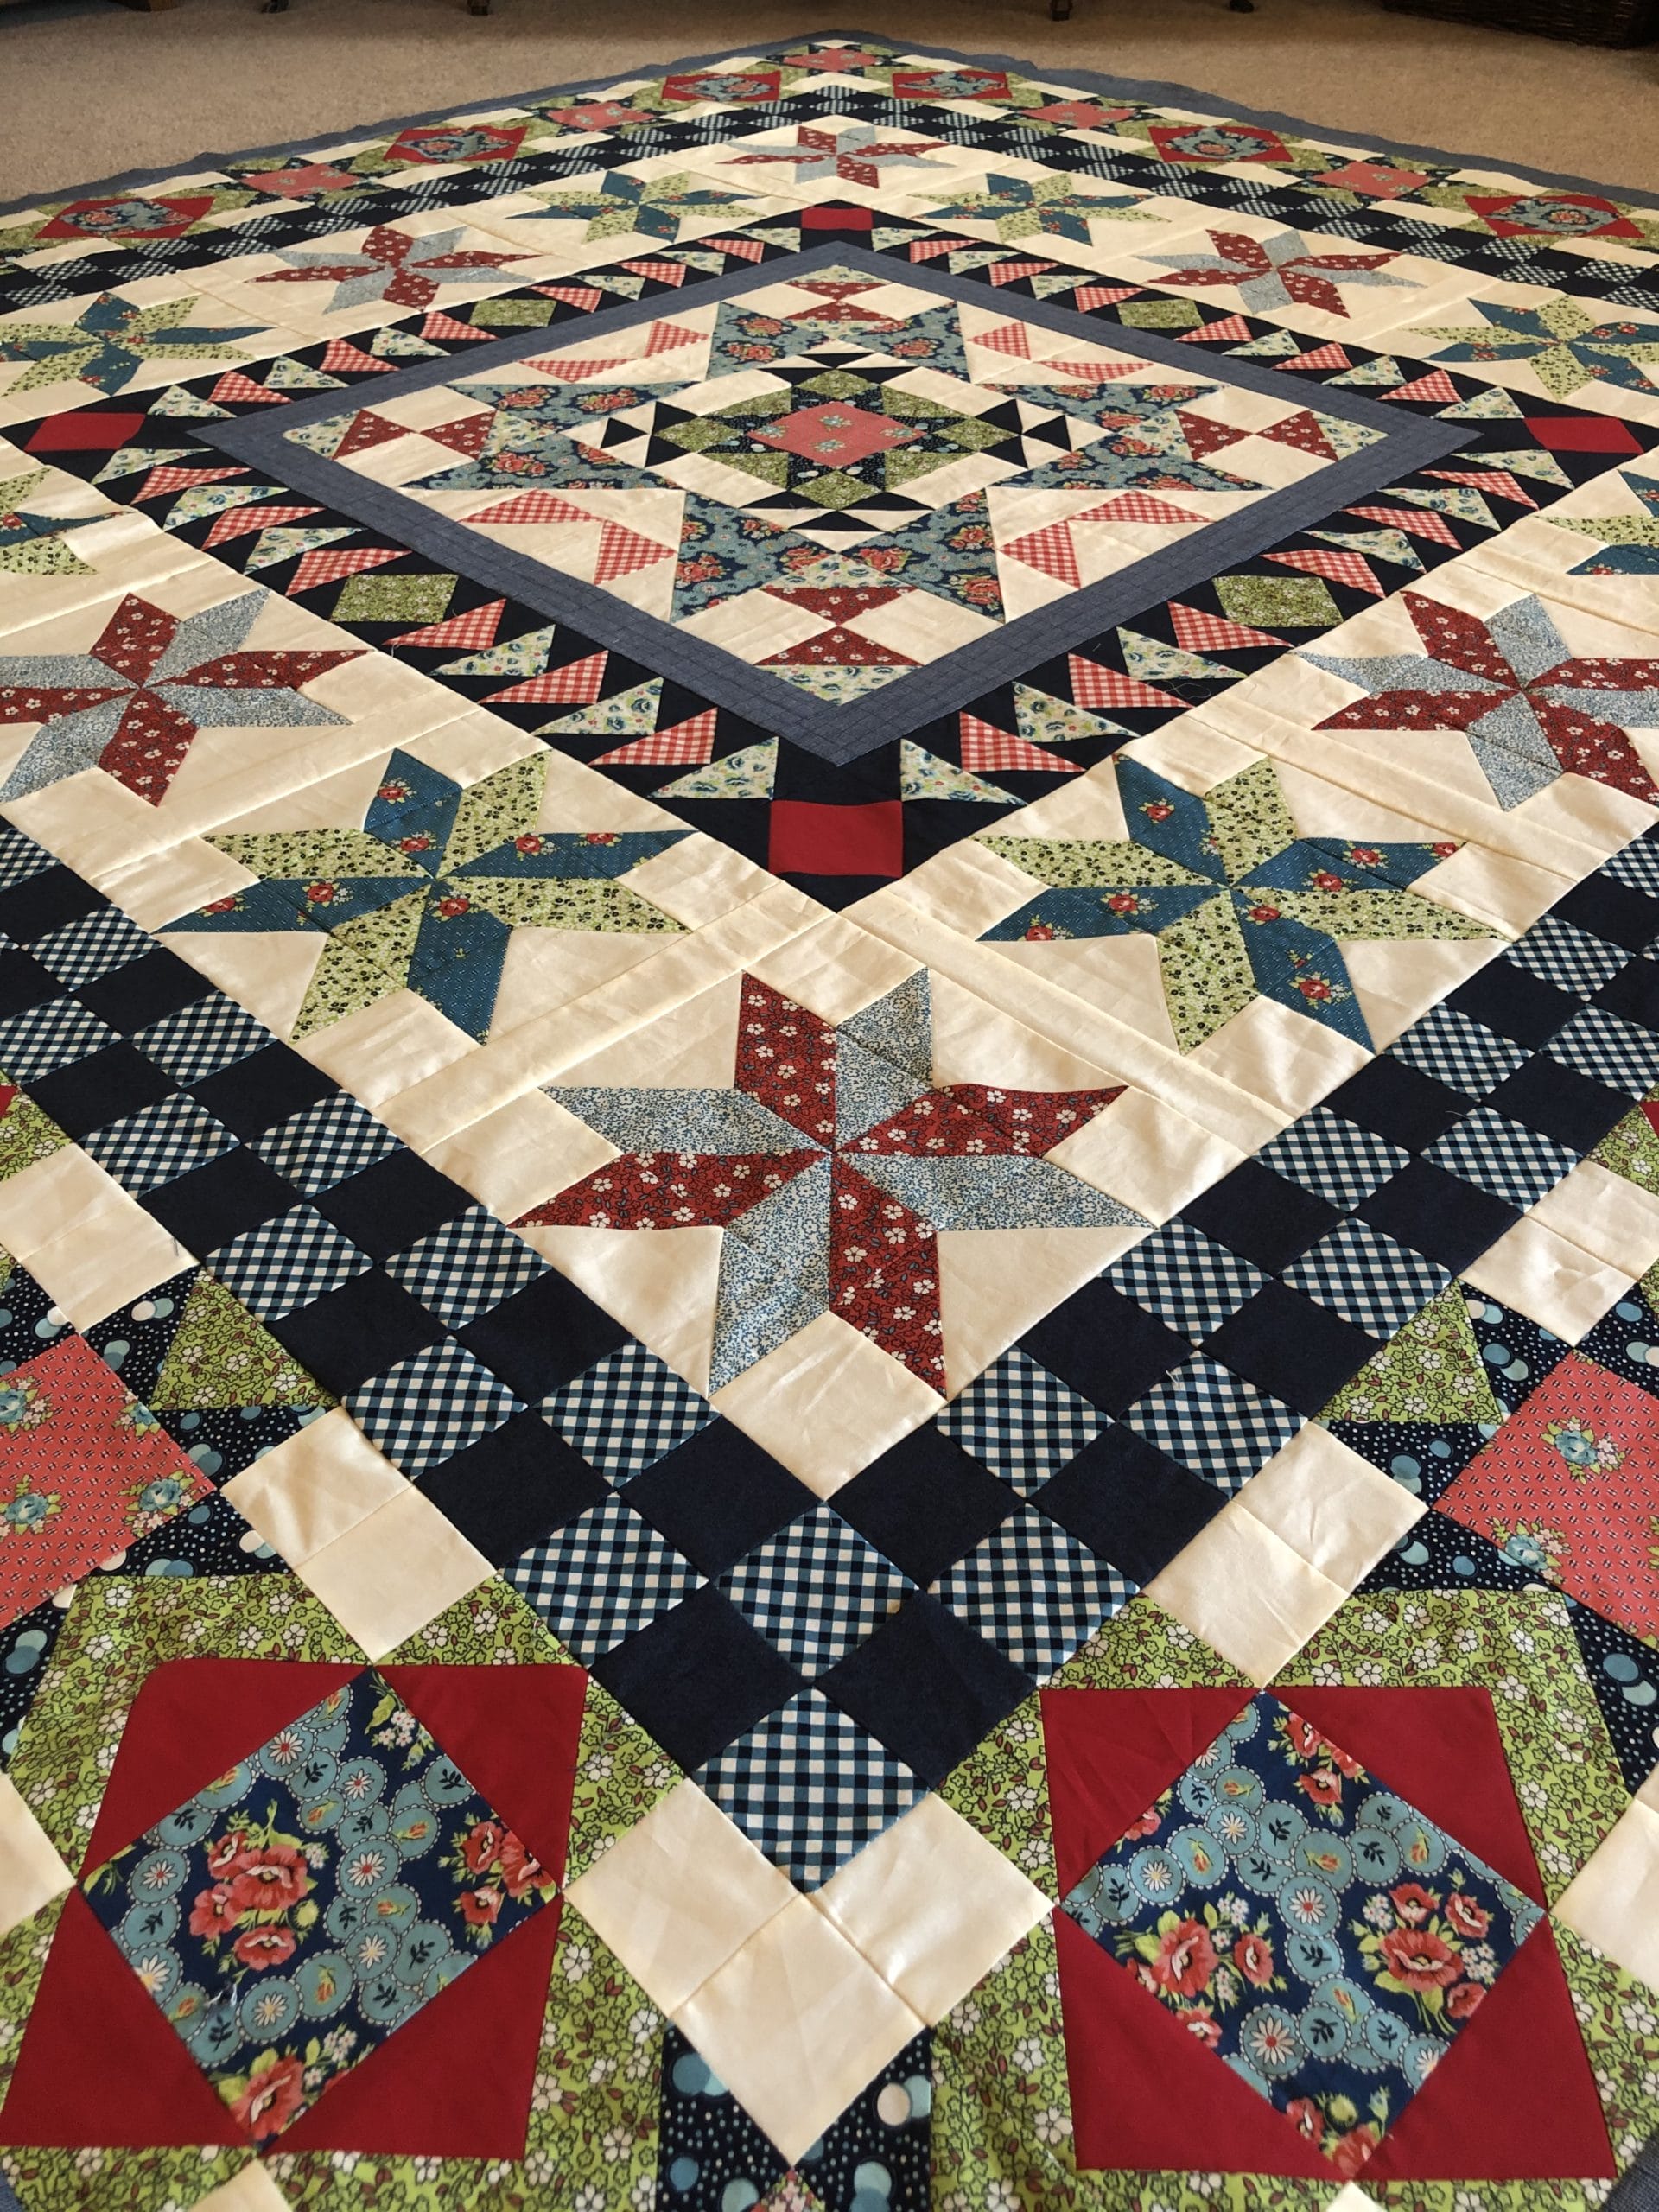
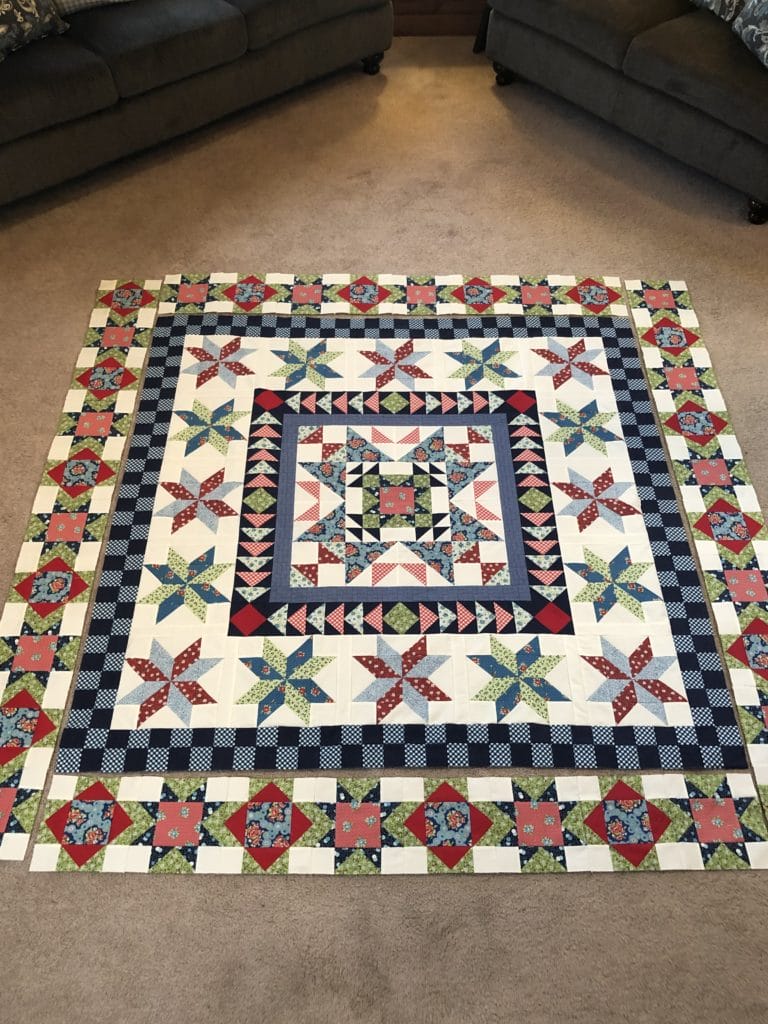
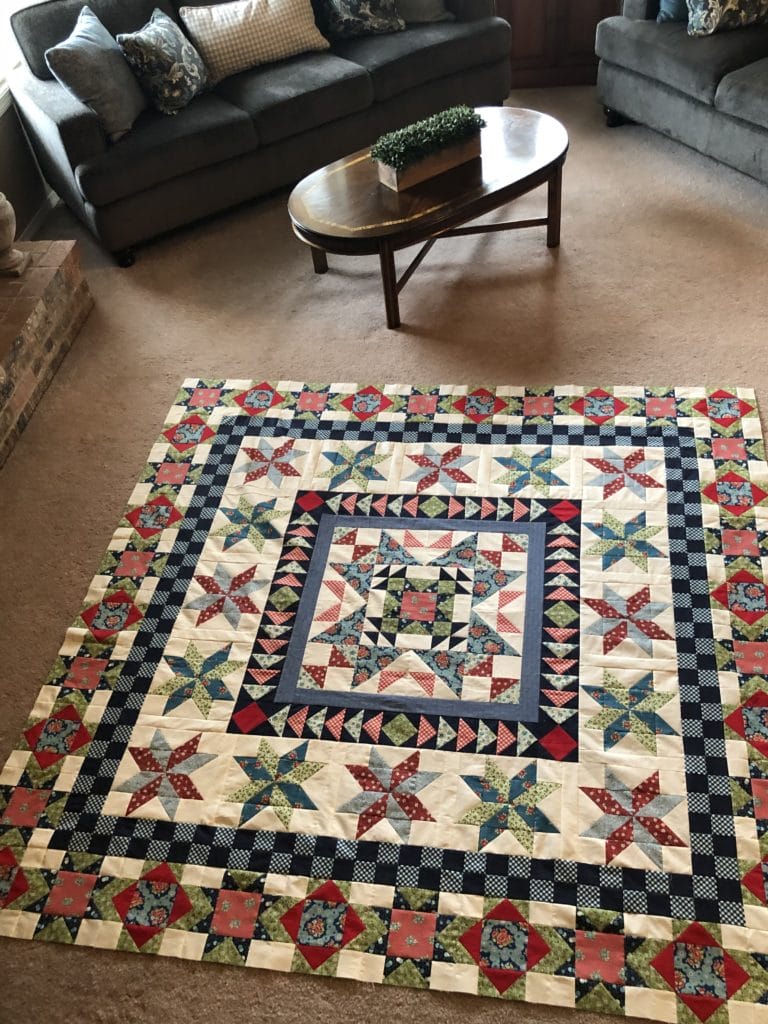
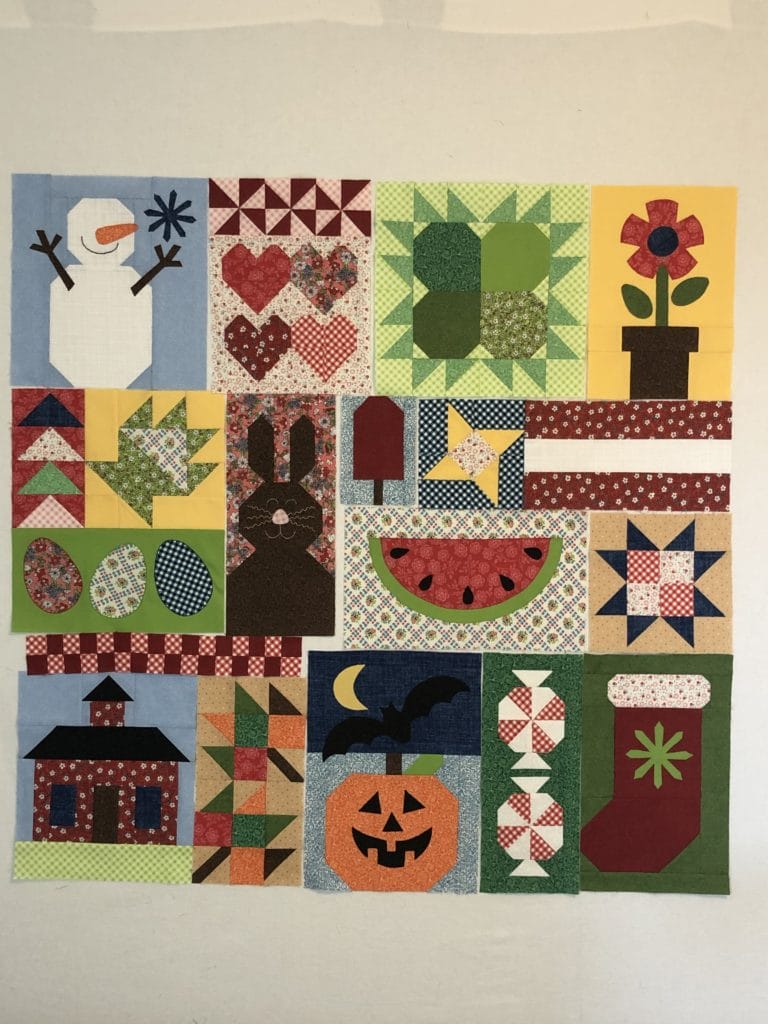
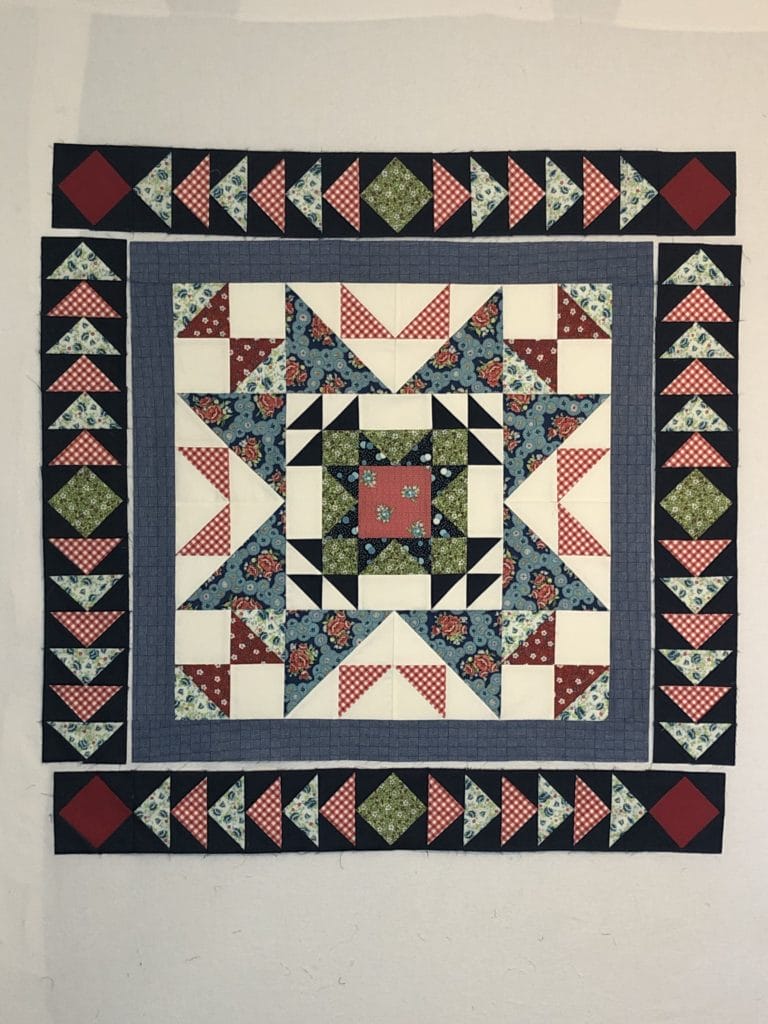
This quilt is now officially too big for my design wall, so it’s happily adding to the ambiance of my living room floor, where it will most likely stay until it’s finished. Good thing I don’t have pets!
Well friends, we are now officially past the half-way mark with this quilt. Yay!
This month will be a lighter month as far as sewing goes, but since we are full swing into the holiday season, hopefully it will be a welcome reprieve for everyone. Don’t get me wrong, sewing is my happy place, but at this time of year I love me some cookie baking, Hallmark movie watching, gingerbread house decorating, carol singing filled days. I hope you all have time at this season to do what fills you with joy!
I know a few of you got ahead of yourselves and tried to sew the star blocks together before getting this month’s instructions, and couldn’t understand why they didn’t fit. Now that you all have your instructions and fabric, you can see that these little stars have some sashing strips sewn between them. See? It all works out in the end!
Here are my stars and sashing strips all ready for pinning and sewing:Now they are sewn together, with the corner stars set aside.
All of my seams are pressed toward the A strips. Once I was finished with step 1, I added the final stars to two of the strips.
Now everything is pieced and ready for the Star Block borders to be sewn to the center.
Sometimes, no matter how well we try and sew, sometimes things don’t fit together as planned. It happens to EVERYONE, not matter how much experience you have. We are human and fabric has give to it. If you find that your Star Block borders are a bit off, you can adjust them by either taking in or letting out the sashing strips as needed. No one will ever know!
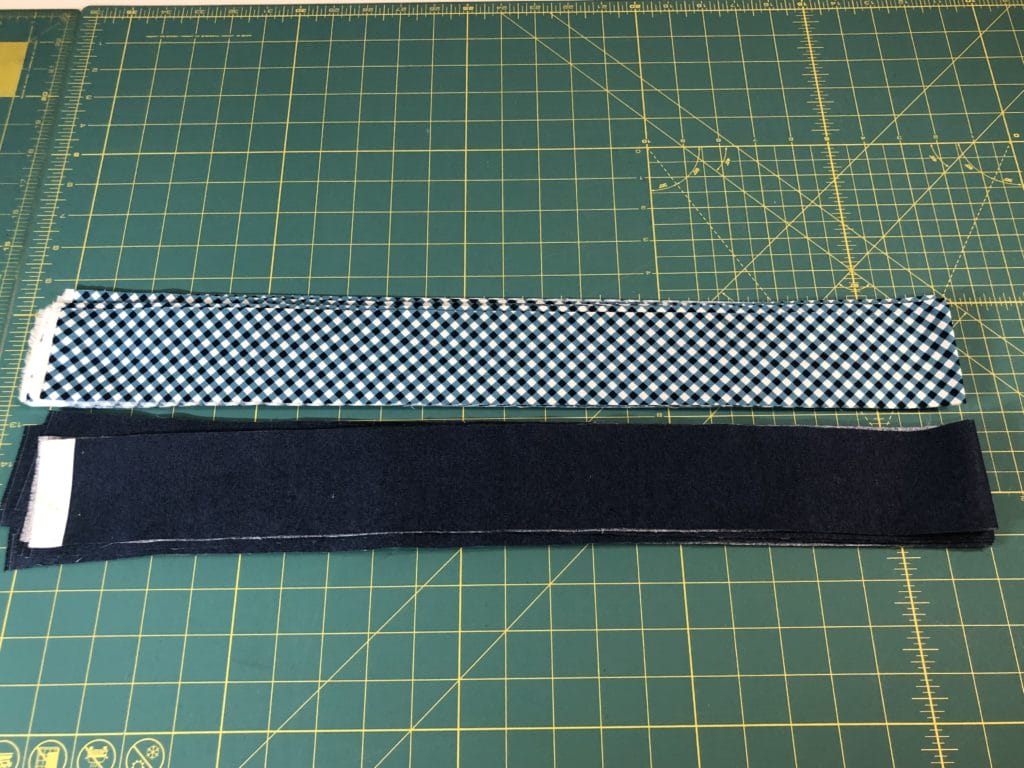
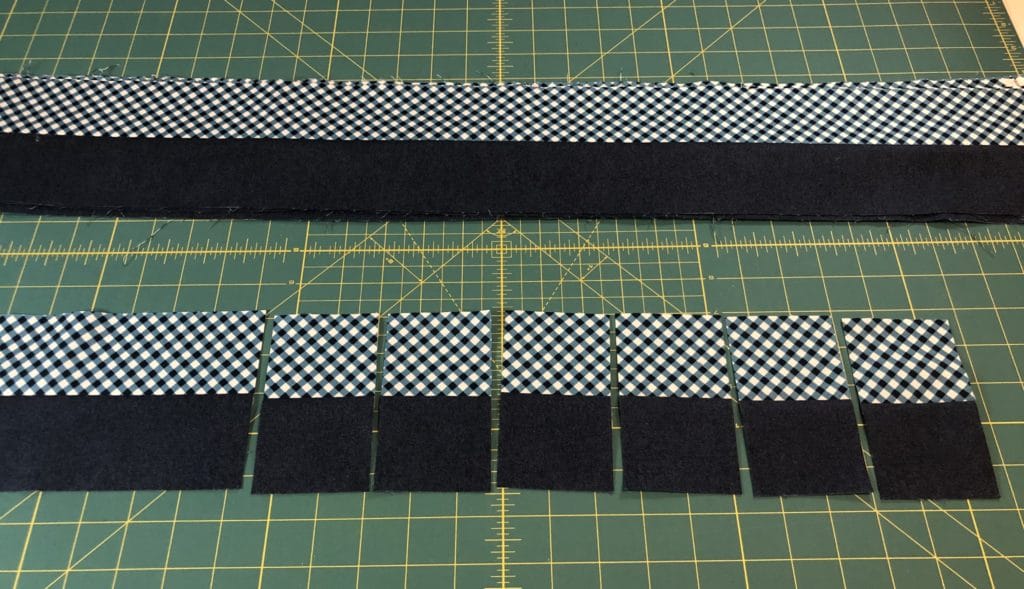
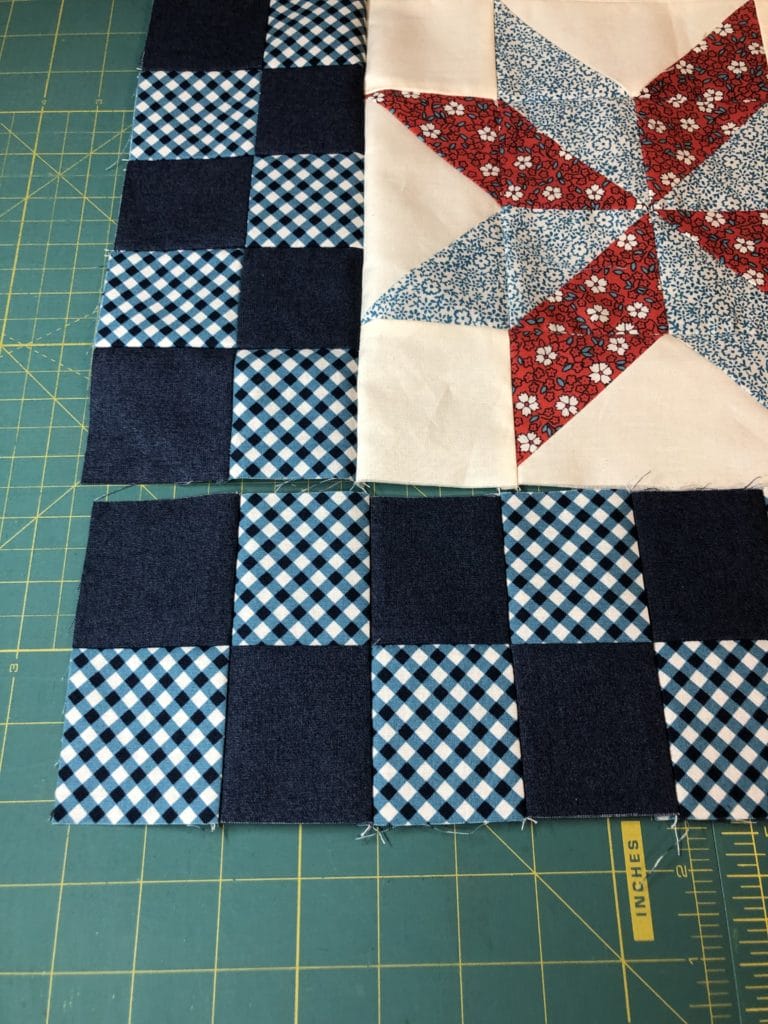
Now it’s time to make those checked borders. Here are all my strips cut and ready for sewing.
By sewing and cutting eight sets of the B/C strips you will have PLENTY for making the borders. I ended up with over half of the last set leftover.
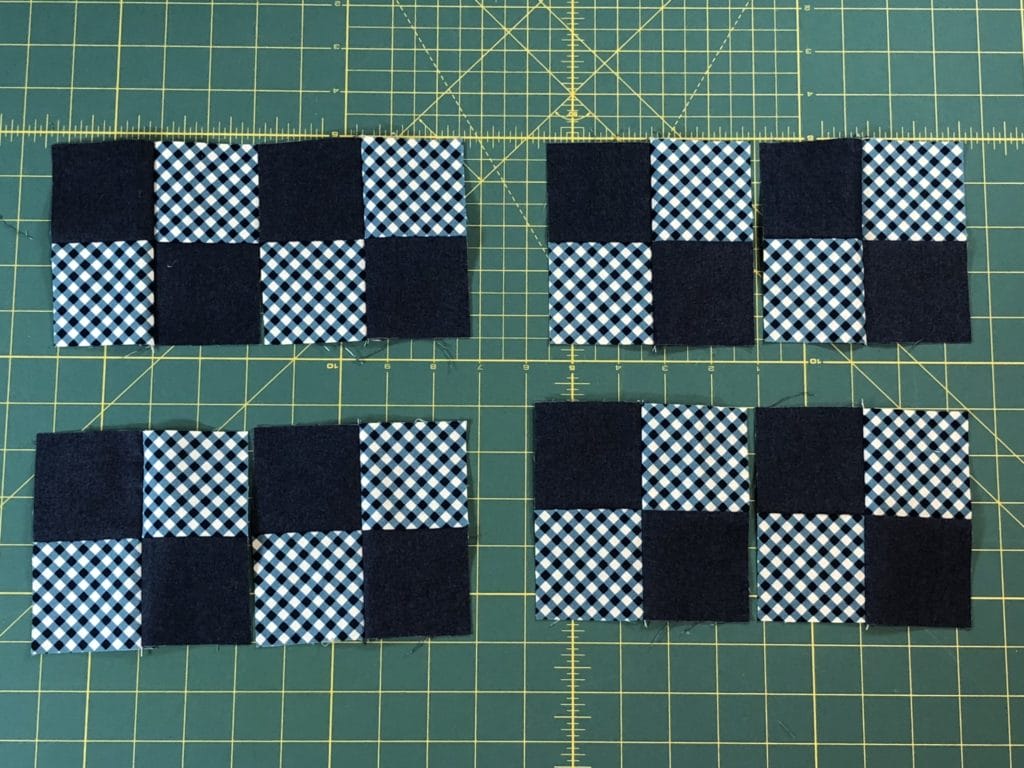
I decided to sew all mine into pairs, and then double each time until I had the correct sized strip sets. However, if you do this method, be mindful that the shorter sets use 28 B/C units and the longer ones use 32 units, so you will need to be counting as you go.
Here I am getting ready to sew my 4-patch units into 8-patch units.
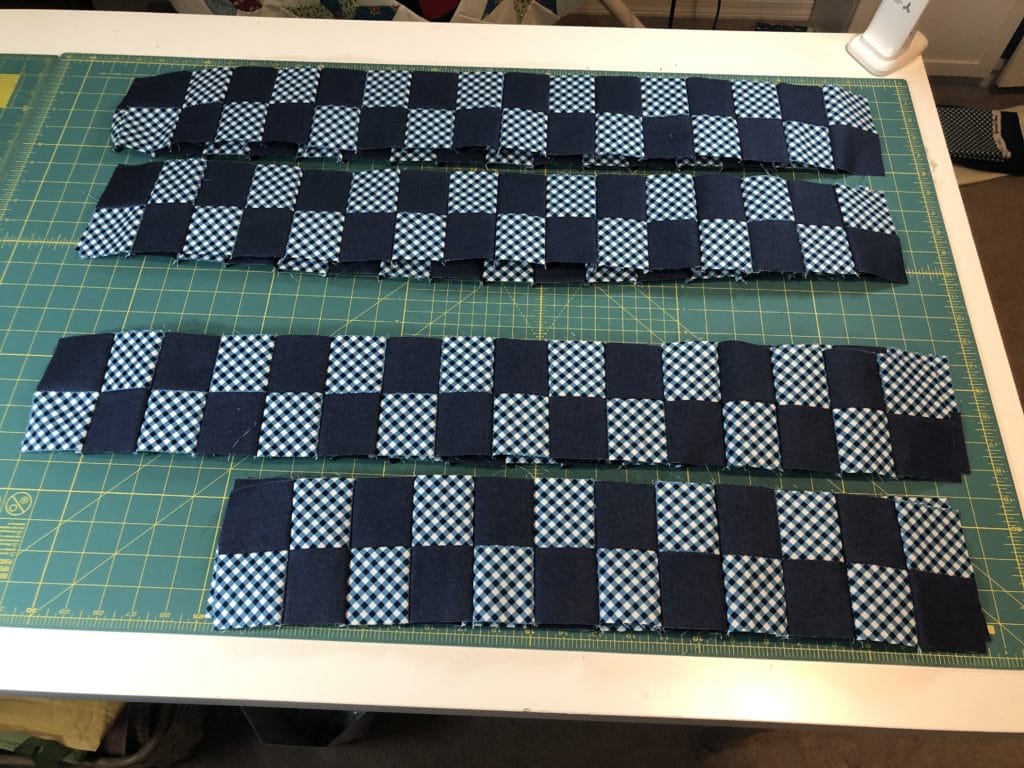
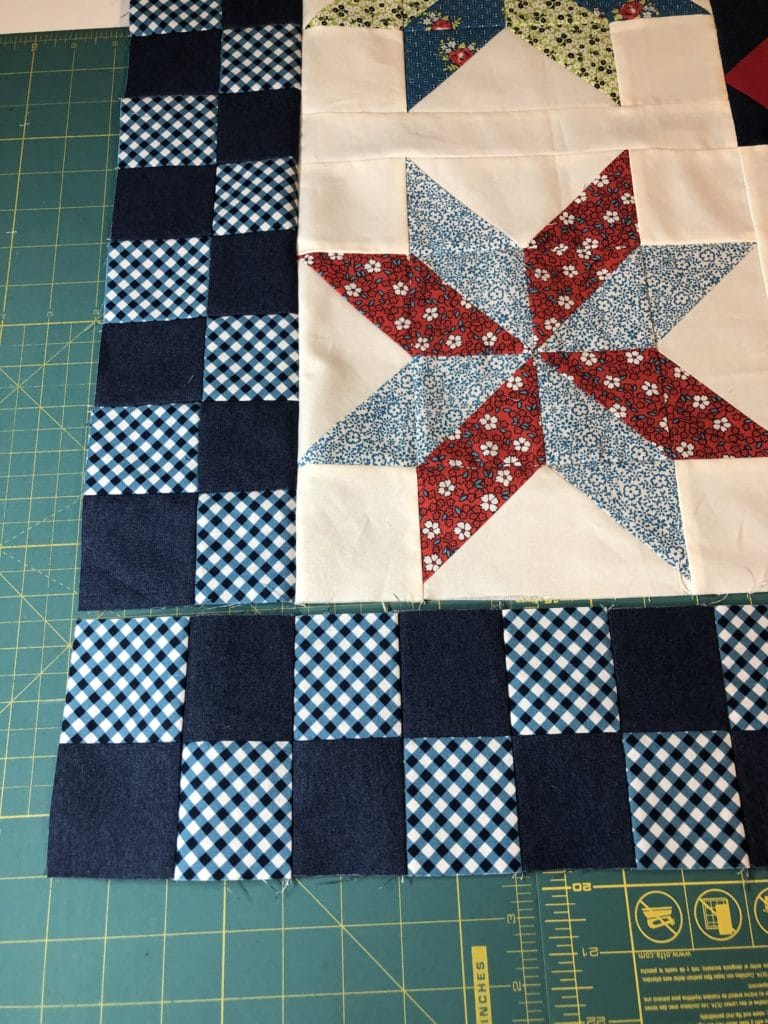
I kept sewing and doubling up until I ended up with what you see below. The top two strips get sewn together to make the top and bottom borders, and the bottom two strips are sewn together to make the shorter side borders.
Also, as I got busy sewing along I did this:
Oops! This is the WRONG way to sew the borders!
Yep, I wasn’t paying attention and ended up with like fabrics that would have been sewn together once I attached my top and bottom checked border rows. Once again, I’m not good at following directions, especially my own! Fortunately it’s an easy fix: I just took the last B/C unit off one end, and then sewed it to the other end.
Much better!
Whenever making any type of pieced border, it can be tricky to make sure things fit properly. Even a 1/32 difference in seam allowance can have a big effect when you are piecing together dozens of squares. I’ve made hundreds of quilts, and I still every once in a while end up with something being way off. Here are a couple of tips I use that may help.
For border strips that are too long: After I’ve ironed my border, if it’s off by around a ½ inch or less, one of my favorite tricks is to spray the pieced strip with MaryEllen’s Best Press, and let it rest. I don’t iron it again before sewing. I just let it dry and it shrinks up just enough to usually fit pretty well. After I sew it together then I press and it works like a charm!
If my pieced border is REALLY long, I will go back and increase the seams in multiple places by just a hair. There’s no need to rip anything out, just sew right next to the old seam. You need to be careful that you don’t increase each individual seam by too much, or it will throw off how things fit and nest together in the coming months. So it’s better to do a tiny bit on multiple seams, rather than just adjust a few seams by a large amount.
For border strips that are too short: If my borders are just a bit too short, then I can usually stretch them a bit and ease them in, but if they are way off, then I get friendly with my seam ripper. I generally will rip out multiple seams and then re-sew them just a scant under the ¼” seam allowance until it fits. It’s not fun or easy, but it works.
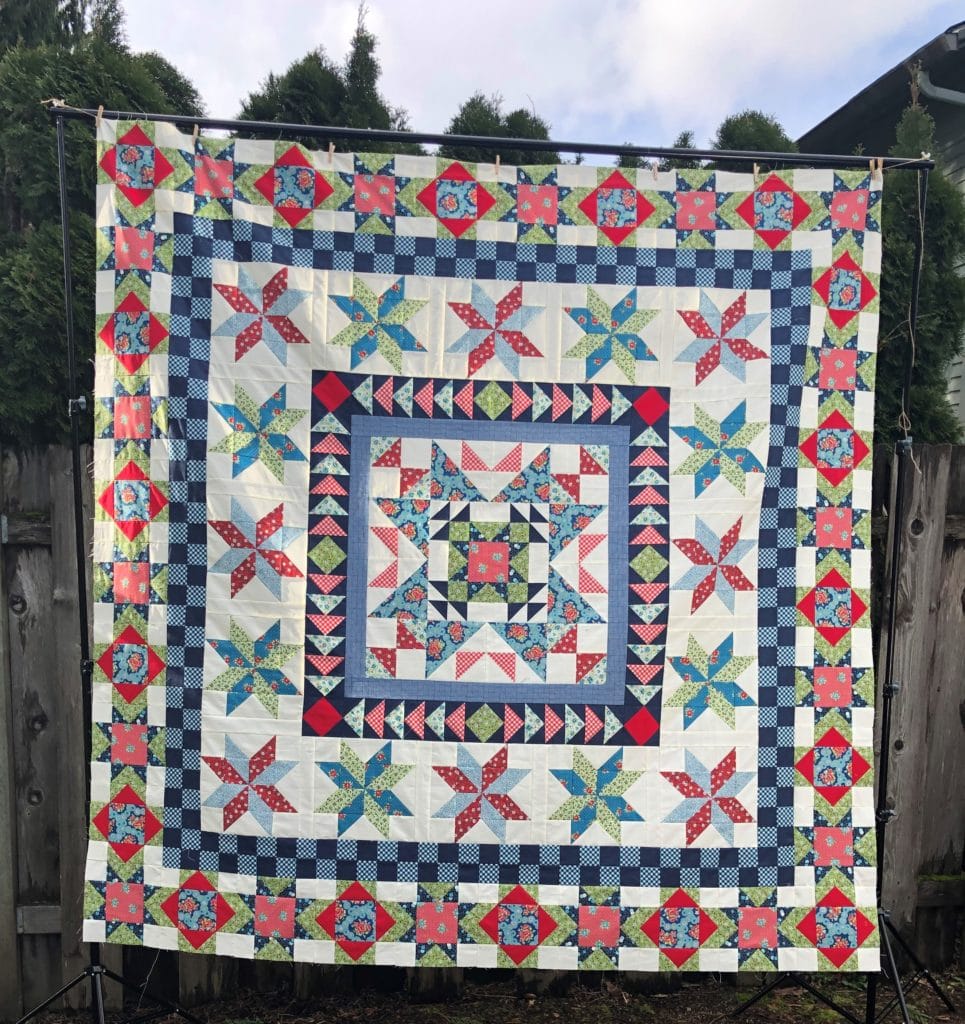
This quilt is really starting to get big!
Have a wonderful holiday season, and Happy Quilting!
The moment we’ve all been waiting for has finally arrived. After months of sewing blocks, we get to put this quilt all together and finish!
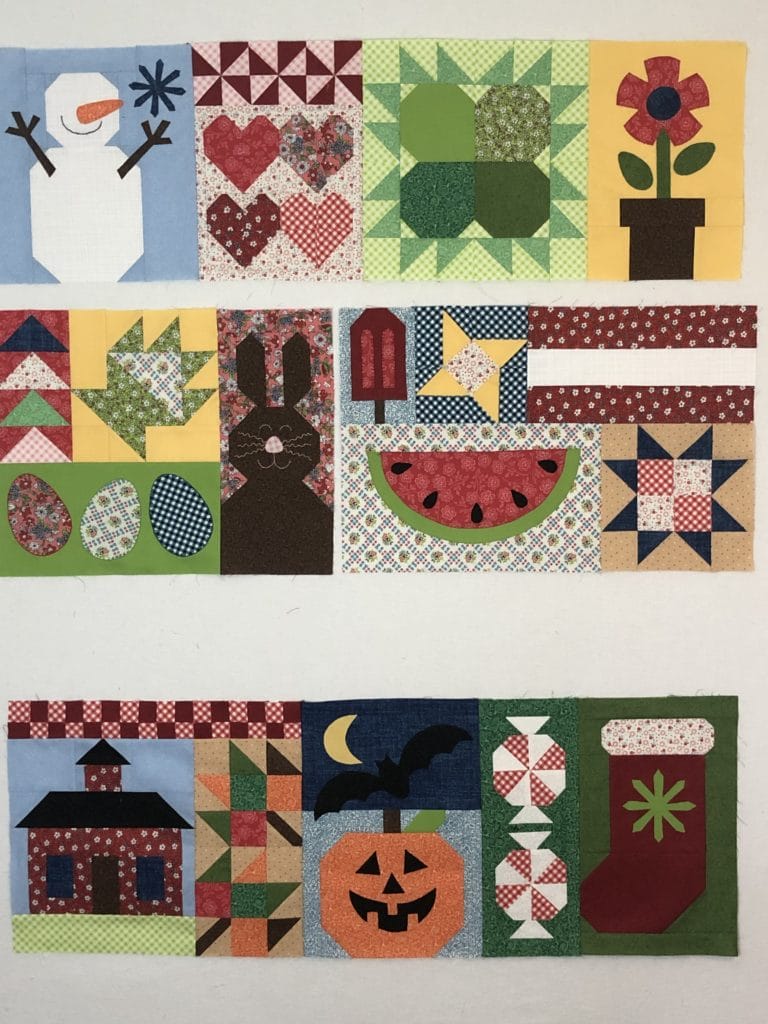
I know many of you jumped right in after finishing last month’s blocks and have already assembled the main portion of the quilt. Once you have the quilt blocks all laid out, it’s not too difficult to see how it all goes together.
I must admit I got a little carried away myself sewing the blocks together, and forgot to take pictures of some of my sewing. Fortunately you all have the pattern to refer too!
Once the center portion of the quilt is put together, it’s time to make and sew the borders. Whenever I have solid borders to add to a quilt, I ALWAYS cut my borders an inch or two longer, just to make sure I have plenty for squaring up the corners.
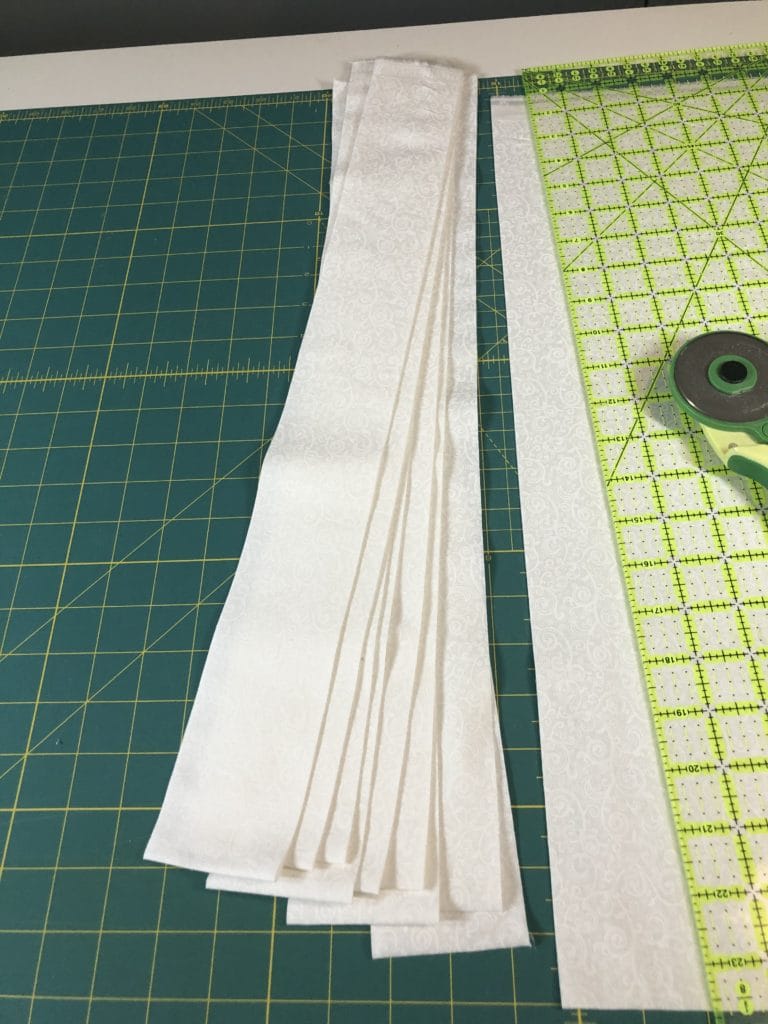
This month’s kit comes with 1-1/2 yards of the White Swirl fabric for the border strips, which means that you don’t need to piece your border strips for the A-D pieces, since you can cut them length-wise on the fabric. If you want to do this so that your borders don’t have seams, make sure you cut all of the A-D strips before cutting out all of your E squares for the pieced border.
Of course, yours truly forgot this and just went to town cutting strips running the width of fabric before I realized what I’d done. Sooo….I got to do some piecing for most of my white border strips. But it works either way, and there is plenty of fabric. I just have a few strategically placed seams in some of my borders.
Yep, I went a little strip crazy and got ahead of myself here.
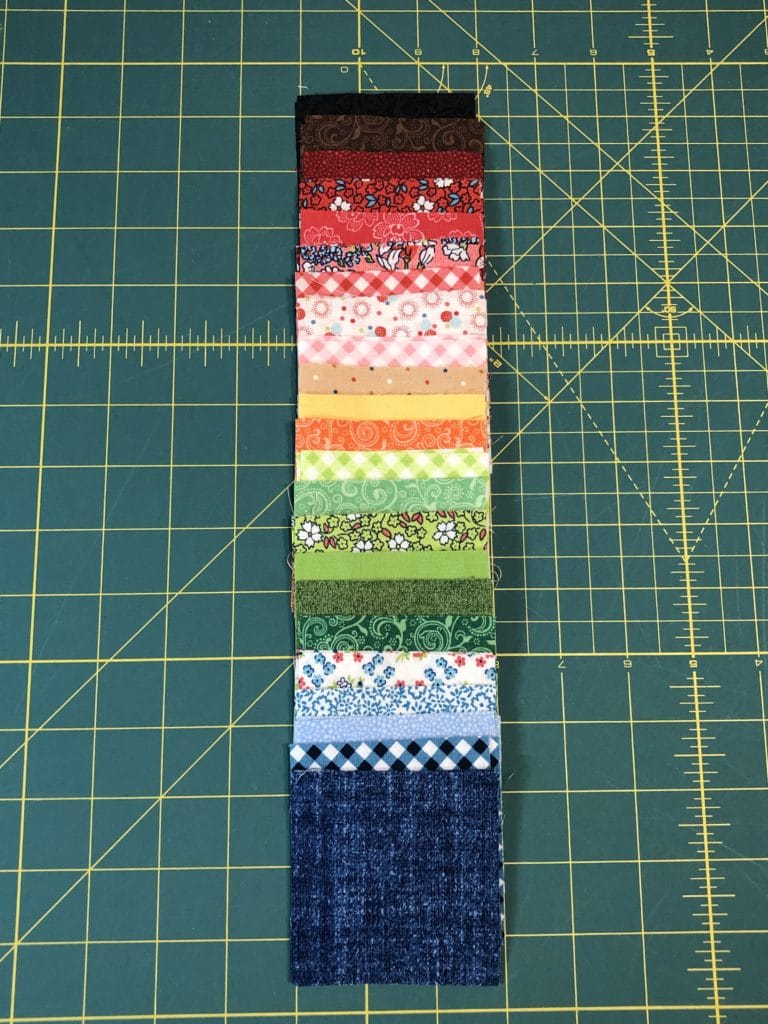
Now it’s time to make the half-square triangles for the pieced borders. Since you all know by now how to make these, I won’t worry about that part. But I’d like to share a little bit about fabric placement and color. Since this quilt is very colorful, I wanted to make sure that the border was a continuation of what was happening in the main body of the quilt. So I made sure to cut two F squares from each fabric in the quilt. This quilt has a lot of greens, blues, and reds, but not as many oranges and yellows, so I went ahead and cut a couple of extra squares of the orange and yellow fabrics so that my border would look more balanced.
Here are all my squares ready for sewing: You can see I’ve made sure I have all the colors of the rainbow represented.
Next, comes the fun part! I know many quilter who at this stage would just start sewing these half-square triangles together at random and surprise themselves with the finished product. I admire their moxie, but I have always had a hard time doing that. I’m one of those crazy people who neurotically places ALL my squares around the quilt on my design wall and then stands back to look at it. I want to make sure I don’t have too many fabrics of similar color or value next to one another. I may move the things around a dozen times before I am satisfied. (Bananas, I know!) Then when I’m happy with the results, I pull out my trusty phone and take pictures of everything before I begin sewing.
This photo is not great, but you can see how I have placed the E/F squares around the quilt to get an idea of how it will come together.
Plus, the added advantage is that I can also make sure that I have all my triangles oriented correctly, especially in the corners.
As you may notice from the photo above, I also sew the squares together in segments, and continually return things to my design wall and refer to my photos to make sure I’m not goofing things up as I go along. It takes a little longer this way, but it’s rare that I have to rip anything out.
Whenever making any type of pieced border, it can be tricky to make sure things fit properly. Even a 1/32 difference in seam allowance can have a big effect when you are piecing together dozens of squares. I’ve made hundreds of quilts, and I still every once in a while end up with something being way off.
Here are a couple of tips I use that may help
For border strips that are too long
After I’ve ironed my border, if it’s off by around a ½ inch or less, one of my favorite tricks is to spray the pieced strip with MaryEllen’s Best Press, and let it rest. I don’t iron it again before sewing. I just let it dry and it shrinks up just enough to usually fit pretty well. After I sew it together then I press and it works like a charm!
If my pieced border is REALLY long, I will go back and increase the seams in multiple places by just a hair. There’s no need to rip anything out, just sew right next to the old seam. You need to be careful that you don’t increase each individual seam by too much, or it will throw off your triangle points when it’s attached. So it’s better to do a tiny bit on multiple seams, rather than just adjust a few seams by a large amount.
For border strips that are too short
If my borders are just a bit too short, then I can usually stretch them a bit and ease them in, but if they are way off, then I get friendly with my seam ripper. I generally will rip out multiple seams and then re-sew them just a scant under the ¼” seam allowance until it fits. It’s not fun or easy, but it works.
Once we have all the pieced borders attached, we can sew on the final border strips and the top is FINISHED!
Thanks so much for making this quilt with me! I hope you enjoy it for many years to come!
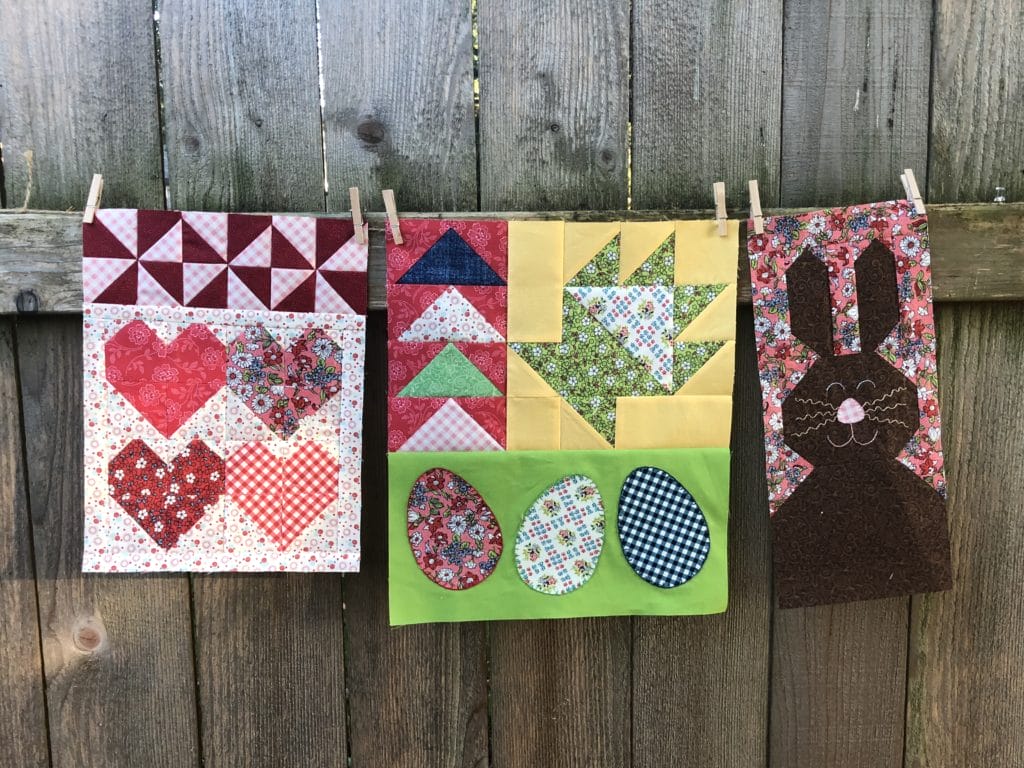
Can you guys believe we are already on month 5? We are on the home stretch! This month we will be making the last three blocks for this quilt, so that next month we can finally put this beauty together and finish! Yay!
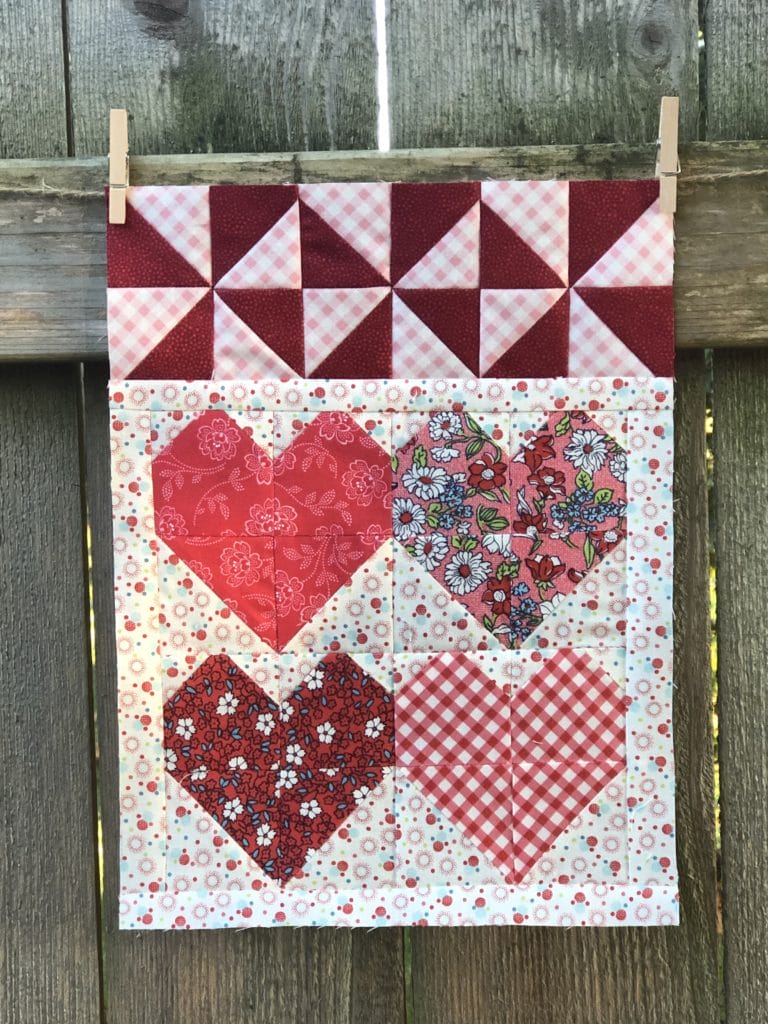
Hearts and Pinwheels
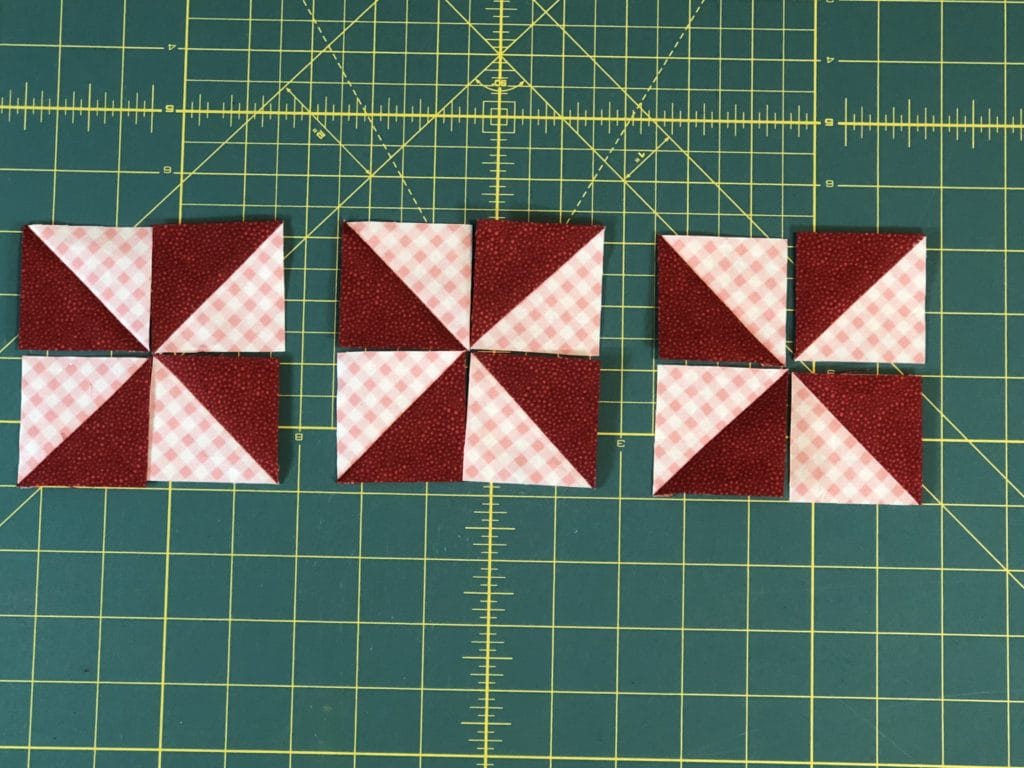
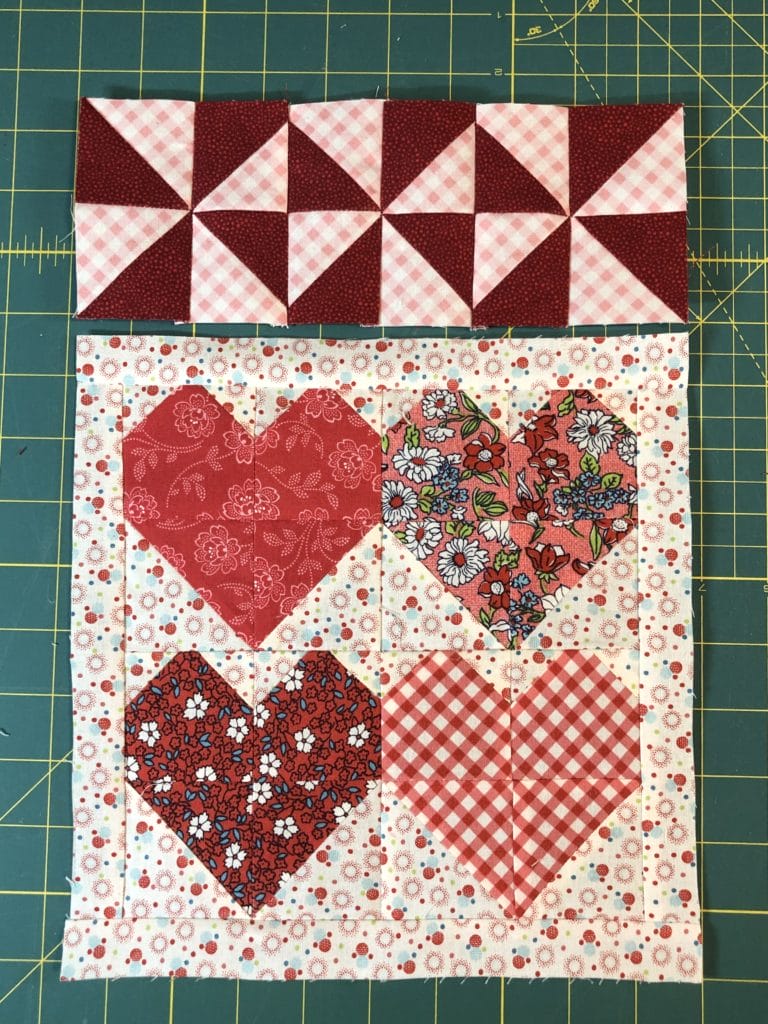
I love pinwheels! I know it can be tricky sometimes to get all the points to match up in the center, but unless I’m way off, I usually don’t get too picky with them. Pinwheels are made from creating half-square triangles and arranging them into a pinwheel block.
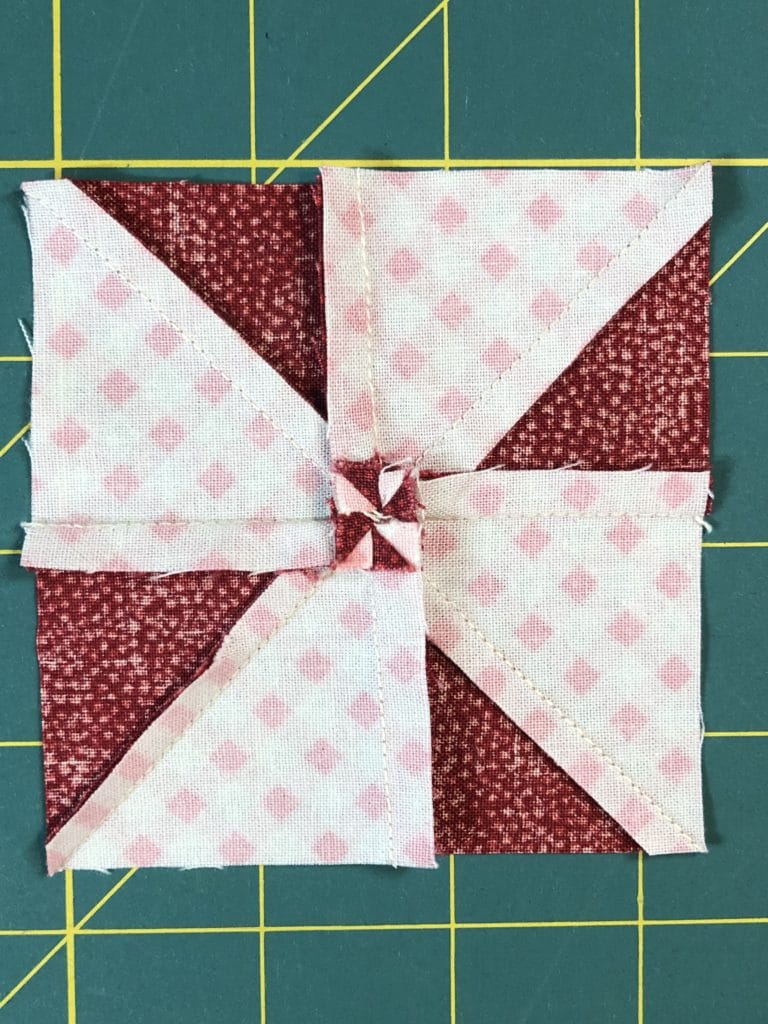
I also open the seams in the center so that they will lay flat when pressed. I don’t know who thought of this idea, but it was a trick I learned years ago. Perhaps many of you do this too. You want to open the seams so that you end up with a pinwheel design on the back side when you press them. It might be hard to make out in the photo, but hopefully you all get the idea.
If you Google “Pressing Pinwheel quilt blocks” You will find a couple of video tutorials that can explain it better than I can here.
Here is a photo of the backside of a pinwheel block. You can see how the seams are pressed open in the center so the block will lay flat.
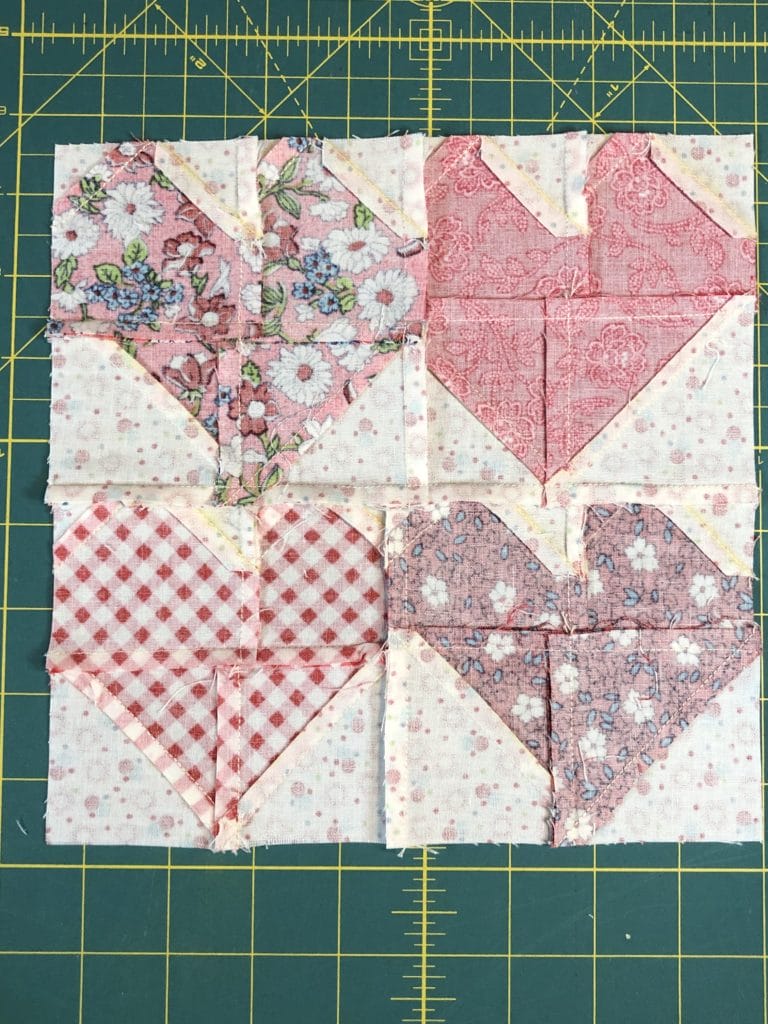
Now it’s on to the hearts portion of this block.
I think these just might be the first hearts I’ve ever designed in a quilt. I’m not sure what that says about me, but in any case, no quilt celebrating all the seasons and holidays of the year would be complete without some sweet Valentine hearts. Here is how I put mine together:
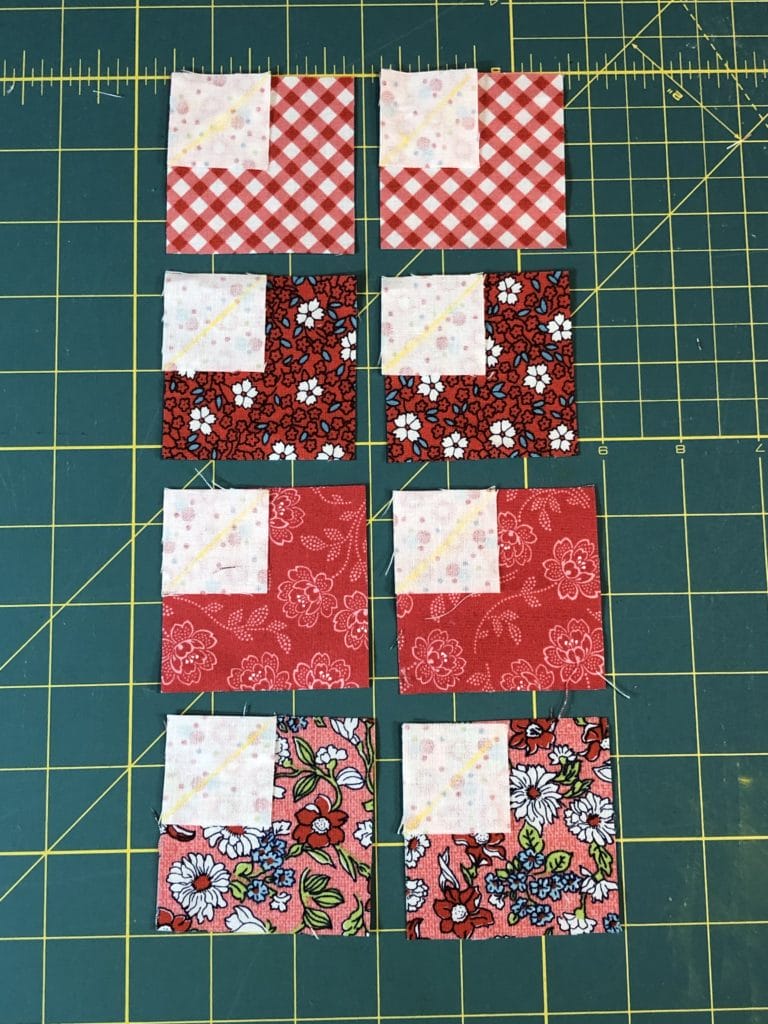
I like to do a lot of assembly line sewing, so I’ve laid out all the units sew I can sew everything at the same time.
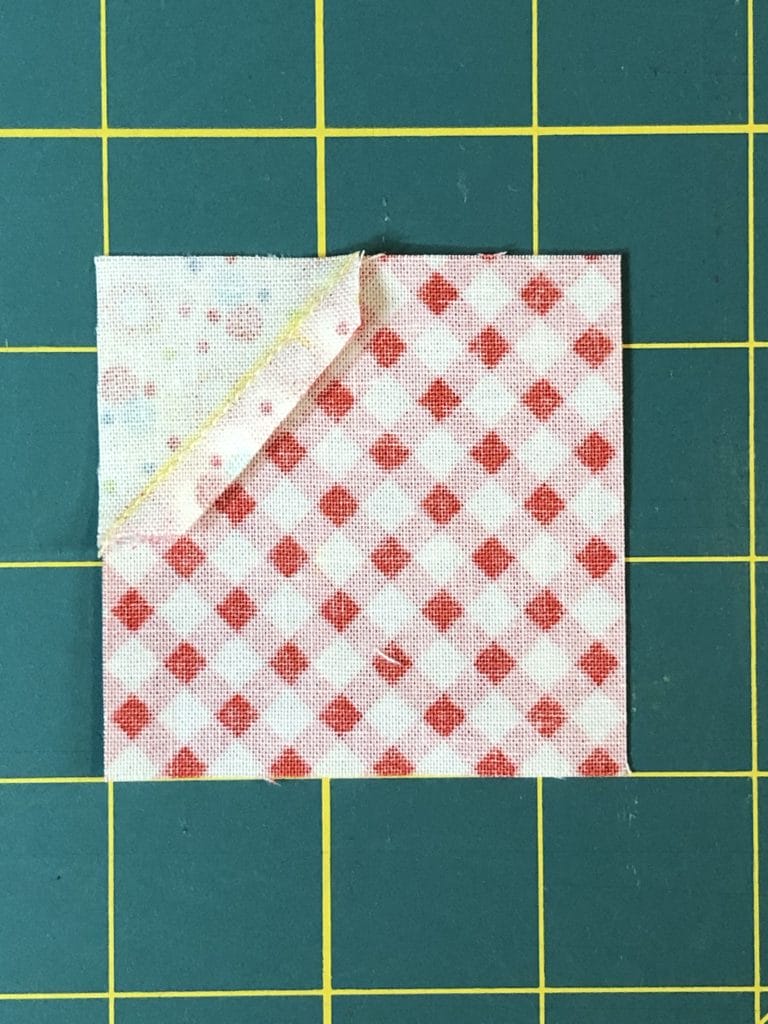
Make sure after you sew the first “C” squares on that you iron the seams downward toward the “H” squares as shown below. The second “C” square will be ironed upward. This will allow the seams to nest together later.
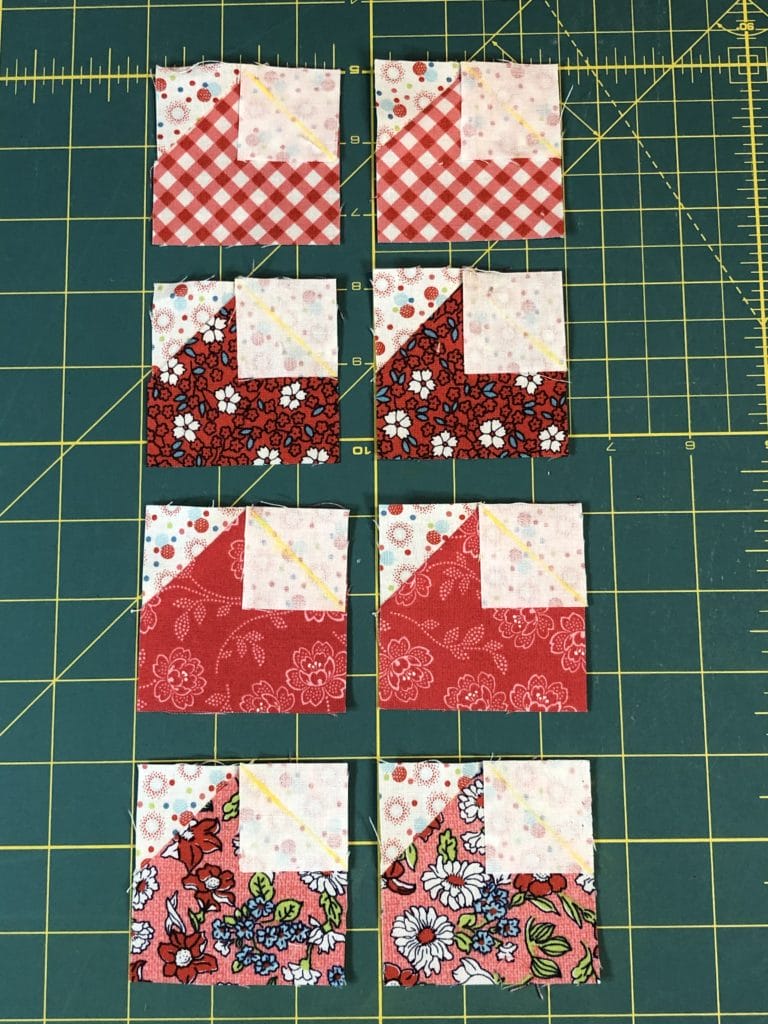
Below you can see I’ve laid out my C/H pieces with the Half-Square triangle units I made in step 5 of the pattern.
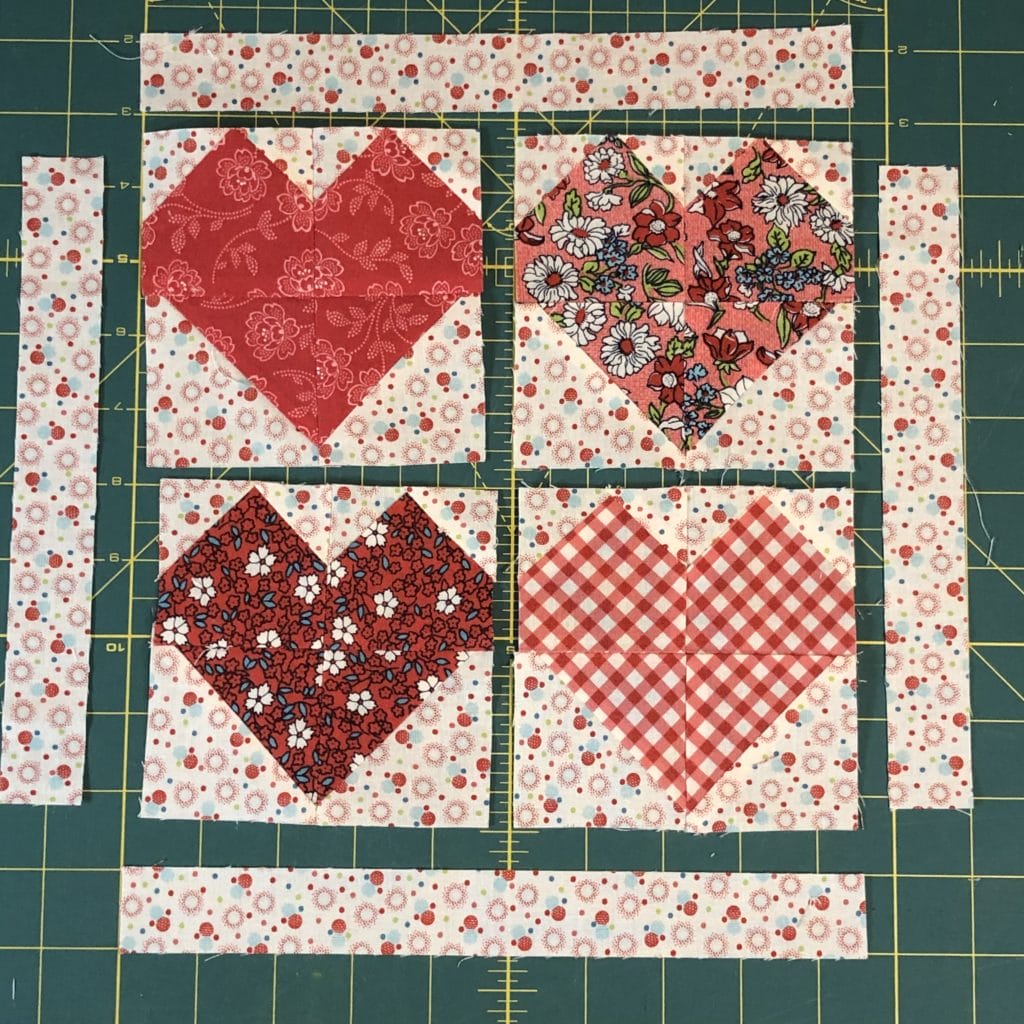
Once the individual hearts are sewn we can put them all together and add the narrow borders. When you sew the four hearts together, you may choose to press the seams open to reduce bulk, or you can re-press some of the seams on the hearts to allow them to nest together.
Here is a photo of the back side of my block. You can see that I chose to adjust some of the seams within the individual heart blocks so that my seams would all nest together. But pressing the seams open works just fine too, so as I always say, do what makes you happy.
And now we can add the pinwheel row to the top to finish the block!
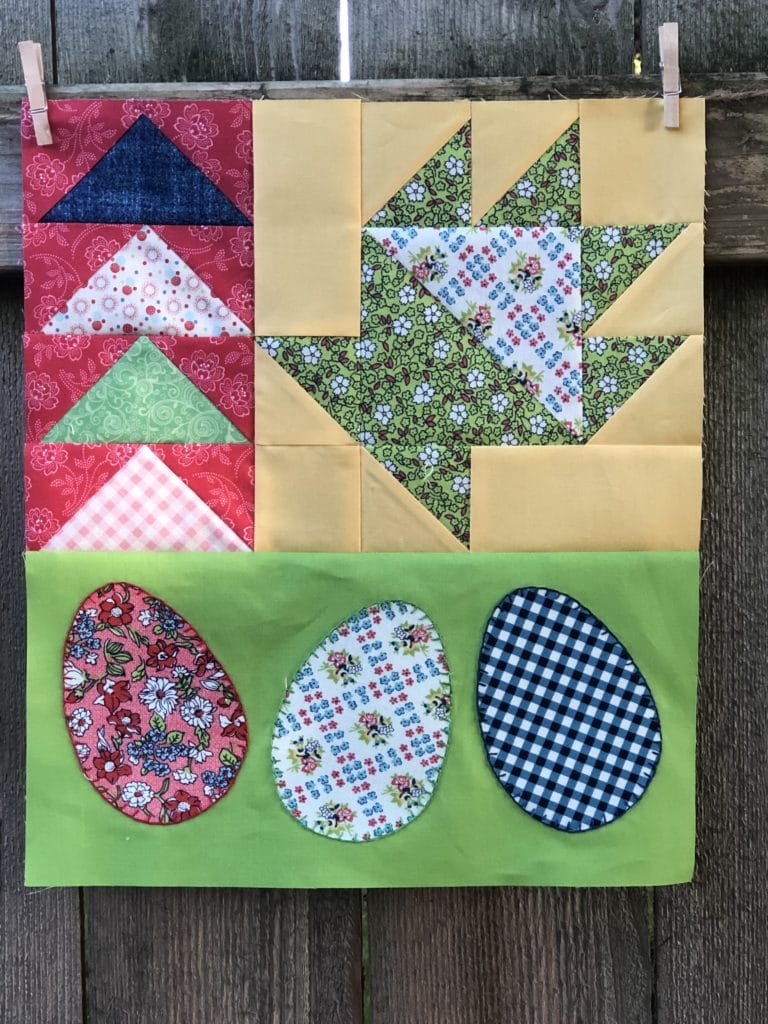
Springtime Block
For the Eggs applique, this time I decided to do some hand stitching with some embroidery floss. I went for thread colors that would help the eggs pop a little more. For some reason I can’t ever seem to make a quilt the same way twice! I really tried to behave myself throughout this project, so that you could see it sewn as the original, but this time I just couldn’t help myself!
The basket just some squares and Half Square Triangles sewn together, so it hopefully isn’t too difficult for all of you. Just pay close attention to the instructions and pressing directions. This will enable the seams to nest together when it is sewn to the flying geese section.
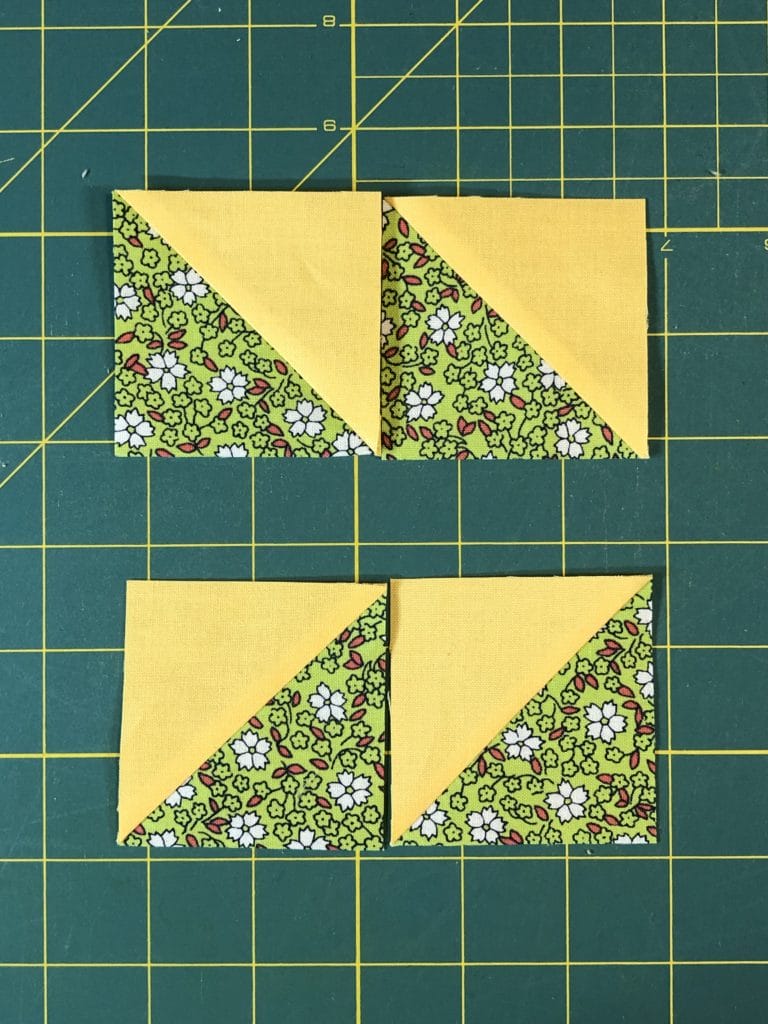
Don’t forget in step 3 to sew each pair of A/D squares going opposite of each other, just like in the photo below.
These units below are from step 5, and are mirror images of each other as well.
And now I’ve laid out all the components for the Basket Block and I’m ready to sew it all together.
Flying Geese unit
Here are some photos of how I made the little row of flying geese. I know sometimes flying geese can be a pain to make. I’ve found that if I sew just BARELY inside the line, I end up with a better looking unit when I’m done.
Now all the units are ready to sew together! Except of course, if you look carefully at the photo below, I still have yet to stitch around my eggs. Apparently I forgot to take another photo after doing that, but before I finished the block. Oops! Sometimes I get carried away with my sewing and forget I’m supposed to be taking pictures too.
Bunny Block
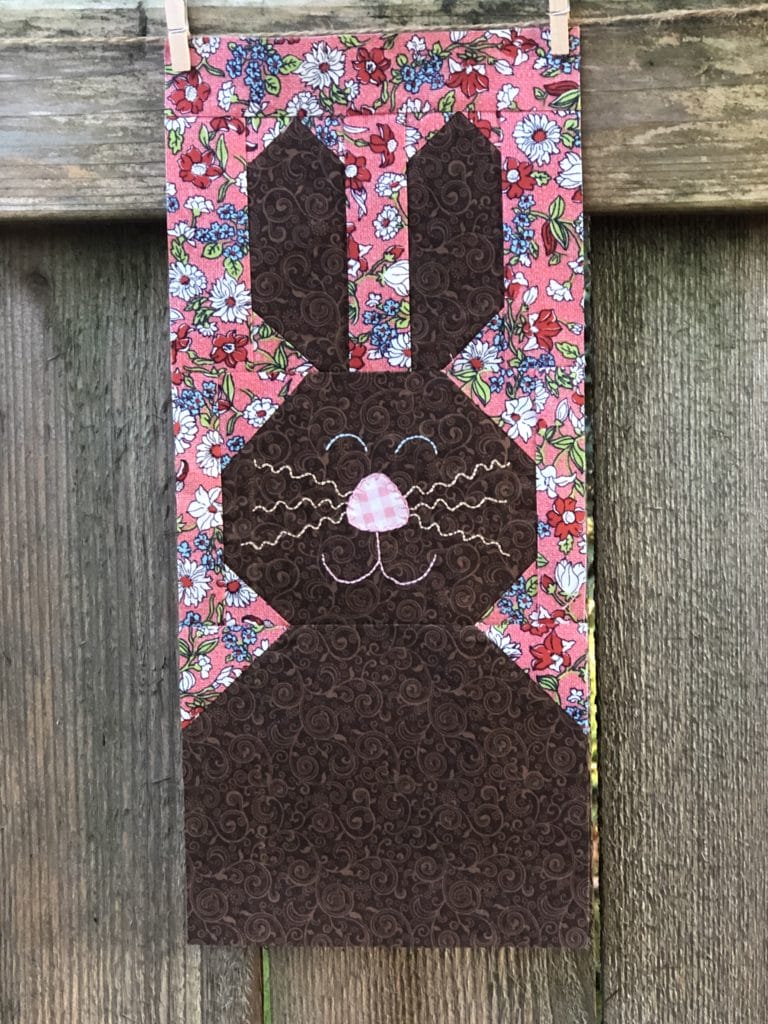
This little cutie is one of my favorites on this quilt. Here is how I put it together:
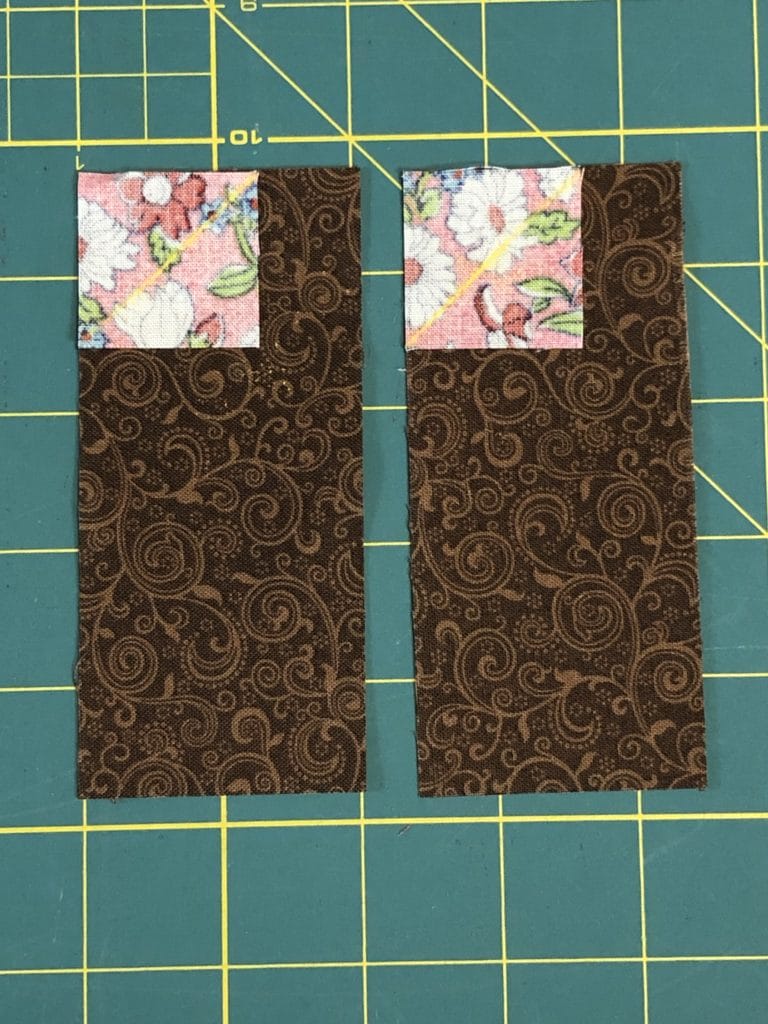
Getting ready to sew the ears
Once the ear points are done on top portion, you need to sew one E square to the bottom each unit, making sure the ears will be mirror images of each other. So as you can see below, one E square goes on the bottom left, and the other E square will be sewn to the bottom right.
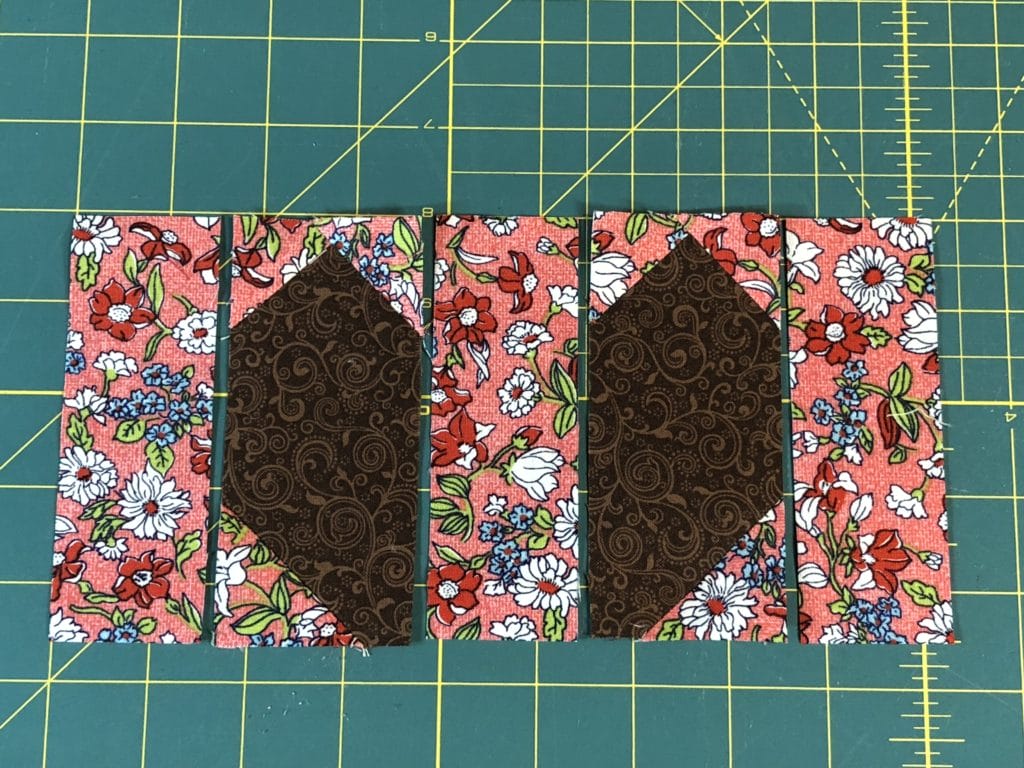
And now you can sew the B strips in between the ears.
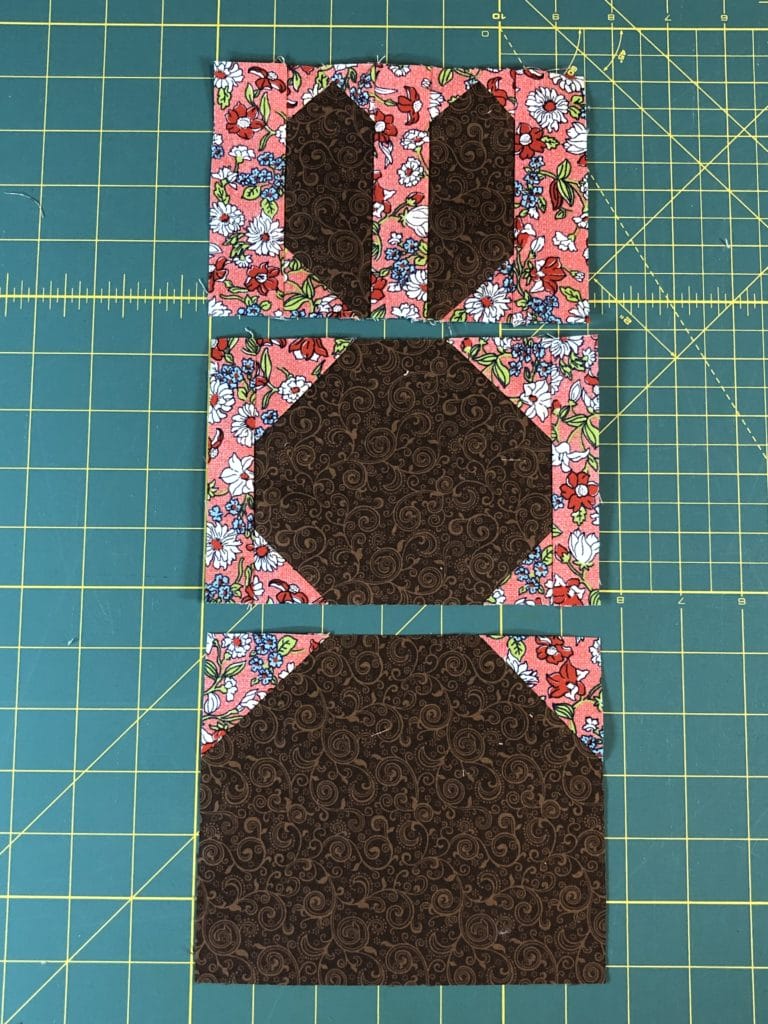
The face and body units of the bunny go together pretty much the same as the ears, by sewing the various squares on marked lines, then trimming and pressing as directed. Just make sure that your bunny’s head has the larger F triangles at the top and the smaller E triangles are at the bottom.
Now we can sew all the components together. If you look at the photo below, you may notice two things missing: 1.) I still haven’t sewn on the bunny’s face. 2.) I forgot to add the A strip to the top of the ears. Clearly I can’t follow directions, even when they are my own! But don’t worry, I fixed it all, as you will see.
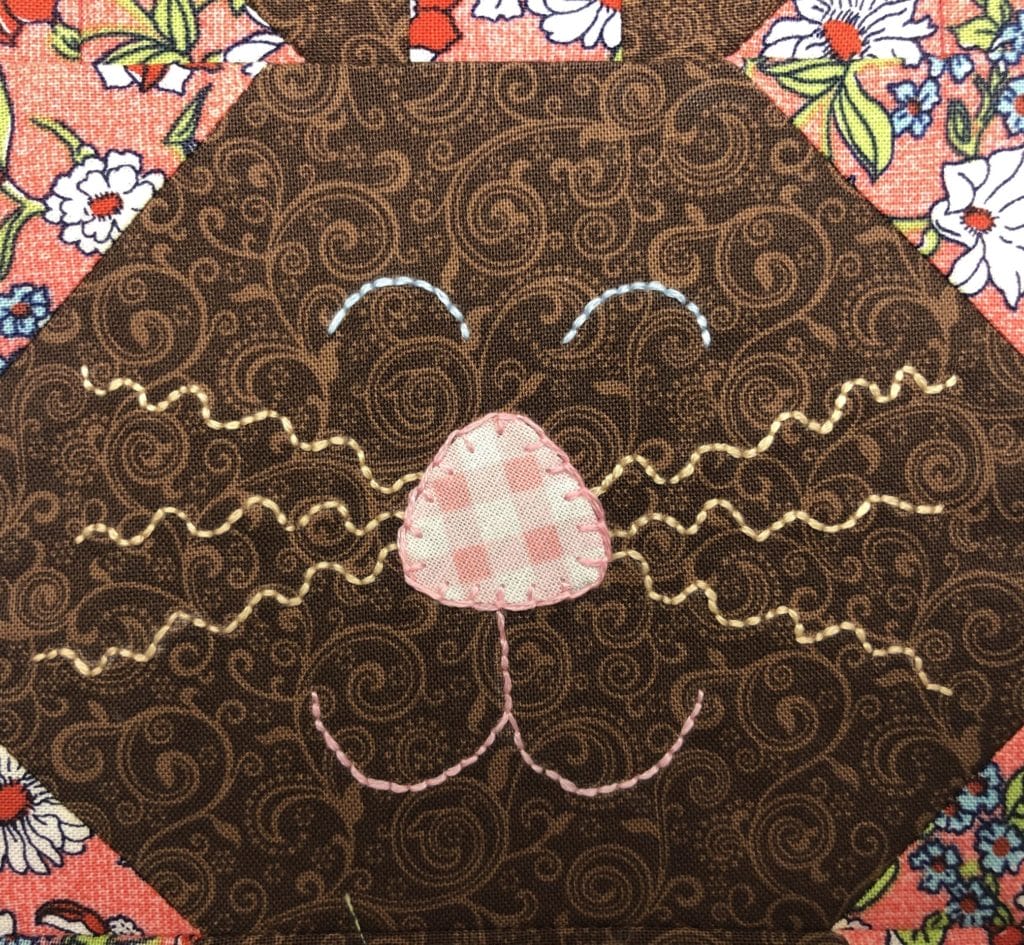
For the face, this time around I decided to go crazy and use some different colored threads for the eyes, whiskers, nose, and mouth. In the pattern it says to use white embroidery thread, but I can’t ever seem to do the same thing twice. I guess I get bored easily?
Anyway, I decided to use a light blue thread for the eyes, some tan for the whiskers, and then a light pink for the nose and mouth. If I were to make this bunny a THIRD time, I would probably use a darker blue for the eyes, and also perhaps use a darker pink fabric for the nose too.
My embroidery skills have always been a bit lacking. My bunny’s mouth is a bit crooked.
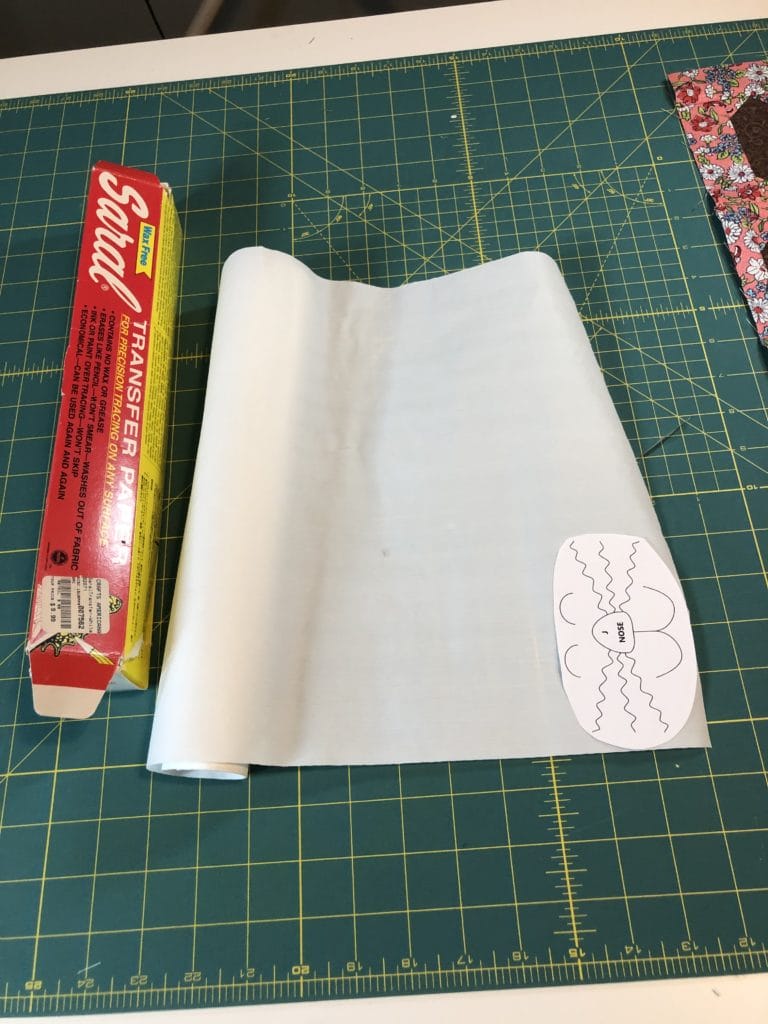
To trace on the face, I used Saral transfer paper in white. I’ve had mine for forever, and I bought it from Connecting Thread’s sister company called Artist’s Club, which is no longer in business. It comes in either a roll or sheets, and they both work equally well. I checked online and you can get it at most major retailers.
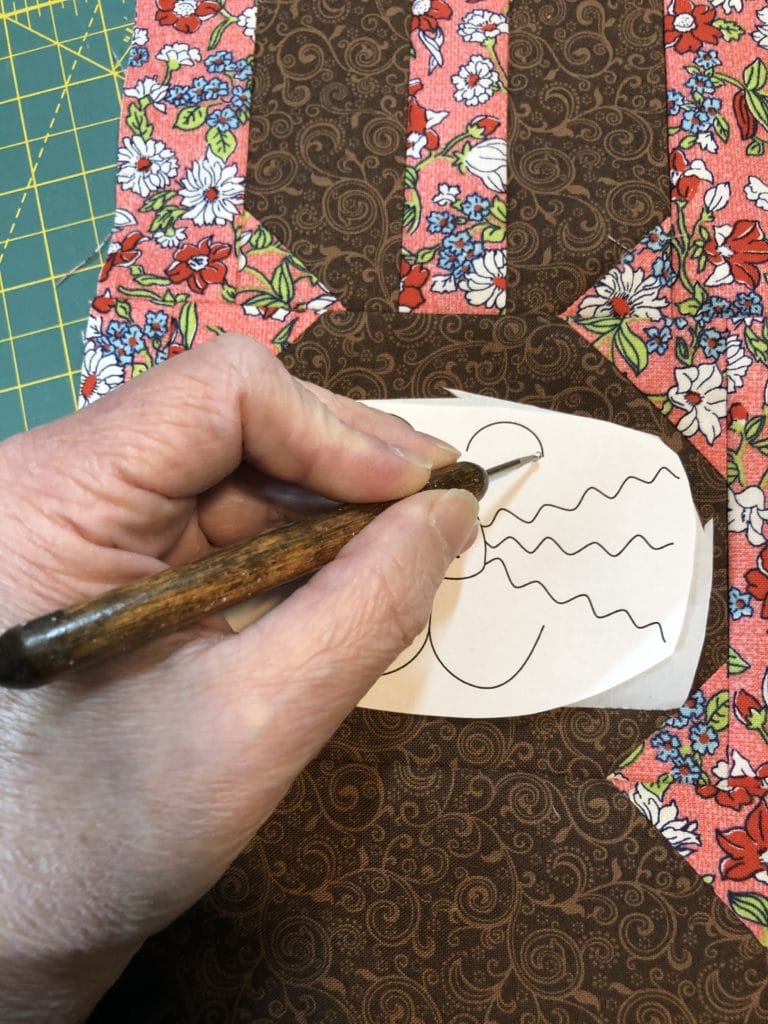
I cut out the face from the pattern, and then slipped a similar sized piece of the transfer paper underneath to trace it on to the brown fabric. I just eyeballed where I wanted it, trying to make it centered from right to left. I used a stylus to trace on the lines.
You can see the scrap of Saral paper underneath the pattern. And yes, I am left-handed, so this may look backwards to most of you.
As you can see, the lines are faint, but it was enough for me to see where to sew.
If you look carefully at this photo, you will notice one of my bunny’s ears is WAY off. Not sure what I did there, but I decided not to care. I may add a flower later to cover it up. Or I may not.
And, I also noticed that I have the bunny’s nose UPSIDE DOWN. Sheesh! How did I not notice it until now?! Quite embarrassing! Clearly I don’t look at a lot of bunnies in my day to day life, because I designed and wrote the pattern this way, and didn’t even realize it until this week. So, feel free to turn that nose around so that your sweet bunny can have a normal face haha! Or, your bunny can have a backwards nose like mine. I figure when this quilt is all put together, most people won’t notice, right?
I hope you’ve enjoyed making all these blocks. I’m so excited for next month when we finally get to put it all together!
If this month feels like Déjà vu, you aren’t going crazy. The blocks we are sewing this month are exactly the same as last month, only with different fabrics. So I won’t bore you by giving you another tutorial about how I sewed the block together. You can’ refer to last month’s blog post for help on that if you need.
This month I thought I’d give you a tiny glimpse into how I sew blocks together when I have a lot to make at once. Whenever I’m sewing I always try to streamline things as much as possible. Perhaps many of you do this too. I like to get everything cut out and marked at once, and then I try to sew as many components as I can at the same time.
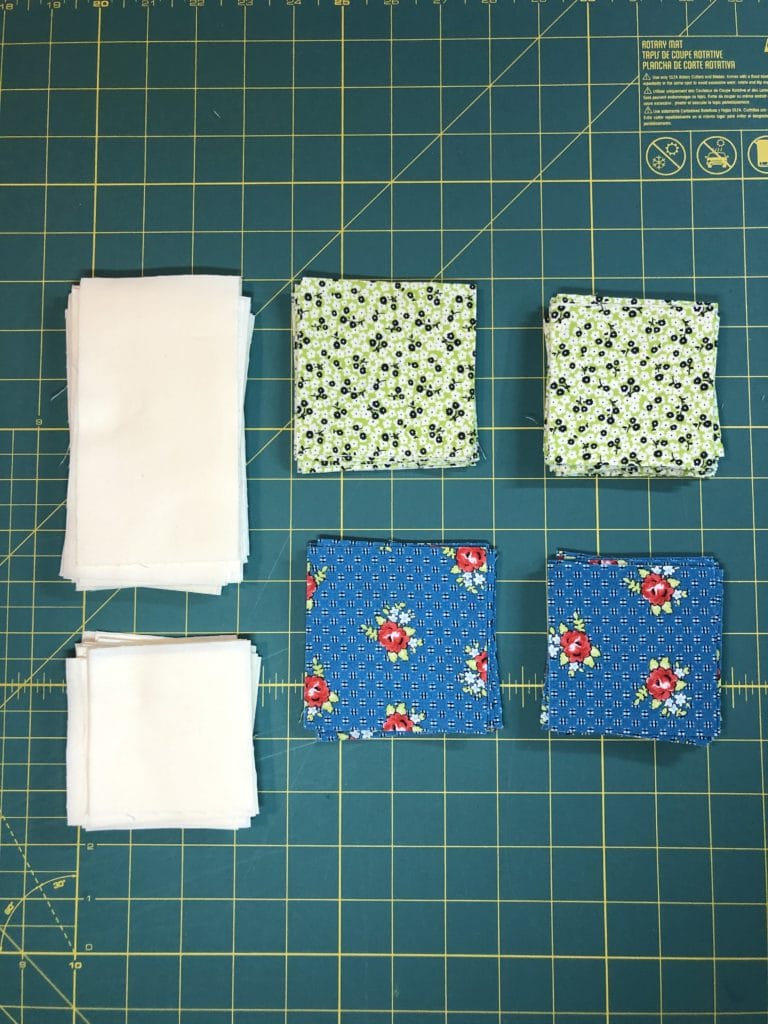
Here I’ve cut out everything I’ll need for all eight blocks.
To start, I’ll be sewing the flying geese units and the HST (Half Square Triangle) units for the pinwheel centers at the same time, so I’ve got everything pinned and ready to go.
I know some of you mentioned in the Facebook Group for this Block of the Month that you were saving your cut corners from the flying geese units, and I must confess I’ve been doing the same. When I cut off the corners, I just leave the pin in the portion that is cut so that I can go back and sew them together later. When I figure out what I’m going to do with the bonus HSTs I’ll let you all know. First I have to get this quilt finished. 🙂
Here is my table full of lots of lovely chain piecing. Clearly I need a bigger table! I keep telling my husband this but he doesn’t believe me. Also, I would need a bigger room for a bigger table, which means buying a new house. Seems reasonable to me! Somehow, he is not convinced…
Once I’ve finished off my flying geese and HSTs, I get ready for some quality trimming time. I always trim and true up my pieces with each step. So once my pinwheel centers are made, I will check them again just to make sure they are all the correct size.
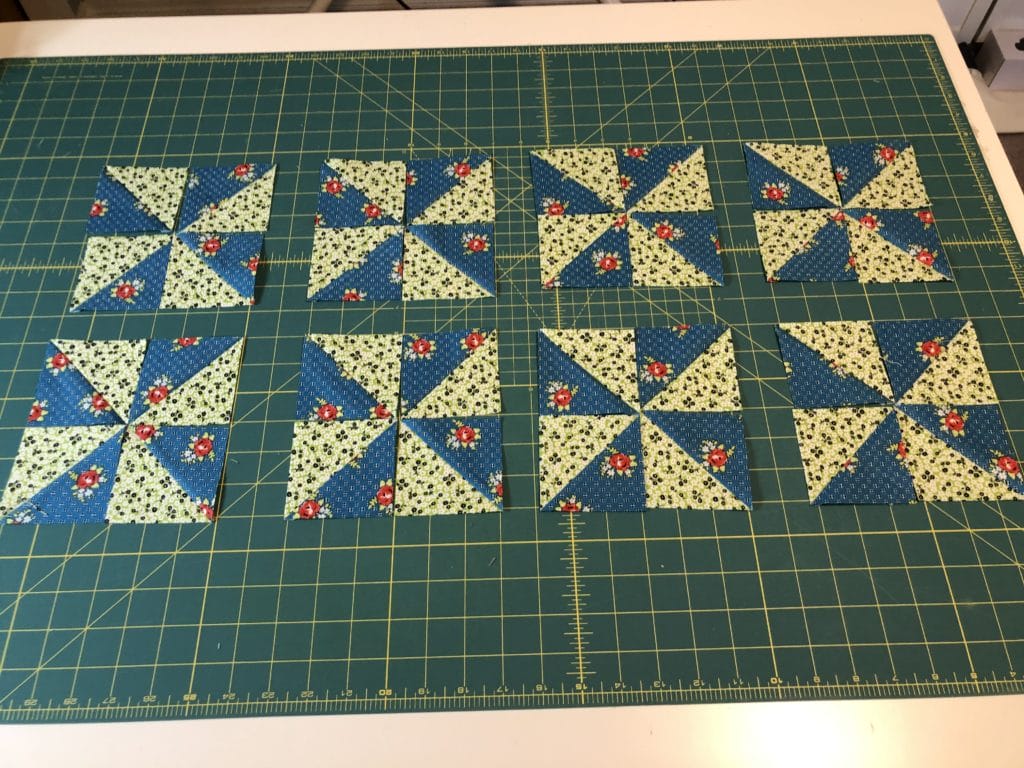
When I made last month’s blocks I was in a hurry and didn’t pay attention to my own directions. So I ended up sewing ALL of my pinwheels incorrectly and they didn’t match up as they were supposed to. Ugh! I had to rip everything out and re-do them. So this time I was determined to do it right the first time, which meant laying out all my pinwheel blocks and checking them with the flying geese units before I began pinning and sewing them all together.
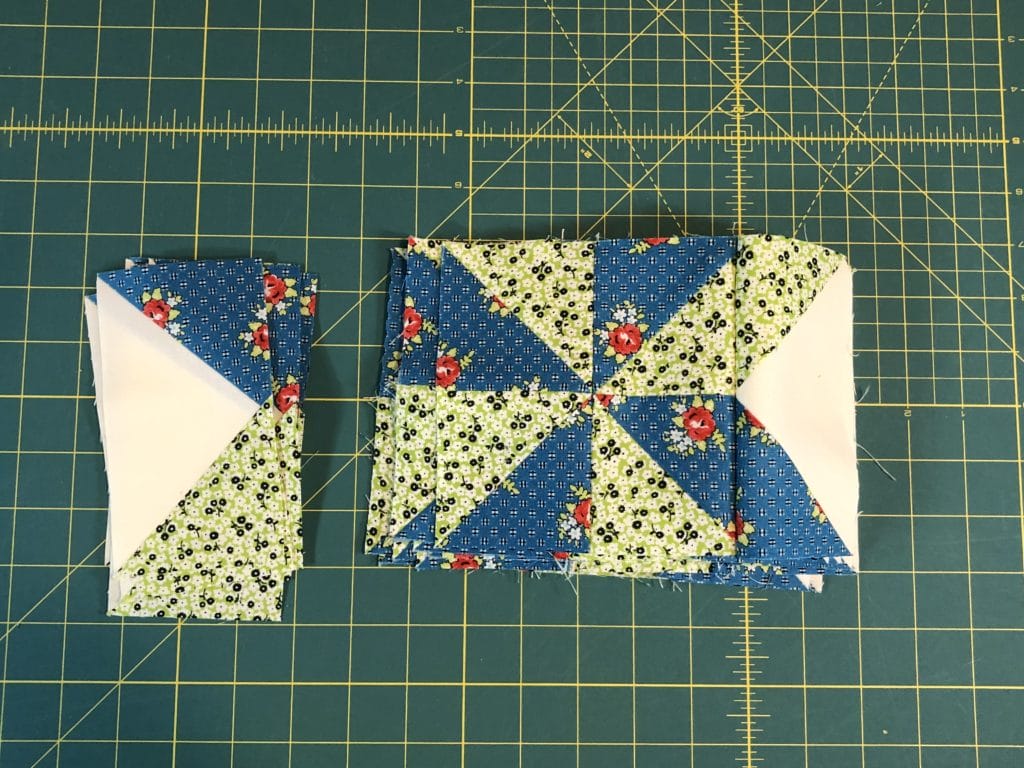
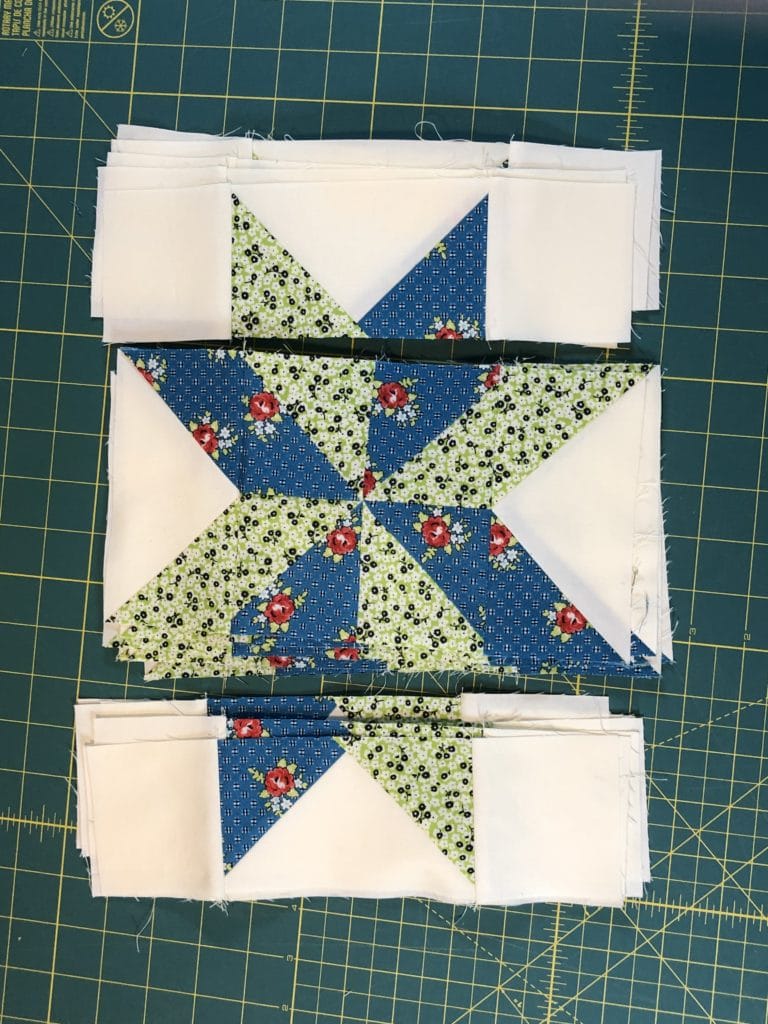
While I was sewing my pinwheels, I was also sewing the “B” squares to the ends of half of my flying geese so that the top and bottom units of the star blocks would be ready to go.
I always press open the centers of my pinwheel units so that they will lay flat. There are some great tutorials on YouTube that show how to do this much better than I can show you here with still shots, but in a nutshell, you want to open your seams so that you will get a pinwheel design on the back side too.
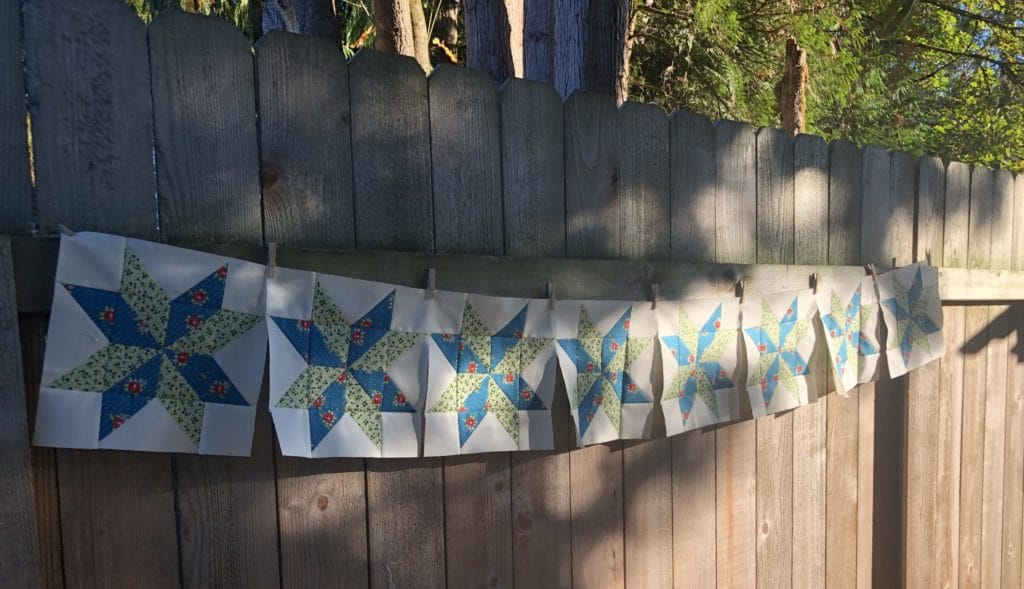
Once I’d finished up with the pinwheels and the top and bottom flying geese units, all I had left to do at this point was sew the remaining flying geese to the sides of the pinwheel units and then I could finish the blocks.
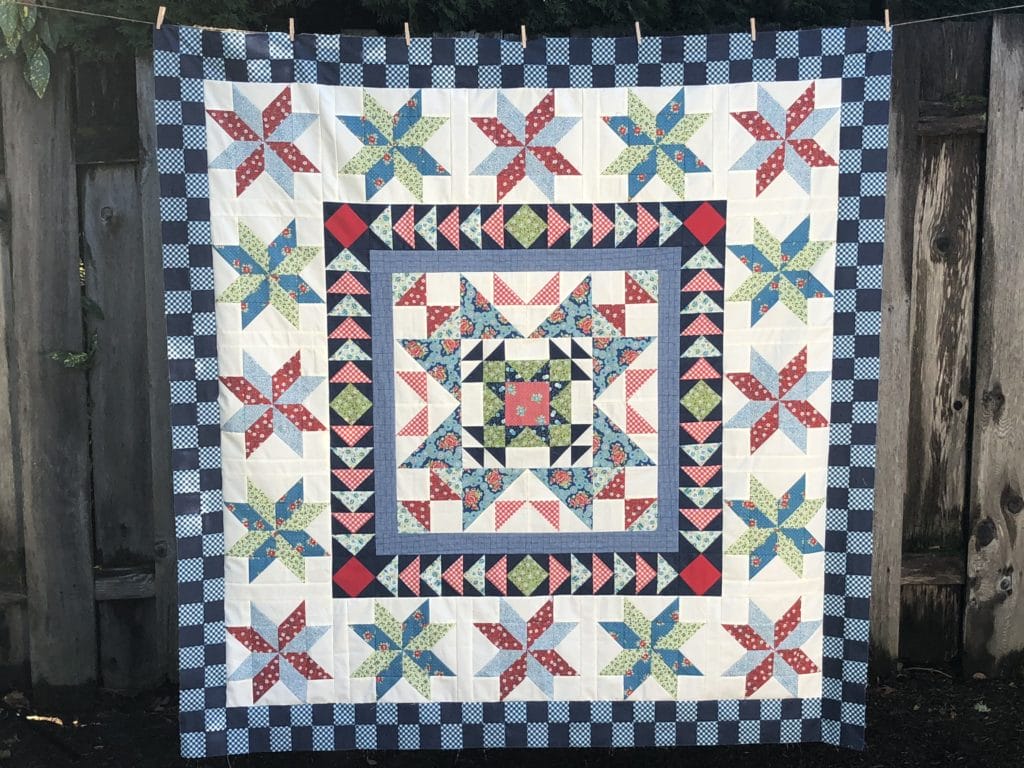
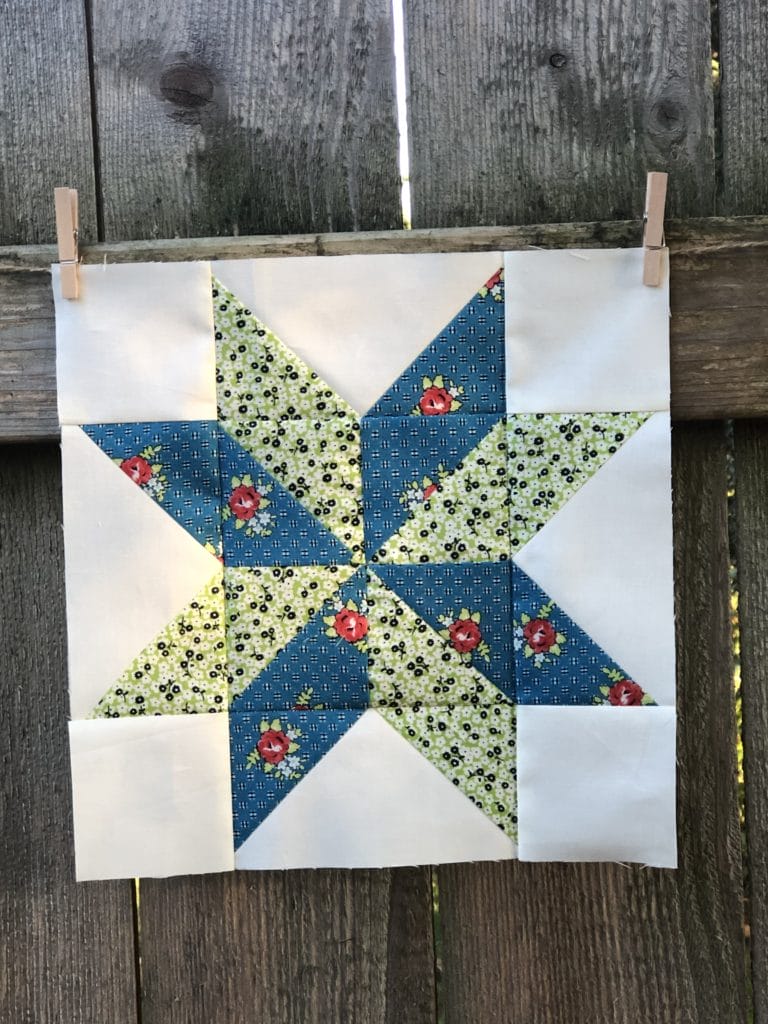
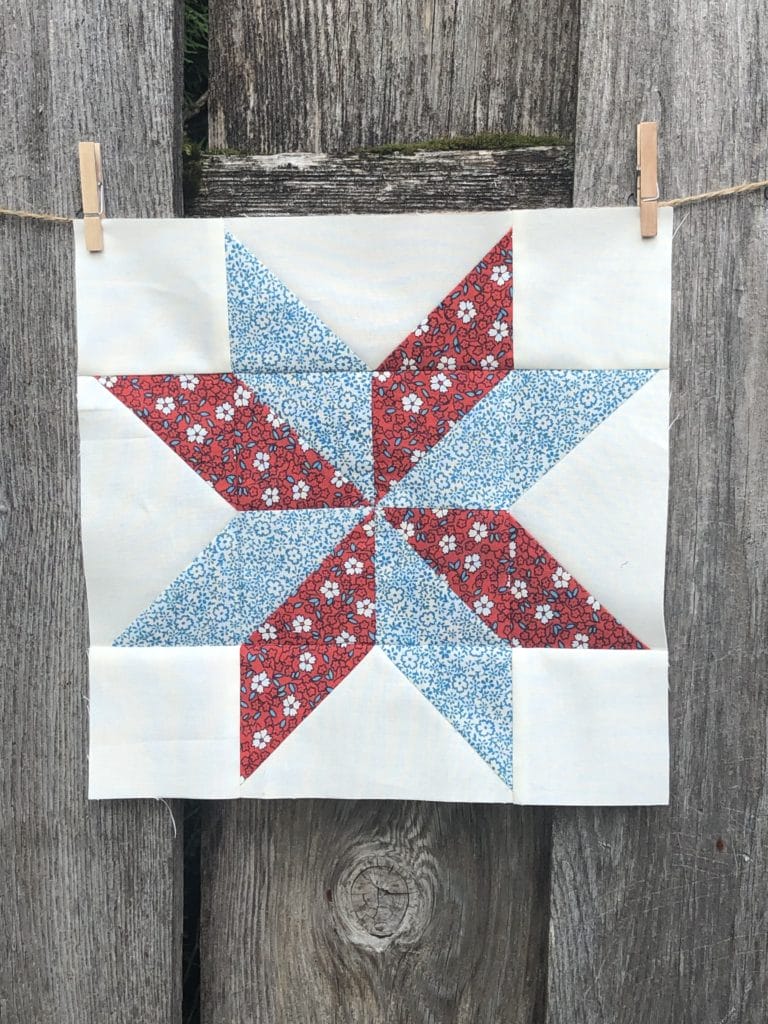
Here they are hanging on my fence, all finished and ready to go.
I can’t wait to get these sewn together and add the checkered border next month. I’m sure you all feel the same! It’s hard to sew these blocks and then wait to add them in the quilt. But don’t worry! We will be finished with this beauty before you know it. We are now almost halfway done. Hooray!
Can you believe we are already on month 4? Time flies when you are having fun! This month we will be making FOUR blocks (which I guess is fitting since we are on our fourth month of this BOM).
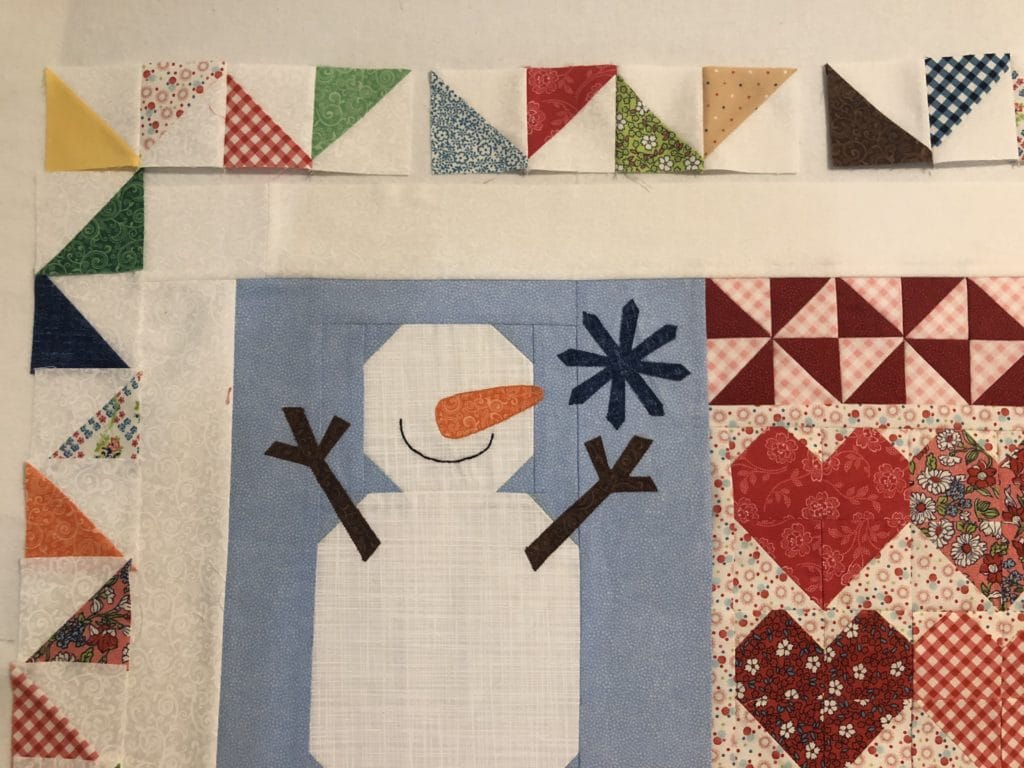
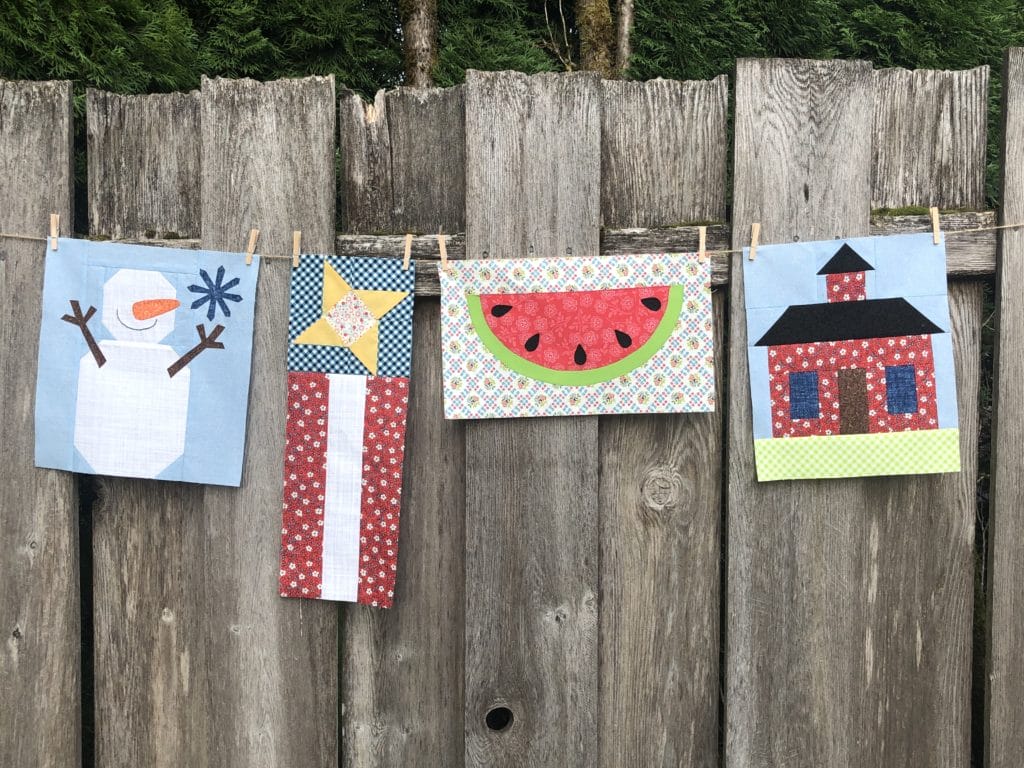
Our first block is a cute little Snowman trying to catch a Snowflake.
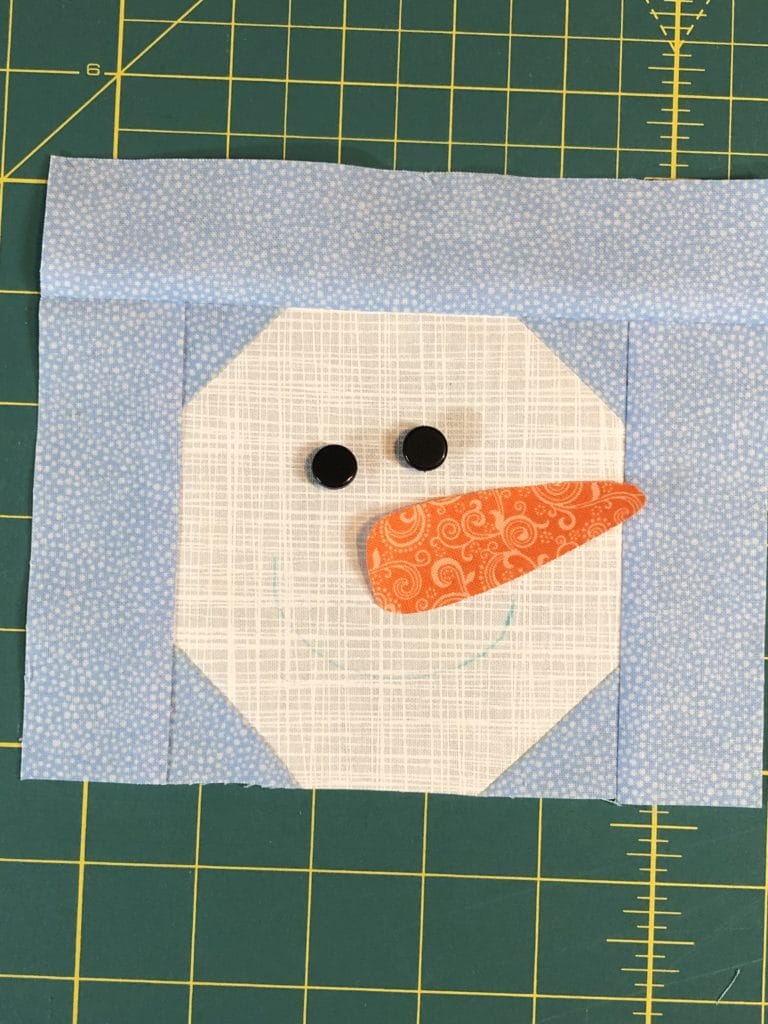
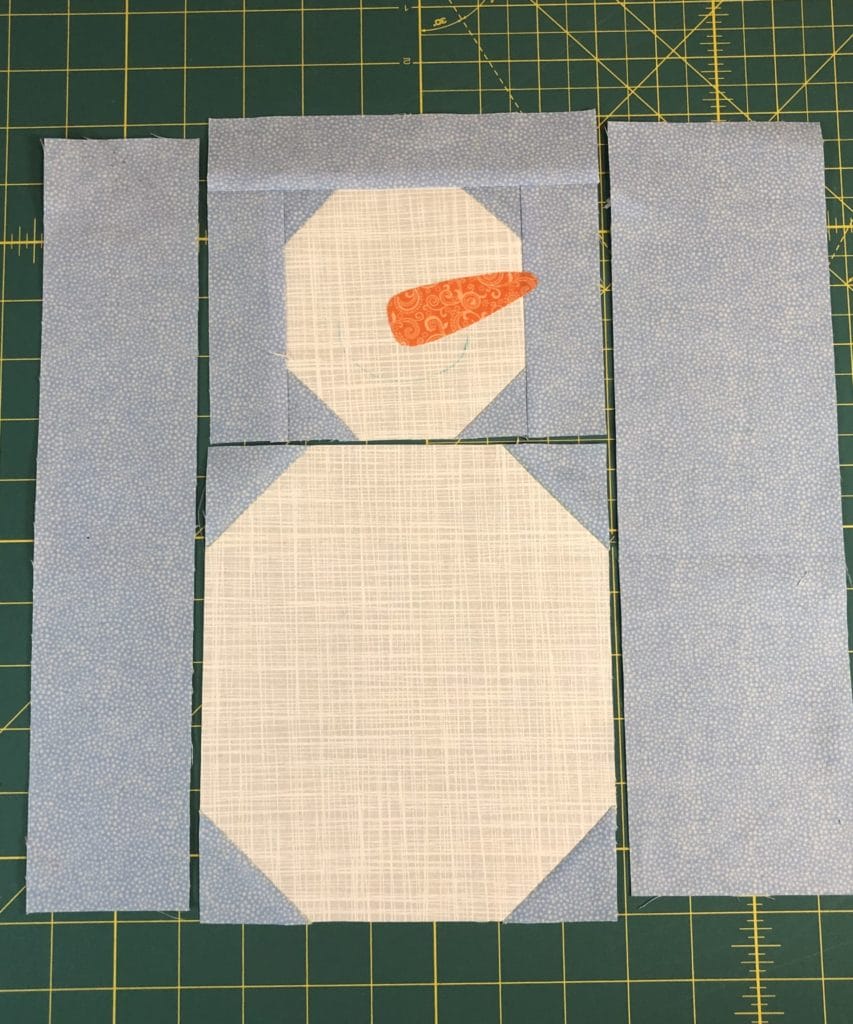
First we are going to make the snowman’s head. I know some of you don’t like those tiny little corner pieces, but as I’ve said before, sometimes it’s a necessary evil in order to get the correct proportions. But fortunately these little corners don’t need to match up with anything, which makes it a bit less frustrating. Just sew on the marked lines and you will be fine.
After you’ve made the head, we will add on the side pieces, and then add his nose.
In order to get the nose where I wanted, I also drew in the snowman’s smile and placed the buttons where they will eventually be sewn on. Once I felt happy with everything, I ironed on the nose and stitched around it. You can also go ahead and backstitch the snowman’s smile at this time too. But for some reason I didn’t actually do that until the end. I’m not very good at following directions, even my own! The snowman’s eyes and buttons will be added after the top is totally finished and quilted.
It’s hard to tell from this picture, but there is a faint blue line where I will sew on the mouth later.
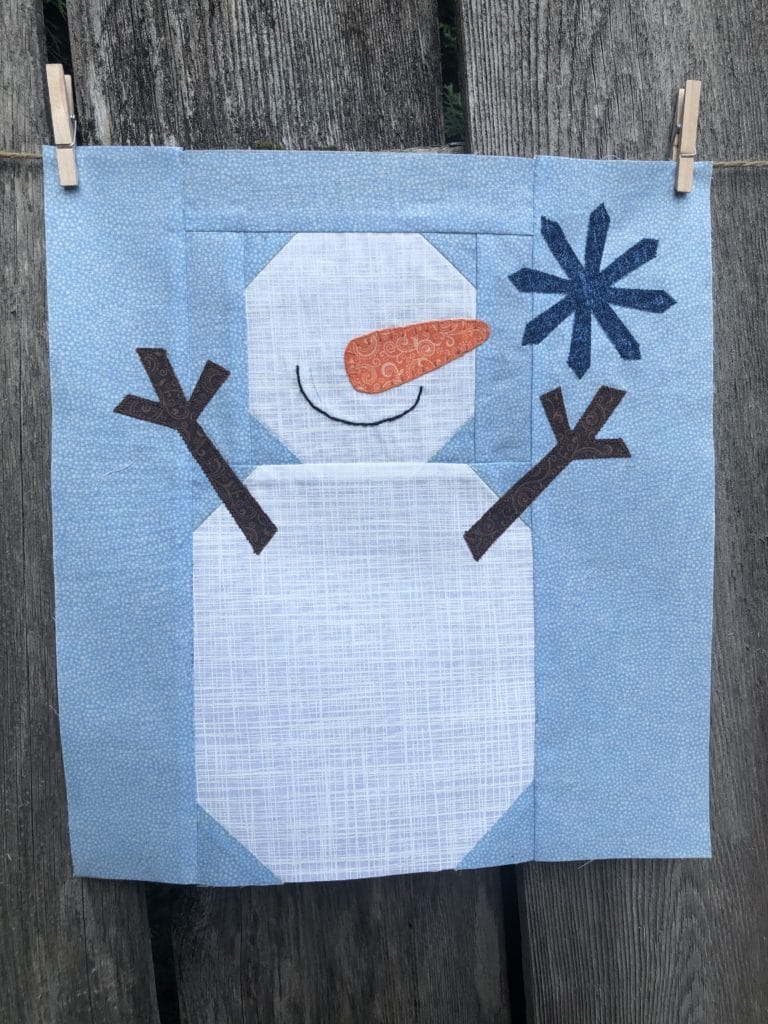
Once you’ve added the snowman’s body and sides, you can applique his arms and snowflake. Make sure you account for your seam allowances as you place these. You don’t want to end up with some of your snowman’s fingers being cut off down the road.
This snowman block is ready to be sewn together.
Since this isn’t the first time we are doing applique for this project, I won’t bore you again with the details of how I applique. In case you forgot, please go back to the Month 1 blog post and re-read.
All my applique pieces are ironed on and ready for stitching.
Sometimes it can be intimidating, especially if you are new to sewing machine applique, to try and navigate some of these smaller pieces. There is nothing wrong with hand sewing a blanket stitch with some embroidery thread if you are a little nervous about using your machine. In fact, I did just that with my snowman’s nose, simply because I wanted the look of the extra lines on the carrot. I also think it would be darling to use some silver embroidery floss and hand stitch a simple snowflake instead of the applique. Or maybe even add a few of them! My point is, you do what you feel comfortable doing, and don’t be afraid to think outside the box.
Now he’s all done! I know he looks a little unfinished right now without his eyes and body buttons, but your long-armer will thank you later. My snowman smile turned out a little crooked, but I decided to leave it. My little snowman just has extra character!
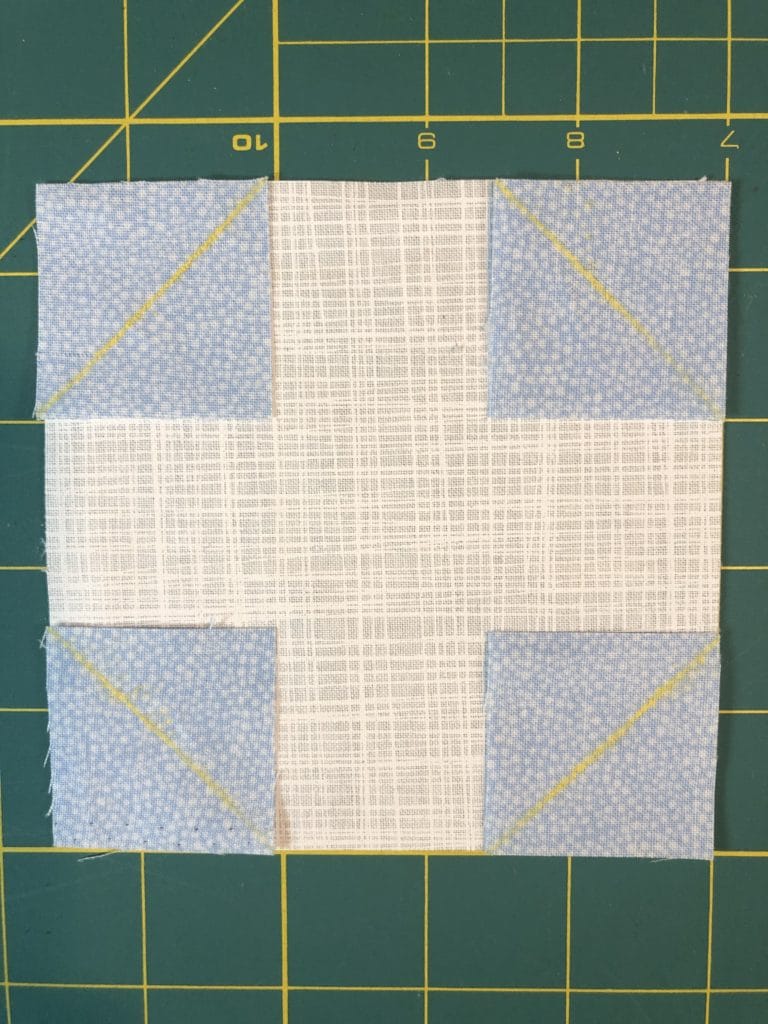
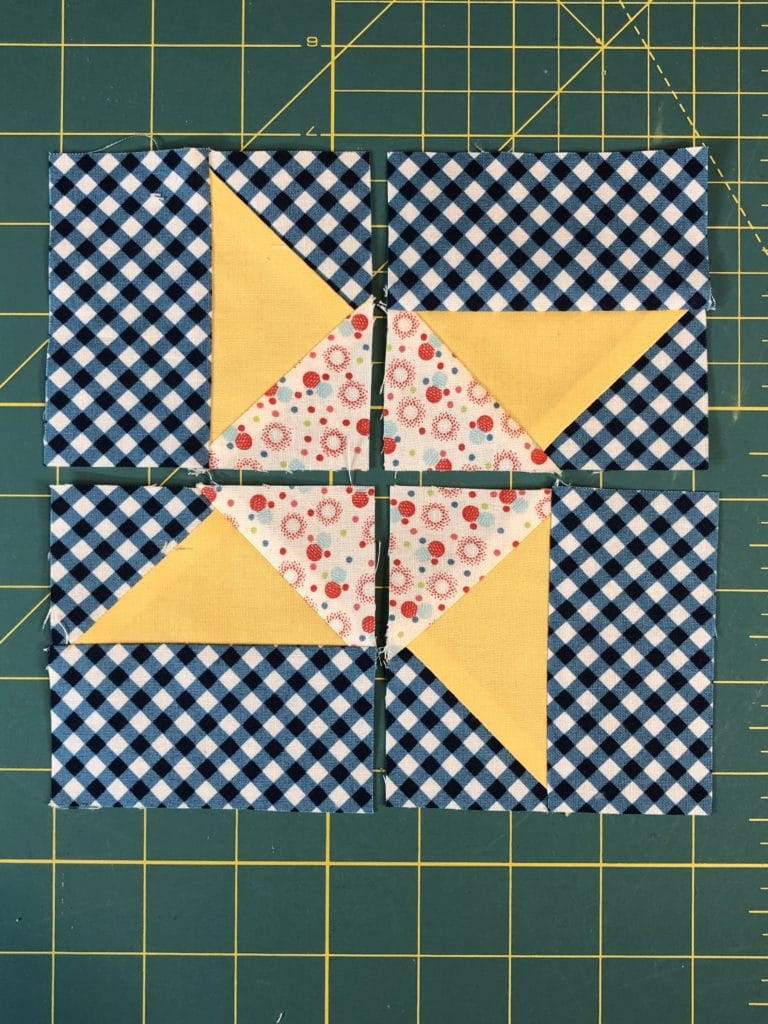
FLAG BLOCK:
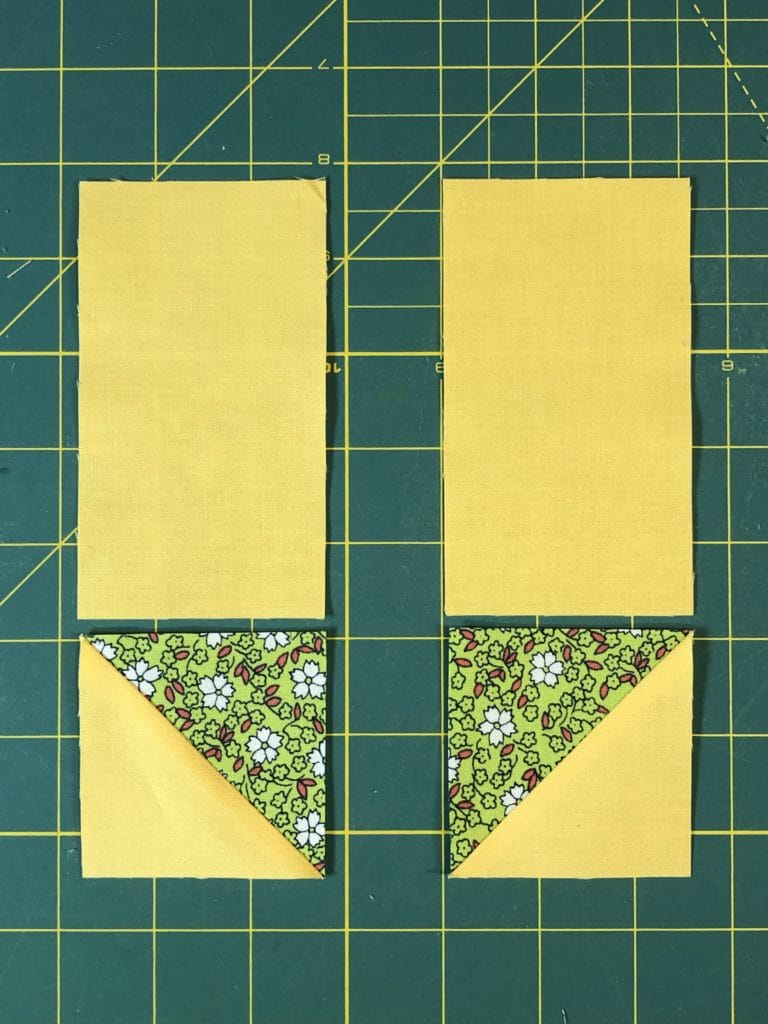
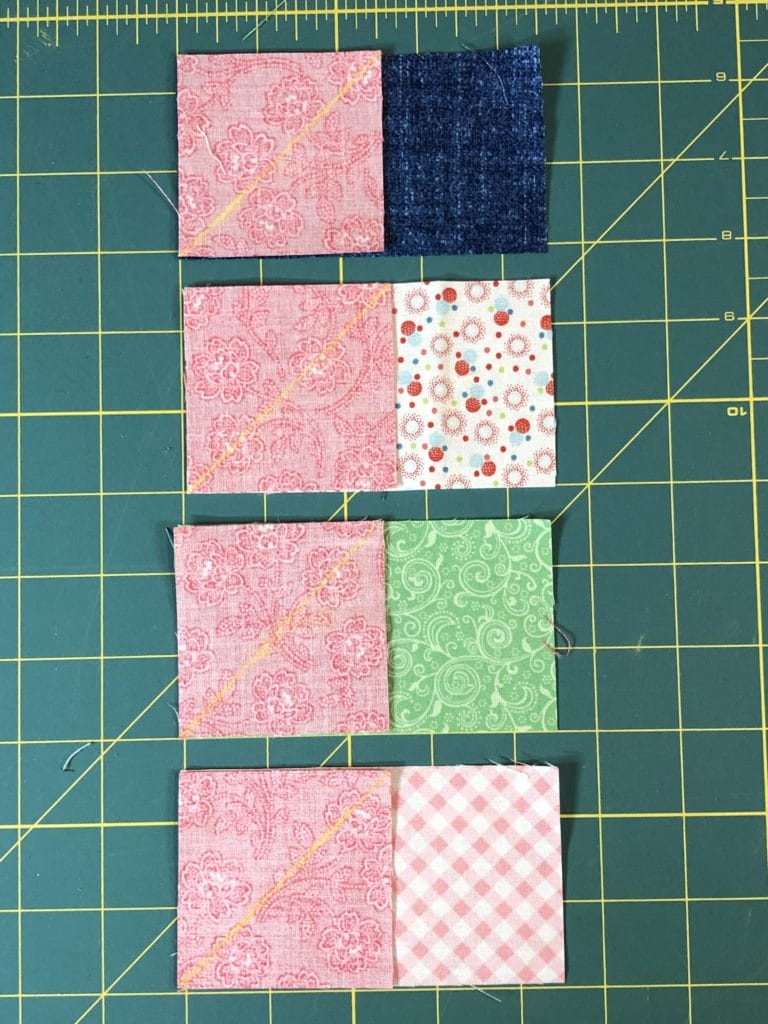
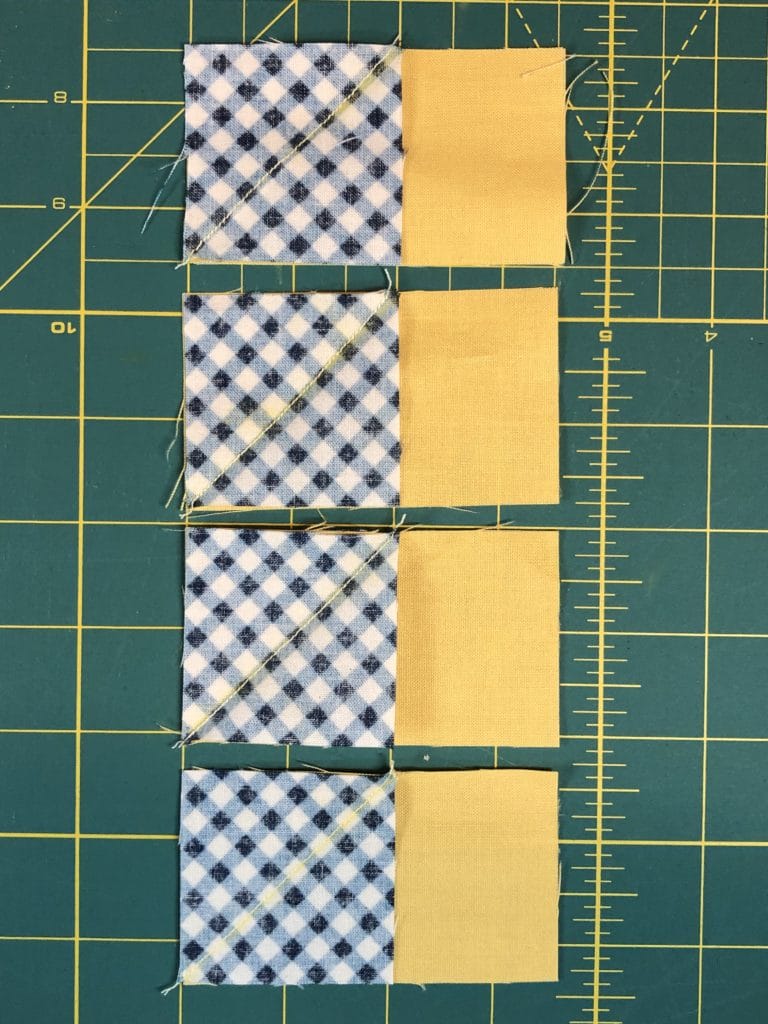
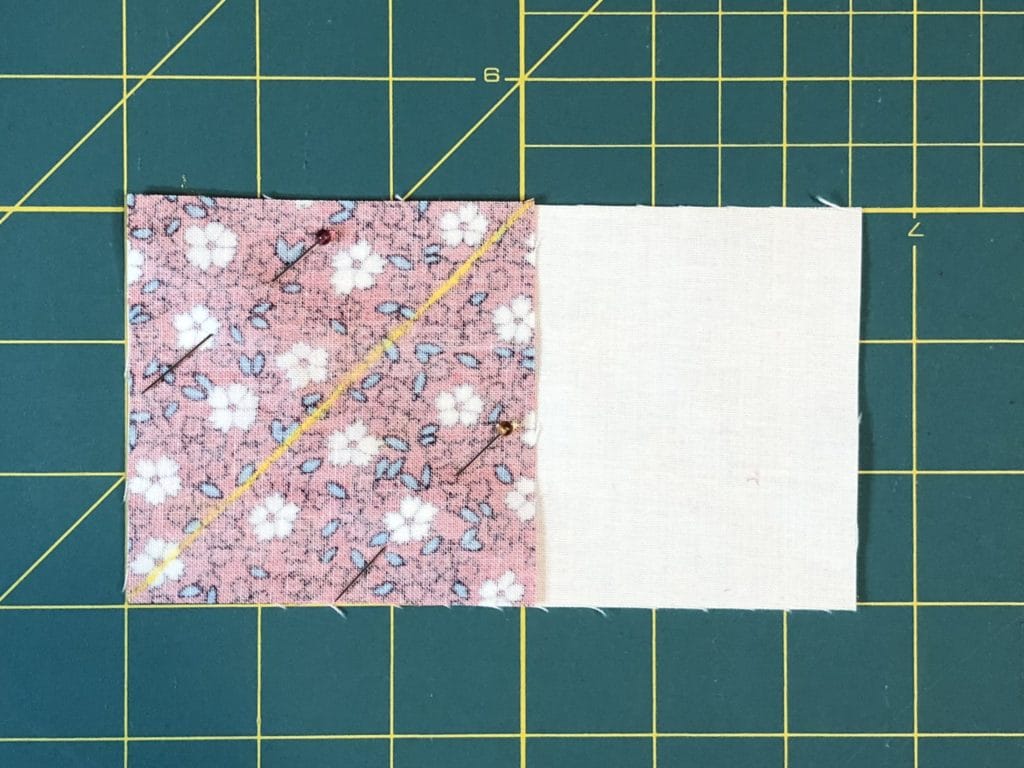
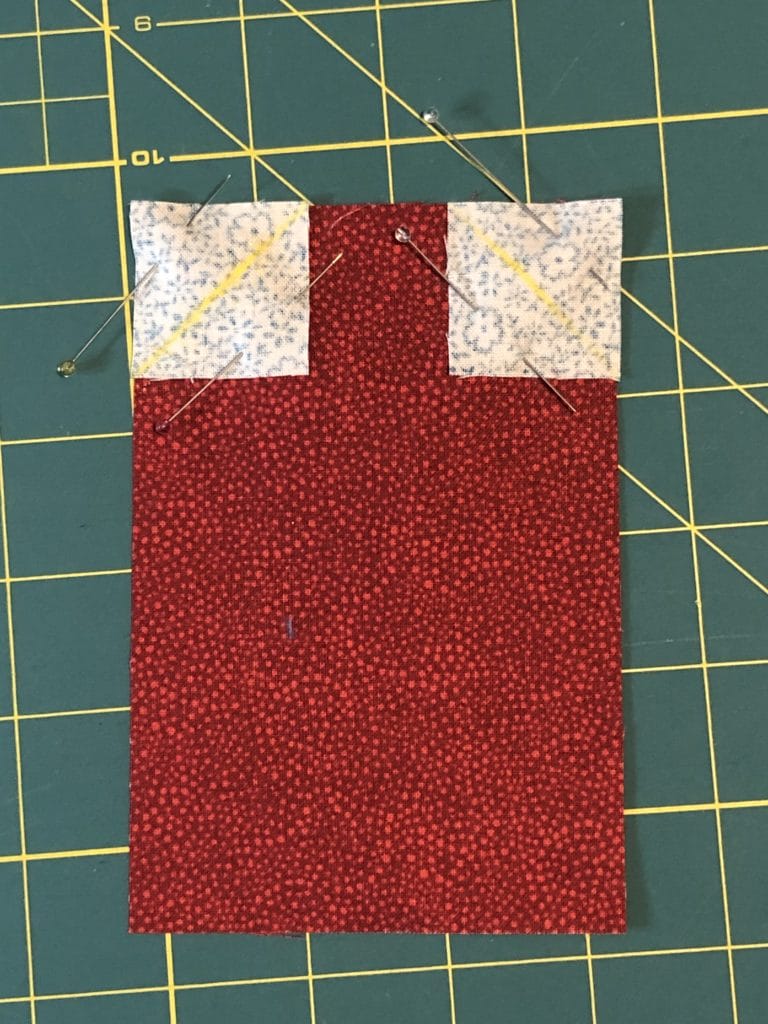
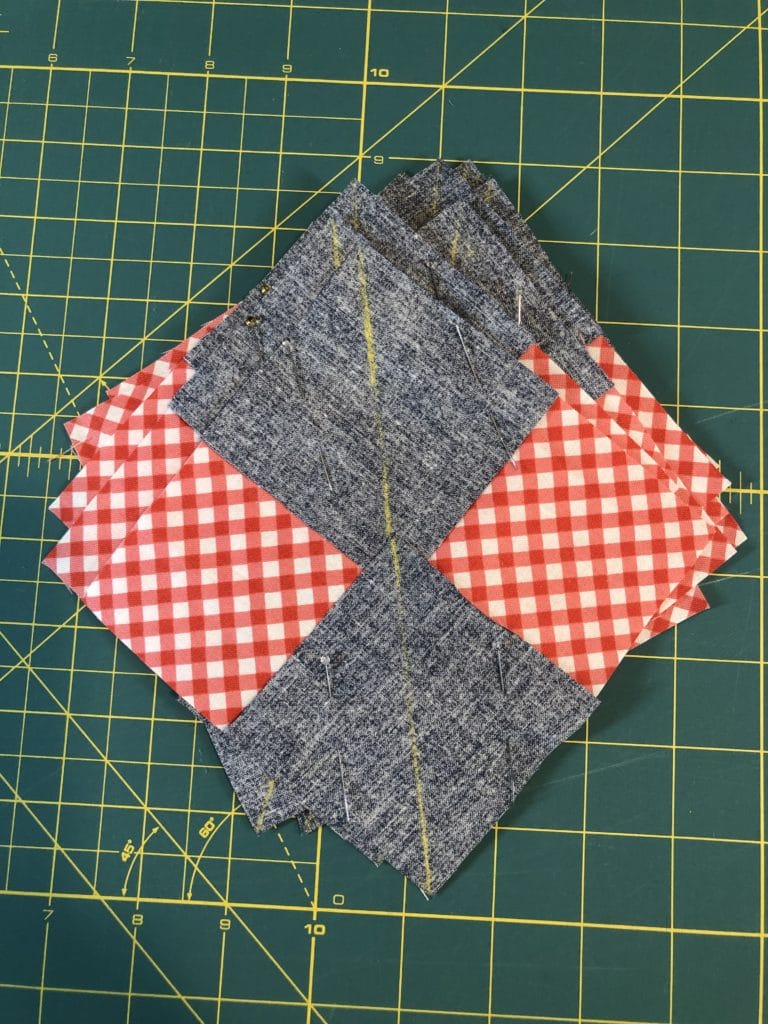
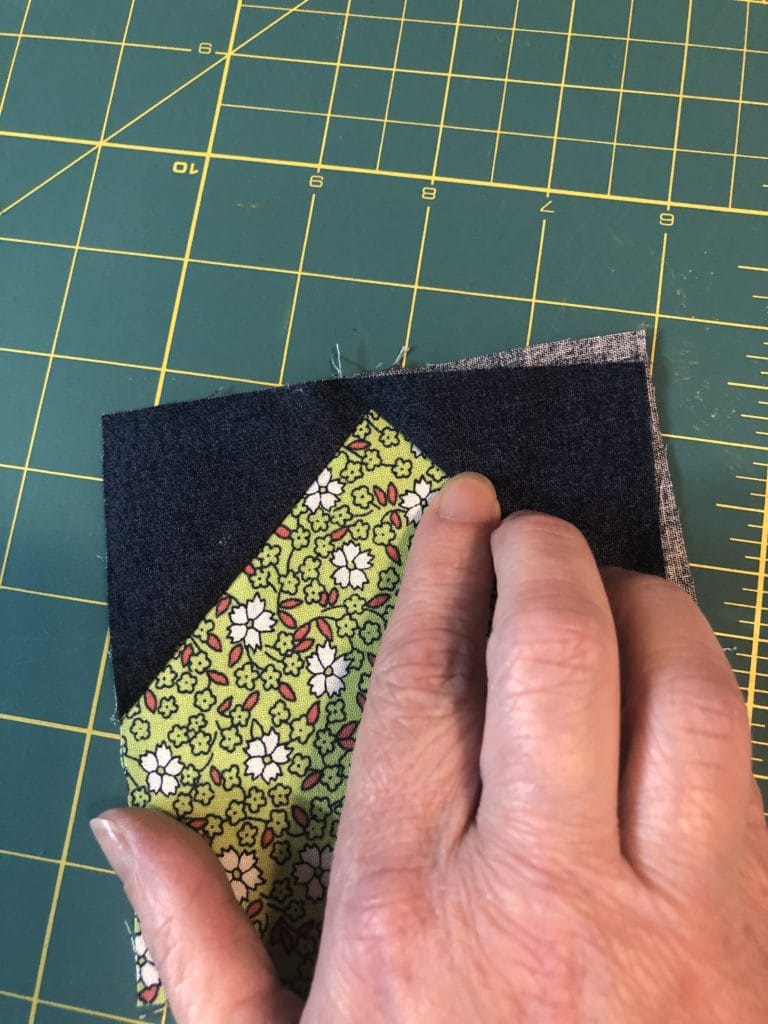
For this block we will be using the traditional method of making flying geese, also known as stitch and flip. I used to use this method for all my patterns until I discovered the joys of no-waste flying geese. But there are times that the no-waste method just doesn’t work, and this is one of those times. Since we are using two different fabrics for our corner triangles, we need to sew these cuties on one at a time.
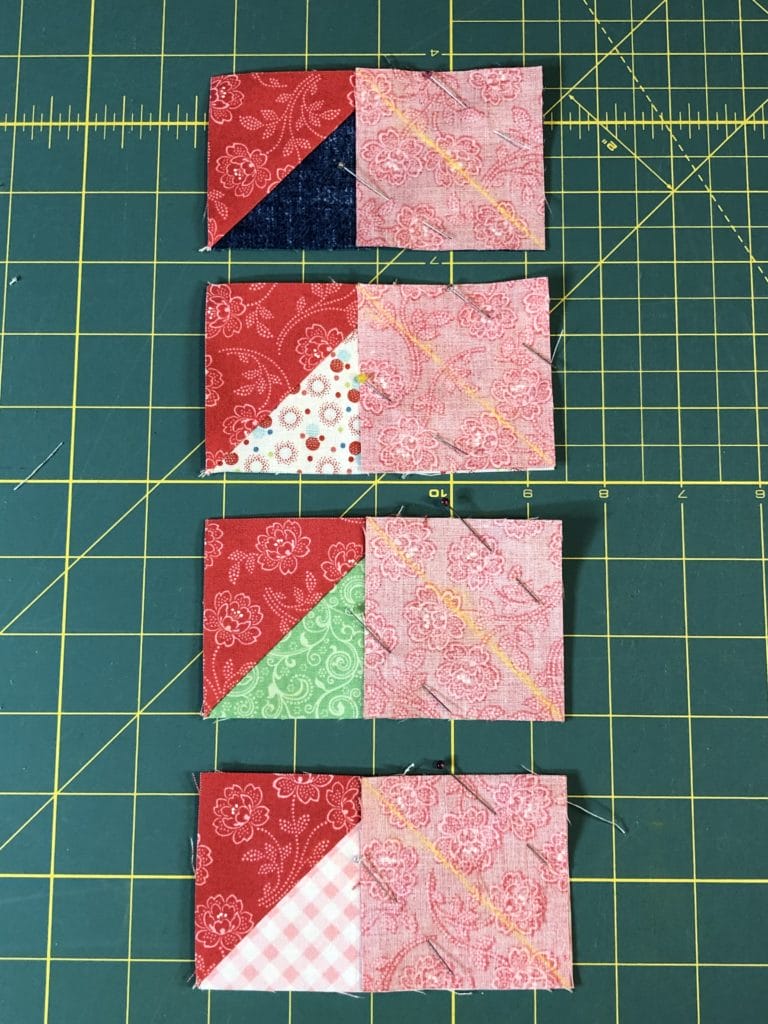
Stitched and ready for trimming.
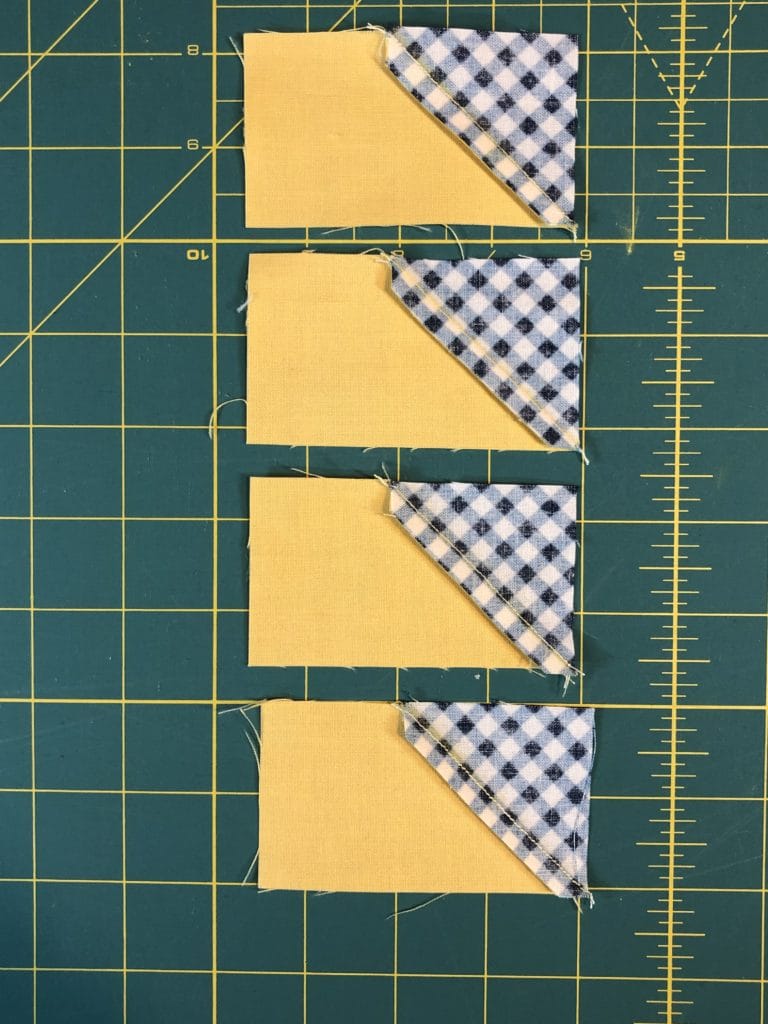
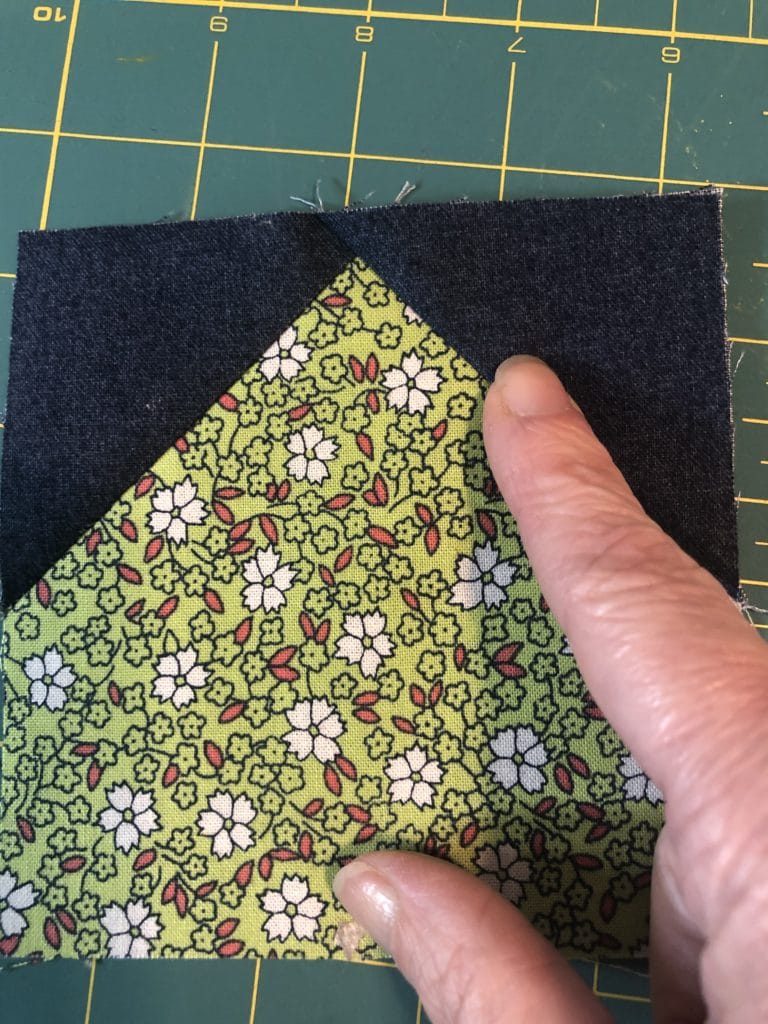
Please make sure that your first triangles (the blue gingham) are pressed down toward the yellow, not away from it as is customary. This will enable you to nest your seams together later. However, white bubble fabric triangles are pressed away from the yellow. So one corner is ironed down, and the other is ironed up. Make sense?
Notice how the seams are pressed down toward the yellow rectangle. This is what your seams should look like from the back.
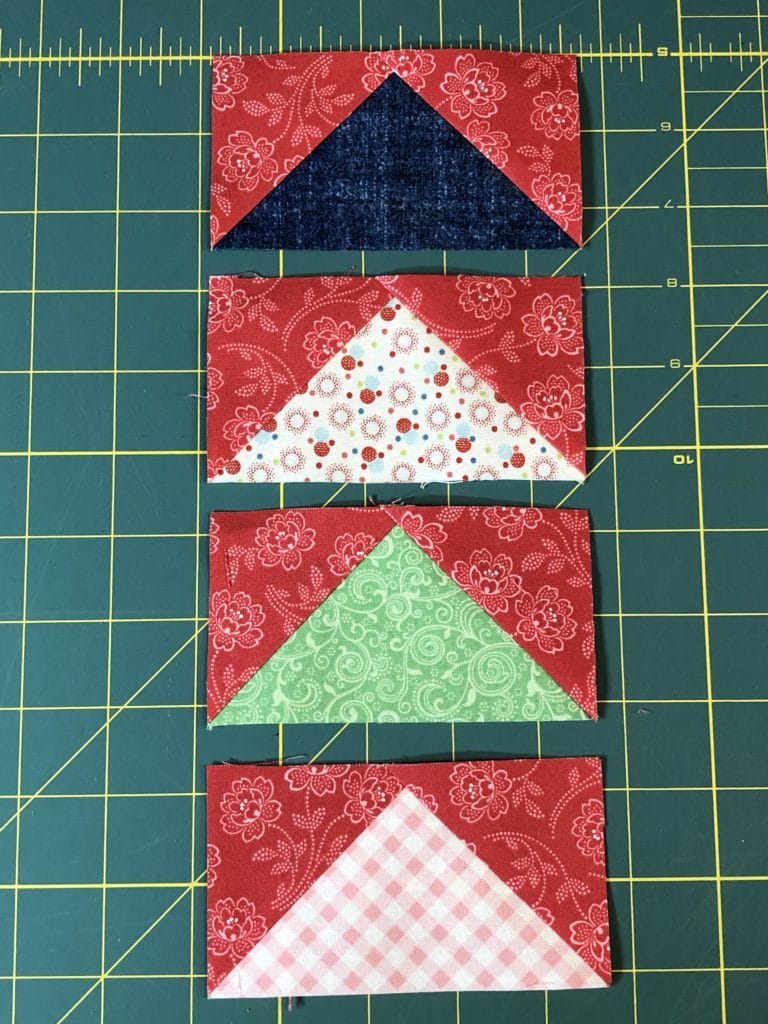
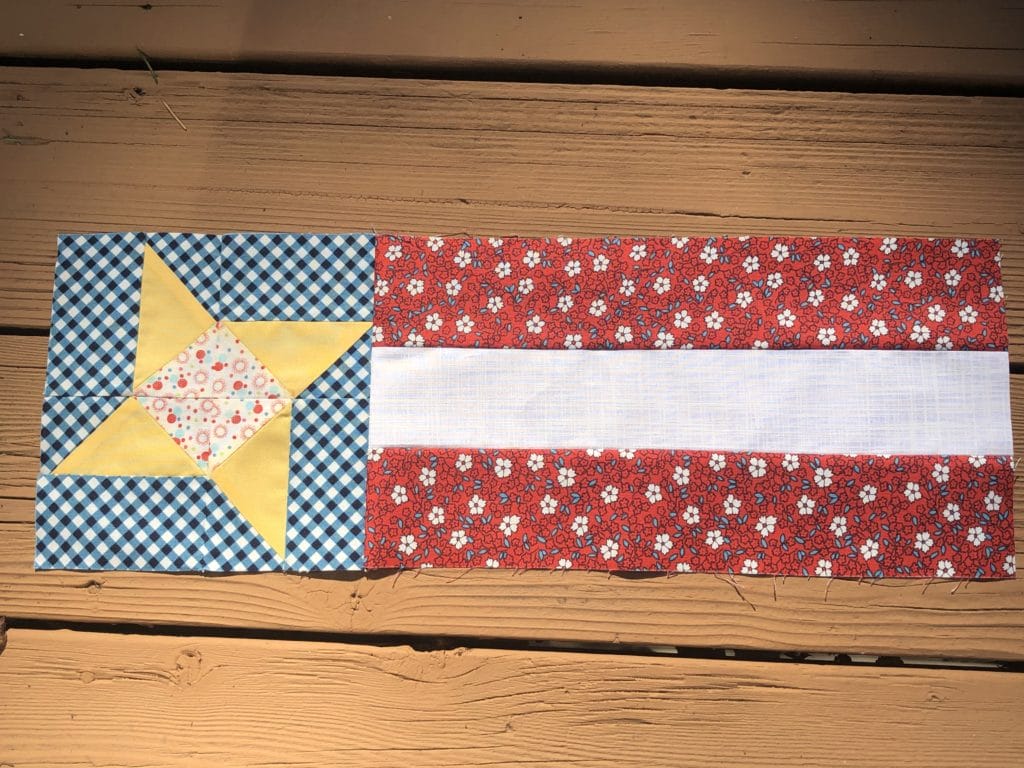
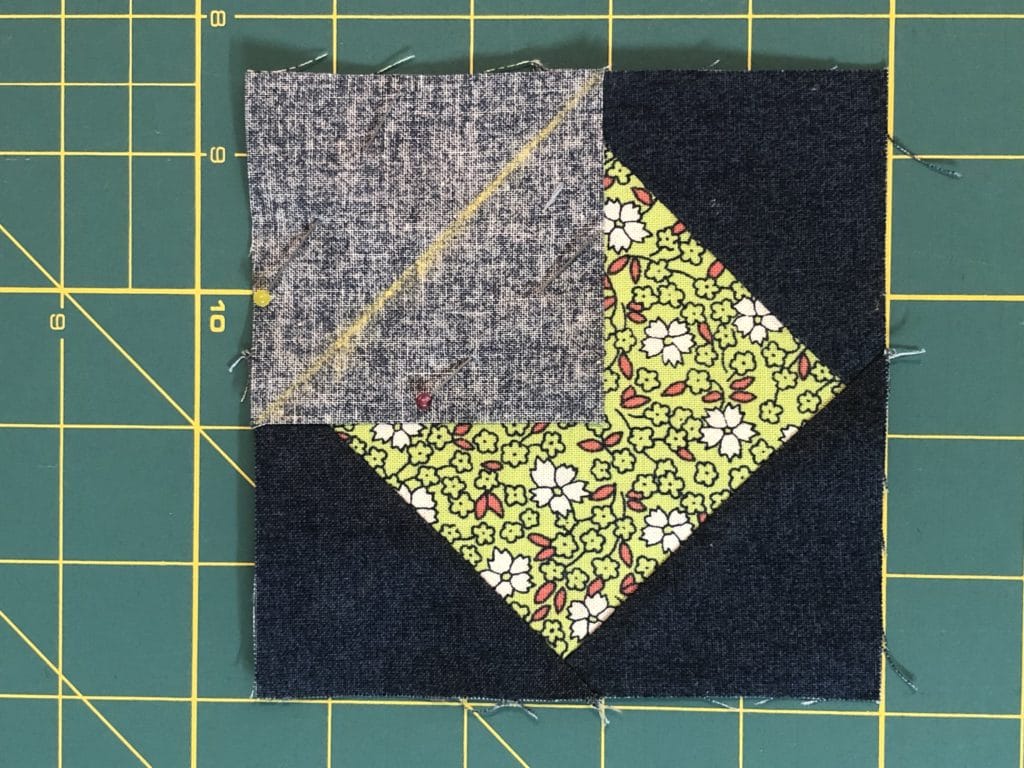
Now you can add the C rectangles, and then the flying geese units can be sewn together to make the star for our flag block, and all the points should nest together.
Sew on a few stripes, and you’re all done!
All finished!
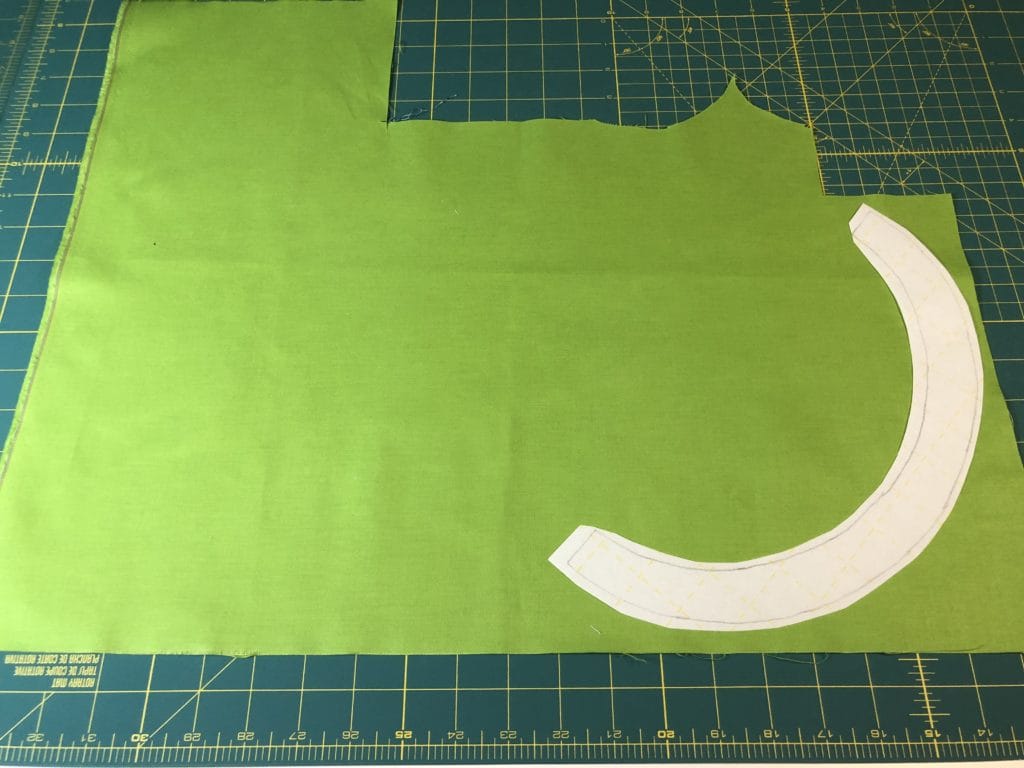
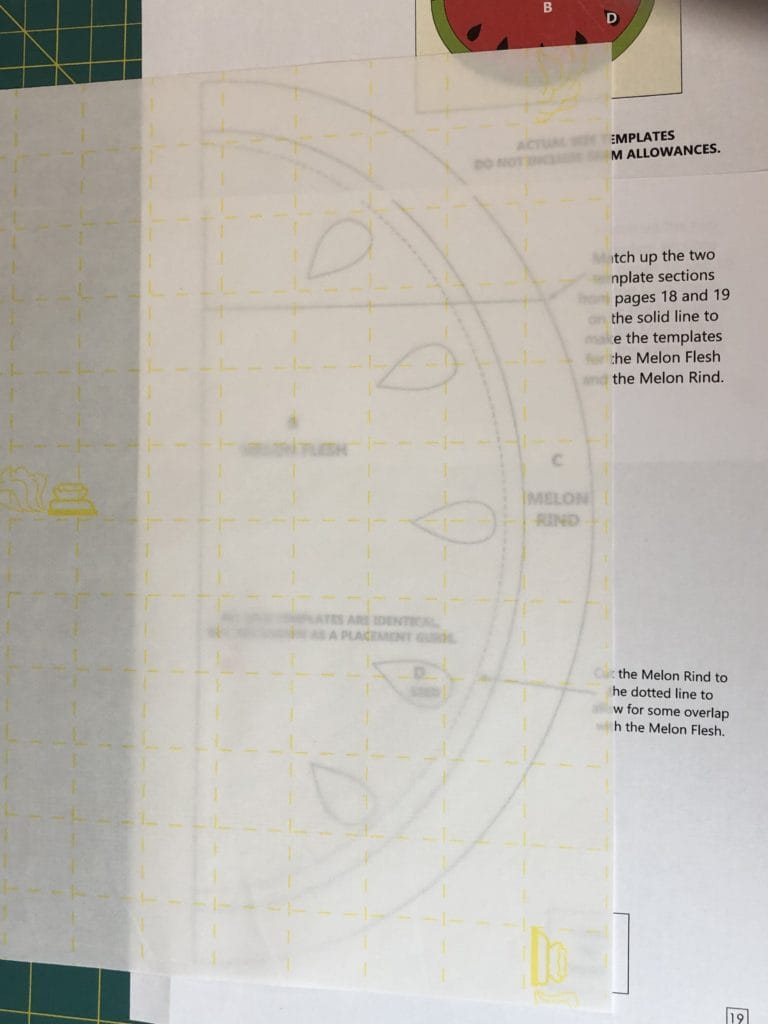
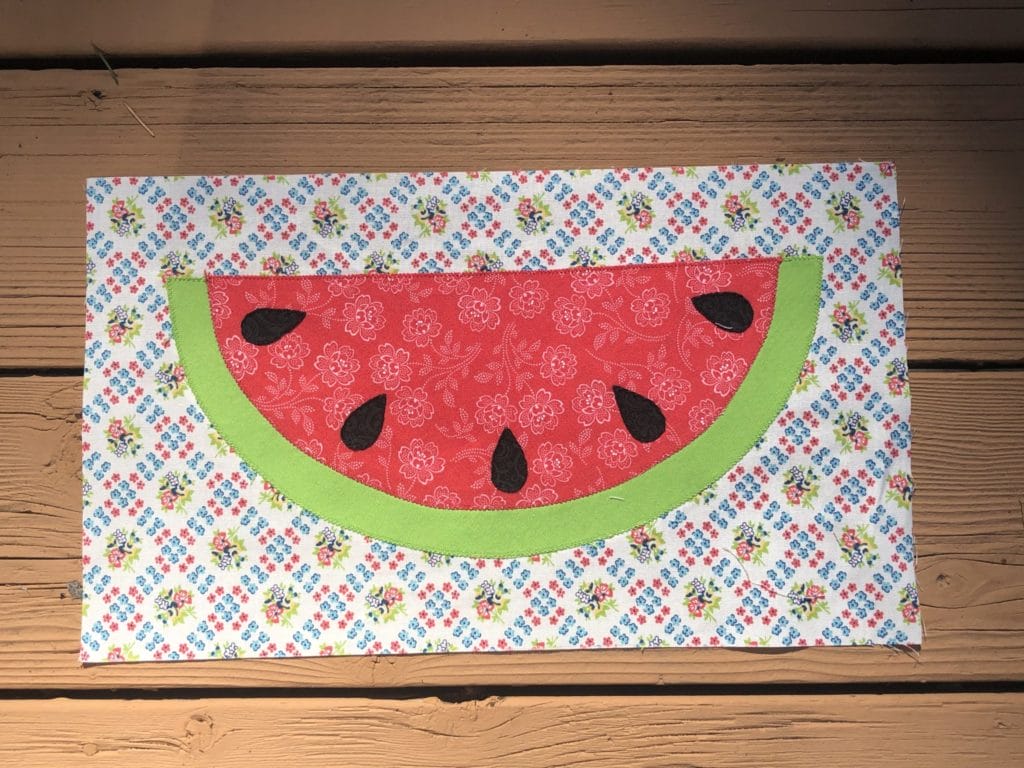
WATERMELON BLOCK:
VERY IMPORTANT TIP: Before you begin cutting, please know that you will need a 6-1/2” x 12-1/2” piece of the Solid Lime Green fabric for next month’s Easter Eggs block. You should easily have enough for this, but I just want you to keep that in mind. As you can see from mine, I have PLENTY left over, and I even made two Green Snowflakes for my Stocking block with this piece.
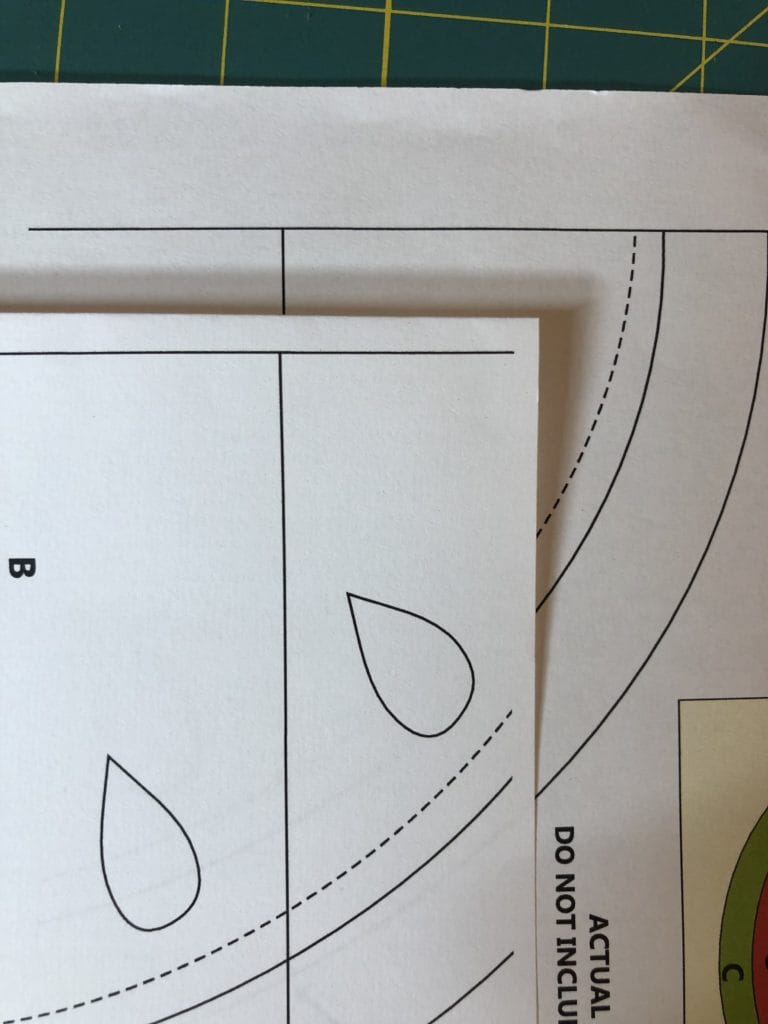
Since the applique template comes in two pieces, you will need to match up the images before you can trace them out. First I matched up the vertical solid line, then I made sure the top of the watermelon and the curved bottoms lined up.
Here I am just trying to get the vertical lines to match up.
As you can see below, my pattern has been secured with with a piece of scotch tape and I have a sheet of the Seam-A-Seam Lite laid over the top ready for tracing. This pattern JUST fits onto one sheet.
My pattern is ready to trace using the Seam-A-Seam Lite.
This block is entirely applique, and most of it is pretty easy. Usually when sewing bigger applique pieces, like the watermelon flesh, I like to only use my Steam-A-Seam around the edges. This helps to keep things more supple and easier to quilt later. But I wasn’t thinking while making this block, and before I knew it, I’d ironed on the whole piece to my fabric. Oops! Fortunately the Seam-A-Seam Lite that I use is pretty light weight. (I guess that’s why they call it LITE, haha!)
Make sure you have your pieces centered before you iron them in place. I usually just eyeball mine, but will sometimes take out a ruler to measure around the edges just to make sure. Once I ironed on the flesh and rind, I applique’d the rind first using matching Lime Green thread, and then went around my flesh with matching red thread.
So, remember at the beginning of this blog post I talked about doing applique for small pieces? Well these seeds are, shall we say, a bit on the small side too! Just like with the snowman, if you are nervous about getting your applique stitching to cooperate, you may want to hand stitch these, but it’s entirely up to you. When I was designing this, I looked hard for some seed buttons to use, because how cute would that be?! But alas, I couldn’t find any that would work. If any of you come across some, let me know. Again, you do what works for you.
The seeds are sewn and the block is done!
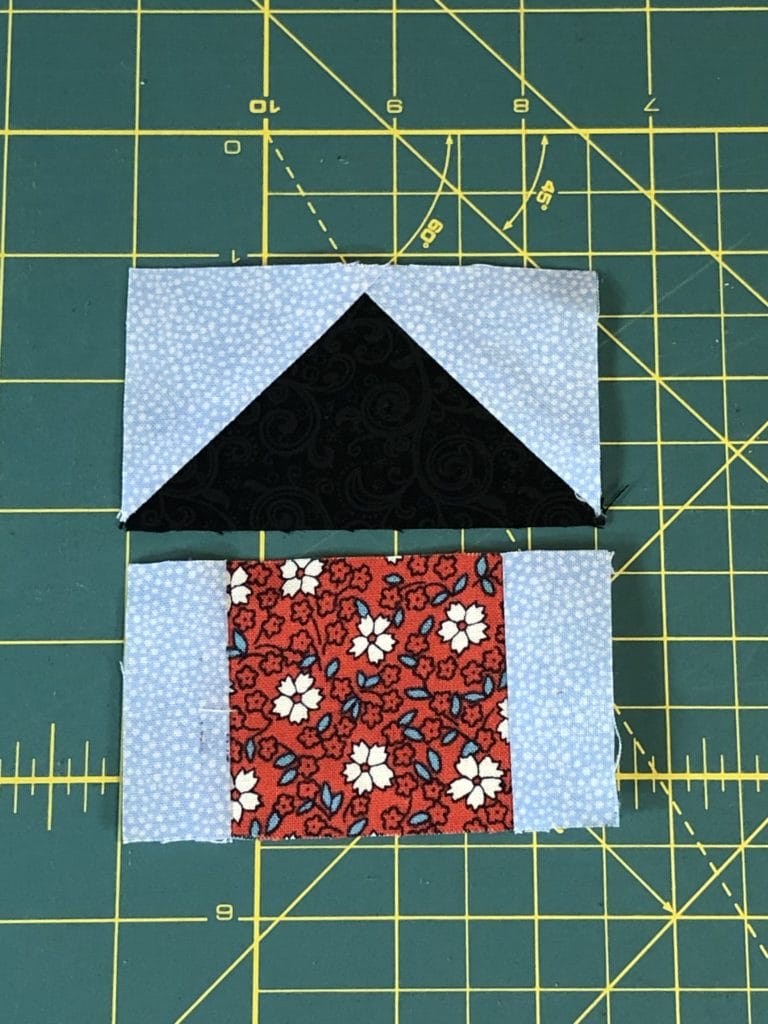
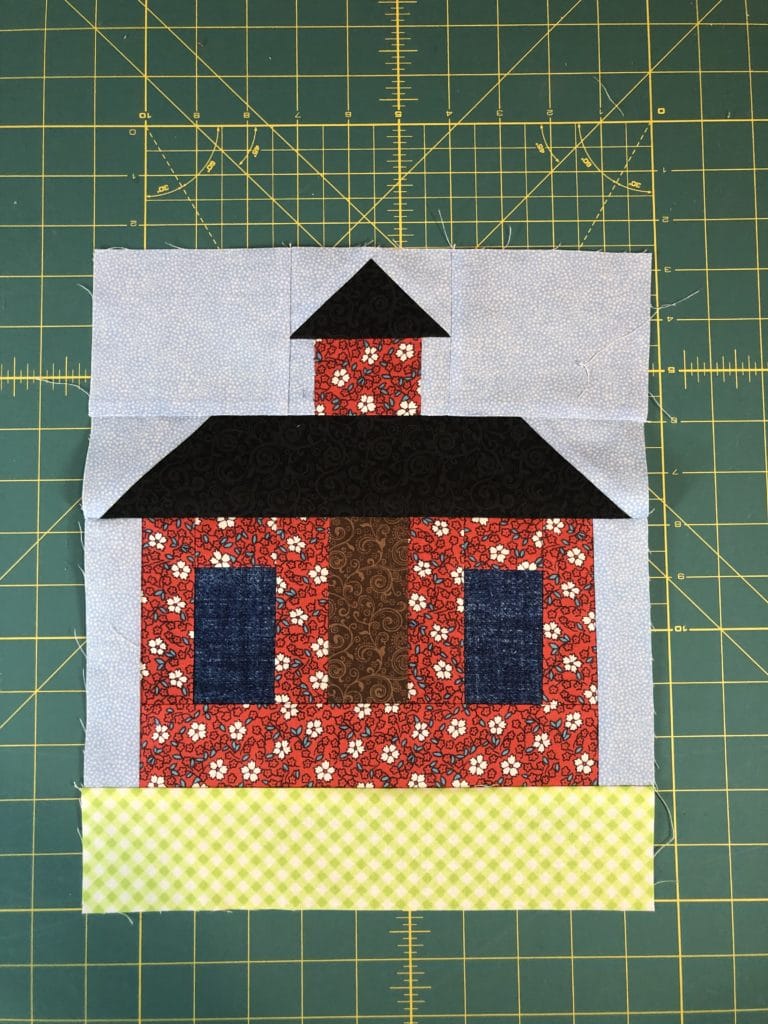
SCHOOLHOUSE BLOCK:
I designed this school house block to honor my heritage. My father grew up in North Dakota, and the little school he attended growing up looked very much like this one. And near my house is the cutest little red two-room school house from the 1800’s that is now someone’s residence. How fun would that be? In any case, I just love how this block turned out.
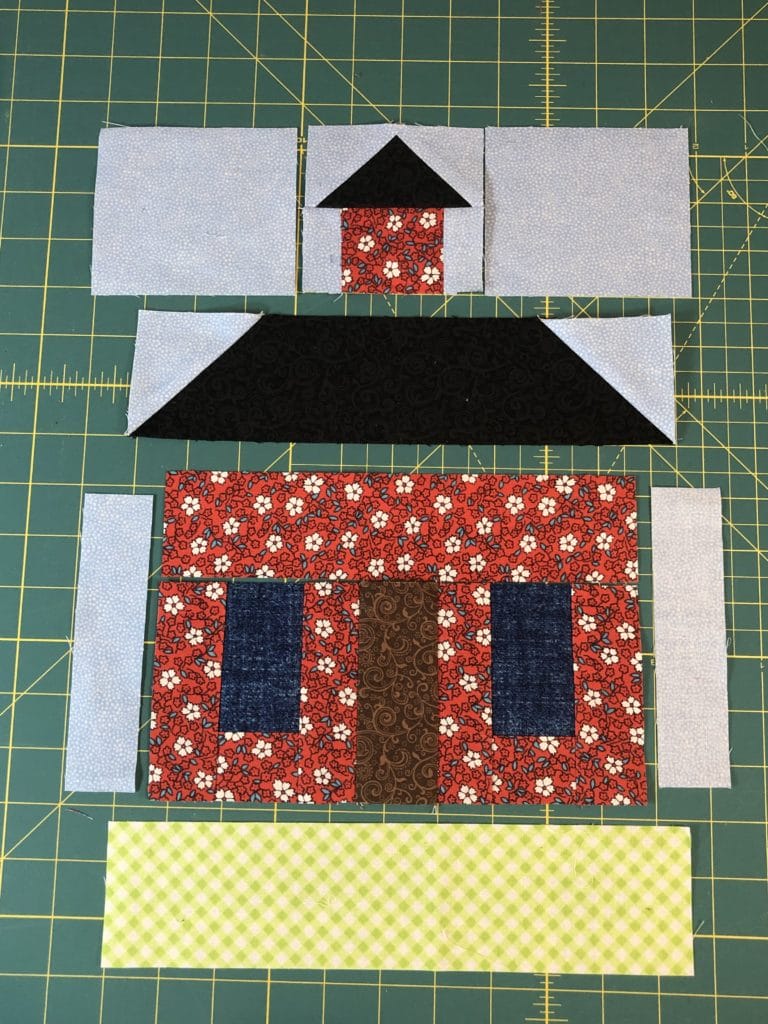
This block is pretty easy, since most of it is squares and rectangles, except for the roof. Here are a few pictures of the block coming together.
All the pieces are laid out in their proper place.
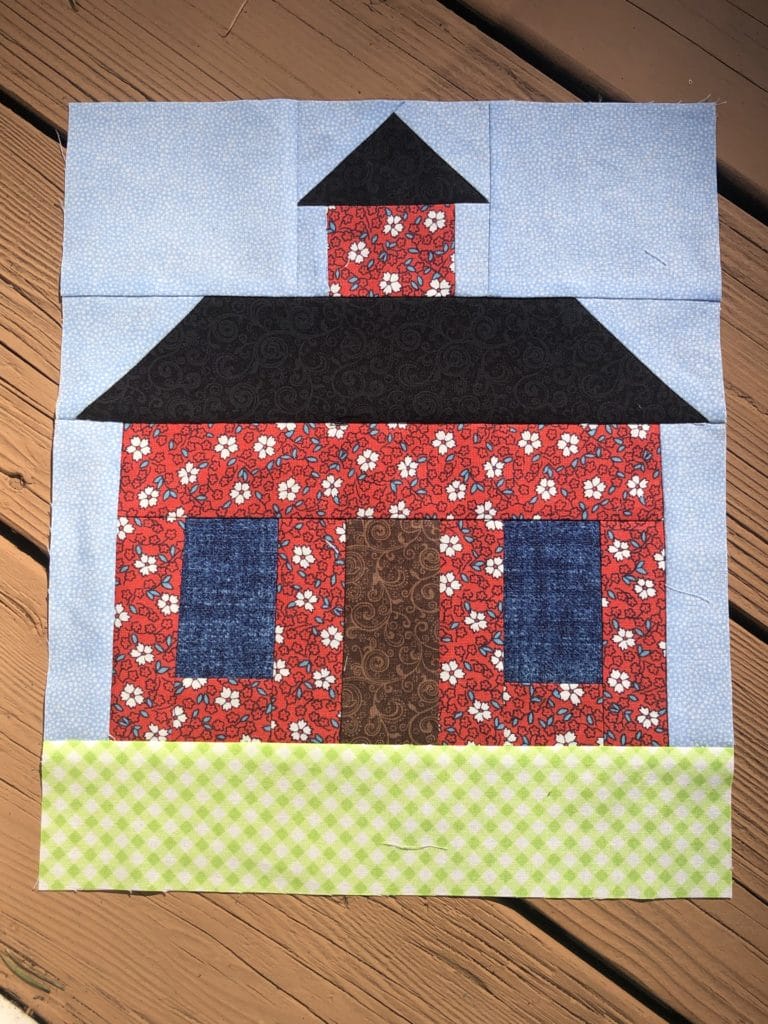
Now look at the picture below- Does anyone see what I’ve done wrong here? Yep, the door section is upside-down. And the dumb thing is, I even laid it out properly! Ugh. So, I got to spend some quality time with my seam ripper and fix it.
Do NOT sew yours together like this!
This looks MUCH better!
I hope you’ve enjoyed making these blocks. Four months down, and only two more to go!
As I’ve probably mentioned before, I LOVE LOVE LOVE Star blocks! Which I guess is why this quilt has a lot of them in it. They are my design weakness!
For this month we will be making eight of these little cuties. They are each 10-1/2” square, and will give you lots of practice with flying geese. (I know, it’s just what you all wanted!)
For these flying geese I use the traditional stitch and flip method. This is the method I used to use all the time when I first started quilting and writing patterns. Then I learned the no-waste method and I have been hooked on that ever since. However, because of the way this block is constructed, we will be using the old-fashioned way. It’s tried and true and does the job.
But I’m getting ahead of myself. Before we get to those flying geese, we will need to make some pinwheel centers for our blocks, starting with some half-square triangles.
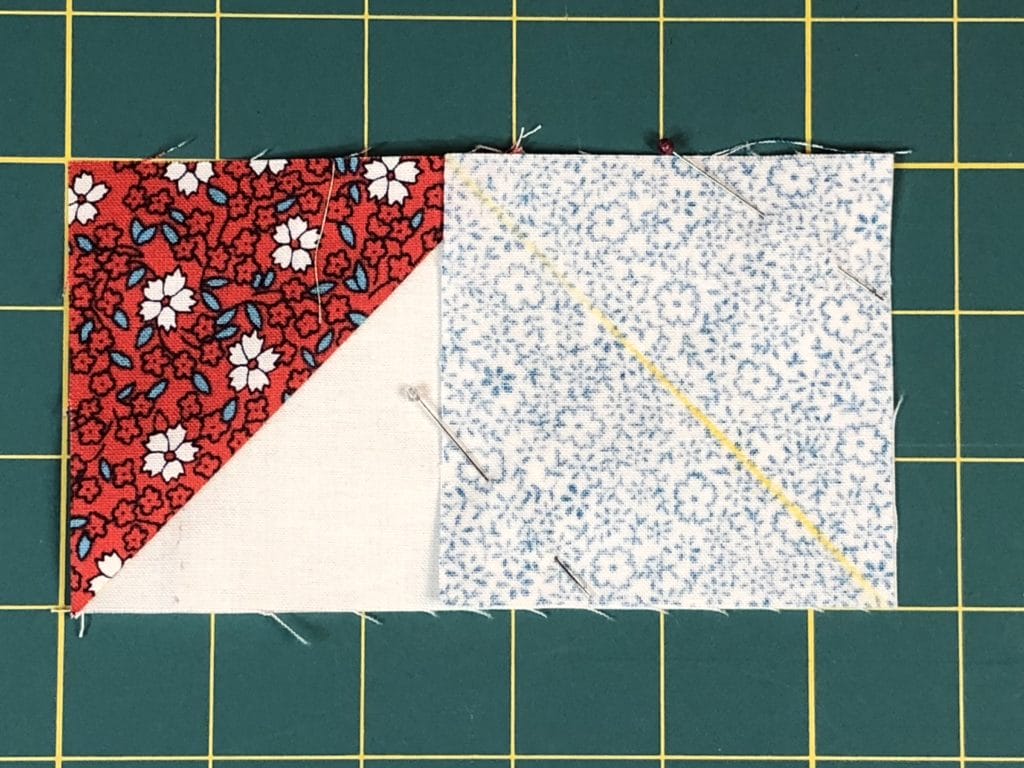
I have moved the top fabric down simply so you can see the red print fabric underneath. You want your squares matched up on all the corners before you begin sewing.
Make sure as you press your F/D squares that all the seams are pressed toward the red print fabric and then all your seams will nest together nicely.
Here are my half-square triangles ready to be trimmed. Not my favorite job but it has to be done!
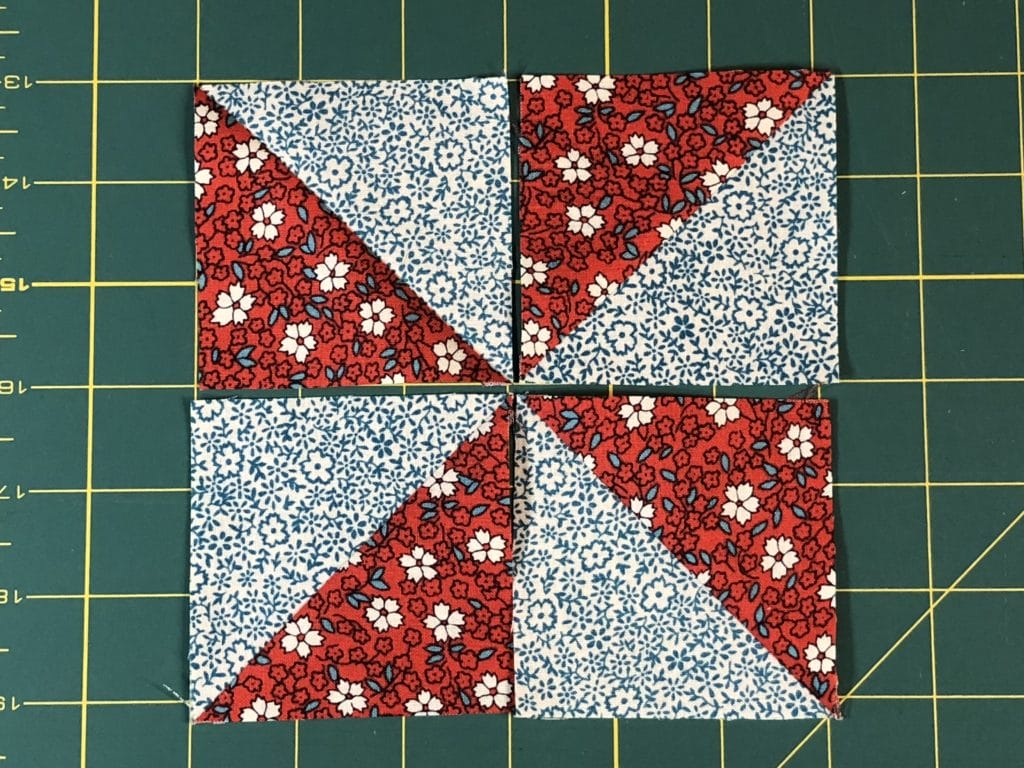
Make sure all your pinwheel are sewn just like the diagram in the pattern. You want the red and blue prints to be placed in the same orientation so that things will all match up later.
The half-square triangles are ready to sew together to make the pinwheel centers.
After your pinwheel blocks are finished, it’s time to make those flying geese.
Place the Red C squares on the left side of each of the A rectangles, and follow the directions.
Then place the Blue E squares on the right side to finish them up. I like to sew just outside of my marked line so that I have some room to square up my flying geese when they are done.
Now we can sew all the components for the block together!
Here below I have laid out all the pieces to make sure everything is in its proper place.
Each print matches up with its counterpart. This picture is a little crooked, but you get the idea.
If you’ve sewn your pinwheel blocks together correctly, all the red fabrics and blue fabrics should line up with each other, giving the illusion that they are one continuous piece.
Once you get going, these blocks come together pretty fast. I hope you have enjoyed making these sweet little stars!
SPOILER ALERT: If you look at the finished quilt on the front page of your pattern, you will notice that we have more of these star blocks to make, just in different fabrics. So be prepared to make a few more of these cuties later on!
It’s hard to believe that we are going to be half way done with this quilt after sewing this month! Didn’t we all just start this project? I hope you are all having fun so far, because quilting should be fun! I have enjoyed seeing what all of your are doing with your previous quilt blocks on Facebook. Some of you are changing things up, adding embroidery, and other embellishments and I love it!
This month we will be making the Shamrock, Popsicle, and Hallow’s Eve blocks.
Let’s start off with the Shamrock Block: I like to assembly line piece whenever possible, so as you can see below, I’ve got everything marked and laid out so I can begin sewing on all these corners.
Here they are all trimmed and finished up and ready to be sewn together. Please note that in the directions for step #1 I’ve asked you to press the upper left C square down toward the center, while the other to C squares are pressed outward. This will allow you to nest all the seams together when you sew them all together.
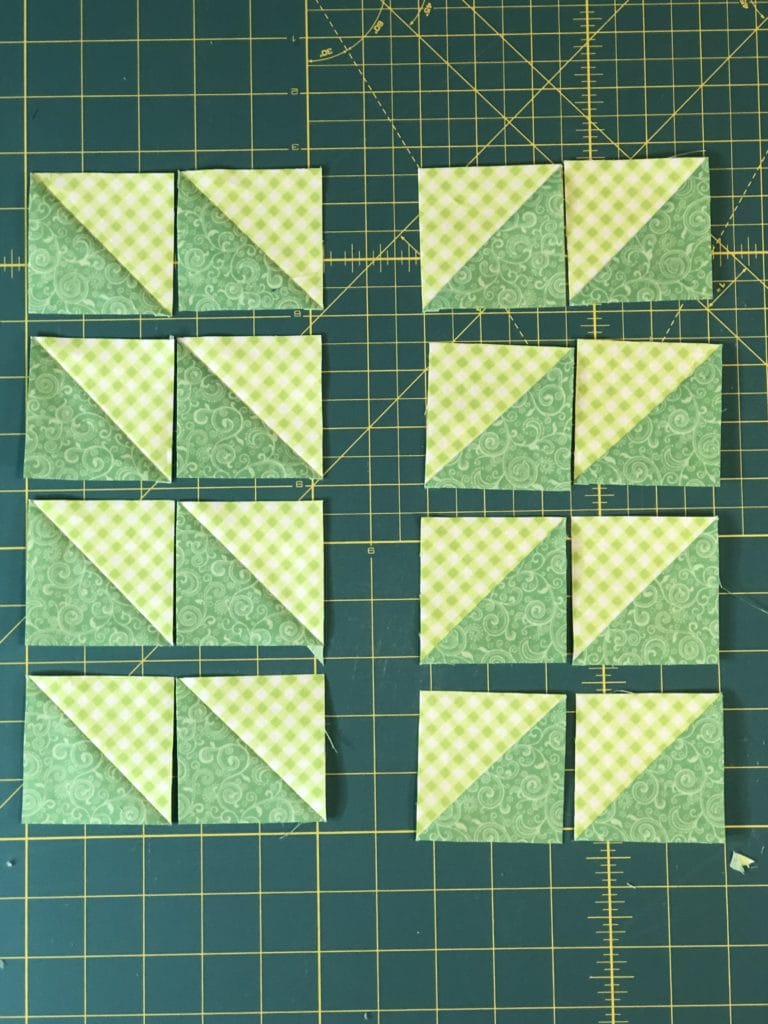
For some reason I got a little excited, or perhaps too “in the zone” while sewing, and plumb forgot to take any pictures of making the half square triangles in step 3. Oops! So here they are below, all finished up.
As you can see, I’ve paired them all up to get them ready for sewing. Don’t forget that you want to make four units with the D triangles in the lower left, and four unit with the D triangles in the lower right.
After sewing all the pairs together. I sewed a LEFT unit to a RIGHT unit (See step 5). Then I took two of those units and sewed an A square to each end as I’ve outlined in the instructions. You can see below that I’m ready to finish off the block by sewing the strips to the sides.
If you find that your pieced strips aren’t matching up exactly, which happens to everyone, here is my little tip: I spray the longer unit with some Mary Ellen’s Best Press (or any other starch will work fine too), and it magically shrinks up just a bit which allows me to match things up better. I don’t know if it’s a kosher quilting thing to do, but it has helped me, so I thought I’d share. 🙂
Almost done!
And here is the finished Shamrock block, which should measure 12-1/2″ square.
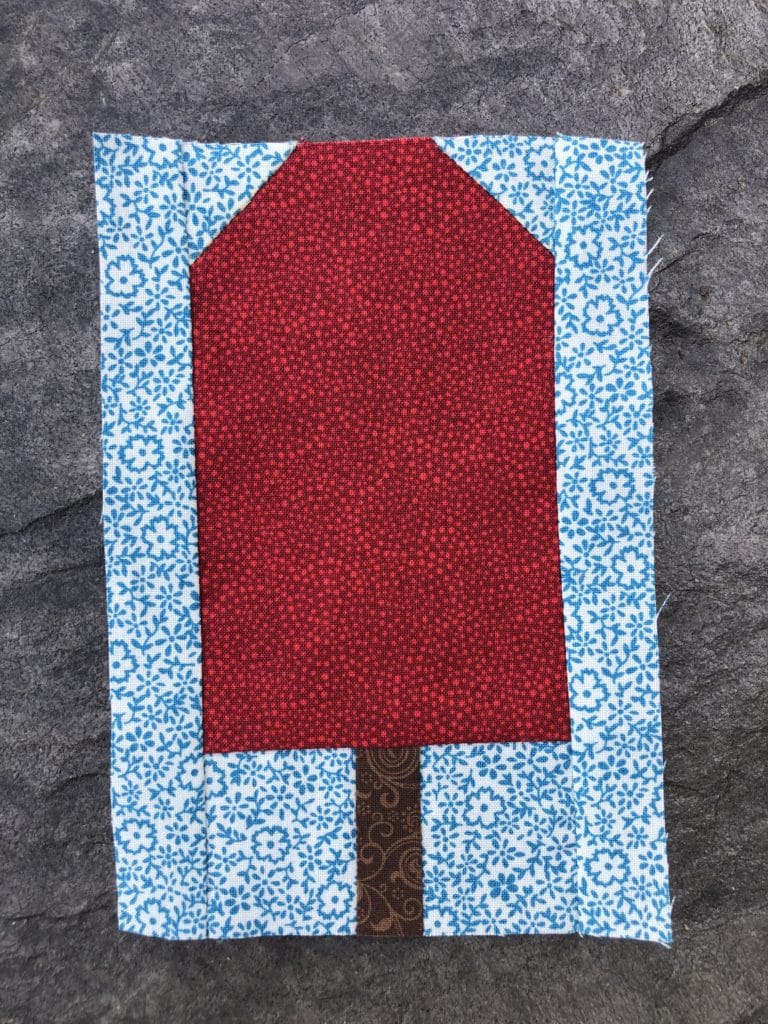
Now we will make the cute little Popsicle block.
Yes, I know I’ve got more of those tiny little squares for you all to contend with for this block, but the good news is that they don’t have to match up with anything, so they will turn out just fine and there’s no need to stress.
When I am working with sewing on marked lines and trimming (otherwise known as stitch and flip) for such small pieces I like to sew just BARELY outside the marked line, like just a thread or two, on the side closest to the corner. This way I can make sure that when I trim and press the corners I will have just enough to true things up in case things get a bit wonky.
This block is pretty straight forward from here. The rest of the pieces are small too, but there isn’t anything too tricky with piecing.
Ready to sew together!
Now it is all done!
After sewing this I realized it would look SO cute with some embroidered detail lines shaped like two long skinny arched windows to make it look like it has the actual popsicle indentations in it. Maybe I’ll add those??? We’ll see!
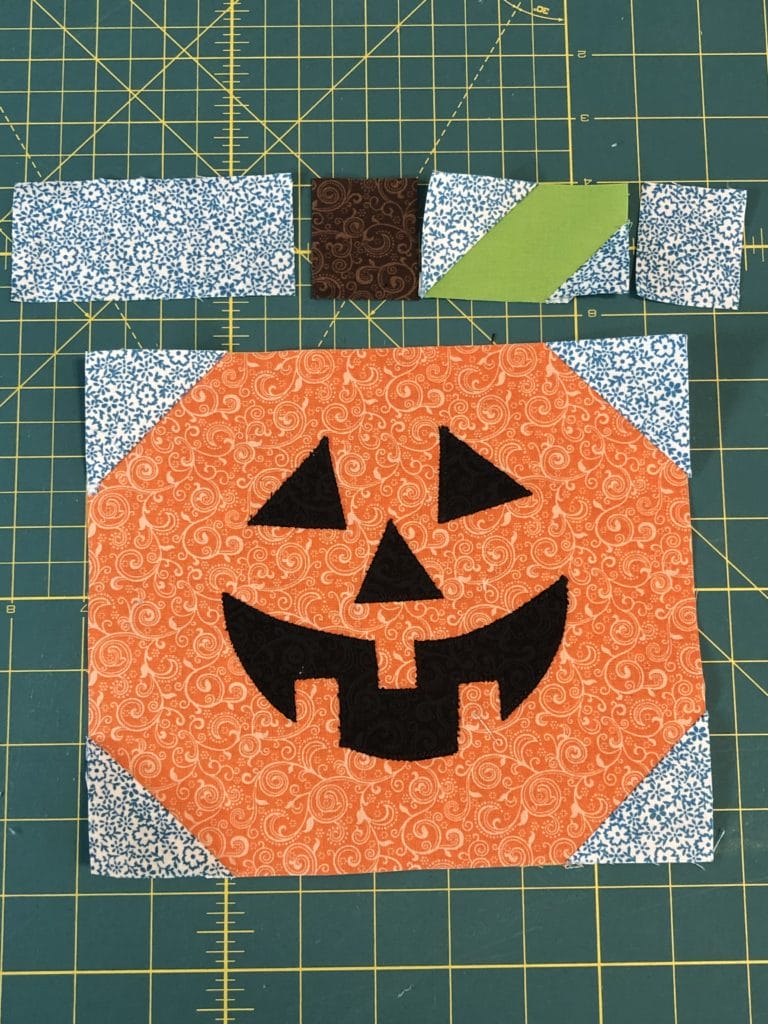
And last but not least, the Hallow’s Eve block.
I’m so excited for Halloween! I’m still holding out hope that we can entertain some trick-or-treaters this year, but we shall see how things play out over the next month or so. (Don’t forget to wear your mask.) I love to decorate for Halloween, but I usually don’t do anything too scary because I want all the adorable preschoolers to come to my door. 😉
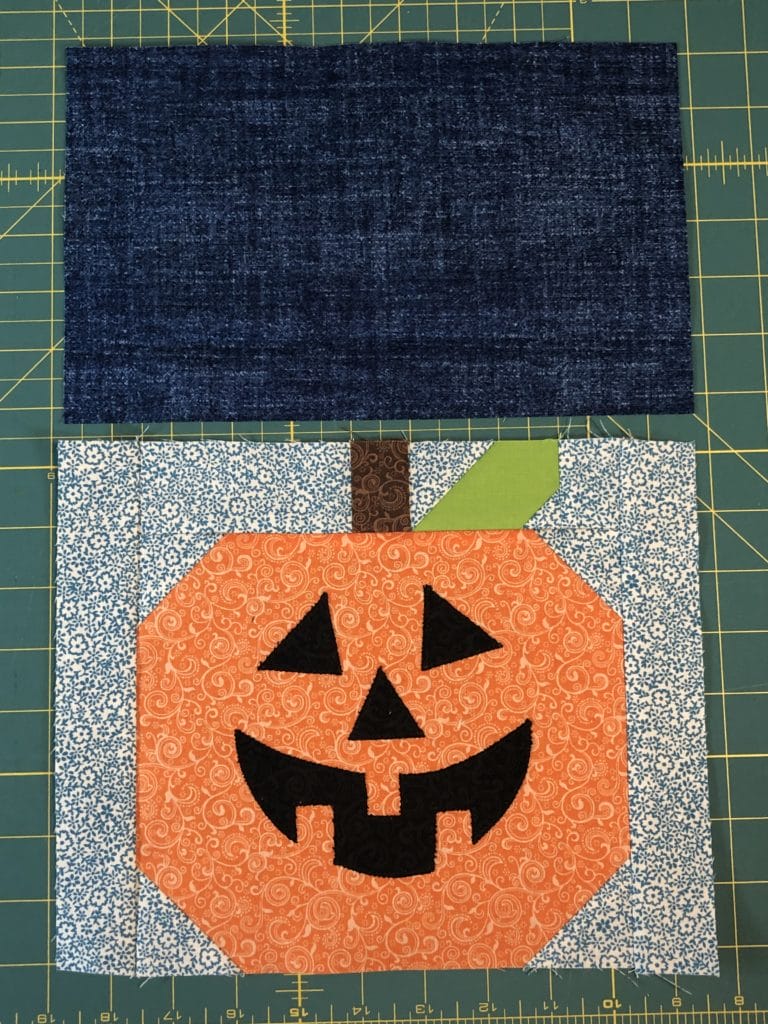
First let’s get this pumpkin together. And apparently I can’t follow my own directions. Notice below how I did my applique before sewing on the corner pieces? Oh well!
You can see below that I’ve added the corner pieces and have assembled what I need to make the stem and leaf. I used the solid lime fabric for the leaf, but there is enough of the other green fabrics for you to swap it out for something else if you prefer.
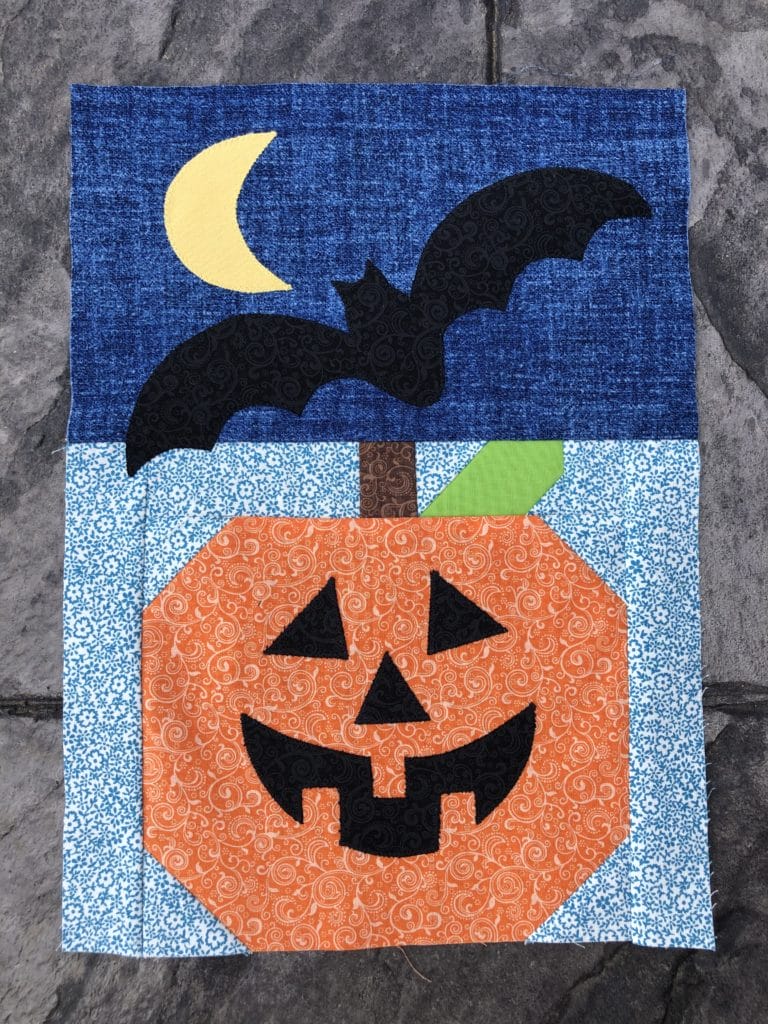
All I have left to do is add this dark blue piece and sew on the bat and moon. If you refer back to the month #1 blog post I talk a bit more about applique. I always use stabilizer when sewing my applique on, and I almost always use freezer paper for this. It’s cheap and easy!
And here is the finished block. I think it would also be fun to add some bat eyes, and maybe even some fangs!
We are now half way there! I can’t wait to see what you all do with this month’s blocks. Have fun and Happy Quilting! – Kristin
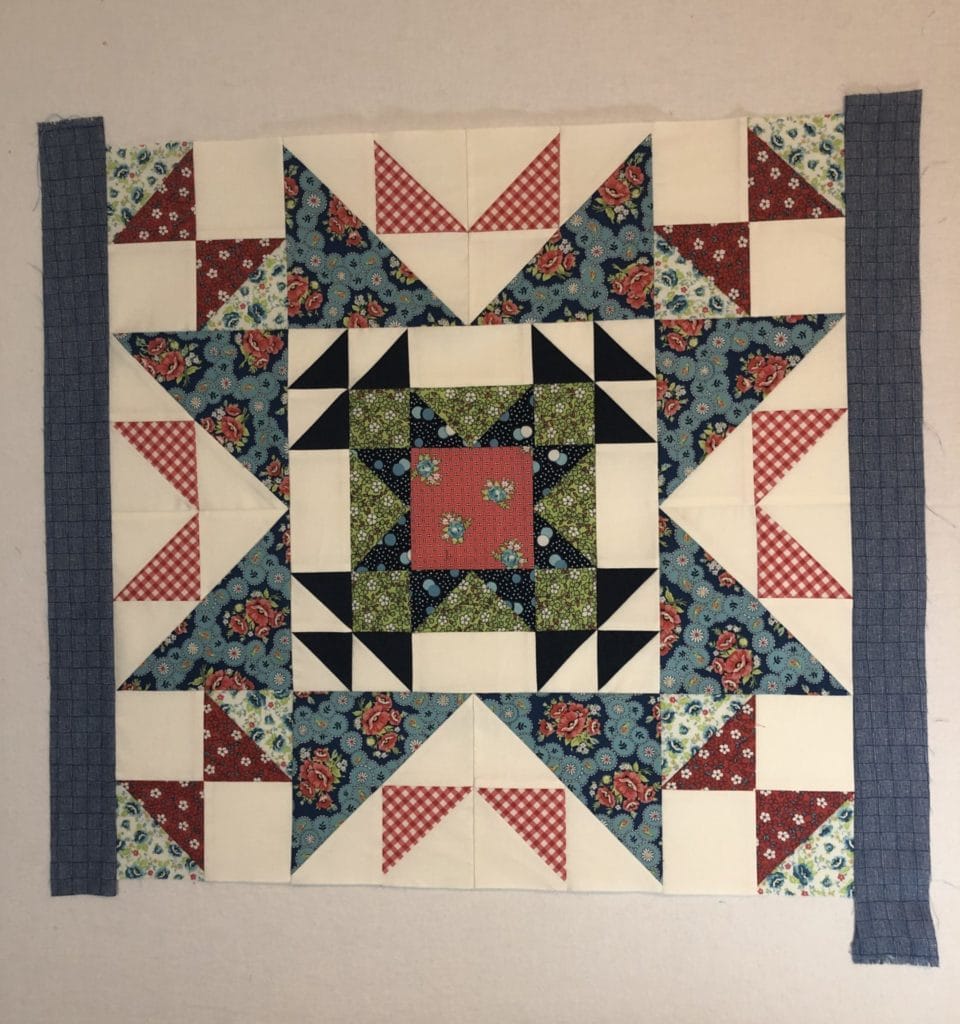
I’ts been so fun to see everyone’s photos from month 1 on the Facebook Group. It always makes me happy to see people enjoying my designs! This month we will be adding a couple of borders to our center medallion. It’ll be a breeze compared to all the piecing we did last month!
The first part of this month’s directions is easy-peasy! Just sew on the border strips as directed. And just so you know, it’s perfectly okay to add at lease 1/4″ or so in length to all your border strips before cutting. I ALWAYS do this every single time I’m adding borders to any quilt. I like having the wiggle room to make sure it’s all going to fit, and then I trim things up as I go.
Some of these are a little more than 1/4″ longer, lol! But since it’s my own pattern I know I’m going to have plenty of fabric, so I’m not worried.
Remember last month when I showed you all how to make no-waste flying geese? Well, we are going to be doing a lot more of that for month 2. (And in later months too!) When I have a lot of identical units to make, I like to do what I call ‘assembly line’ sewing as much as possible. Probably most of you do the same thing already. I basically cut everything and prep my pieces and then I sew like crazy!
Here is my stack of units marked and ready for some quick sewing.
I always chain piece as I sew too, which means I don’t cut my threads in between pieces. I just keep feeding more units through my machine and then clip the connecting threads after I’m done. It goes SO much faster that way!
Lots of happy chain-pieced flying geese.
And as usual, I used my Bloc-Loc tool to do all the trimming. I love how the tool just locks in to place at the “V” so I can make quick work of using my rotary cutter to cut around the edges and true them up.
Here is the Bloc-Loc in its proper place before trimming.
Once I had my flying geese all trimmed it was time to lay them out to sew into the rows as outlined in the pattern instructions.
Getting the strip sets assembled.
I laid out all the units at once to make sure I had everything correct before sewing each of the 8 strip sets together.
Here are the finished flying geese strips.
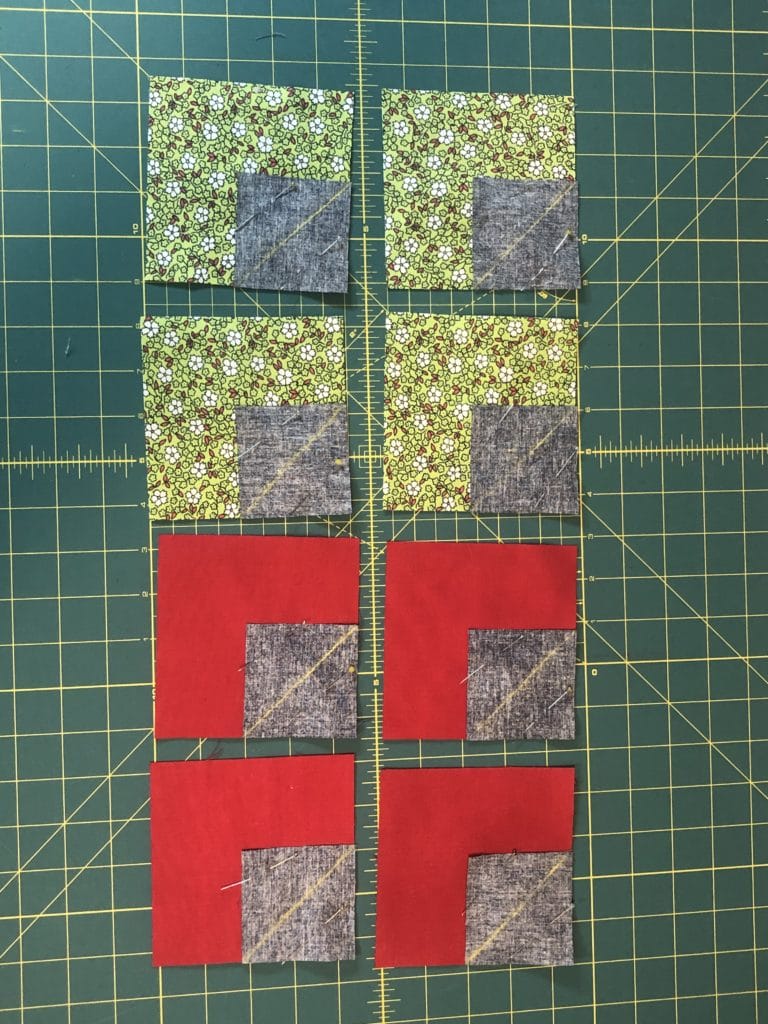
Now it’s on to make the Square-In-A-Square blocks which are in centers and corners of the flying geese borders.
There are basically two different methods to make the Square-In-A-Square blocks: One method is to cut a smaller center square and then attach triangles around the edges. I have some patterns where I’ve done it this way, but I find that sometimes it’s harder to get things to measure correctly in the end. So for this pattern I decided to do the method that gives more accurate results (in my opinion), but the downside is there is a bit of wasted fabric. Since we are only making 8 of these blocks, I figured I wasn’t committing a huge crime with a small amount of waste. haha.
I made these square-in-a-square blocks by using the stitch and flip method, which is also commonly used to make flying geese units. This way we know we can end up with an accurate 4-1/2″ square when we are done, and that each unit has the required 1/4″ seam allowance. And yes, I made all mine at the same time to make quick work of it.
These are all prepped and ready to stitch on the marked lines.
Now it’s on to attach the 2nd square to each unit.
When doing any stitch and flip method, here is something I find helpful: Sometimes after we’ve stitched, trimmed, and pressed we end up with corners that come up short or wonky. I’ve found that after I’ve sewn on the marked line, if before trimming I first flip the square up at the seam and it doesn’t match up at the corner, then I know I need to rip it out and re-stitch. Not my favorite thing to do! To avoid this, I generally sew just BARELY – and I mean just a hair – outside if my marked line, on the side that is closest to the corner. This way I don’t end up with shortened corners and things squaring up much better.
Here is a photo below of me flipping up the square and it NOT matching up in the corner. See how it looks all wonky?
This is the WRONG way to sew on the corner square!
Below is what your corner SHOULD look like after you’ve flipped up the square on the seam you just sewed.
This one is sewn MUCH better!Here is the 3rd corner ready for sewing.And finally the last corner can be sewn!
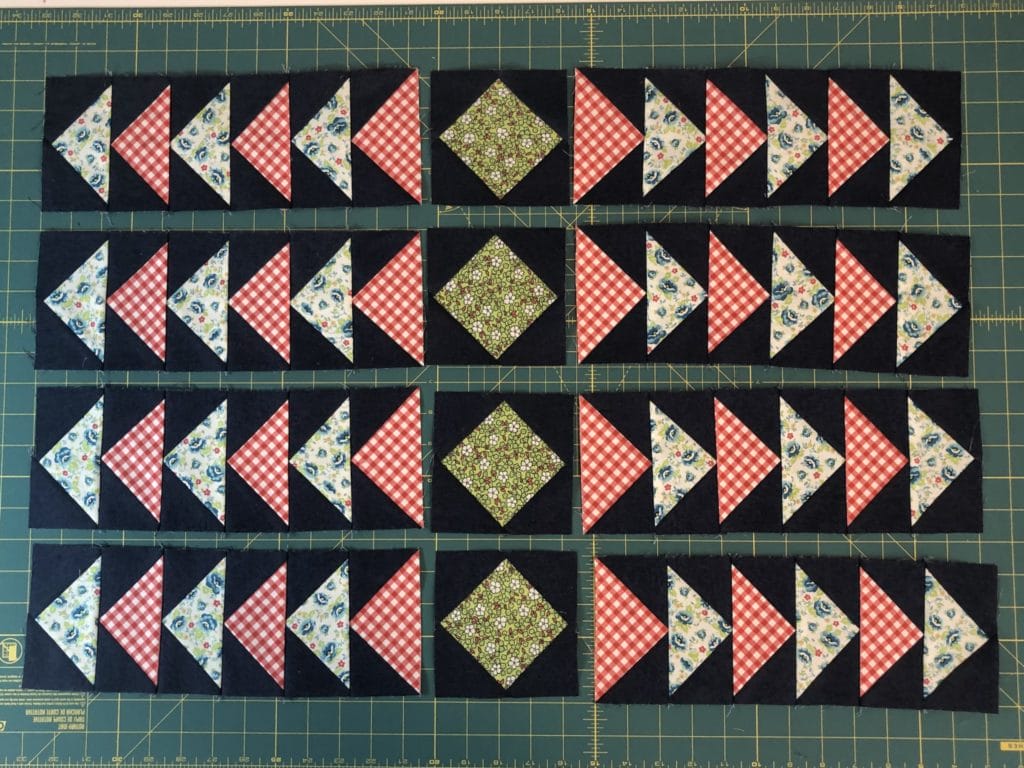
Once you have all your Square-In-A-Square blocks finished up you can sew the green floral ones in between each of your flying geese strip sets.
Make sure your flying geese units are pointing AWAY from the center squares.
Below you can see I’ve sewn the red squares on to the ends of two of the strips sets I just made and am ready to sew everything on to the quilt.
When sewing the red square-in-a-square blocks to the ends of the flying geese units I changed my mind from the directions and decided to press the seams open to reduce the bulk where the triangle points all come together. You can still press them as directed, and it will work, but I thought I’d try it this way too. I talked about seam pressing a bit in the last month’s blog, but basically you do what you think works best for you.
I decided to press these seams open to reduce bulk.
Sometimes sewing pieced borders to your quilt can be tricky. Fabric tends to stretch so we can end up with borders that don’t seem to match up correctly. So here is one tip that has worked well for me.
If I notice my pieced borders have stretched and are a bit too big, I simply give the longer ones a good spray with Mary Ellen’s Best Press, which is my personal go-to starch. (I use it on EVERYTHING. But I’m sure any other starch product you are using would probably work fine too.) For some reason, my pieced borders almost magically shrink back up, usually just enough for me to gently re-press in their smaller size, and then they fit much better. This way I don’t have to do quite so much “easing” things together with my sewing.
Here is the gap I was going to have to contend with because my flying geese border had stretched a bit too much while I was sewing.As you can see, I REALLY sprayed the bottom section of the border to allow it to shrink up.
If you were to look VERY closely at this picture below you will notice that there is a red square that doesn’t quite match up perfectly with the flying geese at the points. I re-did it twice and finally decided it was time to say UNCLE. I’m just as human as any other quilter, and sometimes good enough is good enough!
And now everything fits together. I love this center portion of the quilt so much just as it is. My son actually saw the quilt top in its current form and thought it was a table topper that is finished and ready for quilting. (Wouldn’t that be so cute?!) But this quilt is just going to keep getting bigger and bigger!
I hope you’ve enjoyed this month’s installment of our Annabelle quilt. I can’t wait to show you Month #3, so stay tuned!


 Tutorials
 3.4.2021