


 Tutorials
 9.9.2020
It’s hard to believe that we are going to be half way done with this quilt after sewing this month! Didn’t we all just start this project? I hope you are all having fun so far, because quilting should be fun! I have enjoyed seeing what all of your are doing with your previous quilt blocks on Facebook. Some of you are changing things up, adding embroidery, and other embellishments and I love it!

This month we will be making the Shamrock, Popsicle, and Hallow’s Eve blocks.
Let’s start off with the Shamrock Block: I like to assembly line piece whenever possible, so as you can see below, I’ve got everything marked and laid out so I can begin sewing on all these corners.

Here they are all trimmed and finished up and ready to be sewn together. Please note that in the directions for step #1 I’ve asked you to press the upper left C square down toward the center, while the other to C squares are pressed outward. This will allow you to nest all the seams together when you sew them all together.

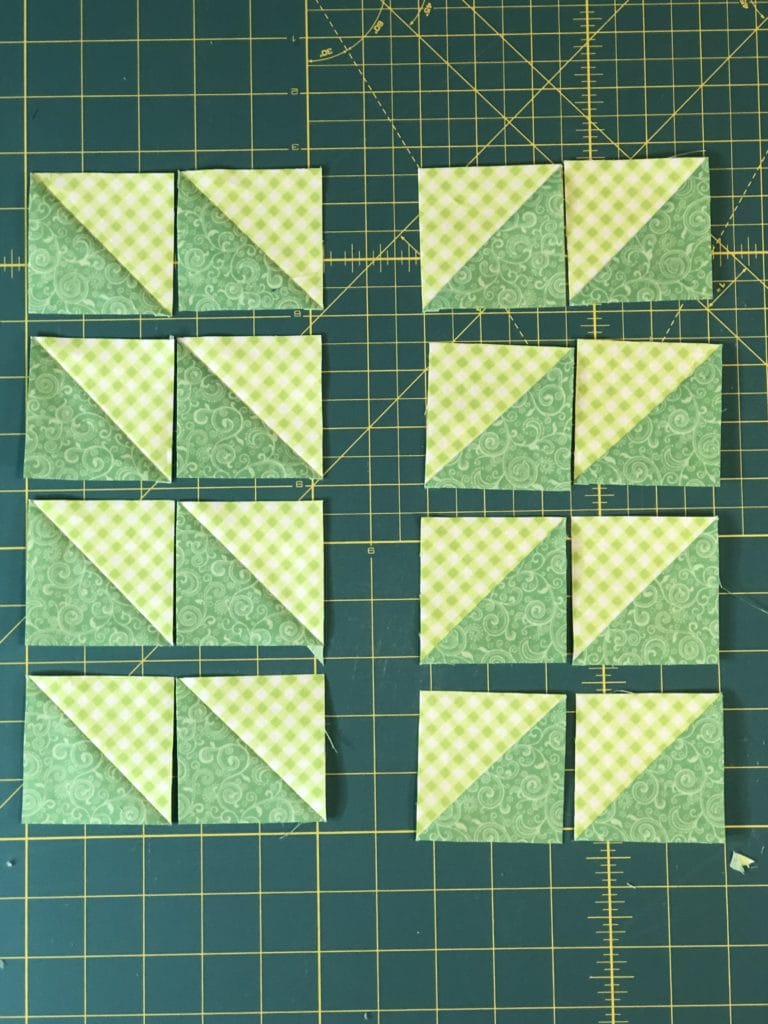
For some reason I got a little excited, or perhaps too “in the zone” while sewing, and plumb forgot to take any pictures of making the half square triangles in step 3. Oops! So here they are below, all finished up.
As you can see, I’ve paired them all up to get them ready for sewing. Don’t forget that you want to make four units with the D triangles in the lower left, and four unit with the D triangles in the lower right.
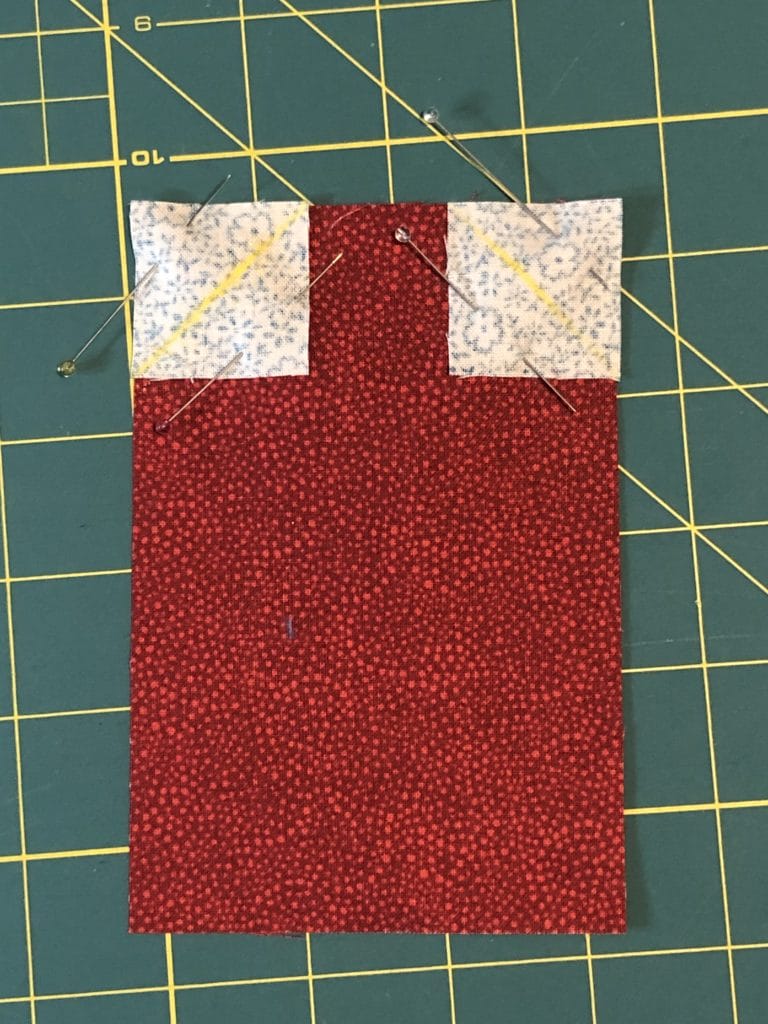
After sewing all the pairs together. I sewed a LEFT unit to a RIGHT unit (See step 5). Then I took two of those units and sewed an A square to each end as I’ve outlined in the instructions. You can see below that I’m ready to finish off the block by sewing the strips to the sides.
If you find that your pieced strips aren’t matching up exactly, which happens to everyone, here is my little tip: I spray the longer unit with some Mary Ellen’s Best Press (or any other starch will work fine too), and it magically shrinks up just a bit which allows me to match things up better. I don’t know if it’s a kosher quilting thing to do, but it has helped me, so I thought I’d share. 🙂

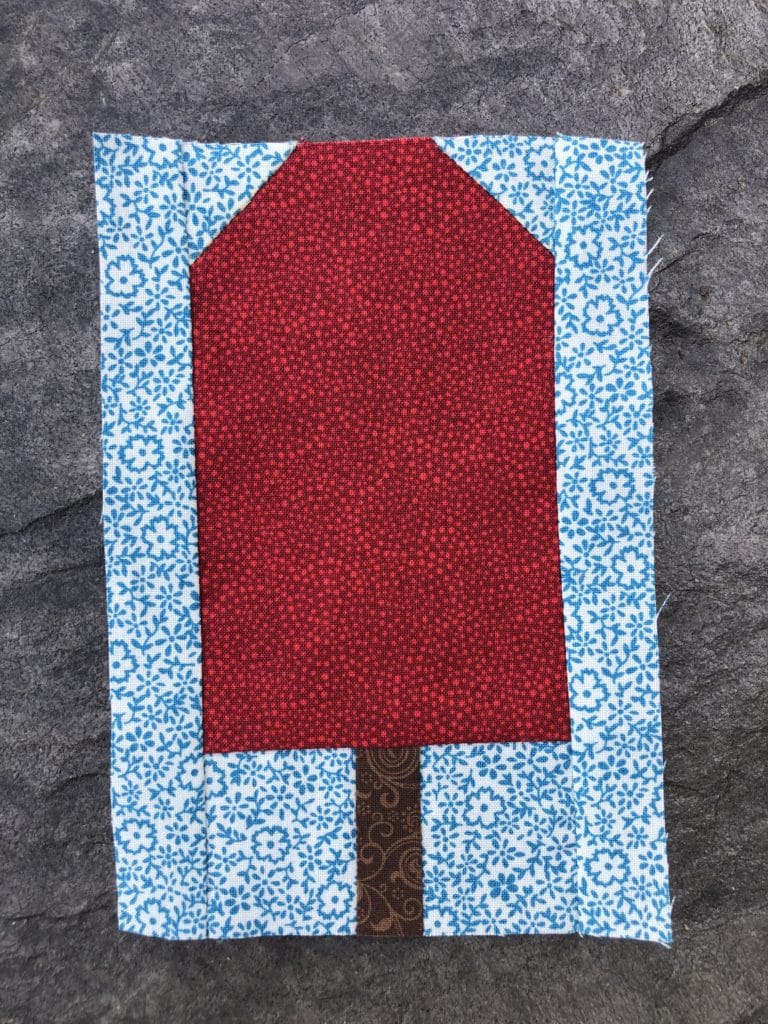
And here is the finished Shamrock block, which should measure 12-1/2″ square.

Now we will make the cute little Popsicle block.
Yes, I know I’ve got more of those tiny little squares for you all to contend with for this block, but the good news is that they don’t have to match up with anything, so they will turn out just fine and there’s no need to stress.
When I am working with sewing on marked lines and trimming (otherwise known as stitch and flip) for such small pieces I like to sew just BARELY outside the marked line, like just a thread or two, on the side closest to the corner. This way I can make sure that when I trim and press the corners I will have just enough to true things up in case things get a bit wonky.
This block is pretty straight forward from here. The rest of the pieces are small too, but there isn’t anything too tricky with piecing.

Now it is all done!
After sewing this I realized it would look SO cute with some embroidered detail lines shaped like two long skinny arched windows to make it look like it has the actual popsicle indentations in it. Maybe I’ll add those??? We’ll see!
And last but not least, the Hallow’s Eve block.
I’m so excited for Halloween! I’m still holding out hope that we can entertain some trick-or-treaters this year, but we shall see how things play out over the next month or so. (Don’t forget to wear your mask.) I love to decorate for Halloween, but I usually don’t do anything too scary because I want all the adorable preschoolers to come to my door. 😉
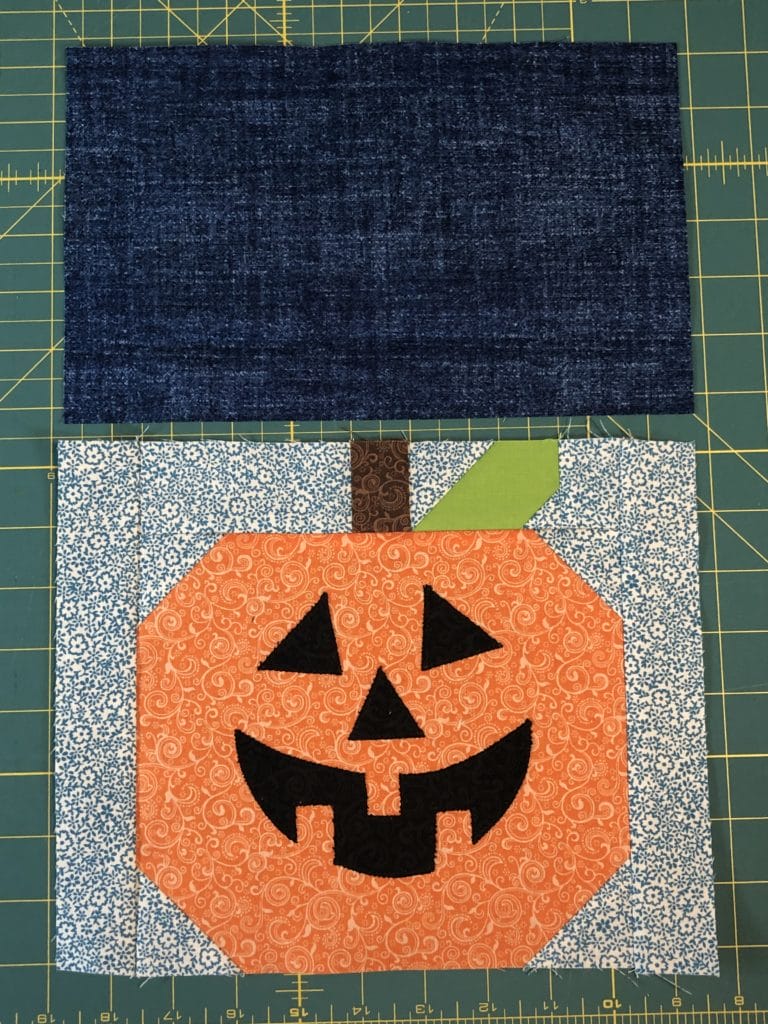
First let’s get this pumpkin together. And apparently I can’t follow my own directions. Notice below how I did my applique before sewing on the corner pieces? Oh well!

You can see below that I’ve added the corner pieces and have assembled what I need to make the stem and leaf. I used the solid lime fabric for the leaf, but there is enough of the other green fabrics for you to swap it out for something else if you prefer.
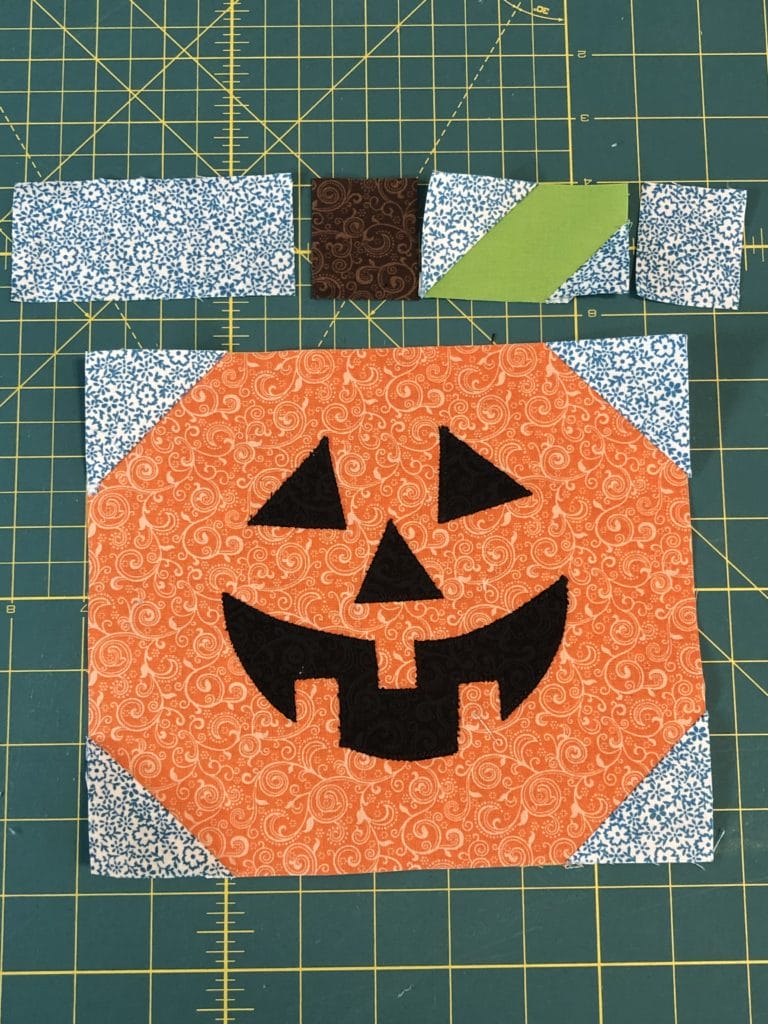
All I have left to do is add this dark blue piece and sew on the bat and moon. If you refer back to the month #1 blog post I talk a bit more about applique. I always use stabilizer when sewing my applique on, and I almost always use freezer paper for this. It’s cheap and easy!
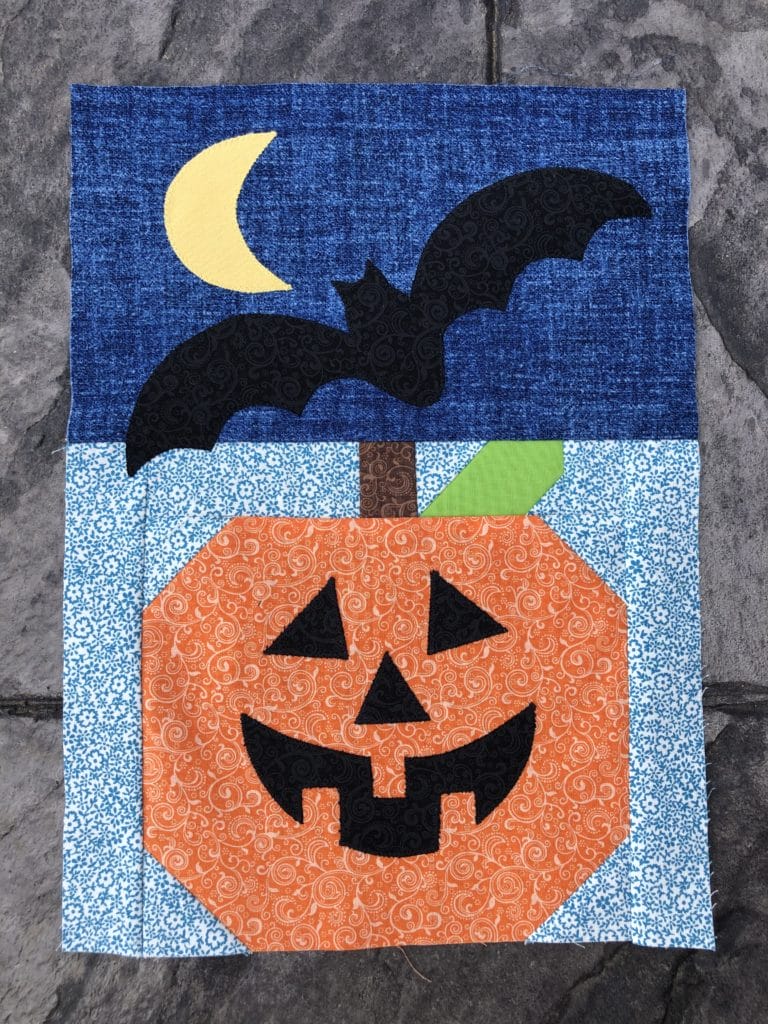
And here is the finished block. I think it would also be fun to add some bat eyes, and maybe even some fangs!
We are now half way there! I can’t wait to see what you all do with this month’s blocks. Have fun and Happy Quilting! – Kristin

