


 Tutorials
 2.11.2021
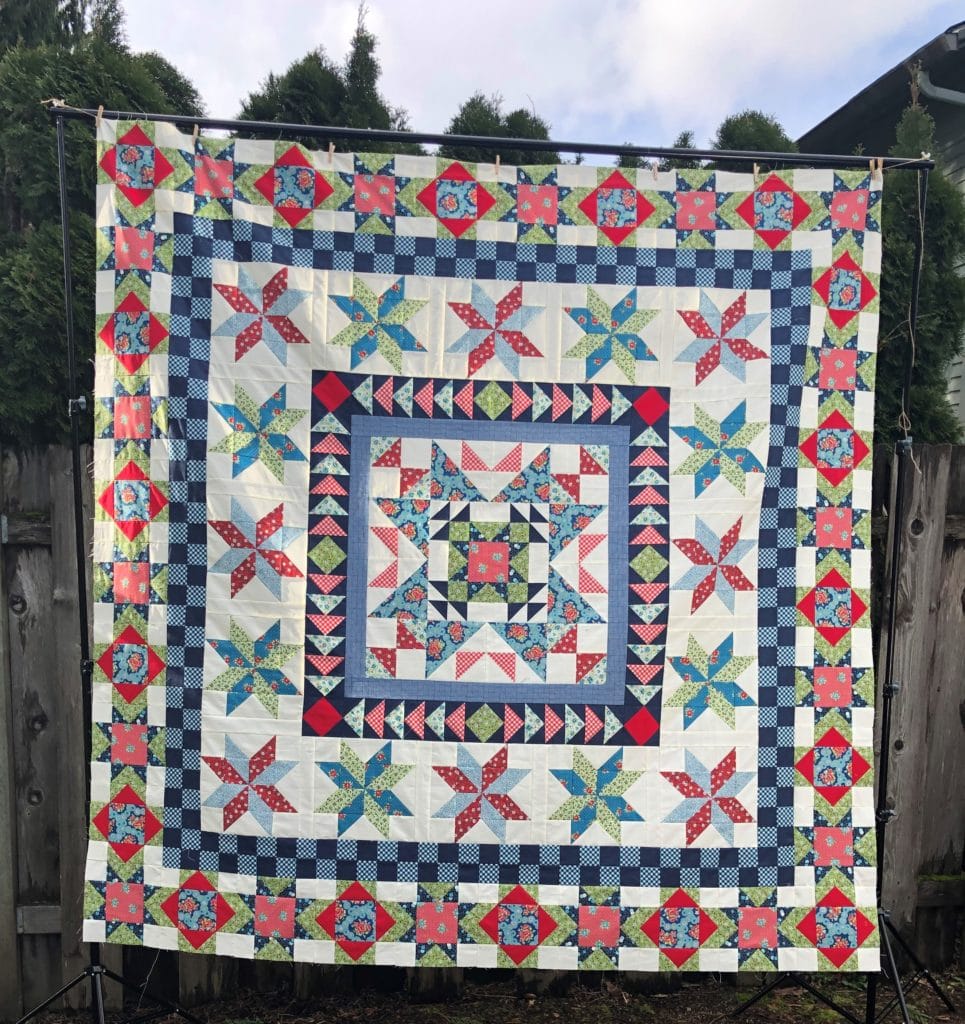
Hi friends!
I’m not gonna lie – this month is A LOT. At least, it felt that way to me. We are making an additional 18 blocks, and then sewing those blocks together with the ones from last month, and then attaching all of it to the center portion. Phew! But we CAN DO IT.
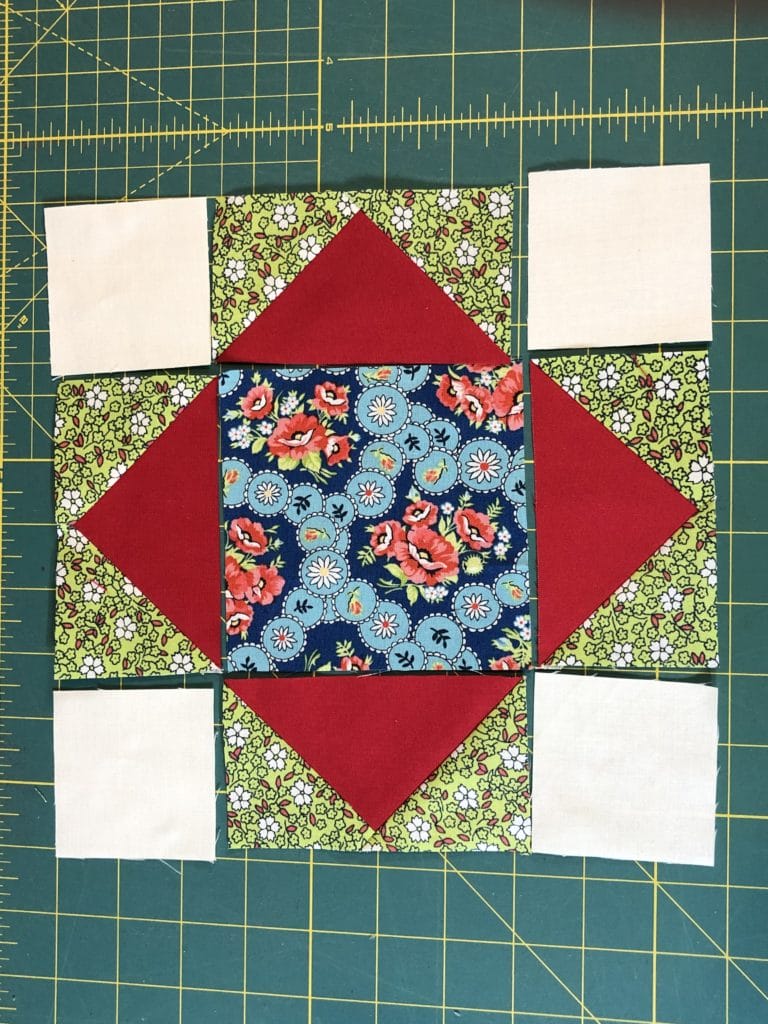
So let’s begin with those 18 blocks! They are basically the same block as last month, but with the flying geese units pointing away from the center square this time. I won’t bore you all with another tutorial on the no-waste flying geese method, but just remember you can always cut those pieces a tad bit bigger so you’ll have room to trim down. I always do.
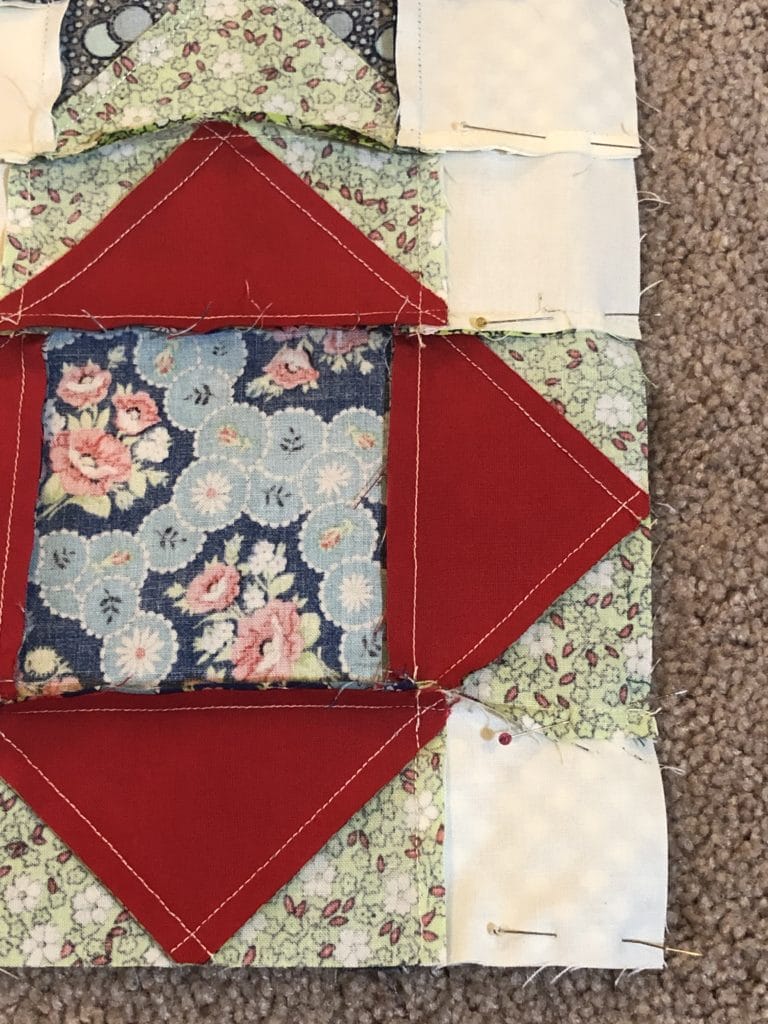
Here is the layout for each block.
Once you have them all finished and trimmed up, you can begin sewing those rows together.
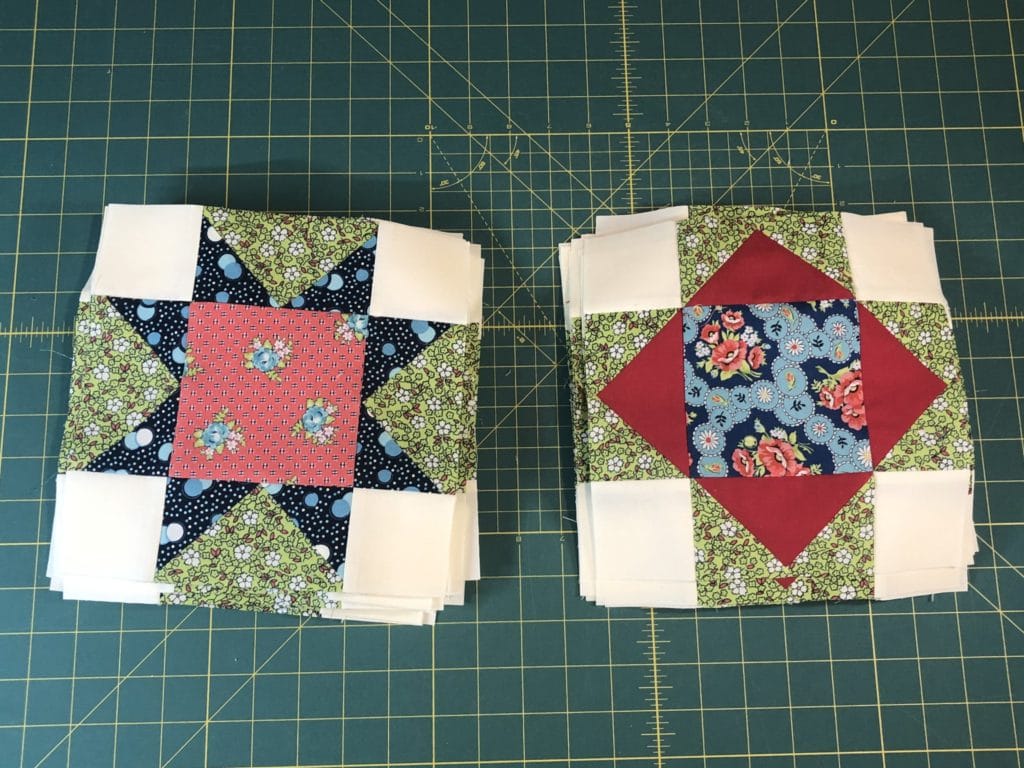
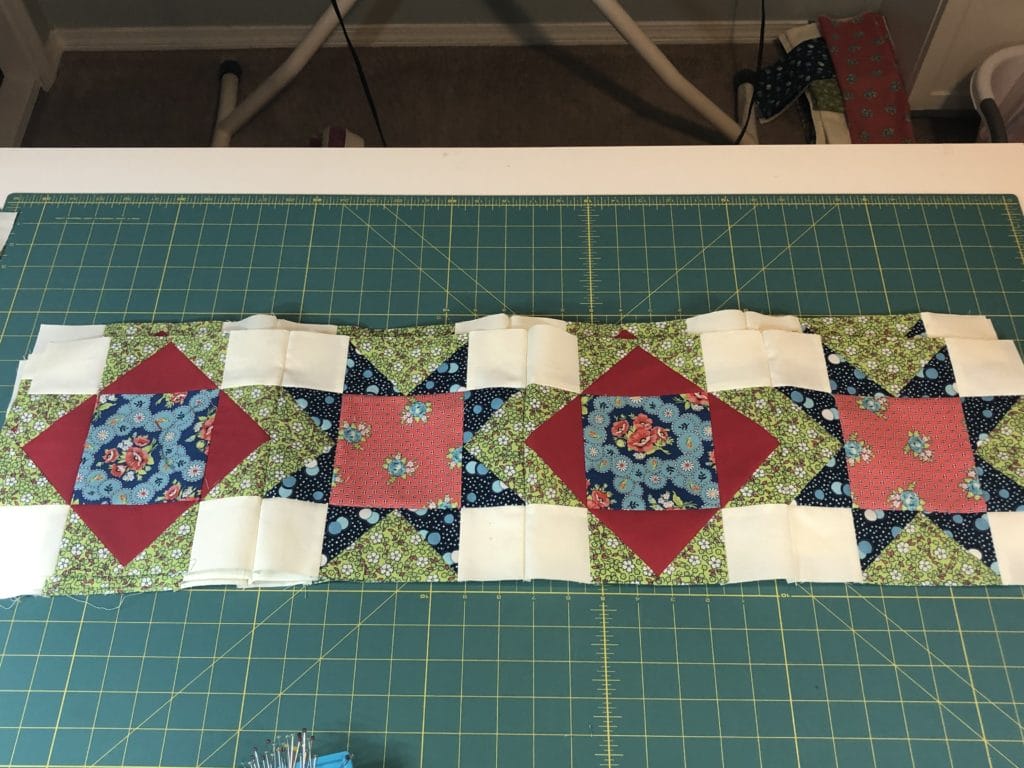
I started by sewing each Diamond block from this month to a Star block from last month. You can see my stack below.
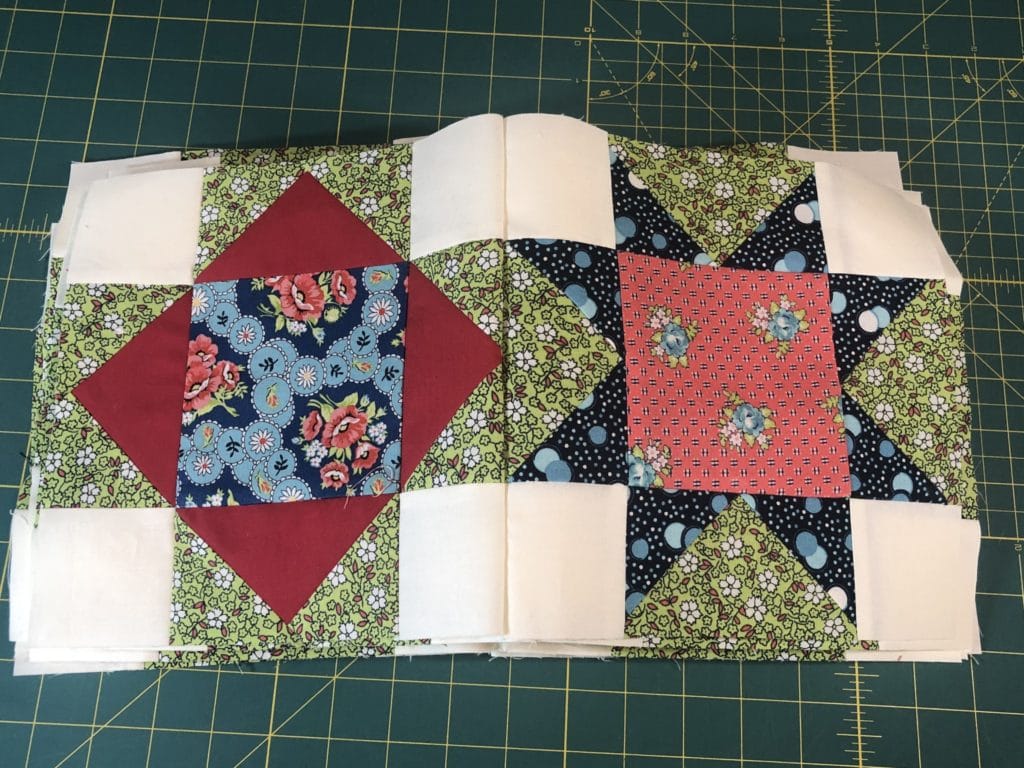
Then, realizing that the side borders needed 4 of these pairs each, I sewed those together. Then I sewed 5 pairs together for the top and bottom rows. Is that clear as mud?
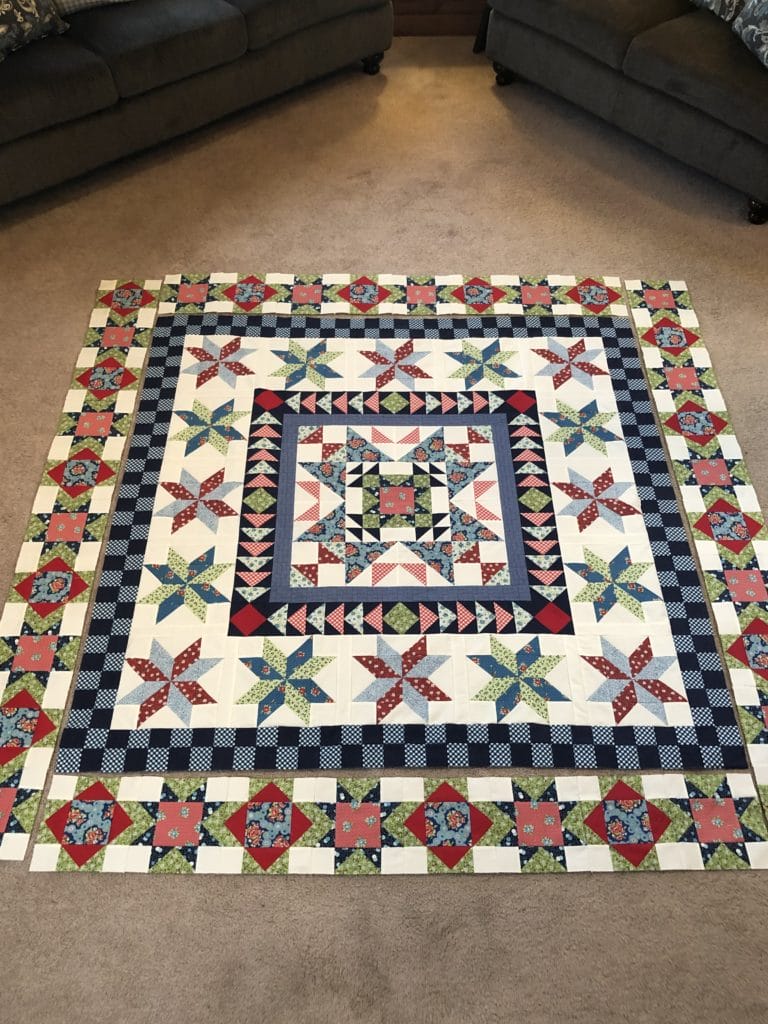
Now these border rows are ready to sew to the quilt.
Please note that at this stage I DO NOT IRON THE SEAMS for the border rows. I pinned and sewed all the borders on first, and THEN ironed all the seams in their proper direction. By not pre-pressing the seams between each block I can pin the seams in their proper nesting direction and then go back and iron the joined seams accordingly.
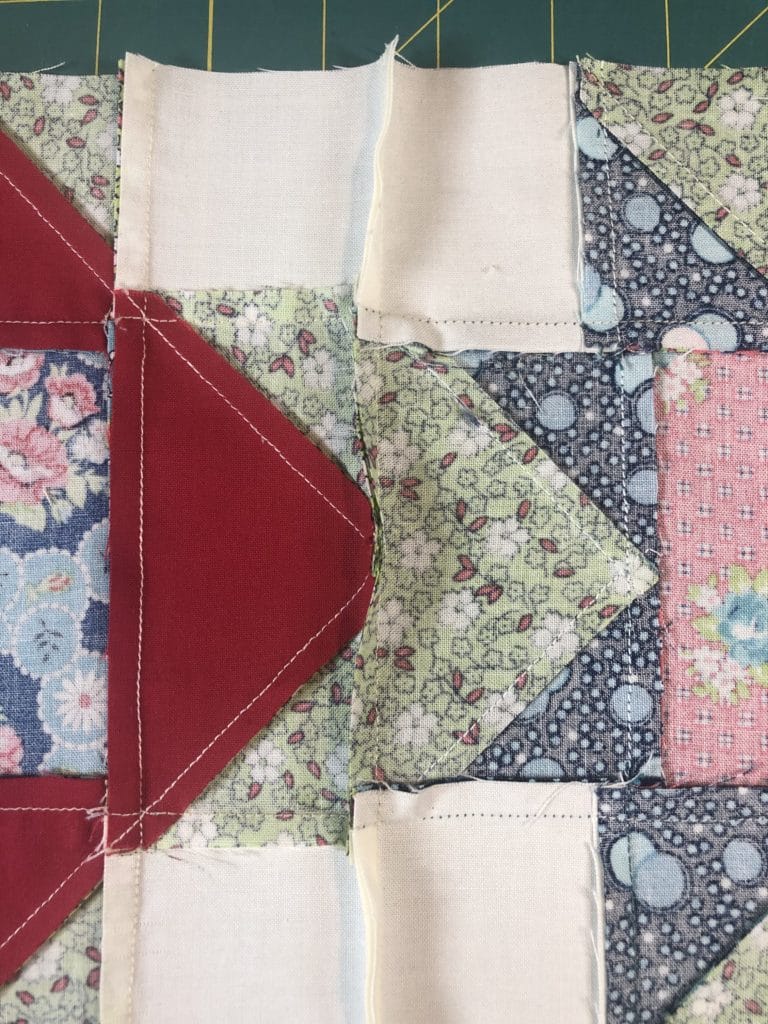
Now here is where things can get tricky – If you didn’t notice already, we have A LOT of seams to match up between these rows and the checkerboard border on the quilt. While I try my best to have the pressing directions allow for seams to nest together, sometimes that isn’t always possible.
While designing and writing this pattern I made myself crazy trying to figure out if there was a way I could tell you to iron those checkers so that they would nest perfectly when the block borders are sewn on. I won’t bore you with the details, but in a nutshell, after spending a few days trying to problem solve I realized there was no viable or easy pressing solution regardless of what I did.
But the good news is many of the seams should already nest together, especially if you re-pressed last month’s blocks like I recommended in the month 6 blog post. And for some of the blocks, you can simply re-press the seams going the other direction after you’ve pinned the rows on and determined the direction they need to go.

But some of the seams will be a bit persnickety when it comes to nesting. Pressing one or both adjoining seams open is always an option, or simply just lining the seams up as best you can with both seams going the same direction can also work.
However, I’m going to tell you my dirty little secret of what I do in this situation: Please don’t send me hate mail or sentence me to quilter’s purgatory for what I’m about to tell you….
I flip the seams so they nest together, which creates a little fold in the seam, and then iron them as flat as I can where the fold is. You’ll see what I mean in the picture below.
I know that you purists out there are probably yelling at your computer screens right now, but I know I’m not the only one who does this. Without naming names, I happen to know a couple other well known designers who do the same thing in this situation. I even called my mother who is a decades long professional quilt designer and long-armer, and she had to confess she does this too. So either we aren’t alone, or perhaps my quilting rebellion is inherited and can’t be helped, haha!
I only had a few seams that needed to be ironed with a fold in them like you see below. And unless I’m going to do stitch-in-the-ditch quilting (which I’m not), then those little occasional seam folds won’t matter, and won’t be seen by anyone once it’s quilted.

So you all have permission to attach these borders and line up these seams however you see fit. And like my mom always says “There is only ONE rule in quilting that matters – DON’T CUT YOURSELF.” So as long as you don’t get injured, the rest doesn’t matter!
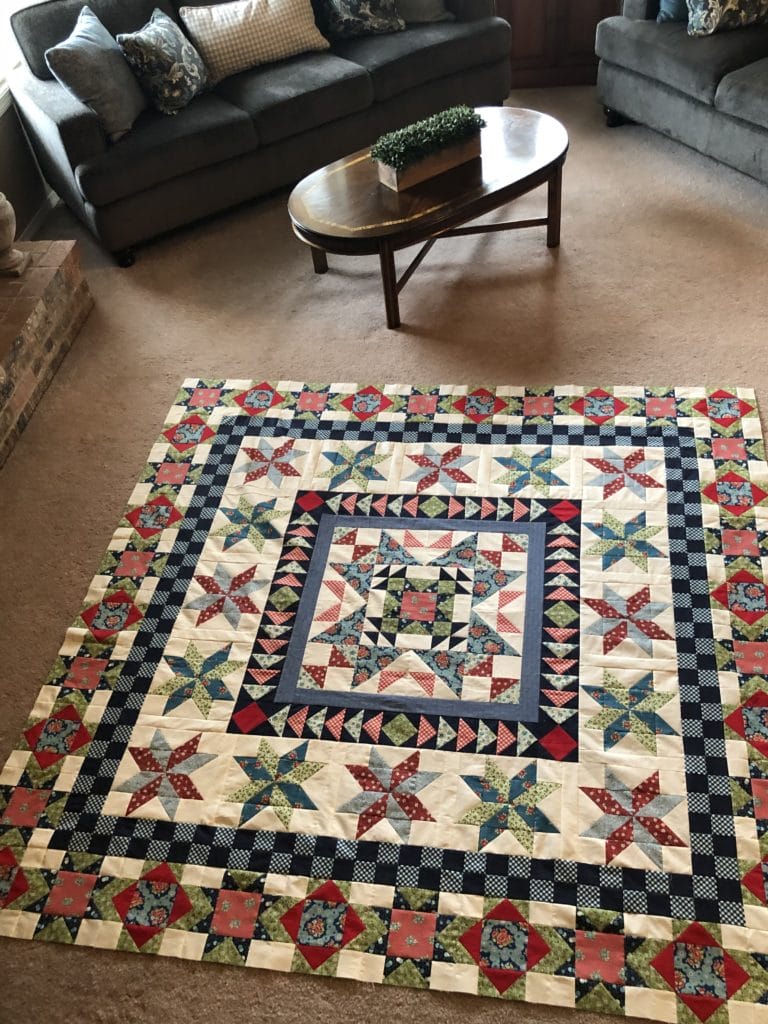
This quilt is now officially too big for my design wall, so it’s happily adding to the ambiance of my living room floor, where it will most likely stay until it’s finished. Good thing I don’t have pets!
Happy Quilting! – Kristin

