Follow along with our team of quilters as we show off our new projects, discuss new and exciting techniques, talk about new fabric collections, and share news about the latest and greatest happenings here at Connecting Threads.
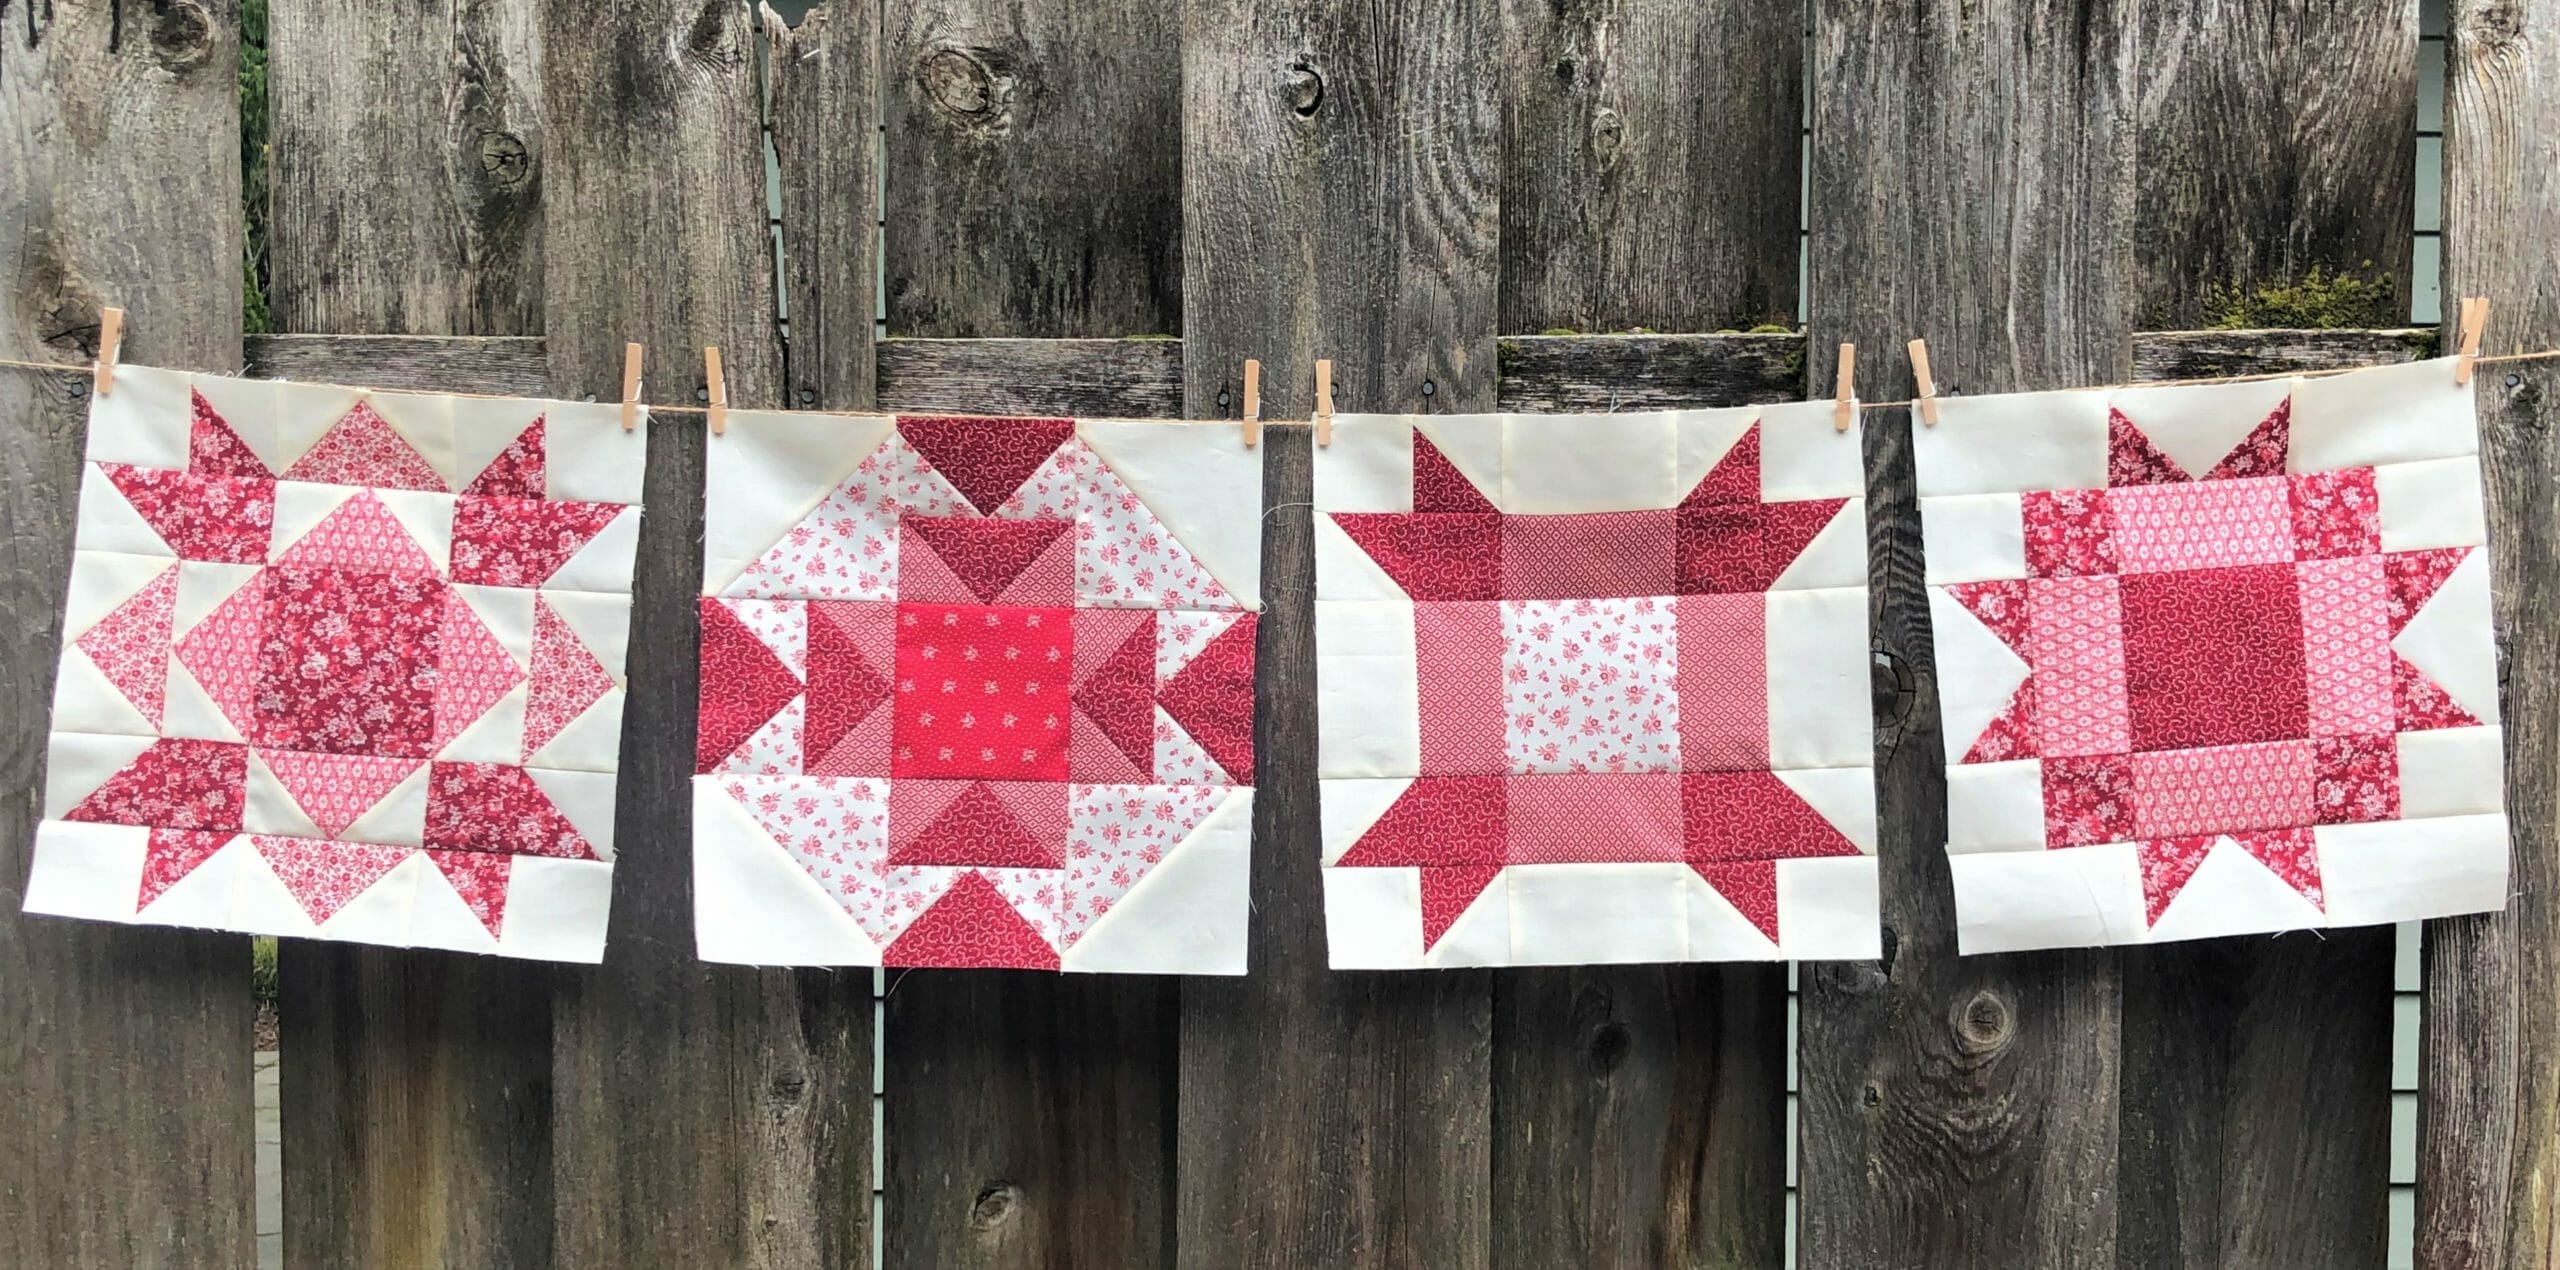
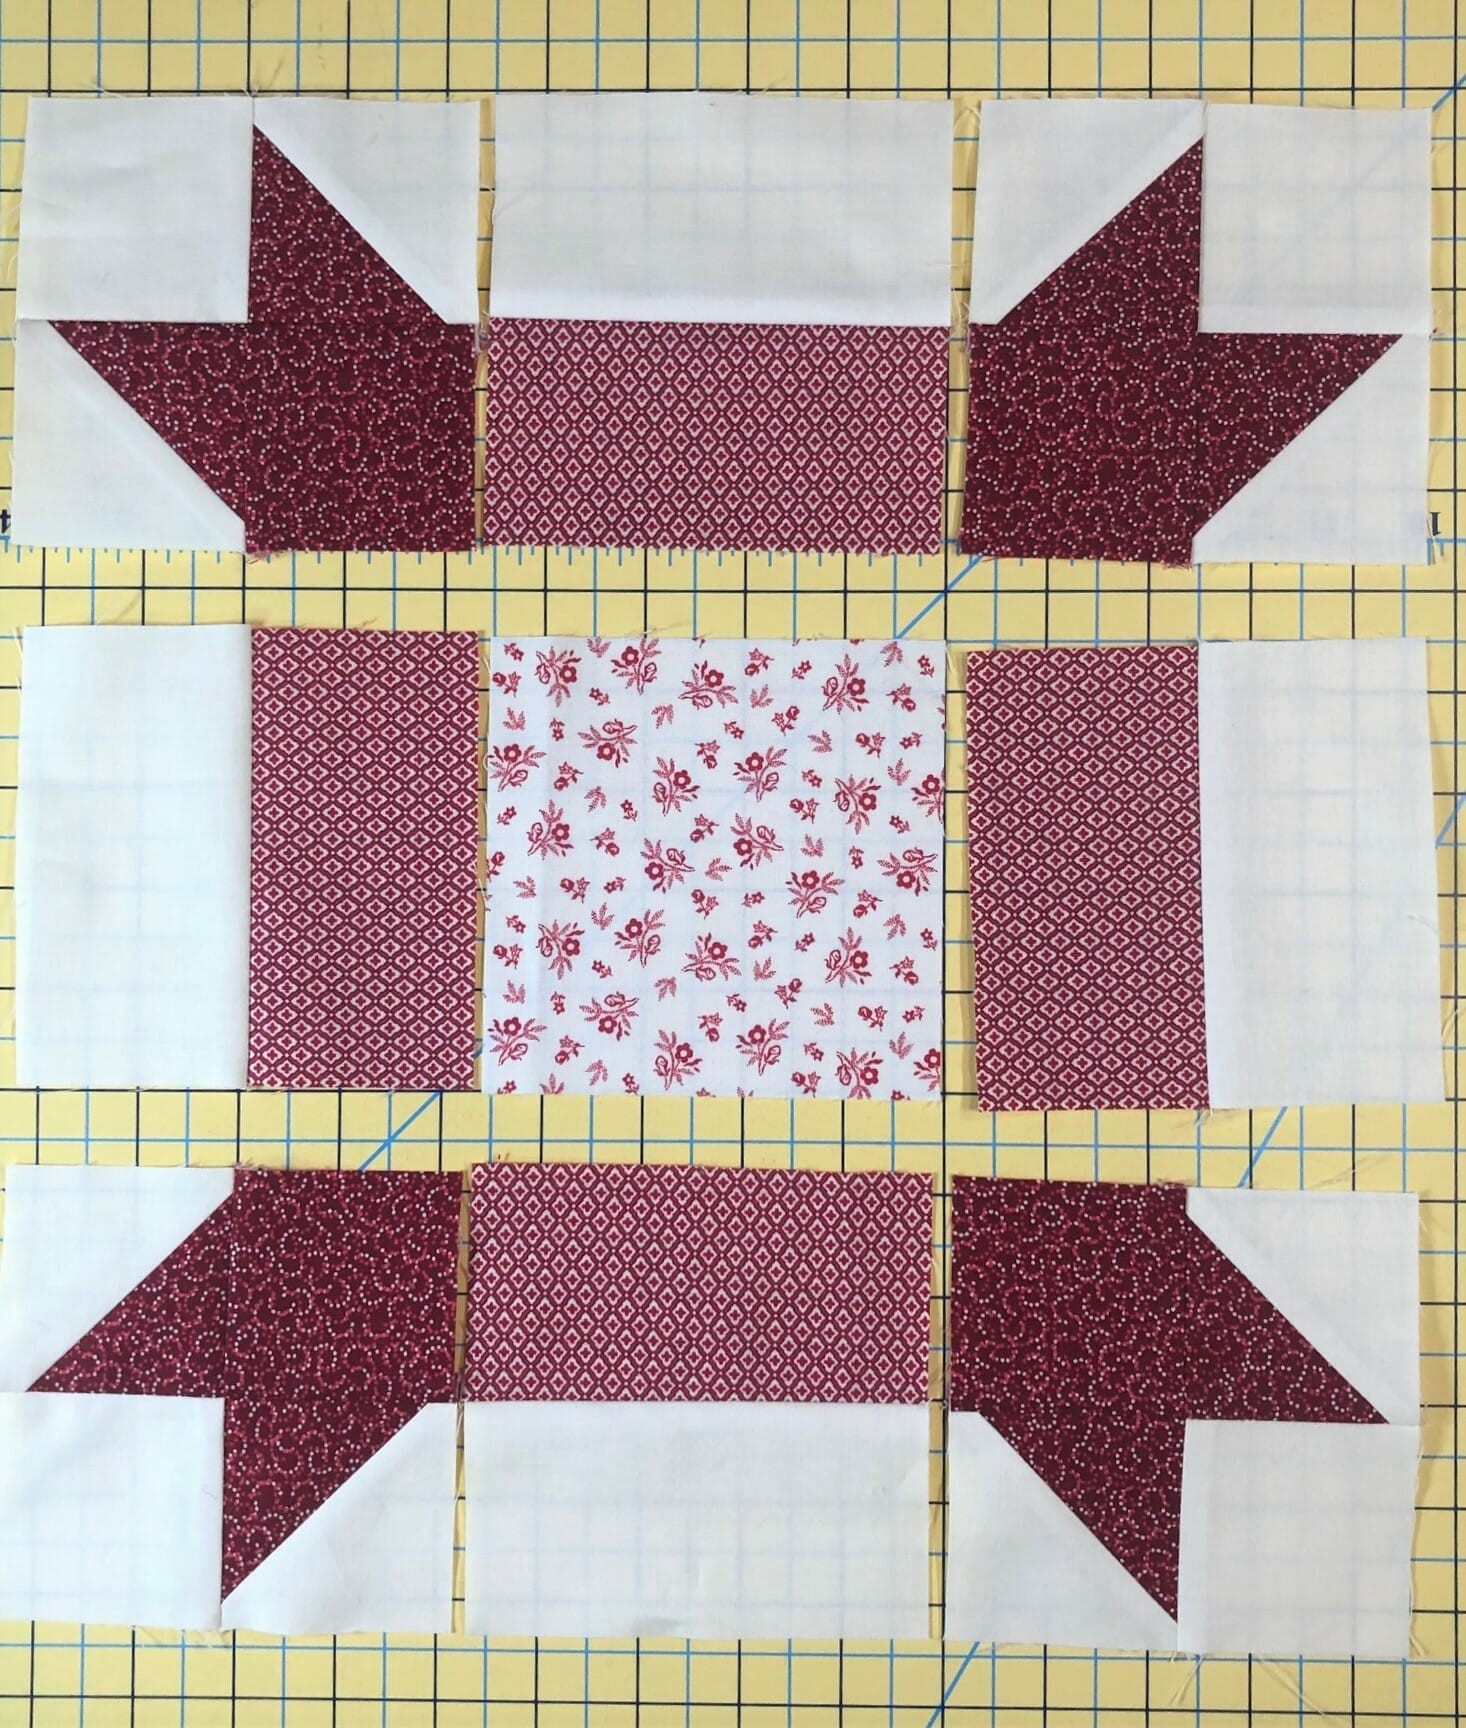
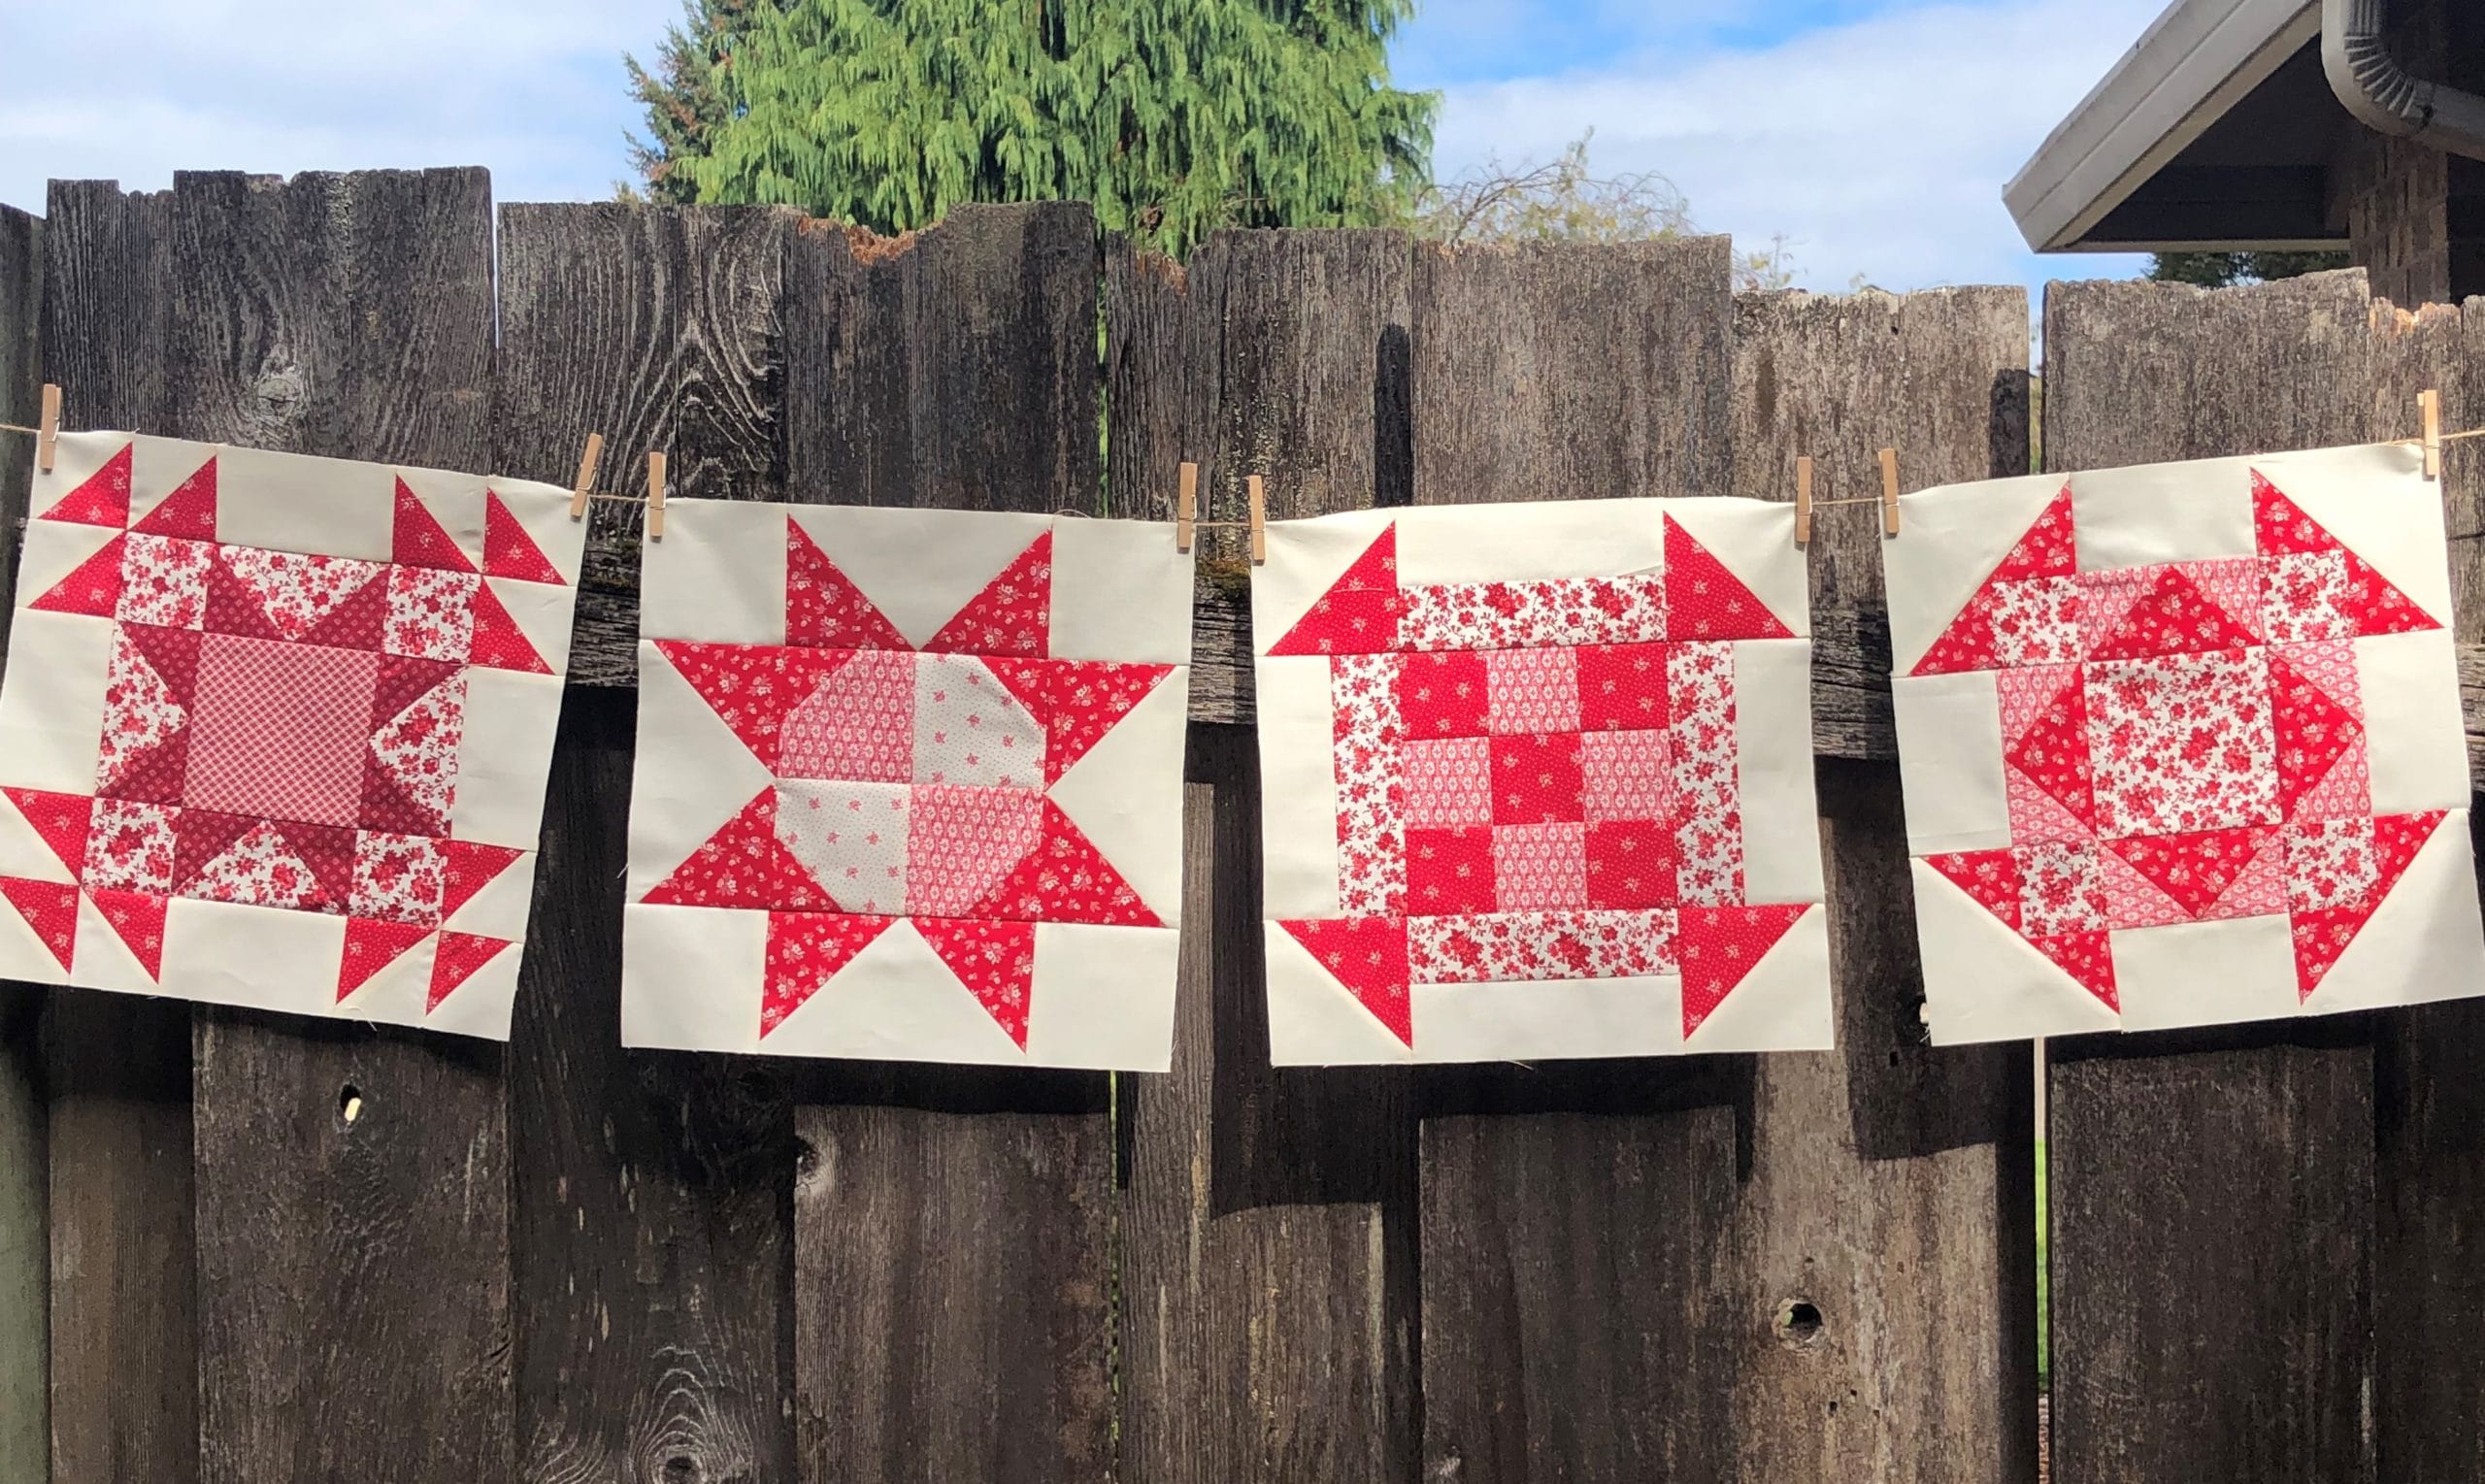
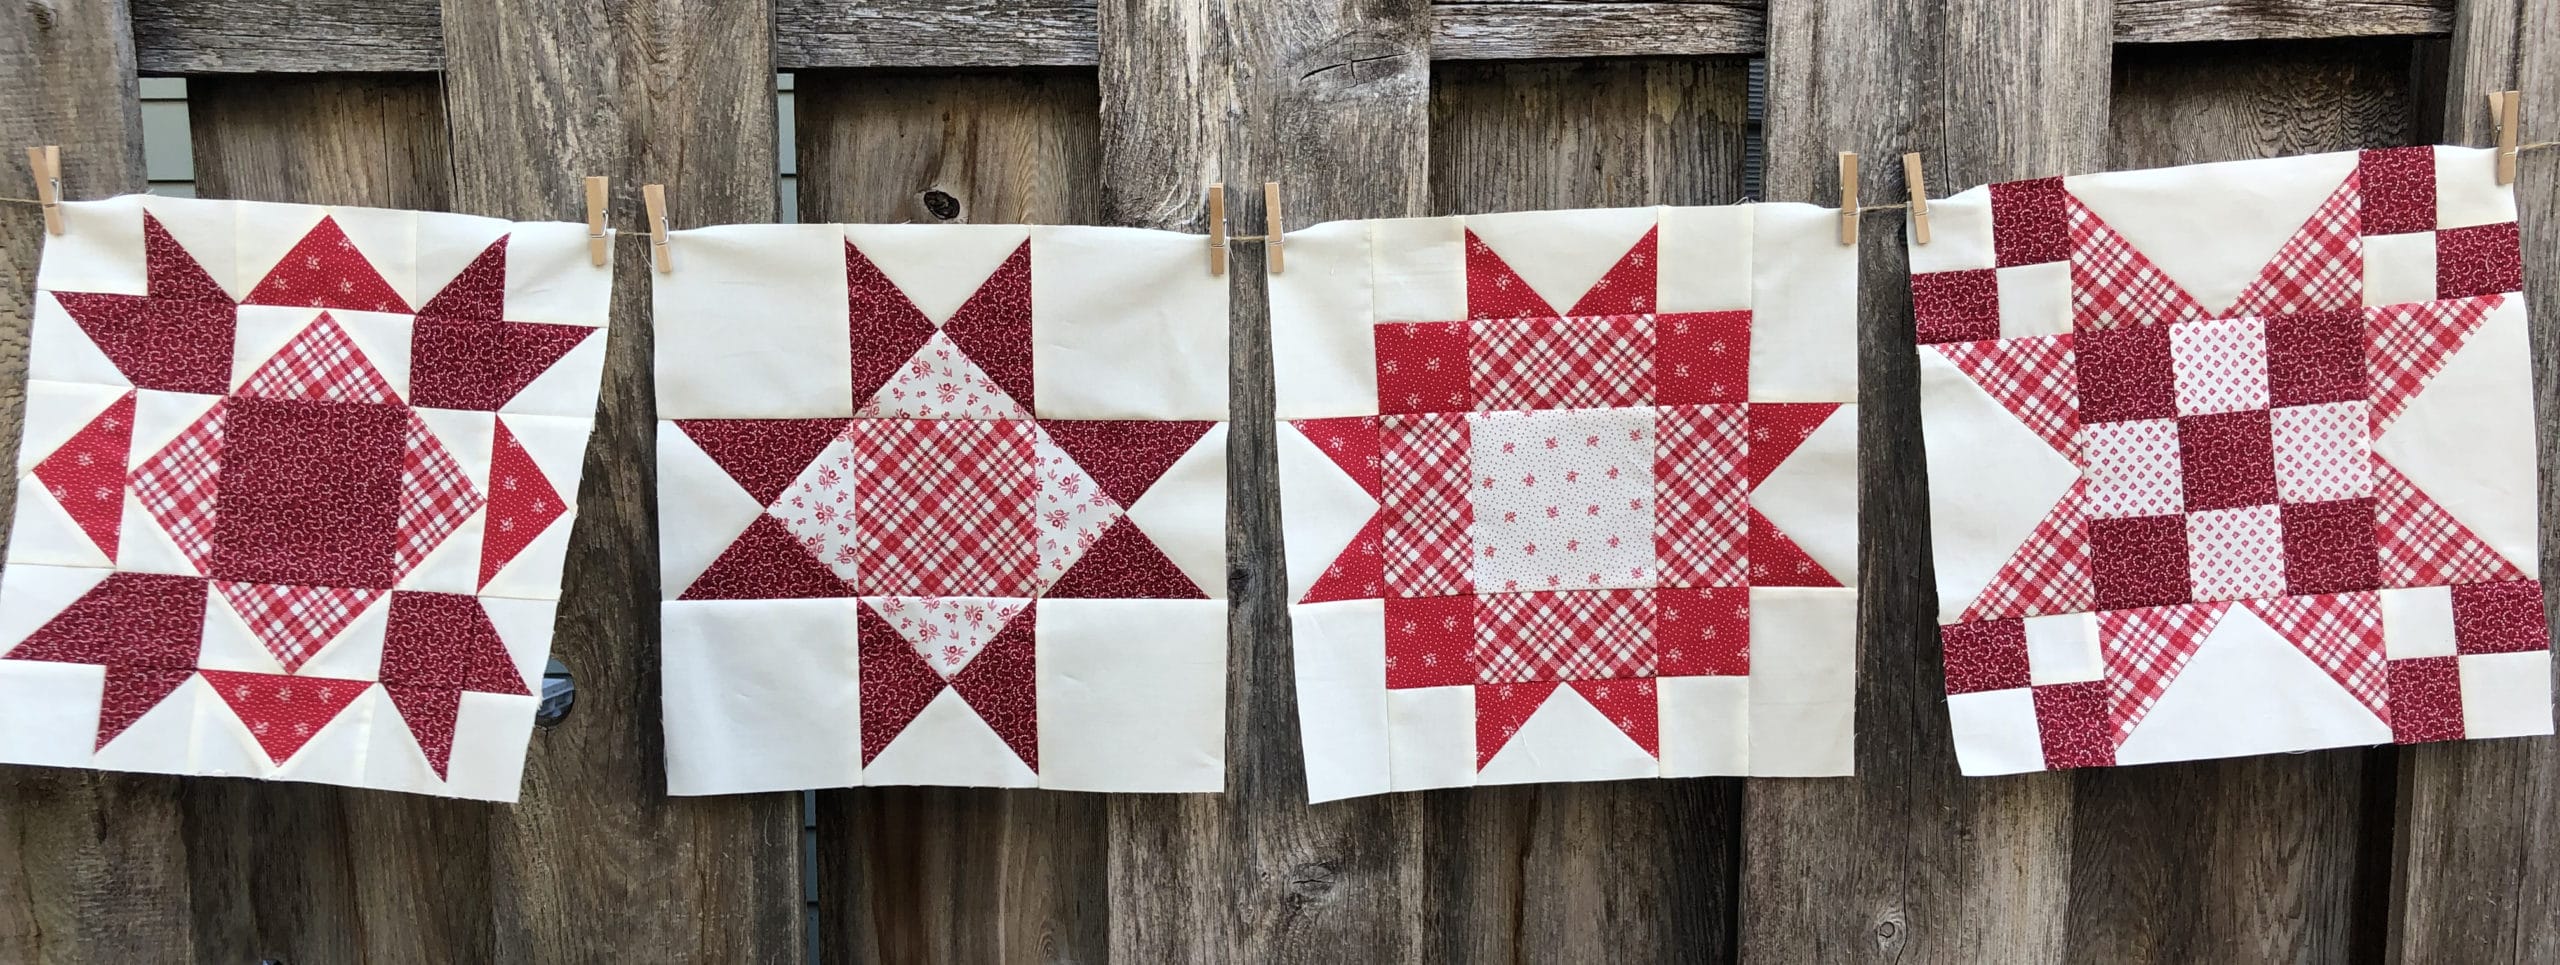
It’s me again! This month we will get to make another four unique blocks, and this time three are repeats, and one brand spanking new. Since by now, we should all be pretty familiar with the techniques used in these blocks, I decided to skip over the lengthy tutorials that I’ve covered in months past. But it’s always good to see what these blocks look like sewn up in their new fabrics, so let’s dive right in!
Block #1
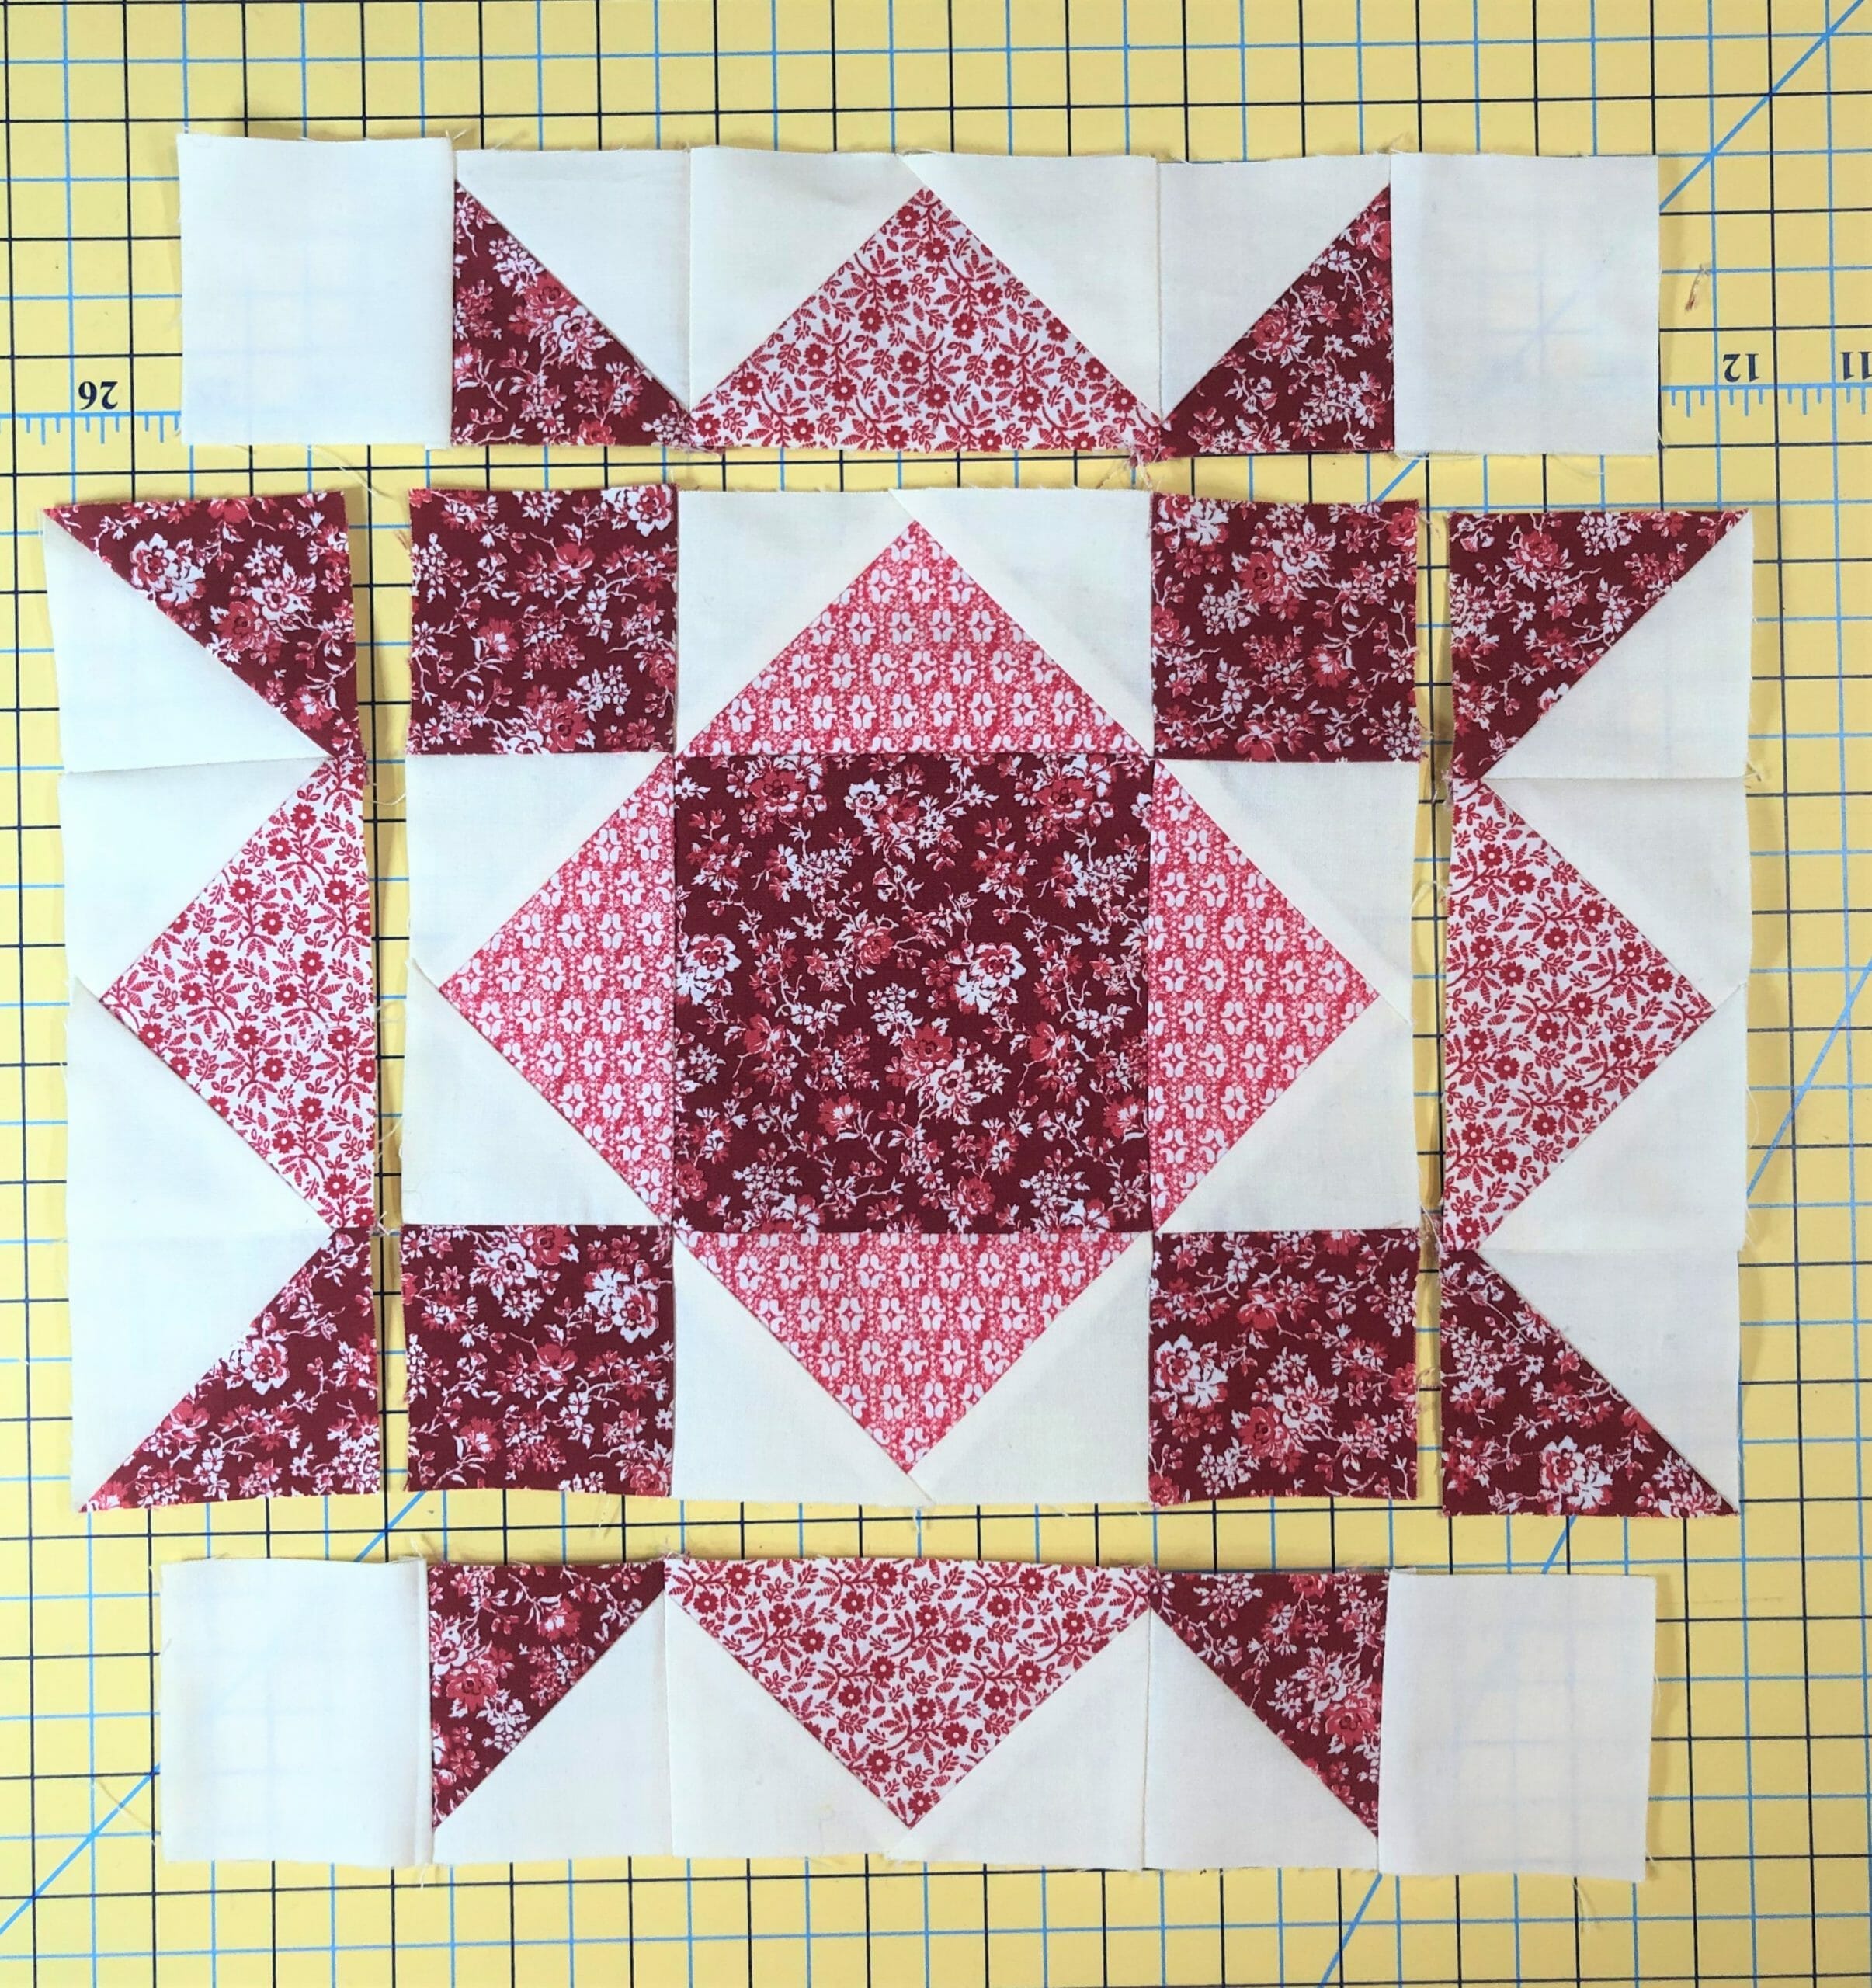
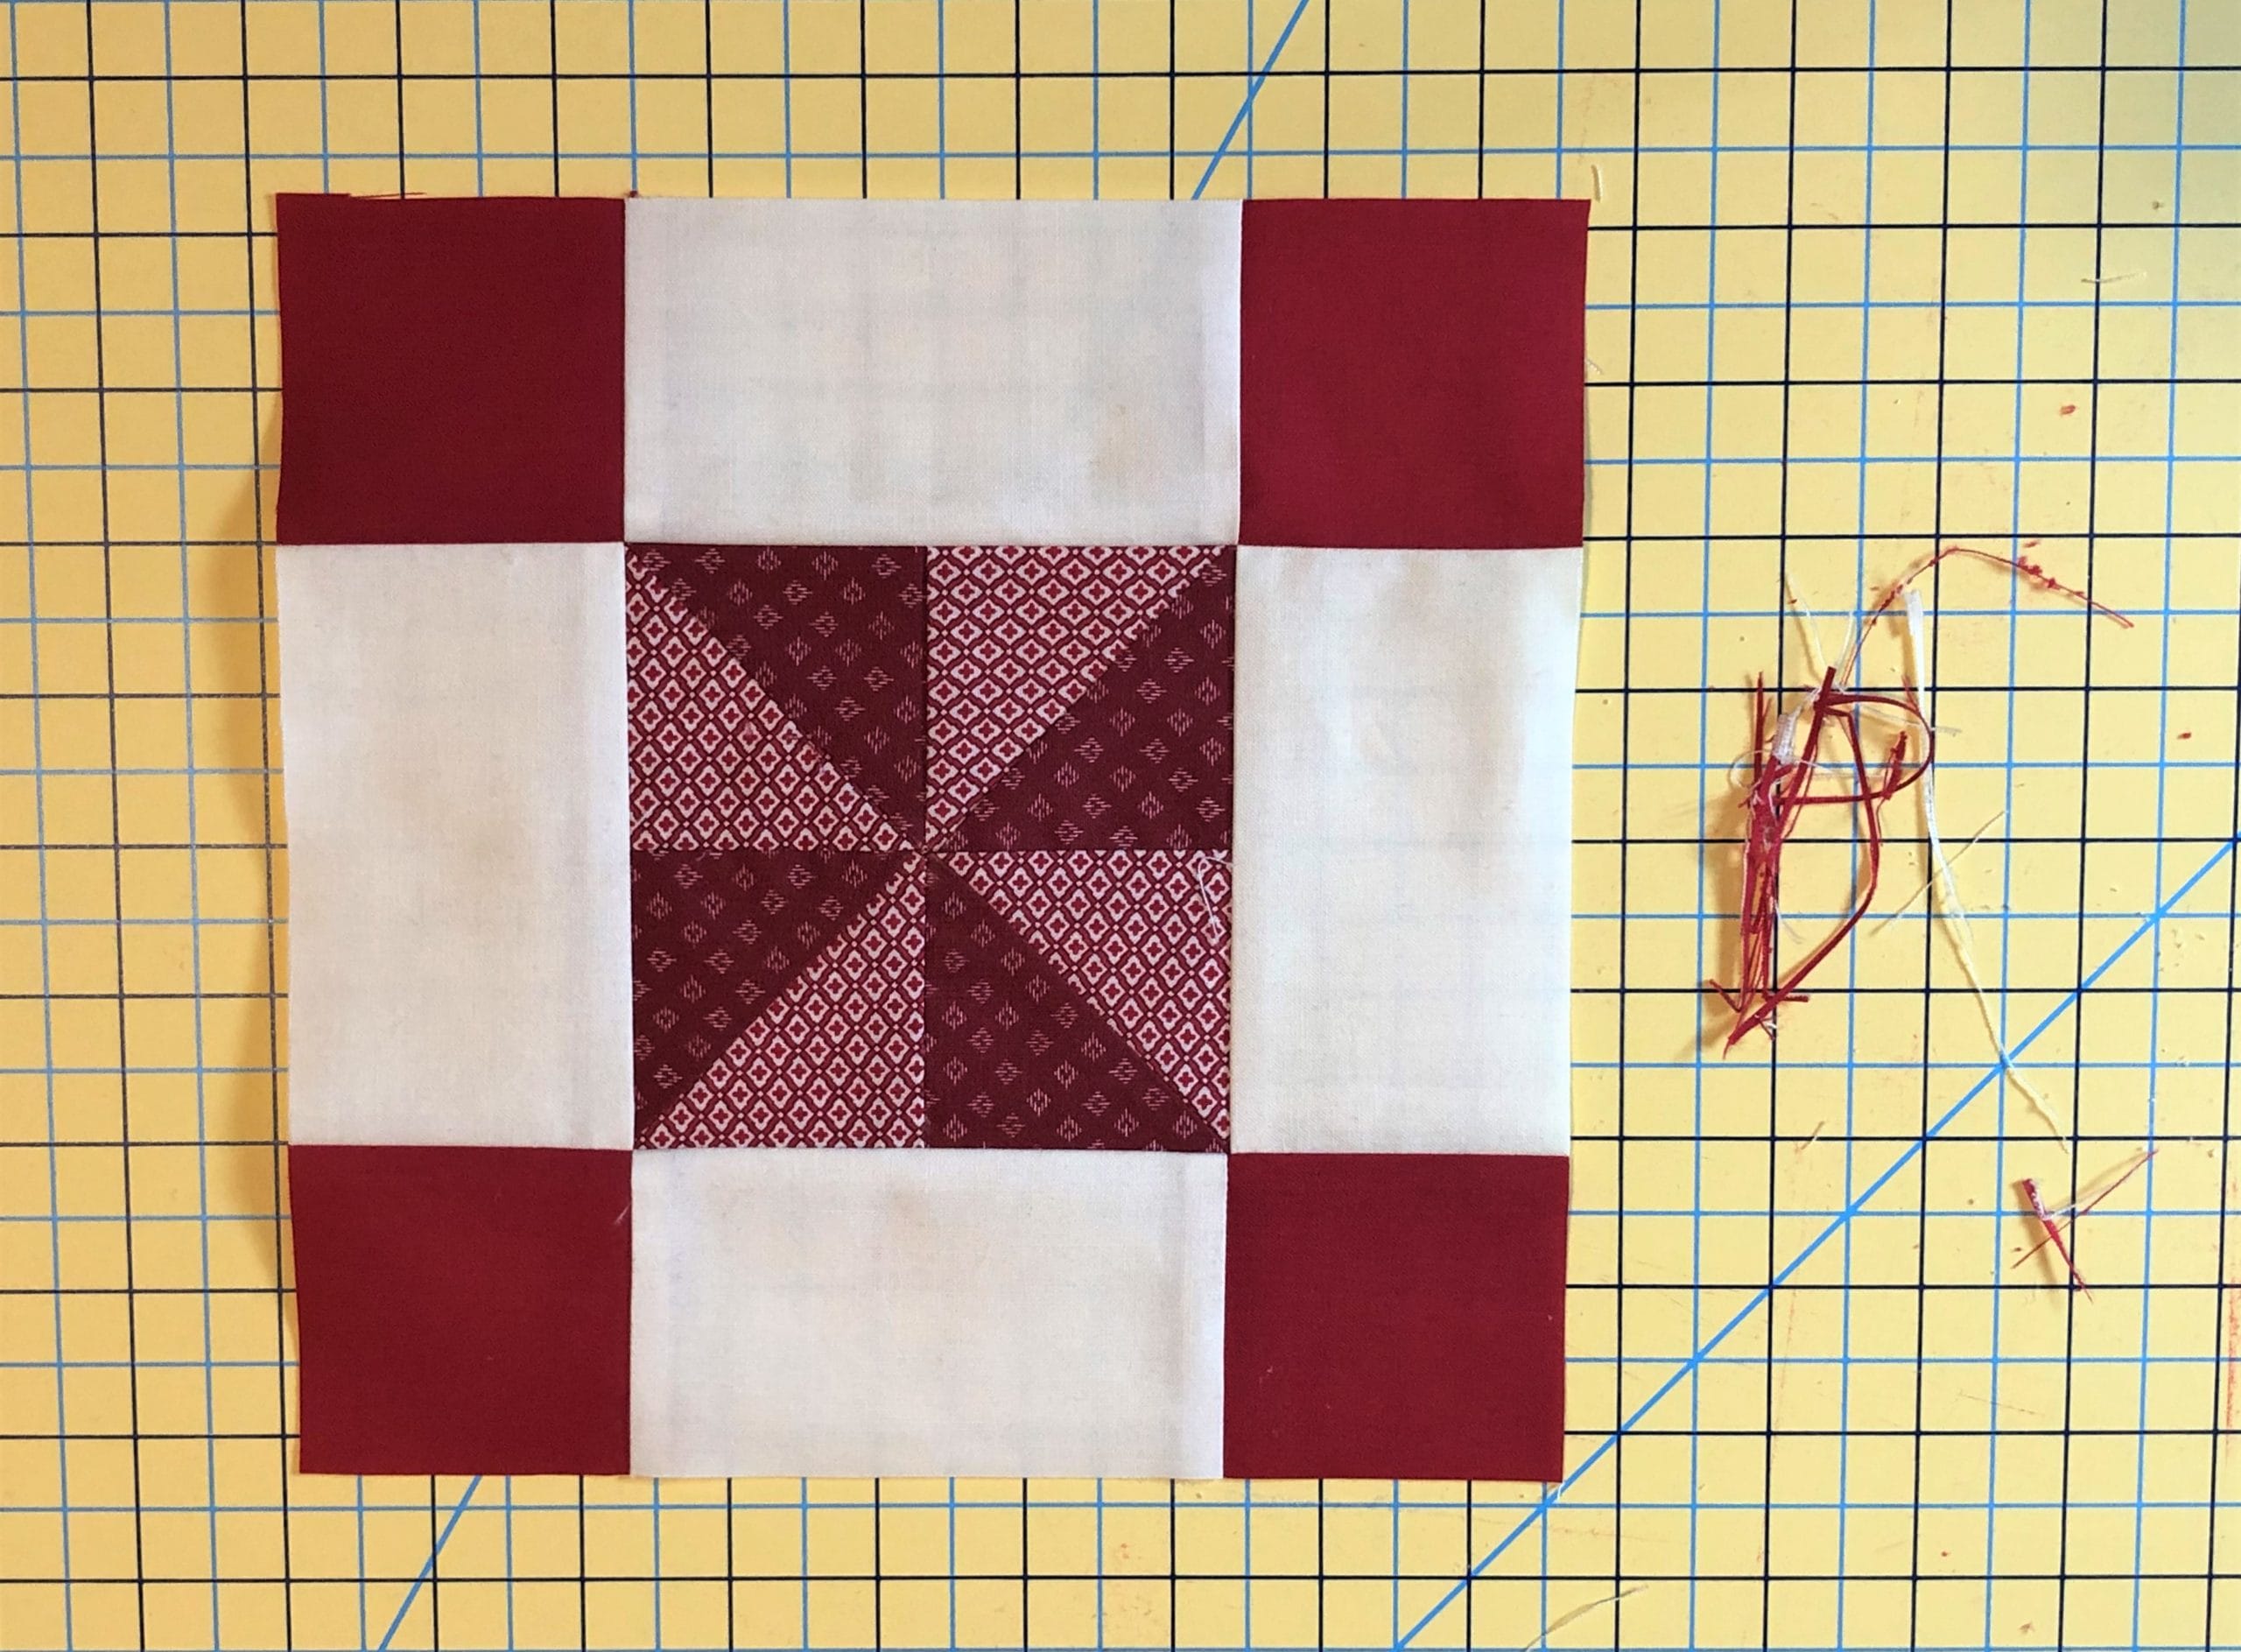
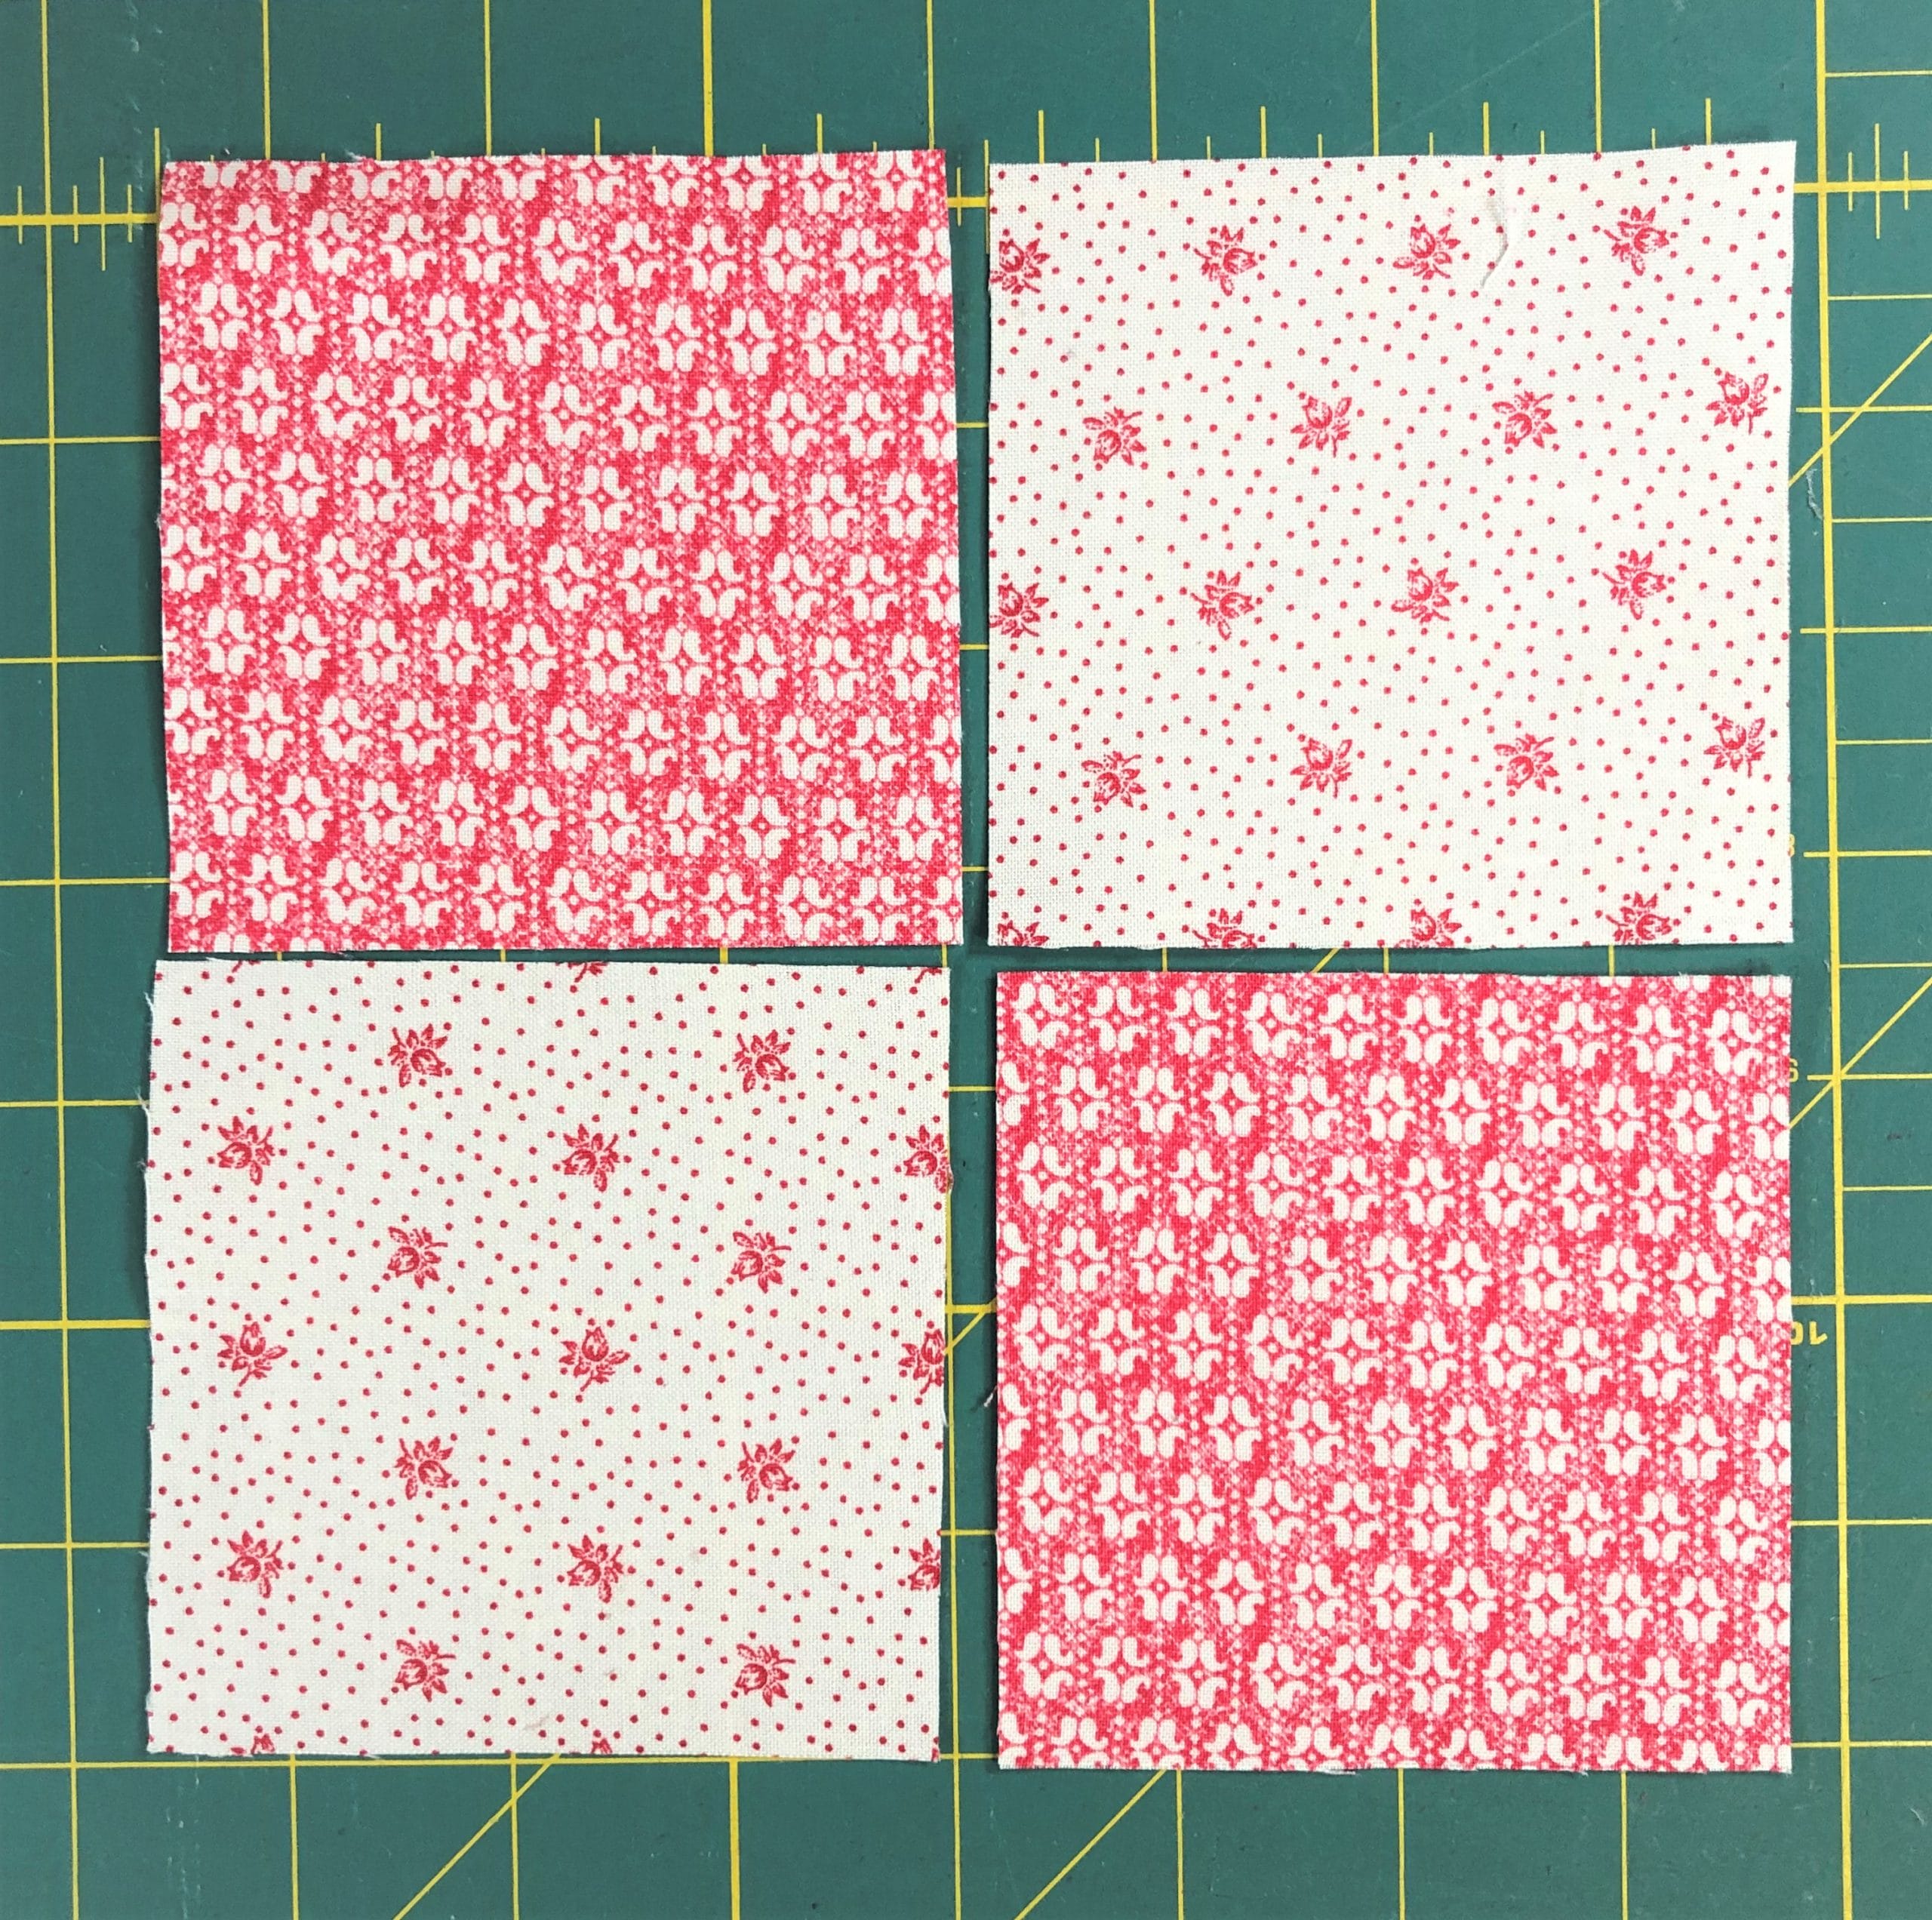
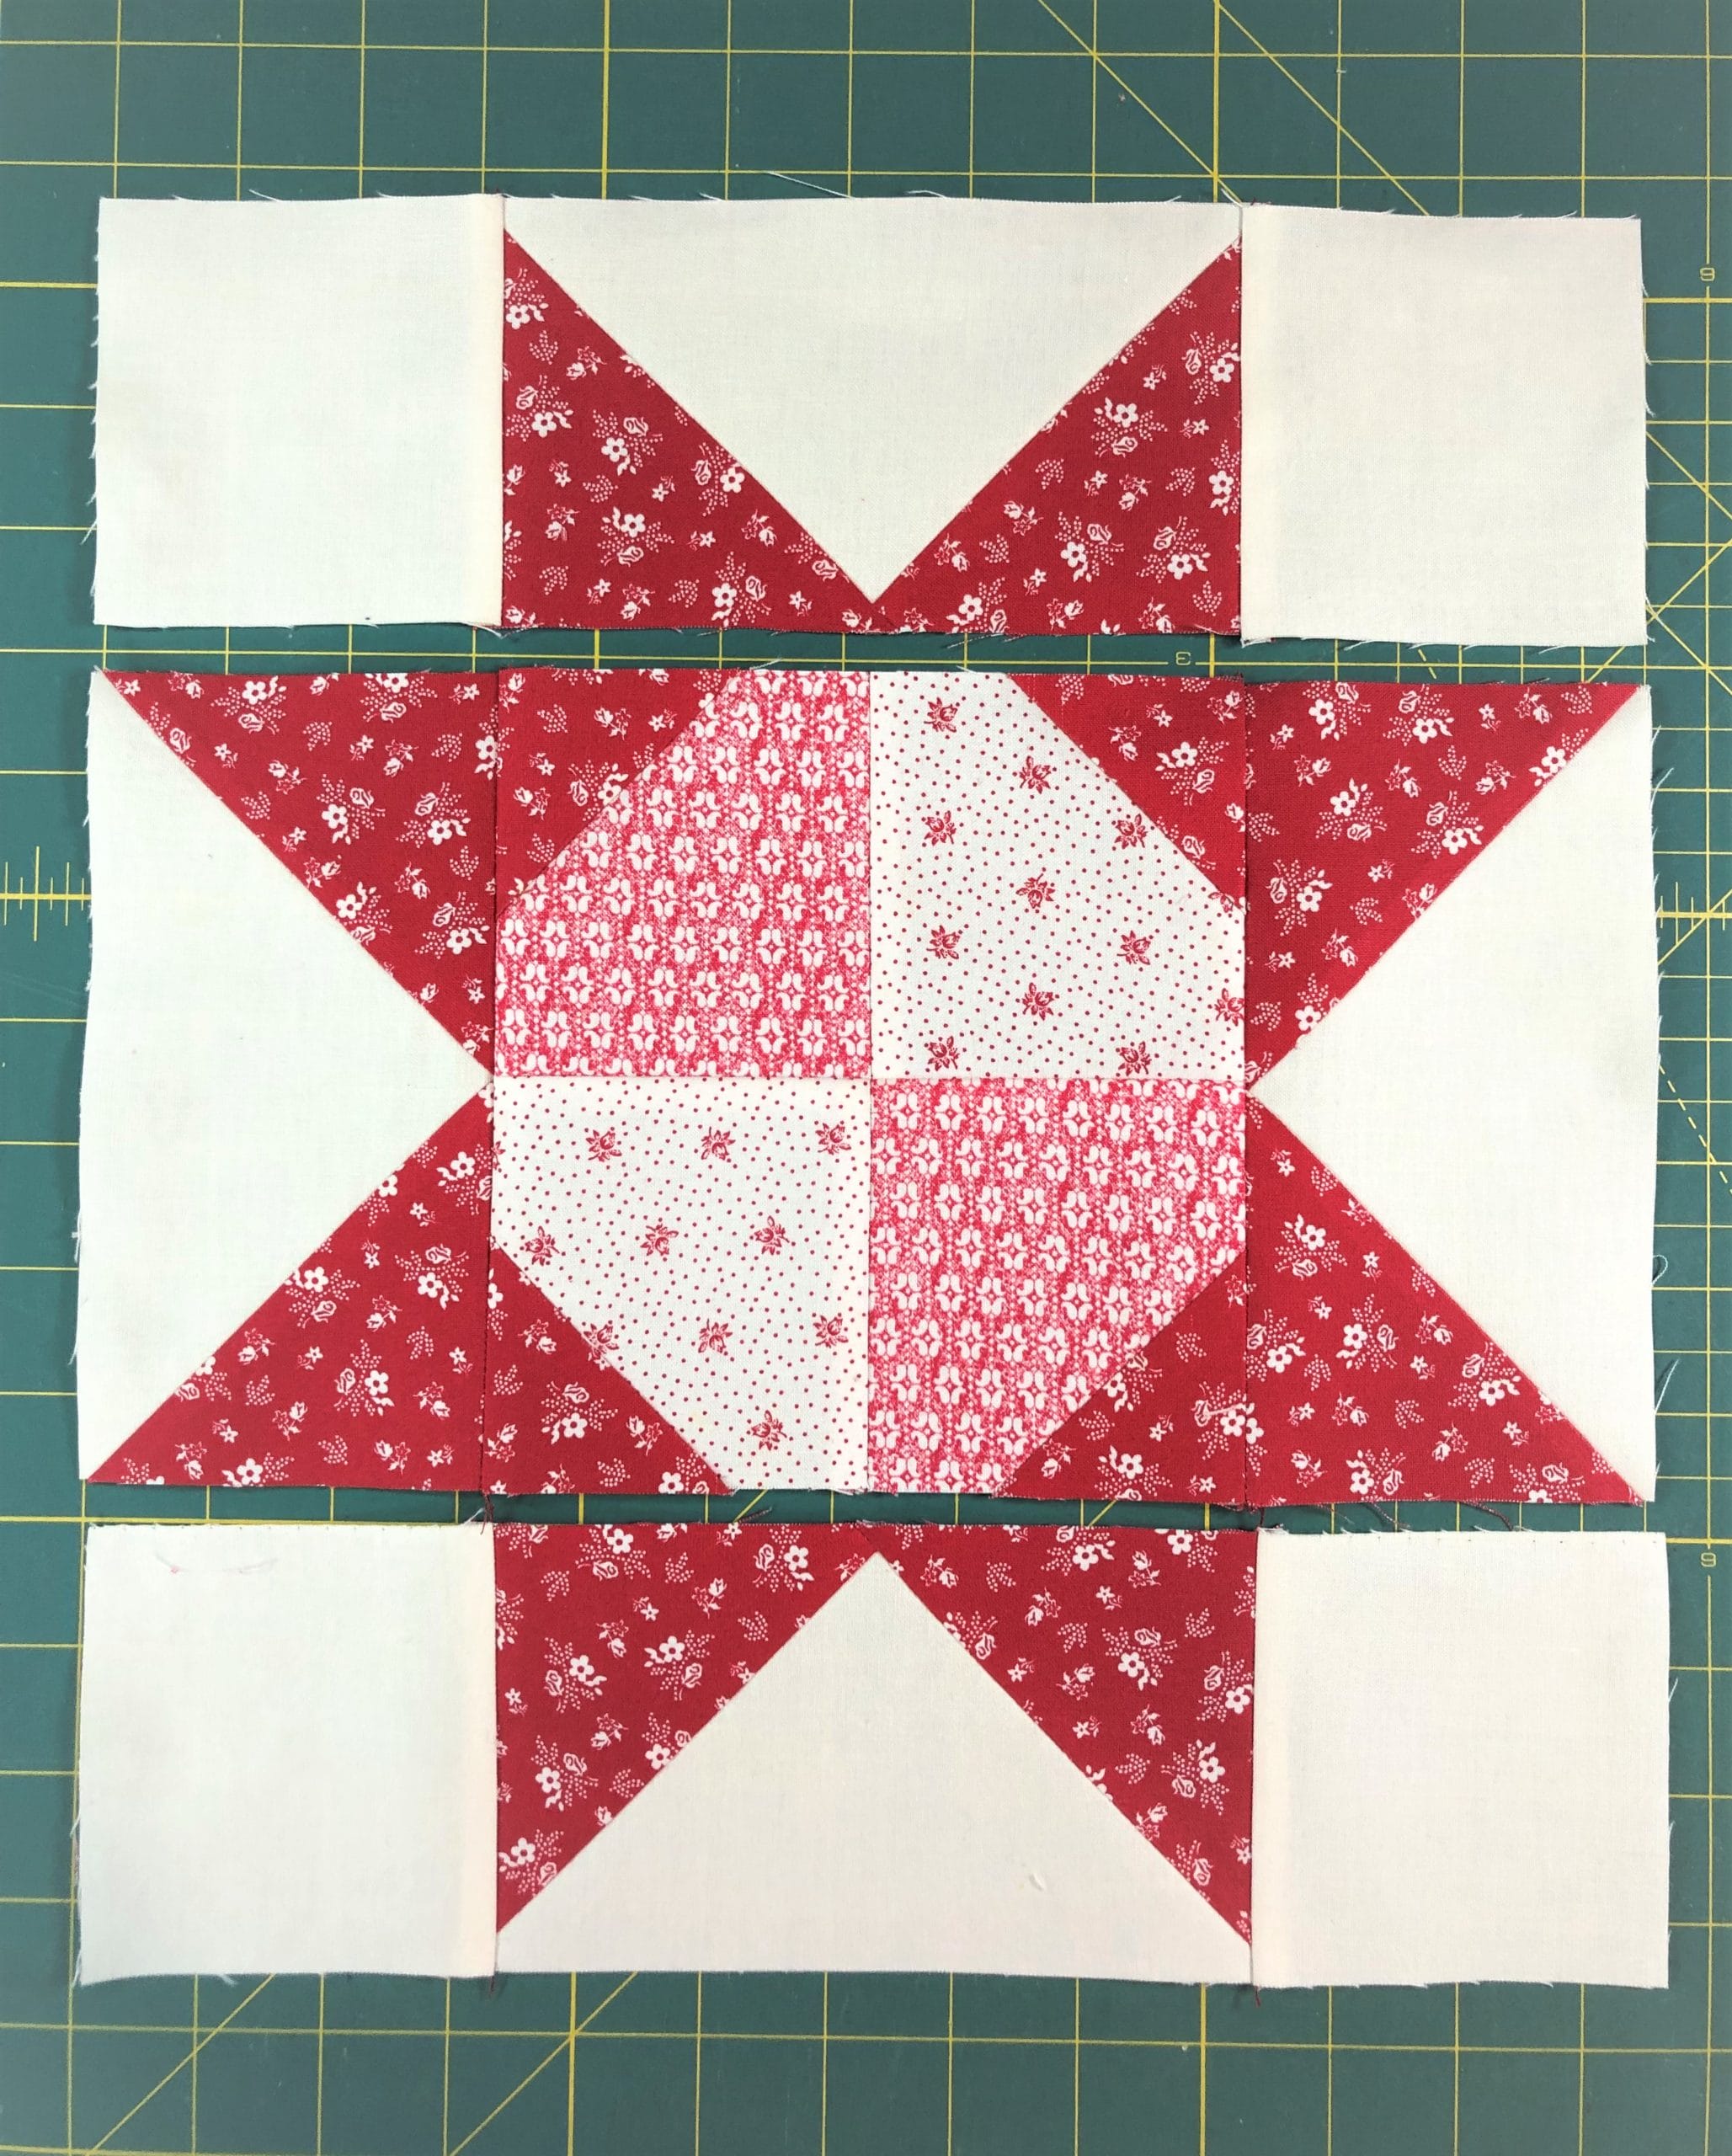
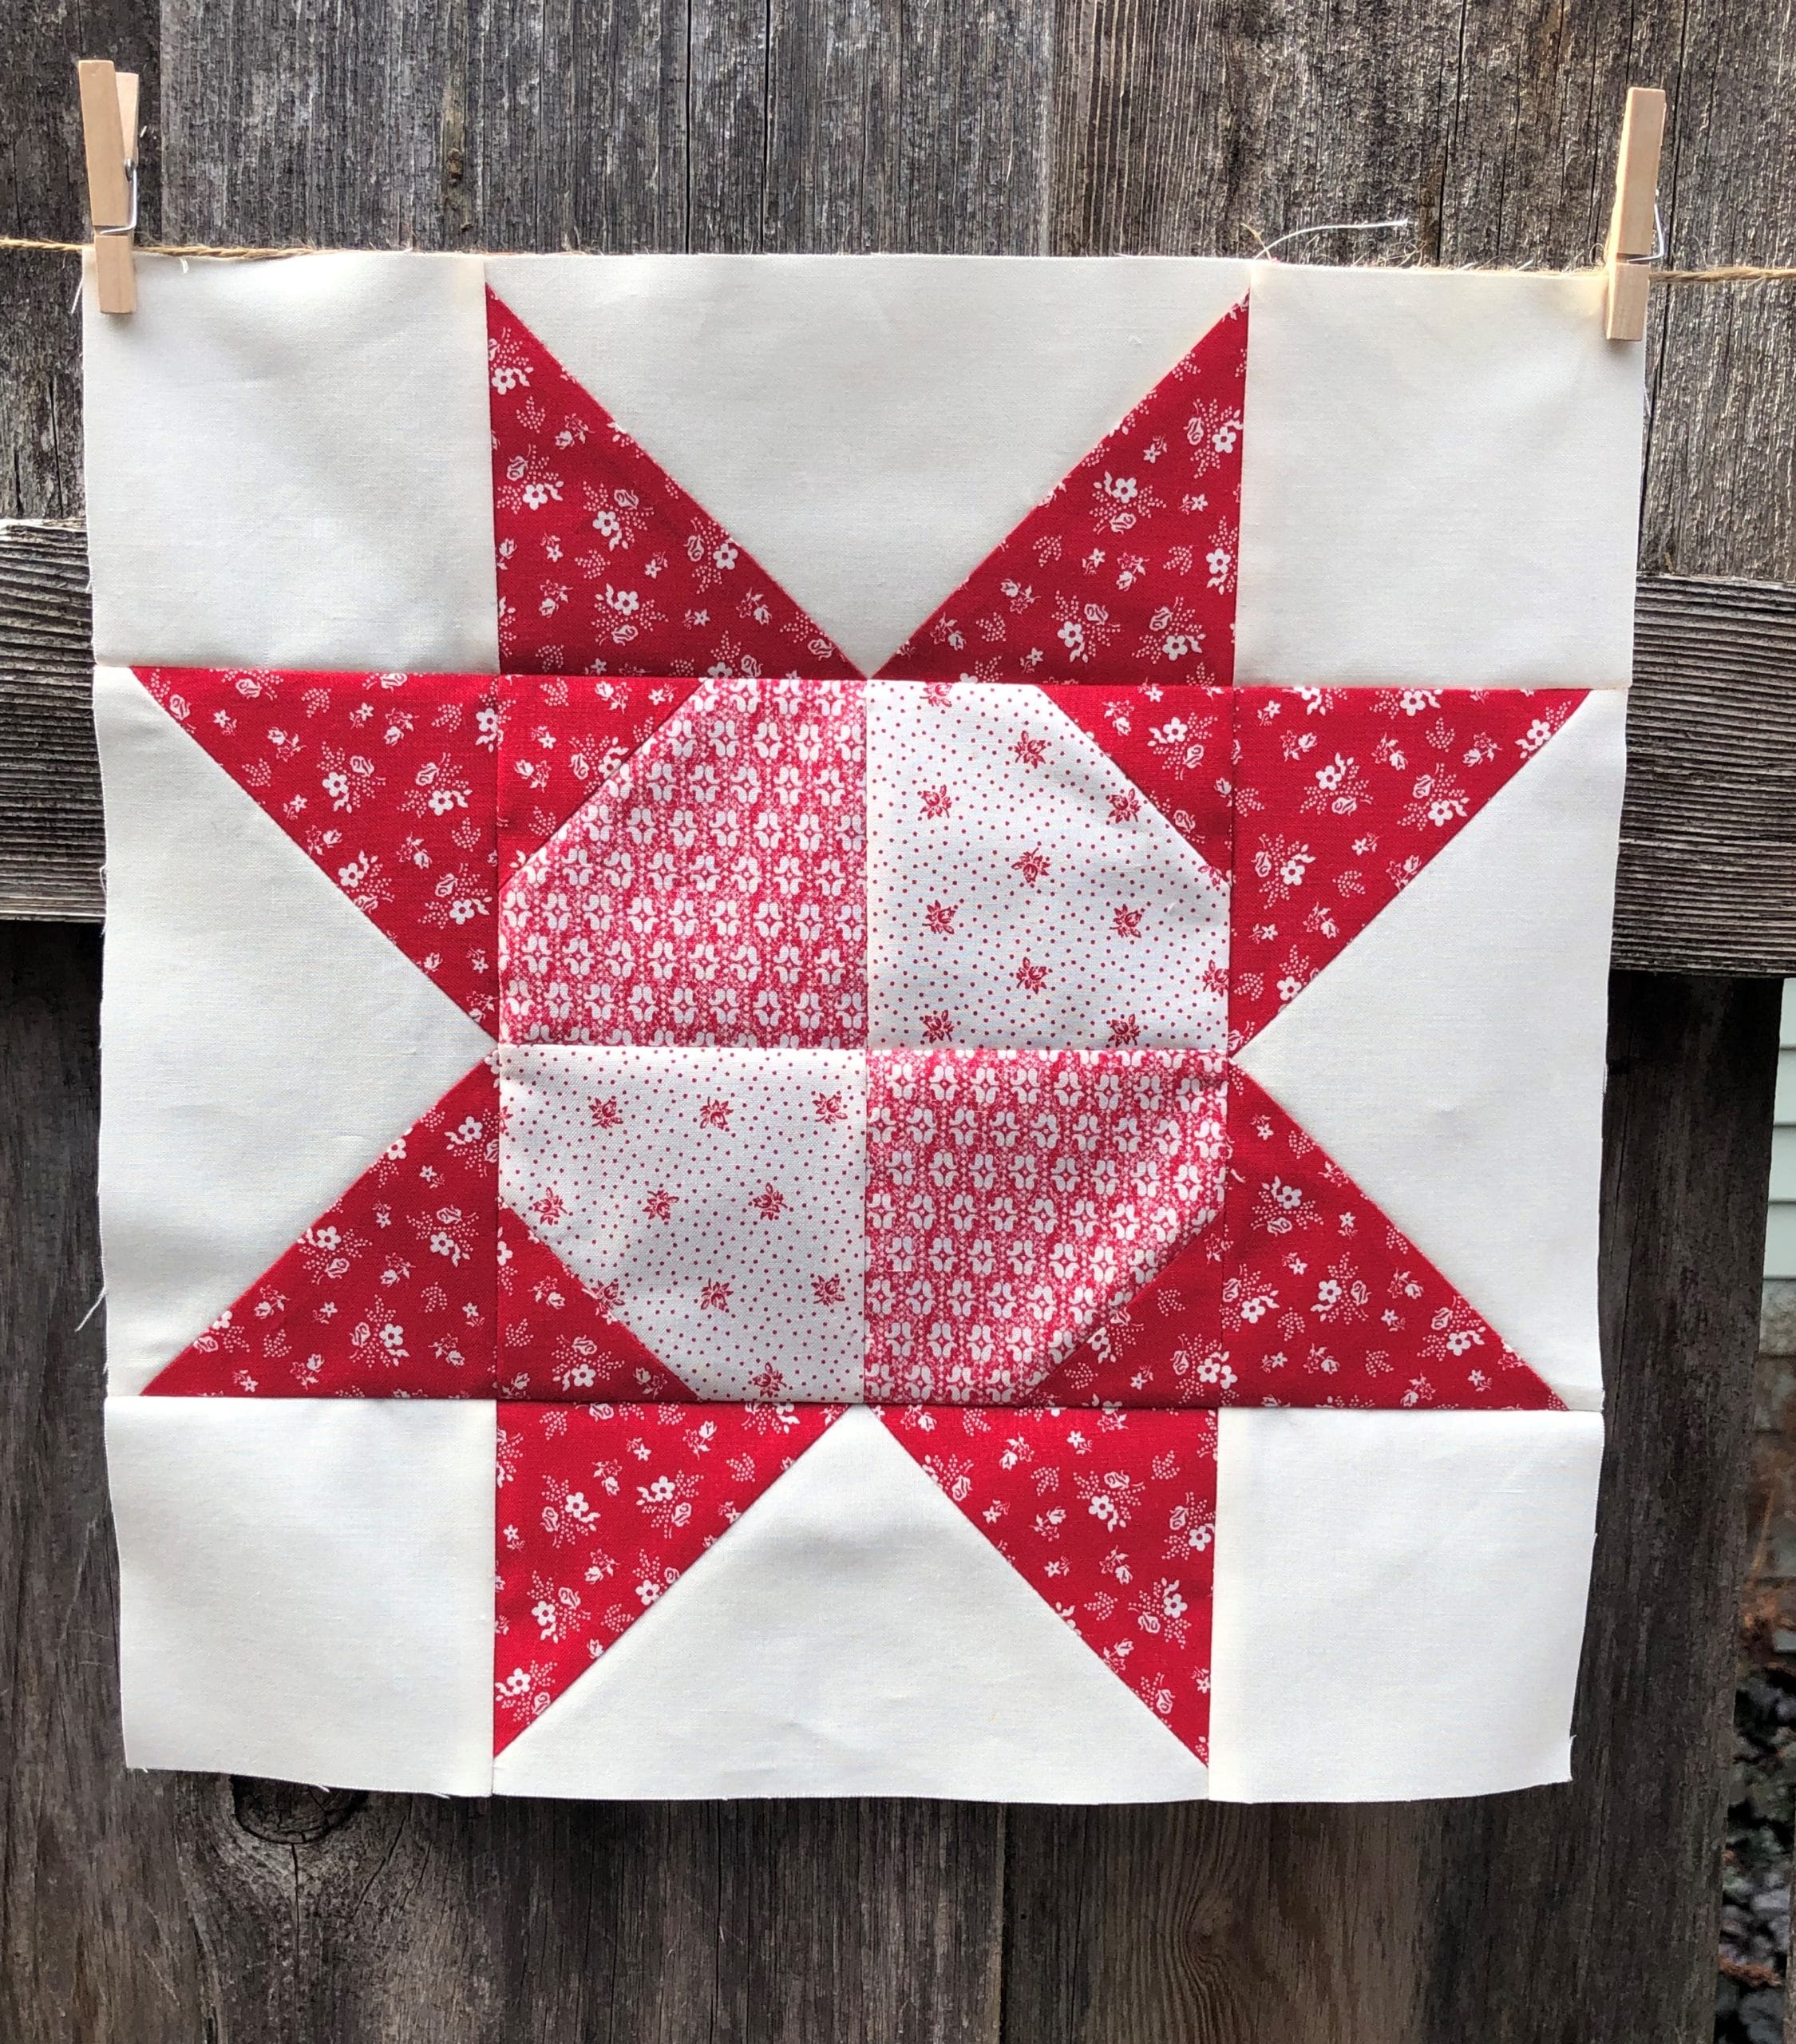
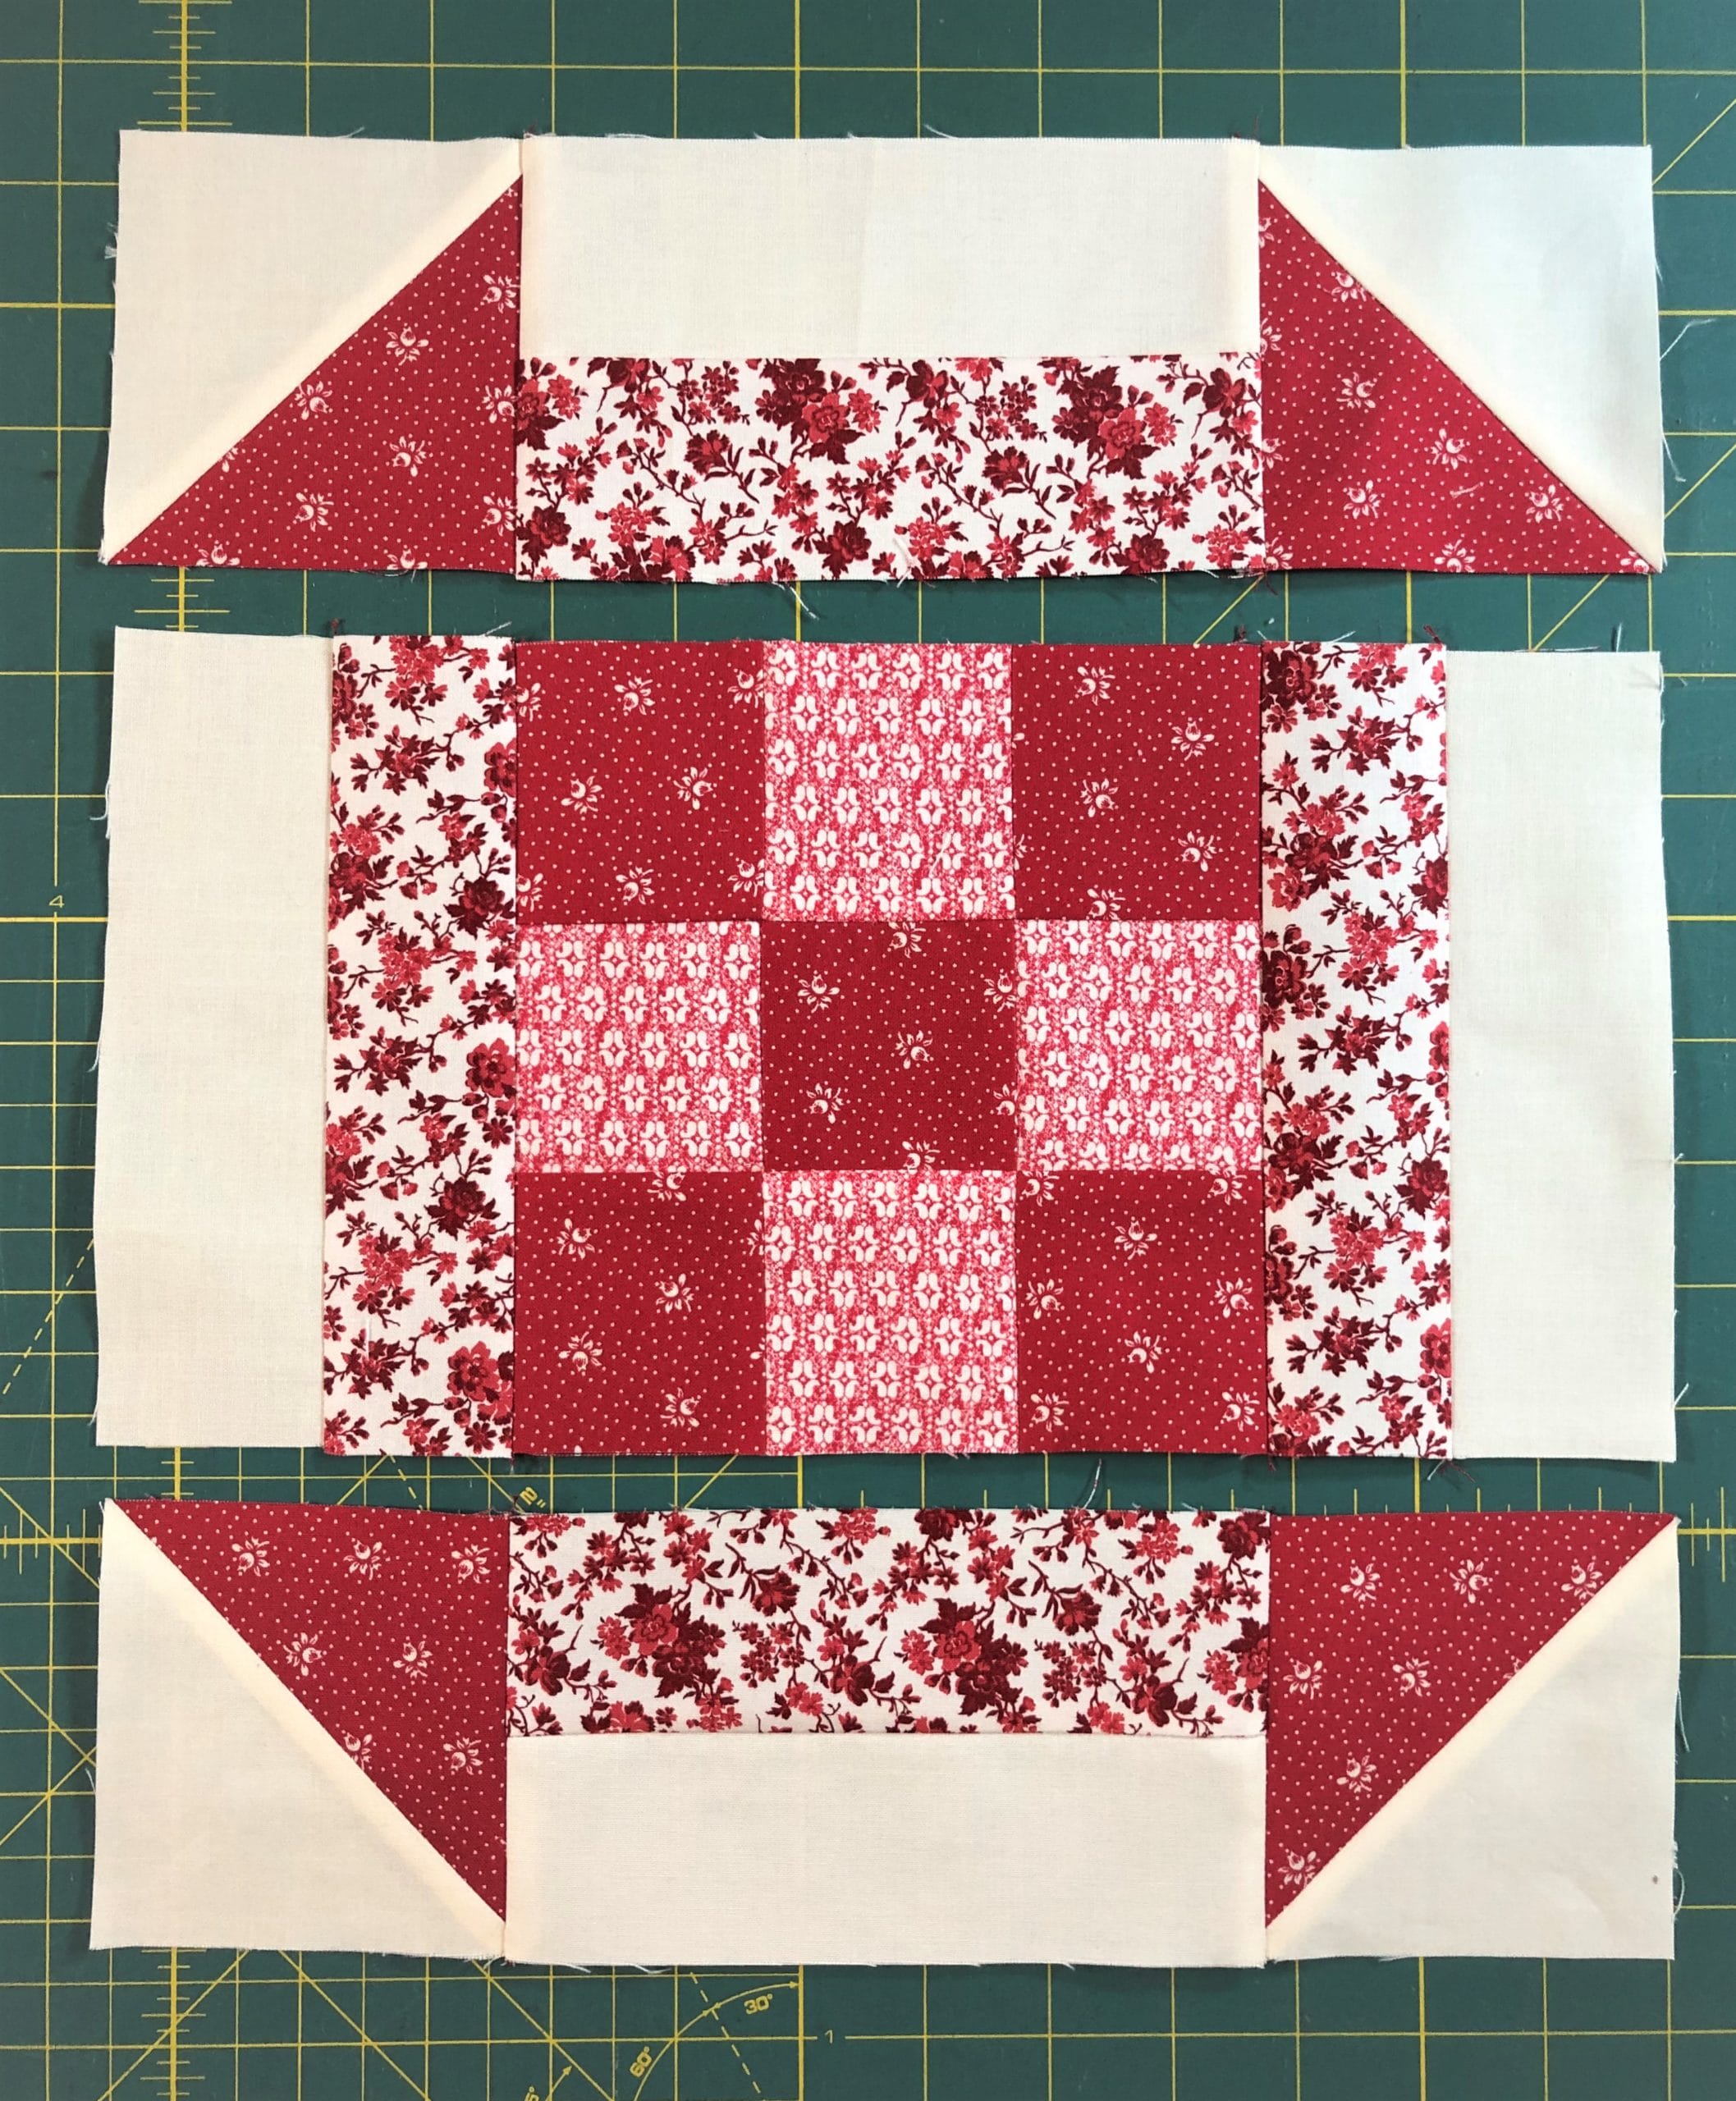
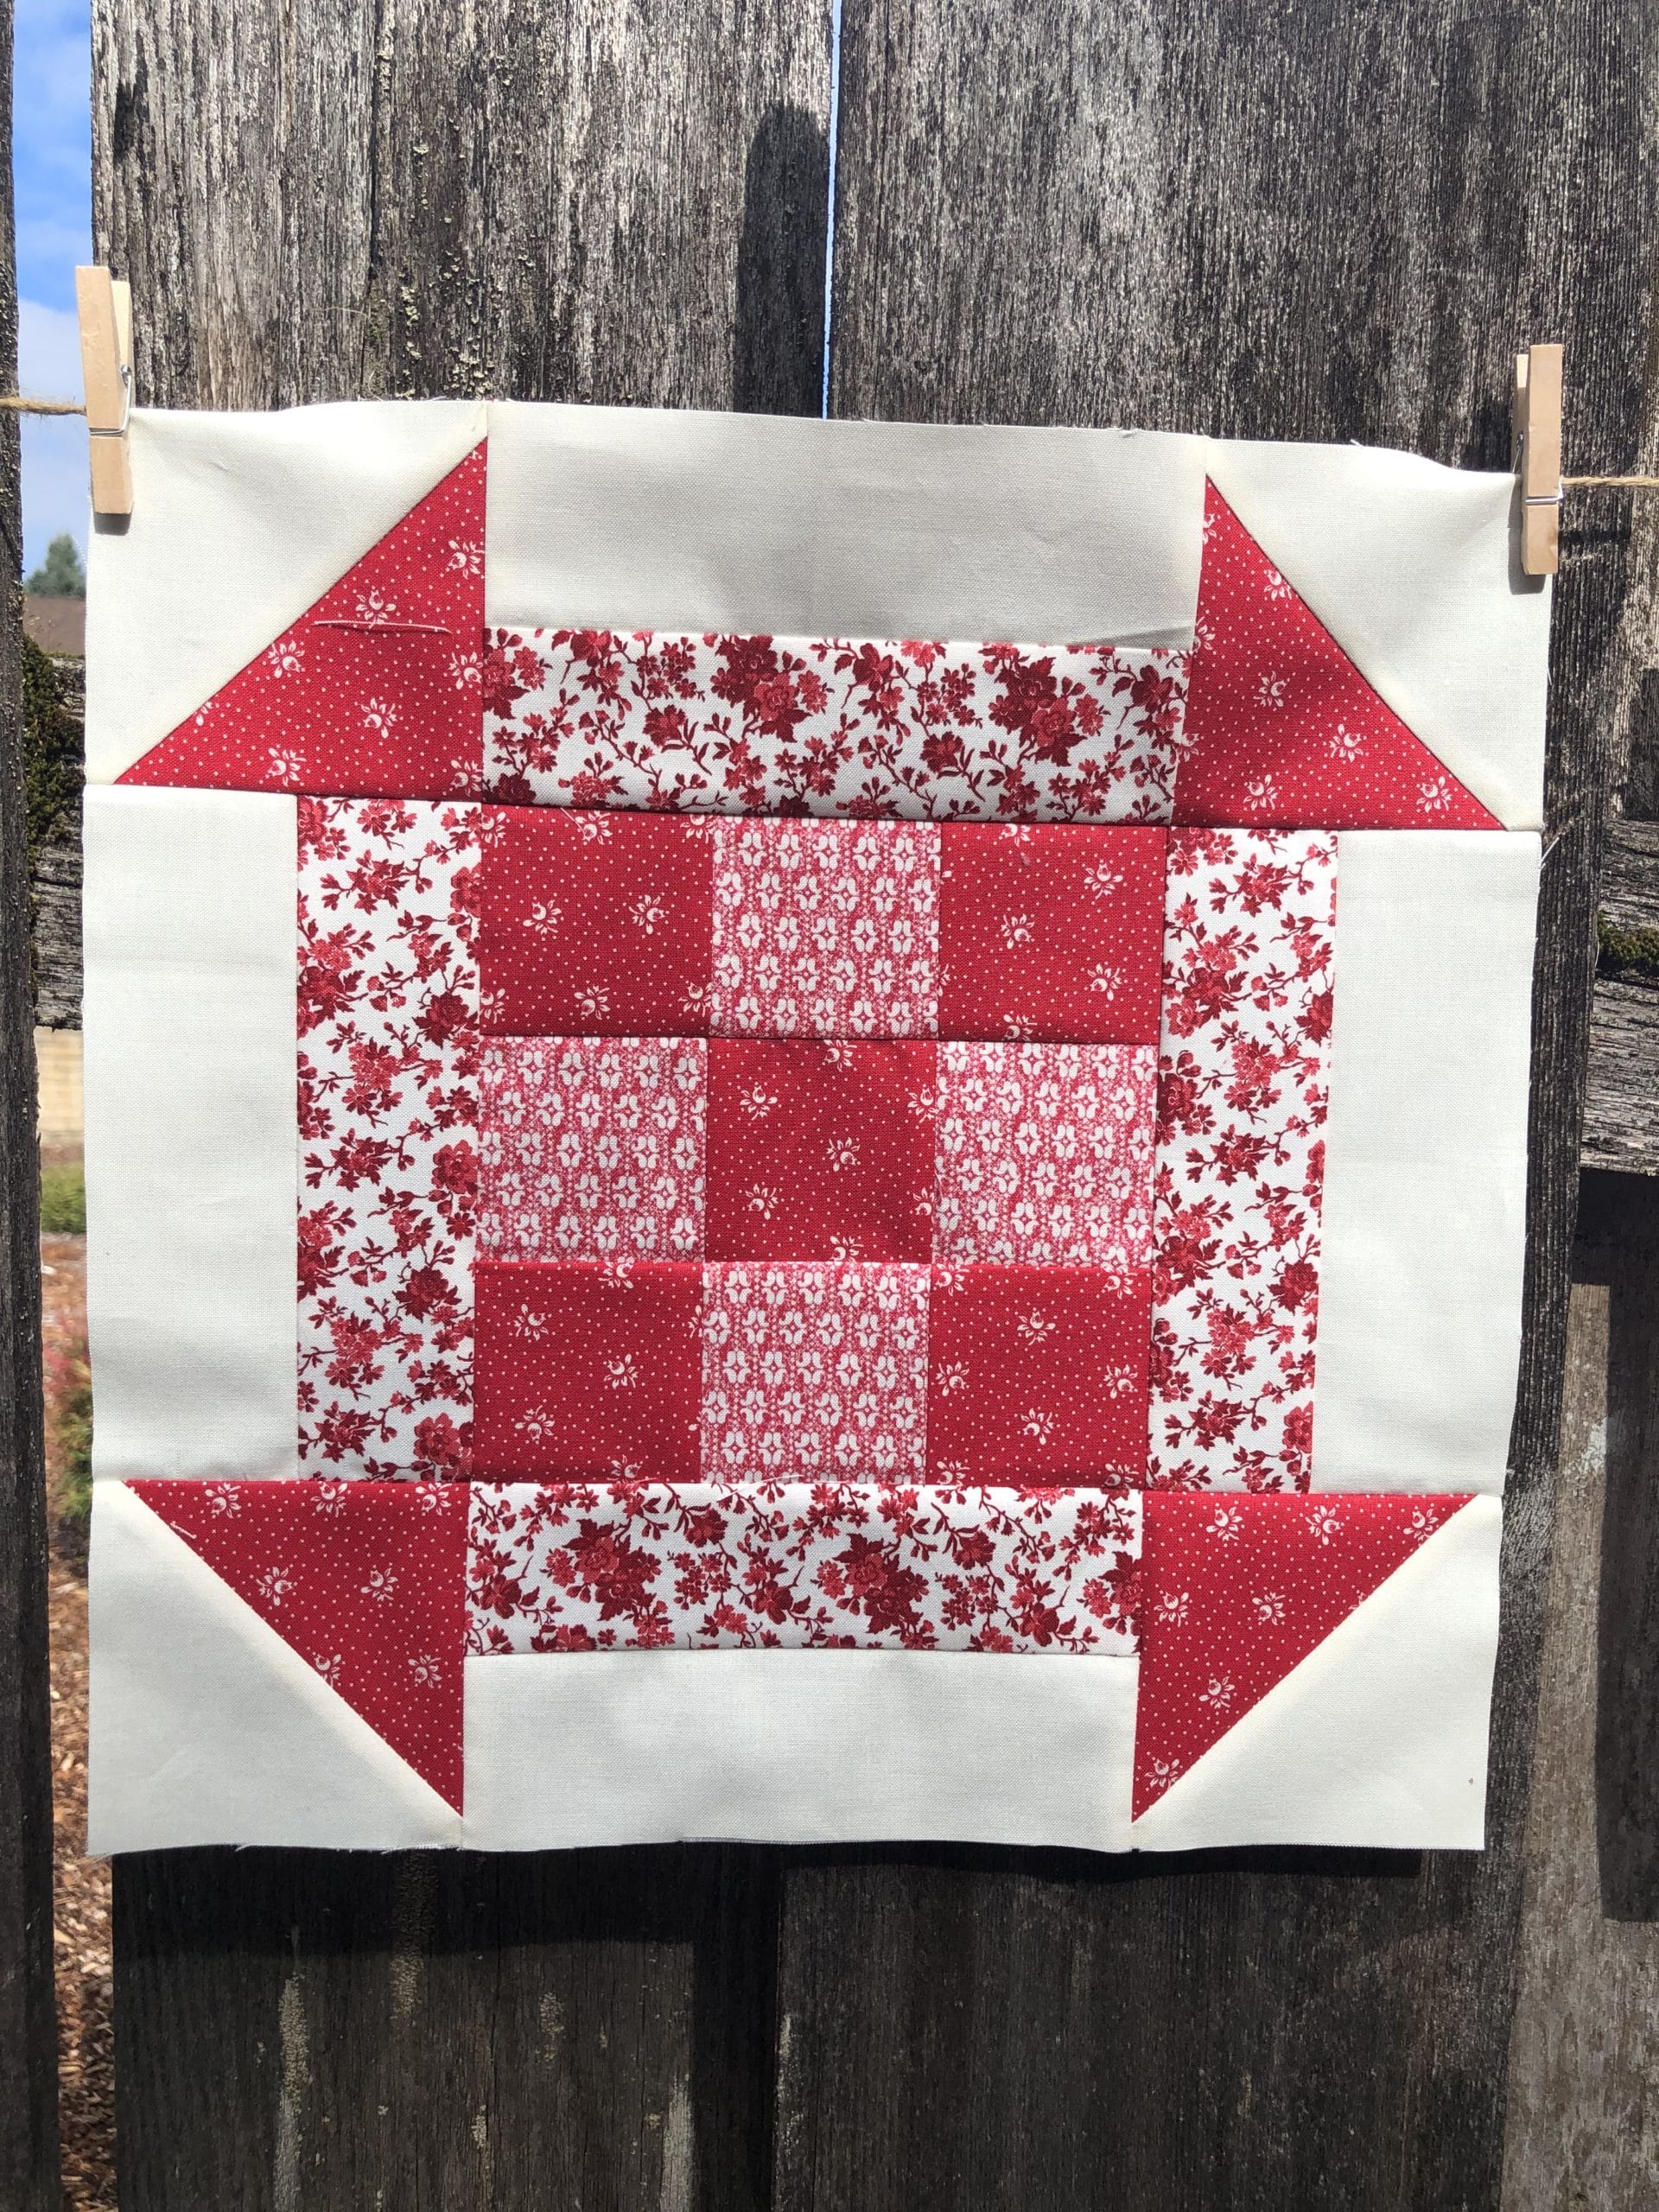
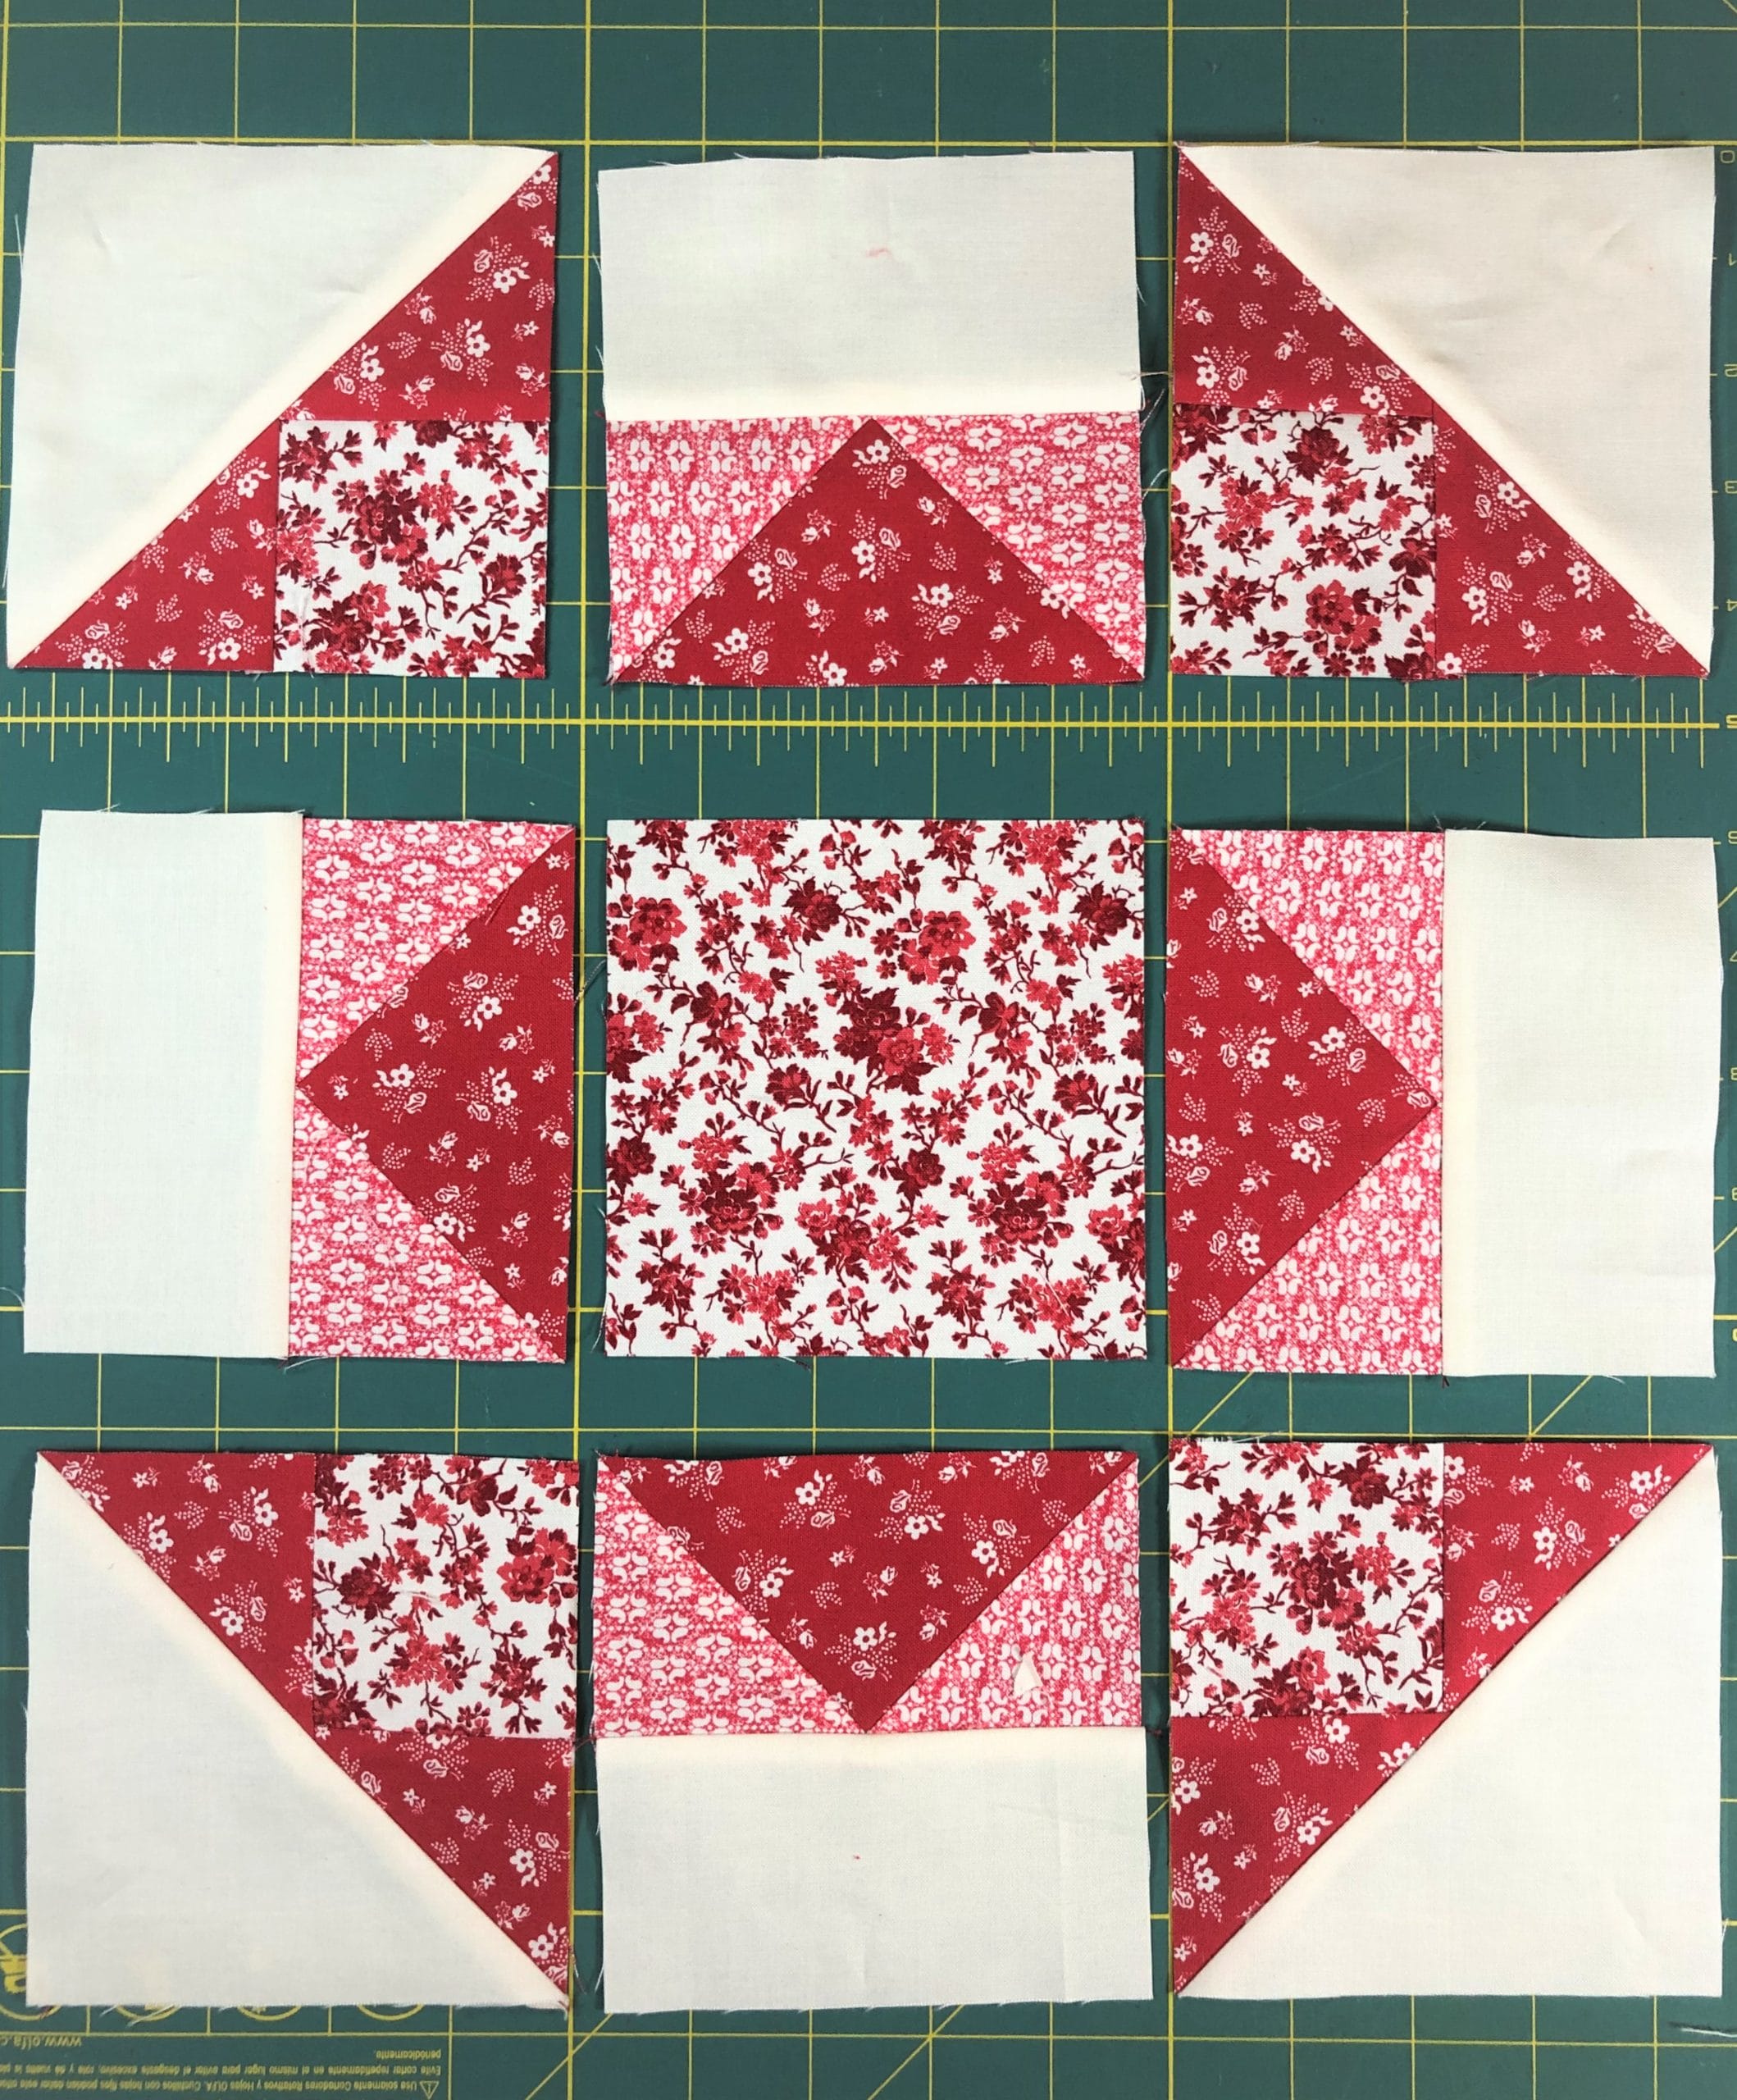
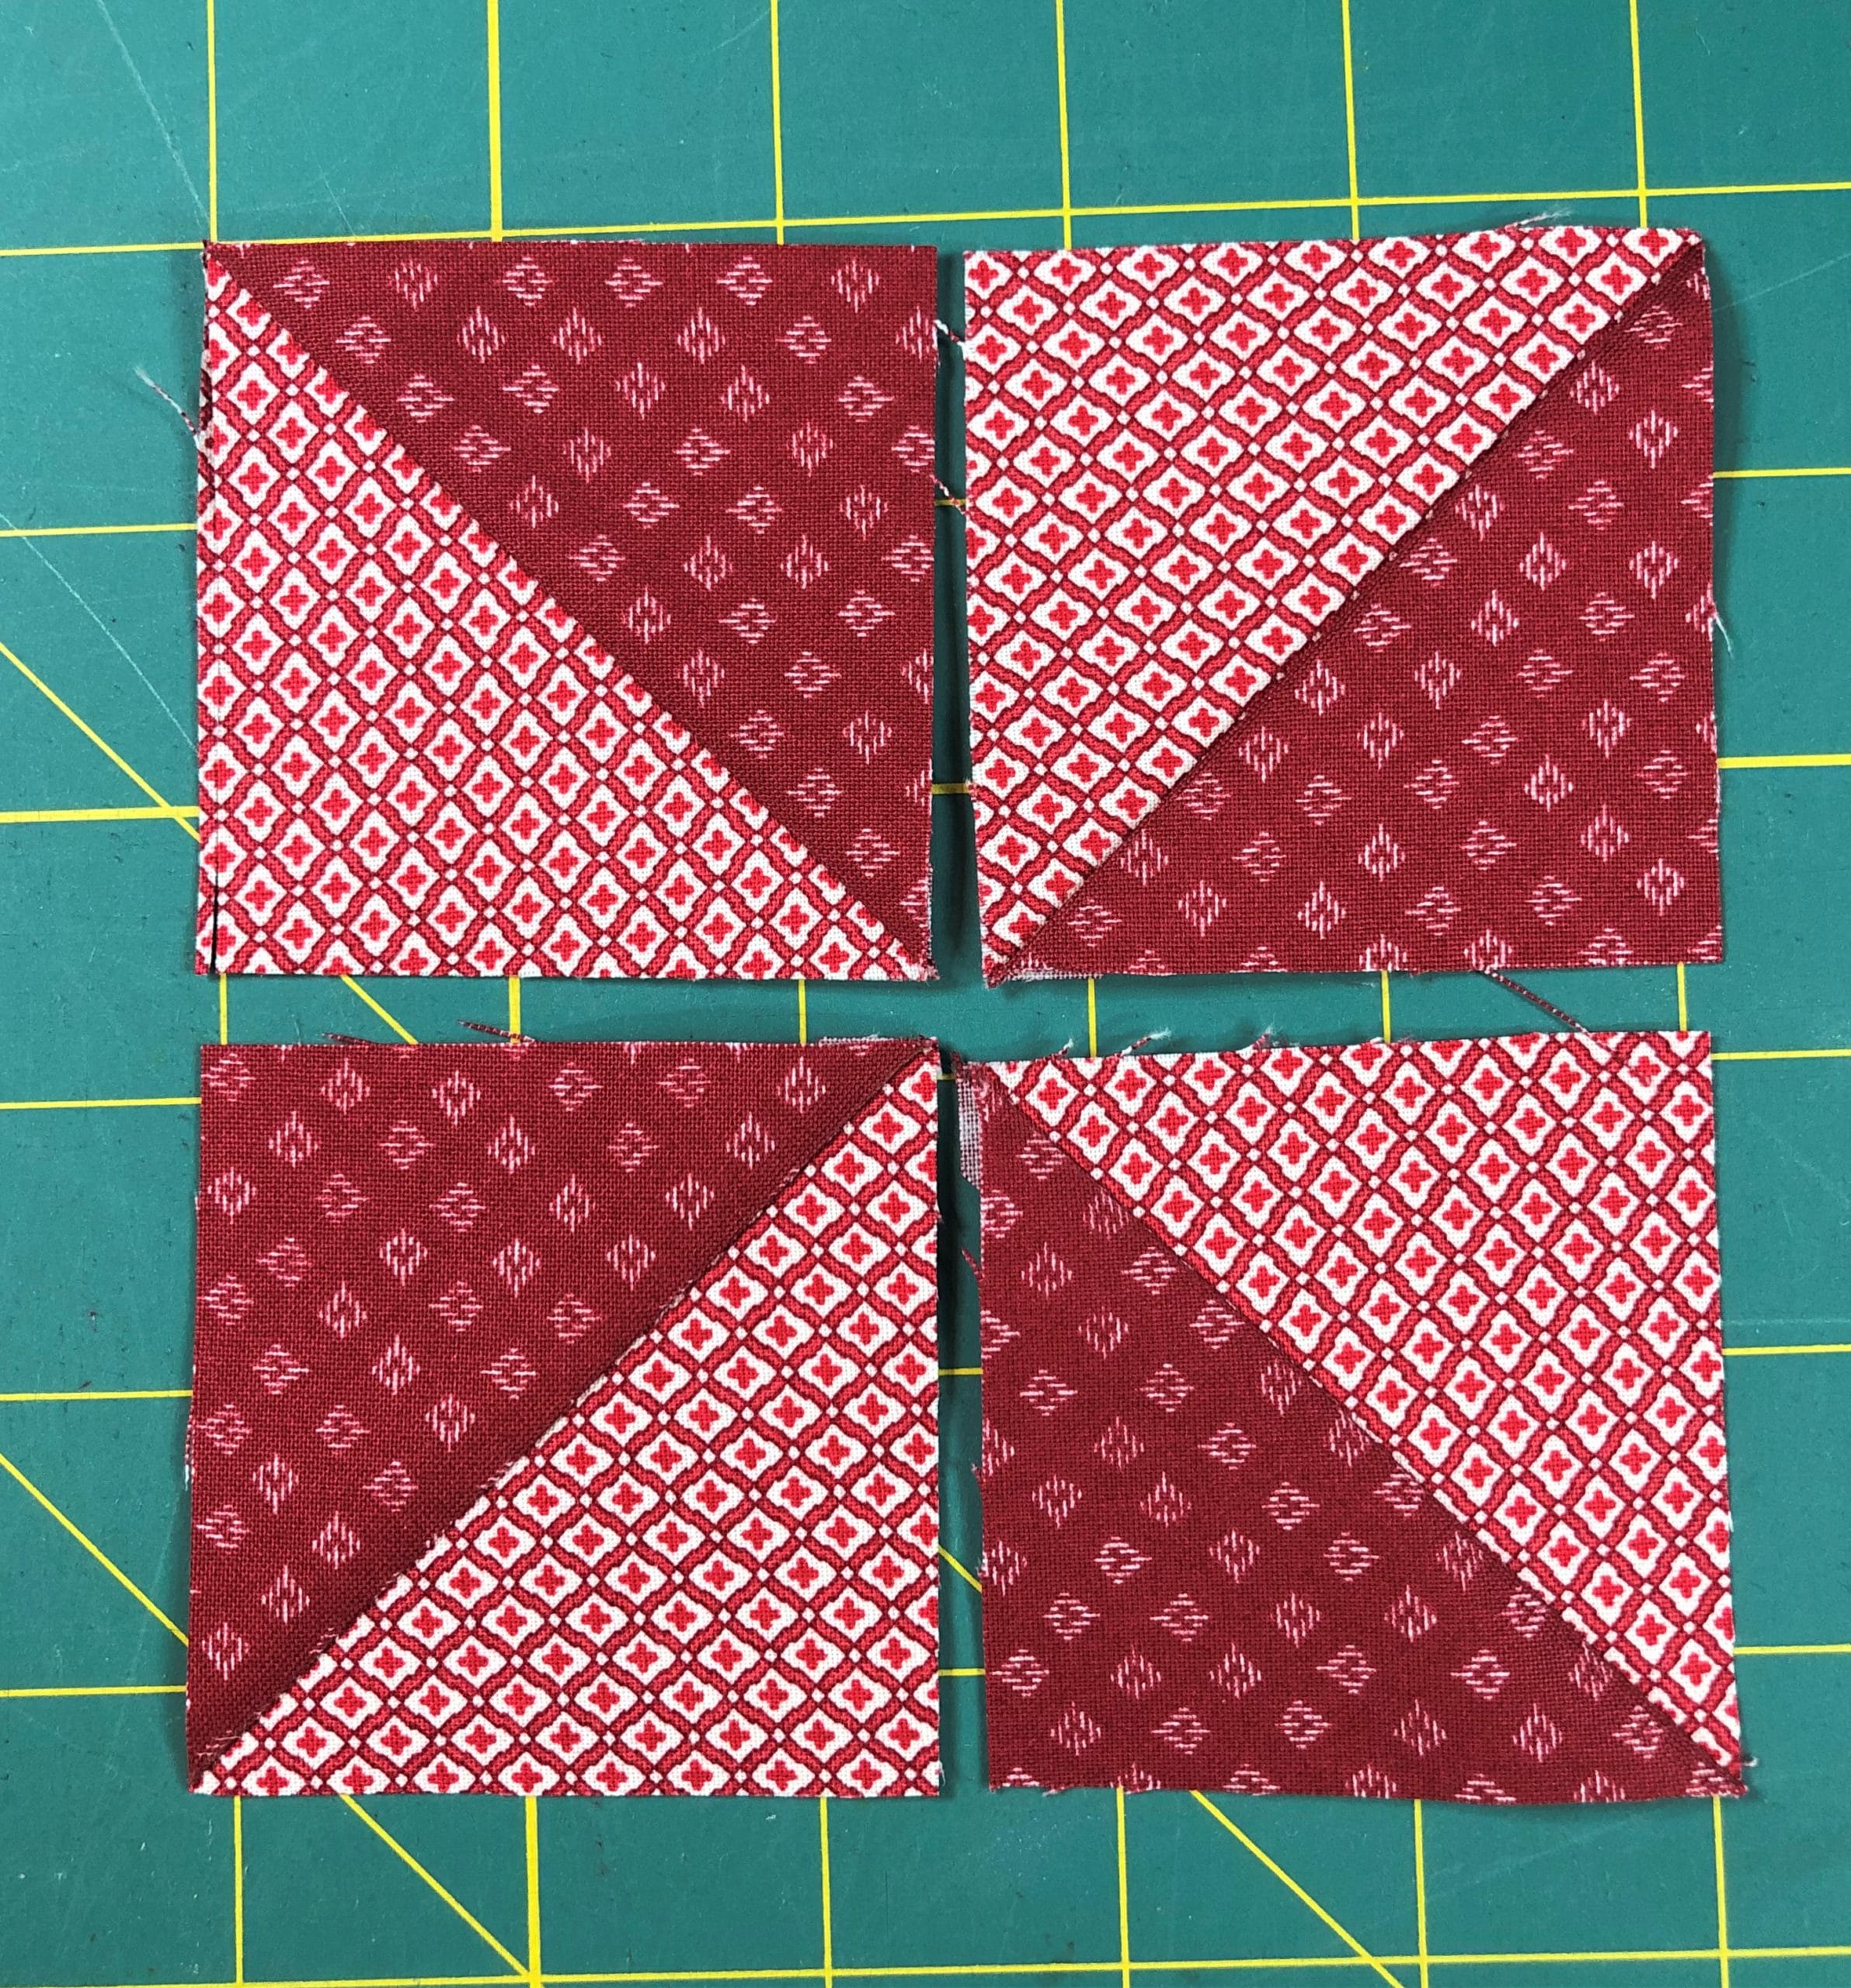
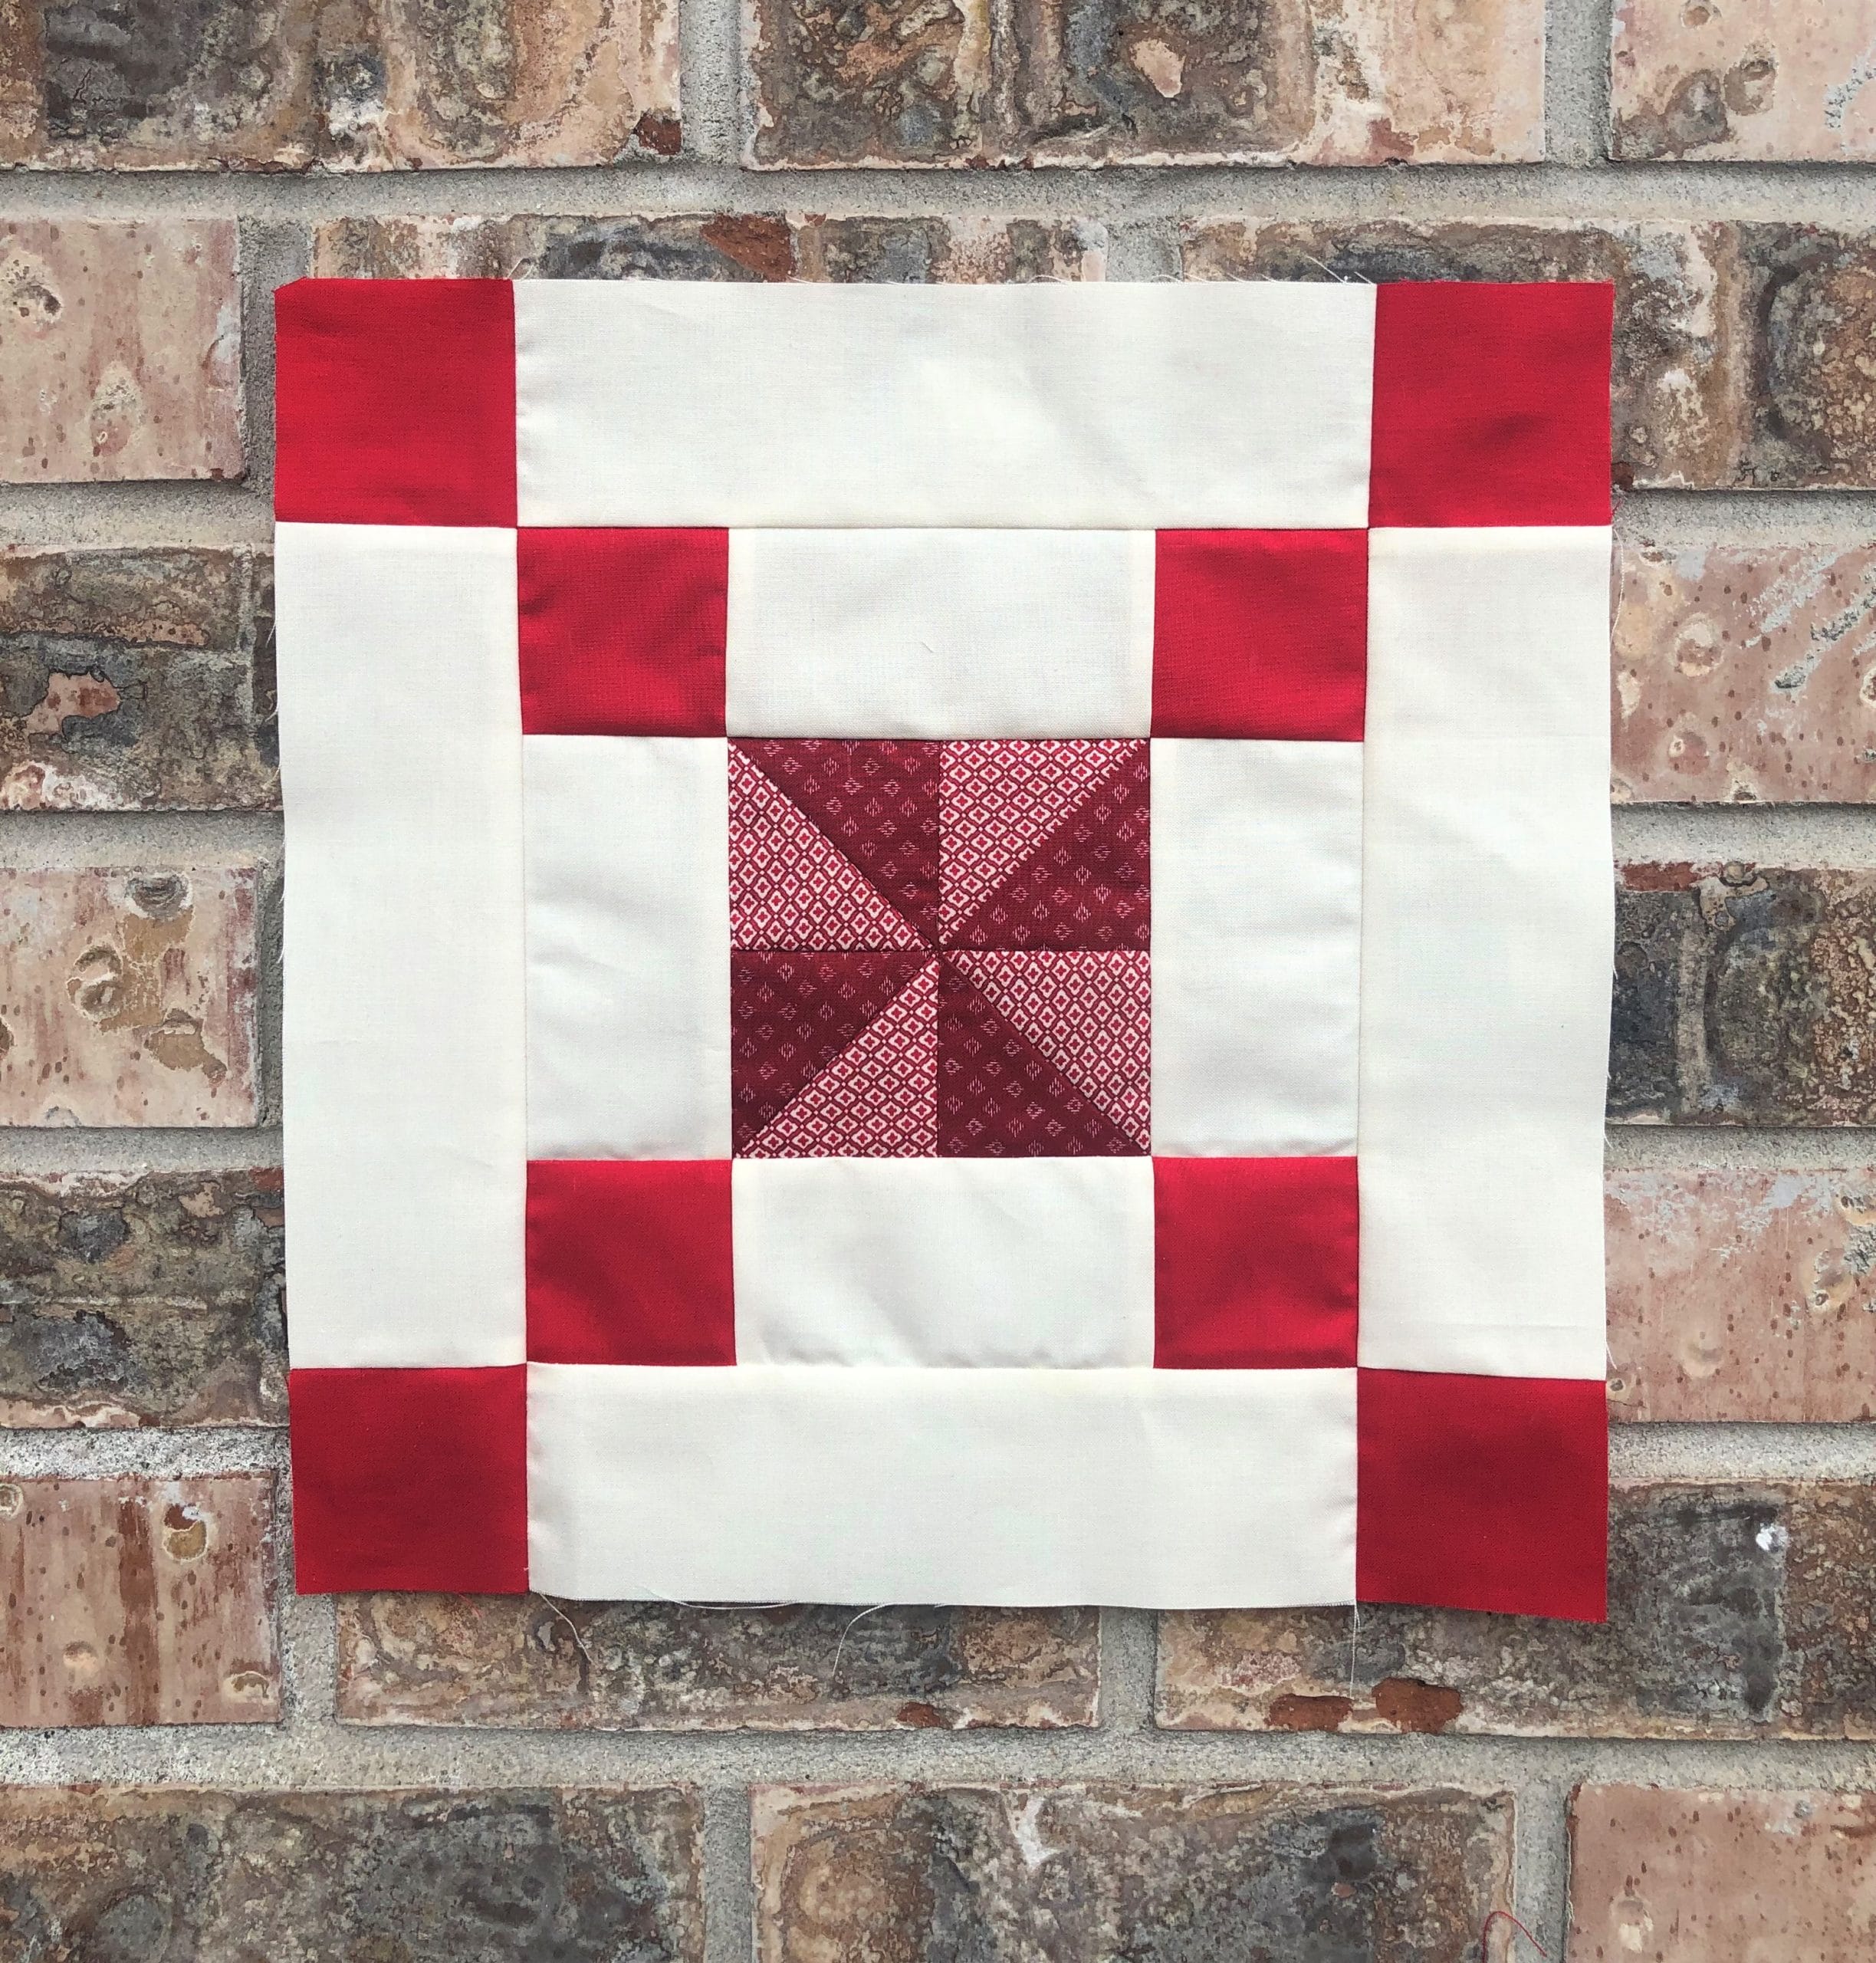
Now that it’s month 9, we FINALLY get to make the first block in the quilt. It’s about time! Technically, we made this same block WAY back in month 1, and it was block #14 then. And why didn’t I switch those and sew block #1 in month one and block #14 now, you ask? The short answer is FABRIC. When I’m planning block of the Month patterns, I need to pay attention to which fabrics will be shipped with which blocks, so blocks with like fabrics get grouped together. So now you know why things sometimes seem out of order. It all works out in the end though!
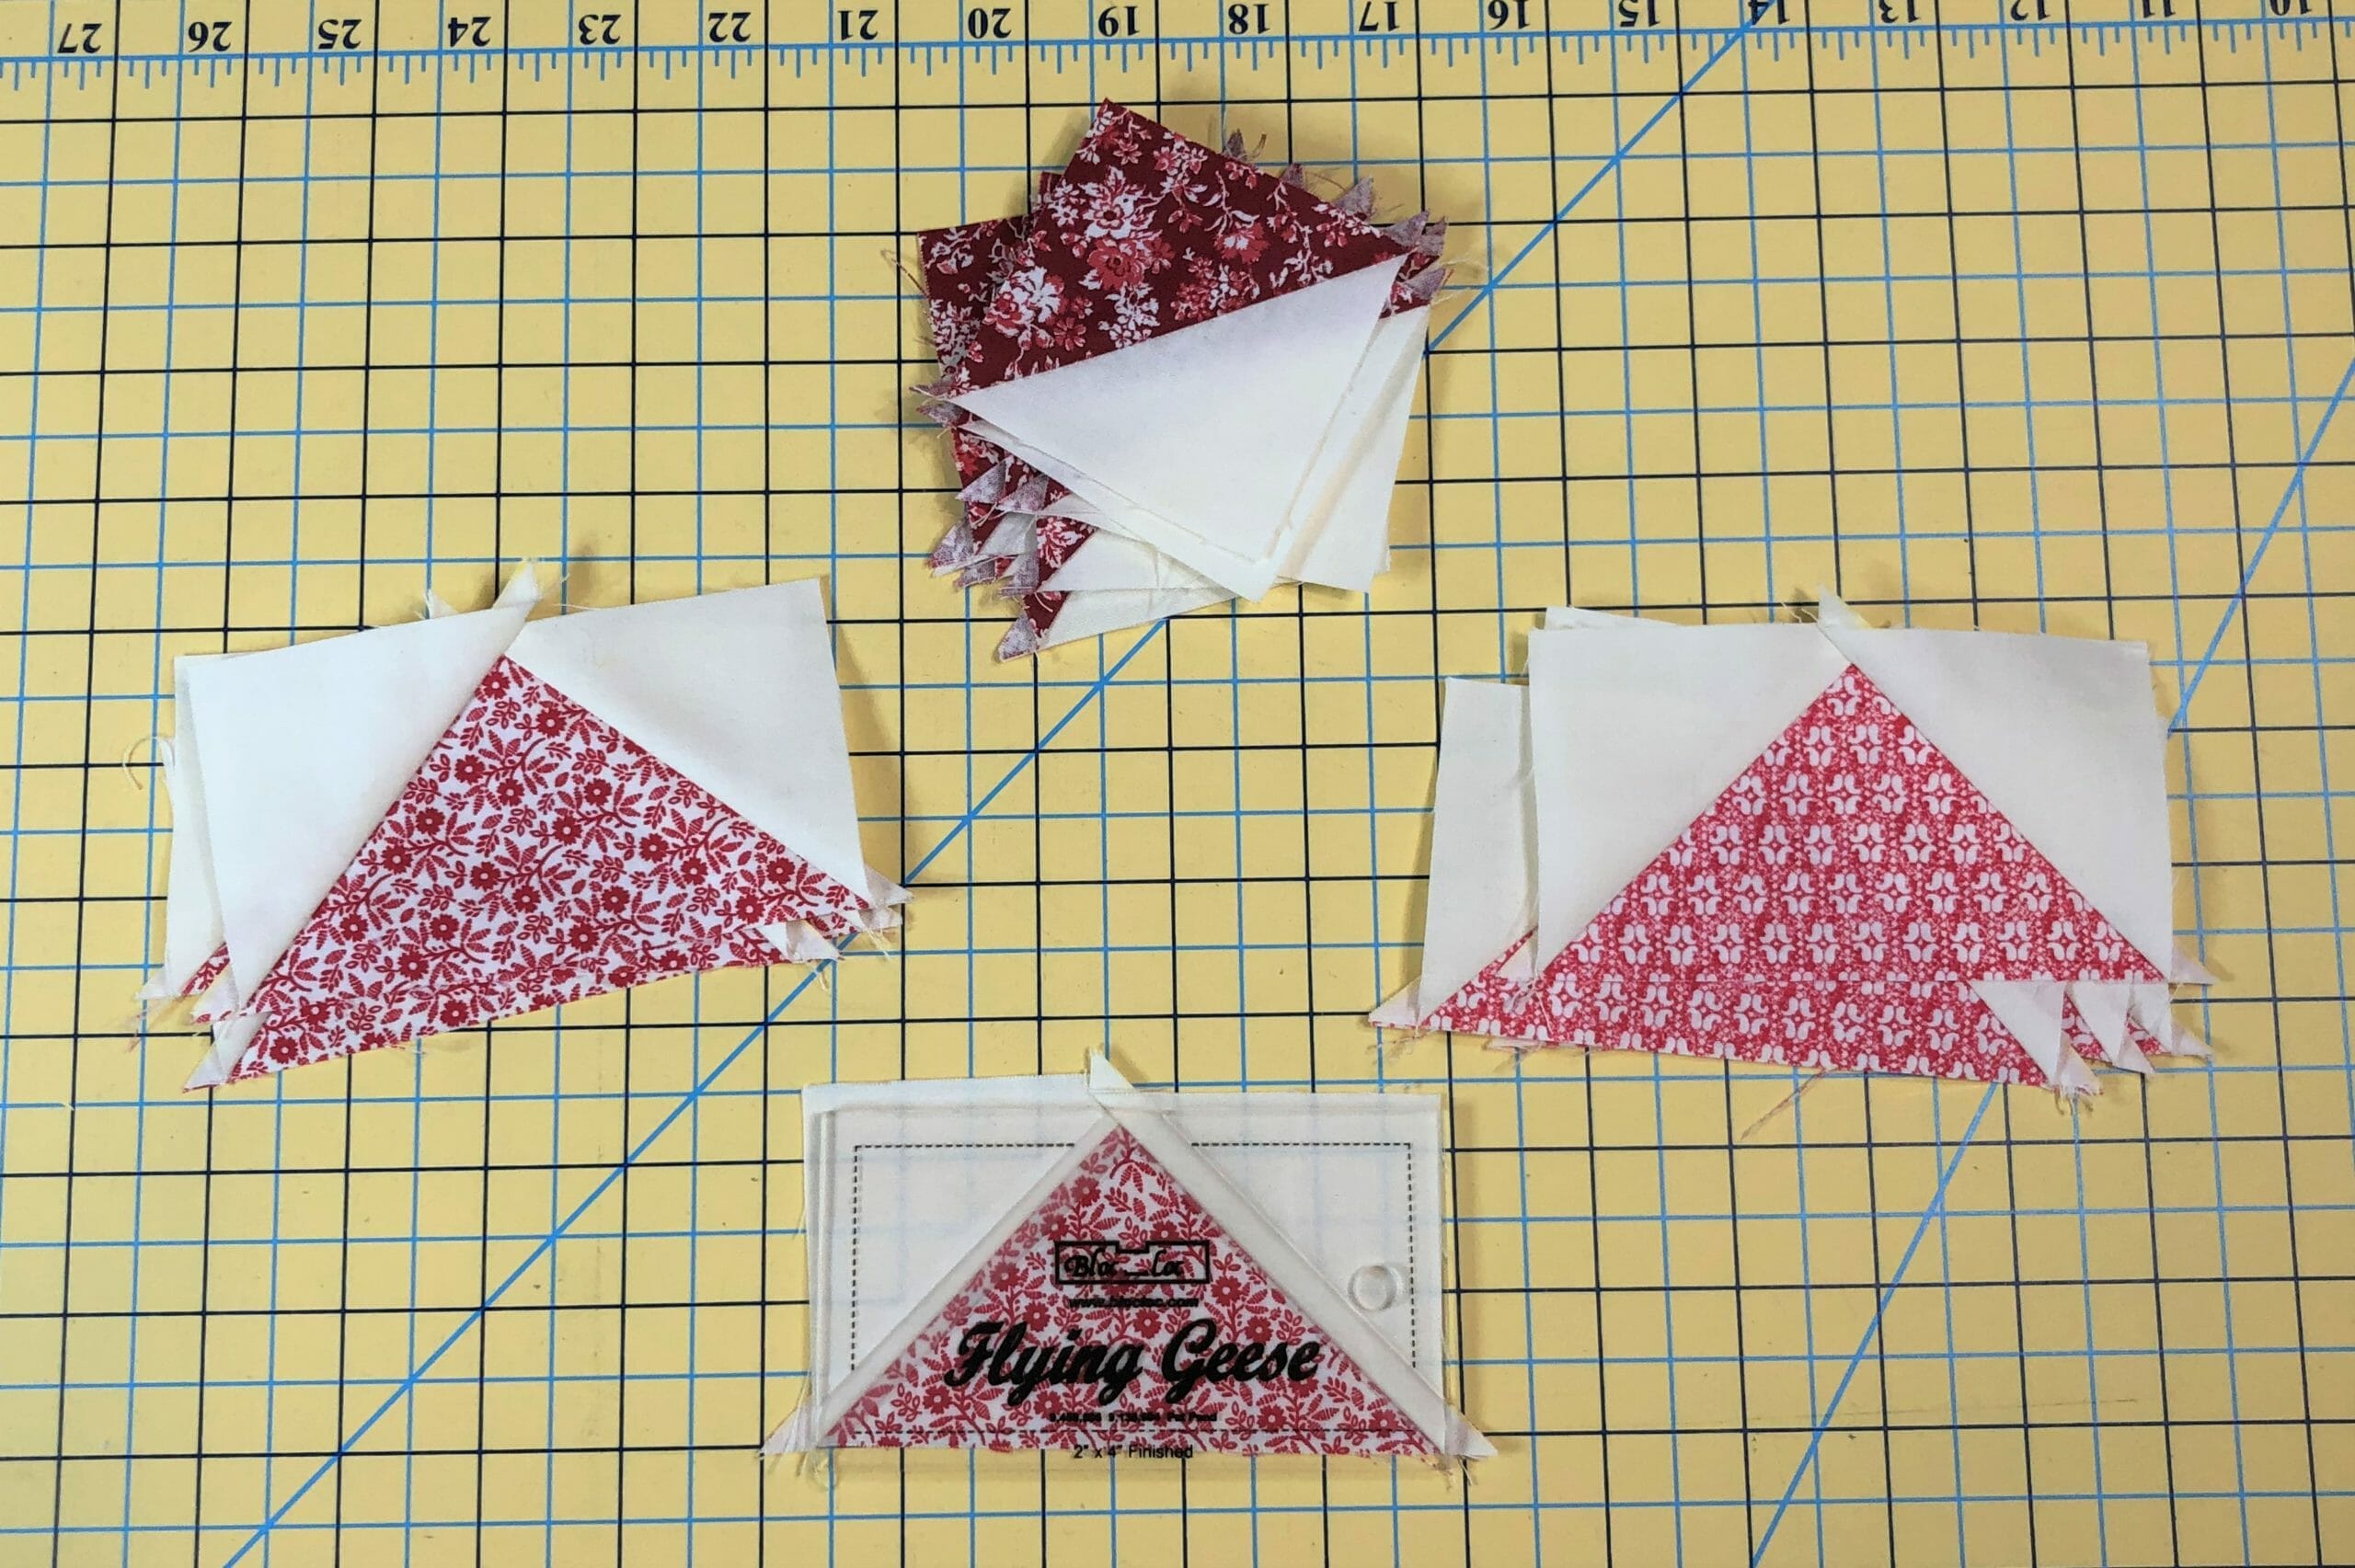
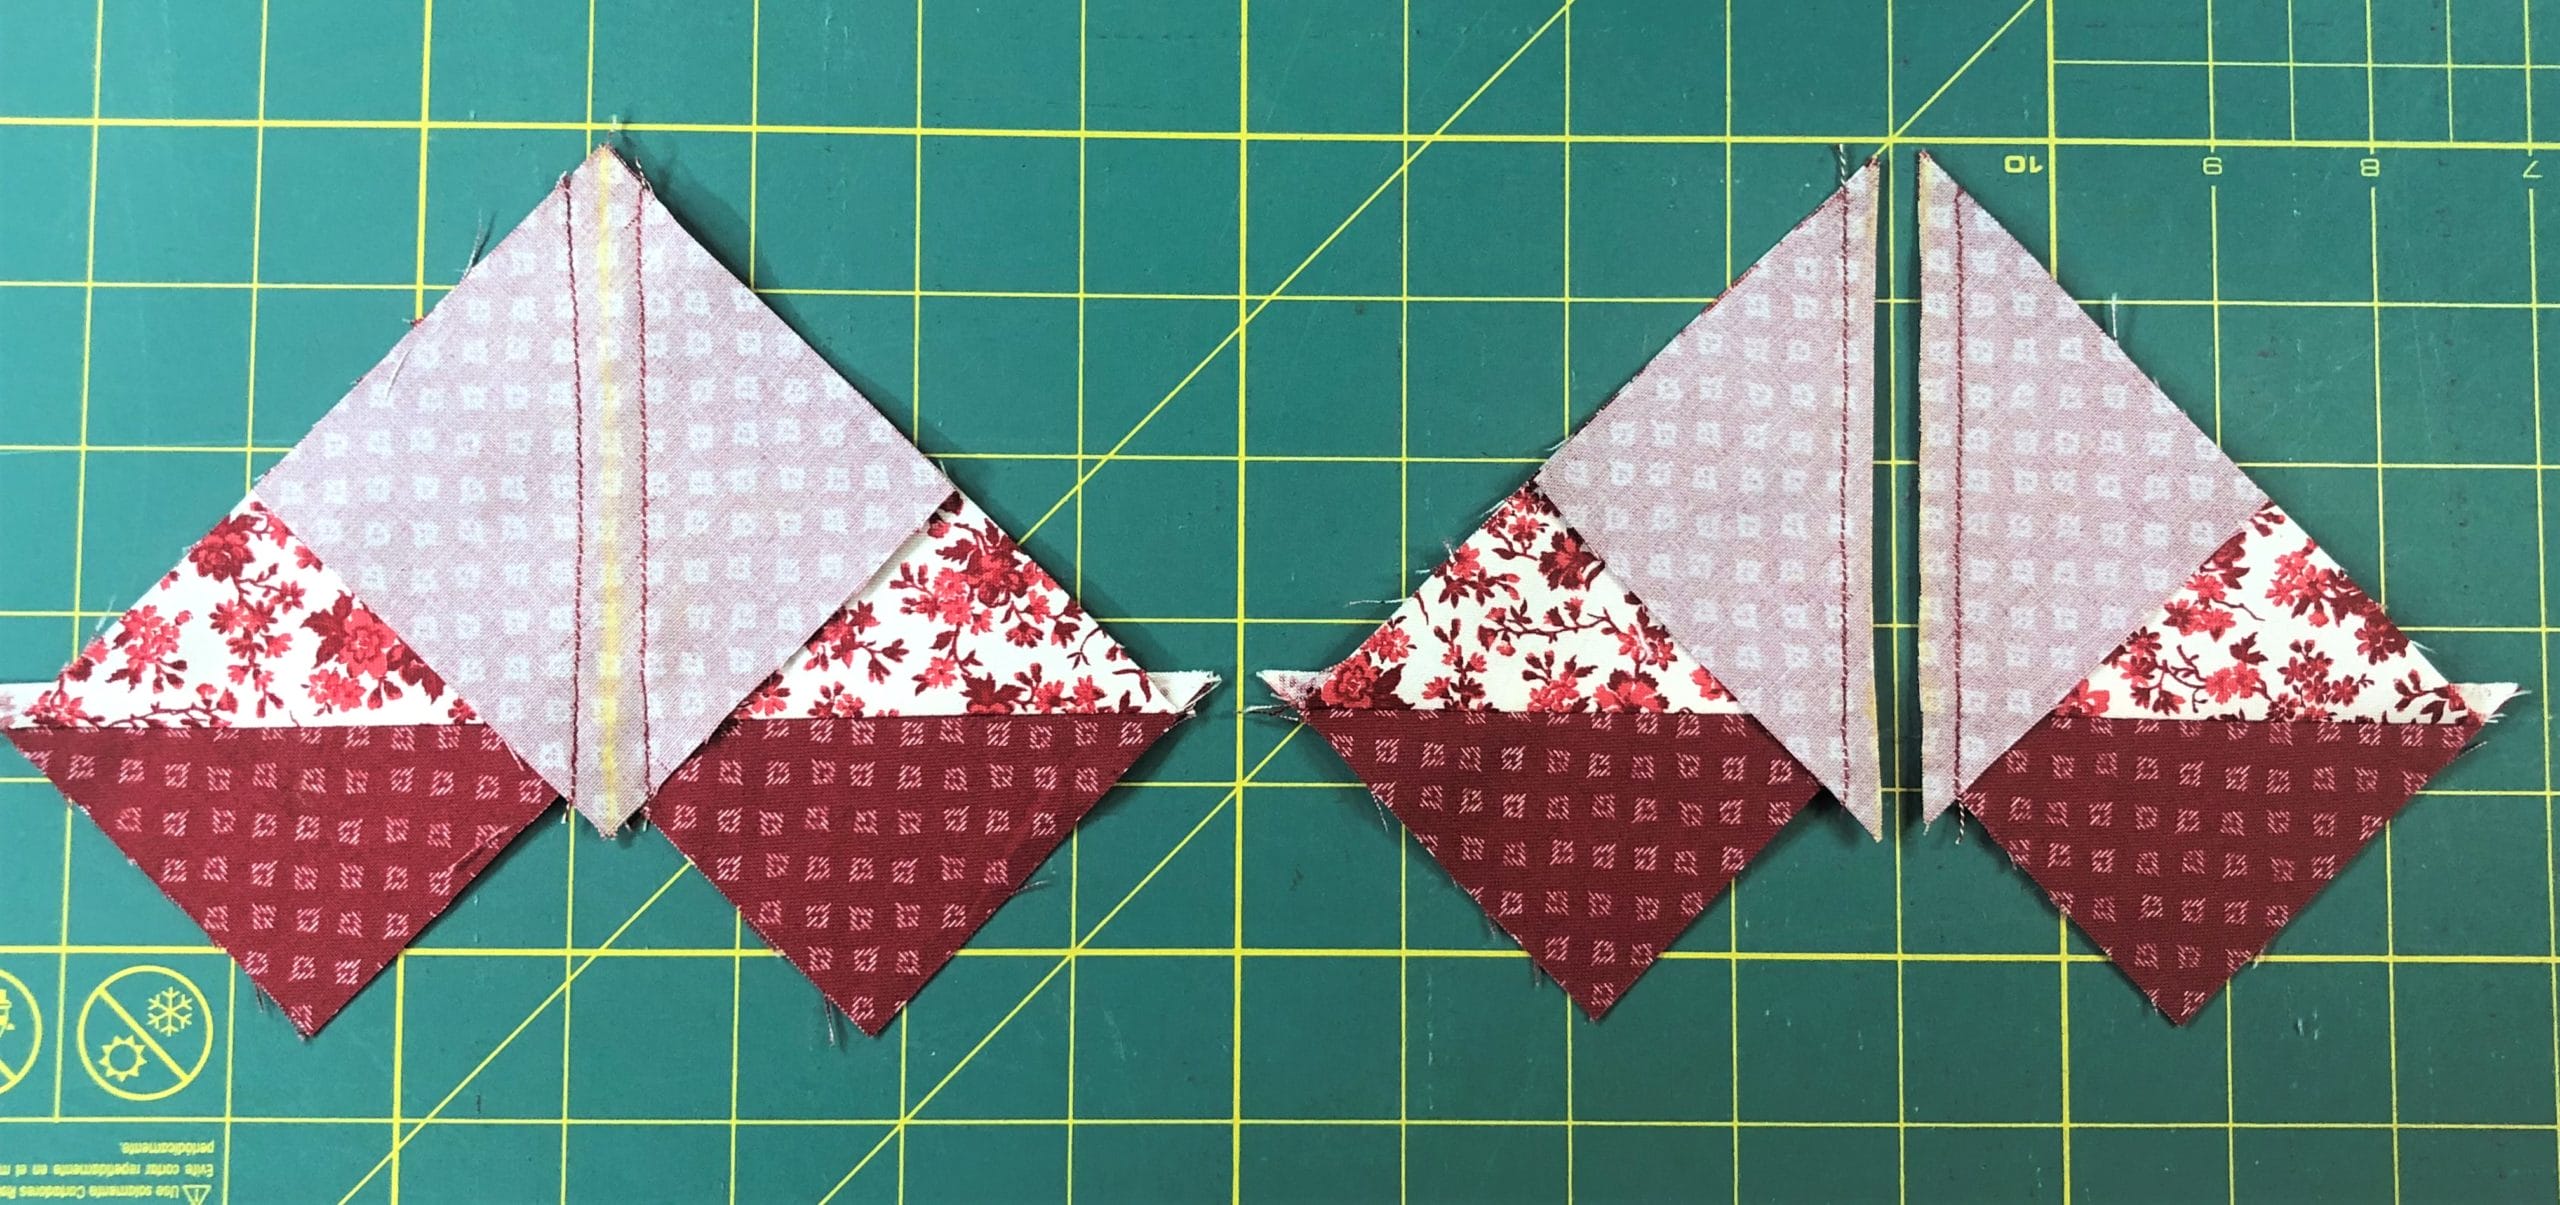
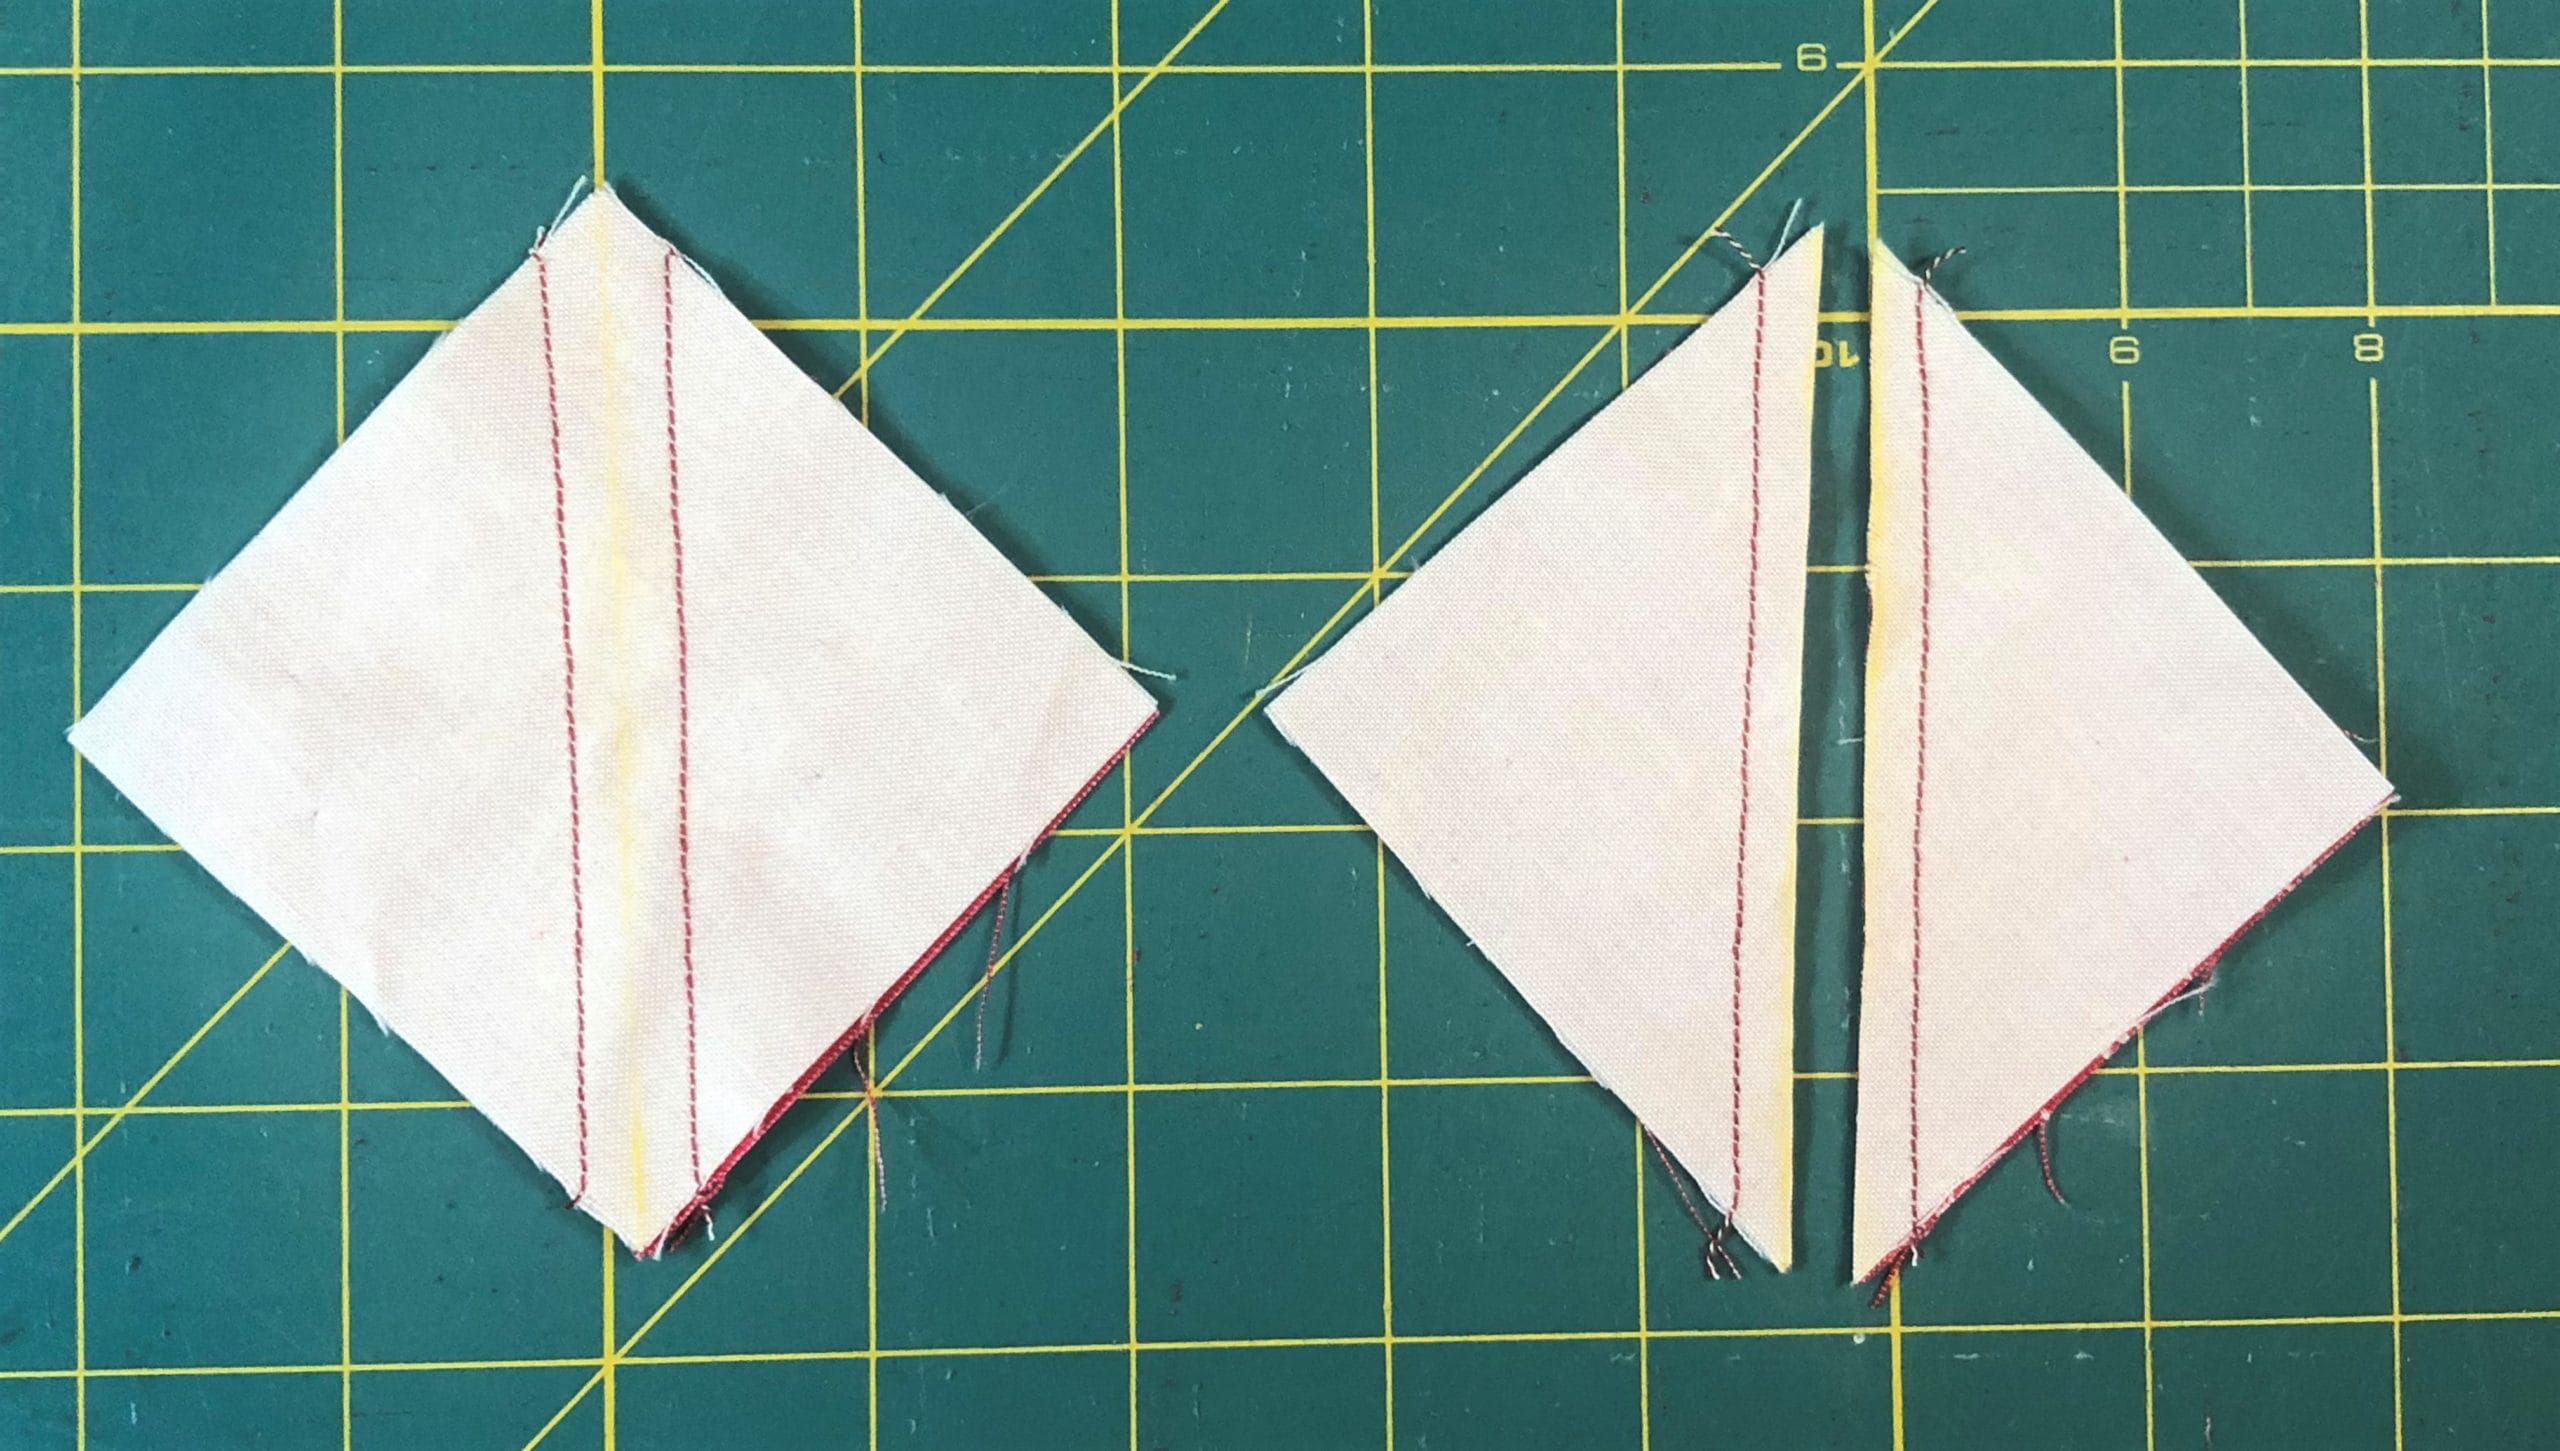
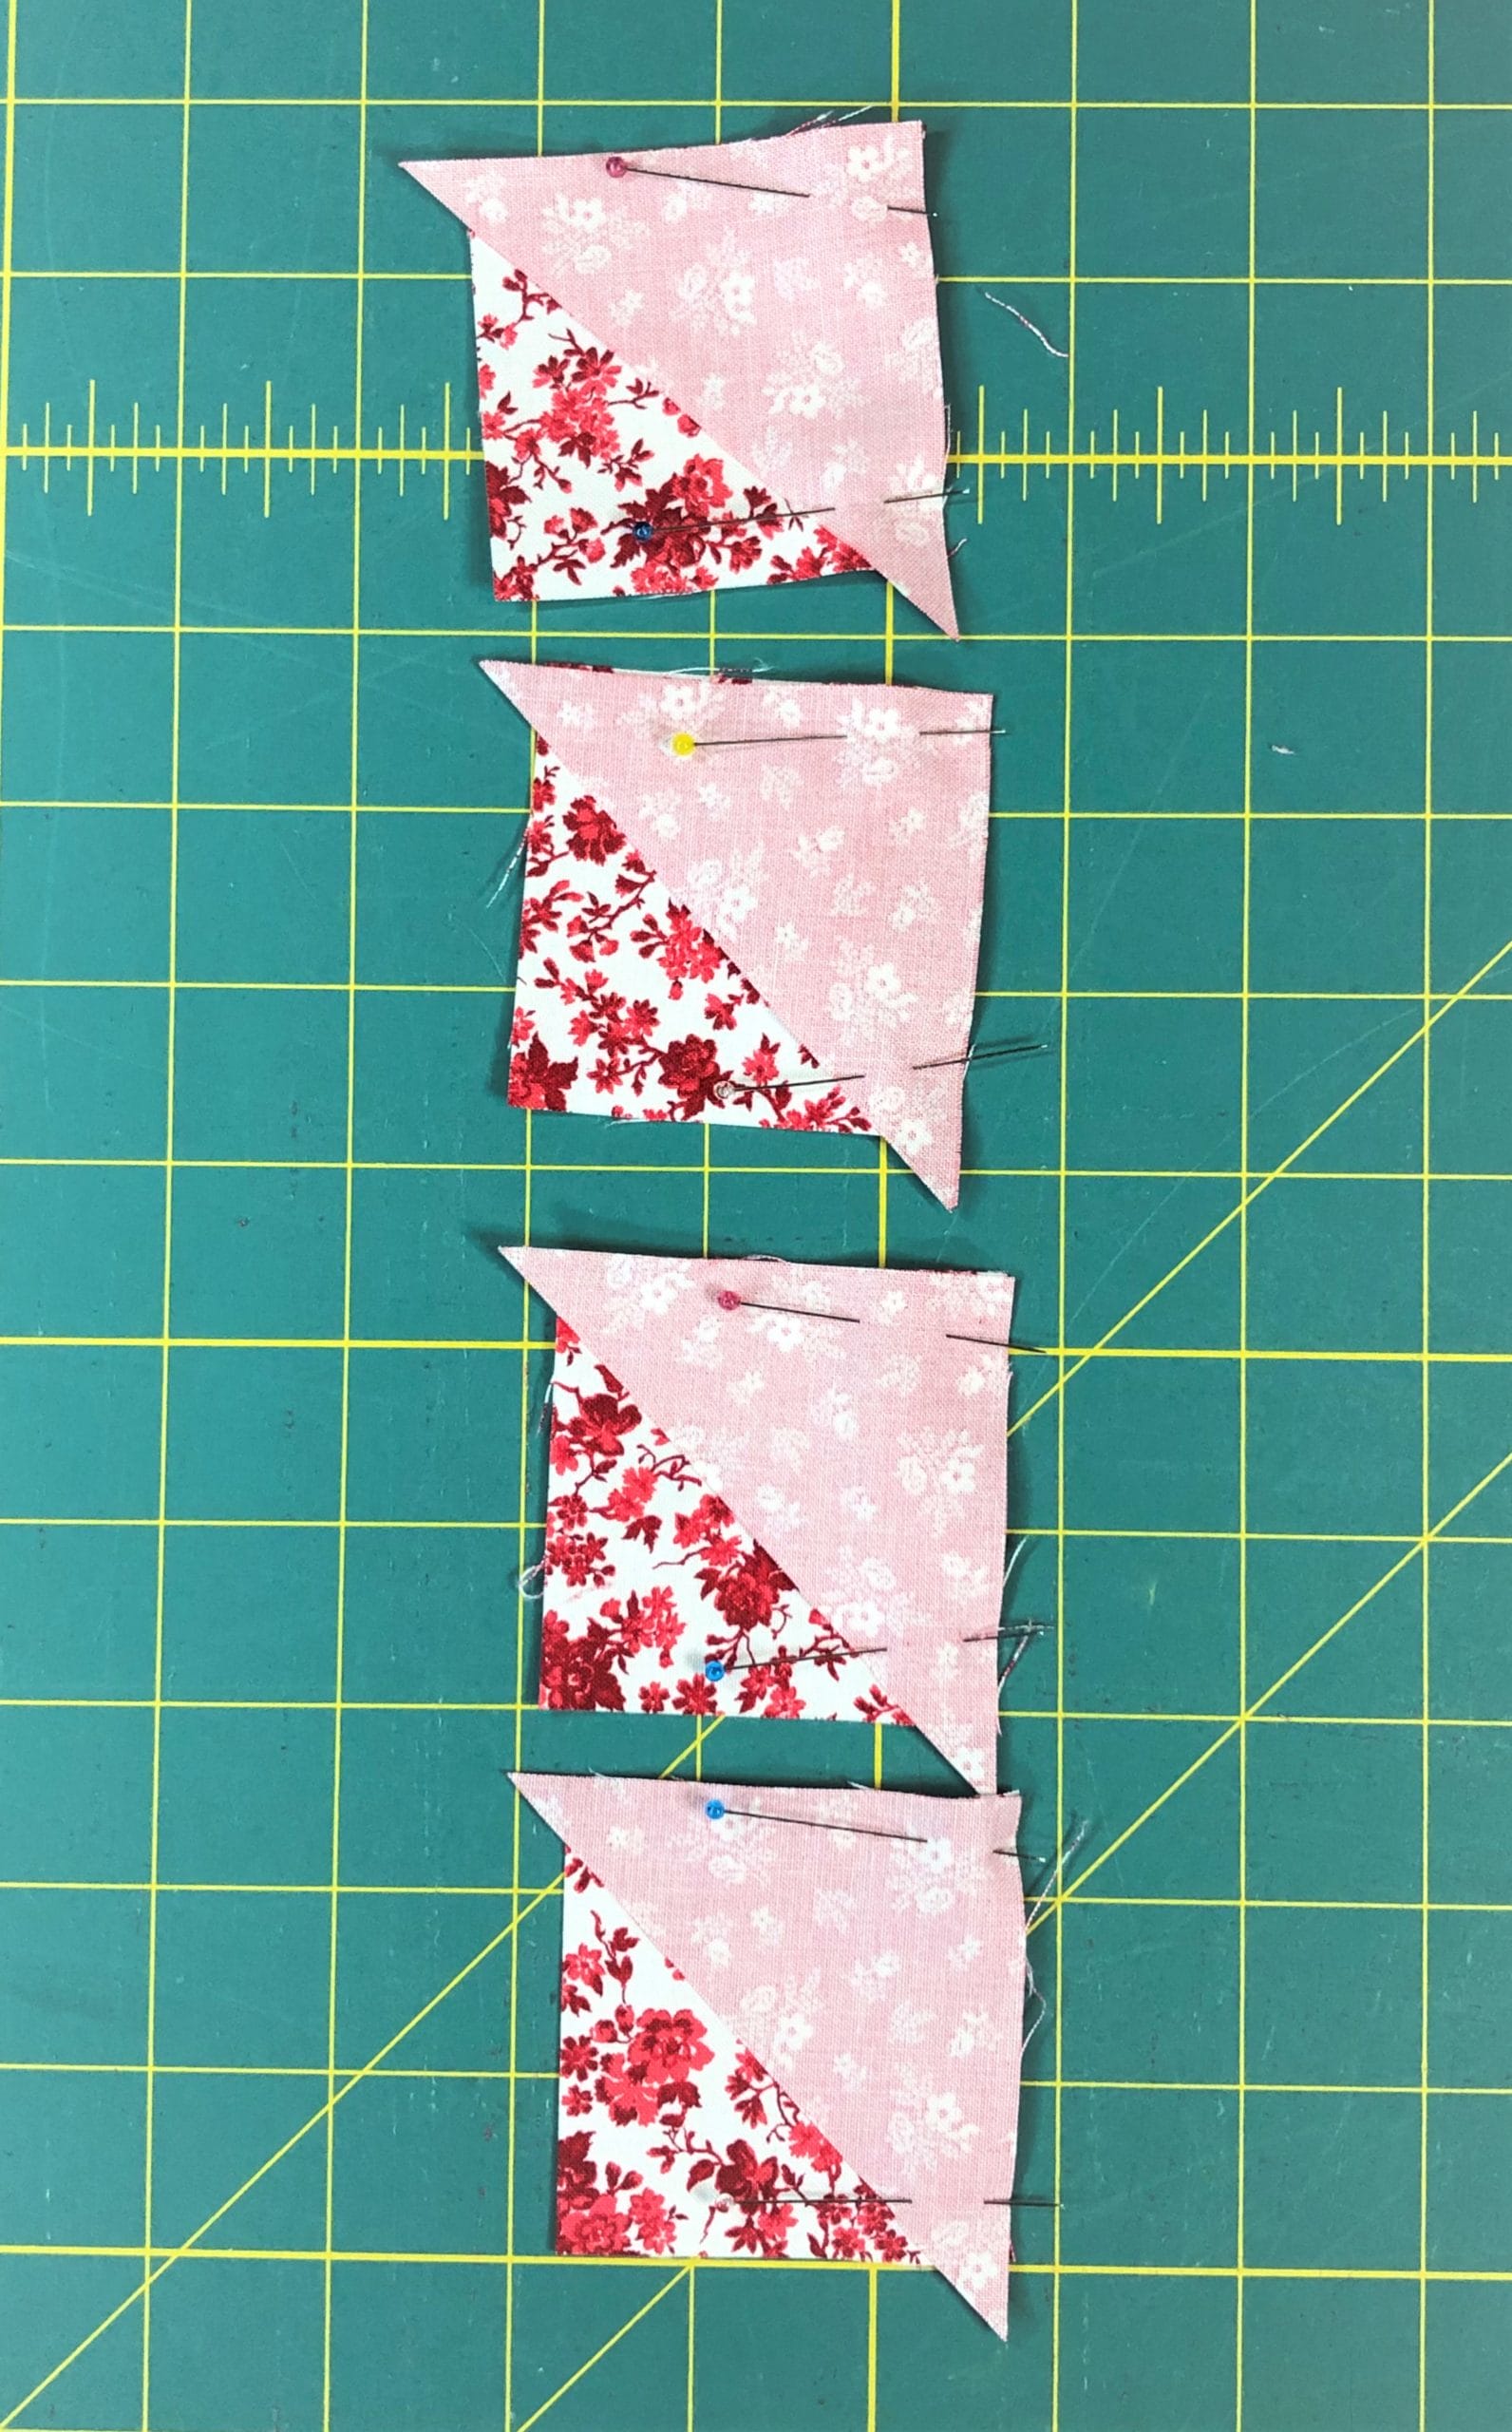
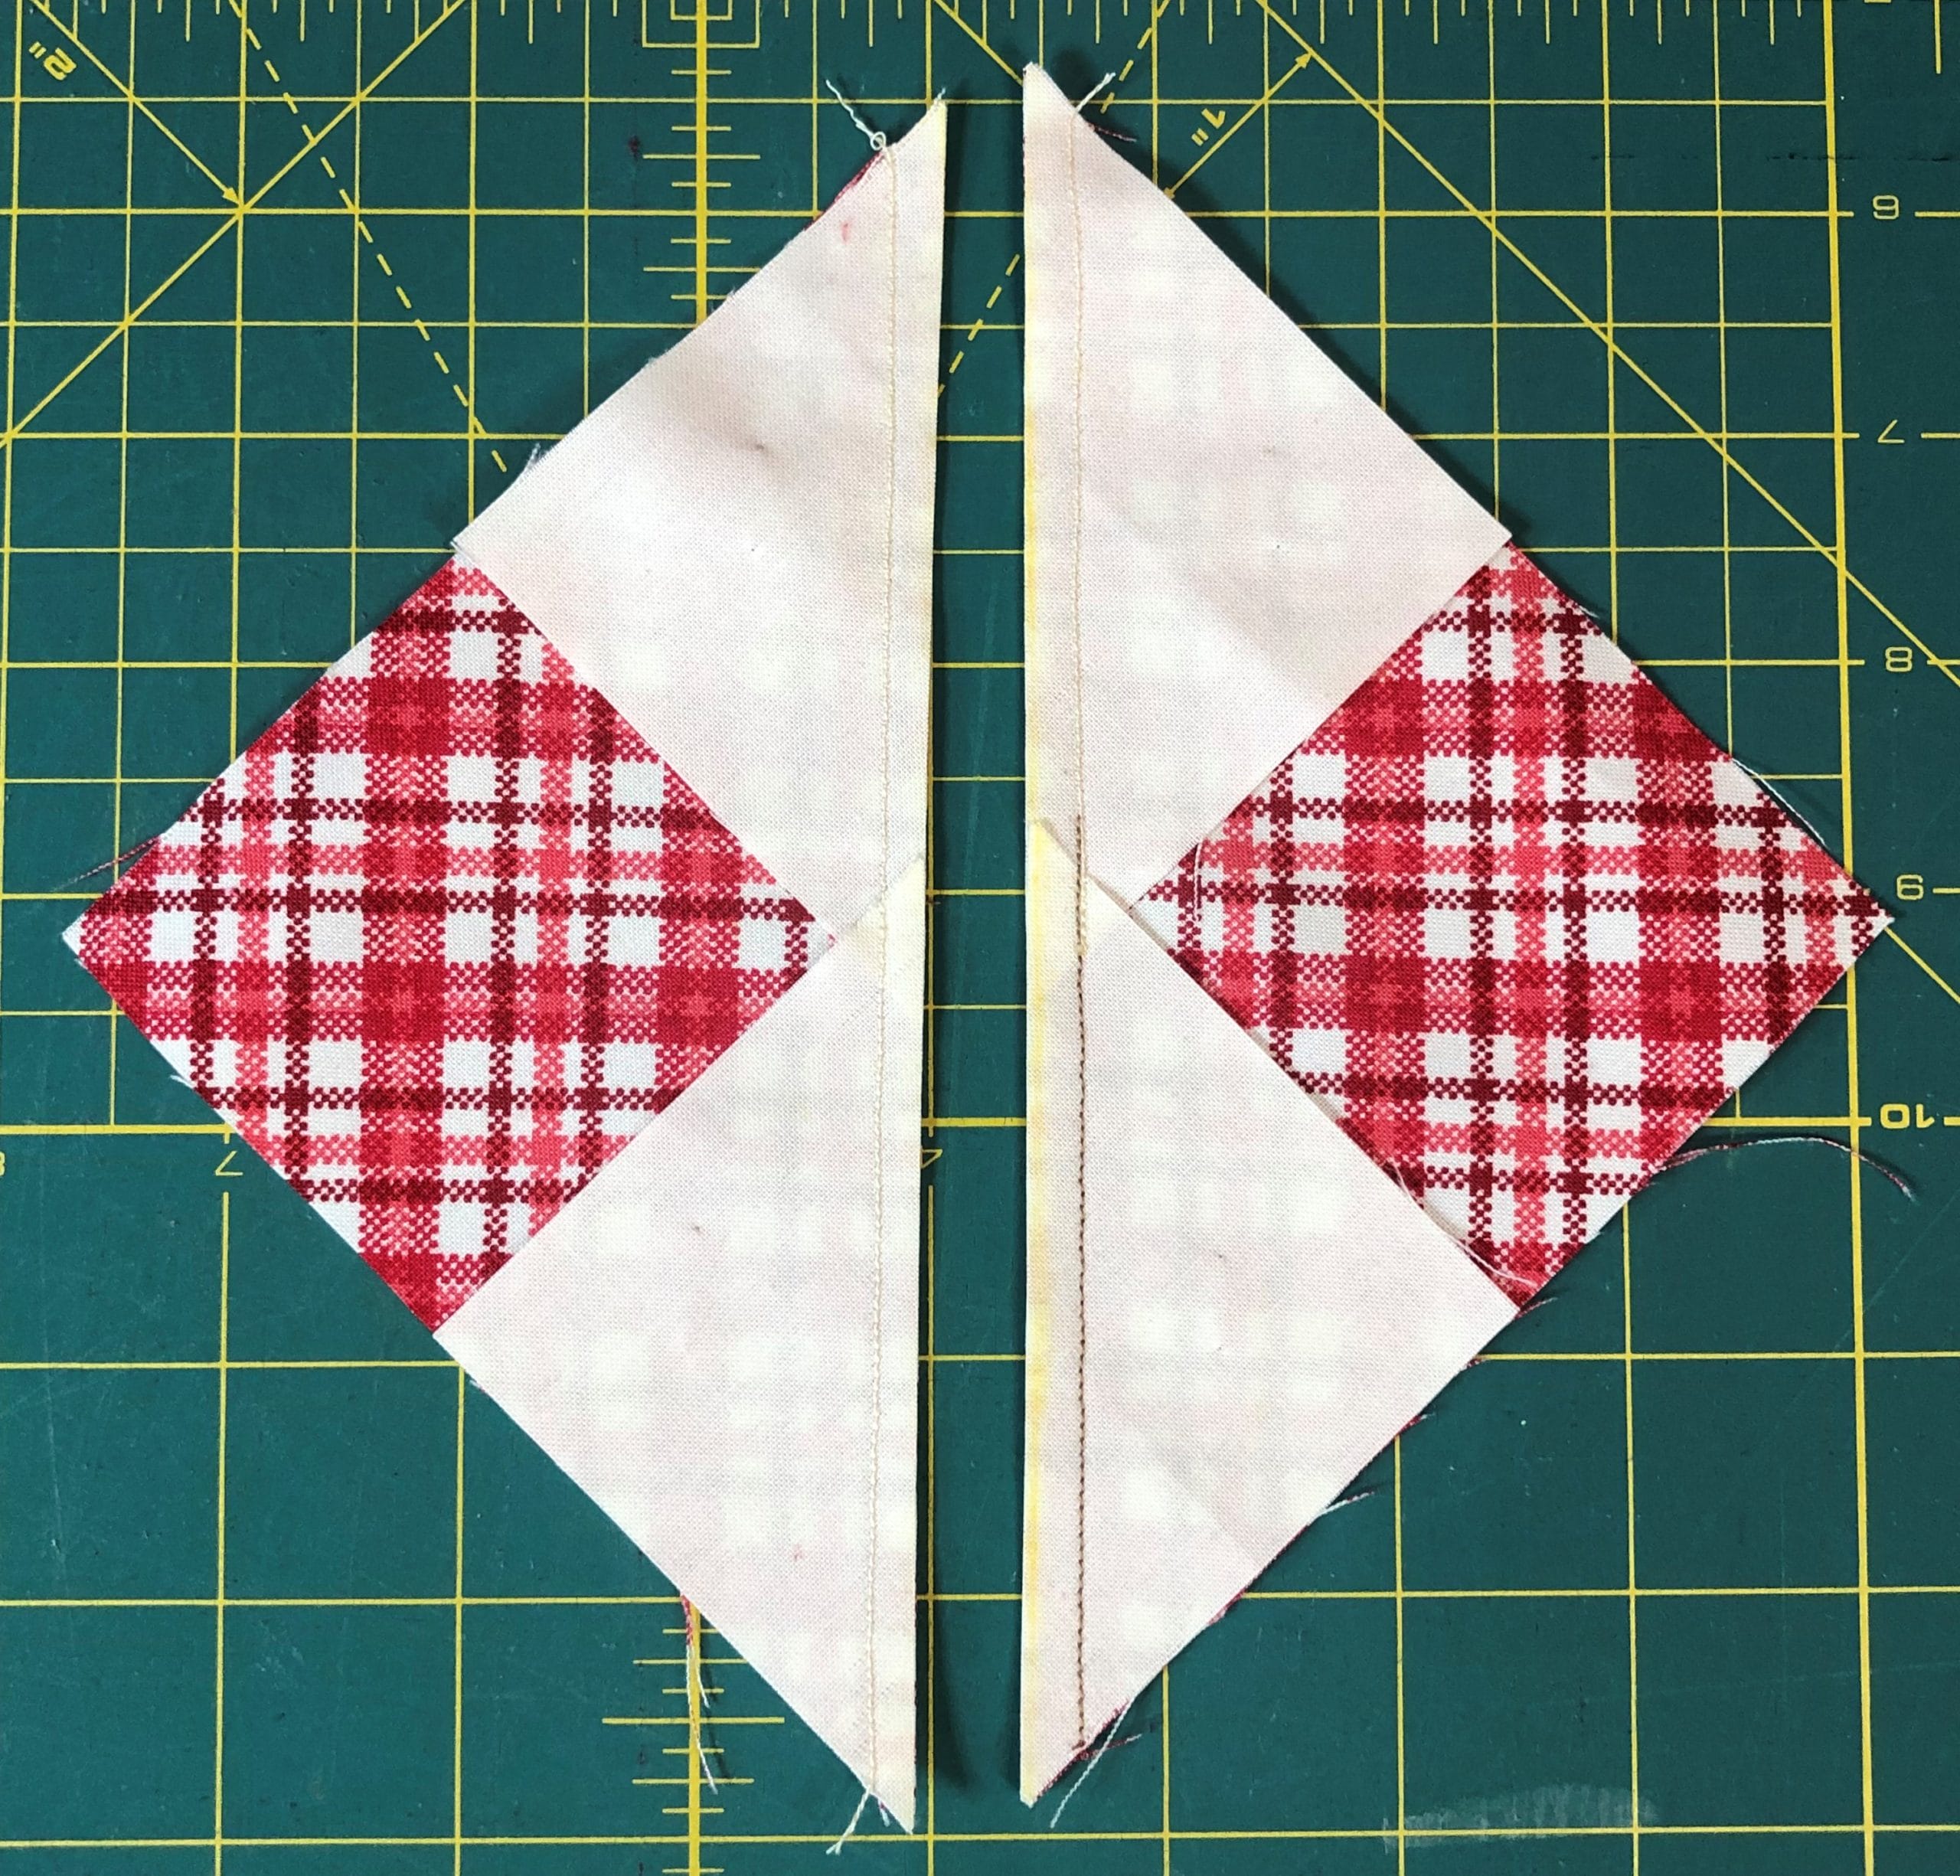
Speaking of being out of order, when sewing up this block, I began by making all of my flying geese and half-square triangles at the same time for this block. As you can see below, they are finished and ready for trimming, using my Bloc-Loc ruler to trim the flying geese units. Since you’ve all made these a million times by now, like I said earlier, I won’t bore you with the details.
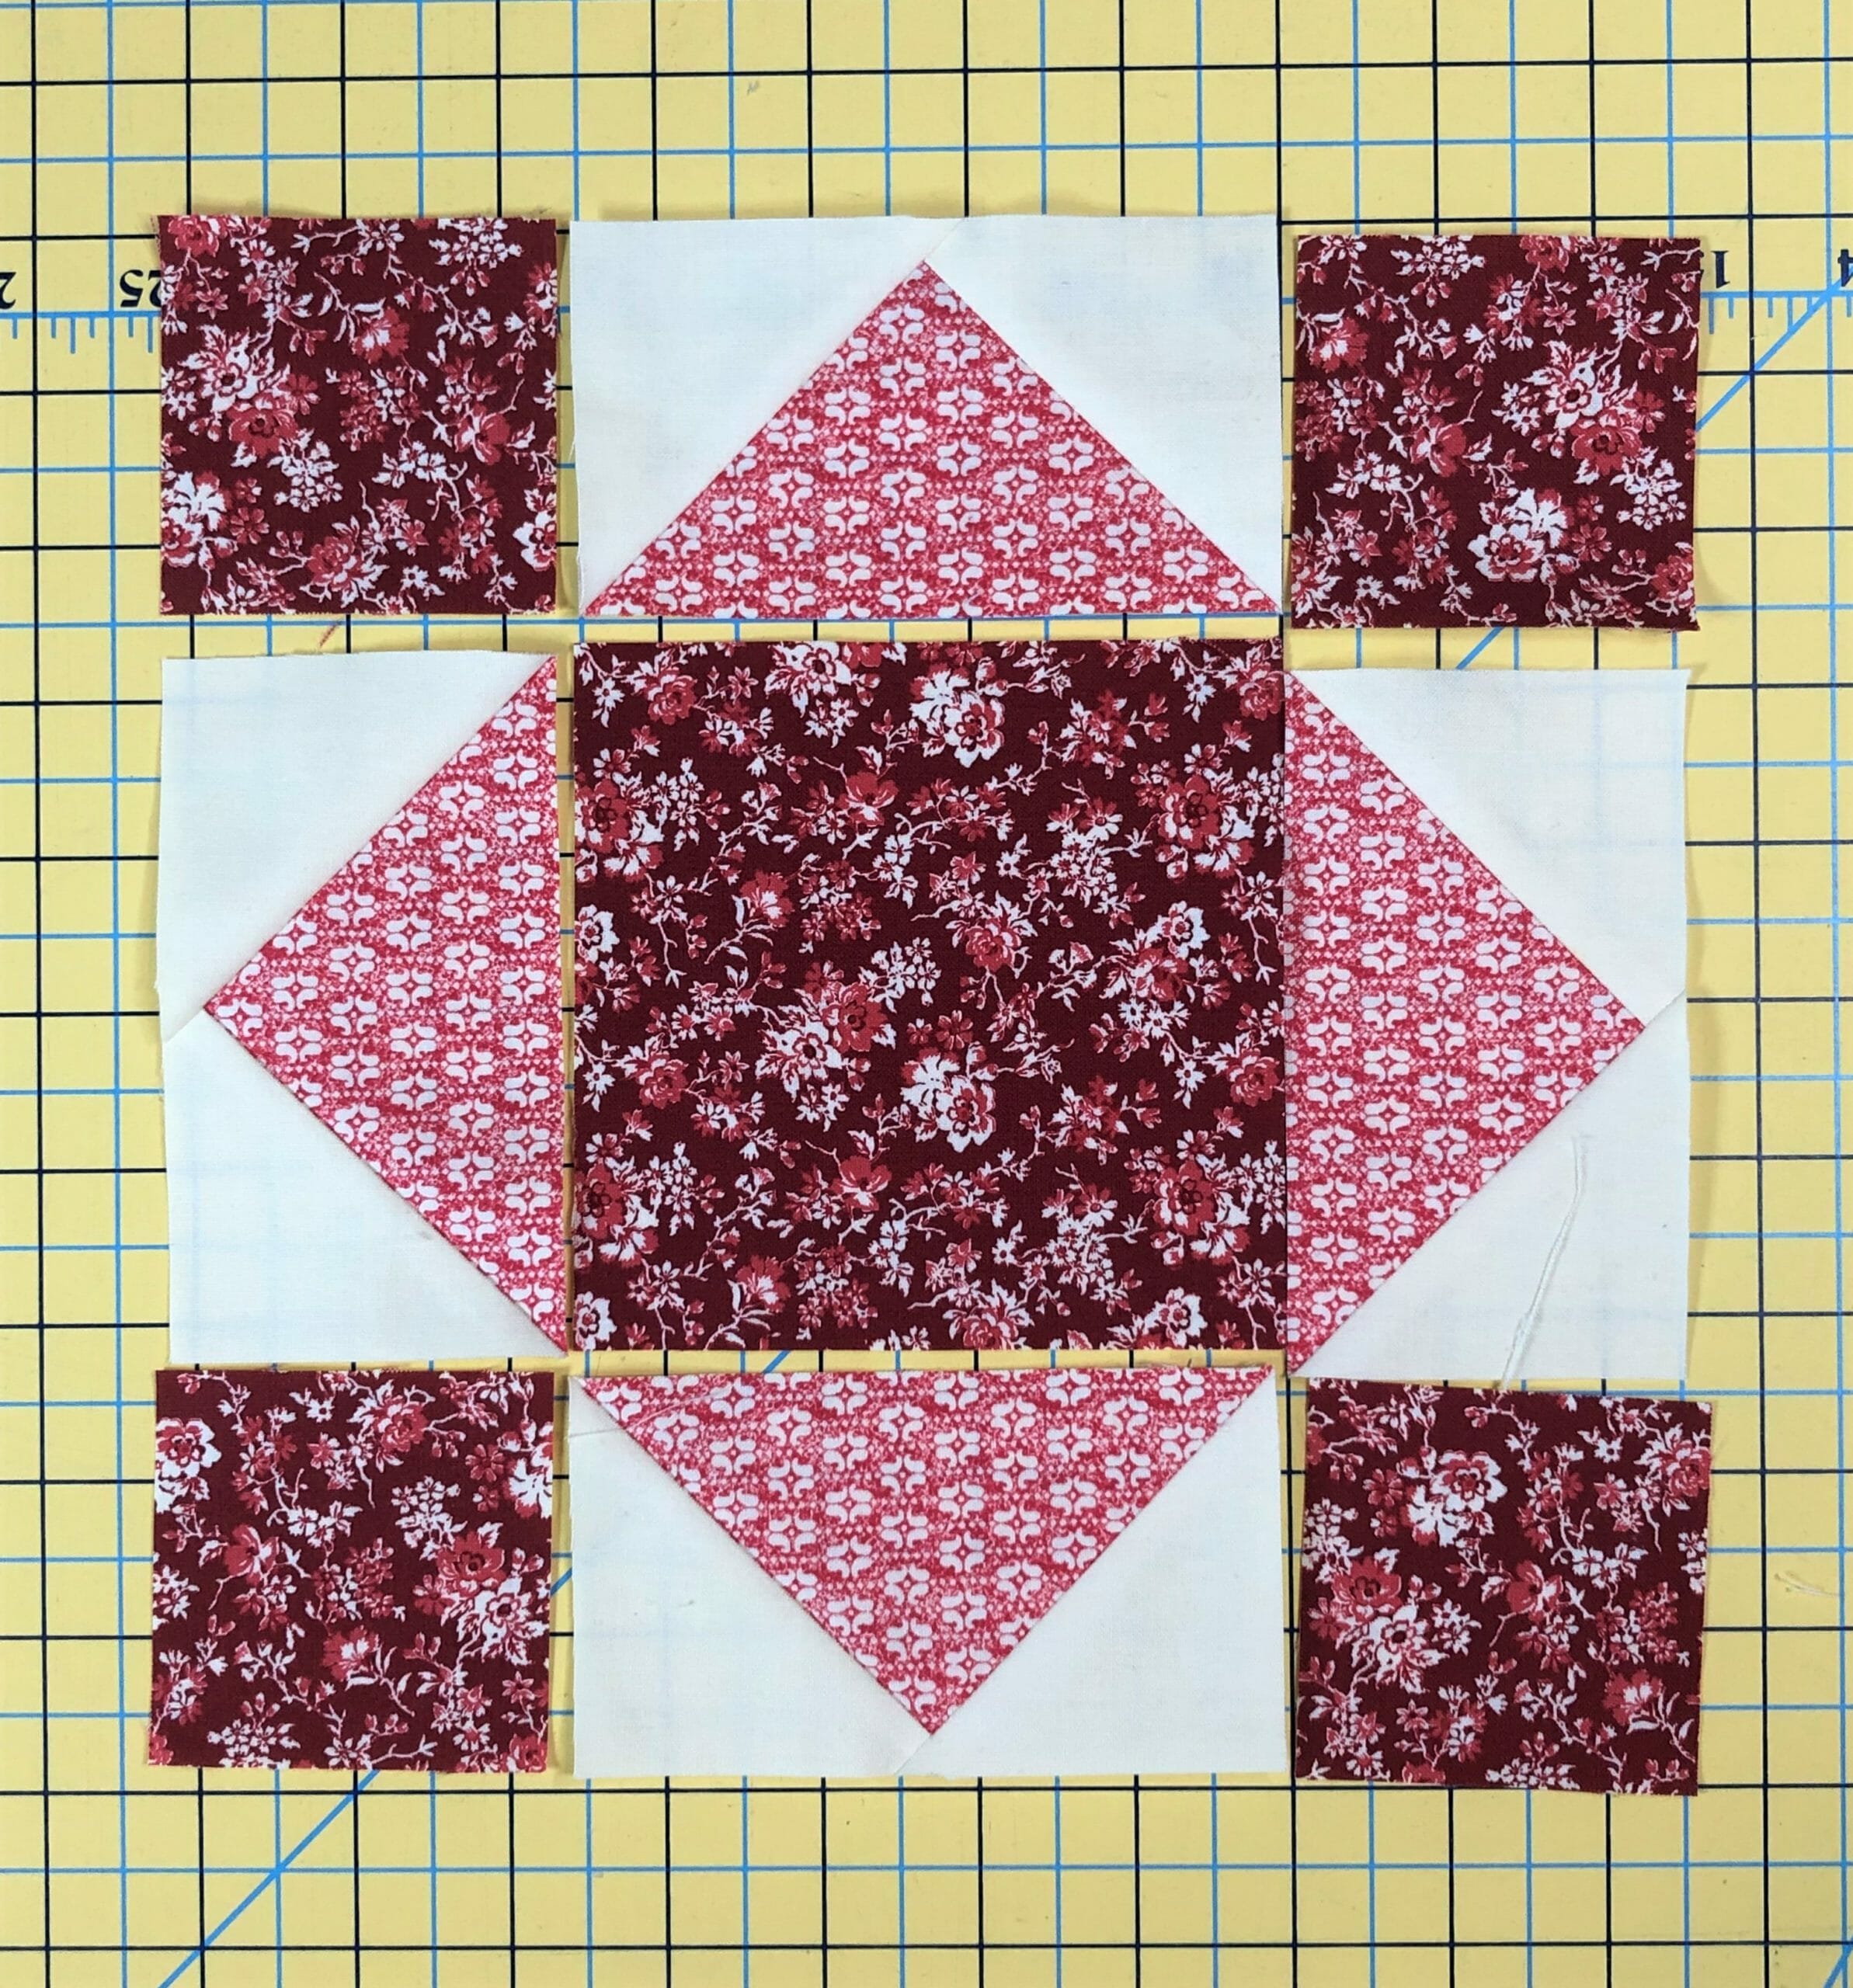
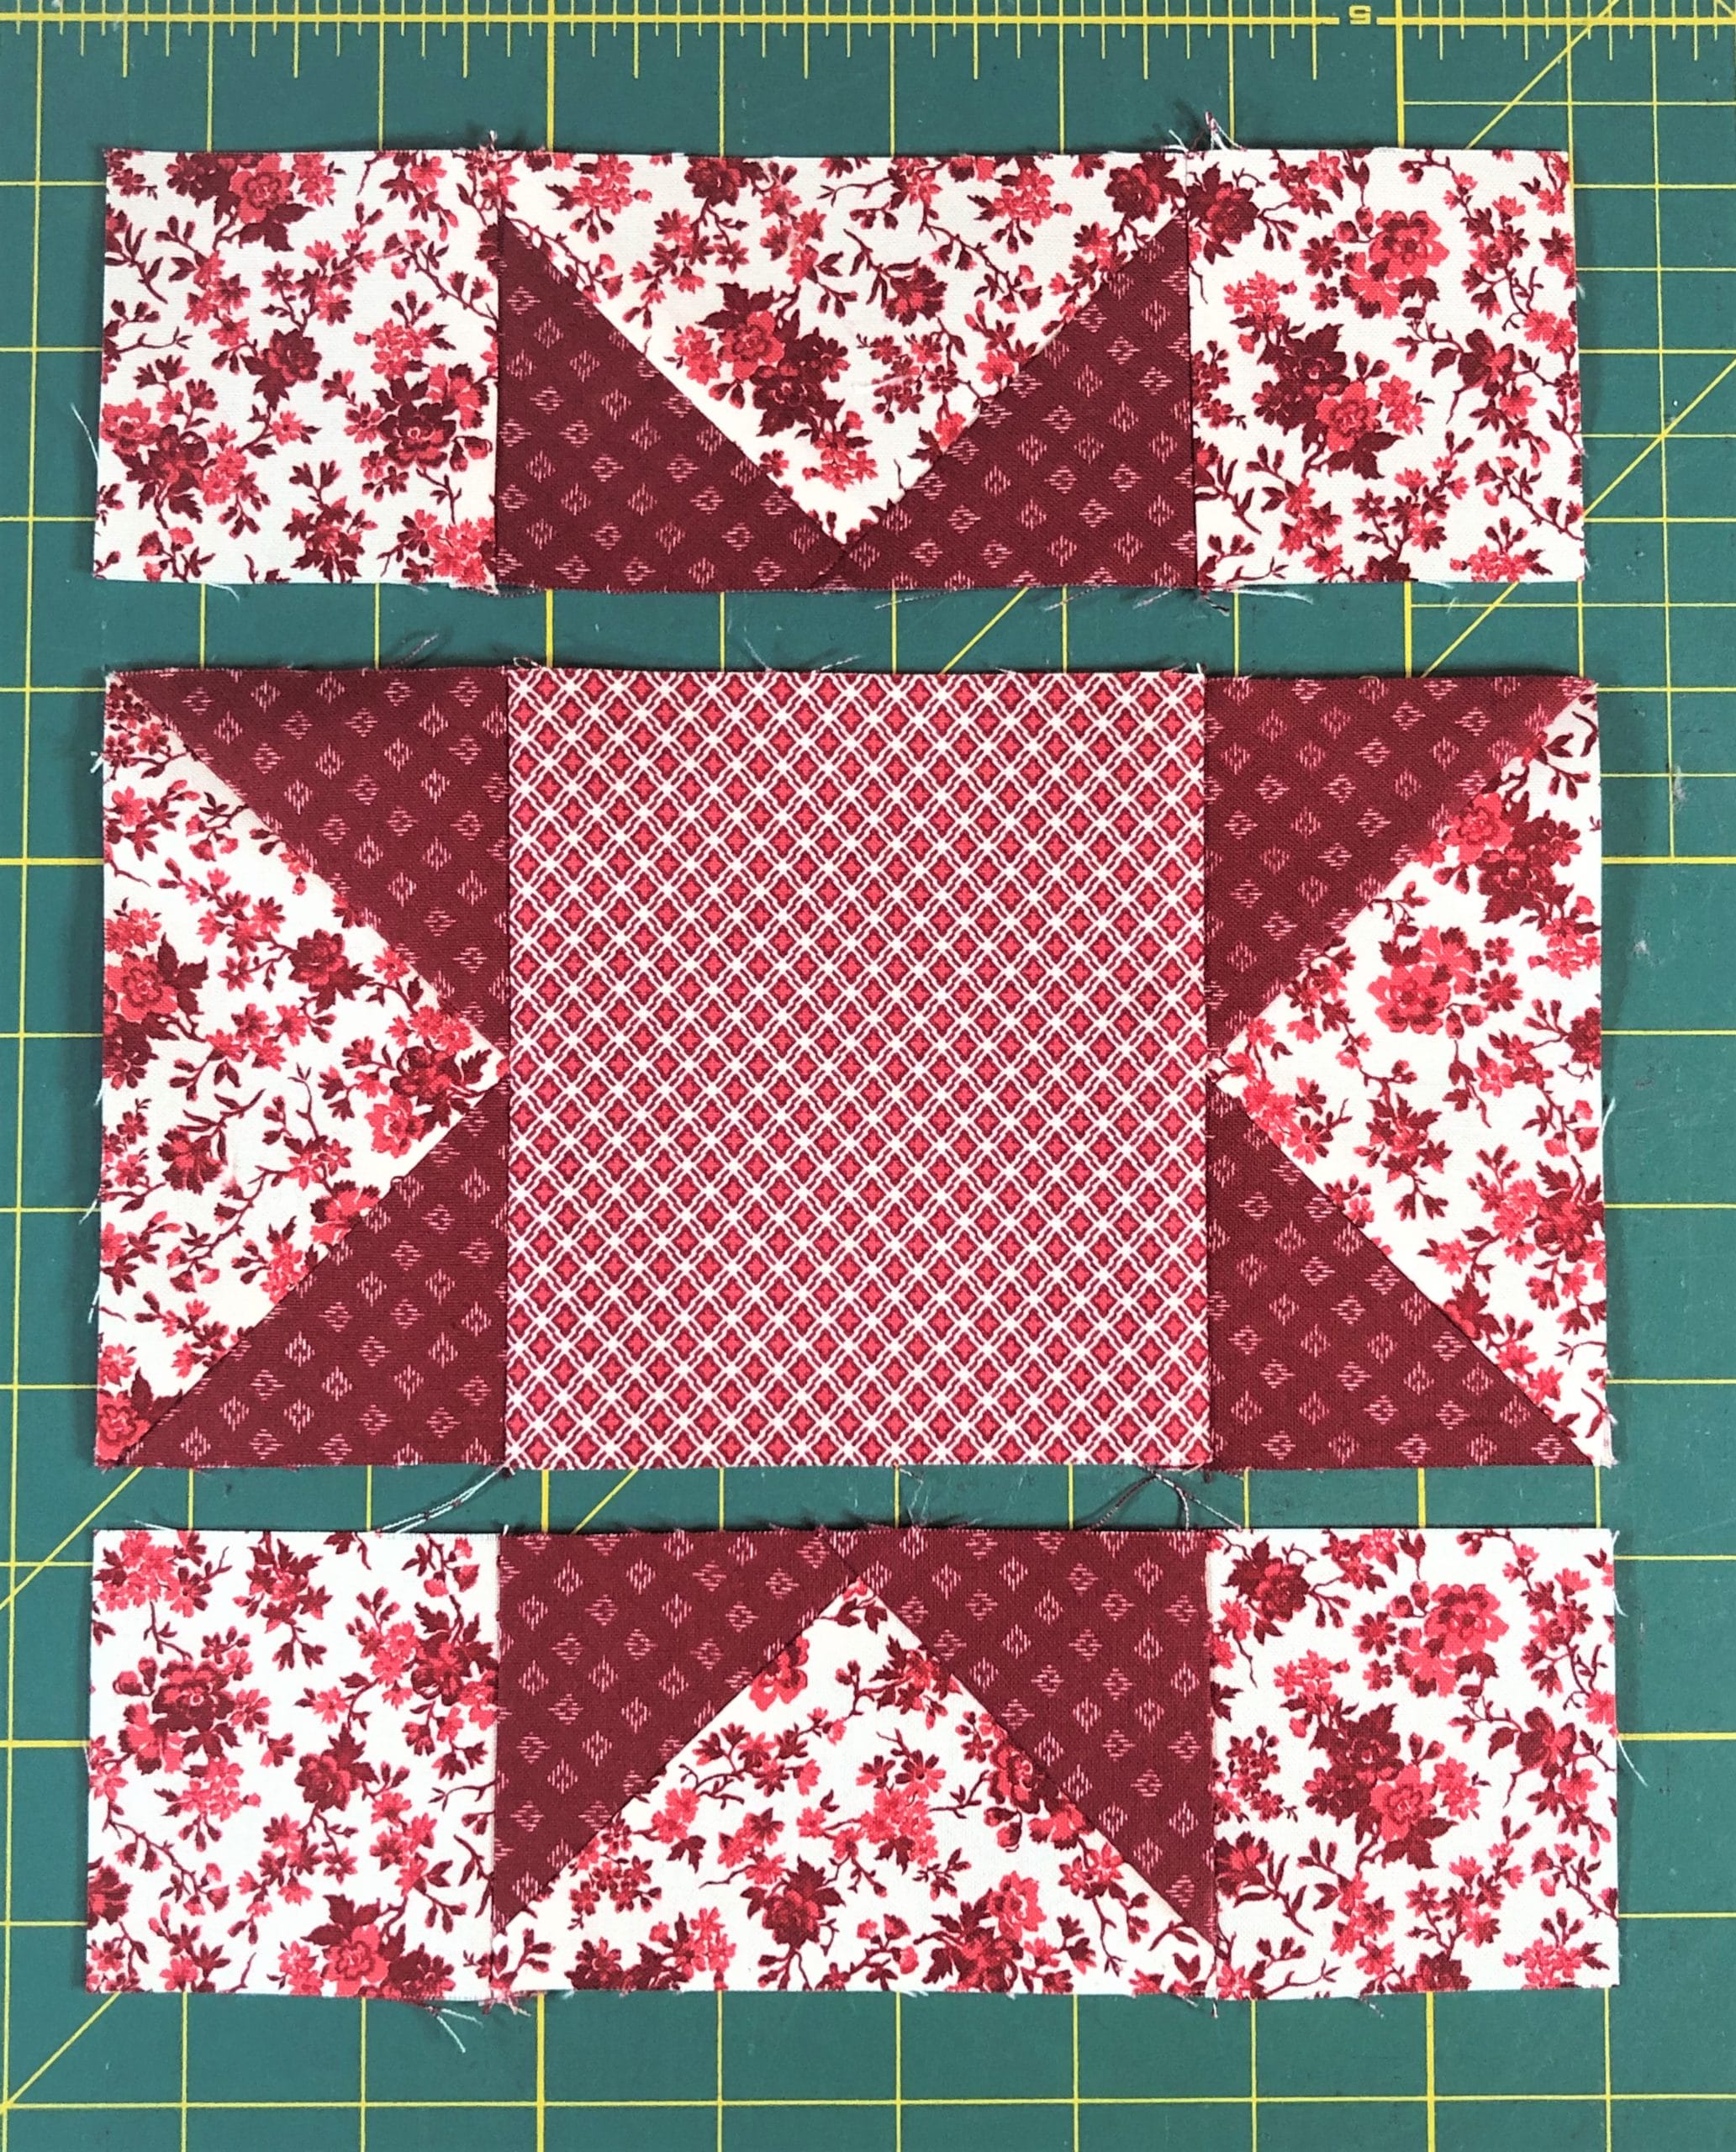
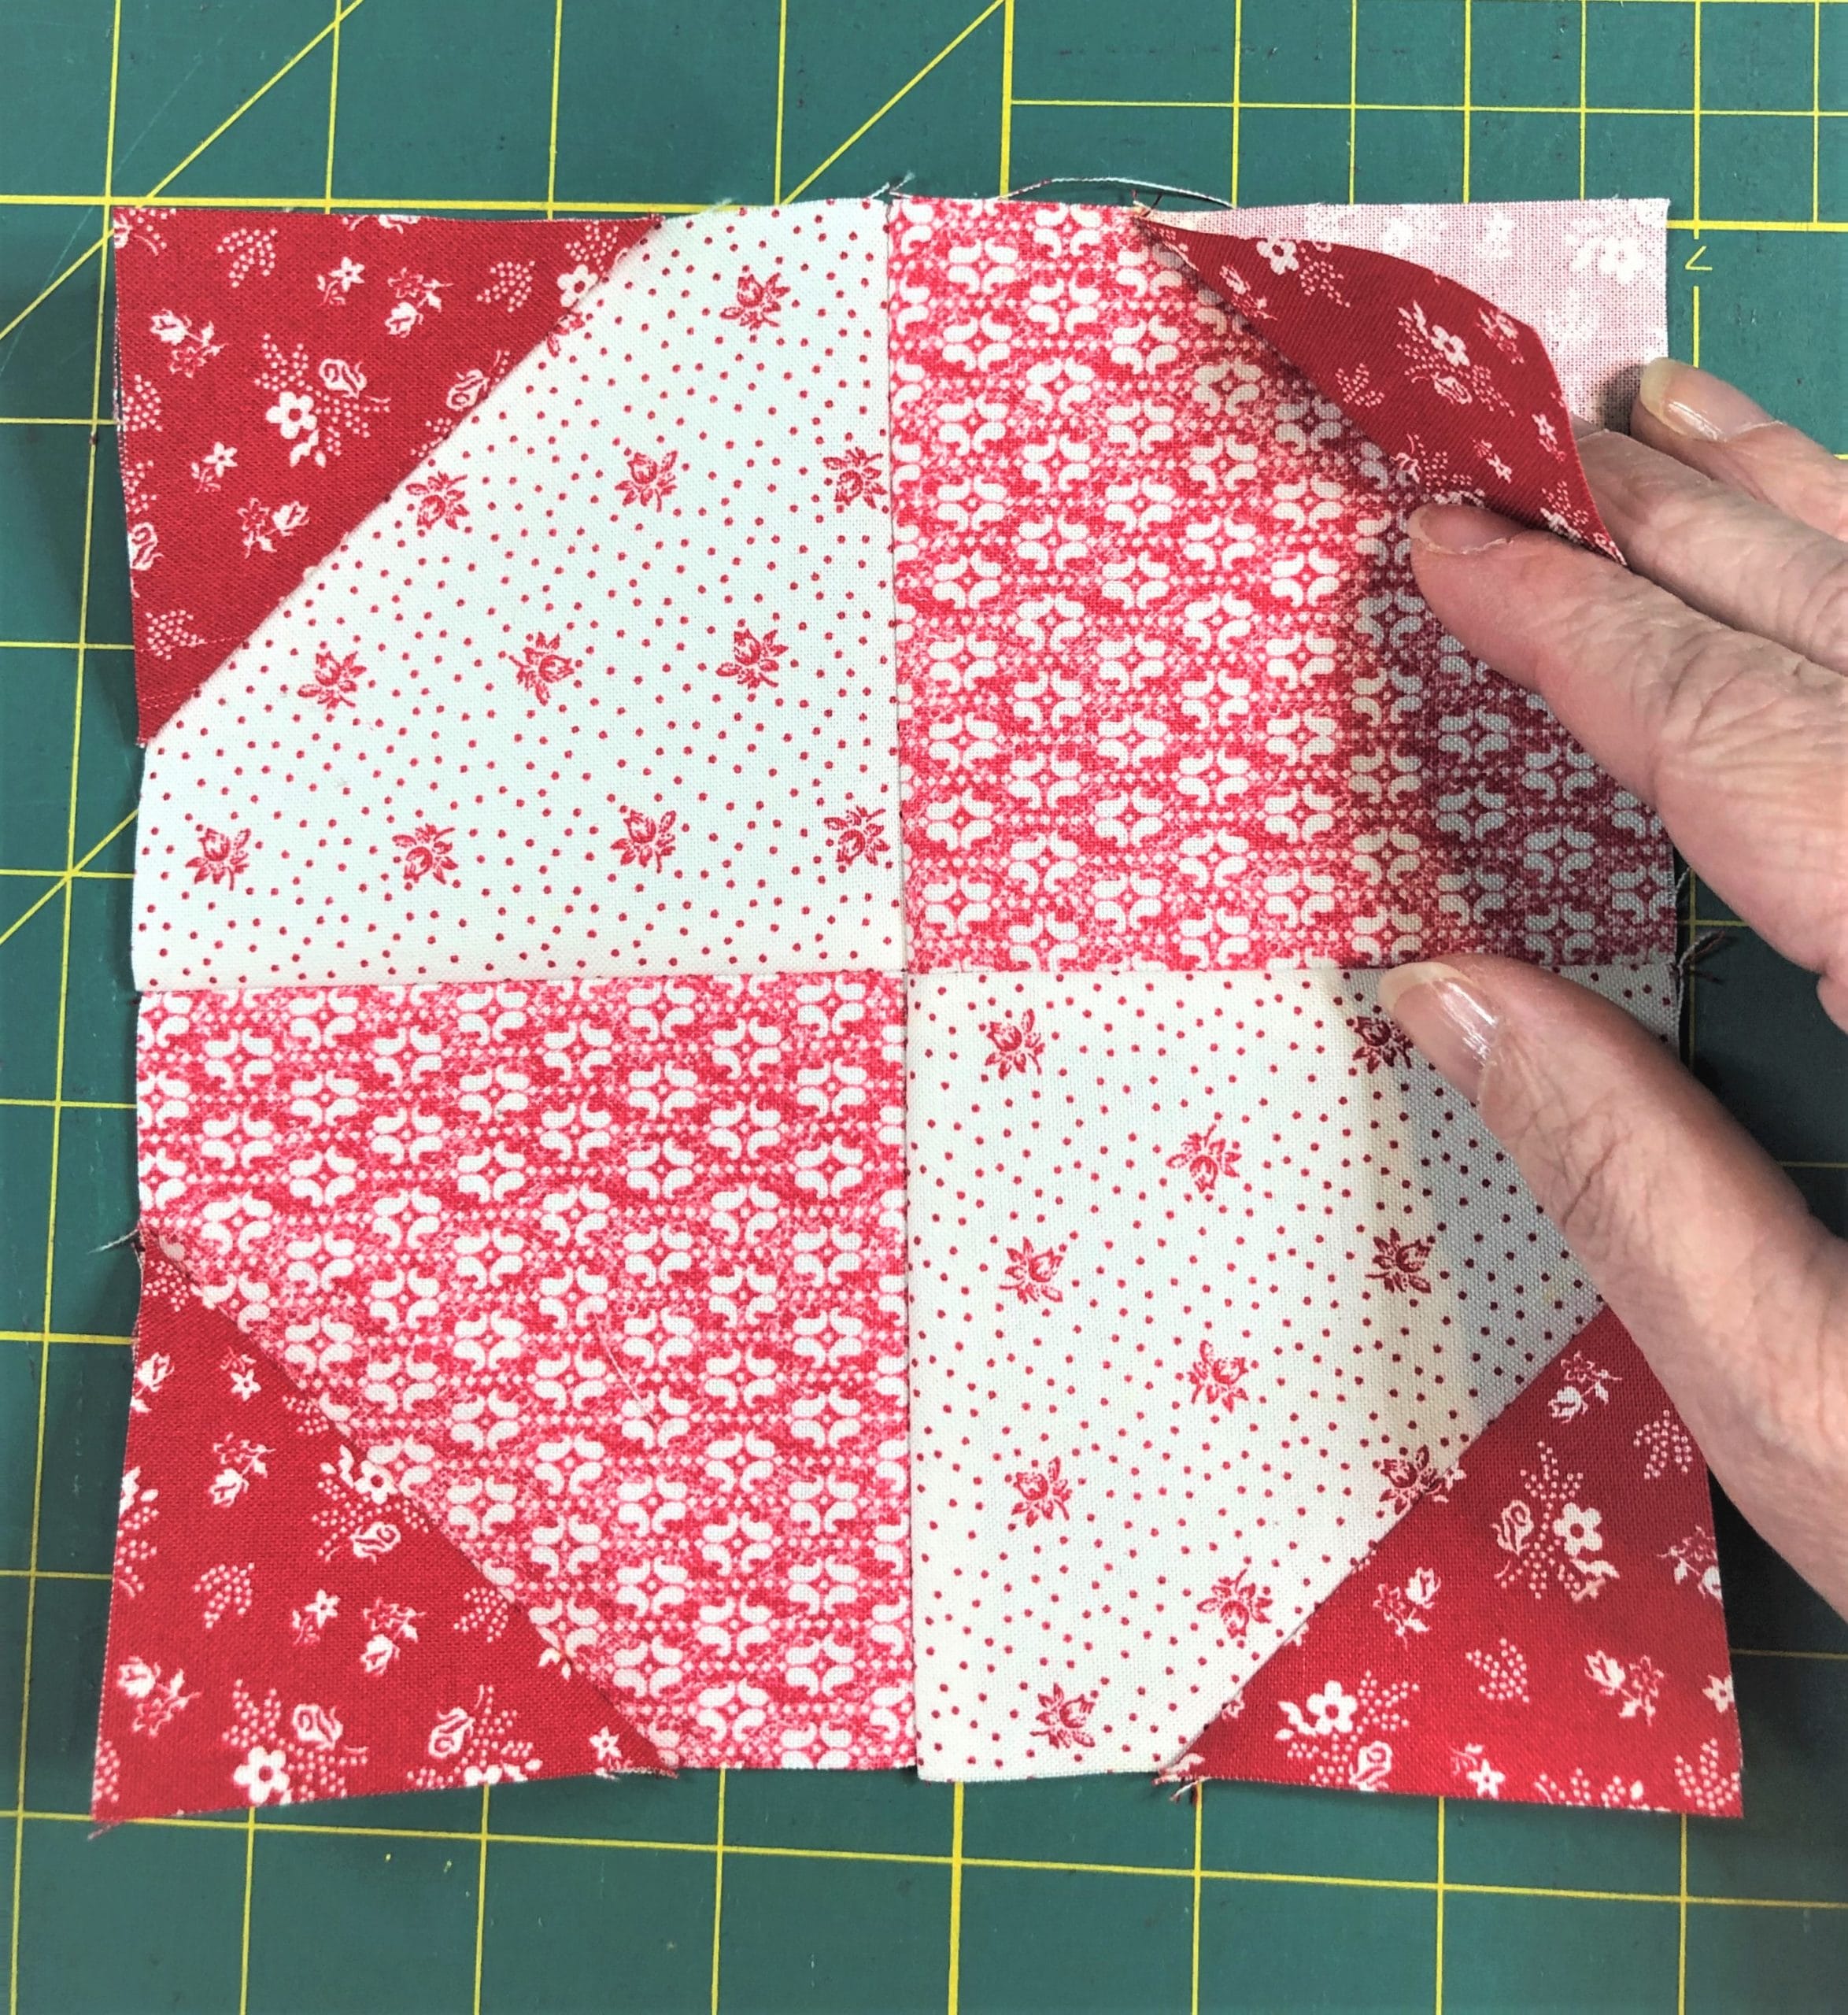
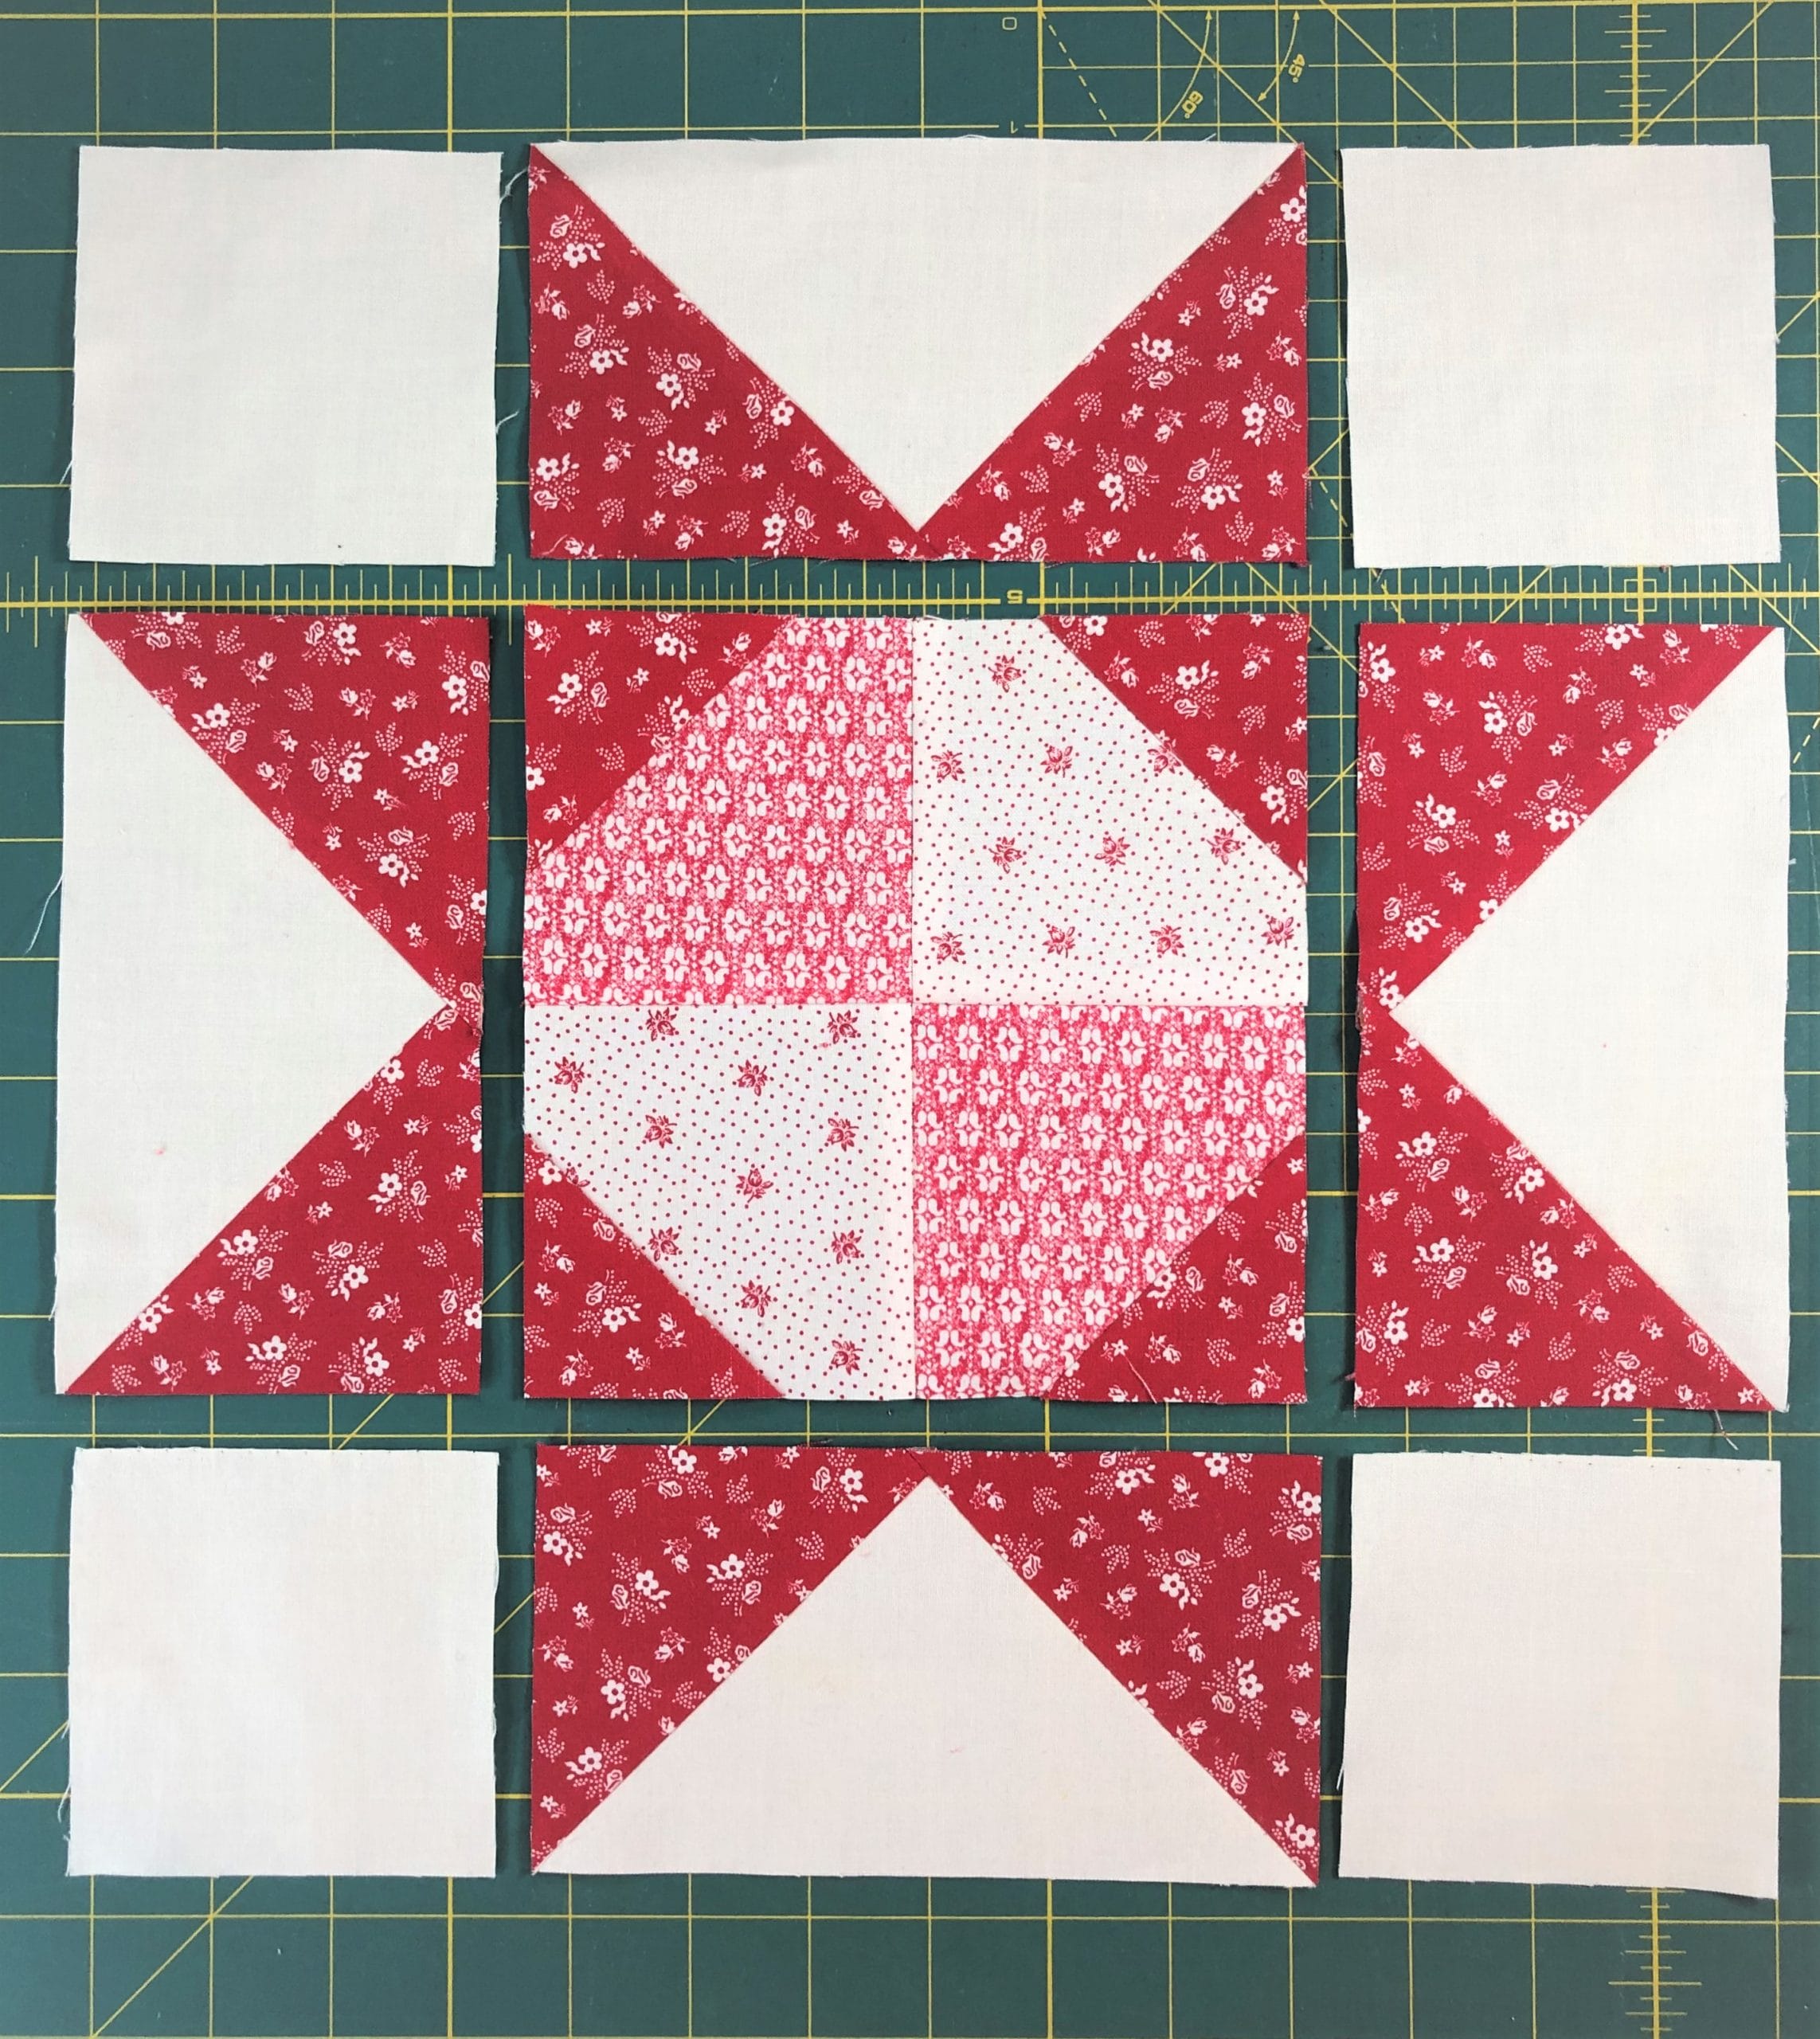
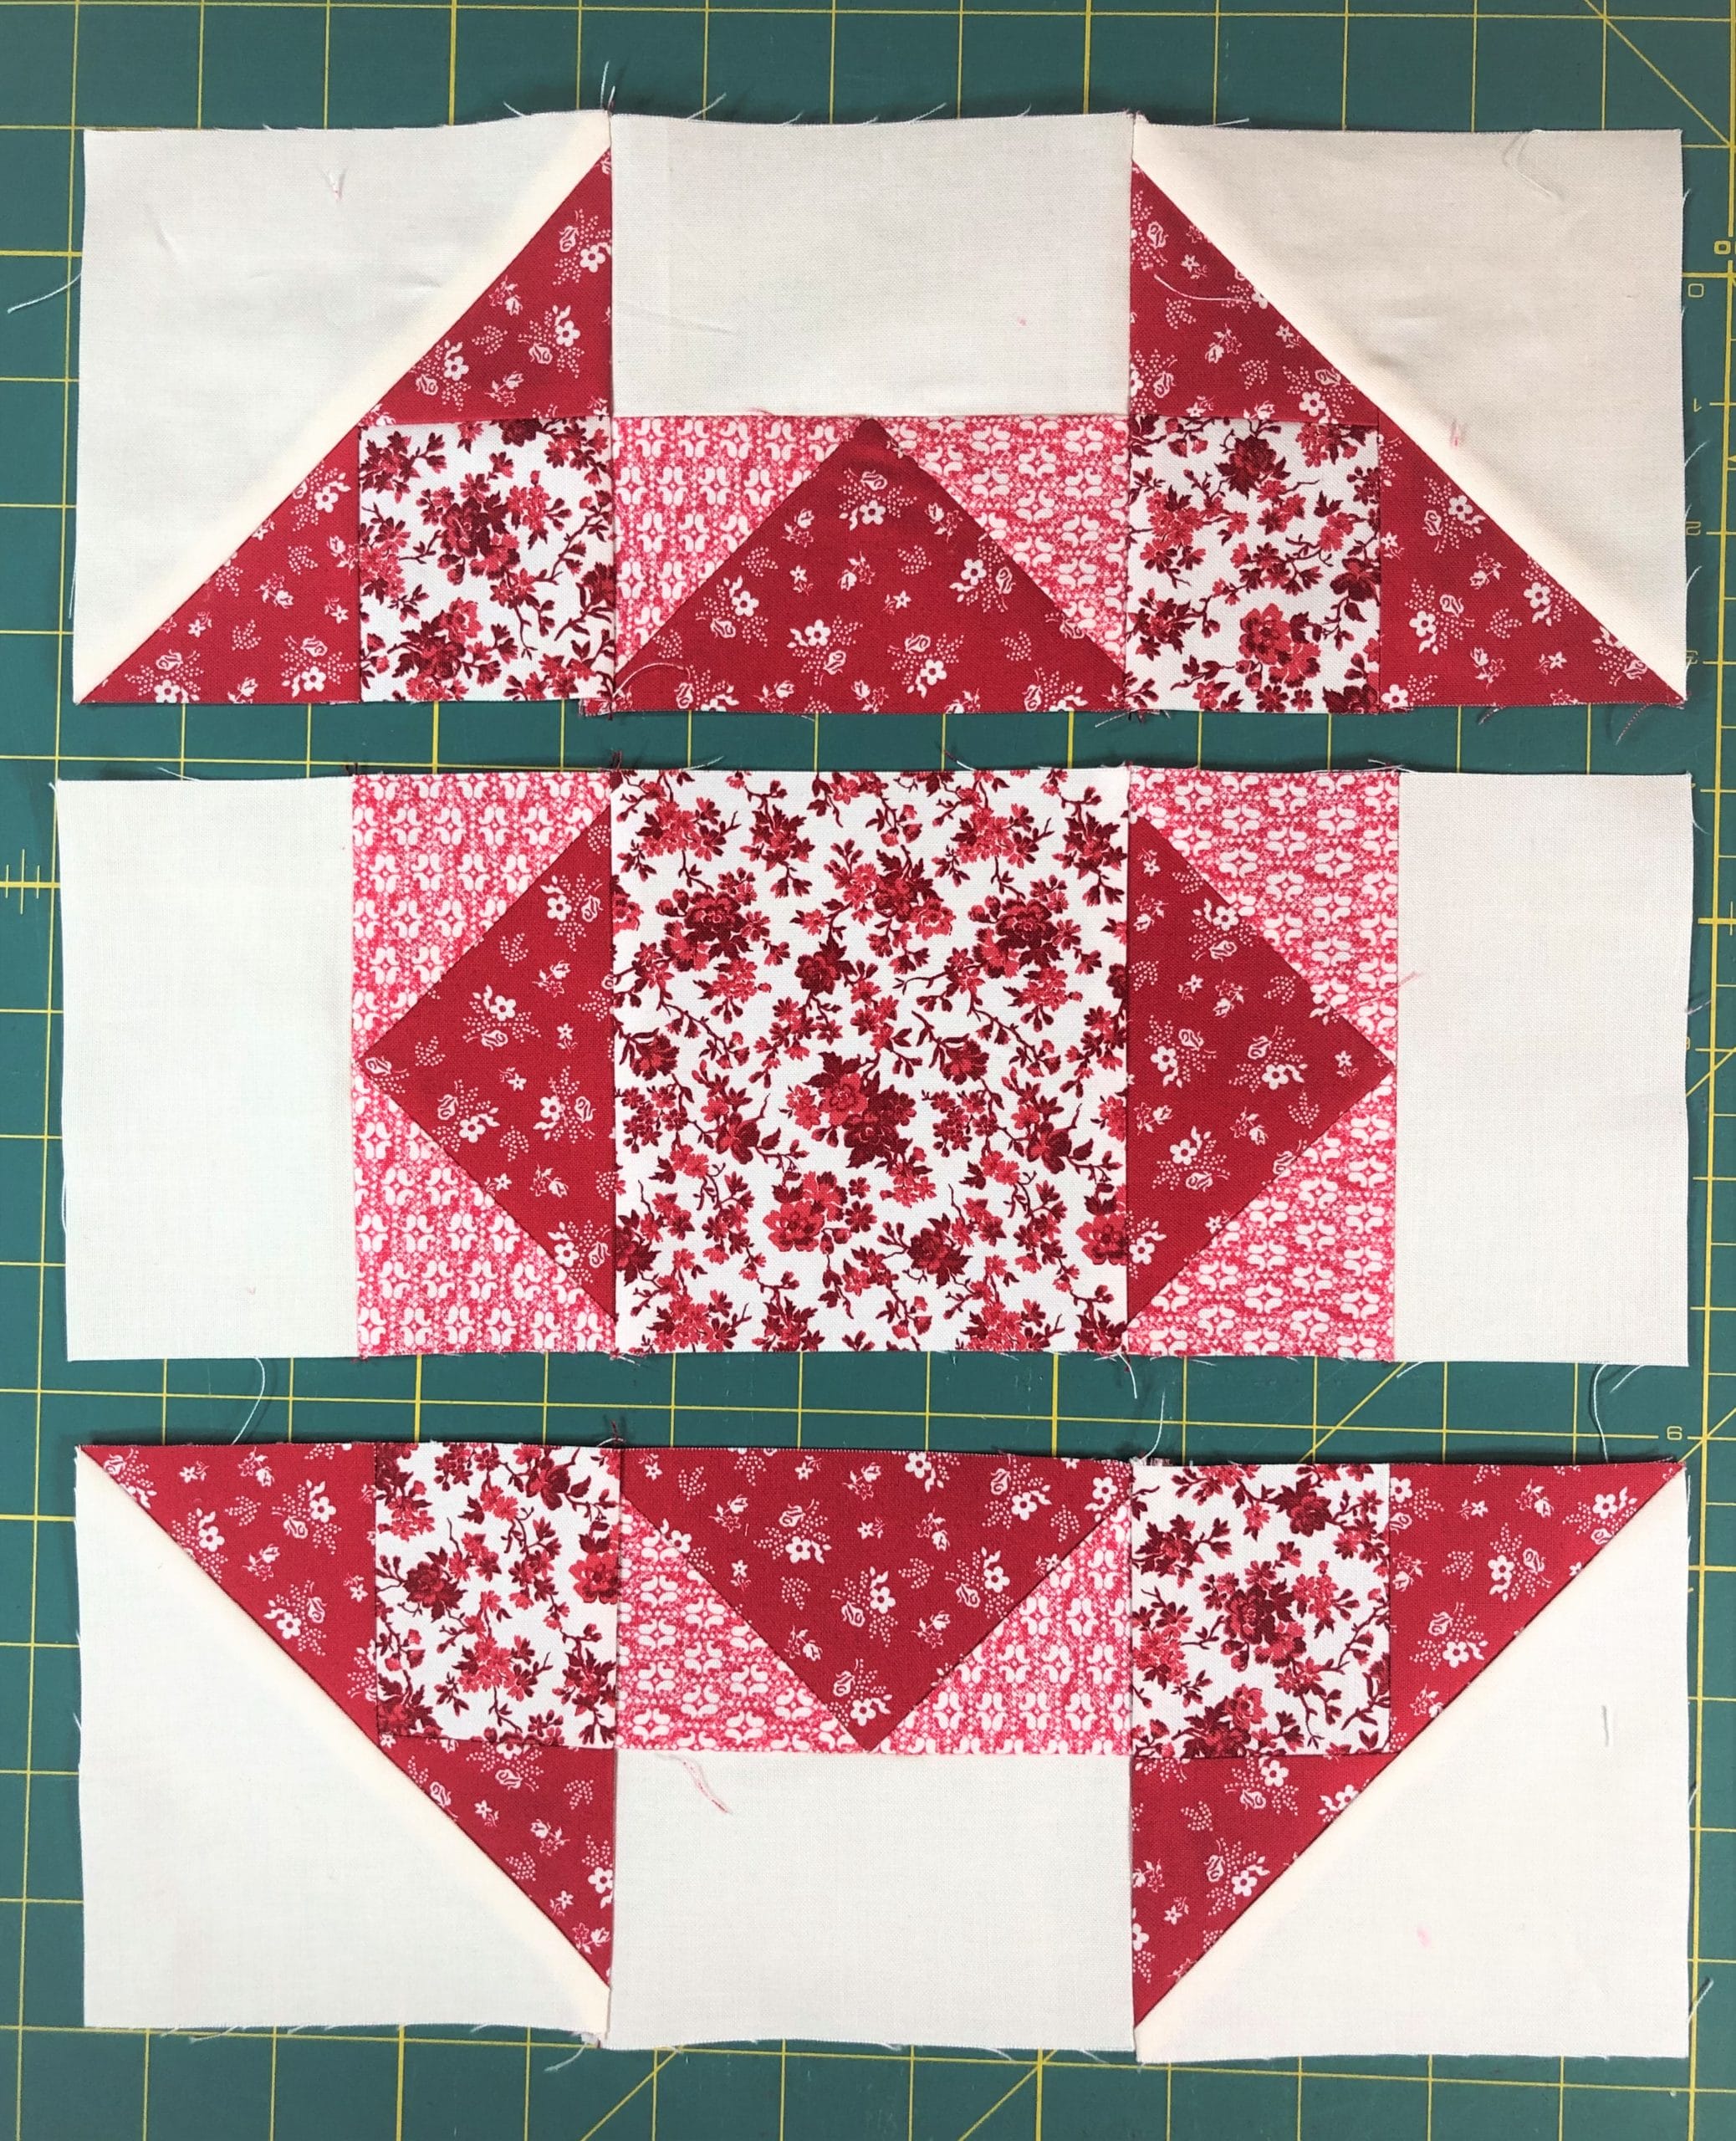
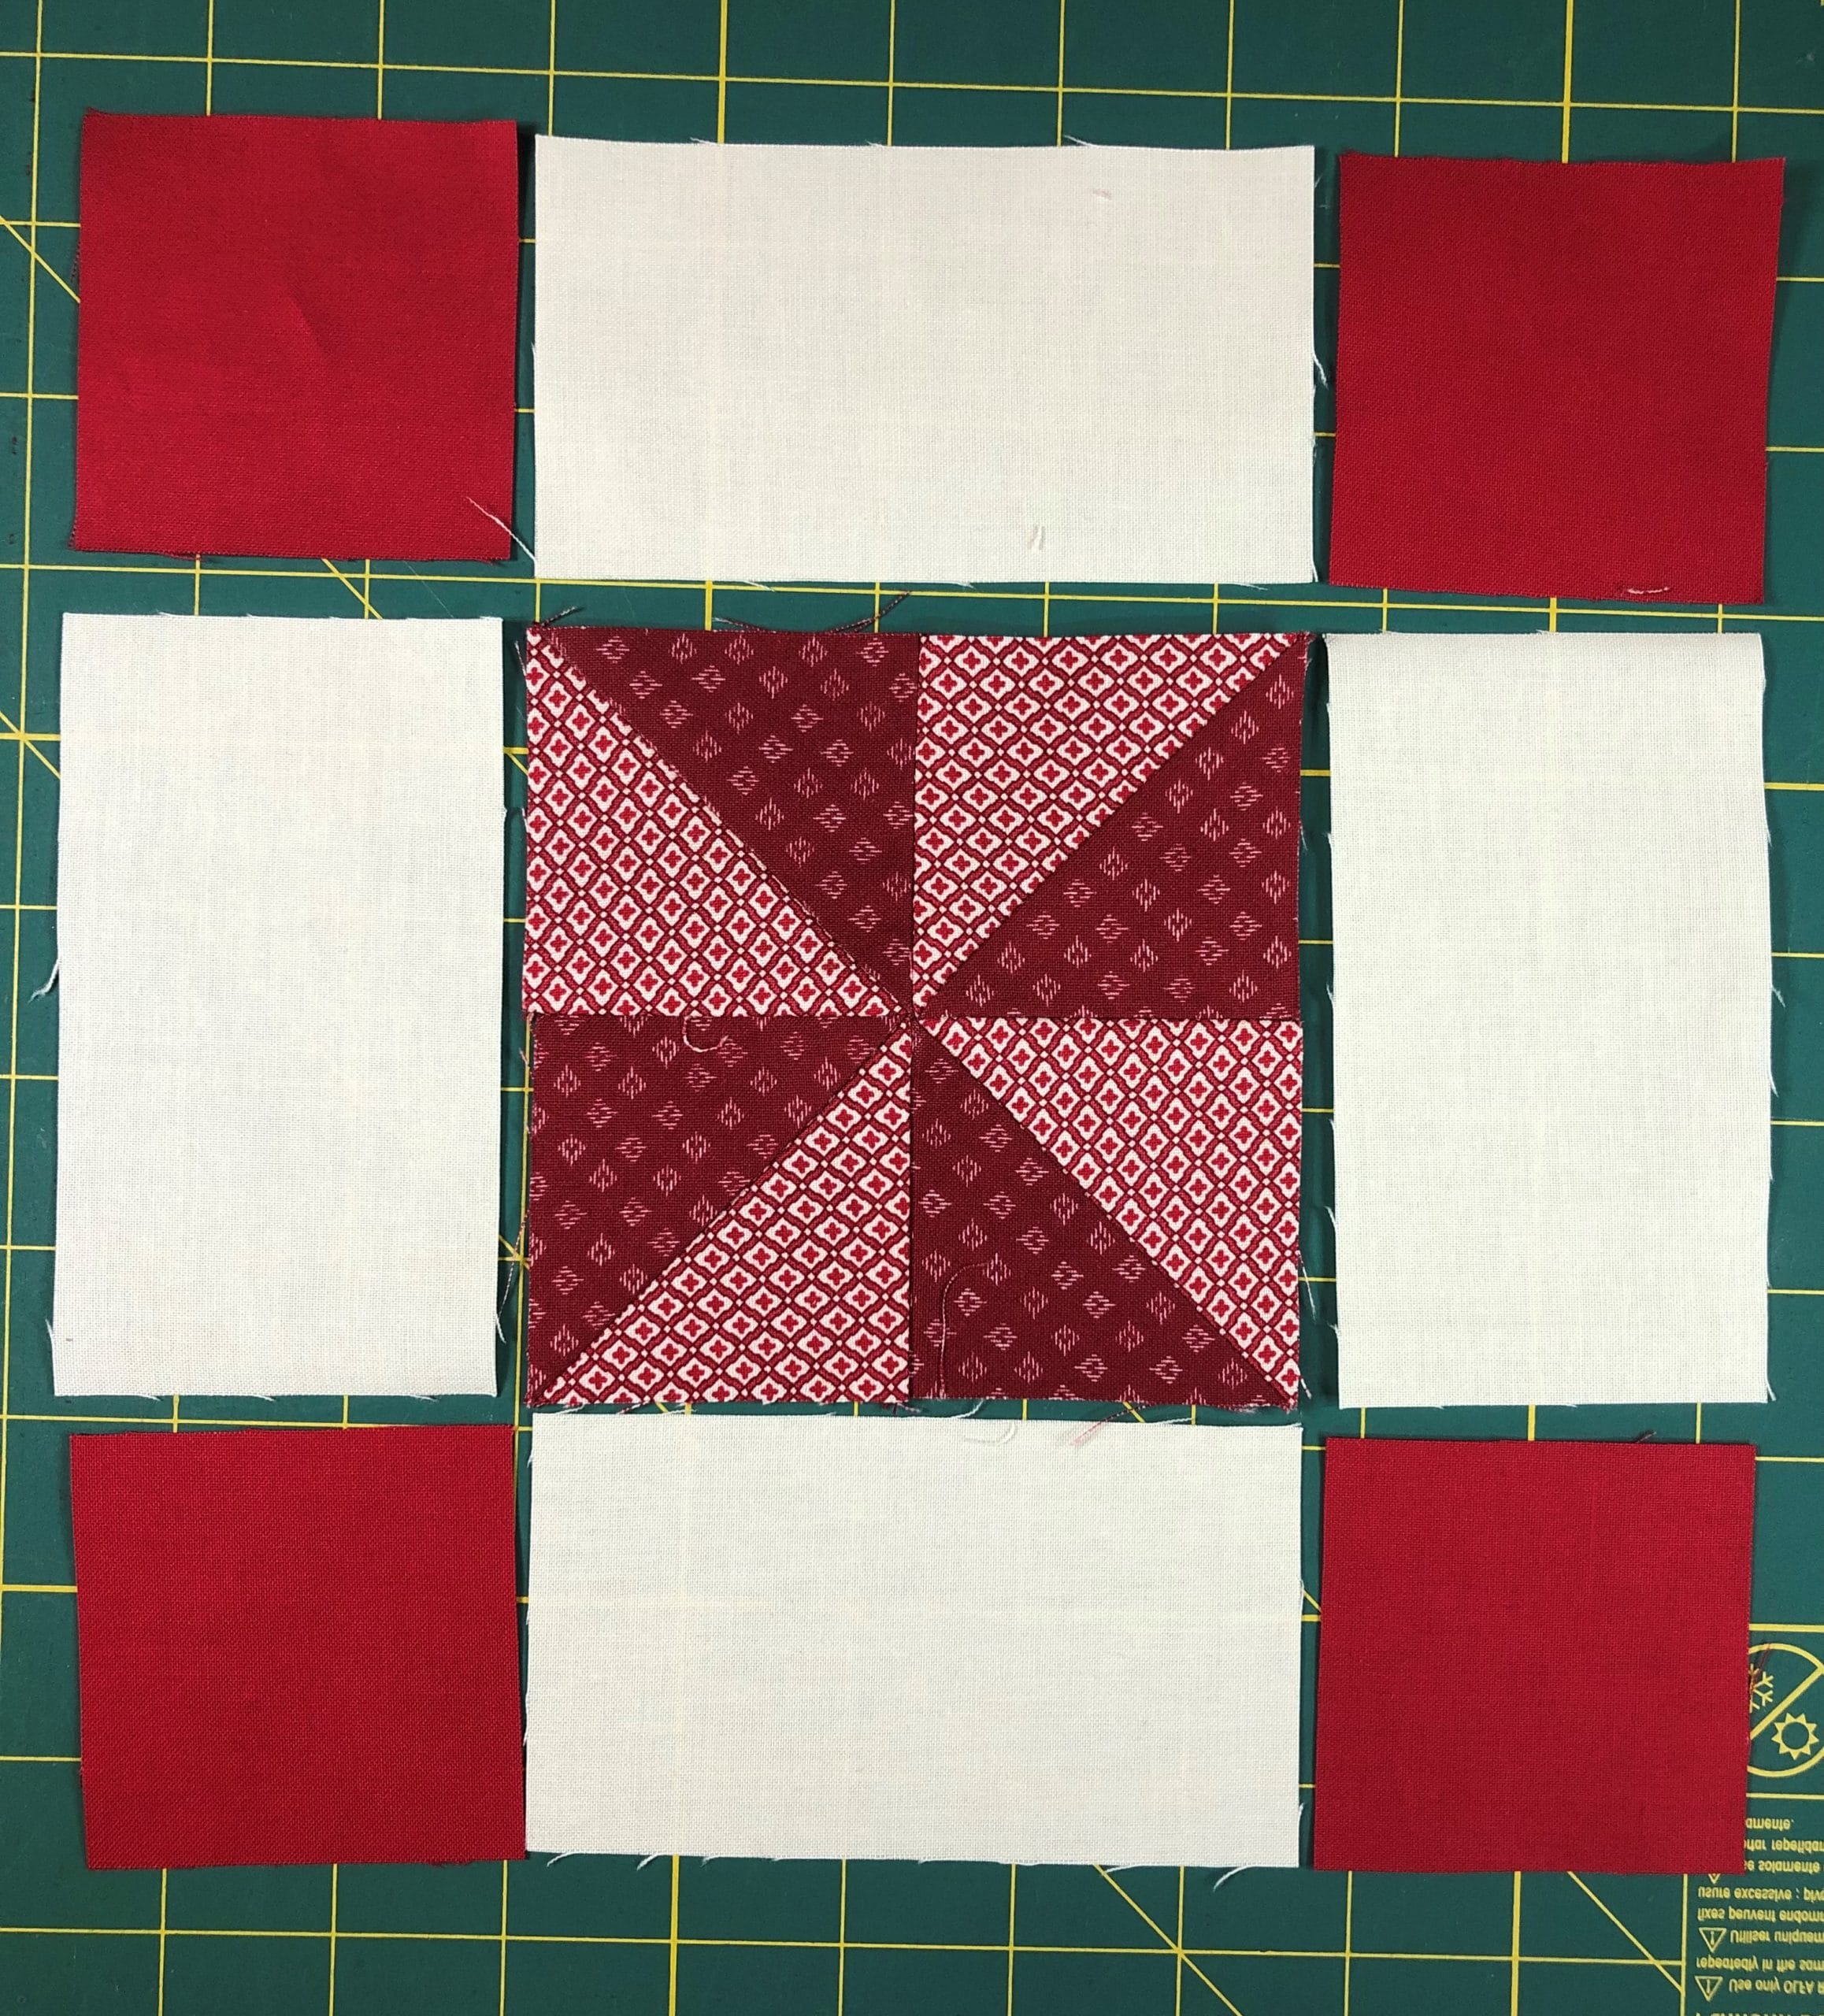
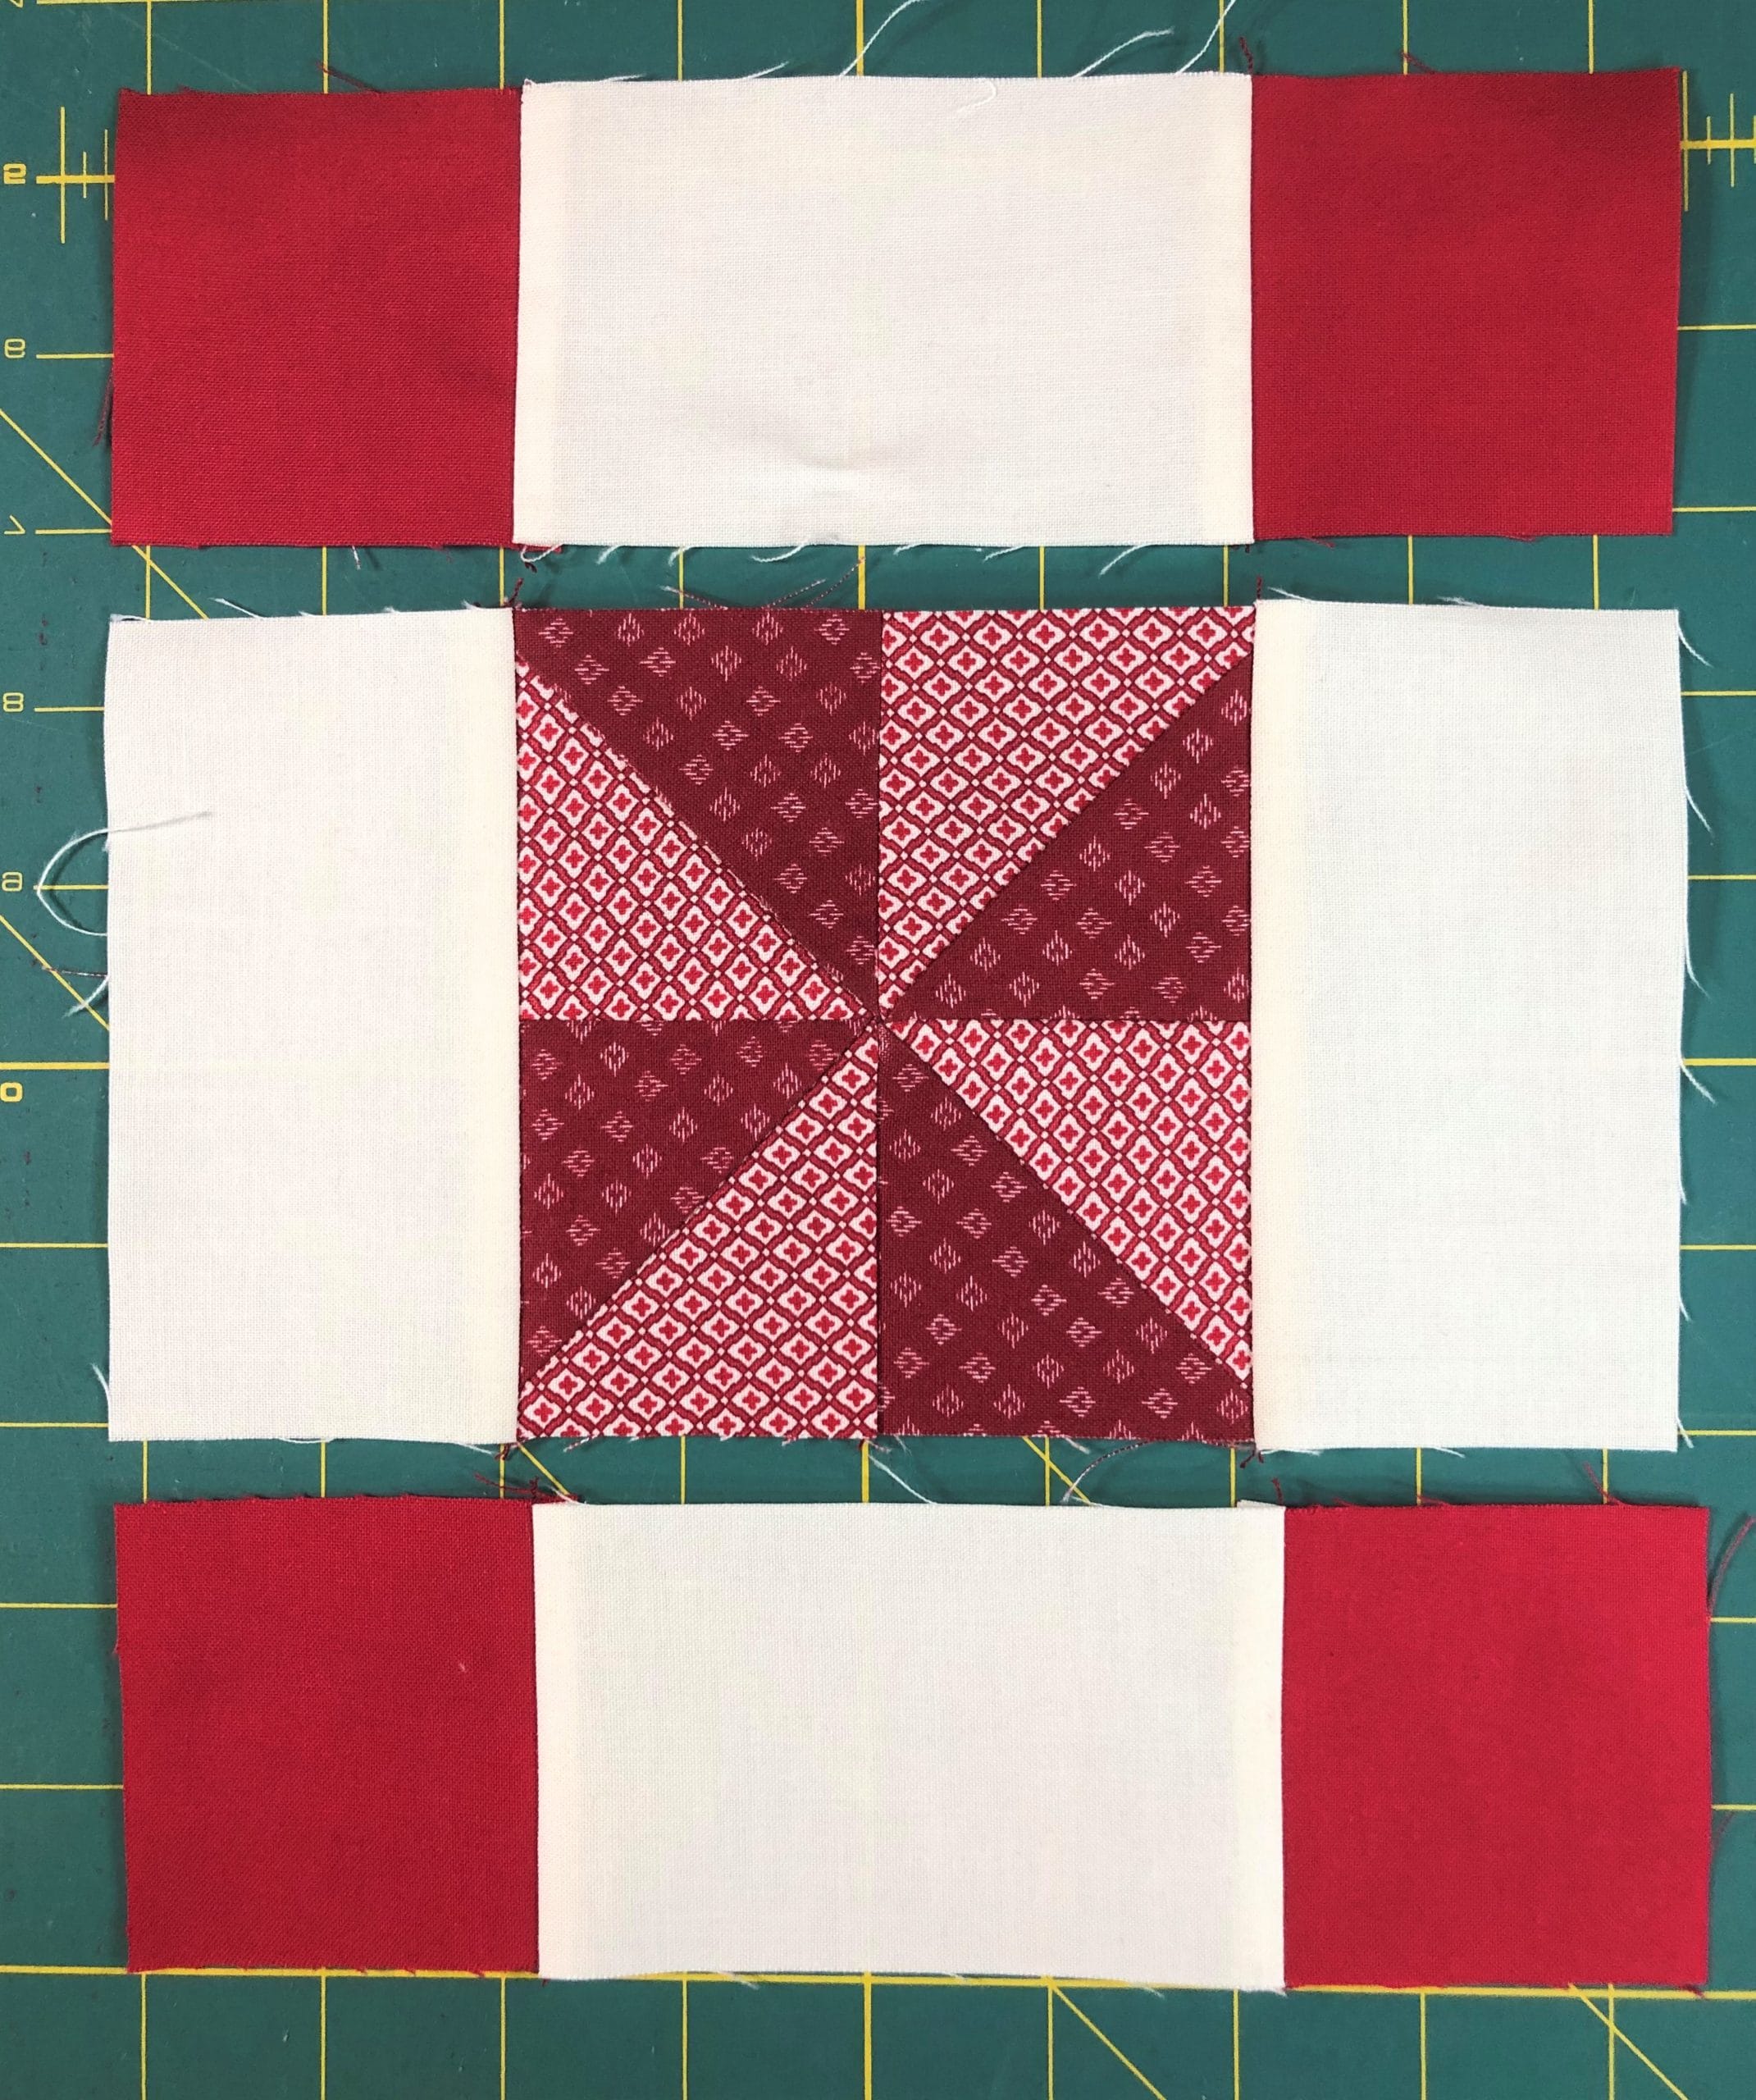
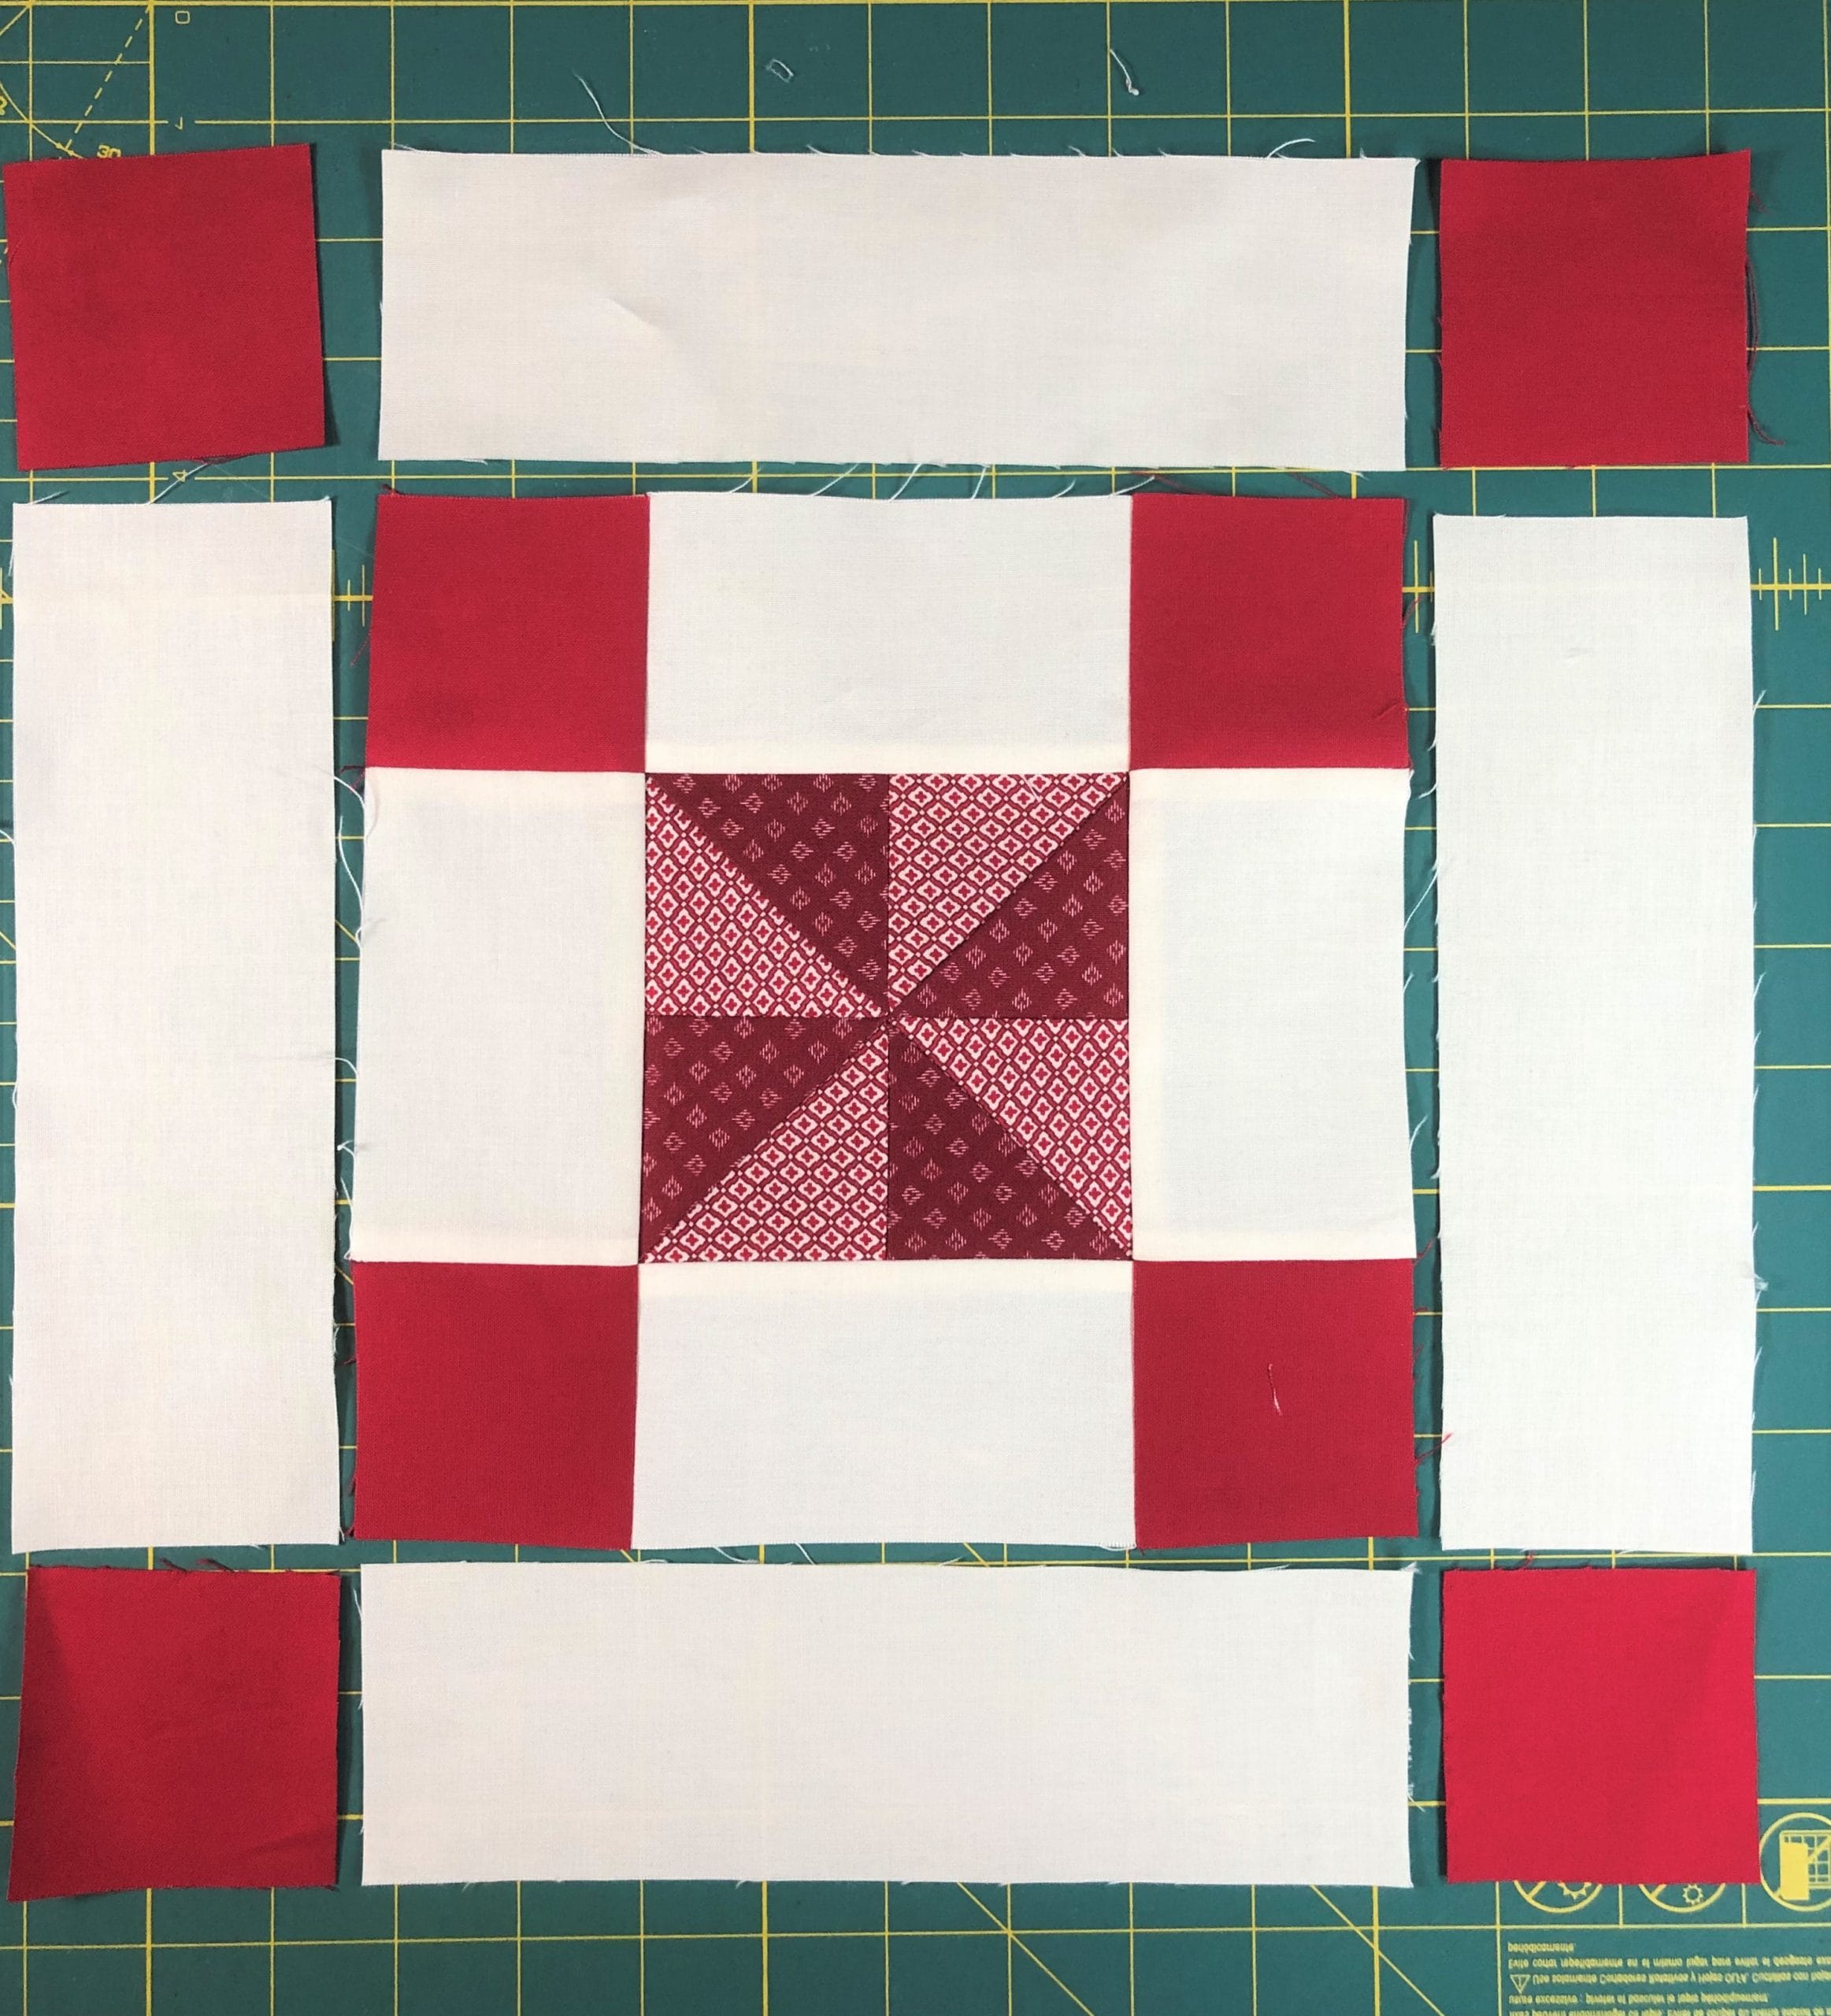
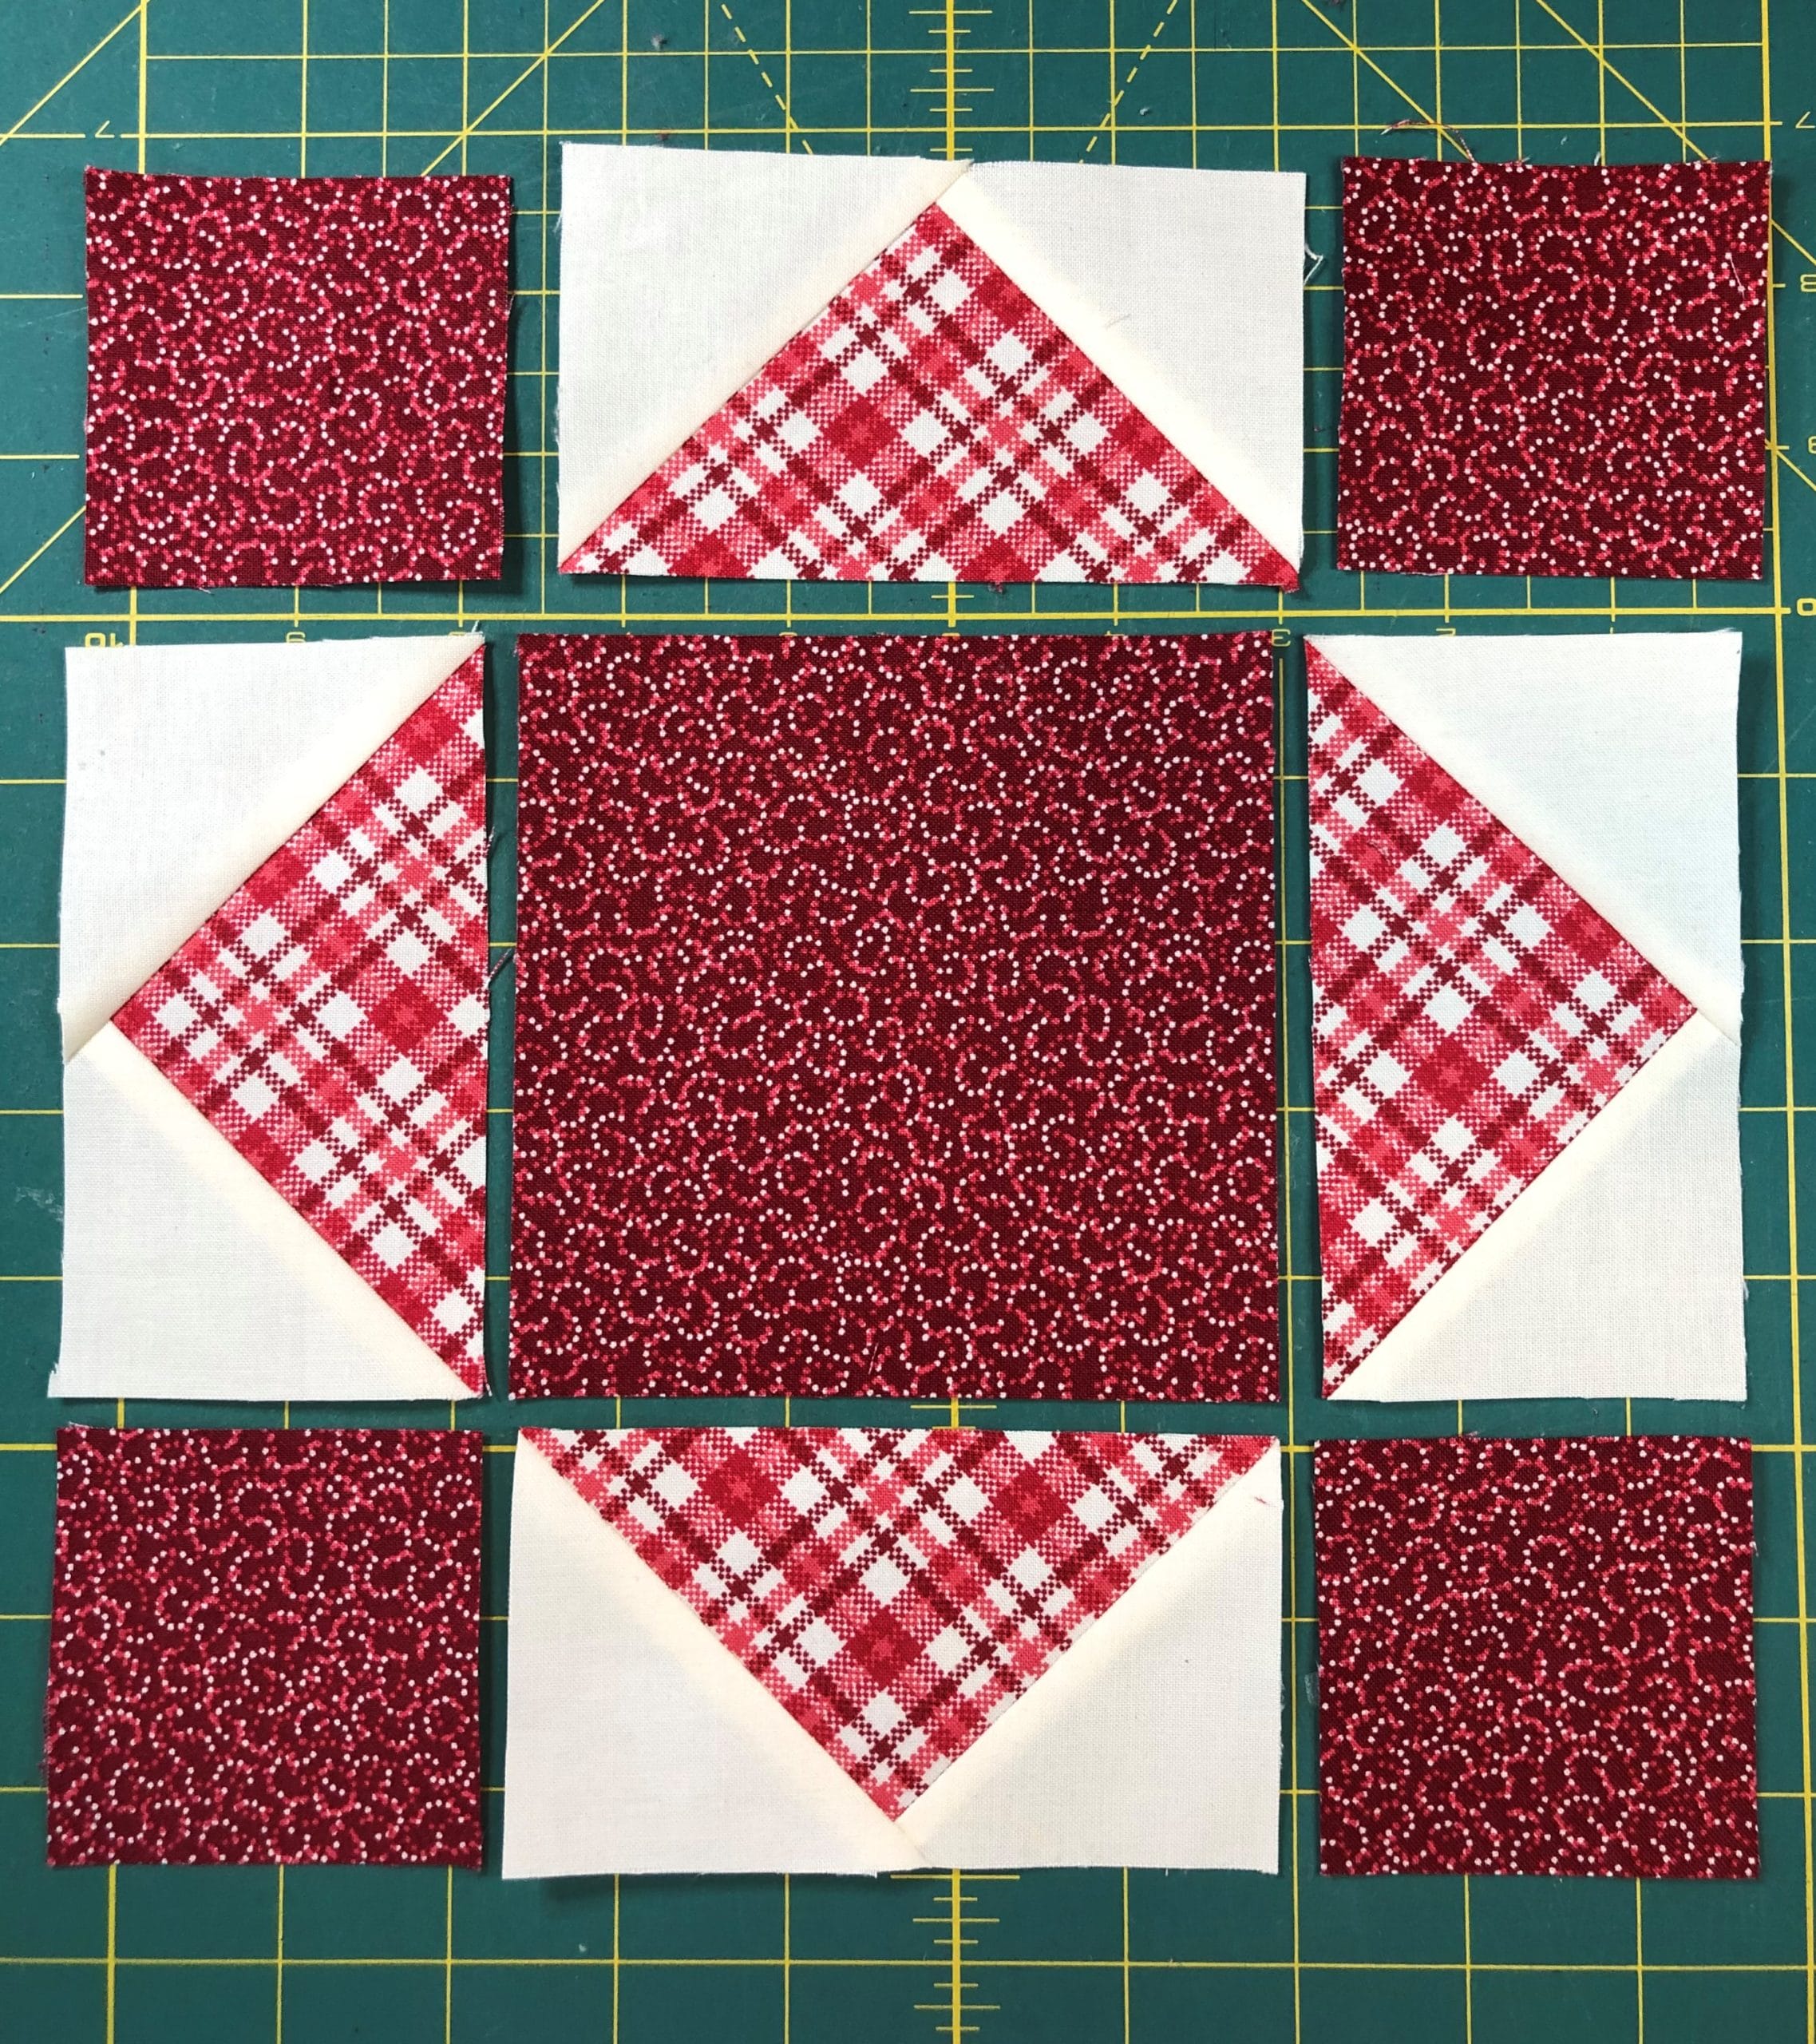
Once those were all finished and trimmed, I was able to get busy assembling the block. Here is the center portion of the unit, which I’ve laid out to begin sewing.
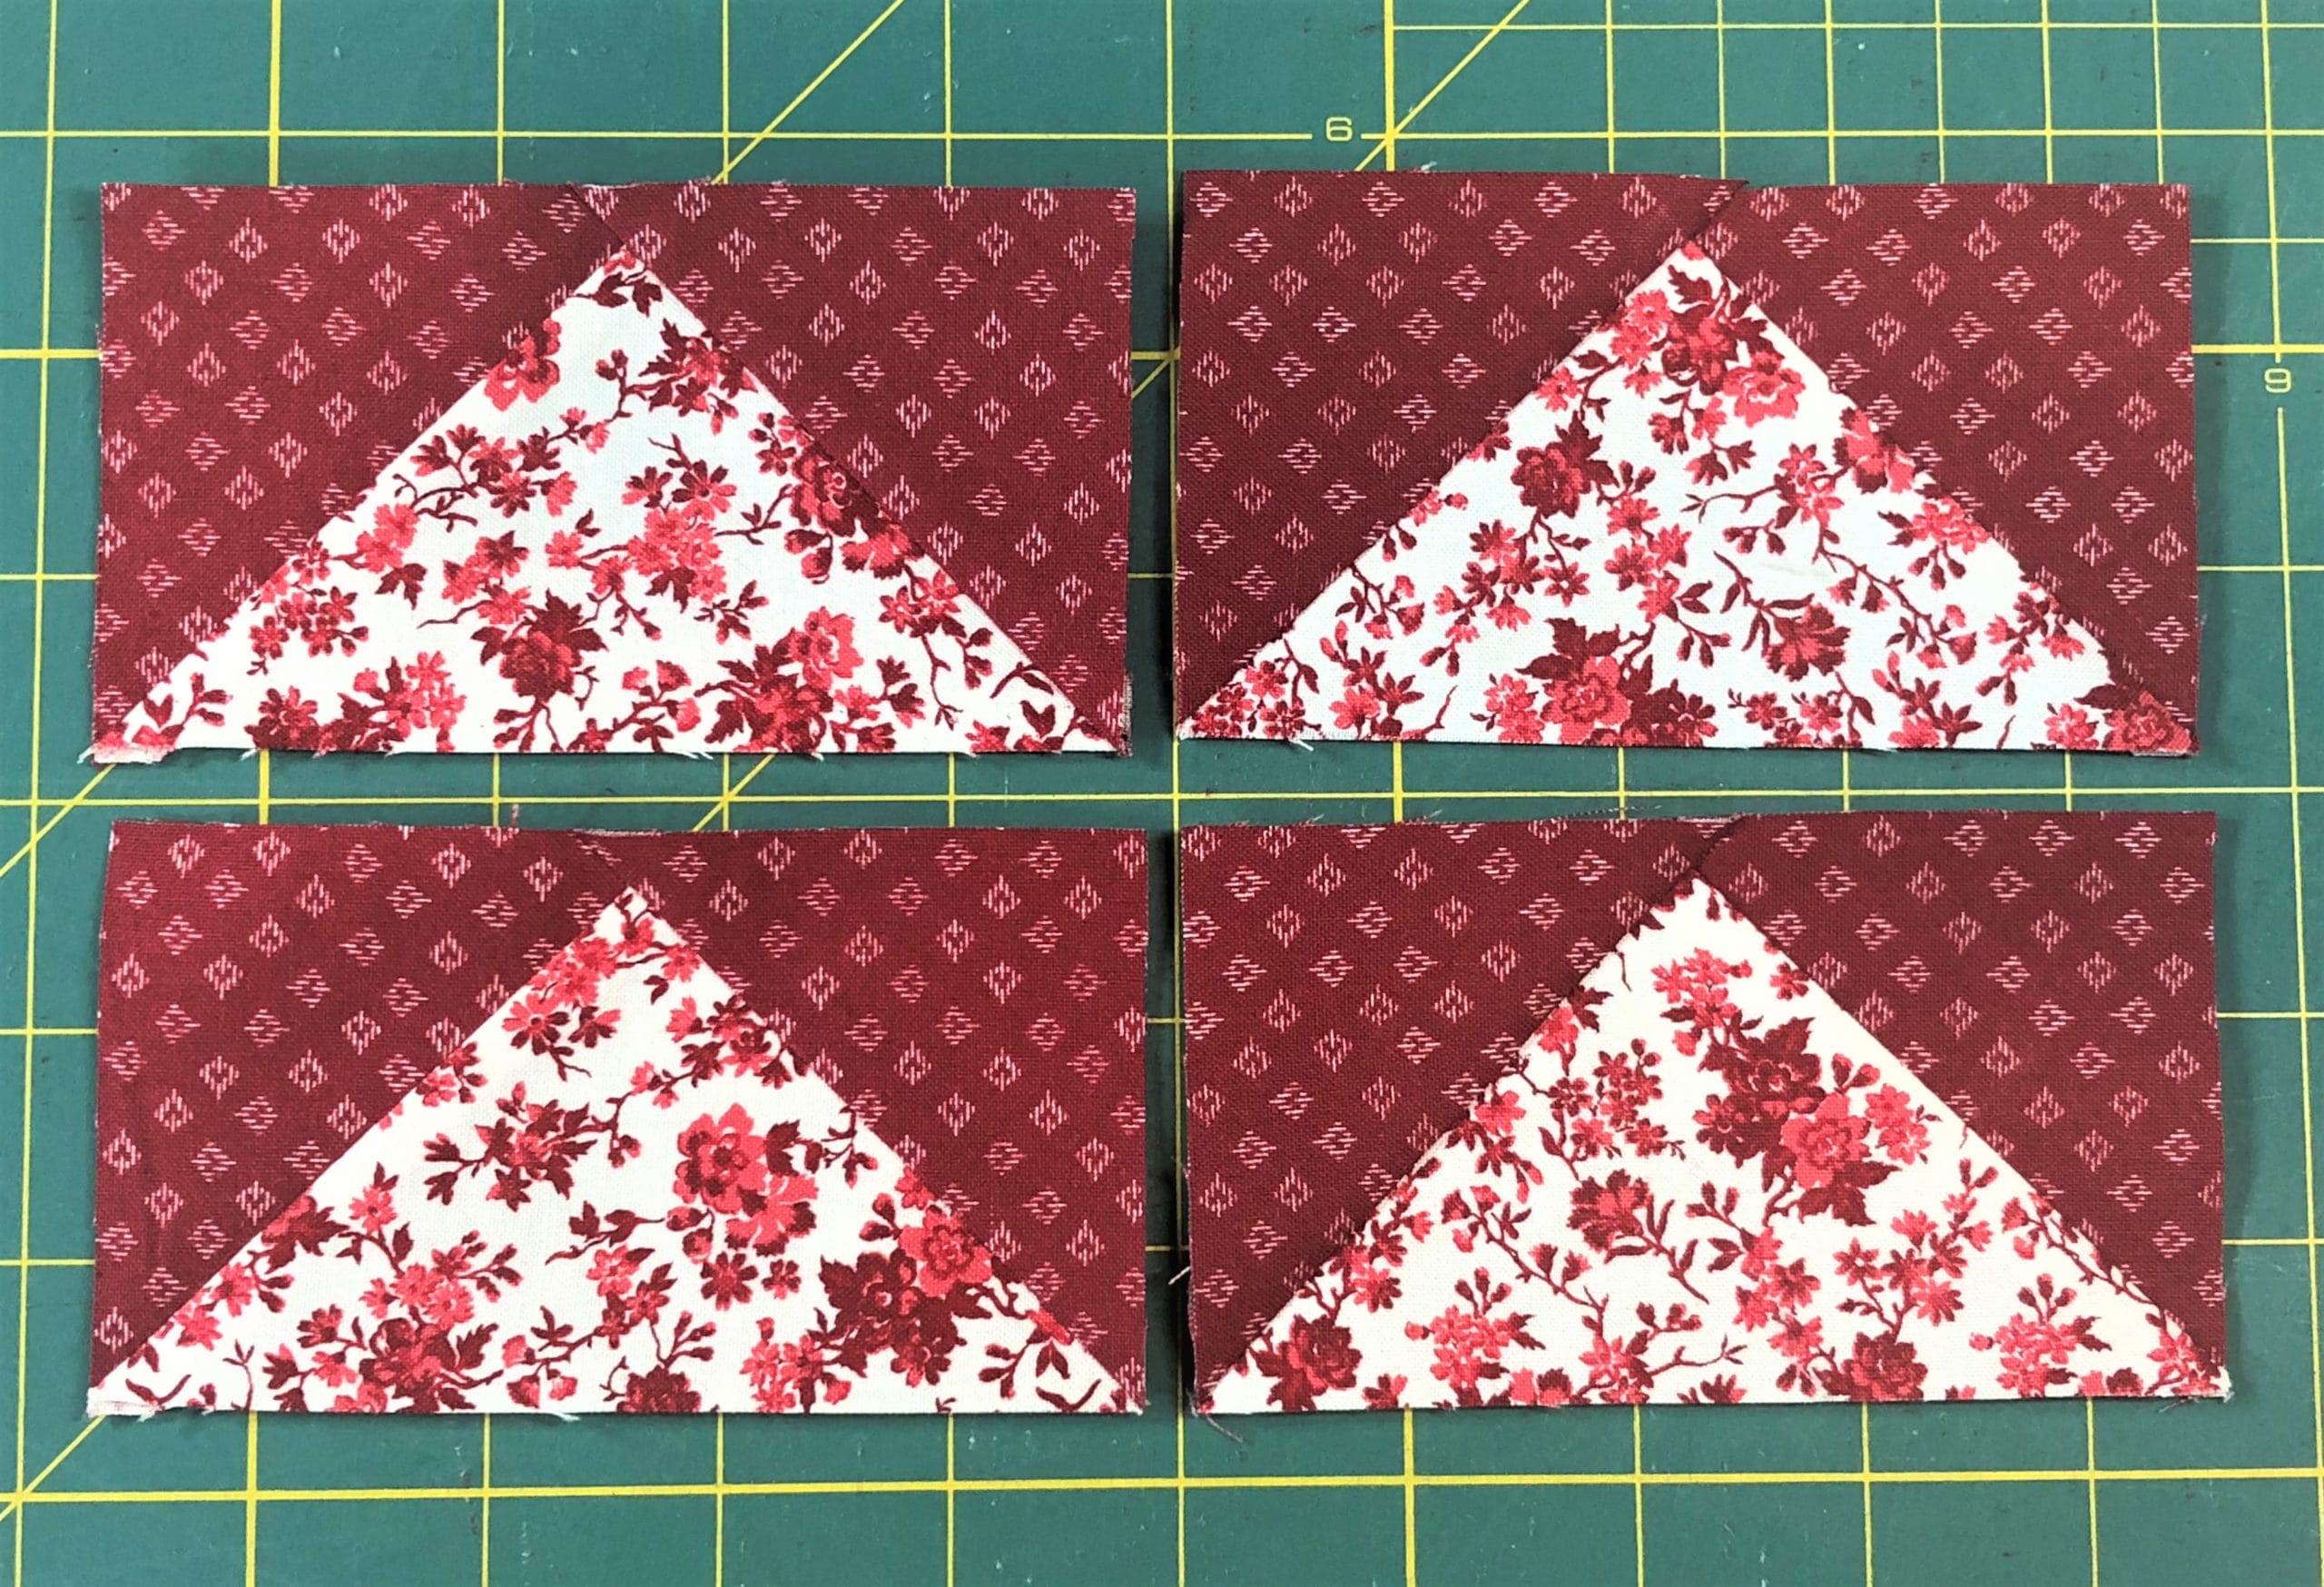
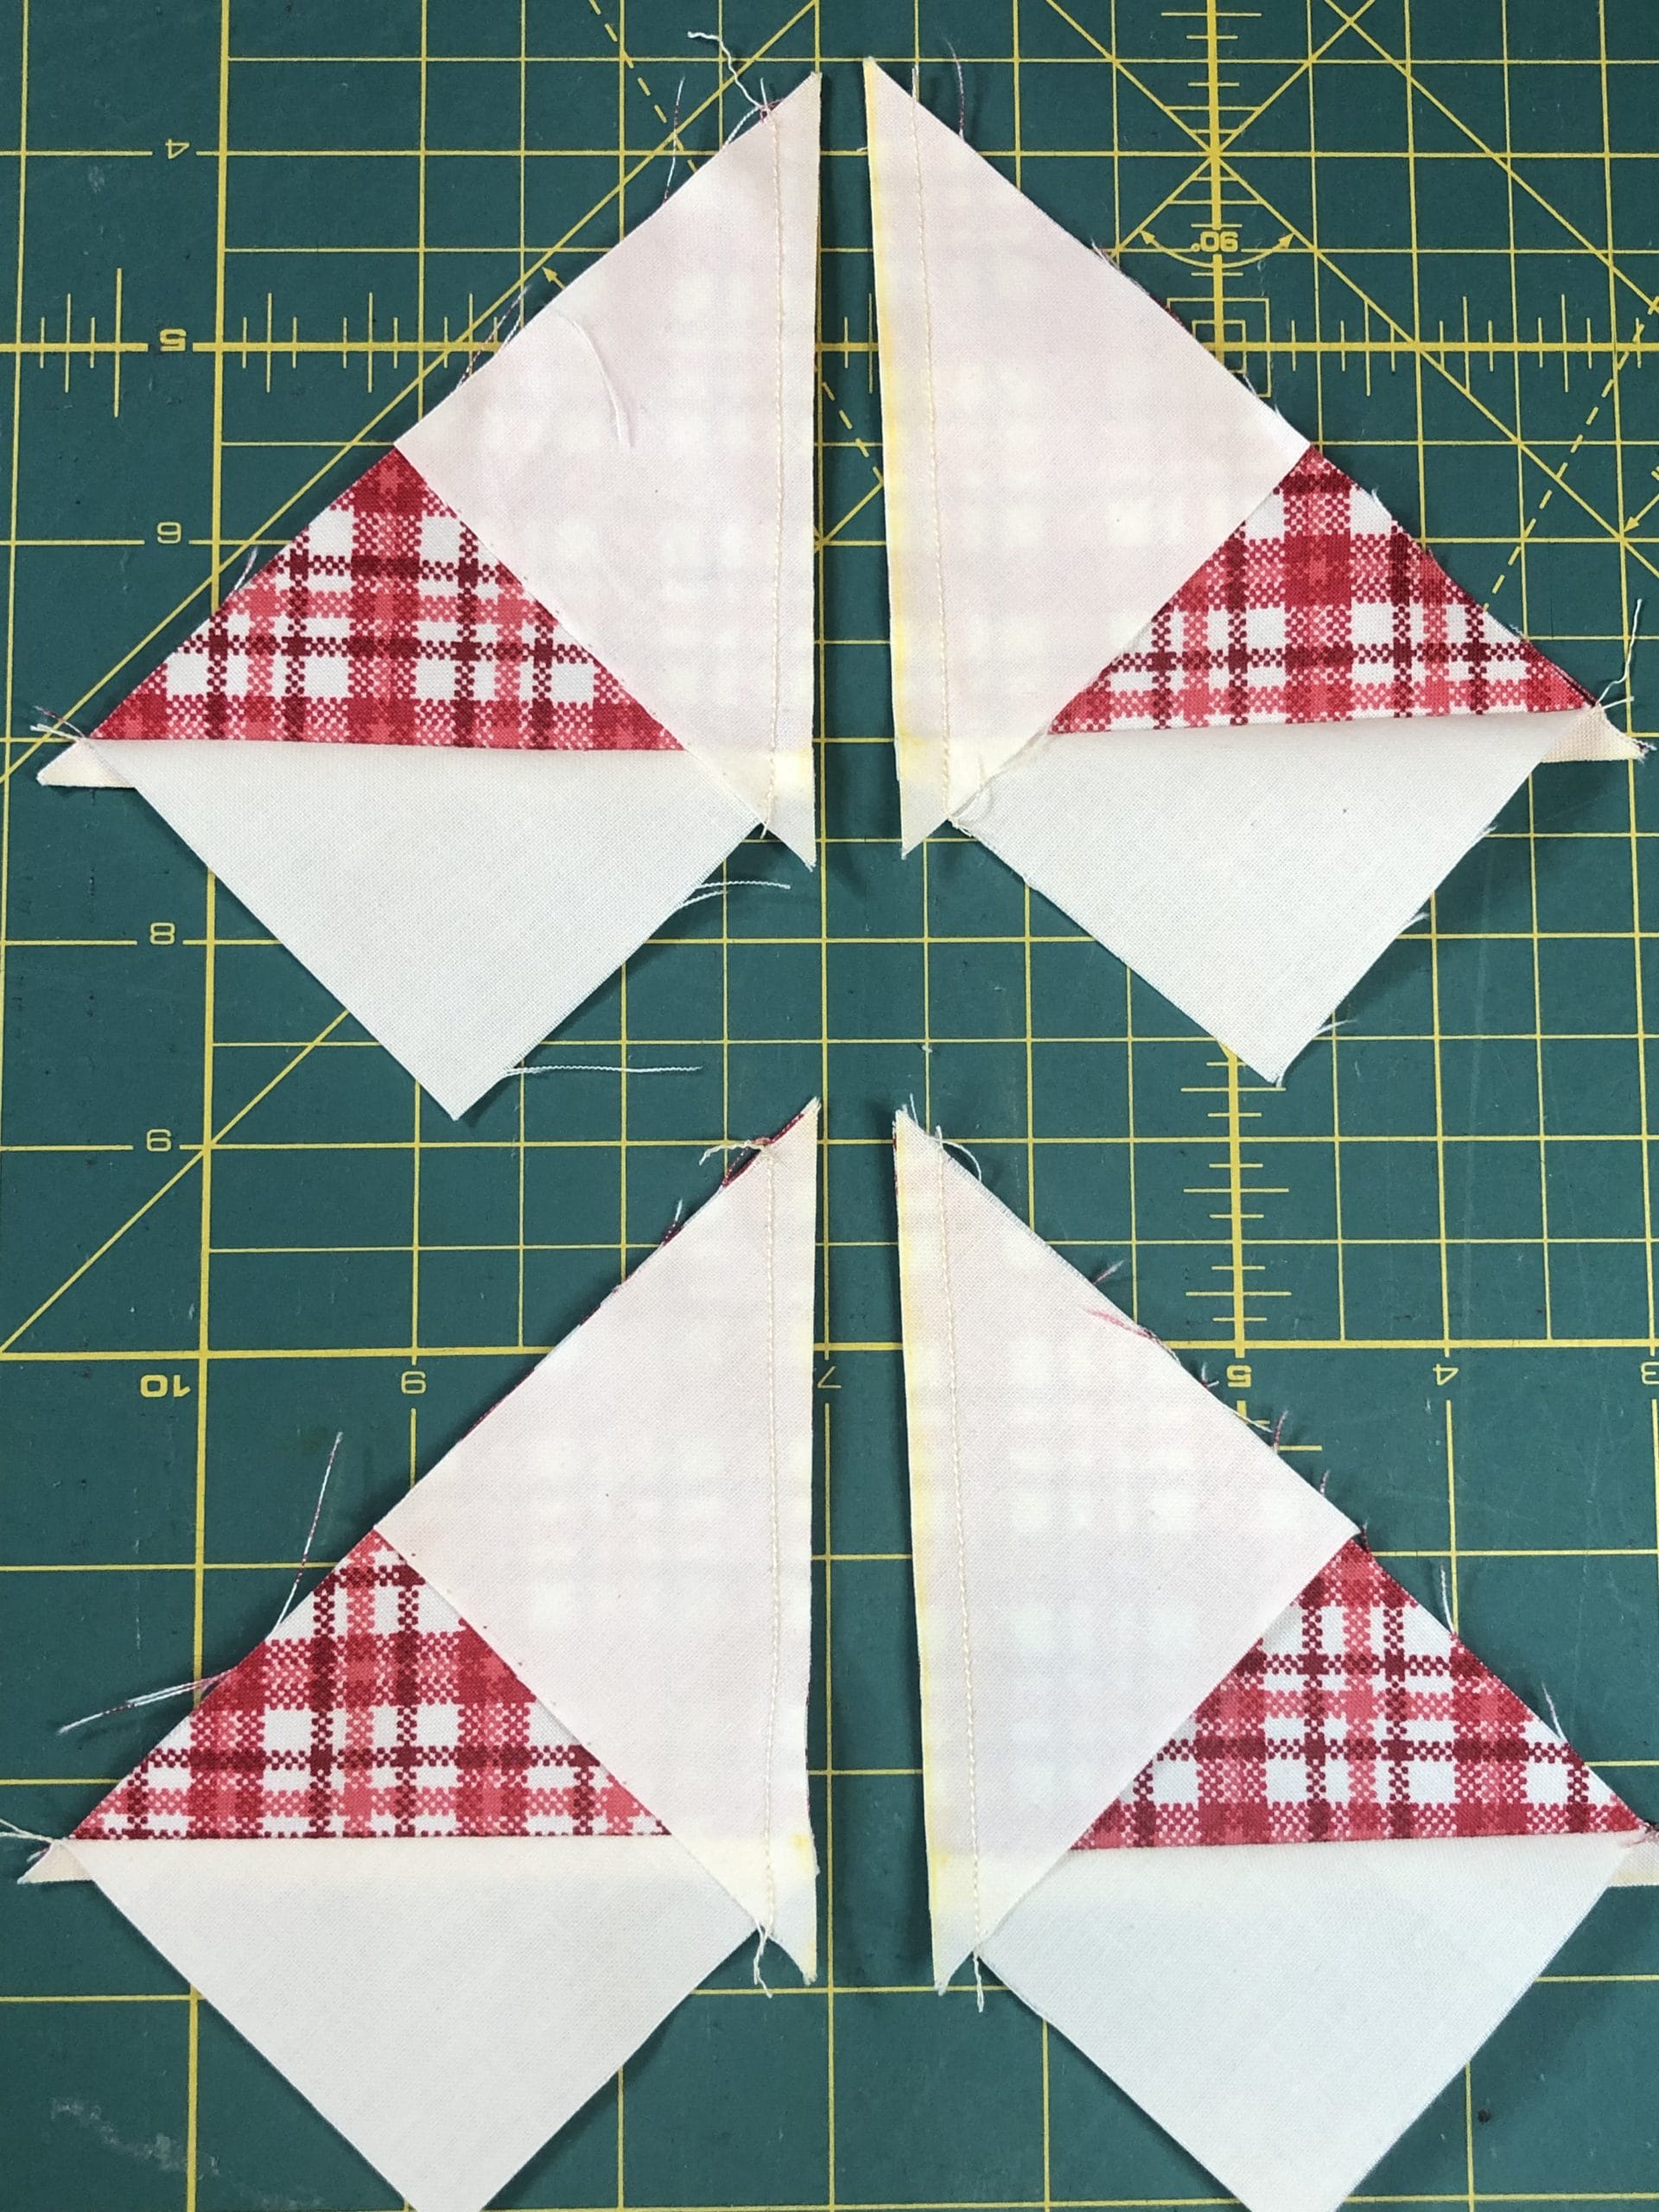
Next, we’ll take the remaining flying geese as well as some Half Square Triangles, then sew those together as shown in step 7. Make sure you press the seam inward toward the flying geese unit on each side so that your seams will nest.
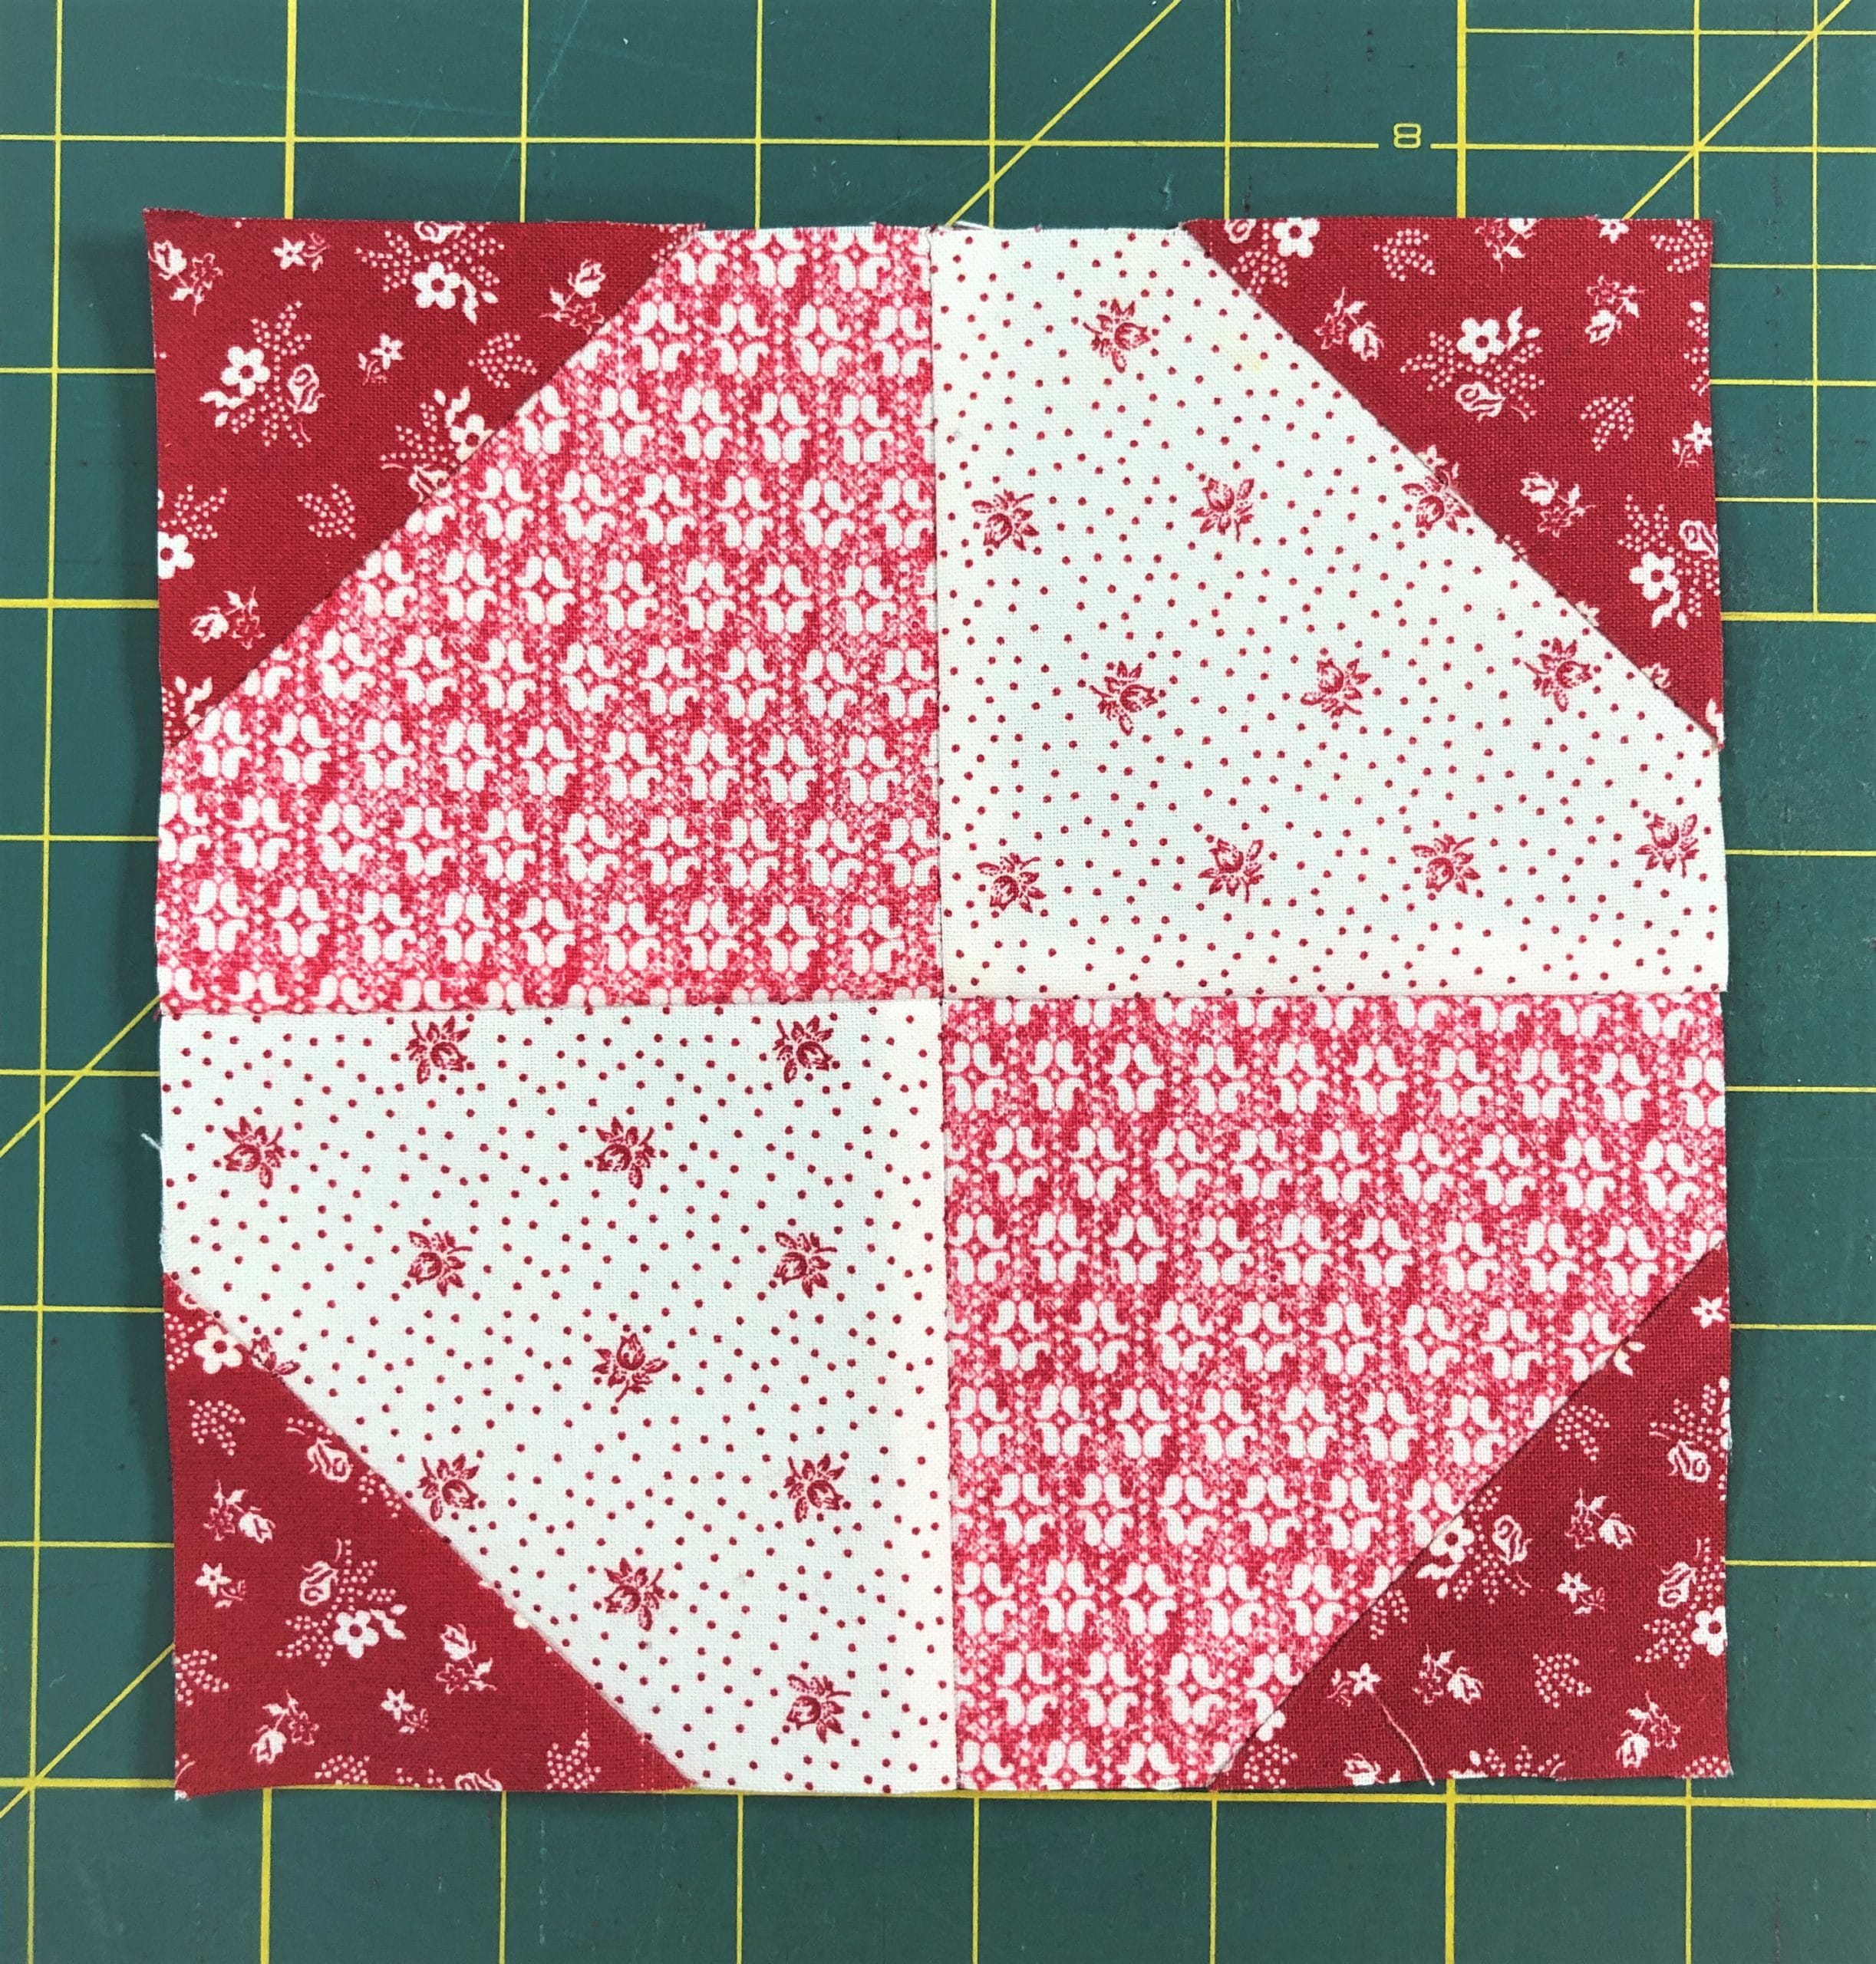
Now, all we have to do is sew those units to the sides, add our G squares to the remaining two units, and then get those sewn to the top and bottom, and the block is finished!
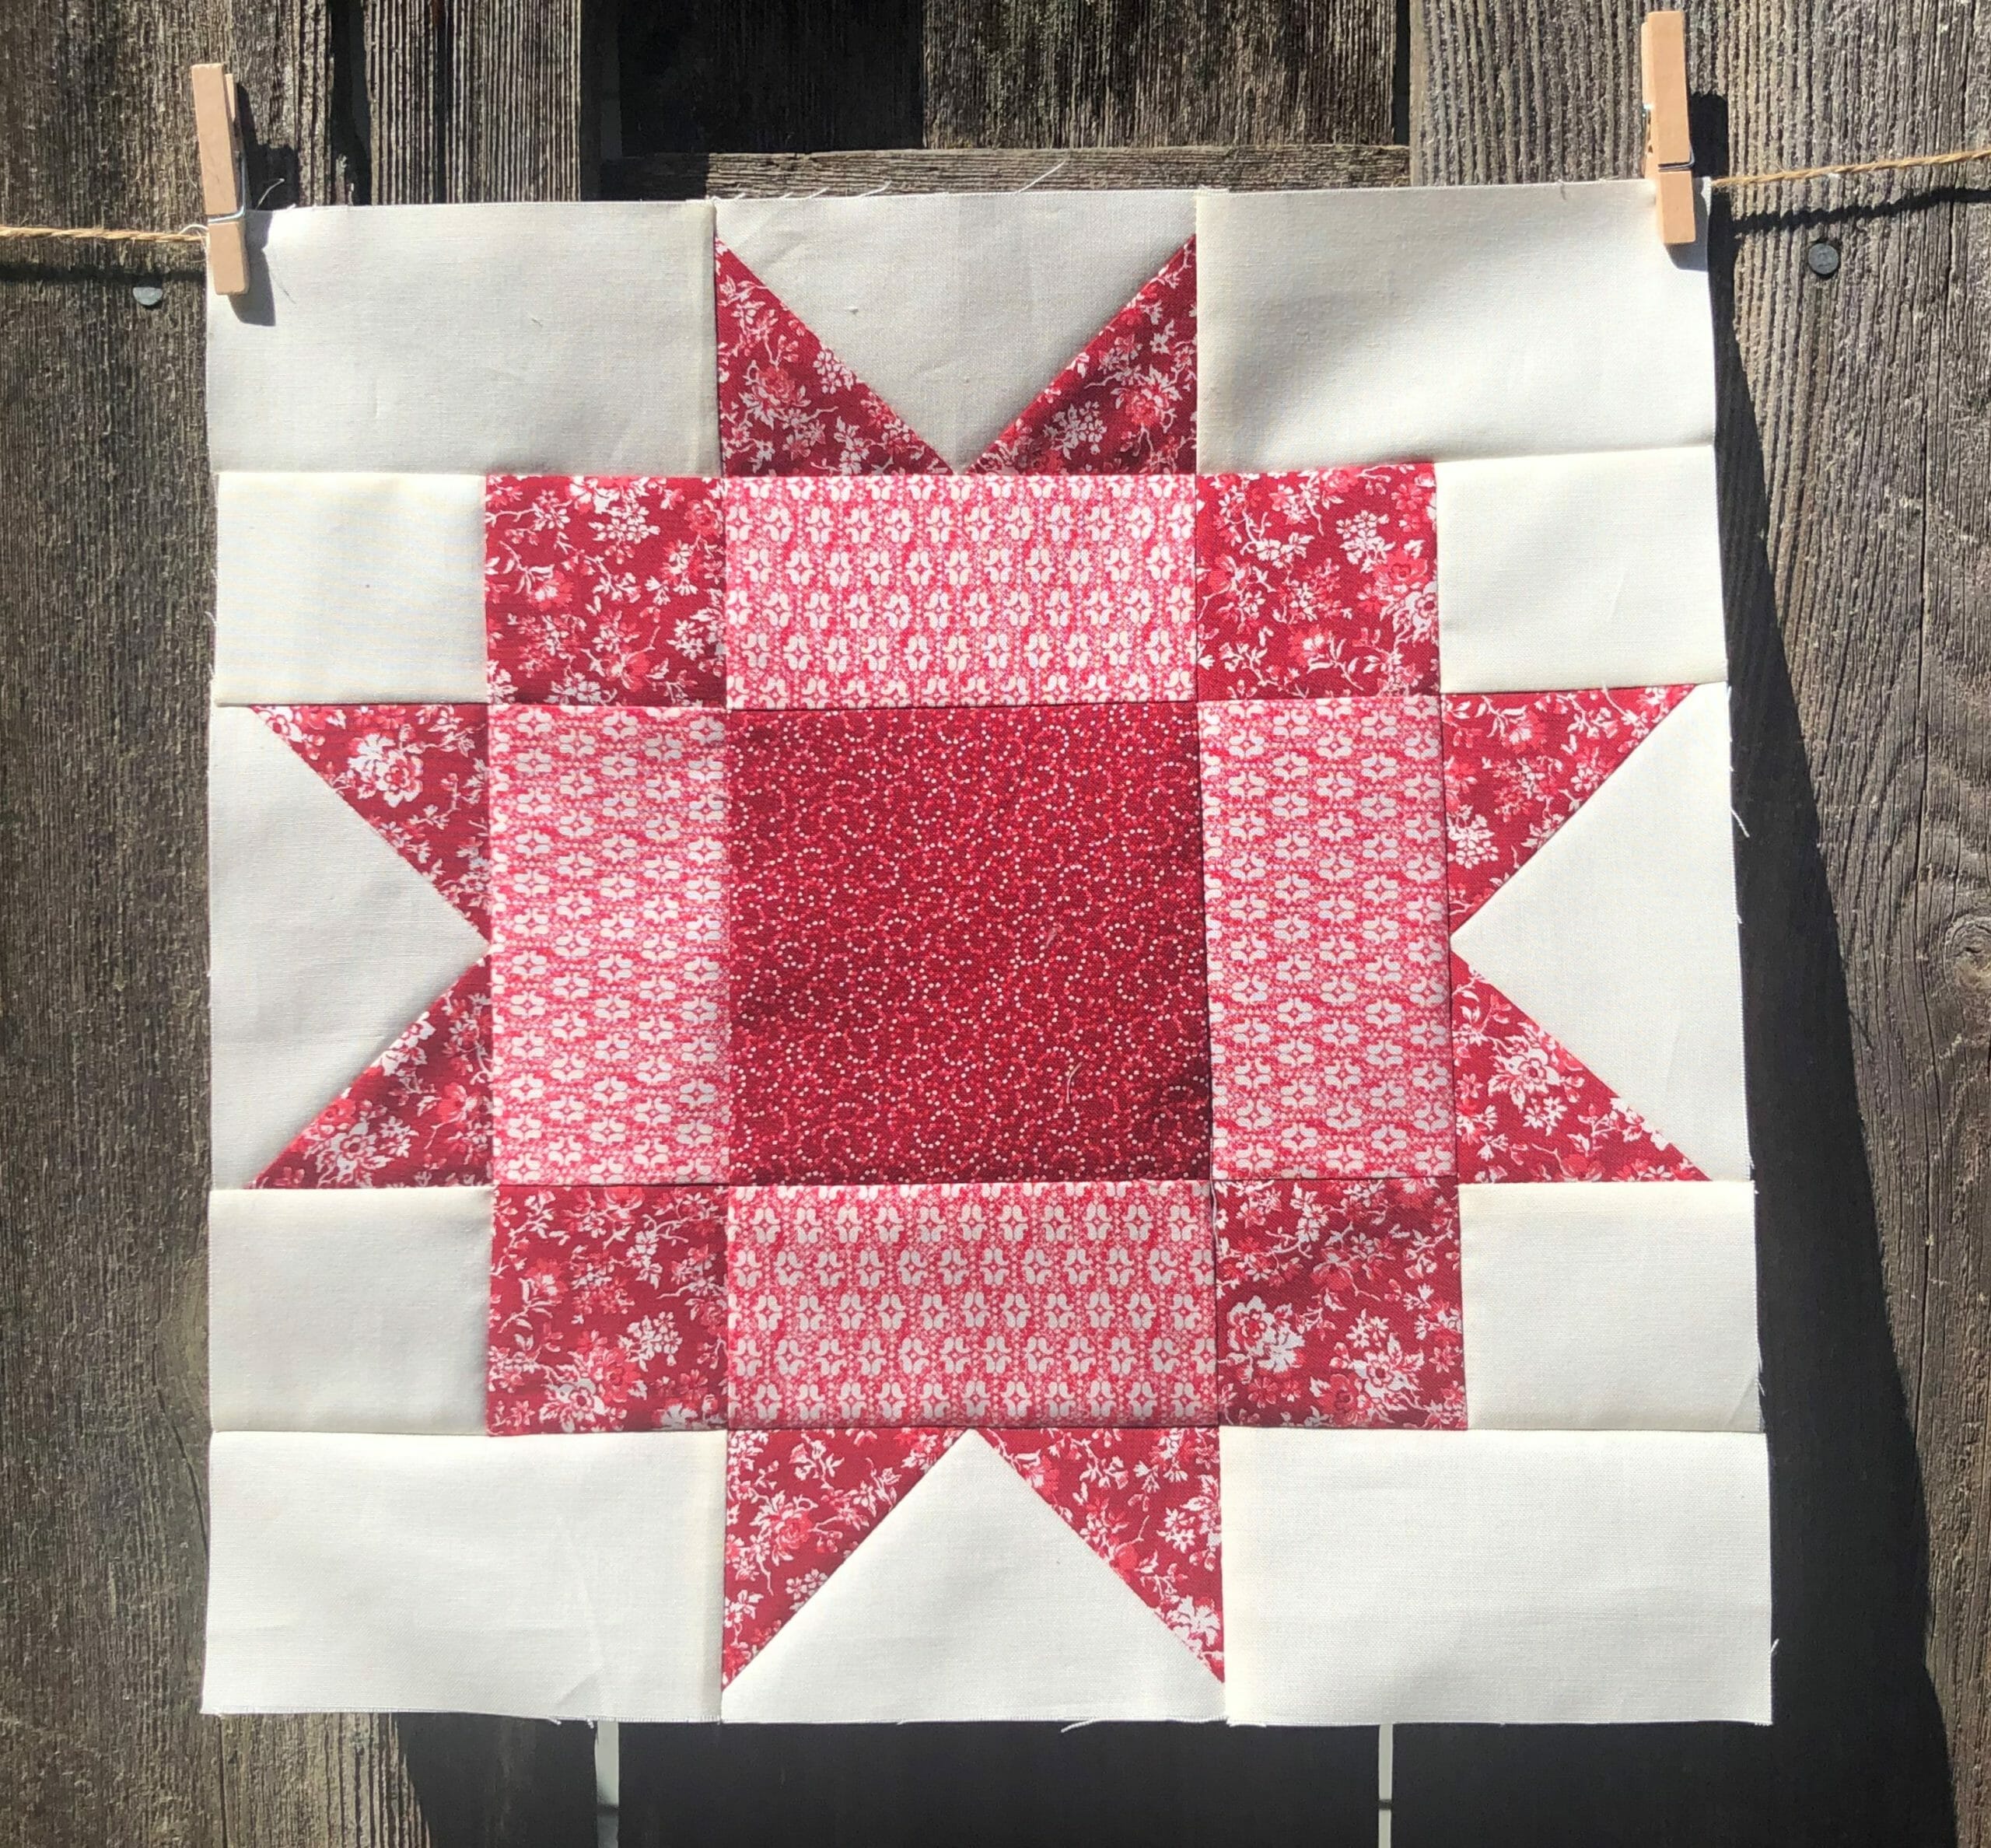
Block #5
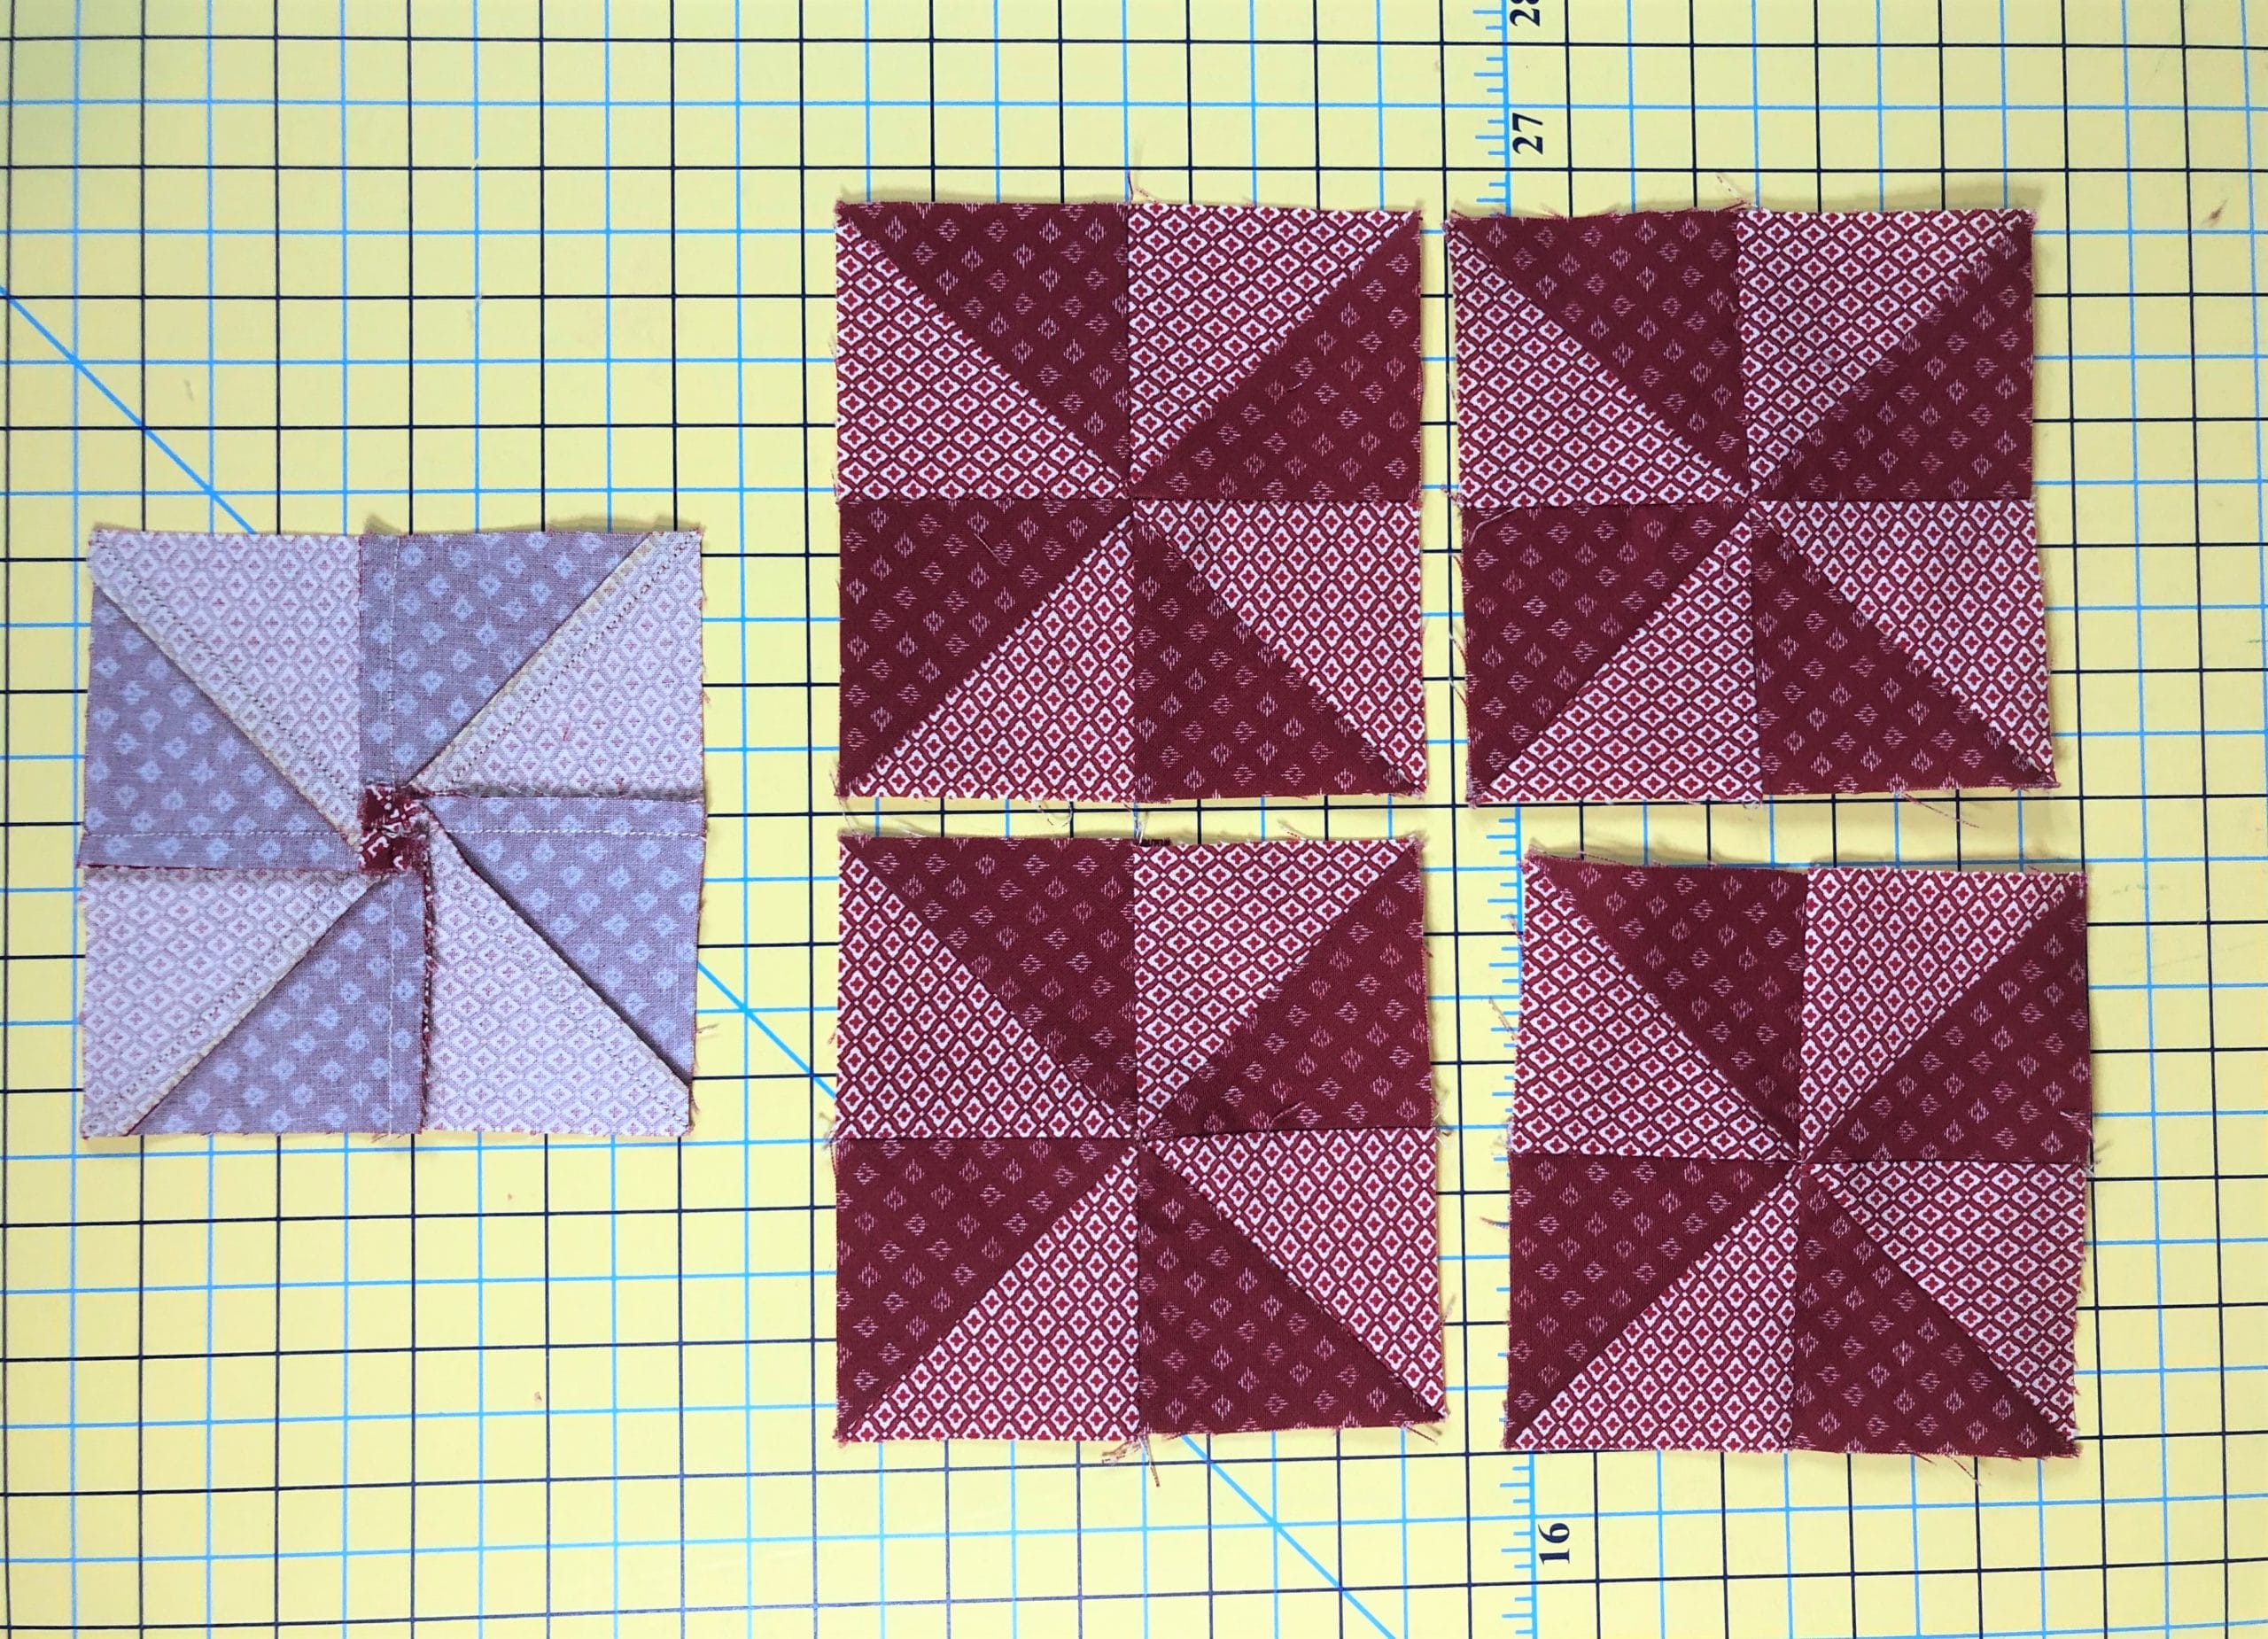
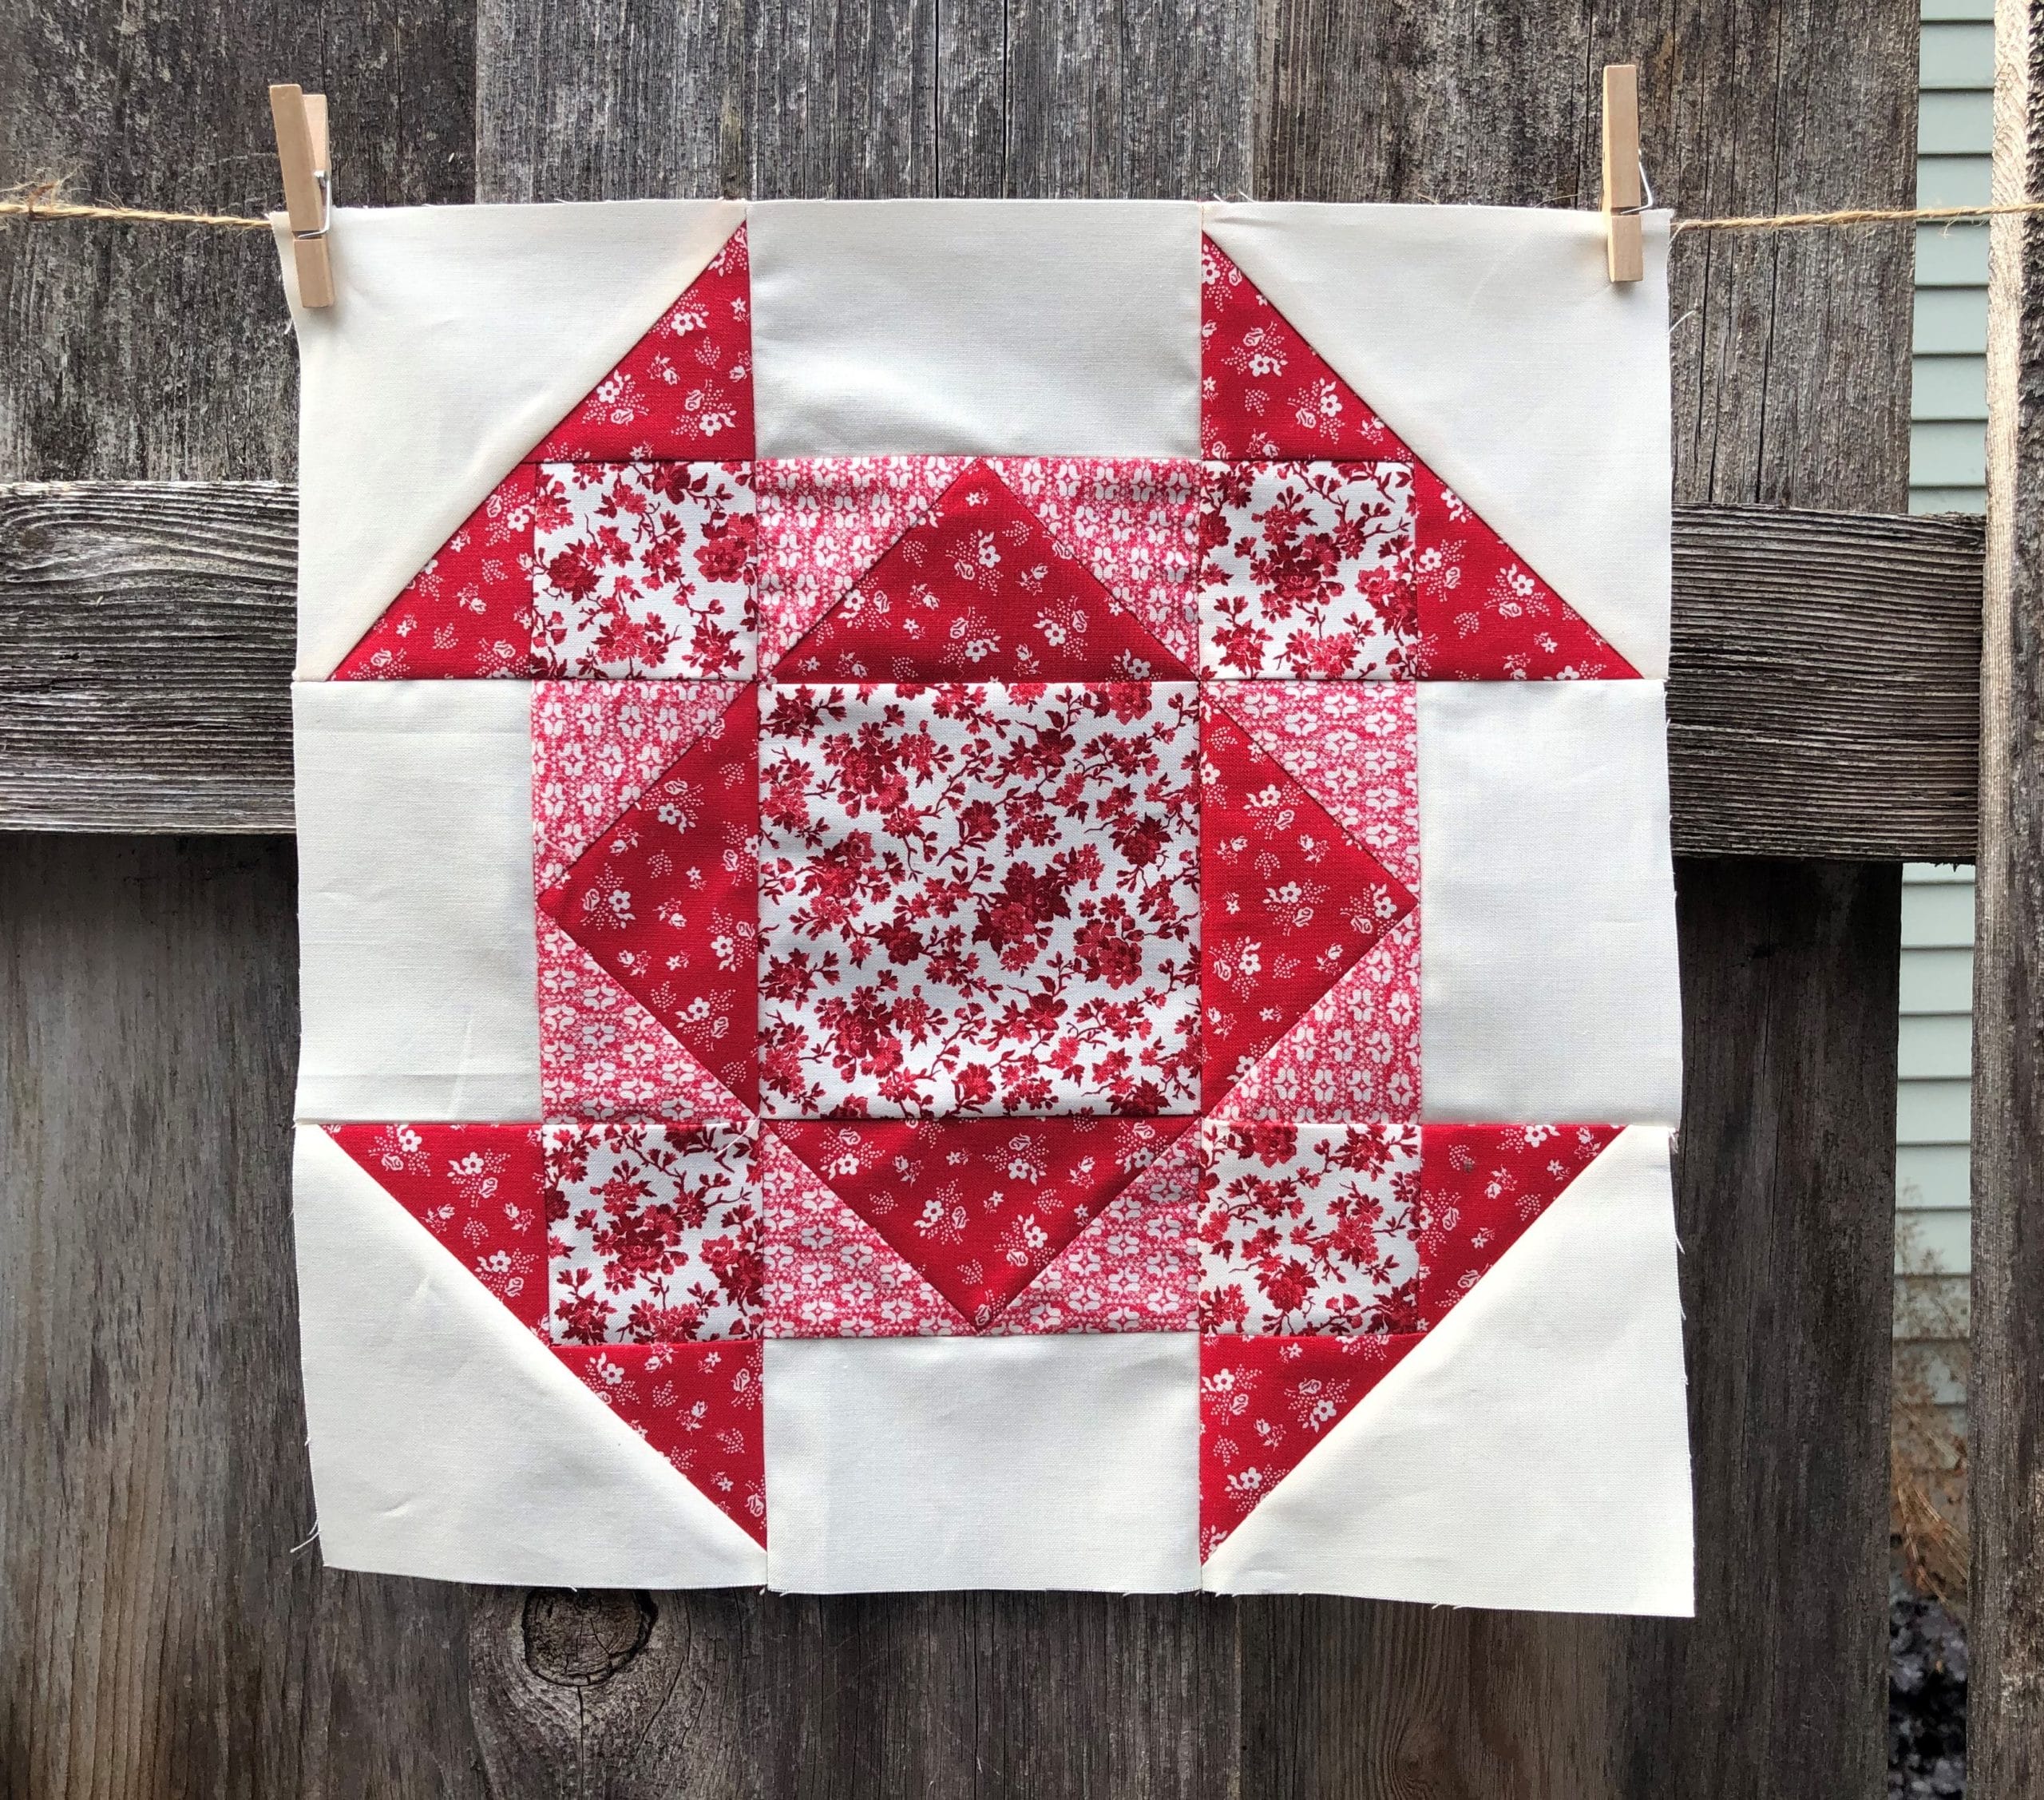
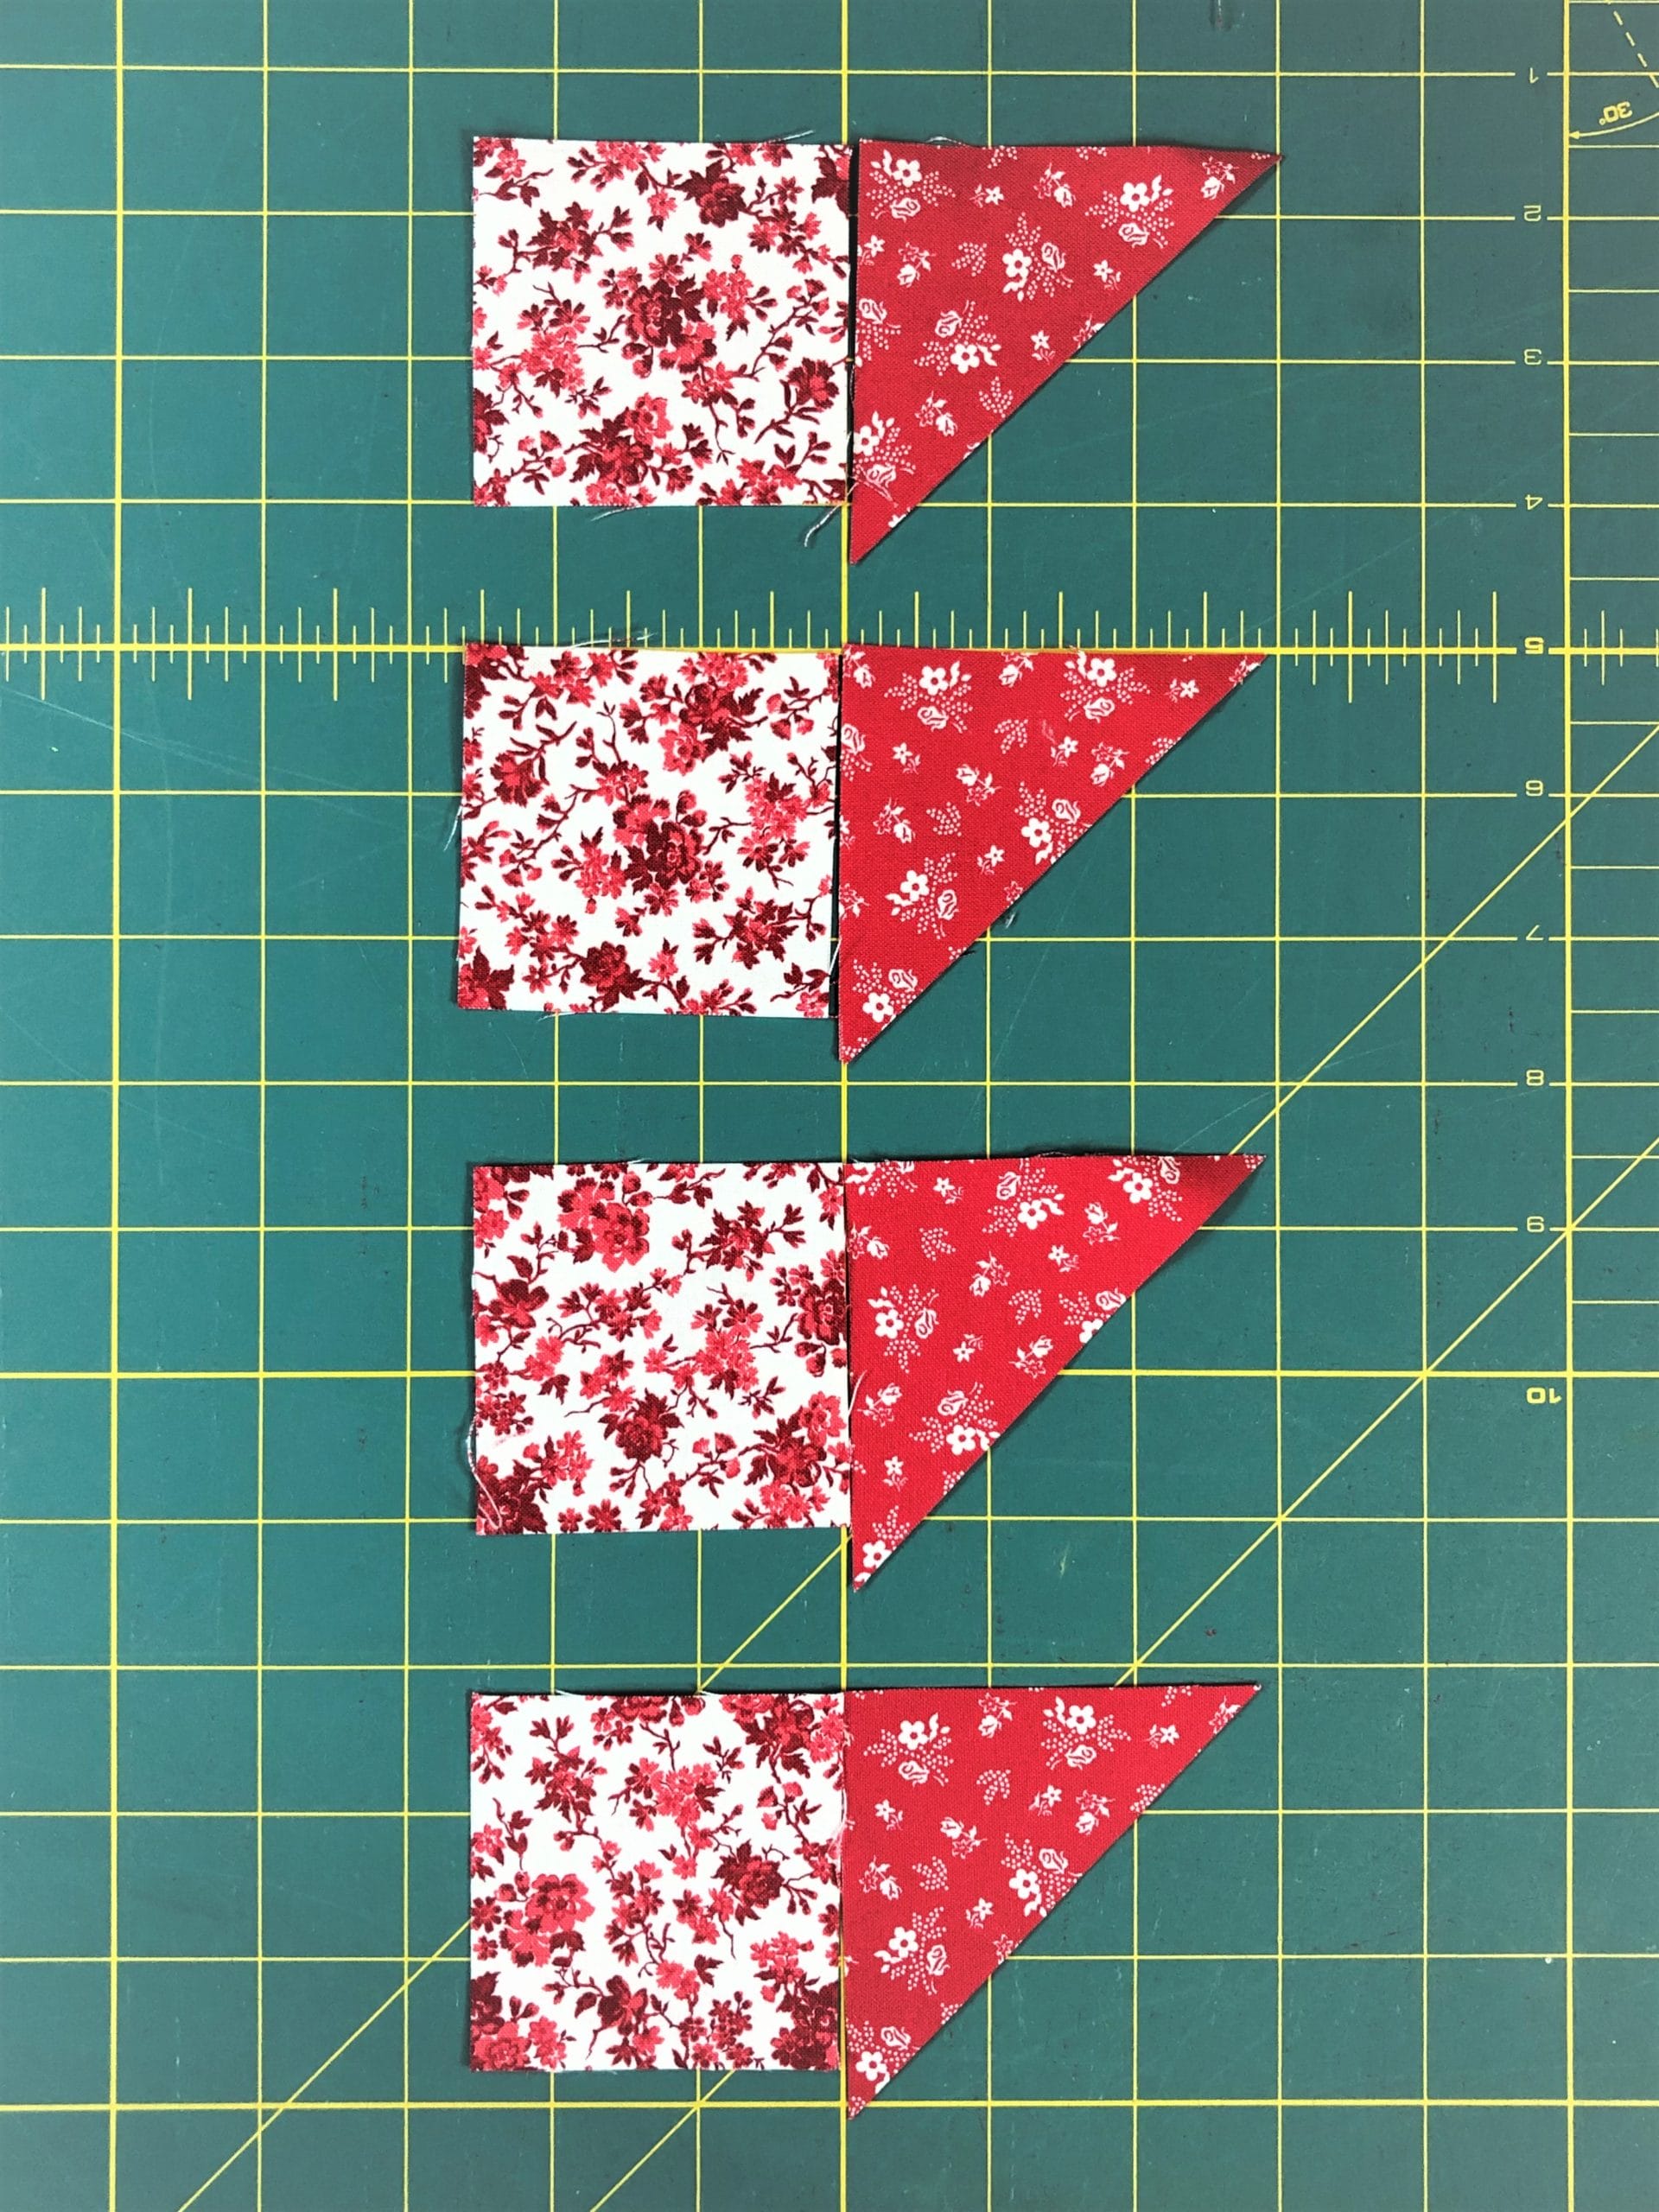
This block is our only new one for the month. And this also means, that since it is new, we will be making it again in month 11, so be prepared.
Right off the bat, we are making even MORE no-waste flying geese – in two colorways no less. Once you have both sets completed, you’ll sew them together like it says in step 5. Here is what that looks like in real life:
Next, you’ll make some more Half Square triangles – big ones this time. Always remember that you are free to cut out your pieces just a smidge bigger so that you have wiggle room to trim as needed.
And now we can sew all the units together 9-patch style. Follow the directions and make sure that all your flying geese are pointing inward toward the center square. This was one of those blocks where the seams can get a little bulky, so if you aren’t comfortable with that, remember that you can always choose to press any seams open to reduce that bulk. Otherwise, follow the pressing arrows and you should be just fine.
Block #12
This block is another repeat from month 1 and was known as block #21.
We start by making a simple 9-patch unit for the center like so:
Next, it’s some more of those flying geese we know and love so well. Two of the completed flying geese units will have an F square sewn to each side, and the other two will have the longer G rectangles sewn to the ends.
Now, all that’s left is to sew those to the center unit like you see above. Easy Peasy!
Block #24
For our last block of the month – our ONLY block in our month 9 installment that doesn’t have ANY flying geese! How did that happen?! We made this block previously in month 5 as block #9 in case you want to refer back.
Begin by making some Half Square Triangles as directed.
Now you’ll use those HSTs to make a simple 4-patch unit like so:
After sewing the E and B strips together, you’ll have everything you need to assemble the block.
Here is my block, laid out and ready to sew together.
How easy was that? Another four blocks in the books!
Do you all realize that we only have one more month of Irish Chain blocks, and one last month of four unique blocks, then we are ready to finish our quilt?! We are SOOOO close to the finish line!
I hope you all have a wonderful, happy, and quilt-filled month!
Can you guys believe it is already November?! I don’t know about you all but this year has flown by for me. And here we are, already working on month 4 for the Ruby BOM. Just think, after sewing these blocks, we will be 1/3 of the way done with this quilt!
This month may look a bit familiar to all of you, since it’s exactly the same as month 2. Surprise! For those with sharp memories, you may recall that we are making our 25 Irish Chain blocks in this quilt over the course of many months. This month we will be making another 5.
Since I previously did a blogpost with a tutorial for making the block, I won’t bore you again with the details. Please feel free to refer back to Ruby BOM month 2’s blogpost if you want a refresher.
This month I thought I would show you how I sew when I’m making multiples of the same block. Probably many of you already do this as well. It just makes things go so much faster!
Step One
Cutting and pinning.
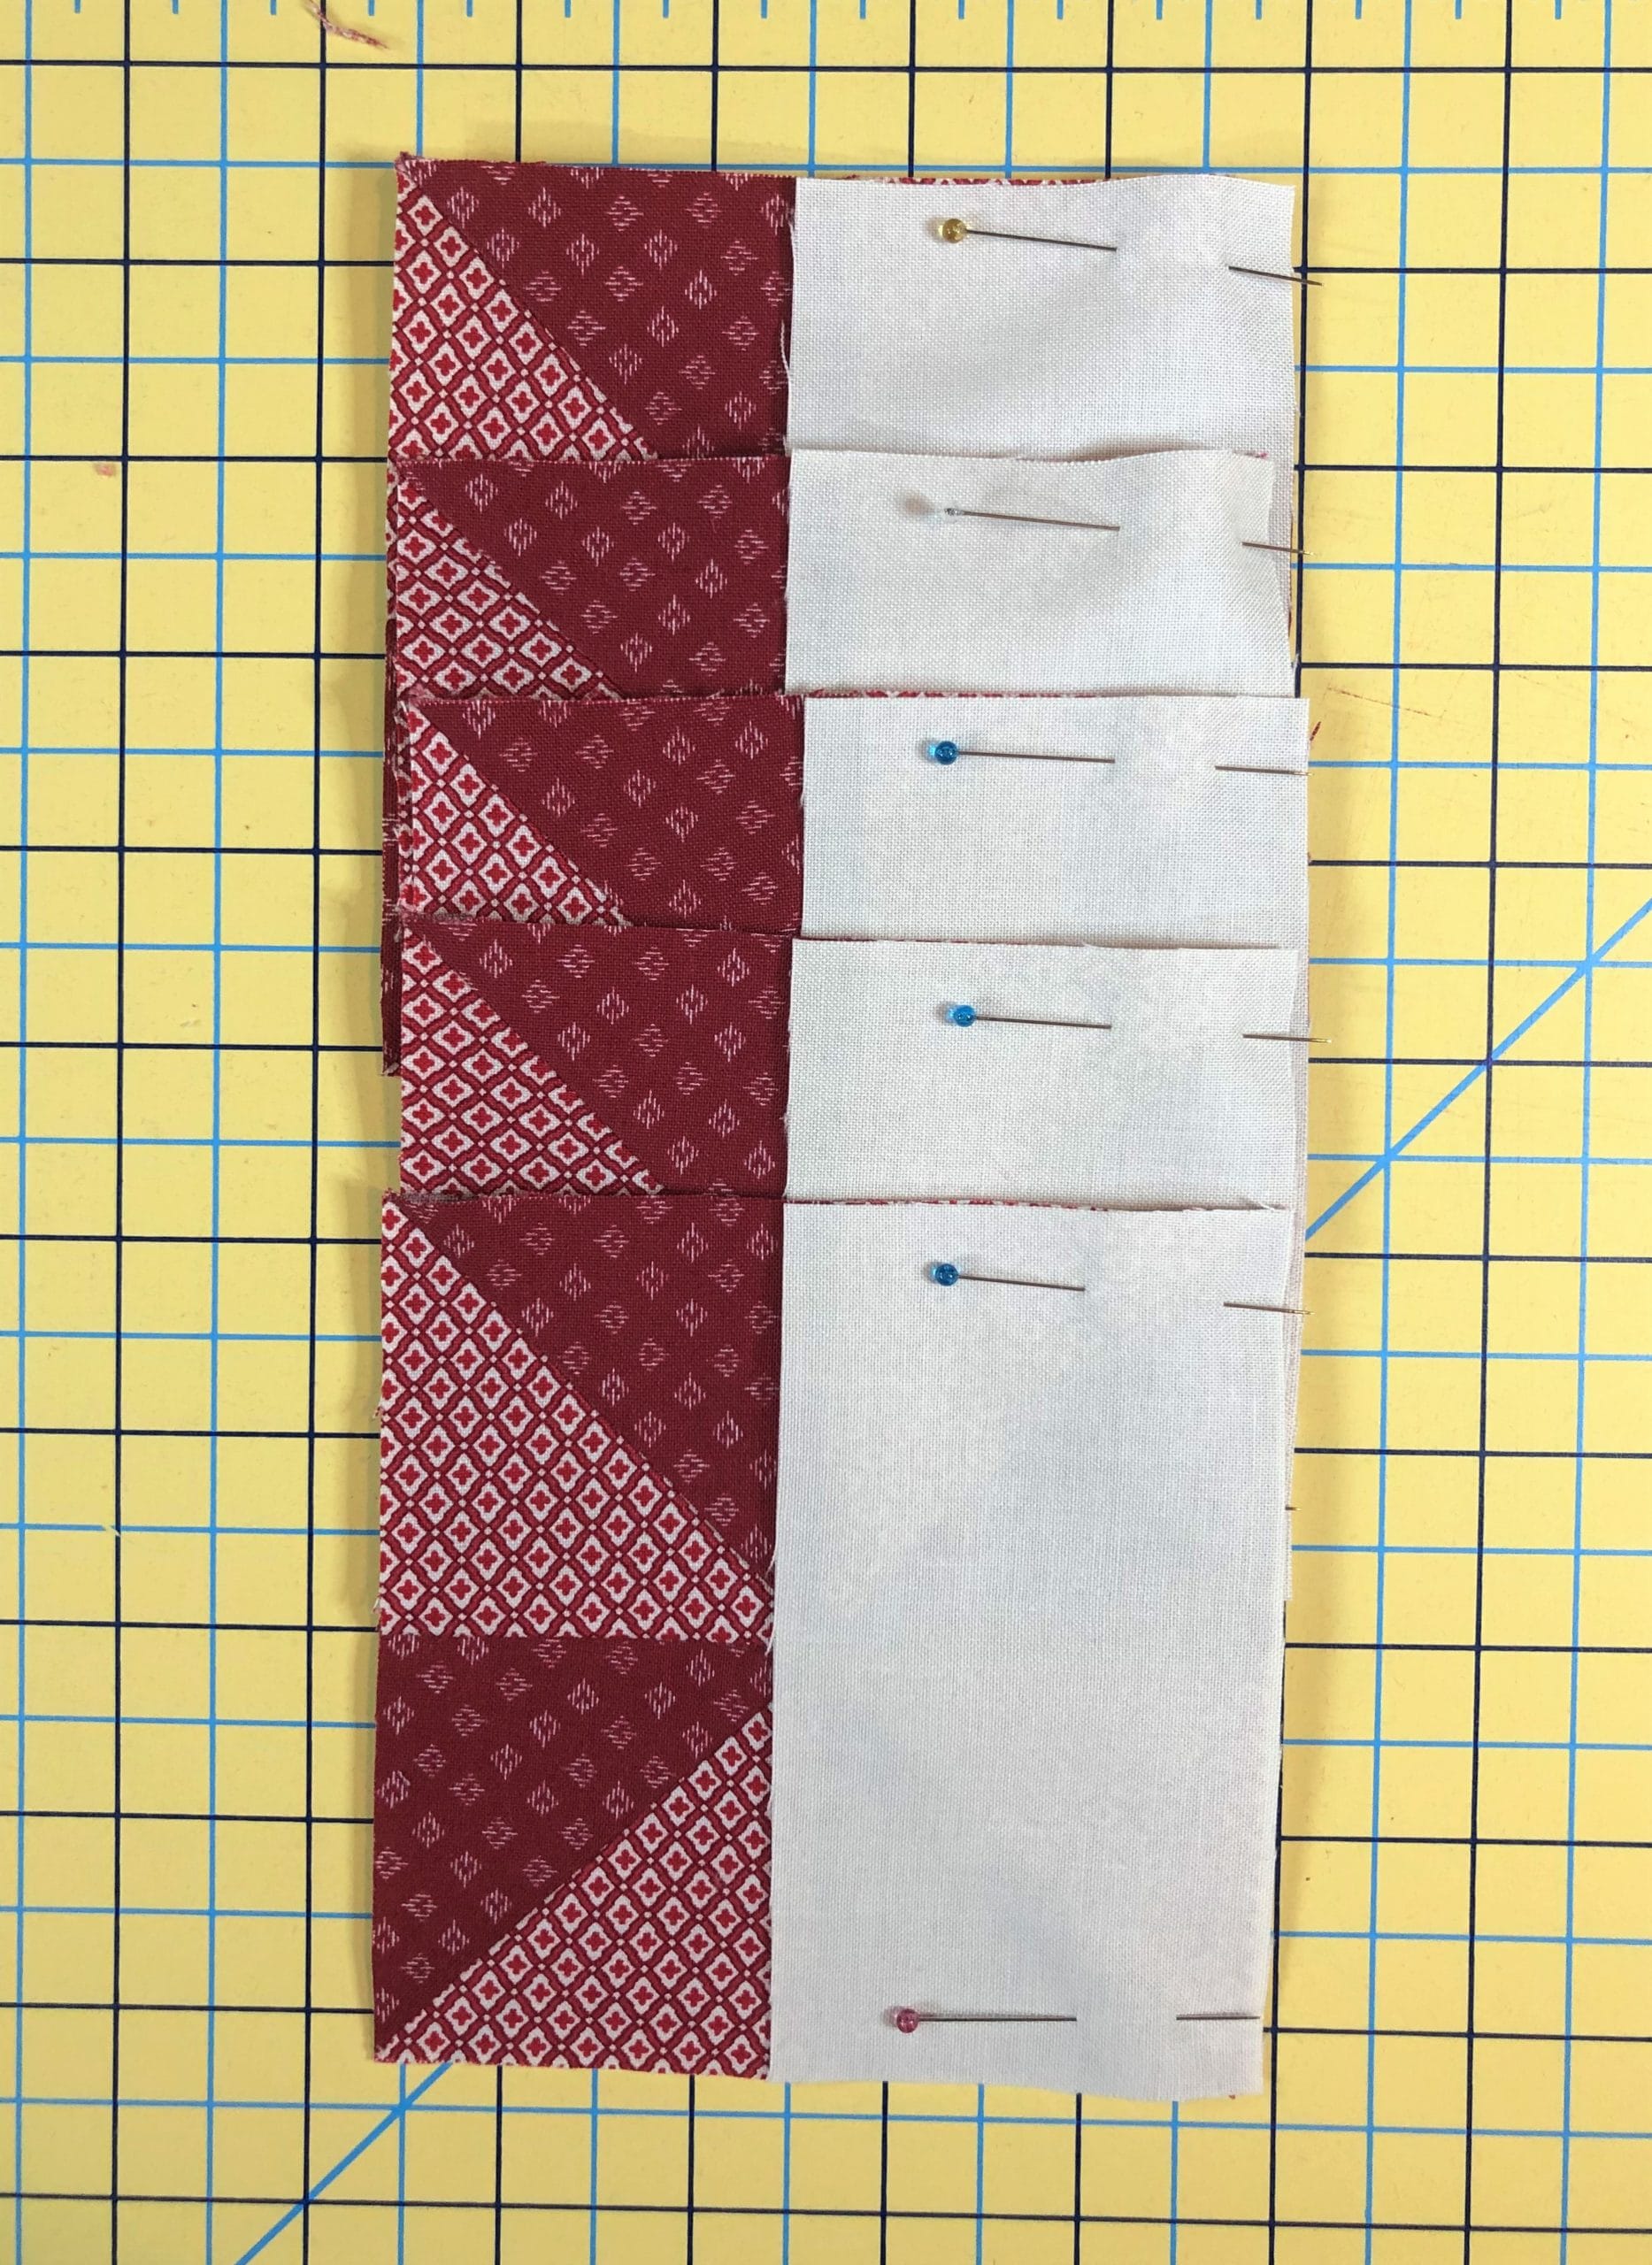
I begin by cutting out everything for all 5 blocks and then get to work.
Whenever I’m piecing a quilt, I look at the entire pattern first. I try to see how much sewing I can do at the same time, even if that means skipping around a bit.
For these blocks, I know that I need to make the half-square triangles right off the bat, so I get those ready.
But I also know by looking ahead in step 3 where it says “Take the two remaining D strips and sew a C square to each end”, that I’ll need two of those C/D/C units for each of the 5 blocks. So I get all ten of those prepped and pinned for sewing too.
And then looking even FURTHER ahead in step 4, I see that each block also has two units with a C square being sewn to each end of an E strip, so I get all ten of those pinned as well.
Step Two
Piecing Squares, Strips, and HSTs
Then I sit down at my sewing machine and get to work.
I always do chain piecing whenever possible. Below is a photo of my chain of half-square triangles after my first pass along one side. I don’t clip the strings, but just run the chain back through on the other side. I then clip everything when I’m done.
Once I have all that prep sewing done, I finish up my half-square triangles, square them up, and start making my pinwheel blocks.
Step Three
Piecing Pinwheels
This time I paid attention to the orientation of the pinwheels, and laid everything out from the start (to make sure I didn’t mess those up like last time)! If you want the nitty-gritty of putting these together, you can refer back to Ruby BOM Month 2.
I’ve included a photo of the pinwheels with one showing the back side so you can see how I pressed the center open. This allows the block to lay flat. If you carefully press the center open, it should naturally push one seam up and the other seam down. You should also end up with a tiny pinwheel in the center where you’ve pressed open!
Step Four
Assemble Blocks
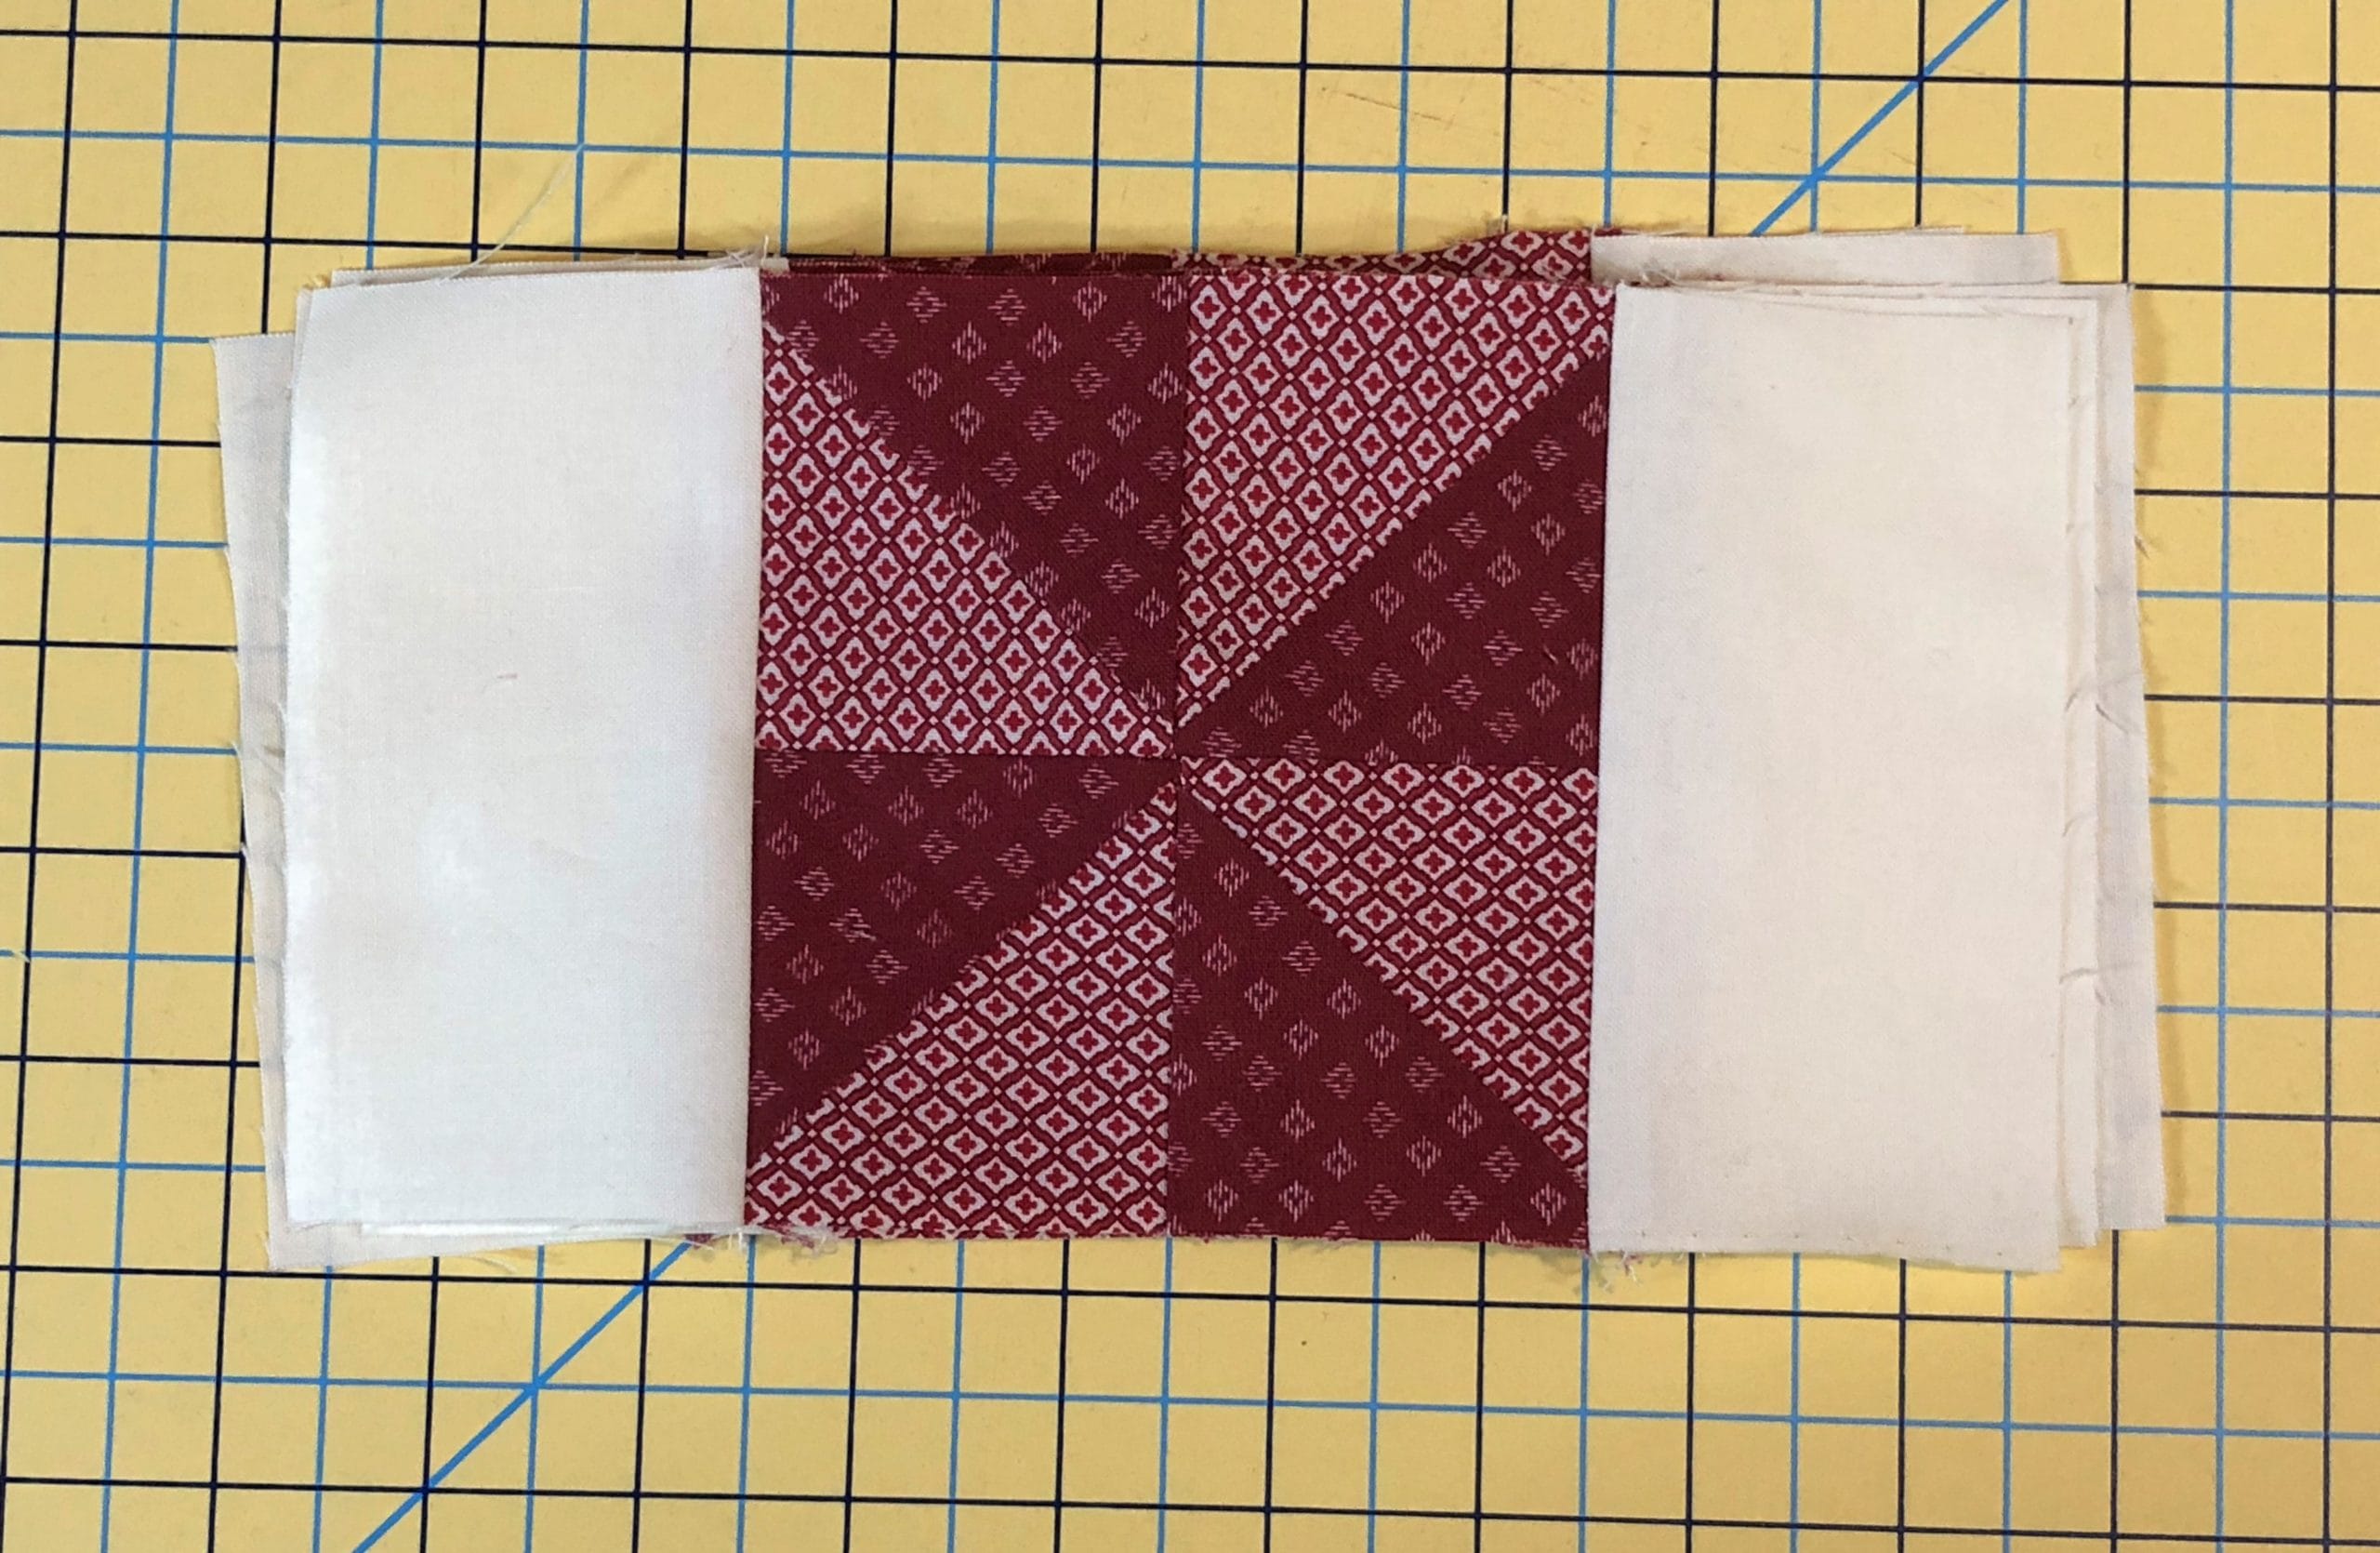
After the pinwheels are finished, there is more assembly line pinning and sewing to get all the D strips to the sides of the pinwheel.
Sew strips to pinwheels
Now that the sides are pressed open, I can put those C/D/C strips I previously made on the top and bottom.I like to pin at each seam, especially when there is a seam I can’t see on the back side. The pins serve as a reminder, so that I can make sure my seams aren’t flipping up as I sew.
I usually don’t press things until I have both sides sewn on, as you see below.
Press and trim
After pressing everything, I like to go ahead and square up the units. Make sure they are all 8-1/2” square. As you can see from the photo, there isn’t much to trim off. I like having the edges all cleaned up for the next step.
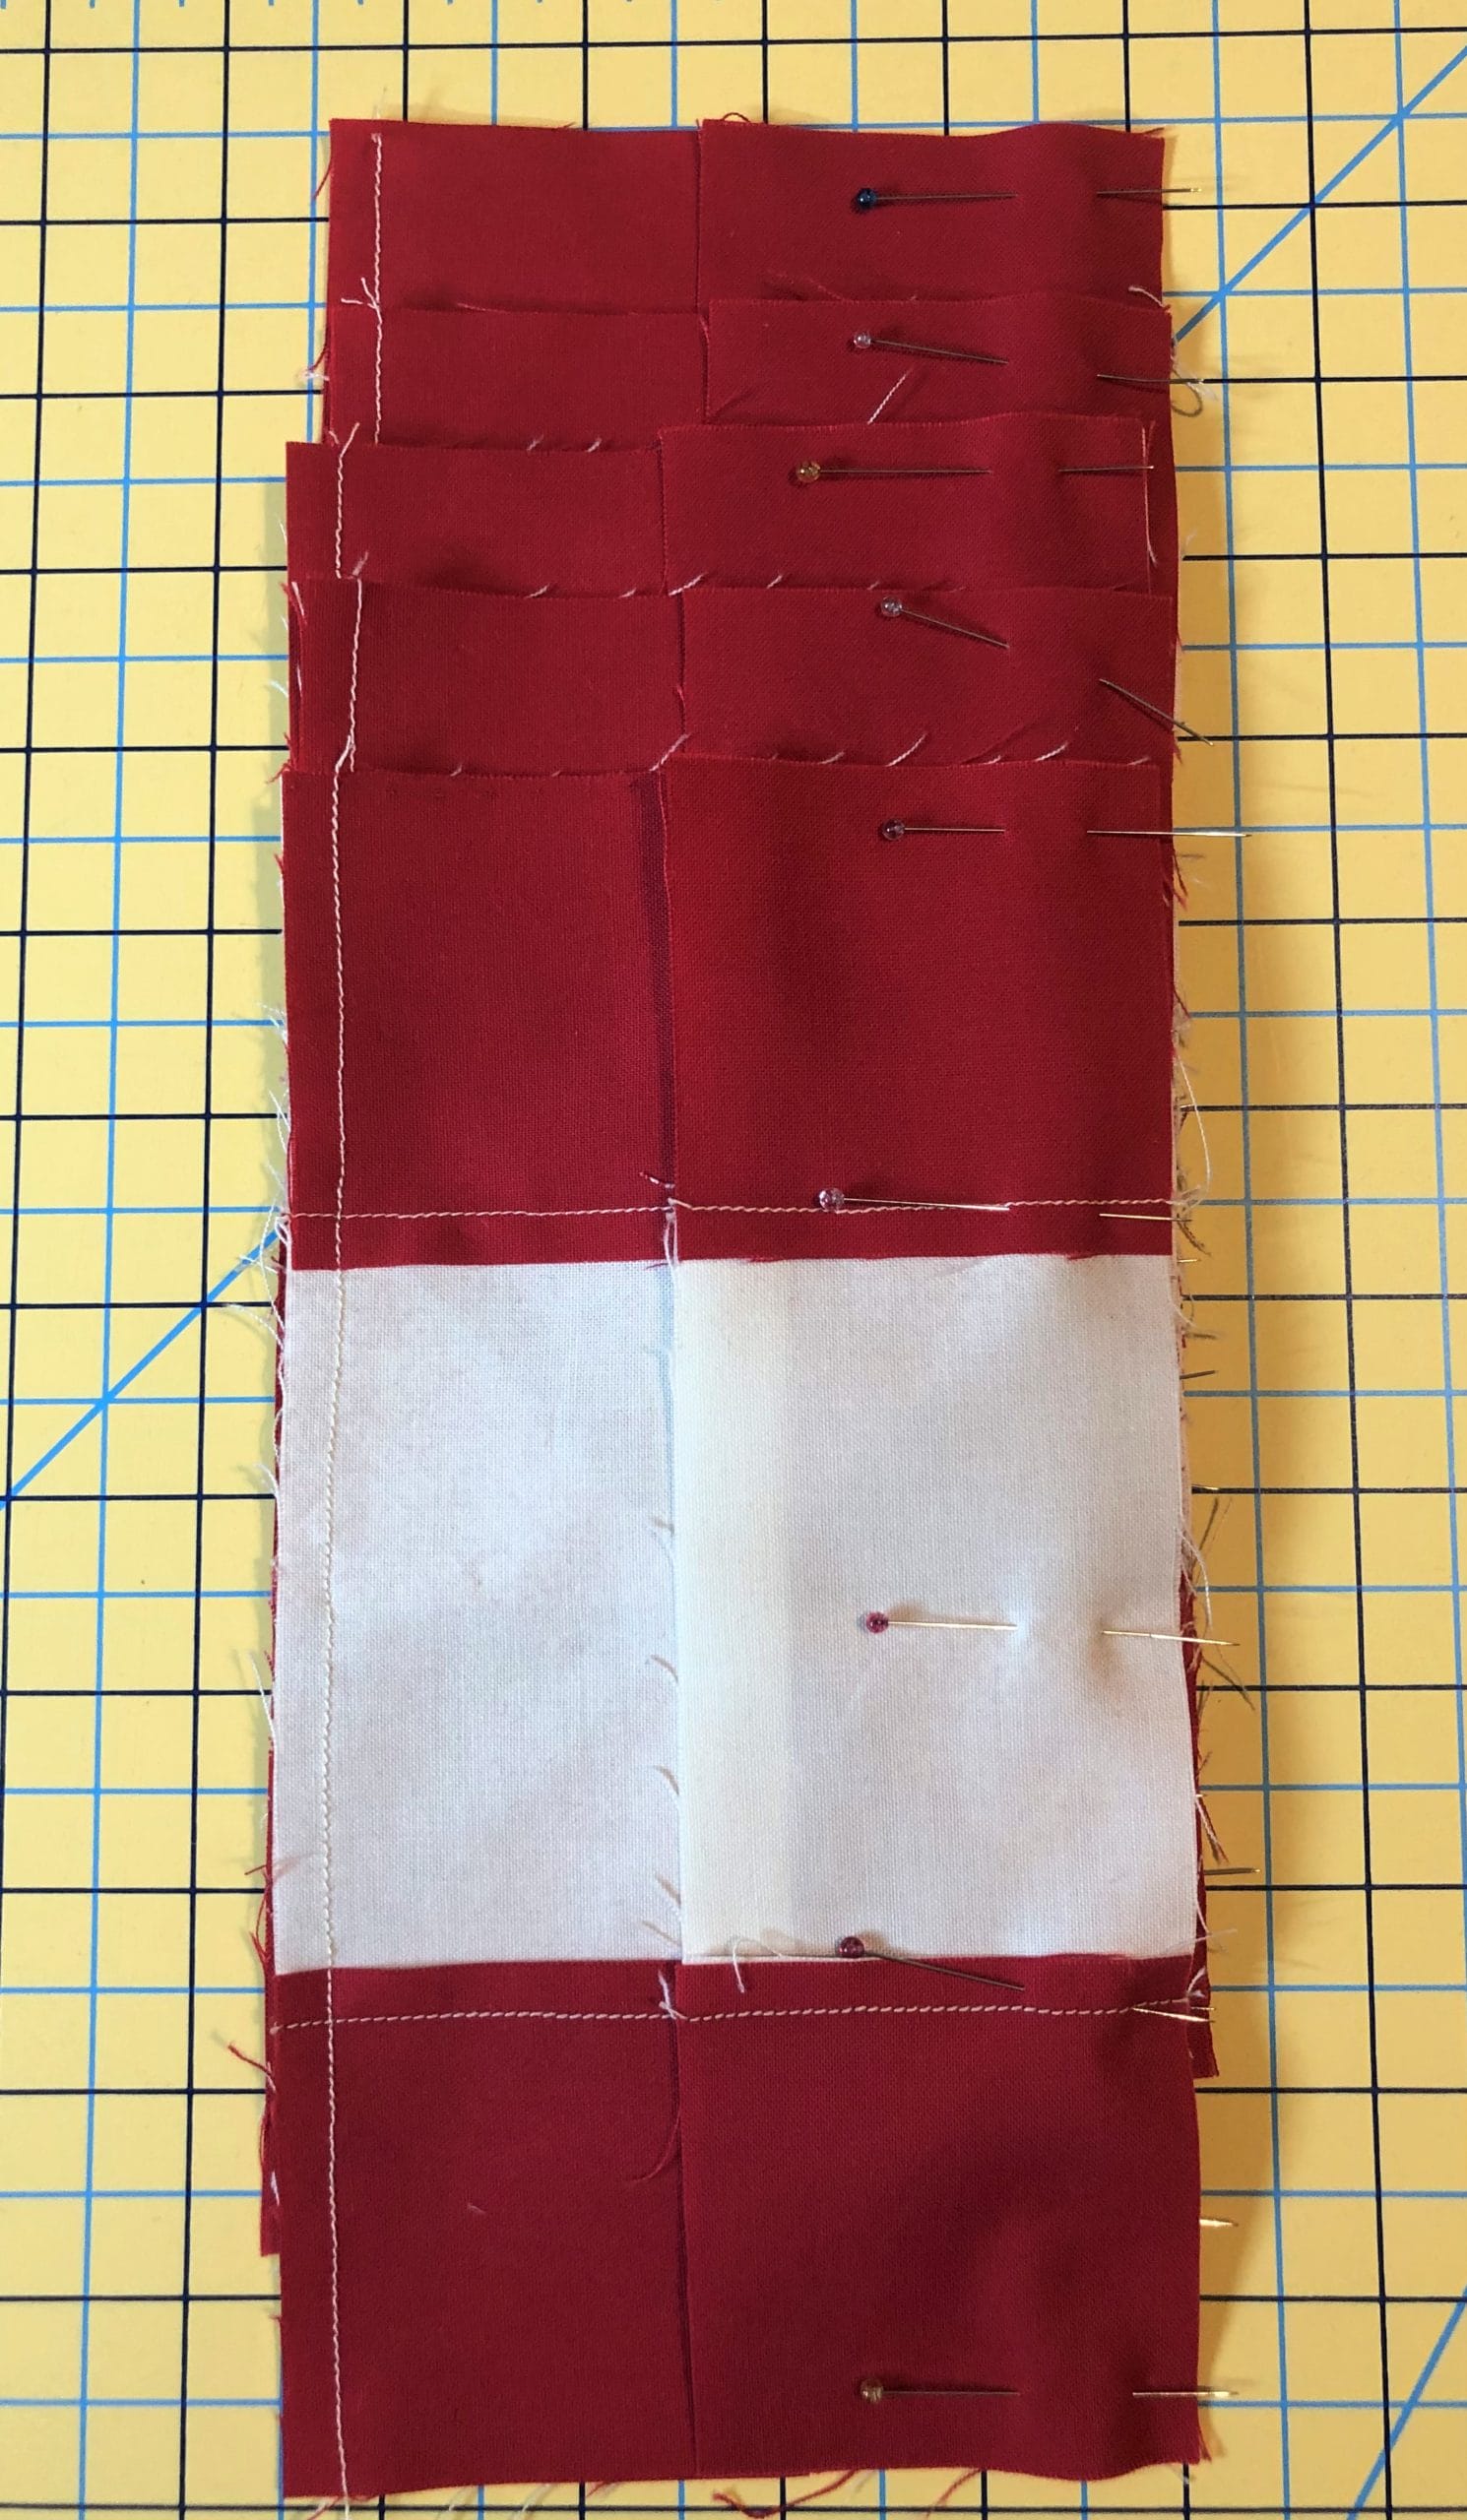
Attach final strips
All that is left is to sew on the final E strips, along with the C/E unit’s I’d previously made. Sometimes I like to pin both sides at once, so I can stay at my machine and sew like crazy!
By sewing the blocks this way, I was able to get all 5 done in a matter of hours. I love it when things come together quickly! By the time we are done with this quilt, we will be able to make these blocks in a flash, right?!
I hope you all have a wonderful November, and I’ll catch you all next month for Ruby BOM Month 5! – Kristin
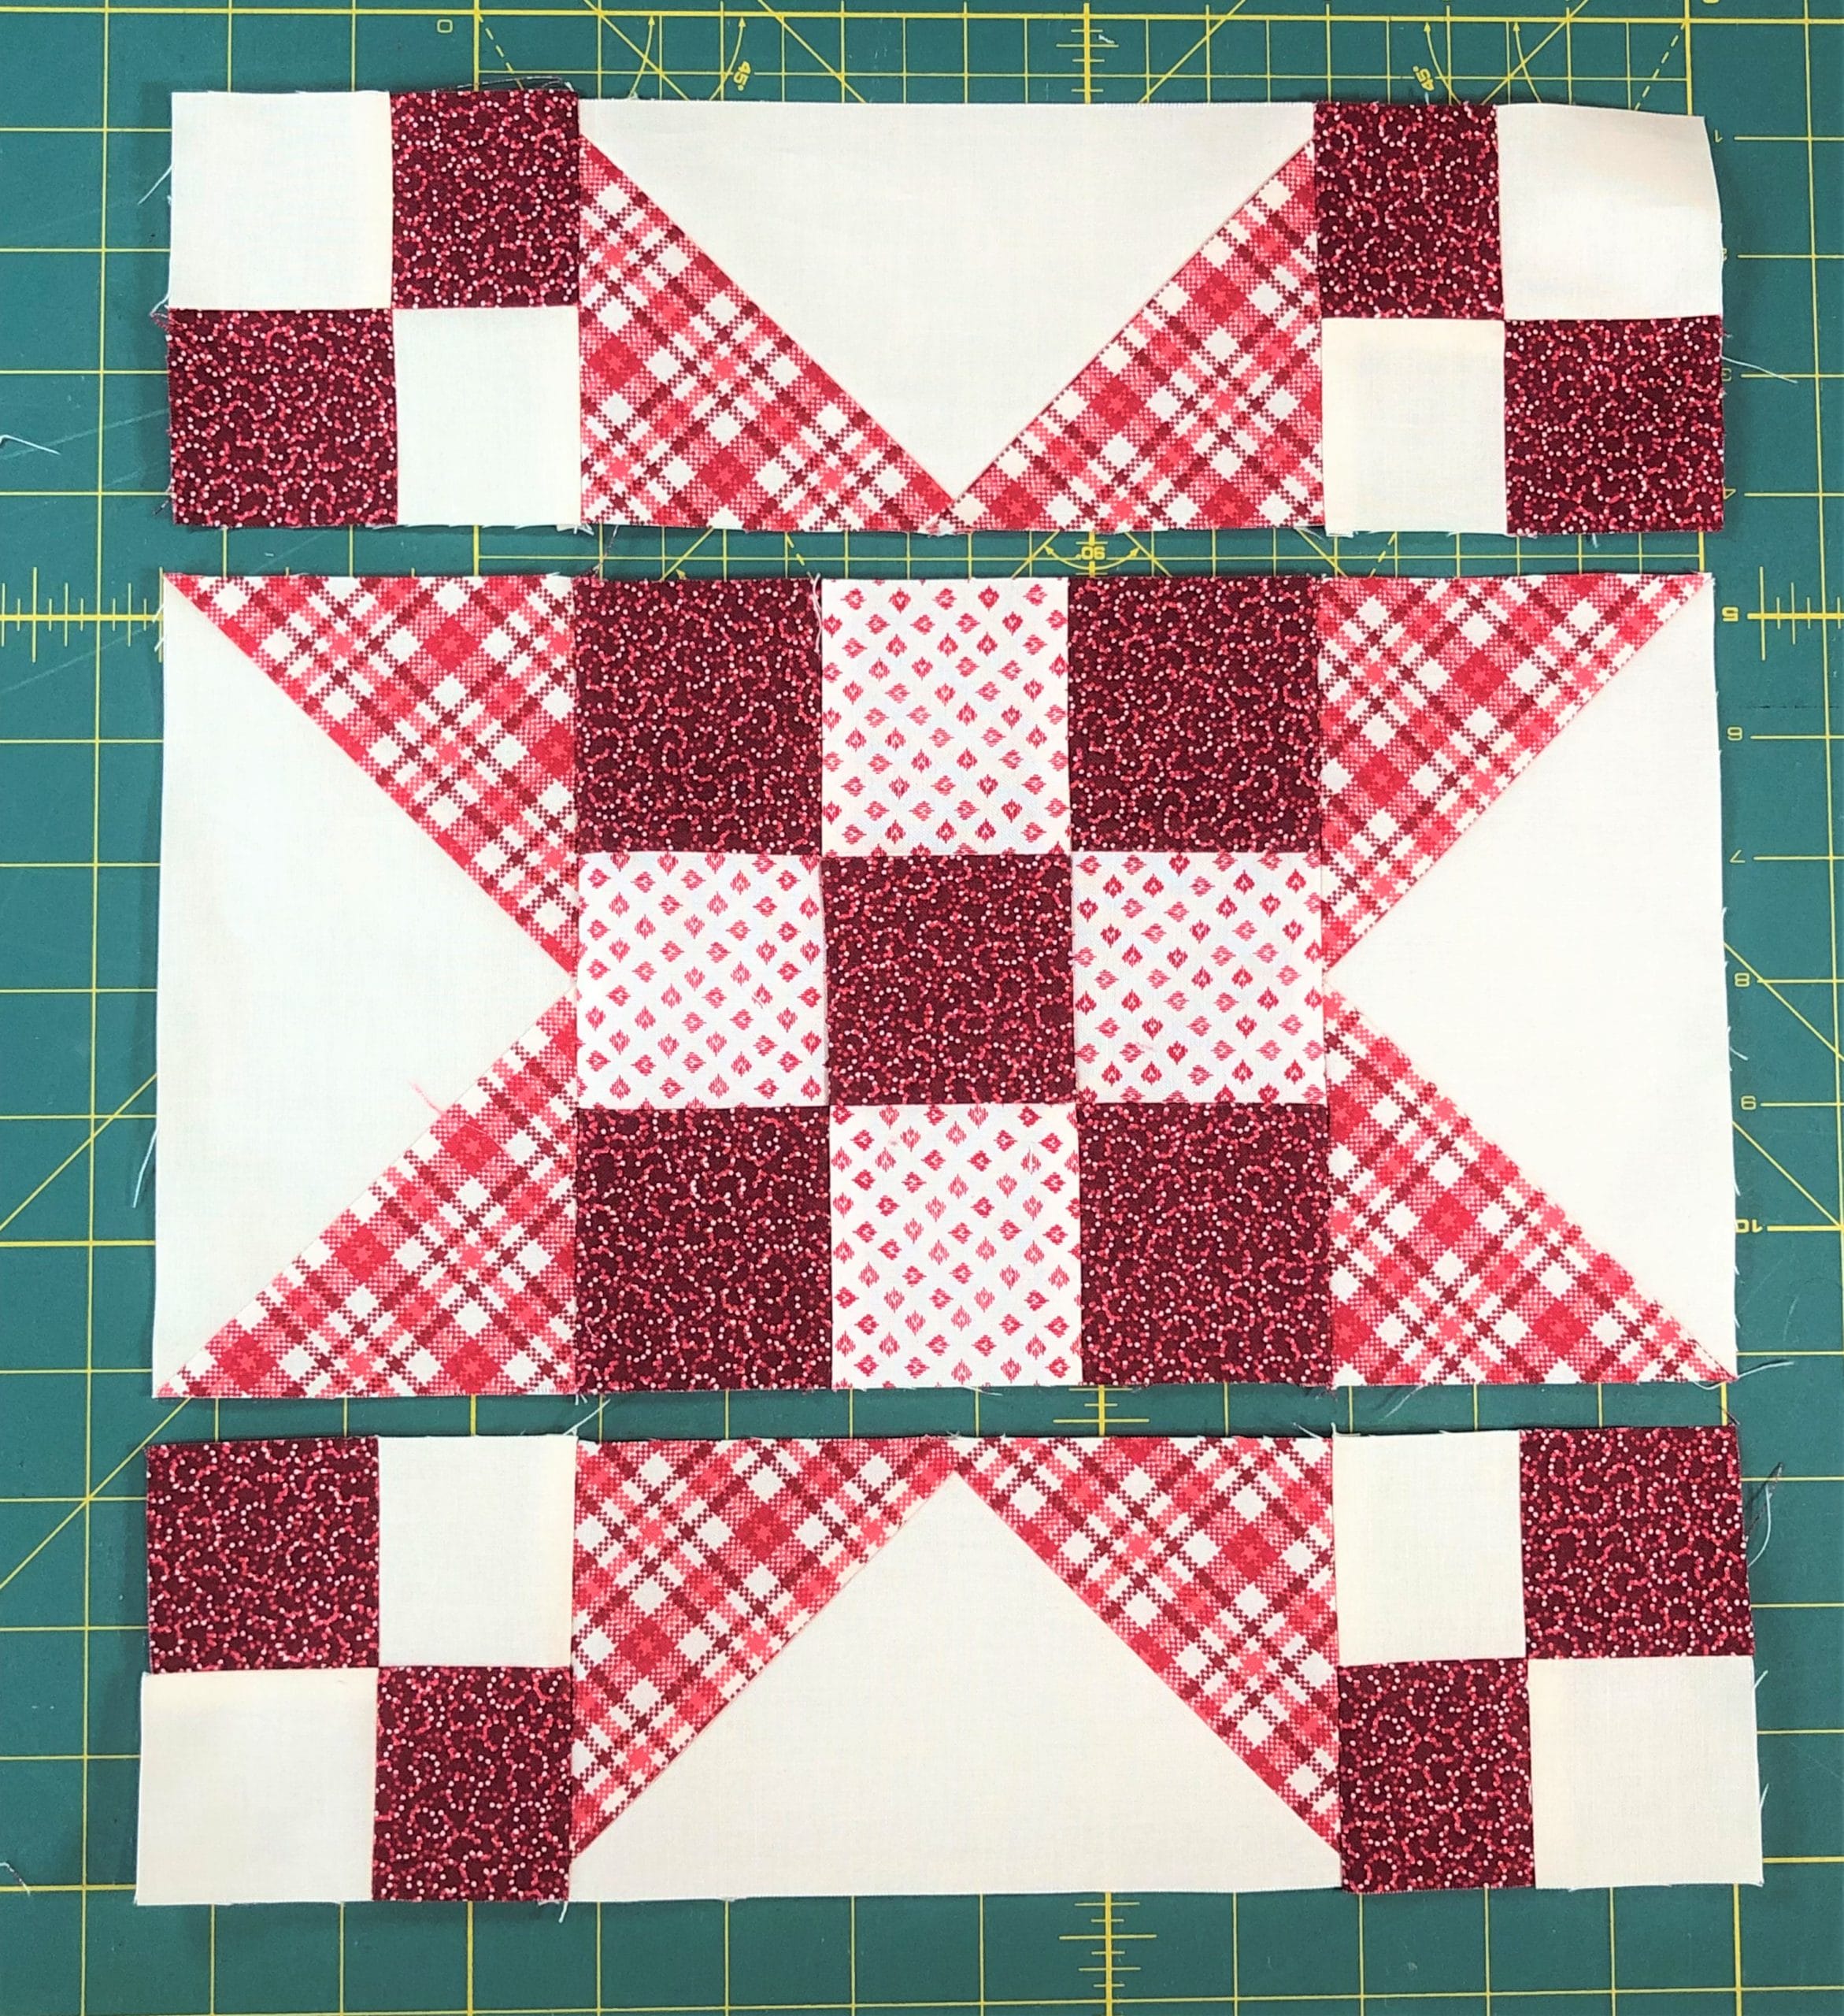
Happy Fall everyone! I’m so happy to join you all again, and provide a little tutorial for this month’s blocks (#6, #7, #15, and #17). Let’s dive right in!
Block #6
This block may look fancy, but it is really just a Sawtooth Star with some extra half square triangles around the border.
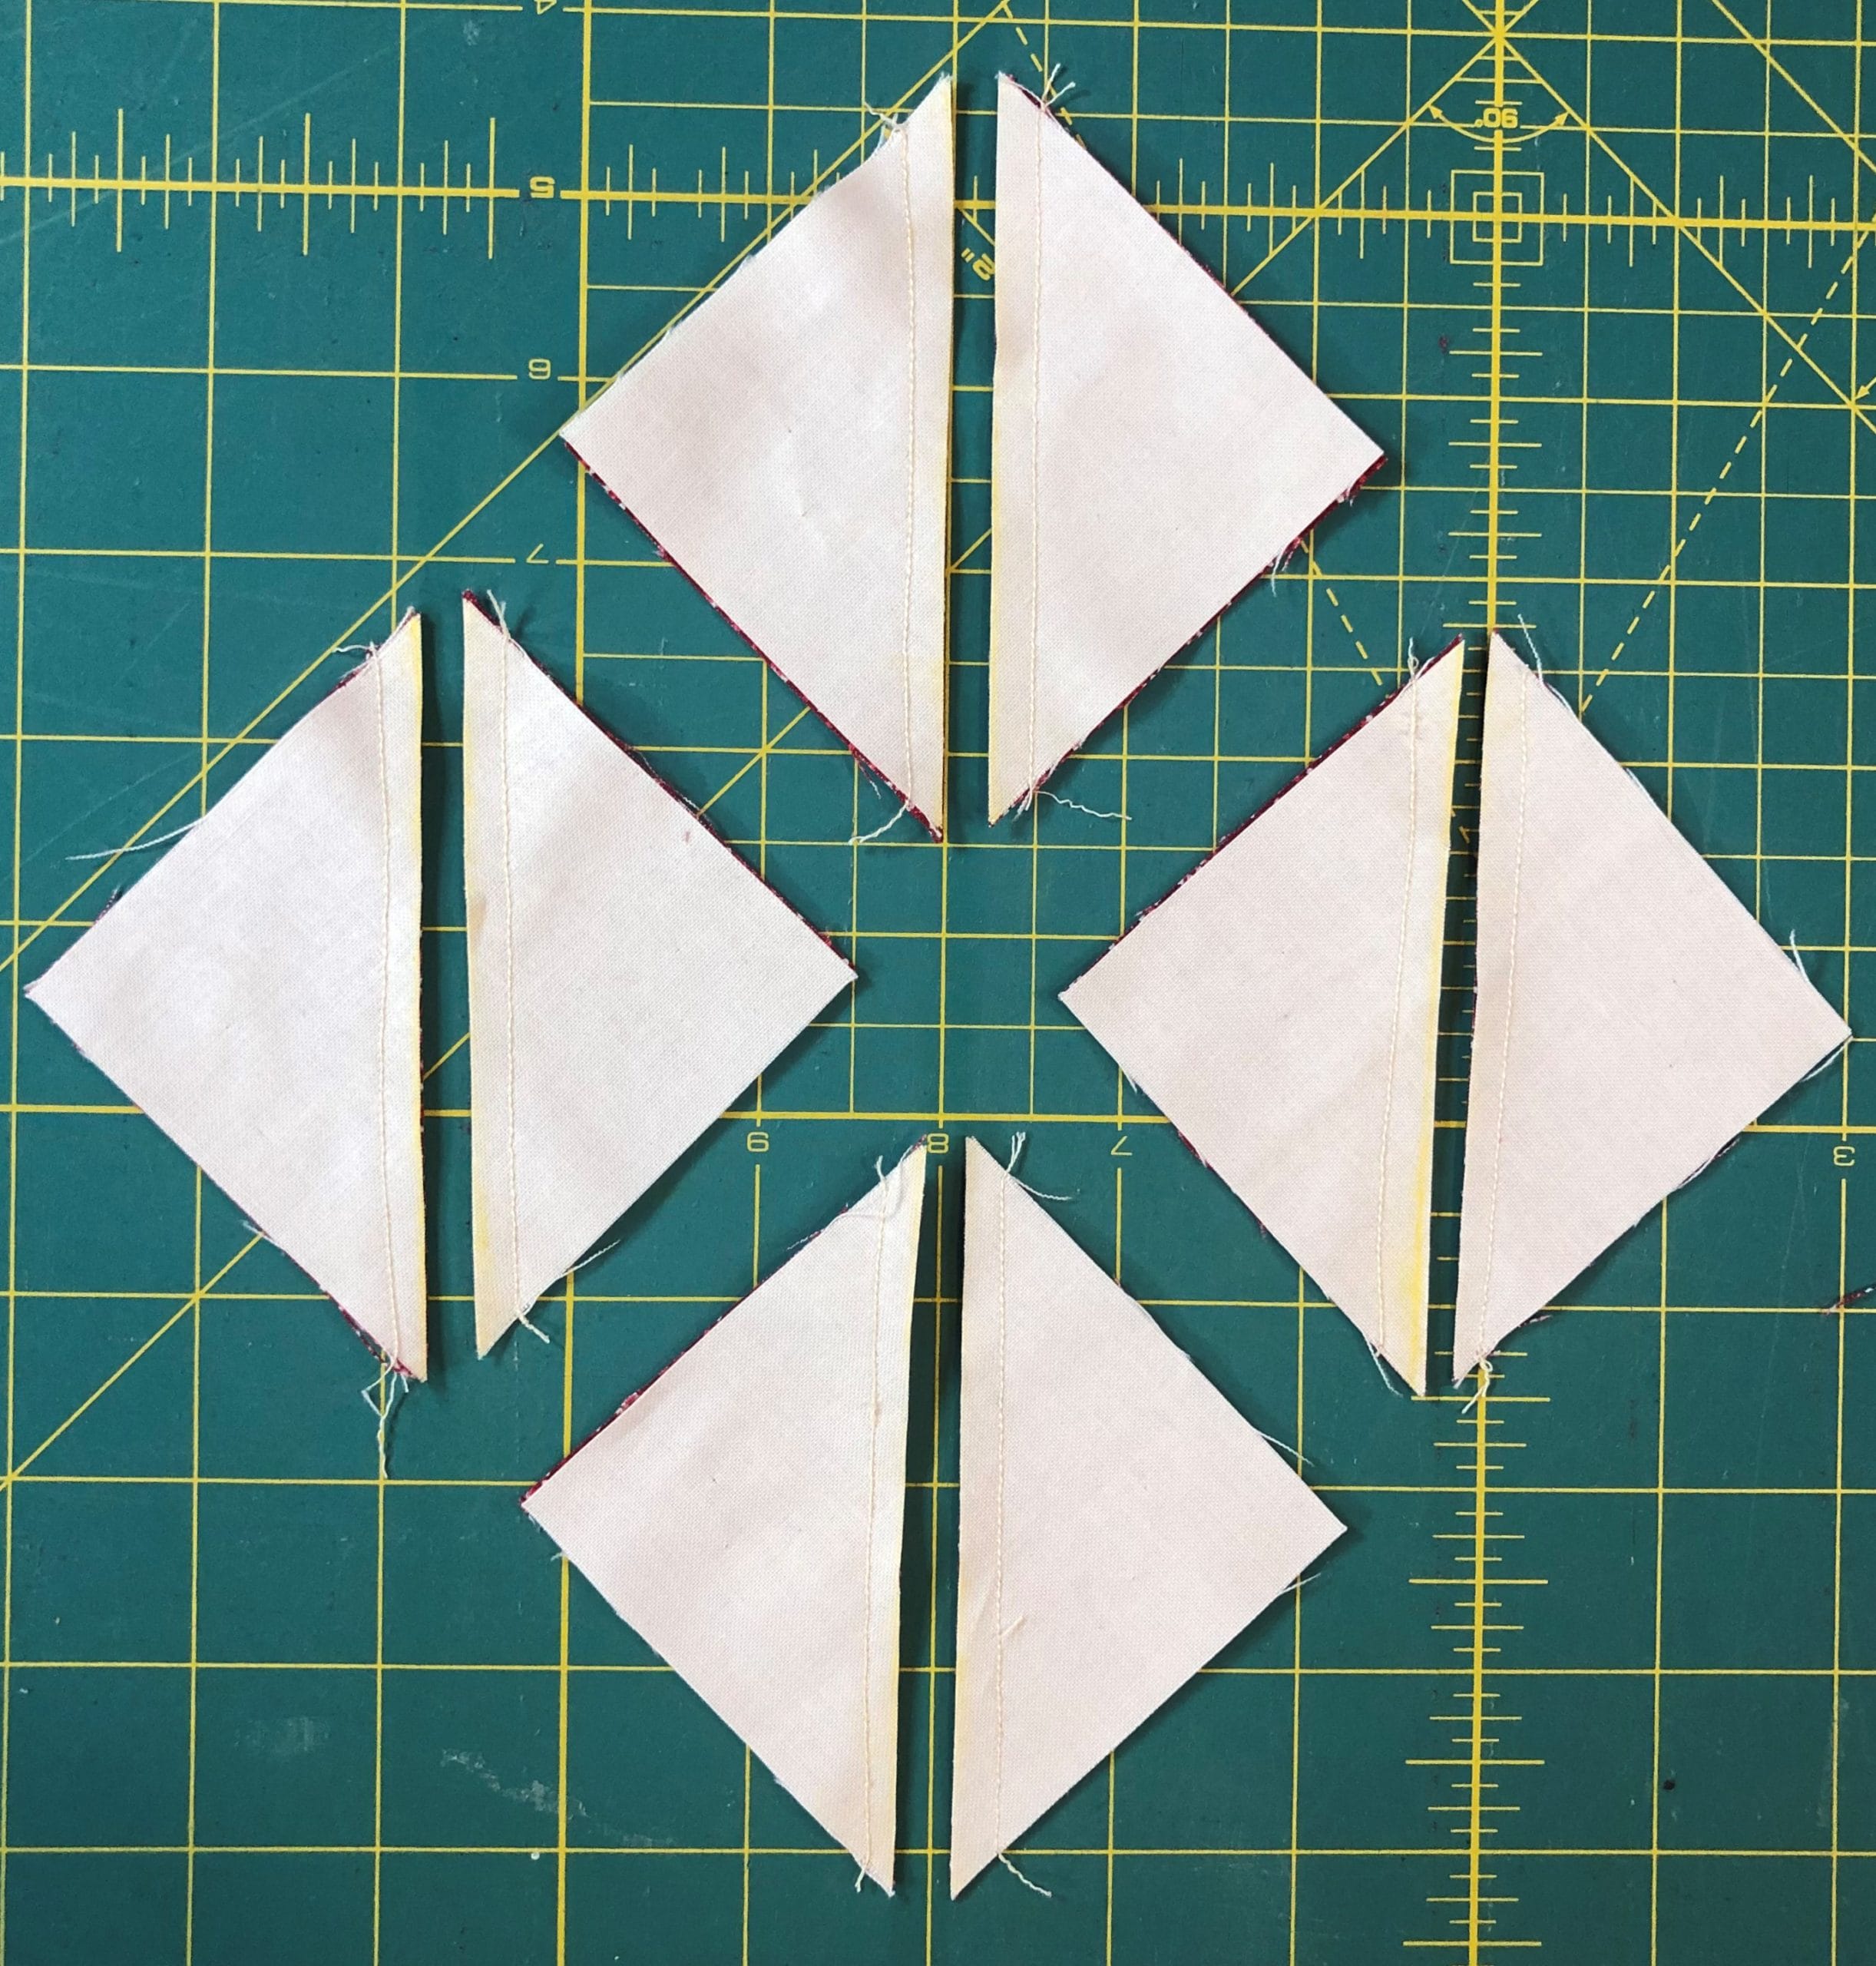
To make the Sawtooth Star center, we’ll begin in steps 1 and 2 by making some no-waste flying geese.
Step 1:
Step 2:
Place two B squares on the C square, with the marked lines matching up like you see above. After stitching a ¼” away from each side of the marked line, cut on the marked line and press the B – now triangles- downward.
Place an additional B square on each unit as you see here (down the center of C) and repeat the same process of stitching a ¼” away from each side of the marked line, then cutting on the line afterward. Press, trim, and you end up with 4 flying geese.
Step 3:
Now all you have to do is sew two of these to the center block, add the D squares to two more flying geese, then sew everything together. Check to make sure this measures 8-1/2” square, and trim if necessary.
Step 4:
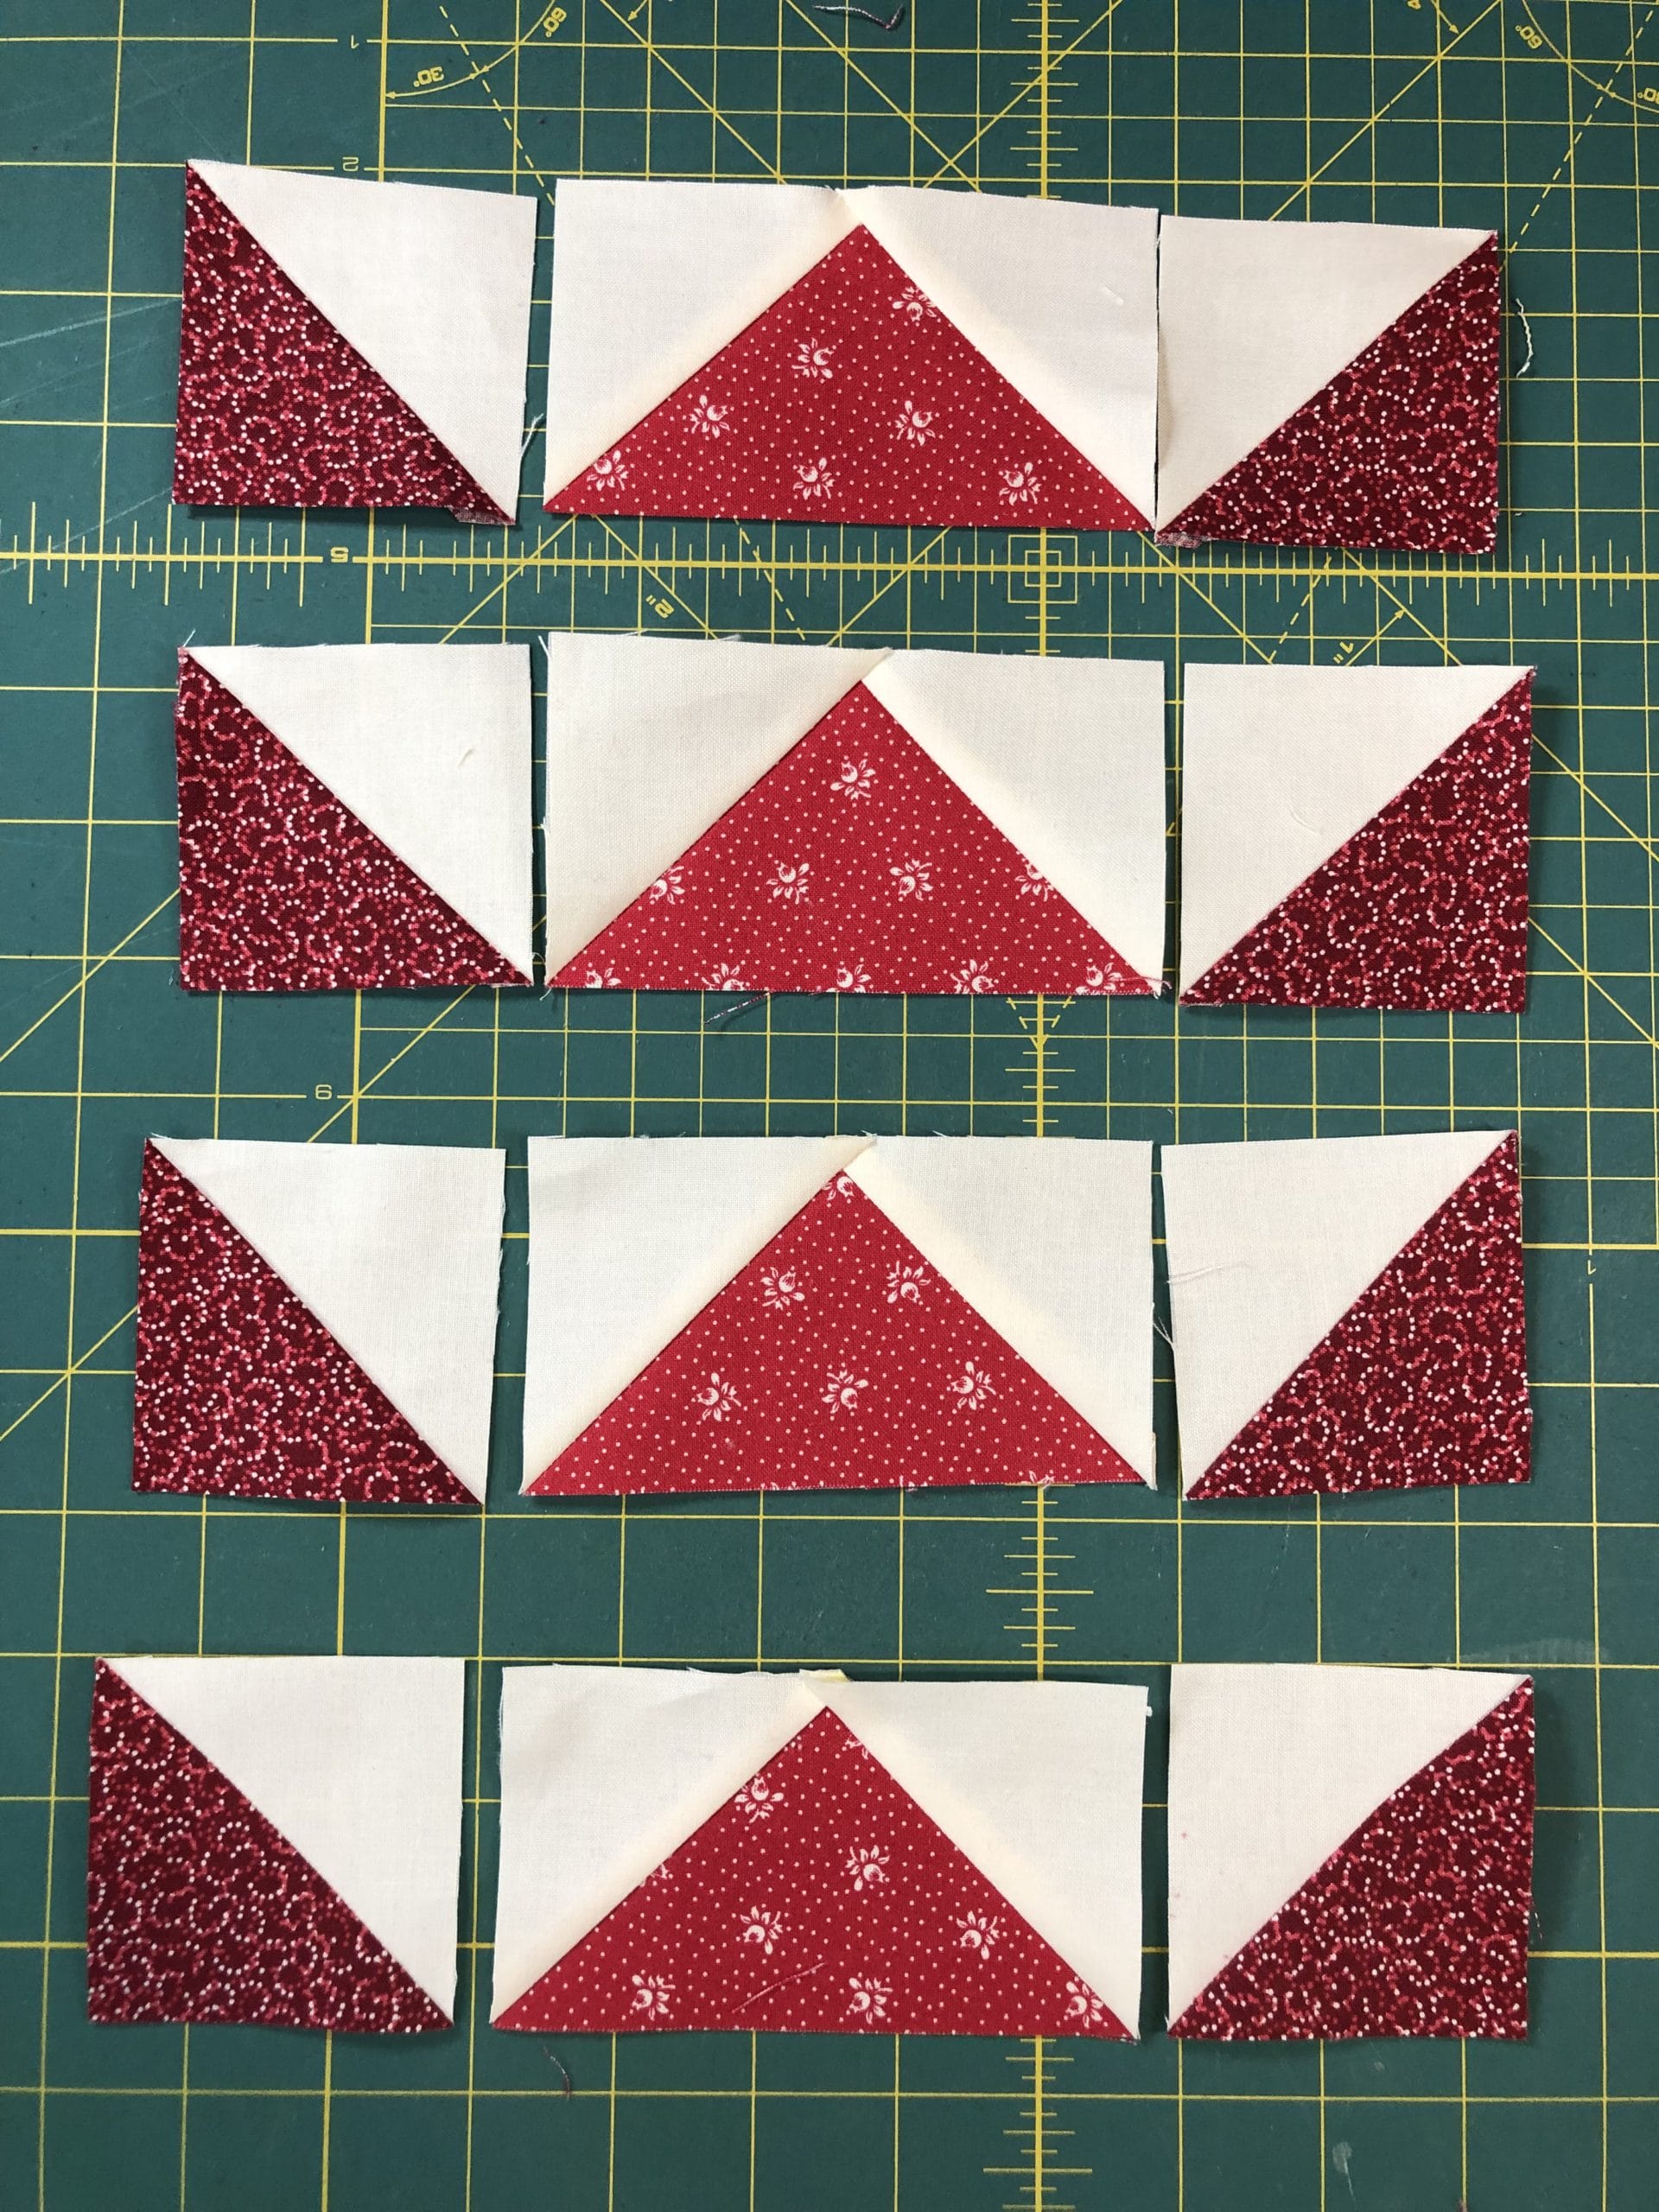
Next we’ll make 12 half square triangles by pairing up those E and F squares, and again stitching ¼” away from each side of the marked lines, then cutting on the line for each unit. Press toward the Solid Ivory (F). I know it’s customary to press toward the dark side, but trust me, doing the opposite this time will enable you to nest your seams together later.
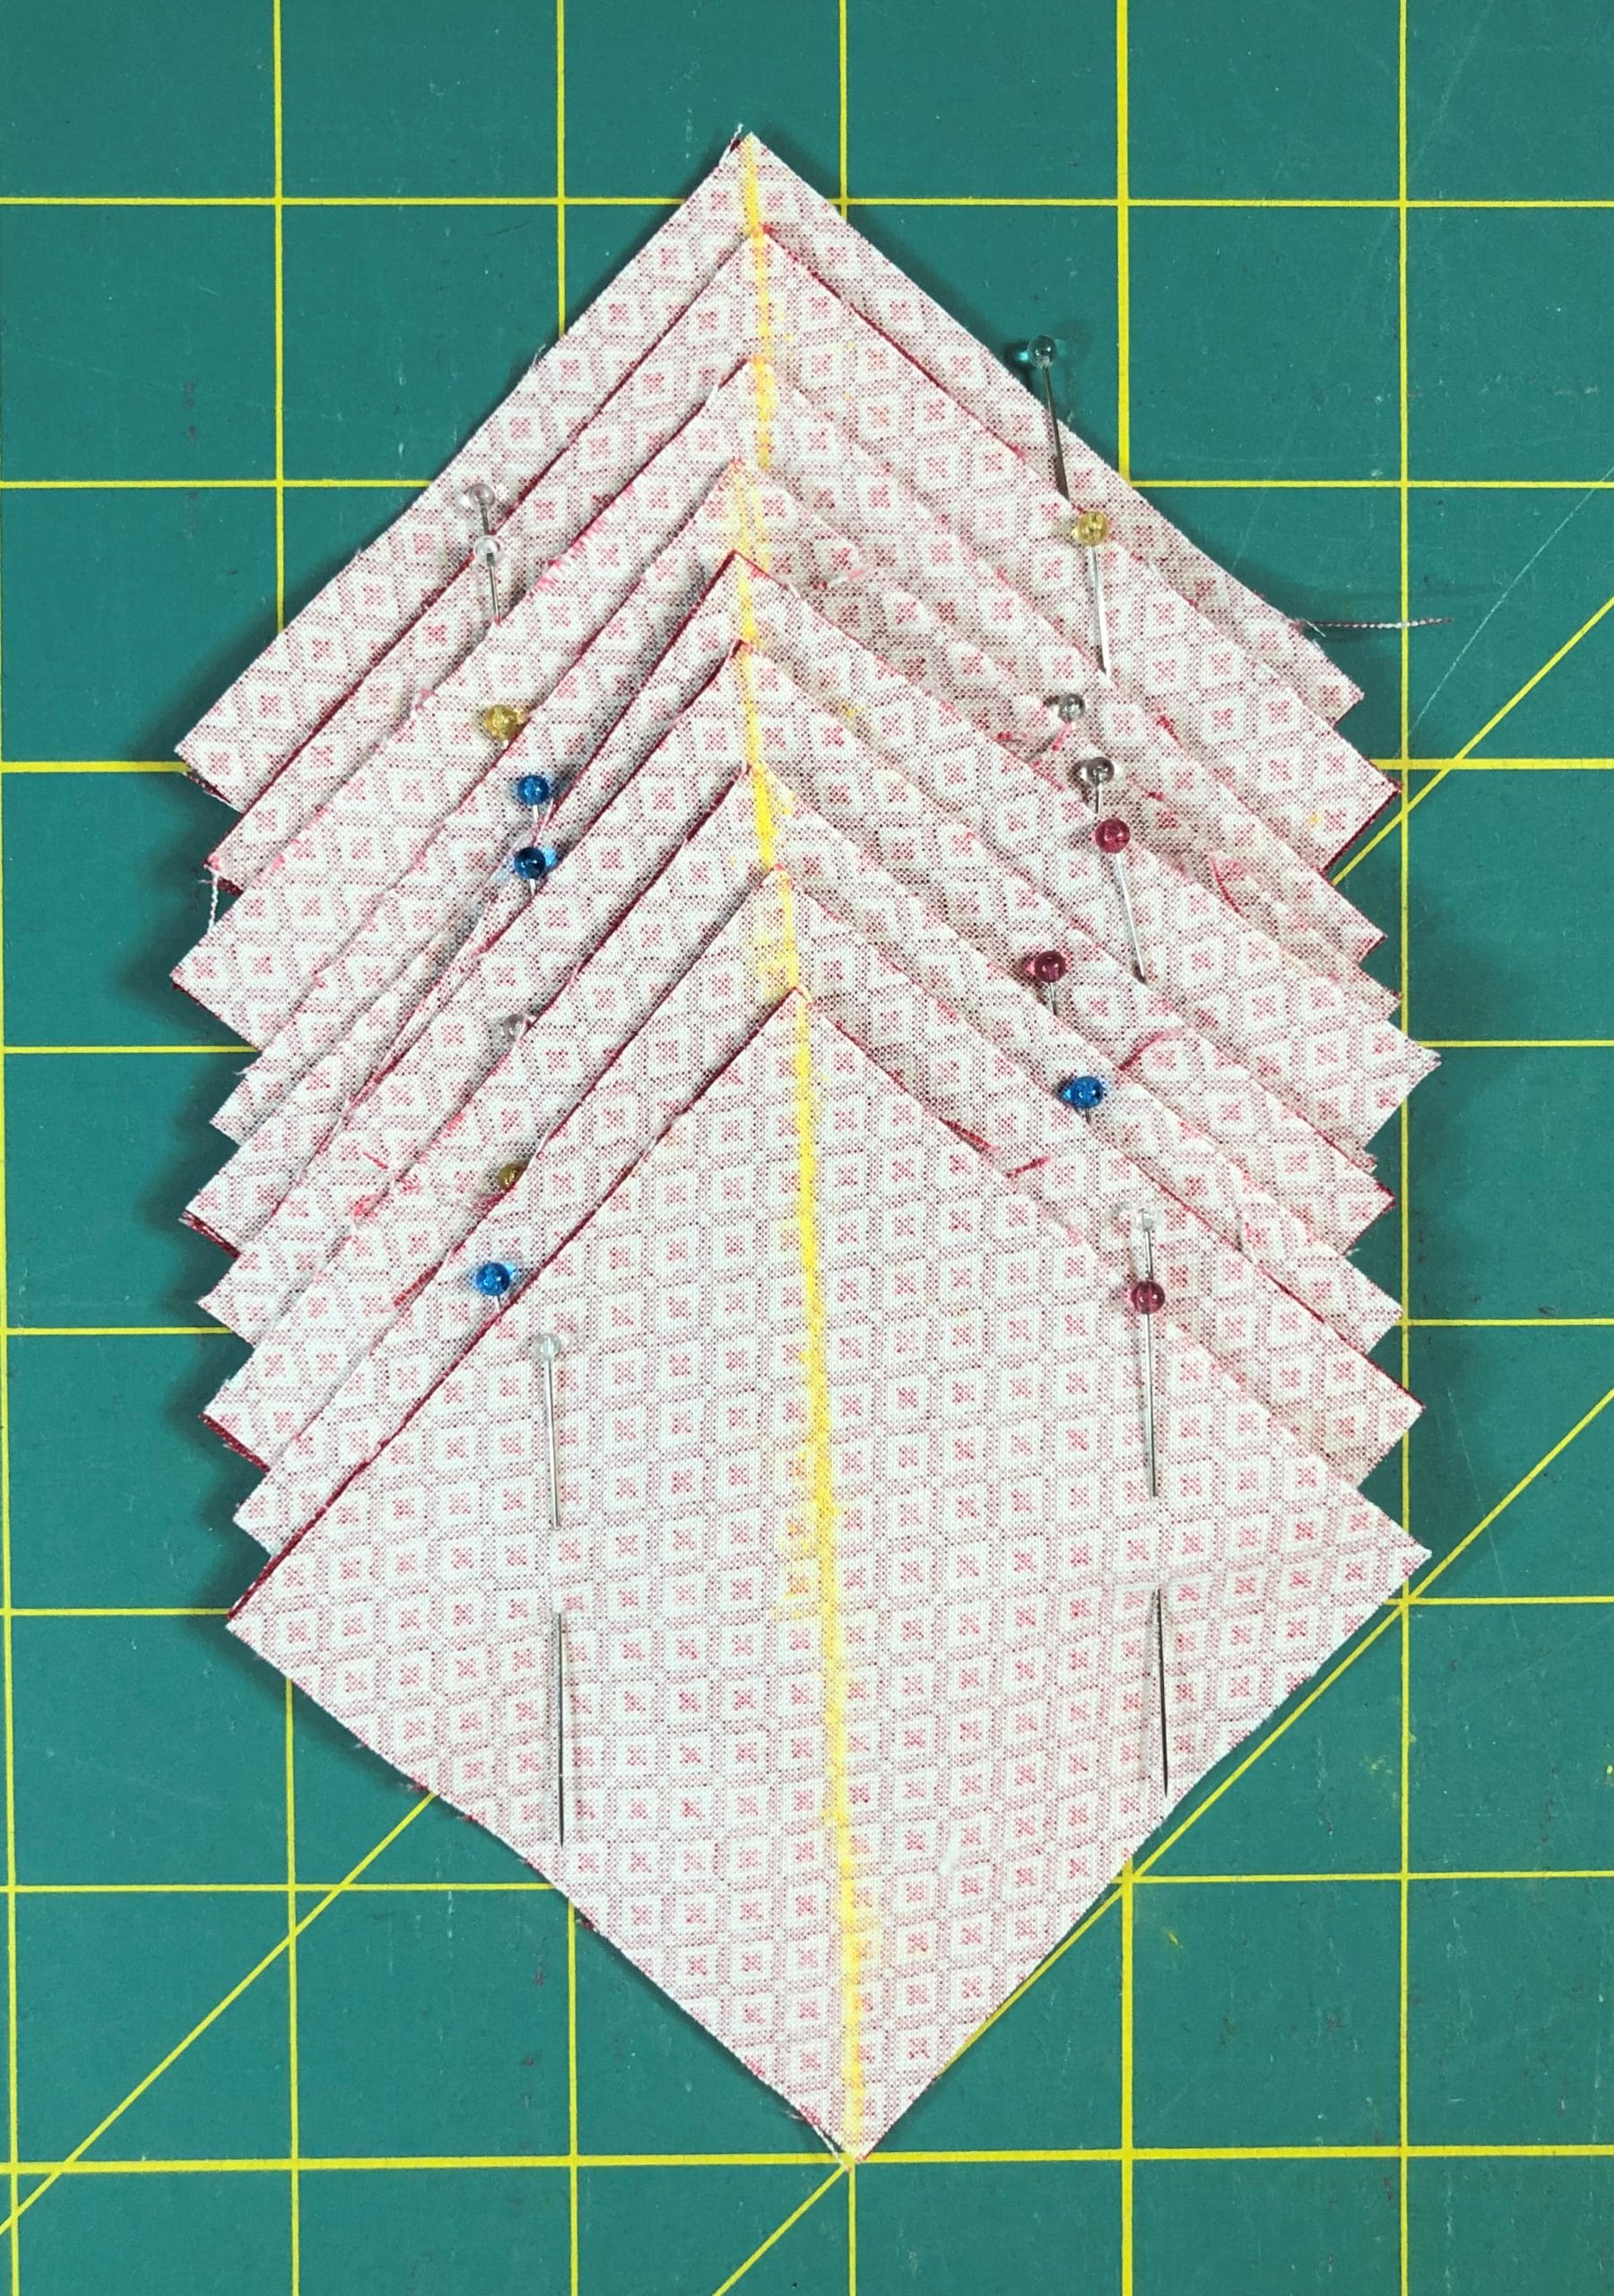
A note about no-waste half square triangles: I give my half-square triangle cutting measurements to be mathematically correct, but please feel free to cut the squares slightly bigger if you want so you can trim them as needed. There’s nothing wrong with cutting your E and F squares at 3” square, and then after you are finished and they are pressed, you can trim them to be 2-1/2” square. My point is, you do what works for you. You won’t run out of fabric. Based on feedback from previous BOMs I’ve done, I was quite generous with the yardage you’ll be getting for this quilt.
Step 5:
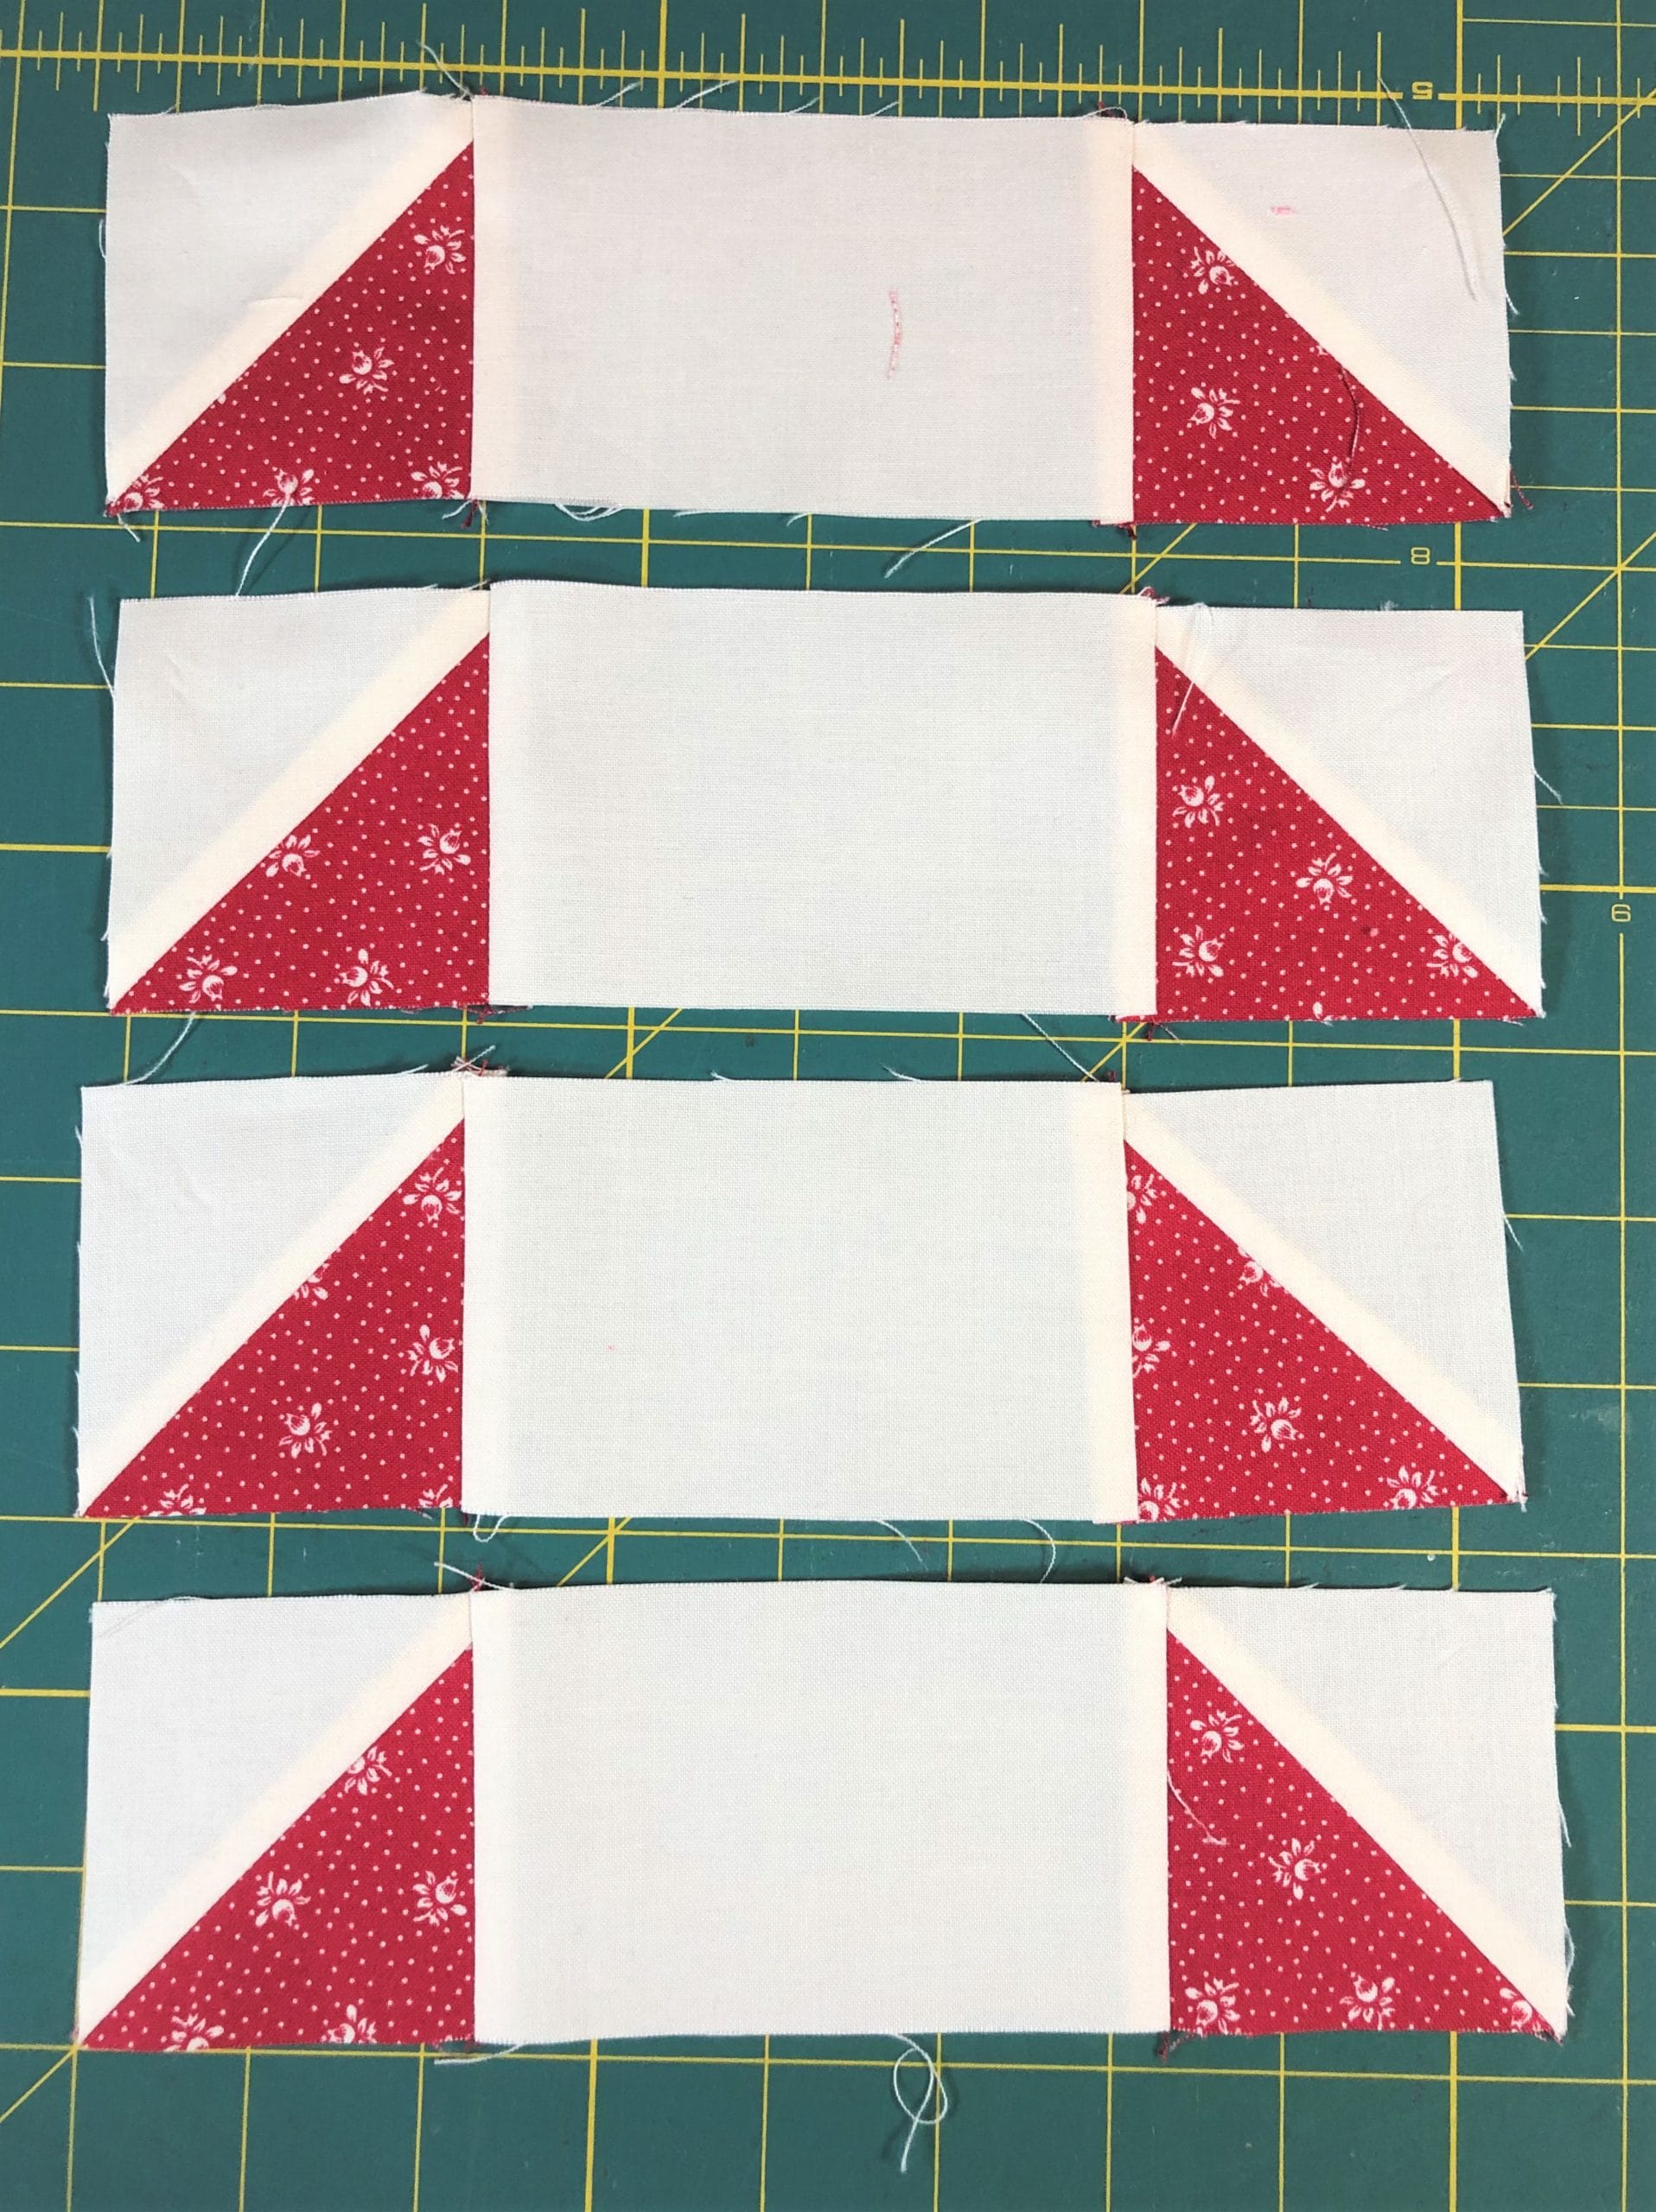
In step 5 you’ll sew an E/F square to each side of a G strip like so: Make sure the red E triangles are facing inward.
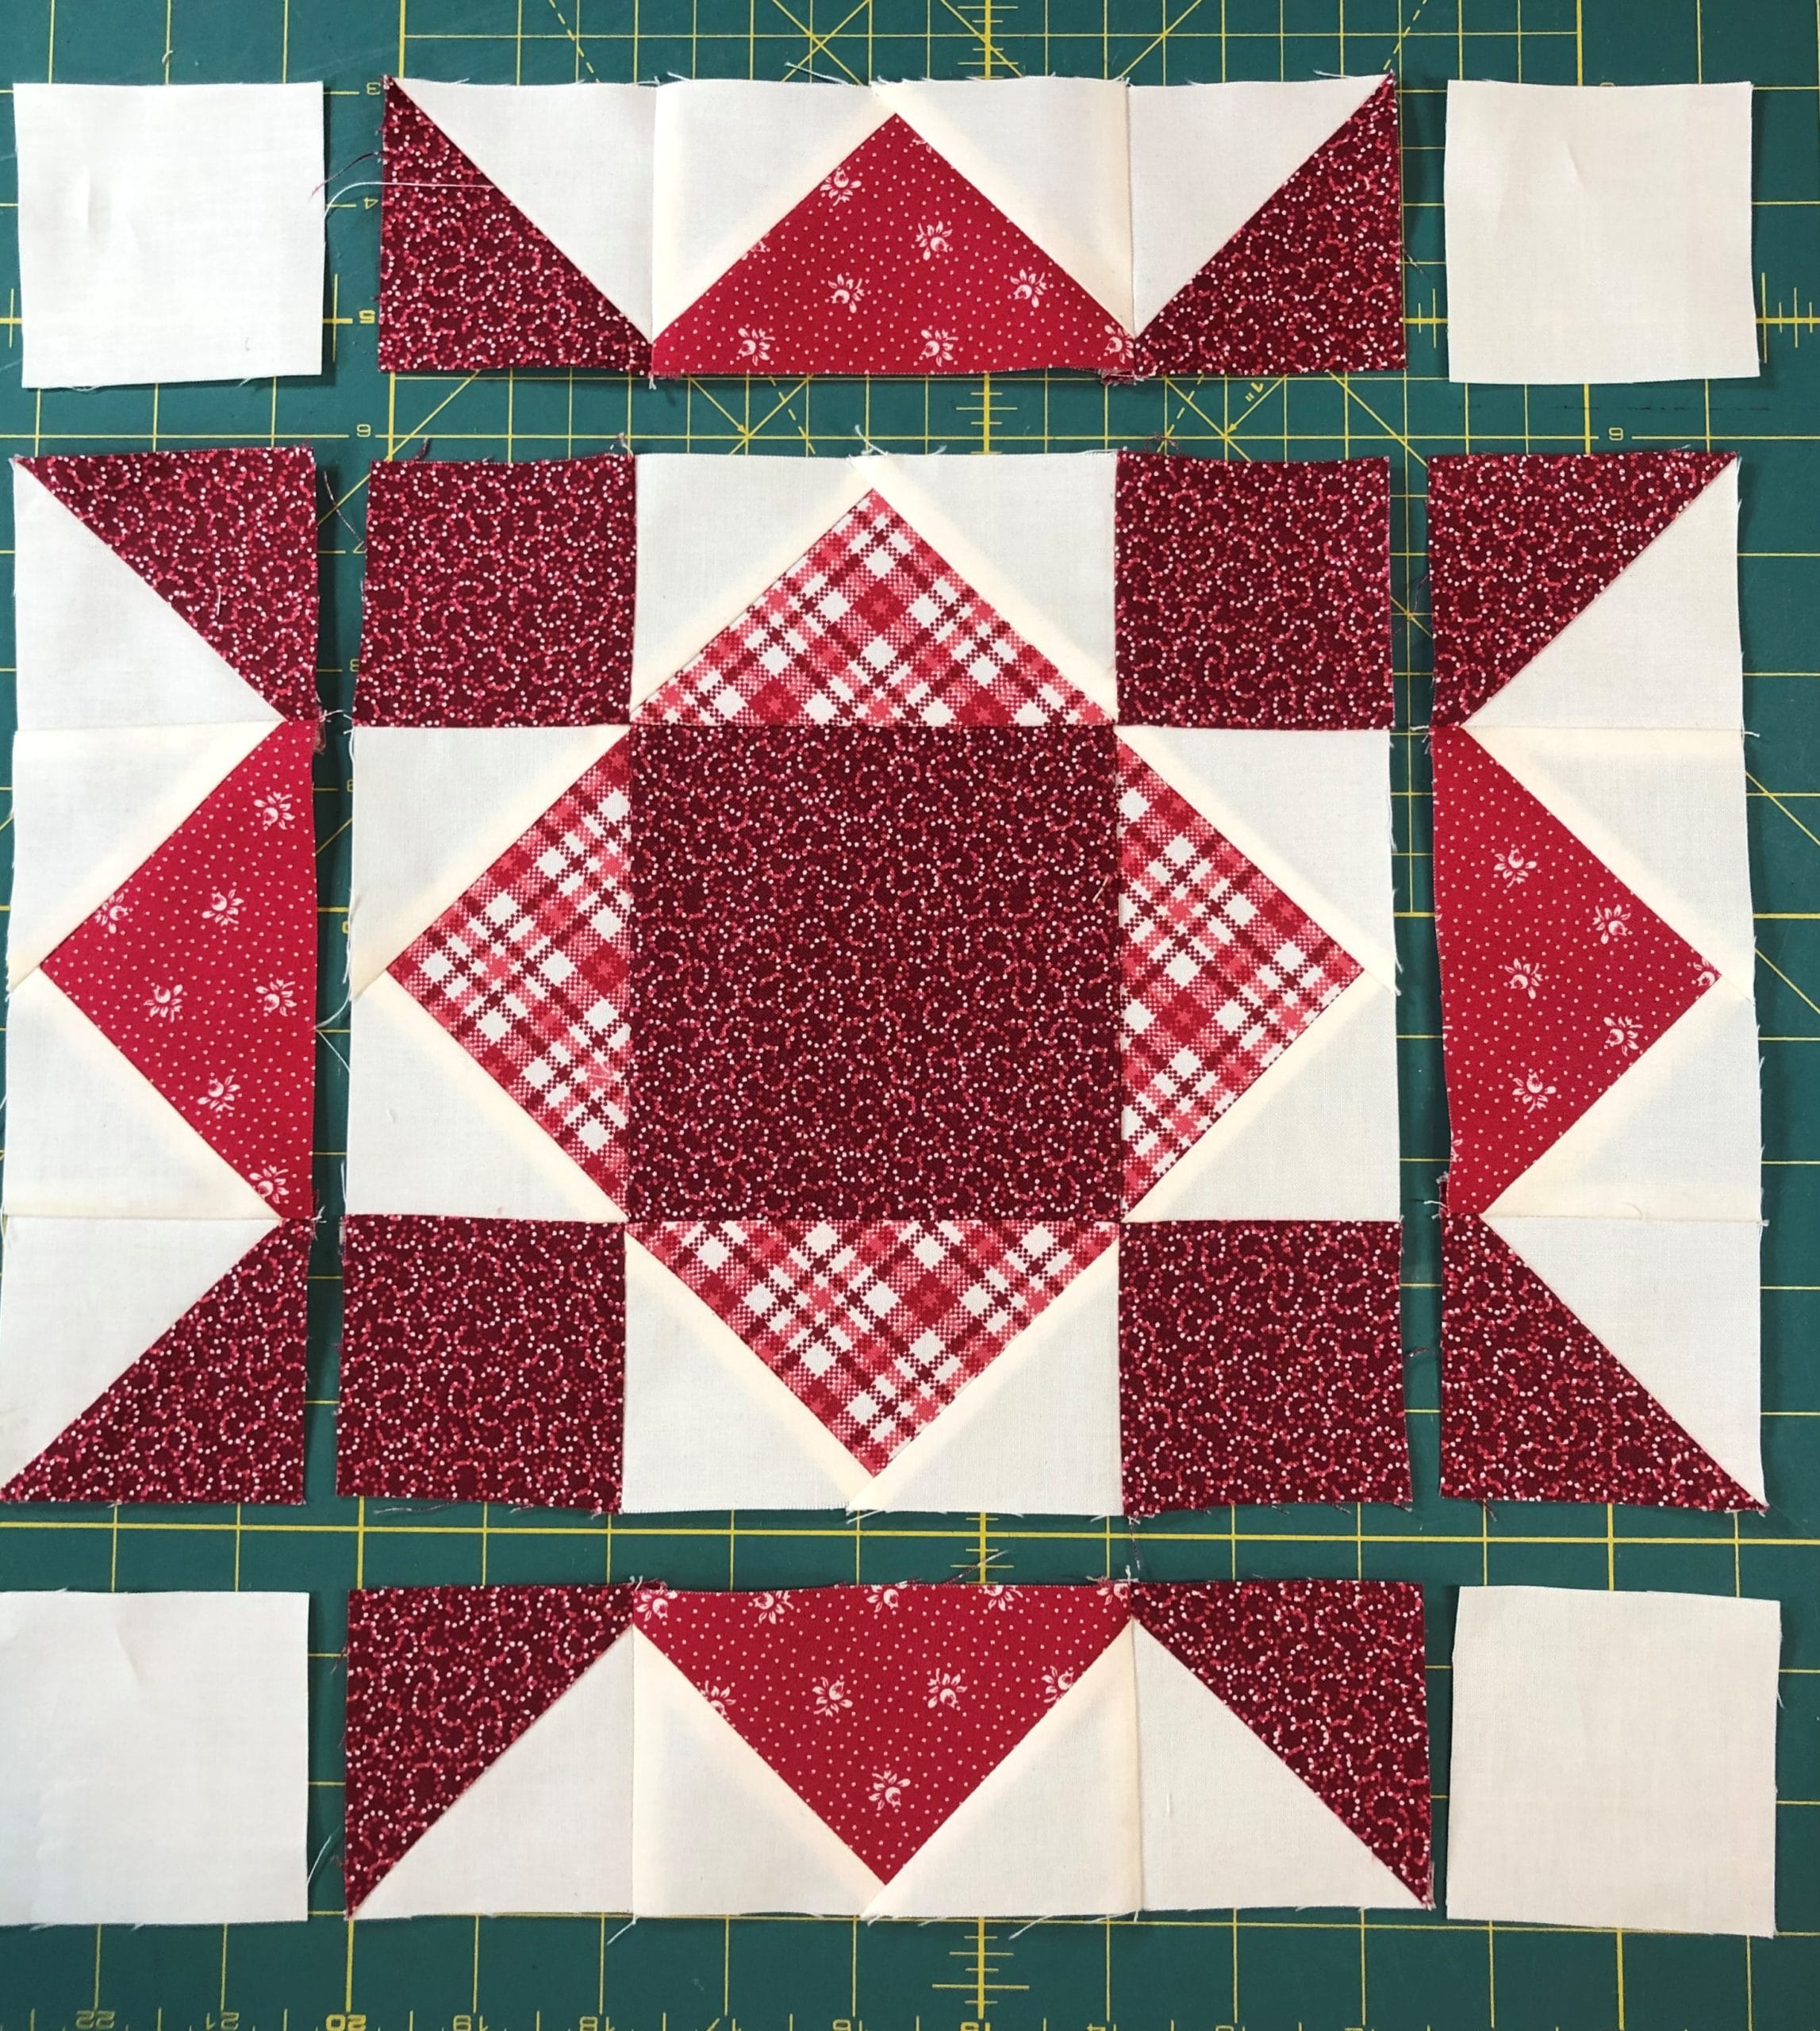
Now it’s time to put all the components together. Before I sew my block together, I like to lay everything out just to make sure I have everything going the right direction. I want to make sure I have all those half square triangles oriented correctly.
Follow the directions in step 6, and pay attention to the pressing arrows so that all your seams will fit together nicely.
Step 6:
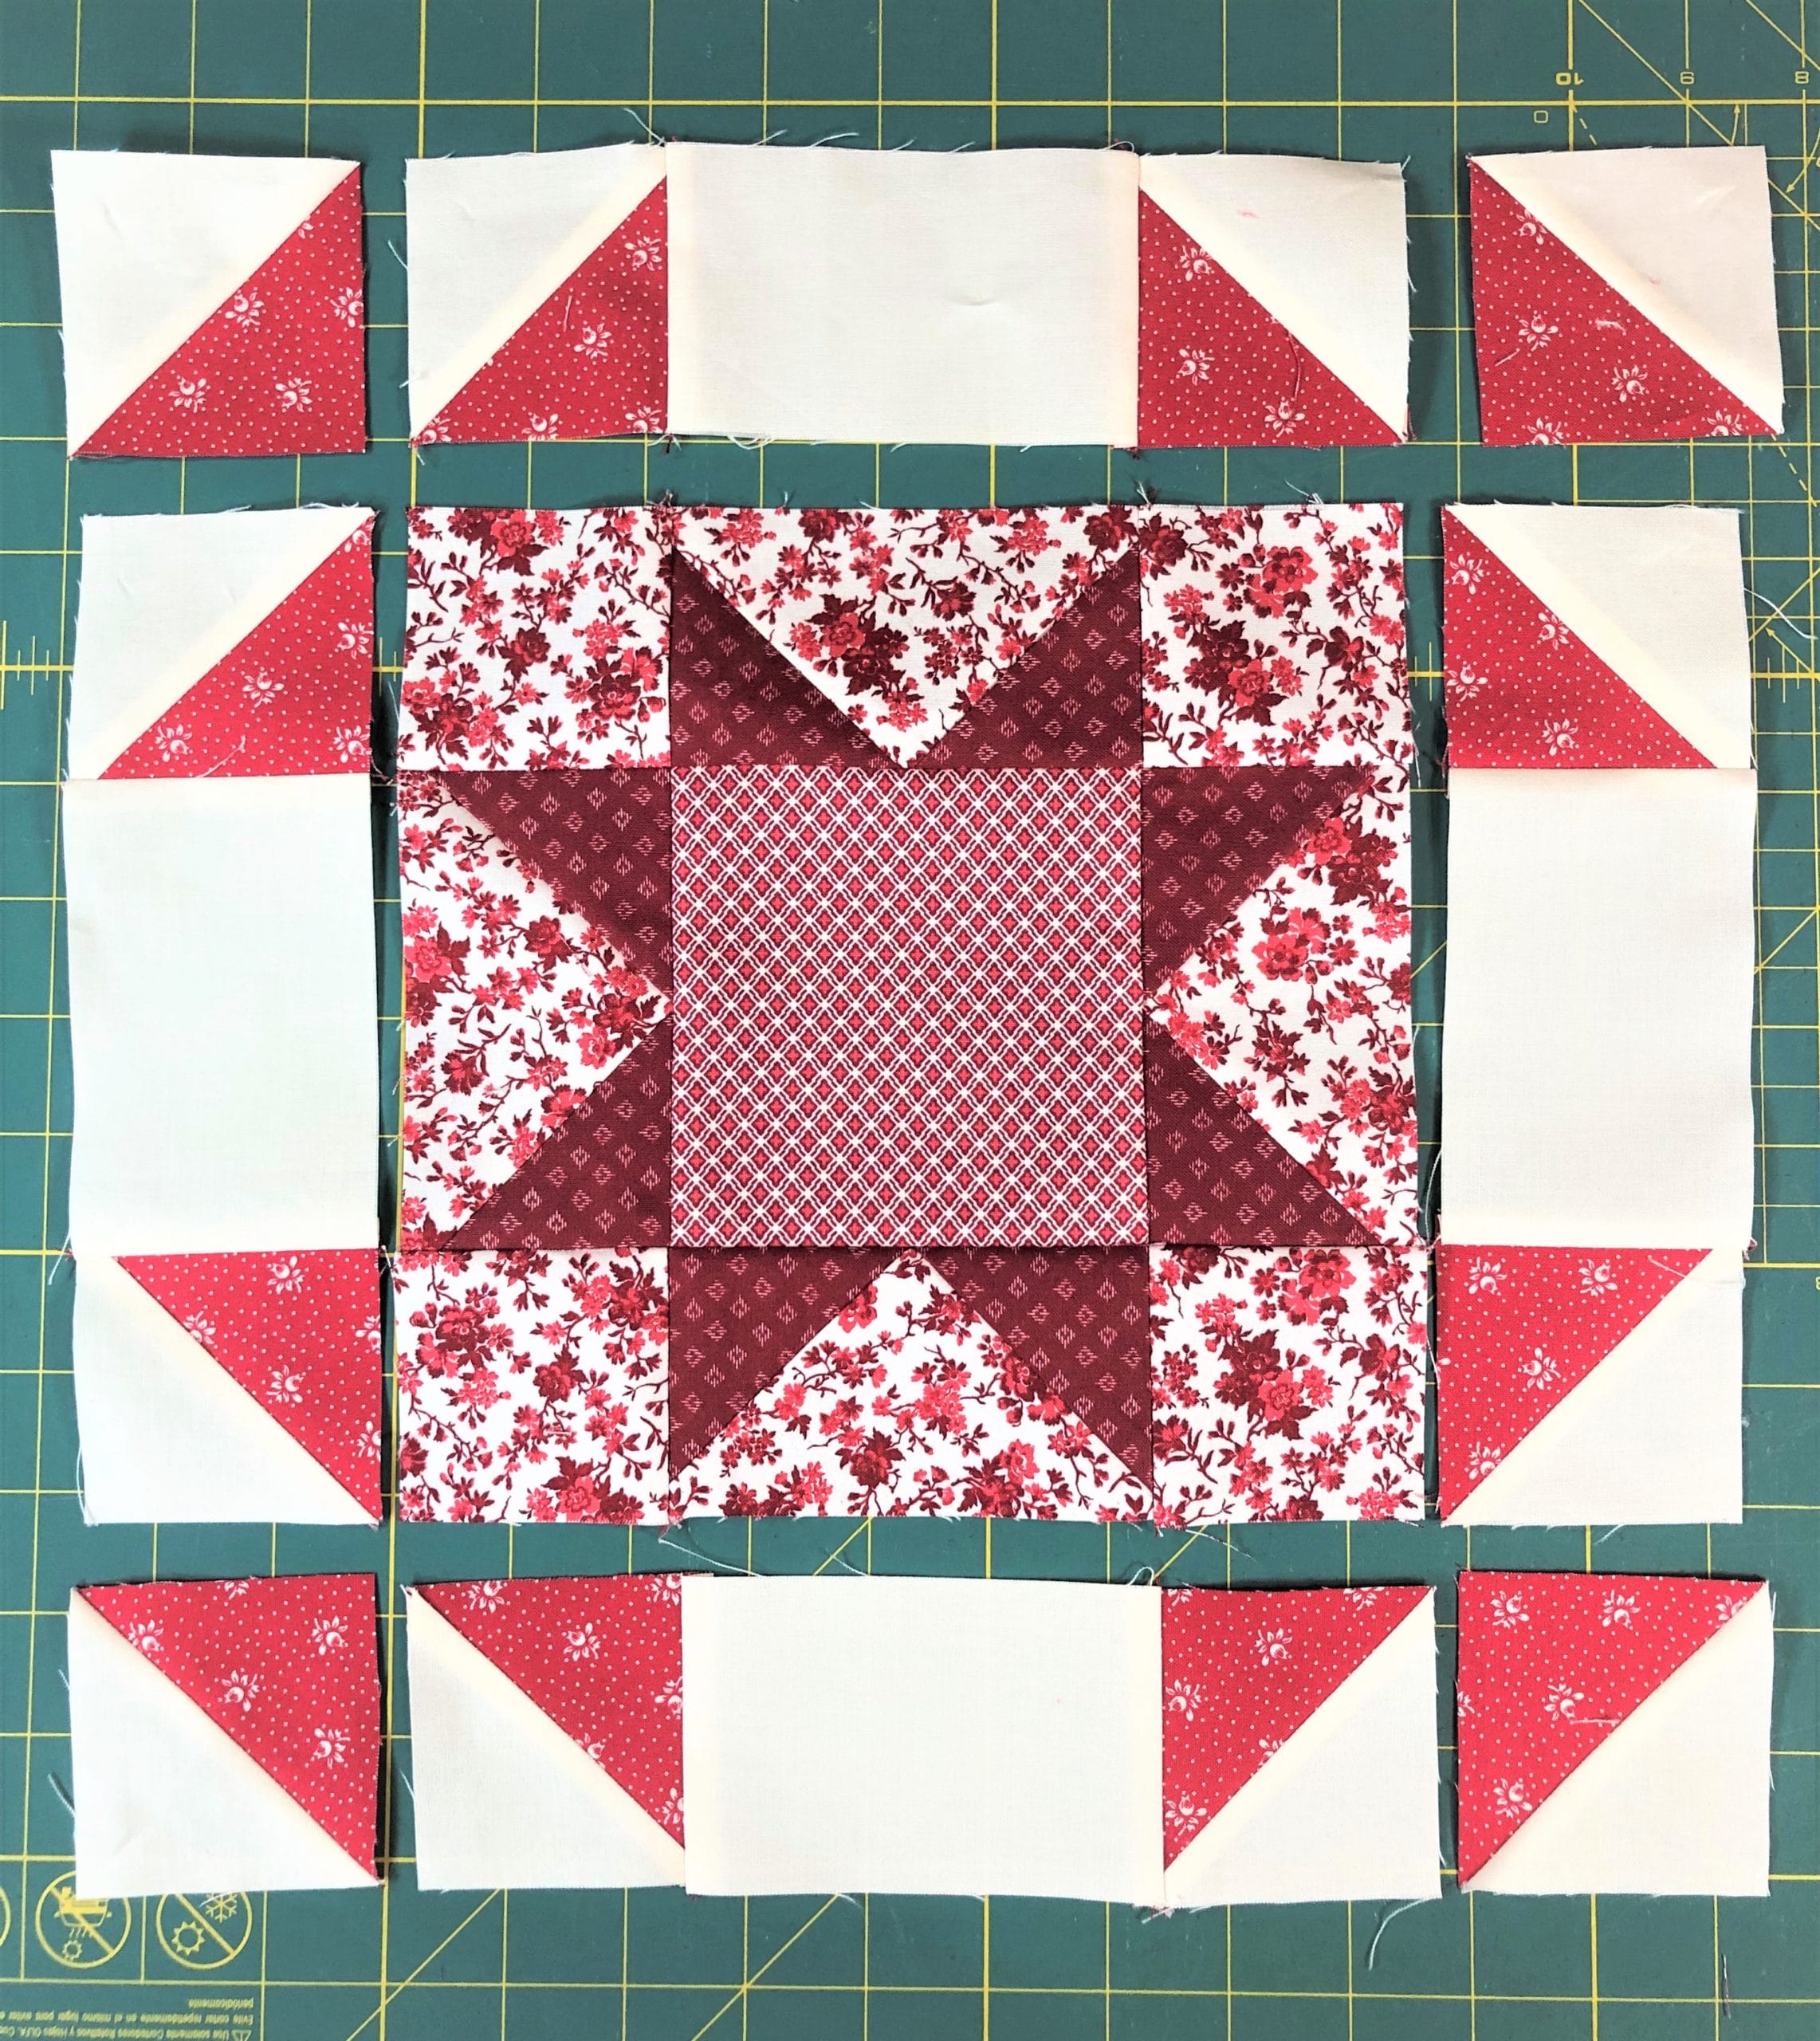
Sew the center portion by taking two of those units you just made in step 5 and sewing them to each side of the Sawtooth star block, pressing the seams away from the center block.
Take the remaining units from step 5 and sew another E/F half-square triangle to each end, then sew those to the top and bottom to finish the block.
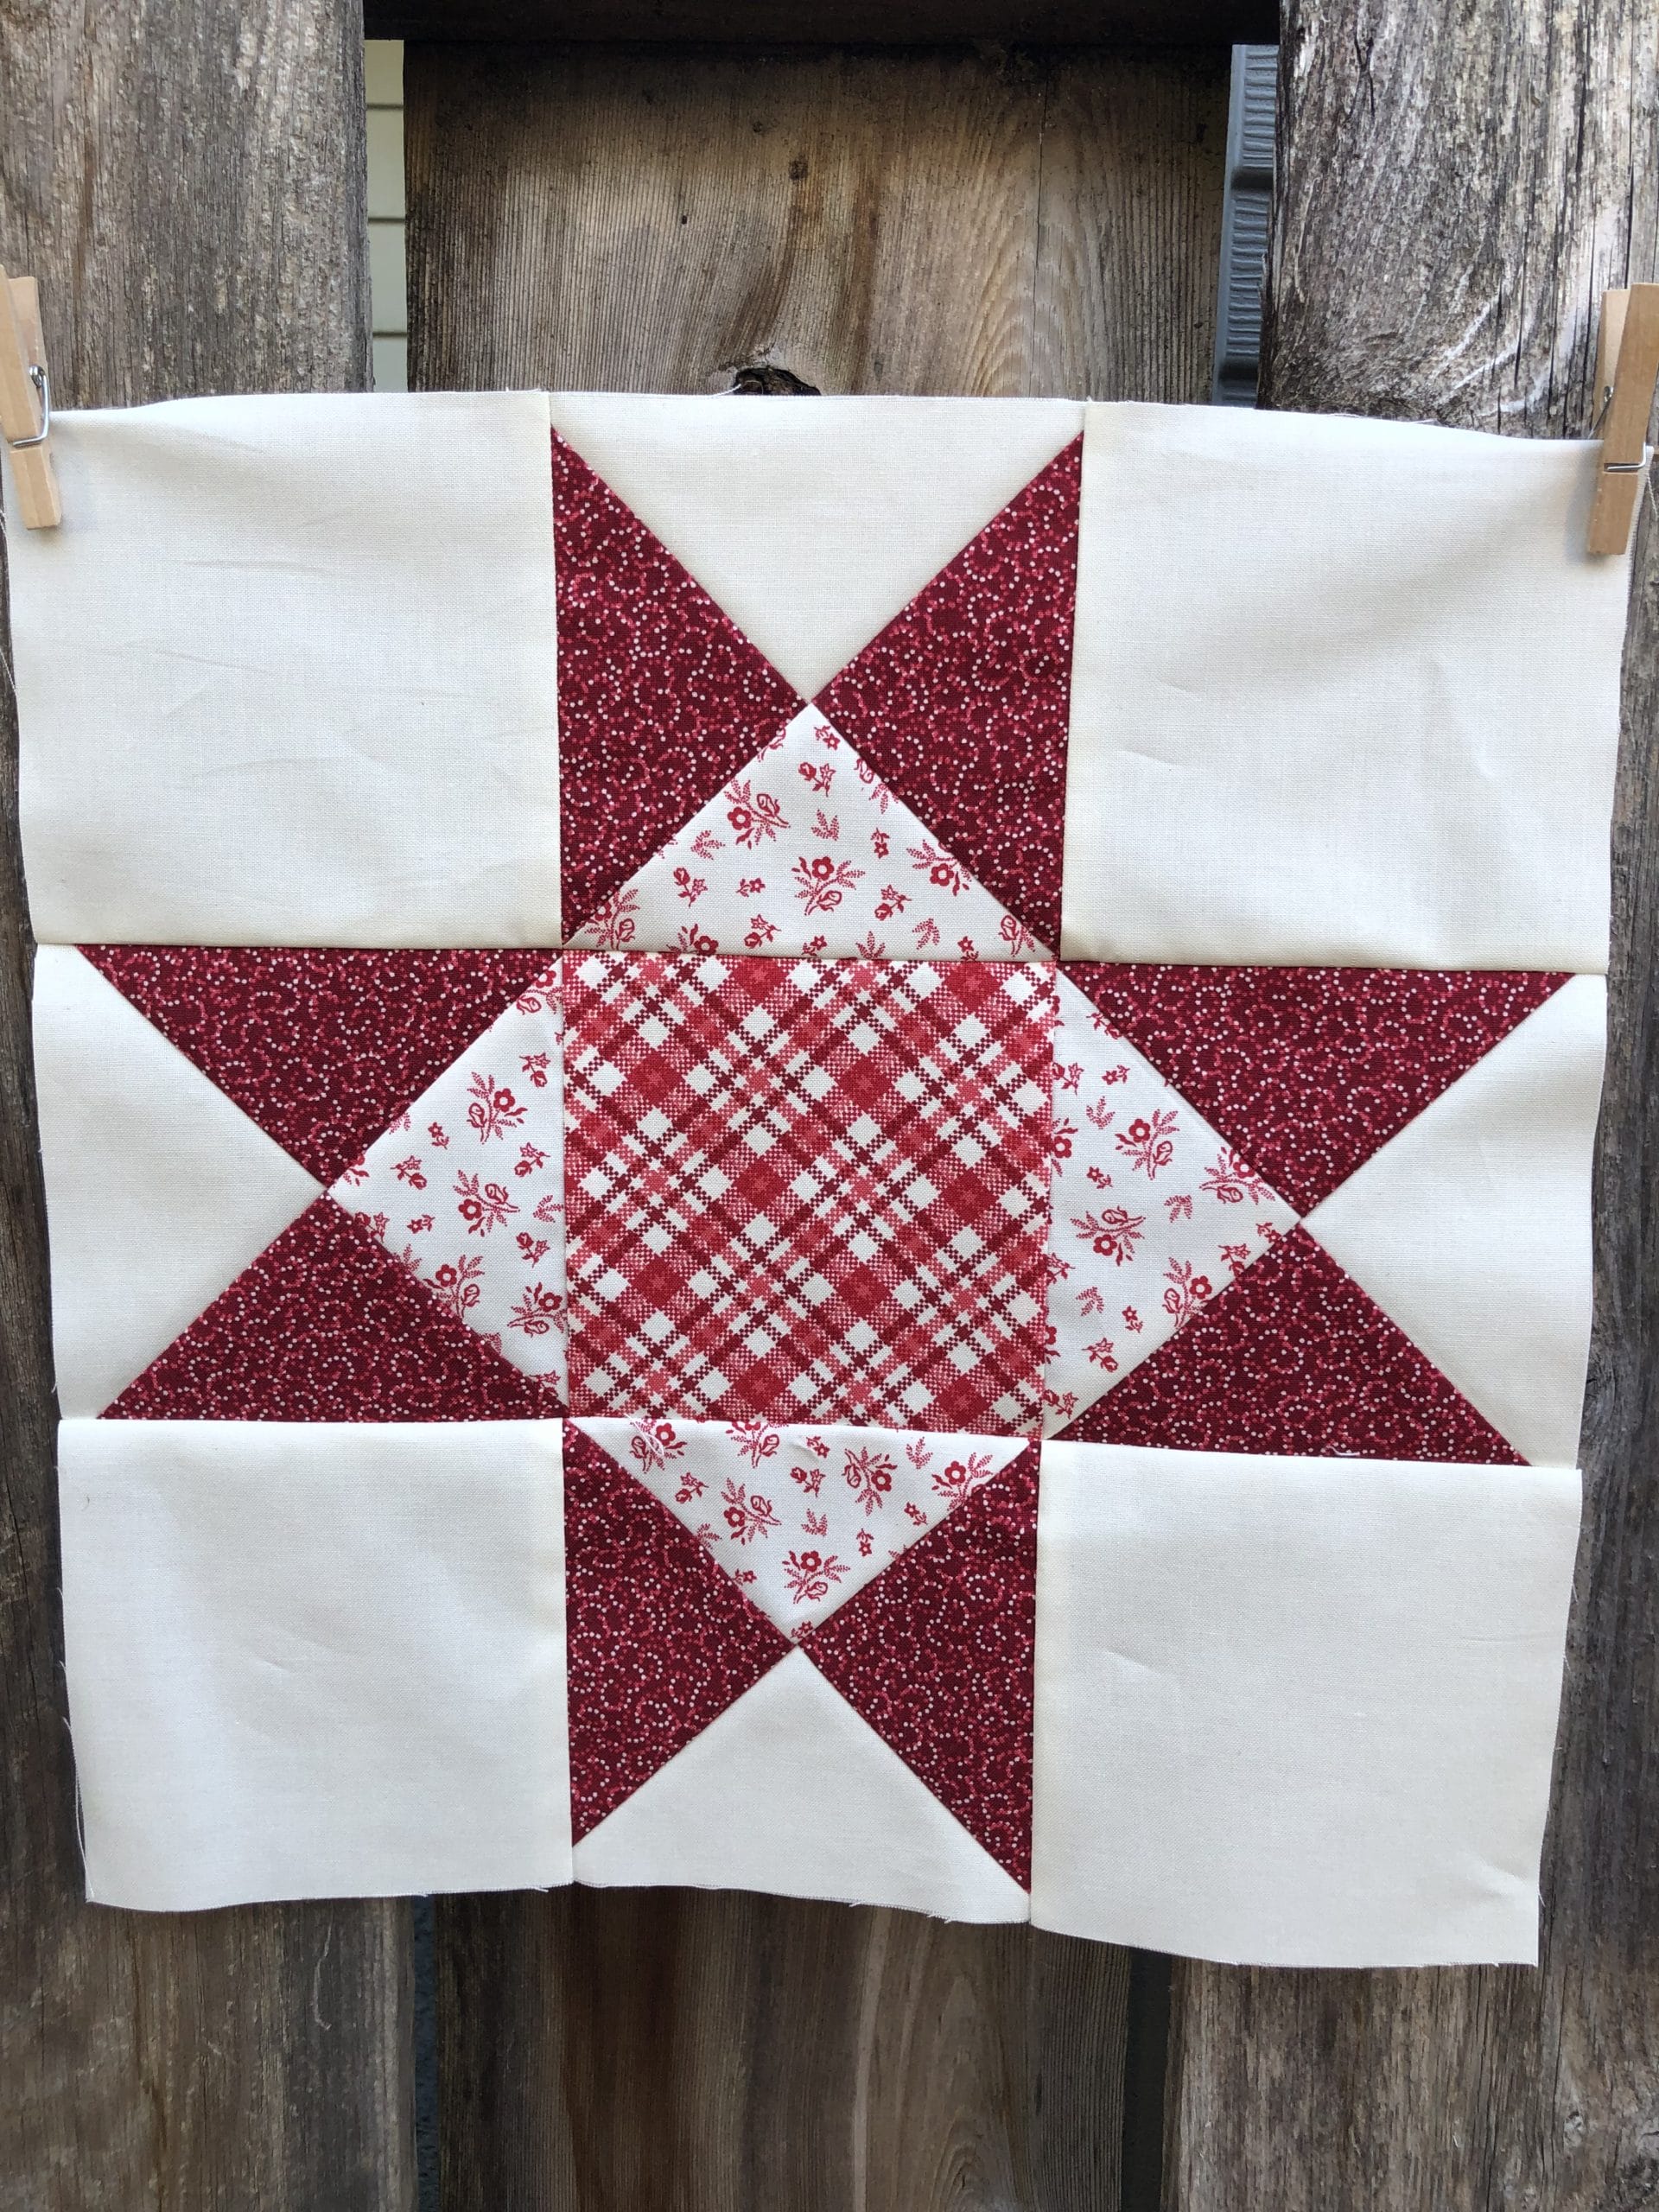
Now the block is finished!
Block #7
This is another Sawtooth star, but with a twist. I actually love this block, and while making it I kept thinking of all the fabrics in my stash I could use to make a scrappy quilt with just this block. But that will have to wait for another day!
Step 1:
This block starts with a simple 4-patch unit. Please note that the Germanium Red fabric is DIRECTIONAL. While it really doesn’t matter if you have your fabrics oriented the same or not, I chose to have both of my B squares with the pattern in the fabric going up and down.
Step 2:
Next, I sewed on those D squares by placing them in the corners and sewing on the marked lines. Whenever I am doing this technique, I always flip up my squares and check them before trimming off the excess. They should match up with the existing corners of the 4-patch block. If the corners come up short, then I know I need to rip things out and re-stitch. To avoid this, I usually sew just a scooch outside the marked line, next to the side that is closest to the corner. Does that make sense?
It’s hard to tell here, but if you look closely, you can see that I’ve sewn just outside the yellow marked lines.Before trimming off the excess, I finger press the corners and make sure they line up. Now this unit trimmed and pressed.
In steps 3 and 4 we’ll make some more of those fabulous no-waste flying geese, only bigger than the ones we made in block 6. I won’t bore you with more detailed instructions.
This block is assembled the same way as the center portion of block 6. The only tricky part is making sure that those 4-patch seams line up with the points on the flying geese units. I usually start pinning from there, and then work my way out. Have I mentioned that I’m a prolific pinner? I admire those that can just sew without pinning. I think I’m just to particular to leave things un-pinned. Or maybe I just don’t sew well enough yet??? Haha! Maybe in another 30 years of sewing I’ll master the no-pinning thing.
Again, I lay everything out first before I begin pinning and sewing, because nothing is worse than thinking you’ve finished a block only to realize that you messed up and have to rip and re-sew.
Next I’ll just sew the block into the three sections, and then sew everything together.
Block #15
This little 9-patch Churn Dash block is a cinch to make, and goes pretty fast. Begin by sewing up a 9-patch unit for the center, and make sure it measures 6-1/2” square when done. Also make sure that you’ve ironed all your seams toward the darker A fabrics while sewing, so that everything nests together.
The rows are sewn together with all the seams pressed toward the Corsage II Red fabric.
Next you’ll make 4 half-square triangles, and trim them to be 3-1/2” square. Again, you can cut these B and F squares a smidge bigger if you like, in order to end up with the proper size when done. Somehow I got busy sewing and forgot to take pictures of the finished half-square triangles, so all I have is what you see below. I have a bad habit of doing that. Sorry!
Now you just need to sew each D strip to an E strip like I’ve shown here. The directions have you pressing your seam towards the E strip, but in this case, it doesn’t matter either way, since there isn’t anything to line it up with.
The block is ready to be sewn together now. Below you can see that I’ve sewn the three rows together and am almost done. I love that this block doesn’t have any tricky piecing or points to match up. So fun and easy!
Block #17
This block is perhaps the most challenging one of the month, not because any of the individual techniques are hard, but because it can be tricky to get everything to match up in the end. But have no fear, you CAN do it, and I will walk you through it!
Before cutting out all my pieces with this block, I used a liberal amount of starch on my fabric. This is especially helpful to use on the D and G pieces BEFORE you cut them diagonally into triangles. It will help them to keep their shape and not get distorted while sewing, which happens easily when sewing on a bias.
Another tip with this block is to REALLY make sure you’re measurements are exact as we go along, and that you’re pressing everything according to the instructions.
Step 1:
We begin with the same old steps of making our no-waste flying geese. Again, I won’t bore you with the details.
Step2:
After you’re finished with these, sew an F strip to the top of each one. And YES, even though it is counter-intuitive, press DOWN toward the flying geese unit. Trust me, it’s going to work out in the end. Make sure this unit is 4-1/2” square when done.
Here is the back so you can see that the seam is pressed toward the flying geese unit.
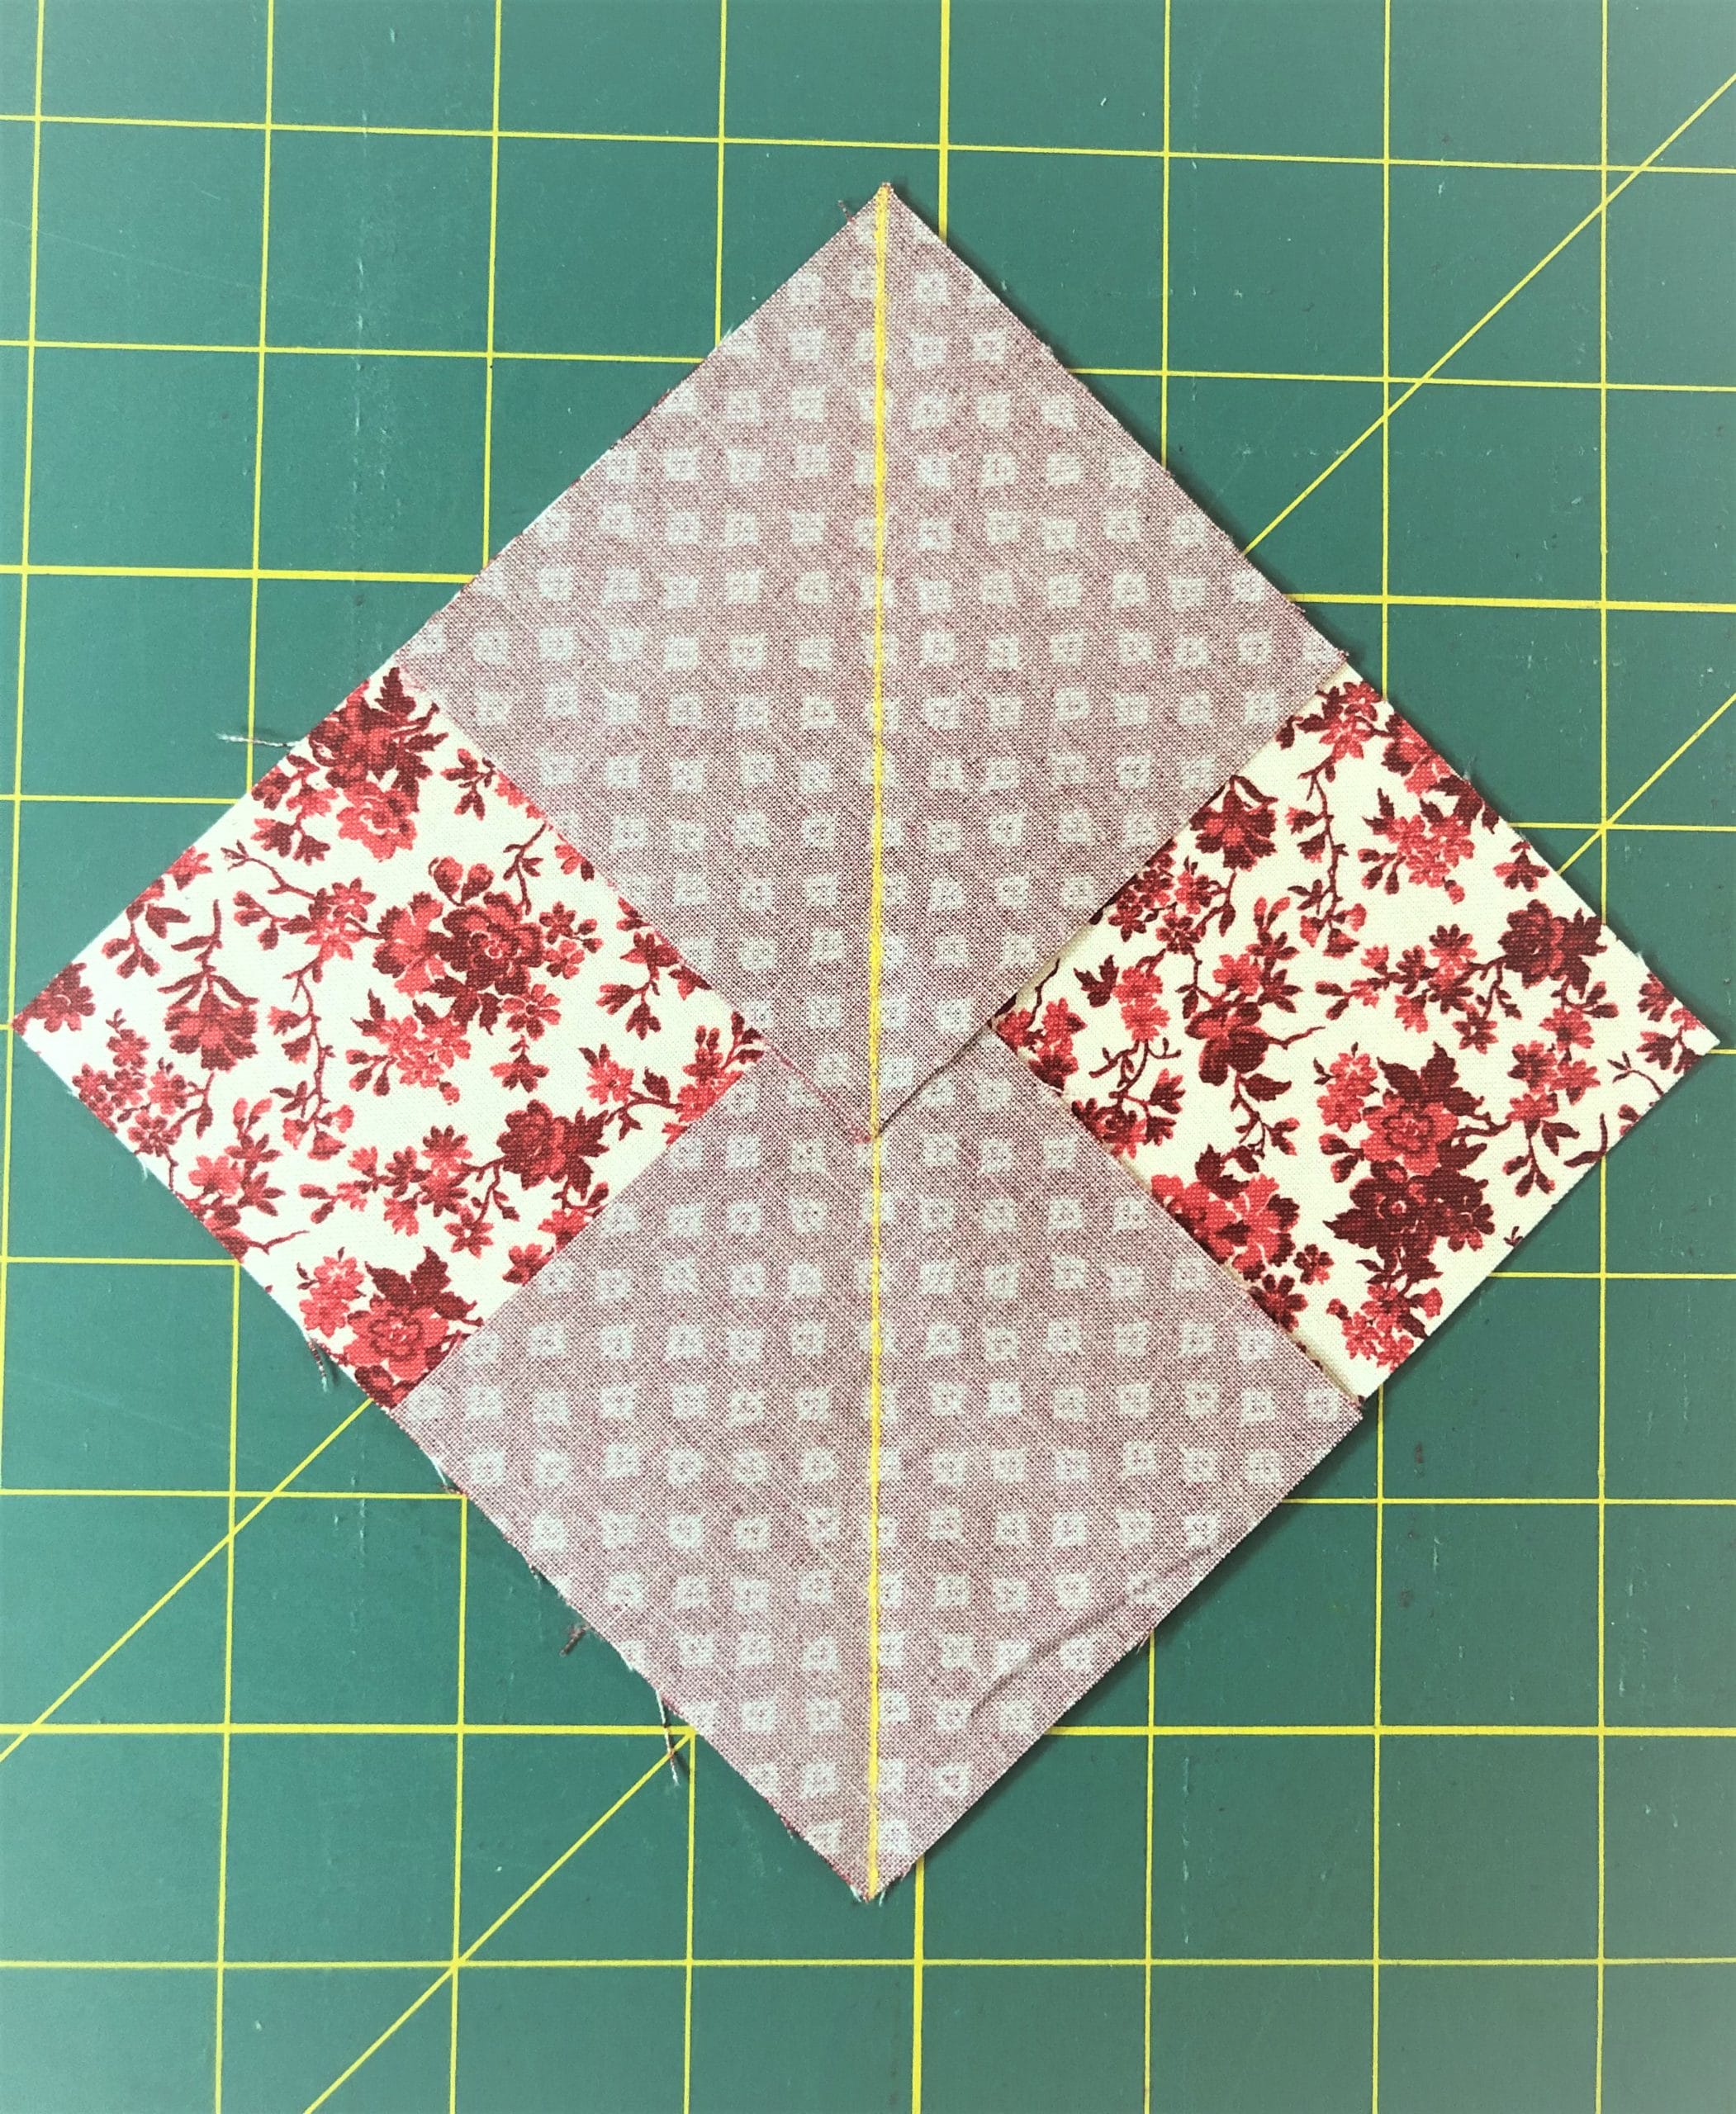
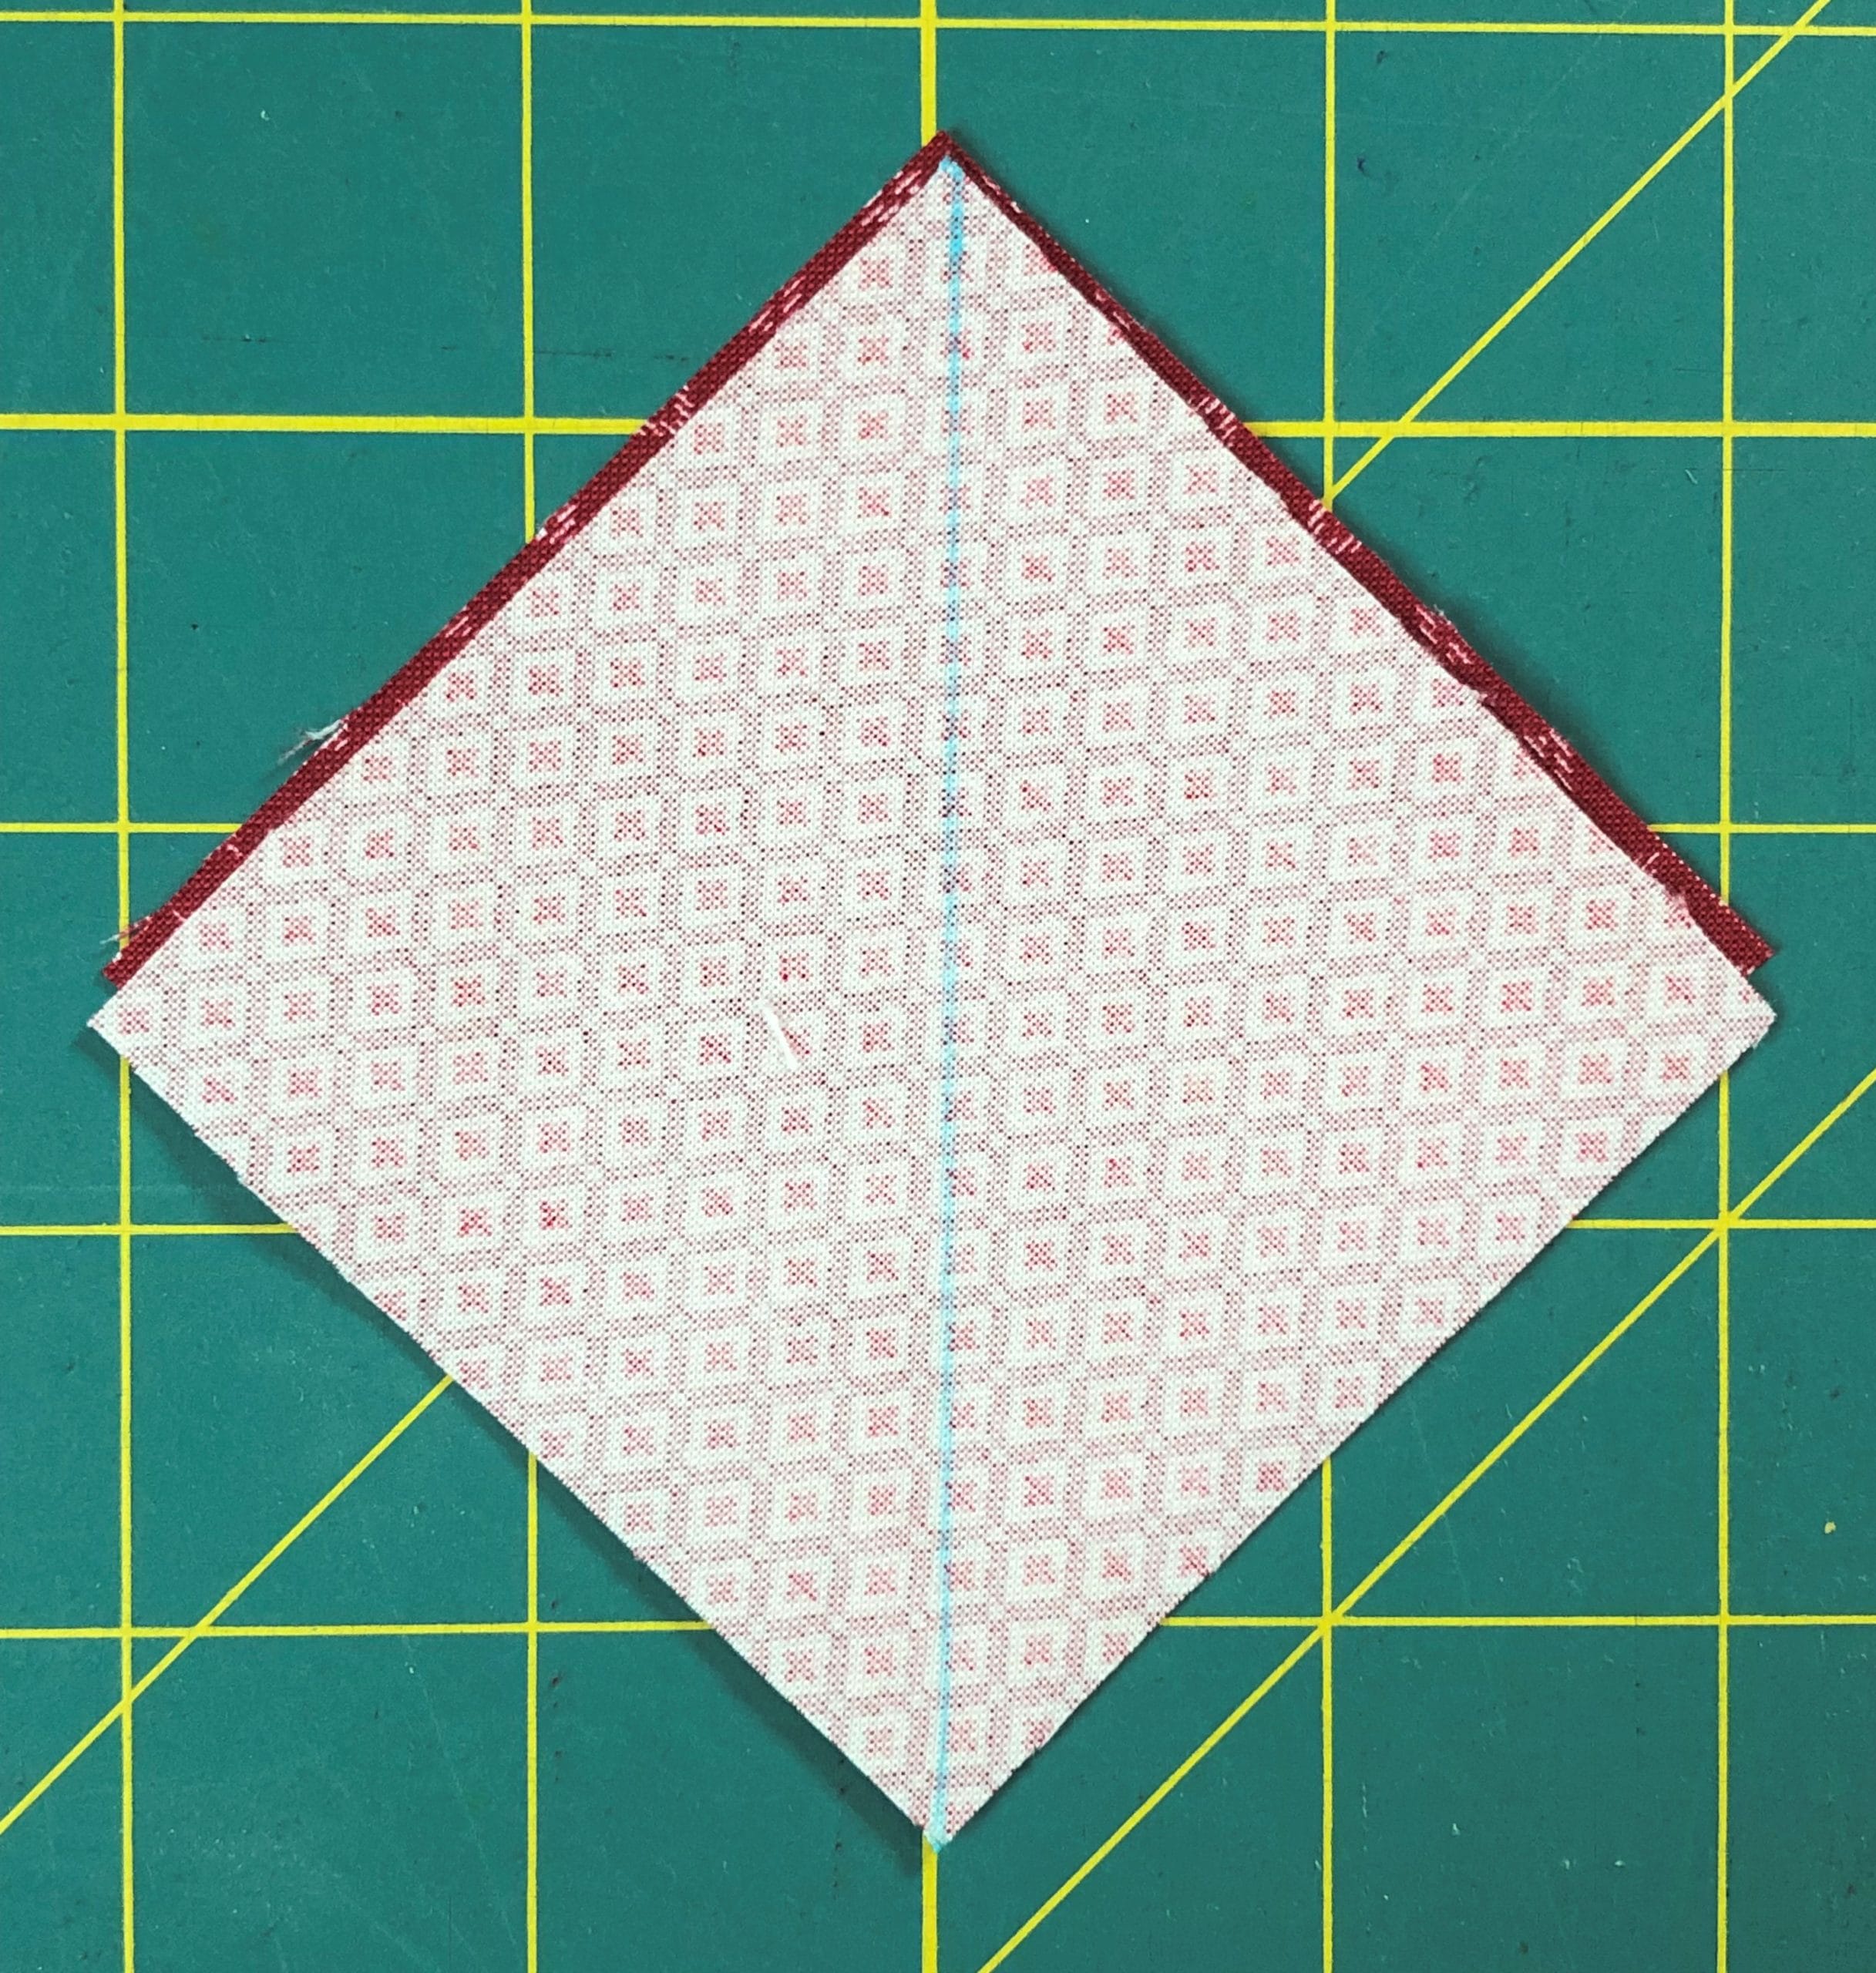
In step 3 we’ll make some fancy pieced triangle units. This is where that spray starch comes in handy.
Step 3:
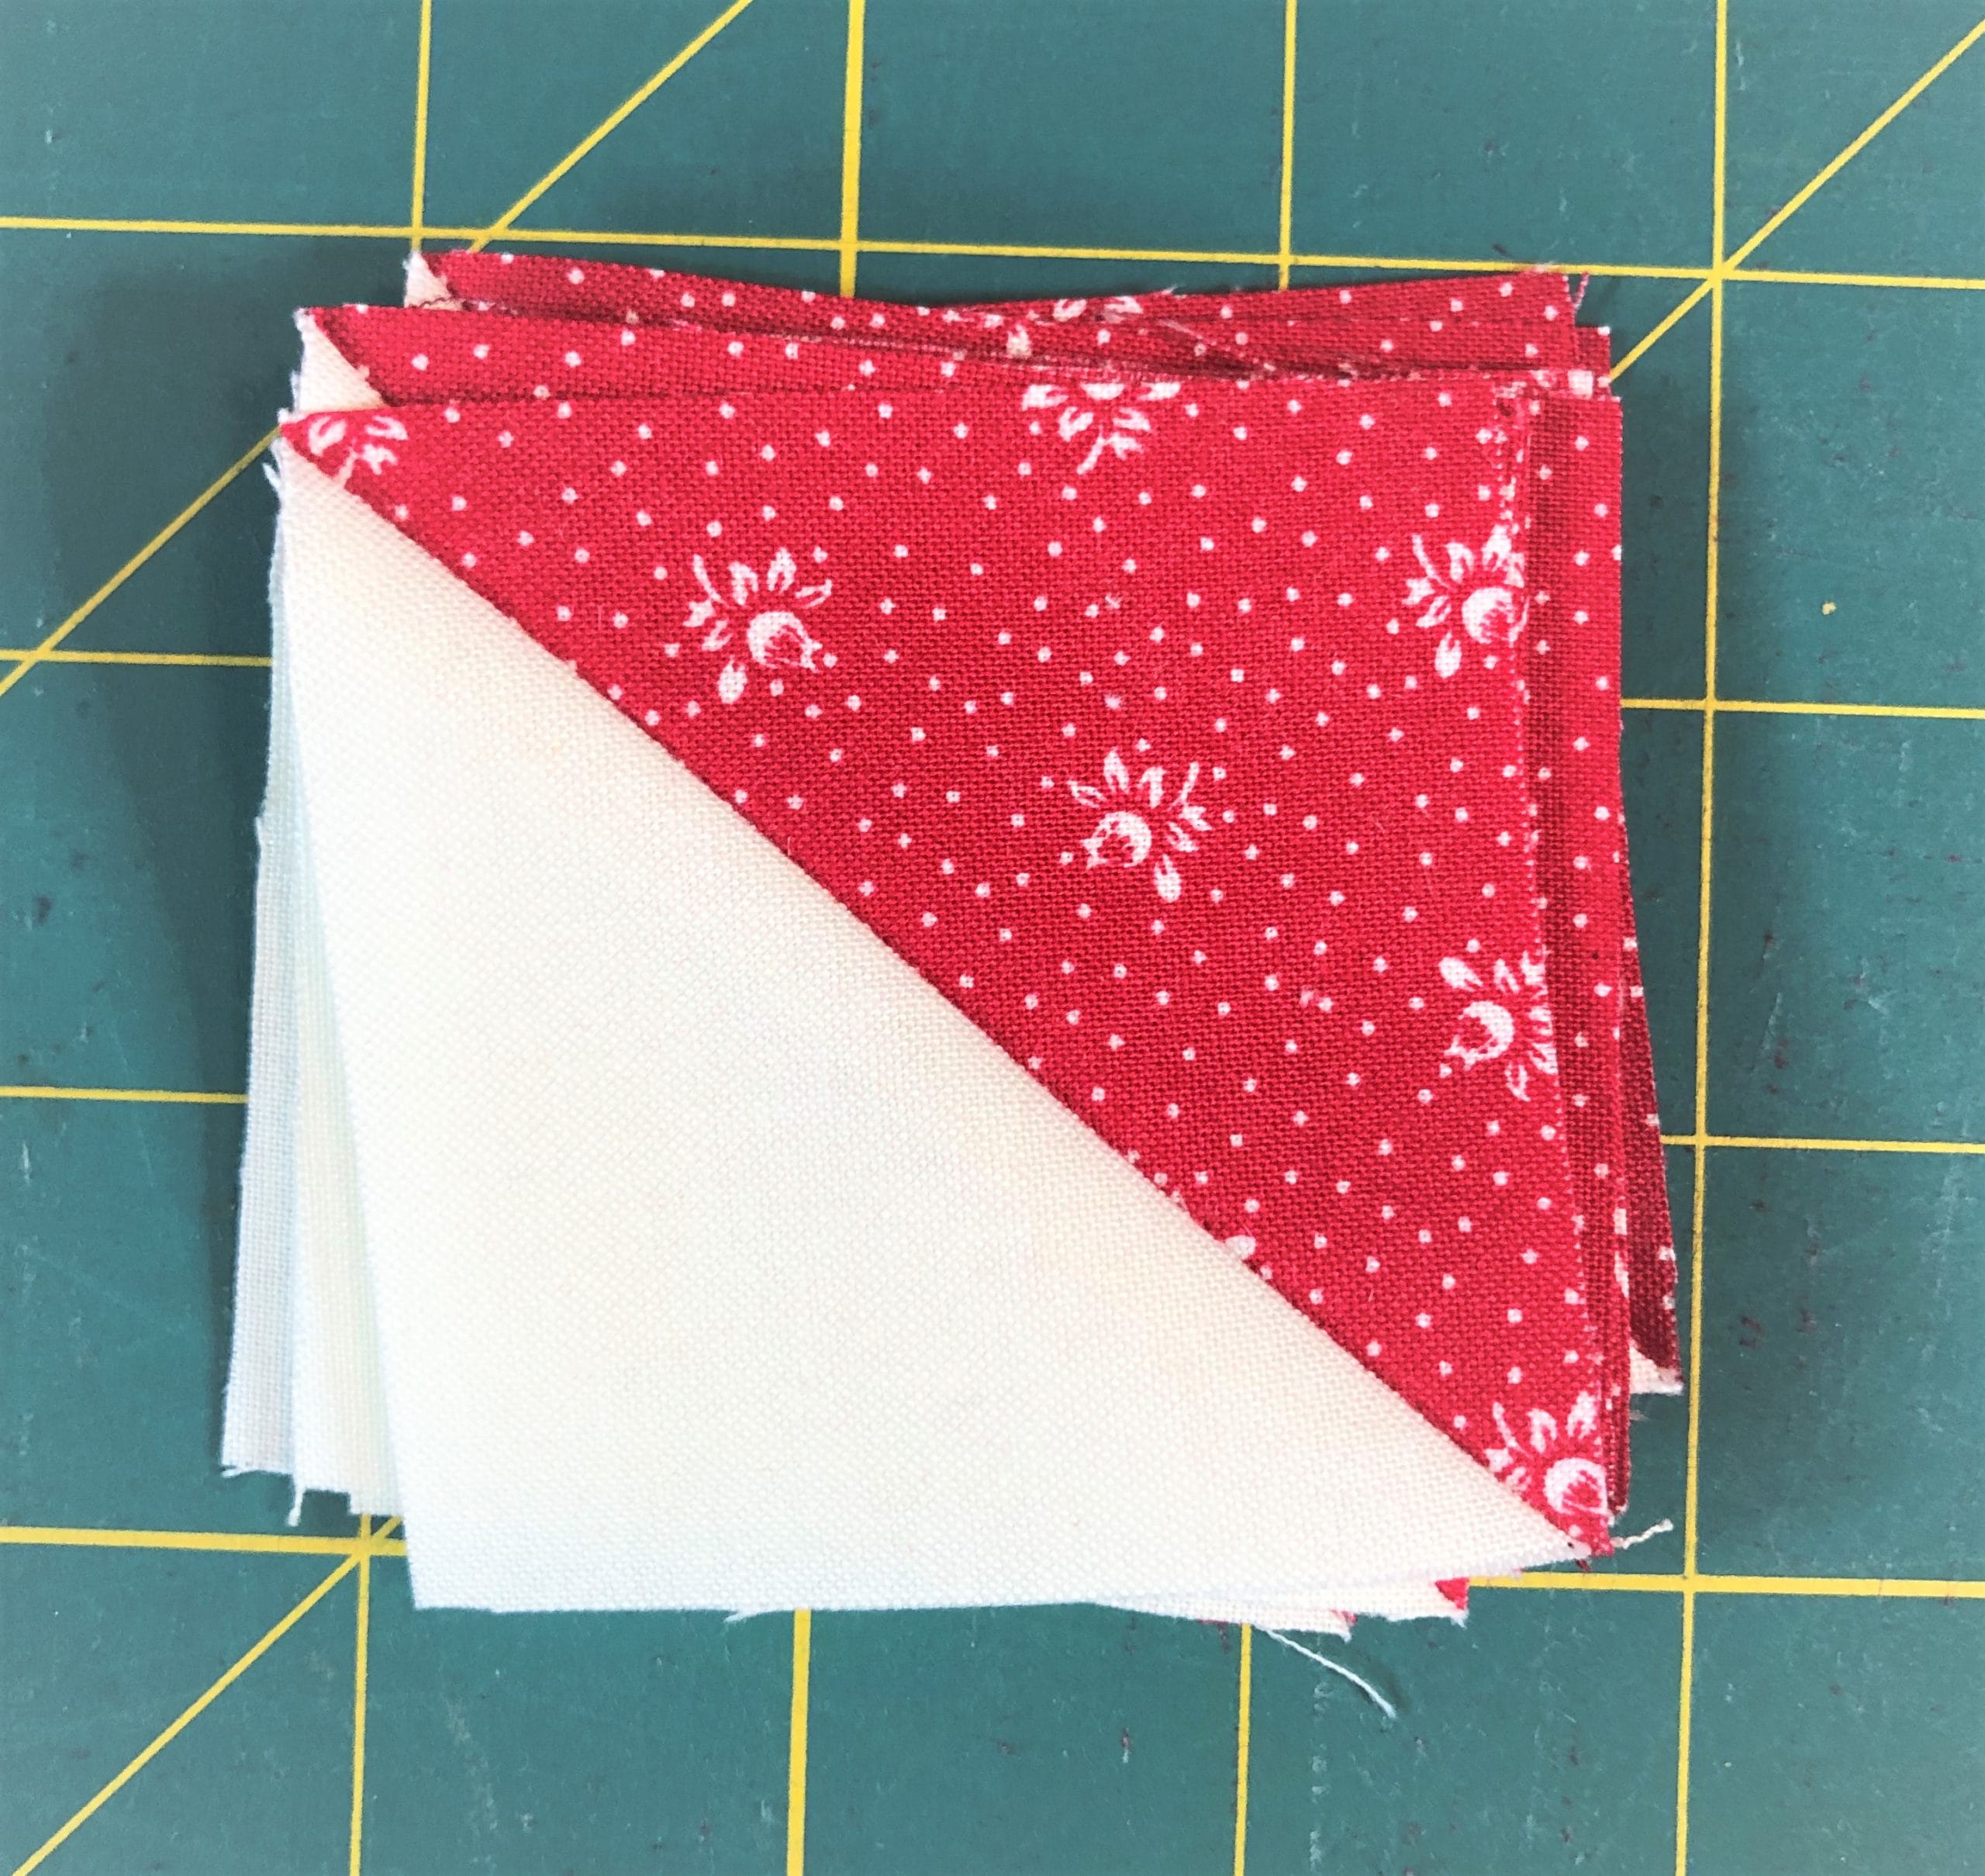
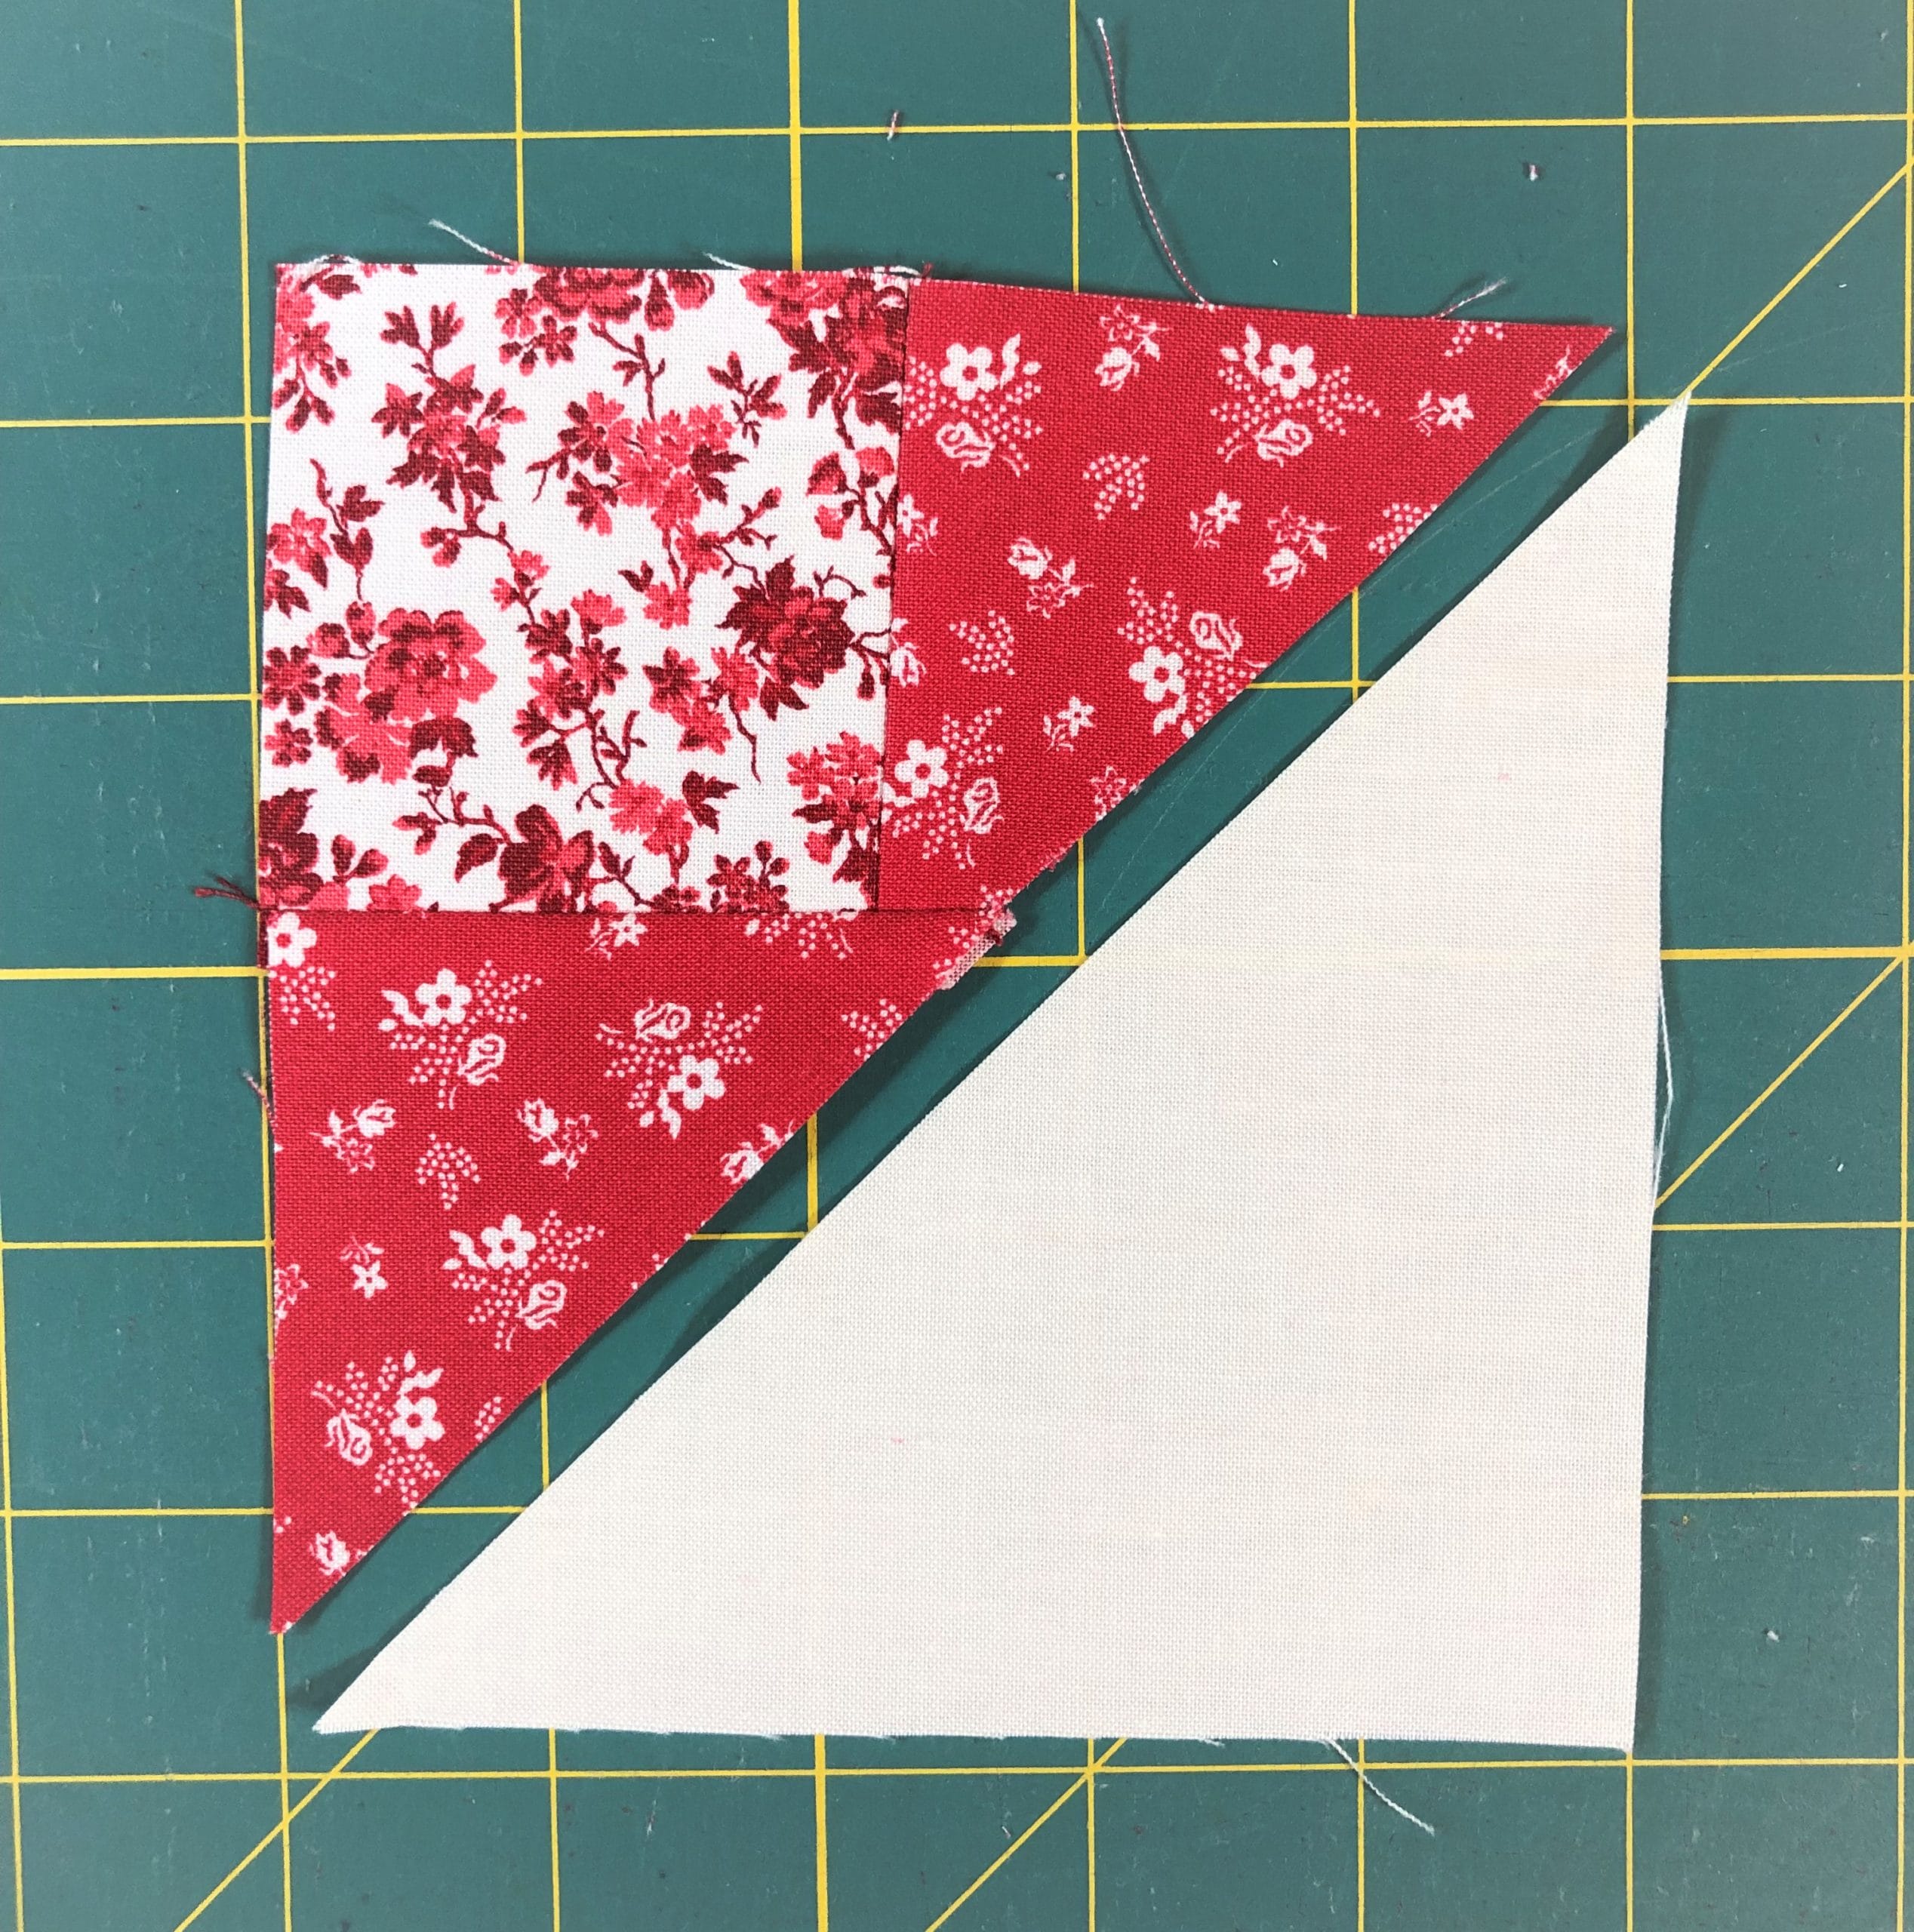
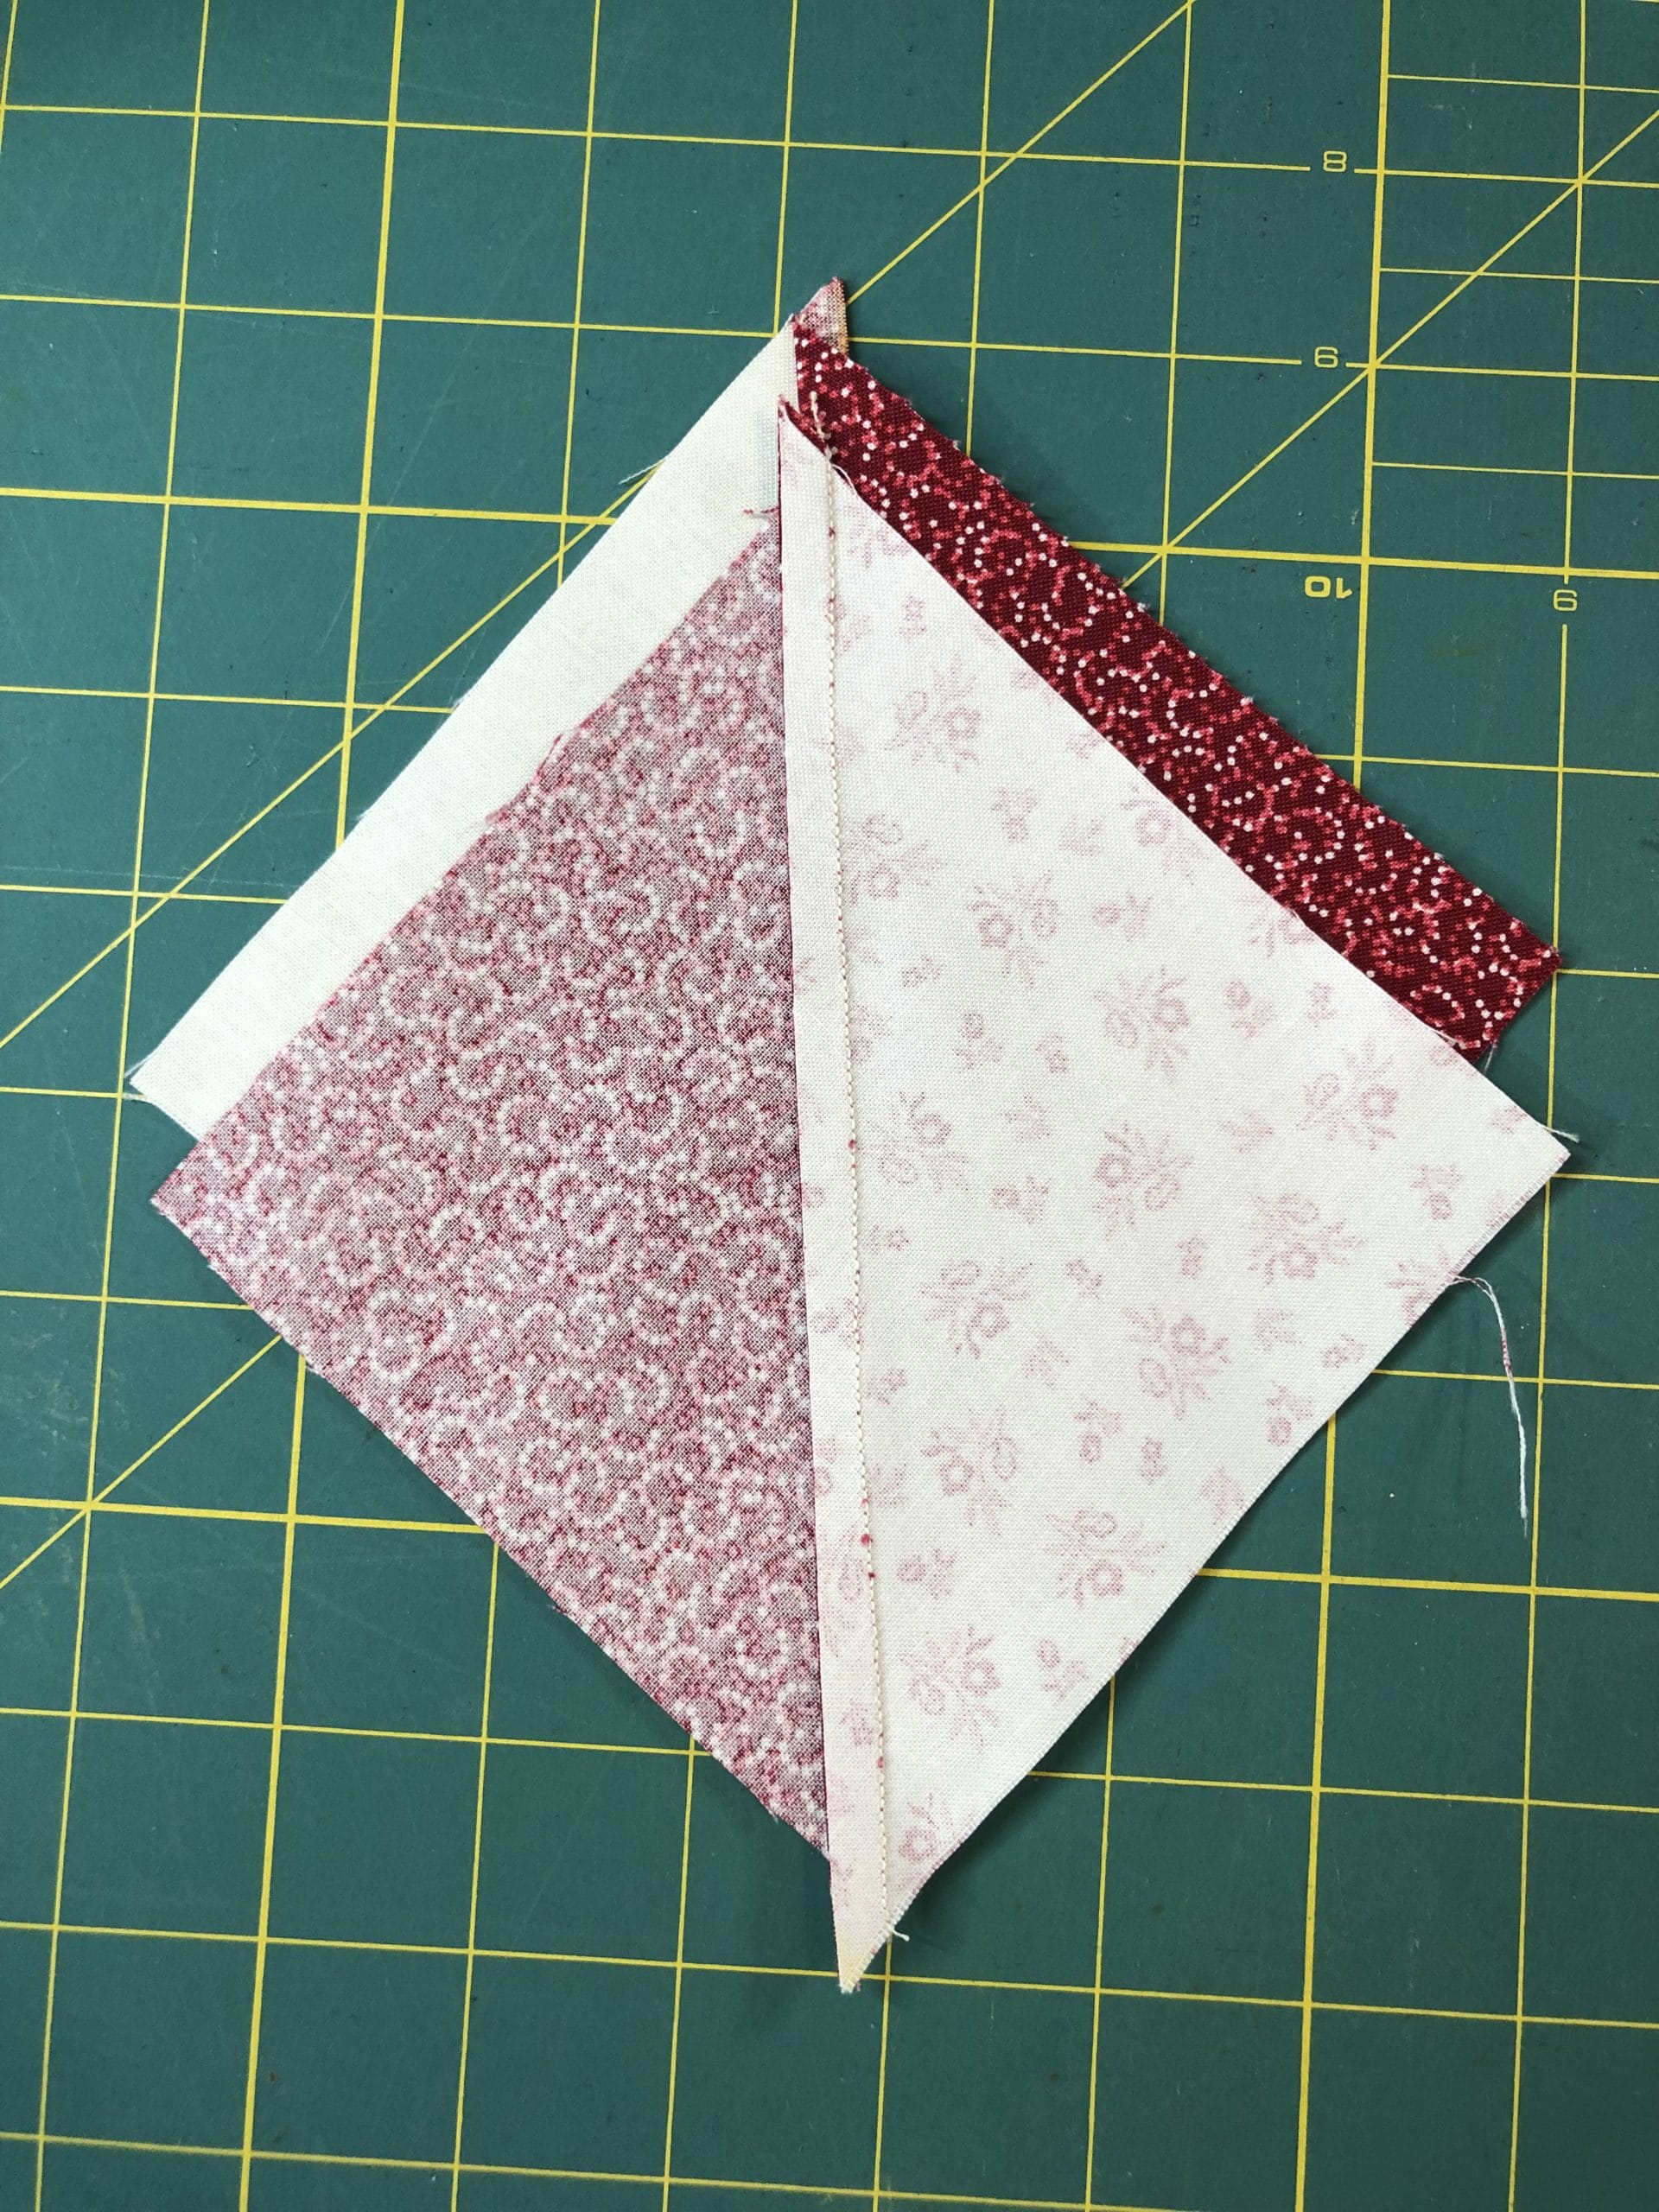
I began by sewing the first D triangle to the right side of the B square. Make sure both units line up at the top, which will leave you a little triangle tail hanging down at the bottom.
This is how you want your pieces to line up before you flip and and pin them.
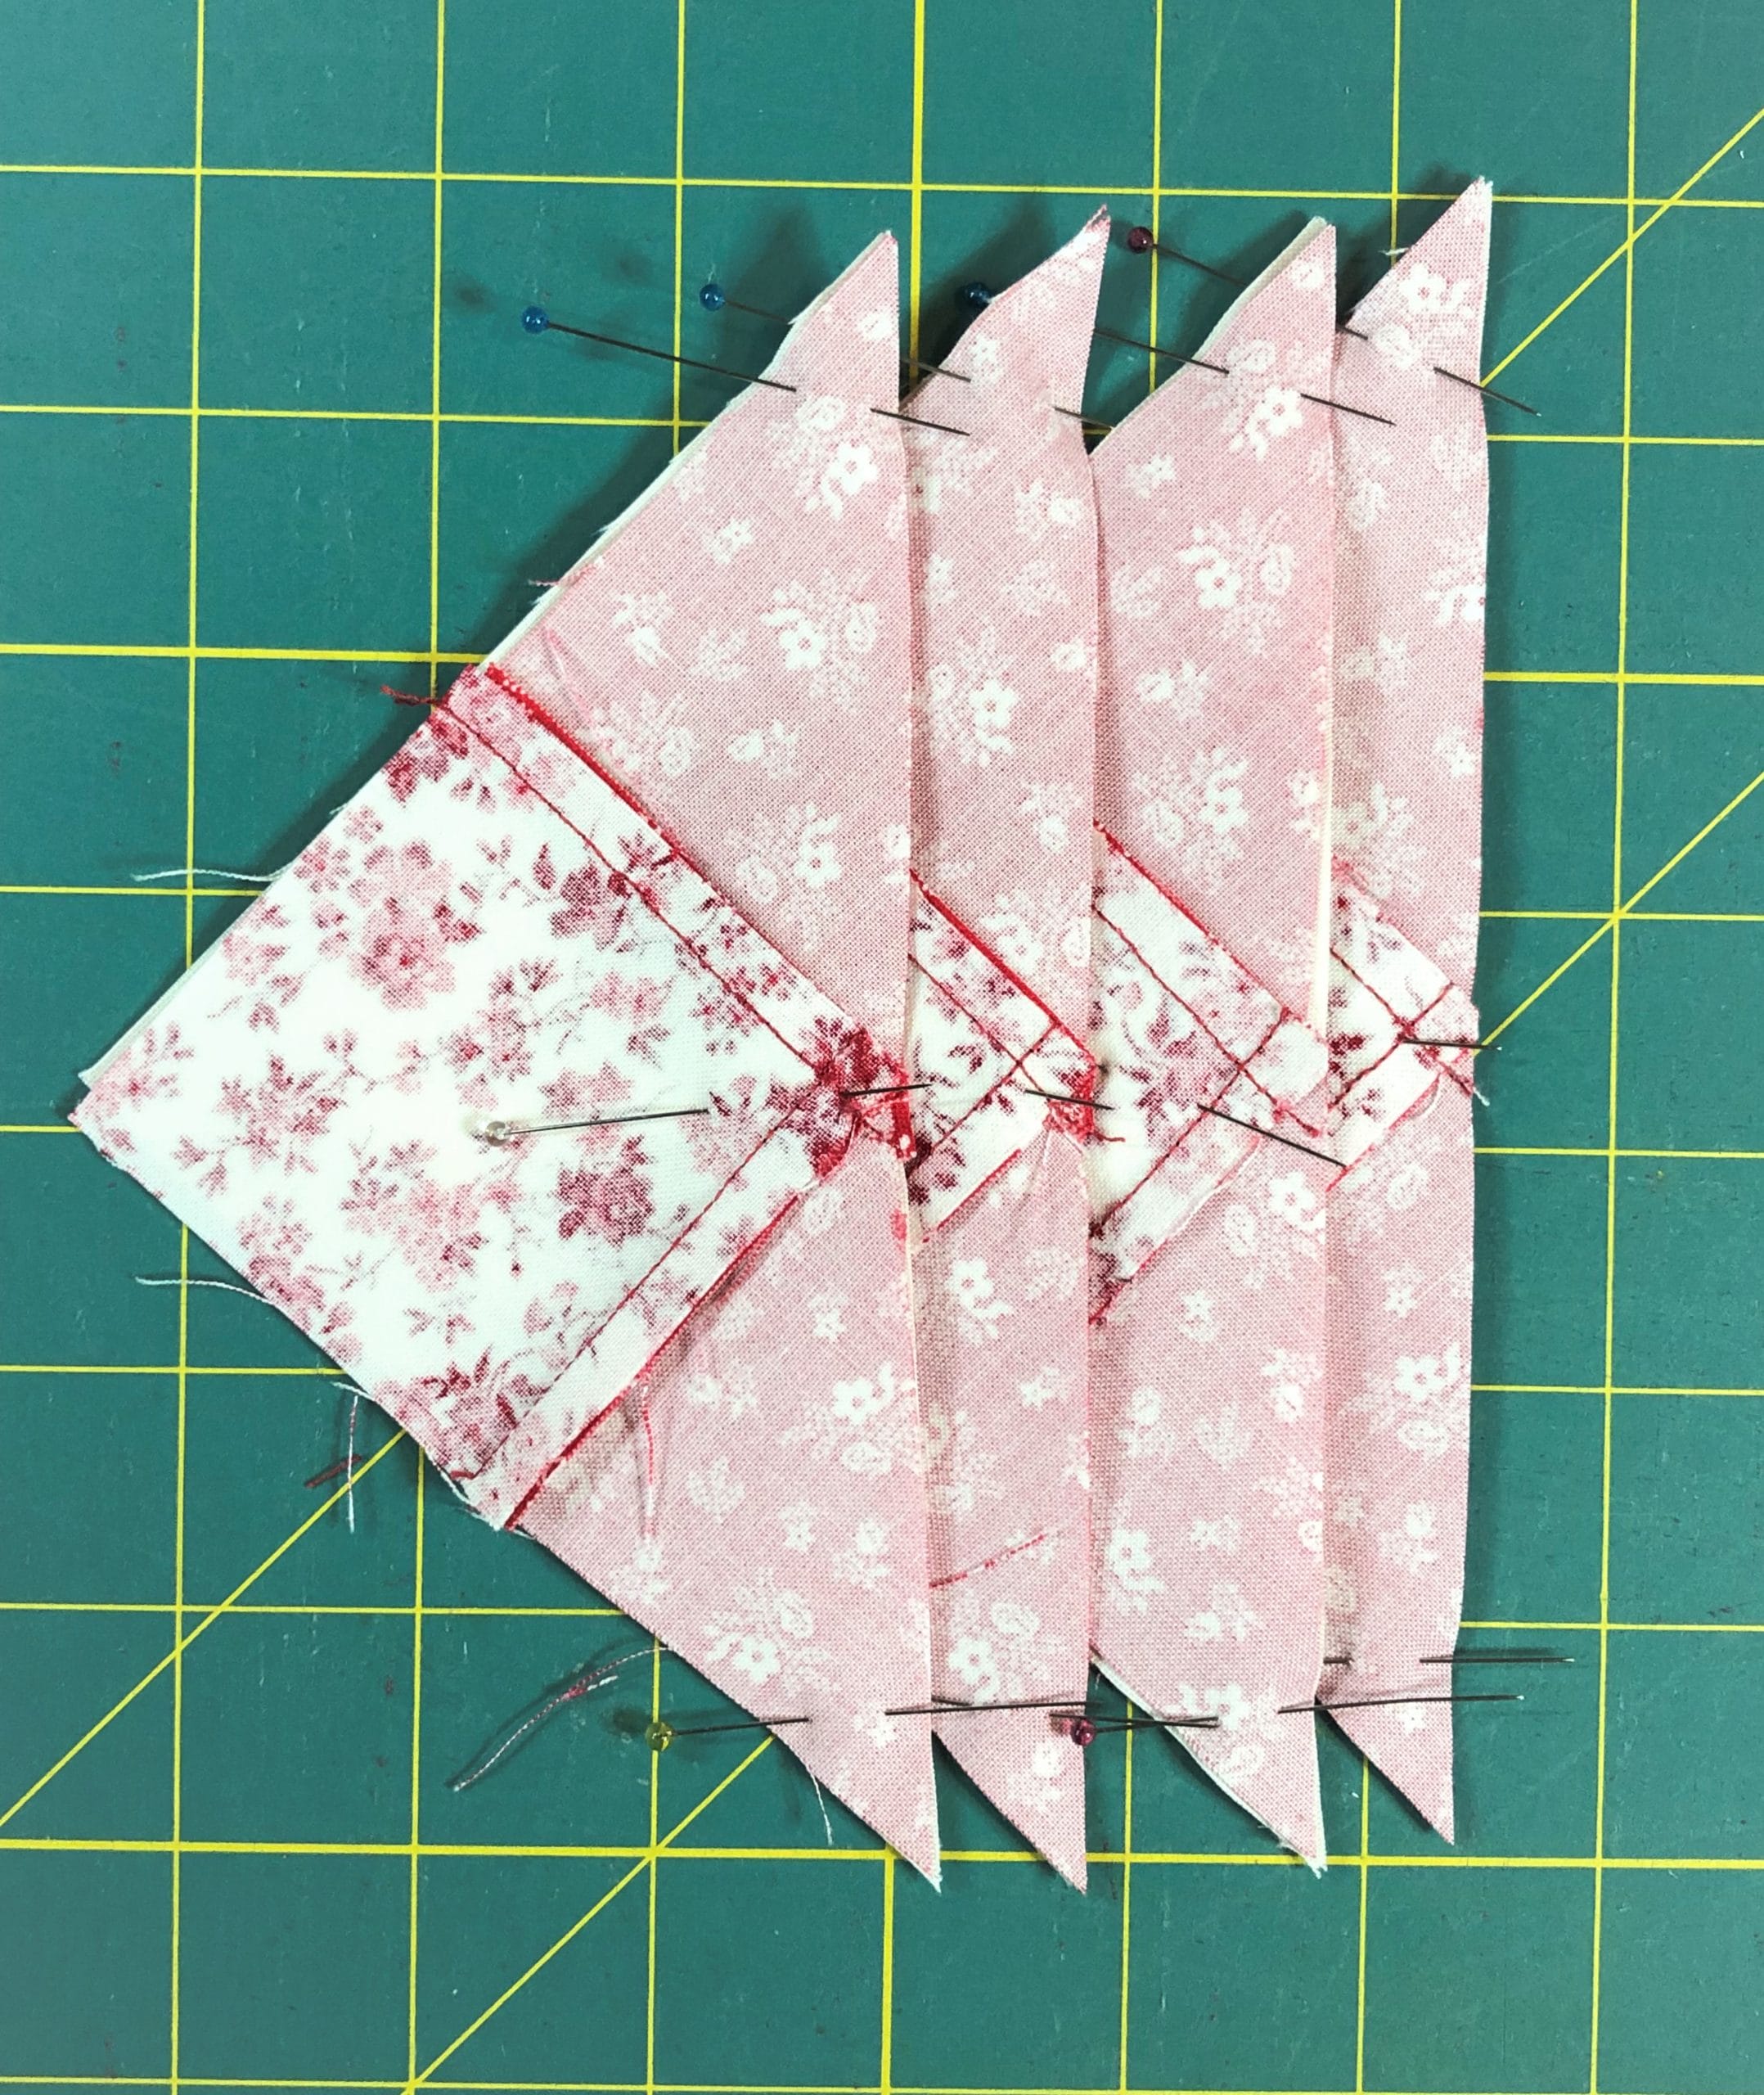
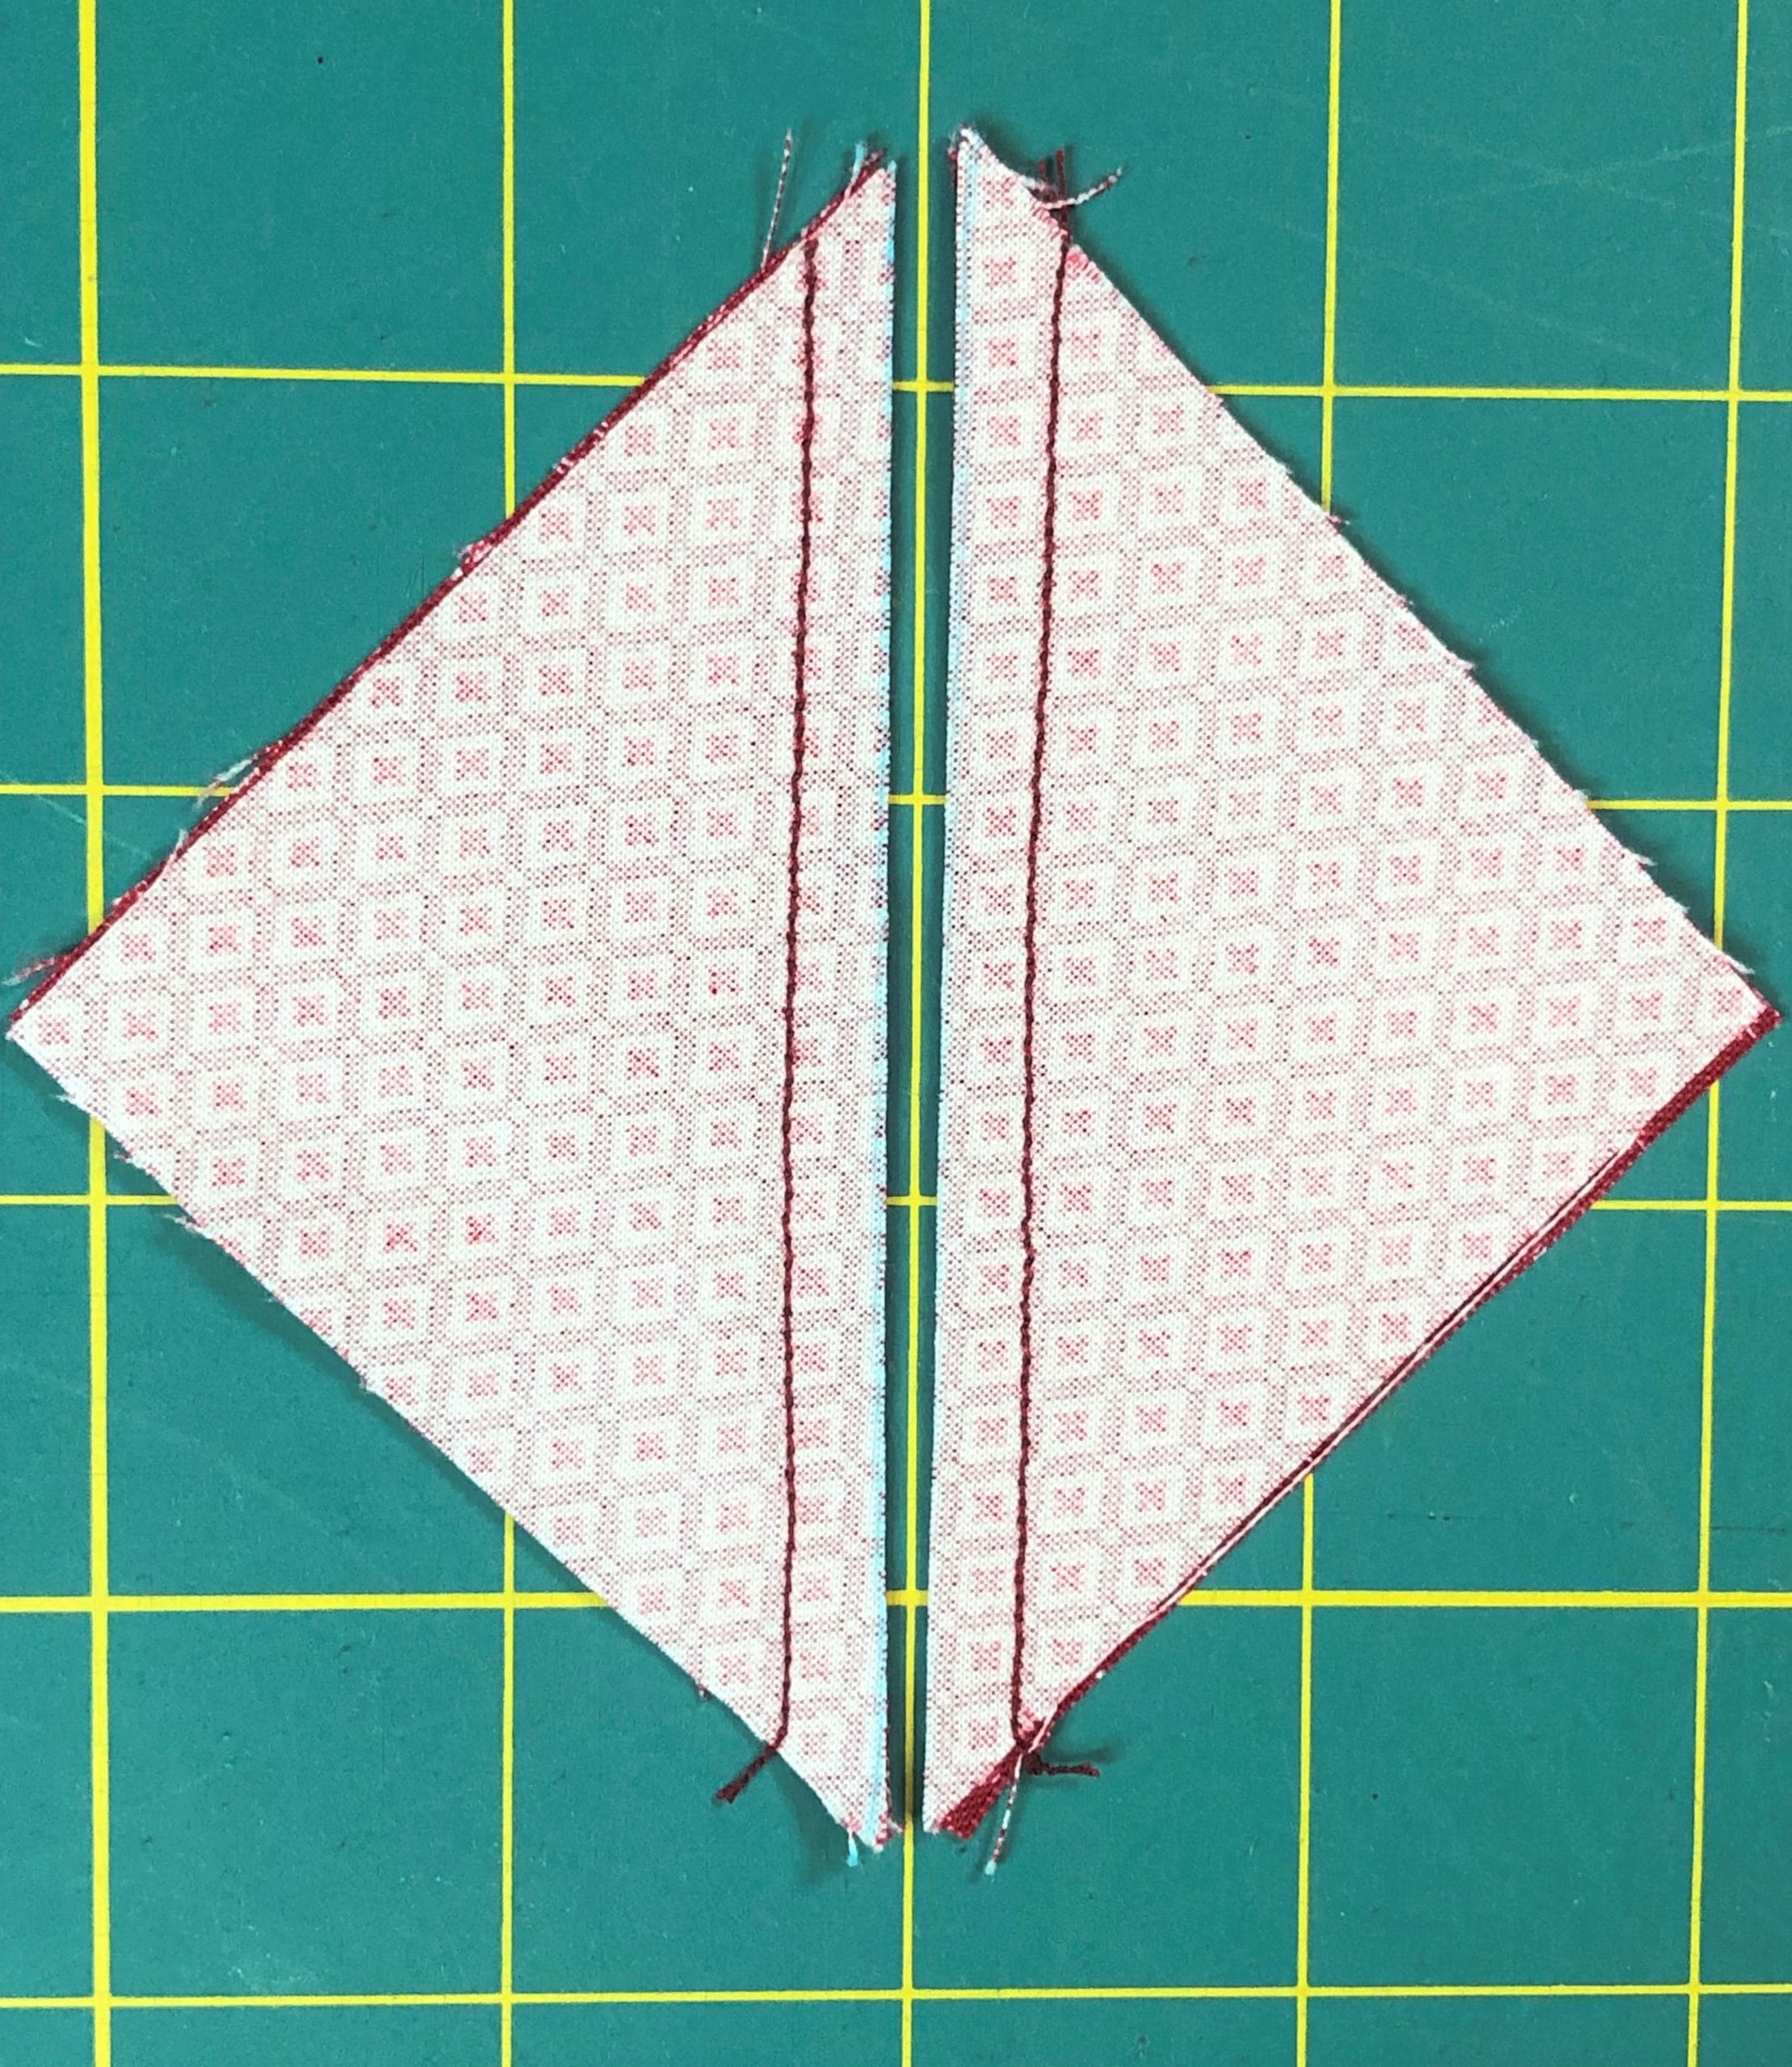
The picture below shows the first set of triangles pinned and ready for sewing.
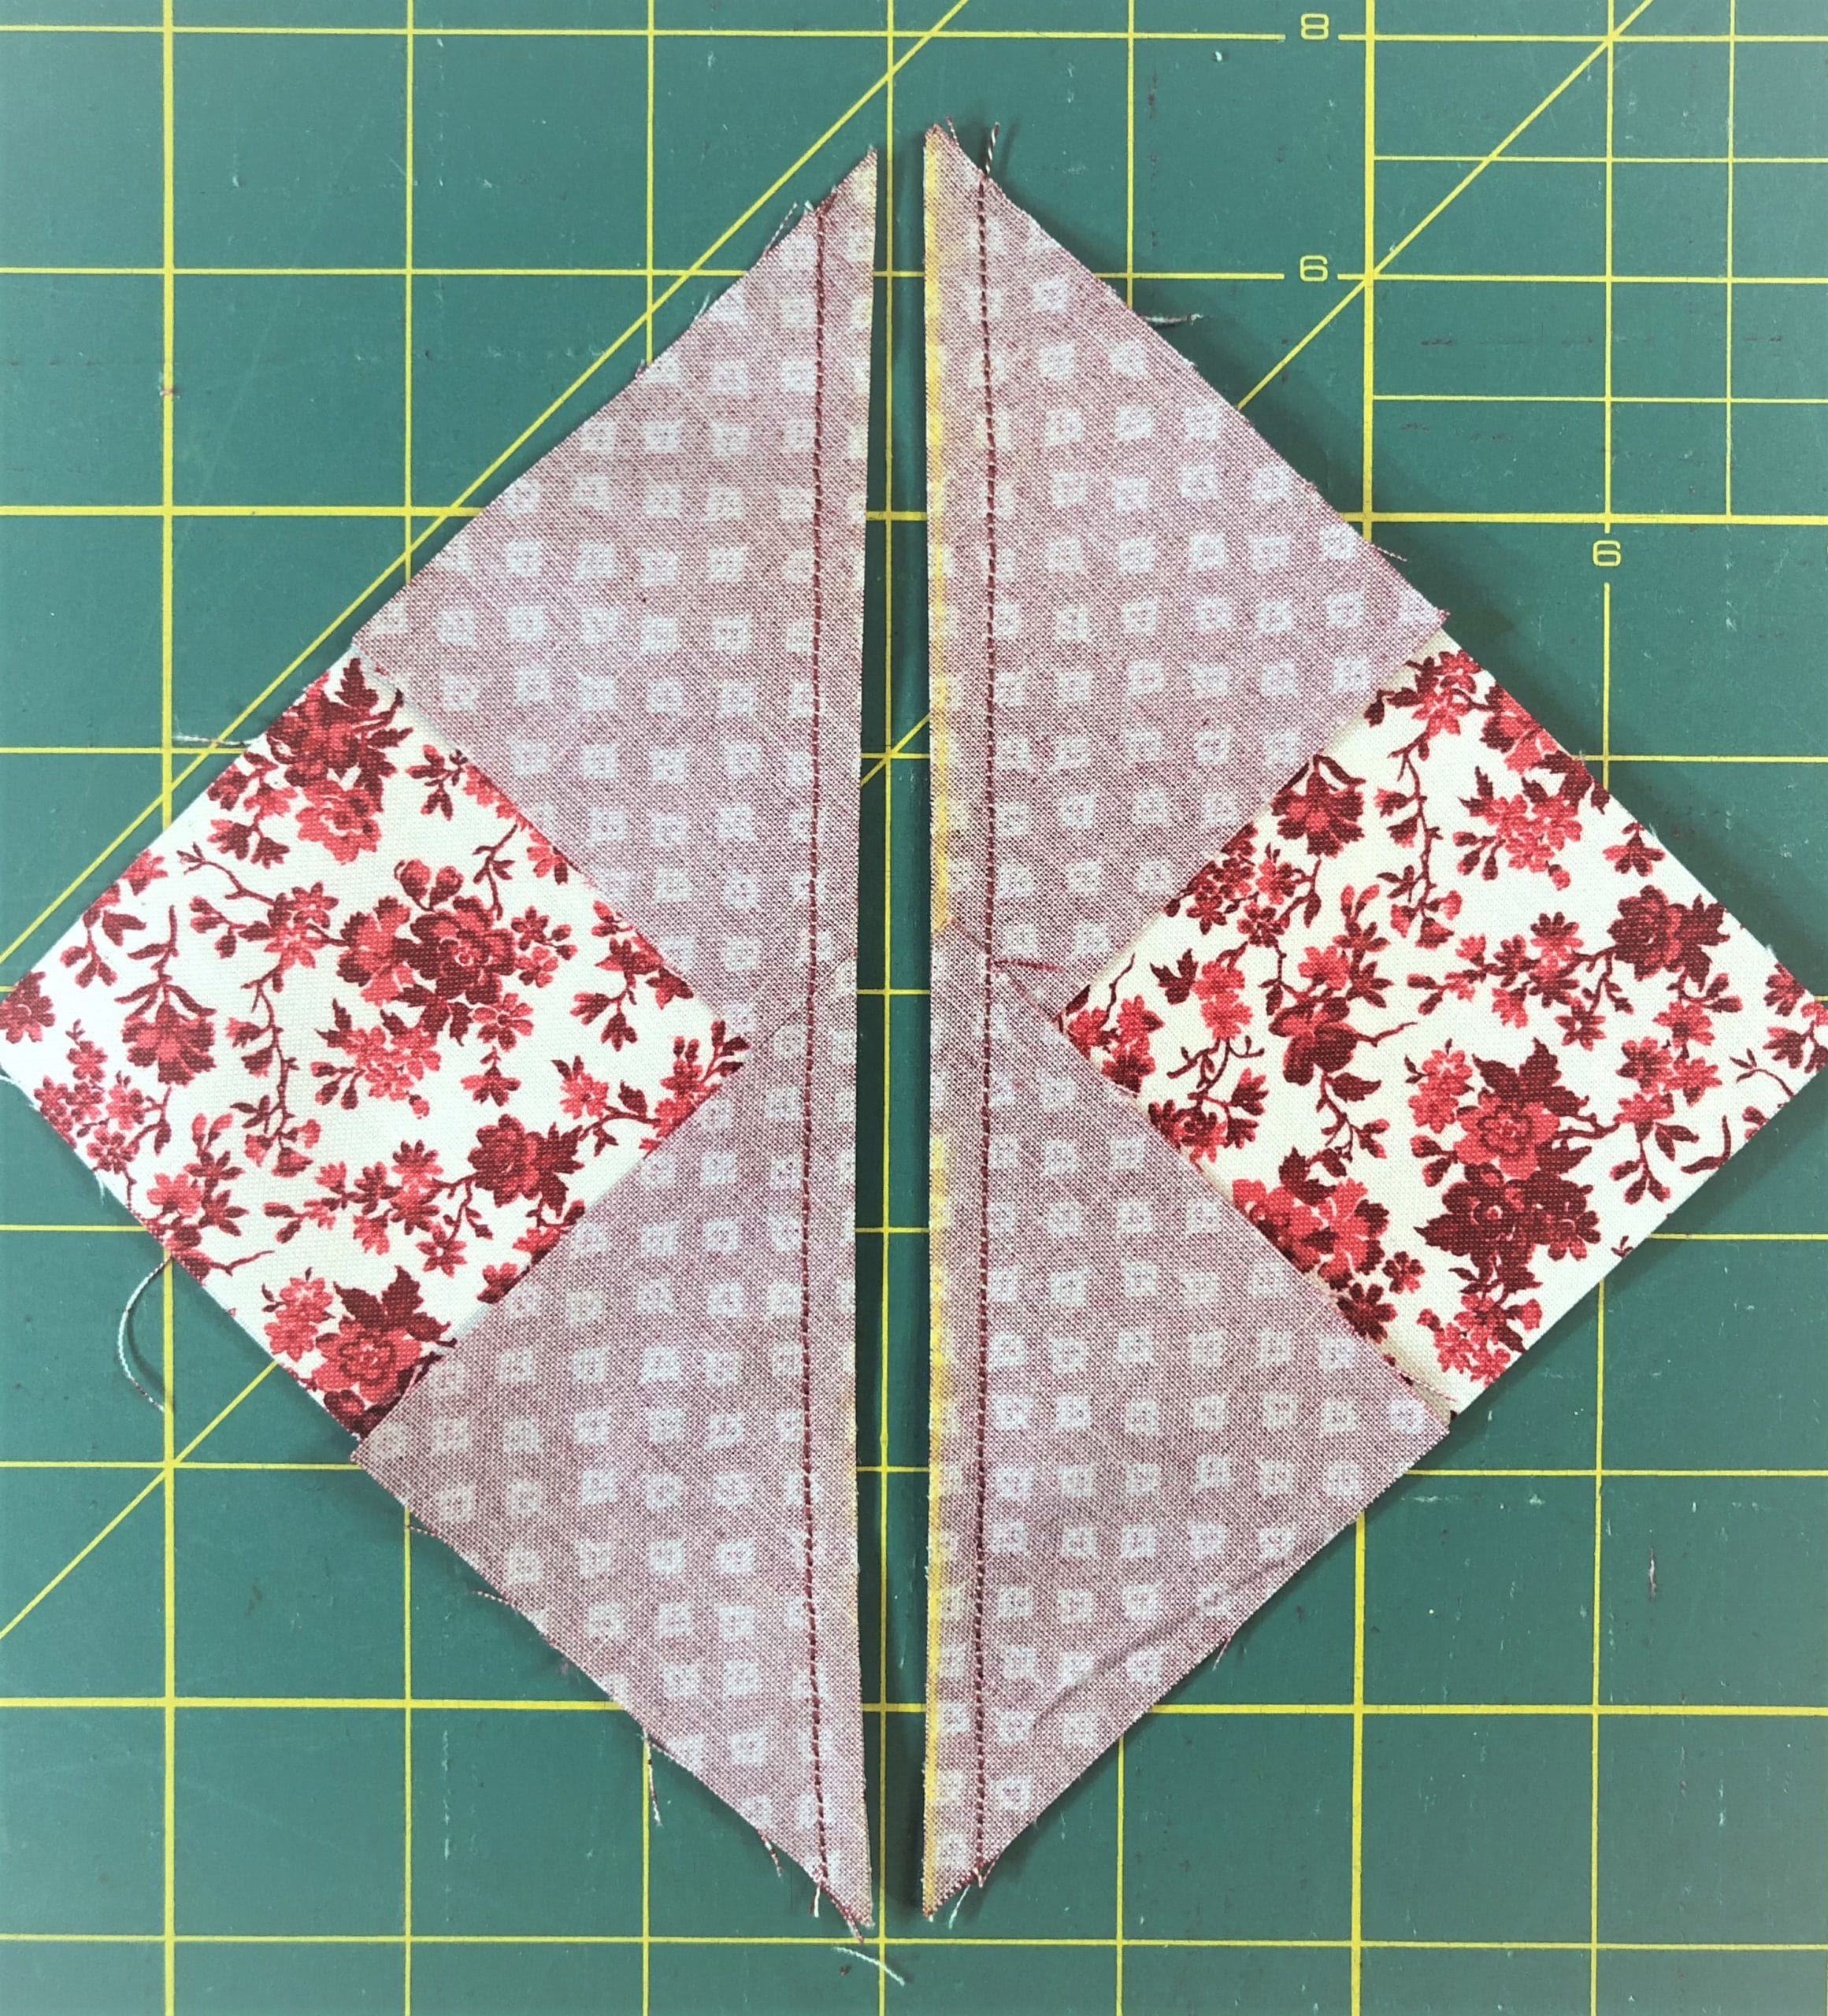
After sewing the first set of triangles to the right side, trim those tails off before sewing on the next D square to the bottom. Again, you want to make sure that the B and D pieces line up, this time along the left side, which will leave a triangle tail on the right.
These are pinned and ready to sew along the bottom edge.
Step 4:
Once you’ve pressed these open you will want to trim off the last tail.
If you find that your triangle units aren’t straight along the D triangles, it’s okay to even them up just a tiny, tiny bit. Don’t trim too much though, or you’ll end up with a block that is too small, which will make worse.
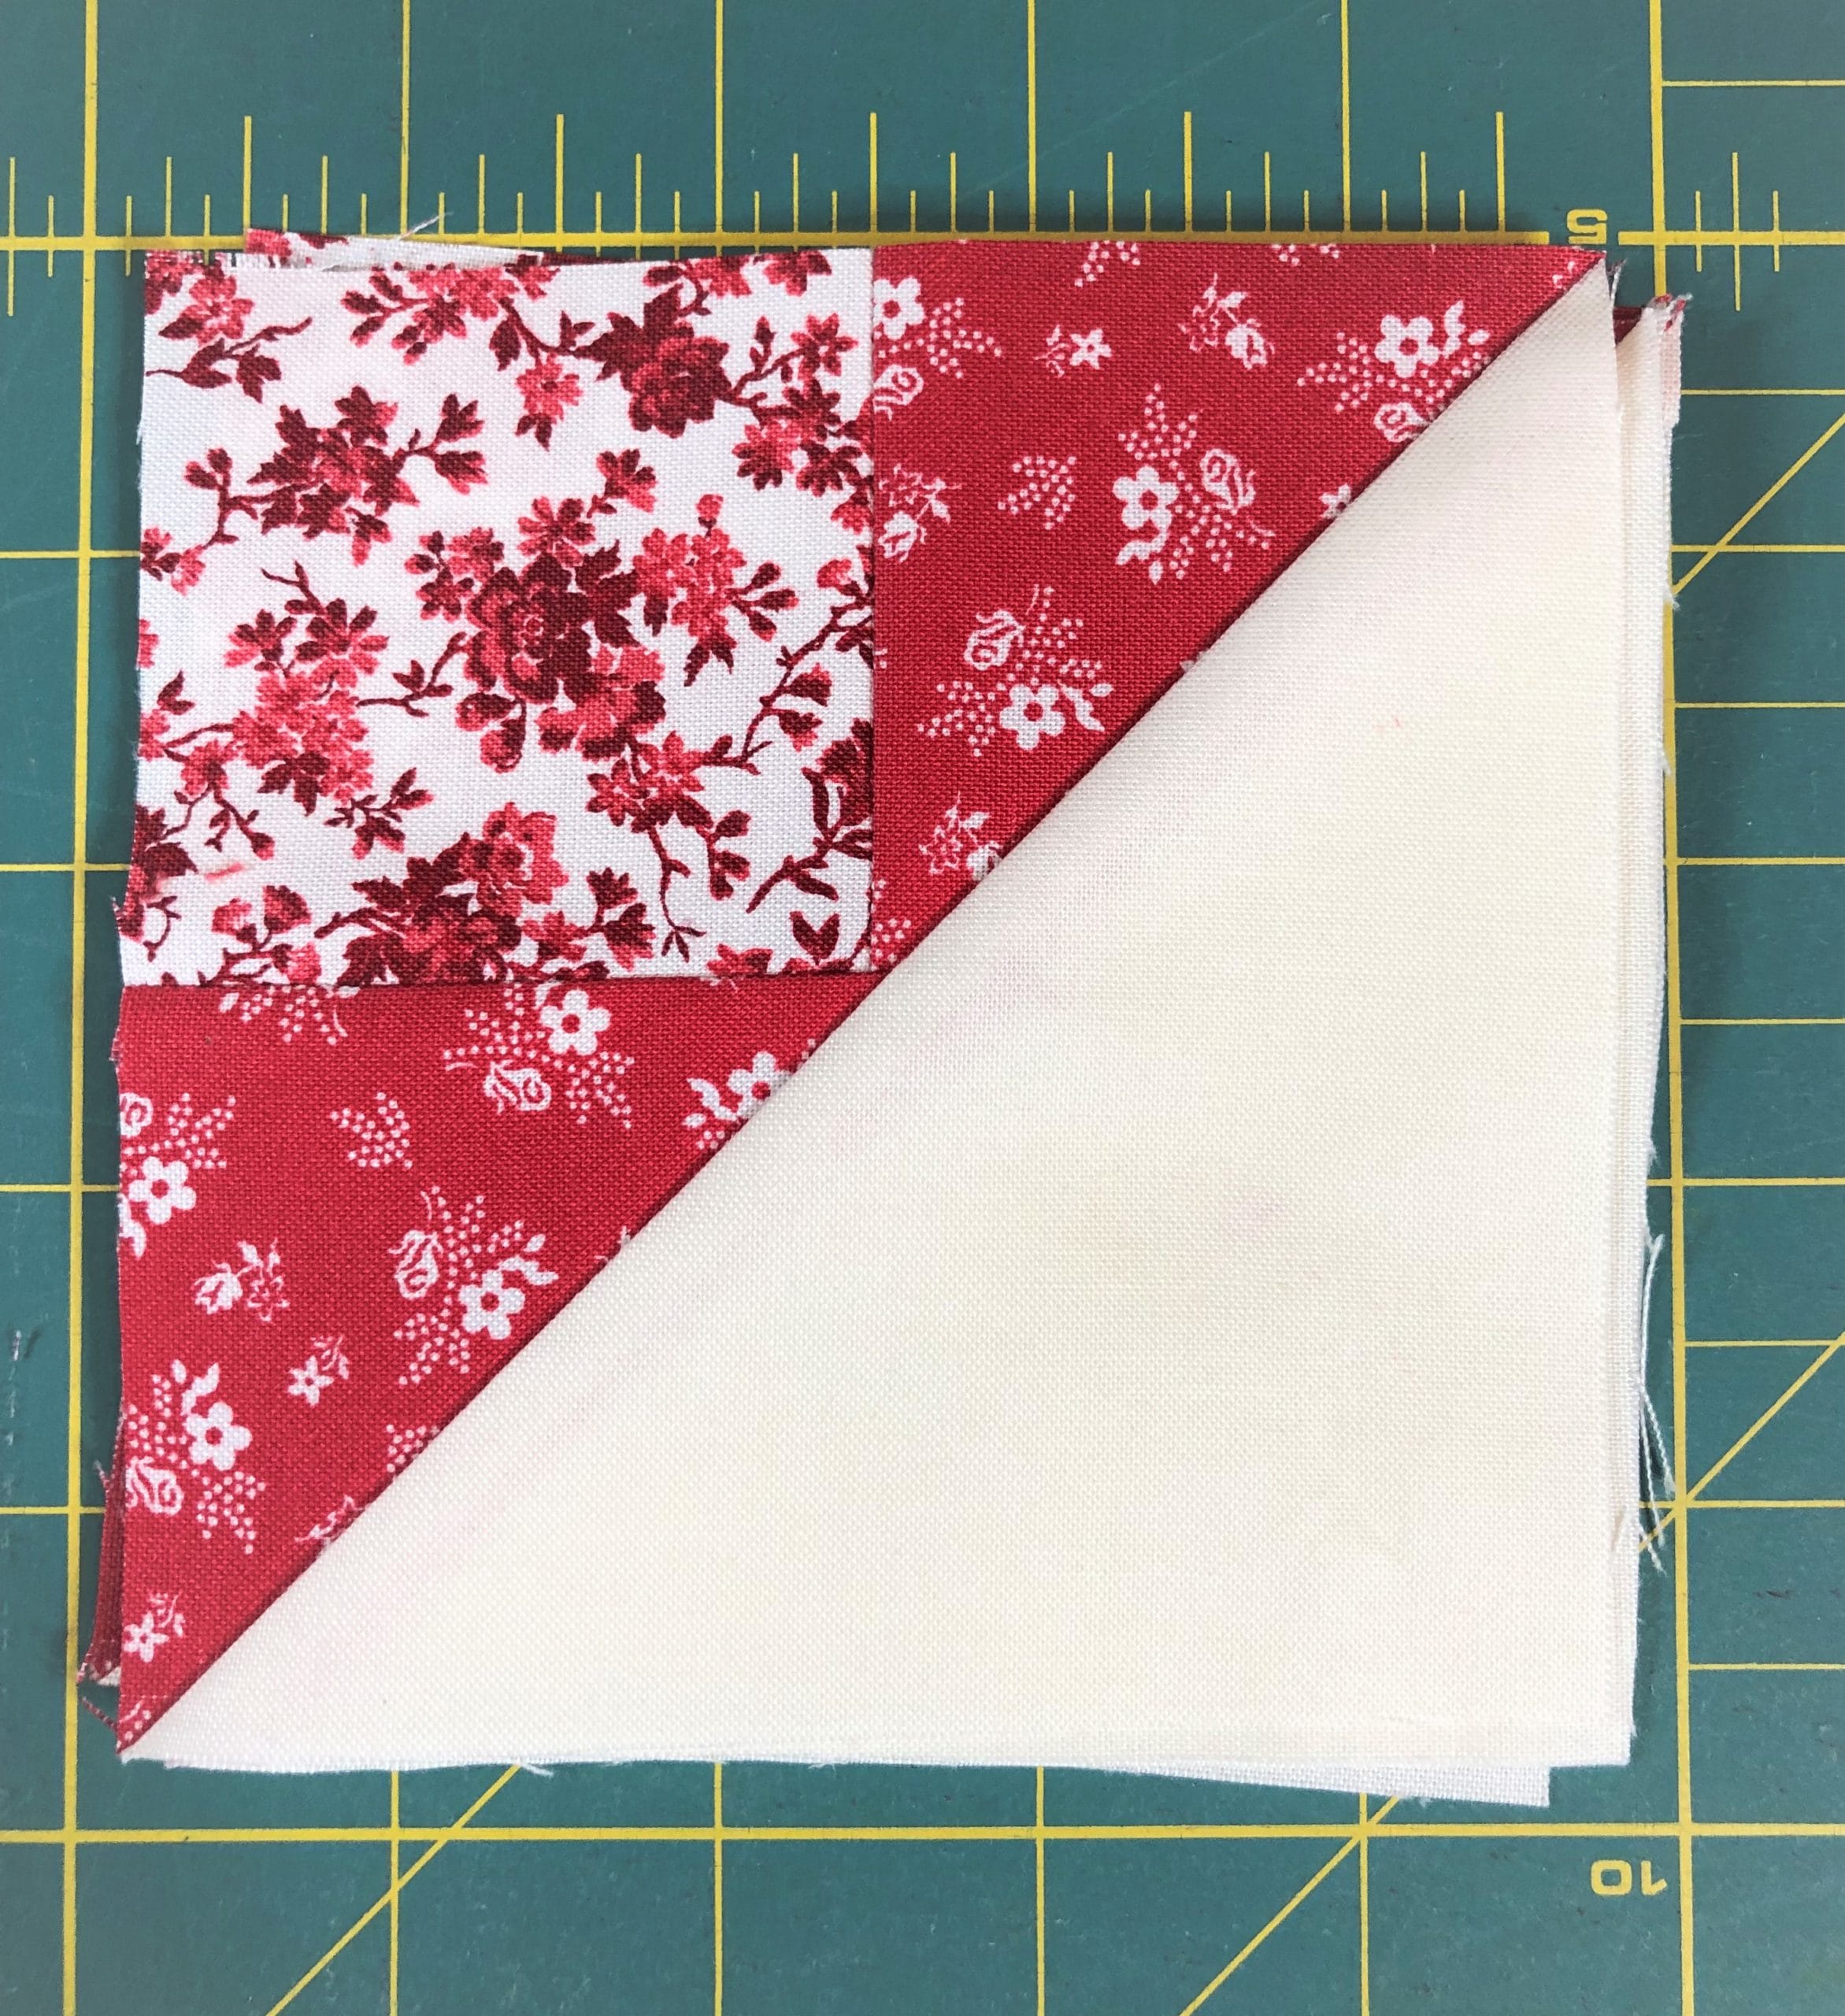
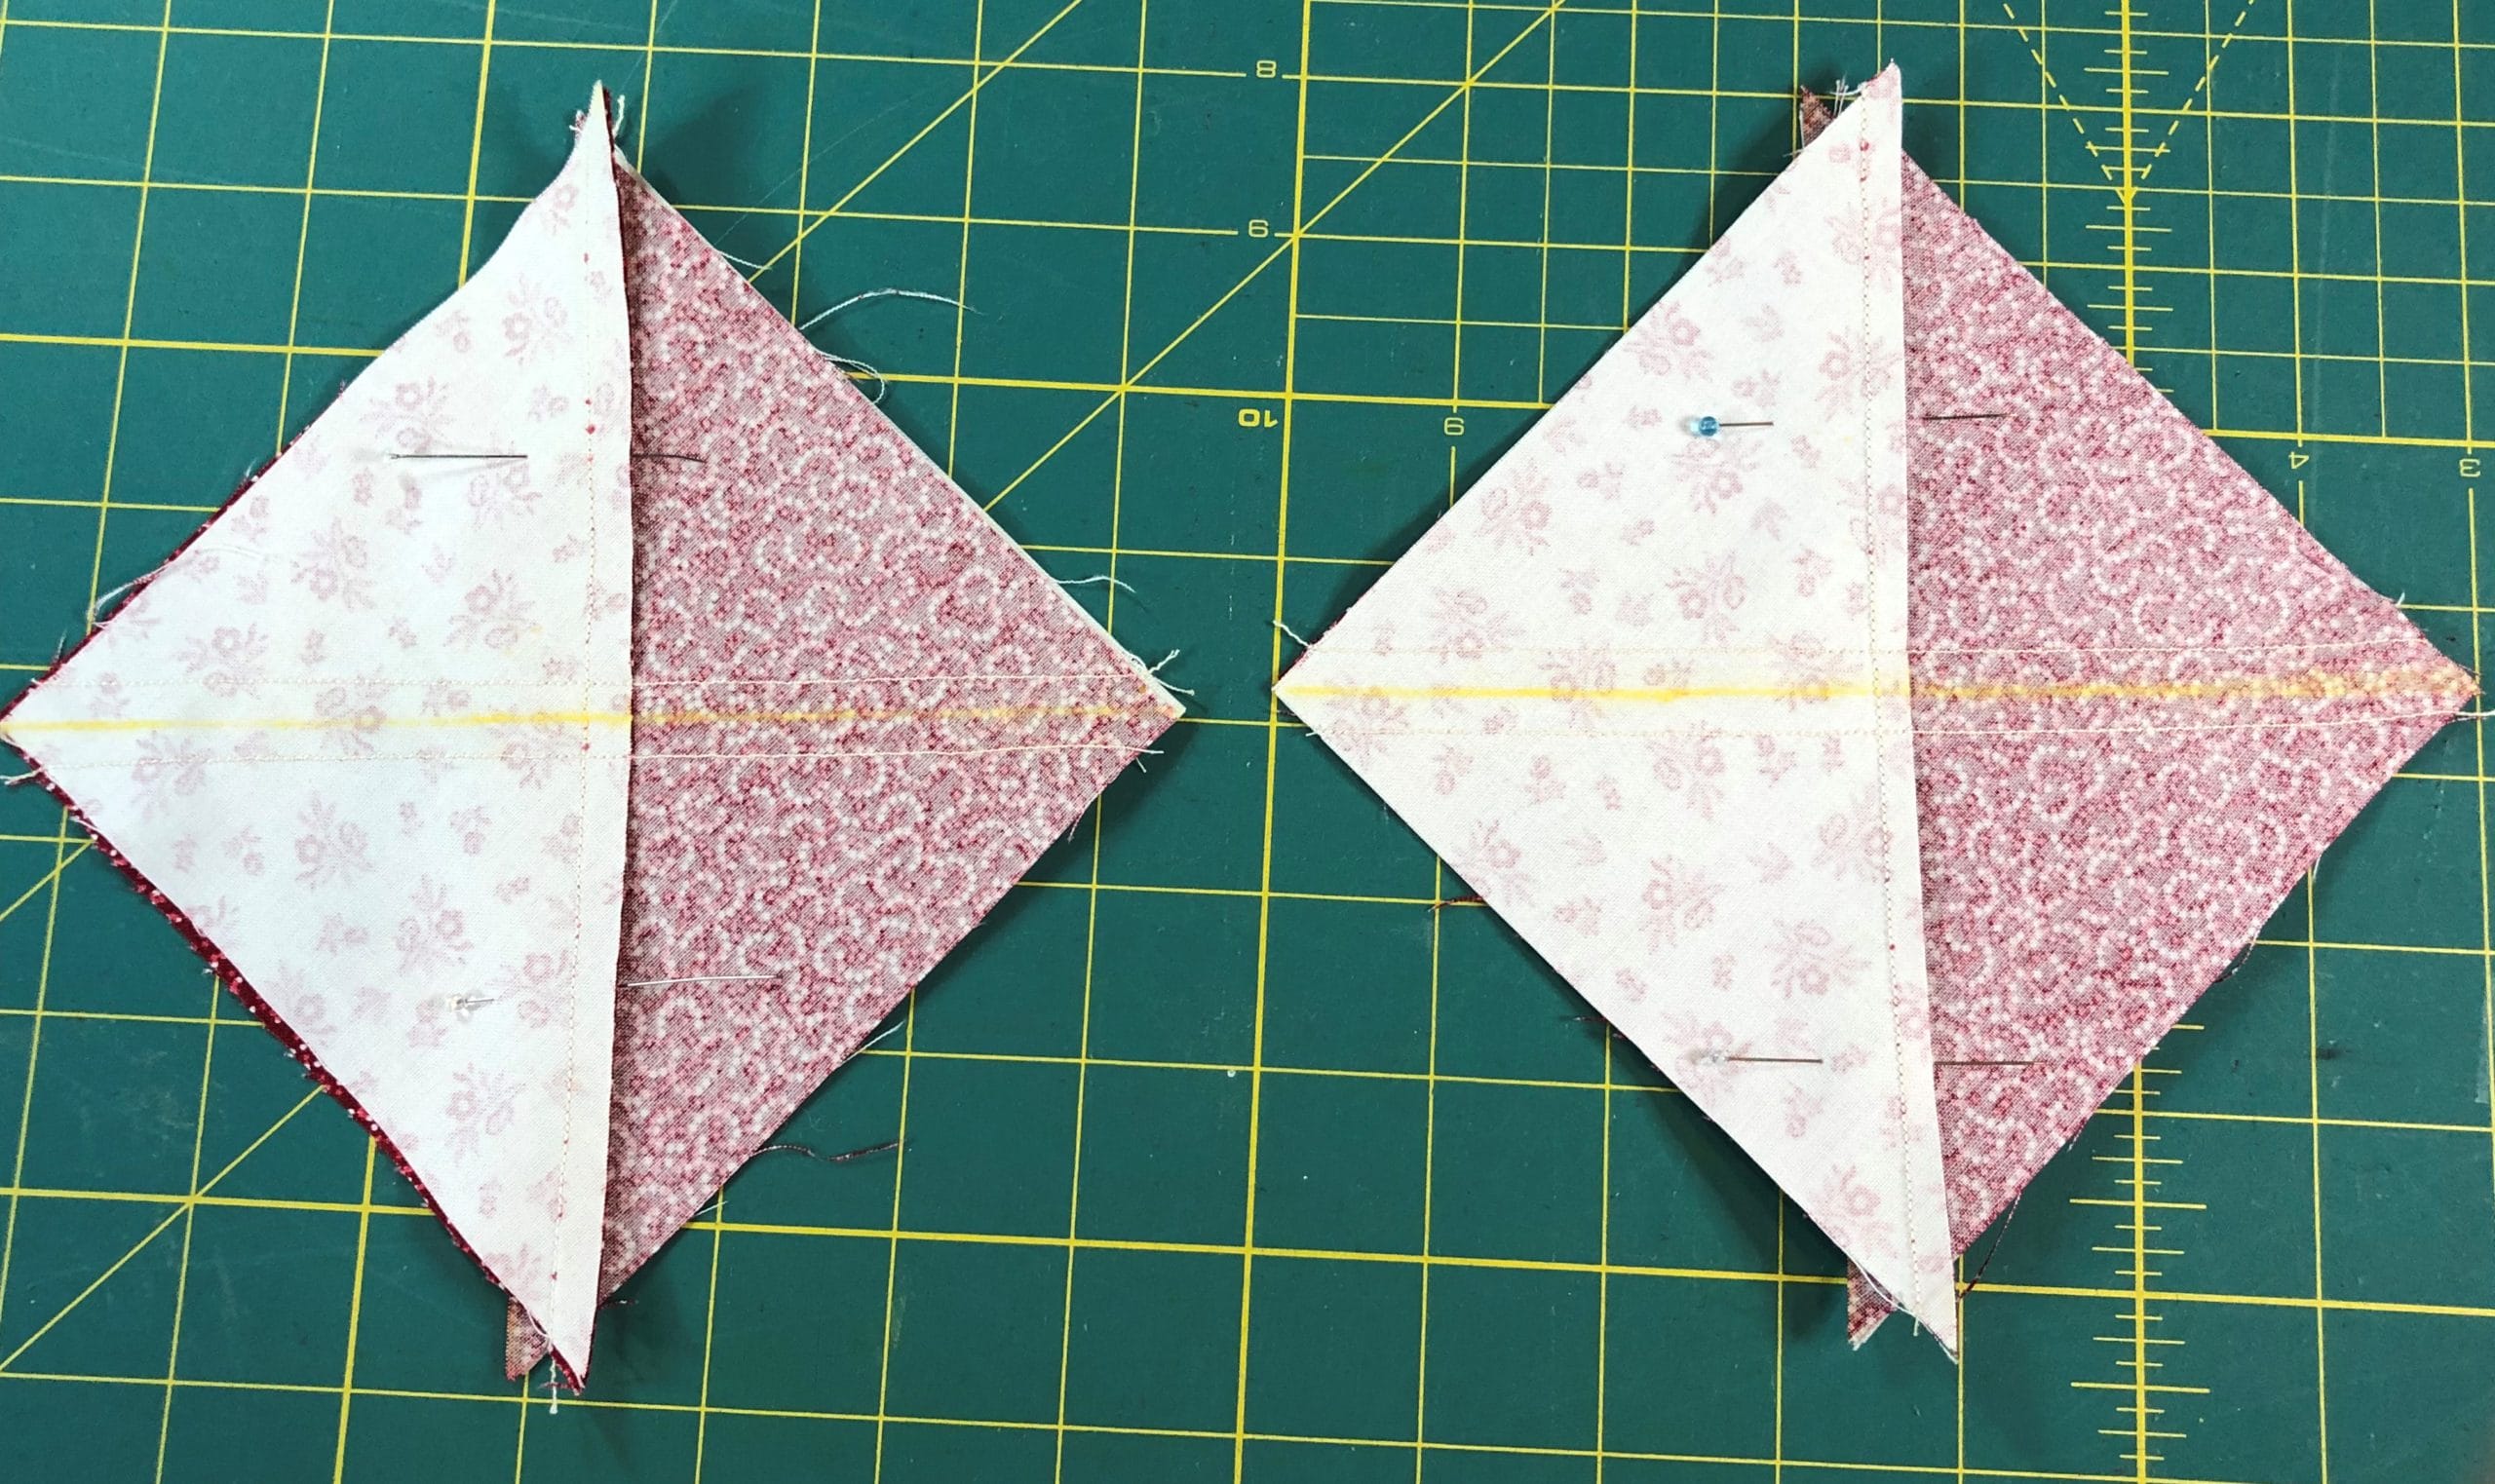
Now you will sew these units to the G triangles, and if all has gone well, you should end up with four 4-1/2” squares. I like to starch these again at this point, just to keep them from stretching or warping.
Ready for the sewing machine!All squared up.
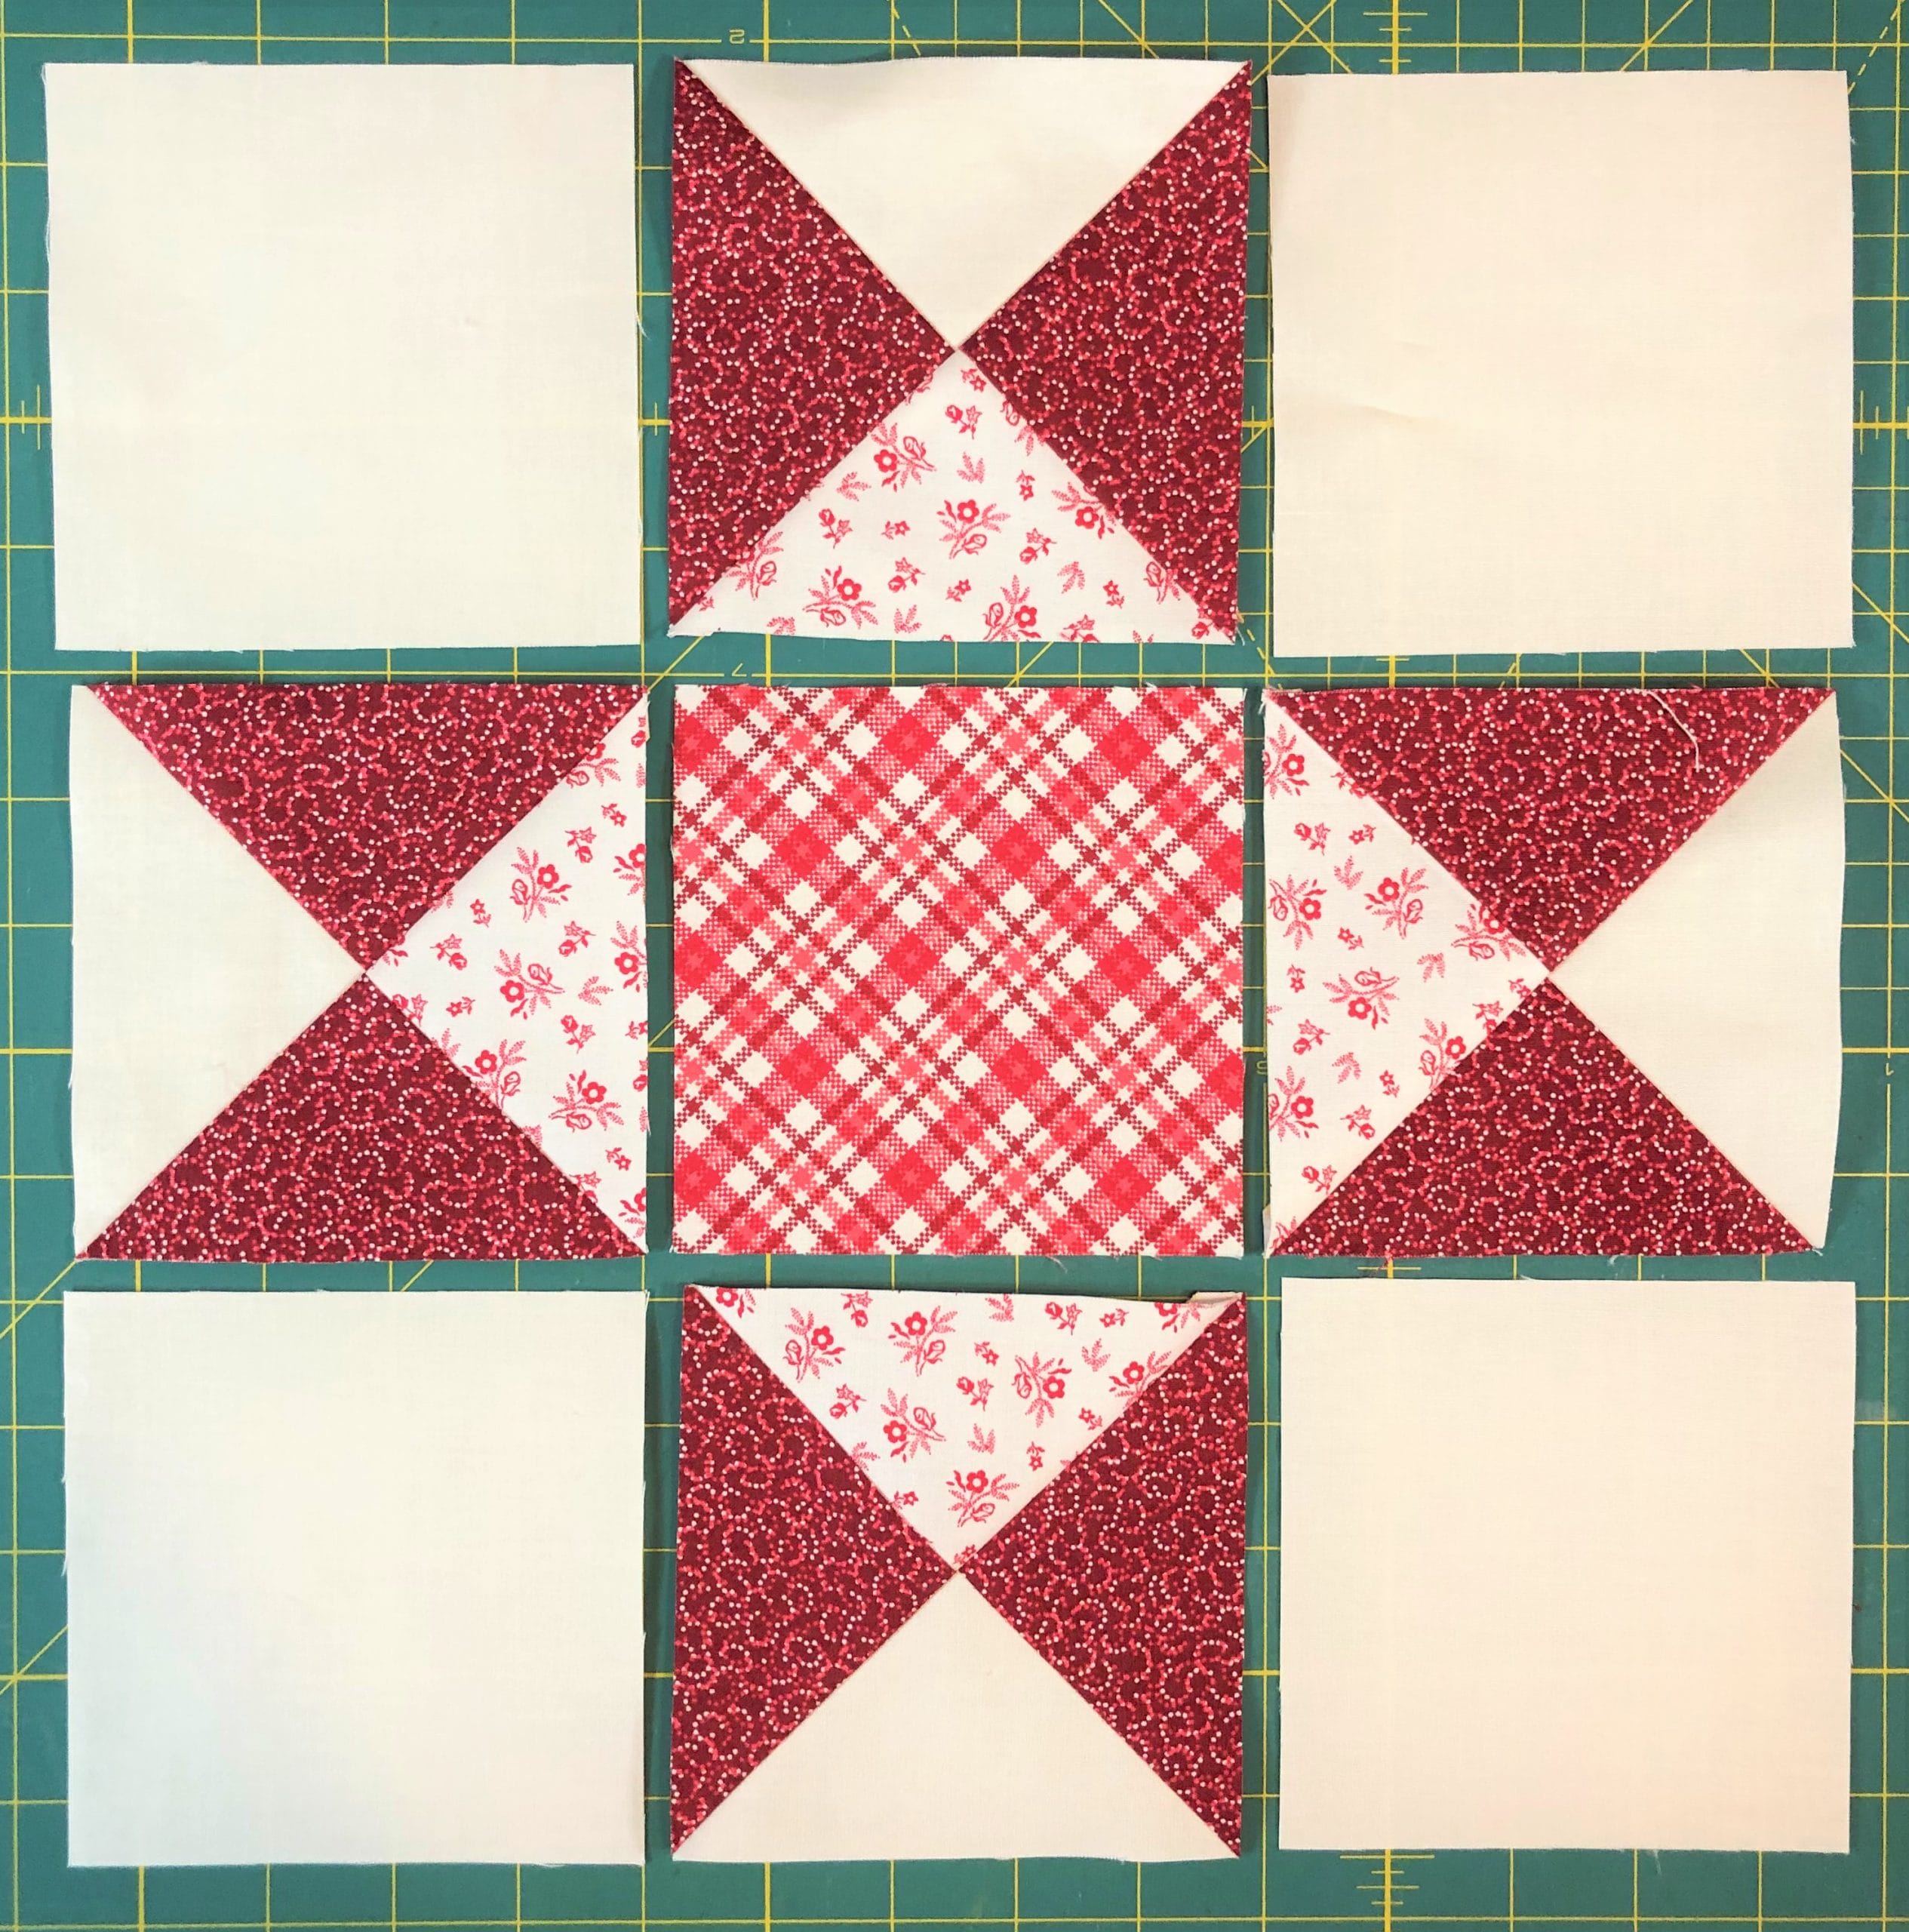
Step 5:
Here comes the fun/tricky part. First, you will take two of the units you made in step 3, and sew them to each side of the center A square, with the Ivory, Solid pieces on the outsides.
Step 6:
Take the blocks you made in step 4 and sew them to each side the remaining two units from step 3. If you’ve followed the pressing directions, the Potpourri Ivory B square and the Germanium Red E triangles should nest together perfectly. Pin that seam intersection first, and then work your way out to the ends of squares, easing things in as needed to make sure the tops and bottoms of the squares also match up.
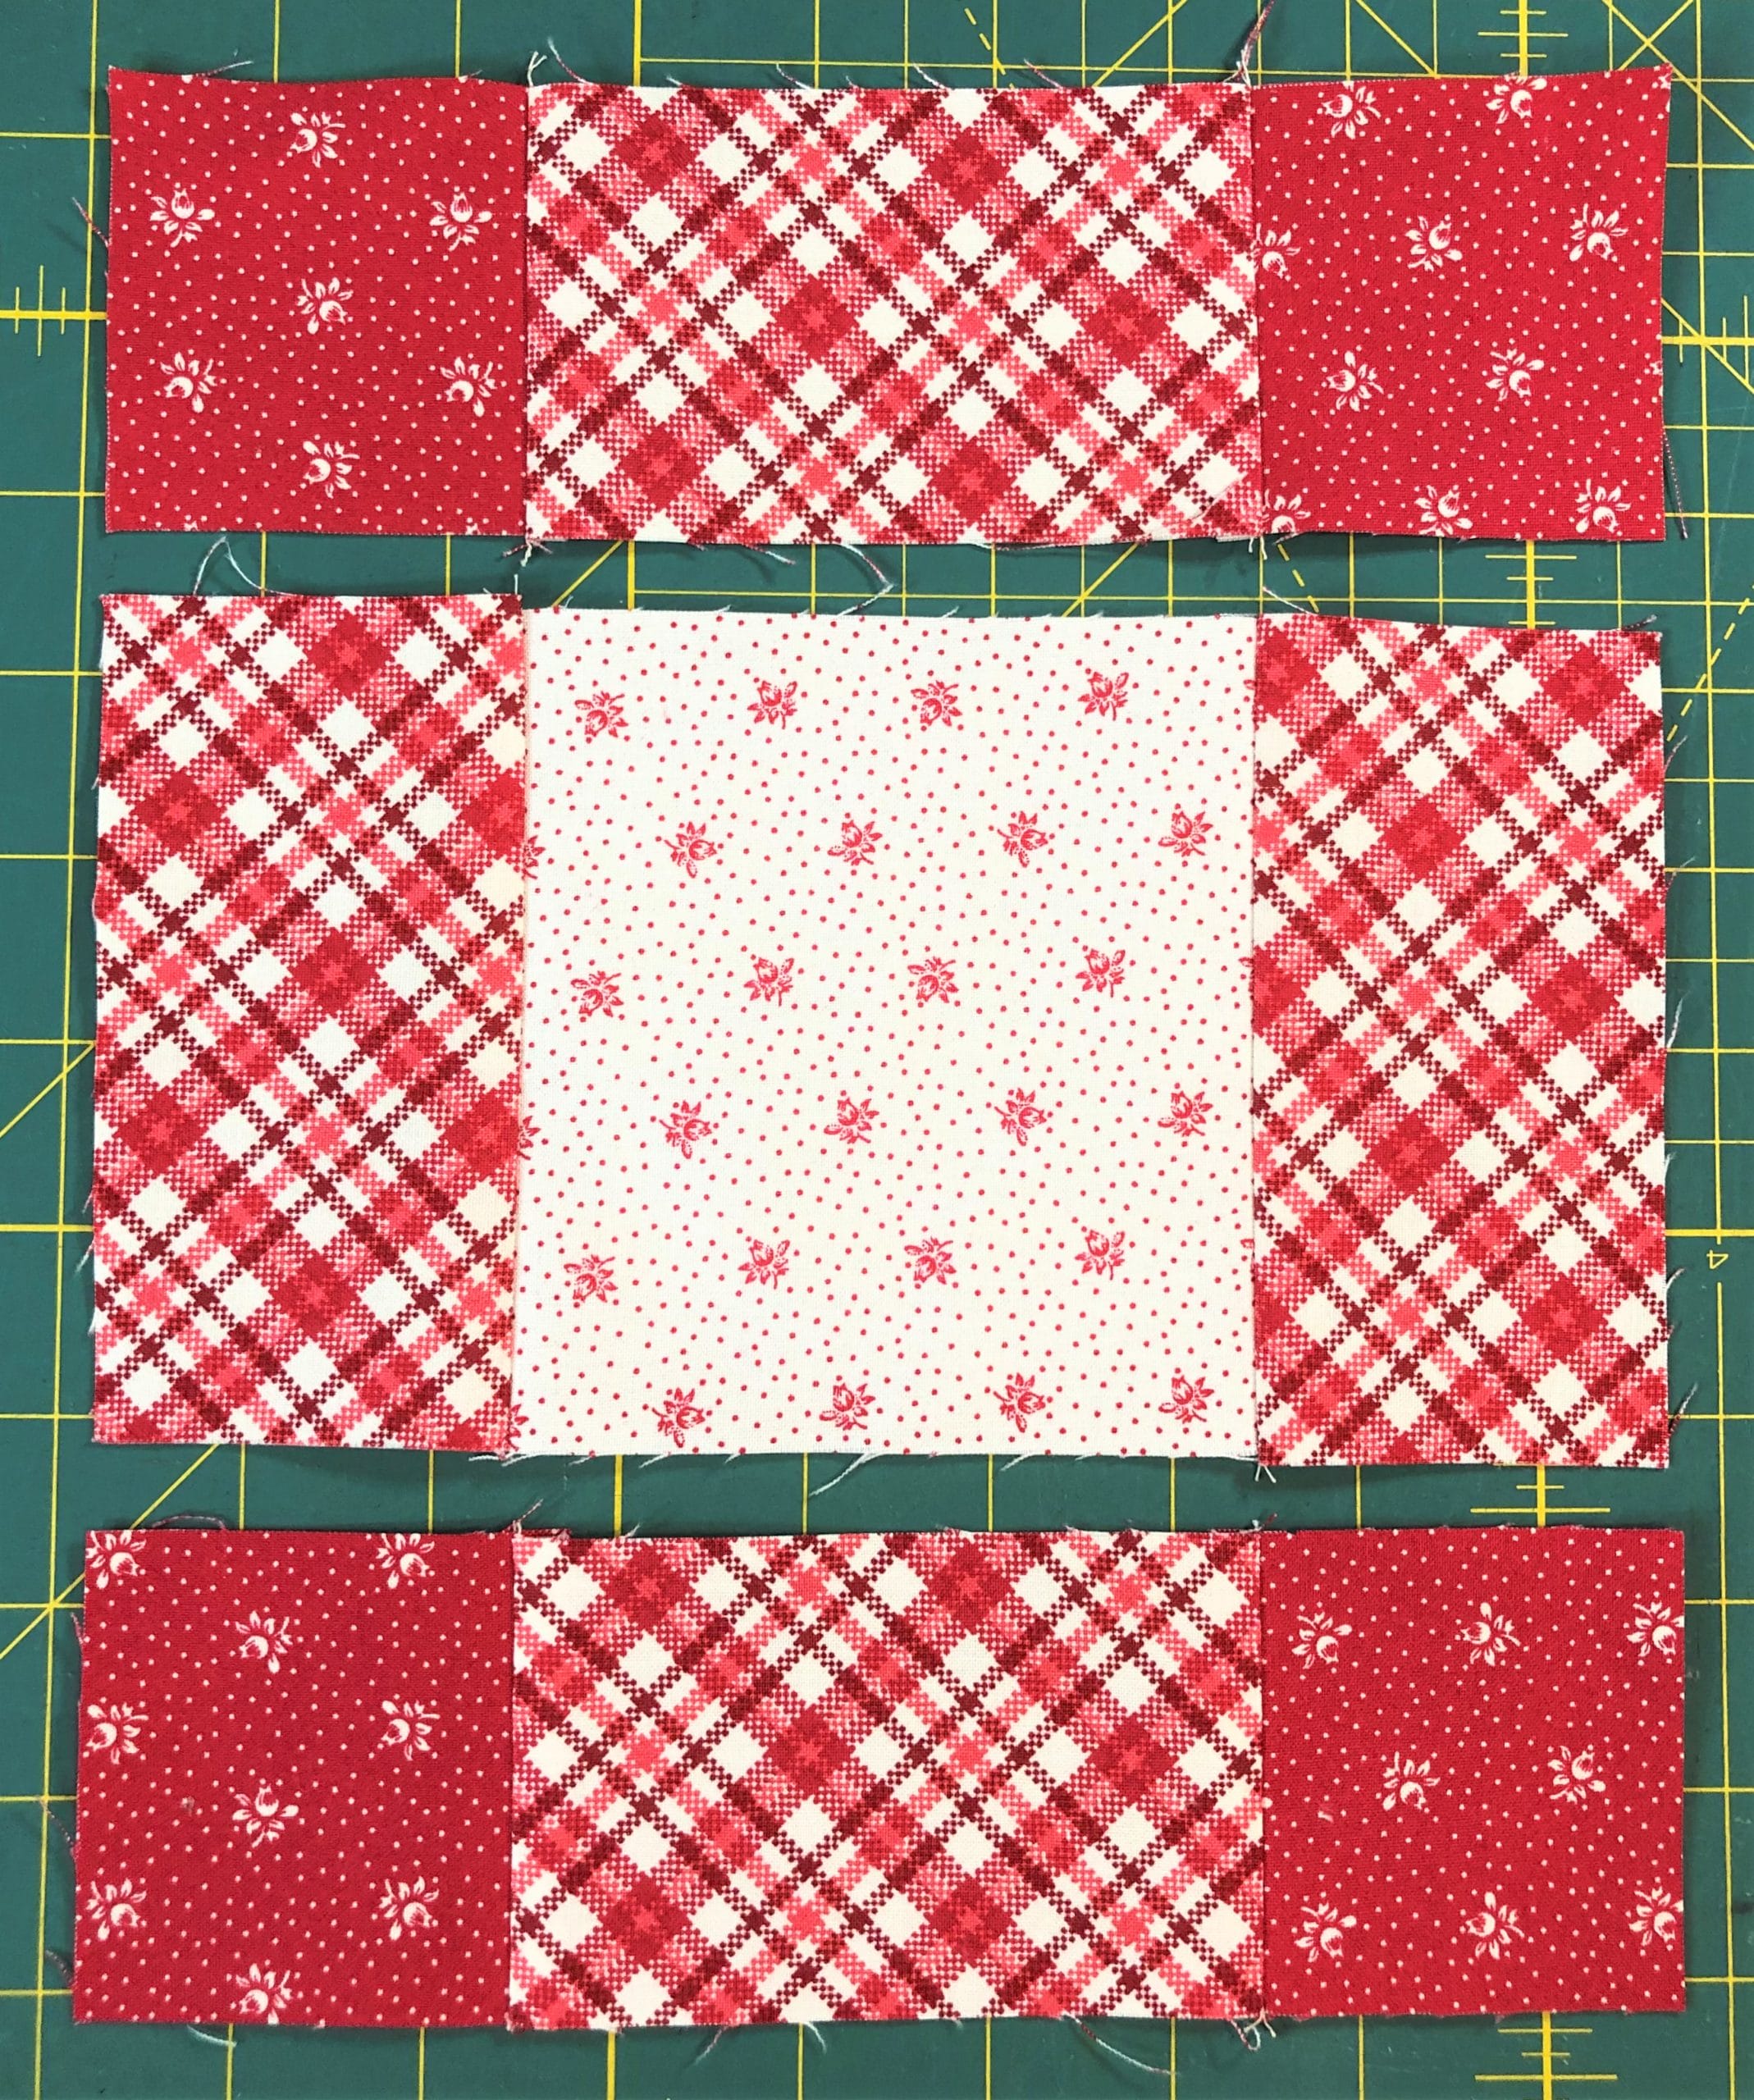
Once you have the three units of the block sewn, you can pin and sew them together to finish the block. You want to continue to pin the seams together first, to make sure they will nest together and line up, and then pin the rest before sewing. The key here is to make sure the flying geese units match up where they meet up in the corners around the center square. I usually pin there first and peek to make sure it all lines up.
If you look carefully at the picture below, you’ll notice that my units on the top row don’t line up perfectly on the bottom. The difference is less than 1/8″, but it looks worse in the photo. Since the difference was very minimal (if it wasn’t I WOULD rip out and start again to protect the integrity of the piecing), rather than rip out and start over (ugh!), here’s what I did: When sewing the top row together, I made sure that the seams lined up where they should with the center unit, and that the tops also where aligned. I still wanted make sure I’d have the 1/4″ seam allowance at the triangle point on top. Then I stitched it to the middle unit as usual. When the block is completed, nobody knows but me….and everyone who reads this lol! Since the difference was minimal, it doesn’t affect the integrity of the block. Even “professionals” don’t sew perfectly. And I’m happy to show my mistakes and the tips I use to compensate. Because we ALL make them!
Phew! You did it! I hope you’ve enjoyed the challenge and are happy with the results.
Have a Happy October, and I’ll catch you all next month!
I hope you all enjoyed making our first four blocks in Month 1. I really loved reading everyone’s comments and photos on Facebook this past month. If you haven’t joined our Ruby Facebook group, I would highly recommend it. It’s a great place to share ideas and stay motivated!
For Month 2 we will be making our first set of the Irish Pinwheel Chain blocks (which I probably should have called Irish Chain Pinwheel blocks, but I digress). There are 25 of these blocks in the quilt, so I’ve broken them down into chunks of 5 and have spread them out over the course of the BOM, just so we all don’t get bored making so many at once! Maybe I’m just speaking for myself, haha!
I’ll walk you through the instructions for making one block:
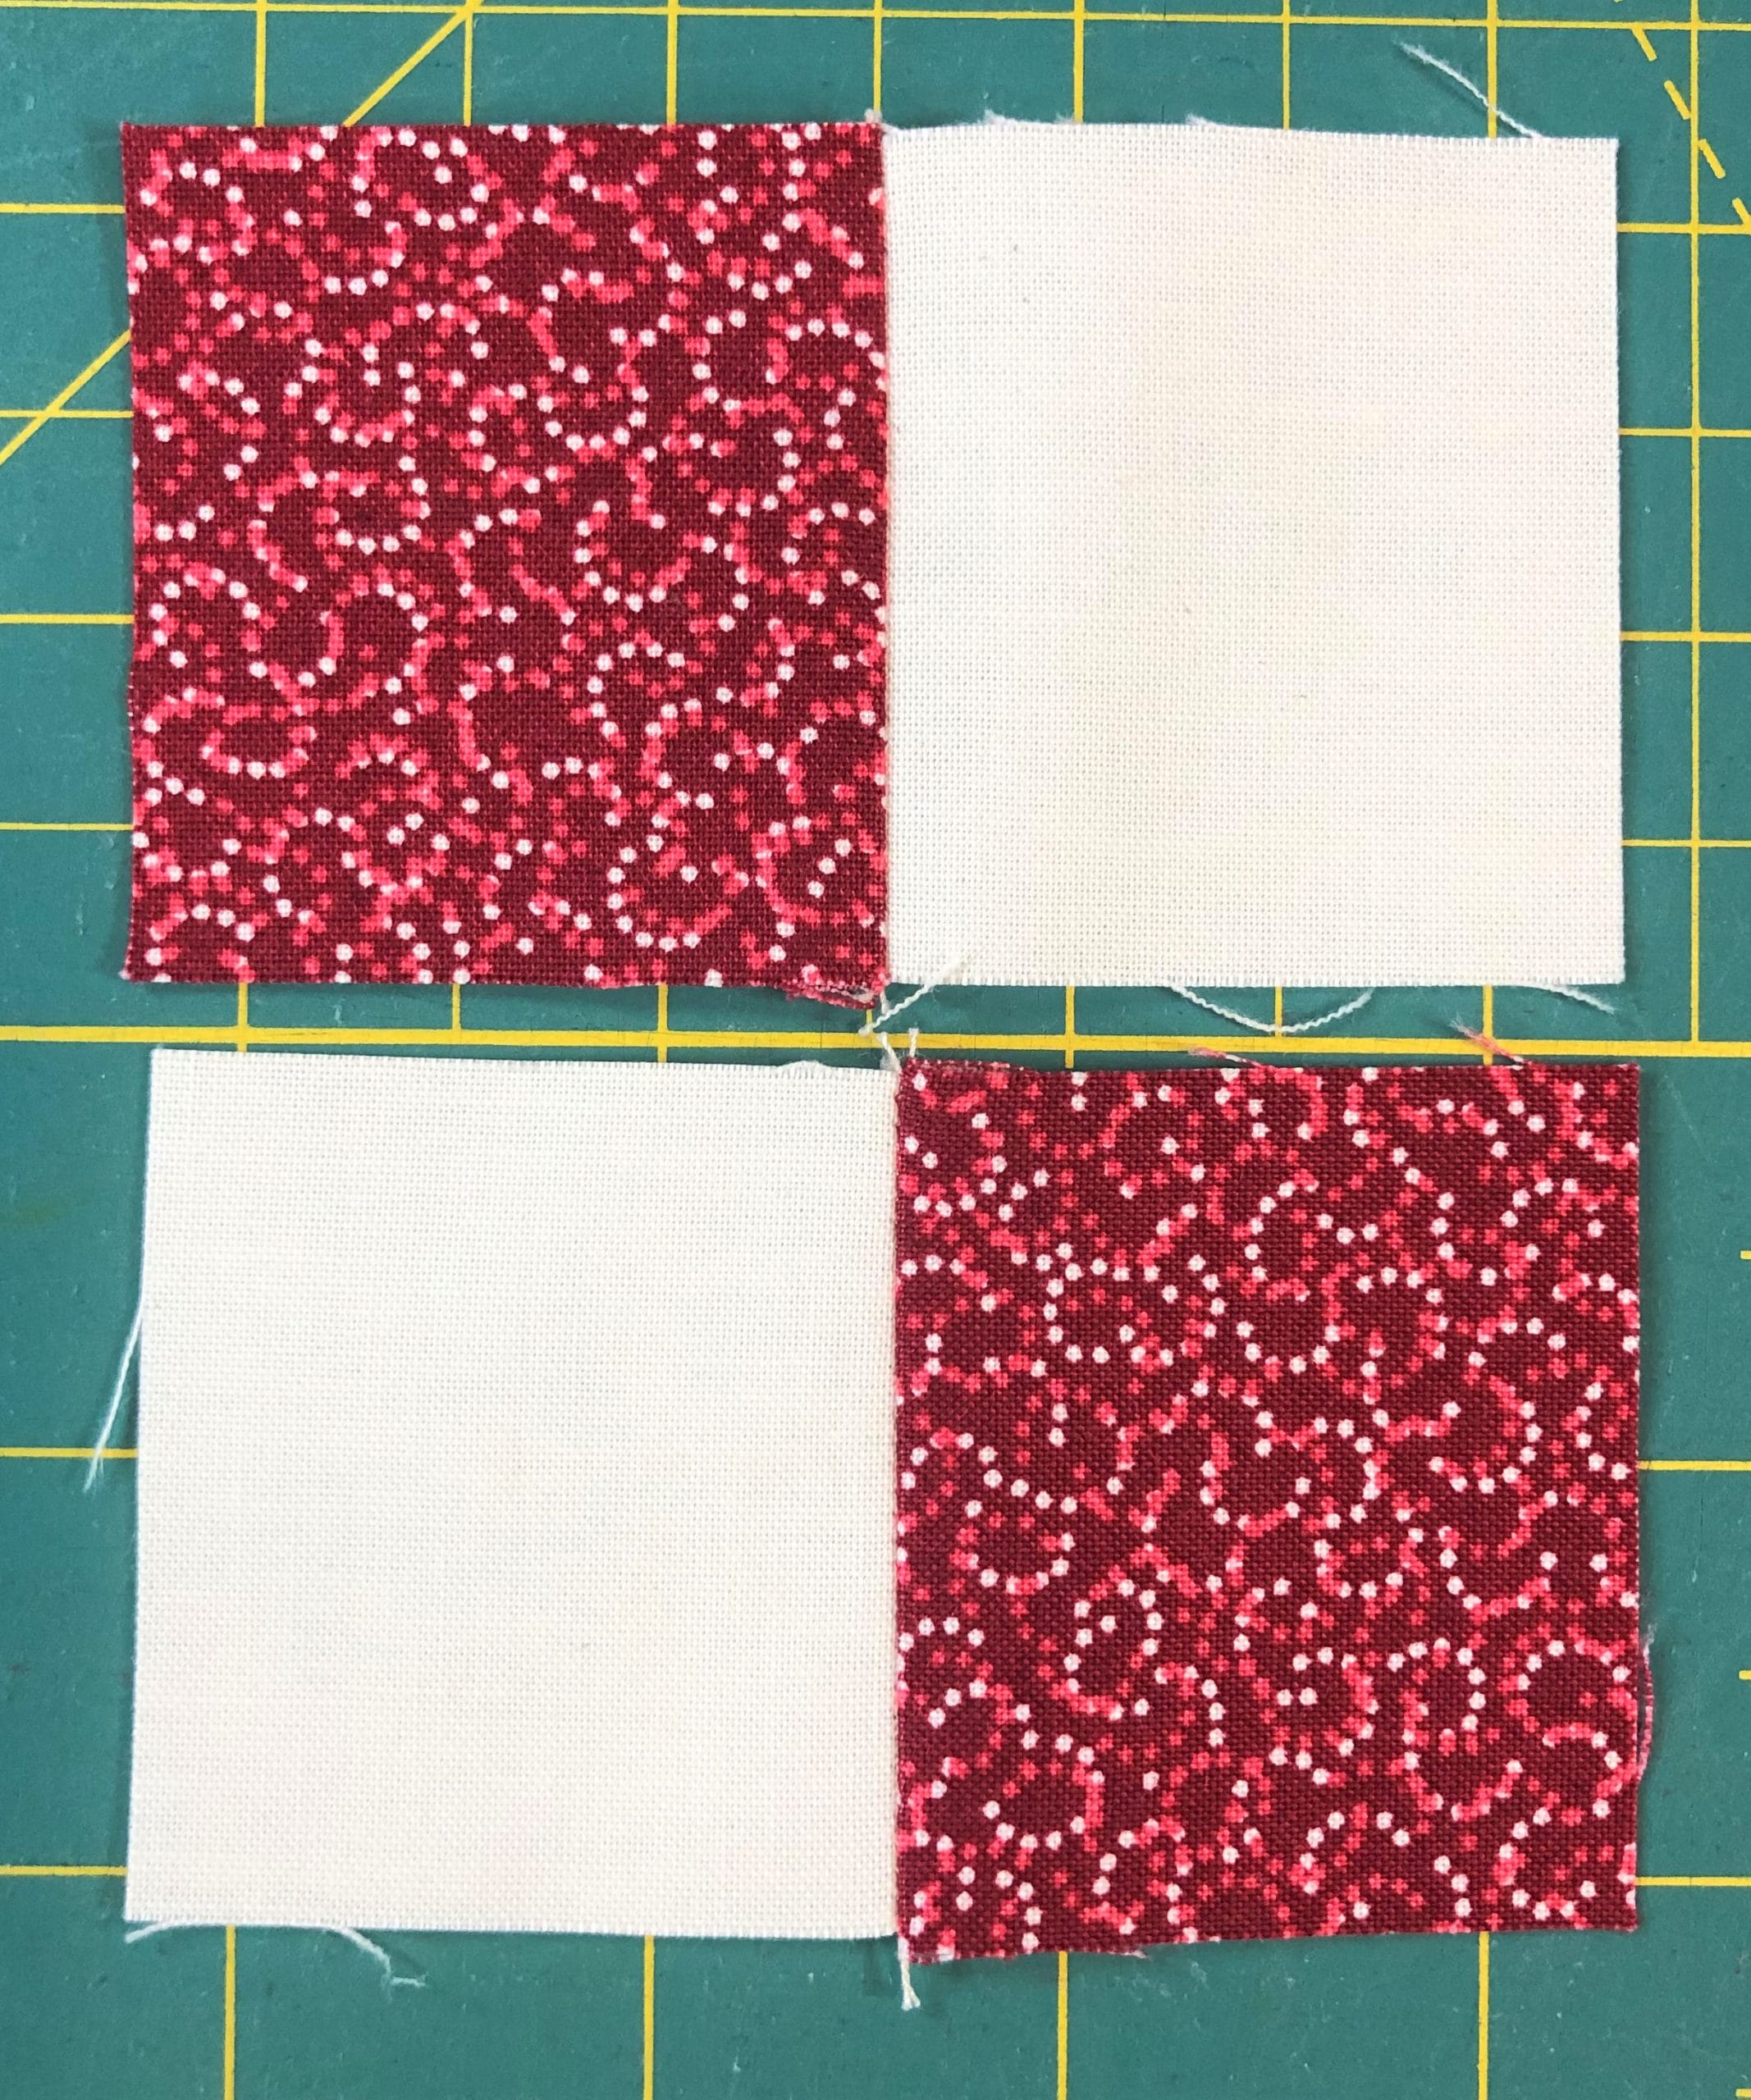
This block begins by making some half-square triangles. Once you’ve paired up your A and B squares and have marked a line like you see below, you are ready to stitch on both sides of the marked line. Obviously the squares shown below aren’t lined up correctly, because I wanted you all to see the square underneath. You’ll want yours matched up perfectly.
Once you’ve sewn everything and have cut on the marked lines, you can press open and square up your blocks to 2-1/2″ square.
Then you’ll sew those half-square triangles together to make a pinwheel. If you want your pinwheels oriented the same throughout the quilt, you’ll want to pay close attention to the diagram, making sure that all of your A and B triangles are in their proper position.
And I must confess, while sewing up my first block for this month’s tutorial, I plumb forgot to pay attention to the direction of my pinwheels. And when I was done and I compared my finished block with my own diagram, OF COURSE they were going the WRONG WAY. If I had been sewing this for myself, and not this blog, I honestly would have left it, and just made sure all the other ones matched. No one would have been the wiser, right? But since you all have my directions and diagrams, and would have seen my mistake, I figured I’d better follow my own instructions and fix it! Thankfully I’d only made the one block and not all five. Otherwise I might have cried…or screamed loud enough for the neighbors to hear.
Once you have your pinwheels sewn up, all you have to do is add the Ivory strips and the Red corner squares. So easy!
I like to sew my blocks into rows first, and then sew the rows together, like you see below.
After the first set of strips and squares, your block should now measure 8-1/2” square. I always measure and trim as I go so that everything turns out the correct size in the end.
Once the last strips and squares are sewn, the finished block should now measure 12-1/2” square.
Things are all laid out and ready to sew the last step.
And here is the finished block!
Some of you have asked for thread suggestions. For this block I used the Scarlet thread, because that’s what I already had in my machine. I really should have used the Cream or Ivory thread, since there is so much of the Ivory background in this block. So do as I say, not as I do! If you really want to get fancy, you could use a red thread for the pinwheels, and then switch to the Ivory thread for sewing the strips.
I hope you have fun making these Irish Pinwheel Chain blocks, because you’ll be making a LOT more of them as we go along! But I’m guessing you all knew that. 🙂
Hello friends! I’m excited to join you on this journey over the next twelve months while we sew up this not-so-little gem of a quilt called Ruby. I’ve always LOVED red and white quilts so I jumped at the chance to design one for Connecting Threads. I’m pretty happy with the results, and hope that you will be too, especially once it’s all finished.
Threads
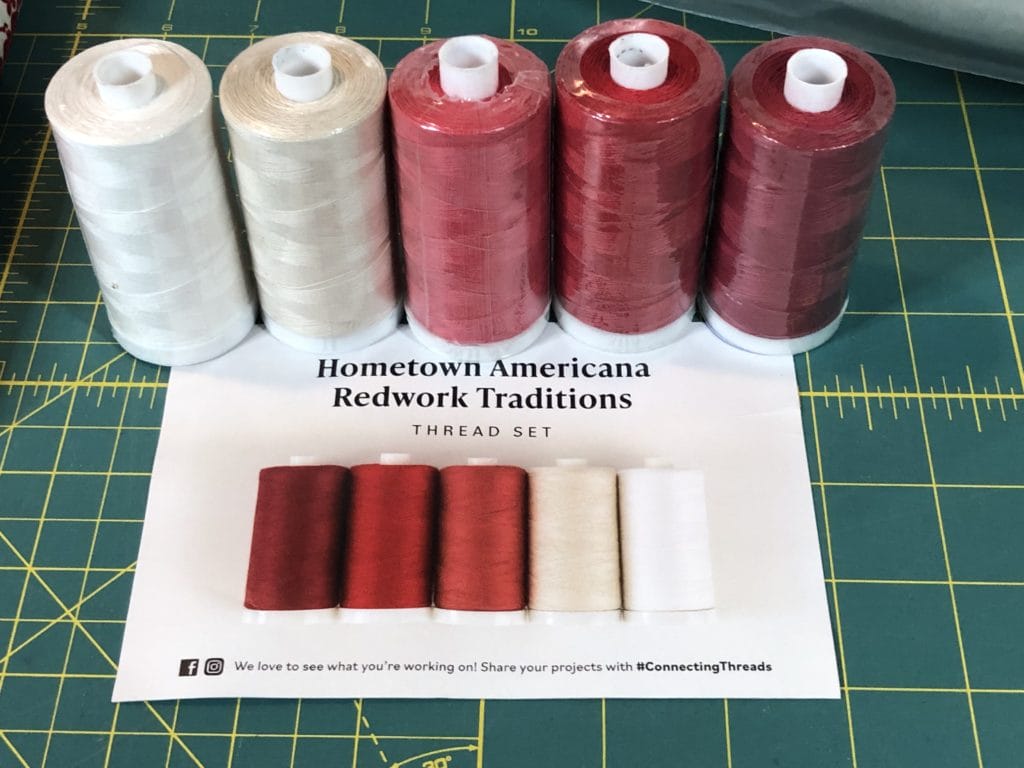
In preparation for this BOM, I snagged a few extra supplies from Connecting Threads. I love their thread and use it all the time anyway, so lucky for me there is a thread set that goes PERFECTLY with this quilt. It’s the Hometown Americana Redwork Traditions Thread set. Of course, you don’t have to use this thread to make the quilt, but since all the colors are perfect for whatever blocks we’ll be making, I just decided I wanted it from the start.
Backing Fabric
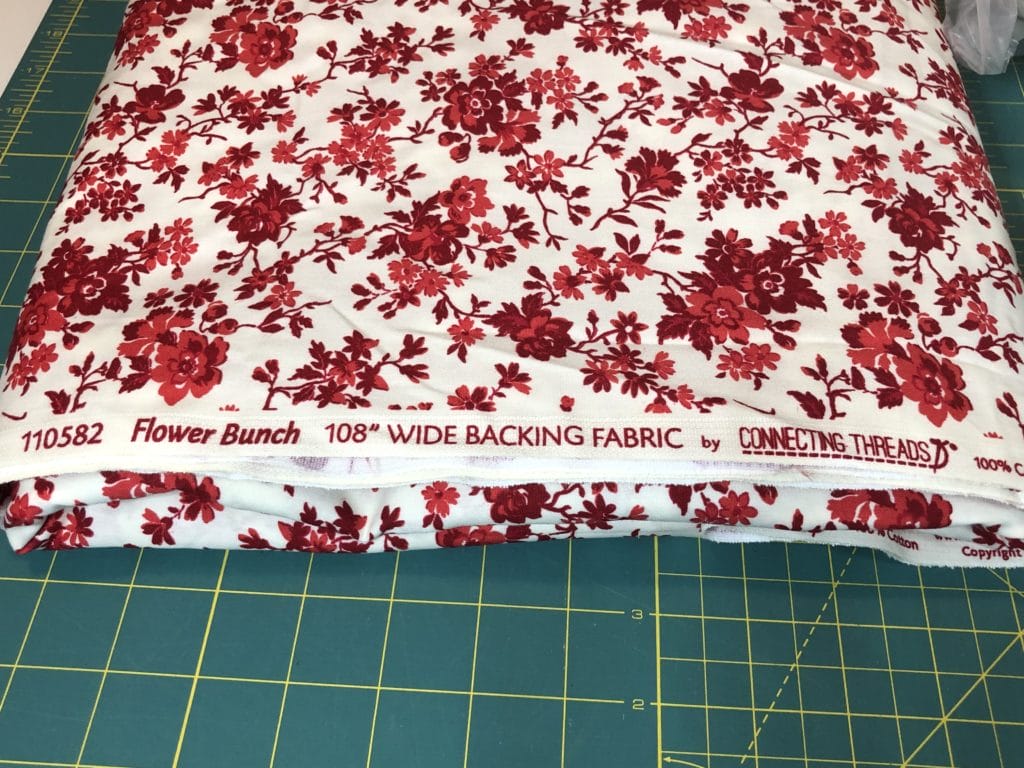
I also got backing fabric, because, depending on the popularity of any given CT fabric collection, there is a chance that the backing fabric I want might not be available by the time I’m ready for quilting. And since we will spend 12 months making the top, I really wanted to make sure I could get what I wanted. So while you don’t have to buy backing fabric now, I would strongly suggest you do, especially if you want something that coordinates.
The pattern states that you’ll need 9.75 yards of standard 44″ wide fabric for the backing. You can also choose to get 3 yards of the 108″ backing fabric as I decided to do. If you go that route, you’ll want to get 3 yards. I picked Flower Bunch (#110582), which coordinates perfectly with this quilt. In fact, it’s so pretty it could be a whole cloth quilt on it’s own. I love it!
Cutting
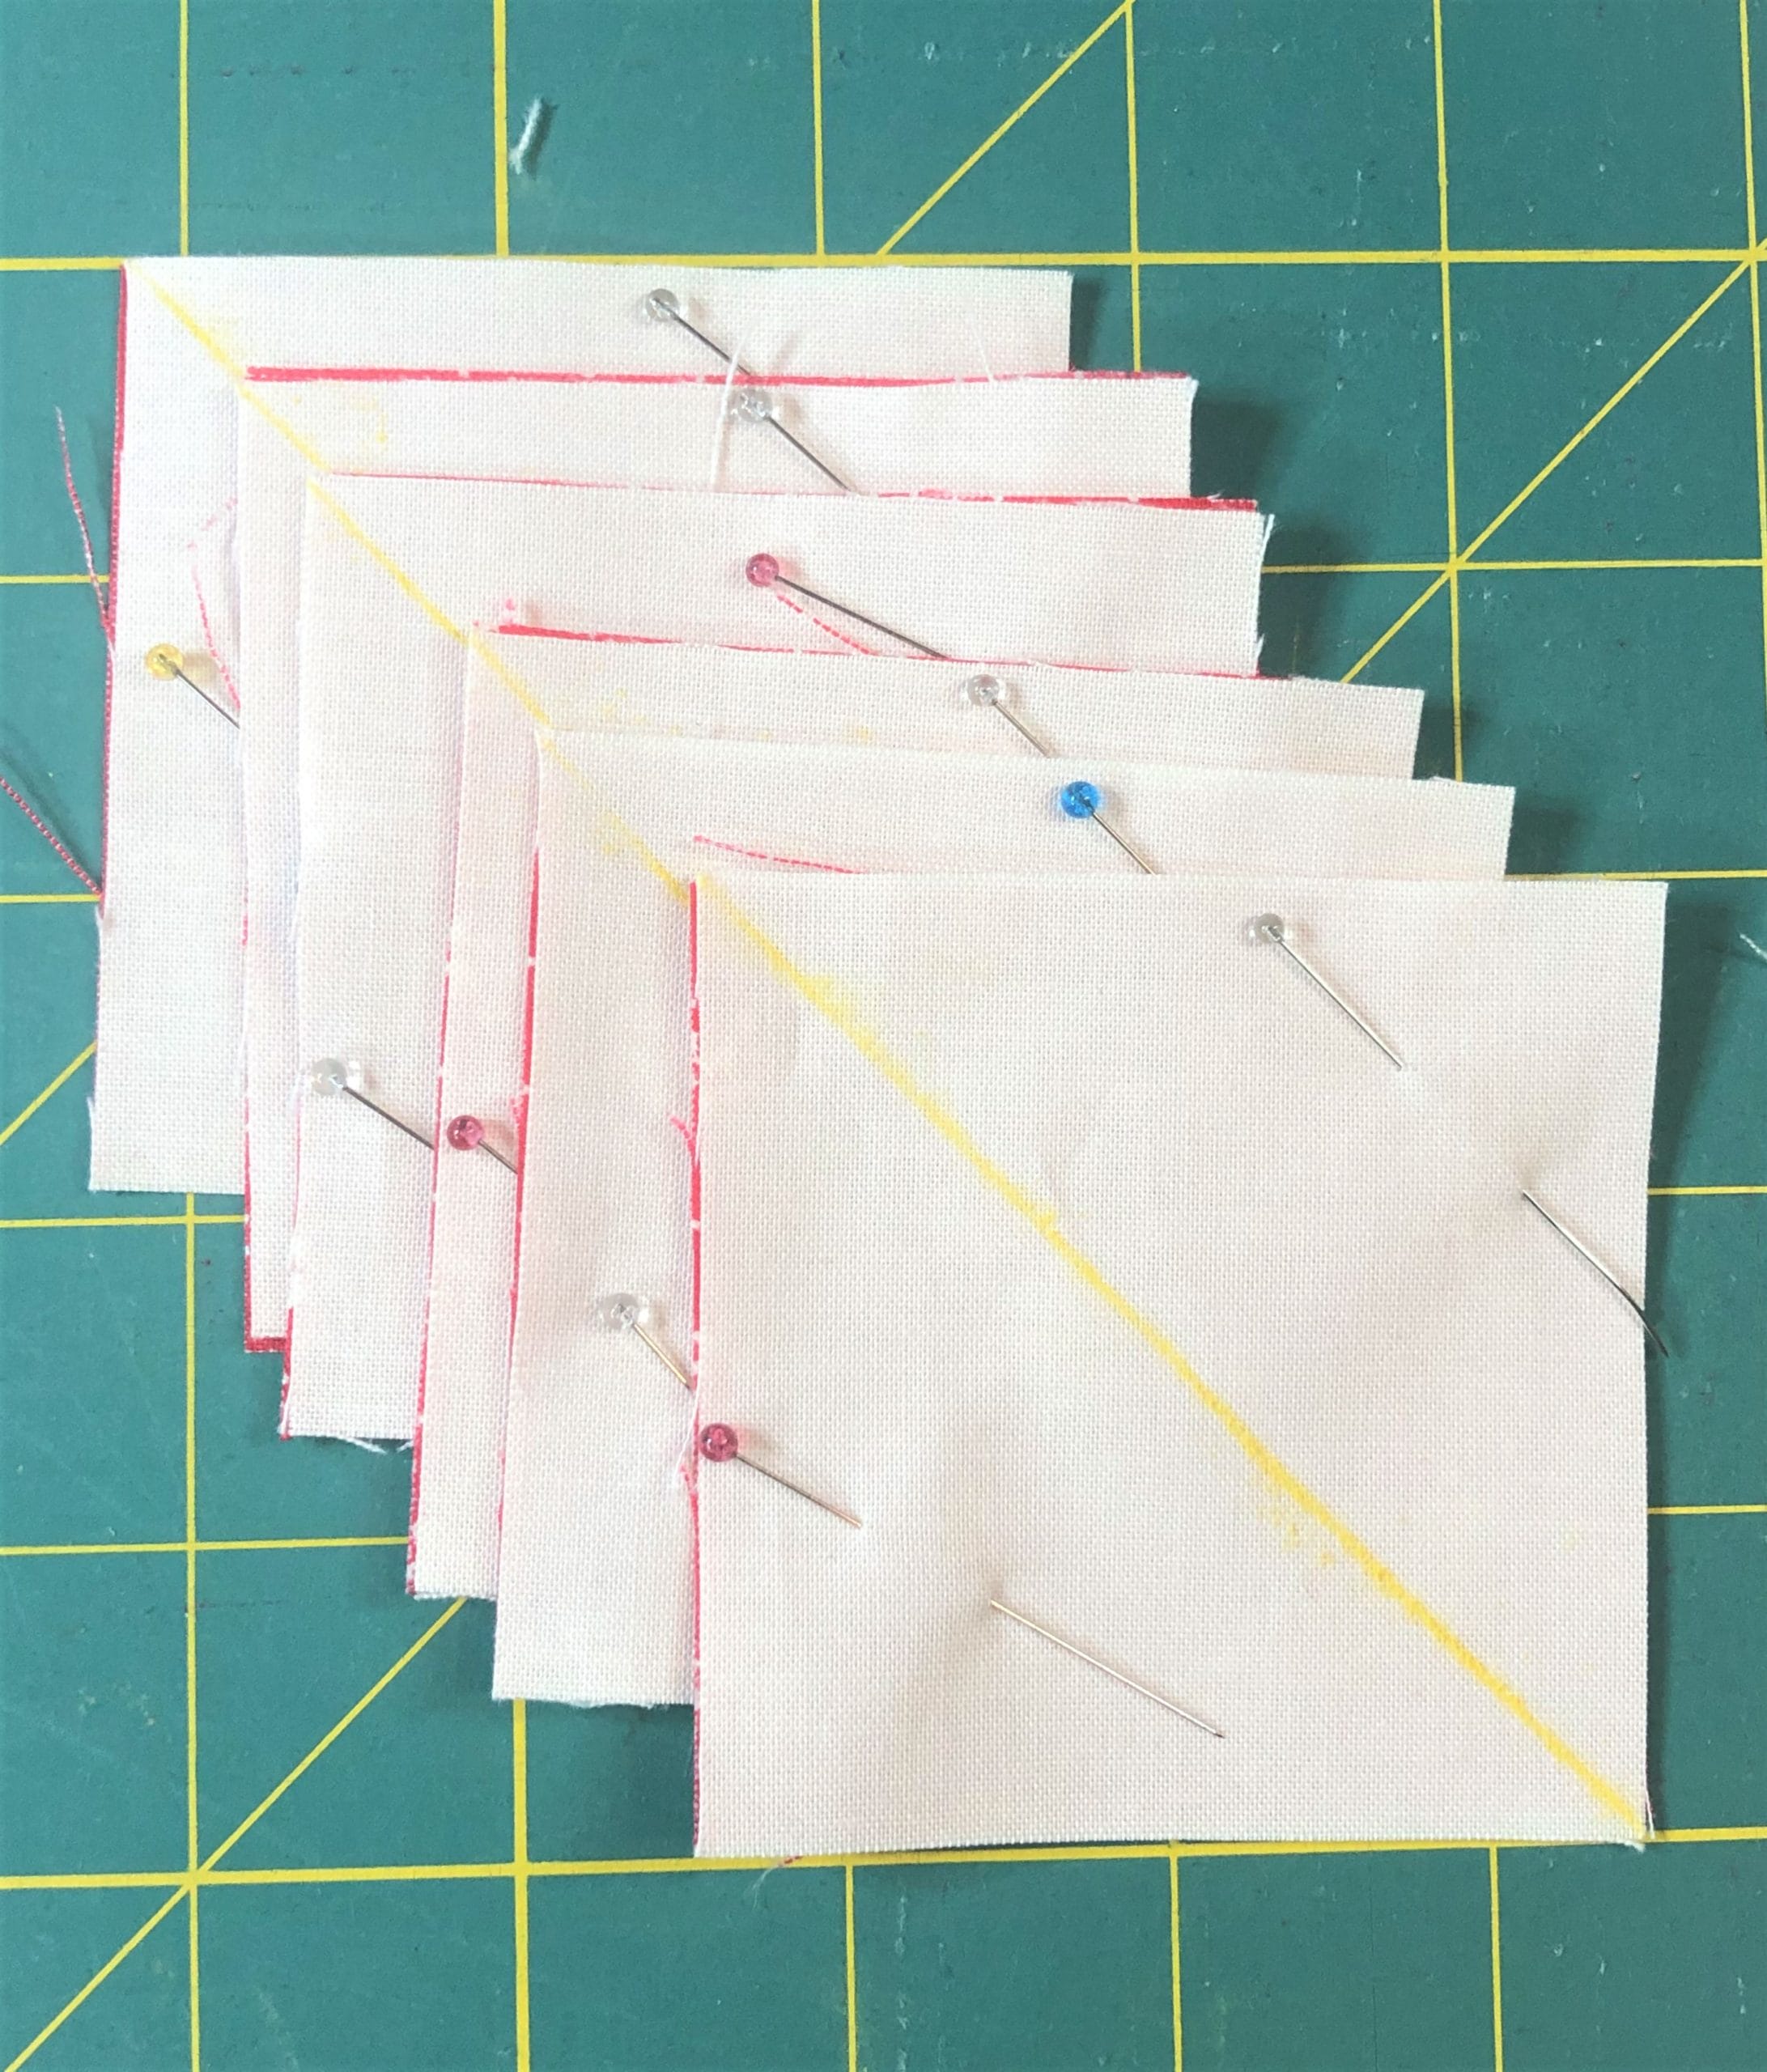
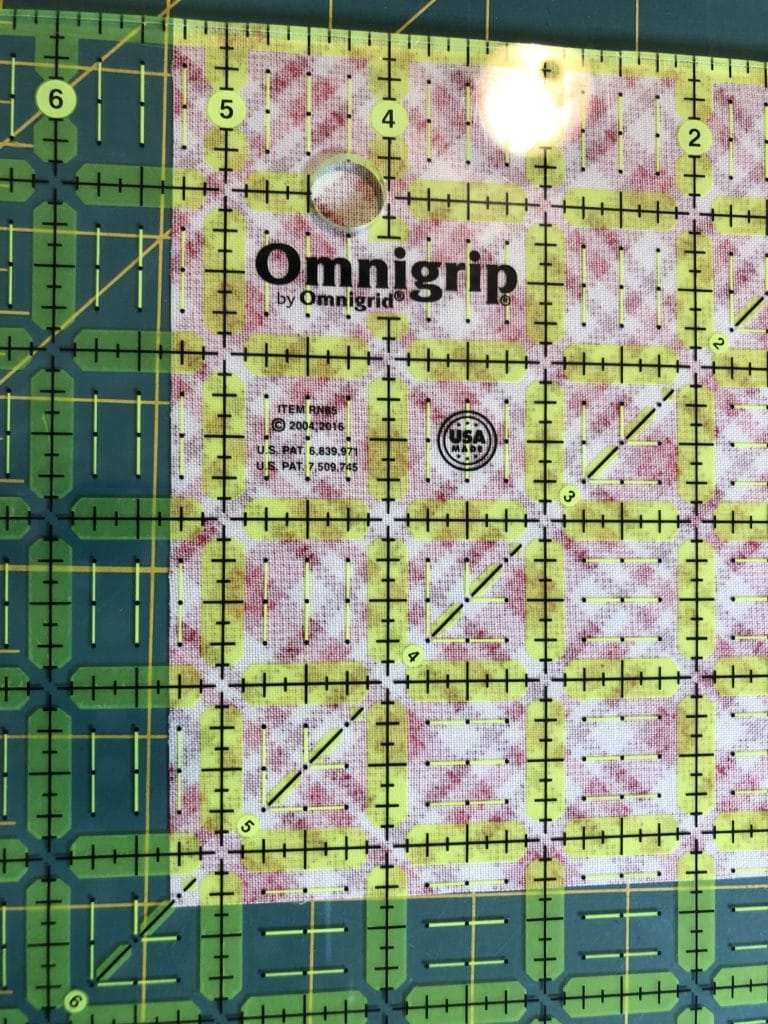
Before we begin cutting and sewing, I’d like to offer a few tips. I know many designers who write patterns in a way that has you cutting pieces slightly larger, and then trimming things down after sewing parts together, so that everything is just right when you are done. While there is absolutely nothing wrong with that, I chose to write my patterns so that everything is mathematically correct and let customers make their own adaptations as they see fit.
That being said, whenever I’m personally making a quilt, I generally cut all my pieces just a scant bigger (like about 1/16” at most), and I also sew everything just a scant under the ¼” seam allowance. This always gives me great results, and allows for me to square things up as needed.
Here is a photo of about how much bigger I cut my pieces, just to give you an idea. If you look closely at the ruler, you can see this piece is just a bit bigger than the 5-1/4″ measurement that is stated in the pattern.
Of course, feel free to cut and sew as you see fit, I’m just letting you know what I do that helps me to get the results I’m after. And don’t worry about having enough fabric if you want to cut things a bit bigger with this kit. I’ve allowed for AMPLE fabric with this BOM, so you should be all good!
This Month’s Blocks
Okay, let’s get started with this month’s blocks! Here are the first four we will be making:
BLOCK 14
If any of you have made previous quilts of mine, you probably know that I LOVE the no-waste method for making flying geese. I think mostly because it bothers me to cut those triangles off with the traditional method and throw them away. I know there are those super talented quilters who can magically come up with something amazing out of those tiny triangles, but I’m not one of them. I used to always save them, thinking that someday I would create a masterpiece, but I would inevitably throw them away sometime later, always feeling a bit guilty. Dumb, I know, but using the no-waste method I don’t have any guilt haha!
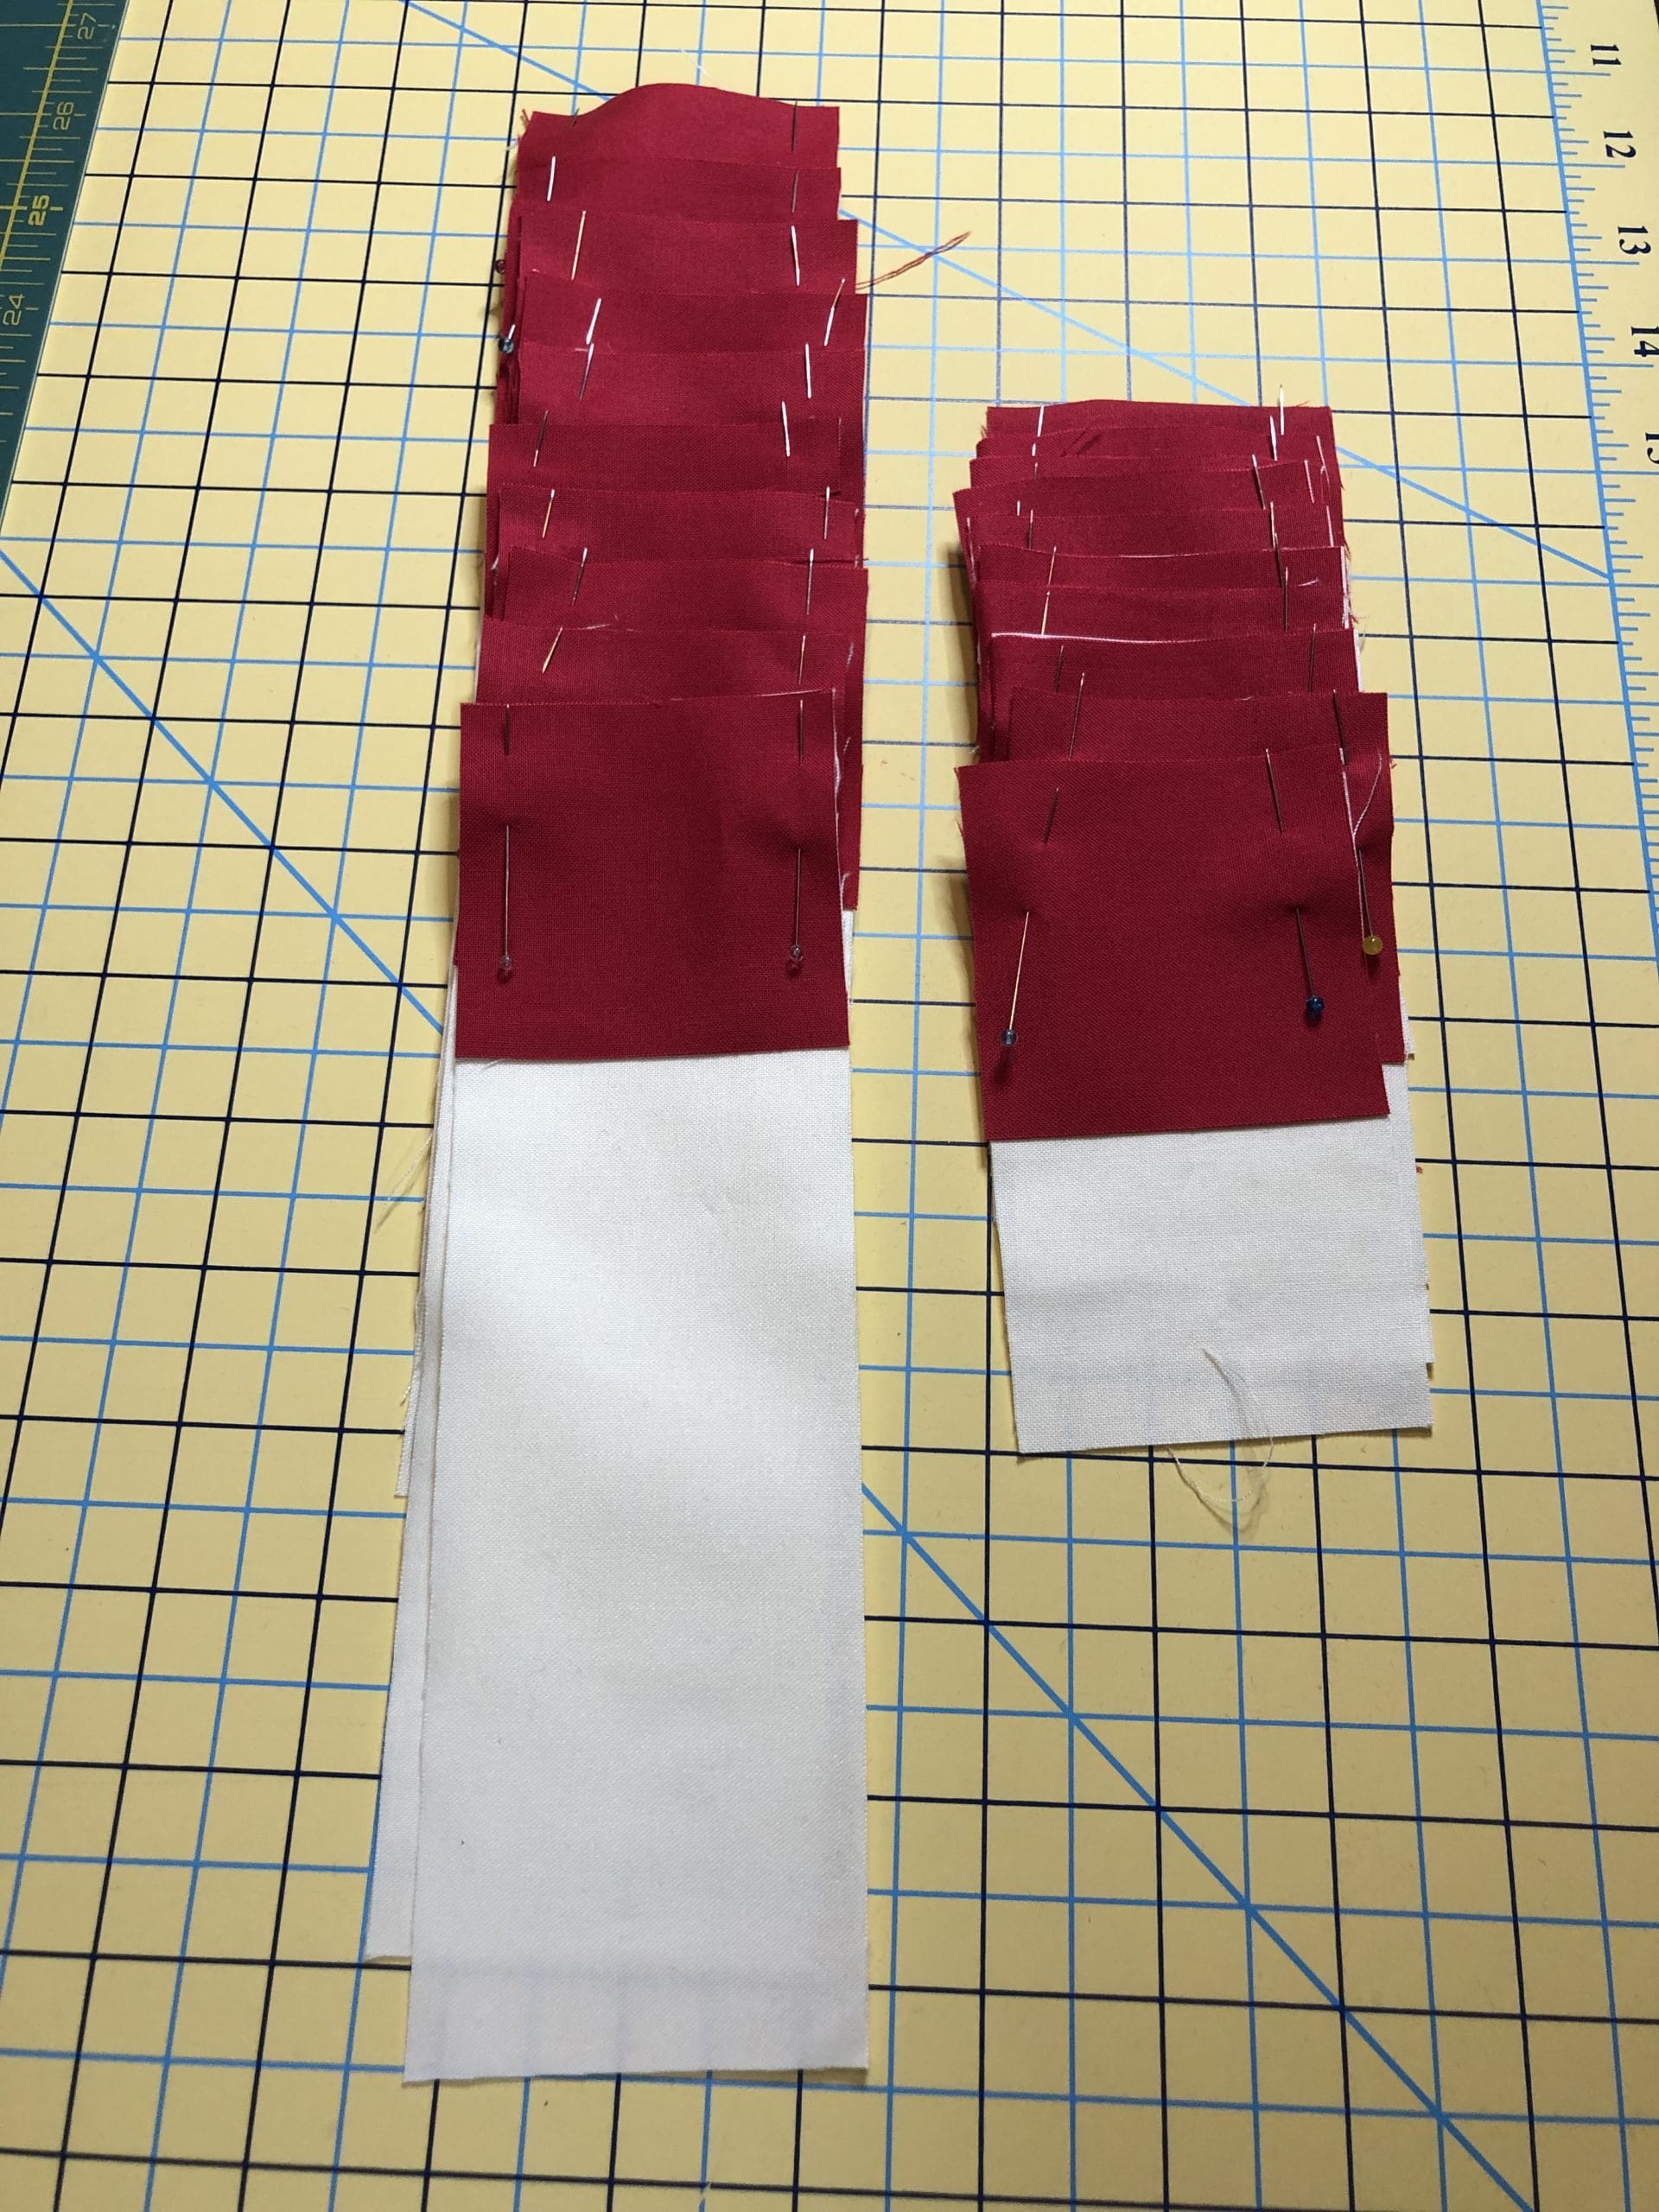
Below are some photographs of steps 1 and 2 for block 14, just so you can see what this looks like in ‘real life’.
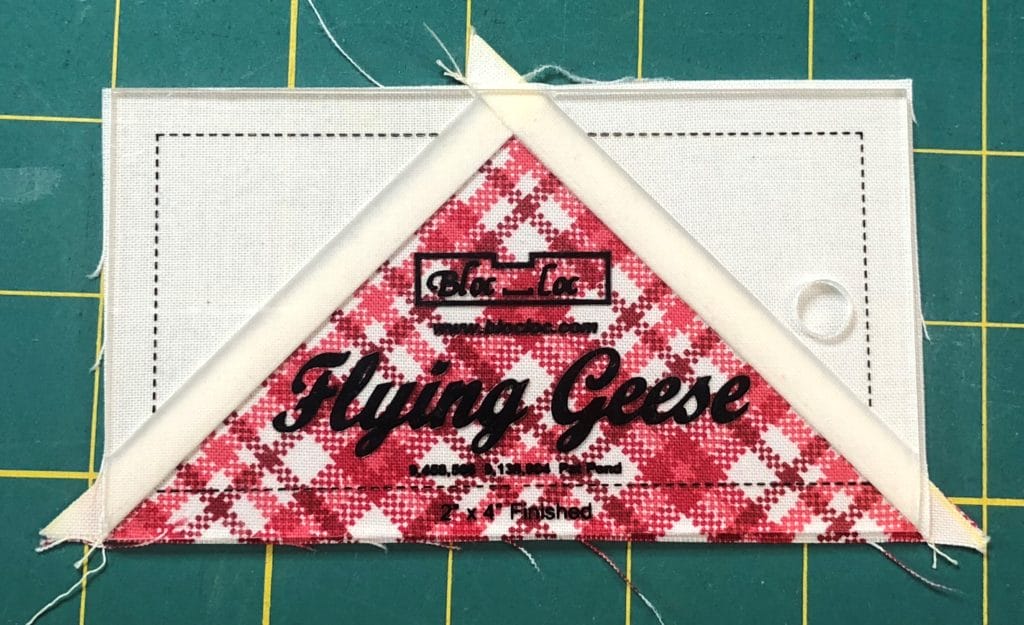
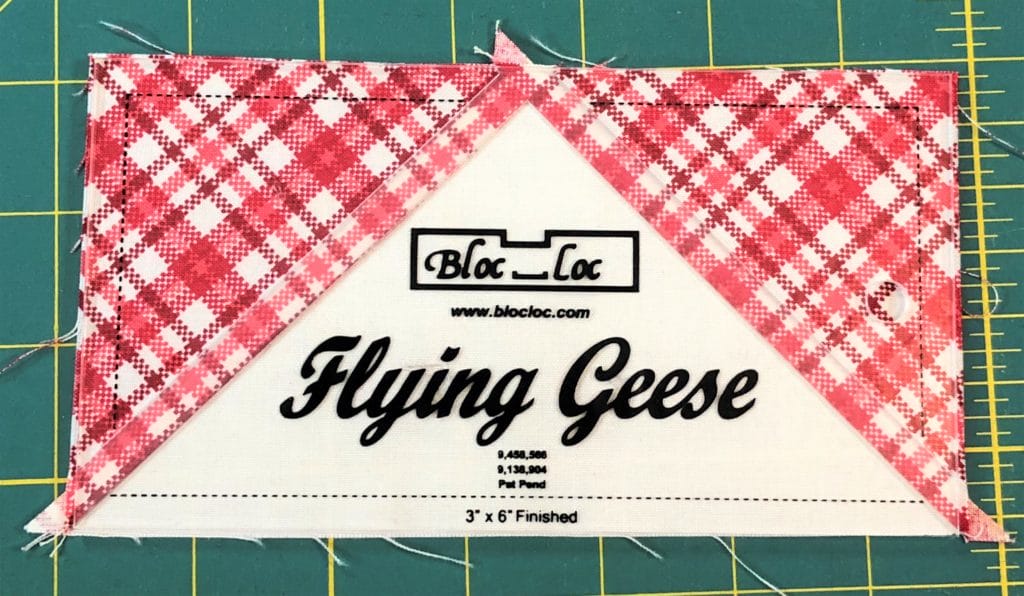
When I’m all done pressing my flying geese, they always need a good trim, and I use the Bloc-Loc flying geese tool to square up my units. This is another tool that is entirely optional. They aren’t cheap but I really like how all my flying geese end up absolutely perfect when I use this to trim them.
After making the first set of flying geese, you’ll attach them to the A square, along with the B squares, to make the center portion of the block.
Next we will make some more flying geese in steps 4 and 5, followed by 8 half-square triangles in step 6. These flying geese are the same as above, and half-square triangles are pretty straight forward.
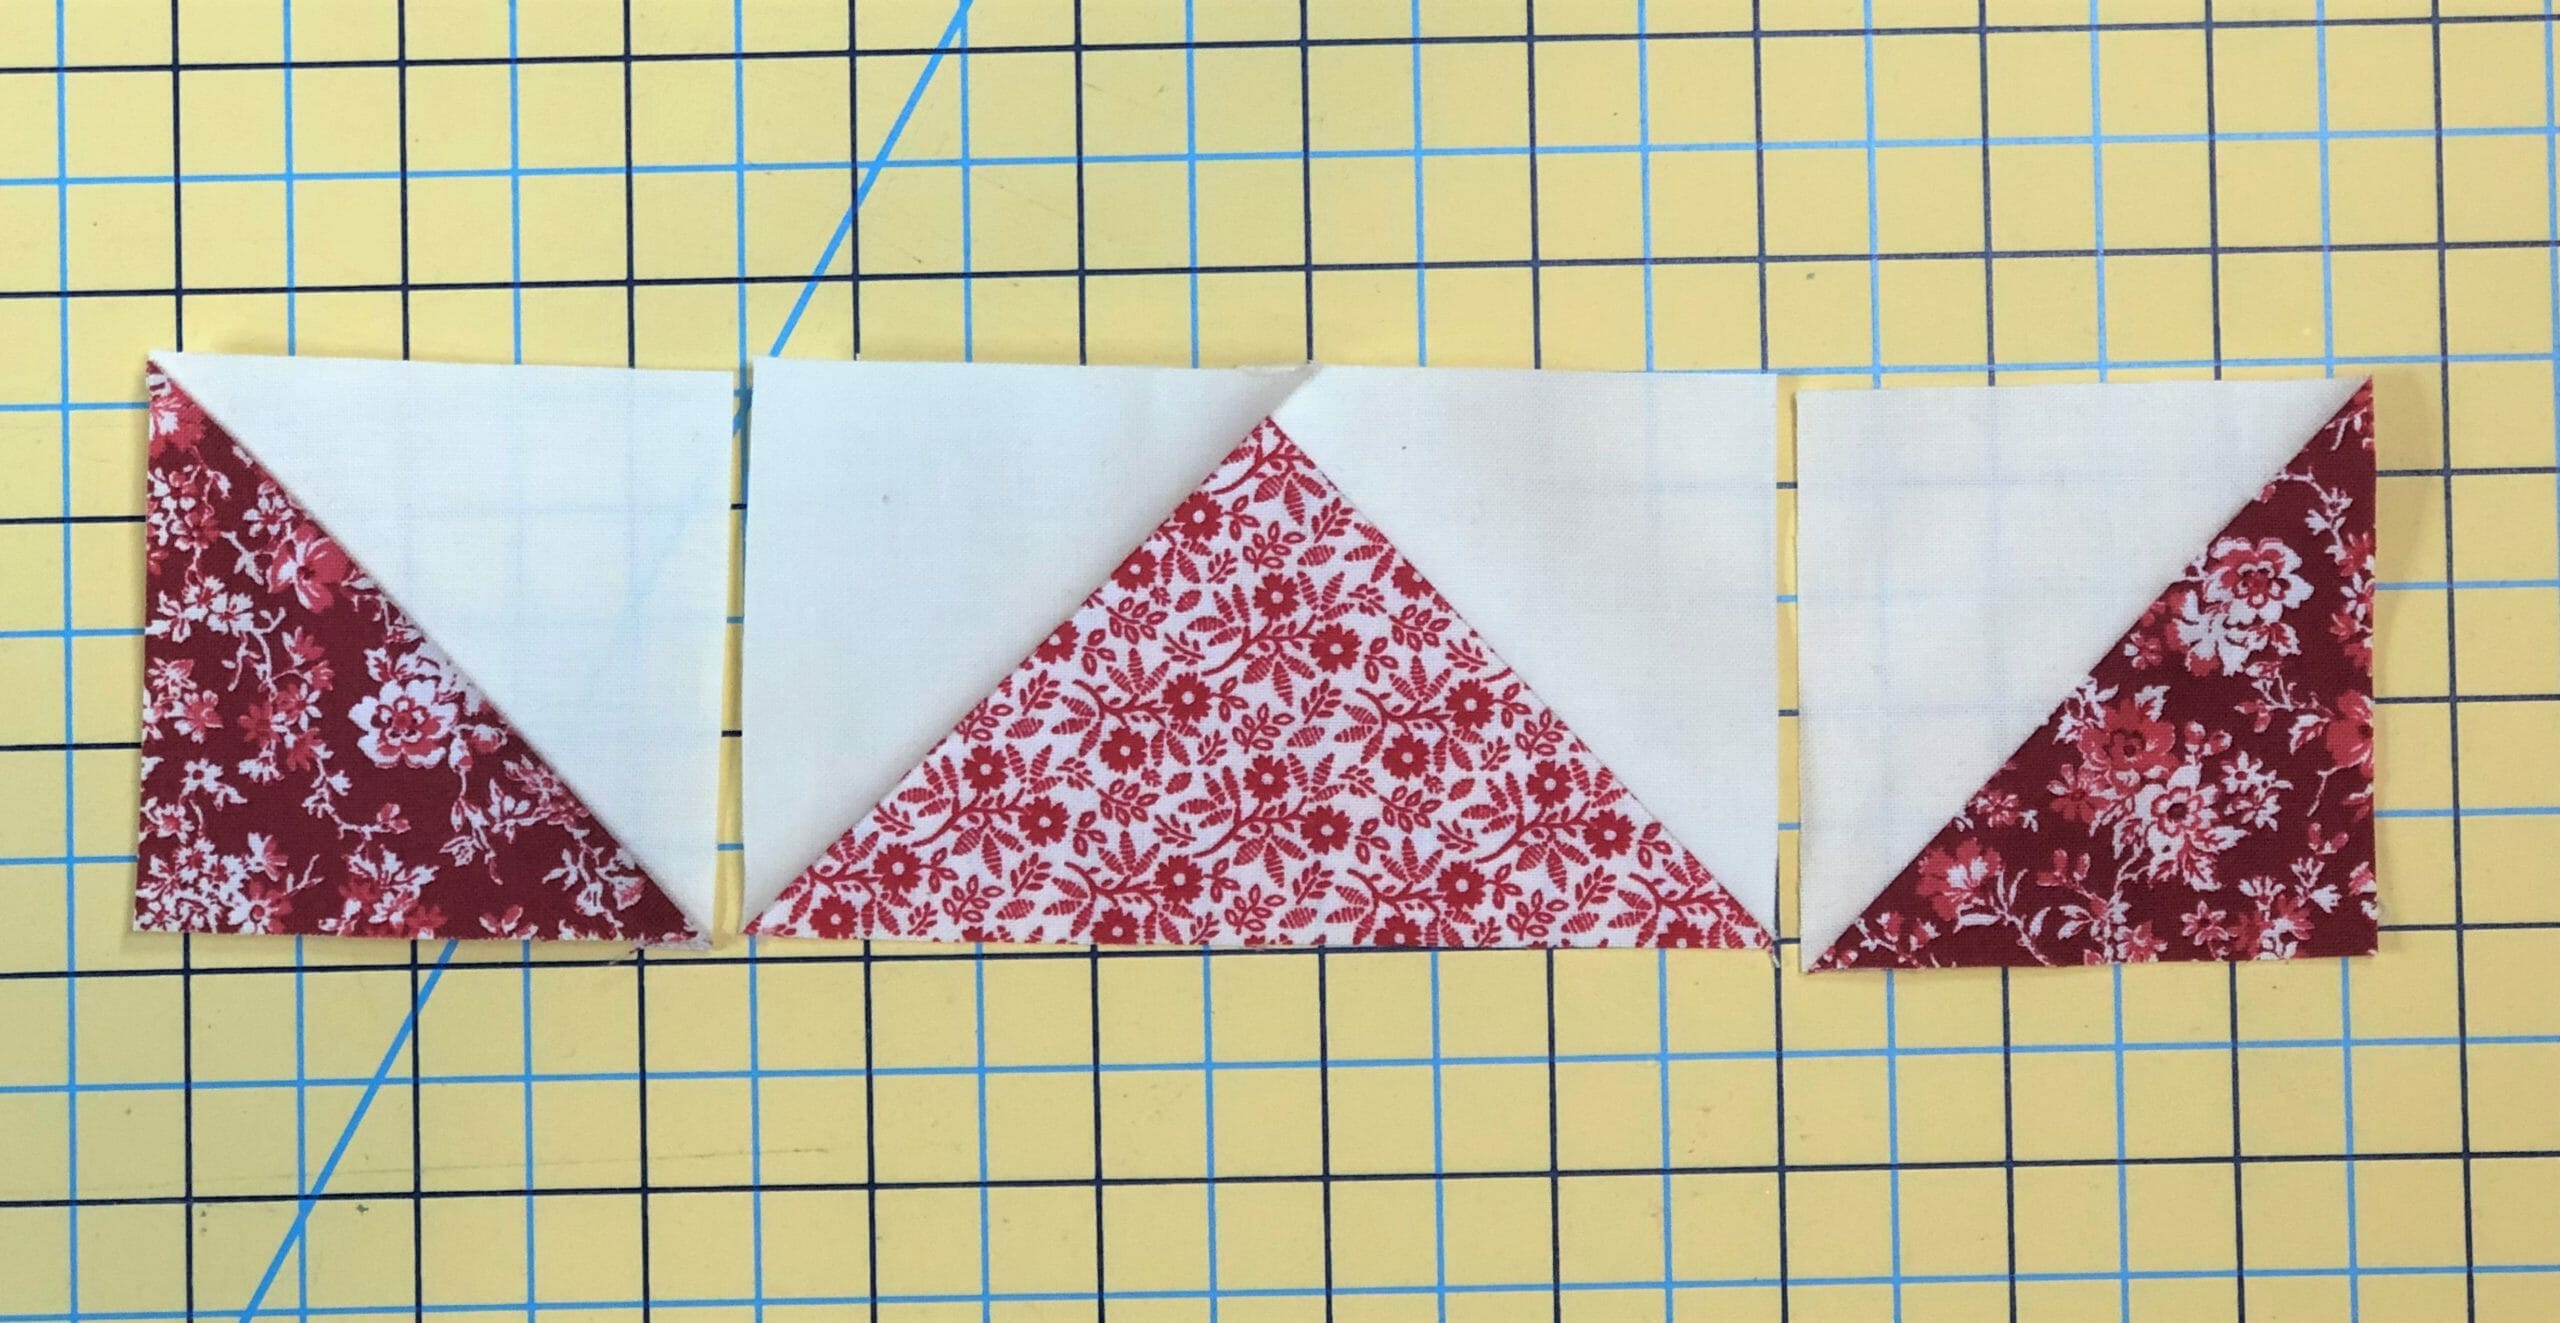
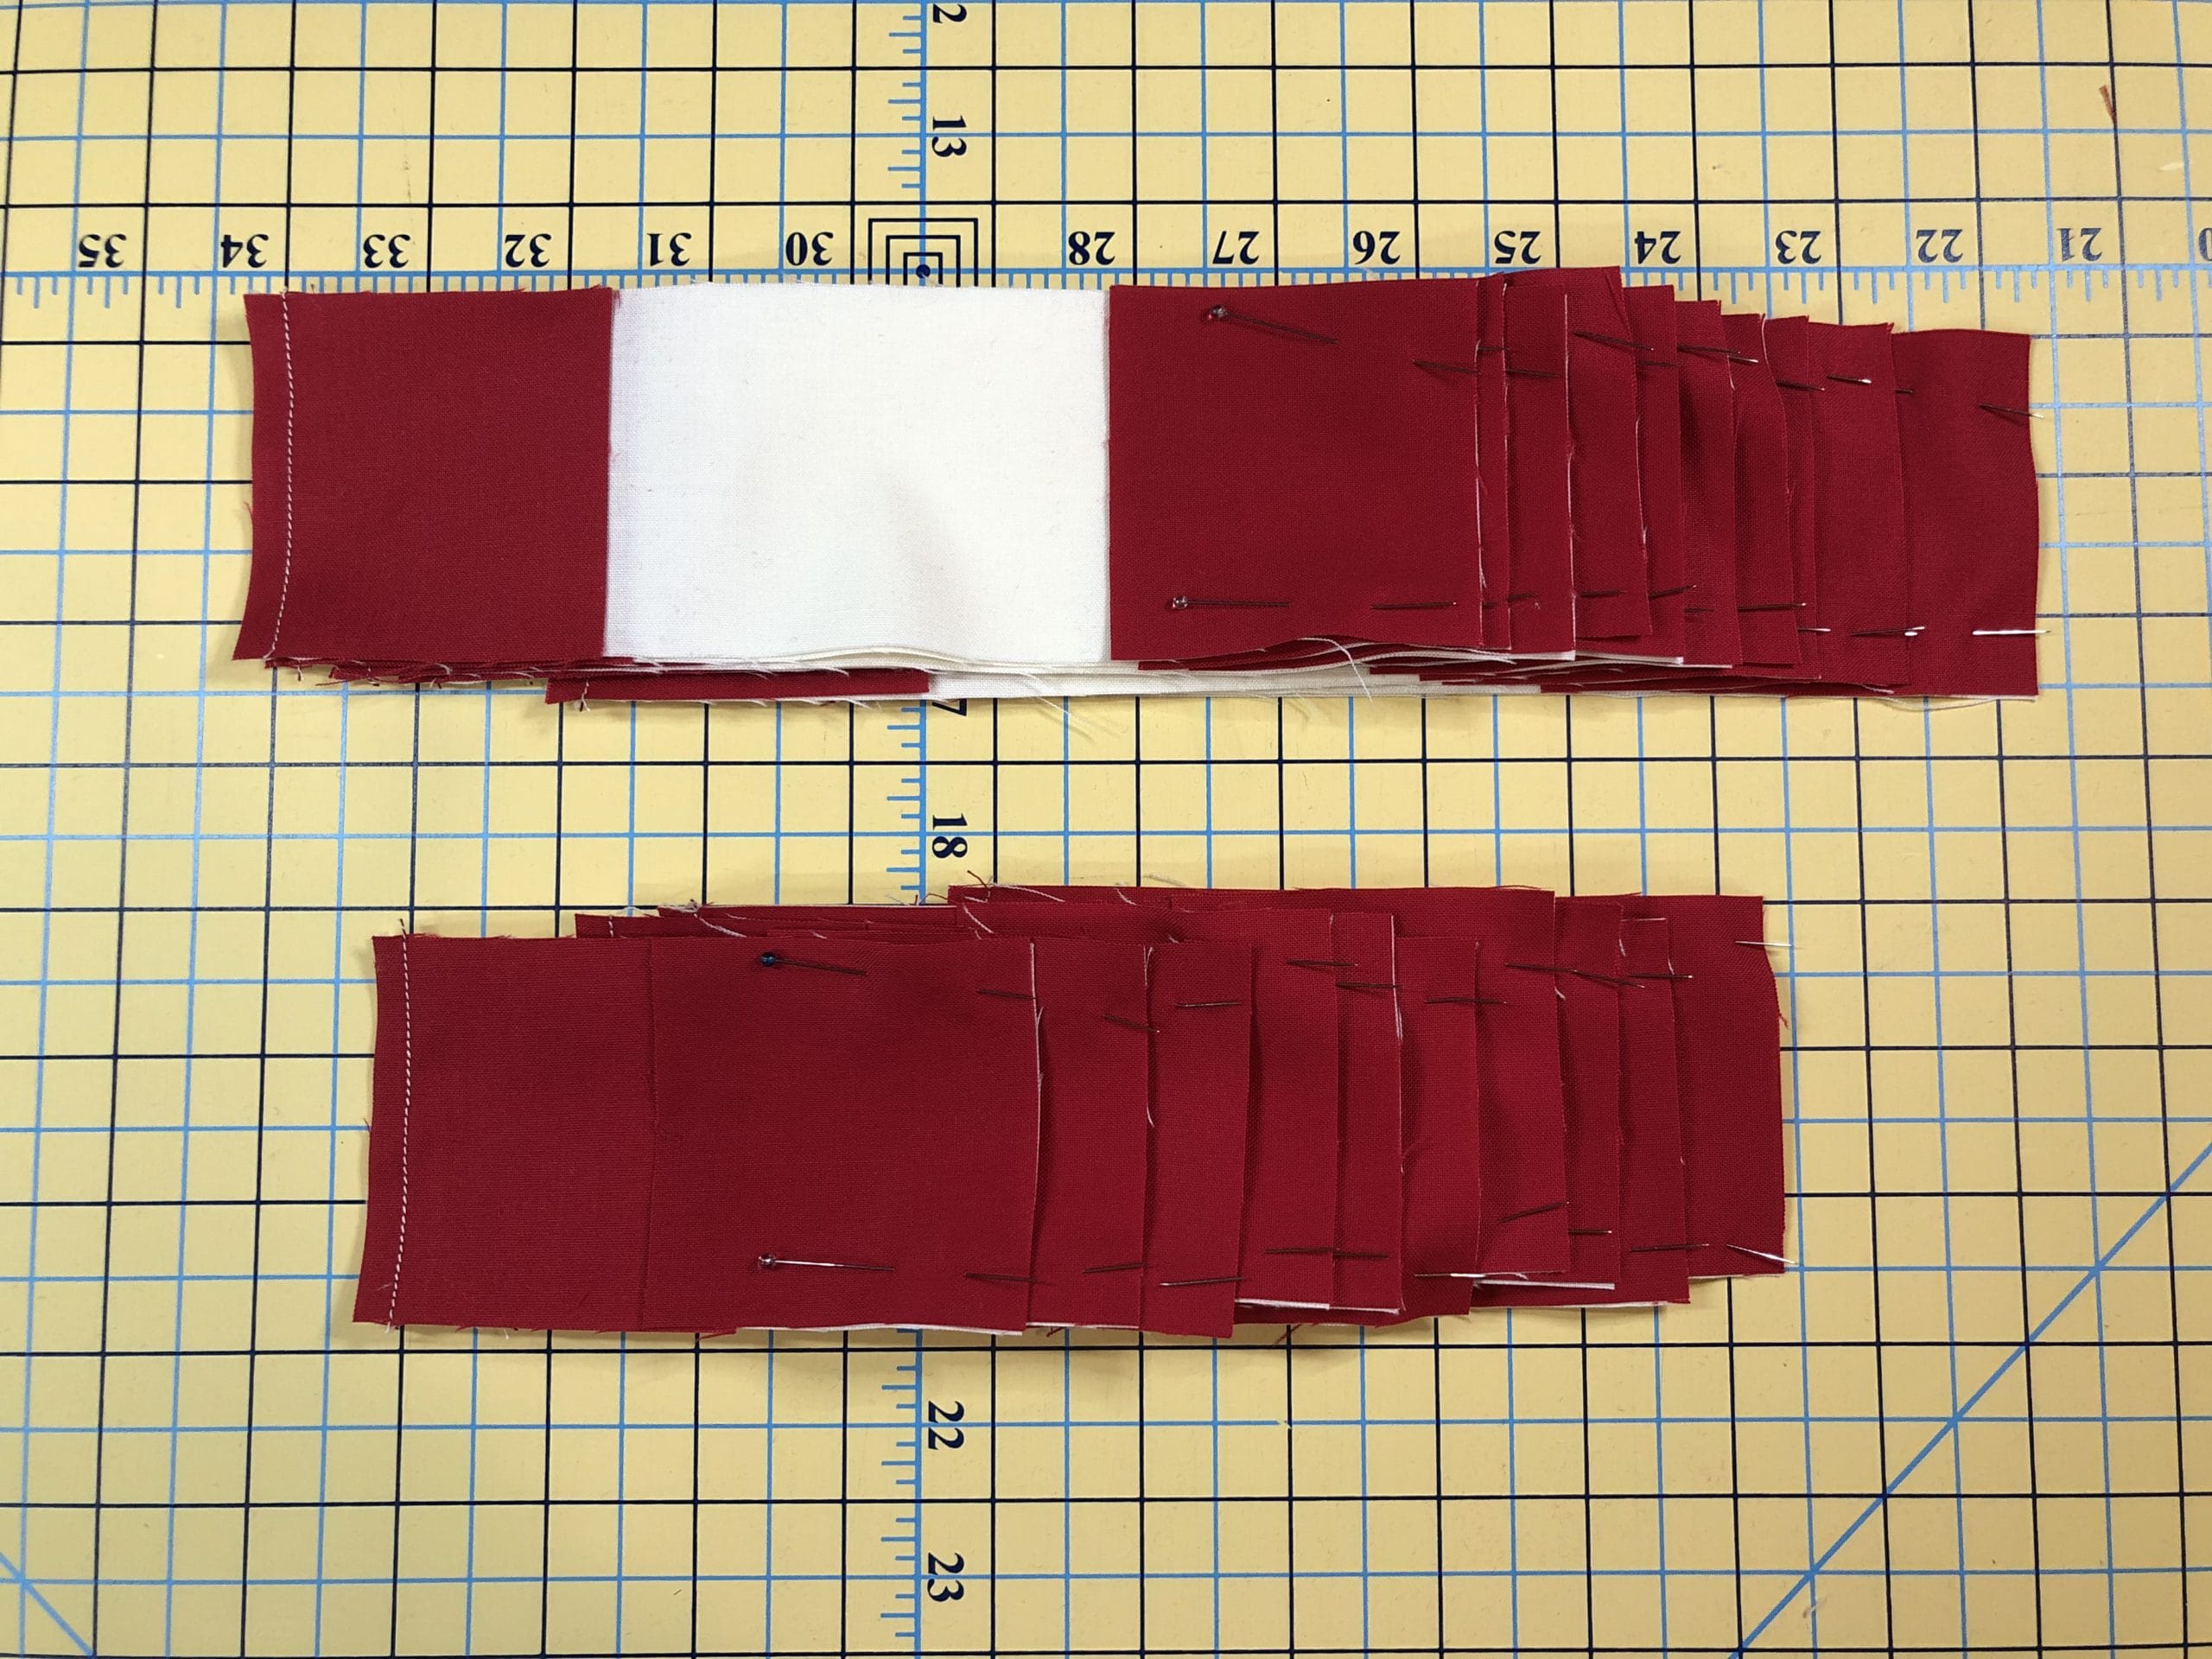
The Half-Square triangles are marked, pinned, and ready for sewing. You will stitch 1/4″ away from each side of the marked line.Here they are, sewn on both sides of the line and trimmed so they can be pressed toward the dark side.
Somehow, while sewing and trimming, I didn’t snap a pic of the completed half-square triangles, but you can see them below all trimmed up and ready to go. In step 7, we will sew these units together like so:
Now it’s time to sew all the components together. Pay attention to the pressing arrows so that all the units will nest together. If all goes according to plan, the block should measure 12-1/2” square.
BLOCK 16
This block is traditionally called the Ohio Star block, and it’s one of my favorites, probably because it’s pretty easy!
We will begin by making some quarter-square triangle blocks. You’ll start by making two sets of half-square triangles: Two will be with the A and C fabrics, and two will be with the D and C fabrics. Usually at this point I would trim these up, but when making quarter-square triangle blocks, I always wait until the very end to square everything up, because with these blocks, it doesn’t really matter until the end. Plus it gives me some extra wiggle room in case I need it later.
Next, we will pair a C/A square (from step 1) with C/D square (step 2), and place them so the C triangles are on opposites sides, like so:
Notice how the Scadoodle, Scarlet fabric is on the left side for the top block, and on the right side for the bottom one.
Draw a line across the square, and then stitch on either side of the marked line.
After you cut ON the marked line, you’ll end up with two quarter-square triangle units. You’ll repeat this so that you’ll have a total of 4 of these squares. Trim them up to be 4-1/2” square.
Now it’s time to assemble the block. This block is pretty simple, but you’ll just want to make sure that all of your Corsage II Ivory triangles (A) are framing the center B square. I always lay out all my pieces before sewing so that I make sure everything is oriented correctly.
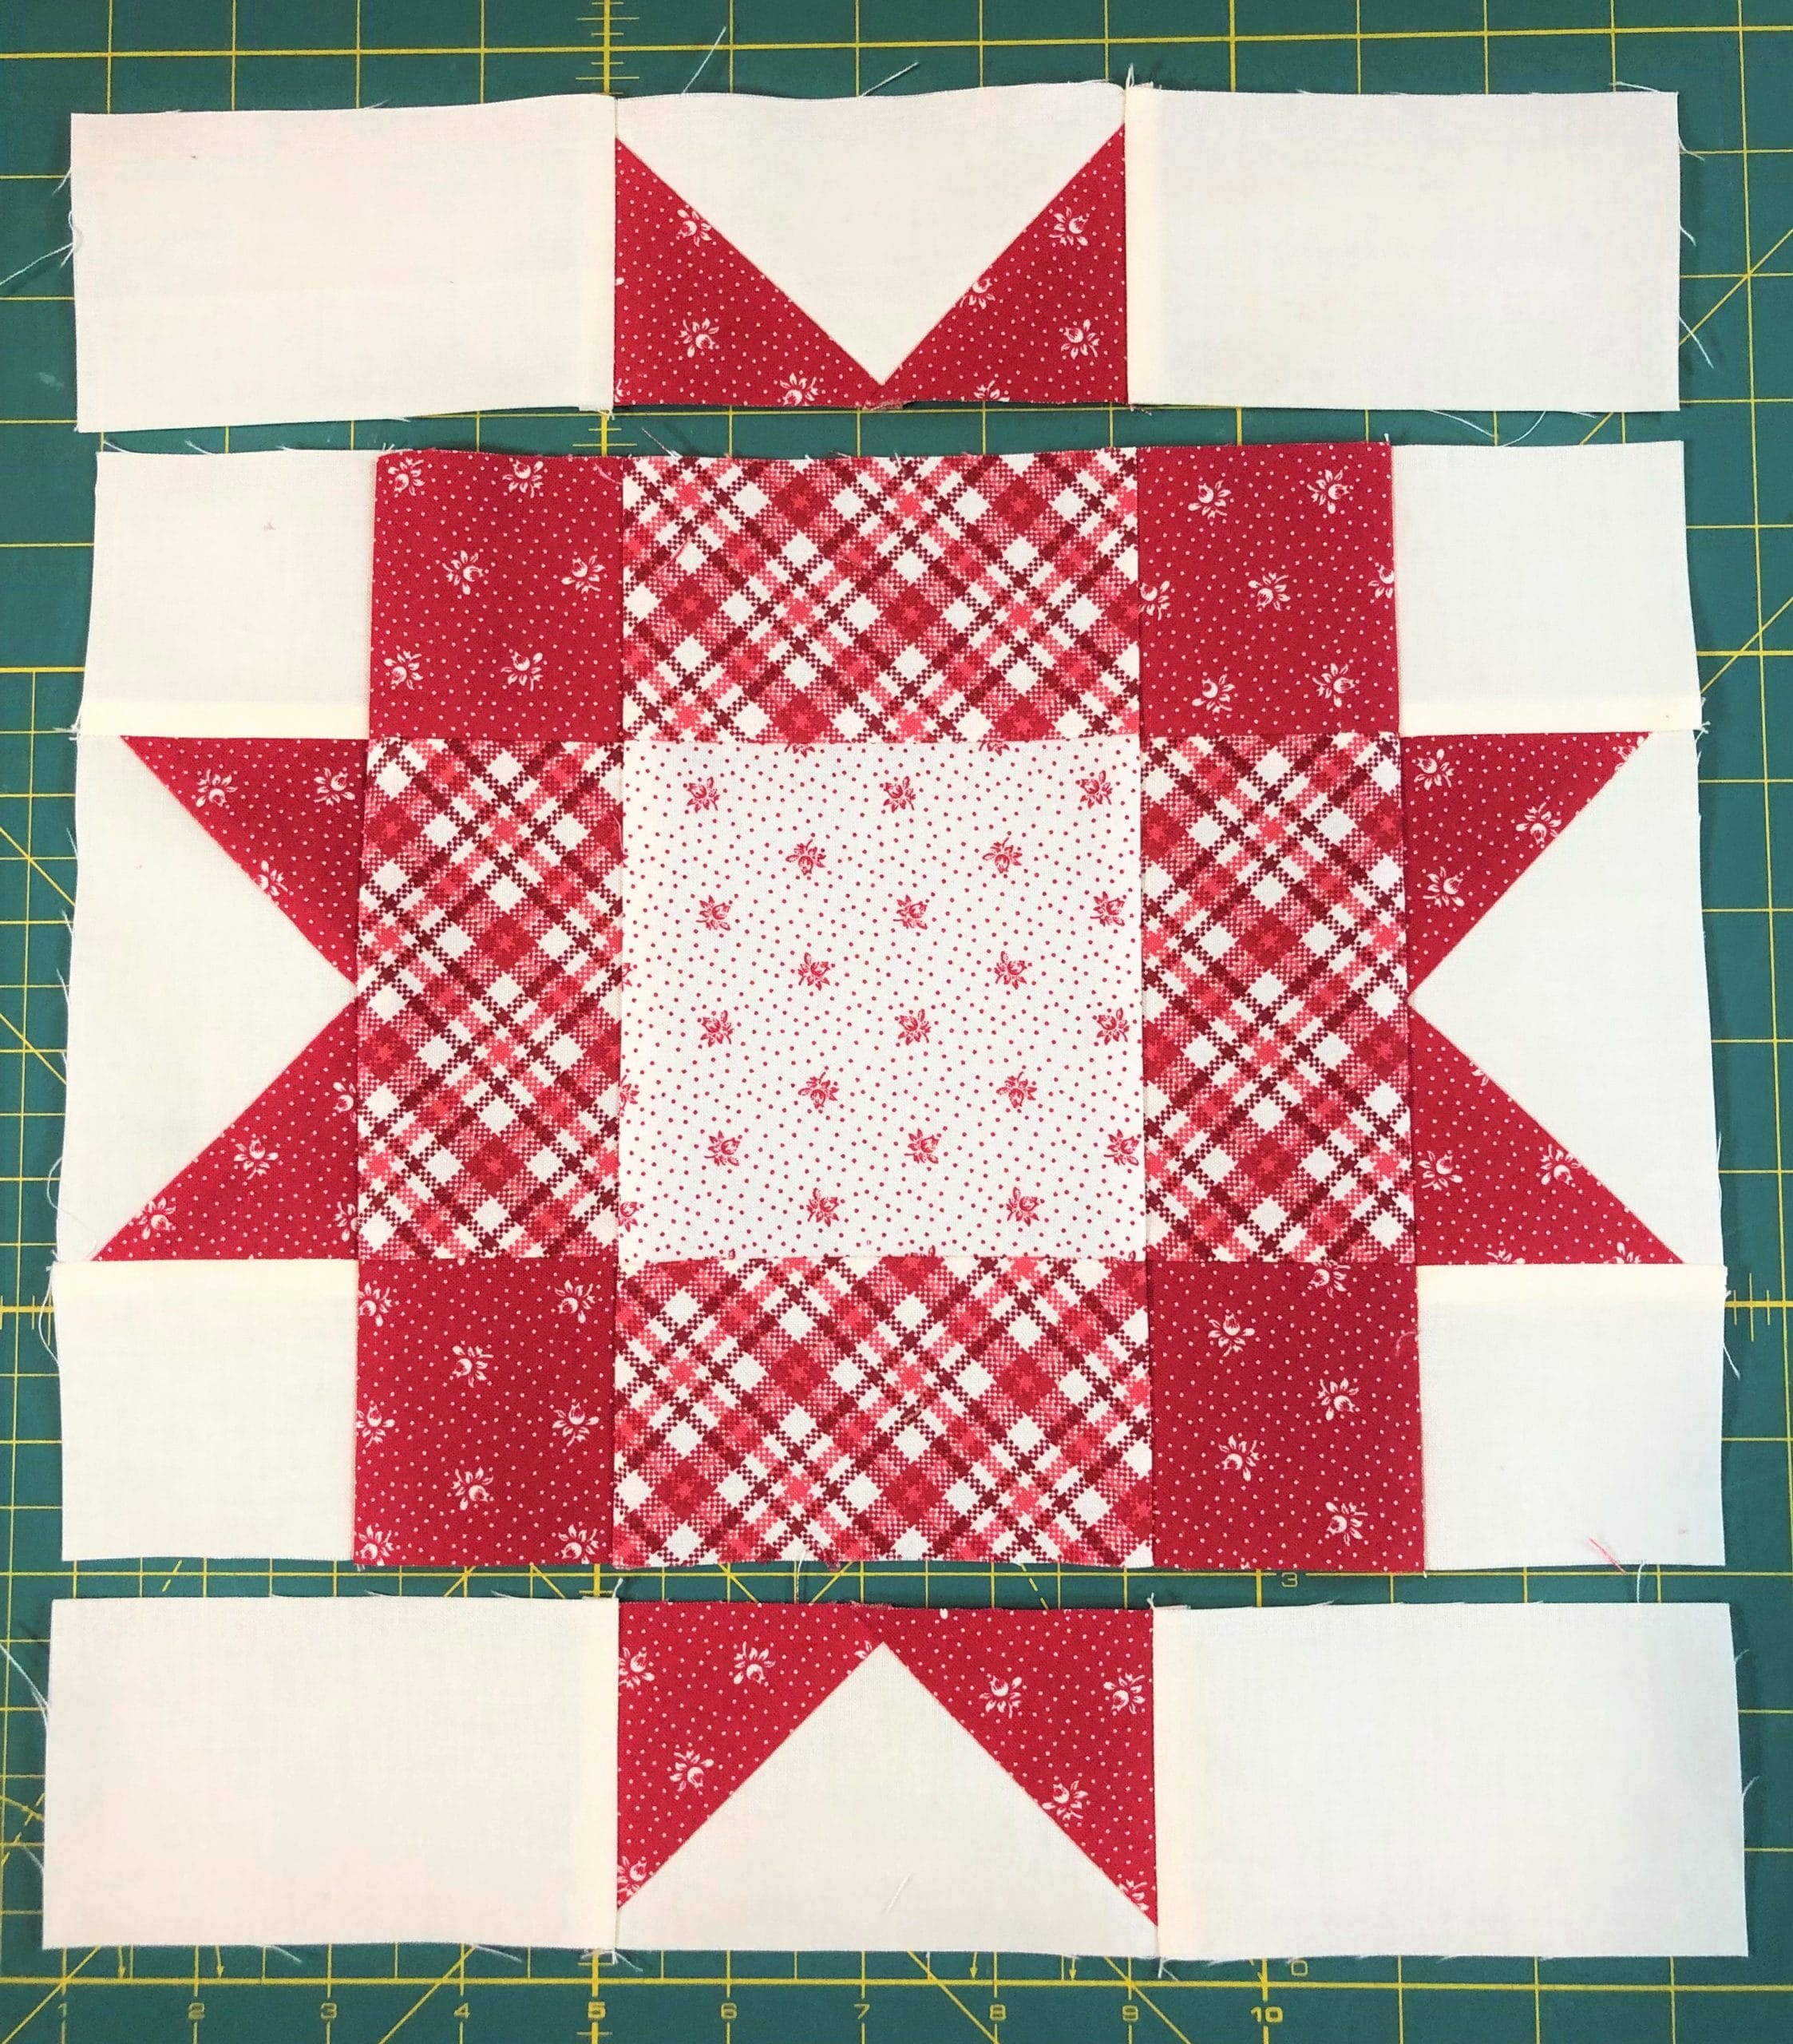
BLOCK 21
This block is also pretty straightforward. Again, you’ll want to pay attention to the pressing arrows so that when the block is all sewn together you’ll have those seams in the right direction.
You’ll start by making a modified 9-patch like so:
I’ve sewed the rows for the 9-patch and am now ready to sew them together.
Next you’ll move on to making some more of those no-waste flying geese. This is the same drill as before with the previous block. And once those are finished you’ll add some of the background F and G pieces to the ends of them like you see here:
Now all you have to do is attach those completed flying geese units to sides, and top and bottom of the center unit, and you are good to go!
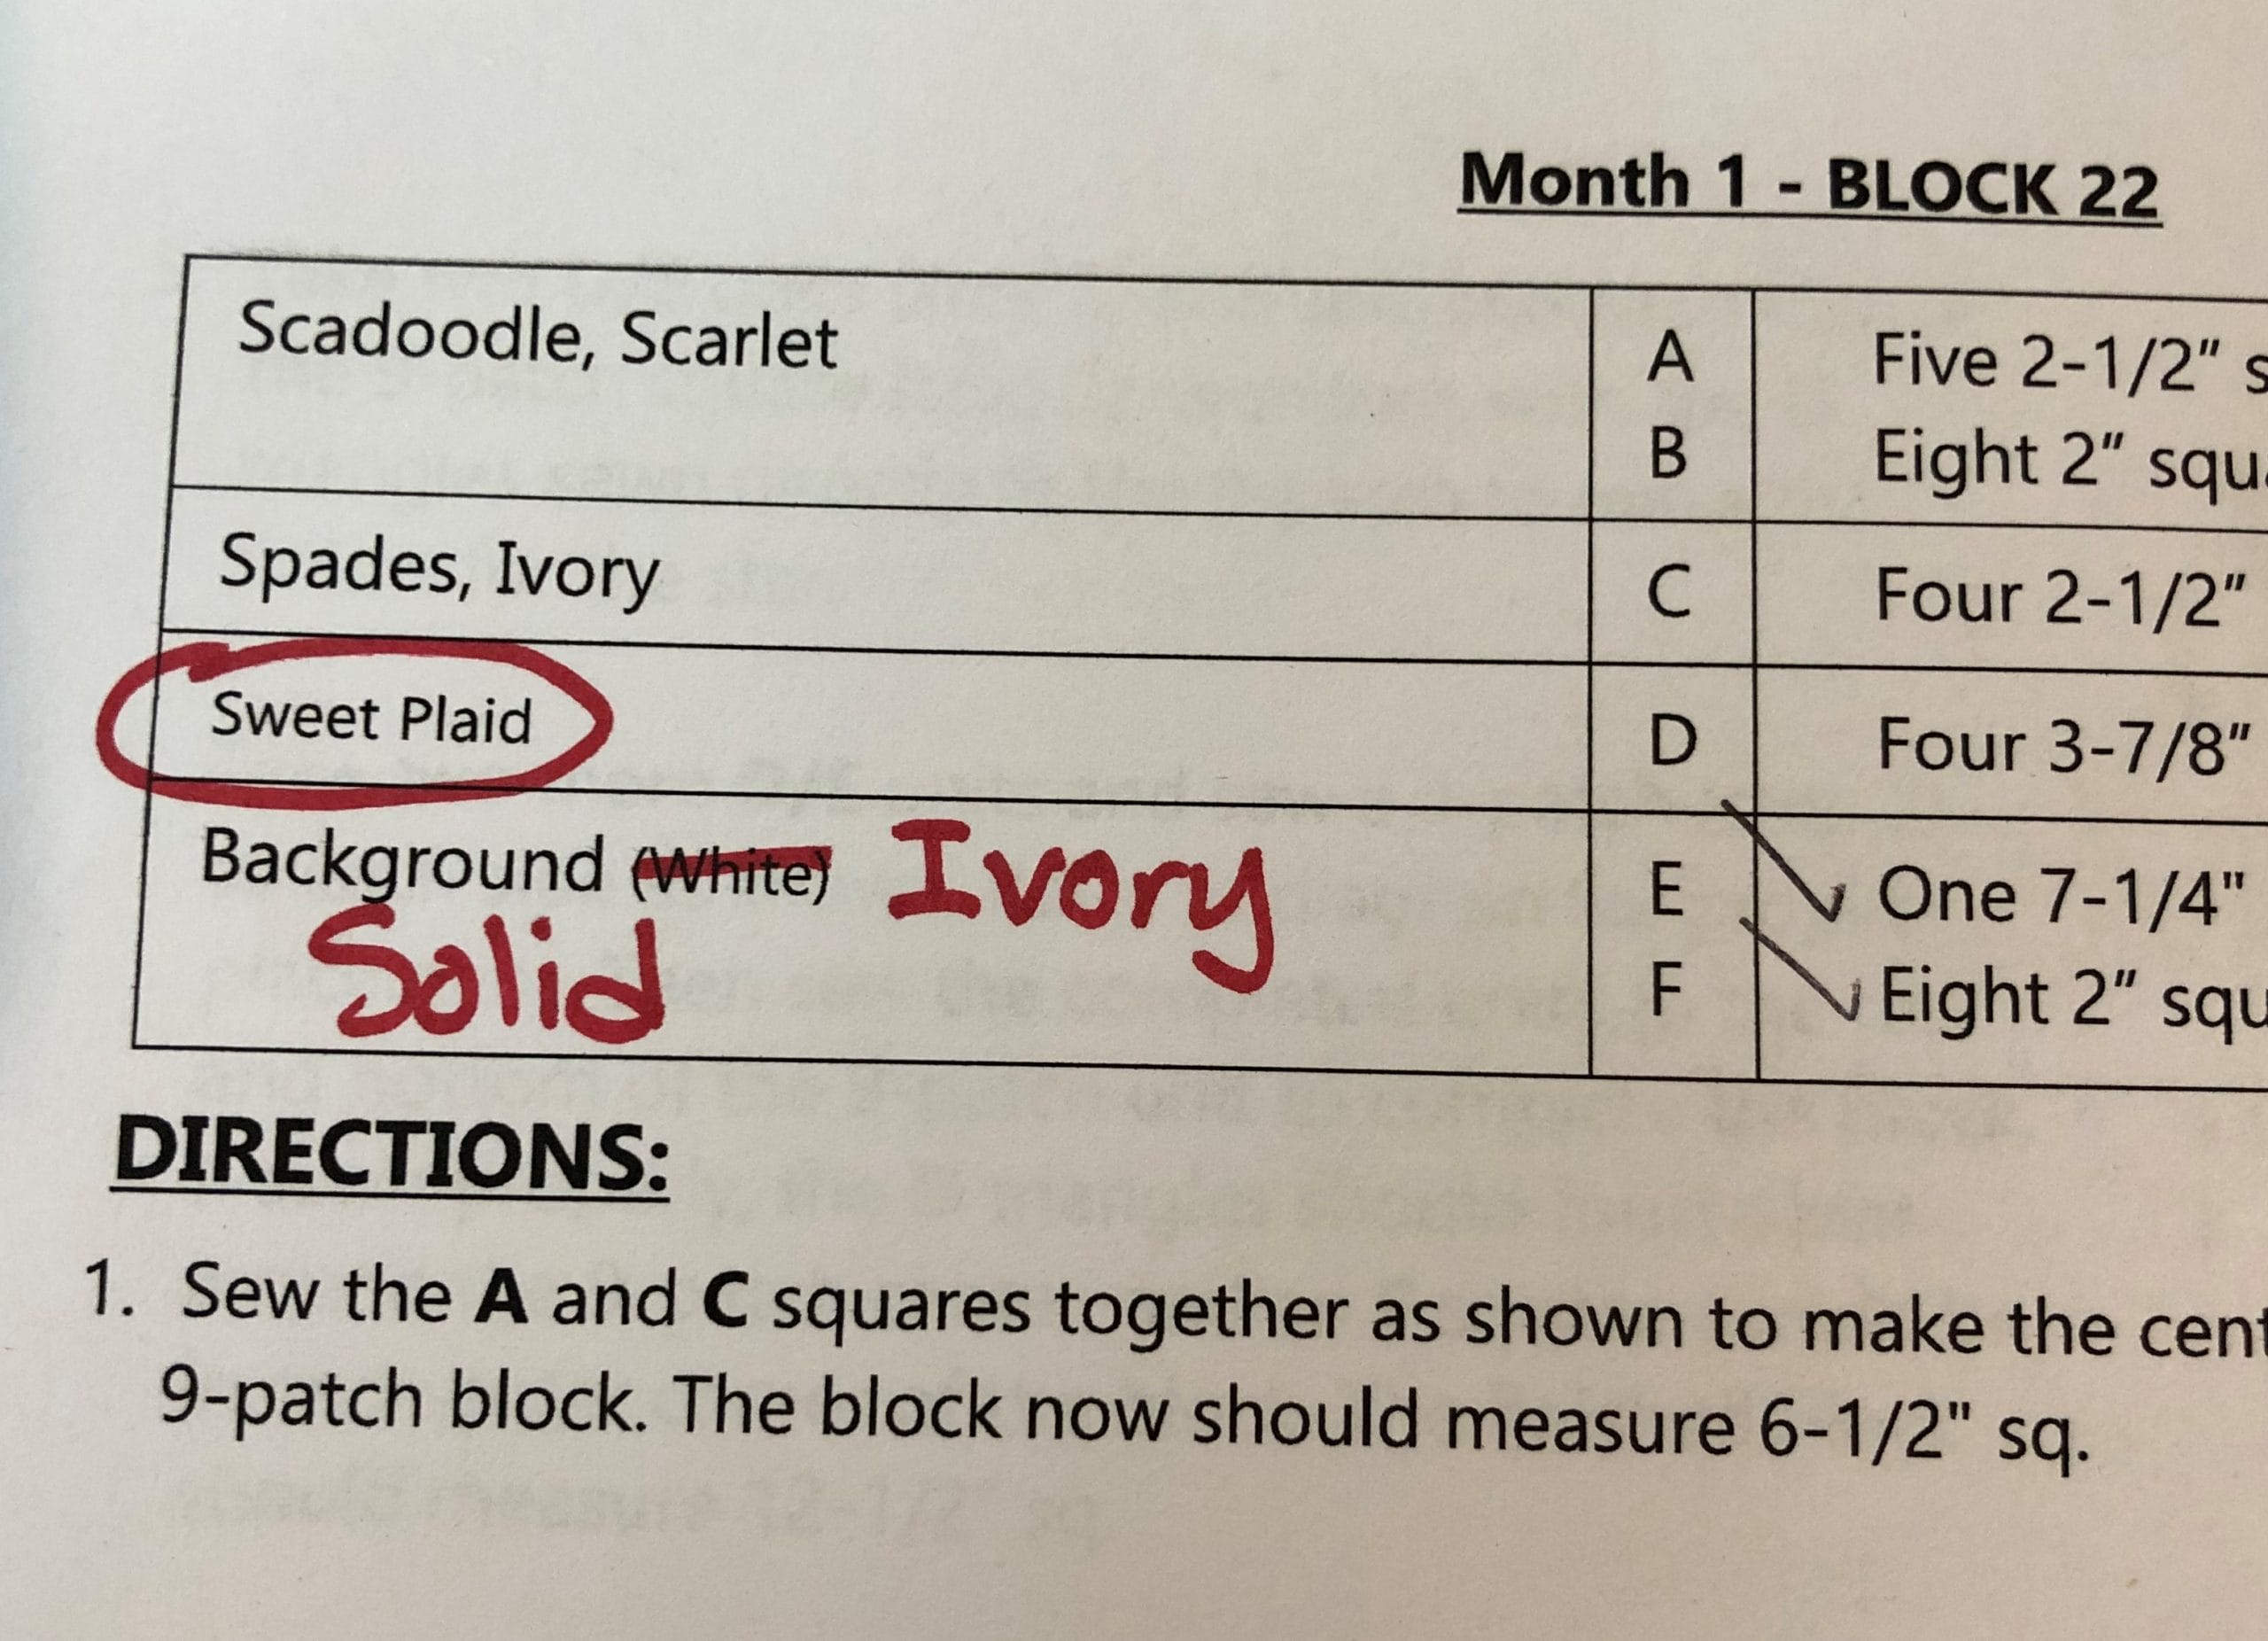
BLOCK 22
Before we begin the instructions for these blocks, I have to apologize for a silly mistake in the cutting instructions. You’ll notice that the last fabric is labeled “Background (White)”, which is obviously not correct, since there is no White fabric in this pattern. This is a generic term I use when writing patterns, which gets changed to the actual fabric name for the final edit. The dumb thing is, I MARKED THIS IN RED PEN to change it, and then somehow didn’t. Ugh. Anyway, please know that “Background White” is really Solid, Ivory.
UGH! Seriously!
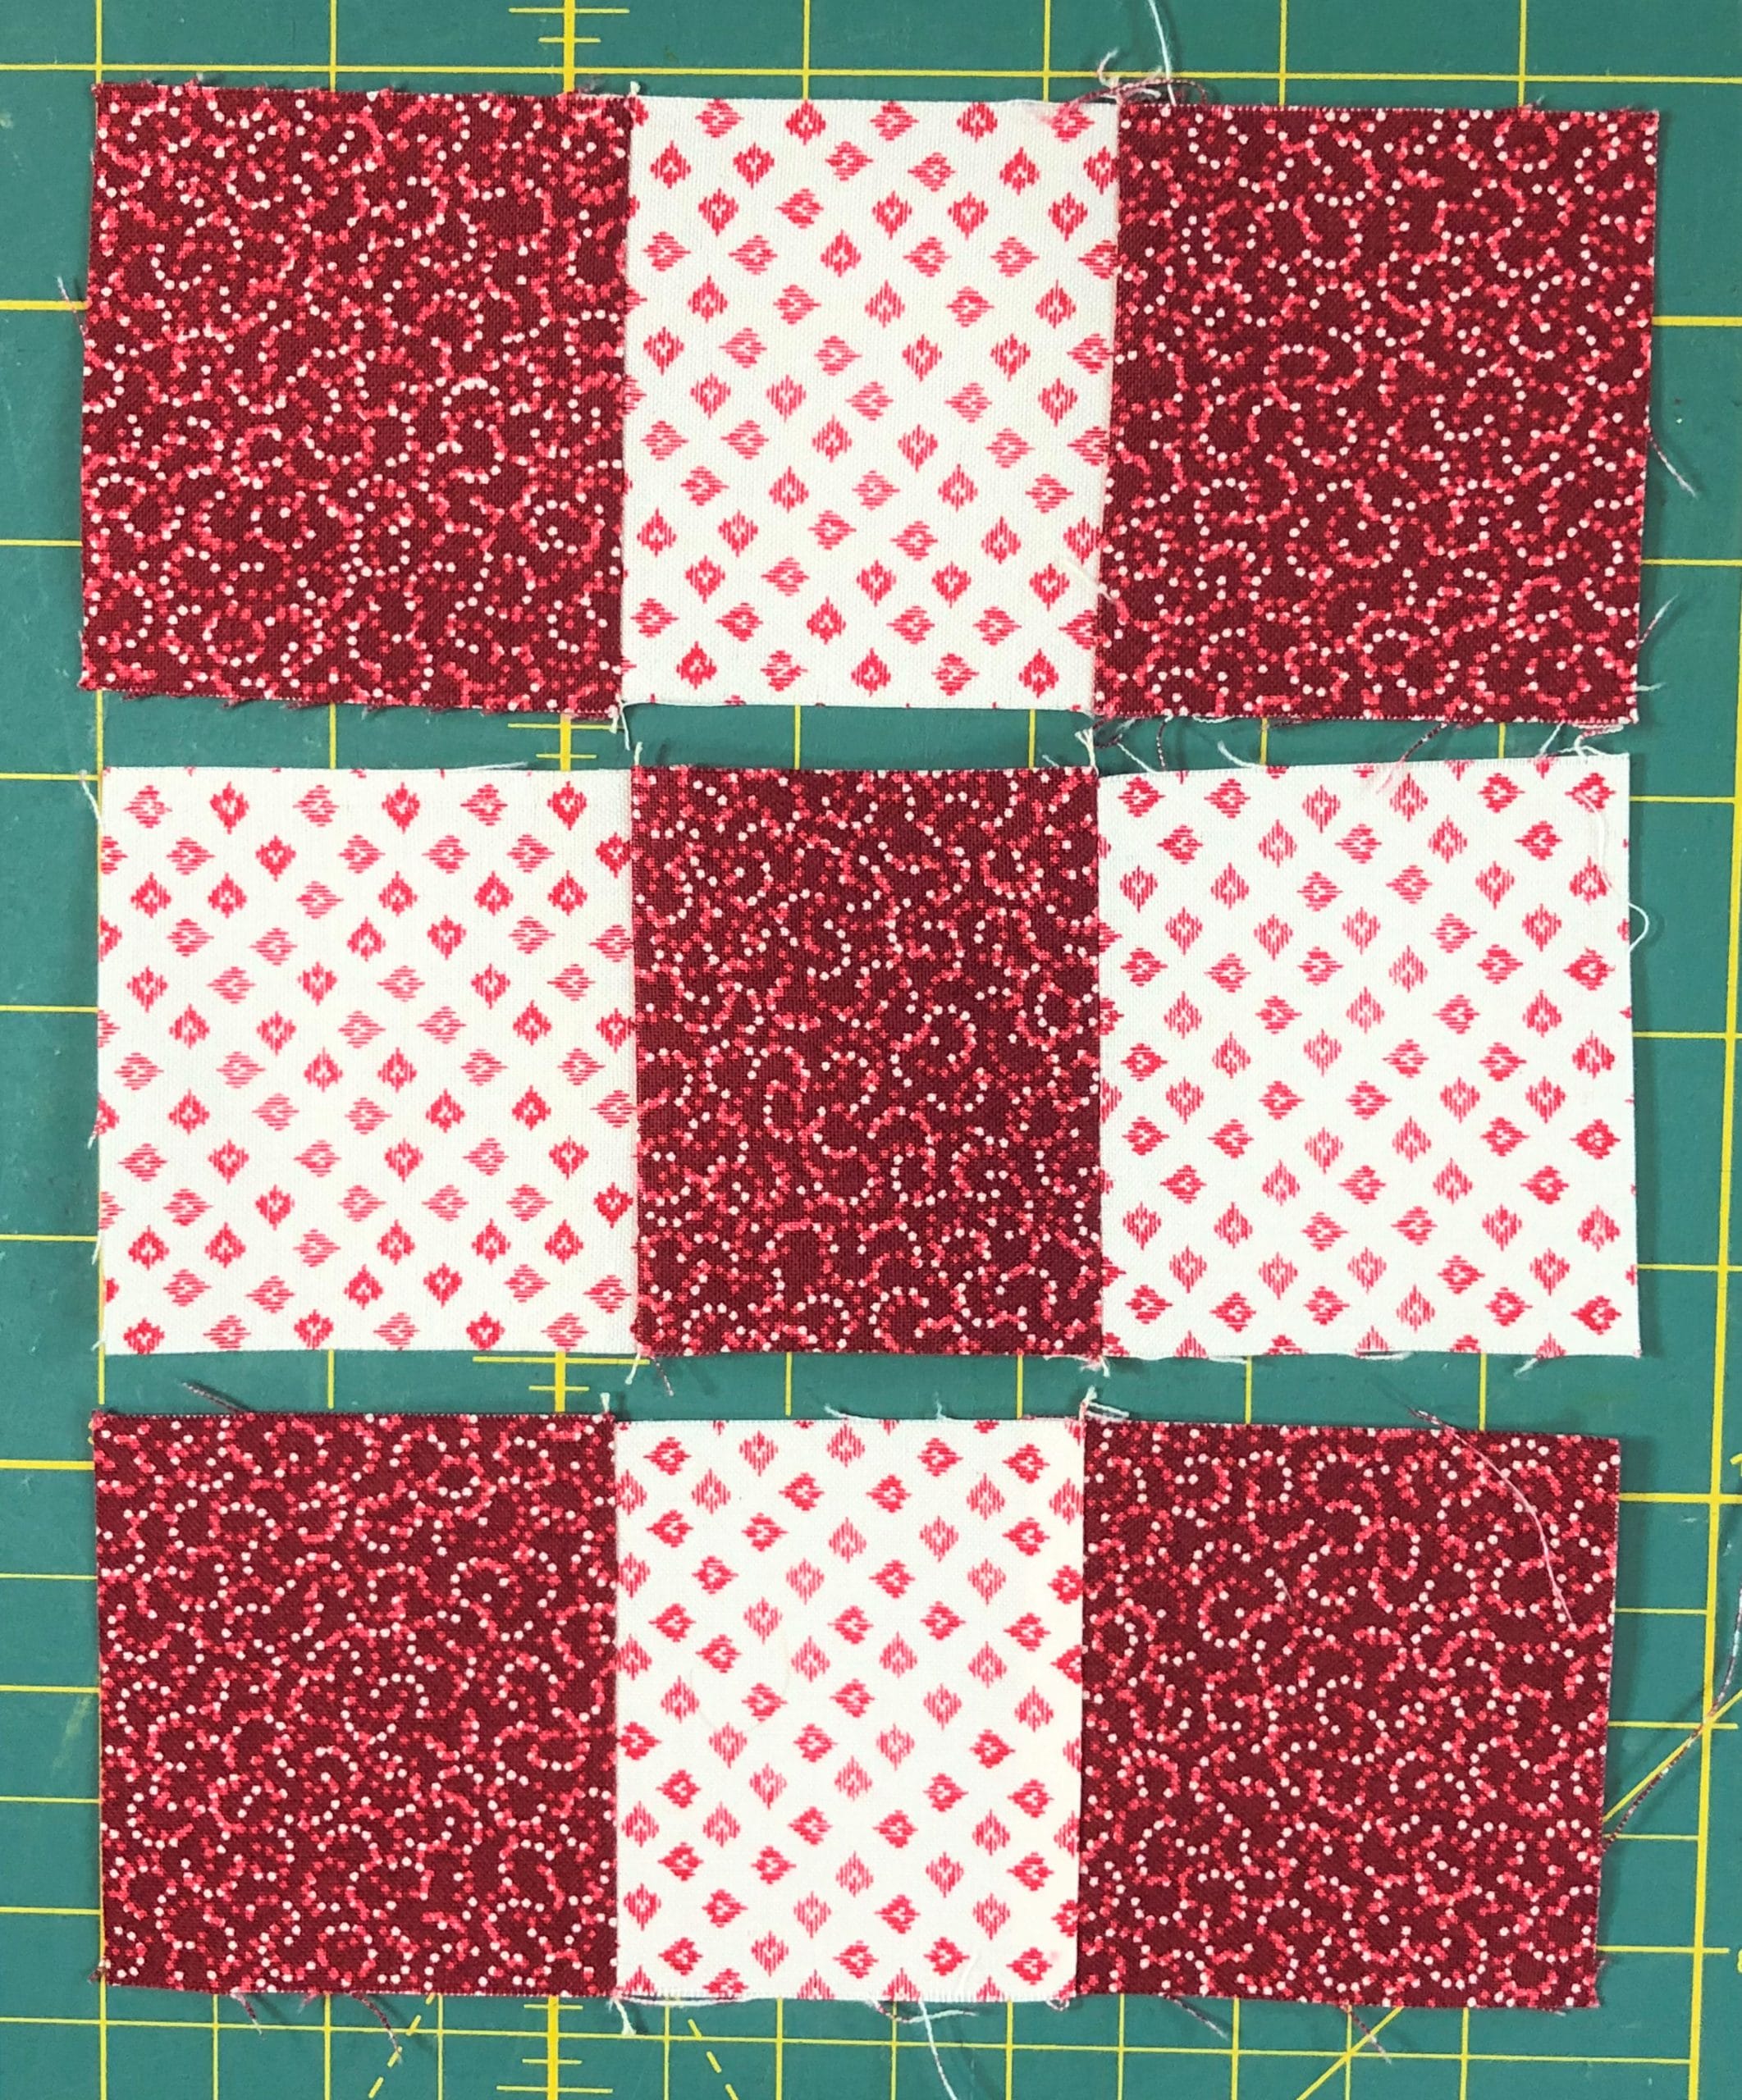
Now on to sewing! We’ll start by making a simple 9-patch and then make, you guessed it, even more no-waste flying geese. (Gee, this sounds kinda similar to the last block…)
Then we’ll make a few easy 4-patch units – Four of them to be exact.
After I sew each F square to a B square, then I sew the pairs together to make the 4-patch units.
The only thing to worry about when assembling this block is the orientation of the corner 4-patch units. As you can see from the picture, the Ivory F squares should be in the outer corners. At least, that’s how I’ve done it. That being said, since this is YOUR quilt, you can switch up the orientation if you so desire, and put those red squares in the corners instead. It’s entirely up to you, just make sure that whatever you do, it’s on purpose. That advice probably applies to more than just quilt blocks, haha!
The rows are sewn together and ready to finish the block.
I hope you’ve enjoyed these first few blocks. Next month we’ll get started on some of those Irish Chain pinwheels. Stay tuned!


 Tutorials
 4.5.2022