


 Tutorials
 12.6.2023
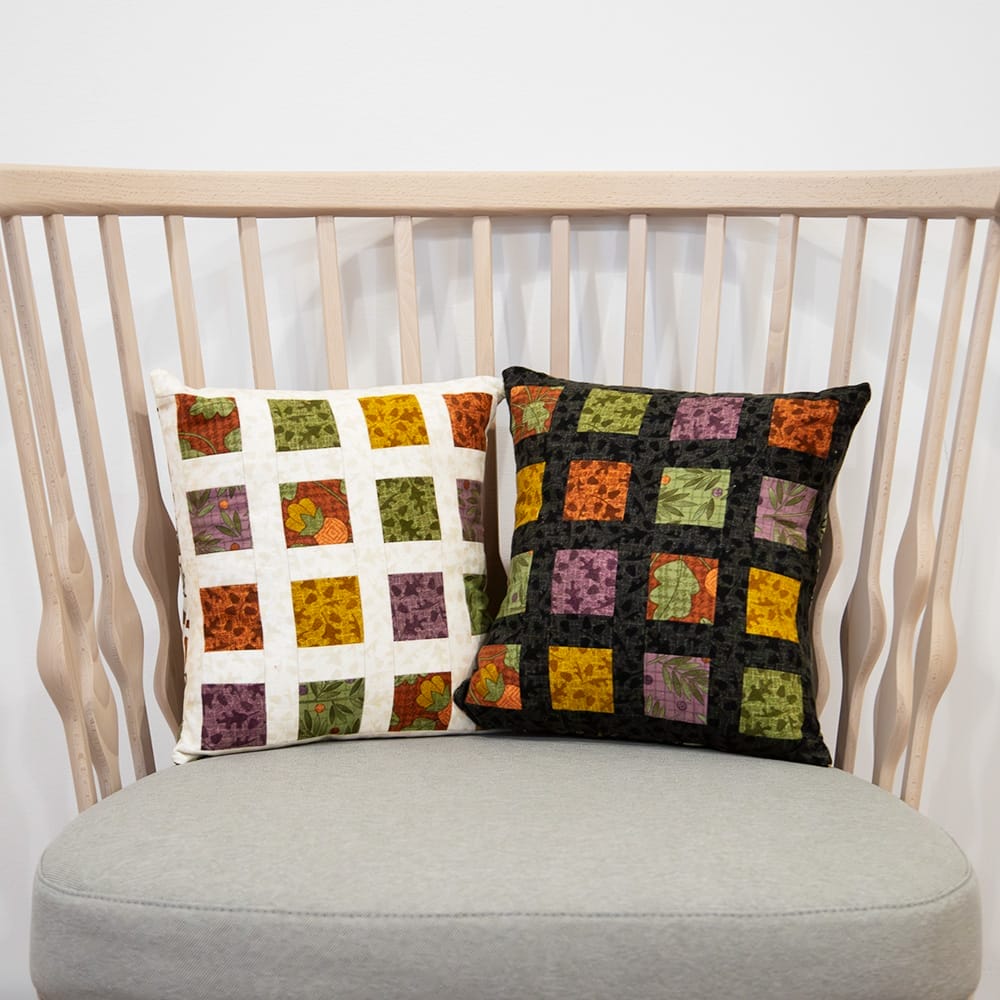
A perfect project for using up extra fat quarters or leftover scraps, the Window Panes Pillow is a fabulous pattern with delightful possibilities. Let’s take look at how to sew this sweet pillow!
This pattern is designed to make one pillow, but can easily be adapted to make more. It also was
Difficulty: Easy, this pillow is great for beginners.
Finished Size: 12″ x 12″

MATERIALS:
- 16 x 2½” squares for the “window panes”
- I used fat quarters from Bonnie Hunter’s Autumn Harvest Flannel collection.
- 5″ and 2½” square packs are also perfect for this project, especially if you have leftovers from another project.
- 1 fat quarter for the pillow front’s background
- Seen above in Bonnie Hunter’s Autumn Harvest Flannel Fat Quarters
- 1 fat quarter for the envelope-style pillow backing
- Seen above in Bonnie Hunter’s Autumn Harvest Flannel Fat Quarters
- 12″ x 12″ pillow insert
- Essential™ Thread
- Basic sewing supplies
- Sewing Machine
- Rotary Cutter
- Ruler
- Cutting Mat
CUTTING DIRECTIONS:
- If you haven’t cut down your 16 x 2½” squares, start by cutting down your scraps (A)
- For the pillow front’s background fabric, cut your fat quarter into these sized pieces:
- 12 pieces measuring 1½” x 2½” (B)
- 5 pieces measuring 1½” x 11½” (C)
- 2 pieces measuring 1½” x 13½” (D)
- For the pillow’s envelope-style back, cut 2 pieces measuring 9″ x 13″ (E)
PILLOW FRONT ASSEMBLY:
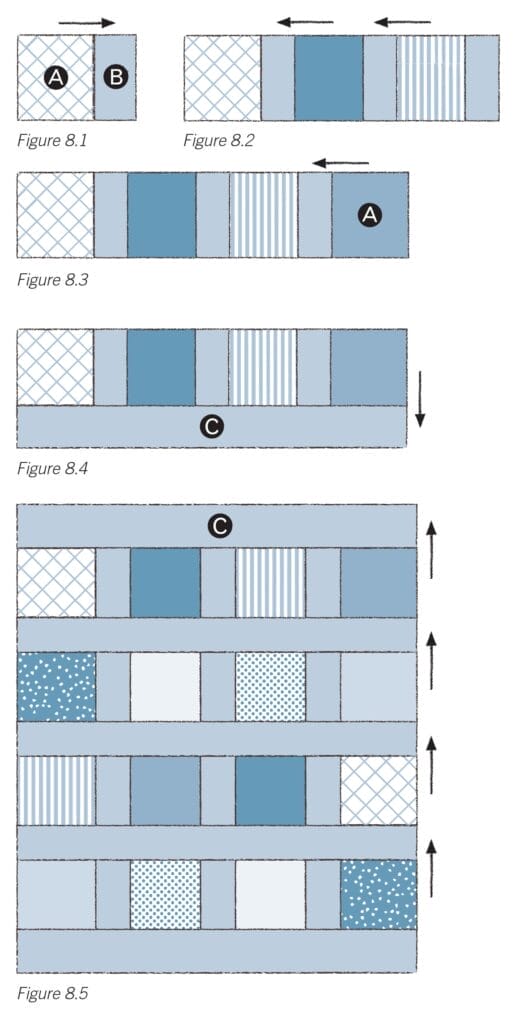
- Sew a (B) to the right edge of 12 of the (A)s. Press towards (B). See Figure 8.1.
- Sew three (A/B) units from Step 1 together as shown in Figure 8.2. Make 4.
- Sew an (A) to the end of the units made in Step 2 as shown in Figure 8.3. Make 4.
- Sew (C) to the bottom of each unit from Step 3 as shown in Figure 8.4.
- Sew all units from Step 4 together as shown in Figure 8.5. Take your remaining (C) unit and sew it to the top.
- Sew a (D) unit to each side of the pillow front. See figure 8.6 below.

PREPARED ENVELOPE BACK PIECES:
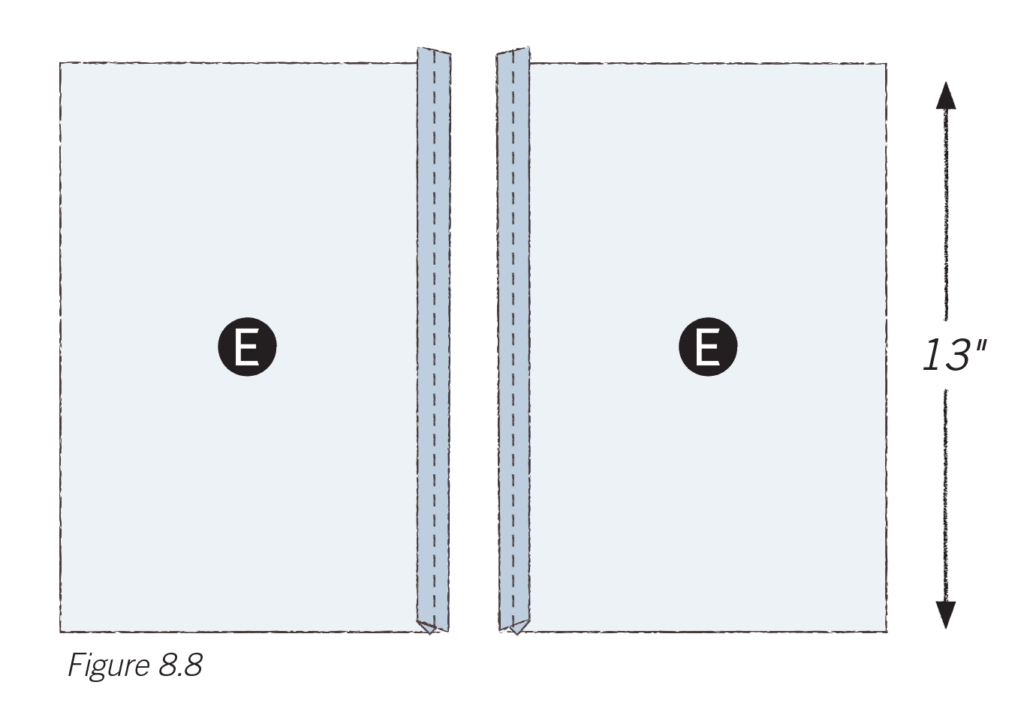
- Take your 2 (E) units and fold an edge down ½” towards the wrong side along a 13″ side. Press.
- Fold the same edge again another ½” towards the wrong side and press again.
- Top stitch the folded edge. Repeat the process for the second (E) unit. See Figure 8.8 for reference.
FINISHING YOUR PILLOW:
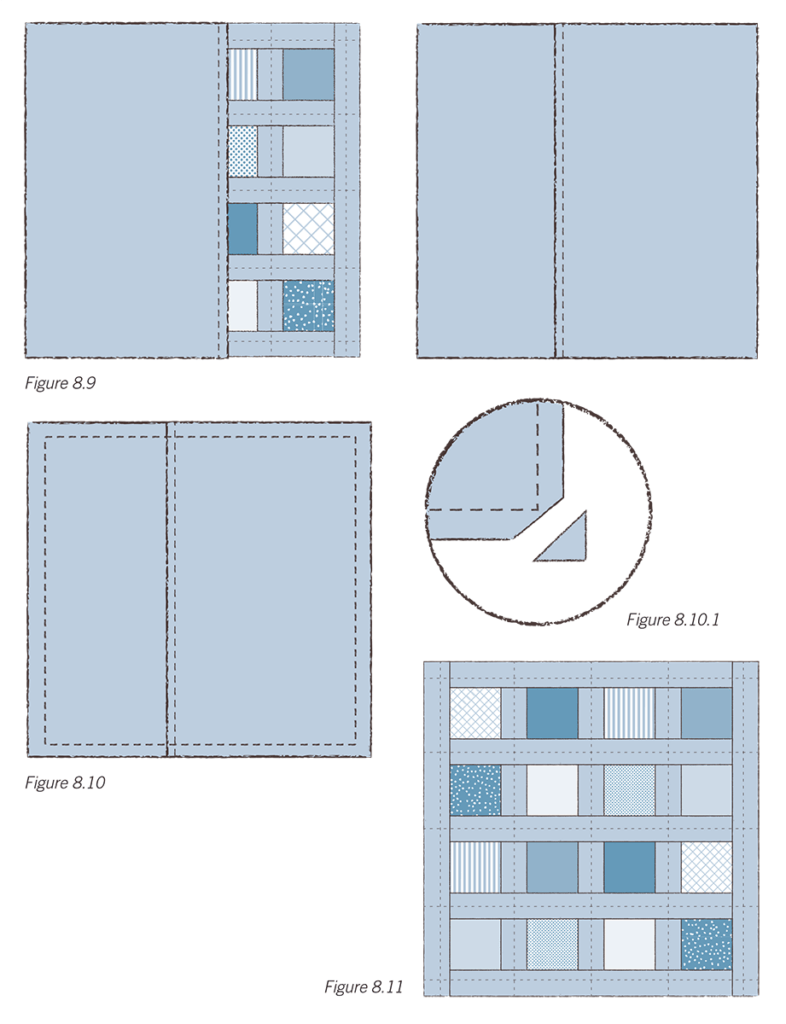
- Lay your pillow top right side up. Lay the 2 (E) units on the pillow top wrong side up (so right sides are facing each other), with folded edges facing towards the center. See Figure 8.9 for reference.
- Using a ½” seam, stitch around all 4 edges of the pillow. Reinforce the folded edges of (E) units but backstitching over each section. See Figure 8.10 for reference.
- Clip each of the 4 corners as seen in Figure 8.10.1.
- Turn right side out. Insert the 12″ square pillow form and hug your brand new pillow! (See Figure 8.11.)

VARIATION:
If you’d like to add some quilting to your pillow top, it’s very easy! Here’s how you’d do it:
- Start with 2 additional materials: one 14″ x 14″ piece of fabric (this will be inside the pillow, so use whatever scrap you have lying around) and one 14″ x 14″ piece of thin batting.
- Take your finished pillow top and make a quilt sandwich: the 14″ square of fabric, the 14″ square of batting and the pillow top, right side up.
- Thread baste of spray baste your quilt sandwich together.
- Quilt your pillow top using whatever design you would like!
- Trim your quilted pillow top down to 13″ x 13″. Continue on with the tutorial and being “preparing envelope pillow backs.”
We hope you love these pillows as much as we do – they’re incredibly simple, can be customized in thrilling ways and can easily be duplicated for a perfect pair!
Happy sewing!

