


 Tutorials
 12.4.2023
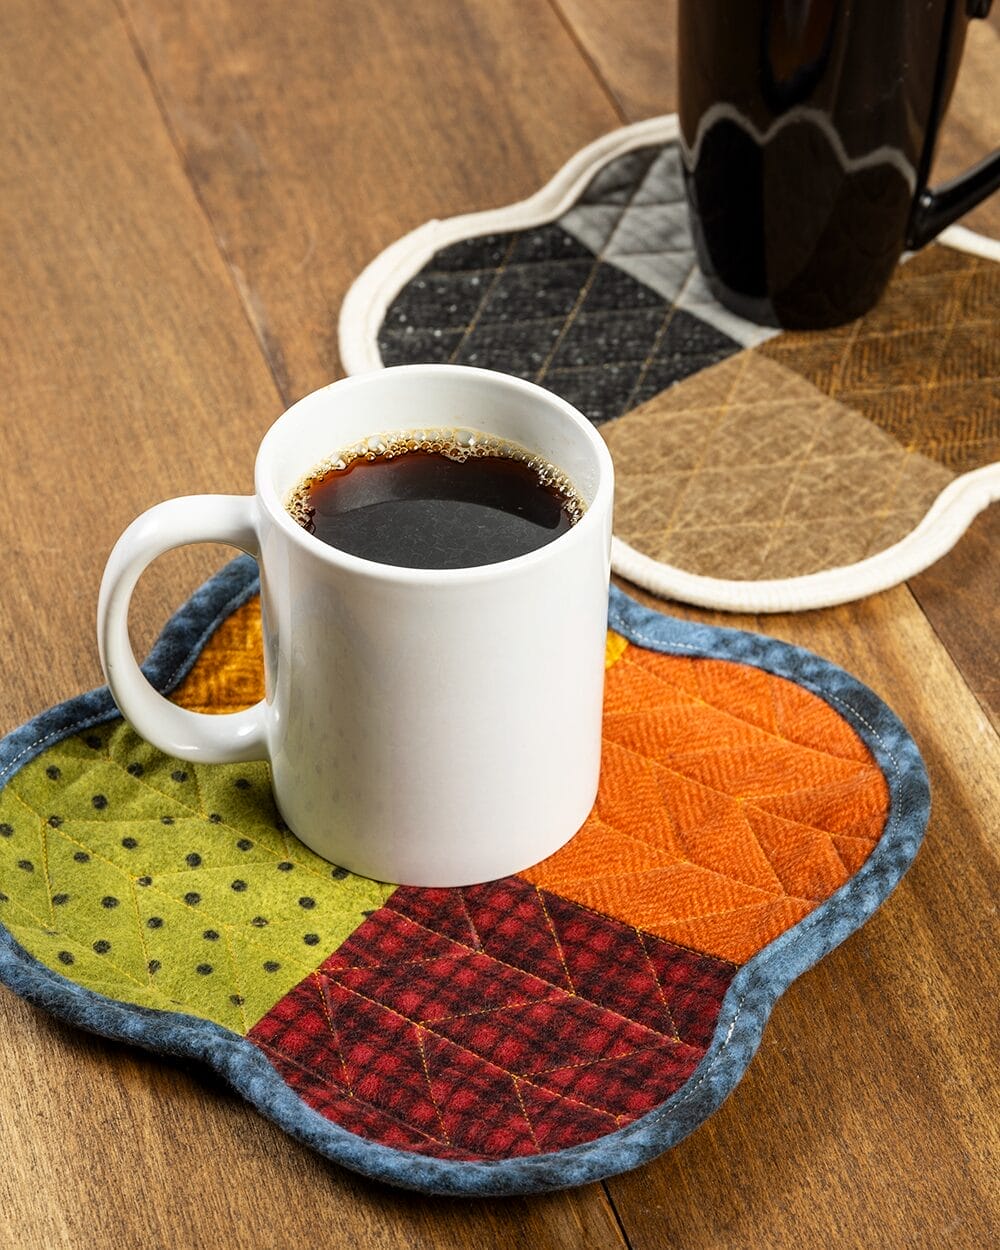
Keep your table protected and your mood bright while you rest your mug on this playful trivet. We picked some of our favorite flannels for a cozy, winter morning feeling!
This pattern is designed to make 1 trivet, but can be easily customized to make however many you need.
Difficulty: Confident Beginner/Intermediate. This pattern requires basic sewing knowledge, understanding how to cut binding on a bias and sewing binding around curved edges.
Finished Size: 8″ x 8″
MATERIALS
- 4 – 5″ squares of fabric for the top
- The colorful trivet uses Woolies Flannel Golden On Point, Orange Herringbone, Green Polka Dots & Red Plaid – sold out, but Red Nubby Tweed would be a great replacement! The Woolies Flannel Colors 5″ Squares would be perfect for this project.
- The neutral trivet uses Woolies Flannel Neutral Fat Quarter Sampler.
- 1 – 10″ square of fabric for the backing
- If using a pack of 5″ squares, try sewing 4 together to make a scrappy backing!
- 1 – 1 ¼” x 35″ strip for binding
- It is highly recommended to cut your binding on the bias, as you’ll be sewing it around the curved corners. While it can be tedious, the extra effort will pay off!
- 10″ square of batting or Insul-Bright
- If you plan to use this with hot mugs, opt for Insul-Bright! Plus, these trivets are big enough to be used for small bowls and plates, so Insul-Bright would be a fabulous option for regular, hot-object usage.
- Quilter’s template plastic or cardstock
- Leftover cereal boxes, cardboard mailers or boxes, and thick scrapbook paper all work well as templates if you prefer not to use plastic.
- Coordinating thread
- I used Cream Essential™ Thread for the binding and Gold Essential™ Thread for the quilting.
ASSEMBLING THE QUILT BLOCK
- Take your 4 x 5″ squares. Start by sewing 2 squares together (seen here in Figure 4.1 as sewing A and B together). Sew the next 2 squares together (seen here in Figure 4.1 as sewing B and A together). Press seams.
- Take your 2 A/B units and sew them together, as seen in Figure 4.1.1. Press seams.
- Make your quilt sandwich: layer your backing square, your batting square and your front square, as seen in Figure 4.2. Your front square might be a touch smaller than your backing and batting, but don’t worry about it – after quilting, you’ll be trimming it down with your template!
- Thread baste or spray baste your quilt sandwich. For a small piece like this, a quick spritz of spray baste (like HeatnBond) between each layer will work perfectly. To thread baste, sew around the entire edge of your square using a basting stitch.
- Quilt: use whatever thread color you love and whichever design speaks to you!
- These trivets are a perfect opportunity to practice your quilting. For the 2 trivets seen in this post, I practiced a diamond pattern and a chevron pattern. Both designs – and many, many more – are from the book Walk by Jacquie Gering.
- These trivets also do not require heavy quilting. If you’re not a machine quilting fan, “stitching in the ditch” along the seam lines would be sufficient.
CREATING AND USING THE TEMPLATE
- Download the template file above ⇑
- Print the template file at 100%. It should measure 8″ when printed.
- Glue the template to a piece of cardstock and cut out.
- If using Quilter’s Template Plastic, place the printed template under the transparent plastic and trace the outside. Cut out the template.
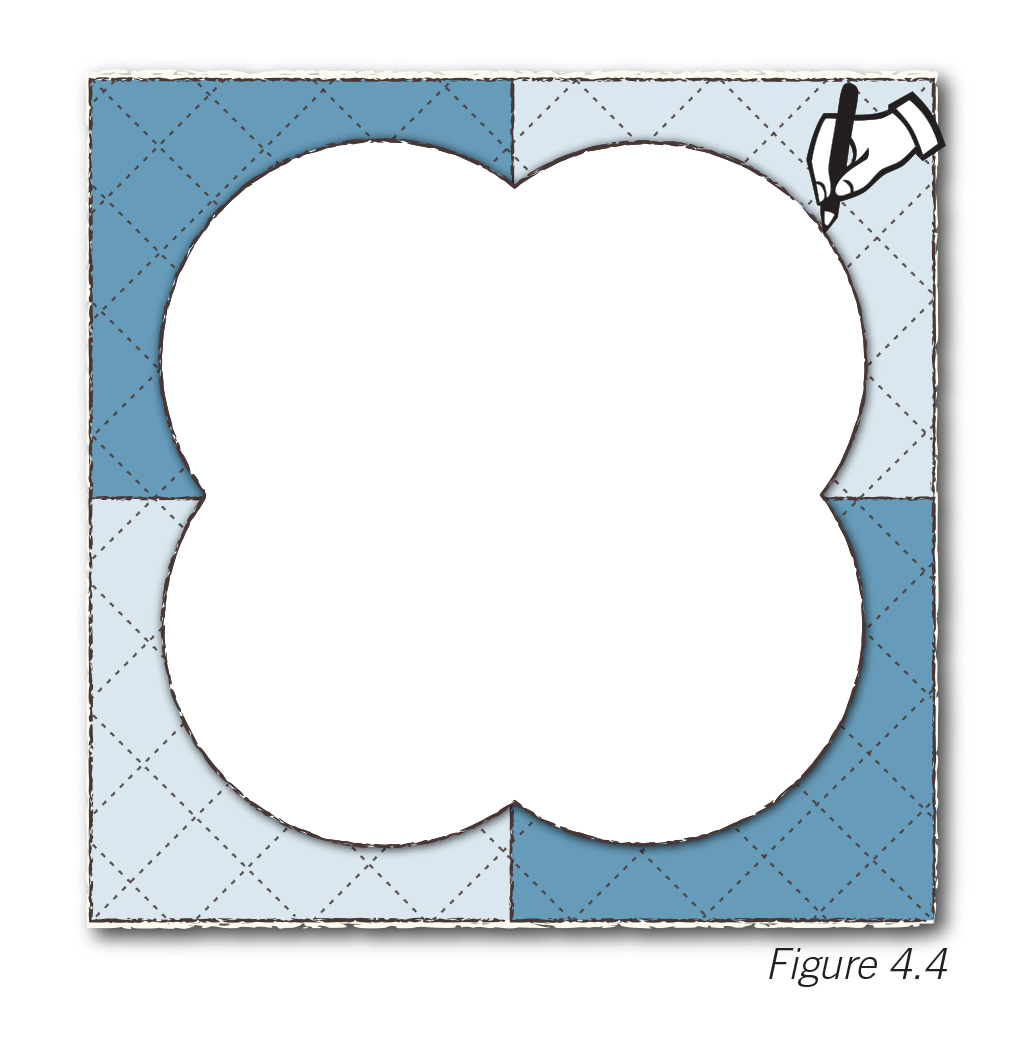
- Lay the template over the quilted block with the top facing up. Center it using the 4-patch seams as guides, seen in Figure 4.4 (below). Trace the outline and cut along the line your just drew.
BINDING
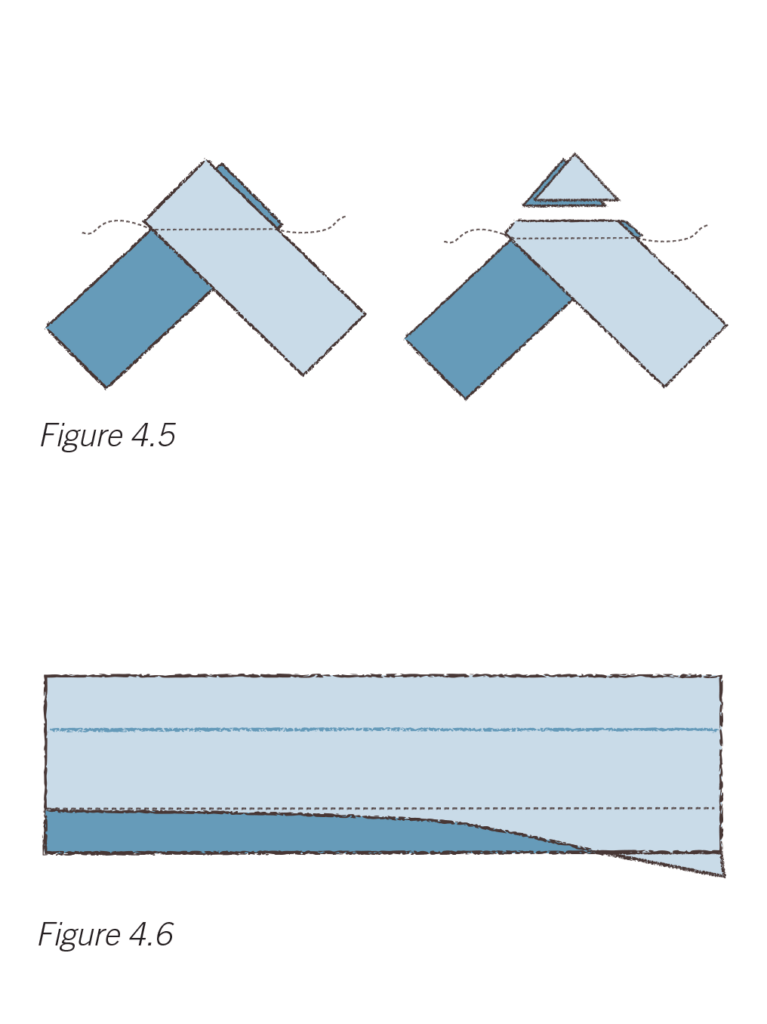
- If using smaller scraps for binding, sew your 1 ¼” strips together as seen in Figure 4.5 Press the seams open.
- Fold up one raw edge ¼” along the length, wrong sides together. Avoid pulling on the binding to prevent stretching or distorting the bias binding fabric. See Figure 4.6 for reference.
- If hand stitching the binding, sew the edge that is not folded to the front perimeter of the trivet with a ¼” seam allowance. Wrap the binding over the raw edge, adjusting the fold if needed. Hand stitch the fold down to the back of the trivet, covering the machine stitch line as you go.
- If machine stitching the binding, sew the edge that is not folded to the BACK perimeter of the trivet with a ¼” seam allowance. Wrap the binding over the raw edge to the FRONT of the trivet, adjusting the fold if needed. Machine stitch your binding down.
VARIATIONS & TIPS
- This pattern is perfect for scrappy sewing! Sew together whatever fabric scraps you have lying around until you make a 10″ x 10″ square. As long as you have a finished quilted square that you can cut the template out of, you’re good to go!
- Insul-Bright is a great option for use with hotter beverages, but it doesn’t work well with basting spray. If using Insul-Bright, I suggest thread basting – you’ll have less issues in the long run!
- Bias binding is essential for a pattern like this, but it’s a skill not every quilter has learned yet! Click here to watch a video all about how to cut bias binding for your curvy projects. Just remember that your binding should only be 1 ¼”!

Voilá, you have a gorgeous Clover Mug Trivet!
We love to see your finished creations, so don’t forget to tag us on social media with photos/videos of your trivets!
Happy sewing!

