Follow along with our team of quilters as we show off our new projects, discuss new and exciting techniques, talk about new fabric collections, and share news about the latest and greatest happenings here at Connecting Threads.
Before we begin with the month 3 blocks, let’s chat about a couple of things.
A few of you have asked questions about the scant ¼” seam allowance I suggest in the patterns, and it seems (no pun intended!) to be throwing some of you off. All of my patterns are written to be mathematically correct, so anyone who wants to use a straight ¼” seam allowance will be able to successfully make these blocks. I personally use a scant ¼” seam and then square up the units as I go. But if any of you prefer to use a standard ¼” seam when sewing, by all means, please do! Just make sure your seams are accurate and consistent, and measure as you go to make sure you’ll end up with the correct 12-1/2” square when each block is finished.
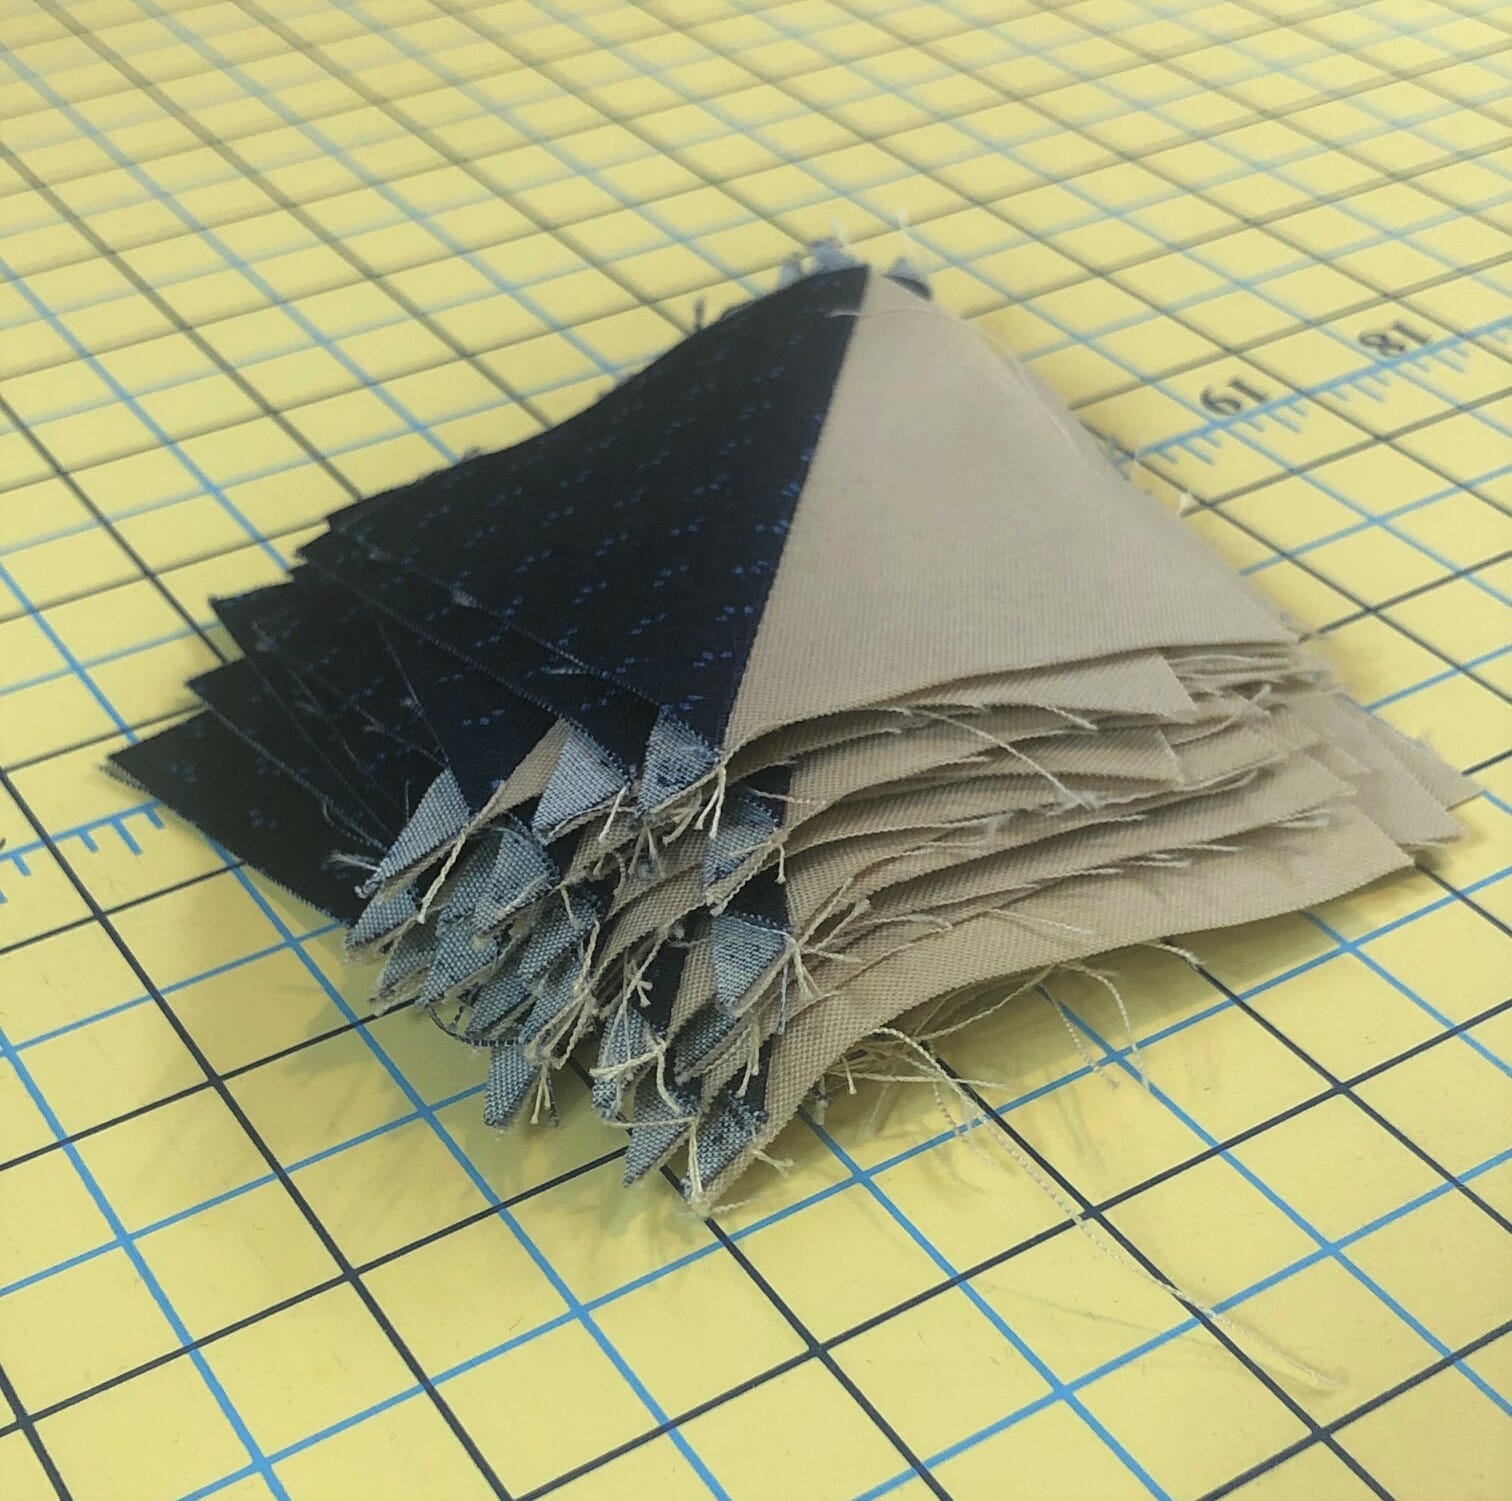
Also, in case you haven’t noticed by now, there are A LOT of half square triangles in this quilt. Everyone has their preferred method of making these, so please feel free to step outside the box. While I used the mathematically correct 7/8” measurements on the cutting for these, please know that there is enough fabric for you to round up the extra 1/8” if you like, and then trim to size when done.
I know some of you are also using the Eight at a Time method of making HSTs, which is great! There are a couple of great videos on YouTube you can look up if you are curious about this method. Like I said, do what works for you!
Okay, let’s talk about this month’s blocks!
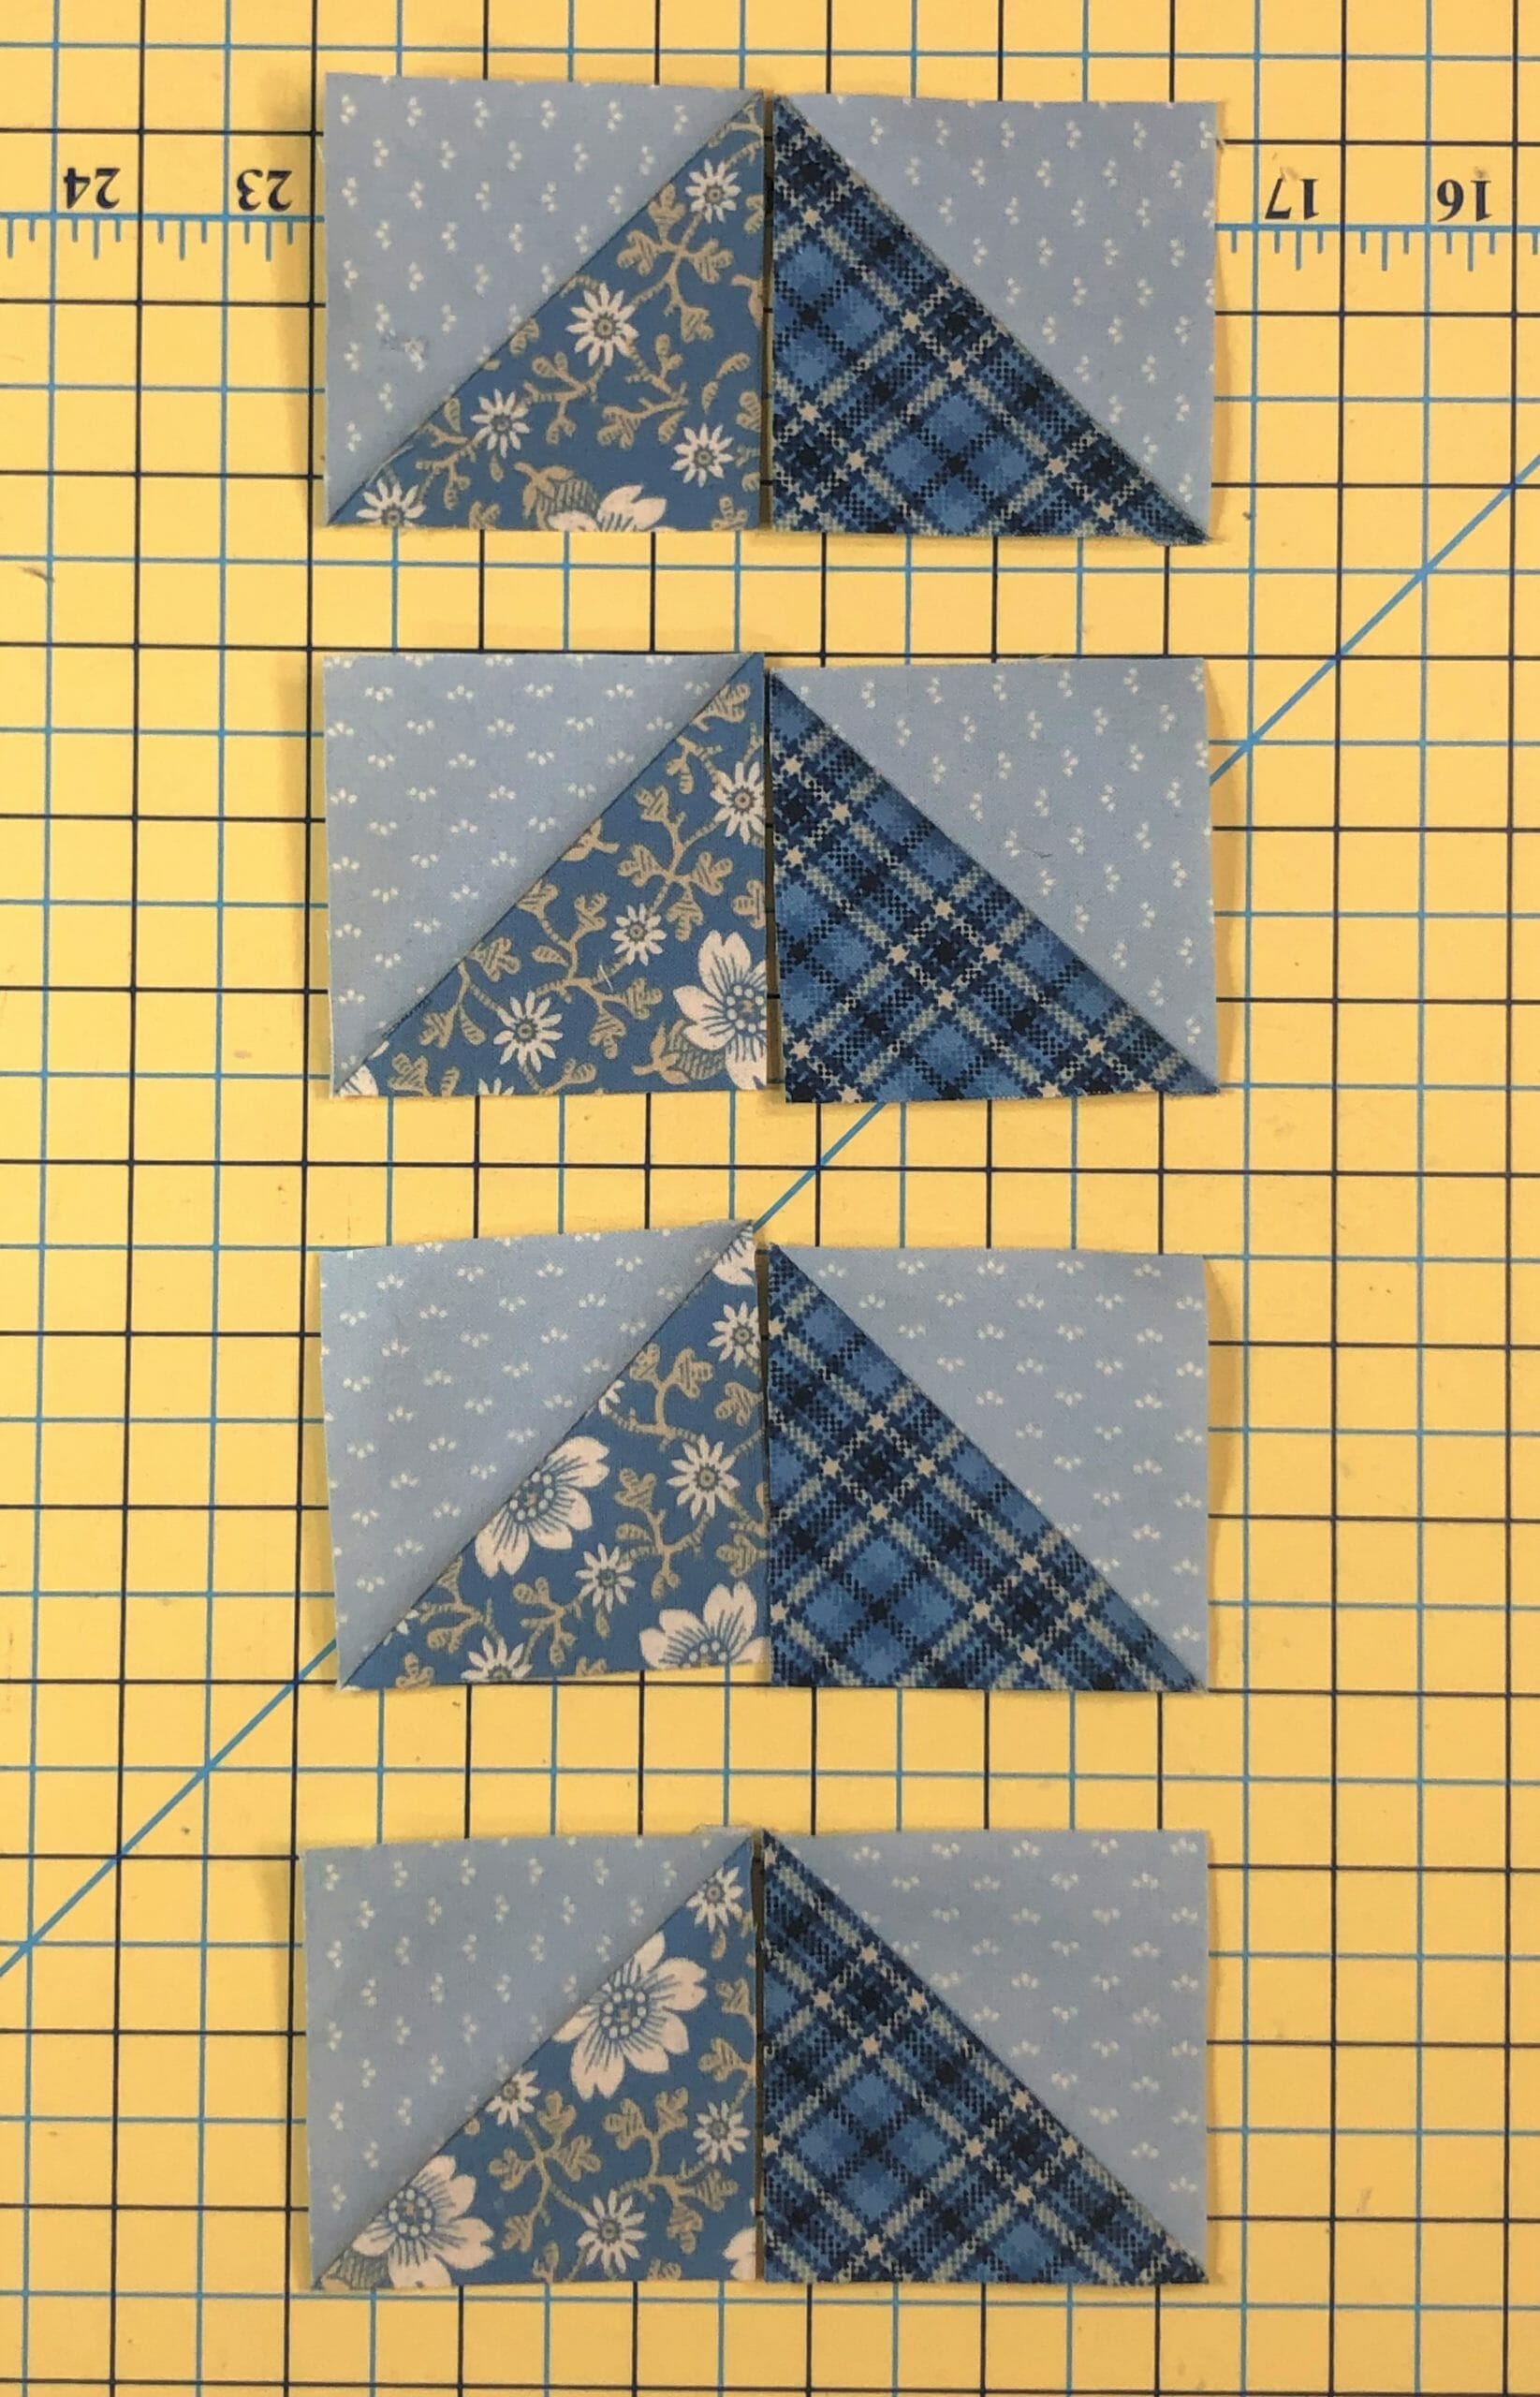
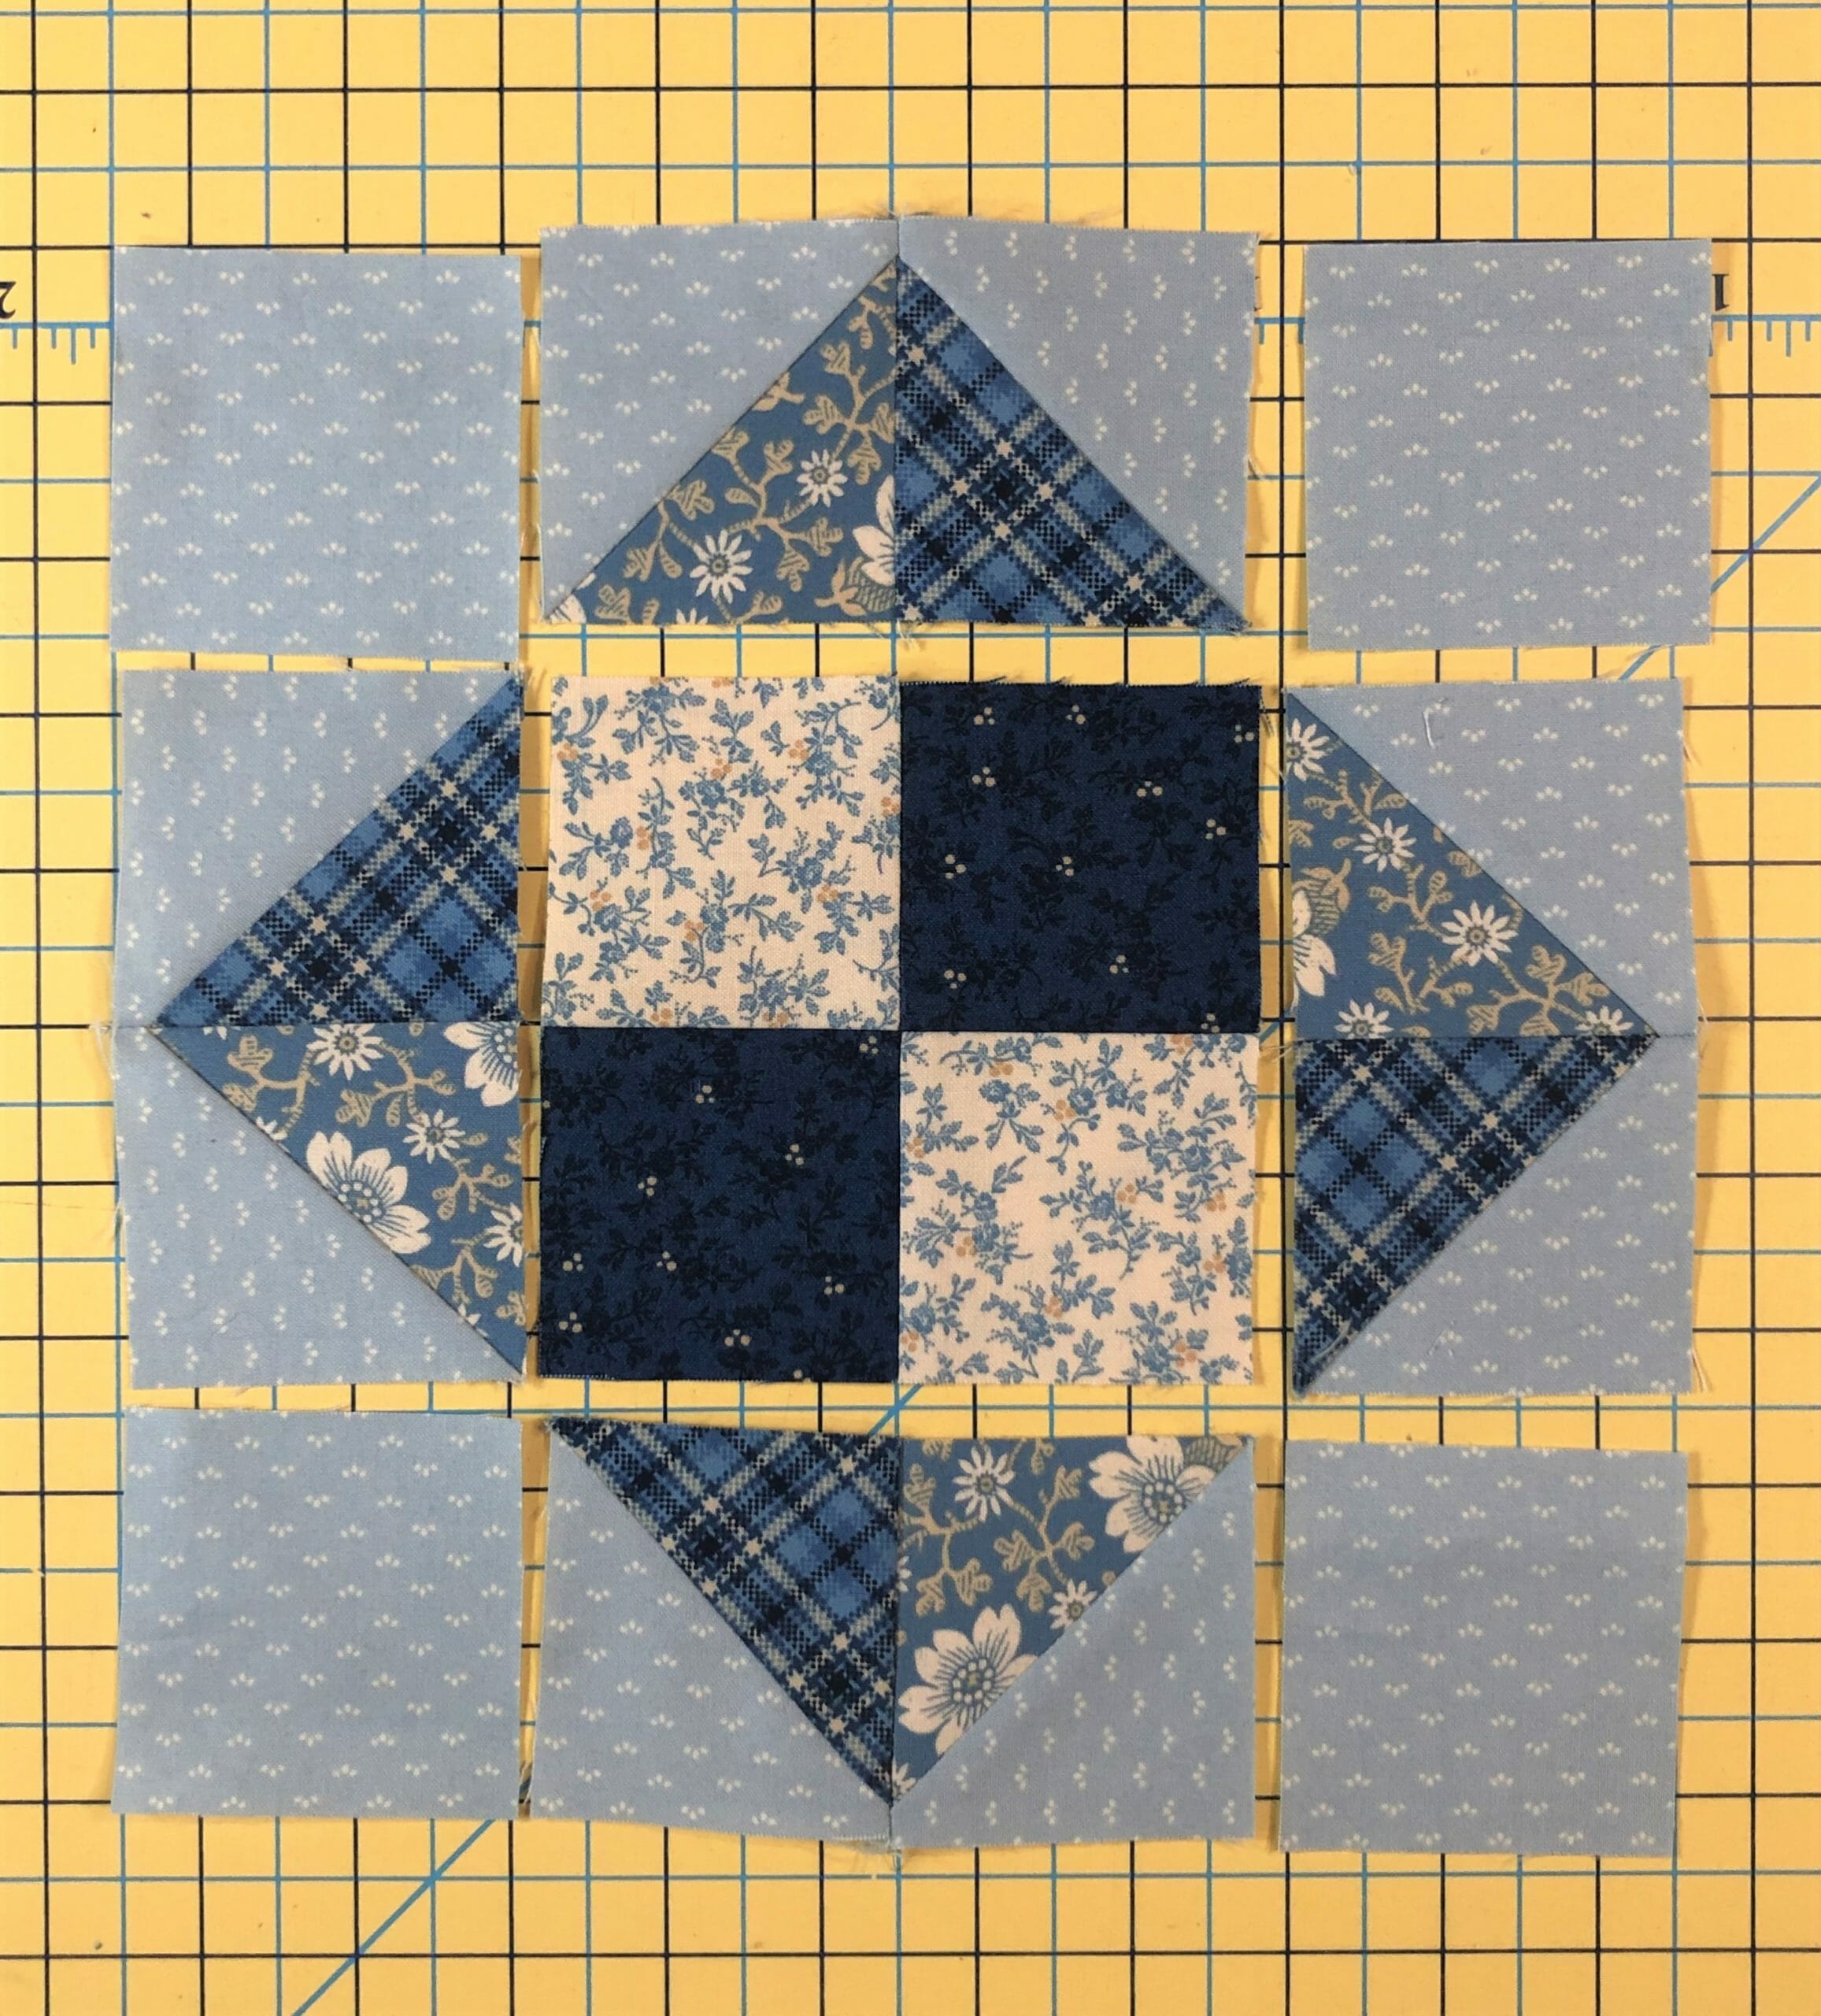
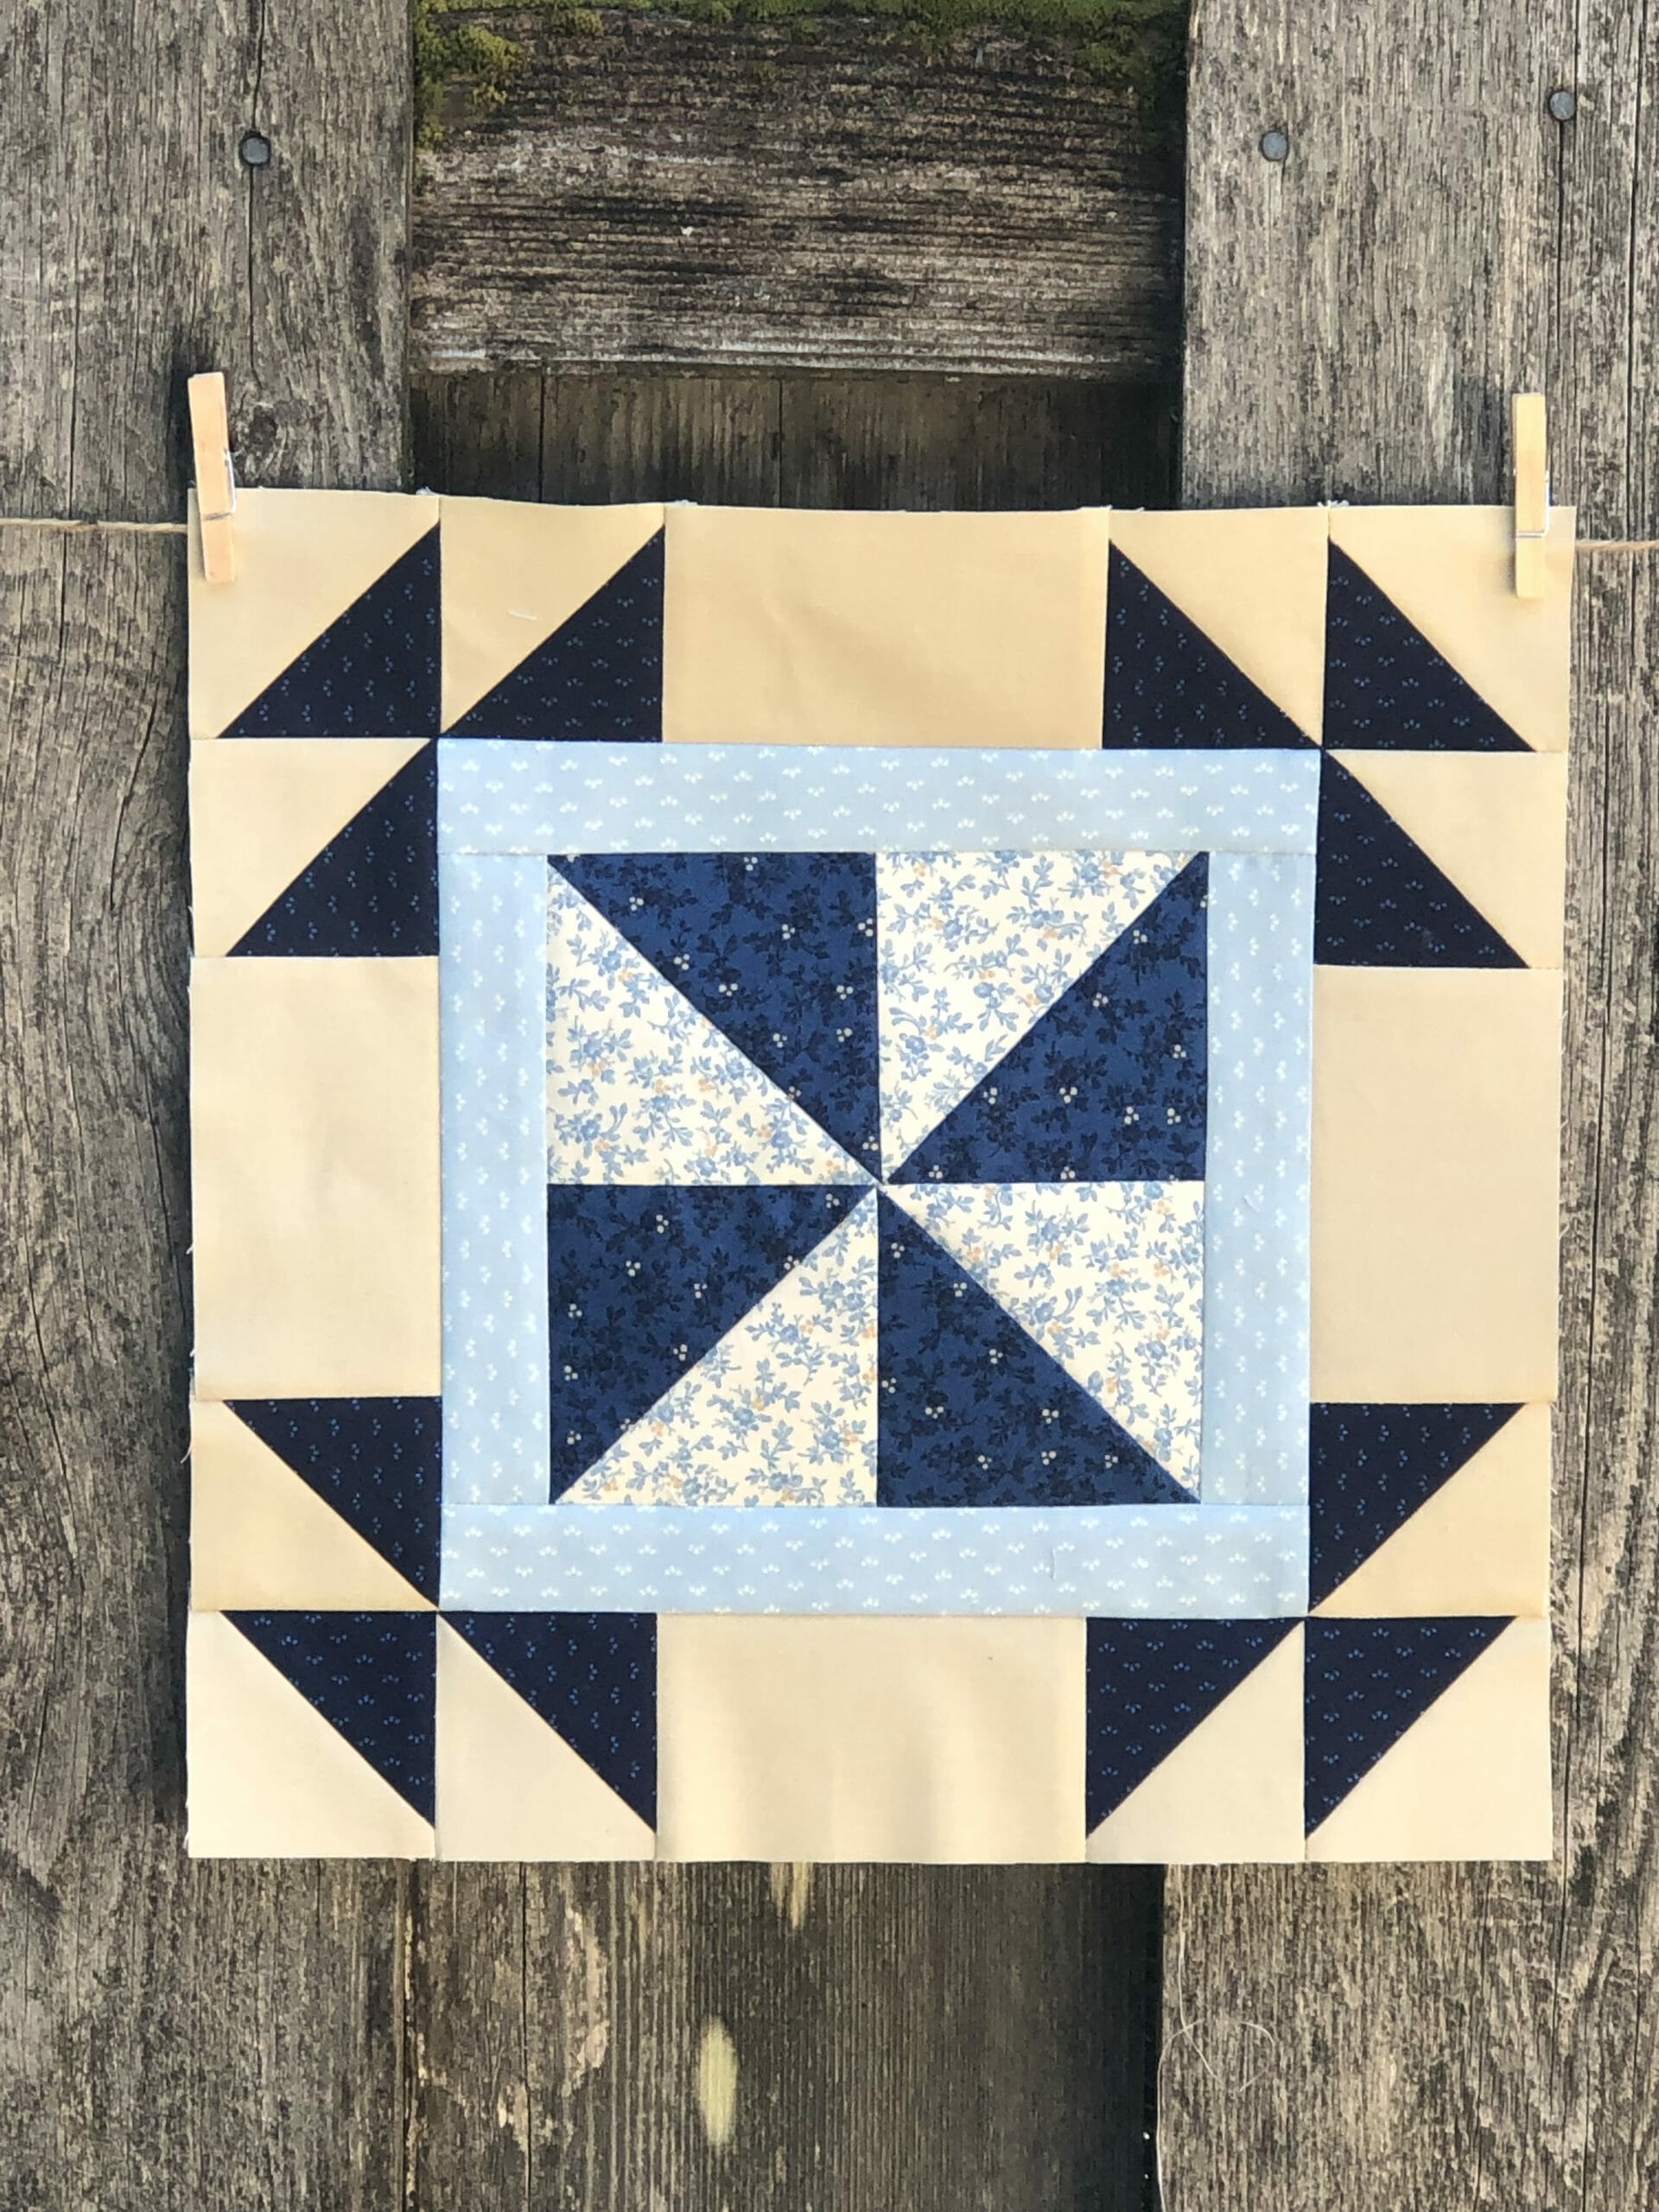
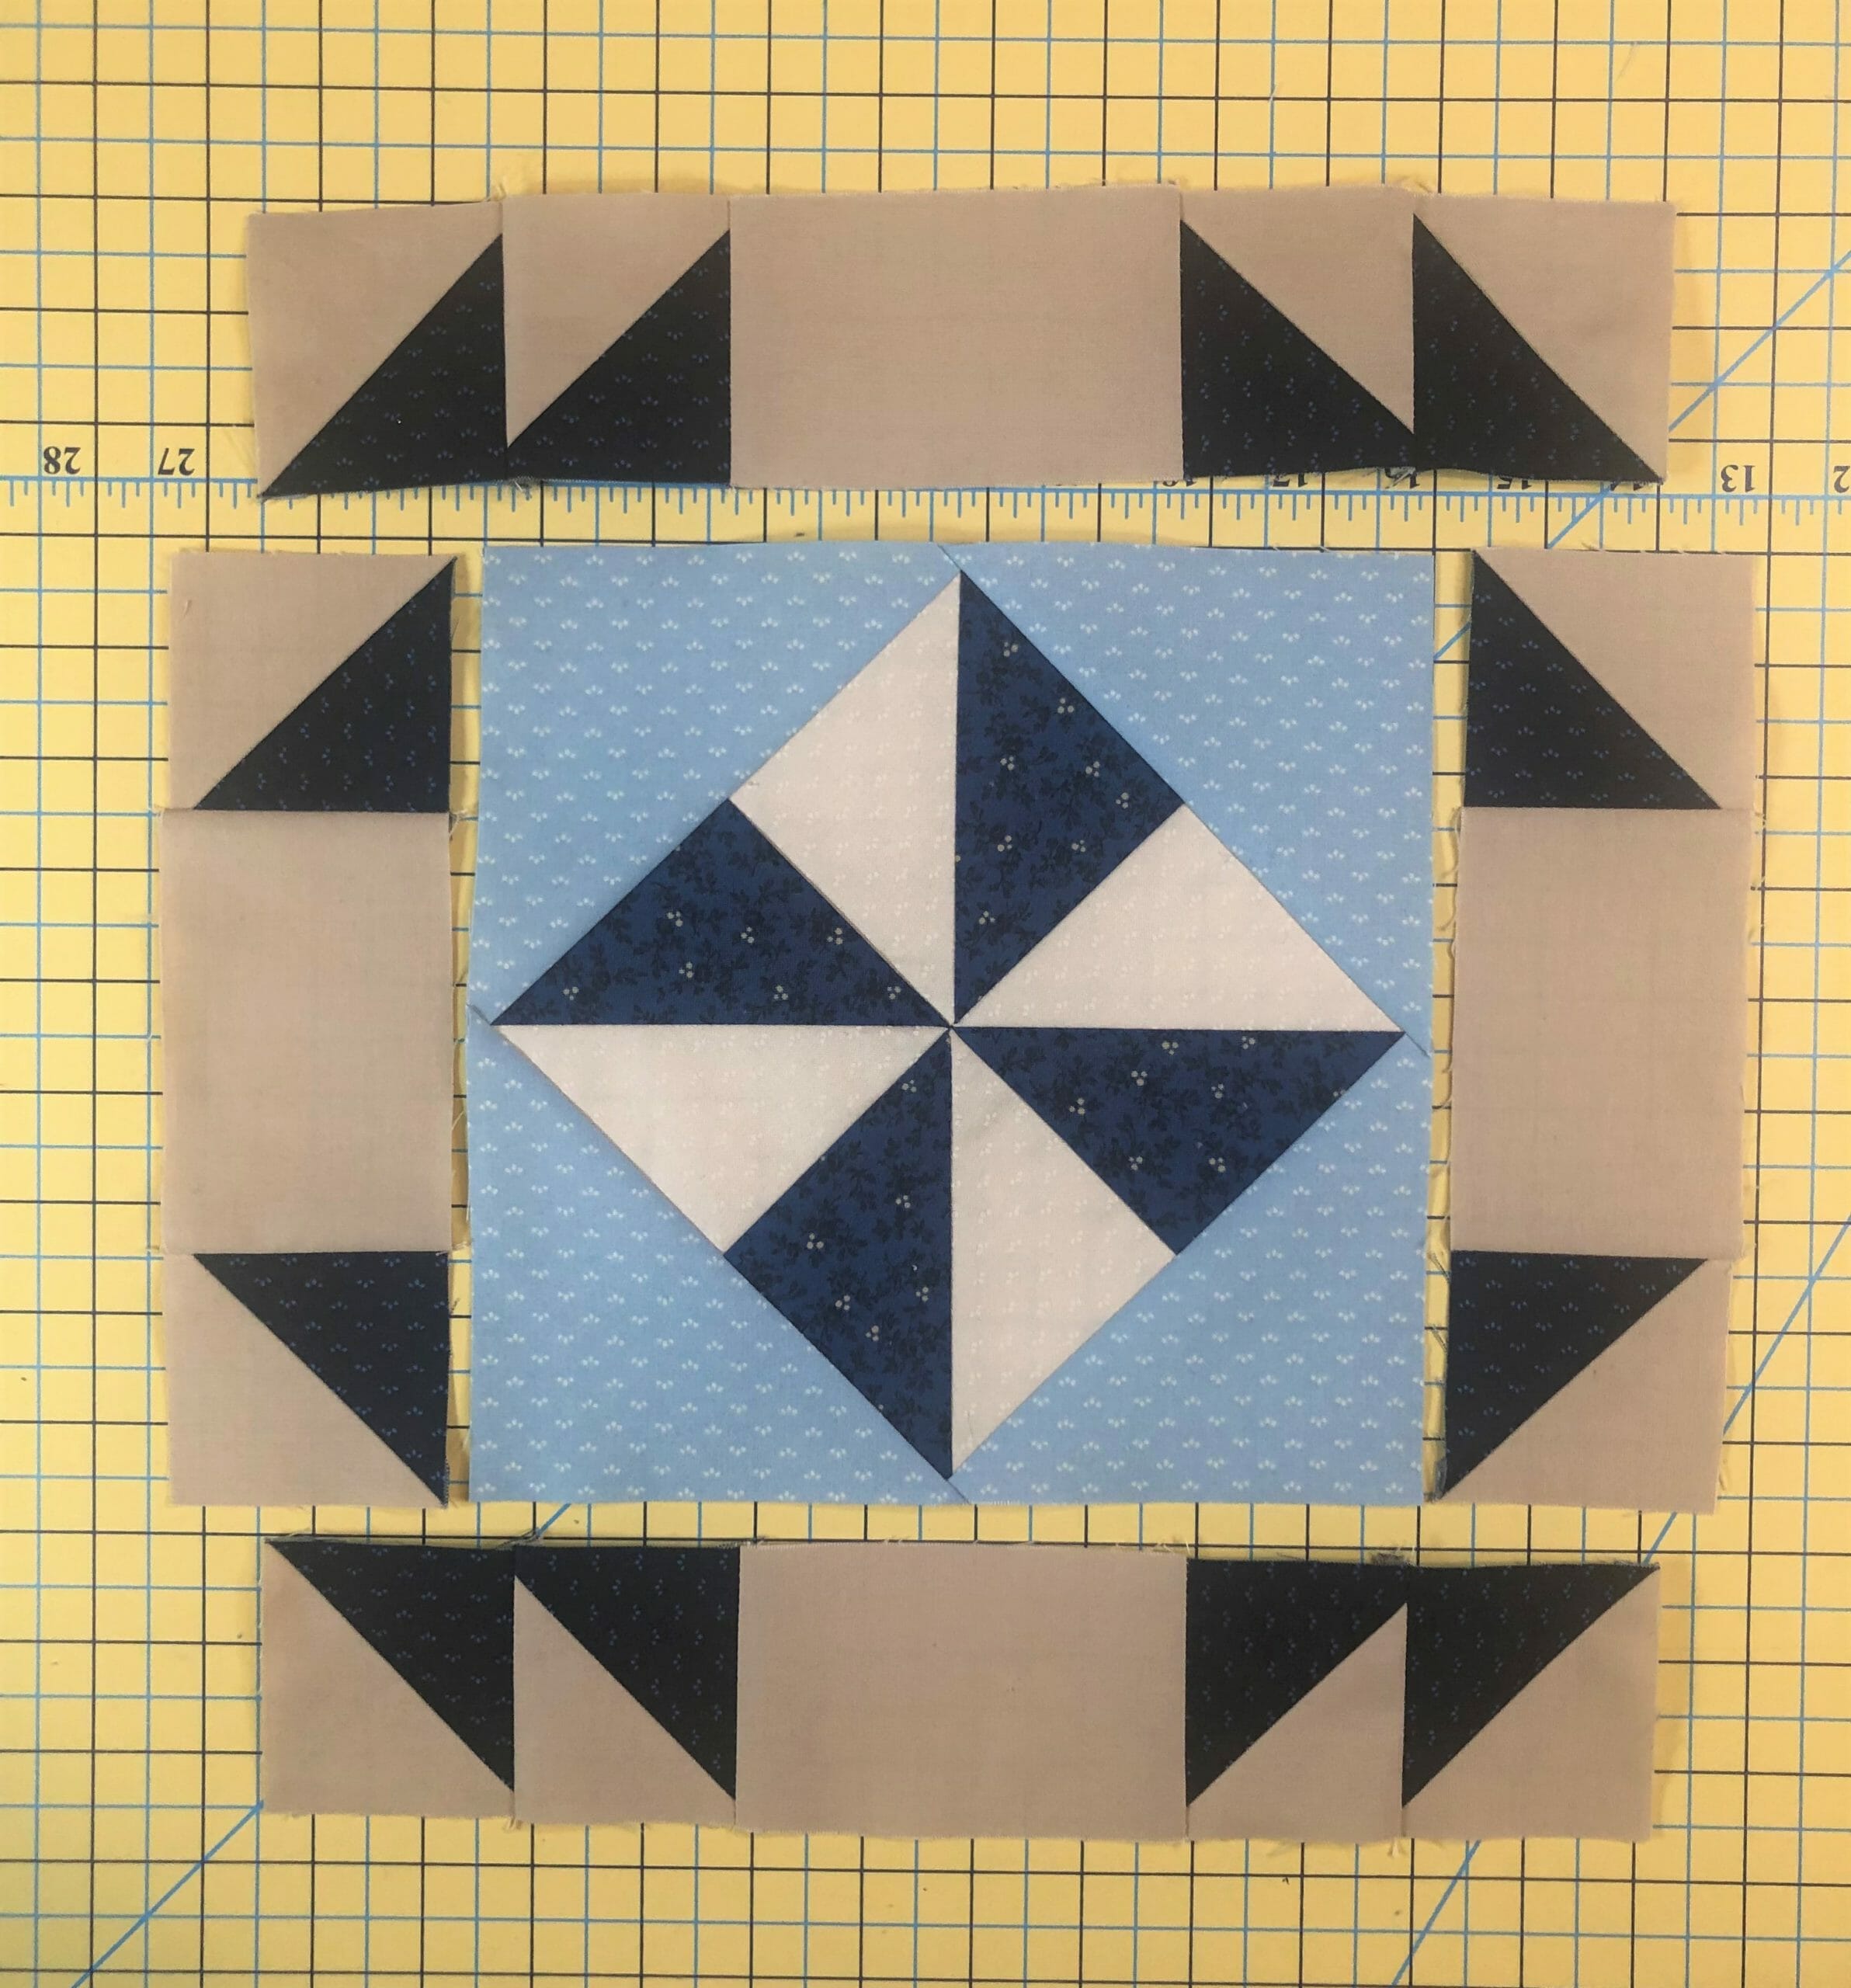
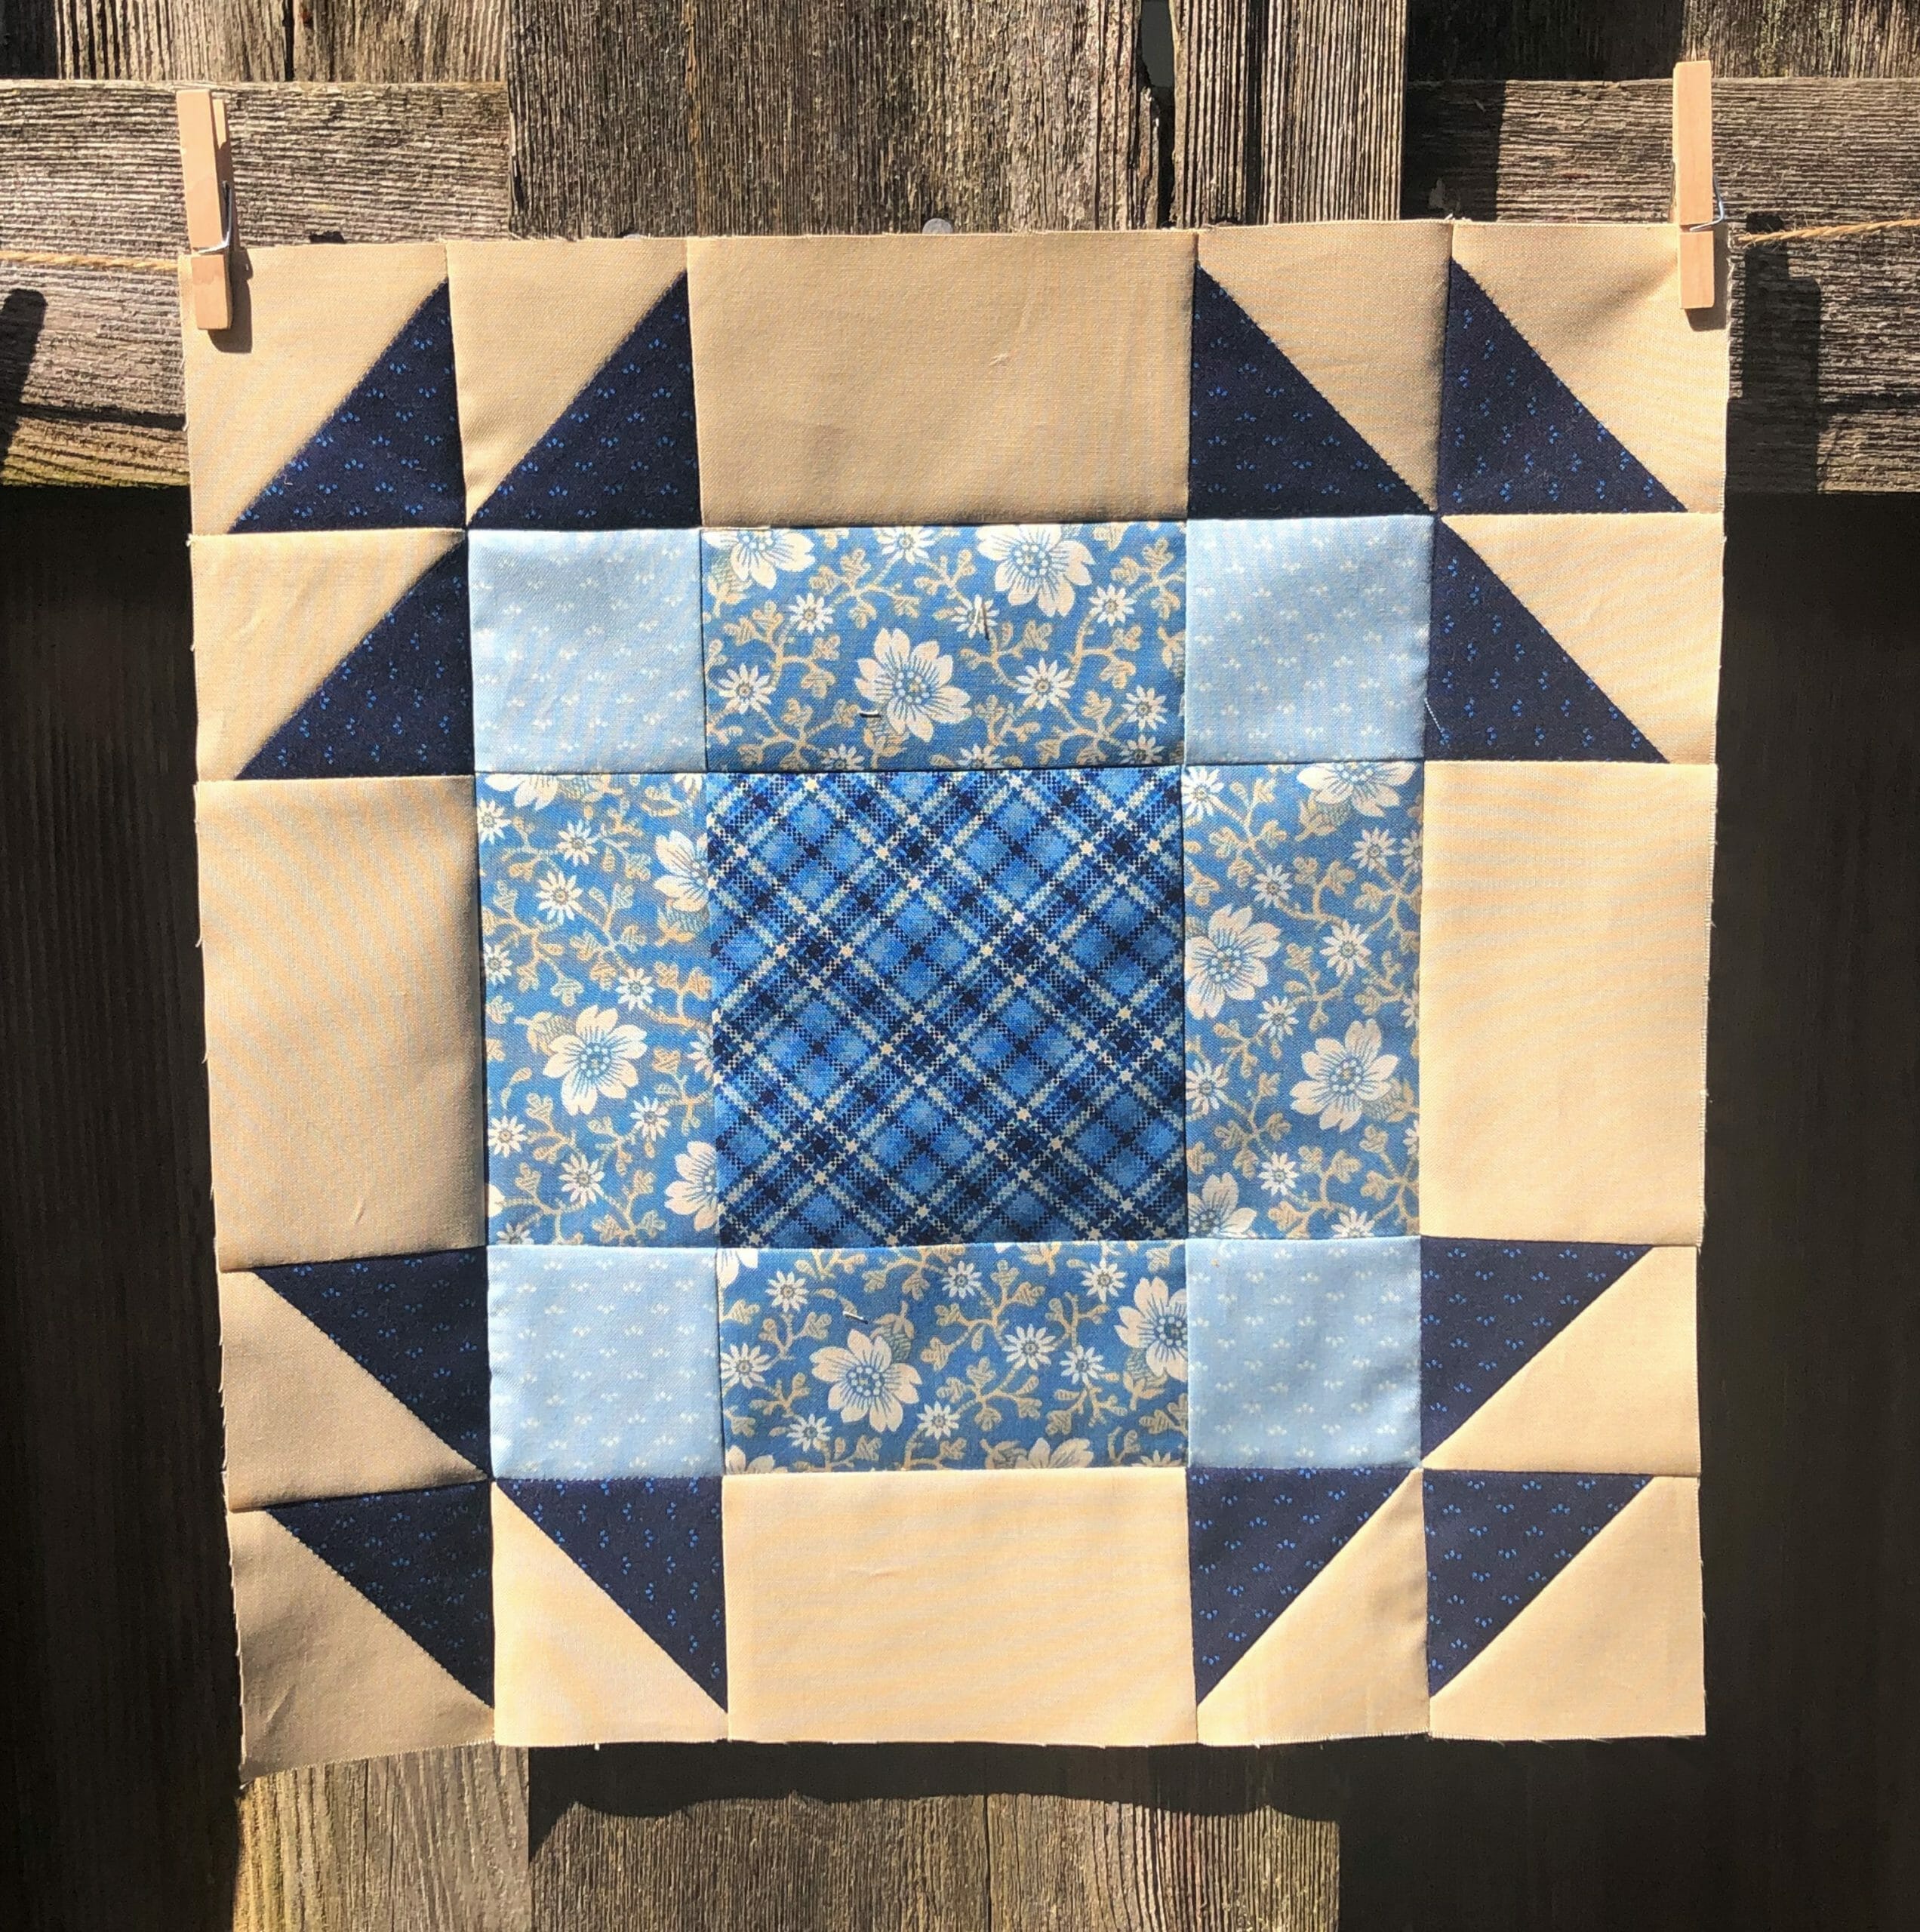
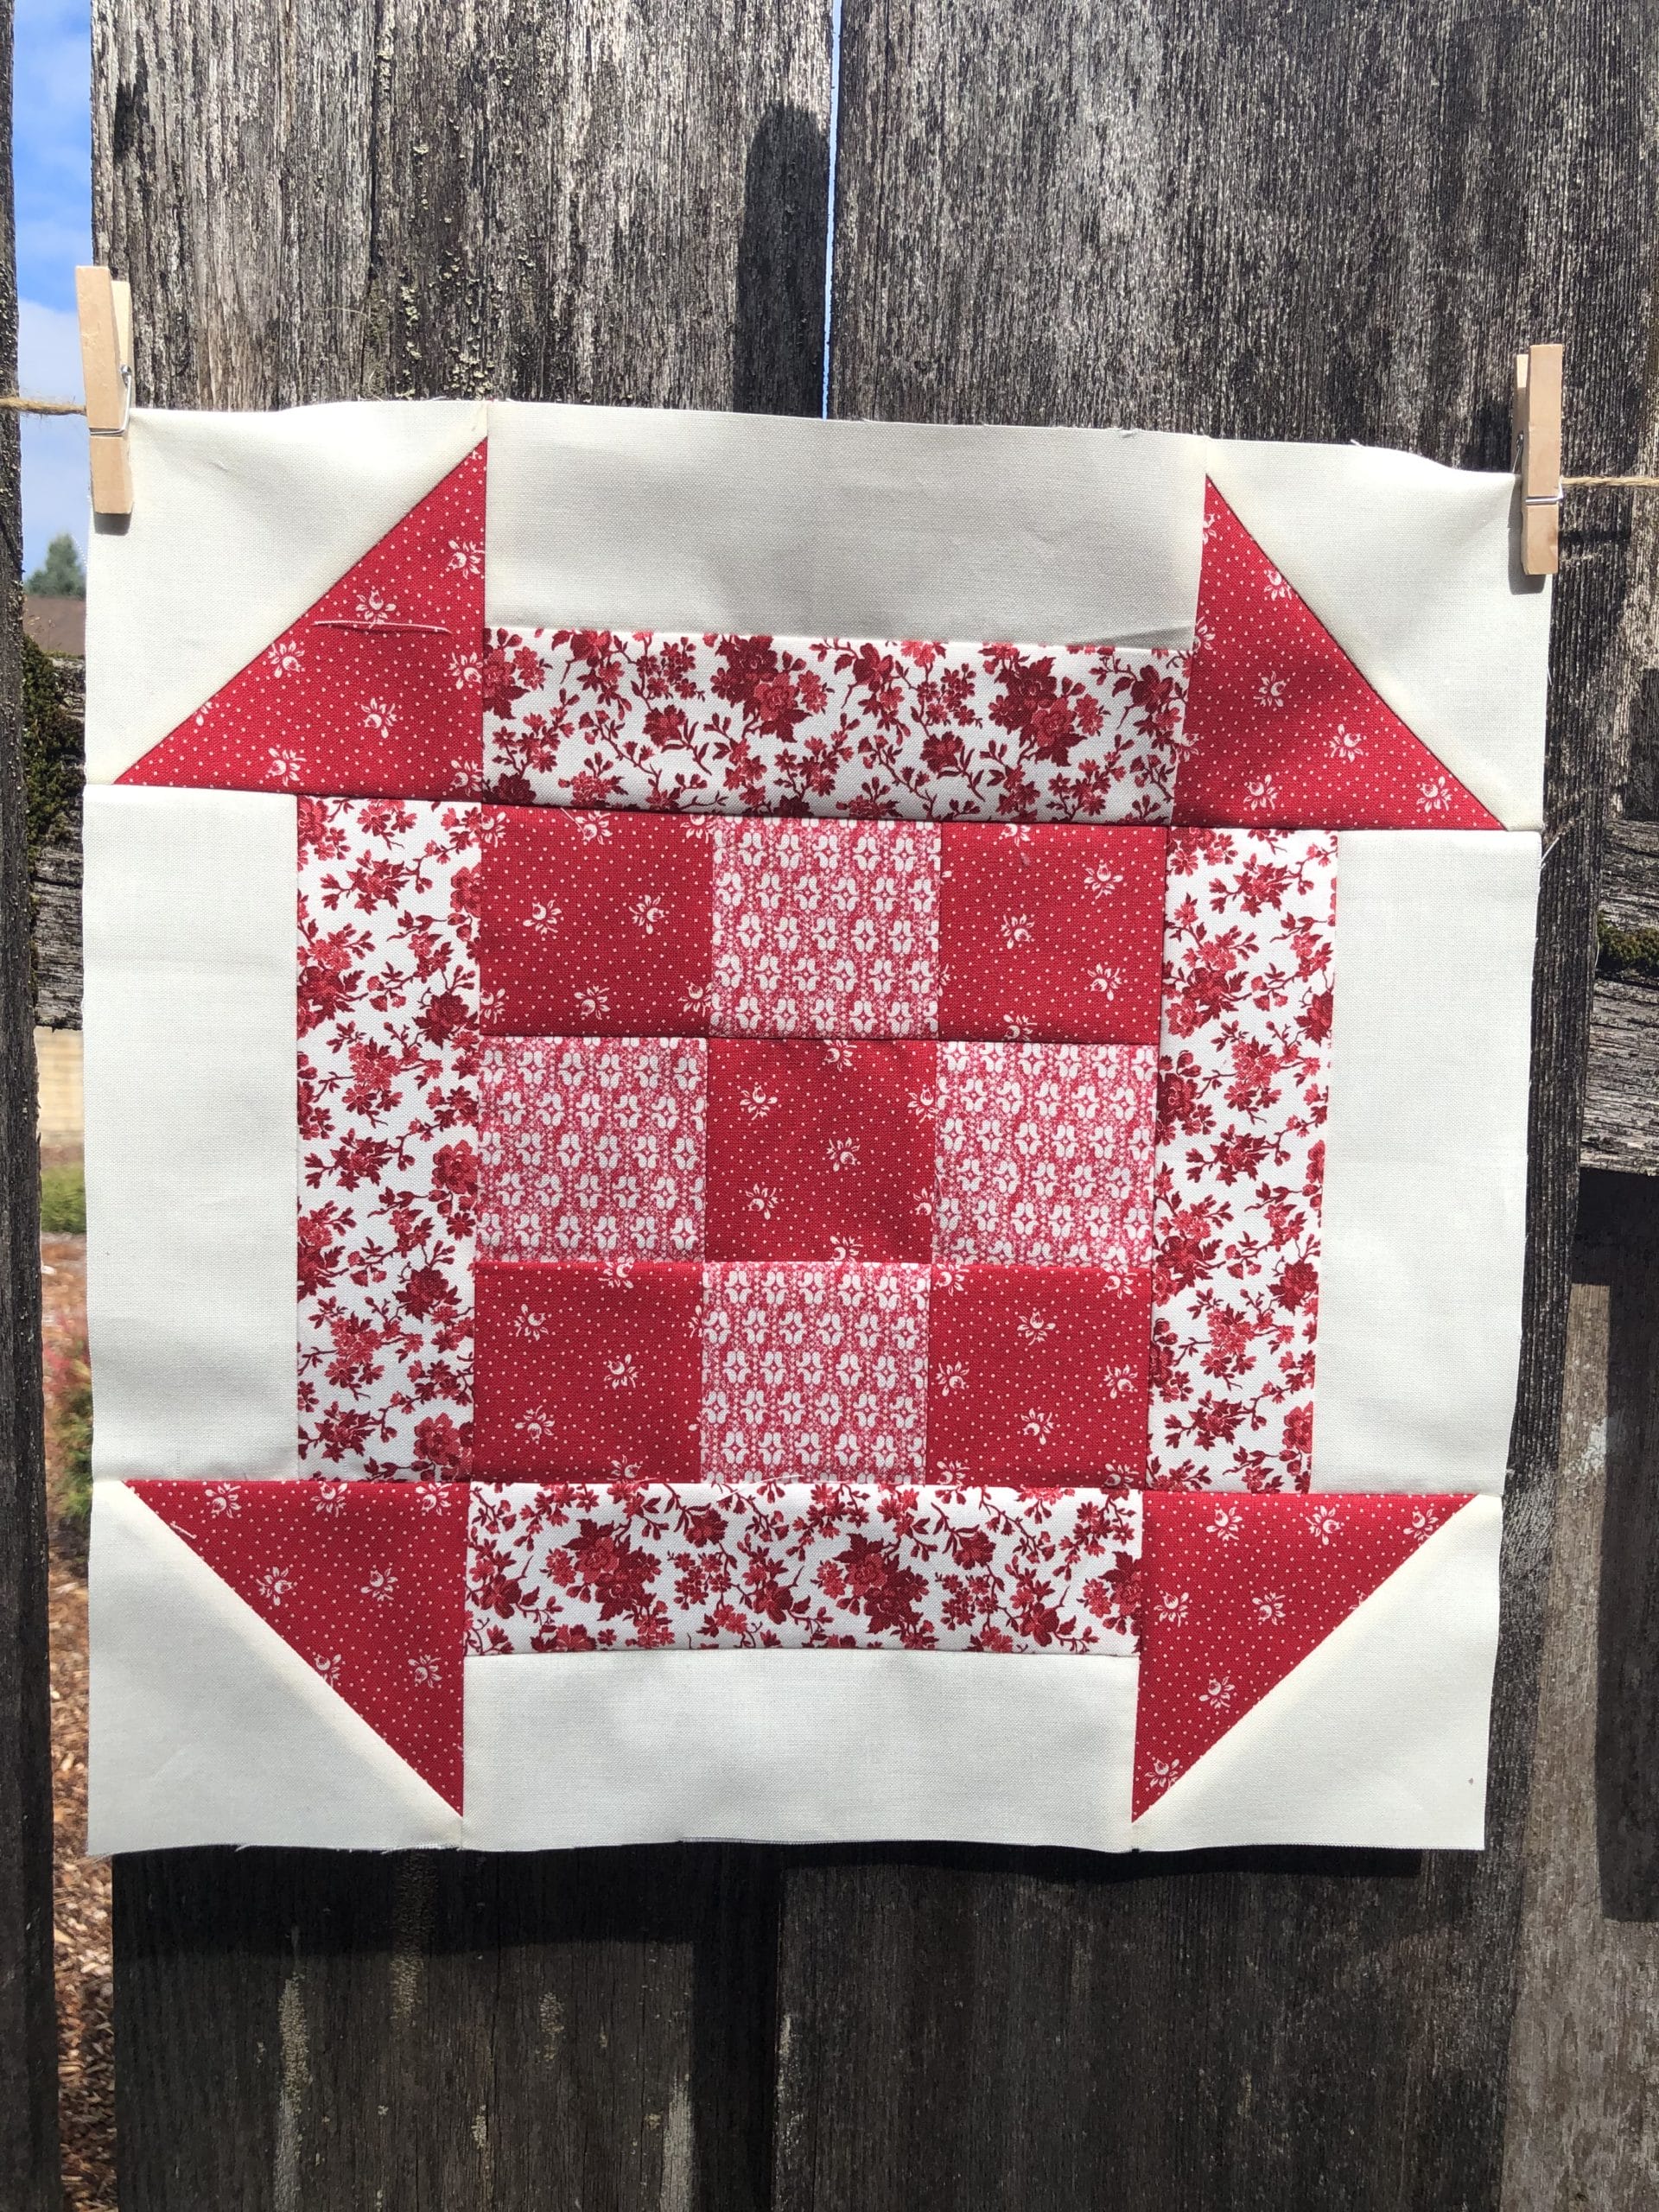
Block # 14
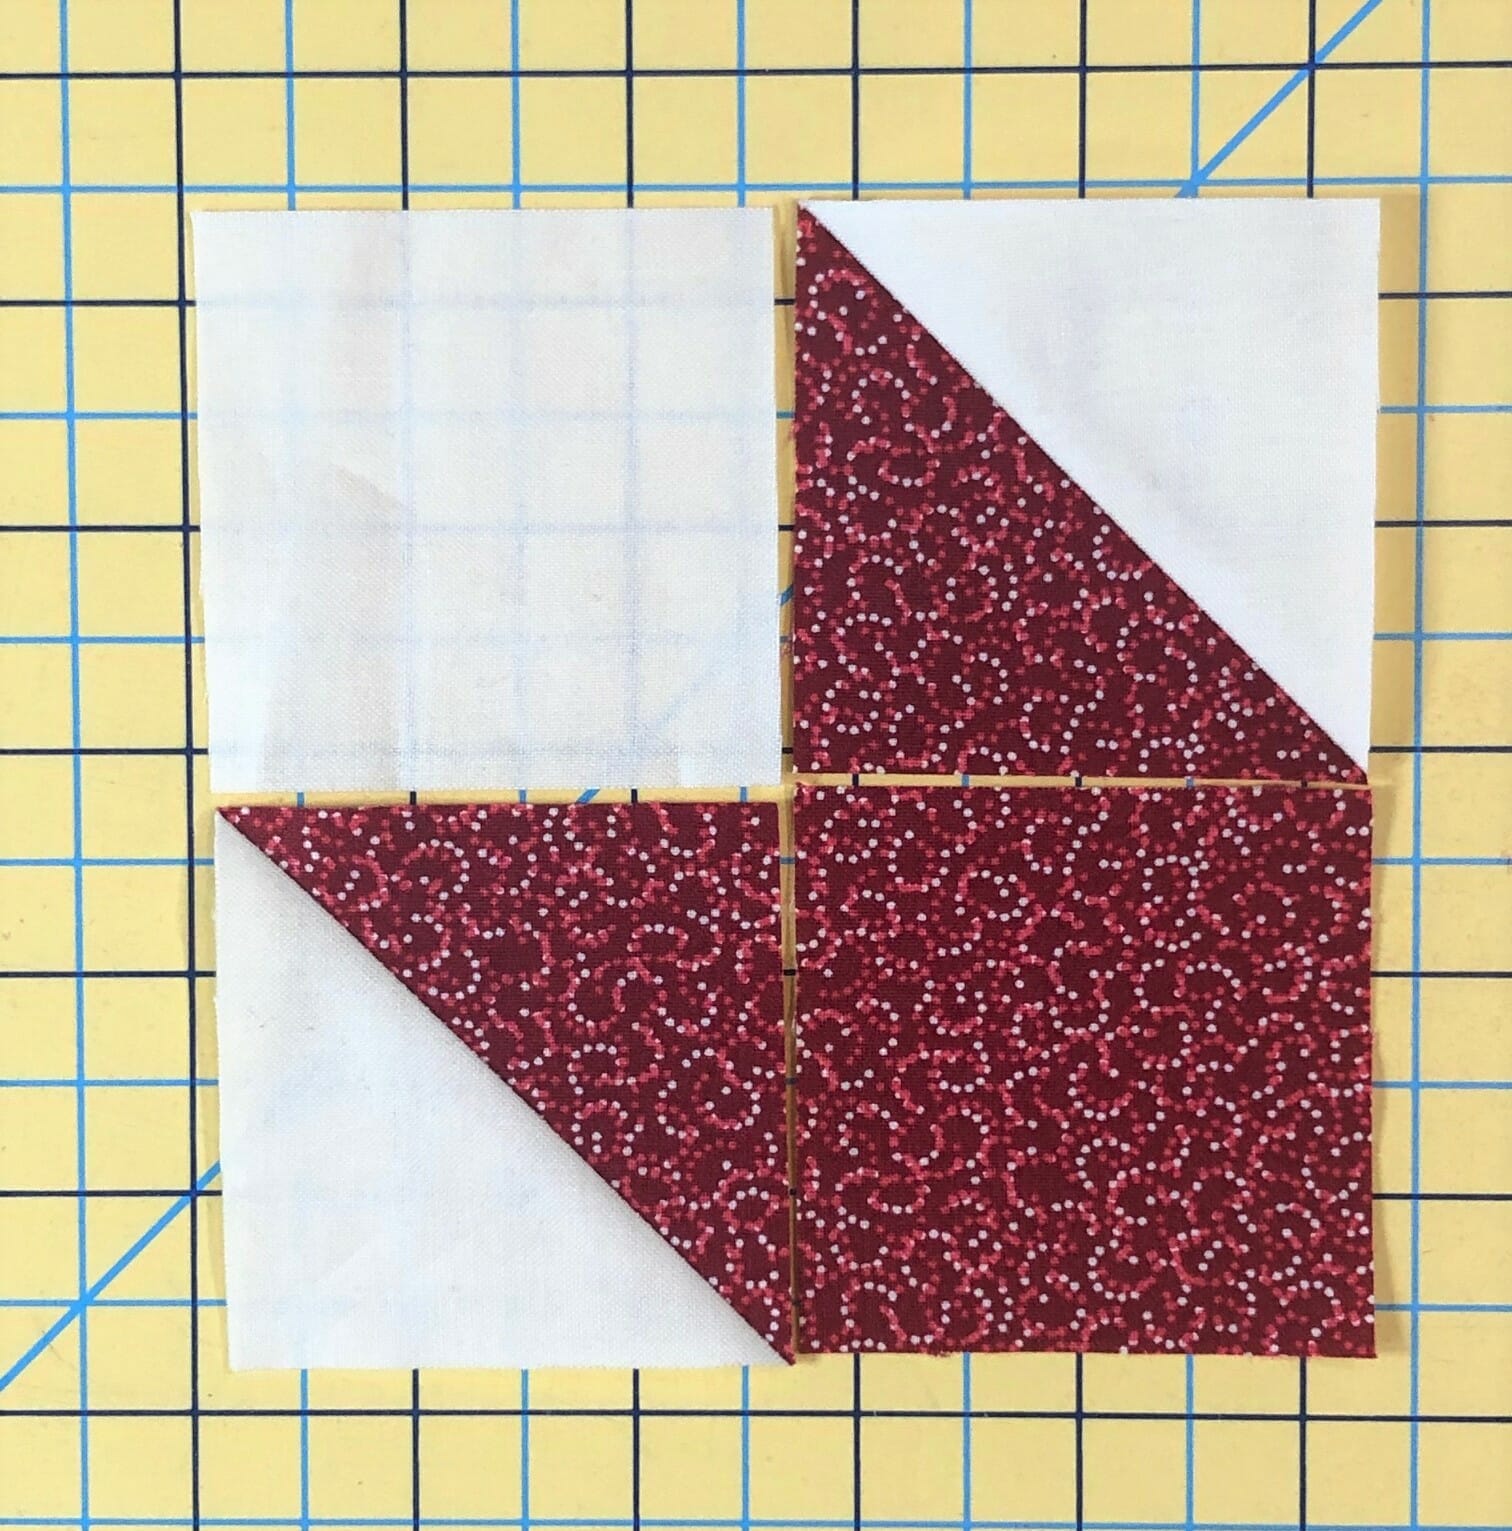
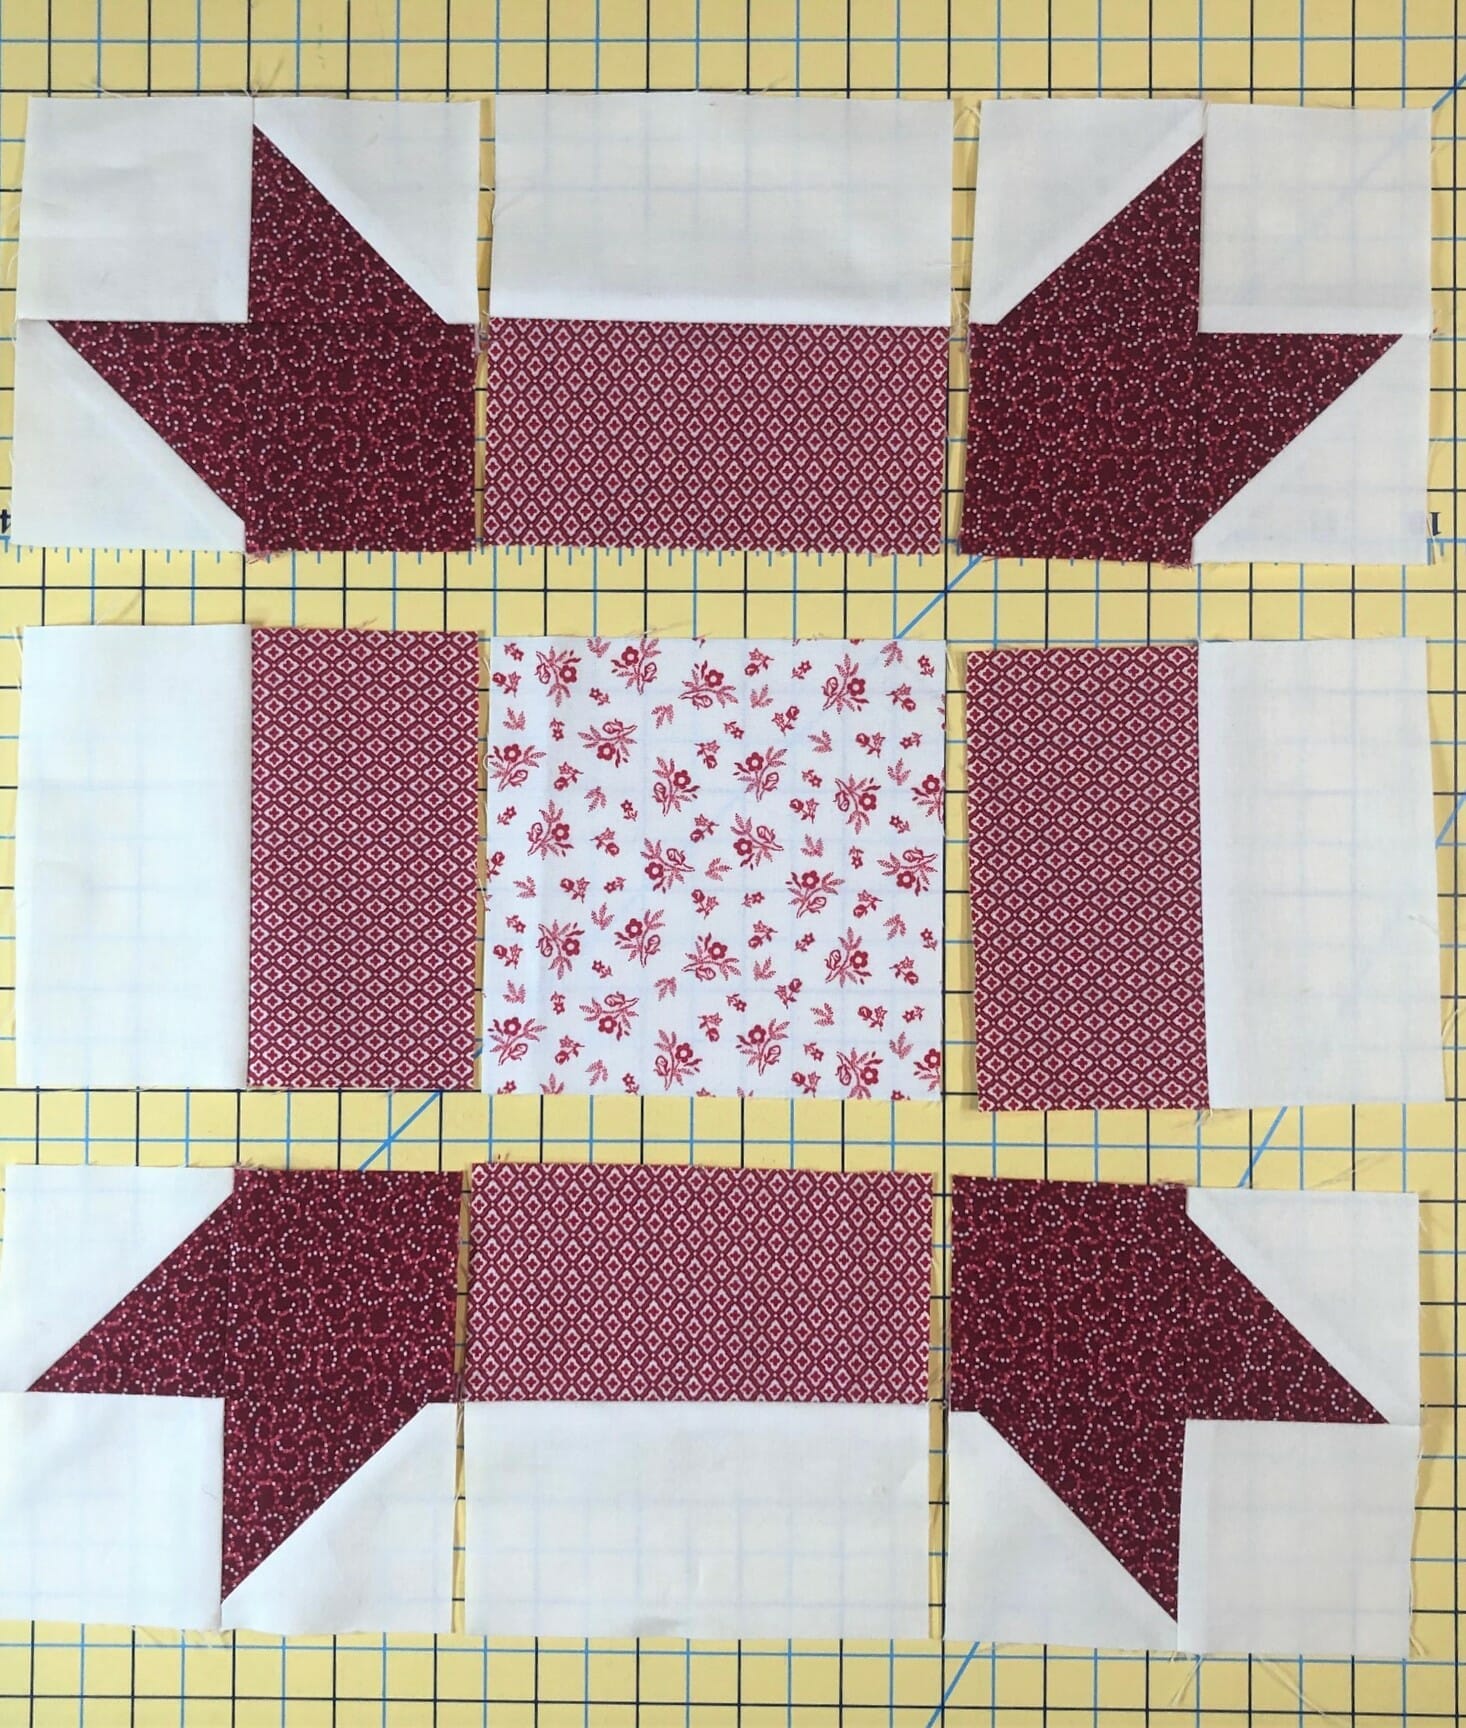
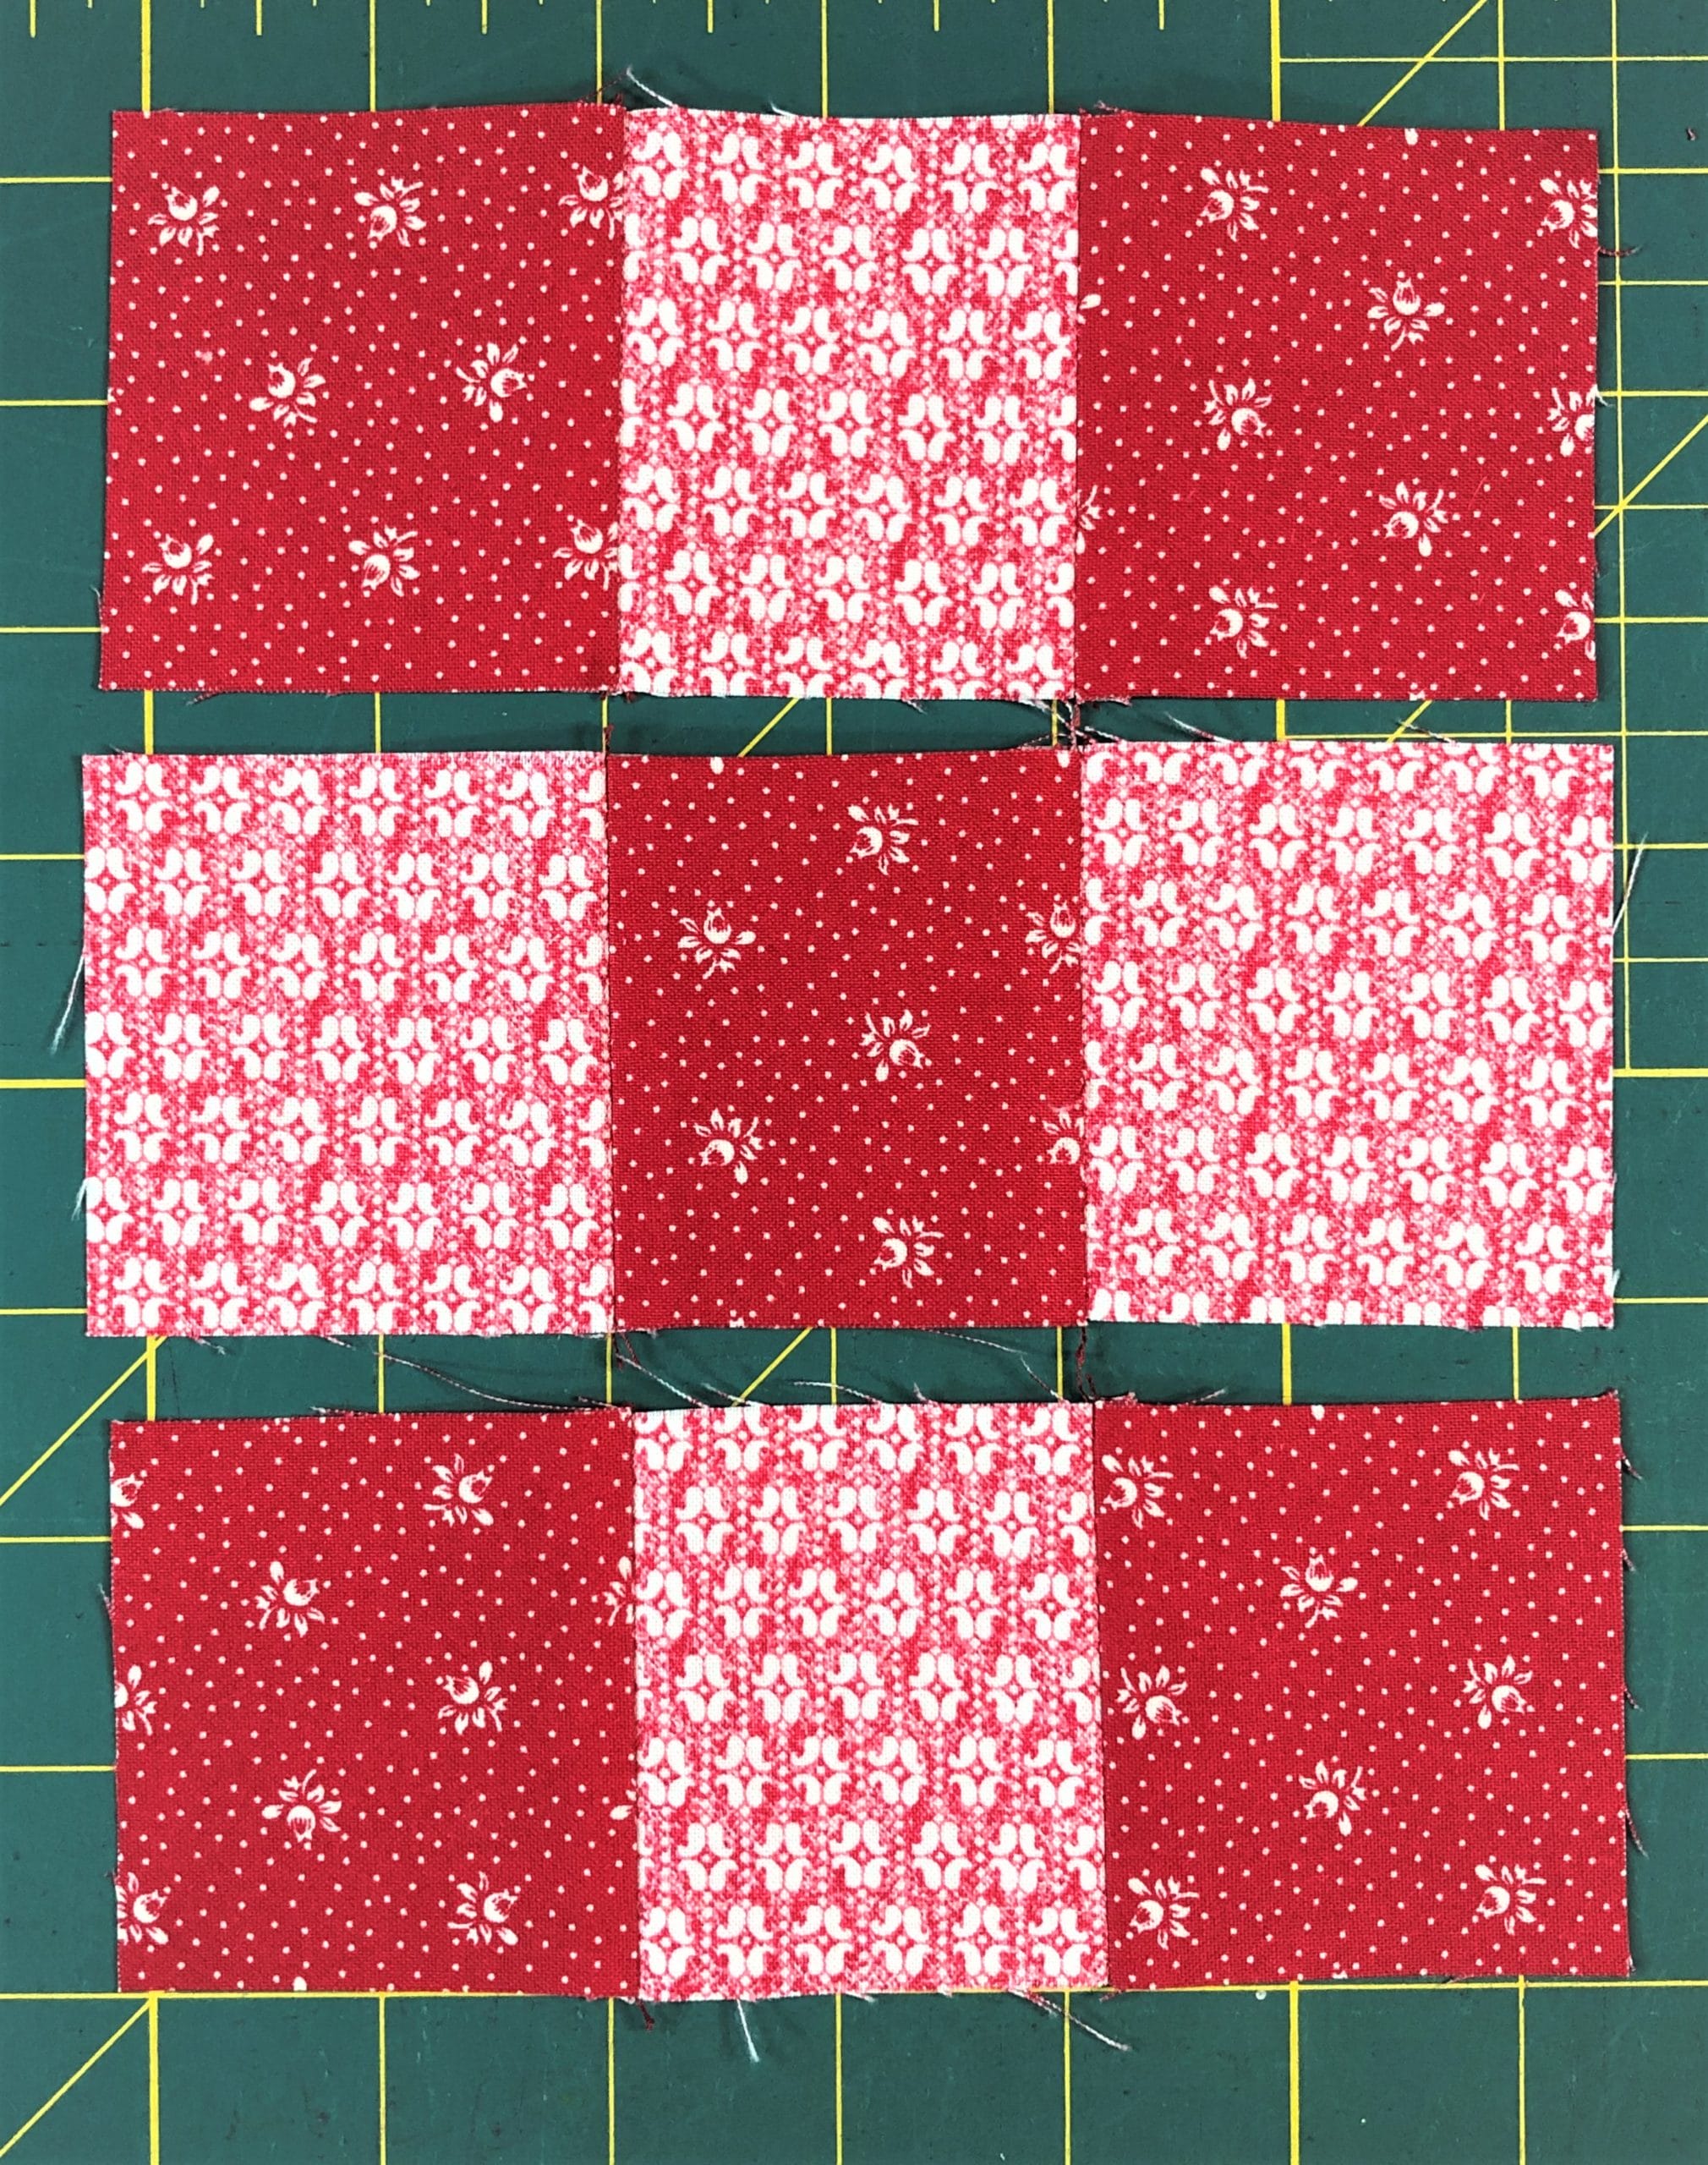
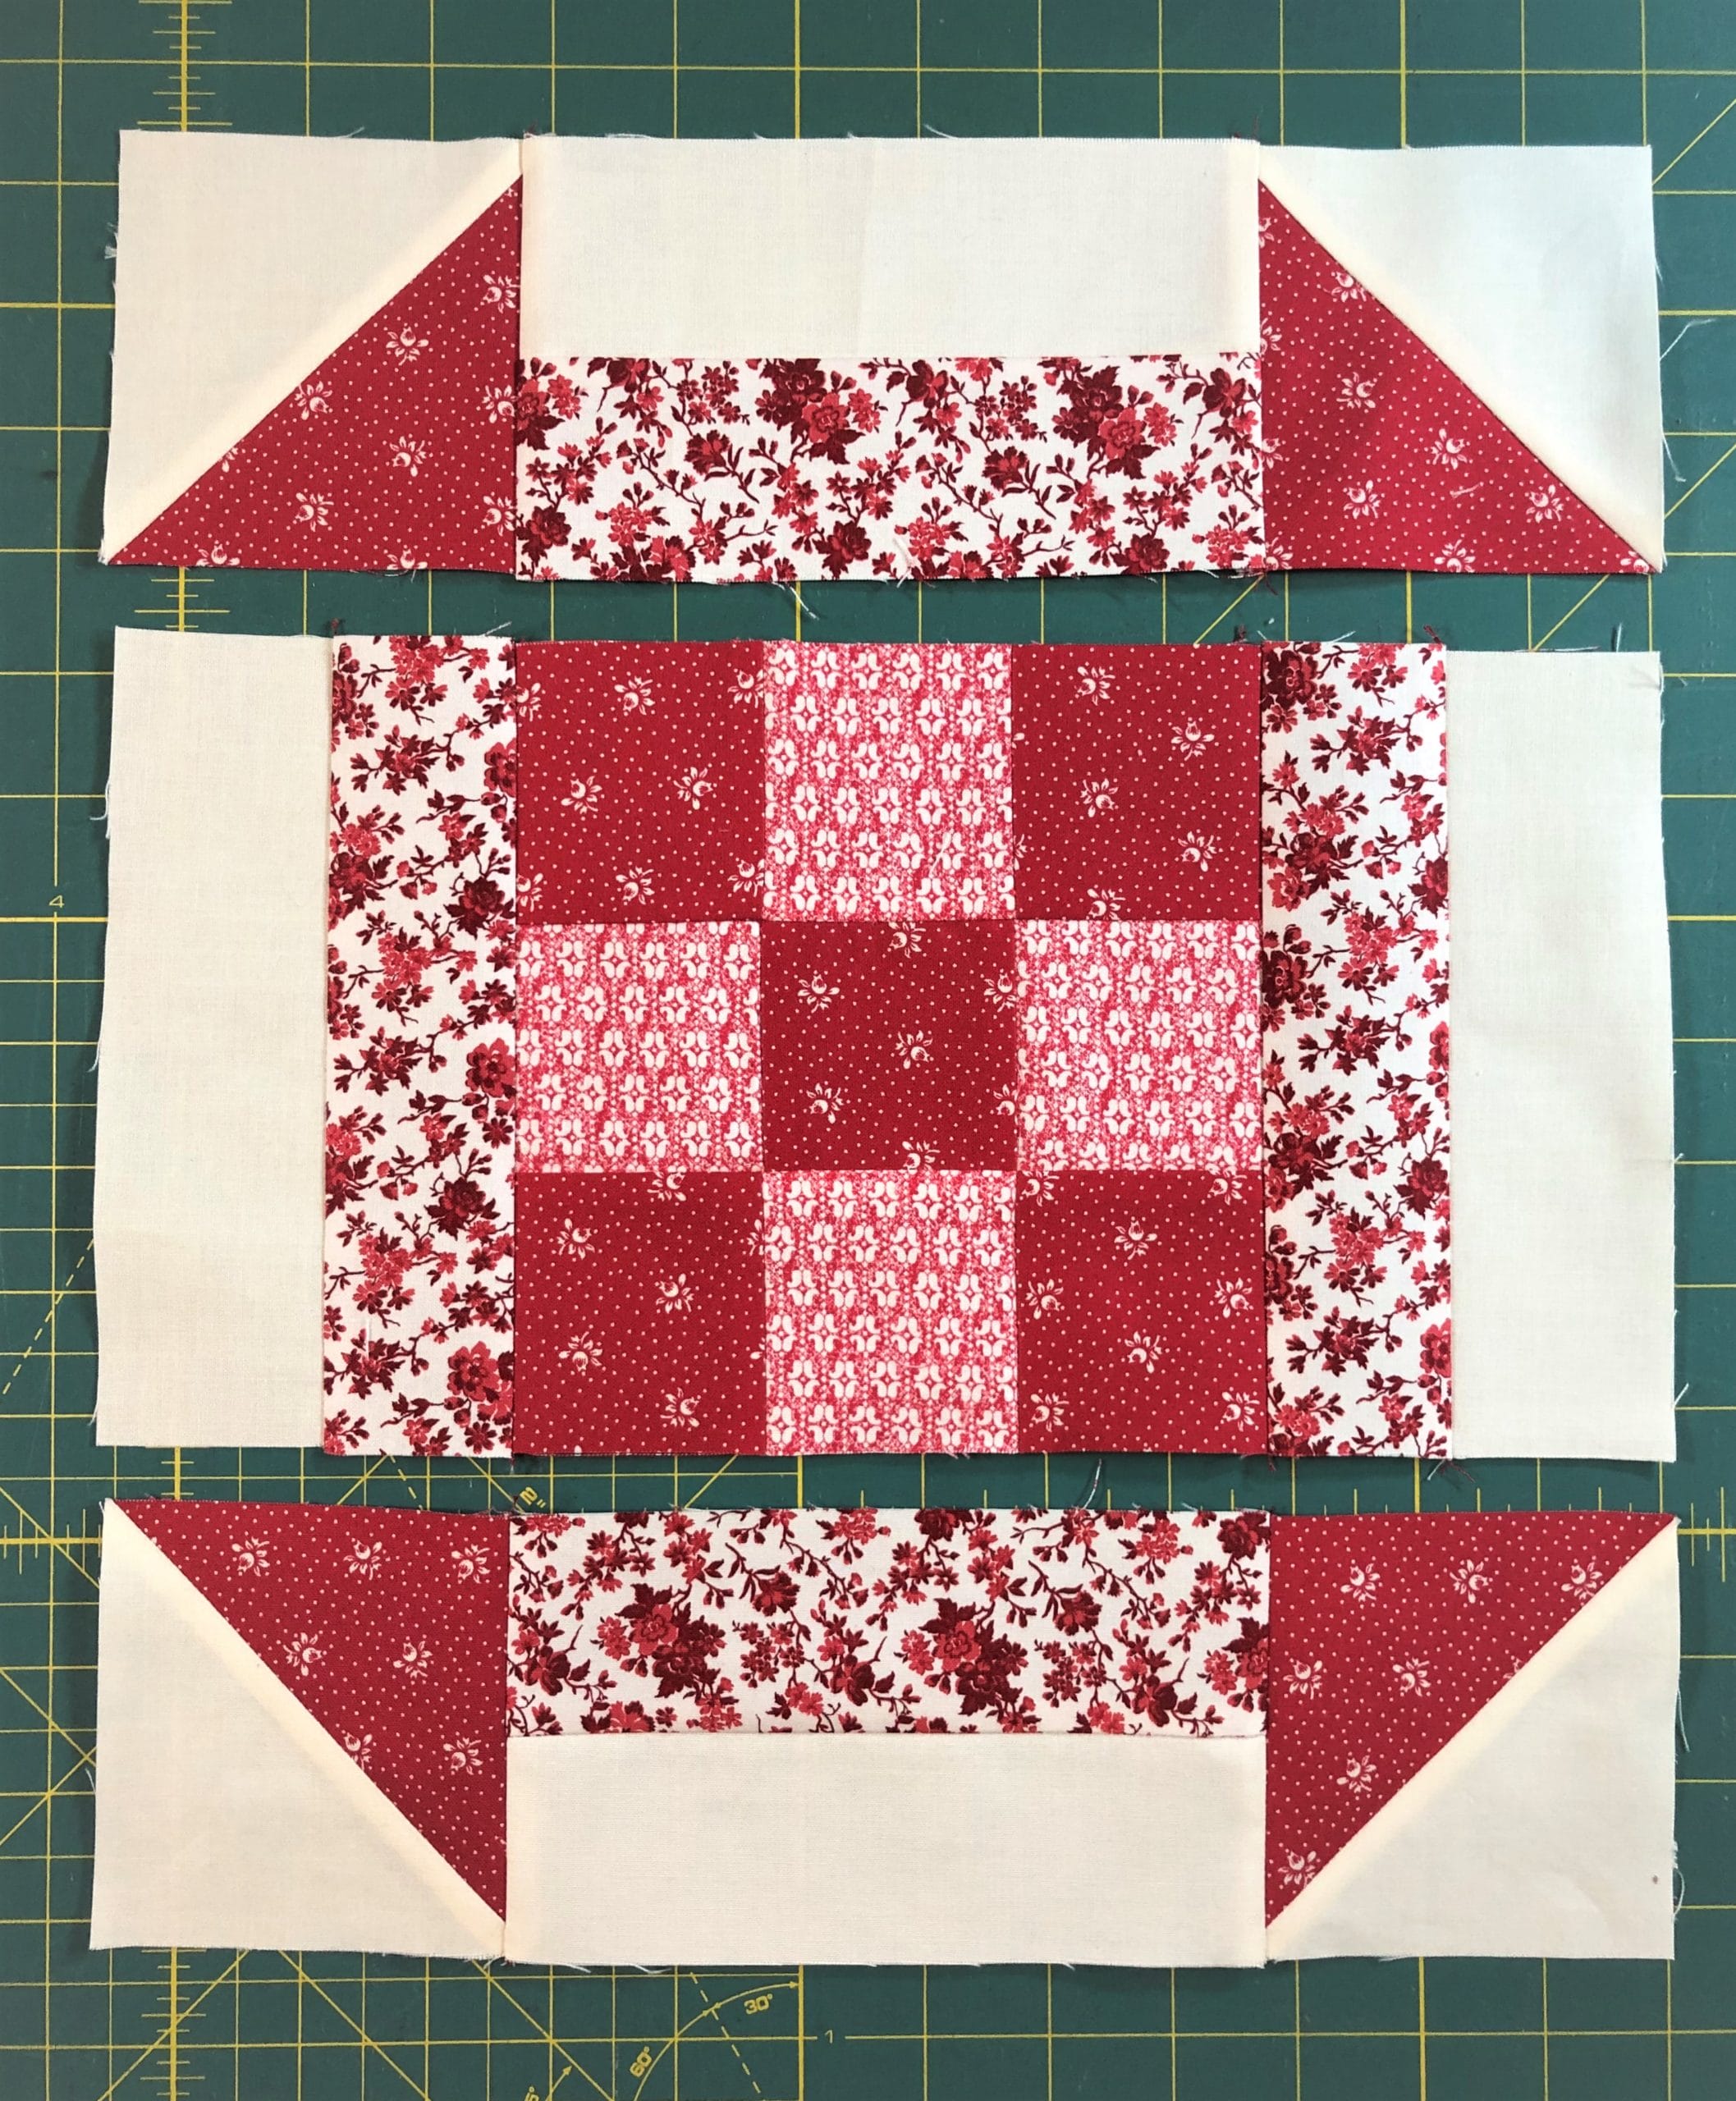
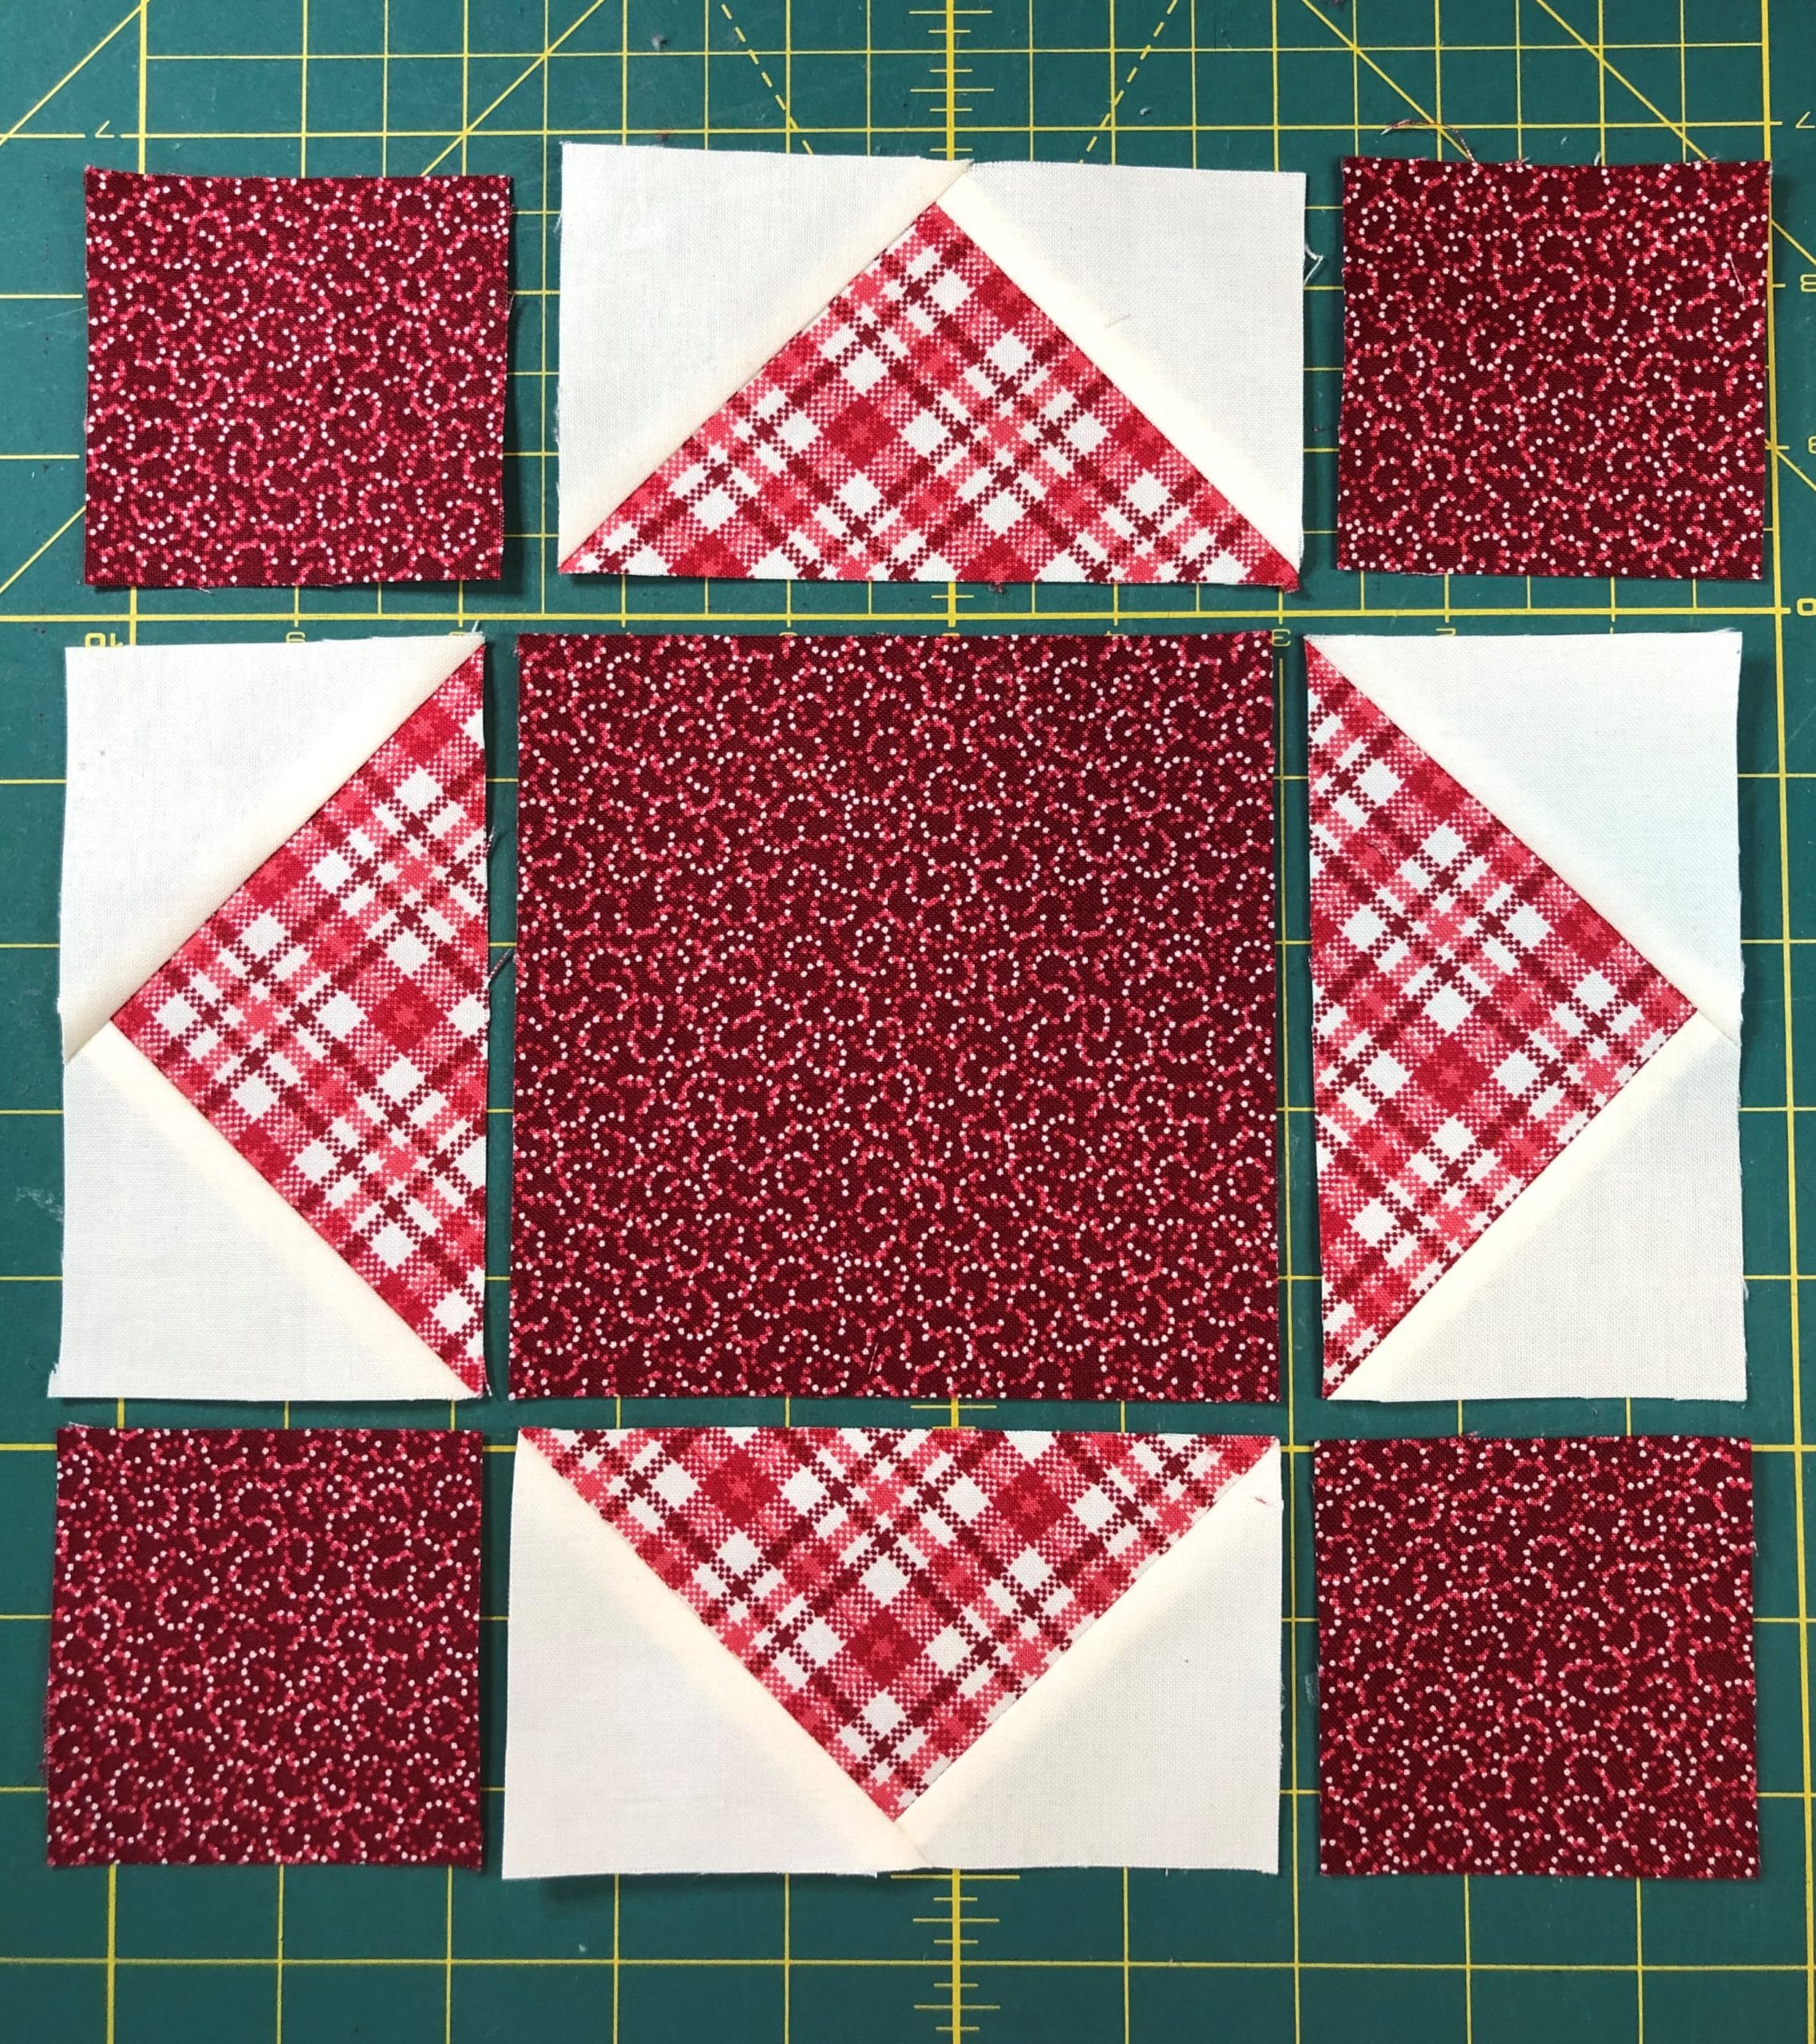
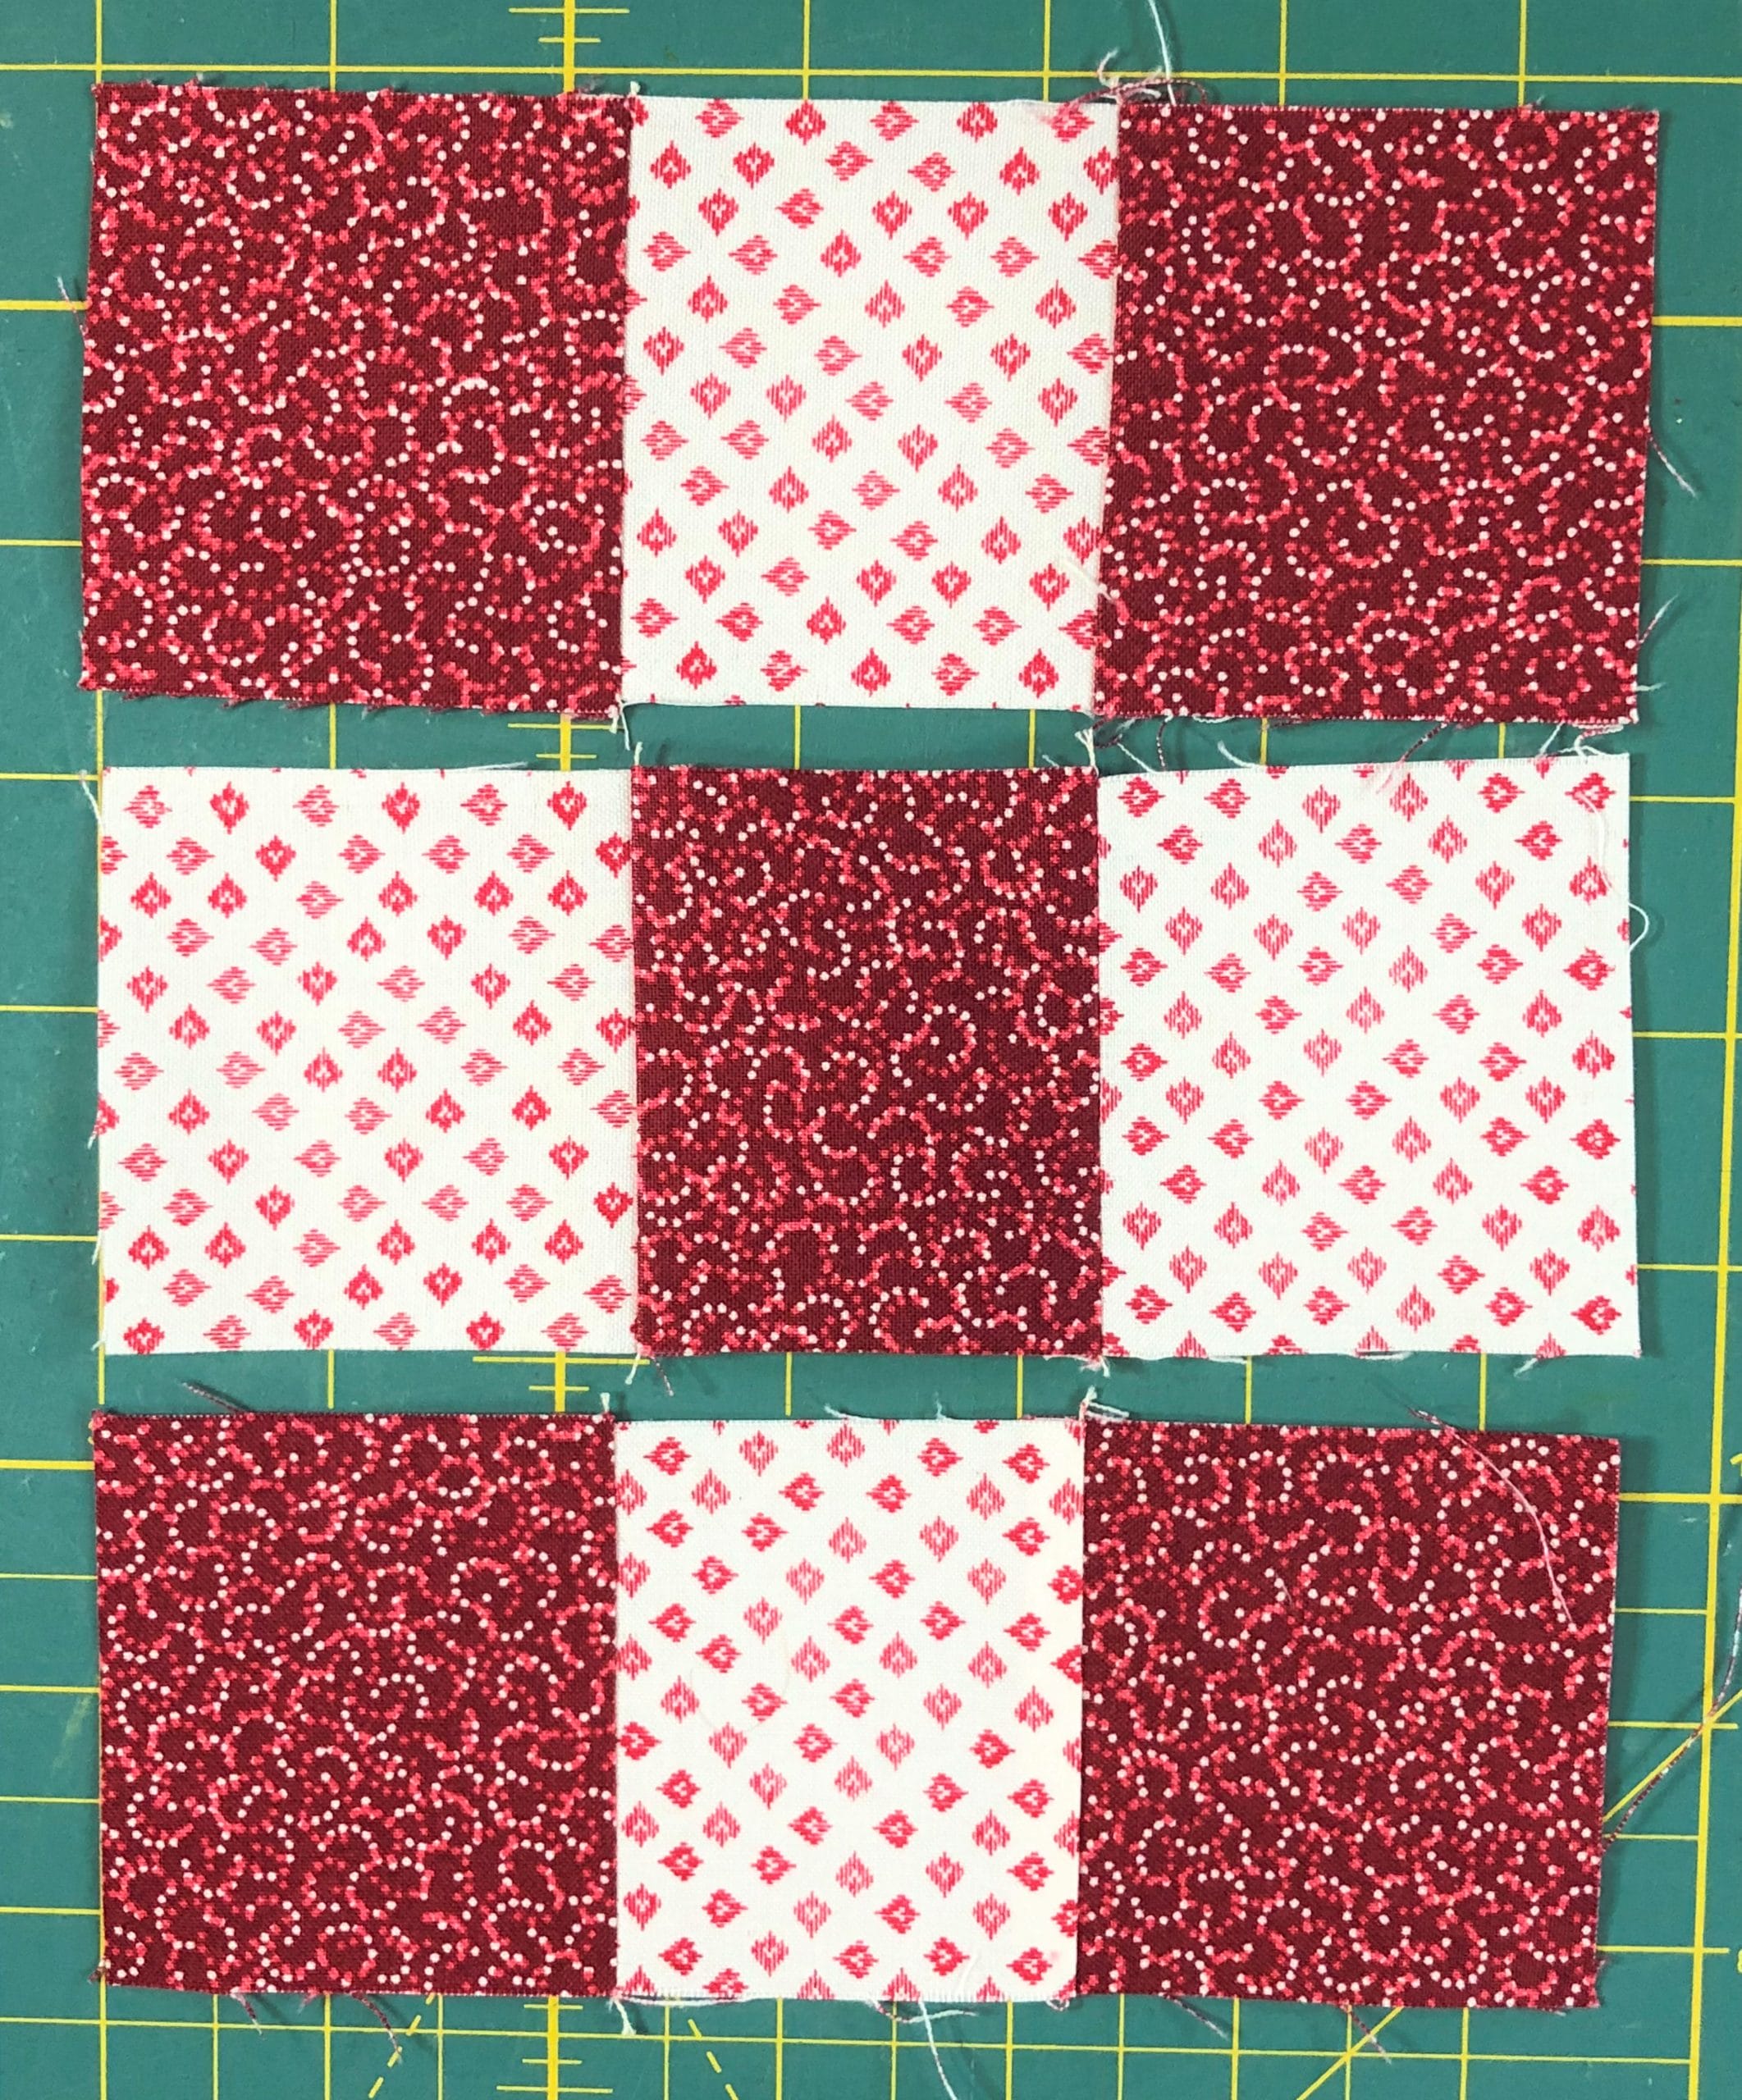
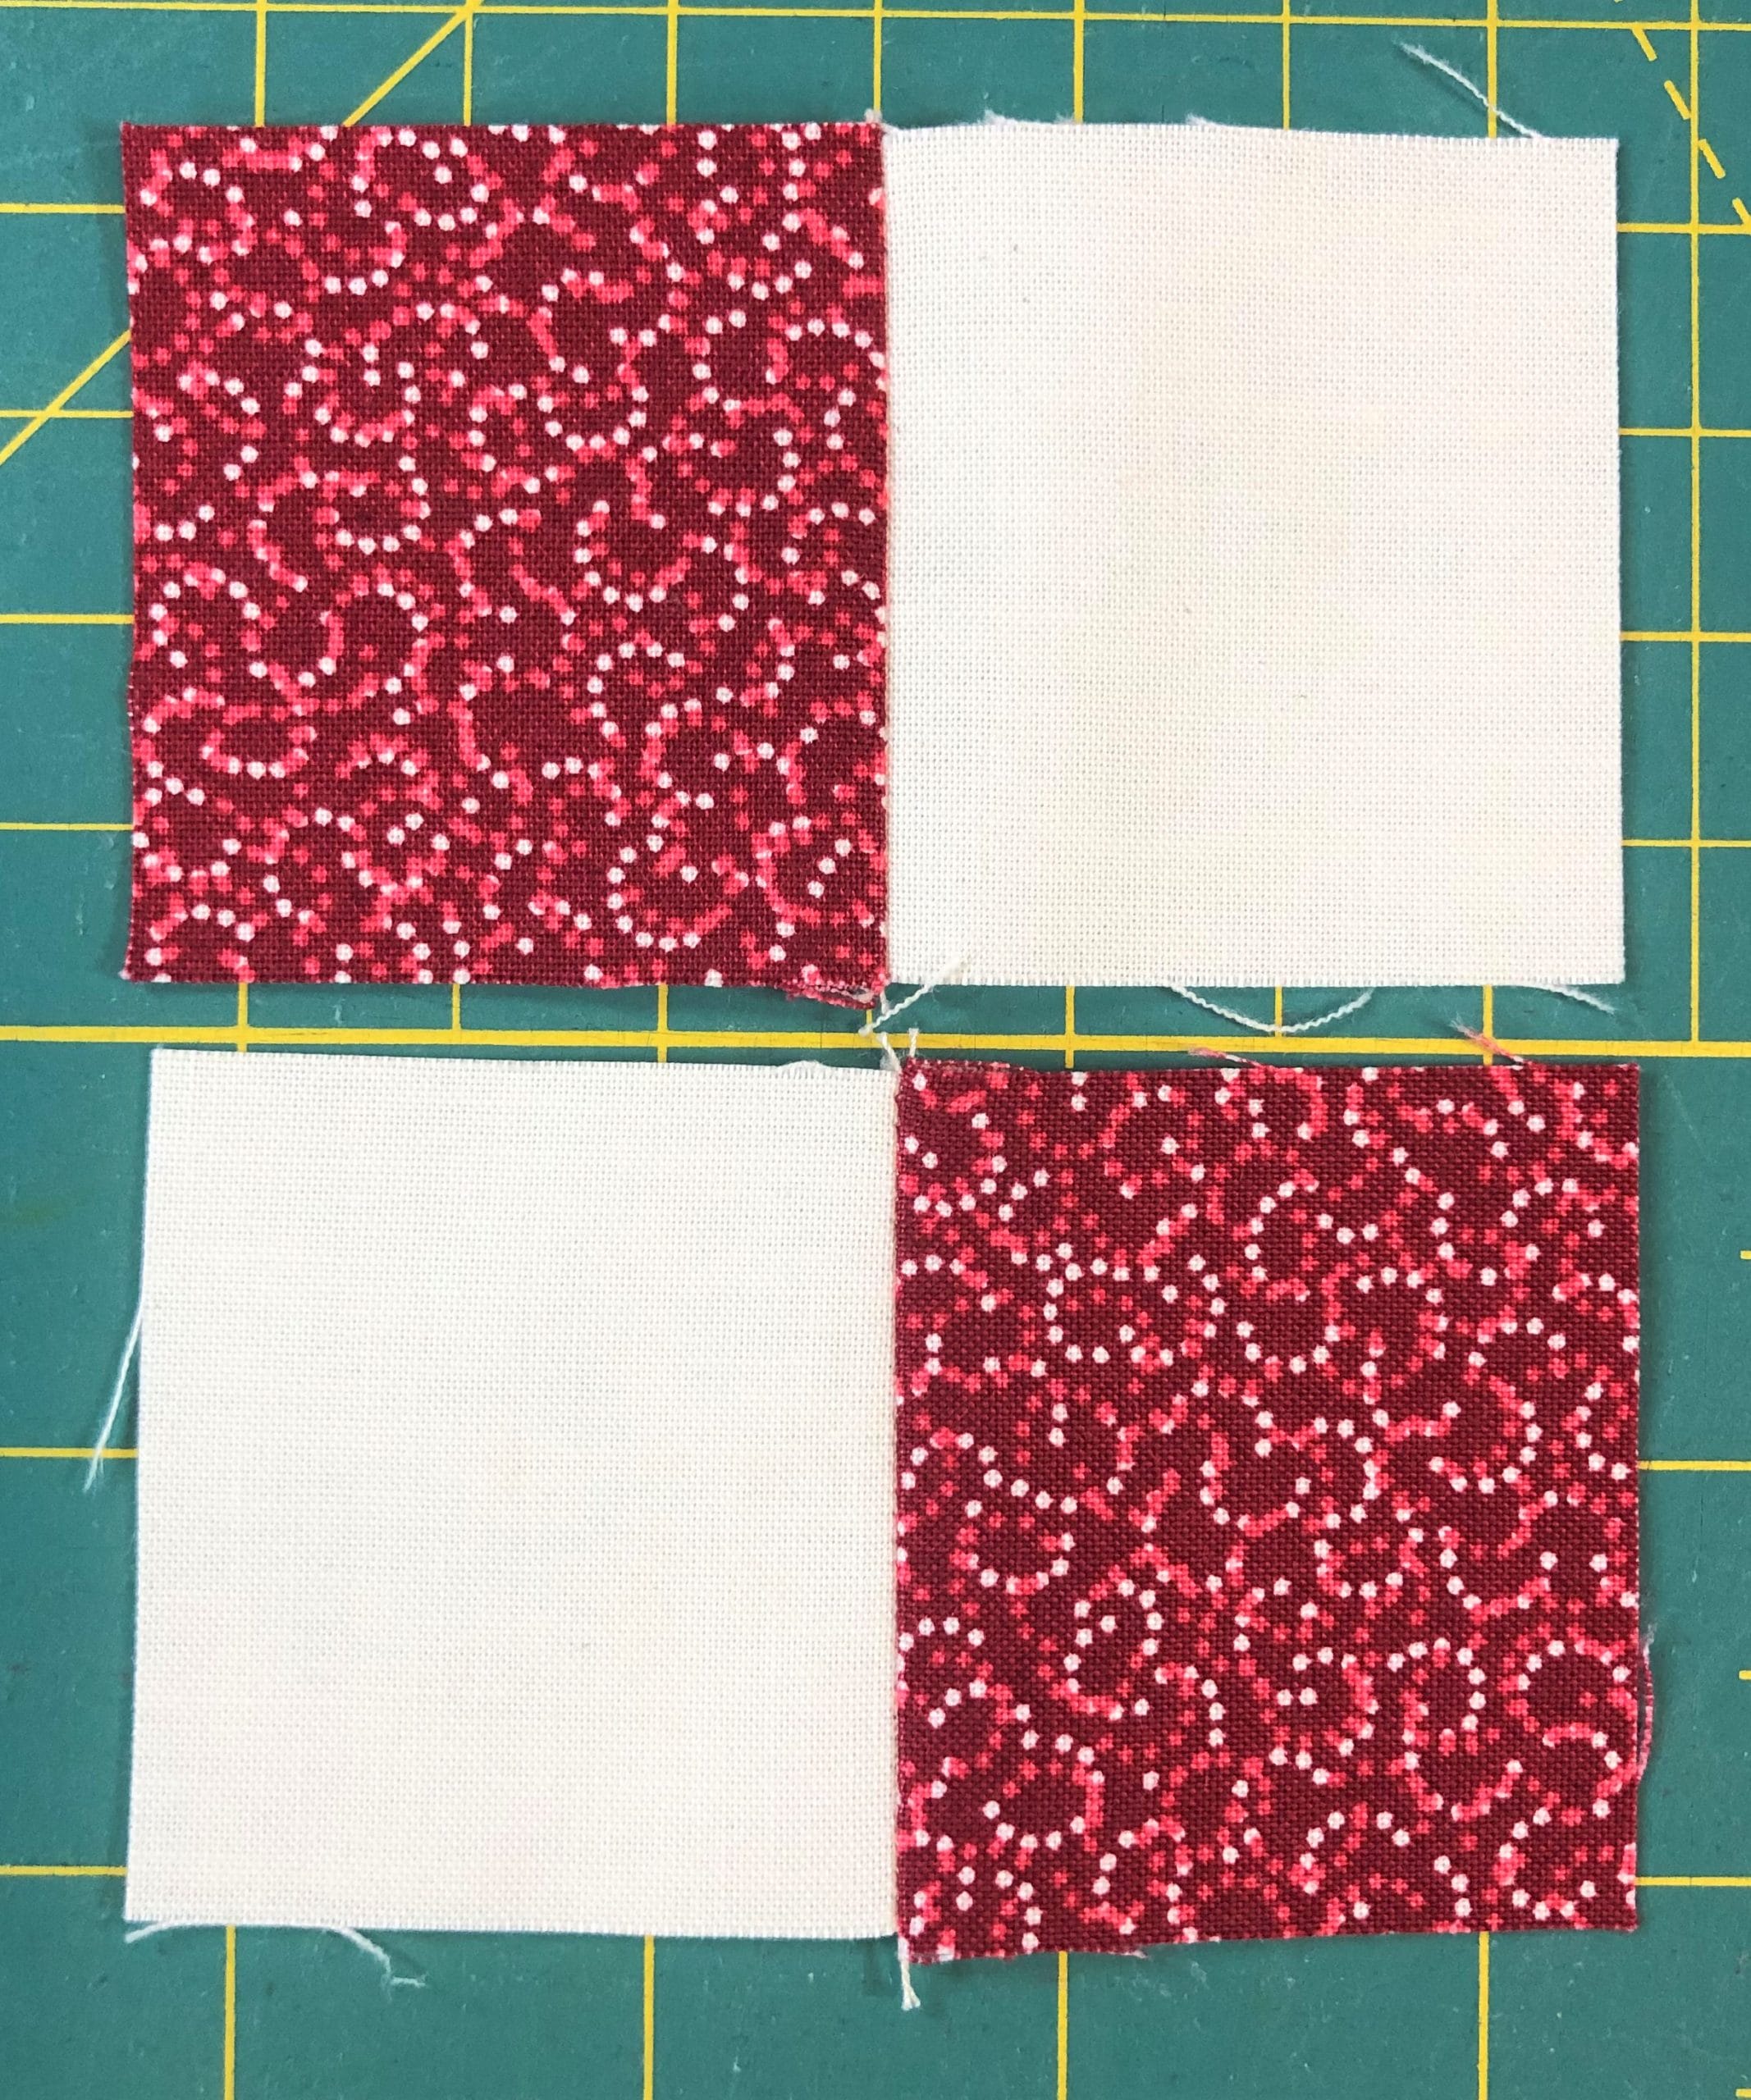
This block has lots of pieces, but it’s pretty straightforward. We’ll begin by making a simple 4-patch.
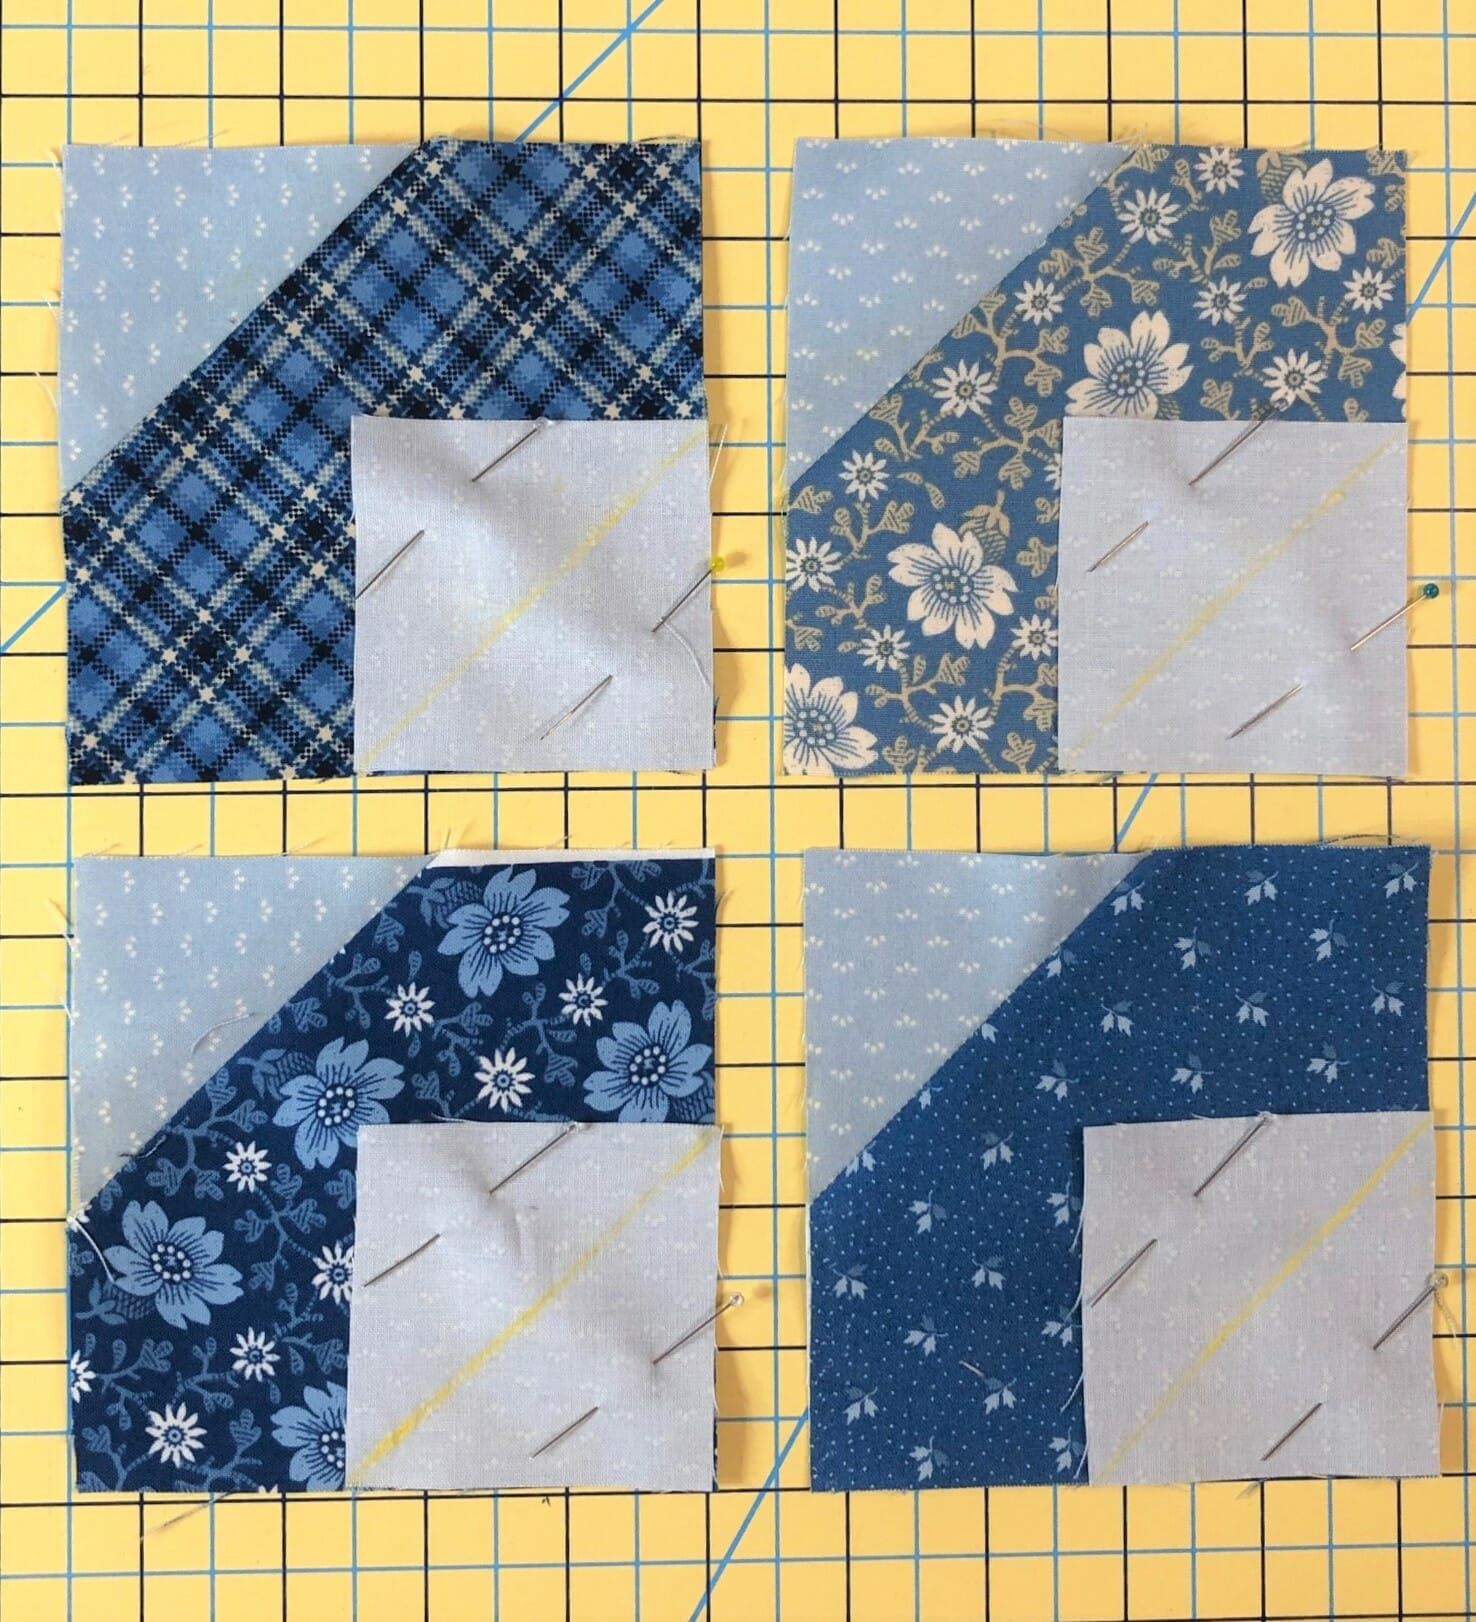
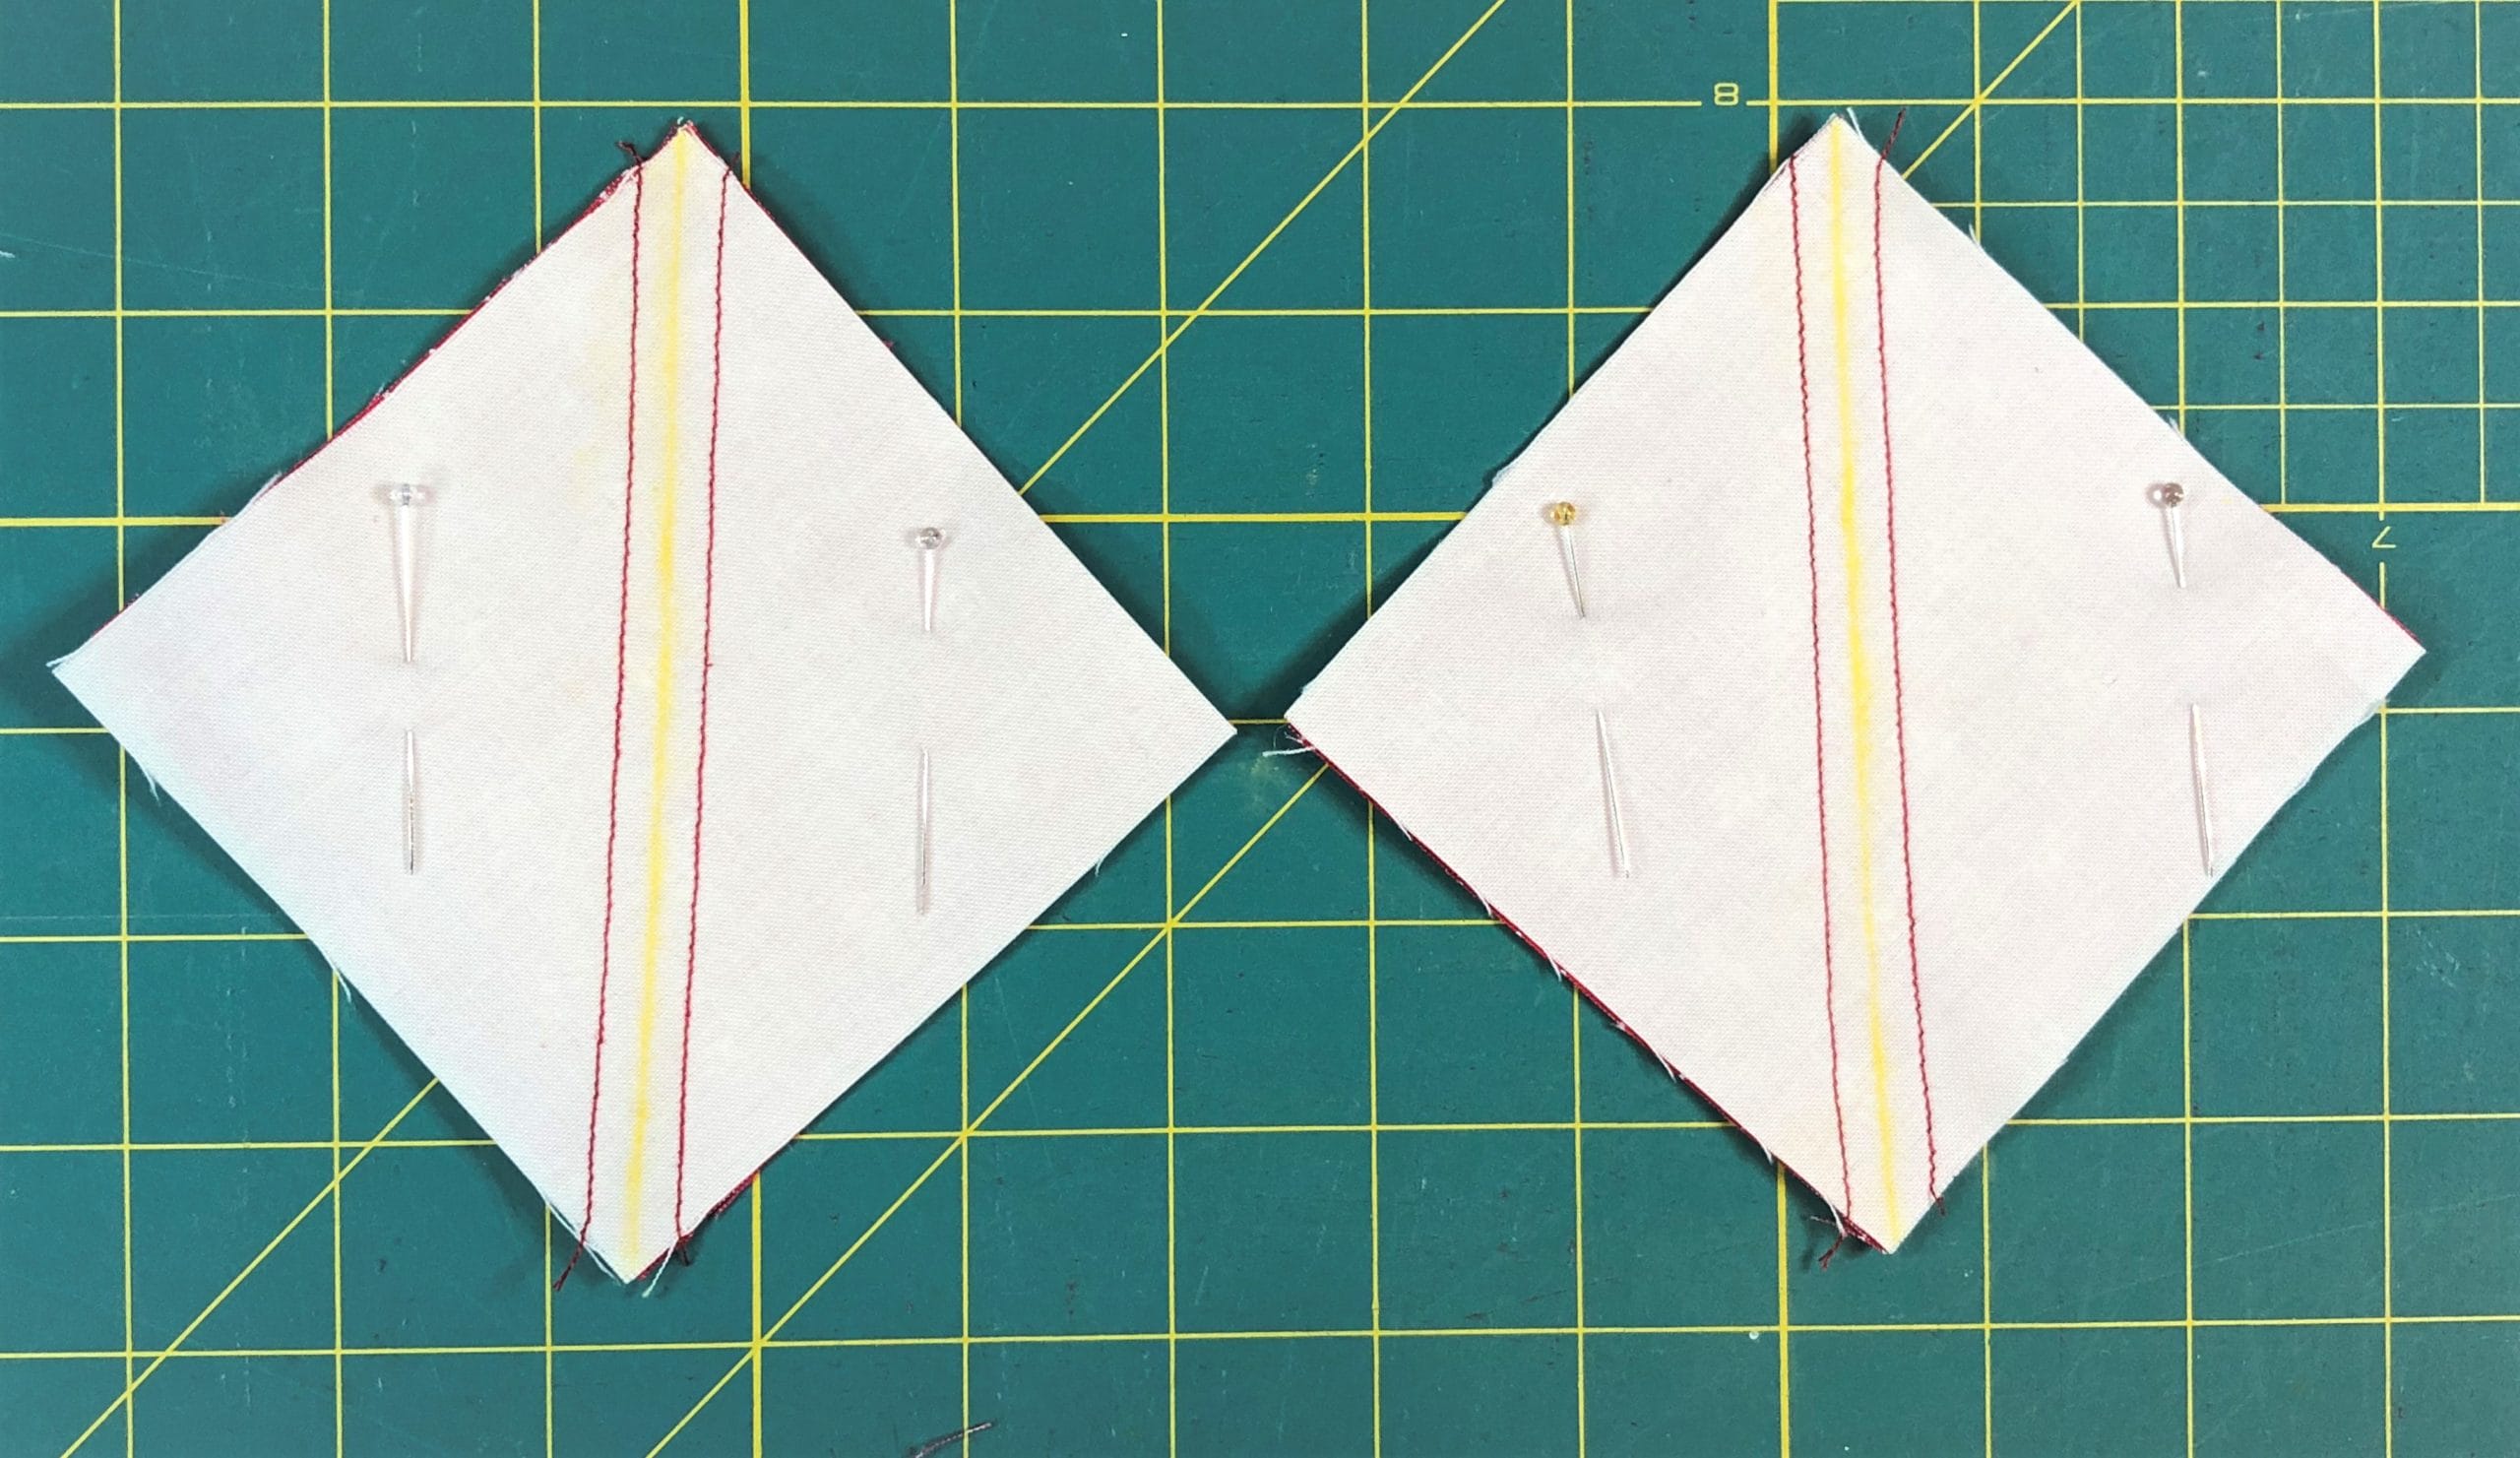
In steps 2 and 3 we will make eight half square triangles – four of each kind.
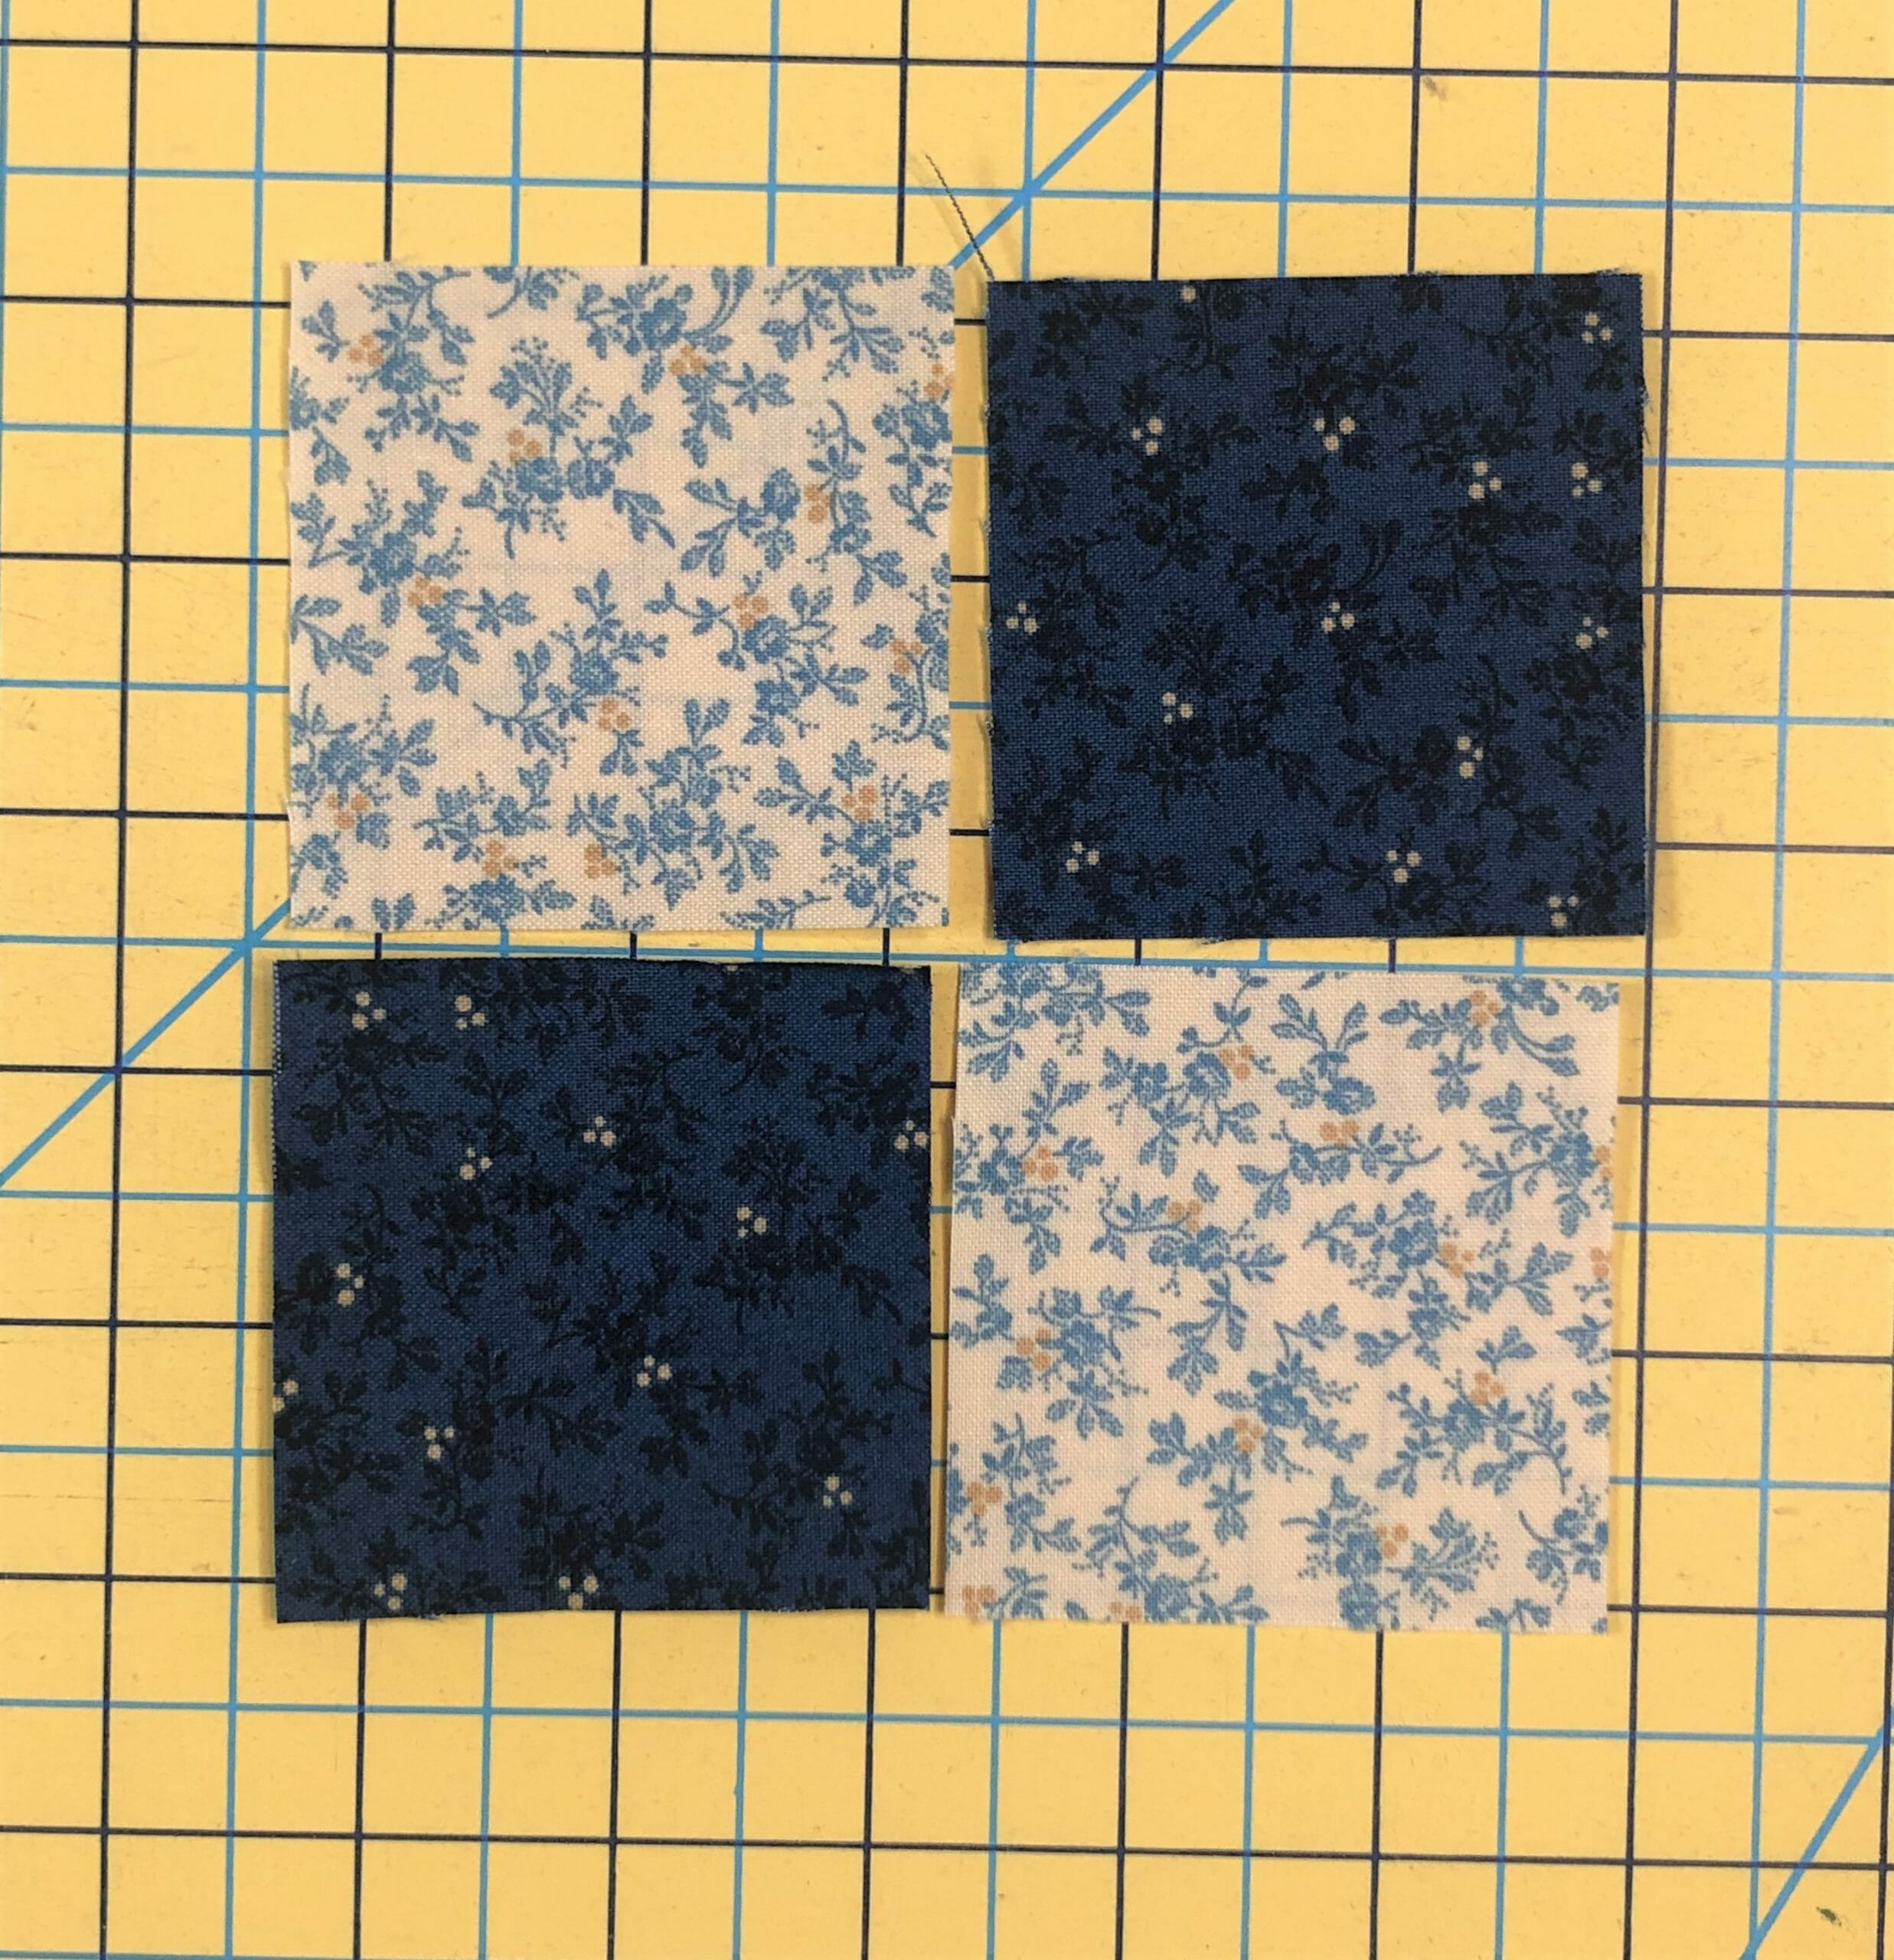
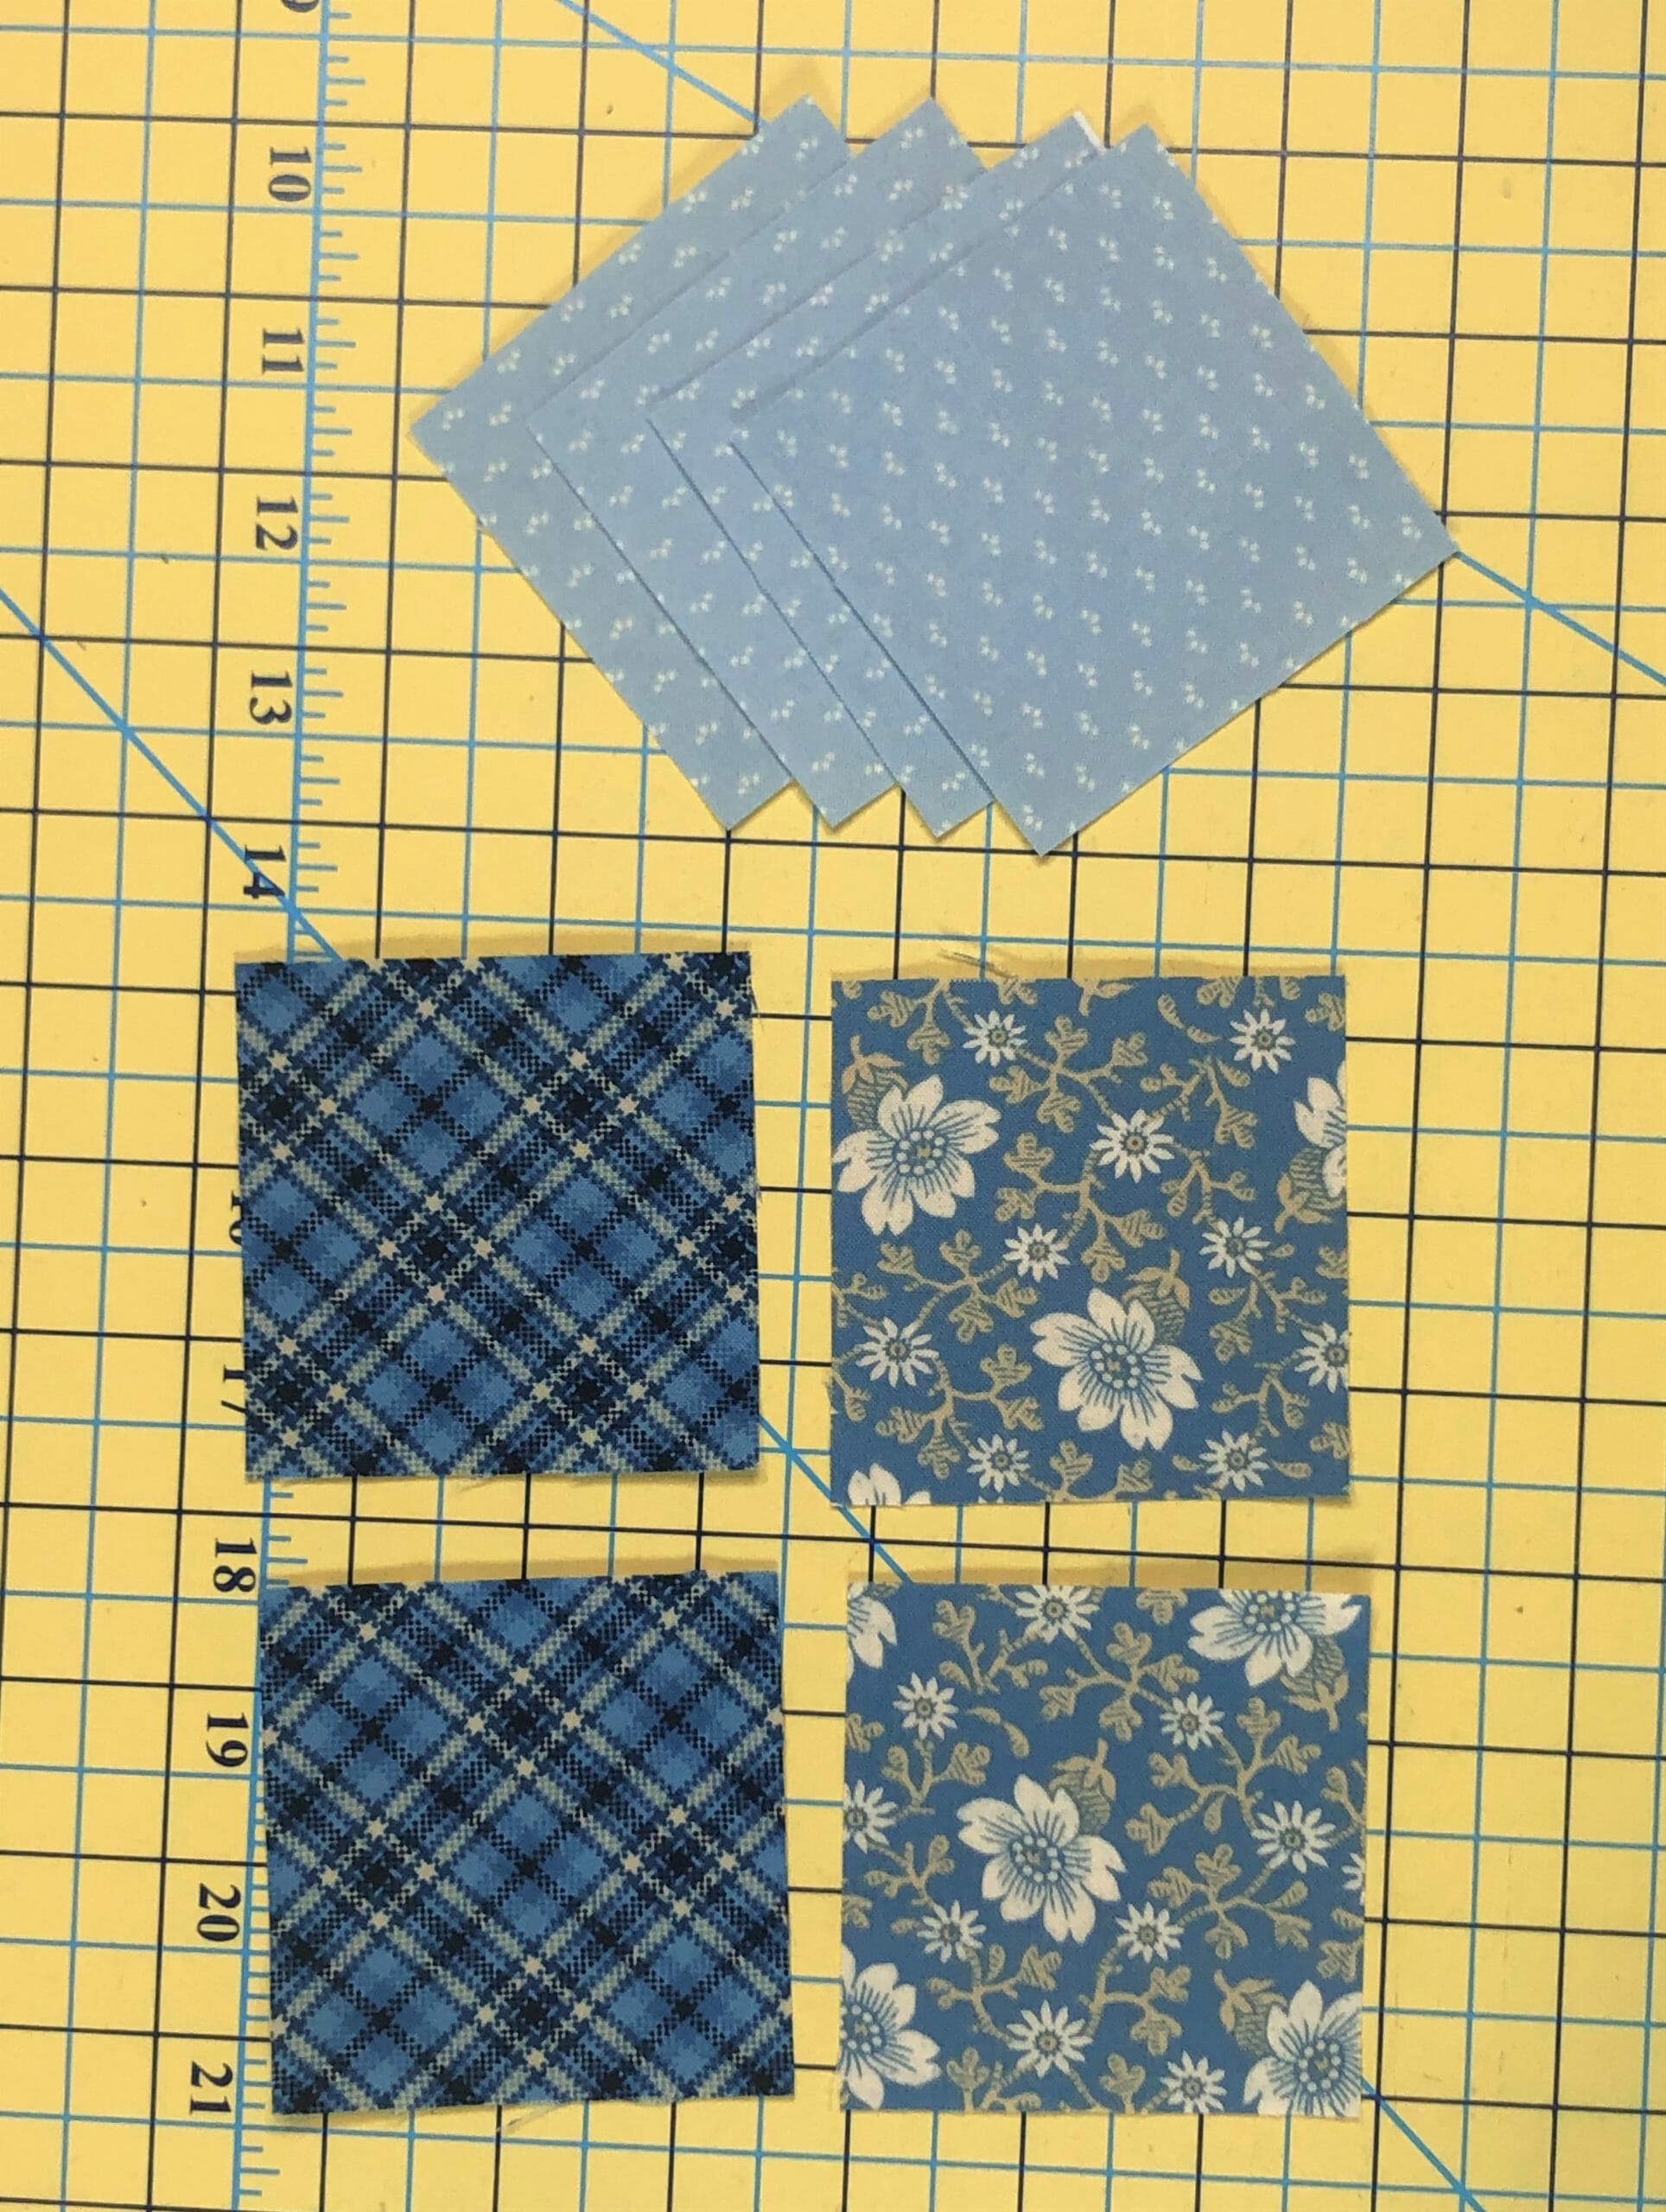
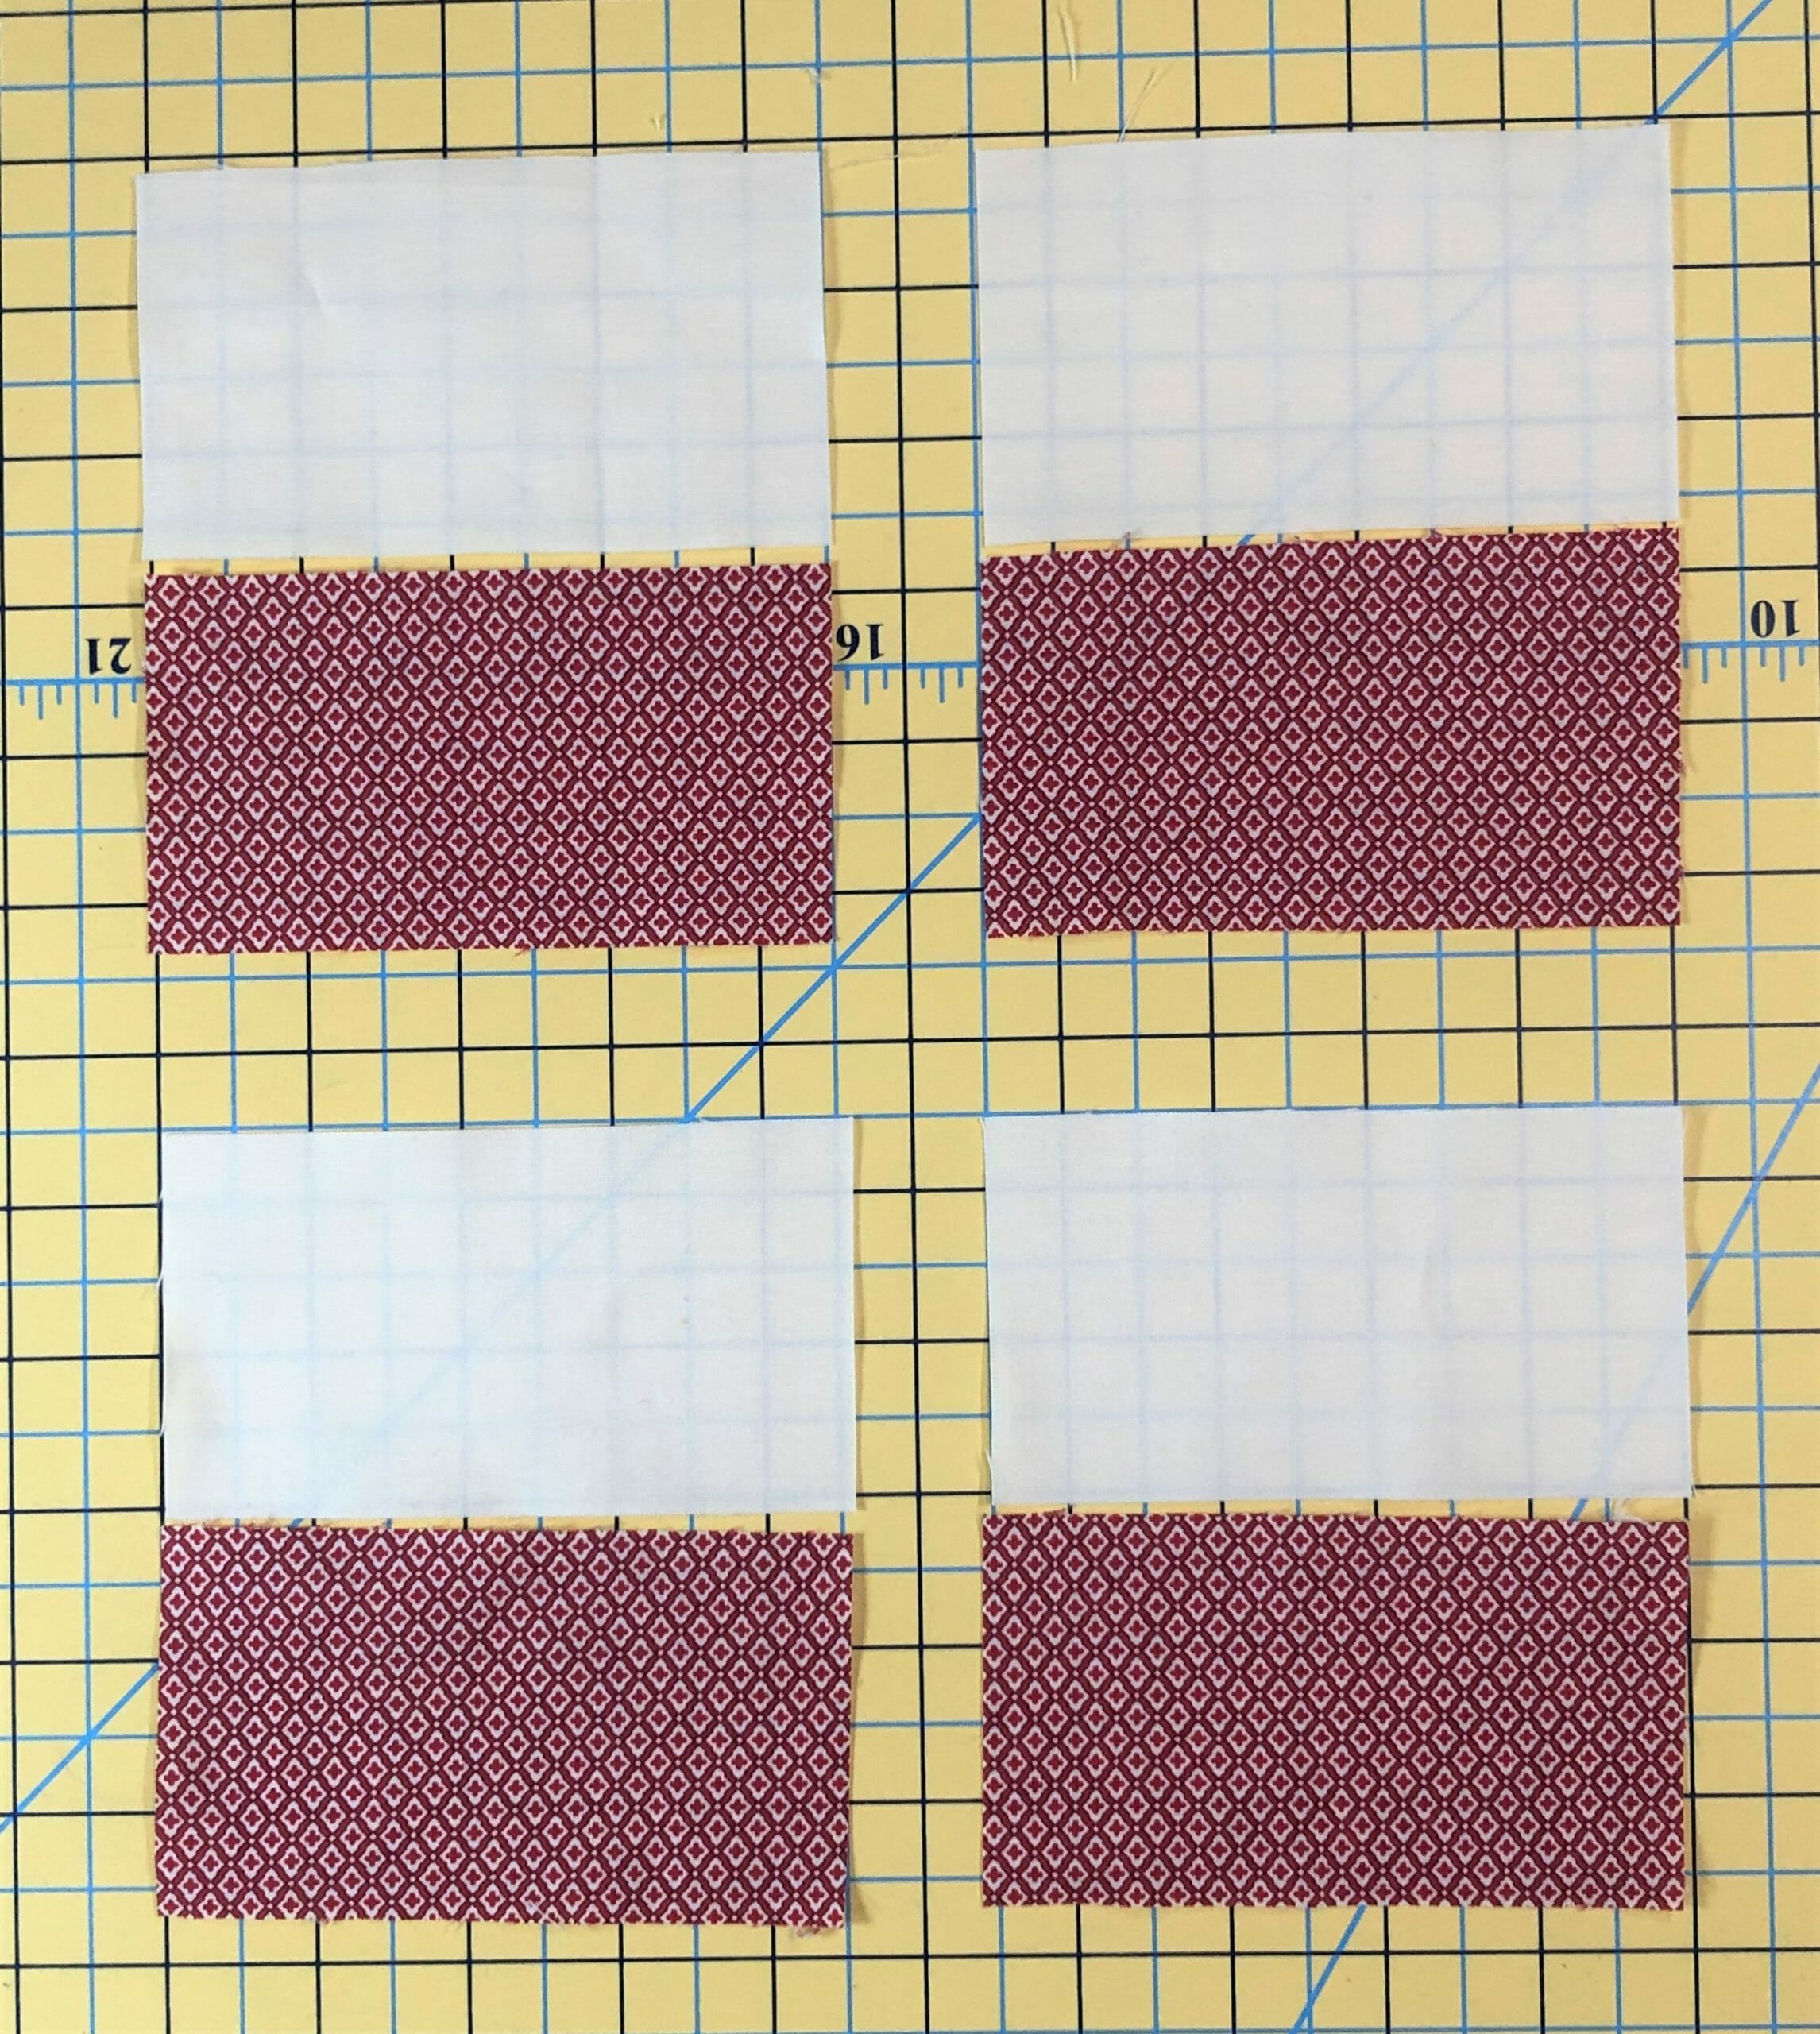
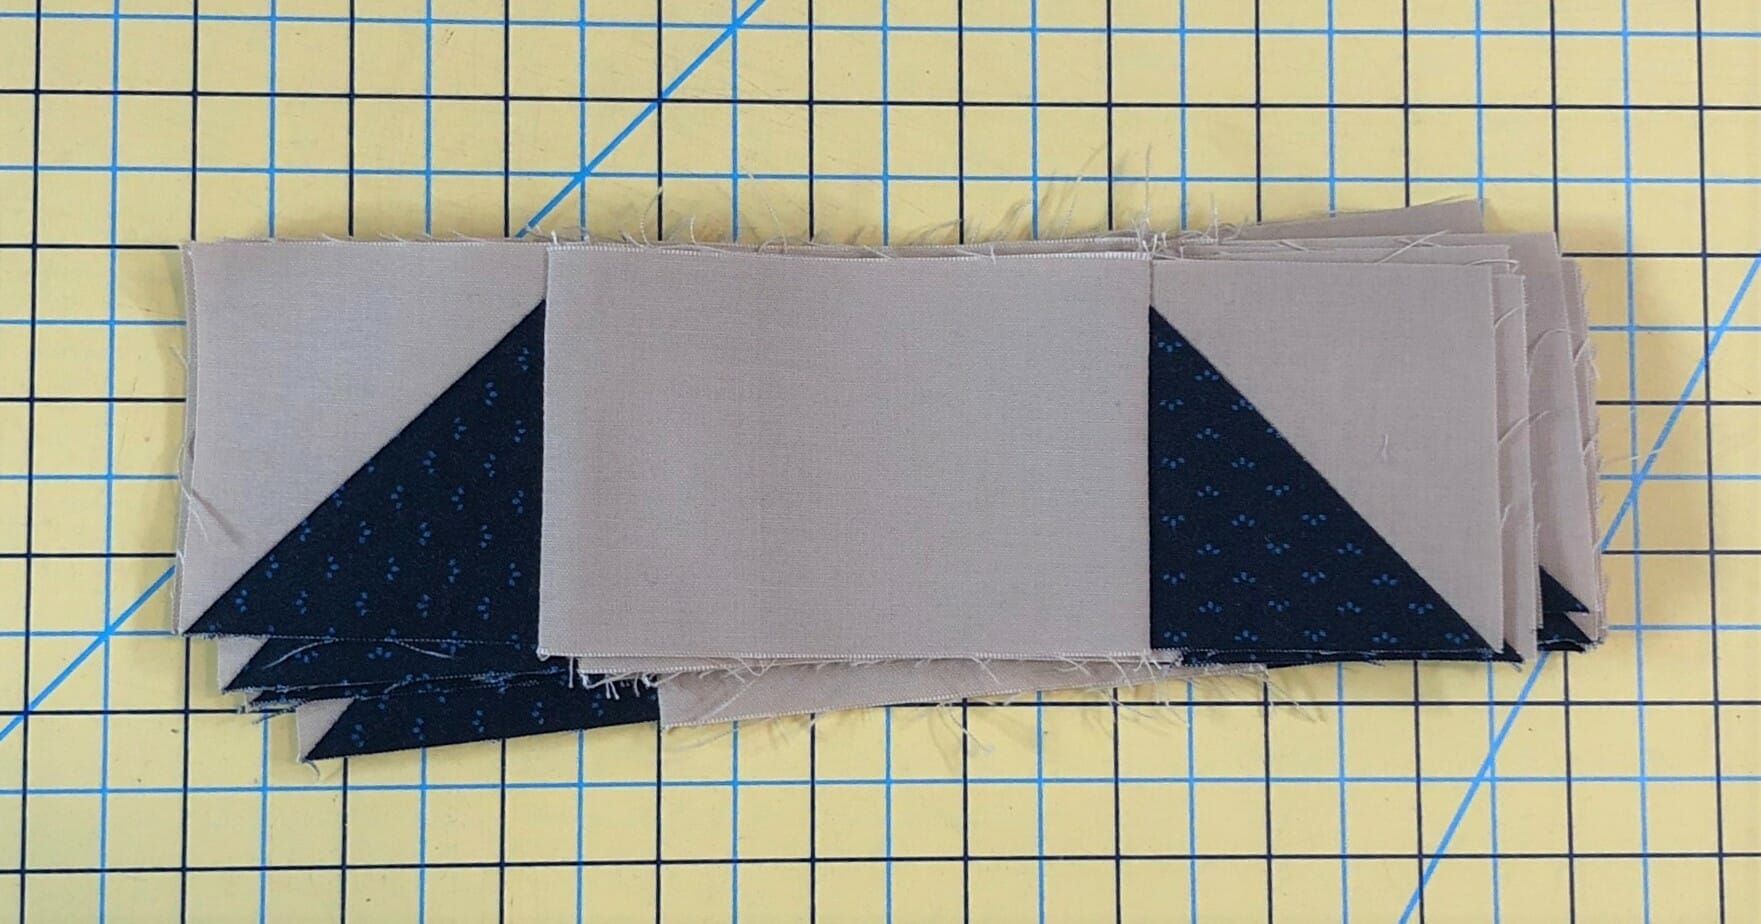
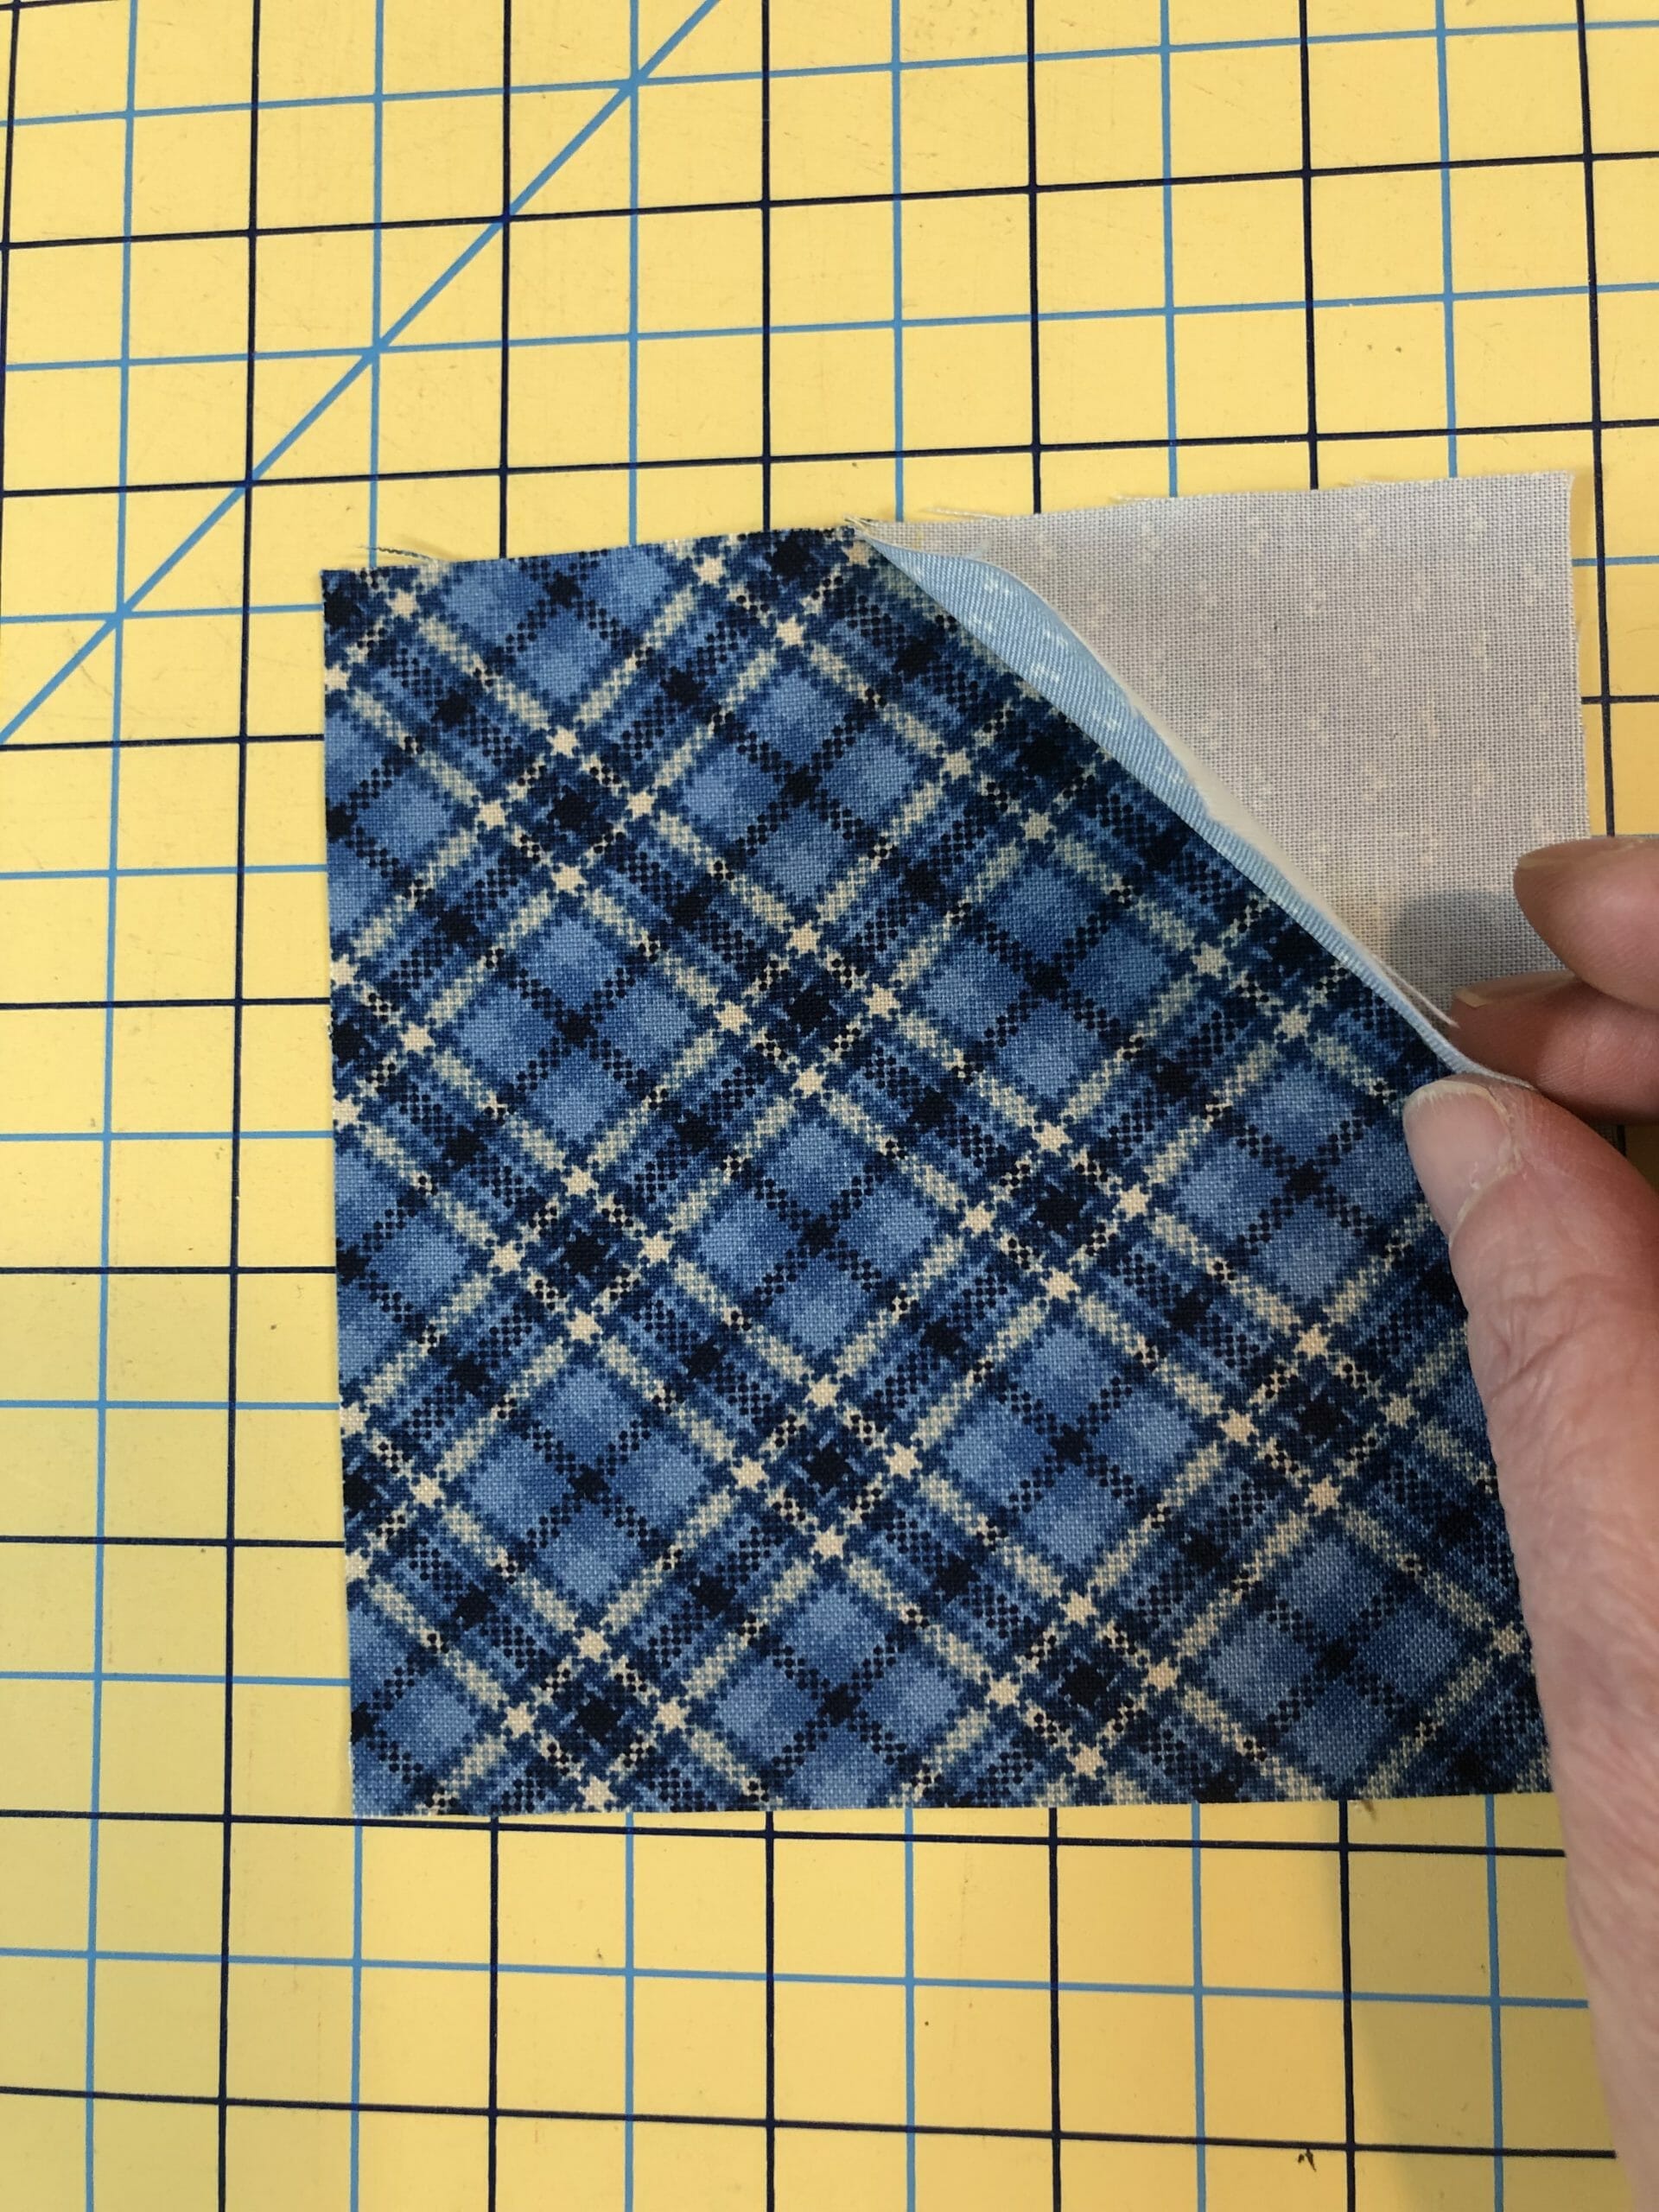
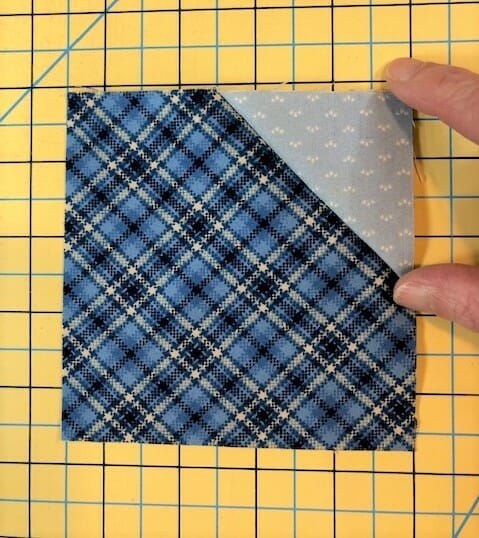
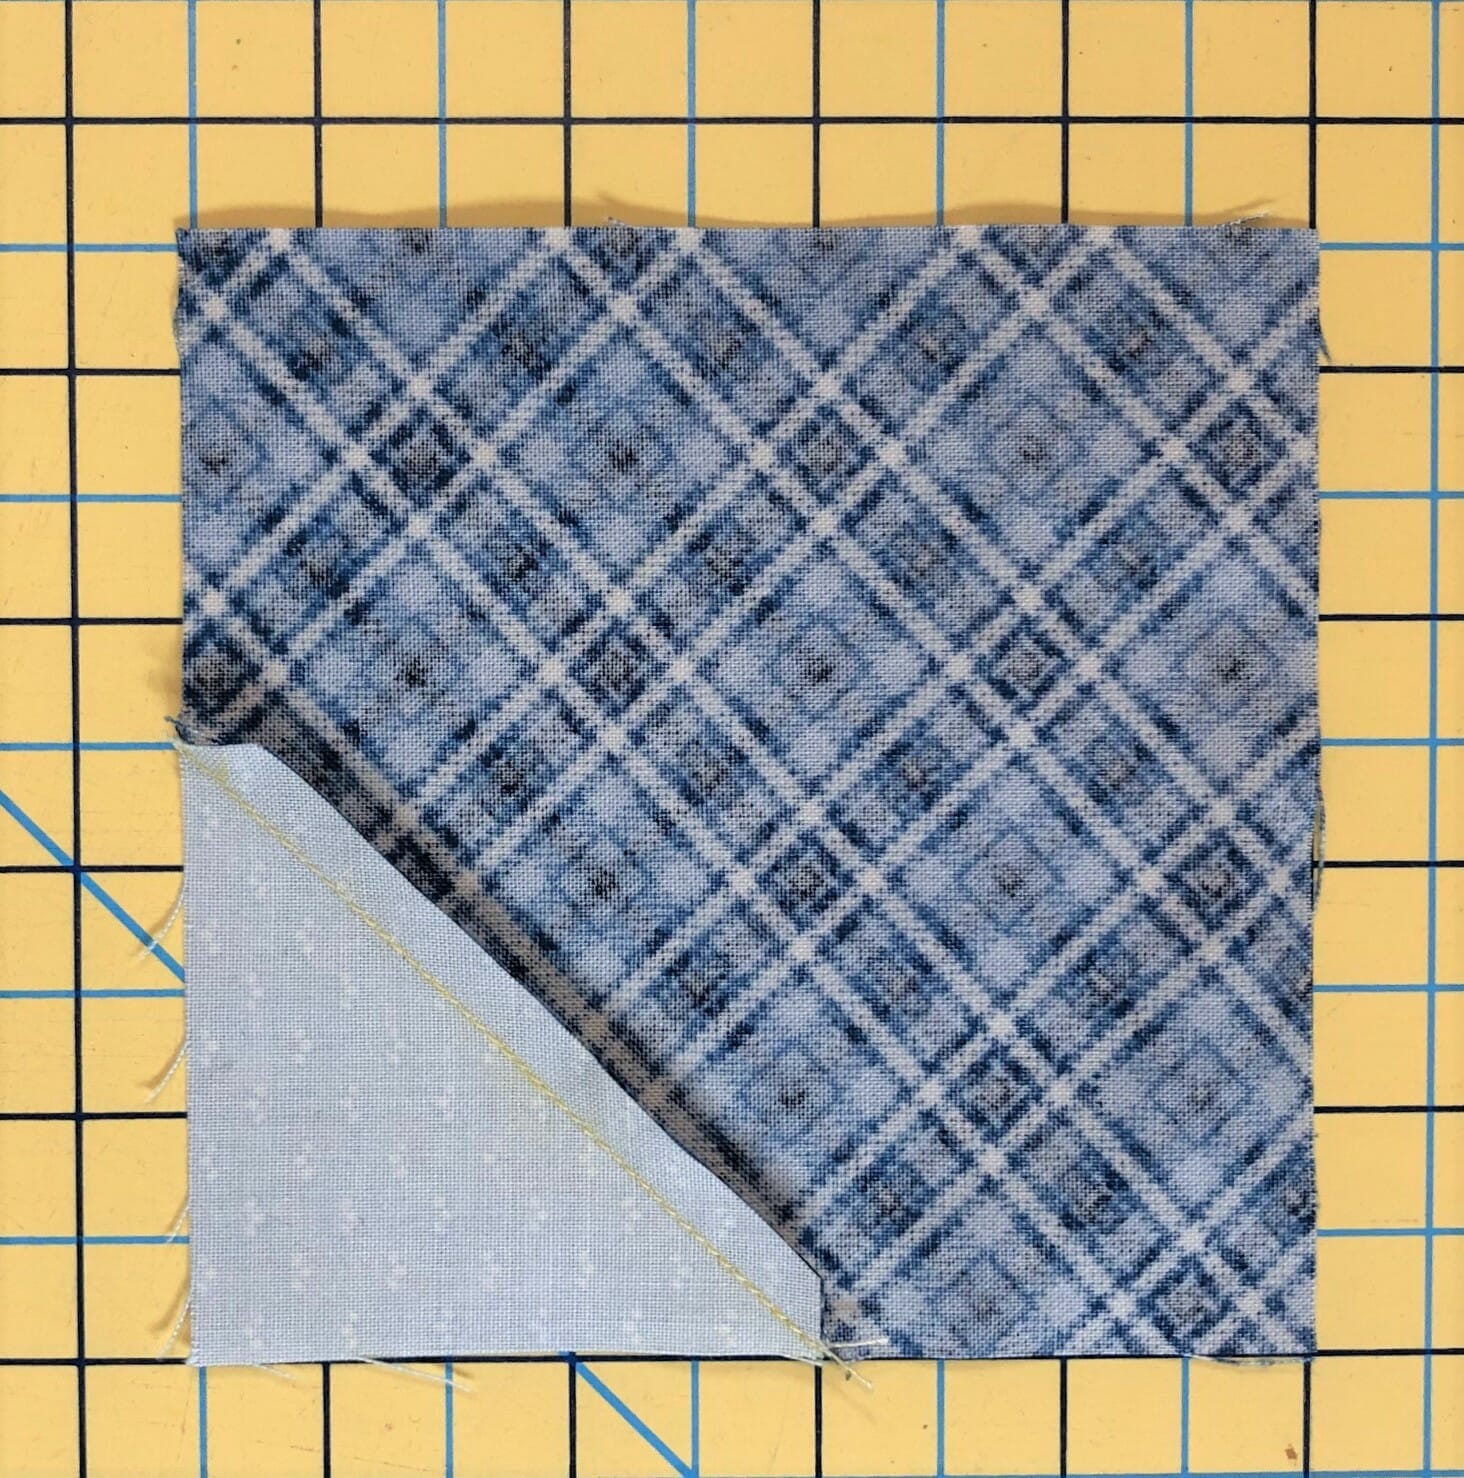
I’ve cut all the squares and am ready to pair them up and mark them for sewing.
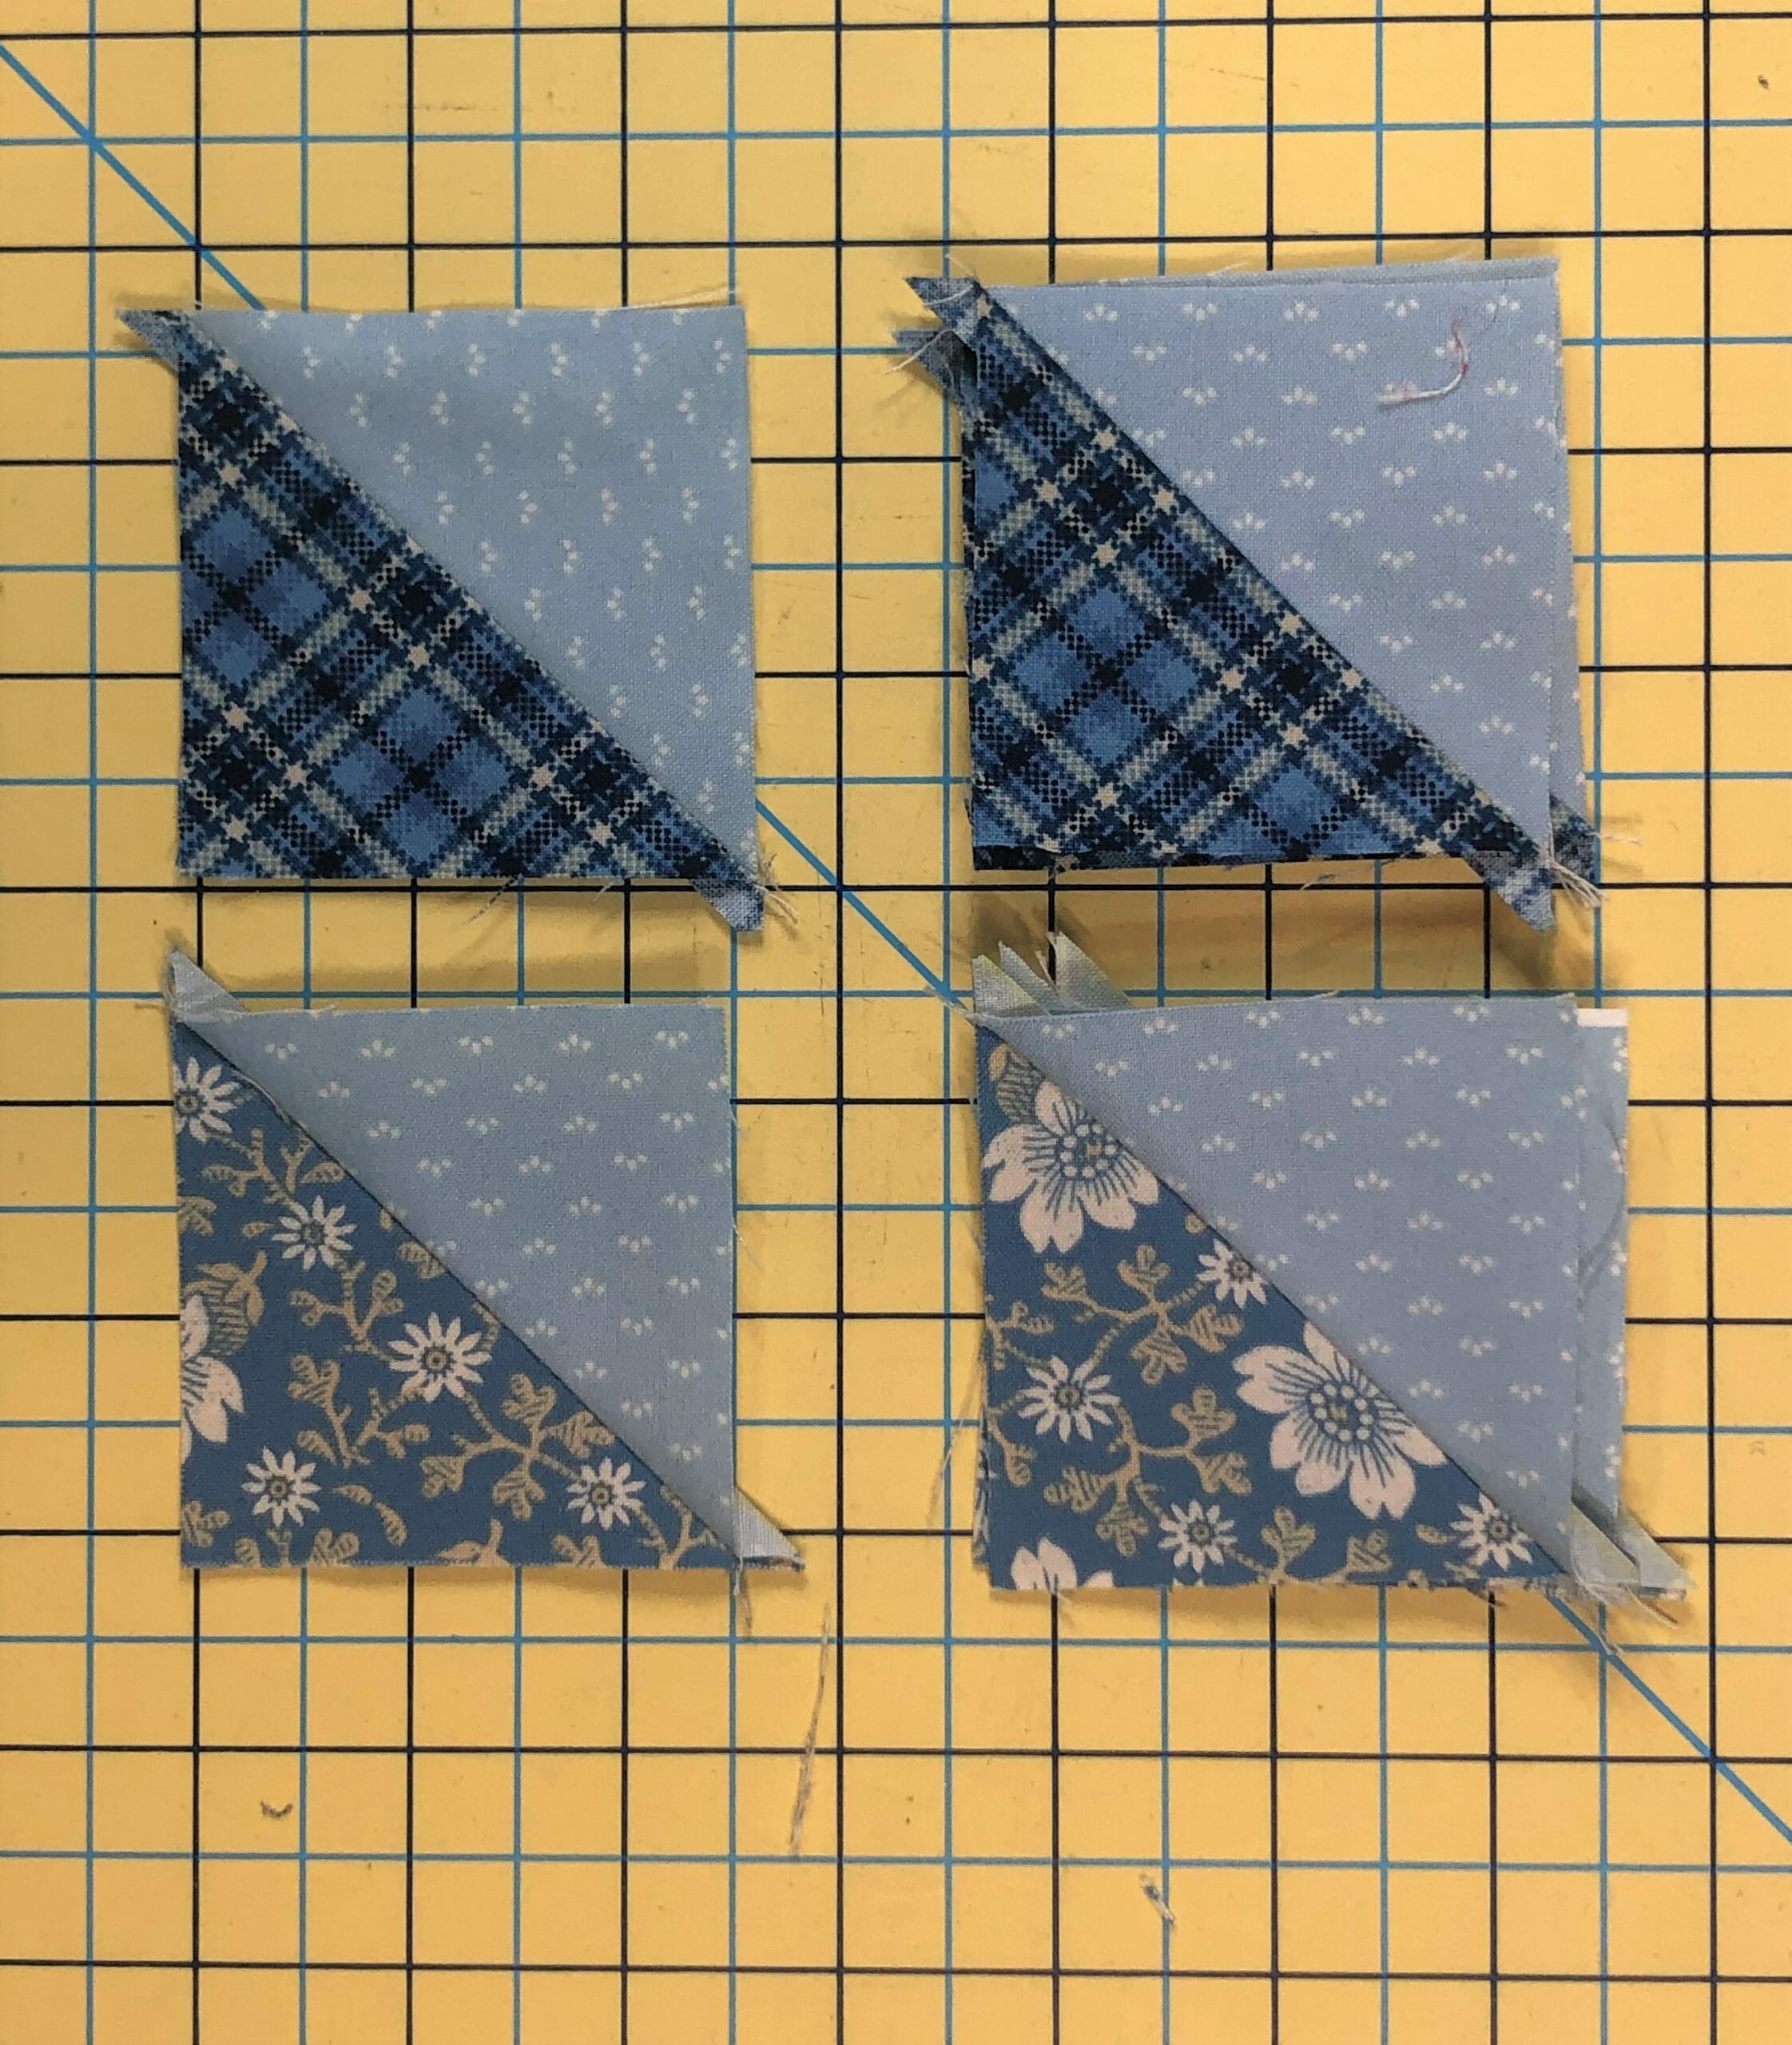
Once the HSTs are sewn and trimmed, I paired them up to get ready to sew them together. Just make sure to keep the Cabin Plaid on the right side of each unit as you sew.
Take two of those completed pairs and sew them to the sides of the four patch. Sew the H squares to the ends of the remaining two units, and then sew those to the top and bottom to complete the center block. If you’ve followed the pressing arrows, all the seams should nest together.
Now all we have to do is assemble and sew on our usual HST borders, and the block is finished!
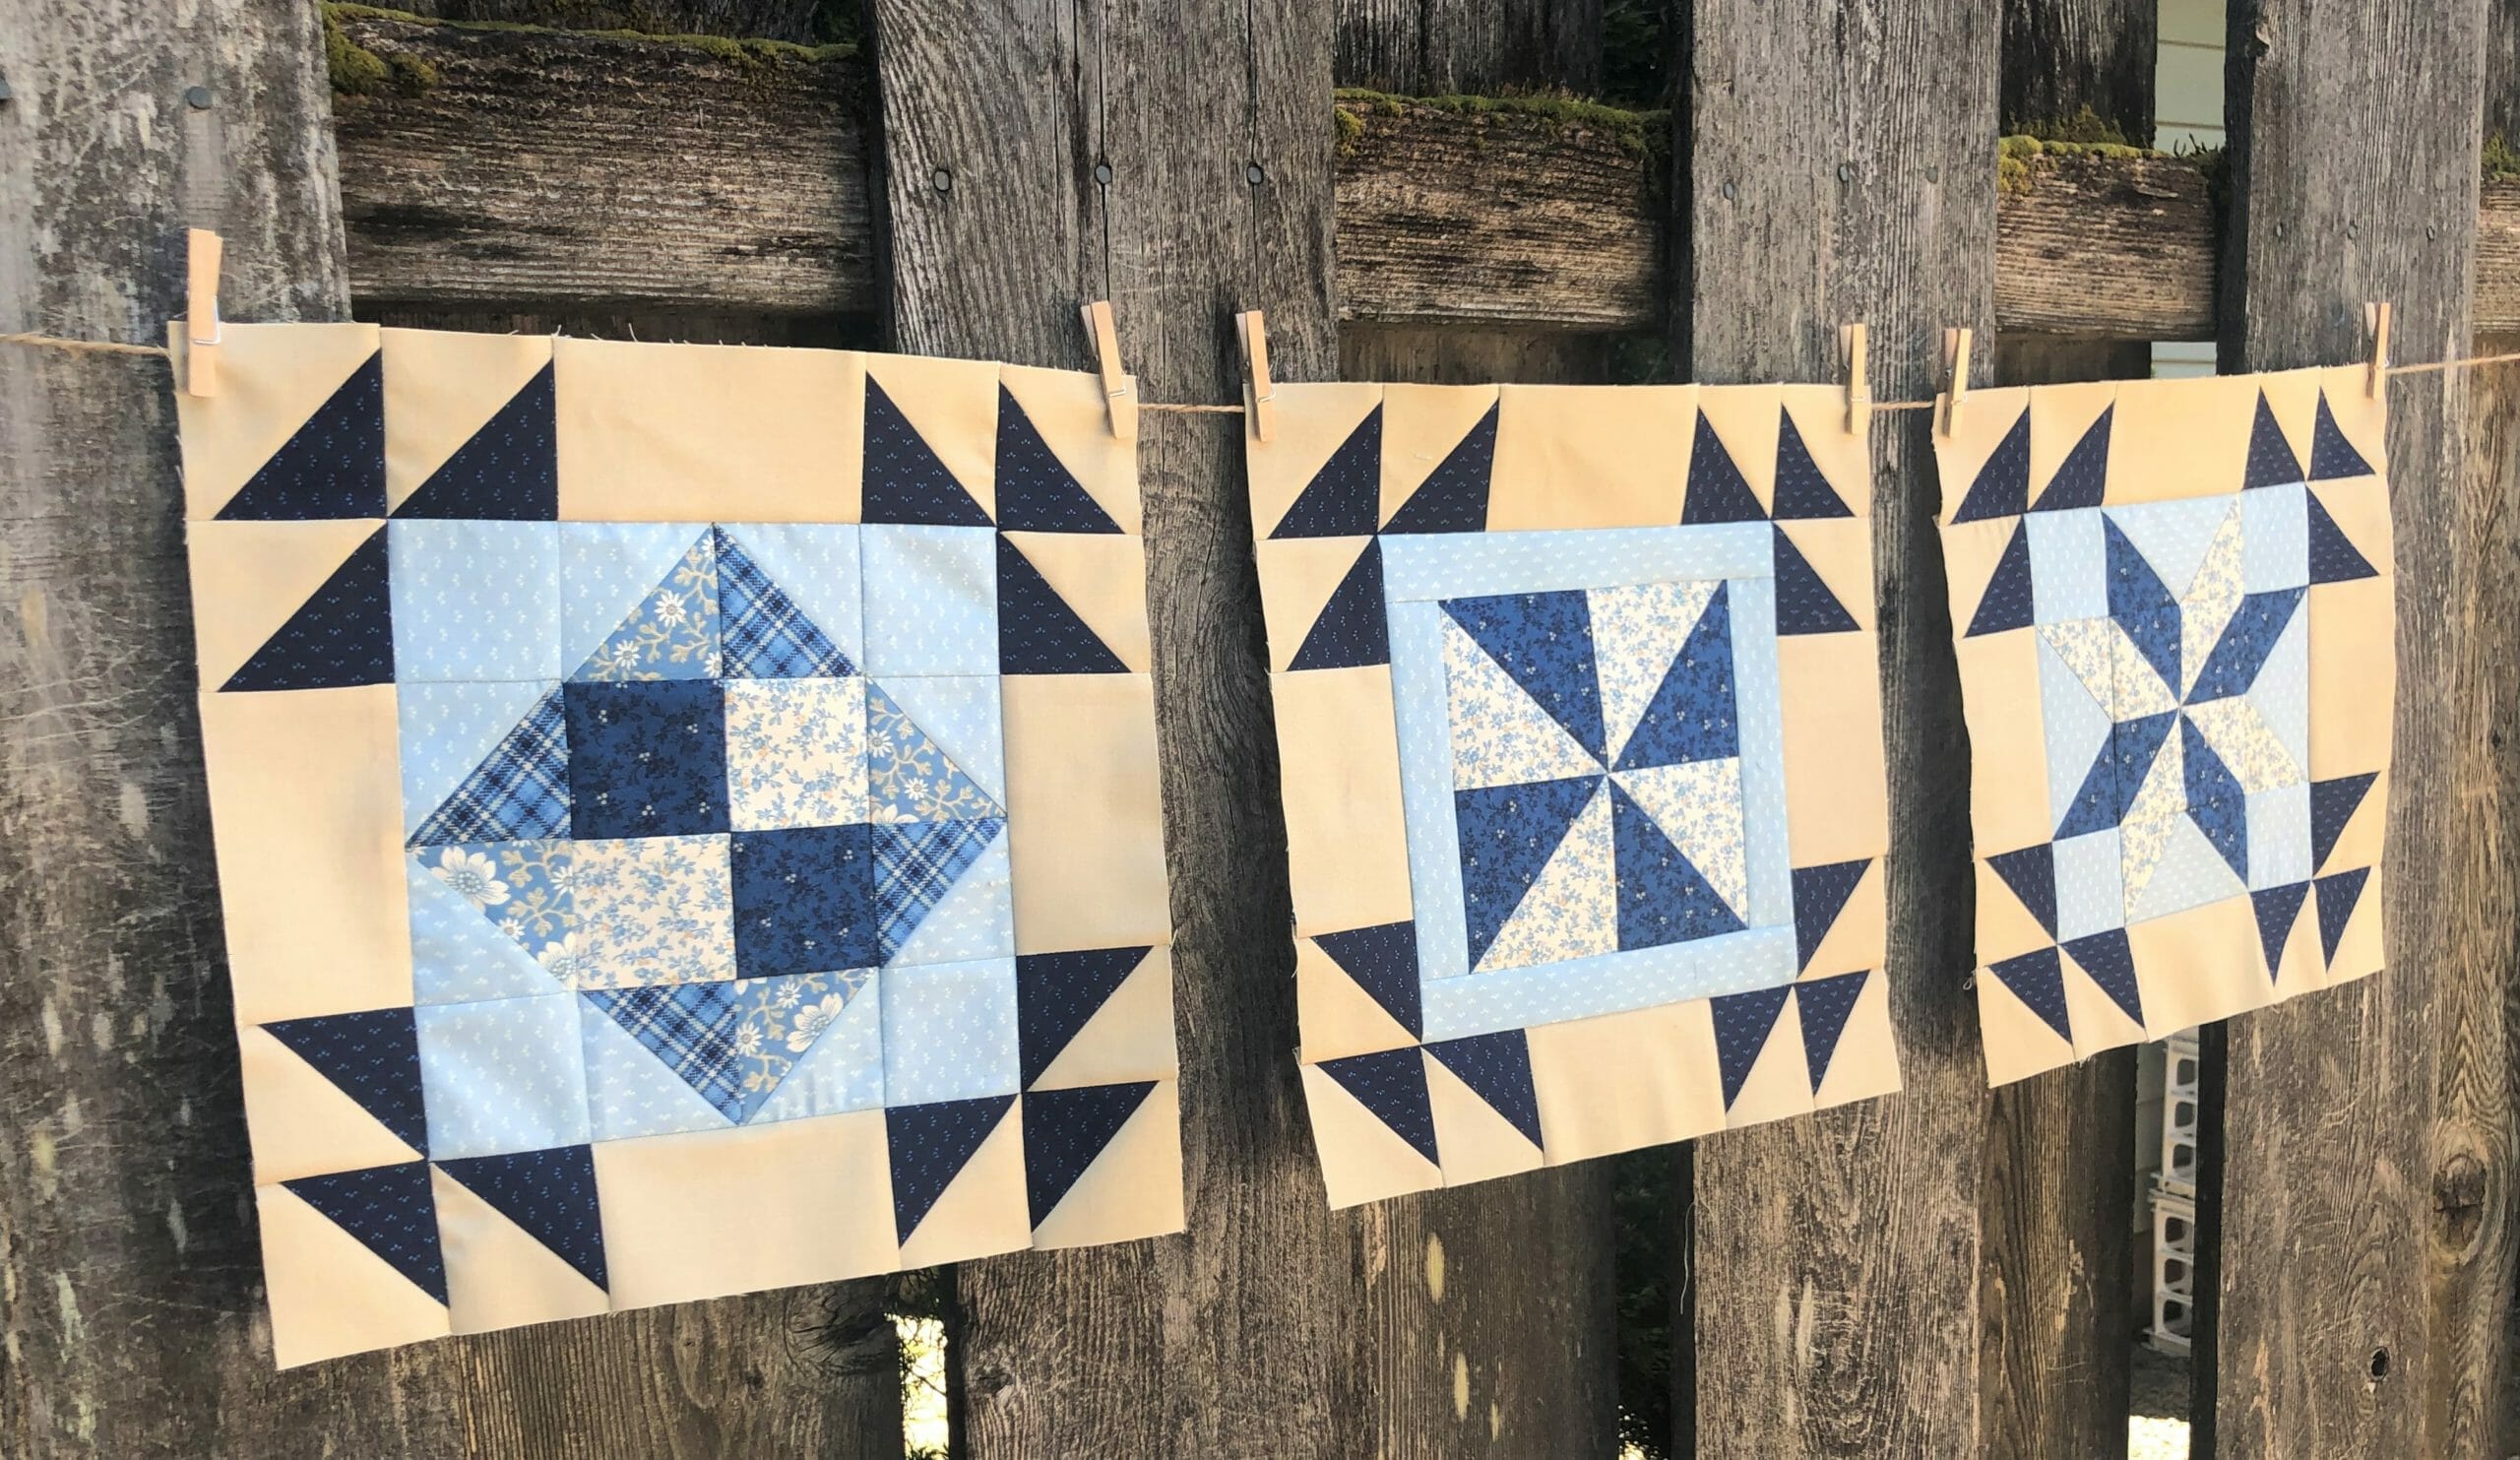
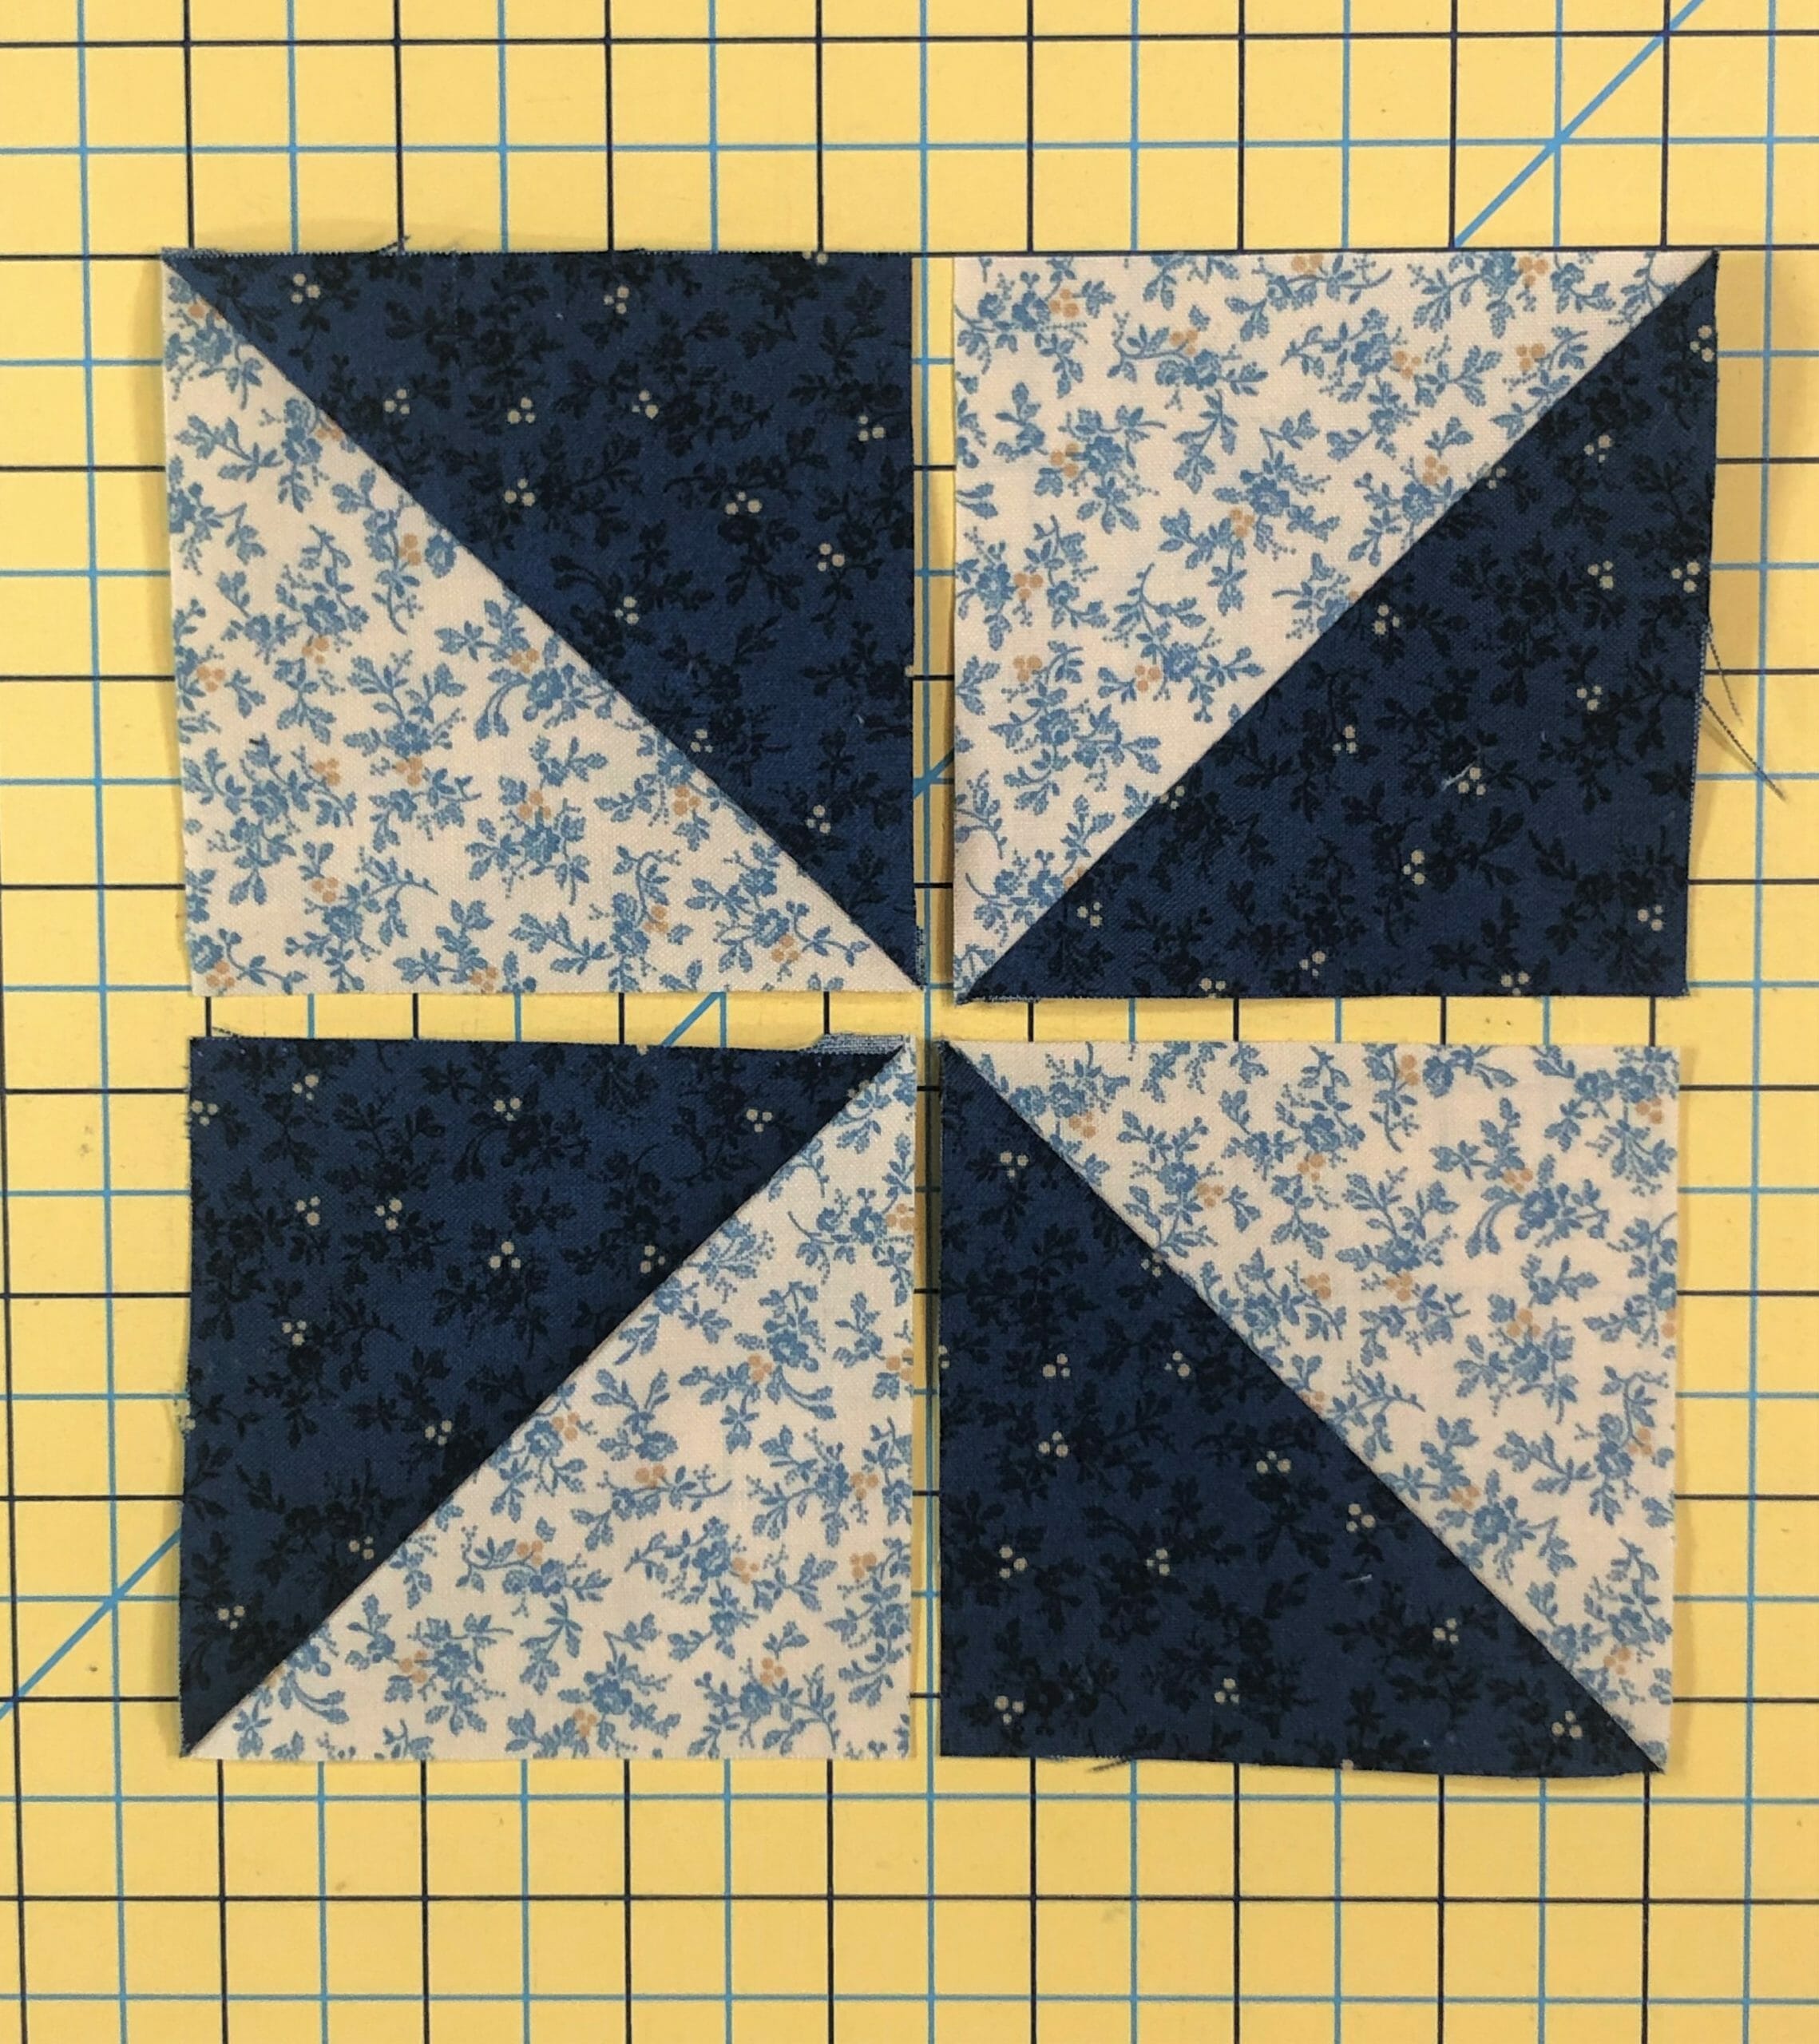
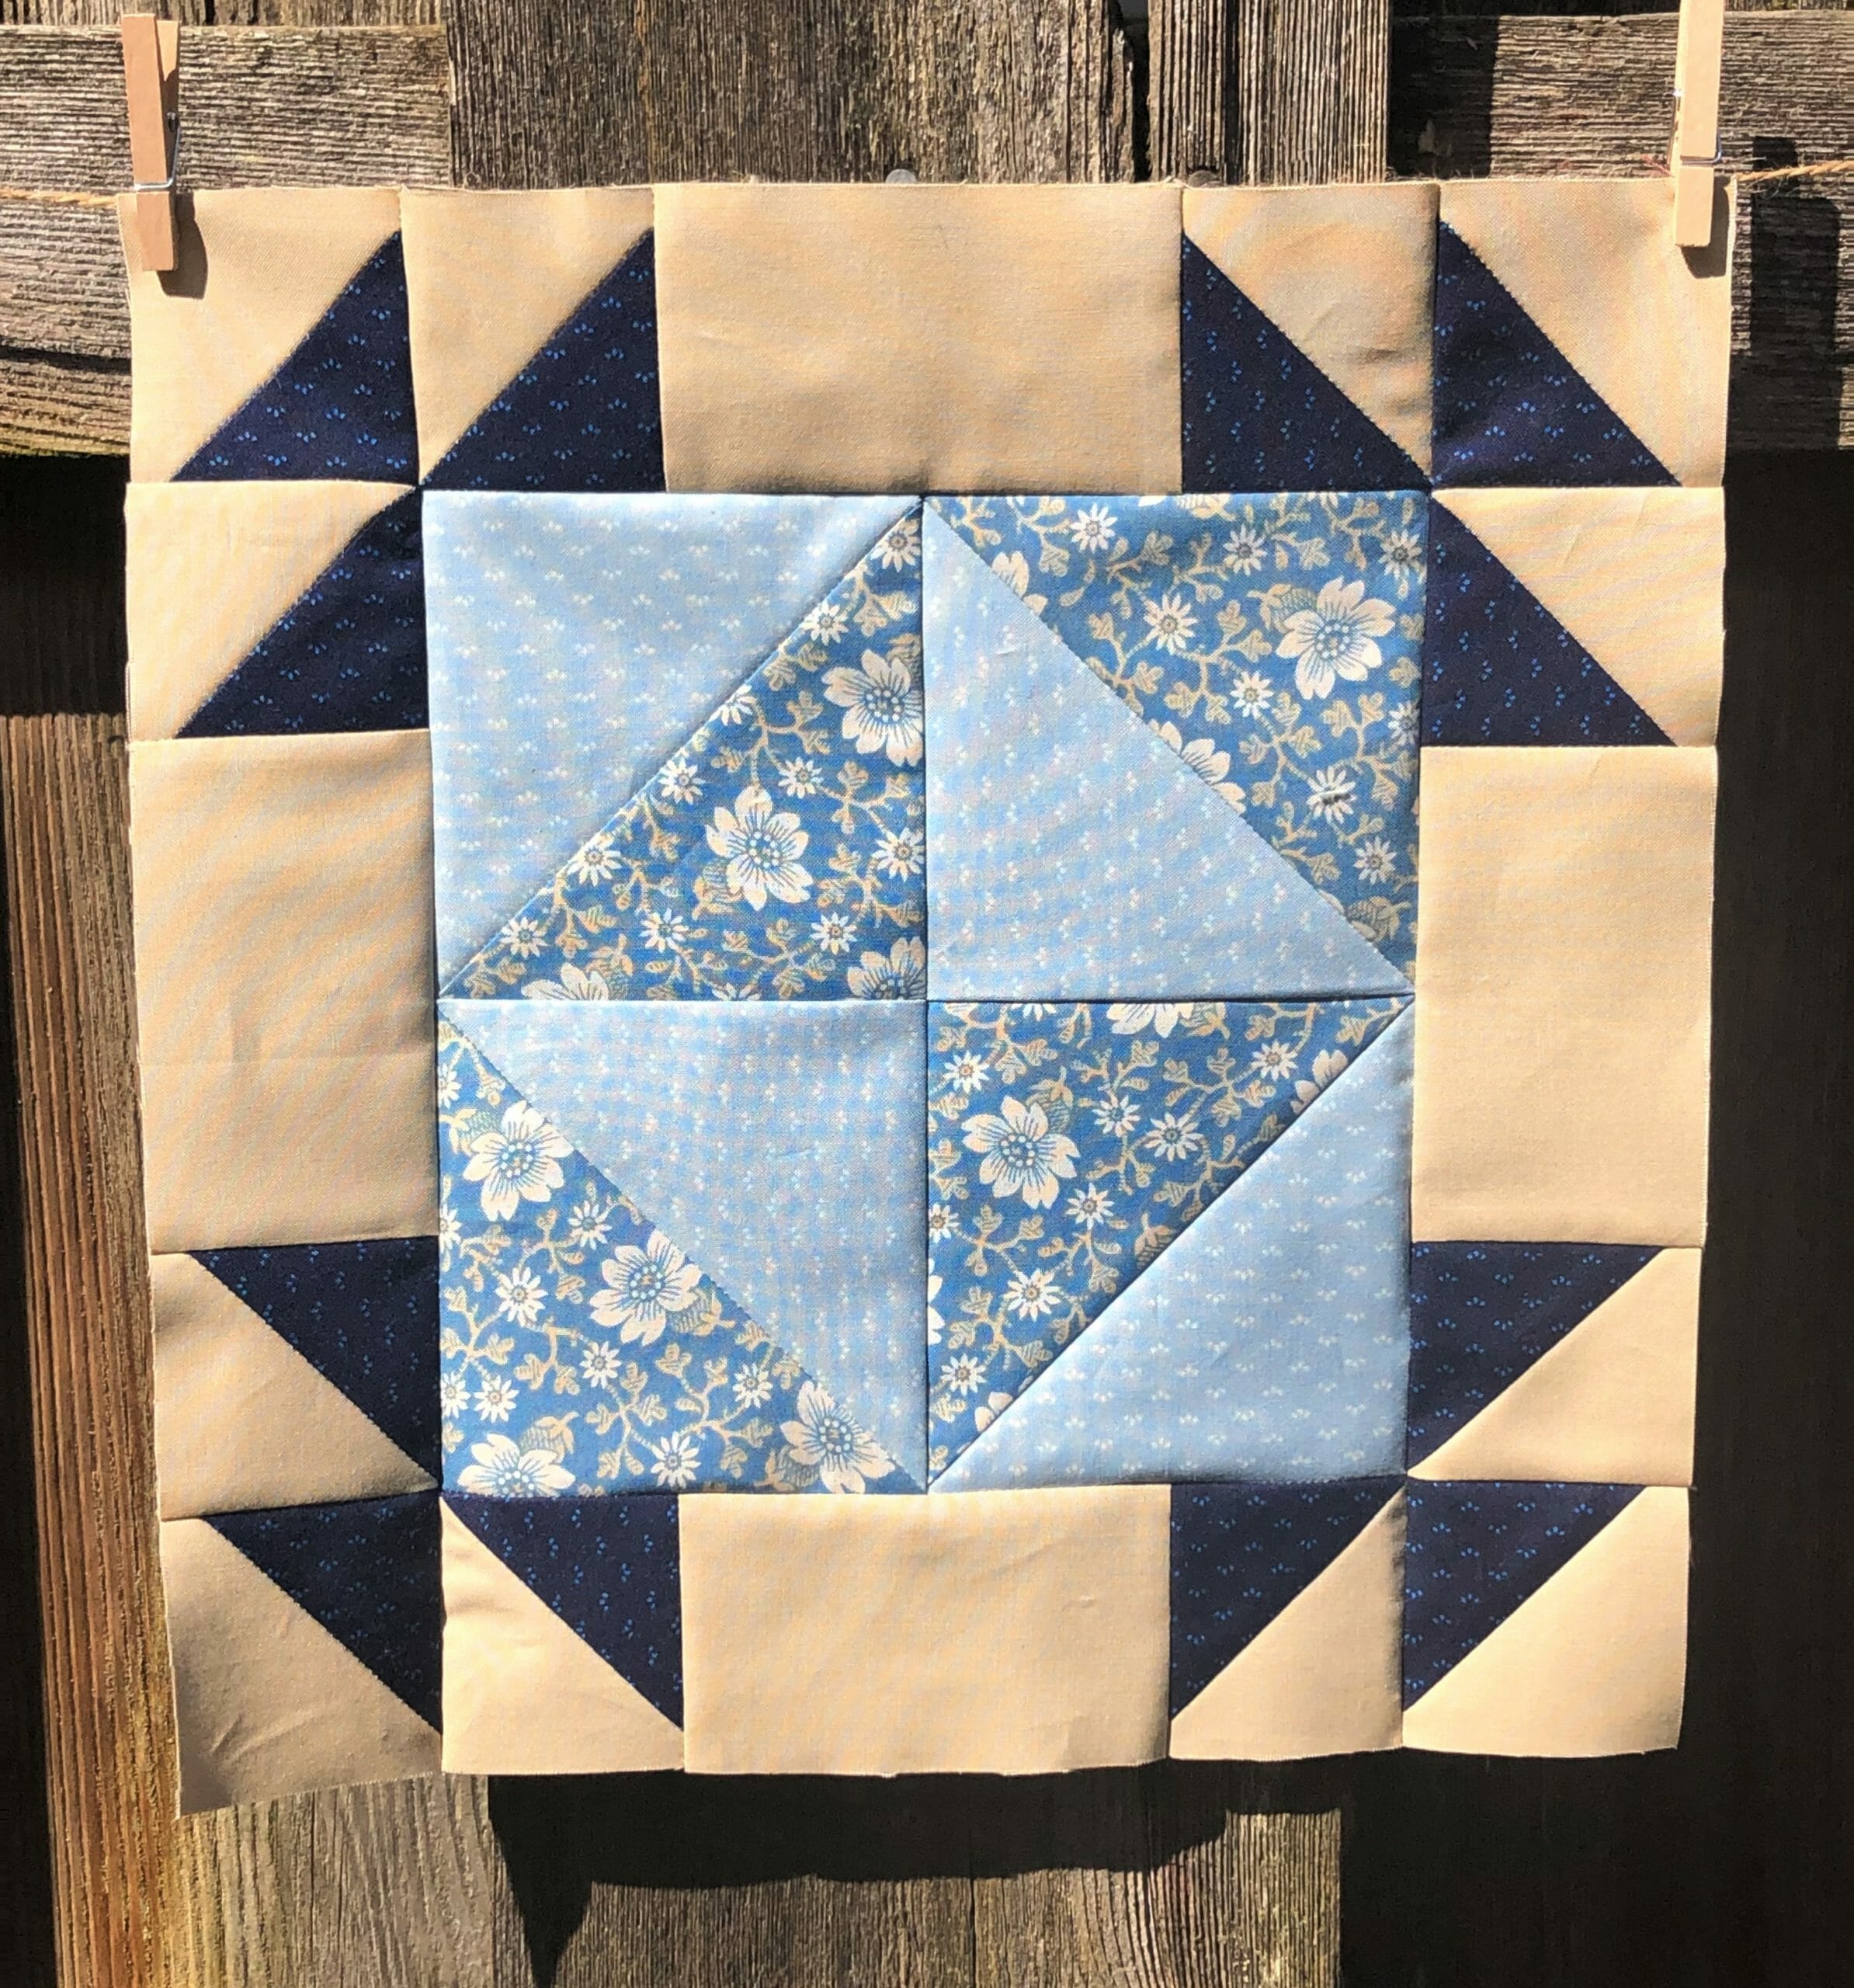
Block # 18
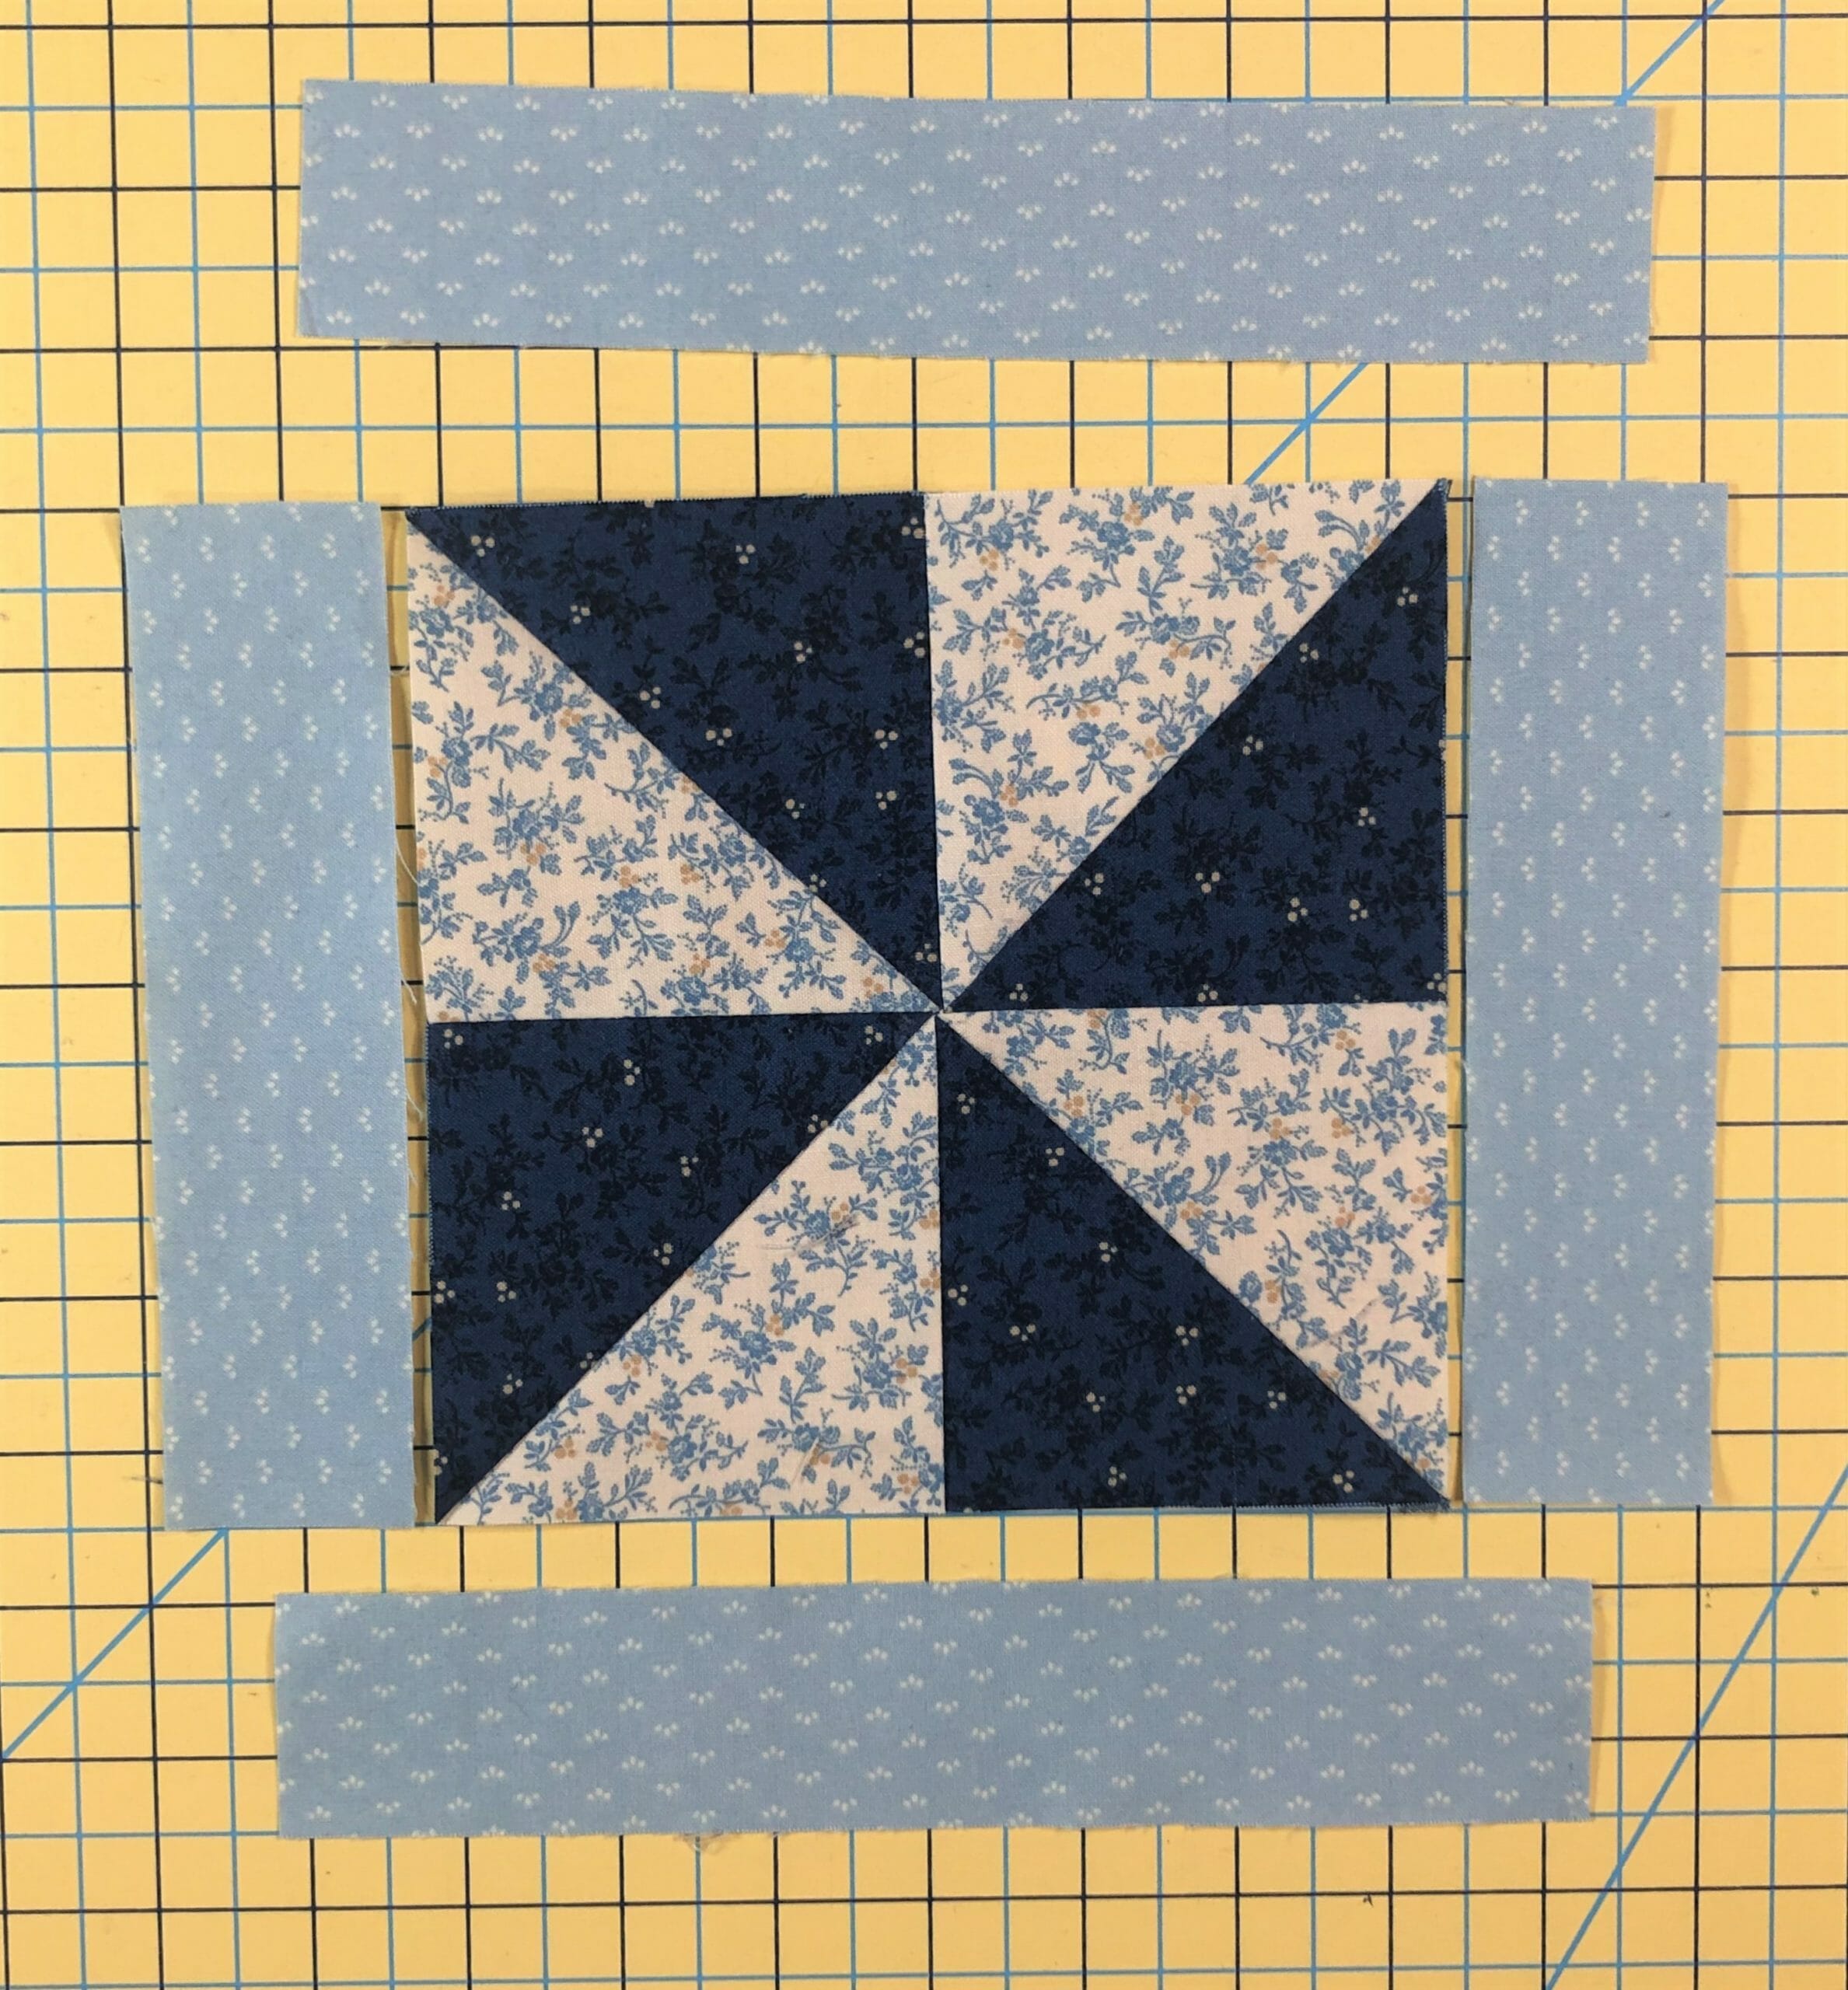
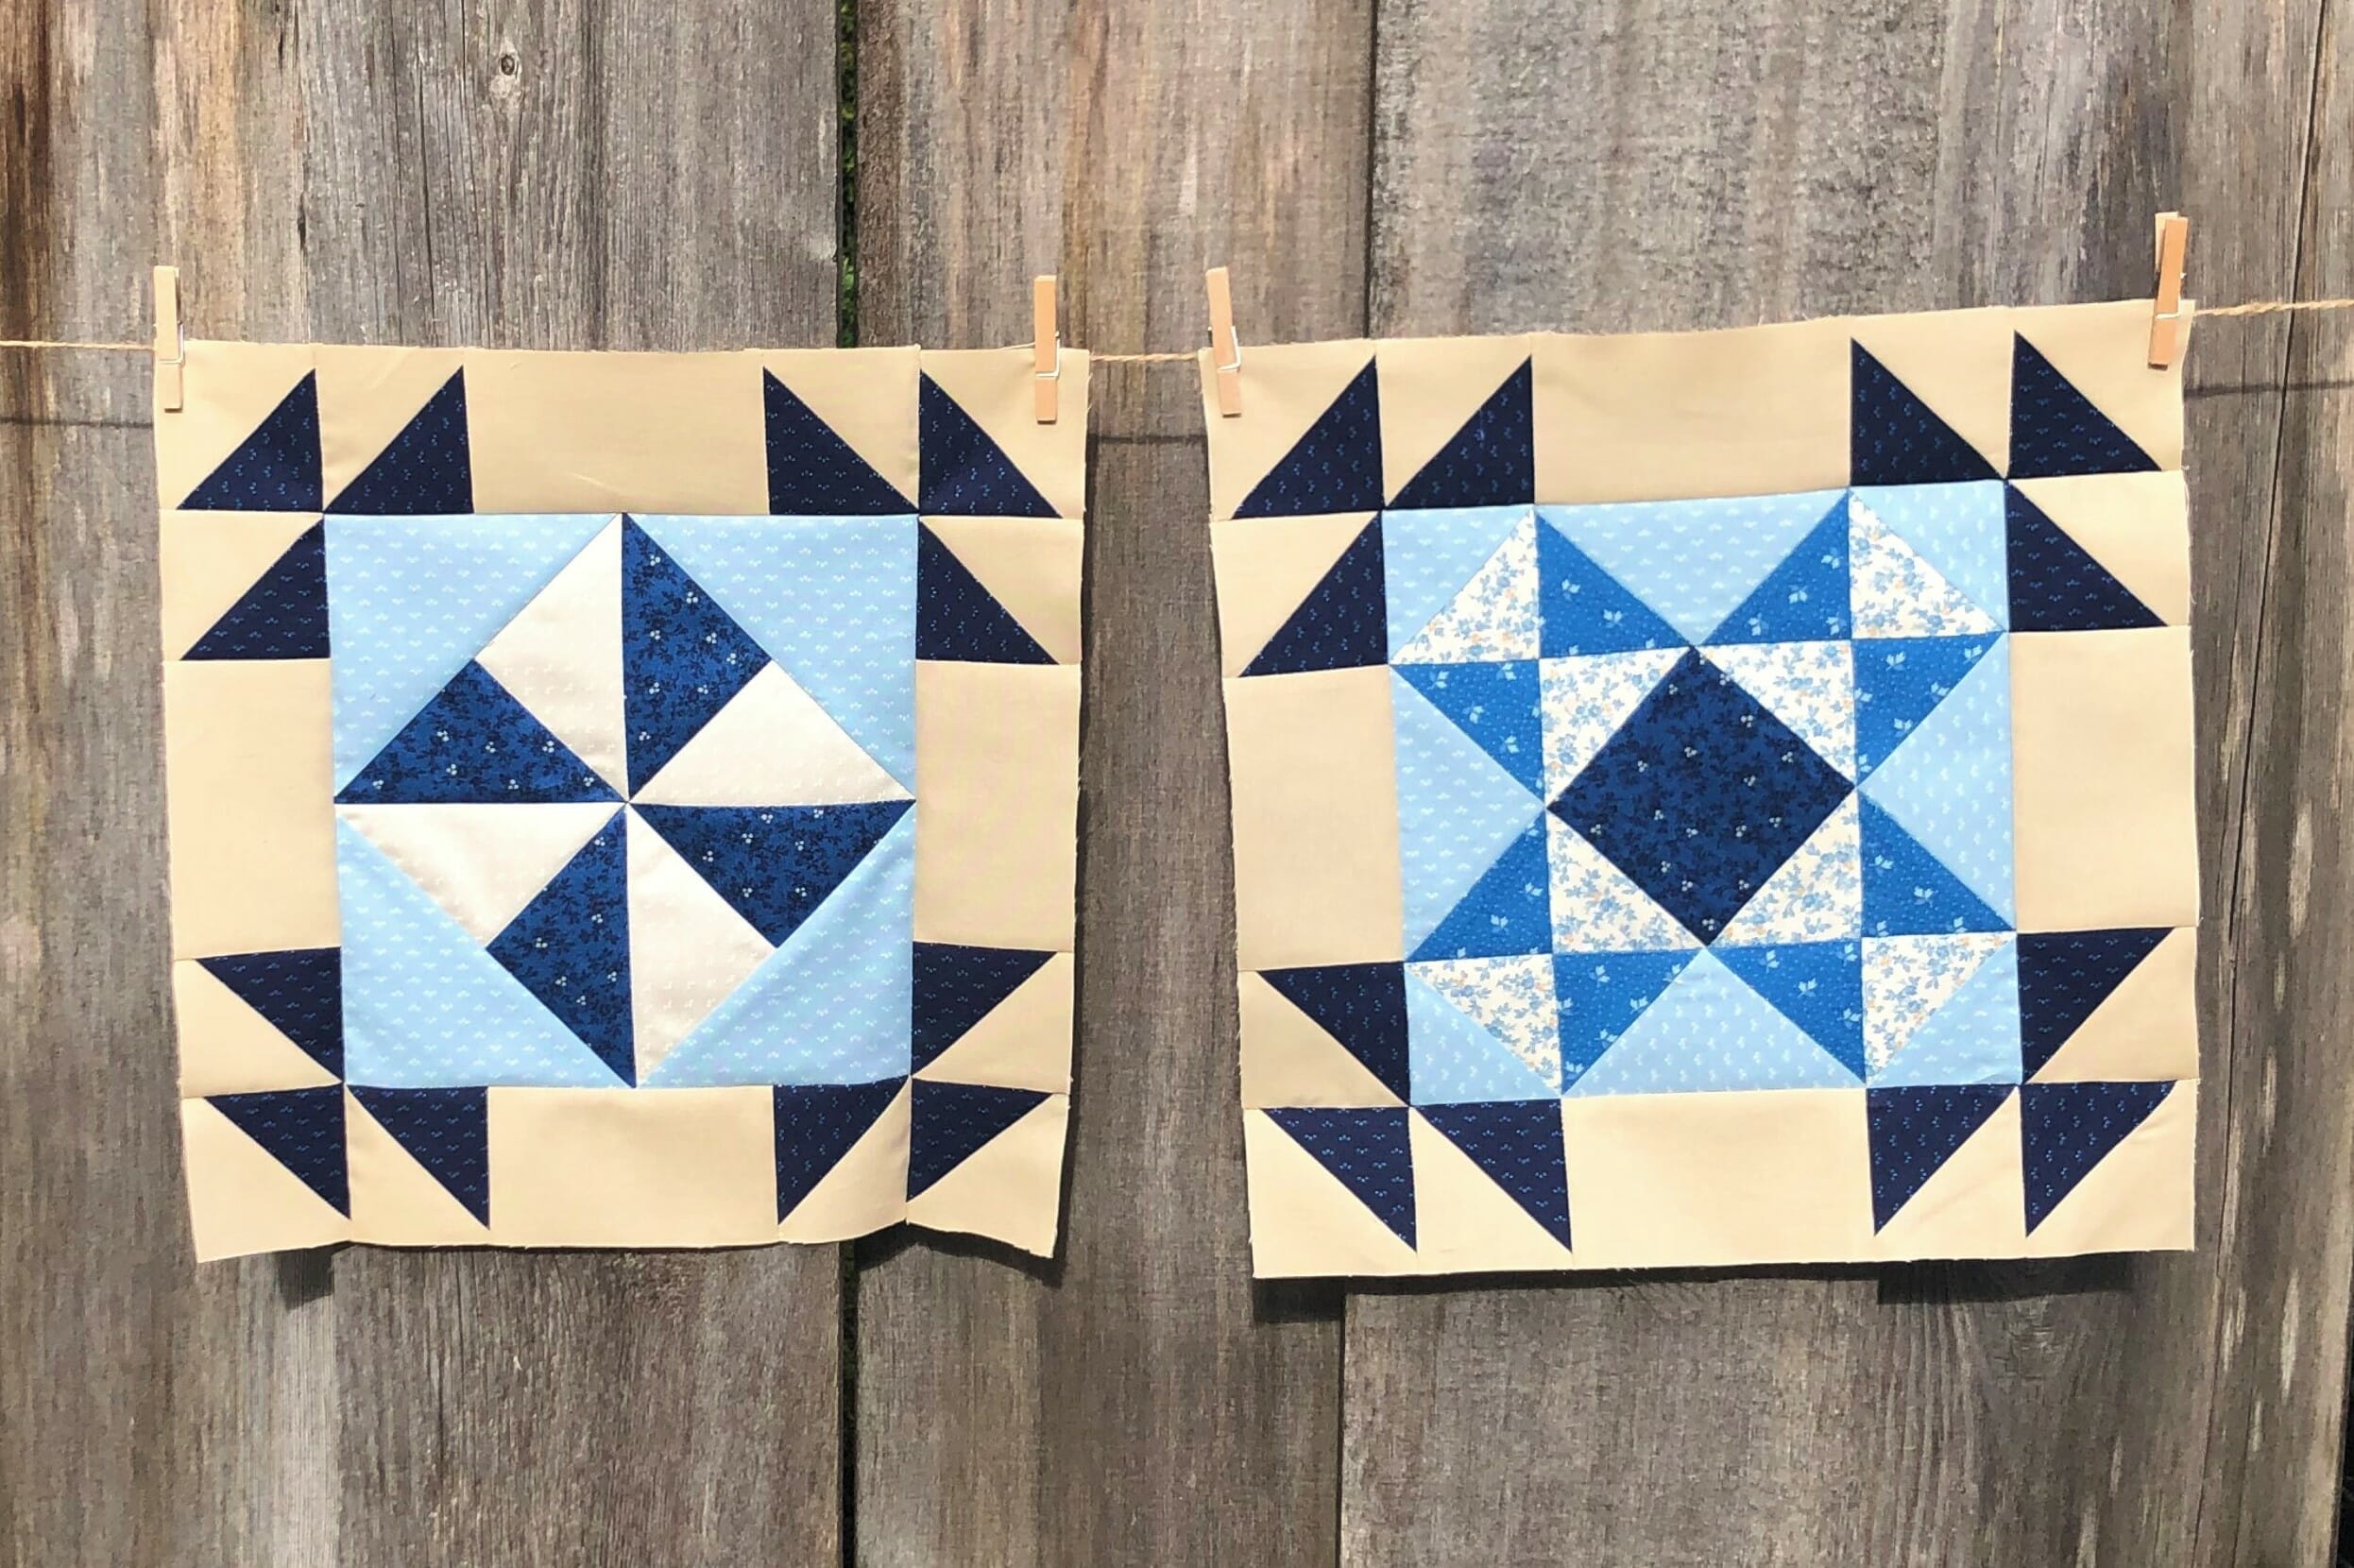
The center portion of this block is block is oh so easy! It’s just a large pinwheel with a border, and it comes together in a snap!
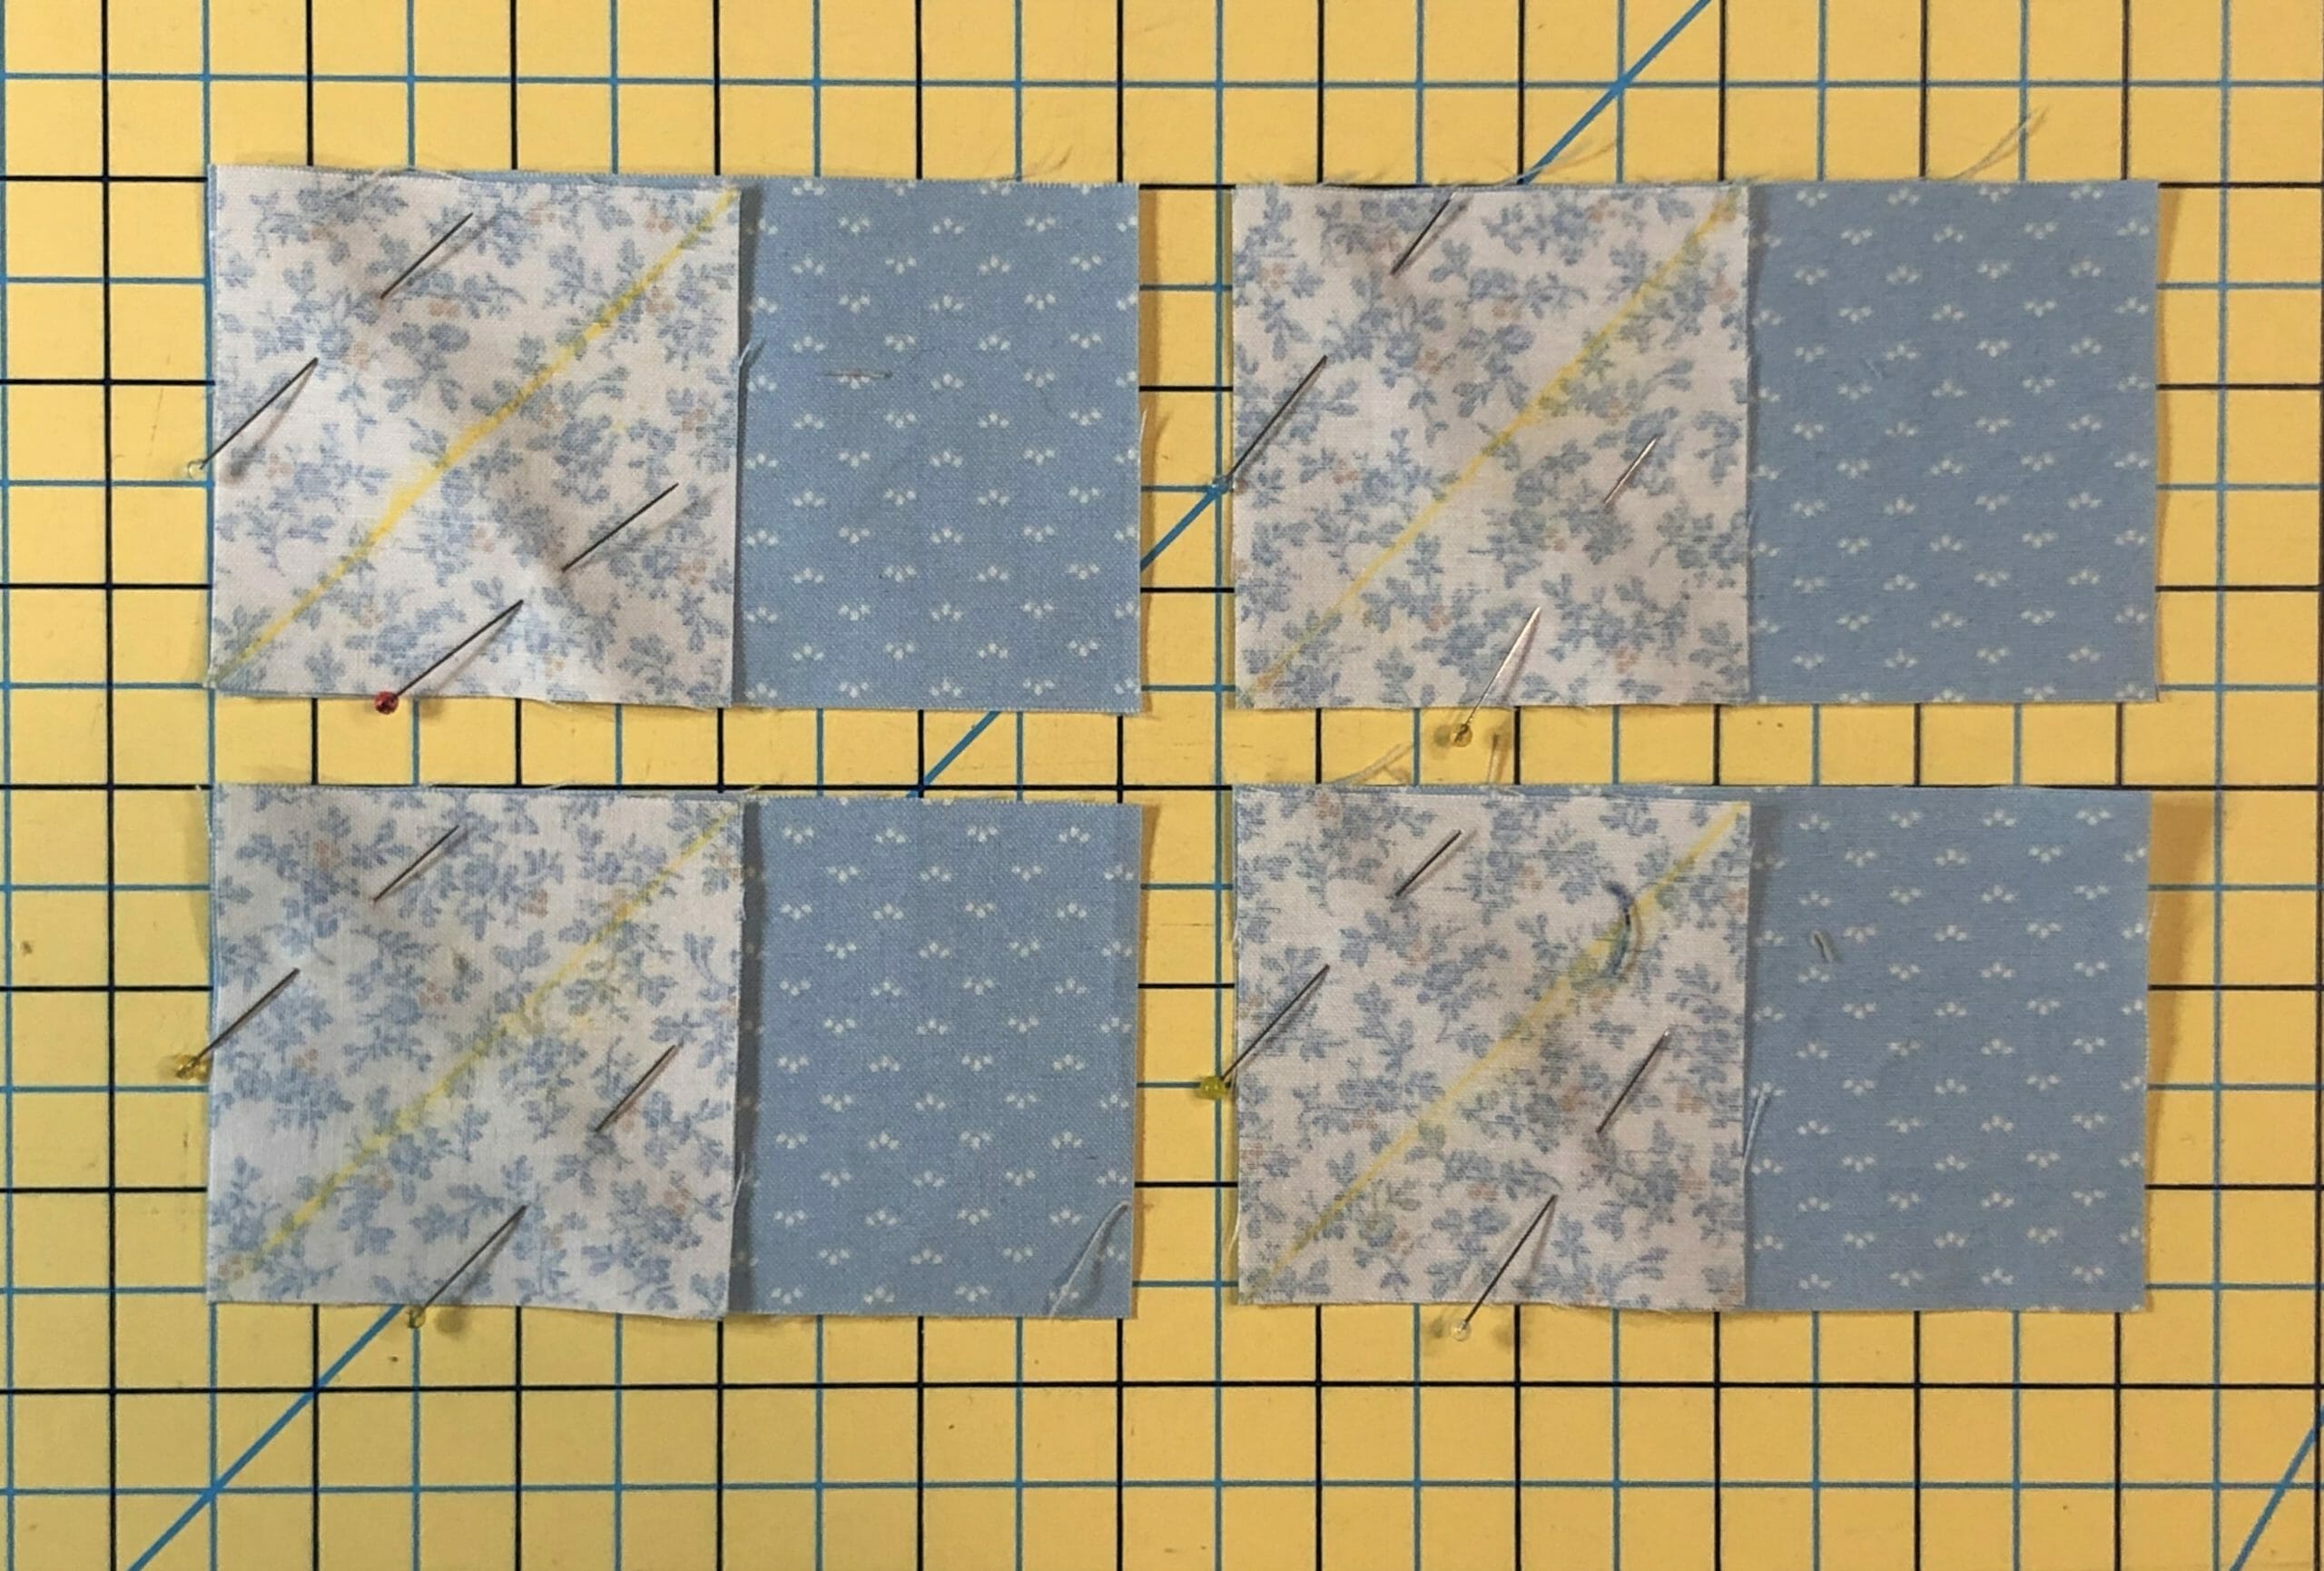
Start by making your four HSTs, and sew them together like the photo below. Make sure your pinwheel block measures 6-1/2” when done. This is when I like to use those scant ¼” seam allowances, so that I have wiggle room for trimming to size.
Then sew the F and G strips on as directed. One tip is to cut your strips a bit longer than necessary, and then trim them to line up with the pinwheel as you go. This is especially helpful with the top and bottom strips. This should measure 8-1/2” square when it’s done.
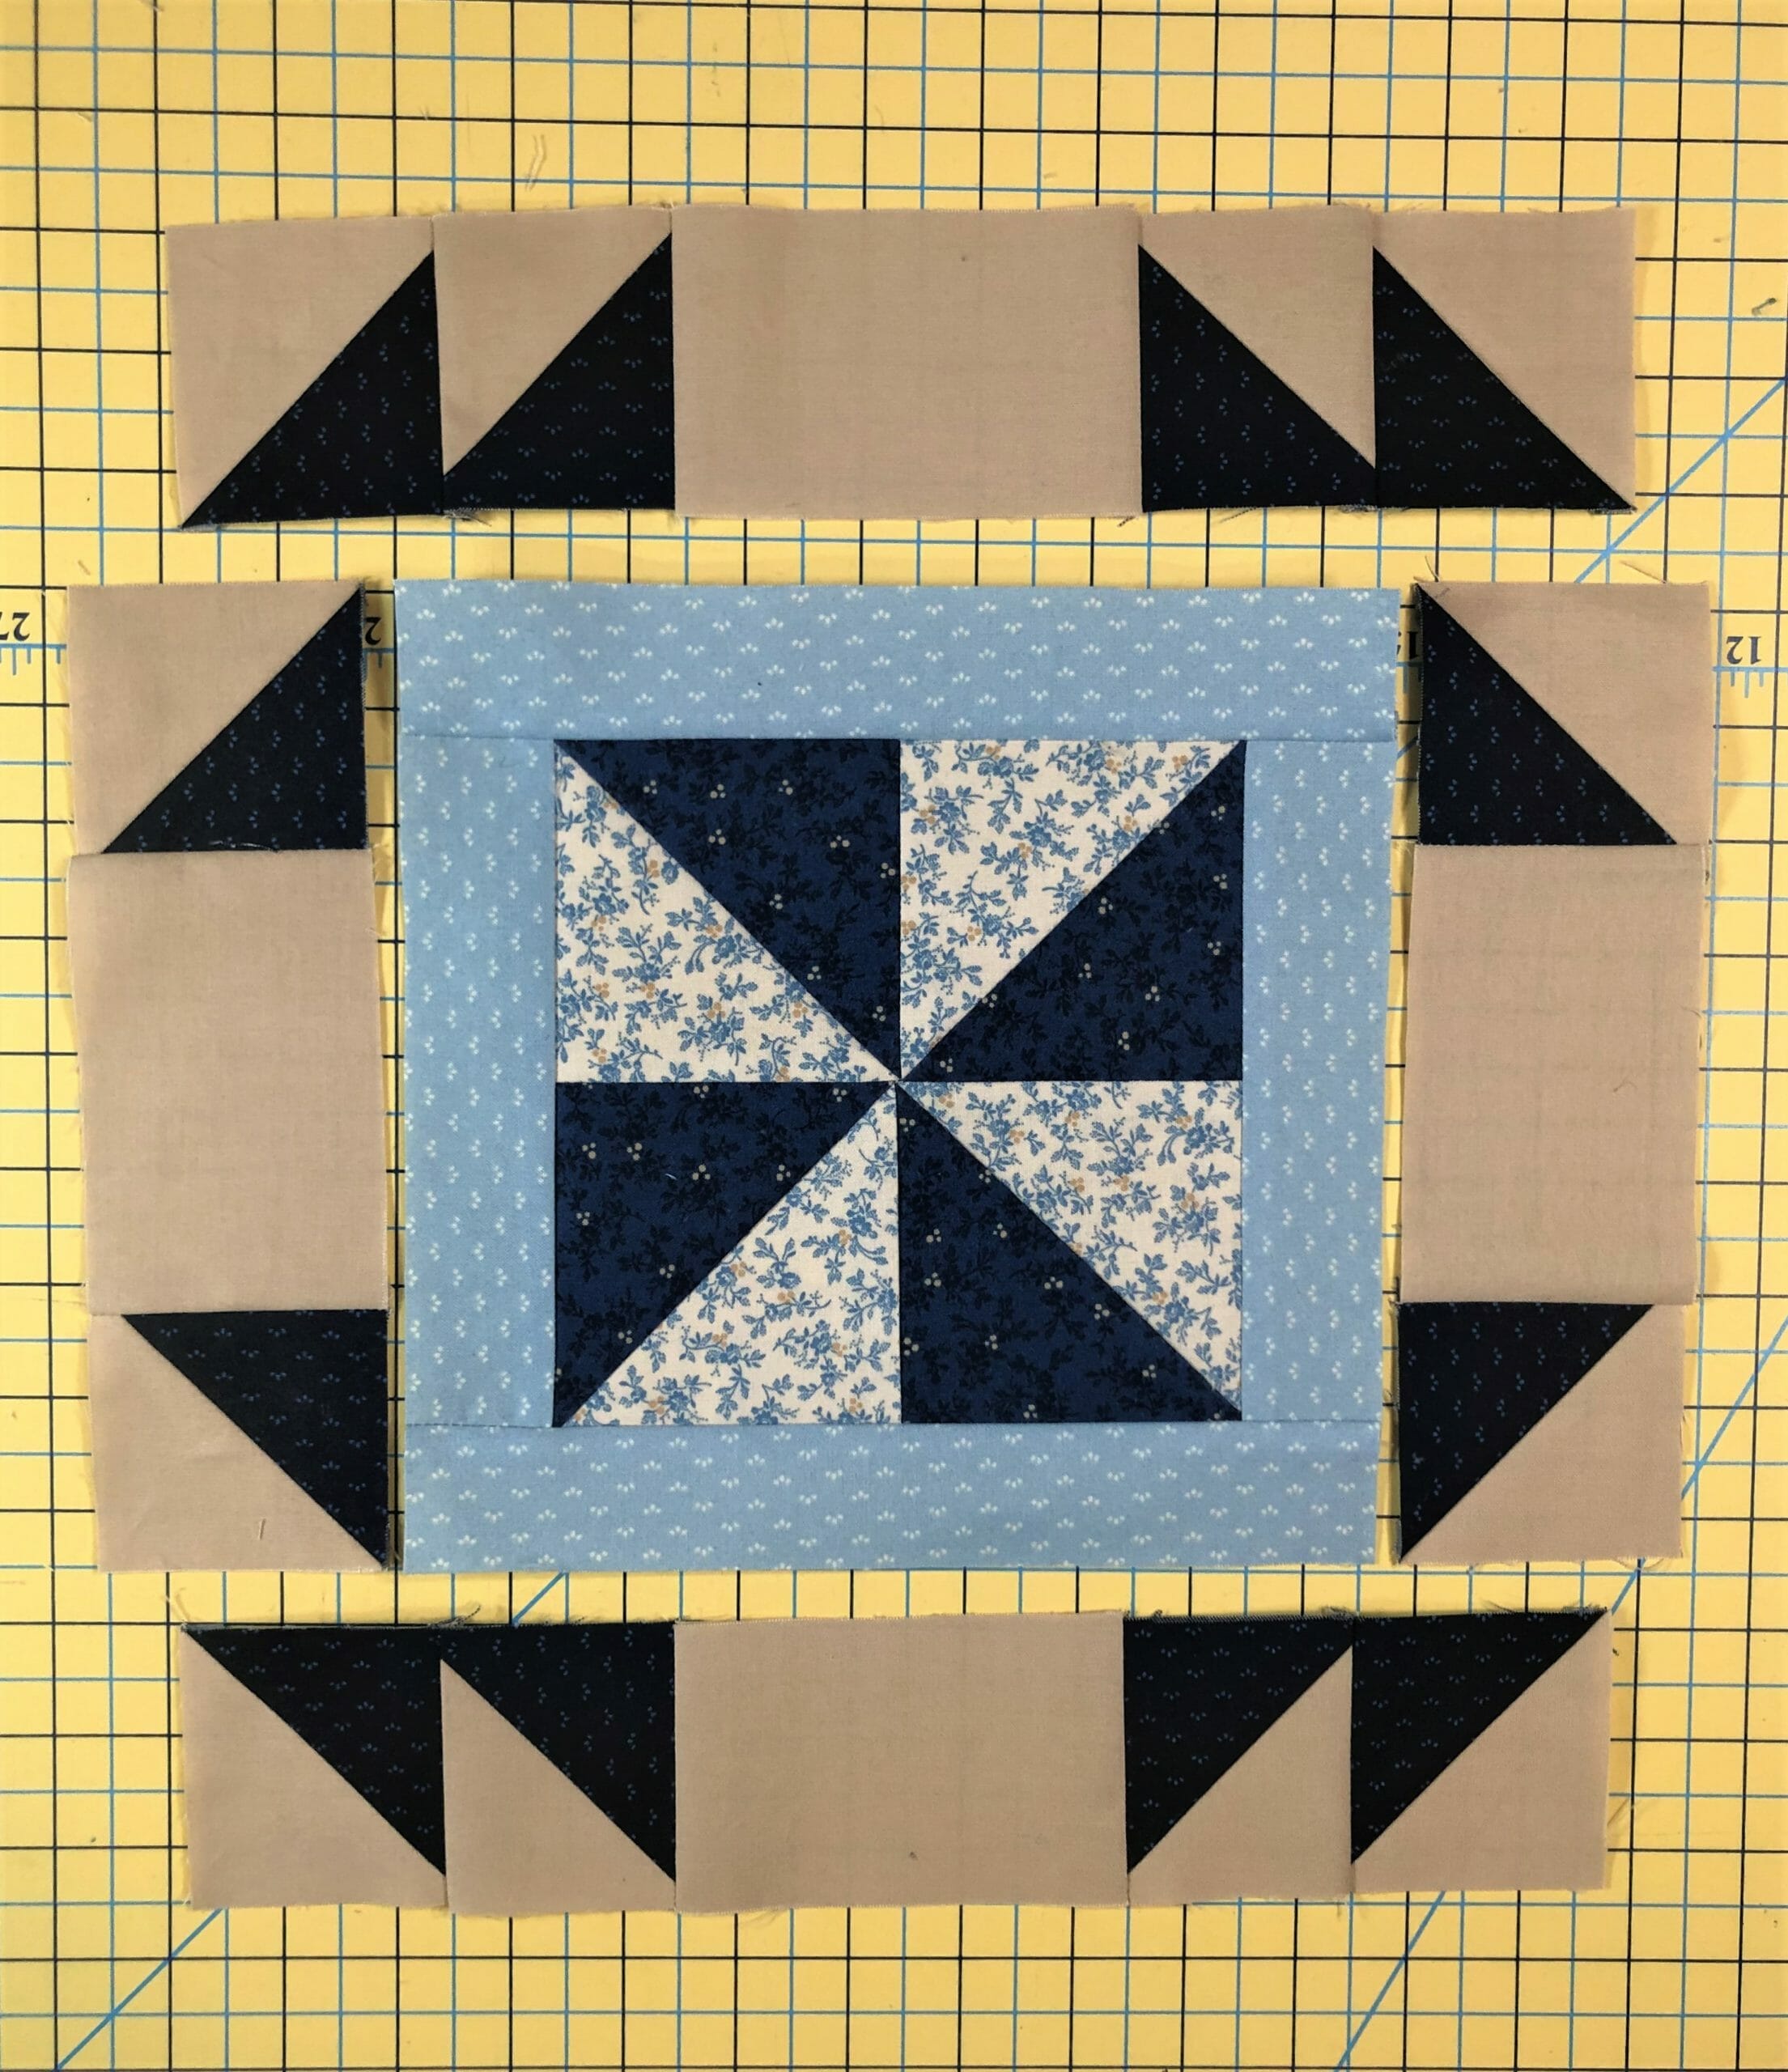
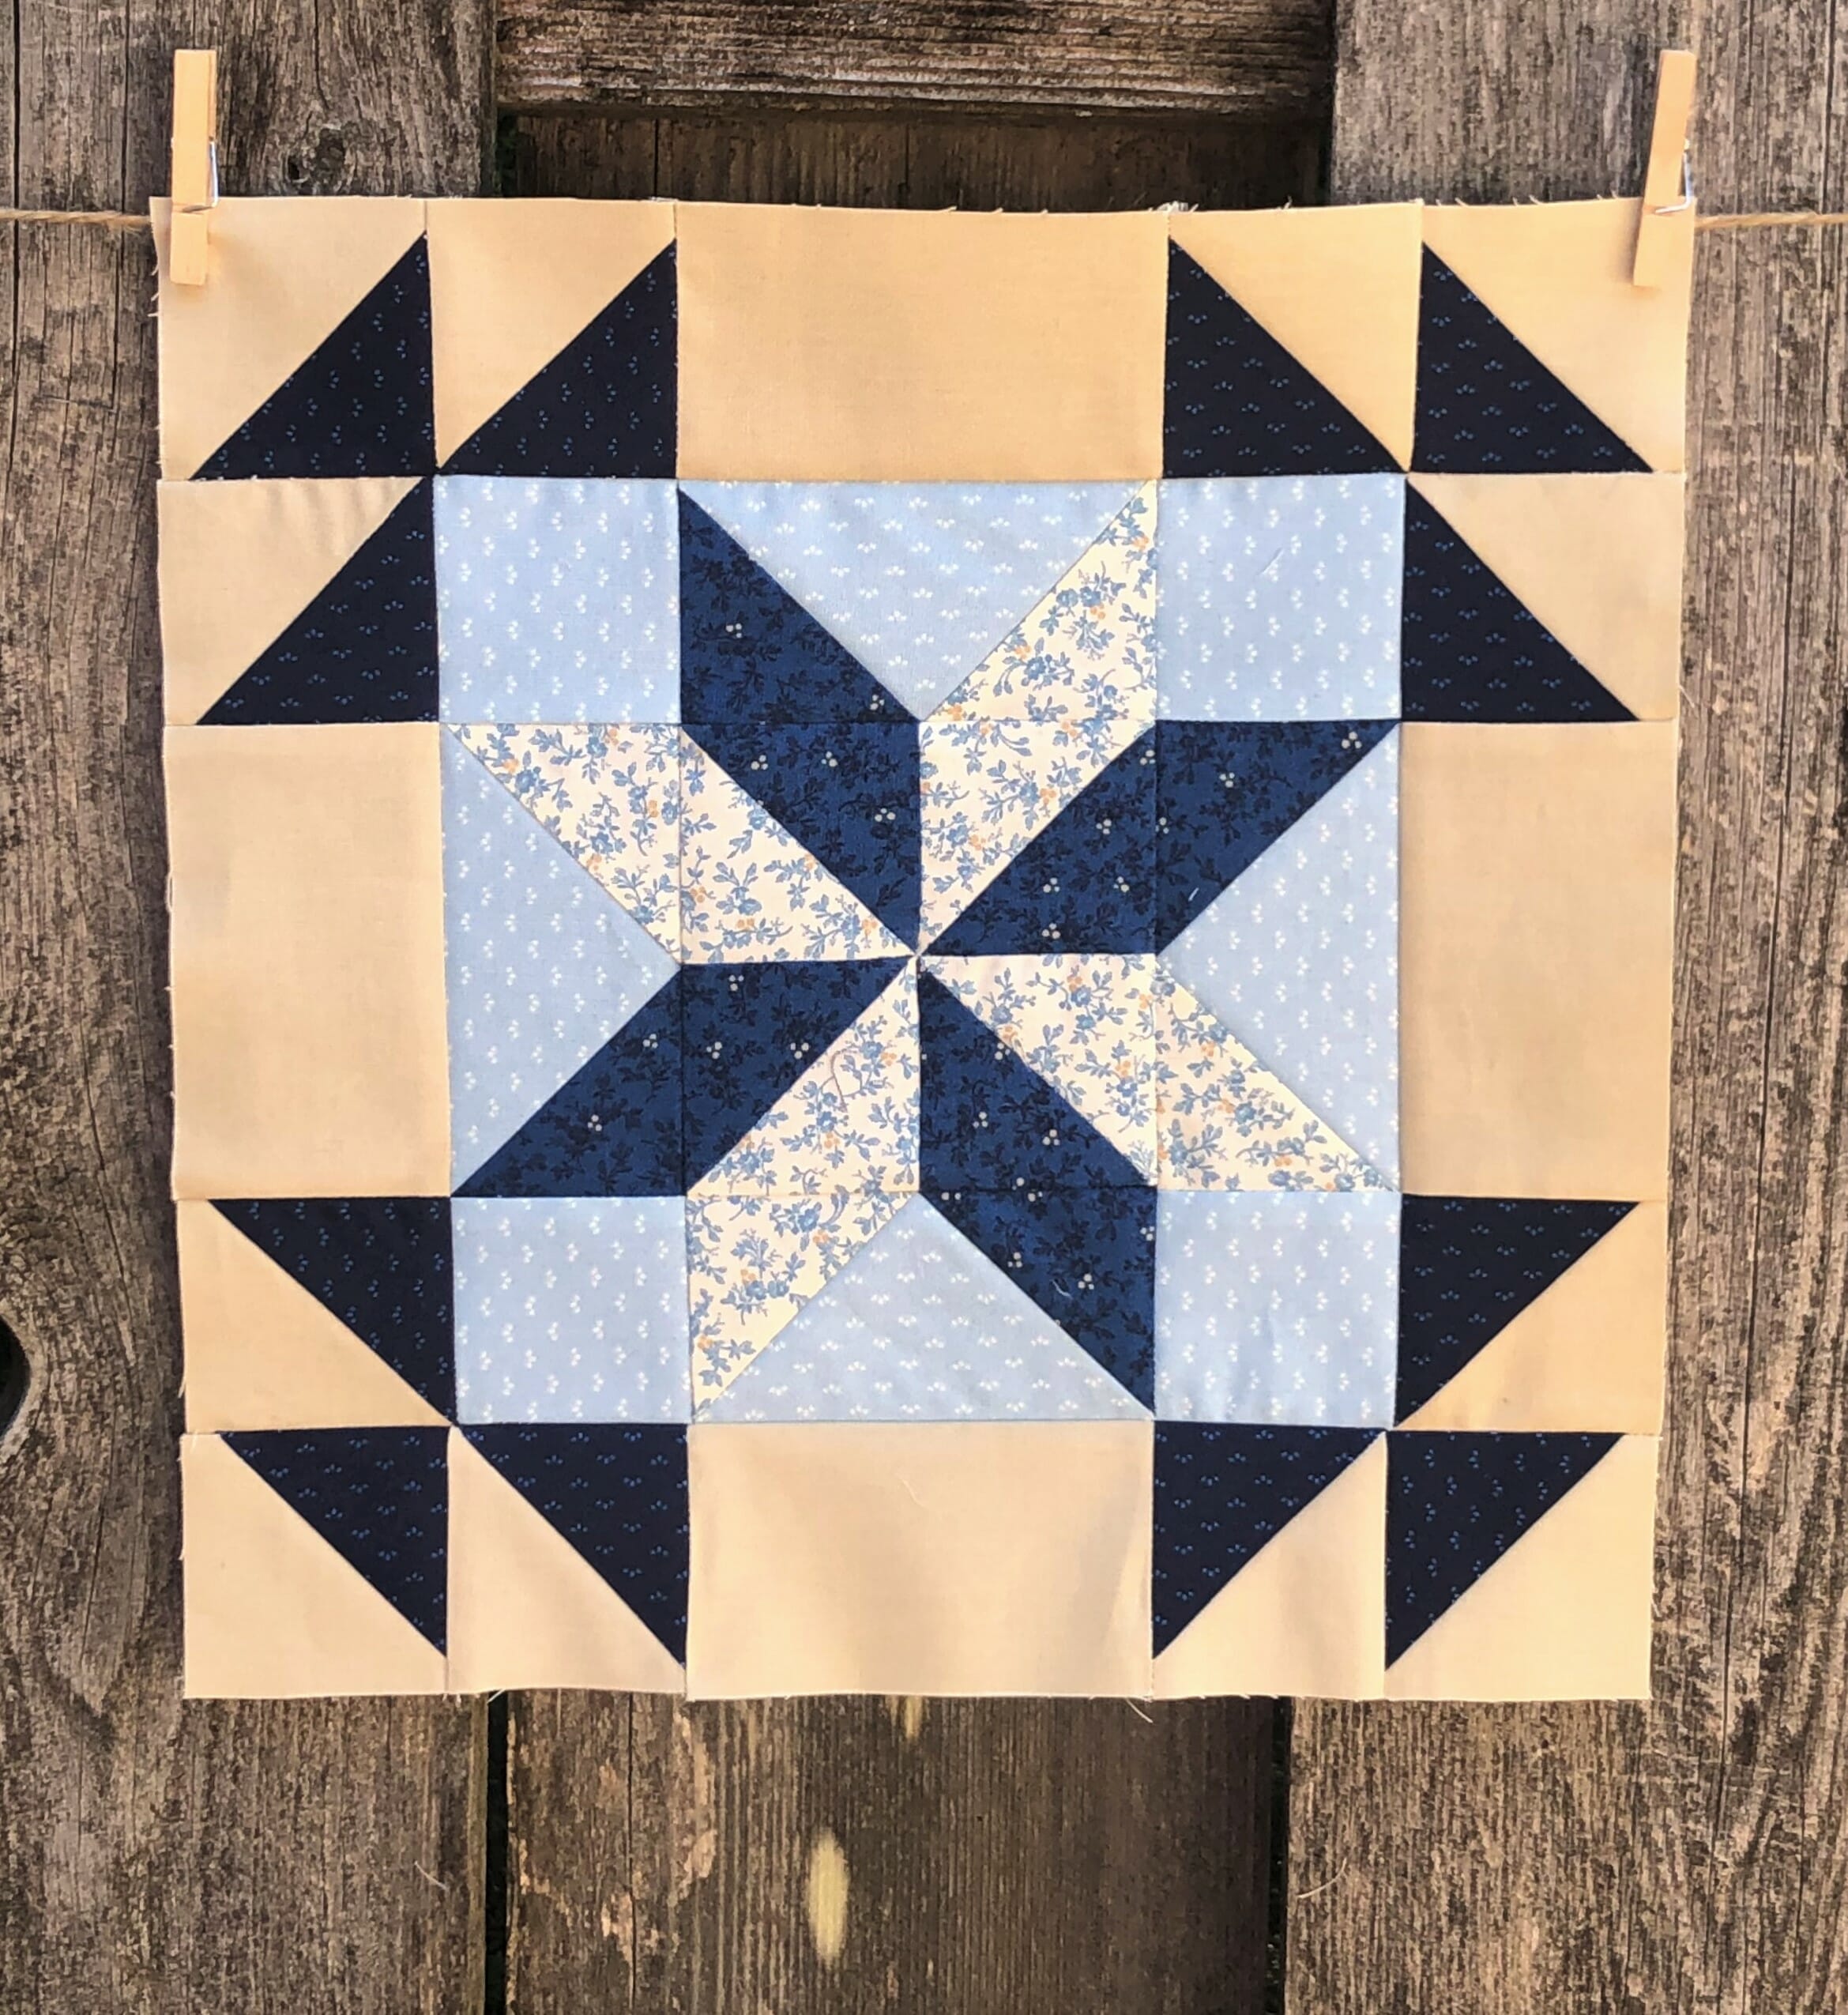
And of course, to finish things off, we will add those borders we are getting so good at.
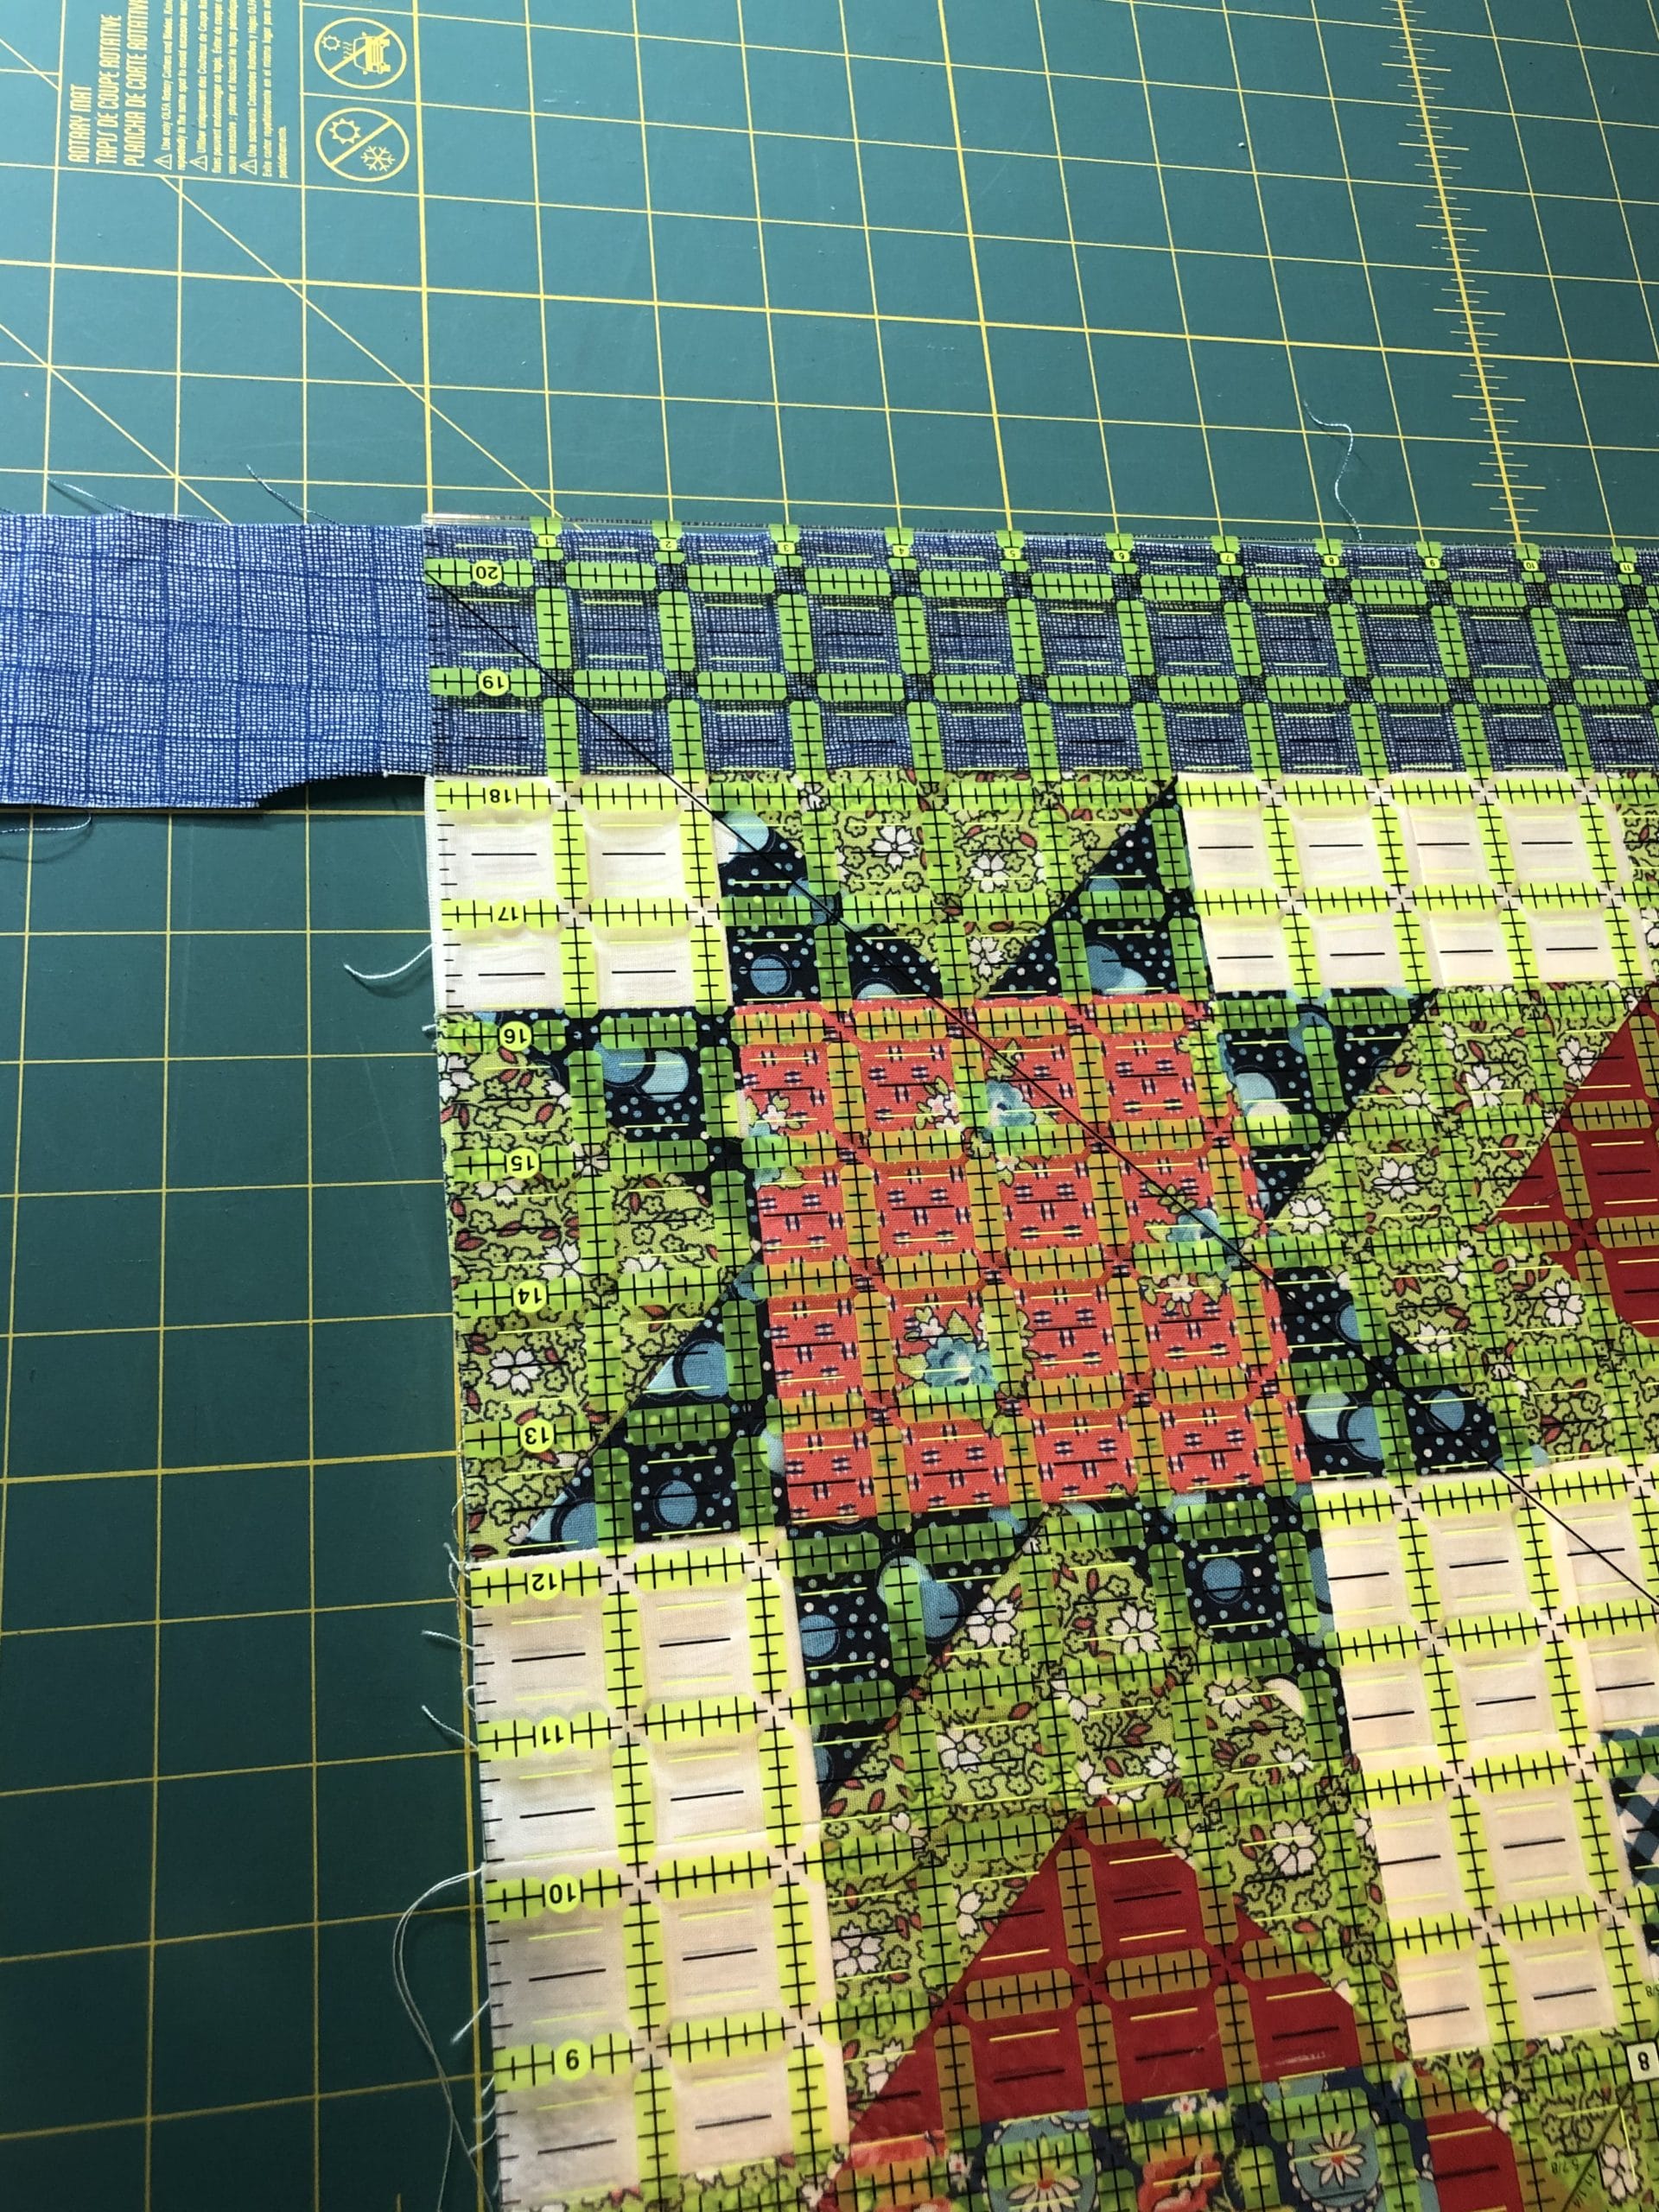
Block # 20
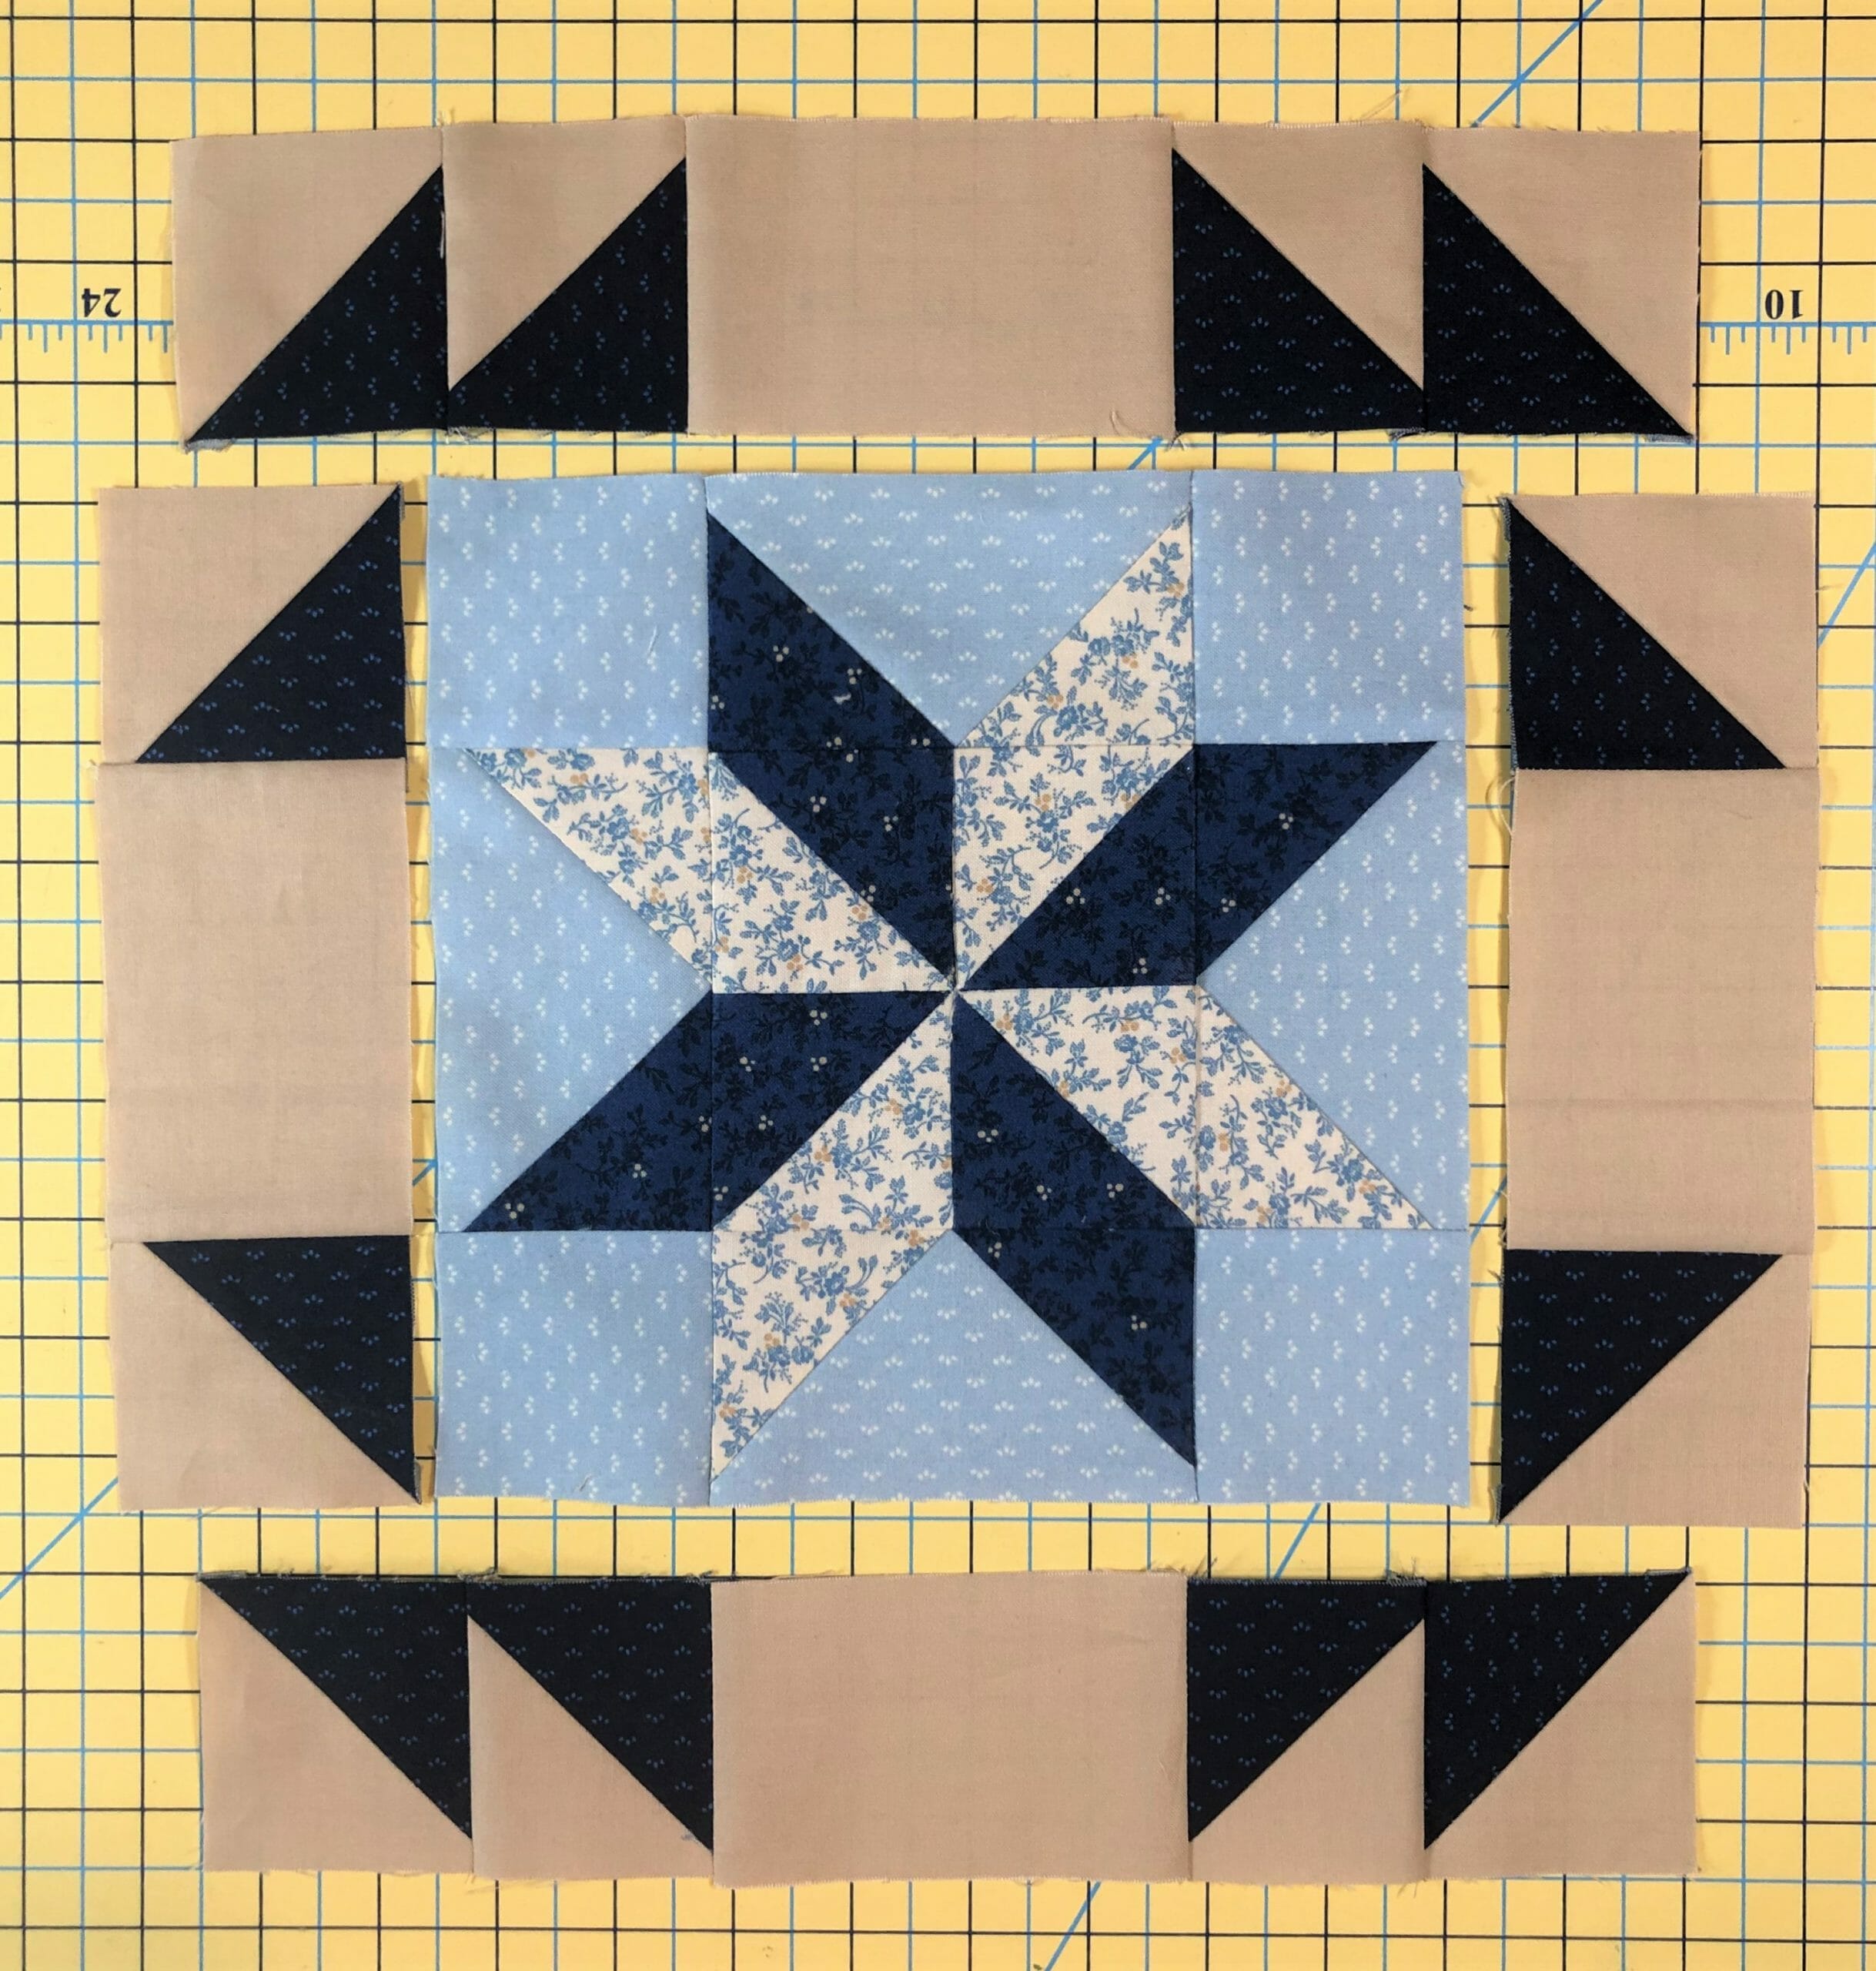
This block is an easy version of the Lemoyne Star. The traditional way to make these is to sew with Y seams and other fun stuff that I don’t personally want to attempt, so we’ll be making this the cheater way.
This block starts the same as the last one, by making a pinwheel unit from half square triangles. It’s important that you have your pinwheel oriented correctly in order for this block to turn out. So please double check as you sew and make sure your D and F triangles are in their proper place, exactly like the diagram in the pattern.
Next comes the flying geese units, and we’ll be using the stitch and flip method. Again, placement is key. You want to start with your Cream G squares on the left side first, followed by the Dark Blue E squares on the right for each unit.
Once you get those flying geese done, you can lay out the block and see that the Dark blues and Creams line up perfectly to make the star. How fun is that?!
With this is all sewn it measures 8-1/2” square, and now you can add your borders to complete the block.
And of course, there are always a few more sashing strips to make as well. I had someone ask if it matters that the A strips are cut crosswise on the fabric instead of lengthwise. I usually cut lengthwise whenever I can for sashing strips, but it’s not imperative. It’s true that cutting as suggested means less give for easing things in, but usually that’s not a problem if the blocks are measuring correctly. If this bothers you, you can cut three out using the FQ and cutting lengthwise, and save your fourth one for the months when you have the extra fabric for making eight, and just cut nine instead those months. It’s totally up to you!
Well, that’s it for this month. Please holler if you have any questions, either on here, or on the facebook group, and I’ll try my best to get to them. Thanks for stopping by!
It’s been so fun to see everyone’s first blocks on the facebook group. Keep up the good work!
This month we will be doing just two blocks, and 8 sashing strips.
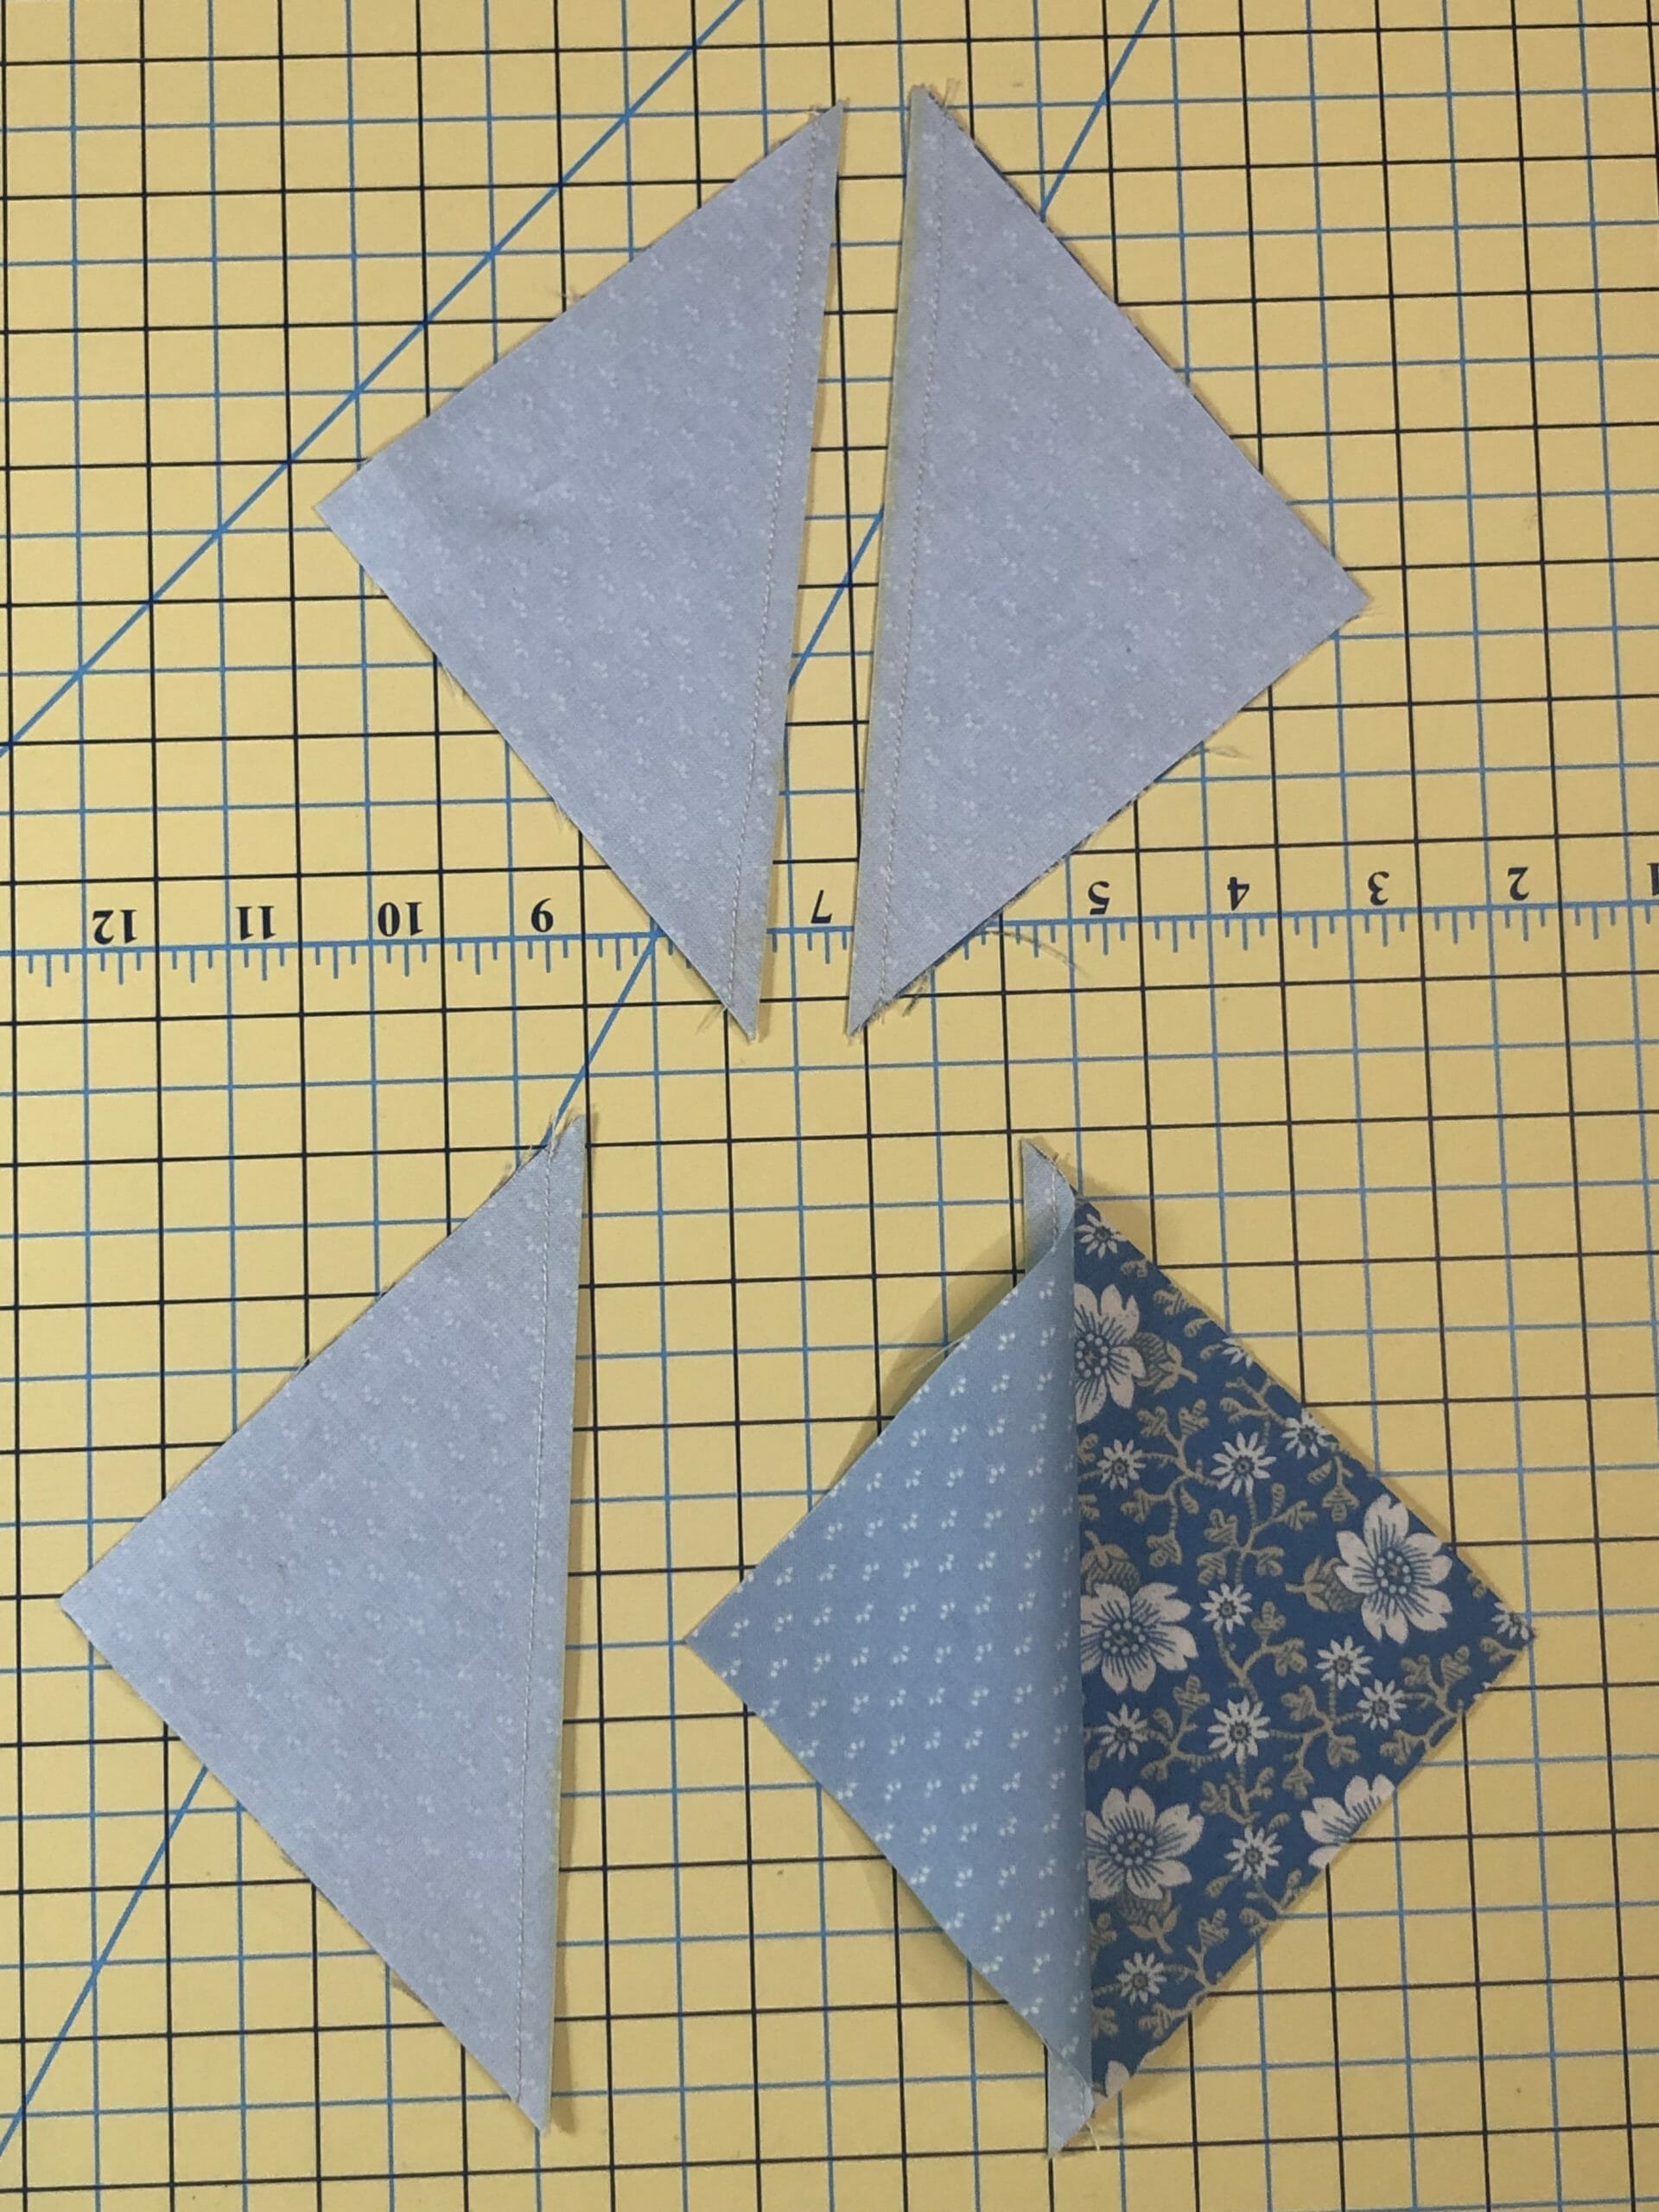
Our two new blocks have one thing in common – Square in a square units. Personally, I have a love/hate relationship with these little guys. I love how they look, but getting them the right size can be tricky. In fact, as I was sewing up these blocks I was seriously questioning my design choices, and wondering what on earth possessed me to do this to all of you. But it’s skill building, right?!
If I have one piece of advice for making these it’s this: Accuracy in cutting the center square is crucial, but the outer triangles that you’ll attach can be cut bigger than needed, and then trimmed to size after they are all sewn on.
Another tip – STARCH! Any time I’m sewing pieces that have been cut on the bias, using extra starch just helps to keep them from stretching or getting wonky.
Ok, let’s get started!
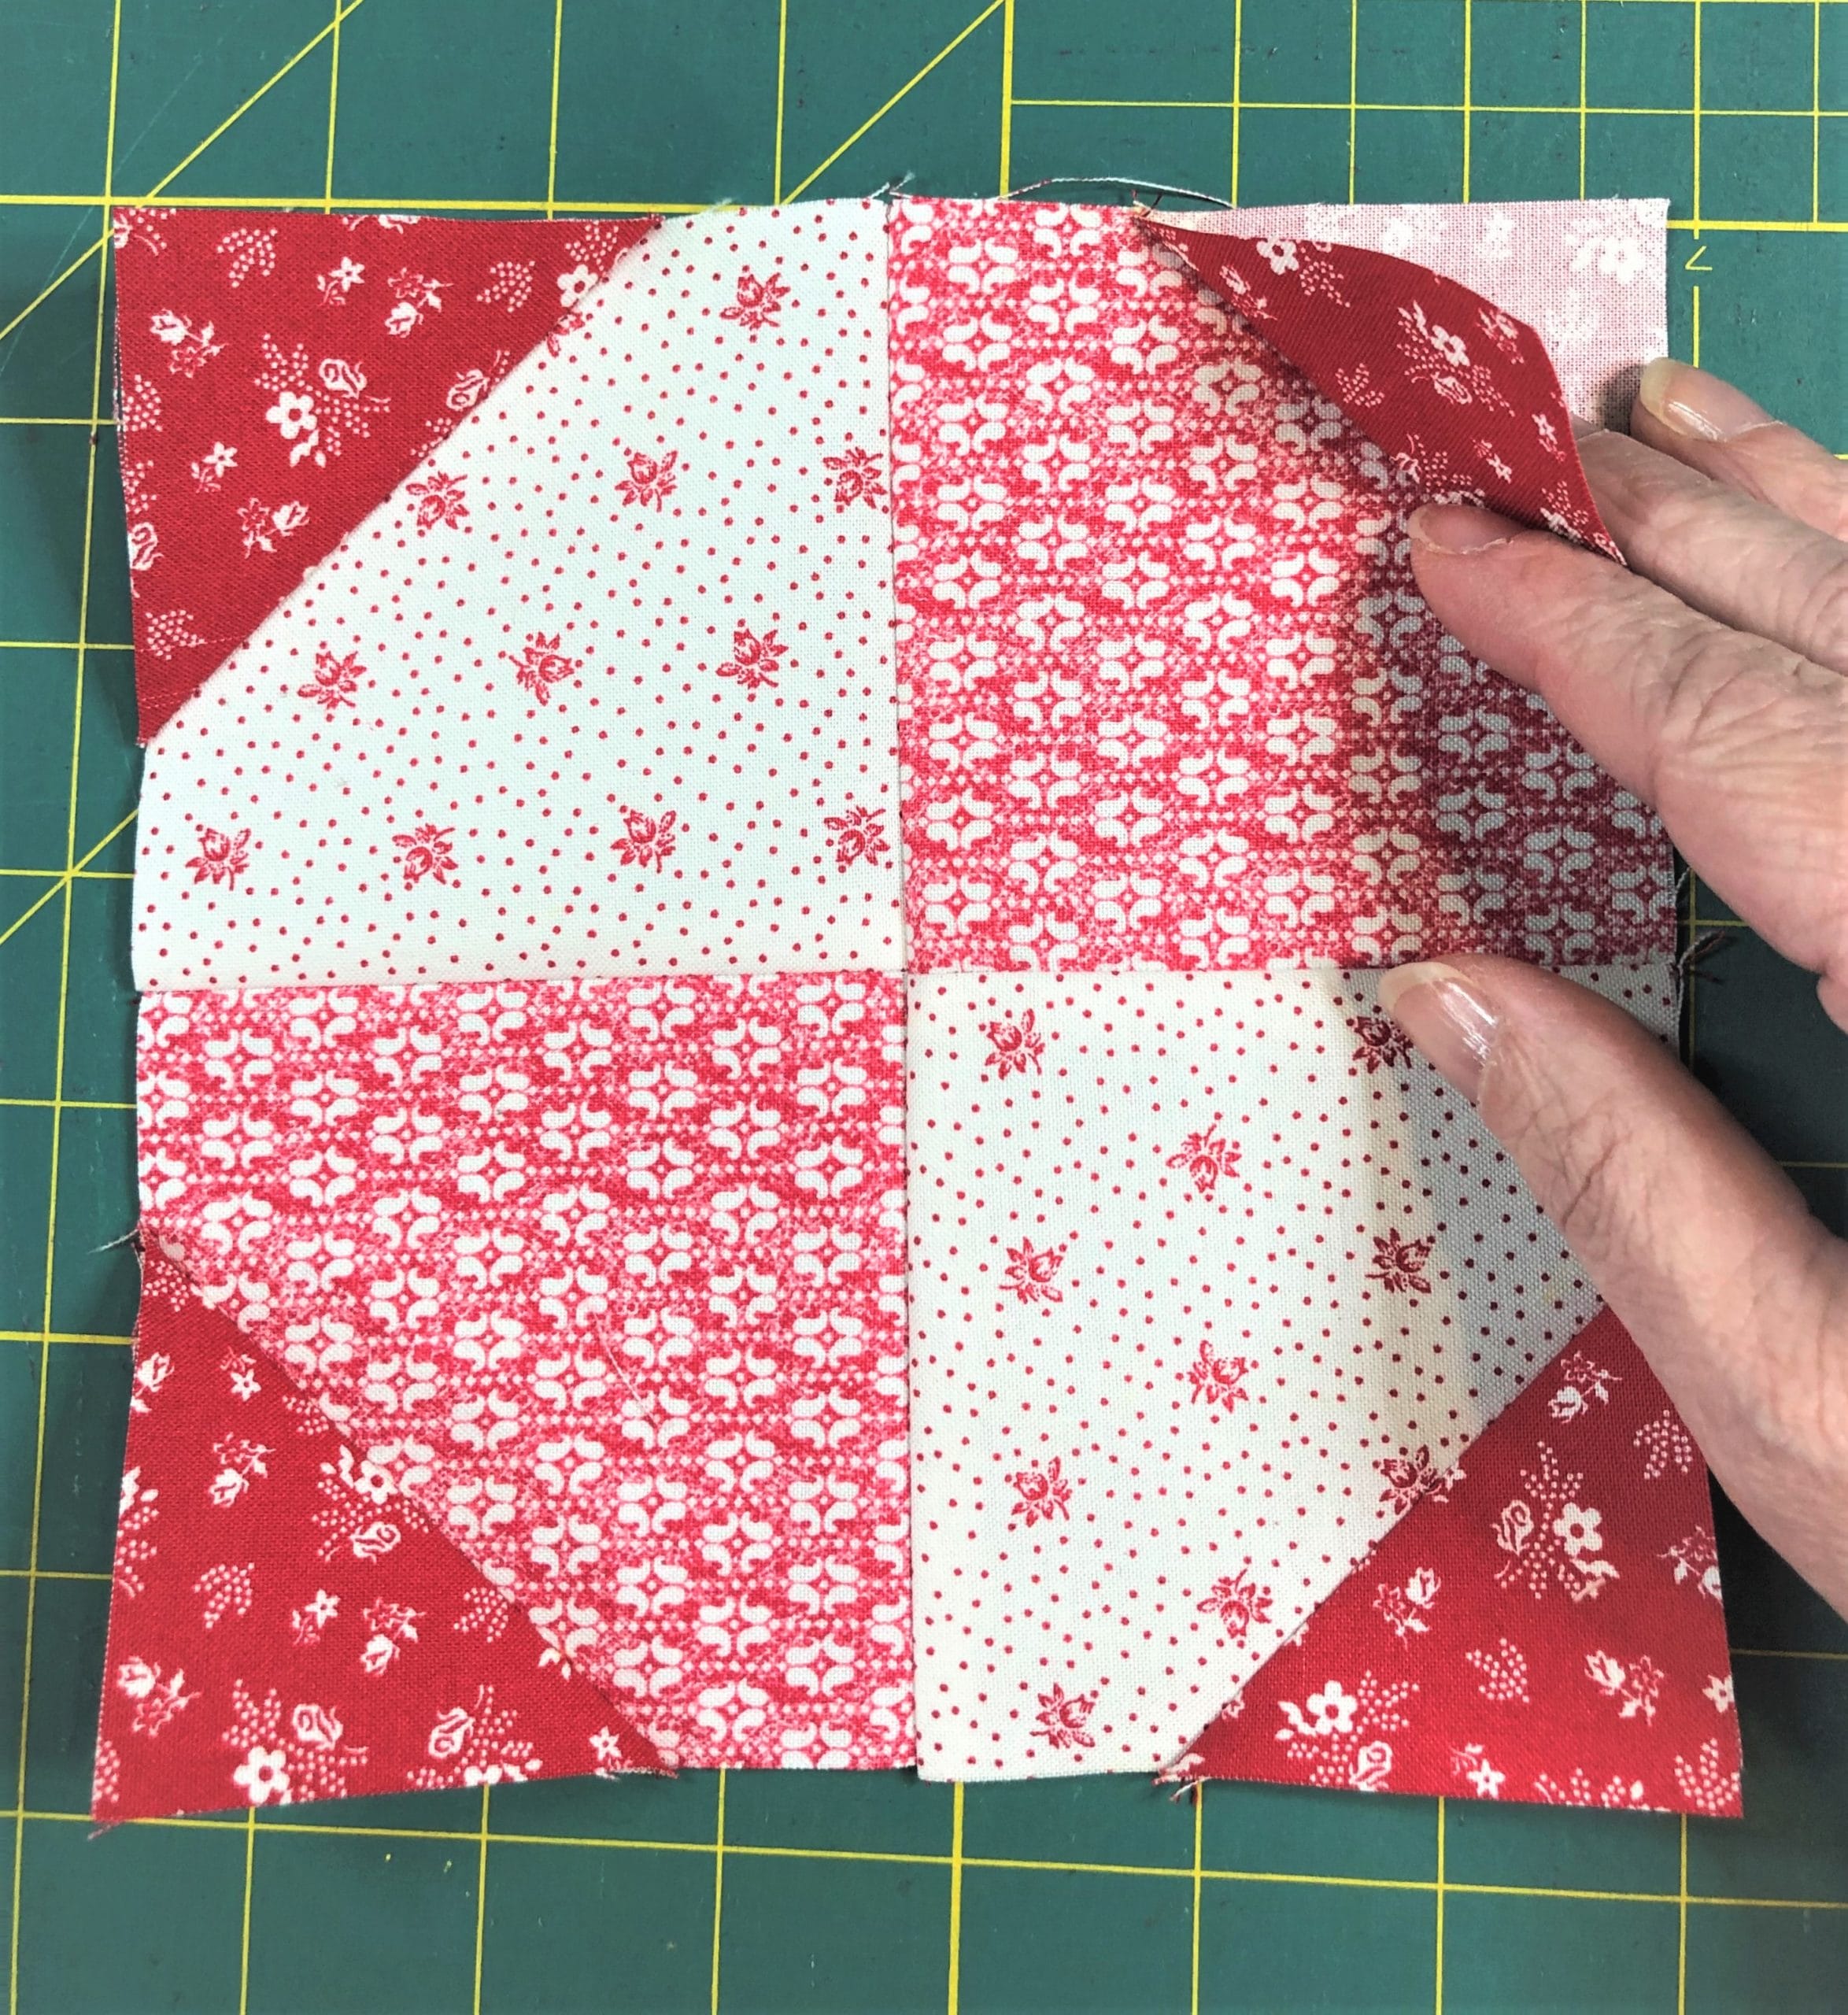
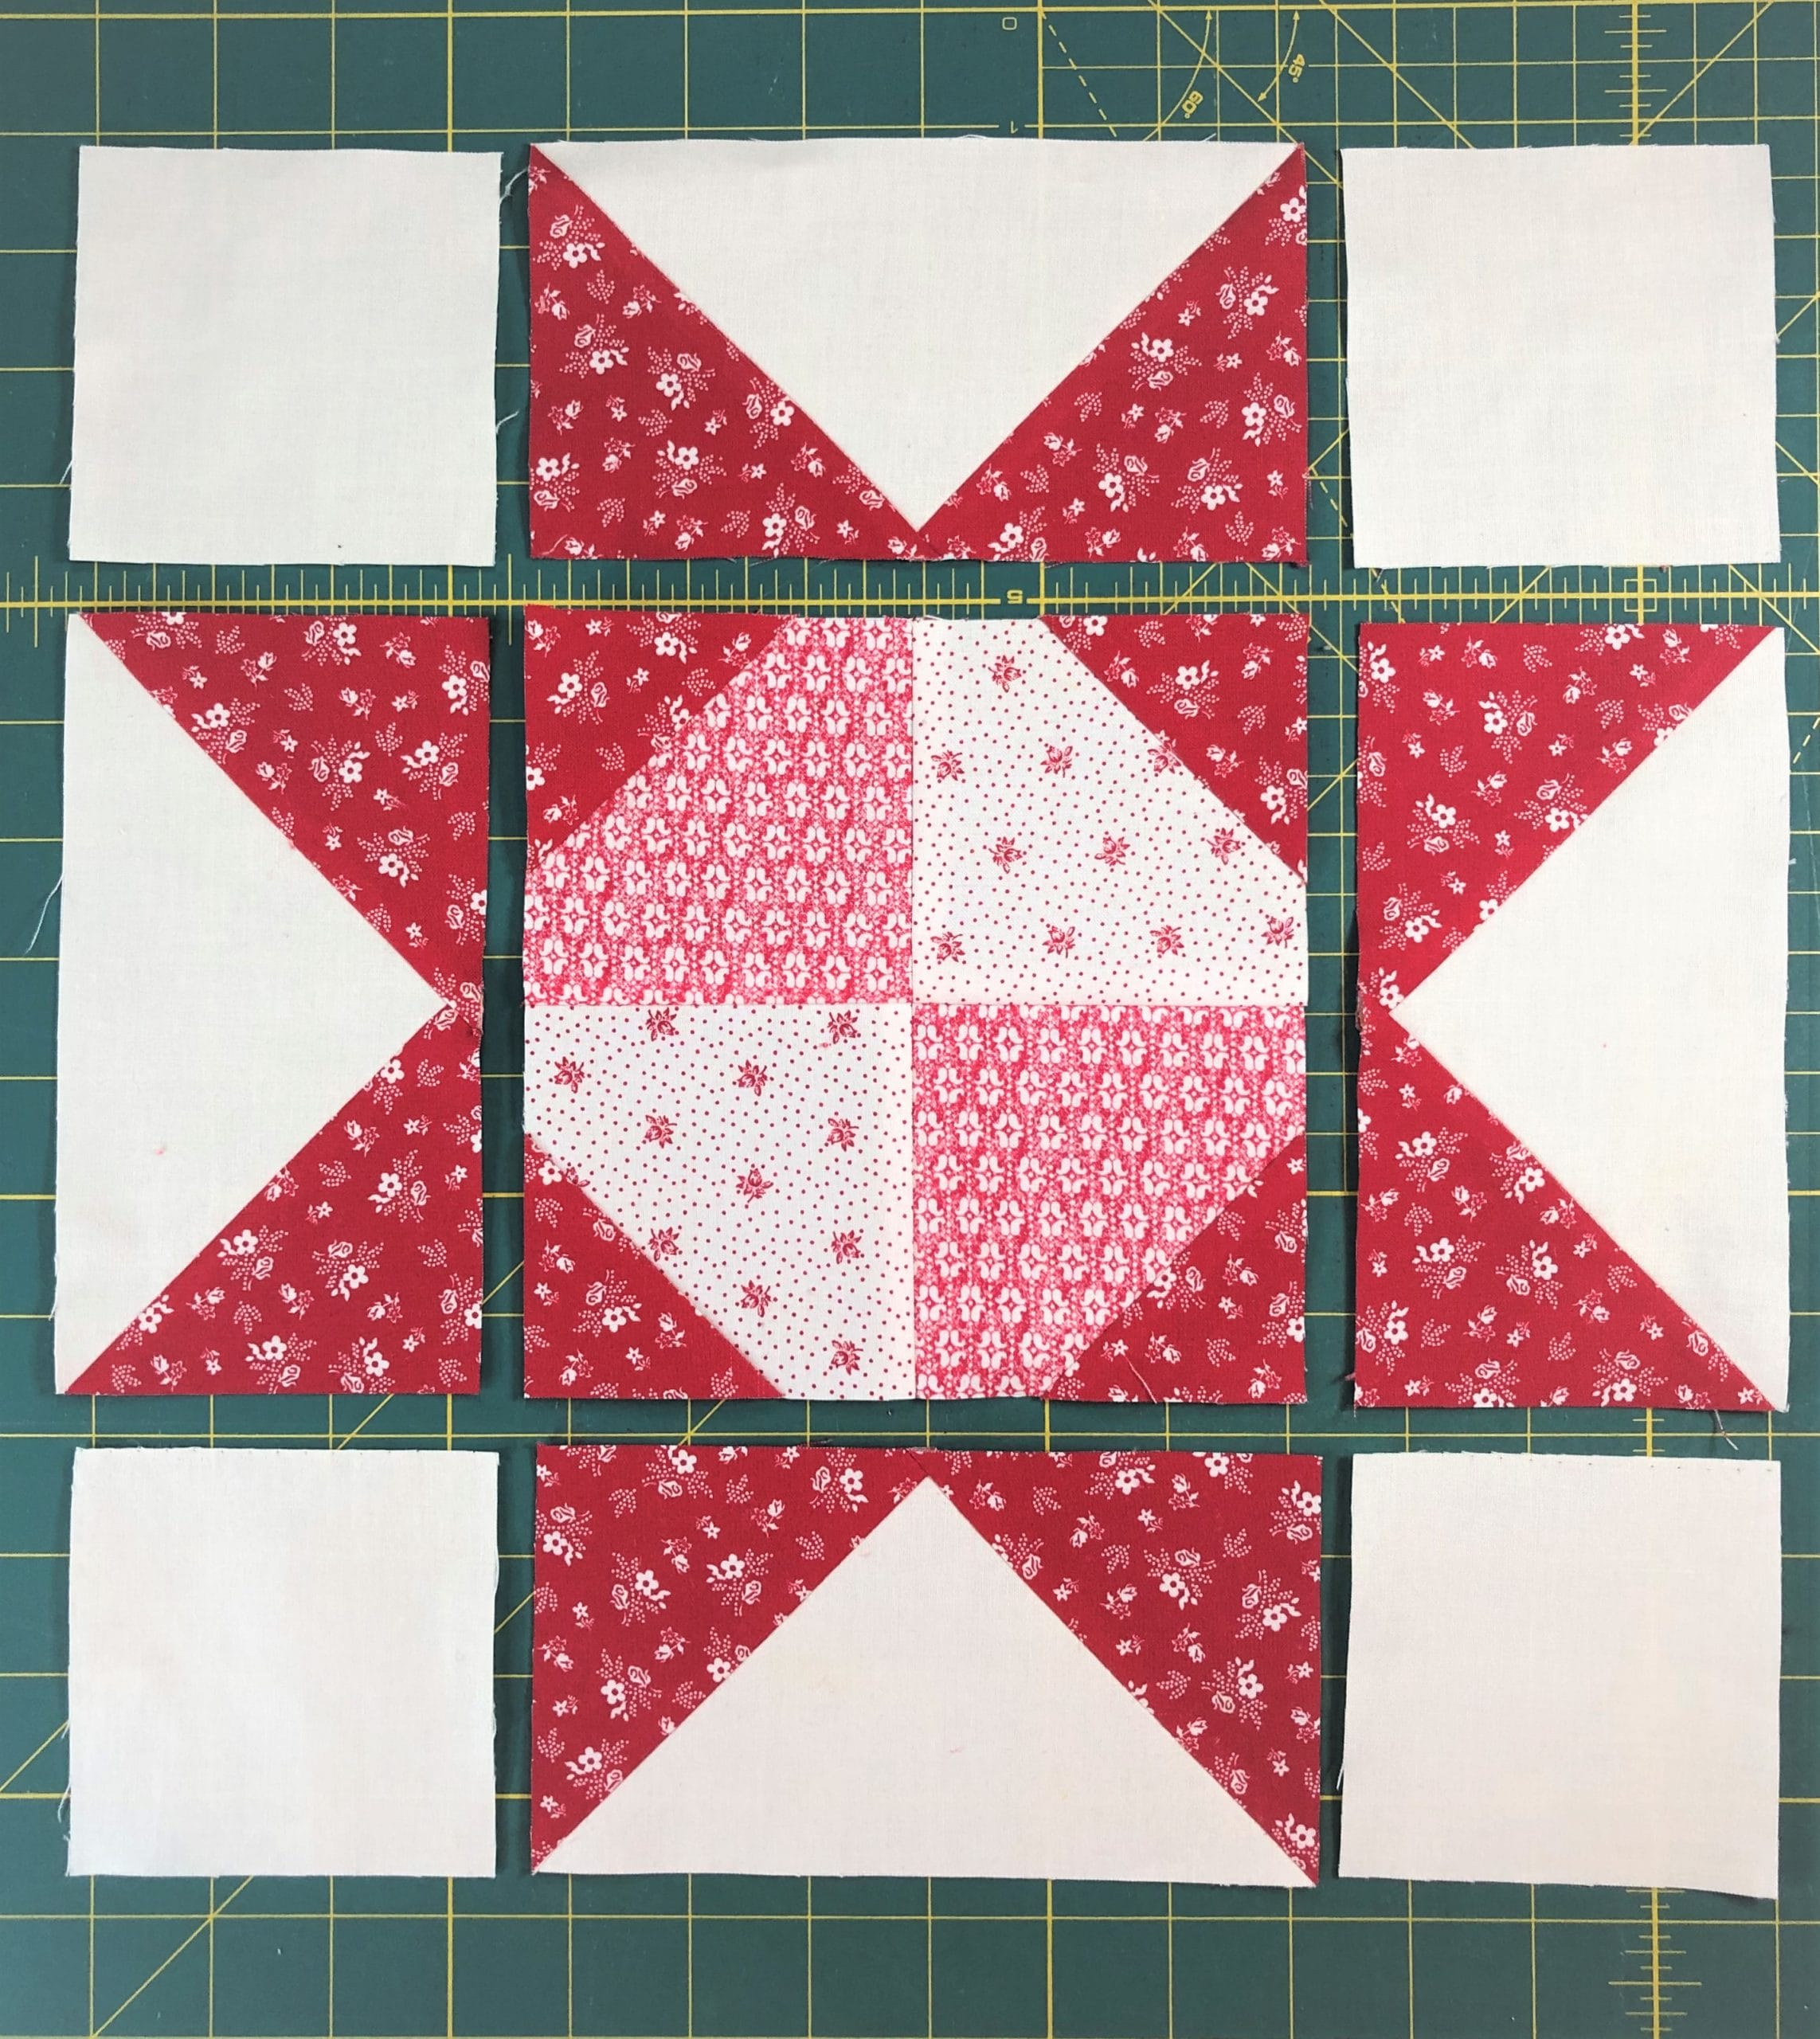
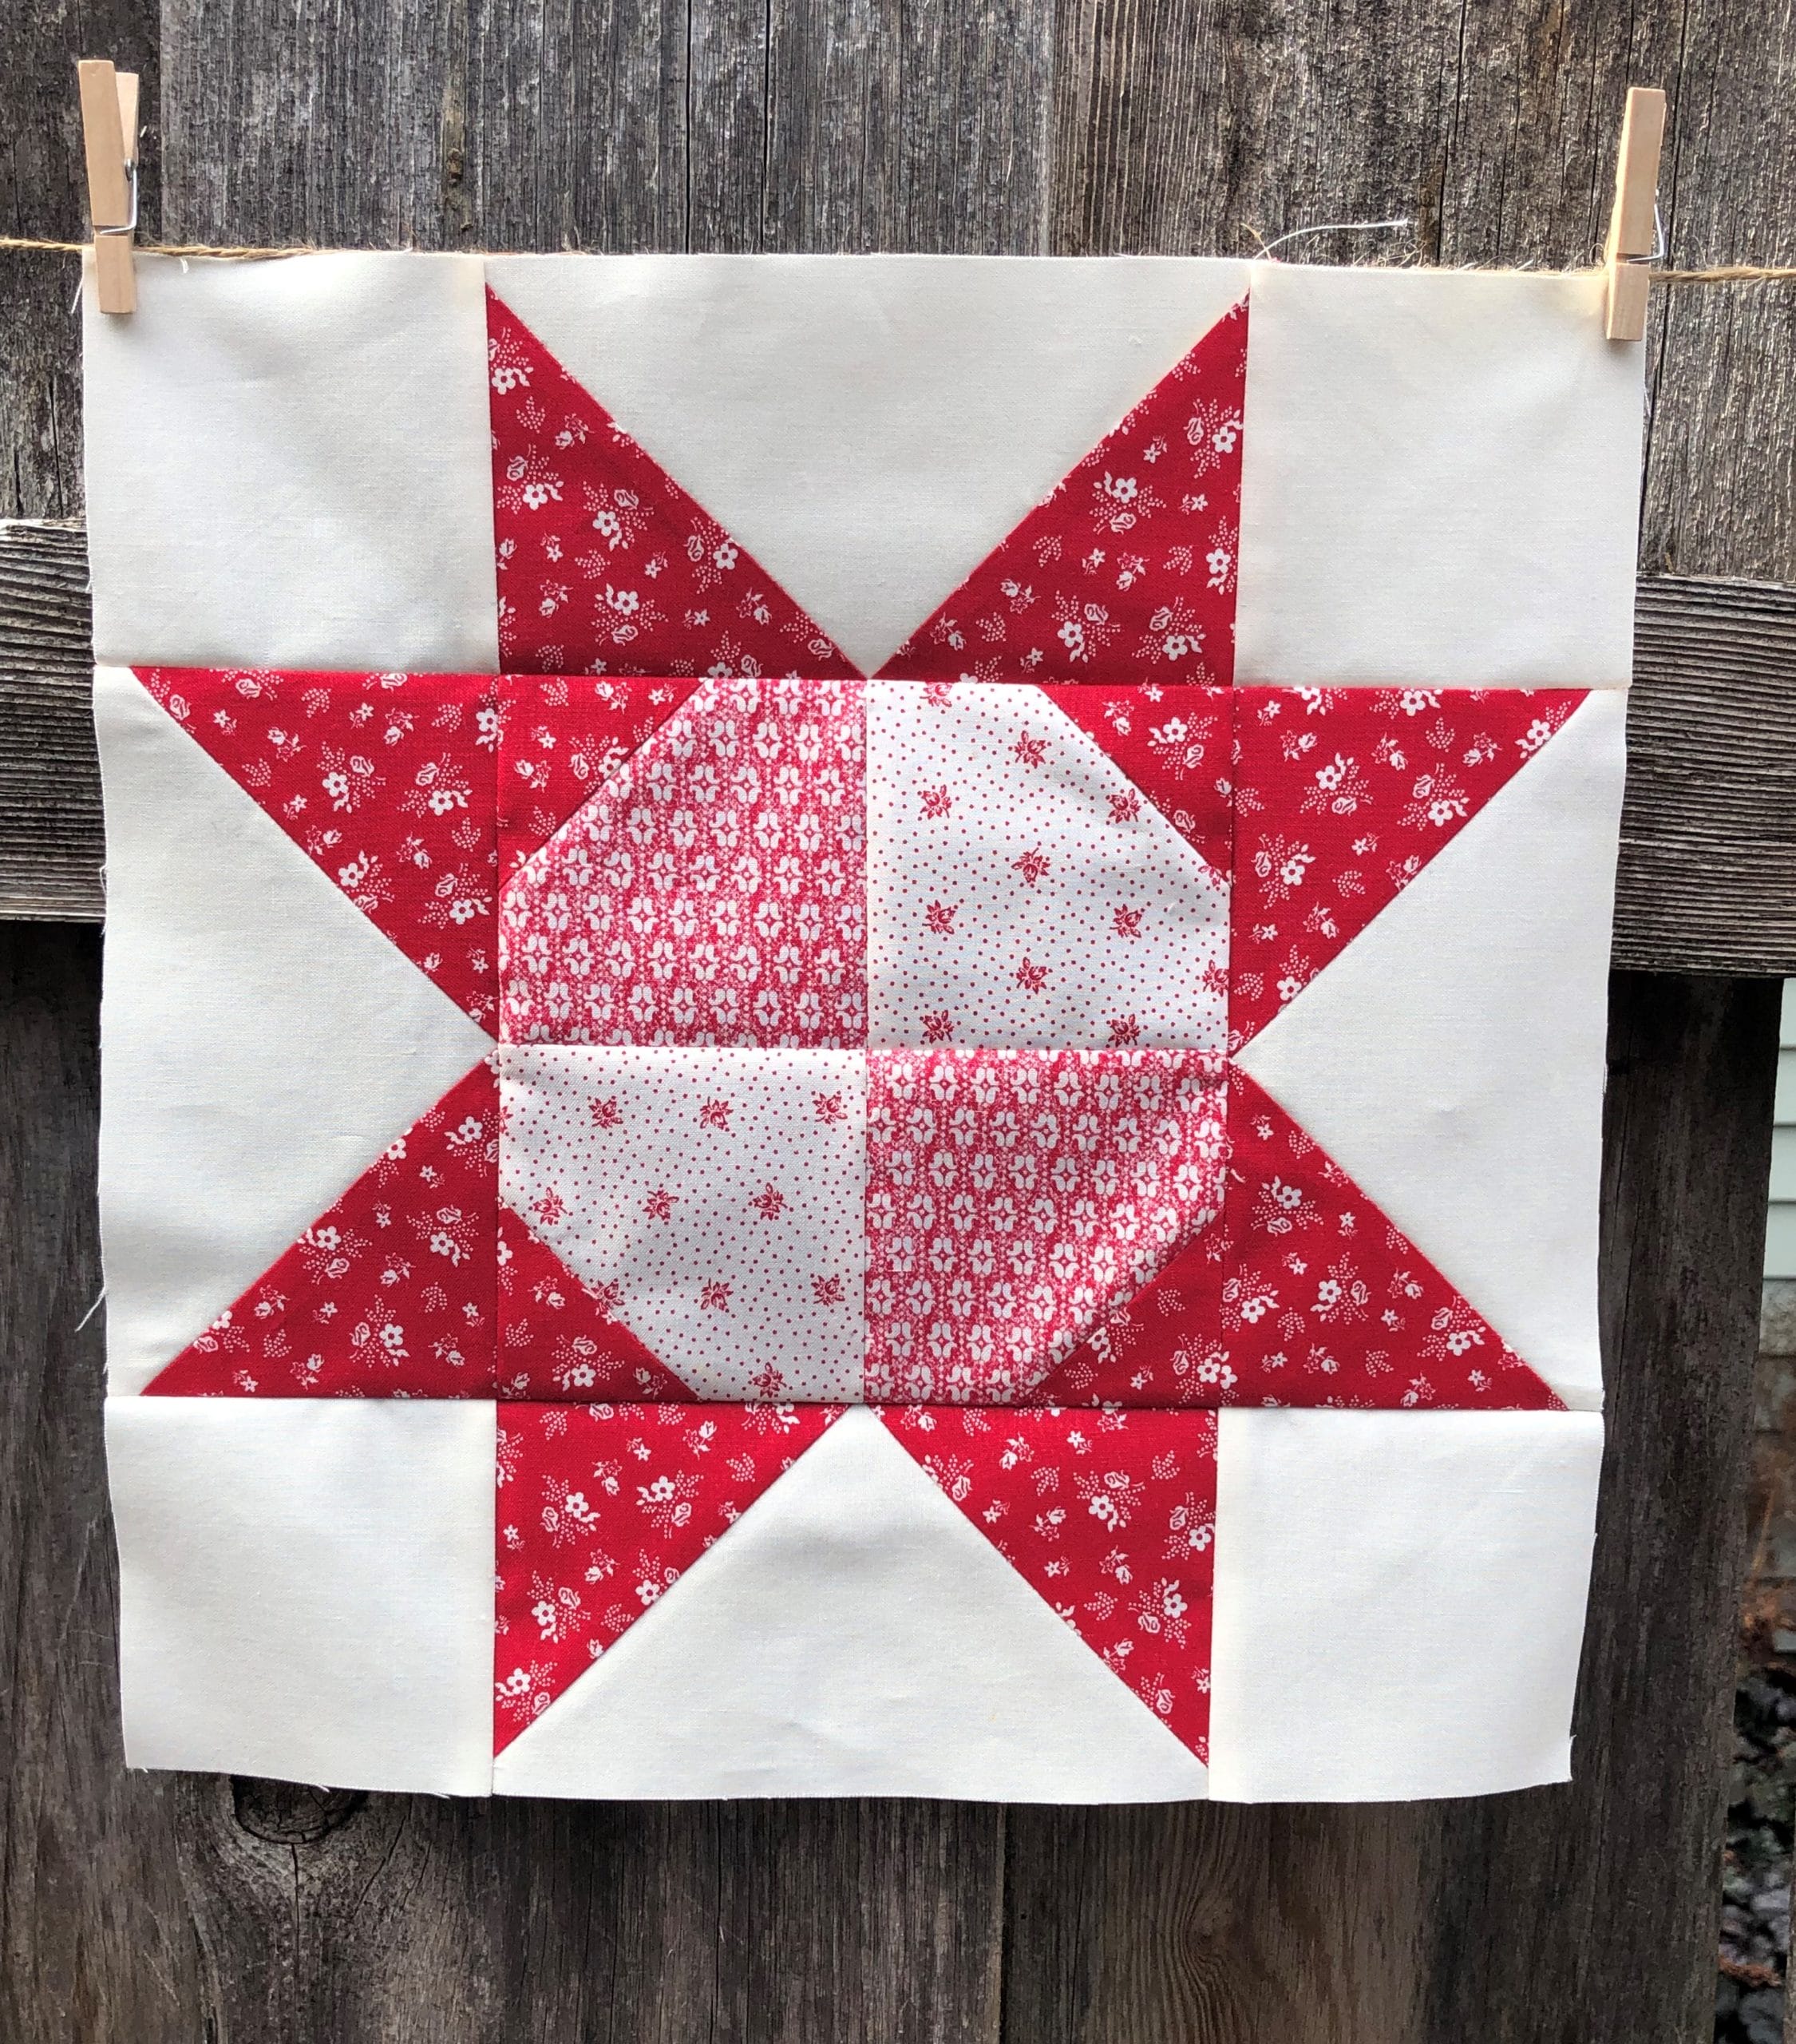
Block #2
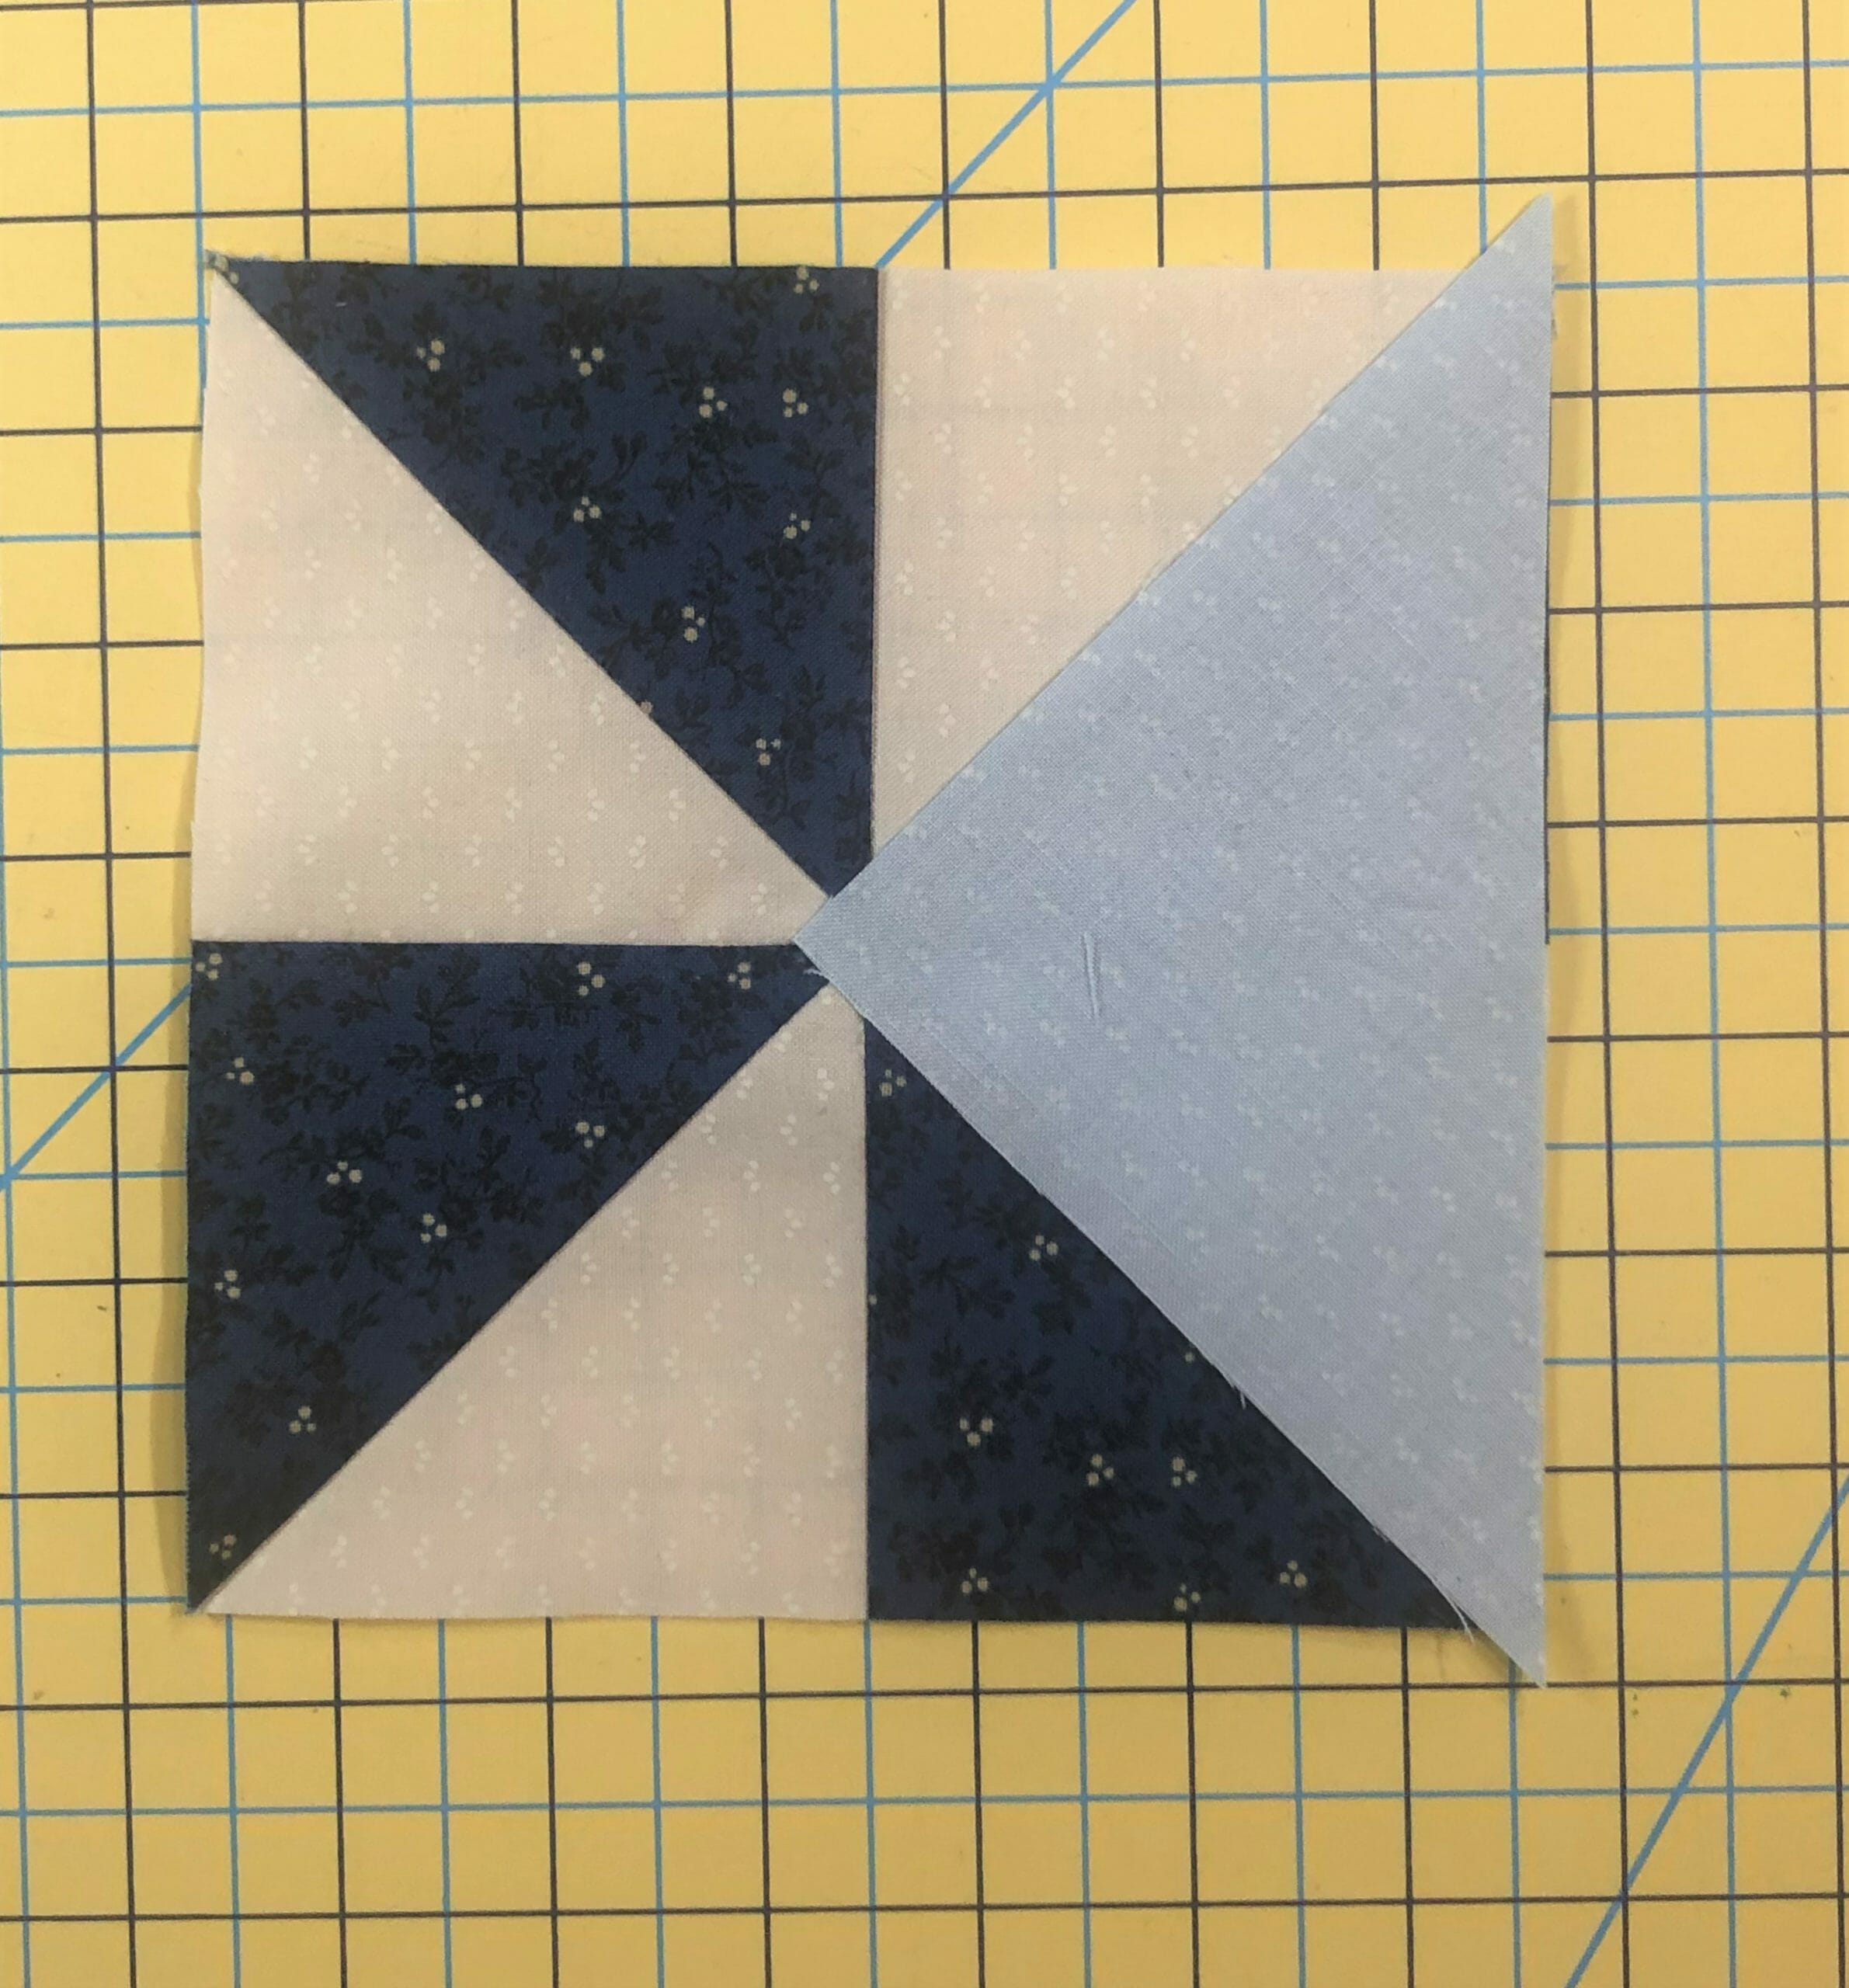
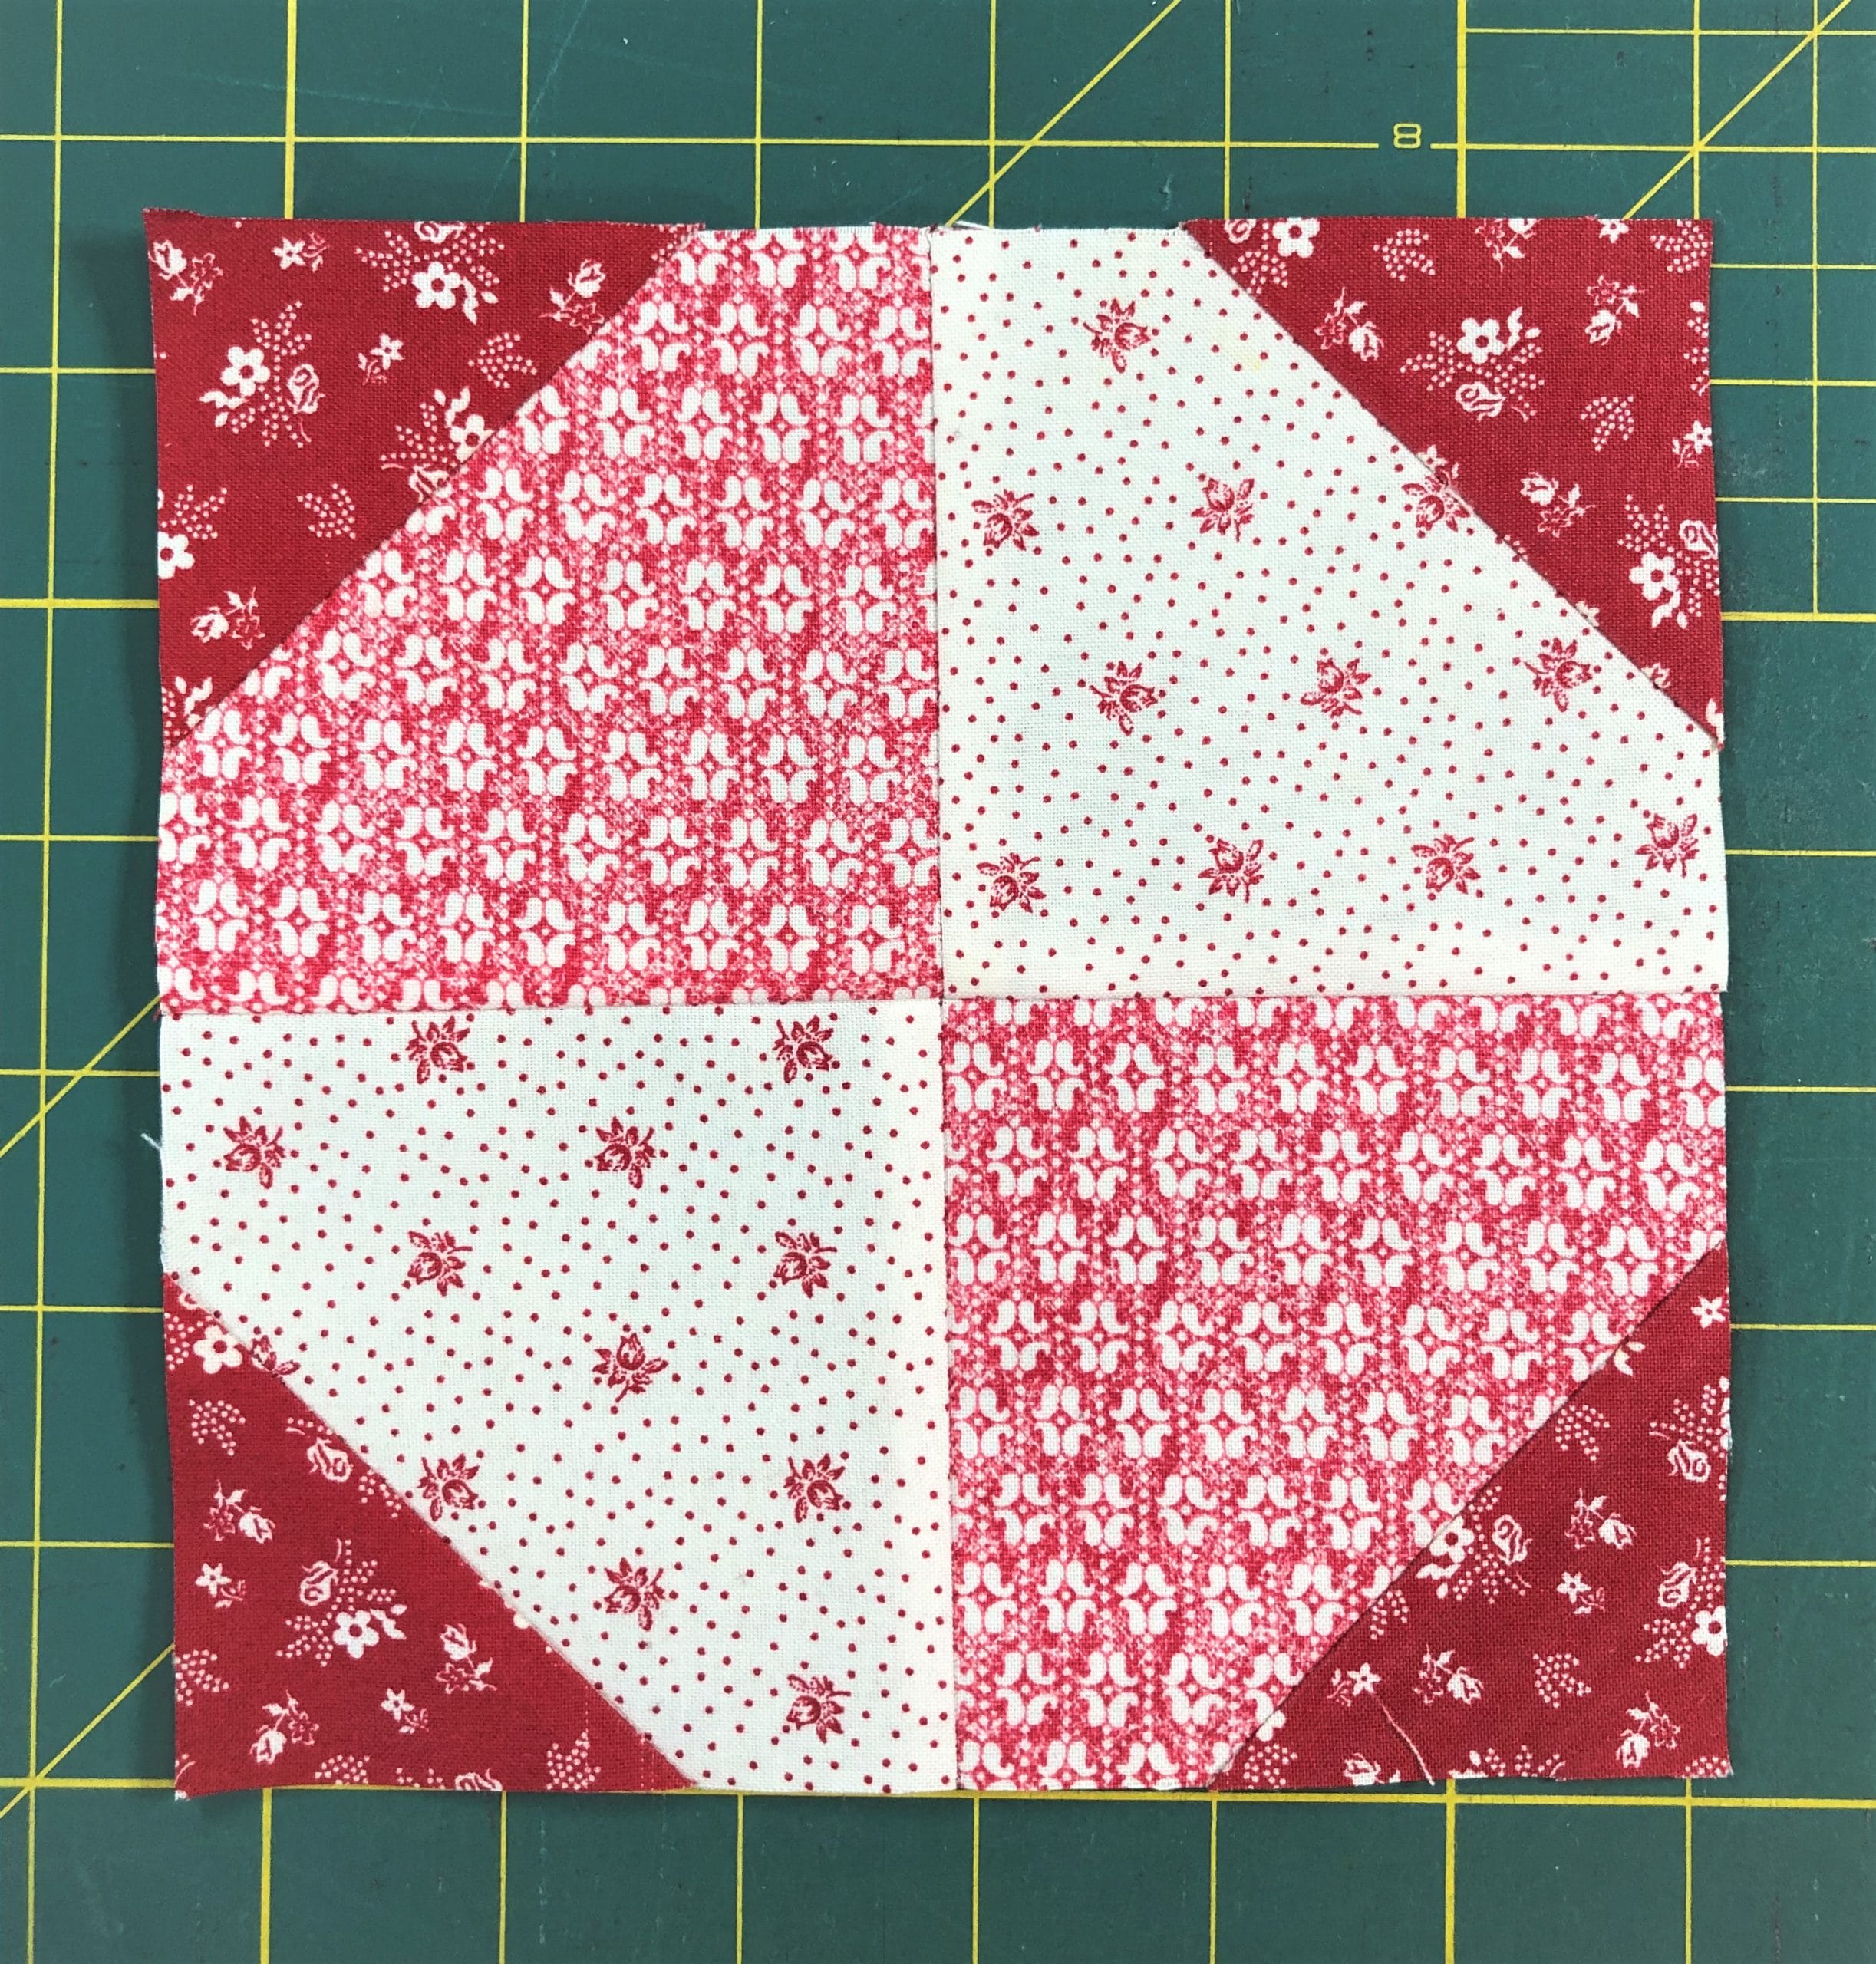
We’ll begin by making a pinwheel unit from four Half-Square triangles. Again, feel free to cut your D and E squares a bit bigger if you like, so that you can trim these down to size. And I know that 3-3/8” HSTs is a weird size! Trust me, it works out.
Make sure your completed pinwheel measures at 6-1/4” square. This is key.
Next, you’ll sew on those well starched triangles. If you are having trouble figuring out where to line up your triangles, use the pinwheel as a guide. The point of the triangle should line up with the seam of the pinwheel, like you see in the photo below:
Do this for all four triangles as you sew them on, one at a time. Acutally, I usually pin mine on two at a time and sew accordingly, even though the directions say otherwise.
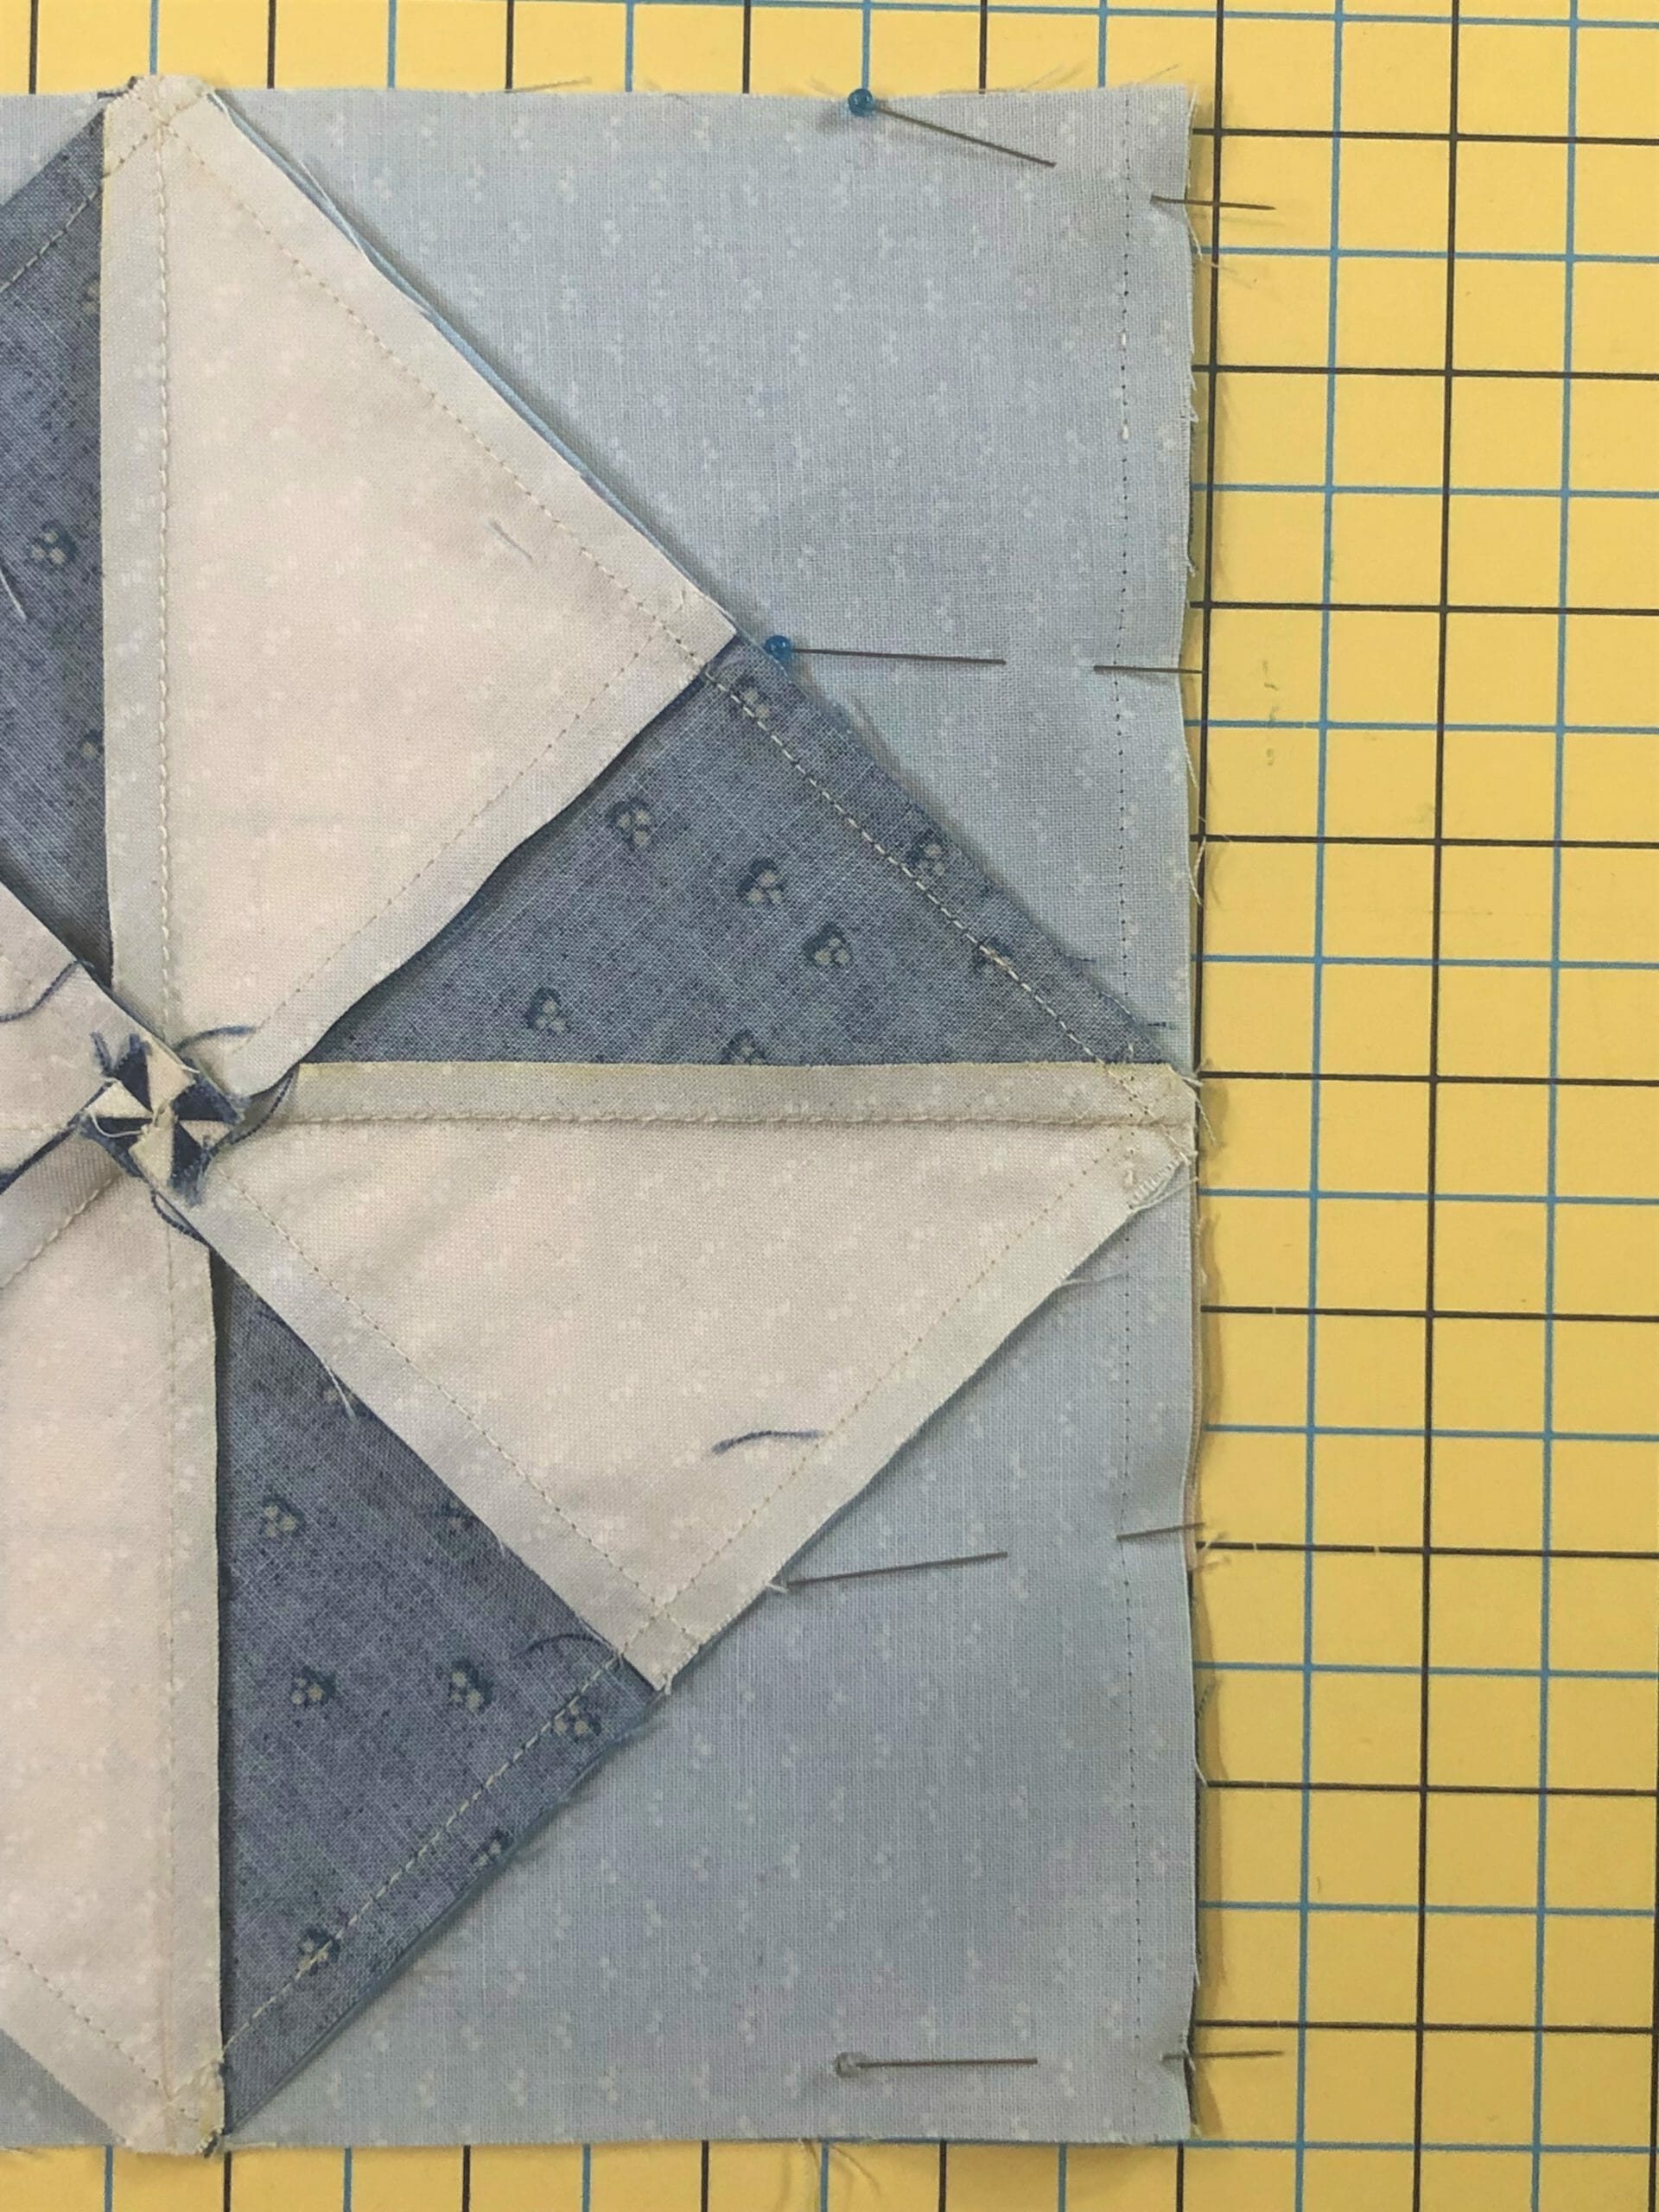
Once all the triangles are sewn on, then trim the unit to 8-1/2” square. If it’s done correctly, you should have the proper ¼” seam allowance to make sure you don’t sew off any of your pinwheel points.
Now all we have to do is sew the same border pieces as we did last month, and then attach them to the pinwheel unit to complete the block. If you need a refresher for how this is done, please take a gander back at the month 1 blog post. I also found it helpful to pin the border pieces on the under side so that I could see where the pinwheel intersects on the edges. I always find this helpful so that I can avoid sewing off my points.
In fact, if you look closely at the photo above, you can see that I had to rip out my first stitches and re-do them, because I had, in fact, cut off the point on this side. Ugh!
And here is the finished block!
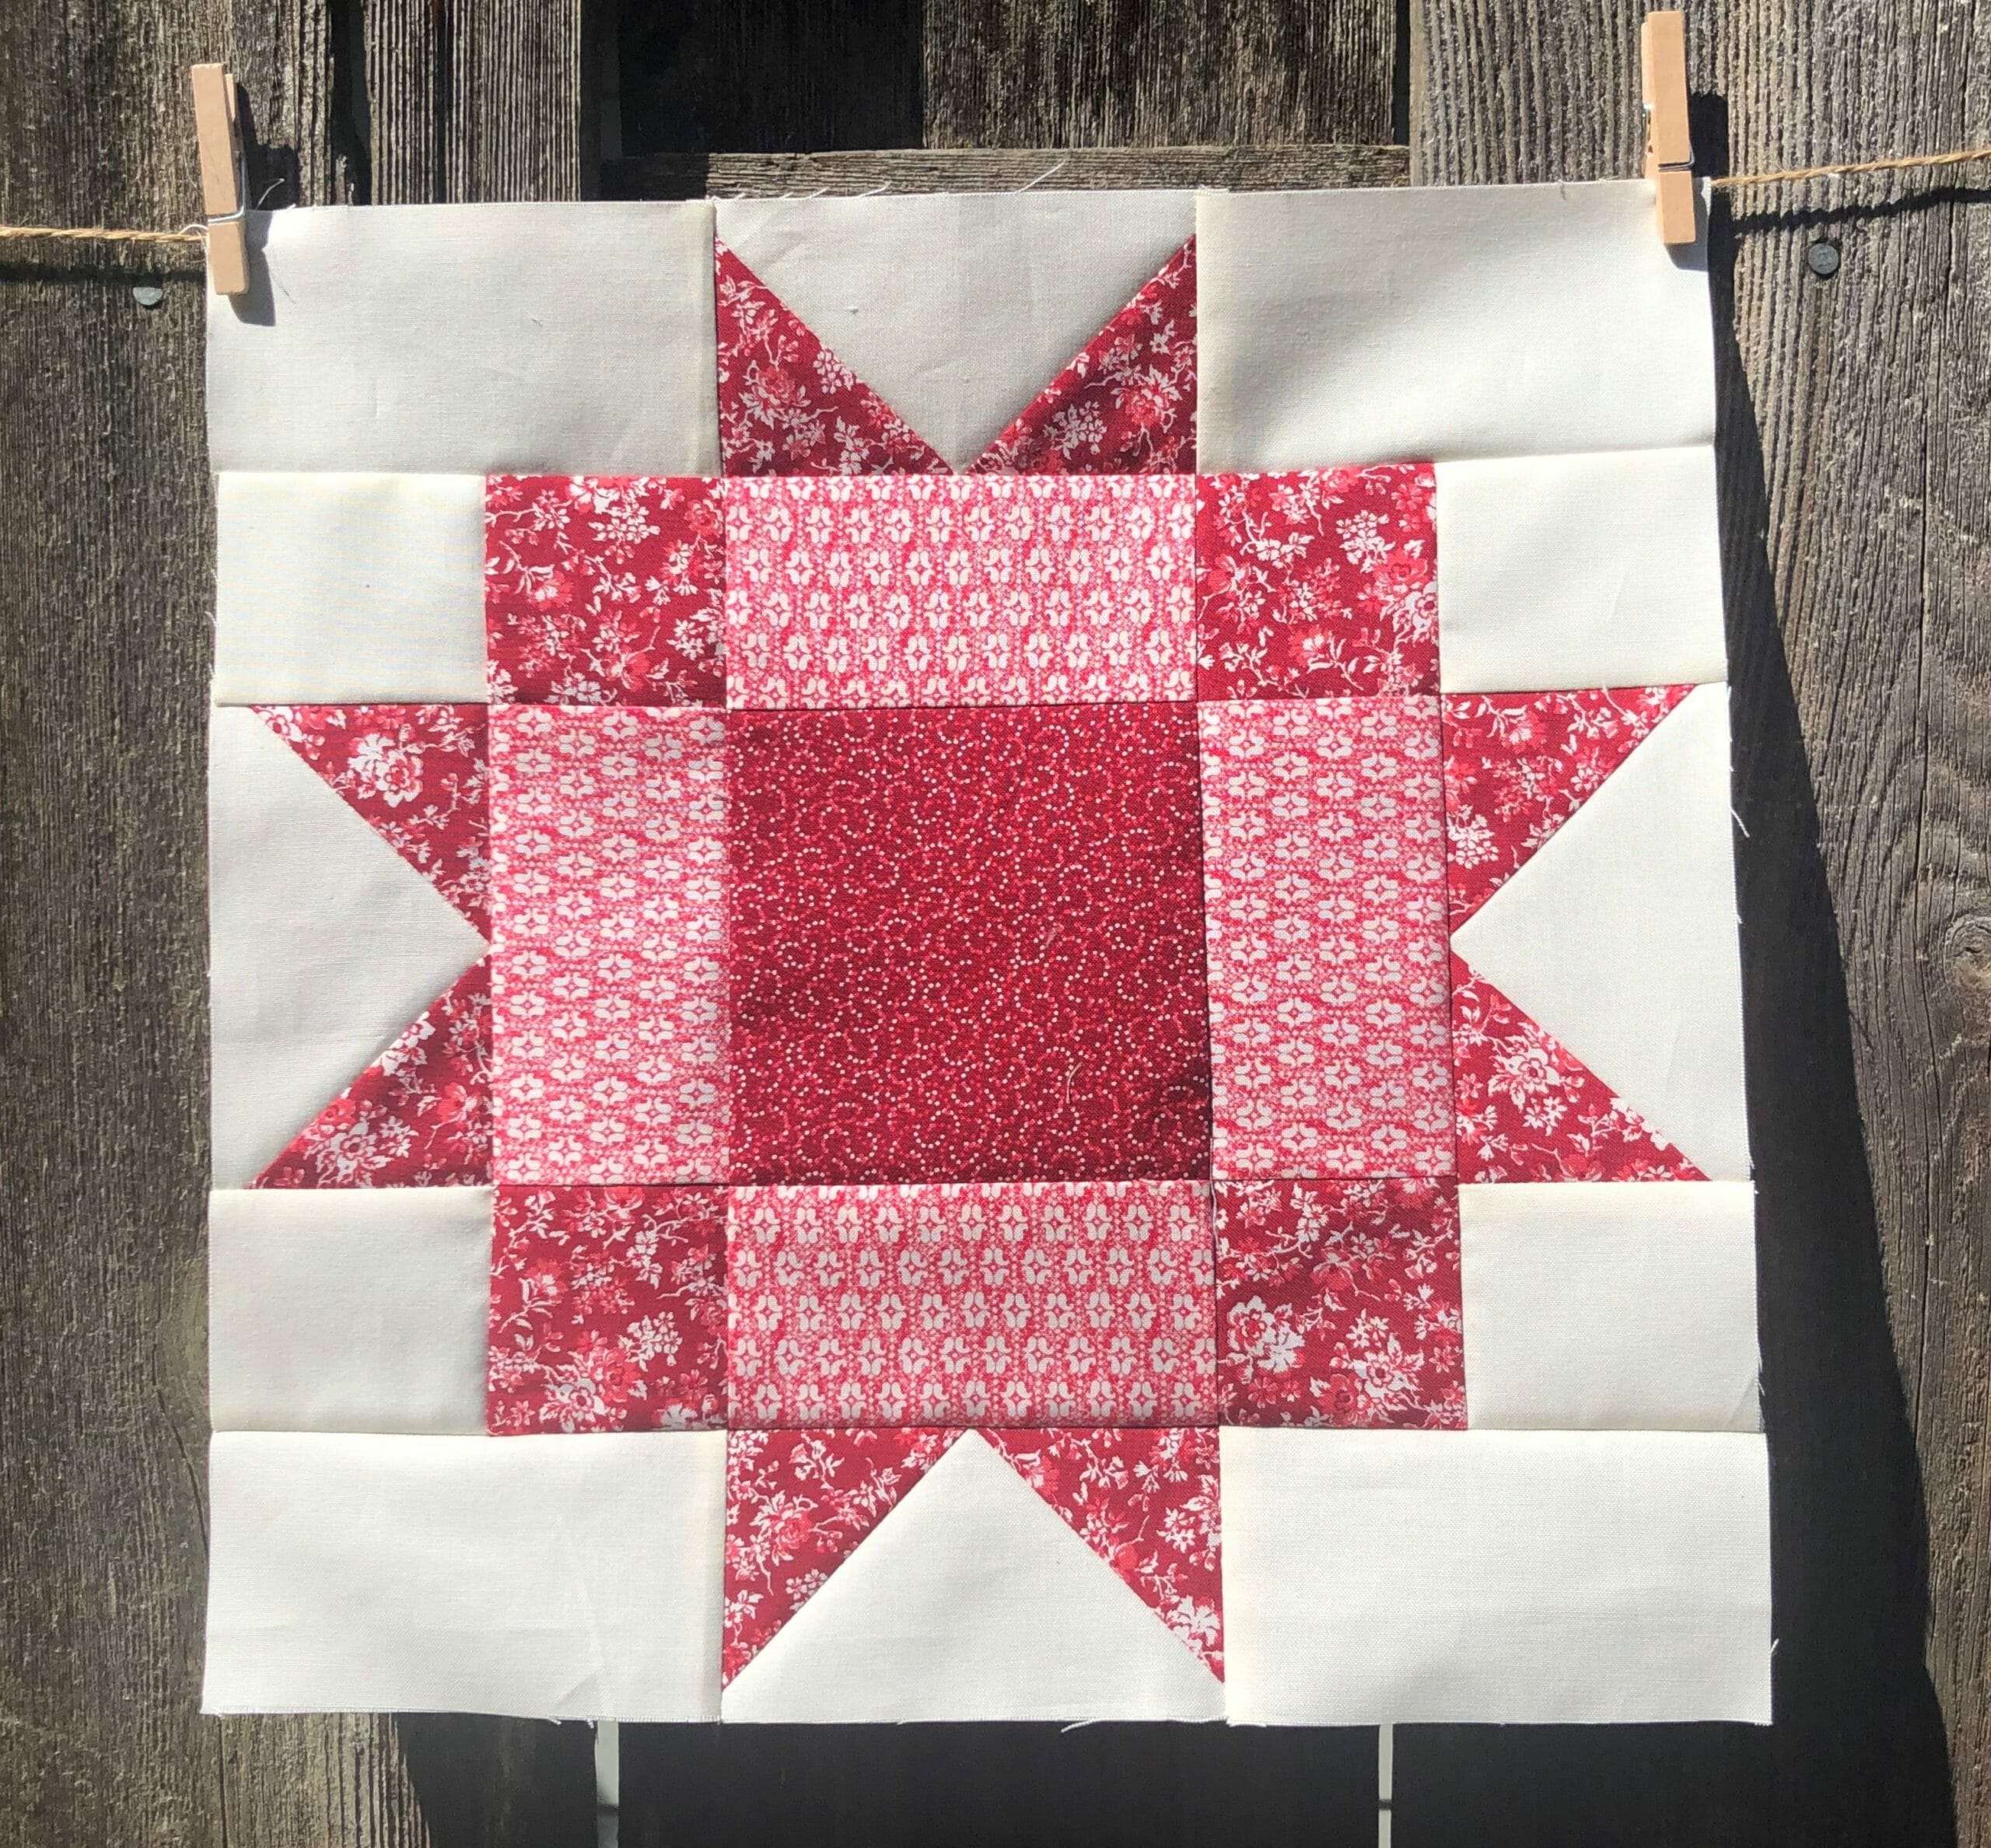
Block #12
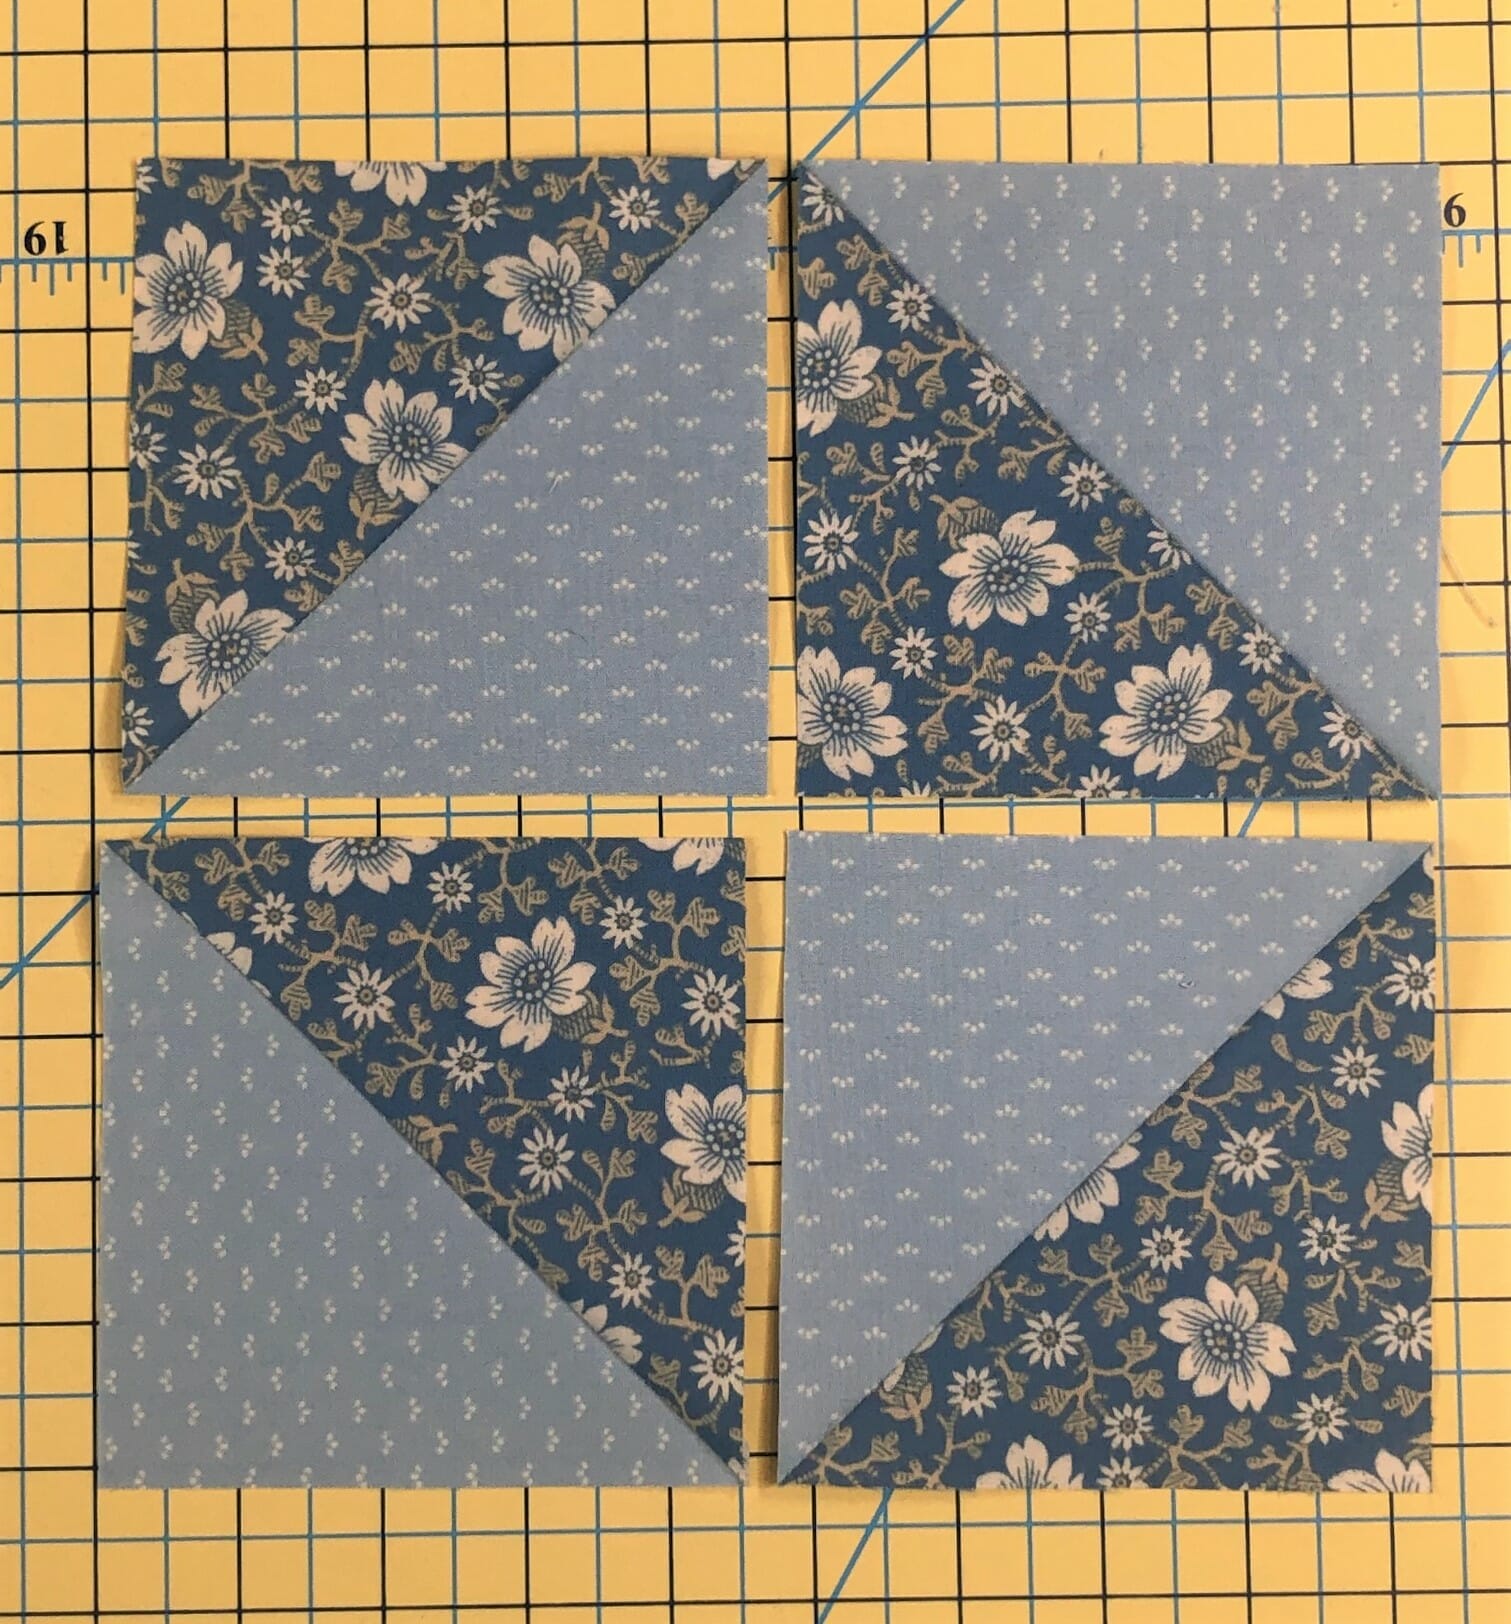
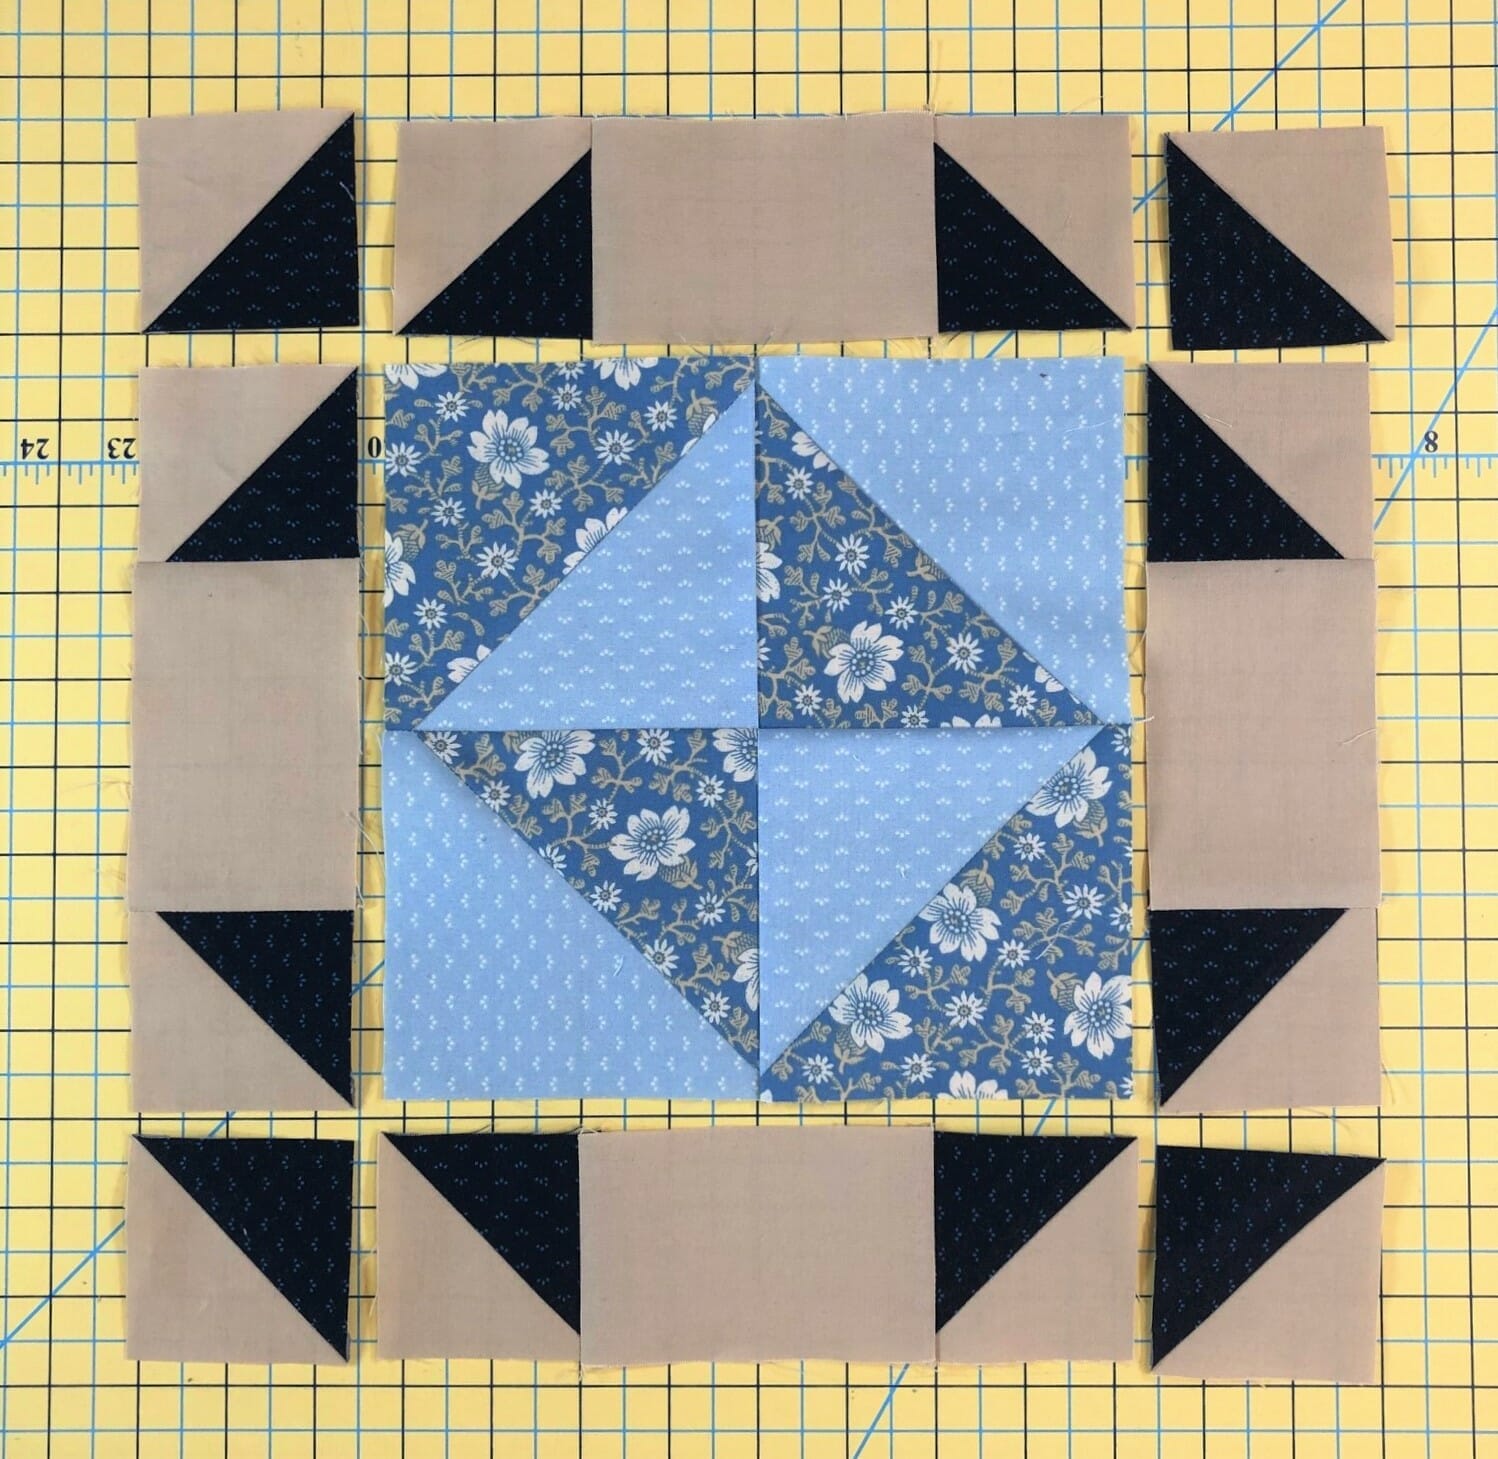
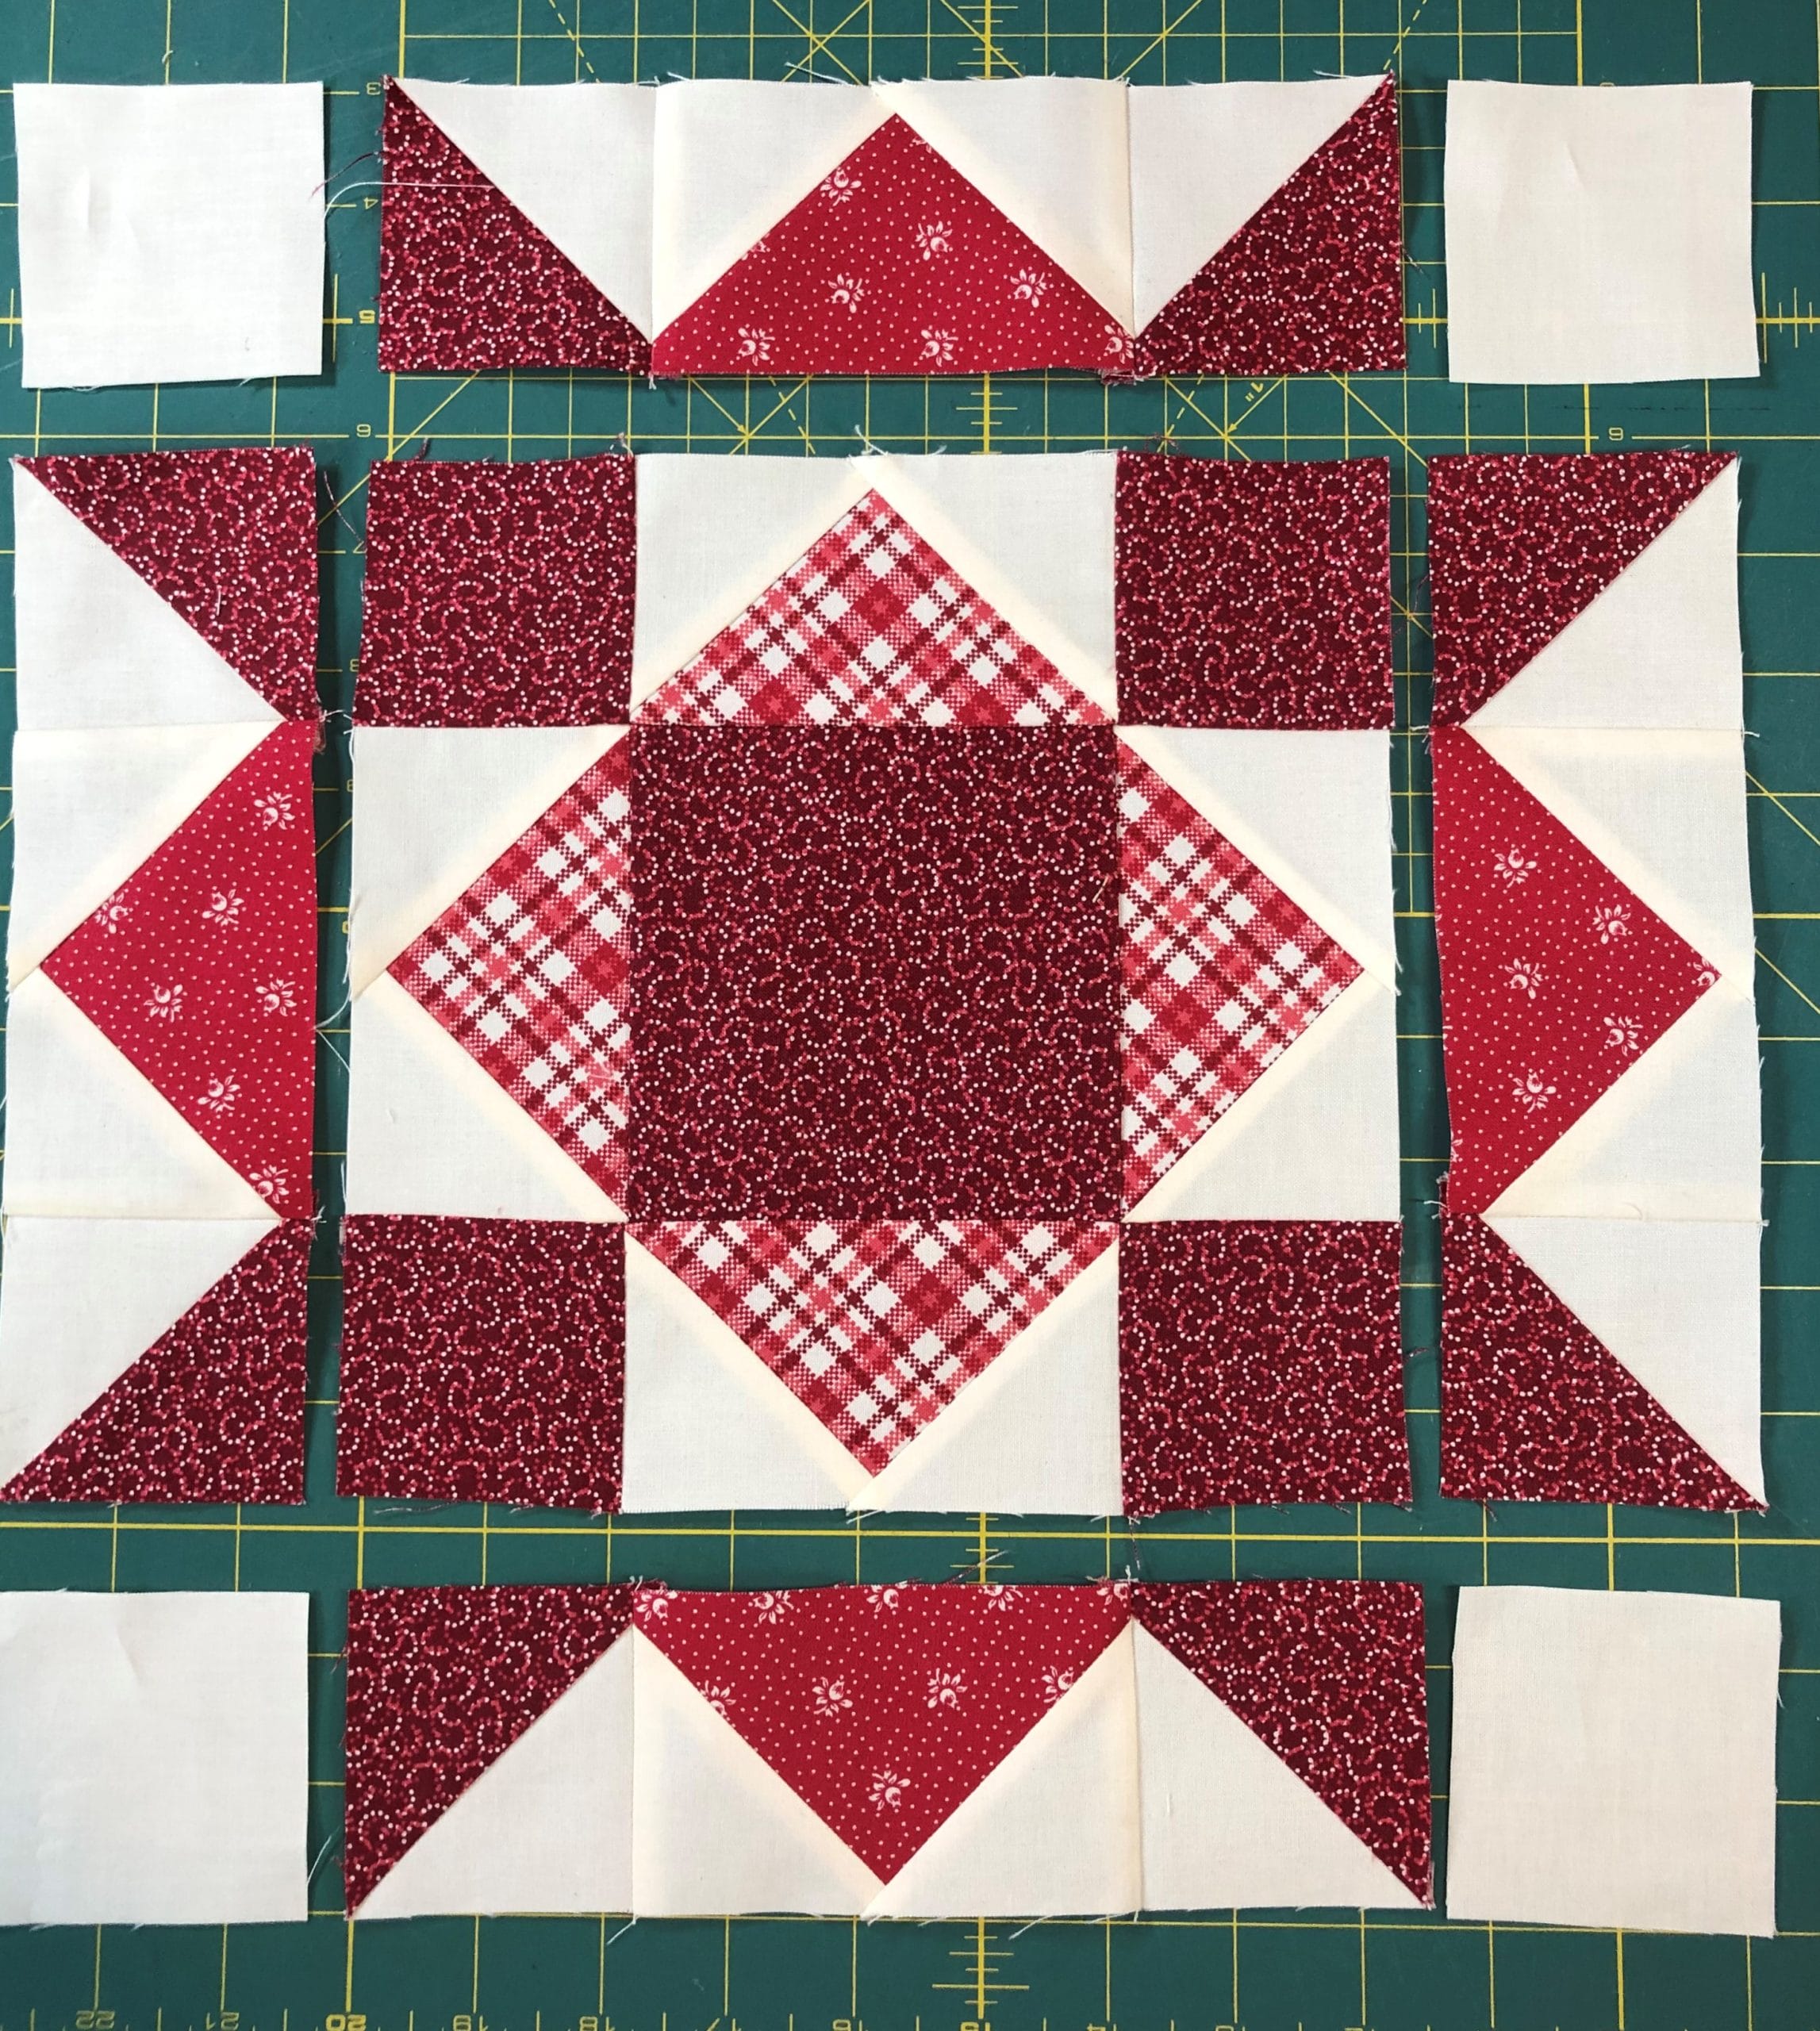
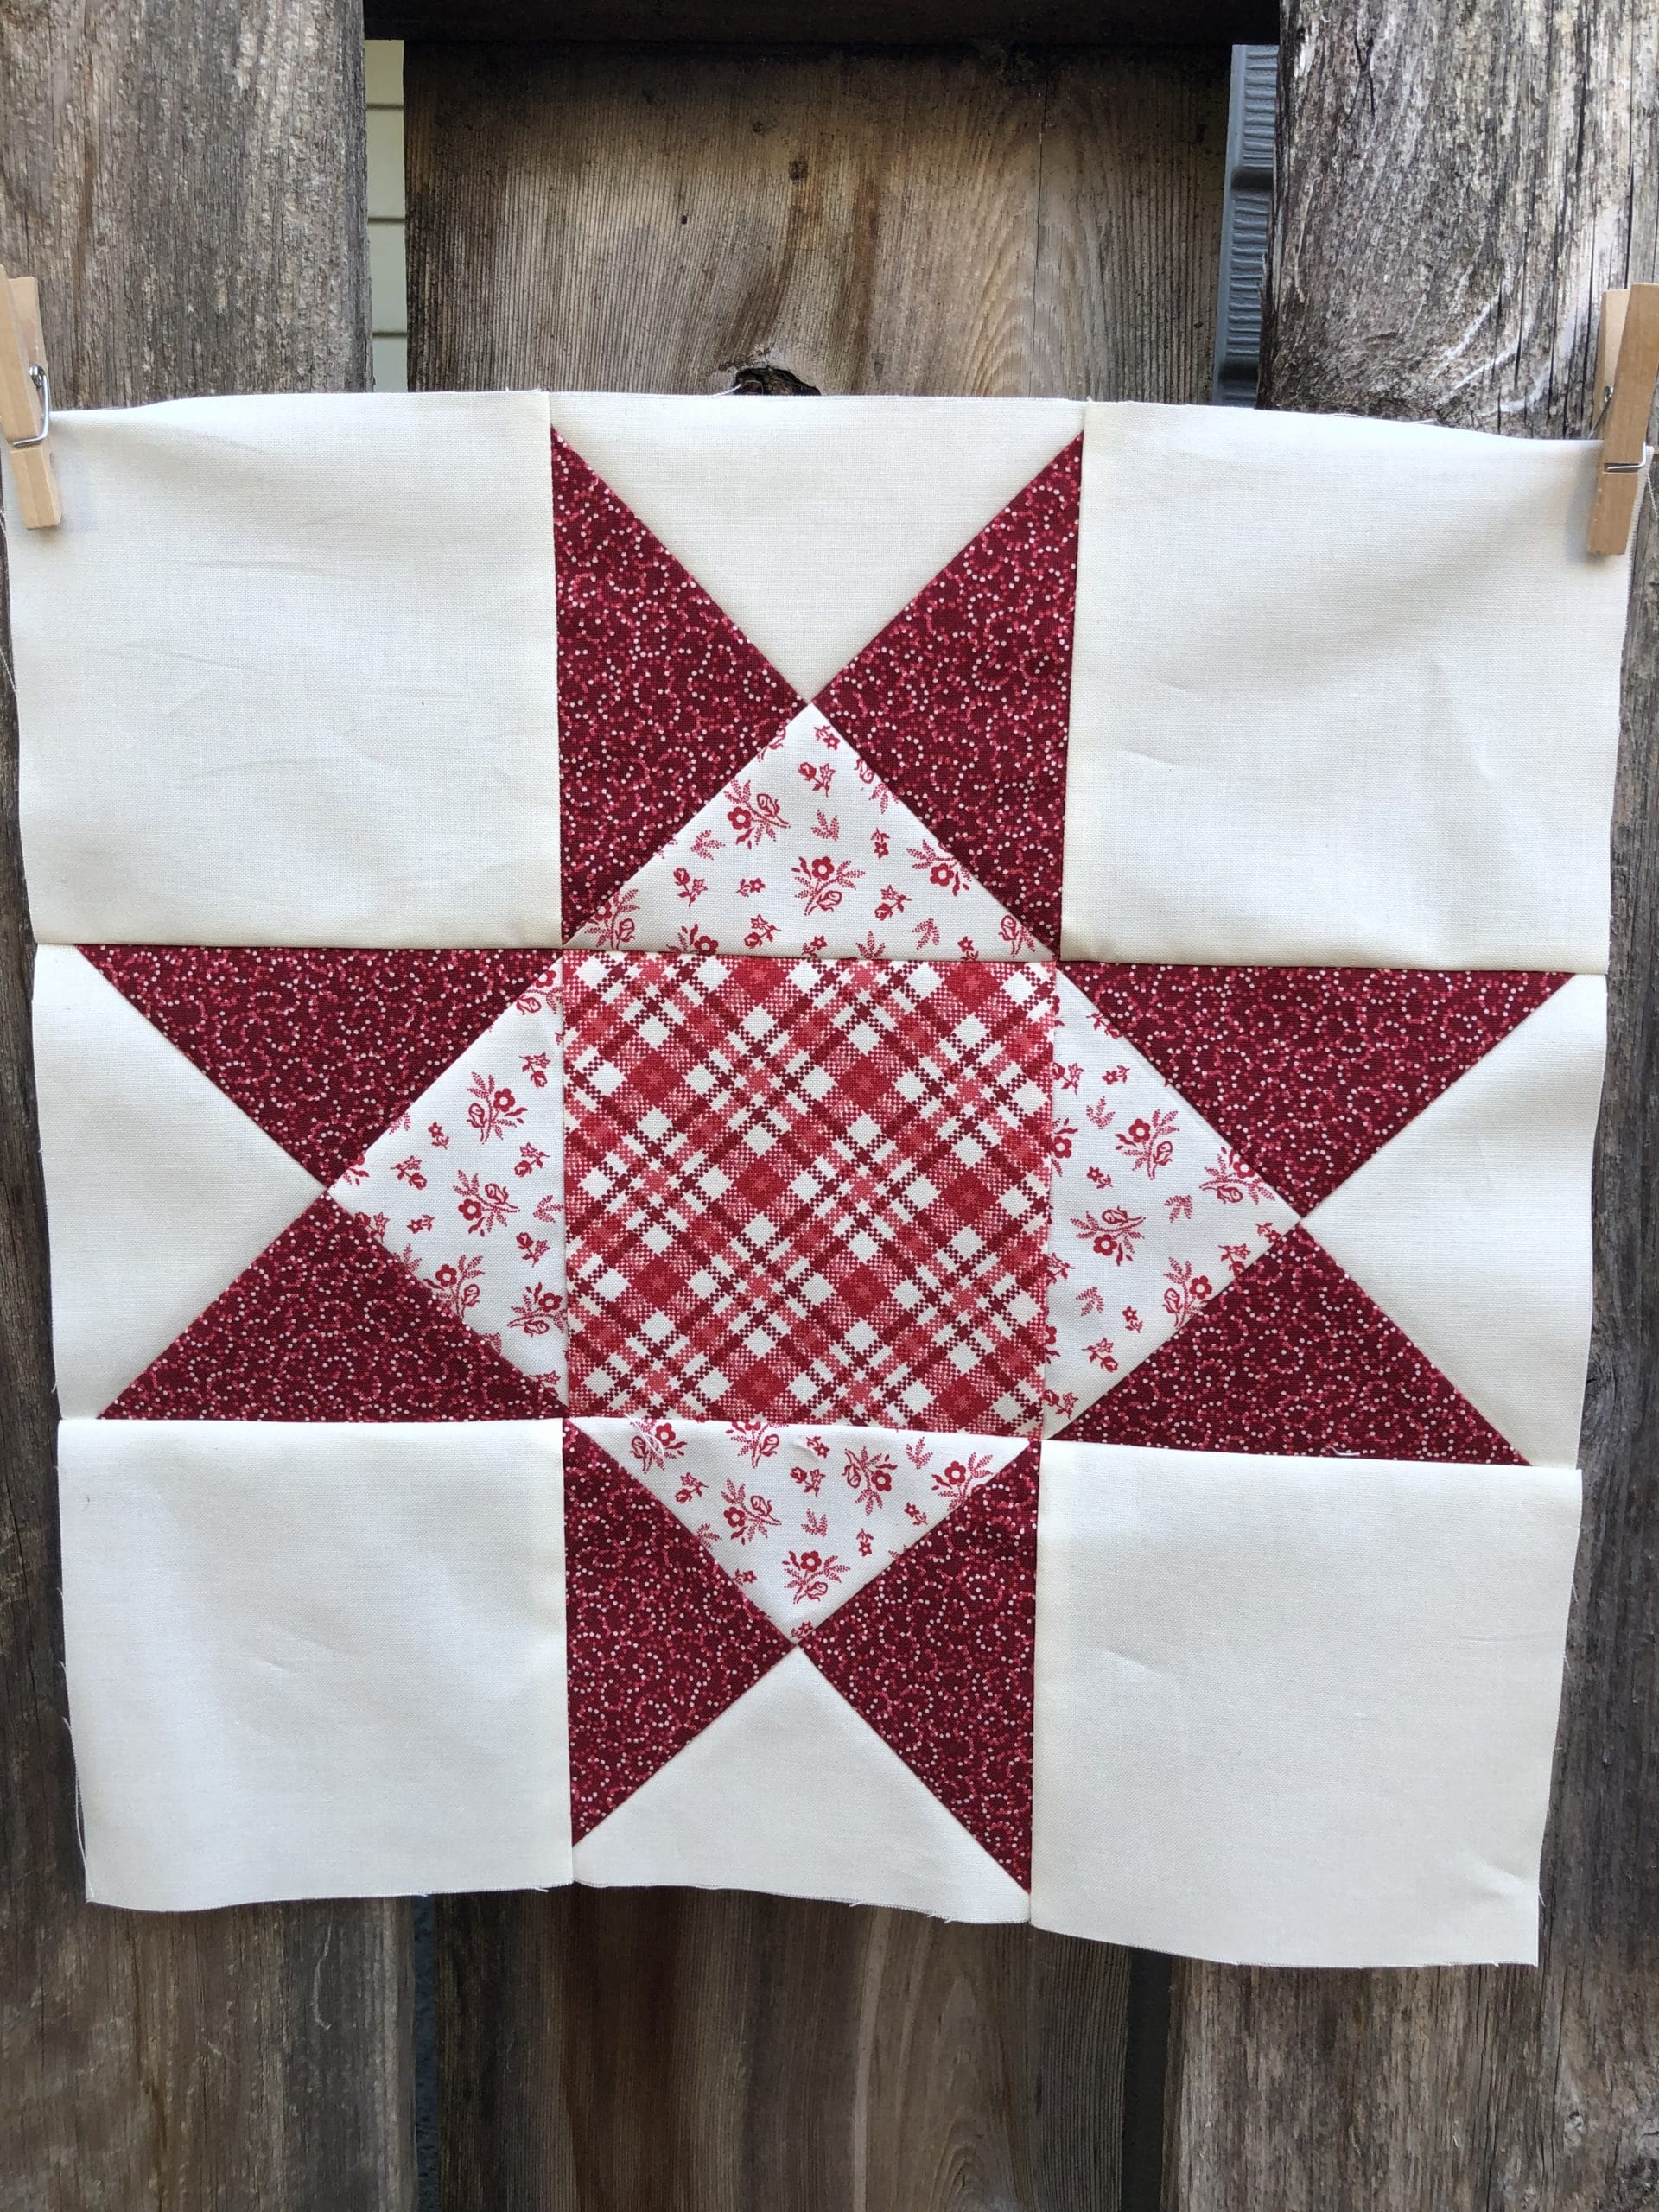
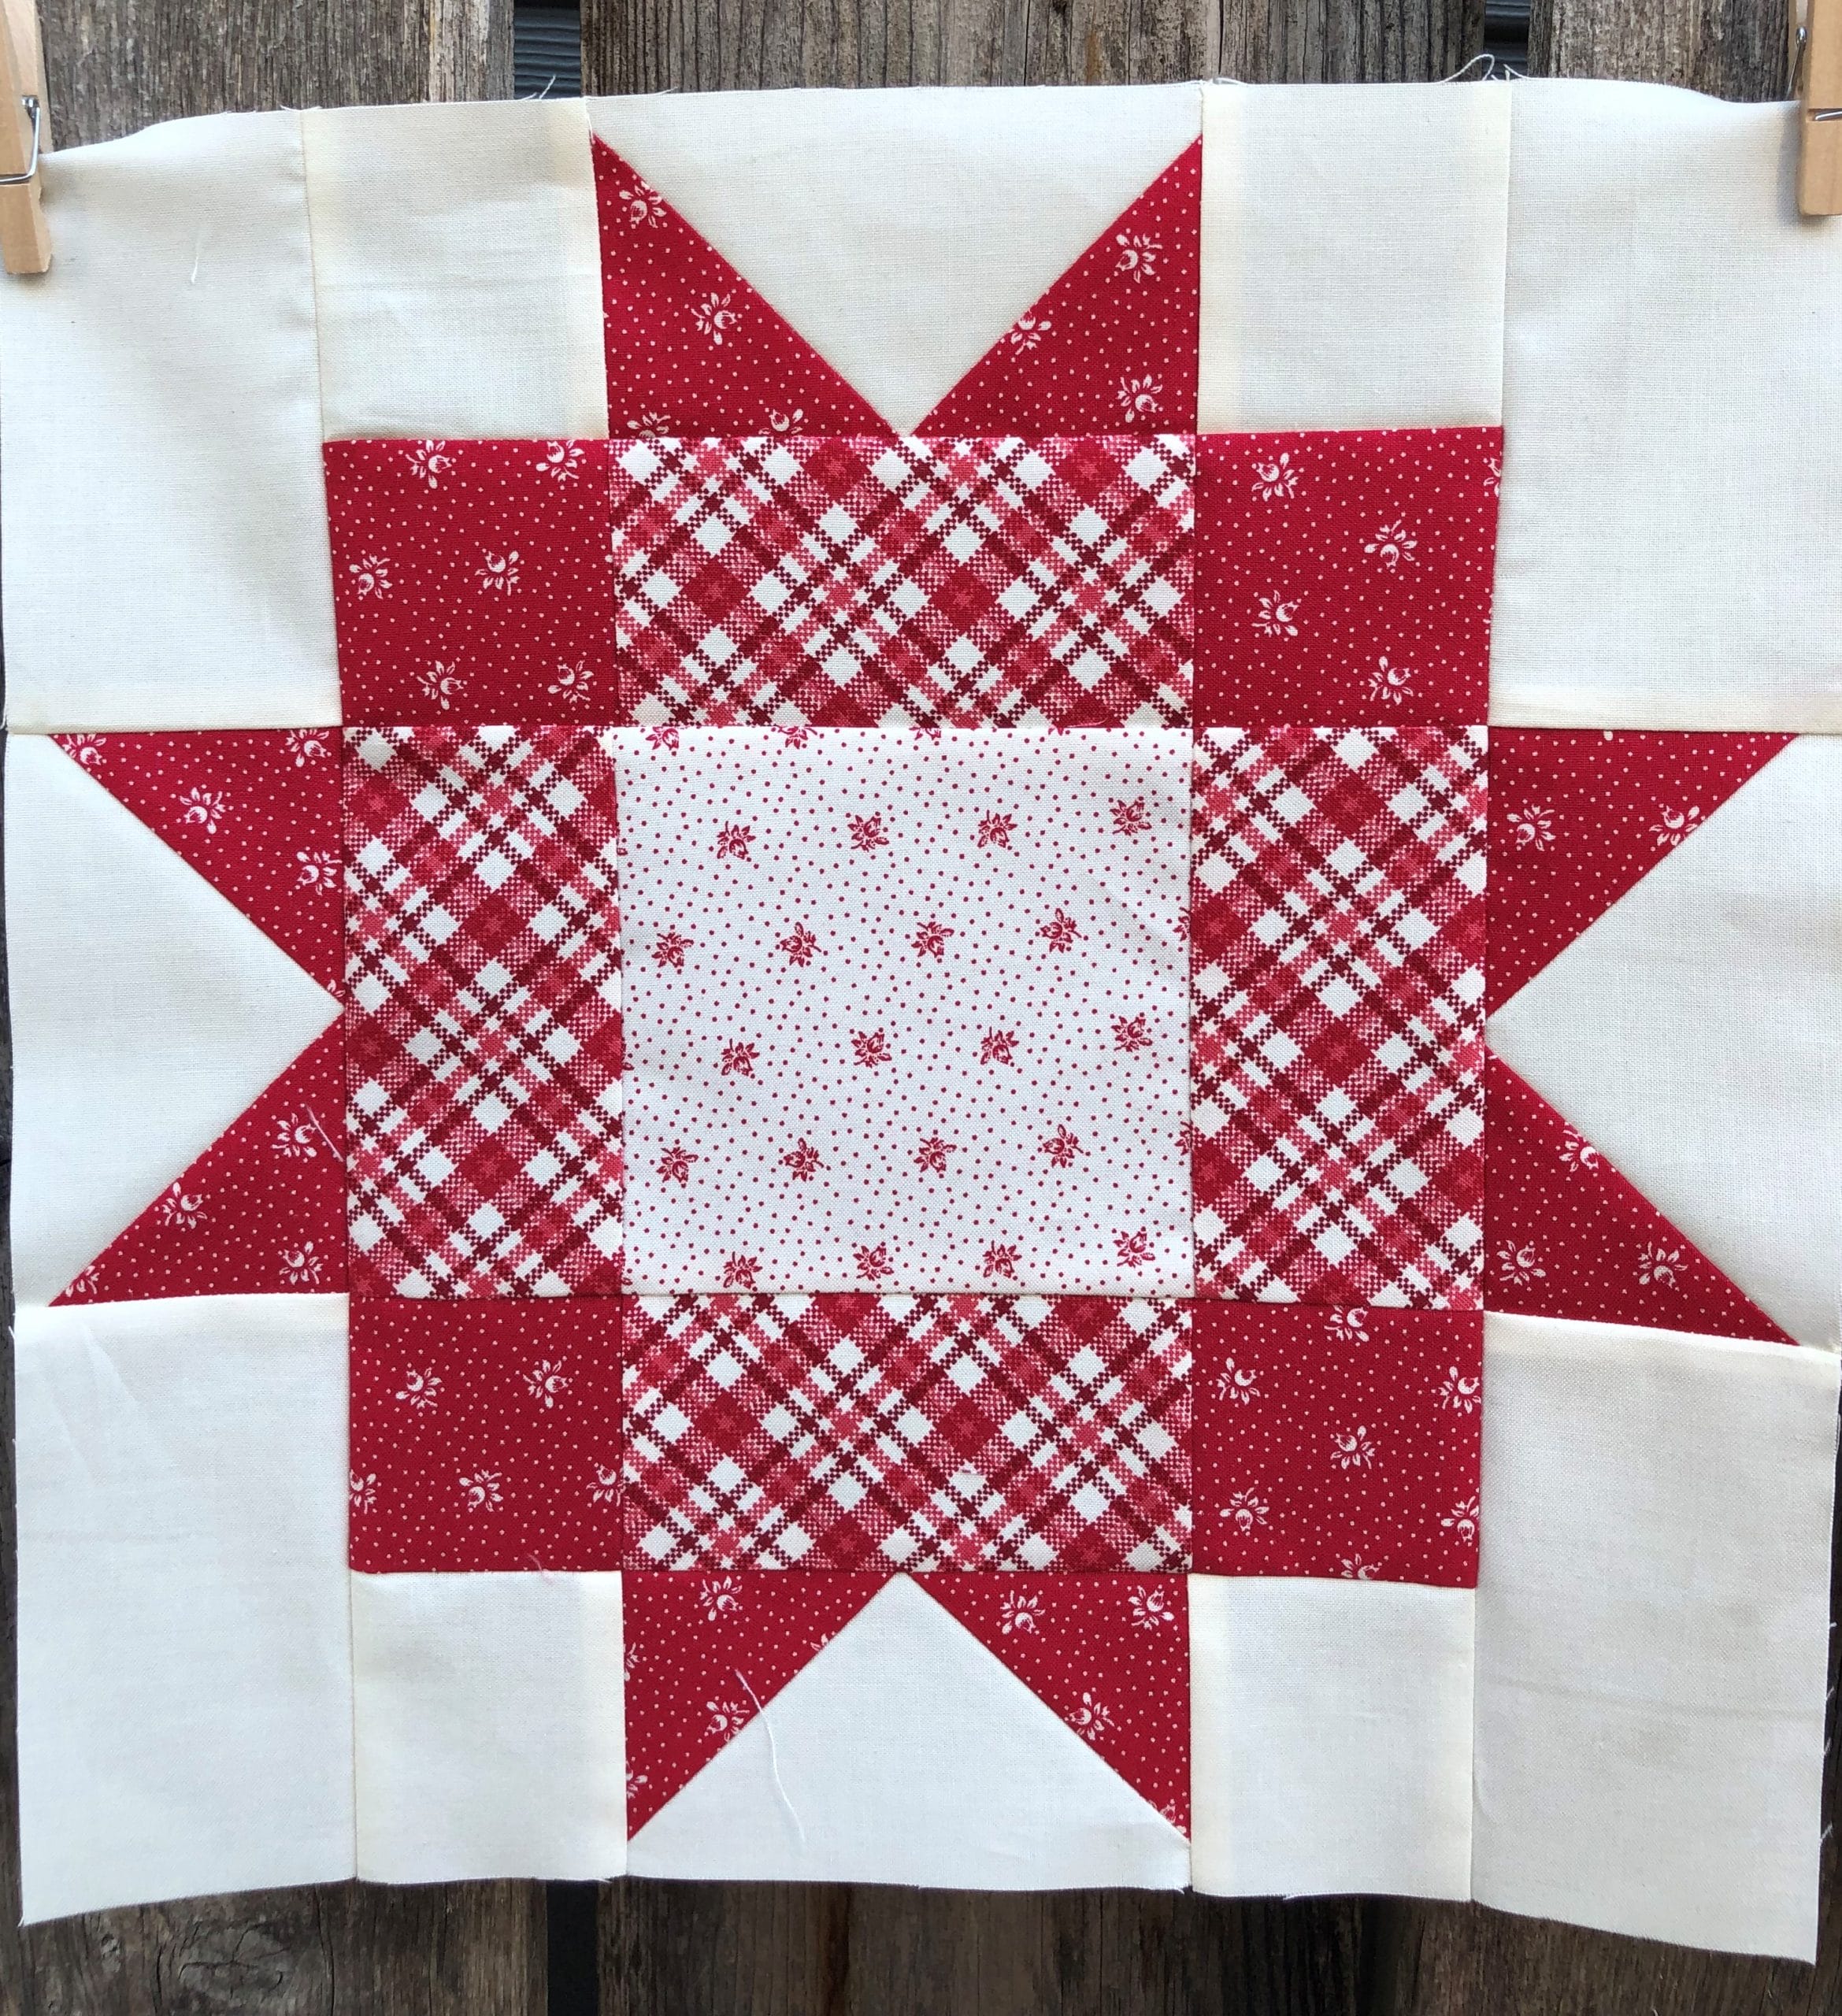
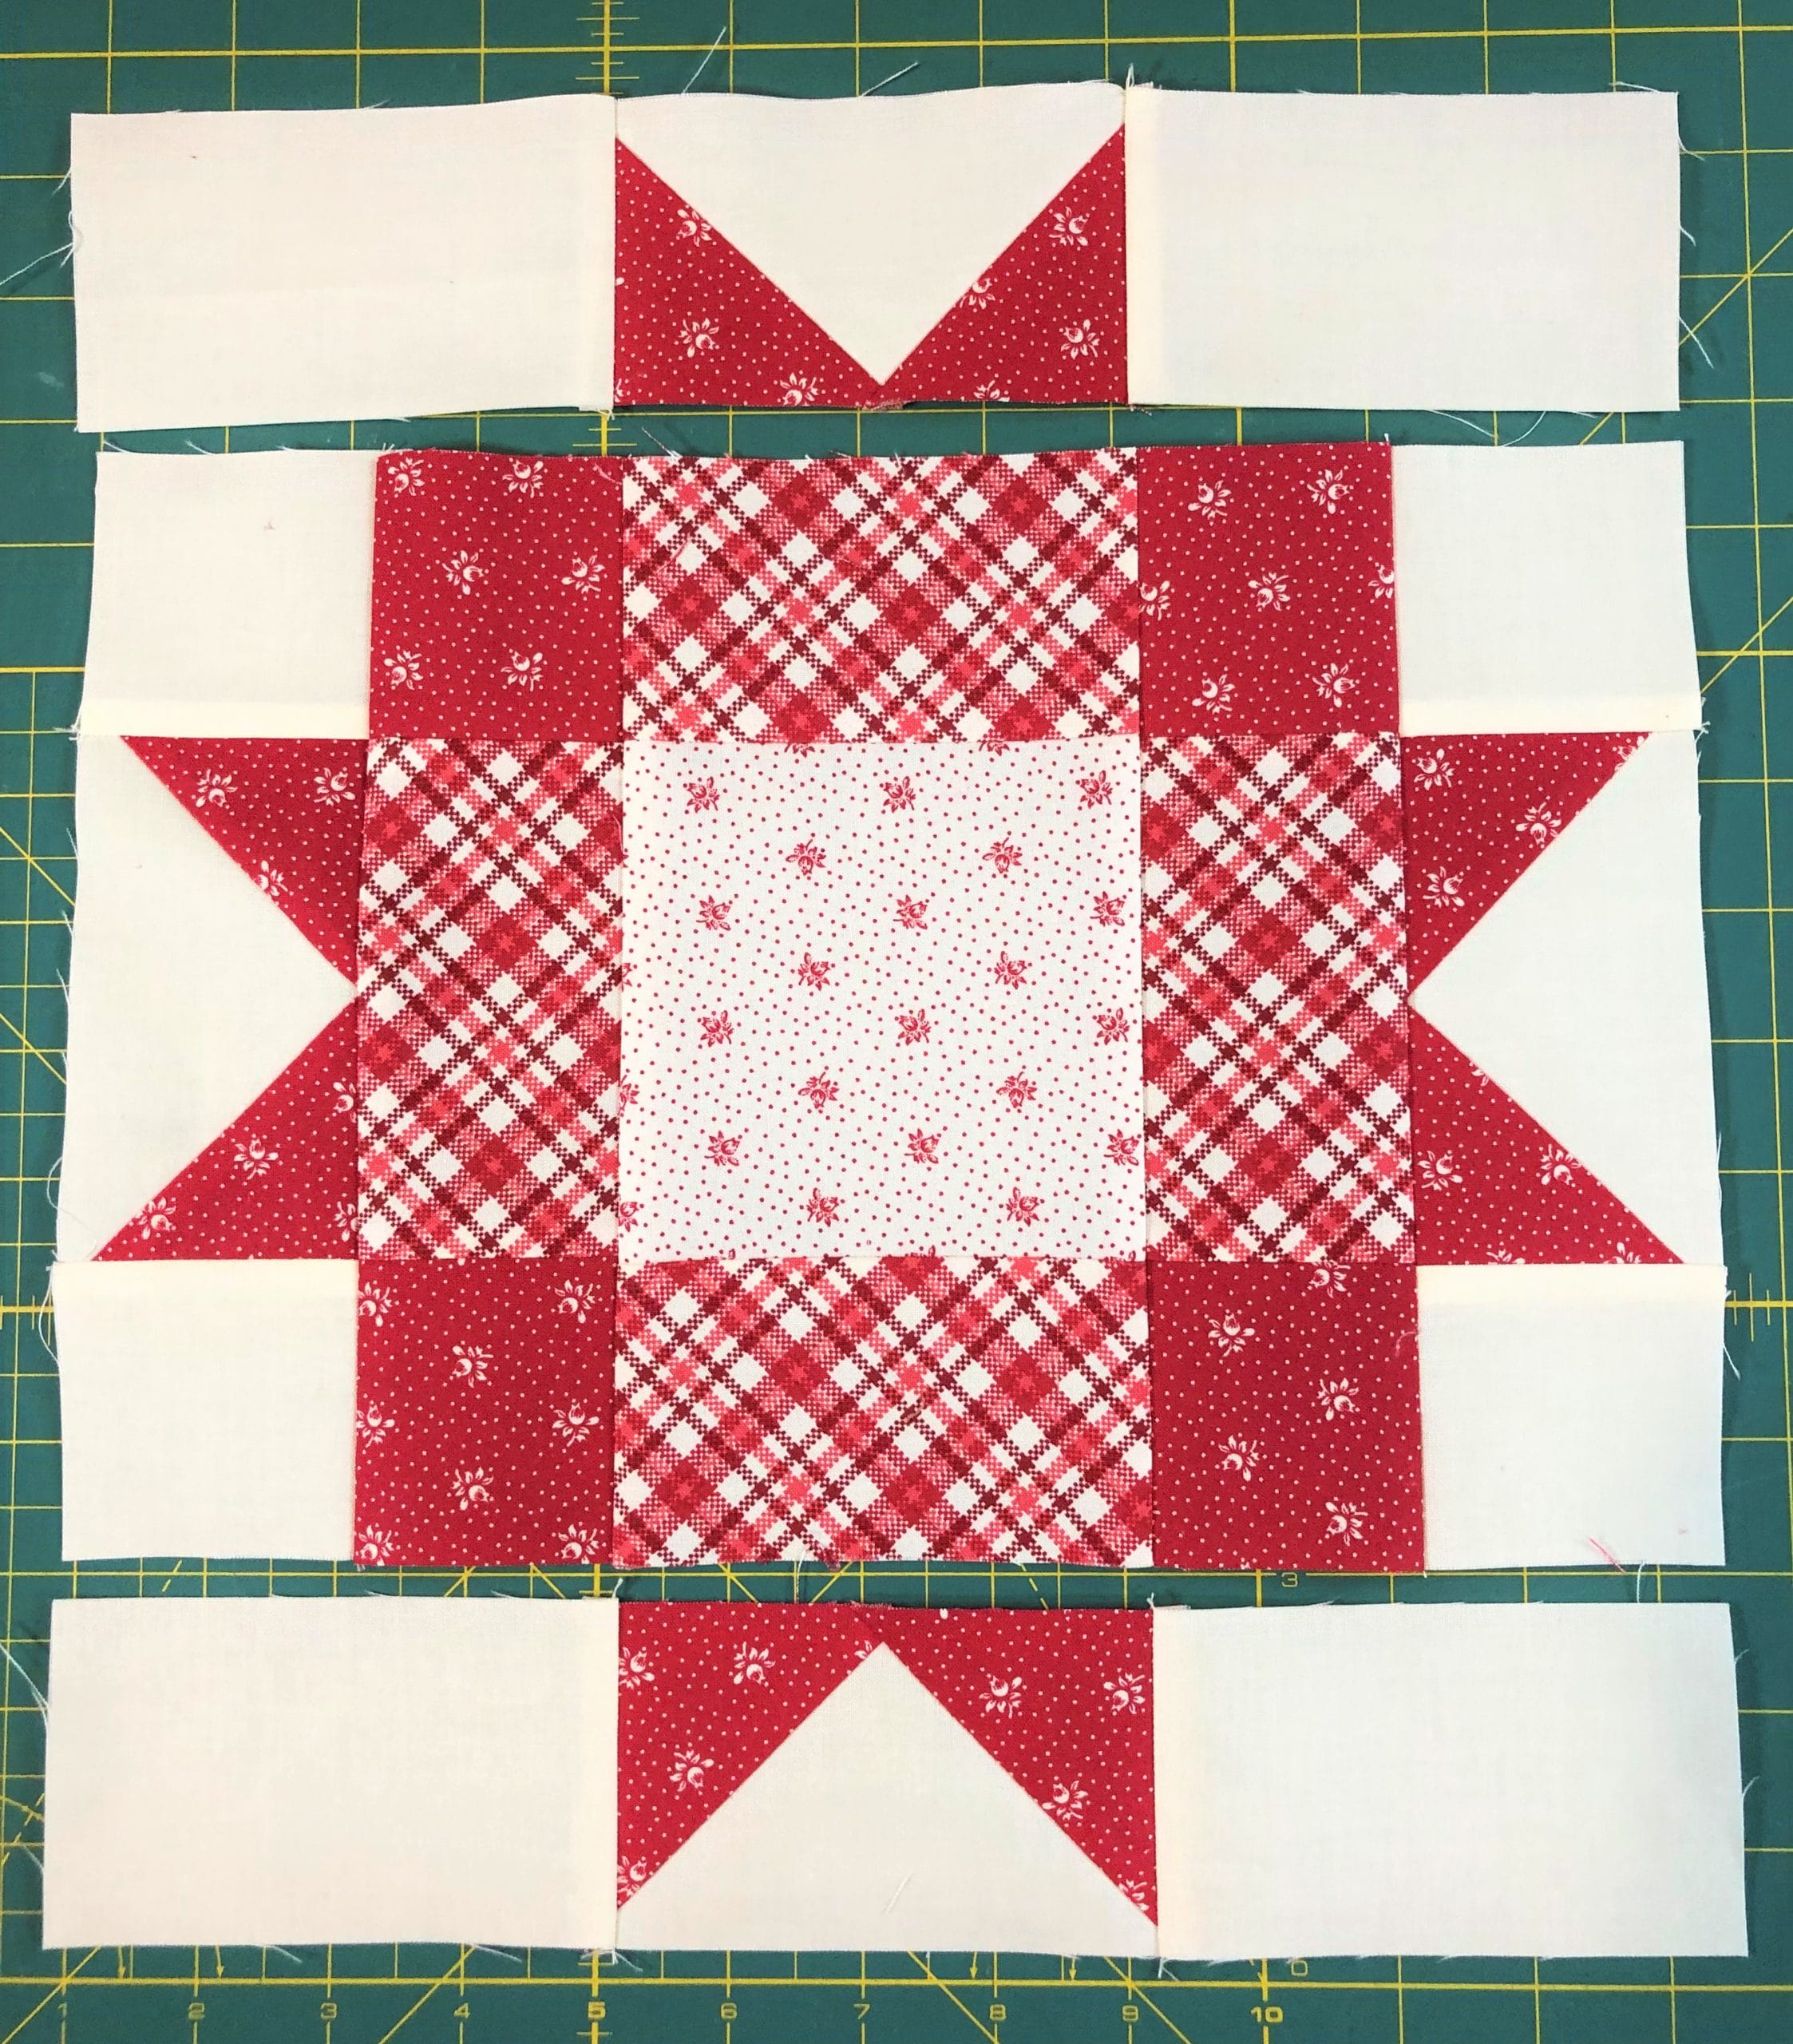
This block is just a sawtooth star that has a diamond (square in a square) unit in the center. Since there are so many triangles coming together in this block, things can get a bit bulky at the seams. If you don’t like all the bulk, feel free to press all your seams open. Personally, I’m kind of obsessed with nesting seams, so I ironed according to my directions, which created a bit of bulk around the center diamond square. I just starched and pressed the heck out of it, and mined turned out pretty flat. But it’s whatever you prefer. Remember, it’s YOUR quilt, and there are no rules, only suggestions!
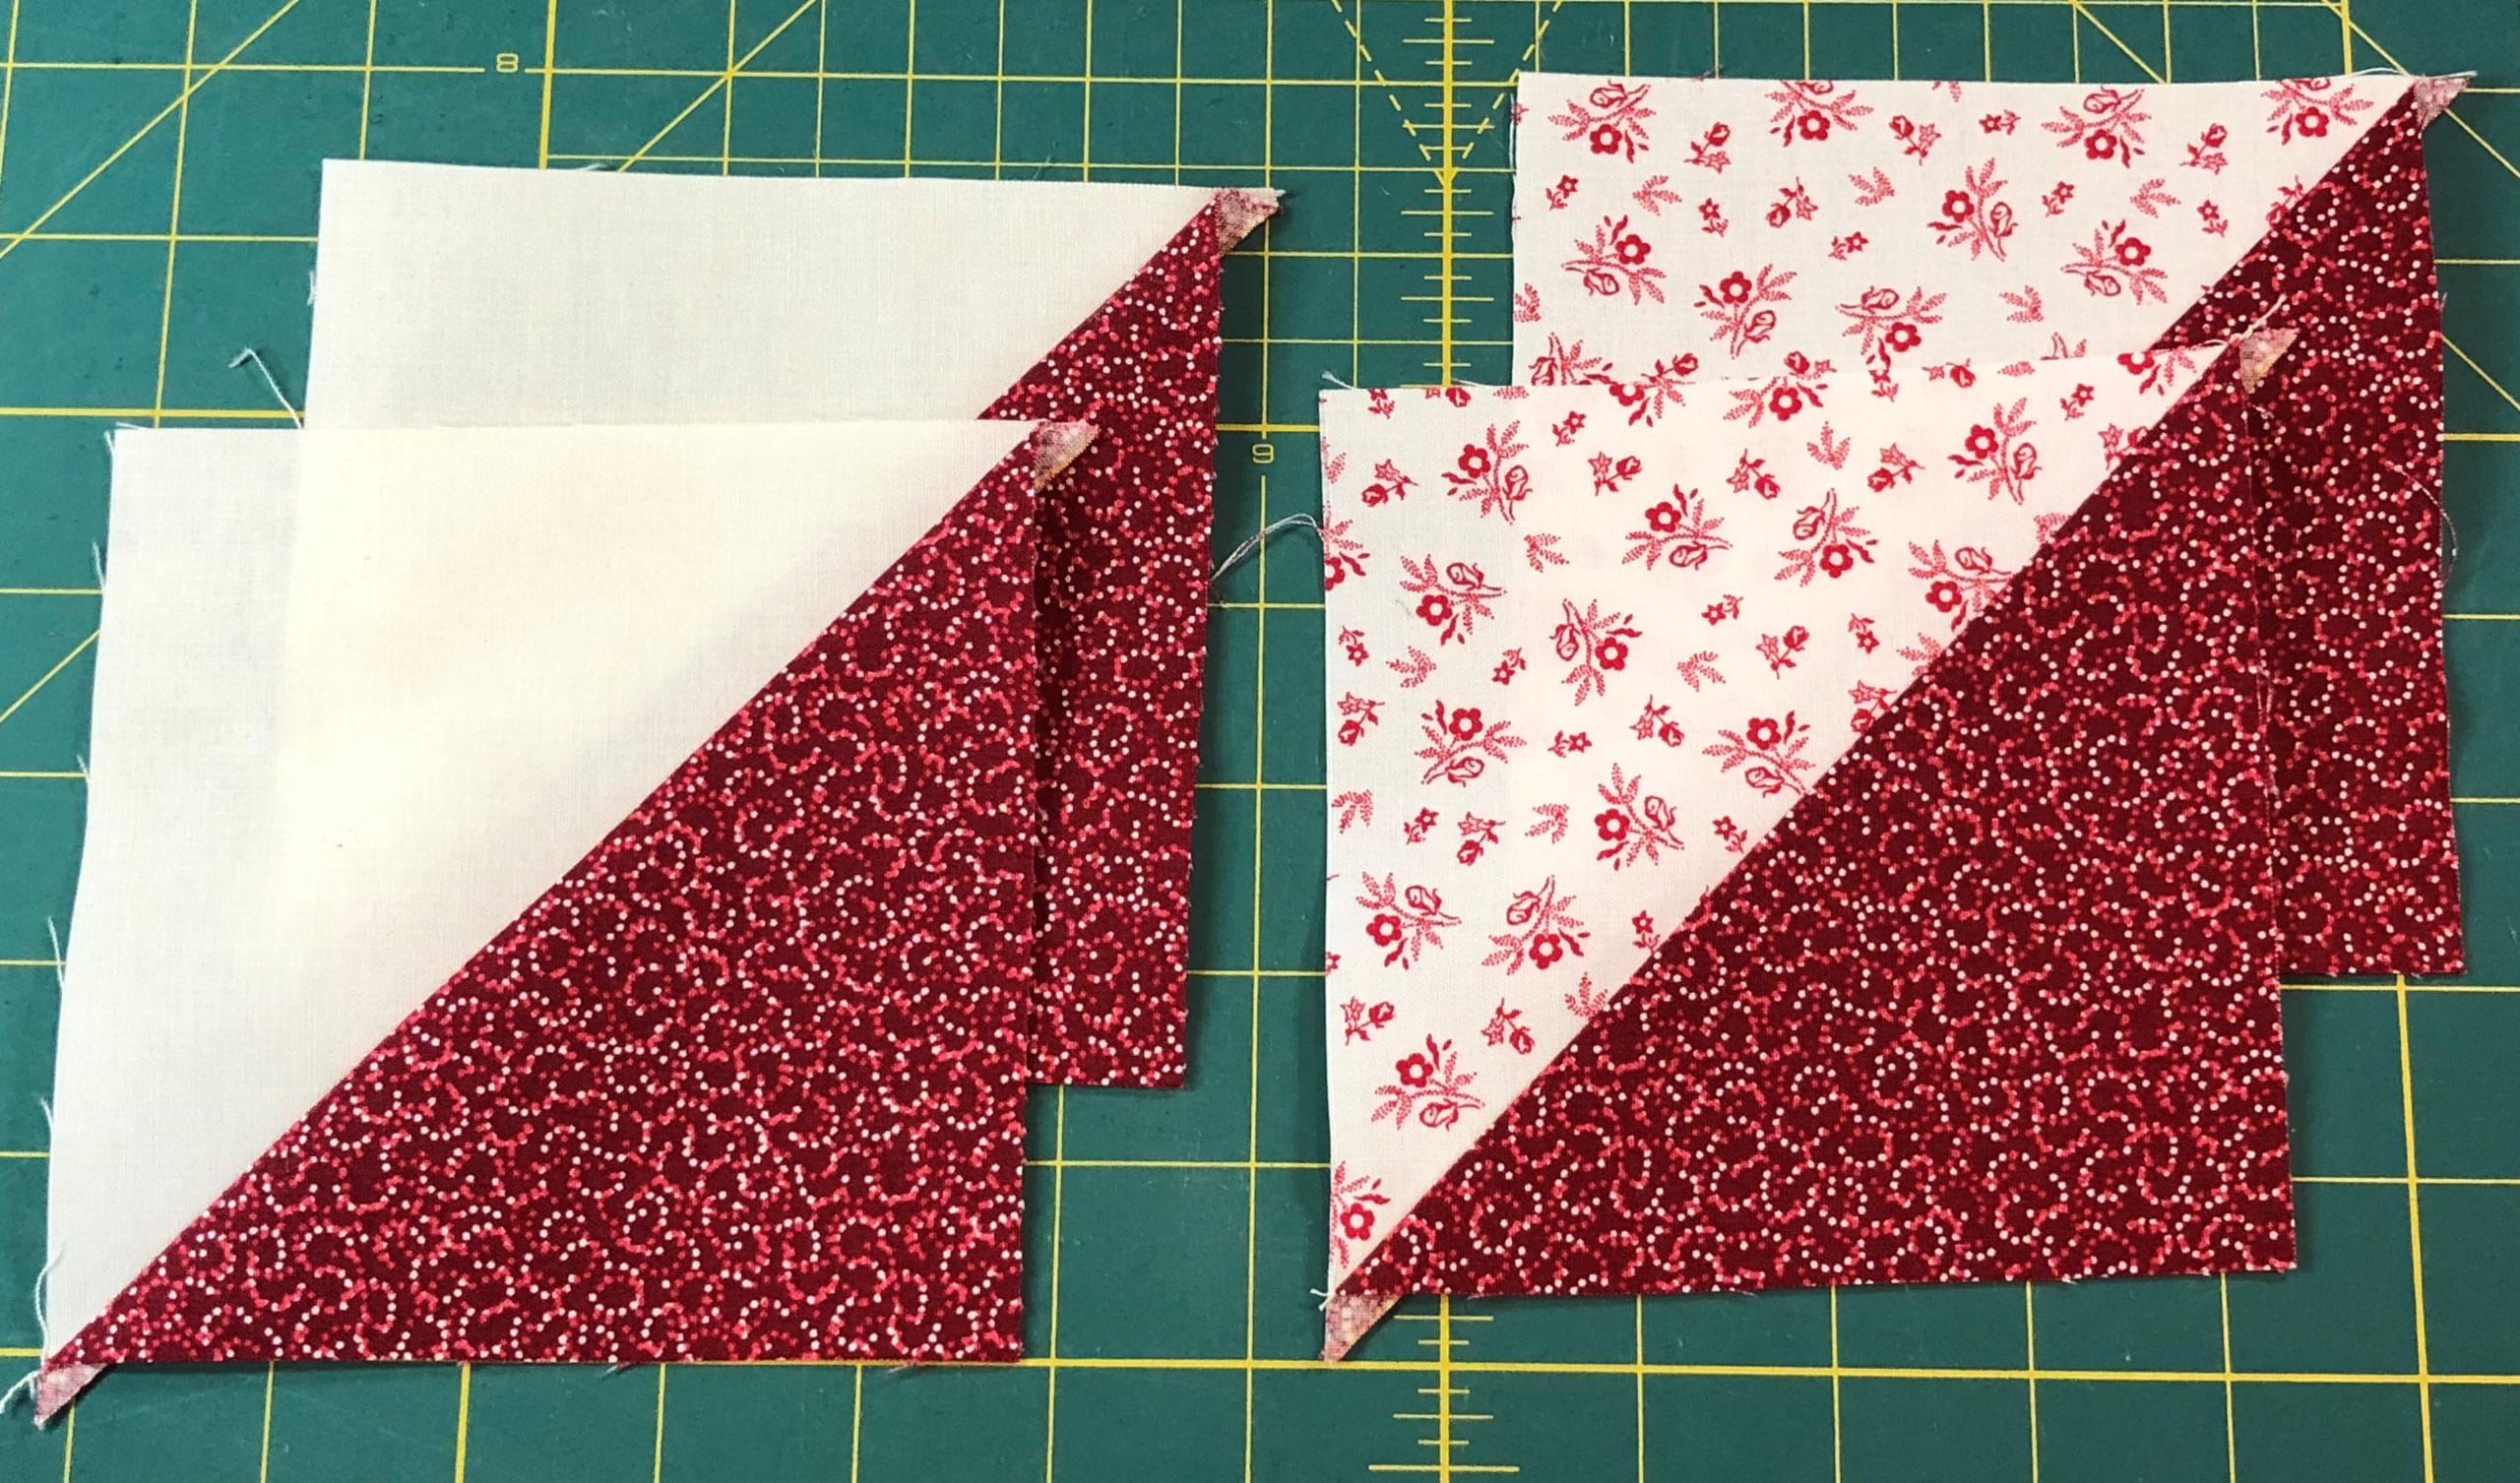
First we will make that square in a square unit as I mentioned earlier, making especially sure that your center D square is cut accurately. You could cut your E squares at 3” and then trim the unit after sewing all the triangles on, if you prefer.
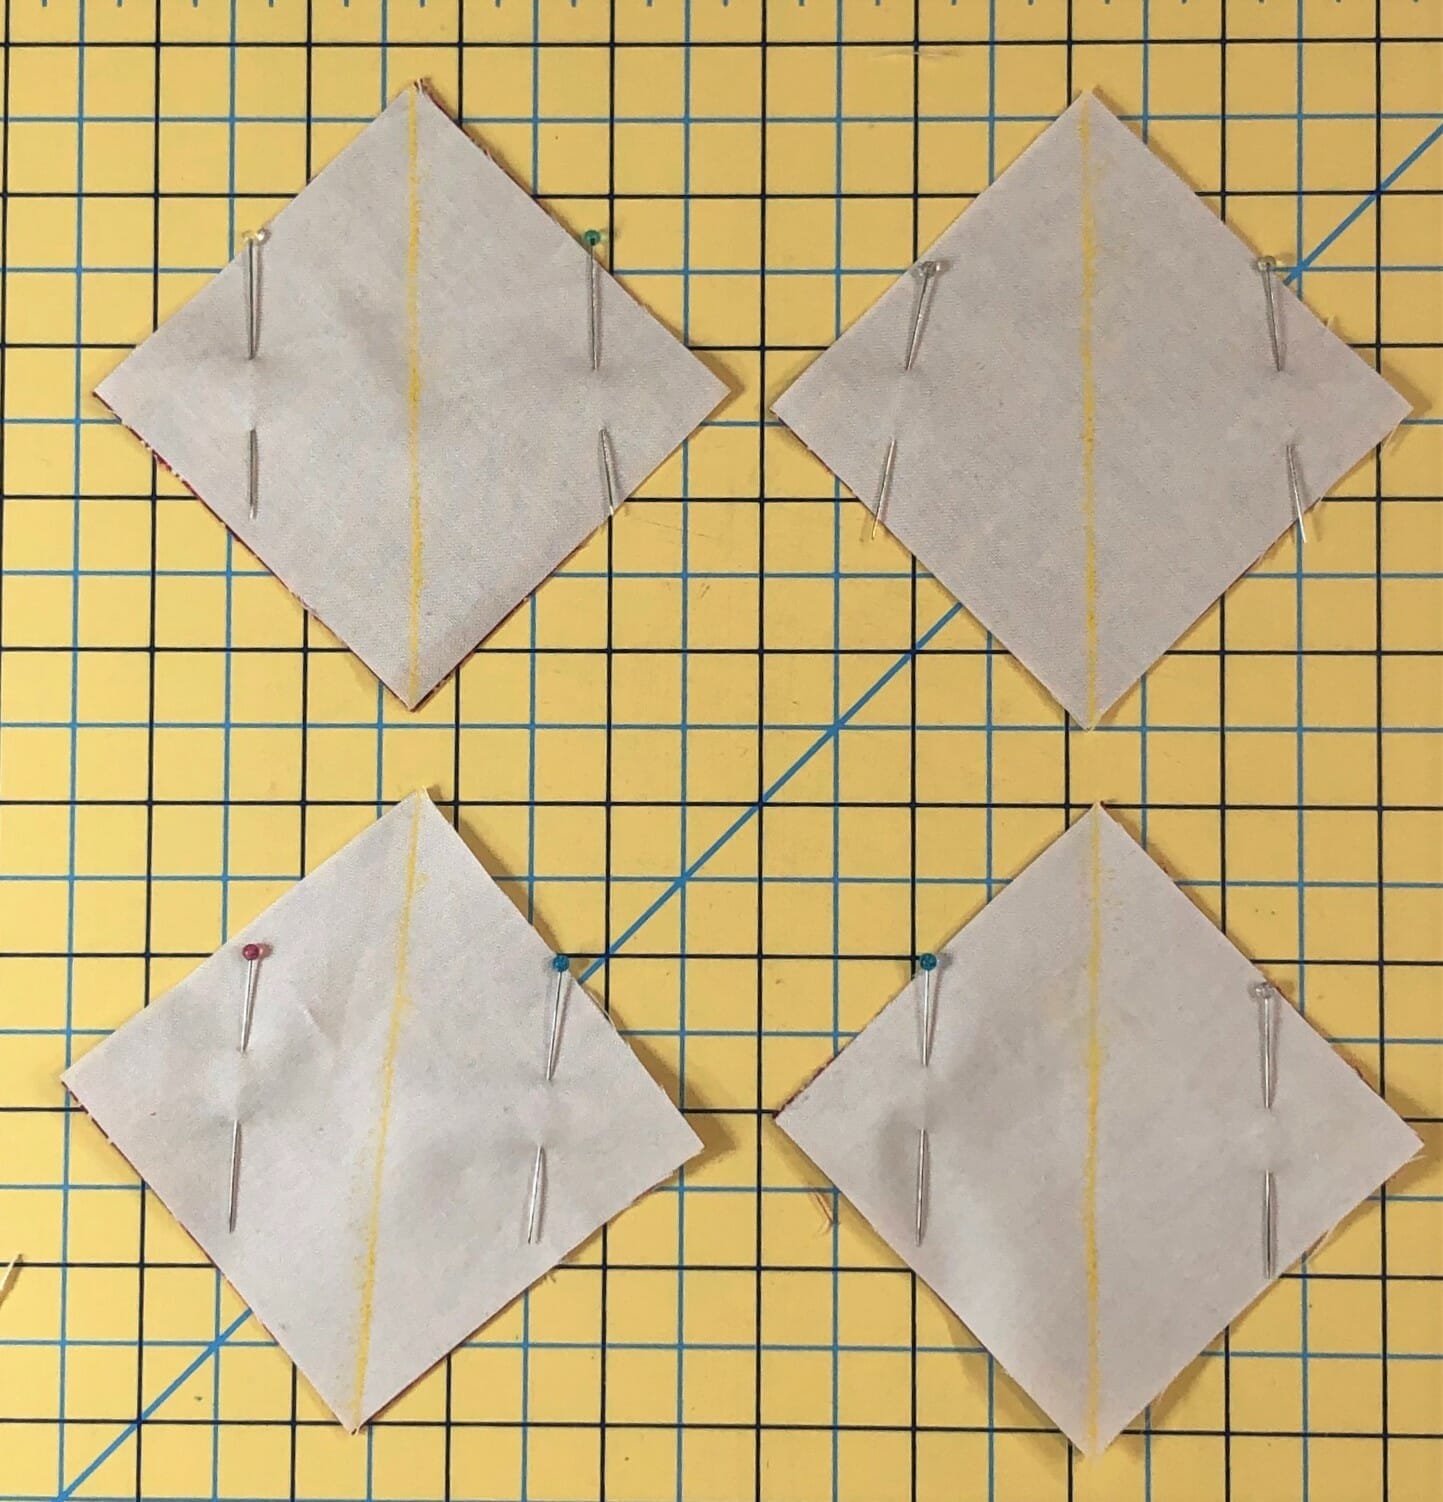
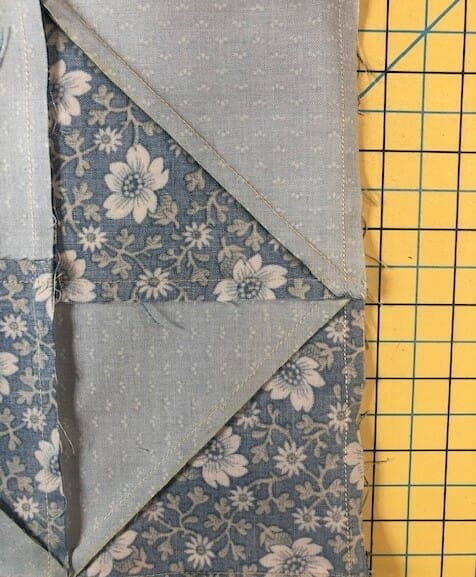
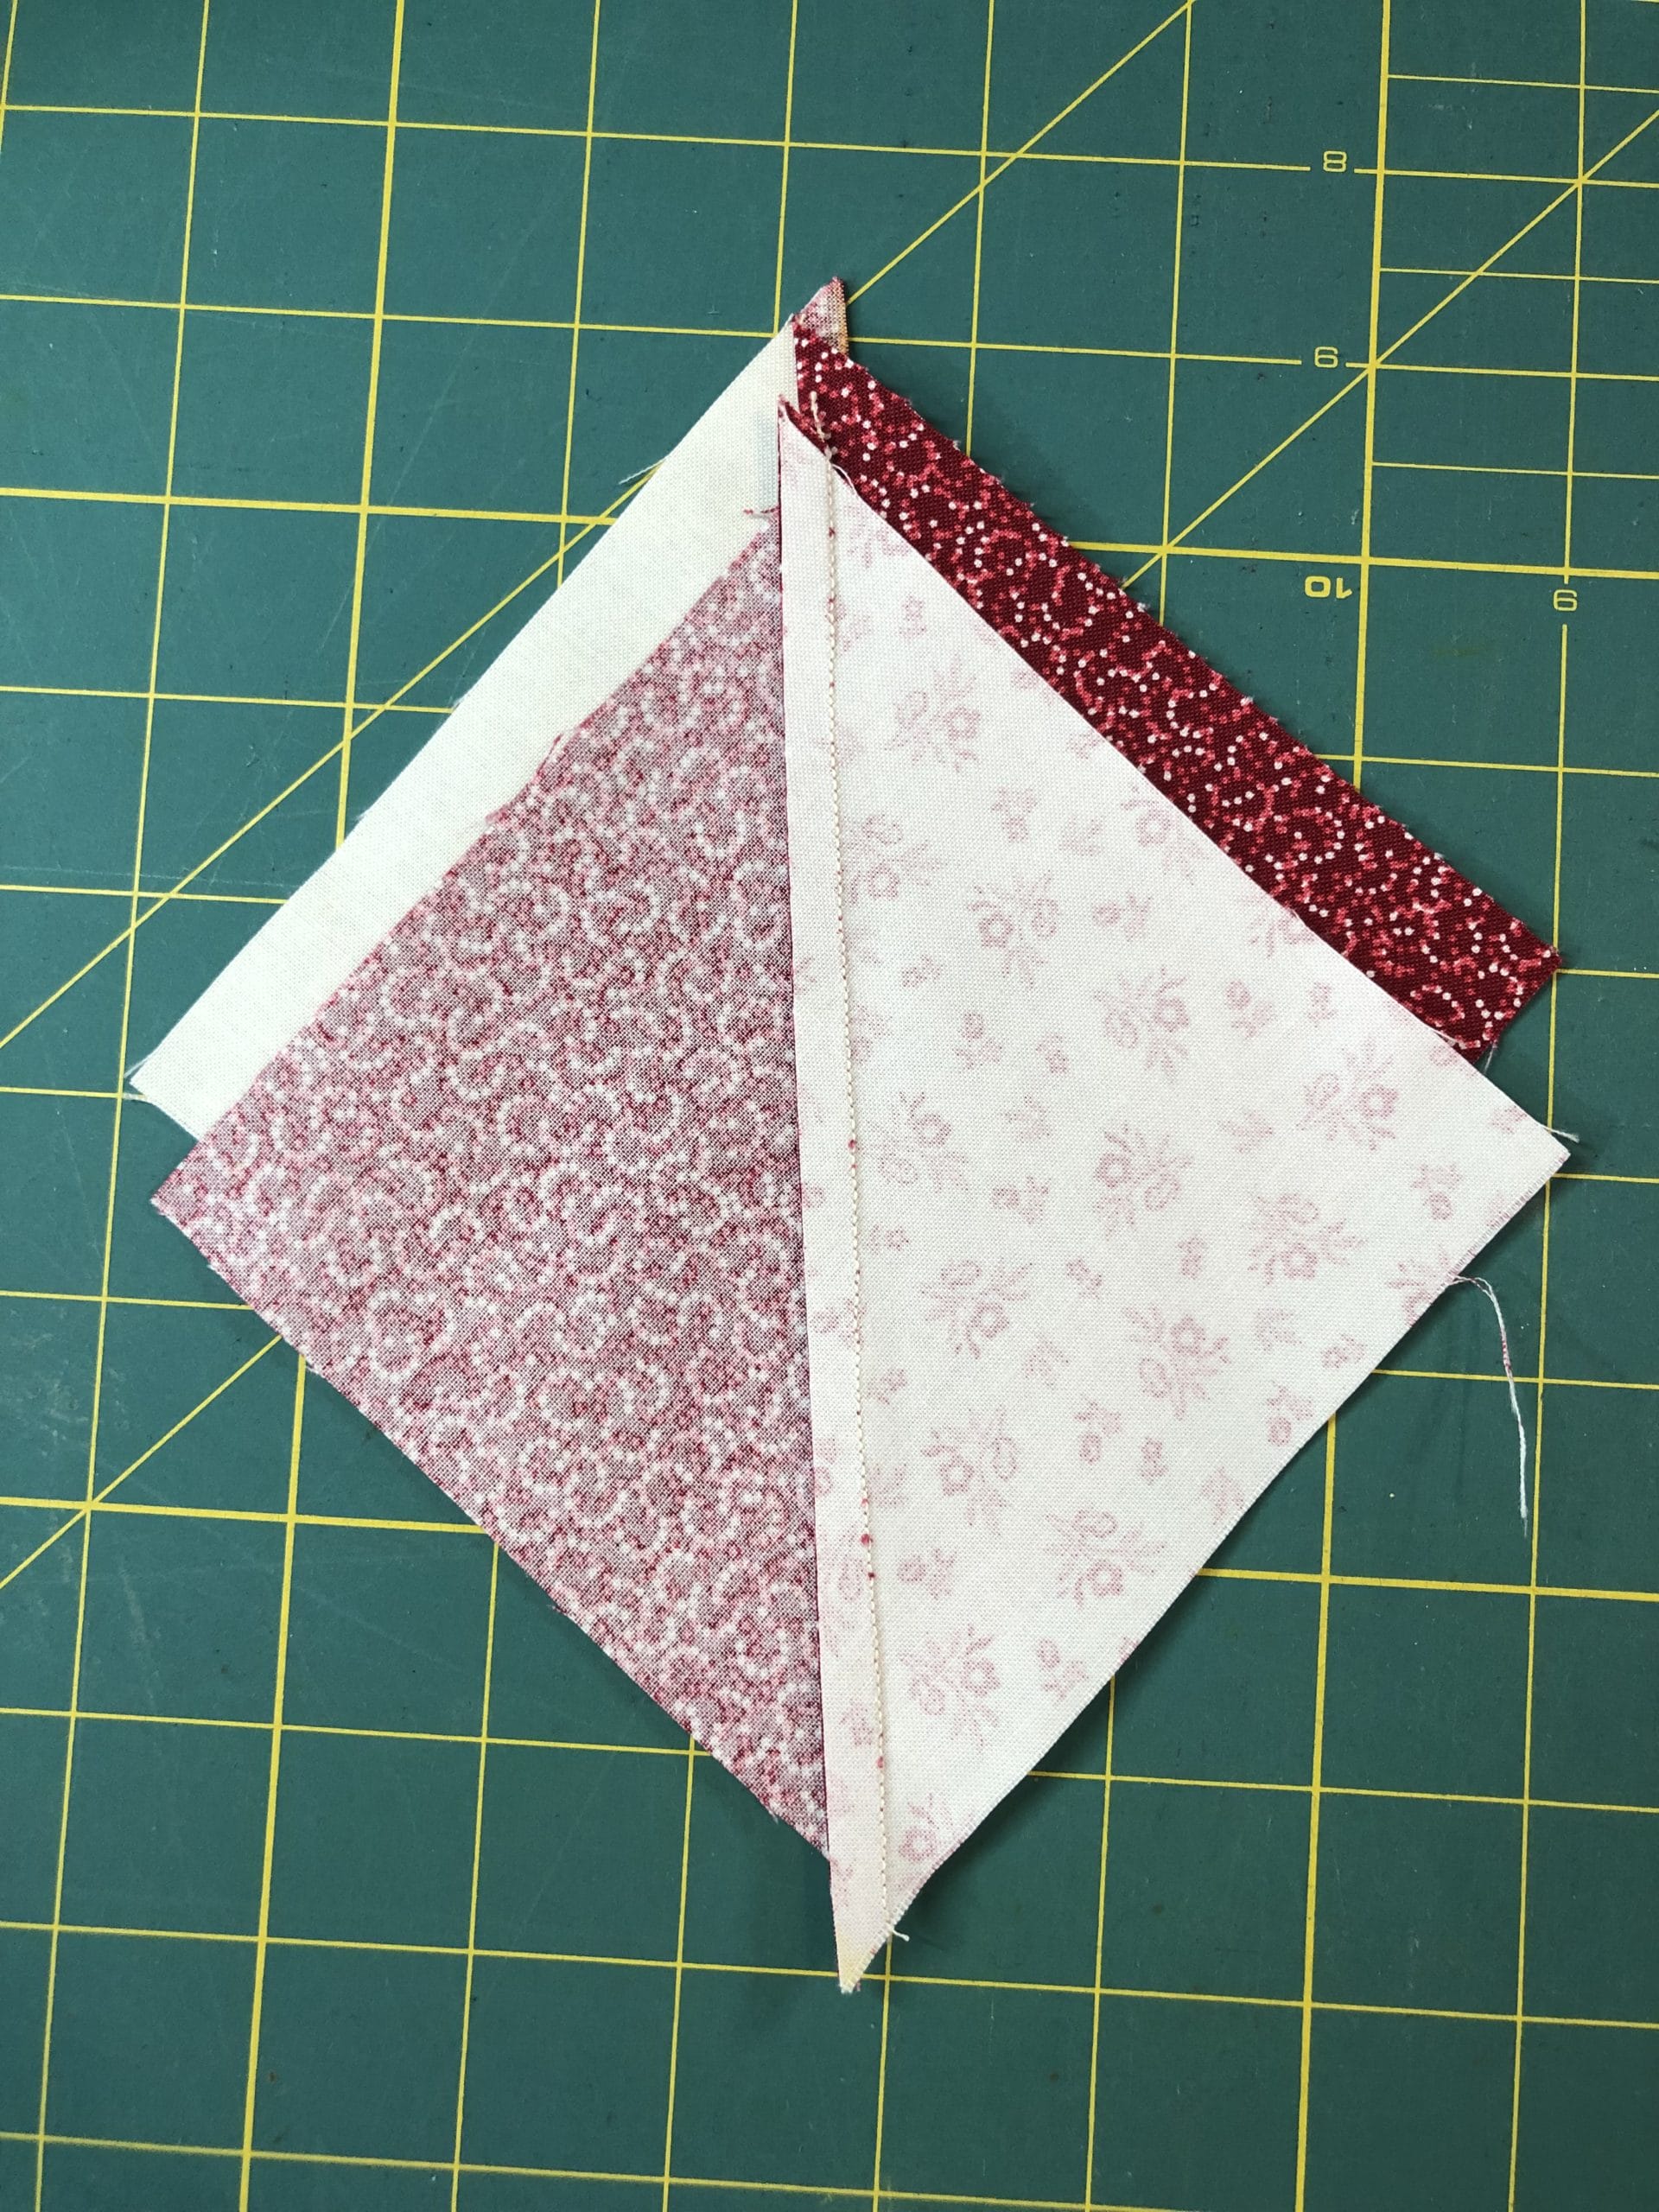
I always find it helpful to fold the center square in half and finger press a seam down the middle, so that I can have a guide to line up the point of the triangle before pinning.
You can’t see it in the photo above, but I promise there is a folded line down the center of the square that I’ve used as a guide to place the triangle before pinning. You want the point of the triangle to be on that line.
Next we will make four HST’s. Apparently I neglected to take a photo of these, but I think you all know how to make them.
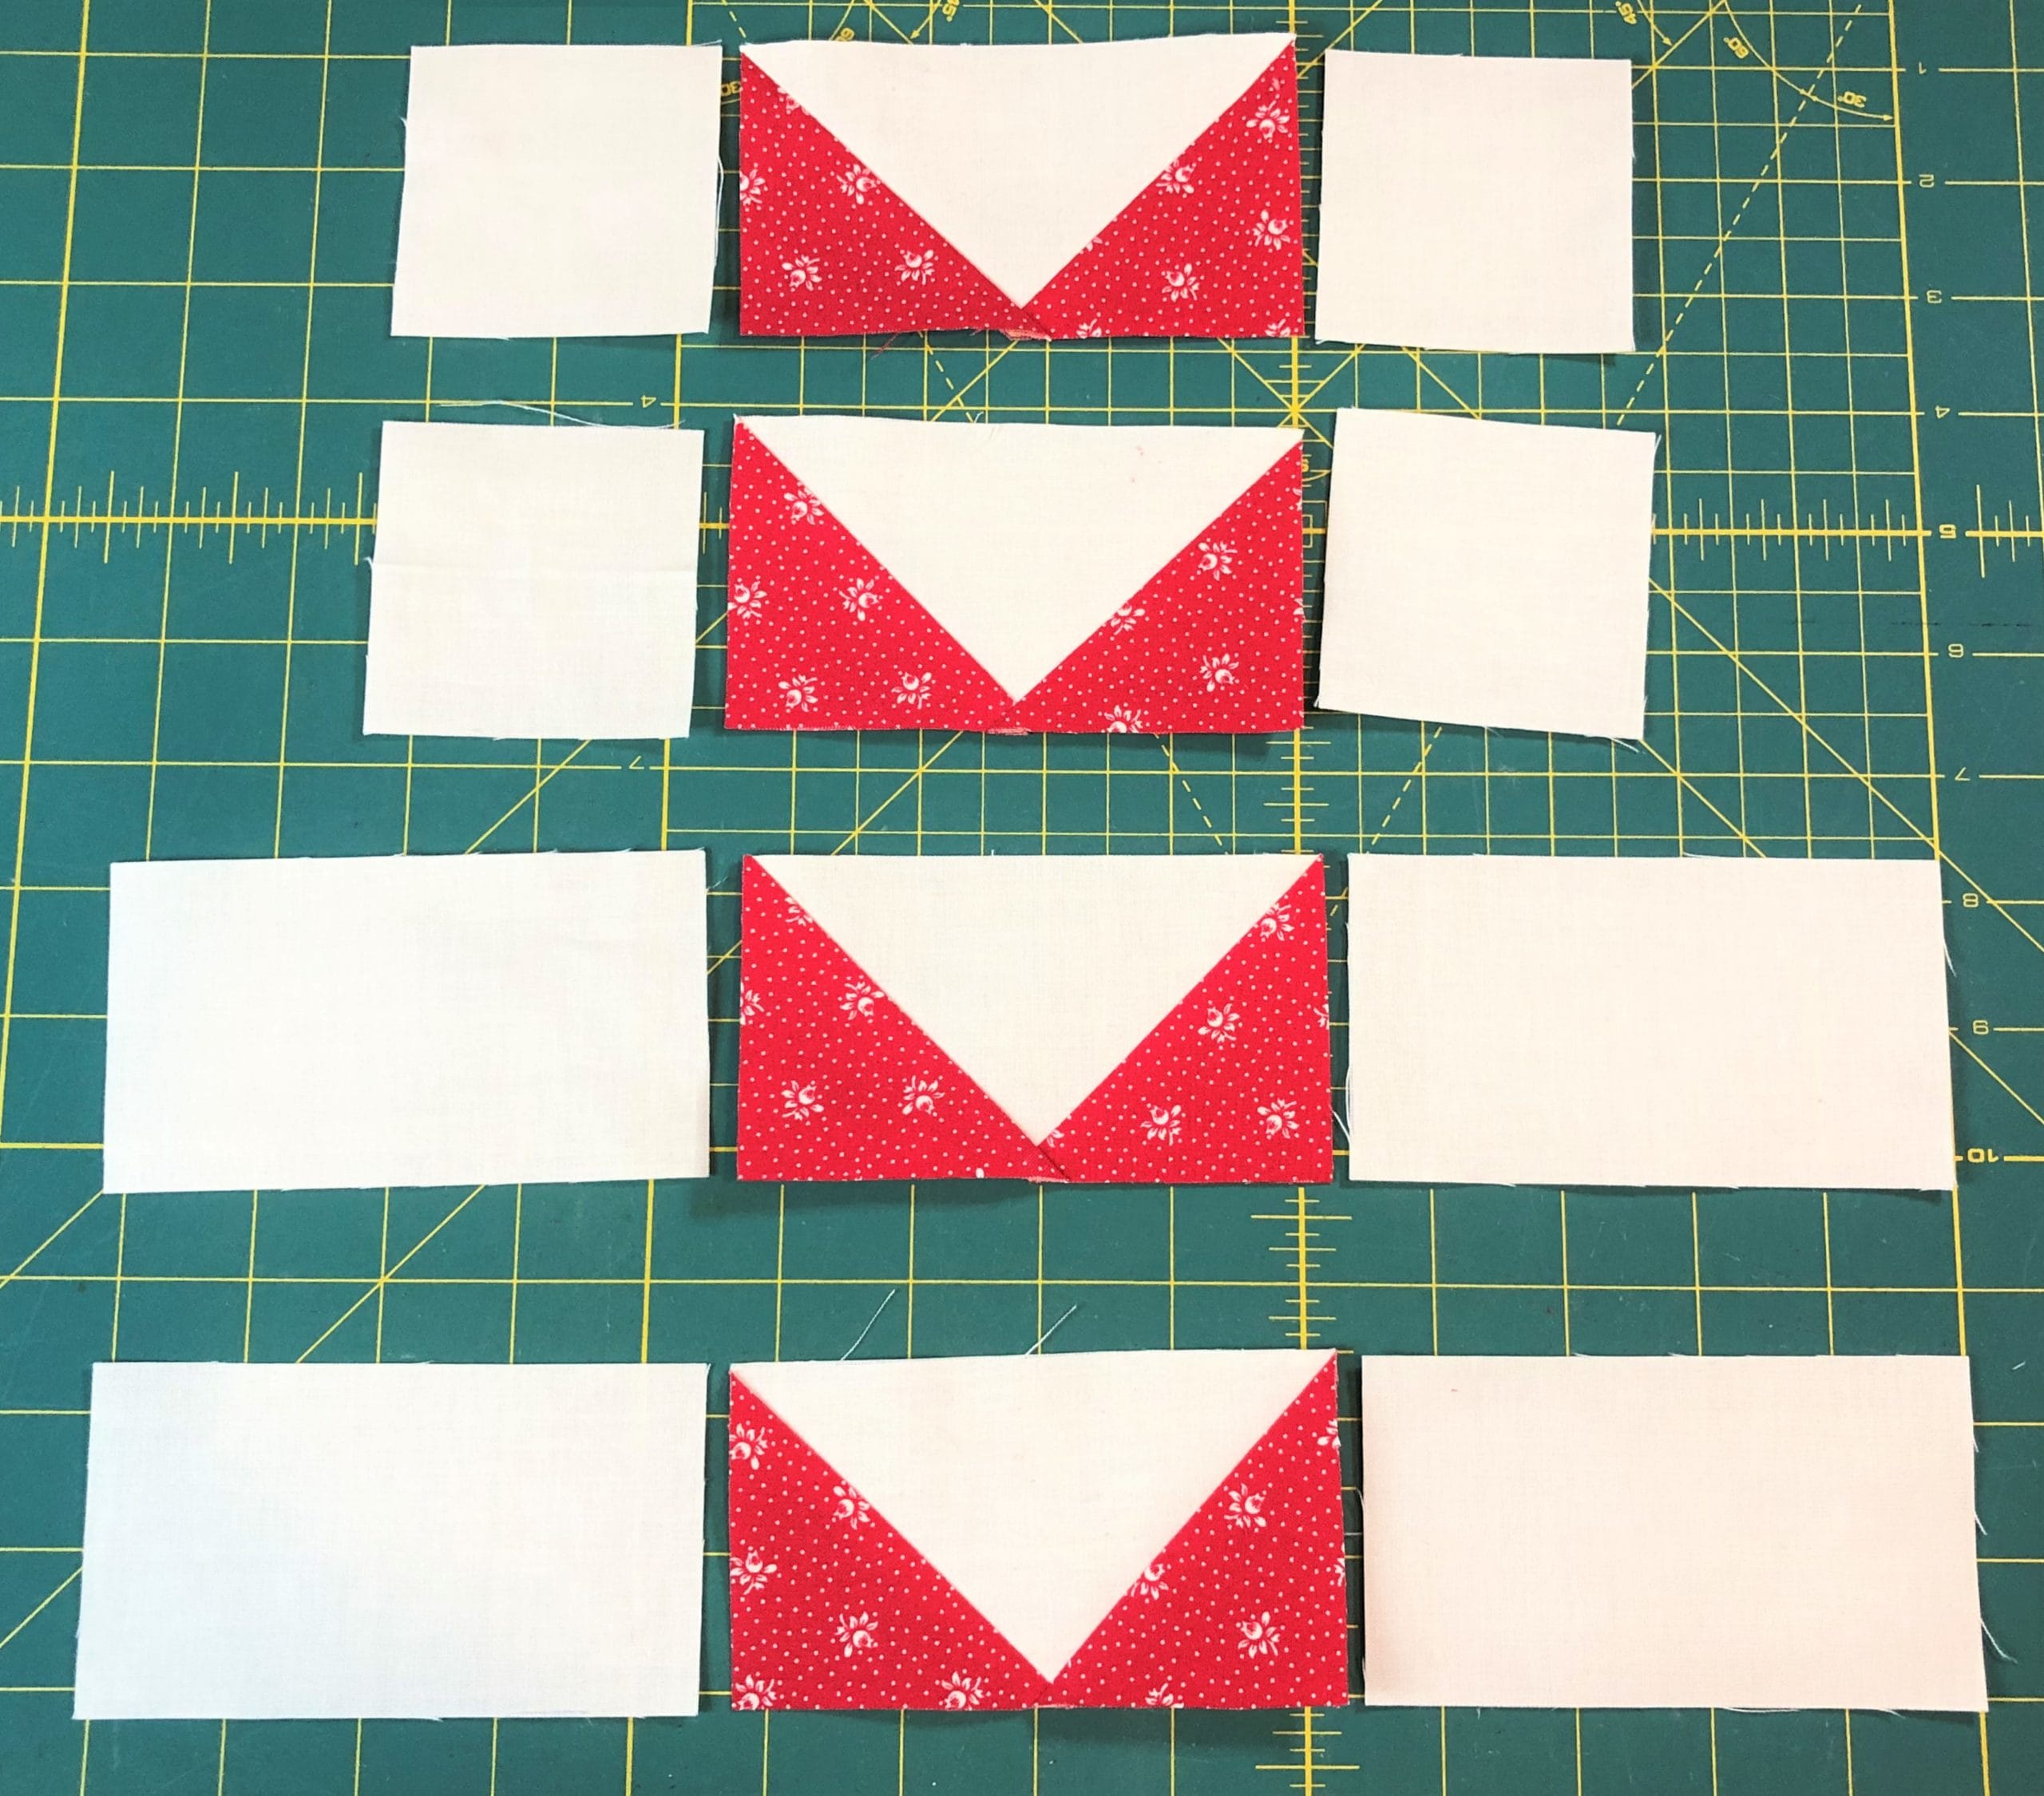
Last, but not least, we will make some flying geese. Usually my patterns have directions for no-waste flying geese, since they are my FAVORITE! But after getting a lot of feedback from customers, I decided to just use the simpler stitch and flip method with this pattern, especially since we don’t make that many in the quilt. And to be honest, I felt a little out of practice!
For those wanting to do the no-waste method, you’ll need to cut one 5-1/4” square from the Droplet, Lt. Denim fabric, and four 2-7/8” squares from the Soaring Leaves, Prussian Blue fabric. For anyone unfamiliar with this method for making flying geese, just look up No Waste Flying Geese on the internet, and you’ll find multiple tutorials.
A little tip for the stitch and flip method: I find it helpful to sew just BARELY outside (the side closest to the corner) of the line, so that I don’t end up with my corners coming up short. And by barely, I mean a thread or two. But again, it’s a suggestion, so you do you!
This photo isn’t the greatest, but I’ve got everything marked and pinned.The second set of squares are ready to be sewn and trimmed.
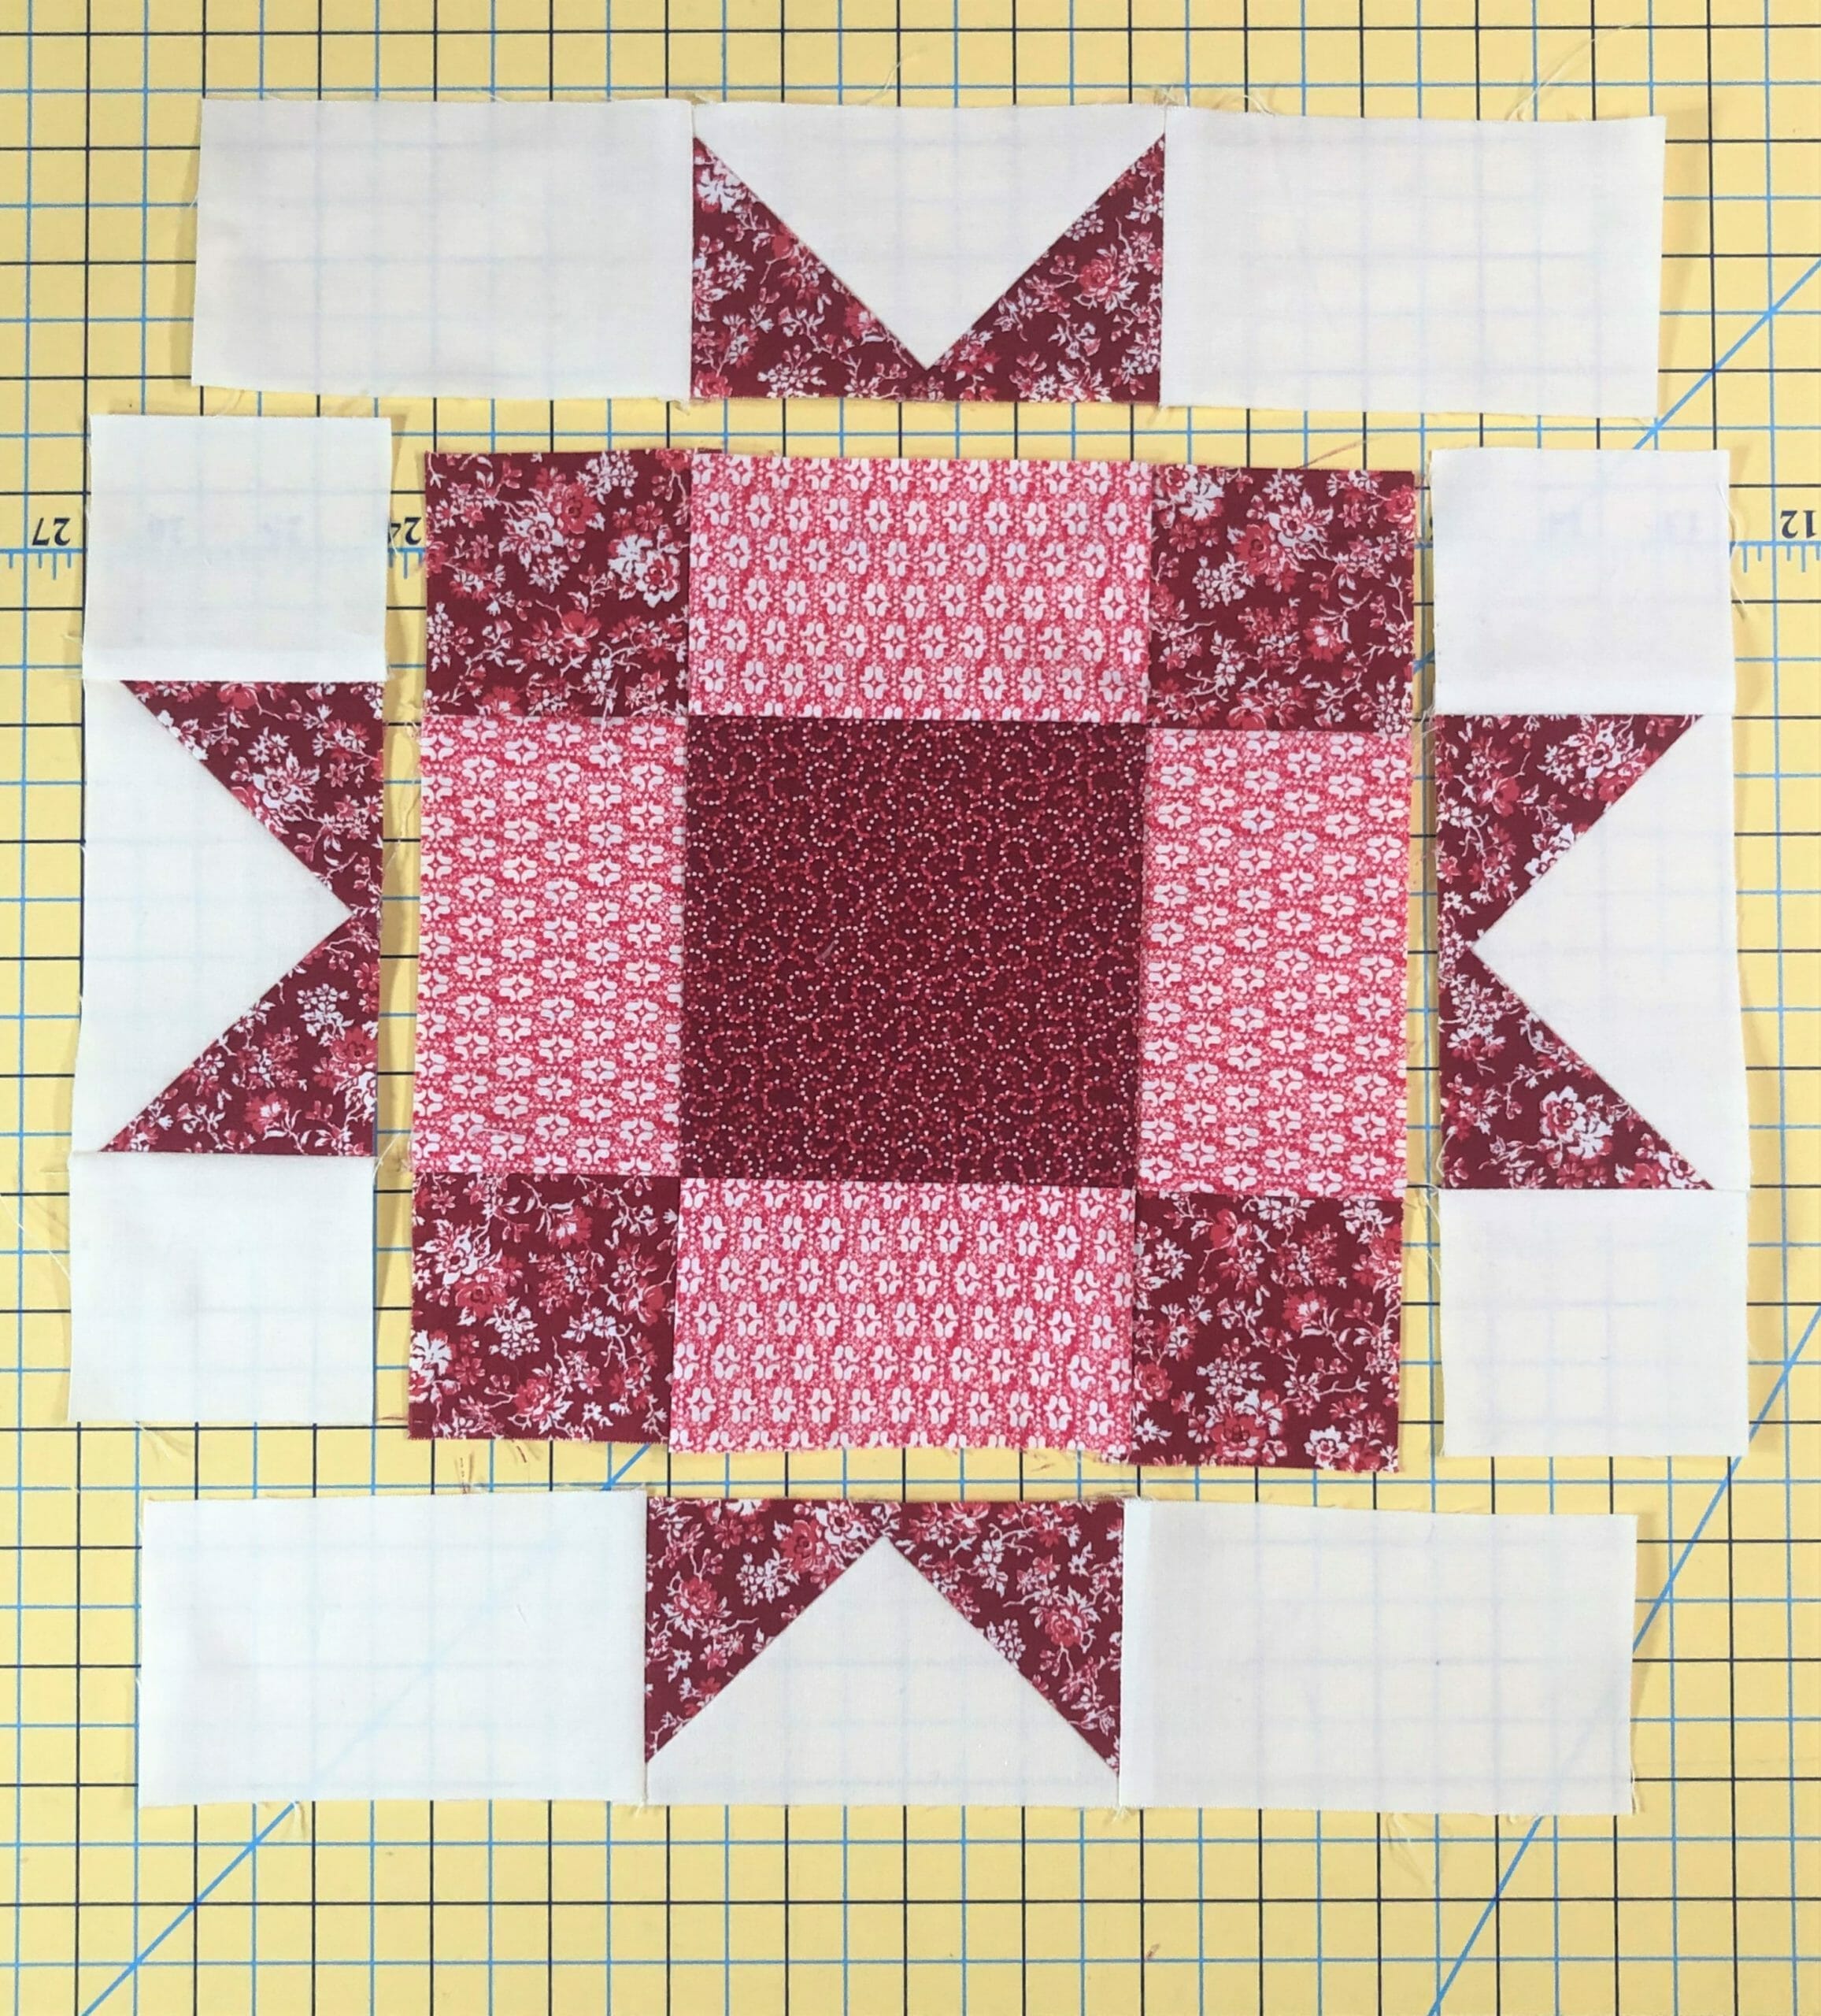
Now it’s time to assemble the block. I always lay everything out and double check that I haven’t flipped something the wrong way before I pin and sew.
As I was sewing and pressing, I continued to spray starch on this block, so that I could have better accuracy with getting my points to line up. I’m not sure I was entirely successful, but I decided it was good enough for me. I used to be really uptight about getting all my points to be PERFECT, and would rip and re-sew things multiple times sometimes, just to get everything to line up. In the past few years I stopped doing that so much, and now just enjoy!
This is also where you might choose to press the seams open, since there is quite a bit of bulk where the flying geese and the center diamond meet up. I pressed mine to the sides like a mad woman, lol!
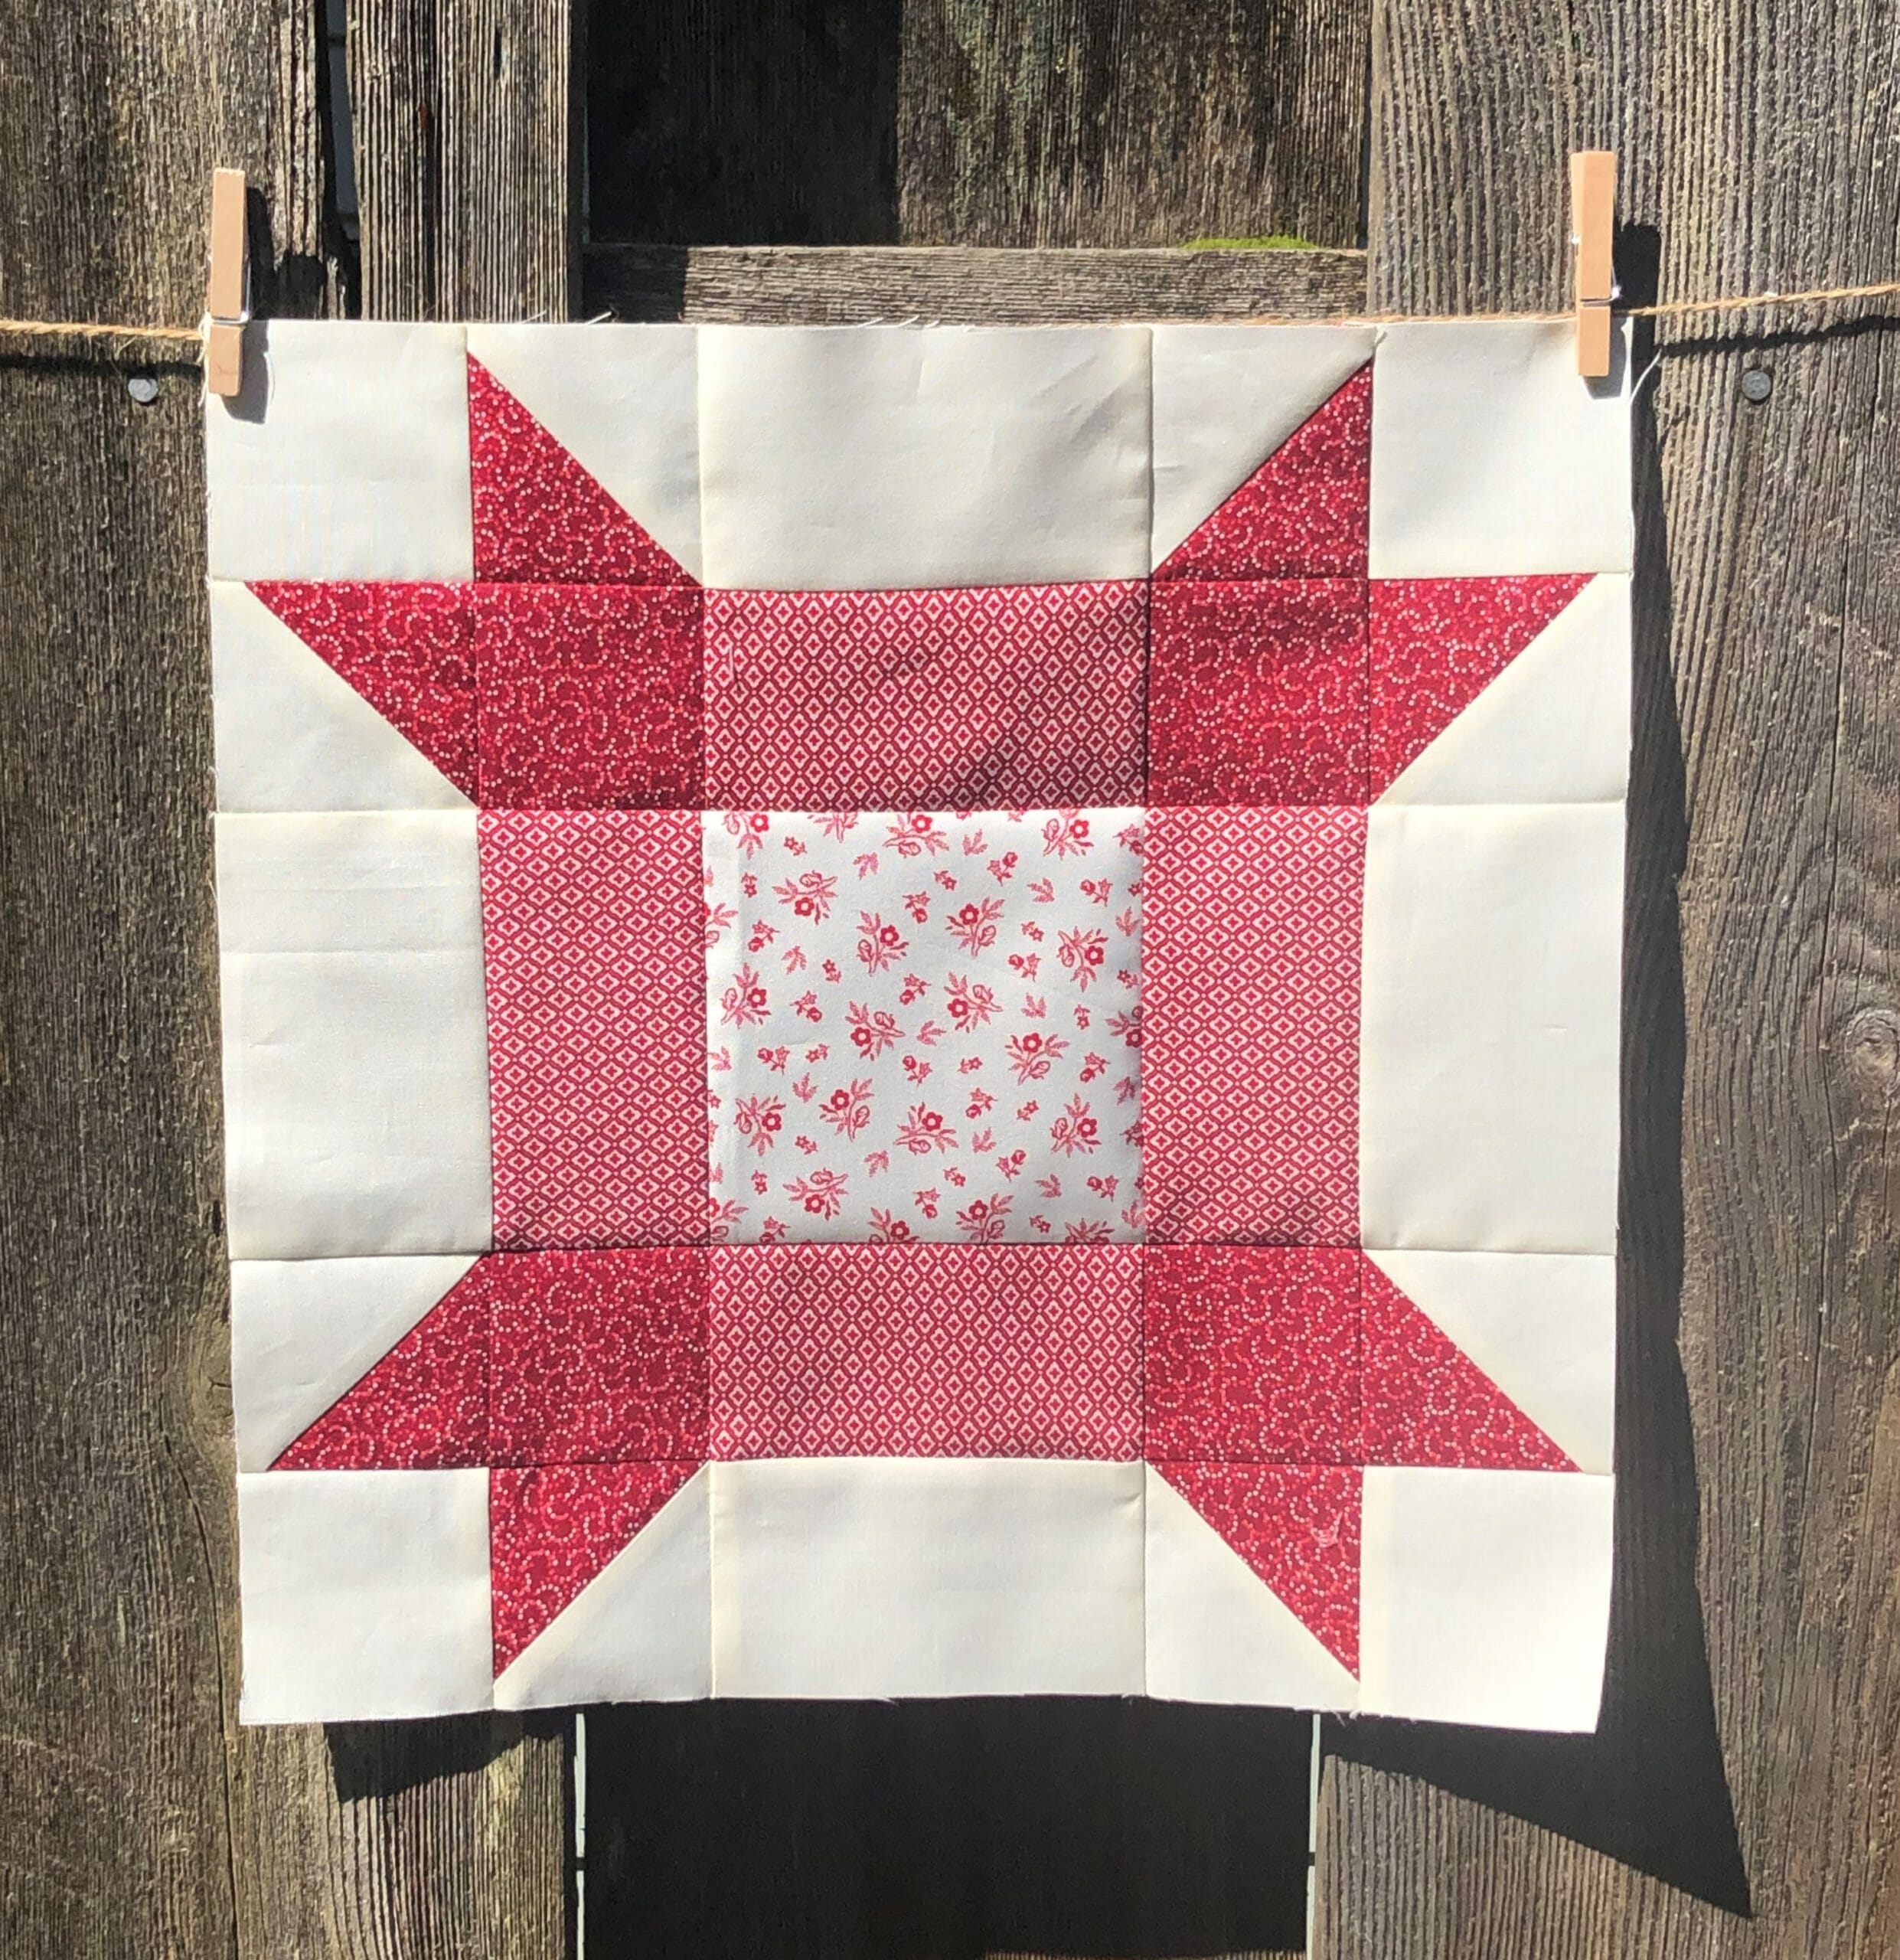
Hopefully if all went well, this center unit should measure 8-1/2” square, and is ready to sew on our border pieces. We are going to get SO good at making these quilt block borders!
DONE!
And, of course, we have an additional eight sashing strips to make…
If you want to be sneaky, you could even use your extra fabric to make a few extra, since you know that you’ll be making more anyway. I promise I won’t tell!
Well, that’s all for this month. Yay, we did it! Thanks for stopping by, and please either comment below, or shoot me an email if you have any questions.
It’s me again! This month we will get to make another four unique blocks, and this time three are repeats, and one brand spanking new. Since by now, we should all be pretty familiar with the techniques used in these blocks, I decided to skip over the lengthy tutorials that I’ve covered in months past. But it’s always good to see what these blocks look like sewn up in their new fabrics, so let’s dive right in!
Block #1
Now that it’s month 9, we FINALLY get to make the first block in the quilt. It’s about time! Technically, we made this same block WAY back in month 1, and it was block #14 then. And why didn’t I switch those and sew block #1 in month one and block #14 now, you ask? The short answer is FABRIC. When I’m planning block of the Month patterns, I need to pay attention to which fabrics will be shipped with which blocks, so blocks with like fabrics get grouped together. So now you know why things sometimes seem out of order. It all works out in the end though!
Speaking of being out of order, when sewing up this block, I began by making all of my flying geese and half-square triangles at the same time for this block. As you can see below, they are finished and ready for trimming, using my Bloc-Loc ruler to trim the flying geese units. Since you’ve all made these a million times by now, like I said earlier, I won’t bore you with the details.
Once those were all finished and trimmed, I was able to get busy assembling the block. Here is the center portion of the unit, which I’ve laid out to begin sewing.
Next, we’ll take the remaining flying geese as well as some Half Square Triangles, then sew those together as shown in step 7. Make sure you press the seam inward toward the flying geese unit on each side so that your seams will nest.
Now, all we have to do is sew those units to the sides, add our G squares to the remaining two units, and then get those sewn to the top and bottom, and the block is finished!
Block #5
This block is our only new one for the month. And this also means, that since it is new, we will be making it again in month 11, so be prepared.
Right off the bat, we are making even MORE no-waste flying geese – in two colorways no less. Once you have both sets completed, you’ll sew them together like it says in step 5. Here is what that looks like in real life:
Next, you’ll make some more Half Square triangles – big ones this time. Always remember that you are free to cut out your pieces just a smidge bigger so that you have wiggle room to trim as needed.
And now we can sew all the units together 9-patch style. Follow the directions and make sure that all your flying geese are pointing inward toward the center square. This was one of those blocks where the seams can get a little bulky, so if you aren’t comfortable with that, remember that you can always choose to press any seams open to reduce that bulk. Otherwise, follow the pressing arrows and you should be just fine.
Block #12
This block is another repeat from month 1 and was known as block #21.
We start by making a simple 9-patch unit for the center like so:
Next, it’s some more of those flying geese we know and love so well. Two of the completed flying geese units will have an F square sewn to each side, and the other two will have the longer G rectangles sewn to the ends.
Now, all that’s left is to sew those to the center unit like you see above. Easy Peasy!
Block #24
For our last block of the month – our ONLY block in our month 9 installment that doesn’t have ANY flying geese! How did that happen?! We made this block previously in month 5 as block #9 in case you want to refer back.
Begin by making some Half Square Triangles as directed.
Now you’ll use those HSTs to make a simple 4-patch unit like so:
After sewing the E and B strips together, you’ll have everything you need to assemble the block.
Here is my block, laid out and ready to sew together.
How easy was that? Another four blocks in the books!
Do you all realize that we only have one more month of Irish Chain blocks, and one last month of four unique blocks, then we are ready to finish our quilt?! We are SOOOO close to the finish line!
I hope you all have a wonderful, happy, and quilt-filled month!
Welcome, everyone! I’m thrilled that so many of you have decided to join me in sewing up my latest Block of the Month quilt! Some of you may have already sewn some of my previous BOMs, but I suspect many of you might be new.
Each month I’ll be posting a little tutorial blog here, with tricks and tips to help you create the best quilt possible. And with this BOM we will also be adding some extra content over the coming months as promised, so be on the lookout for that too. It’s going to be so fun!
As we go along, please feel free to ask any questions in the comments section, and I’ll do my best to help you out. My email address is also on the pattern, so you are welcome to reach out to me that way as well.
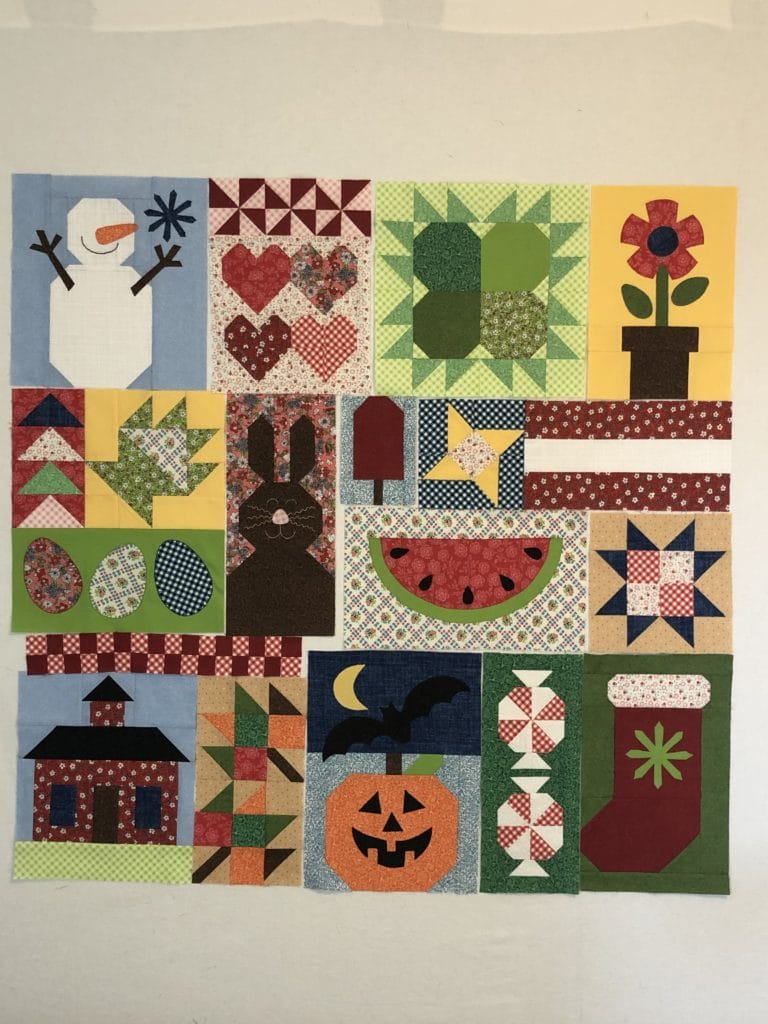
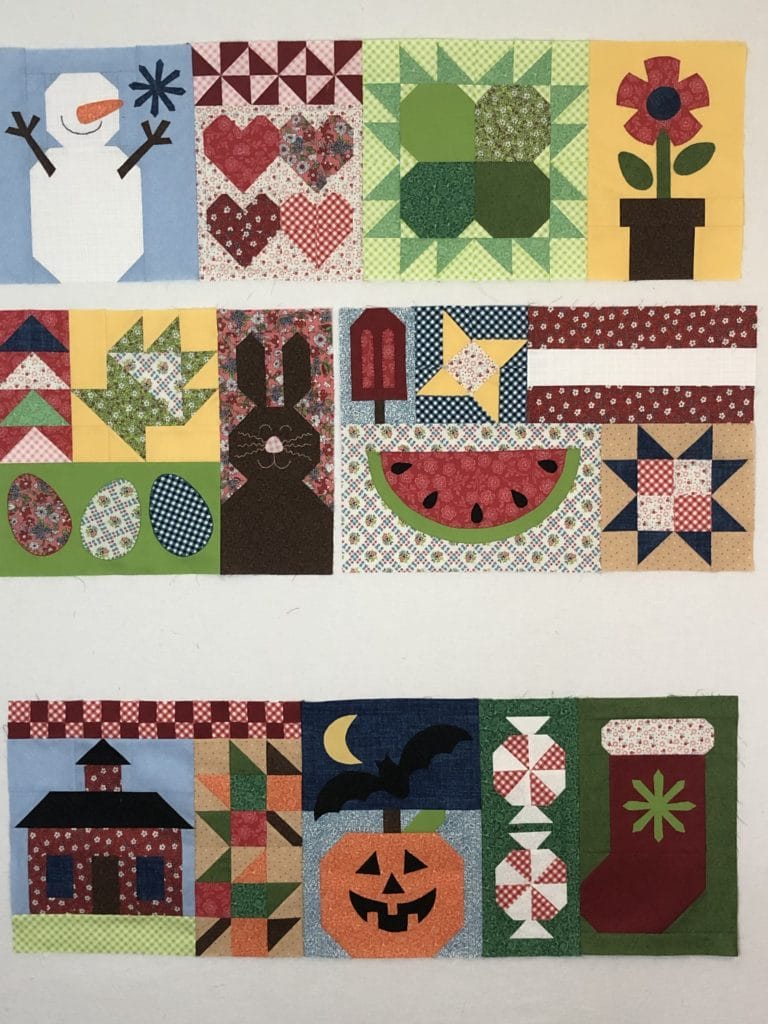
Now let’s get to business! Here are the three blocks we will make this month, photographed in no particular order:
Before we talk about these blocks one by one, I have a few general tips:
I always make my cutting measurements mathematically correct in my patterns. Over the years I’ve tried many different methods of cutting and trimming in my instructions, and long story short, I came back to doing it this way.
This means that technically speaking, if you cut your Half Square Triangle pieces at 2-7/8” square, and follow the directions, using a correct seam allowance, you should end up with 2-1/2” HST squares in the end. However, I also allow for enough fabric in case you want to make your pieces a smidge bigger. In fact, if I’m being honest, no matter what quilt I’m sewing, I always cut my pieces just a hair larger, and then sew my seams just a hair under a 1/4”, and always come up with enough wiggle room to trim things up perfectly. My point is, that you do what works best for you, and know that you are free to cut your pieces a bit larger and trim them down later if that’s your preference.
I also NEVER pre-wash my fabric. Again, this is a personal preference. And just FYI – Out of curiosity, I actually did a bleed test on the Droplet Navy for this quilt since it is so dark, and it didn’t bleed AT ALL. Hooray for great Connecting Threads fabric!
I love to pre-starch all my fabric. I always starch and iron everything before I ever take a rotary cutter to a single piece. My preferred starch is MaryEllen’s Best Press – Caribbean Beach scent. And that’s just because I always want to be in the Caribbean, haha!
By now some of you have likely received your first installment of Open Skies. If you look at the pattern, you’ll notice that each block has the same half-square triangle border. We are going to get SO good at making these by the end of this quilt!
Knowing that each of the three blocks this month needed a total of 12 identical HSTs, I cheated a little bit and made all 36 at the same time before sewing up each of the blocks individually. So if you want to do the same, you’ll need to cut a total of 18 of both the B and C squares, then sew them up according to the directions.
A small side note, The Droplet Navy fabric is directional, but personally, I didn’t pay much attention to the direction of the print because I don’t think it is very noticeable in the final quilt. If it bothers you, then you are most welcome to figure that in with regards to how you sew these together. Since the Half Square triangles end up facing every which way in the blocks anyway, I decided to just get sewing and let the print be in whichever direction it ends up.
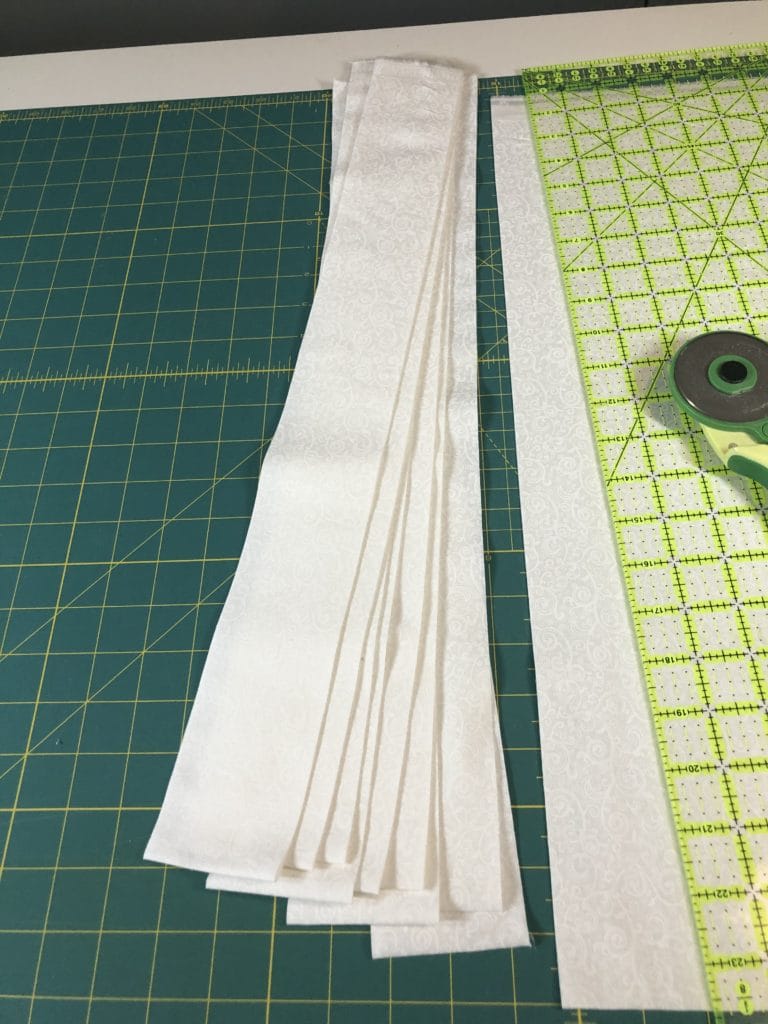
Here is my stack of 36 HSTs – ready for trimming
I like to look for shortcuts whenever I’m making a quilt – even with my own patterns! So I decided to assemble all the components for the outer borders before I began making the center portions of each block. But if jumping ahead with these messes you up, please ignore what I just said and follow my directions by sewing the blocks one by one.
In the photo below I have a stack of 12 of the A/B/C units. This step is #3 in block #1.
Now on to the individual blocks we’ll be making this month!
Block #1
The first block we will be making has a very simple 9-patch unit in the center. This center uses another directional print with the Droplet Lt. Denim fabric. Again, it probably doesn’t matter too much, but you may choose to pay attention to the placement of those F squares in order to have the print all going in the same direction. It all depends on how picky you want to be.
Another tip for this block as well as all the others: Make sure you are following the pressing instructions in order to ensure that your seams will nest together properly in the end. This is especially important because of all those half-square triangles on the border. But if you mess up, don’t fret. You can always choose to press your seams open if you prefer.
Once the center is sewn, you can take your completed border sections and attach them as shown below. Before you begin sewing, it’s a good idea to double-check that all your HSTs are facing the correct direction around the perimeter. This is why I always lay things out first.
Block #11
This block involves making even more HSTs, but the ones for the center are much larger. As I mentioned above, this is where it’s handy to cut your pieces just a smidge bigger, and then use a scant 1/4″ seam allowance, so that you can trim to perfection, or at least close enough!
Make sure you’ve got these in the correct orientation before you begin sewing like you see below.
And here is this block, ready for sewing the HST border around the outside.
There isn’t too much that is tricky with this block either, but I have one additional tip: When sewing the outer A/B/C units onto the center portion, you may want to pin and sew so that the central unit is on the top, and the A/B/C units are underneath. This will enable you to see where you are sewing through those D/E points on the sides of the center block, helping you to get them just right. The picture below will help illustrate what I mean:
Maybe not the greatest photo, but if you look close, you can see where the stitched line goes right through the intersection of where the HSTs are joined.
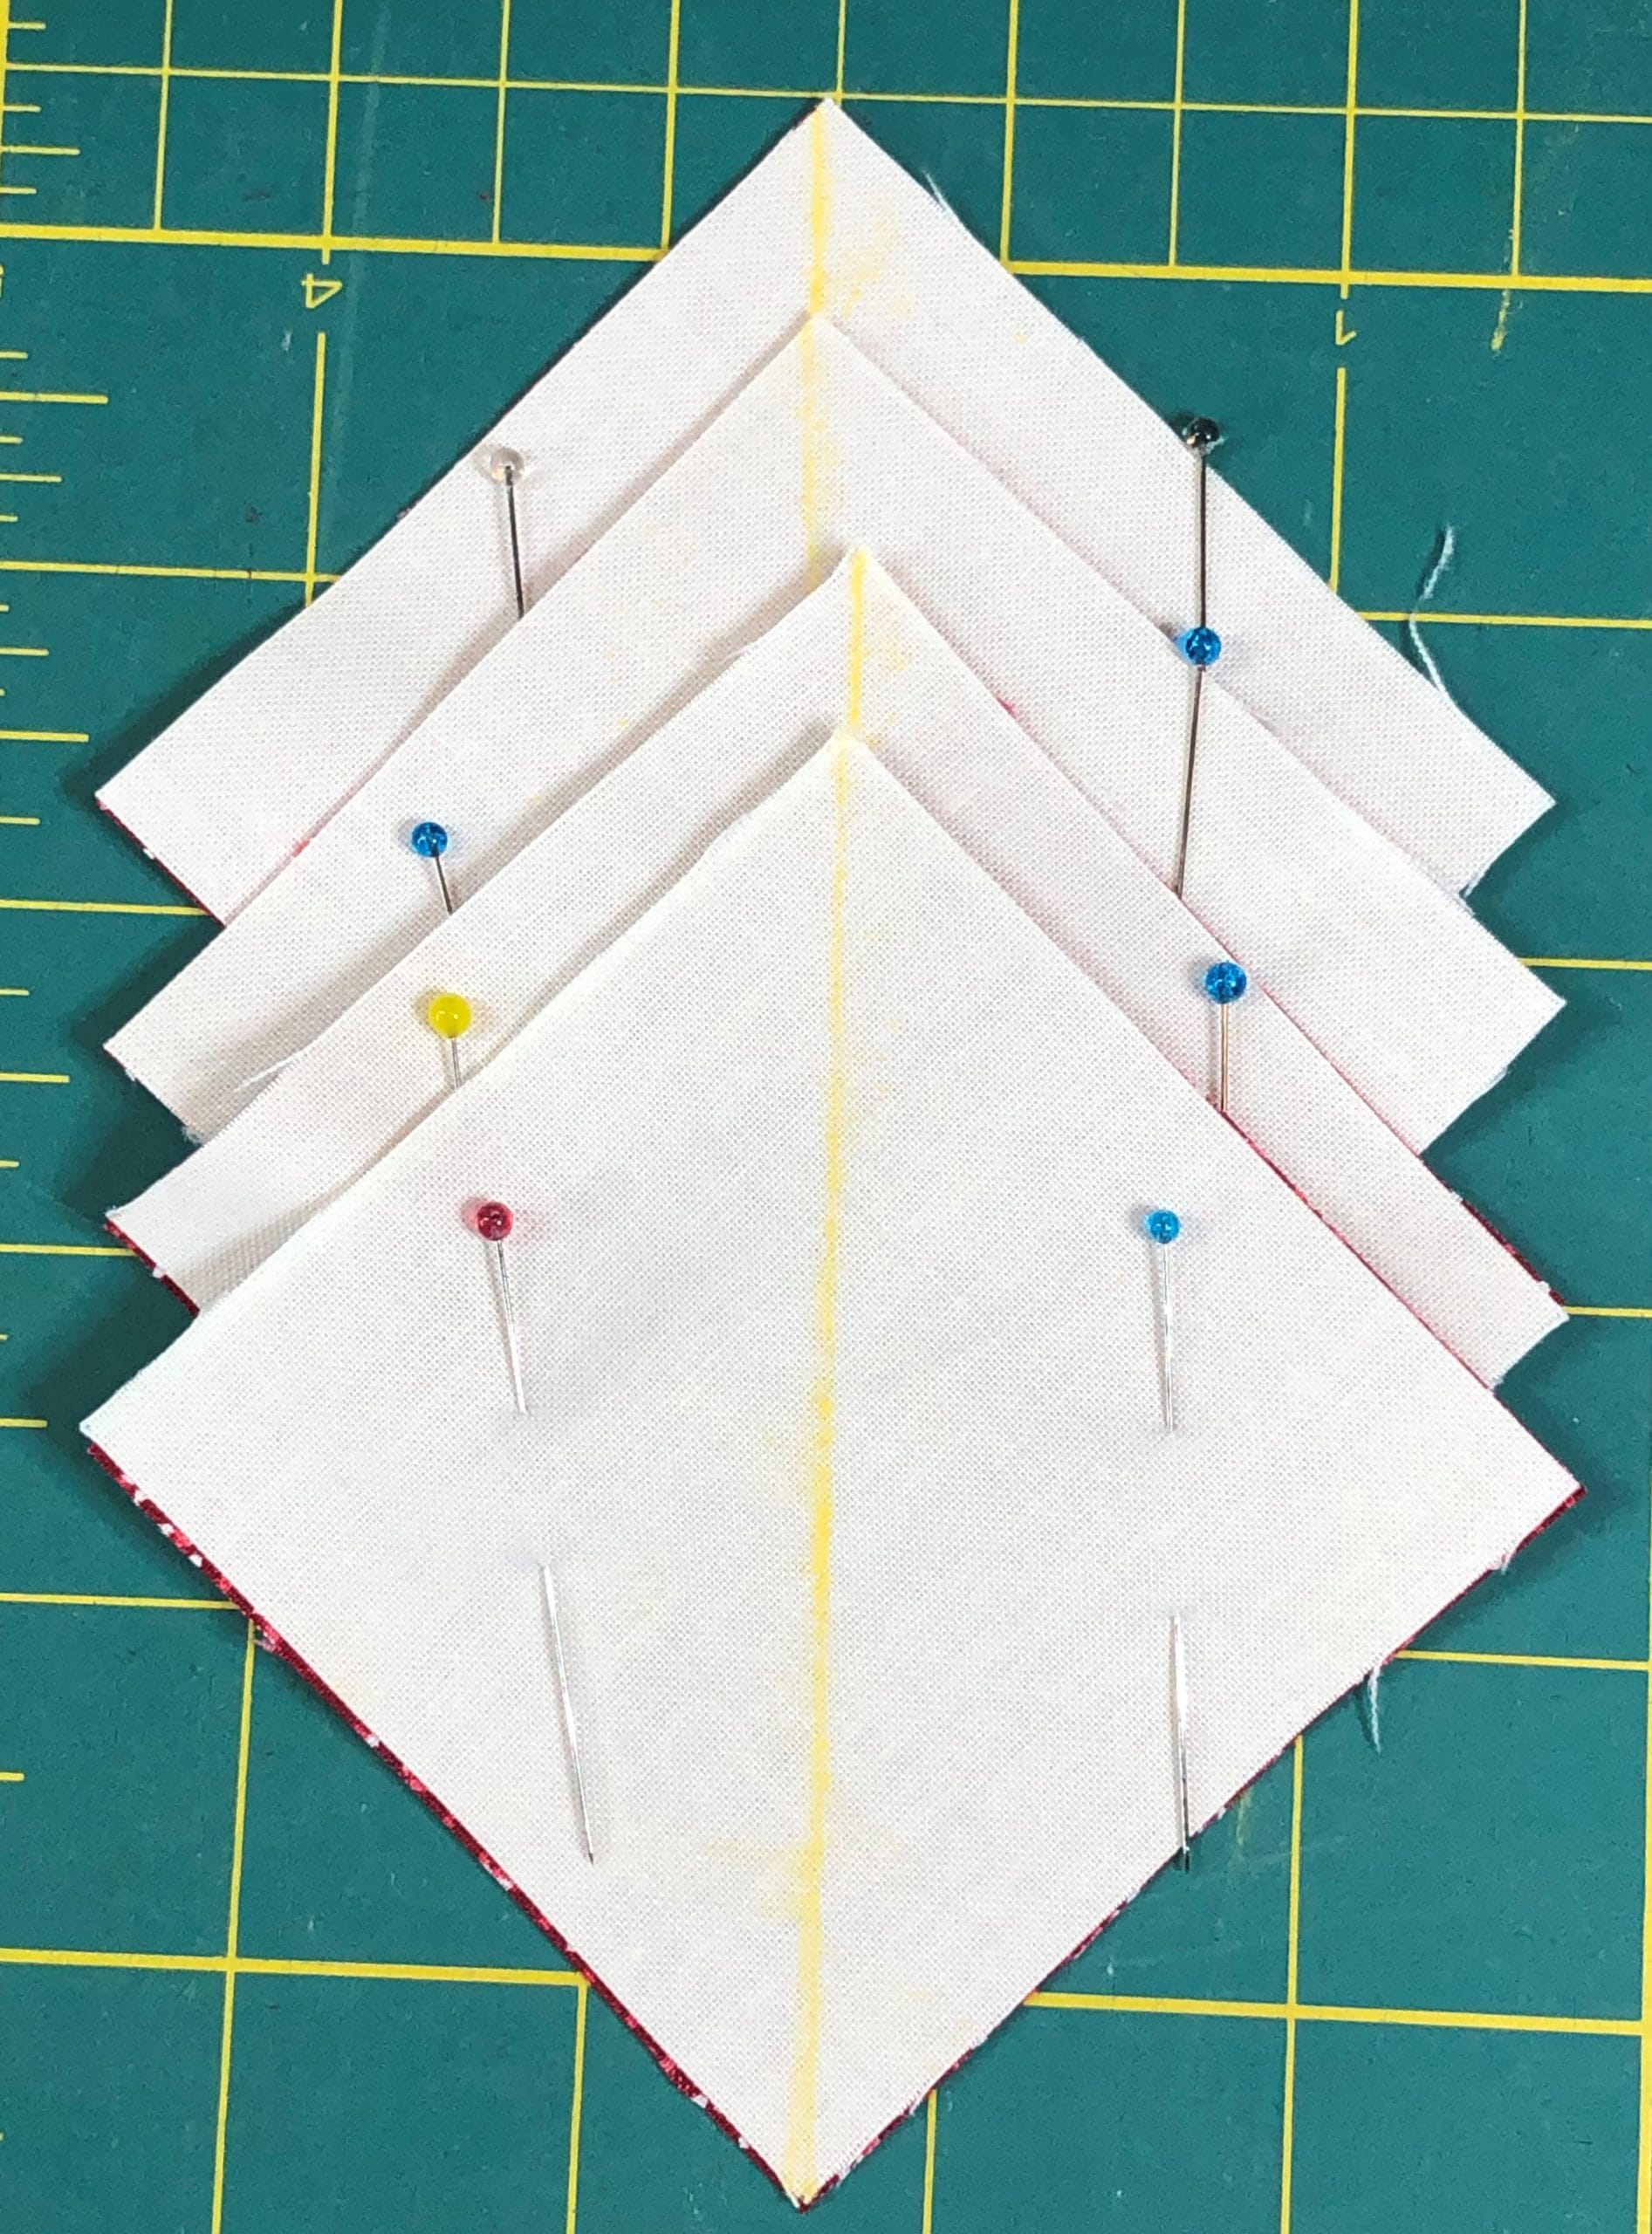
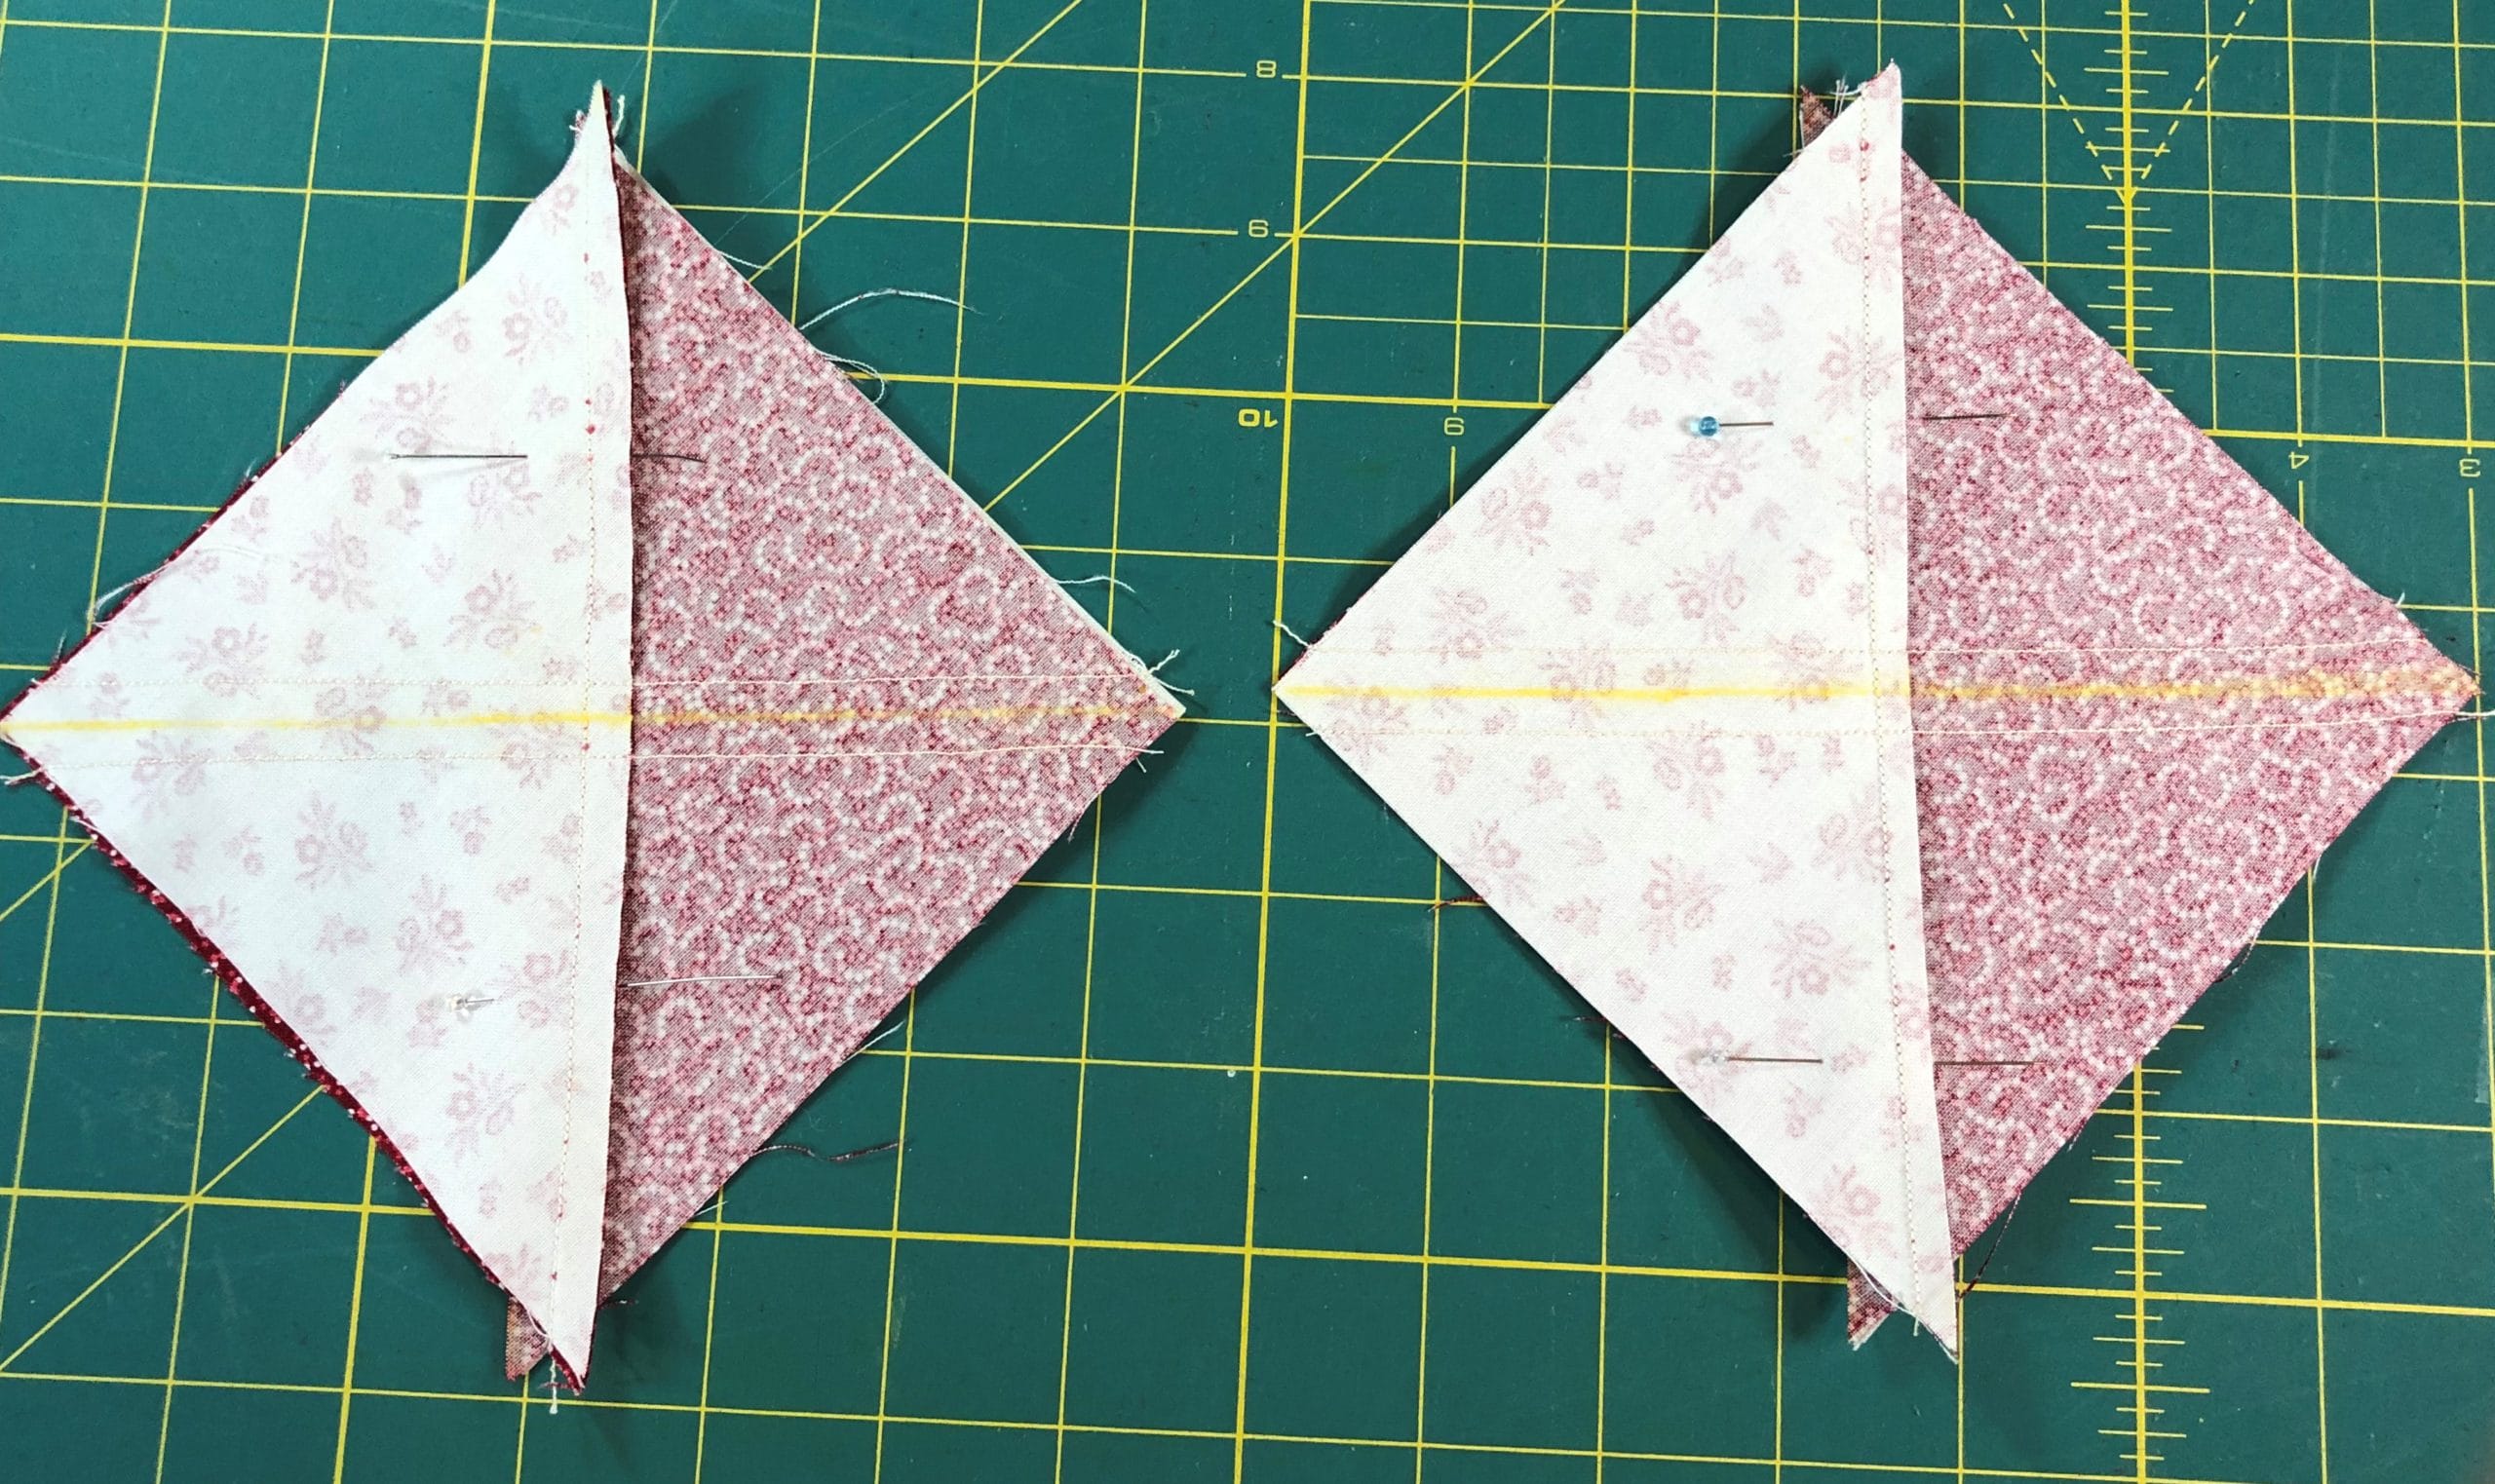
Block #13
Our last block is probably the most challenging of the month. Each of the four D squares in this block will have three E squares sewn and trimmed to make an almost square in a square unit. Here you can see the first E squares pinned and ready to go.
Anytime I use the method of sewing on a line and then trimming to a 1/4 “ seam allowance, I always sew just a hair outside the line. This helps me to make sure when I trim and press, that I don’t end up with those triangle corners coming up short.
Before you trim, I suggest you flip up each E square and see if the corners match up. I always check this on every single one, and if it comes up short, then I know I need to rip out my stitching and try again. I know it’s tedious, but you’ll thank yourself later.
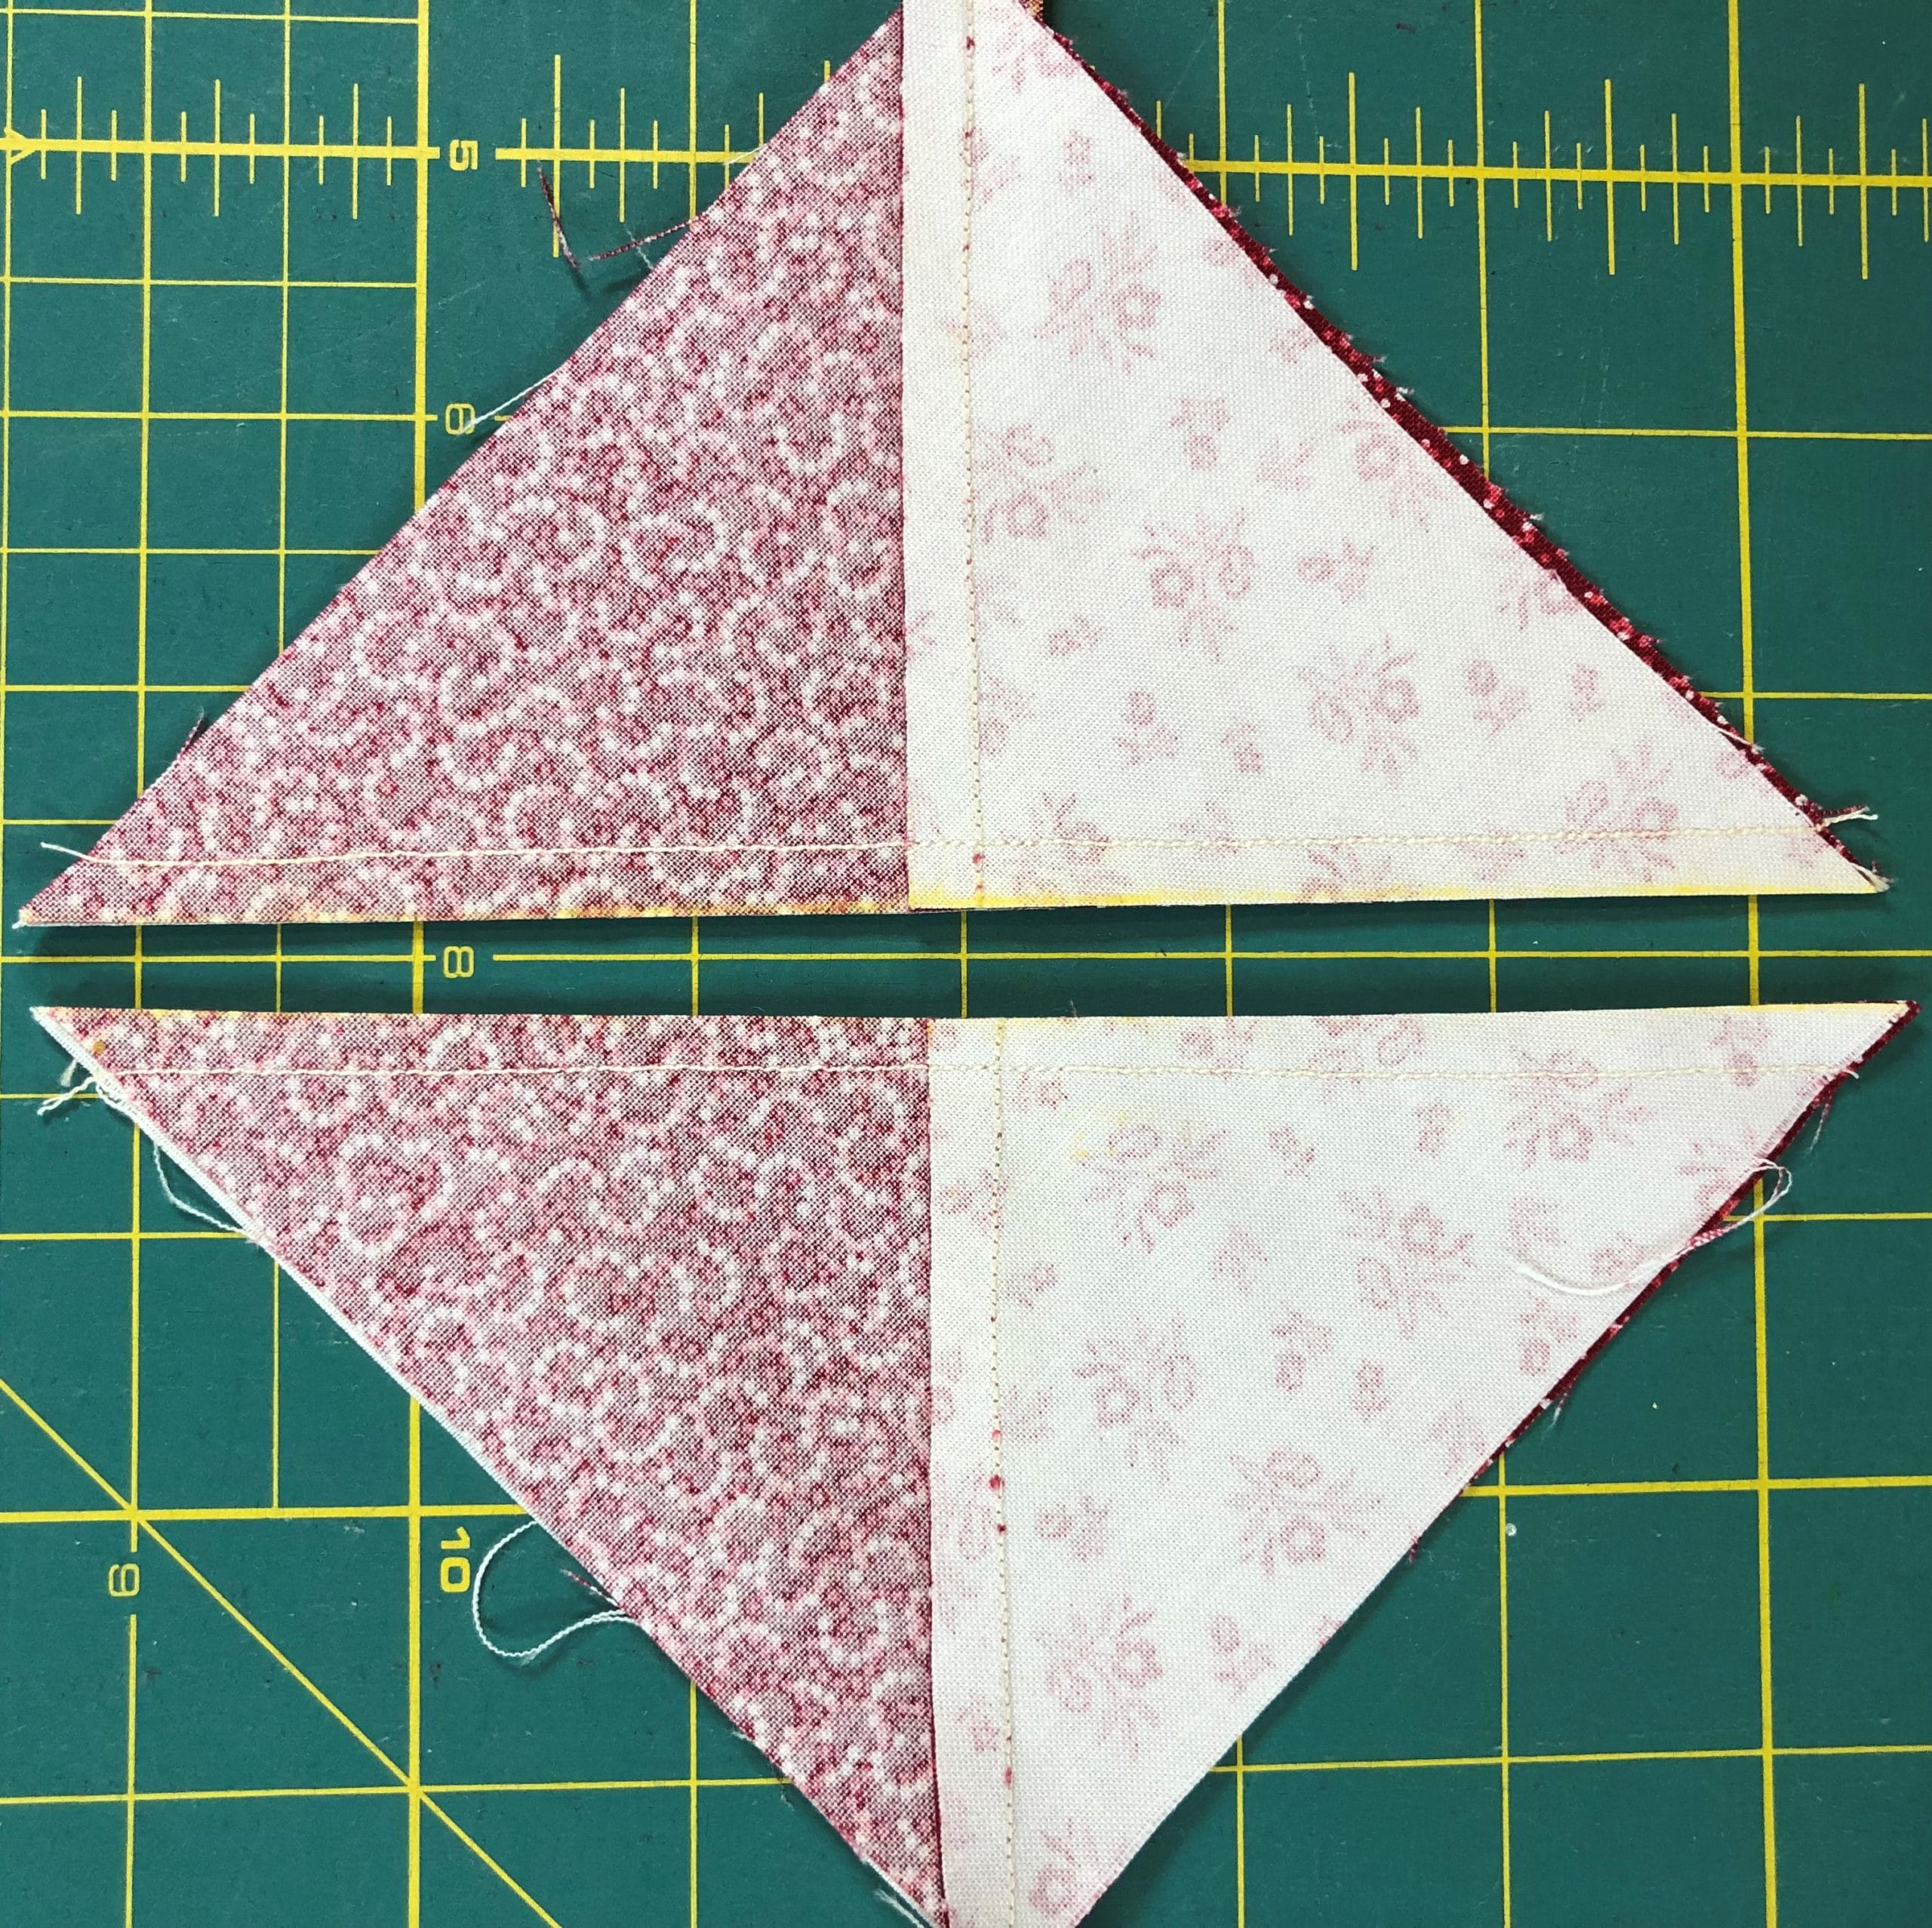
I’ve checked to make sure my corners line up, so now I can trim off the excess.
If you look at the directions, you will notice that the first E triangle is pressed TOWARD the D square, while the remaining two are pressed AWAY from the D square. This is especially important because this will once again allow for those seams to nest when you sew the units together.
The first E square is pressed TOWARD the D square like you see here.
Once you’ve finished with the first E squares, the remaining ones are pressed outward.
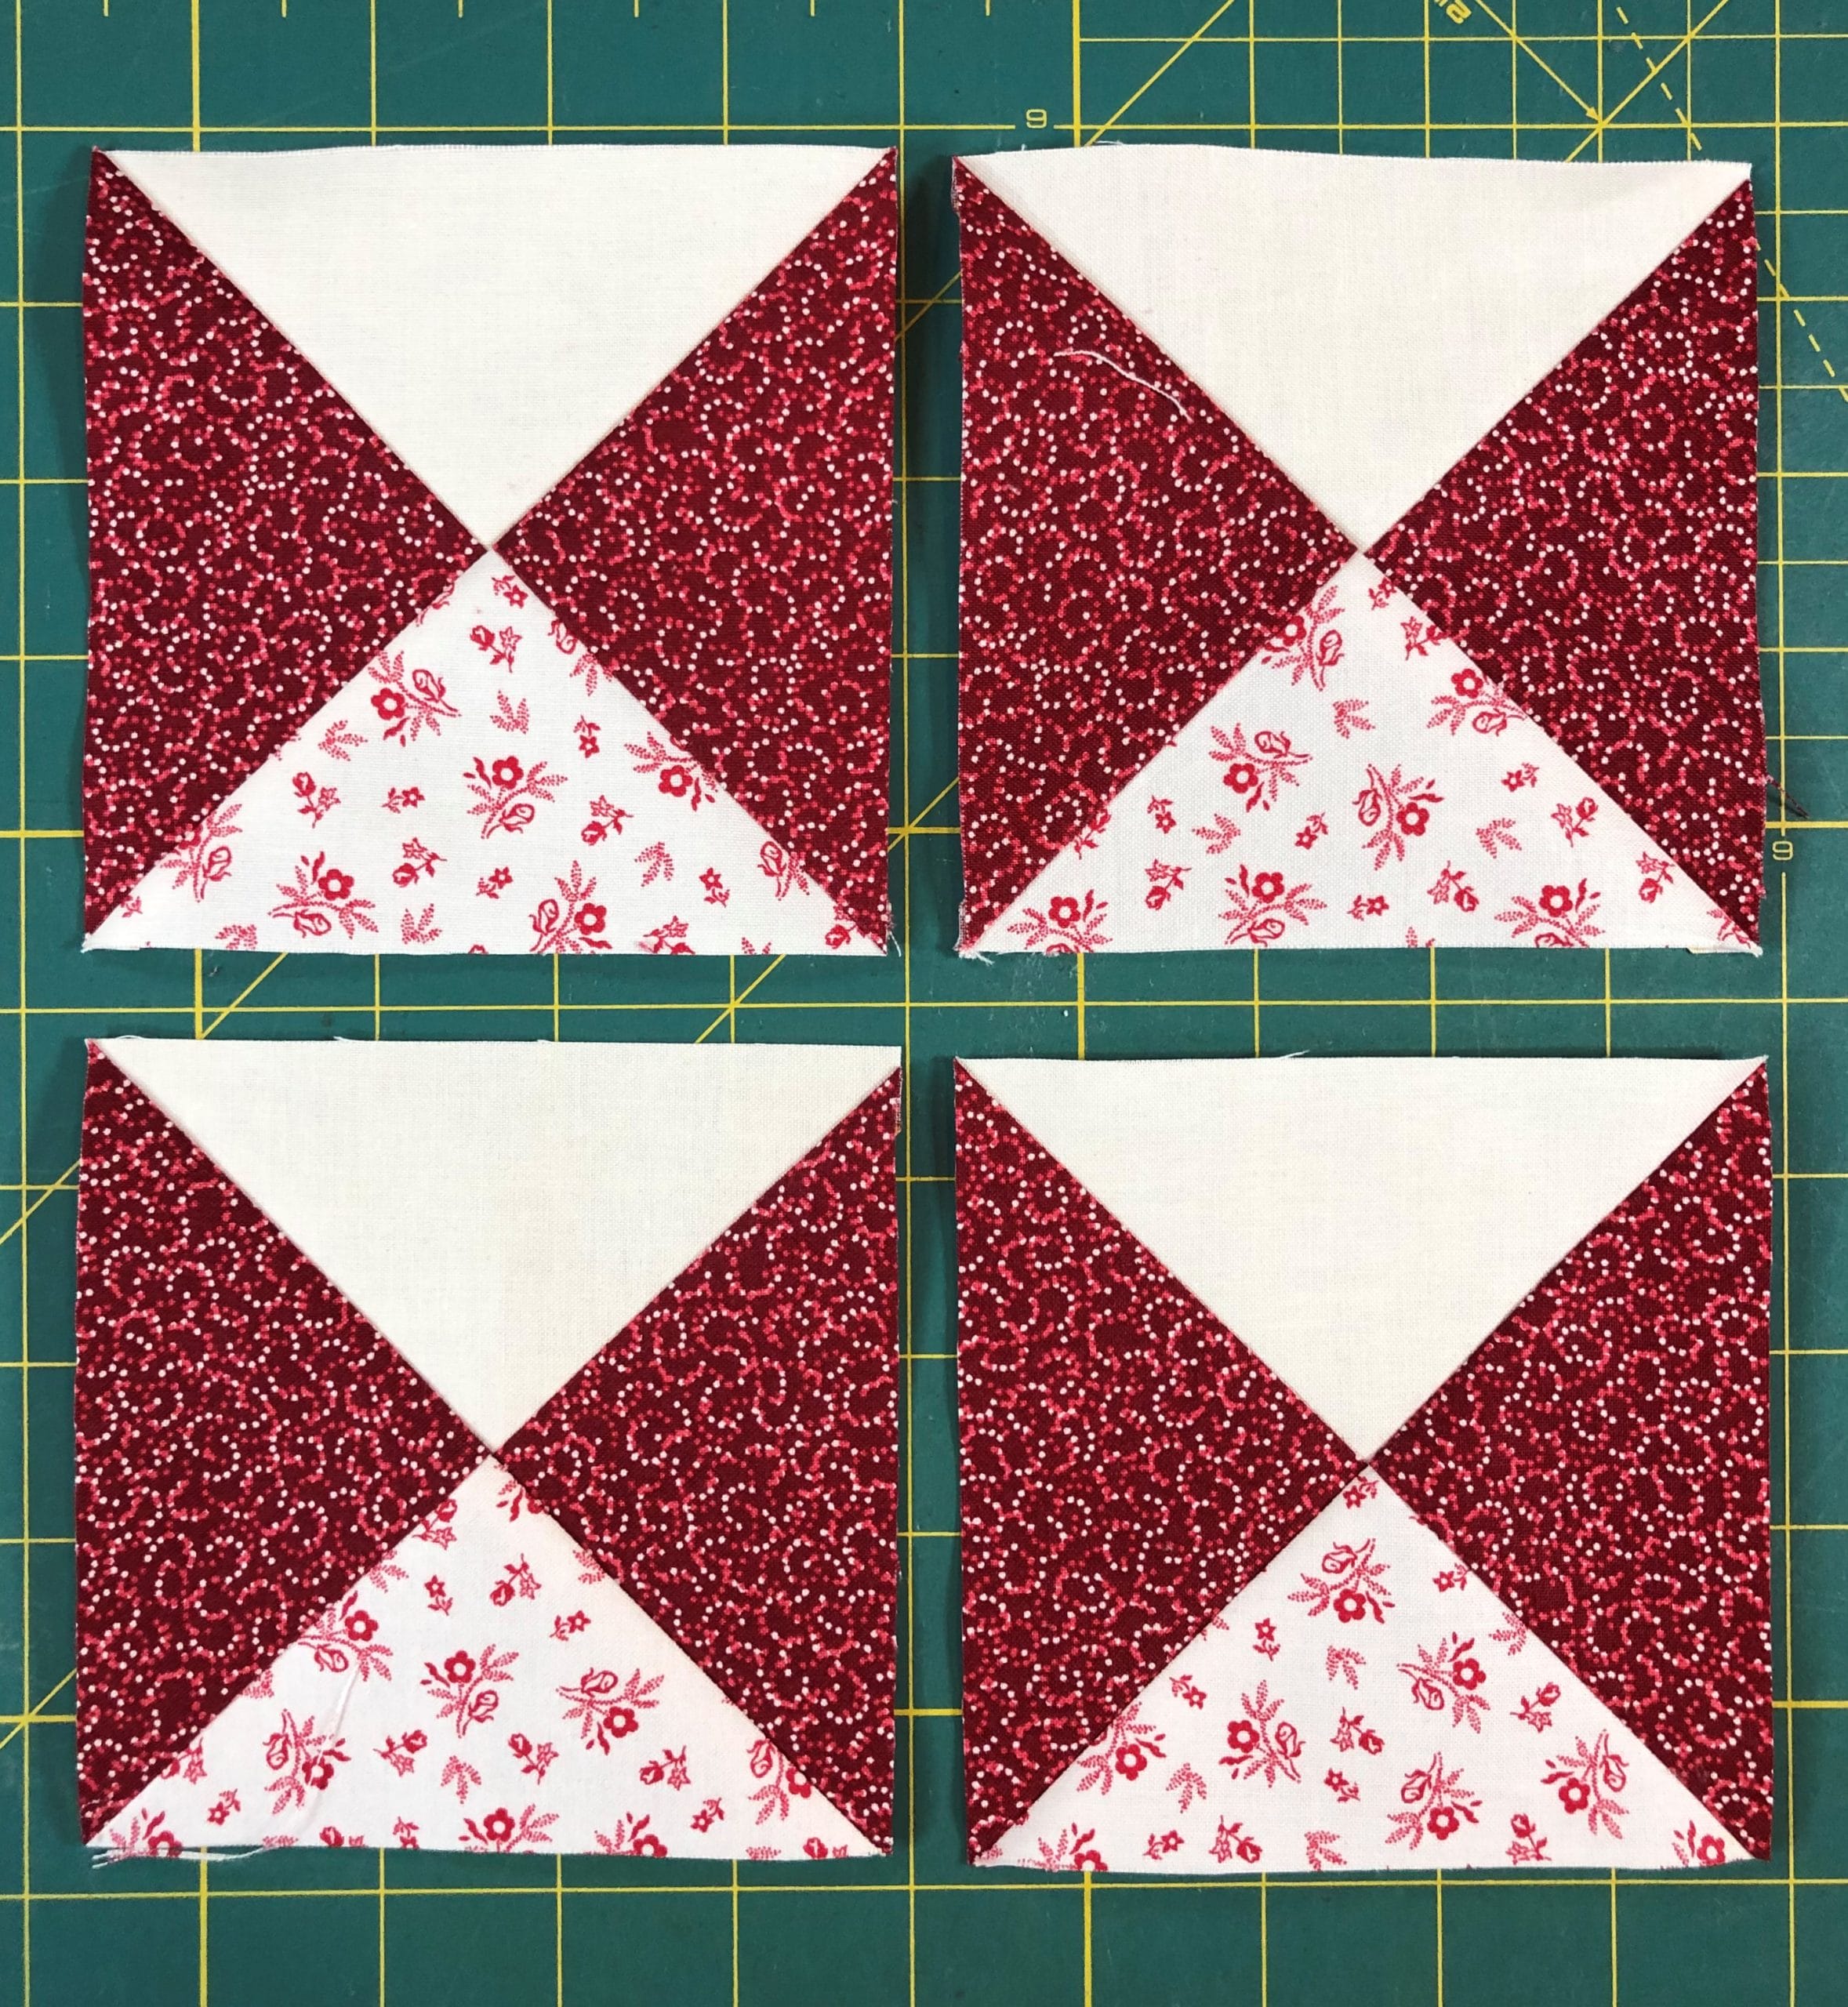
The placement doesn’t matter when you sew the four units together, so If you don’t like how I’ve arranged them, by all means, move them around to your liking.
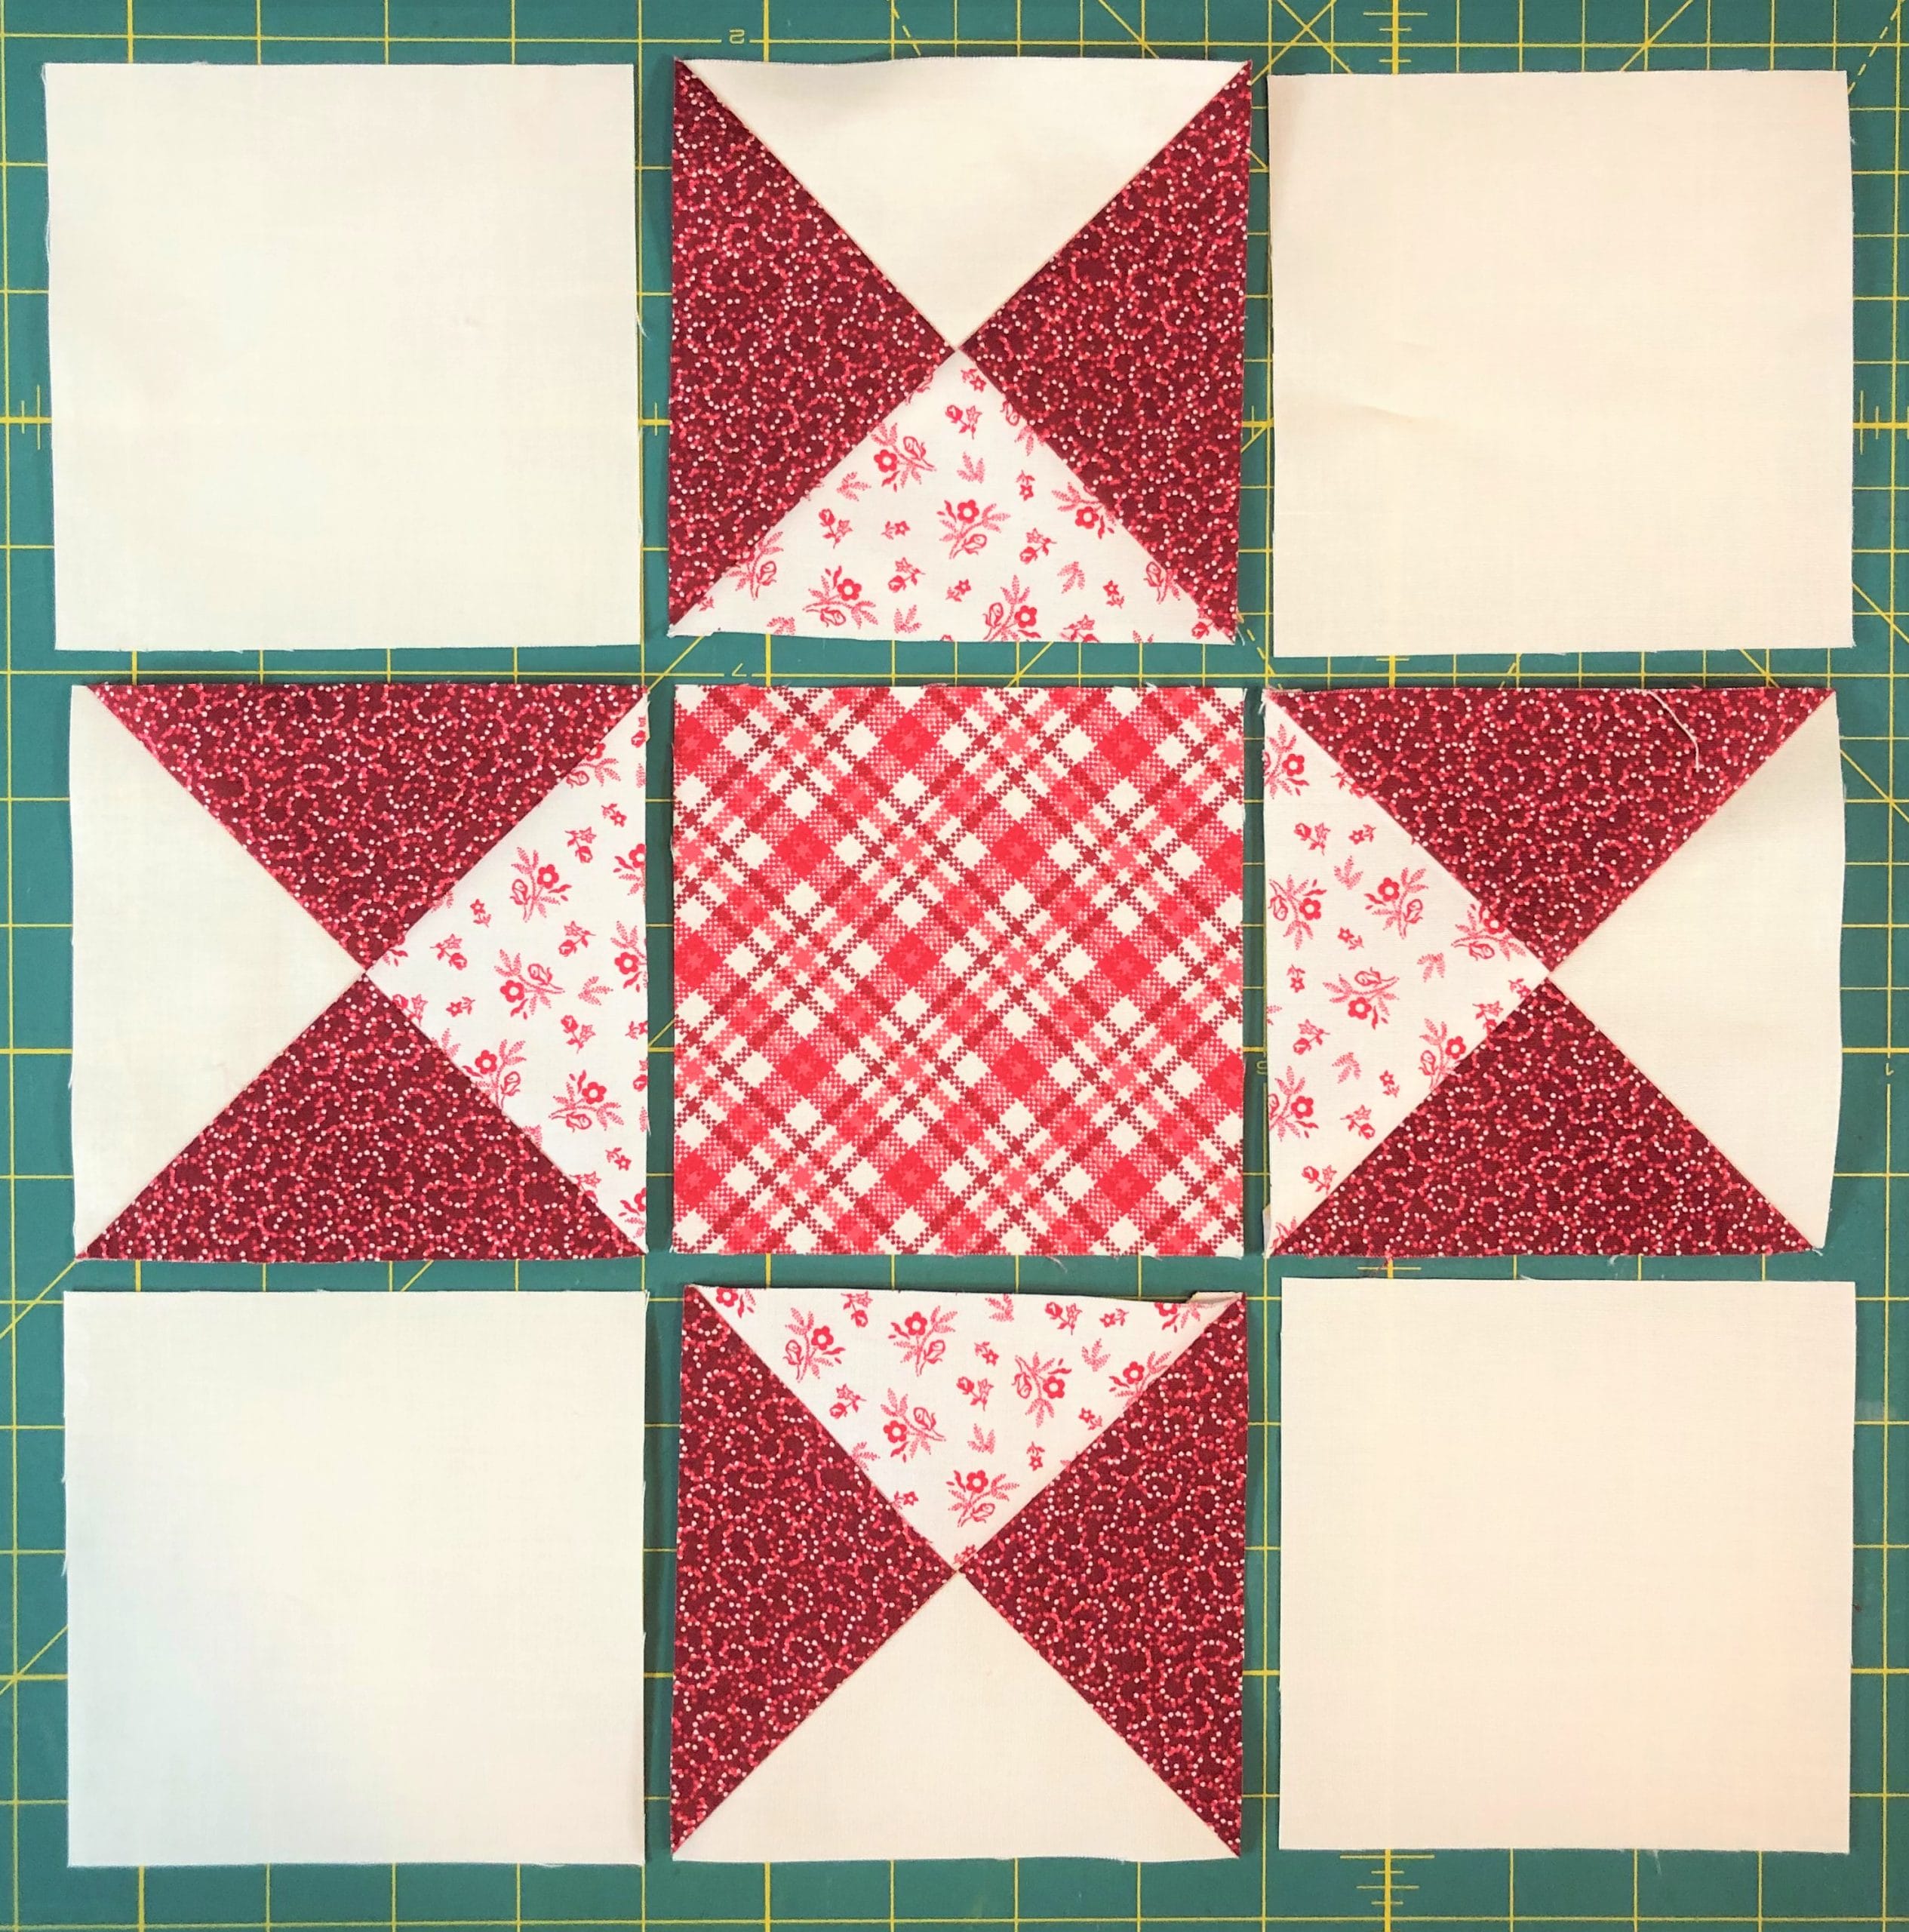
This block would also benefit from having those outer A/B/C units on the underside as you sew in order to make sure you see where you are sewing and get those point intersections nice and crisp.
Sashing strips:
Last but not least, we will be making a few sashing strips. Since there are so many in this quilt, I thought it would be a good idea to knock some of these out every month. Again we are using that directional navy print, and again, I didn’t pay attention to the direction. I’m starting to sound like a broken record, aren’t I?
As I mentioned above, it’s helpful to sew just a hair outside the line with these, and flip up the corners before you trim to make sure they match up.
Firs two squares are pinned on.
Below are the last two squares pinned and ready to sew. In addition to getting good at sewing Half-Square Triangles, we are also going to get really good at these sashing strips over the coming months!
Well, there you have it! The first three blocks and a few sashing strips are done! Next month we will make a couple more blocks, and even more sashing strips.
I look forward to sewing and chatting with all of you over the coming months. Until next time….
Happy Fall everyone! I’m so happy to join you all again, and provide a little tutorial for this month’s blocks (#6, #7, #15, and #17). Let’s dive right in!
Block #6
This block may look fancy, but it is really just a Sawtooth Star with some extra half square triangles around the border.
To make the Sawtooth Star center, we’ll begin in steps 1 and 2 by making some no-waste flying geese.
Step 1:
Step 2:
Place two B squares on the C square, with the marked lines matching up like you see above. After stitching a ¼” away from each side of the marked line, cut on the marked line and press the B – now triangles- downward.
Place an additional B square on each unit as you see here (down the center of C) and repeat the same process of stitching a ¼” away from each side of the marked line, then cutting on the line afterward. Press, trim, and you end up with 4 flying geese.
Step 3:
Now all you have to do is sew two of these to the center block, add the D squares to two more flying geese, then sew everything together. Check to make sure this measures 8-1/2” square, and trim if necessary.
Step 4:
Next we’ll make 12 half square triangles by pairing up those E and F squares, and again stitching ¼” away from each side of the marked lines, then cutting on the line for each unit. Press toward the Solid Ivory (F). I know it’s customary to press toward the dark side, but trust me, doing the opposite this time will enable you to nest your seams together later.
A note about no-waste half square triangles: I give my half-square triangle cutting measurements to be mathematically correct, but please feel free to cut the squares slightly bigger if you want so you can trim them as needed. There’s nothing wrong with cutting your E and F squares at 3” square, and then after you are finished and they are pressed, you can trim them to be 2-1/2” square. My point is, you do what works for you. You won’t run out of fabric. Based on feedback from previous BOMs I’ve done, I was quite generous with the yardage you’ll be getting for this quilt.
Step 5:
In step 5 you’ll sew an E/F square to each side of a G strip like so: Make sure the red E triangles are facing inward.
Now it’s time to put all the components together. Before I sew my block together, I like to lay everything out just to make sure I have everything going the right direction. I want to make sure I have all those half square triangles oriented correctly.
Follow the directions in step 6, and pay attention to the pressing arrows so that all your seams will fit together nicely.
Step 6:
Sew the center portion by taking two of those units you just made in step 5 and sewing them to each side of the Sawtooth star block, pressing the seams away from the center block.
Take the remaining units from step 5 and sew another E/F half-square triangle to each end, then sew those to the top and bottom to finish the block.
Now the block is finished!
Block #7
This is another Sawtooth star, but with a twist. I actually love this block, and while making it I kept thinking of all the fabrics in my stash I could use to make a scrappy quilt with just this block. But that will have to wait for another day!
Step 1:
This block starts with a simple 4-patch unit. Please note that the Germanium Red fabric is DIRECTIONAL. While it really doesn’t matter if you have your fabrics oriented the same or not, I chose to have both of my B squares with the pattern in the fabric going up and down.
Step 2:
Next, I sewed on those D squares by placing them in the corners and sewing on the marked lines. Whenever I am doing this technique, I always flip up my squares and check them before trimming off the excess. They should match up with the existing corners of the 4-patch block. If the corners come up short, then I know I need to rip things out and re-stitch. To avoid this, I usually sew just a scooch outside the marked line, next to the side that is closest to the corner. Does that make sense?
It’s hard to tell here, but if you look closely, you can see that I’ve sewn just outside the yellow marked lines.Before trimming off the excess, I finger press the corners and make sure they line up. Now this unit trimmed and pressed.
In steps 3 and 4 we’ll make some more of those fabulous no-waste flying geese, only bigger than the ones we made in block 6. I won’t bore you with more detailed instructions.
This block is assembled the same way as the center portion of block 6. The only tricky part is making sure that those 4-patch seams line up with the points on the flying geese units. I usually start pinning from there, and then work my way out. Have I mentioned that I’m a prolific pinner? I admire those that can just sew without pinning. I think I’m just to particular to leave things un-pinned. Or maybe I just don’t sew well enough yet??? Haha! Maybe in another 30 years of sewing I’ll master the no-pinning thing.
Again, I lay everything out first before I begin pinning and sewing, because nothing is worse than thinking you’ve finished a block only to realize that you messed up and have to rip and re-sew.
Next I’ll just sew the block into the three sections, and then sew everything together.
Block #15
This little 9-patch Churn Dash block is a cinch to make, and goes pretty fast. Begin by sewing up a 9-patch unit for the center, and make sure it measures 6-1/2” square when done. Also make sure that you’ve ironed all your seams toward the darker A fabrics while sewing, so that everything nests together.
The rows are sewn together with all the seams pressed toward the Corsage II Red fabric.
Next you’ll make 4 half-square triangles, and trim them to be 3-1/2” square. Again, you can cut these B and F squares a smidge bigger if you like, in order to end up with the proper size when done. Somehow I got busy sewing and forgot to take pictures of the finished half-square triangles, so all I have is what you see below. I have a bad habit of doing that. Sorry!
Now you just need to sew each D strip to an E strip like I’ve shown here. The directions have you pressing your seam towards the E strip, but in this case, it doesn’t matter either way, since there isn’t anything to line it up with.
The block is ready to be sewn together now. Below you can see that I’ve sewn the three rows together and am almost done. I love that this block doesn’t have any tricky piecing or points to match up. So fun and easy!
Block #17
This block is perhaps the most challenging one of the month, not because any of the individual techniques are hard, but because it can be tricky to get everything to match up in the end. But have no fear, you CAN do it, and I will walk you through it!
Before cutting out all my pieces with this block, I used a liberal amount of starch on my fabric. This is especially helpful to use on the D and G pieces BEFORE you cut them diagonally into triangles. It will help them to keep their shape and not get distorted while sewing, which happens easily when sewing on a bias.
Another tip with this block is to REALLY make sure you’re measurements are exact as we go along, and that you’re pressing everything according to the instructions.
Step 1:
We begin with the same old steps of making our no-waste flying geese. Again, I won’t bore you with the details.
Step2:
After you’re finished with these, sew an F strip to the top of each one. And YES, even though it is counter-intuitive, press DOWN toward the flying geese unit. Trust me, it’s going to work out in the end. Make sure this unit is 4-1/2” square when done.
Here is the back so you can see that the seam is pressed toward the flying geese unit.
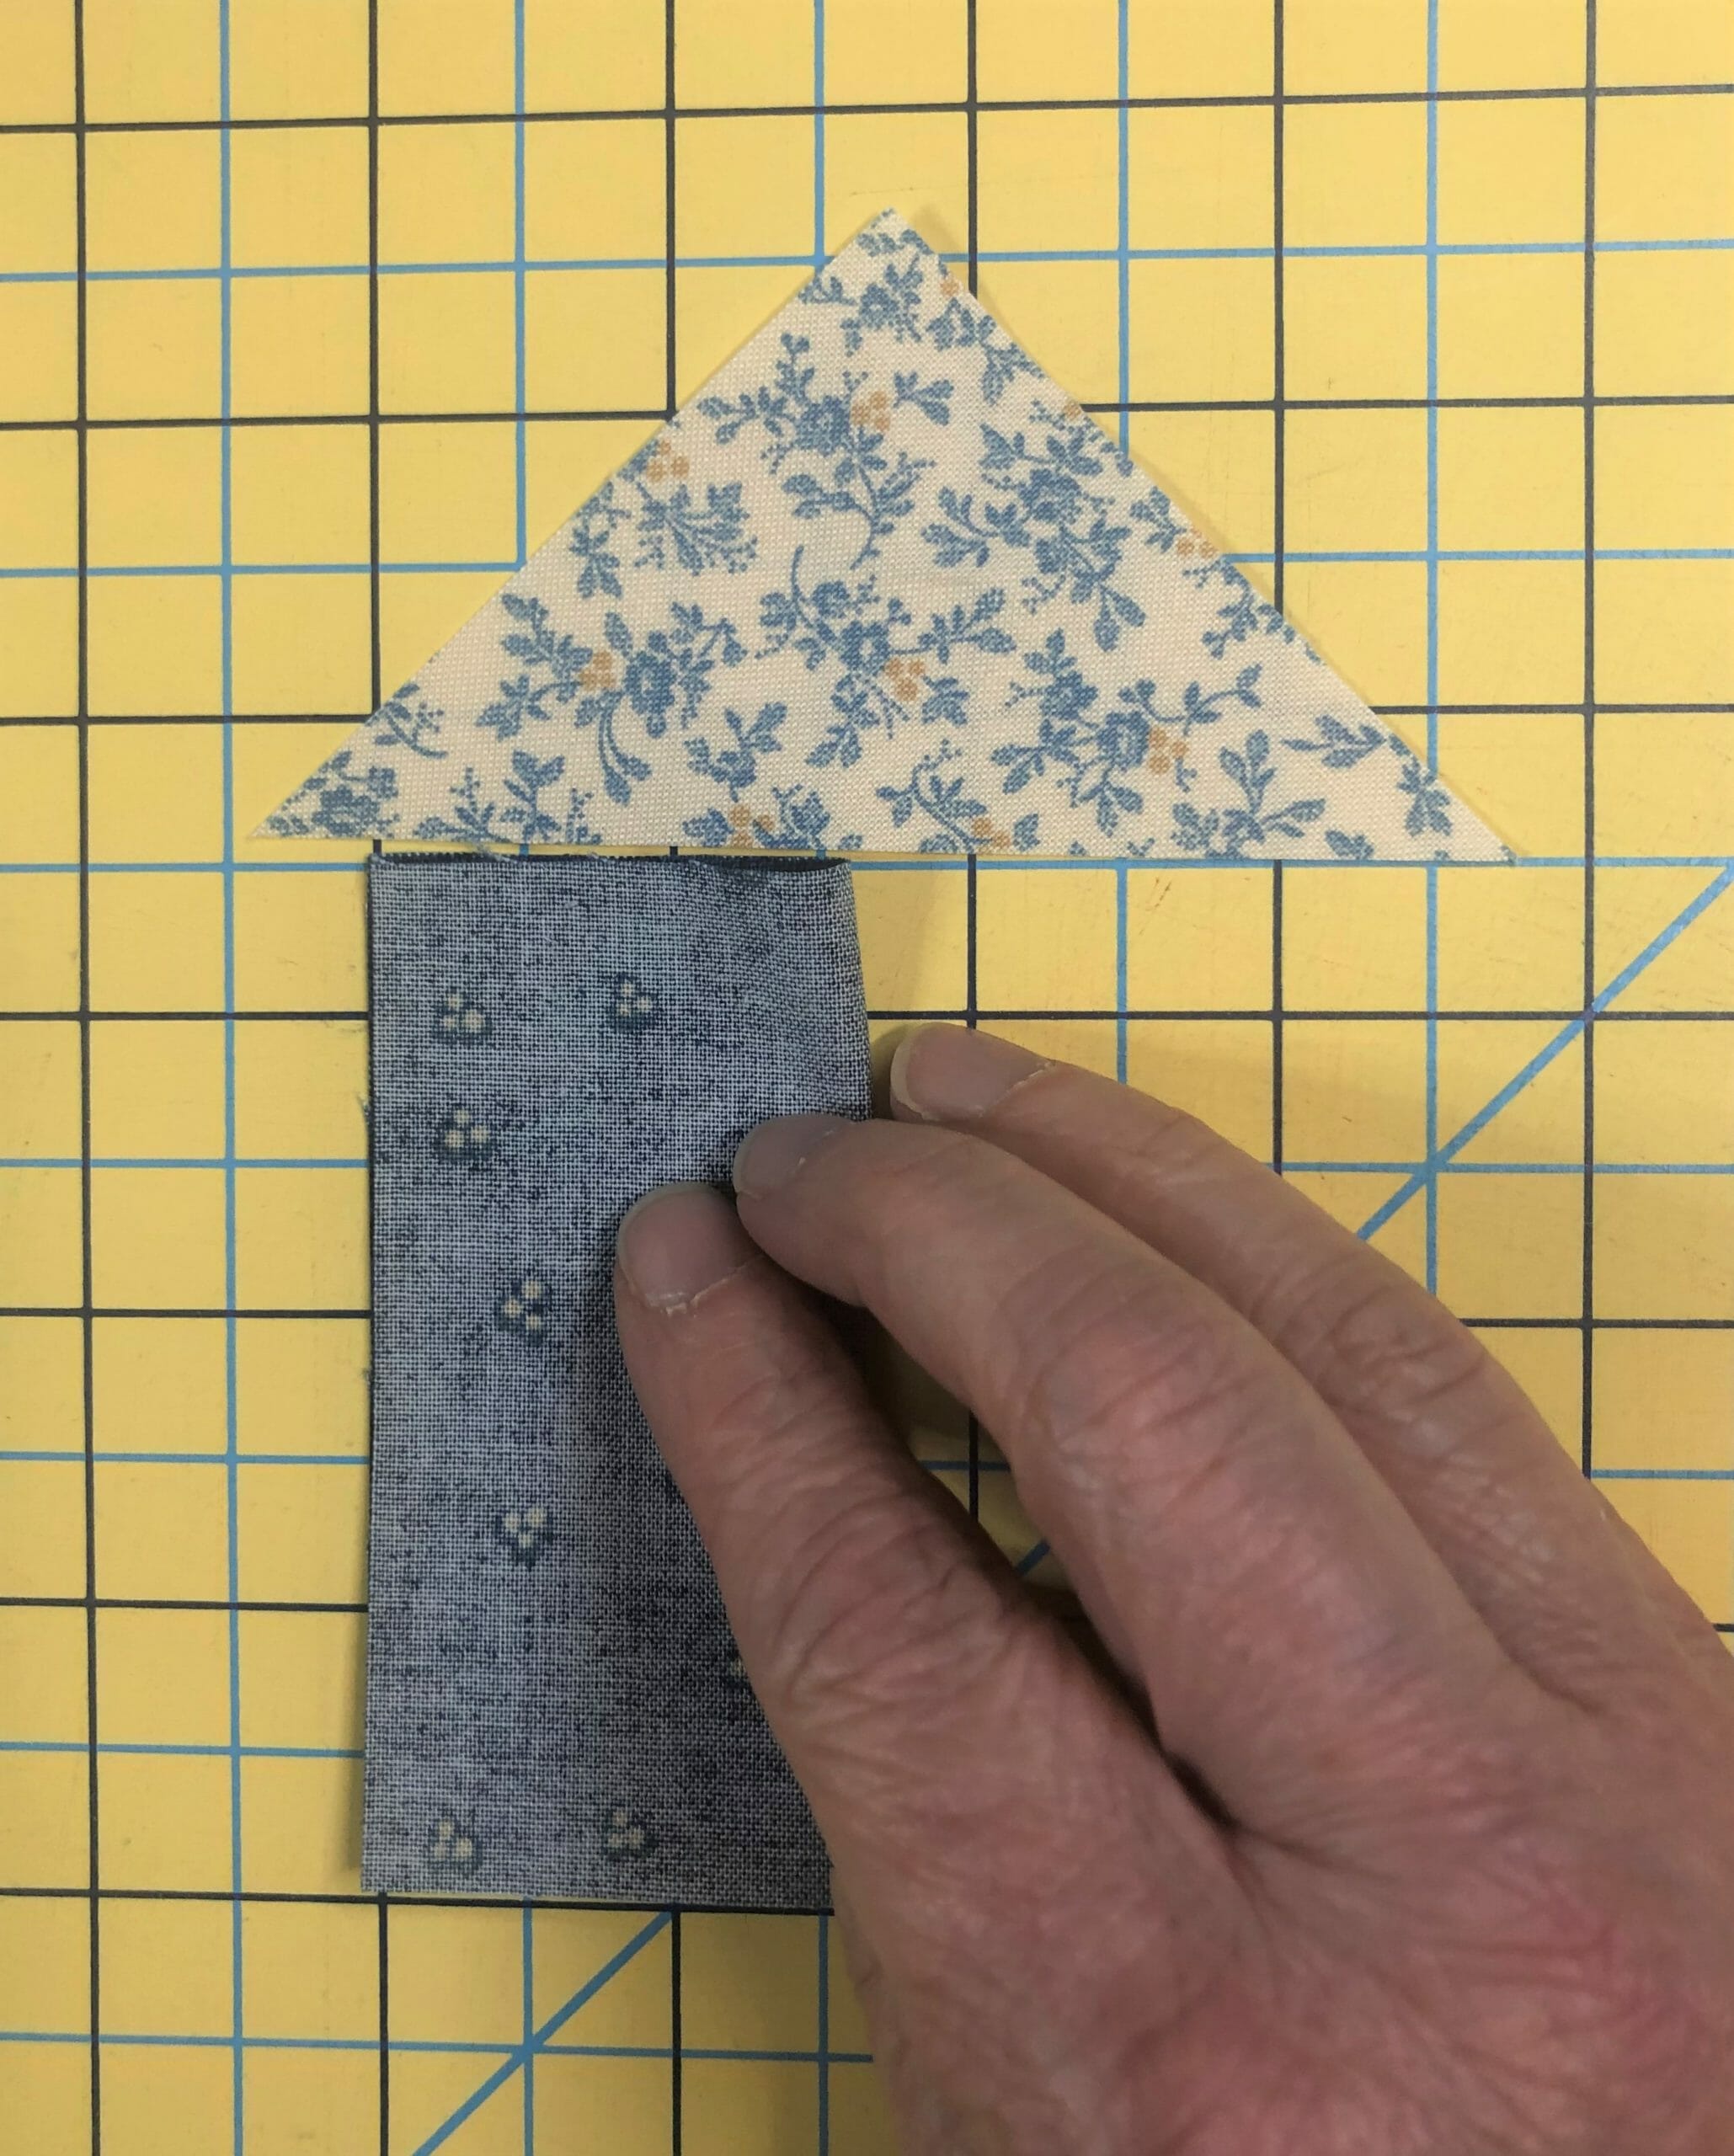
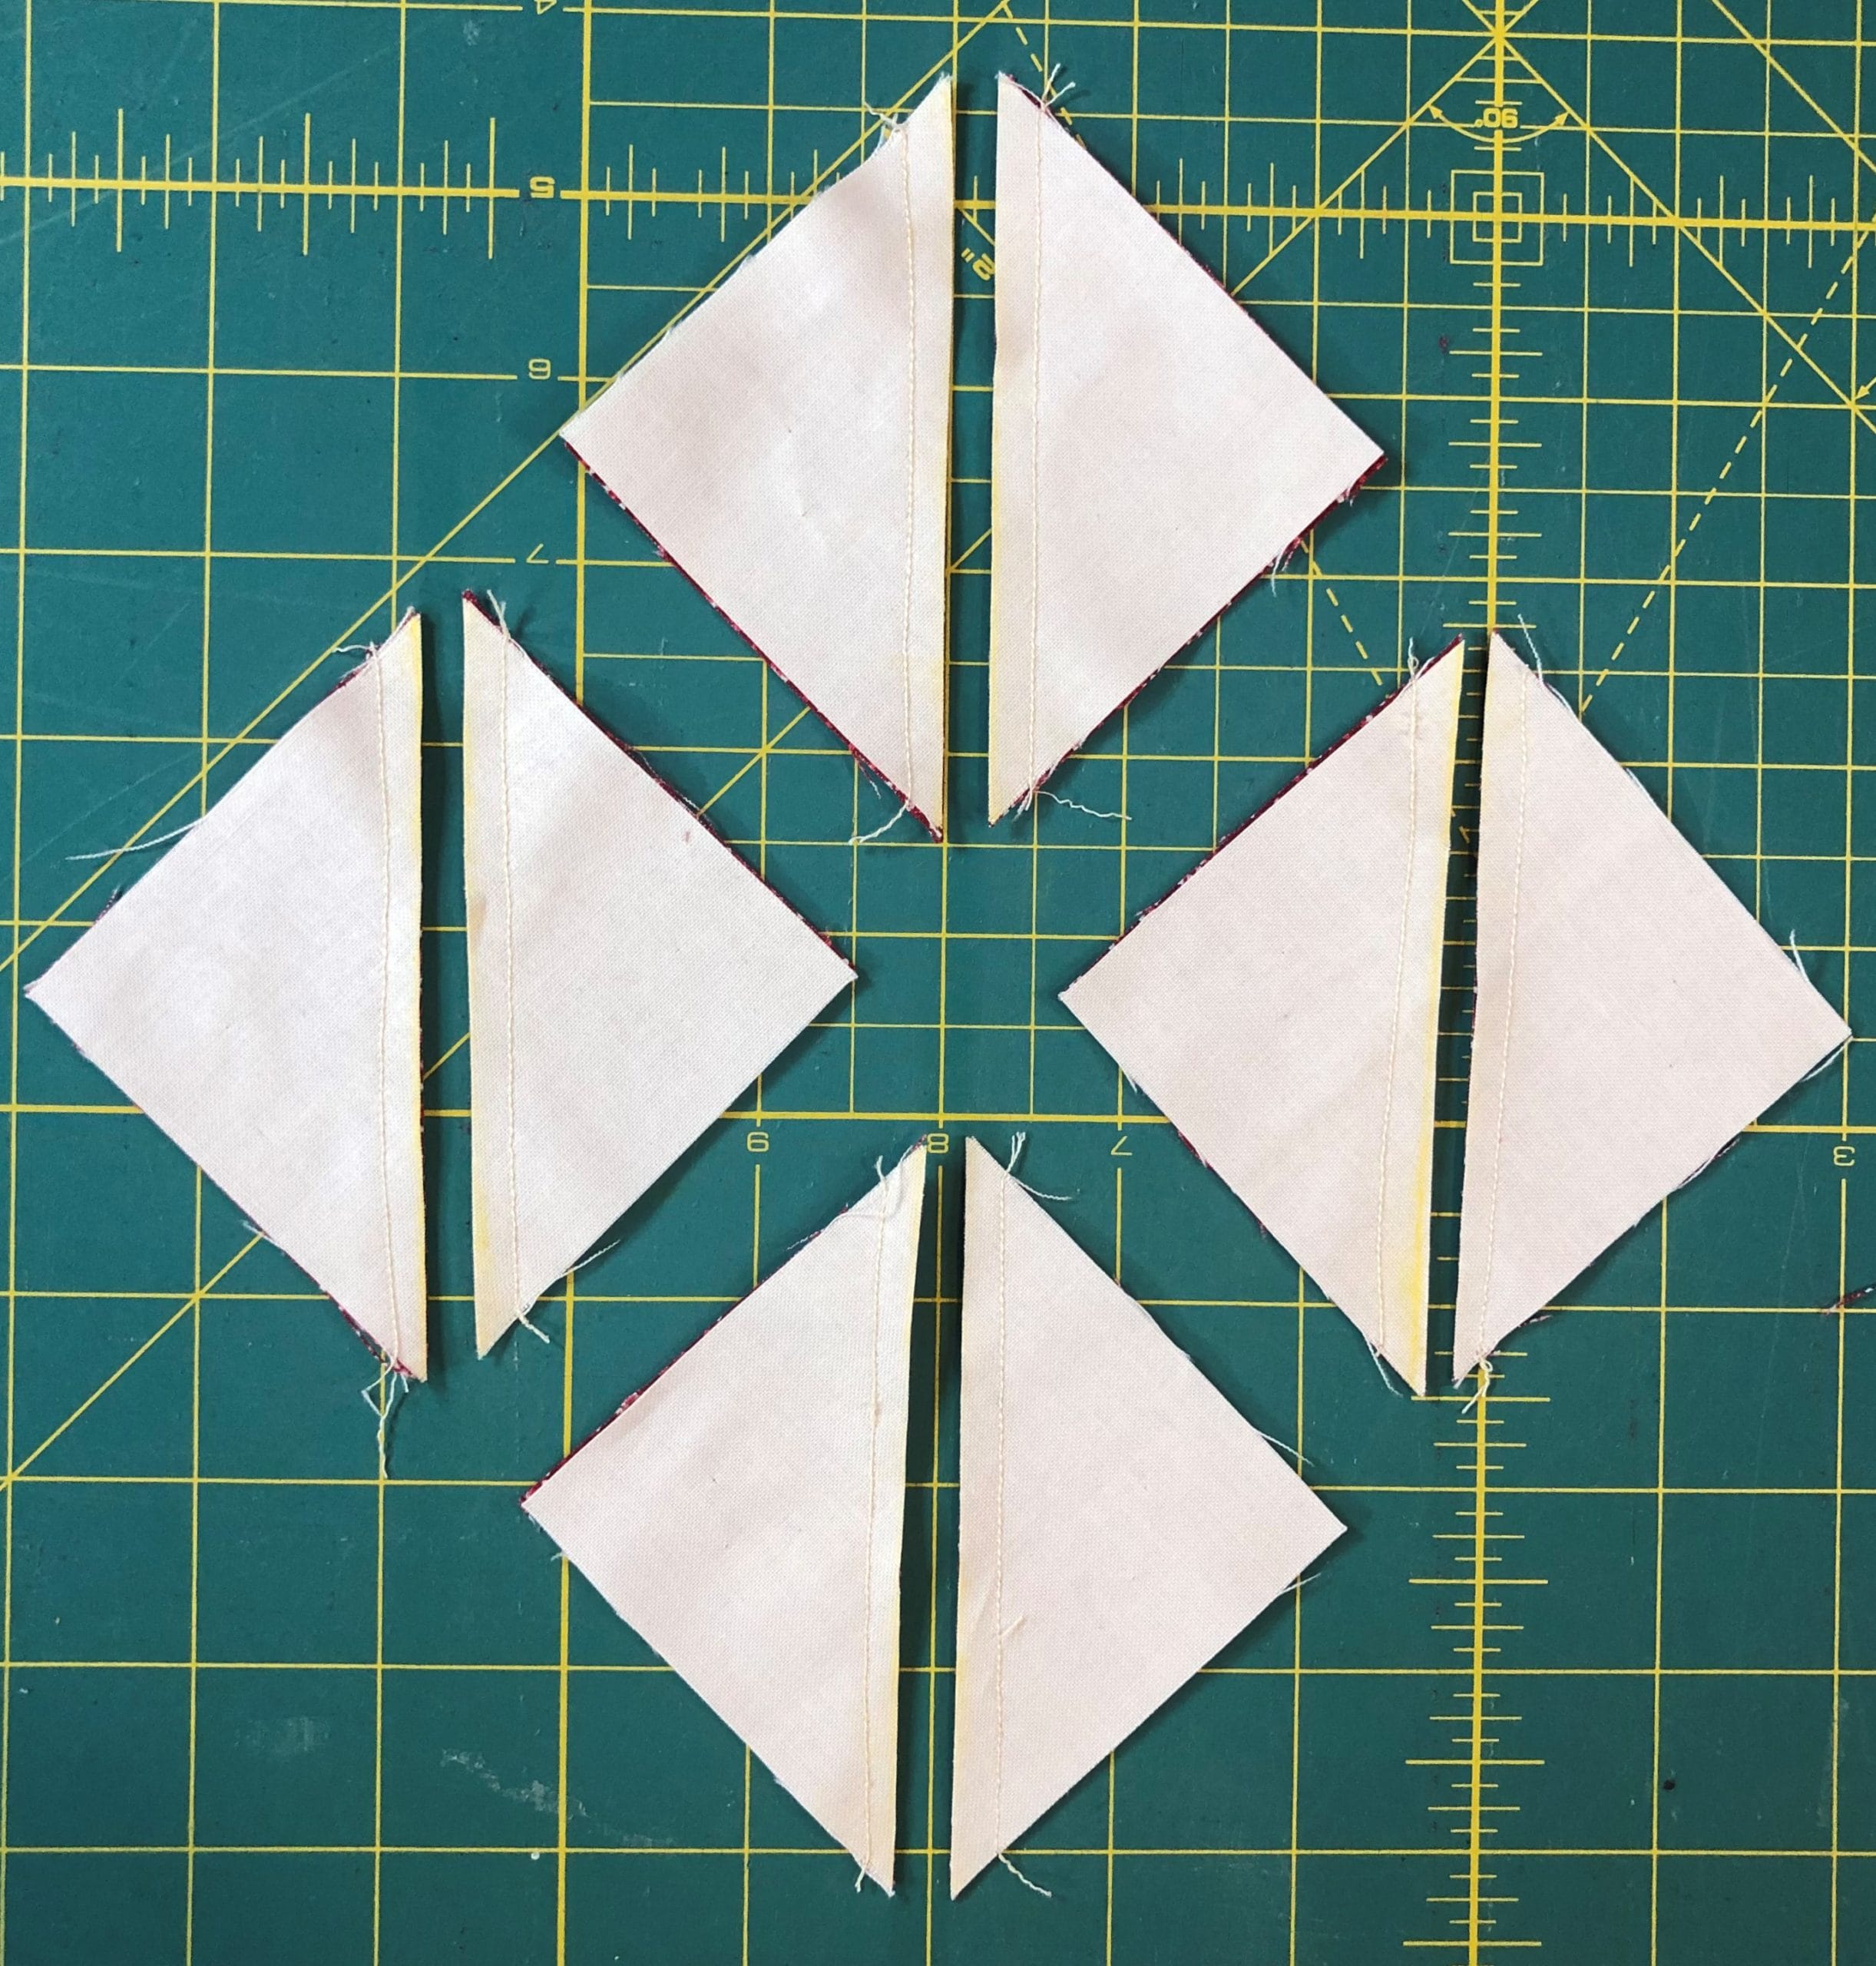
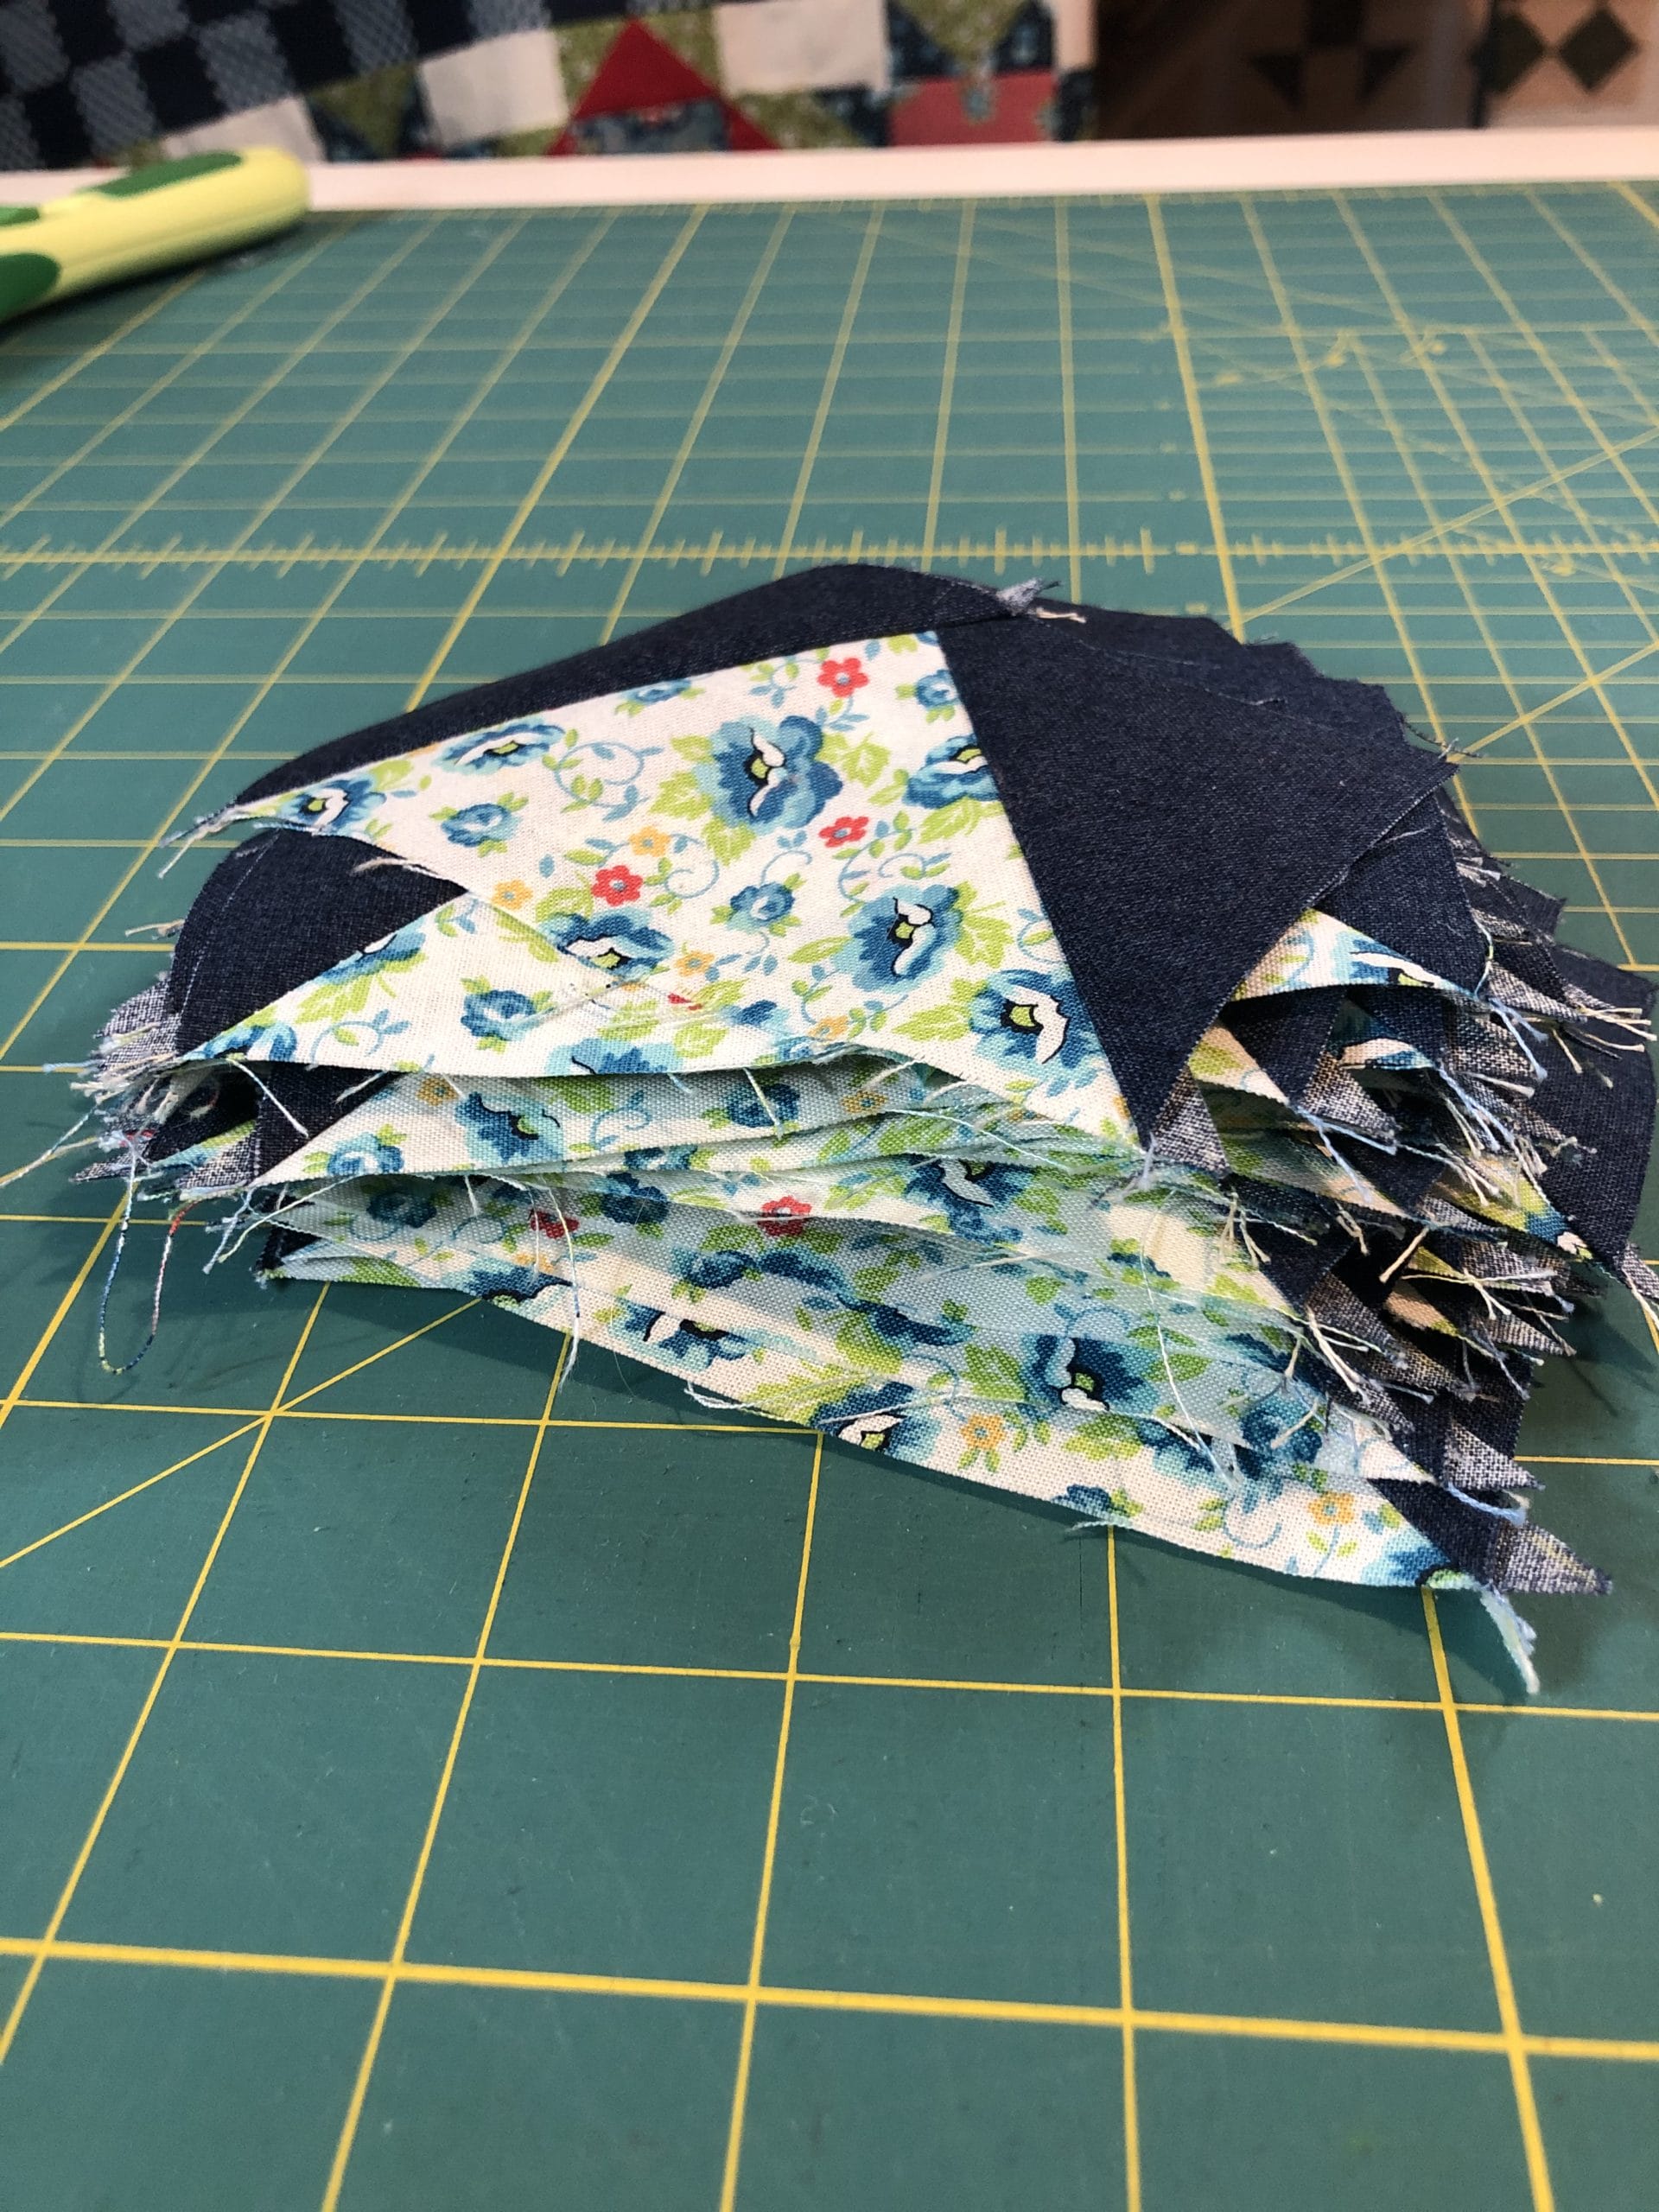
In step 3 we’ll make some fancy pieced triangle units. This is where that spray starch comes in handy.
Step 3:
I began by sewing the first D triangle to the right side of the B square. Make sure both units line up at the top, which will leave you a little triangle tail hanging down at the bottom.
This is how you want your pieces to line up before you flip and and pin them.
The picture below shows the first set of triangles pinned and ready for sewing.
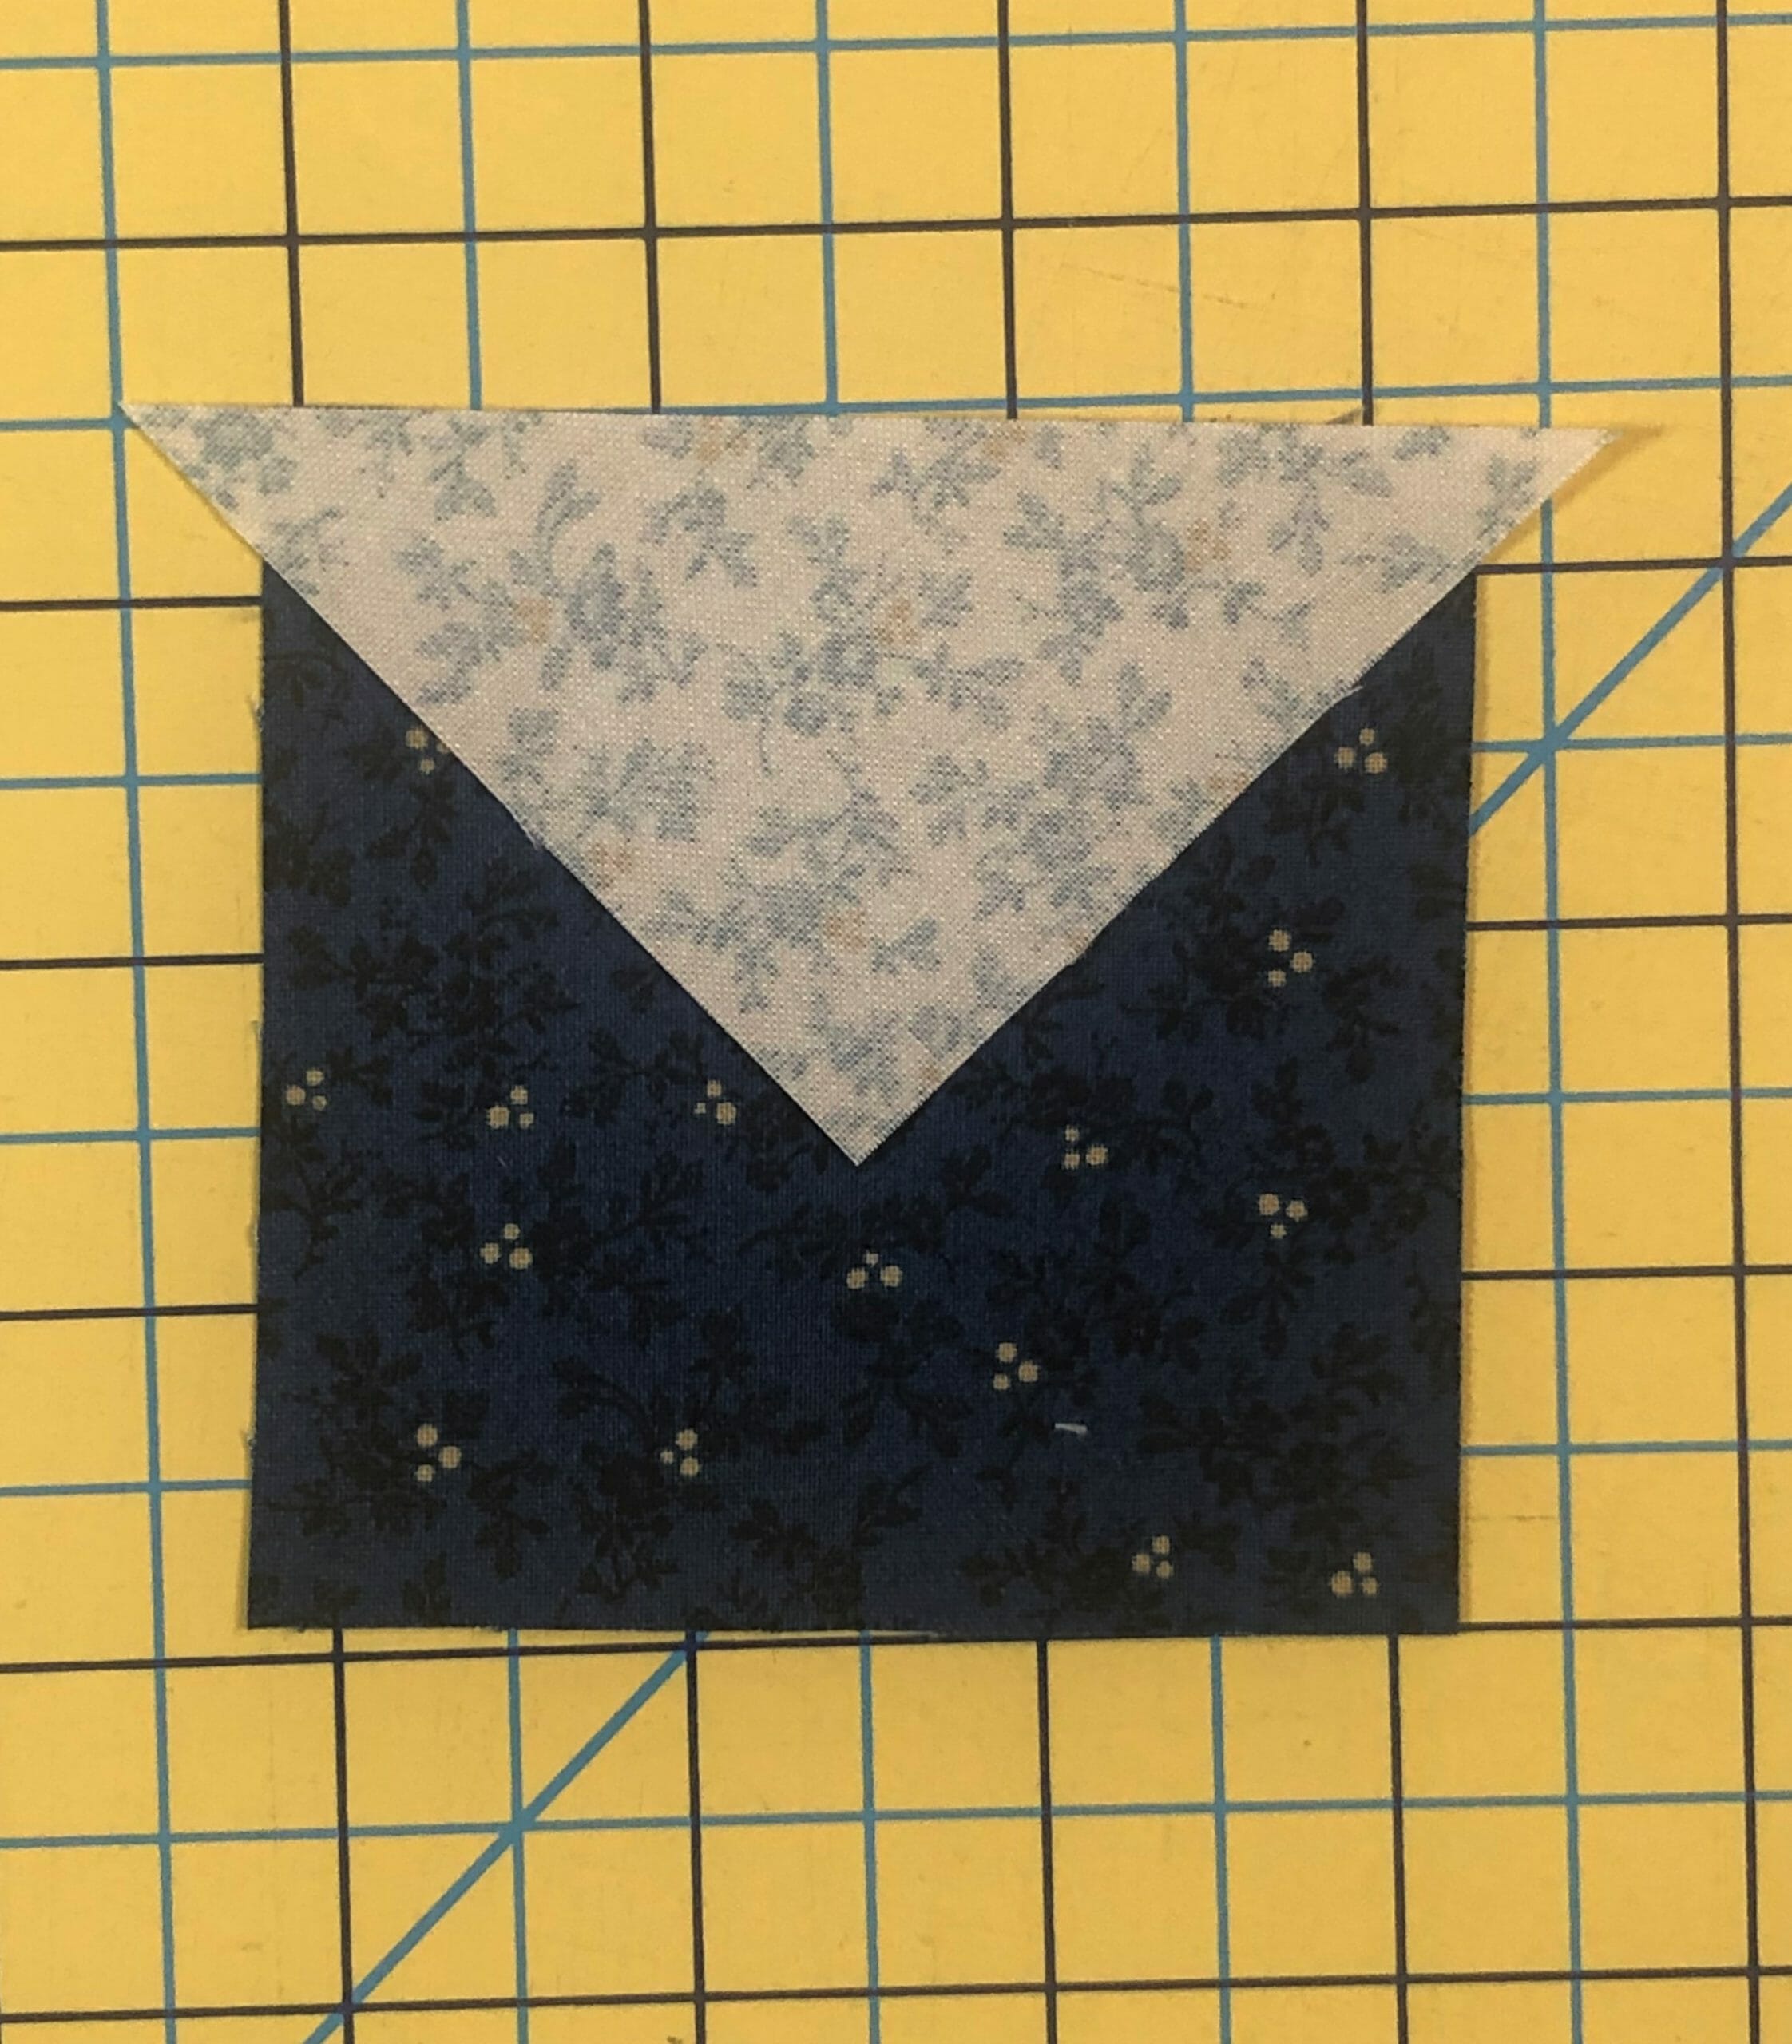
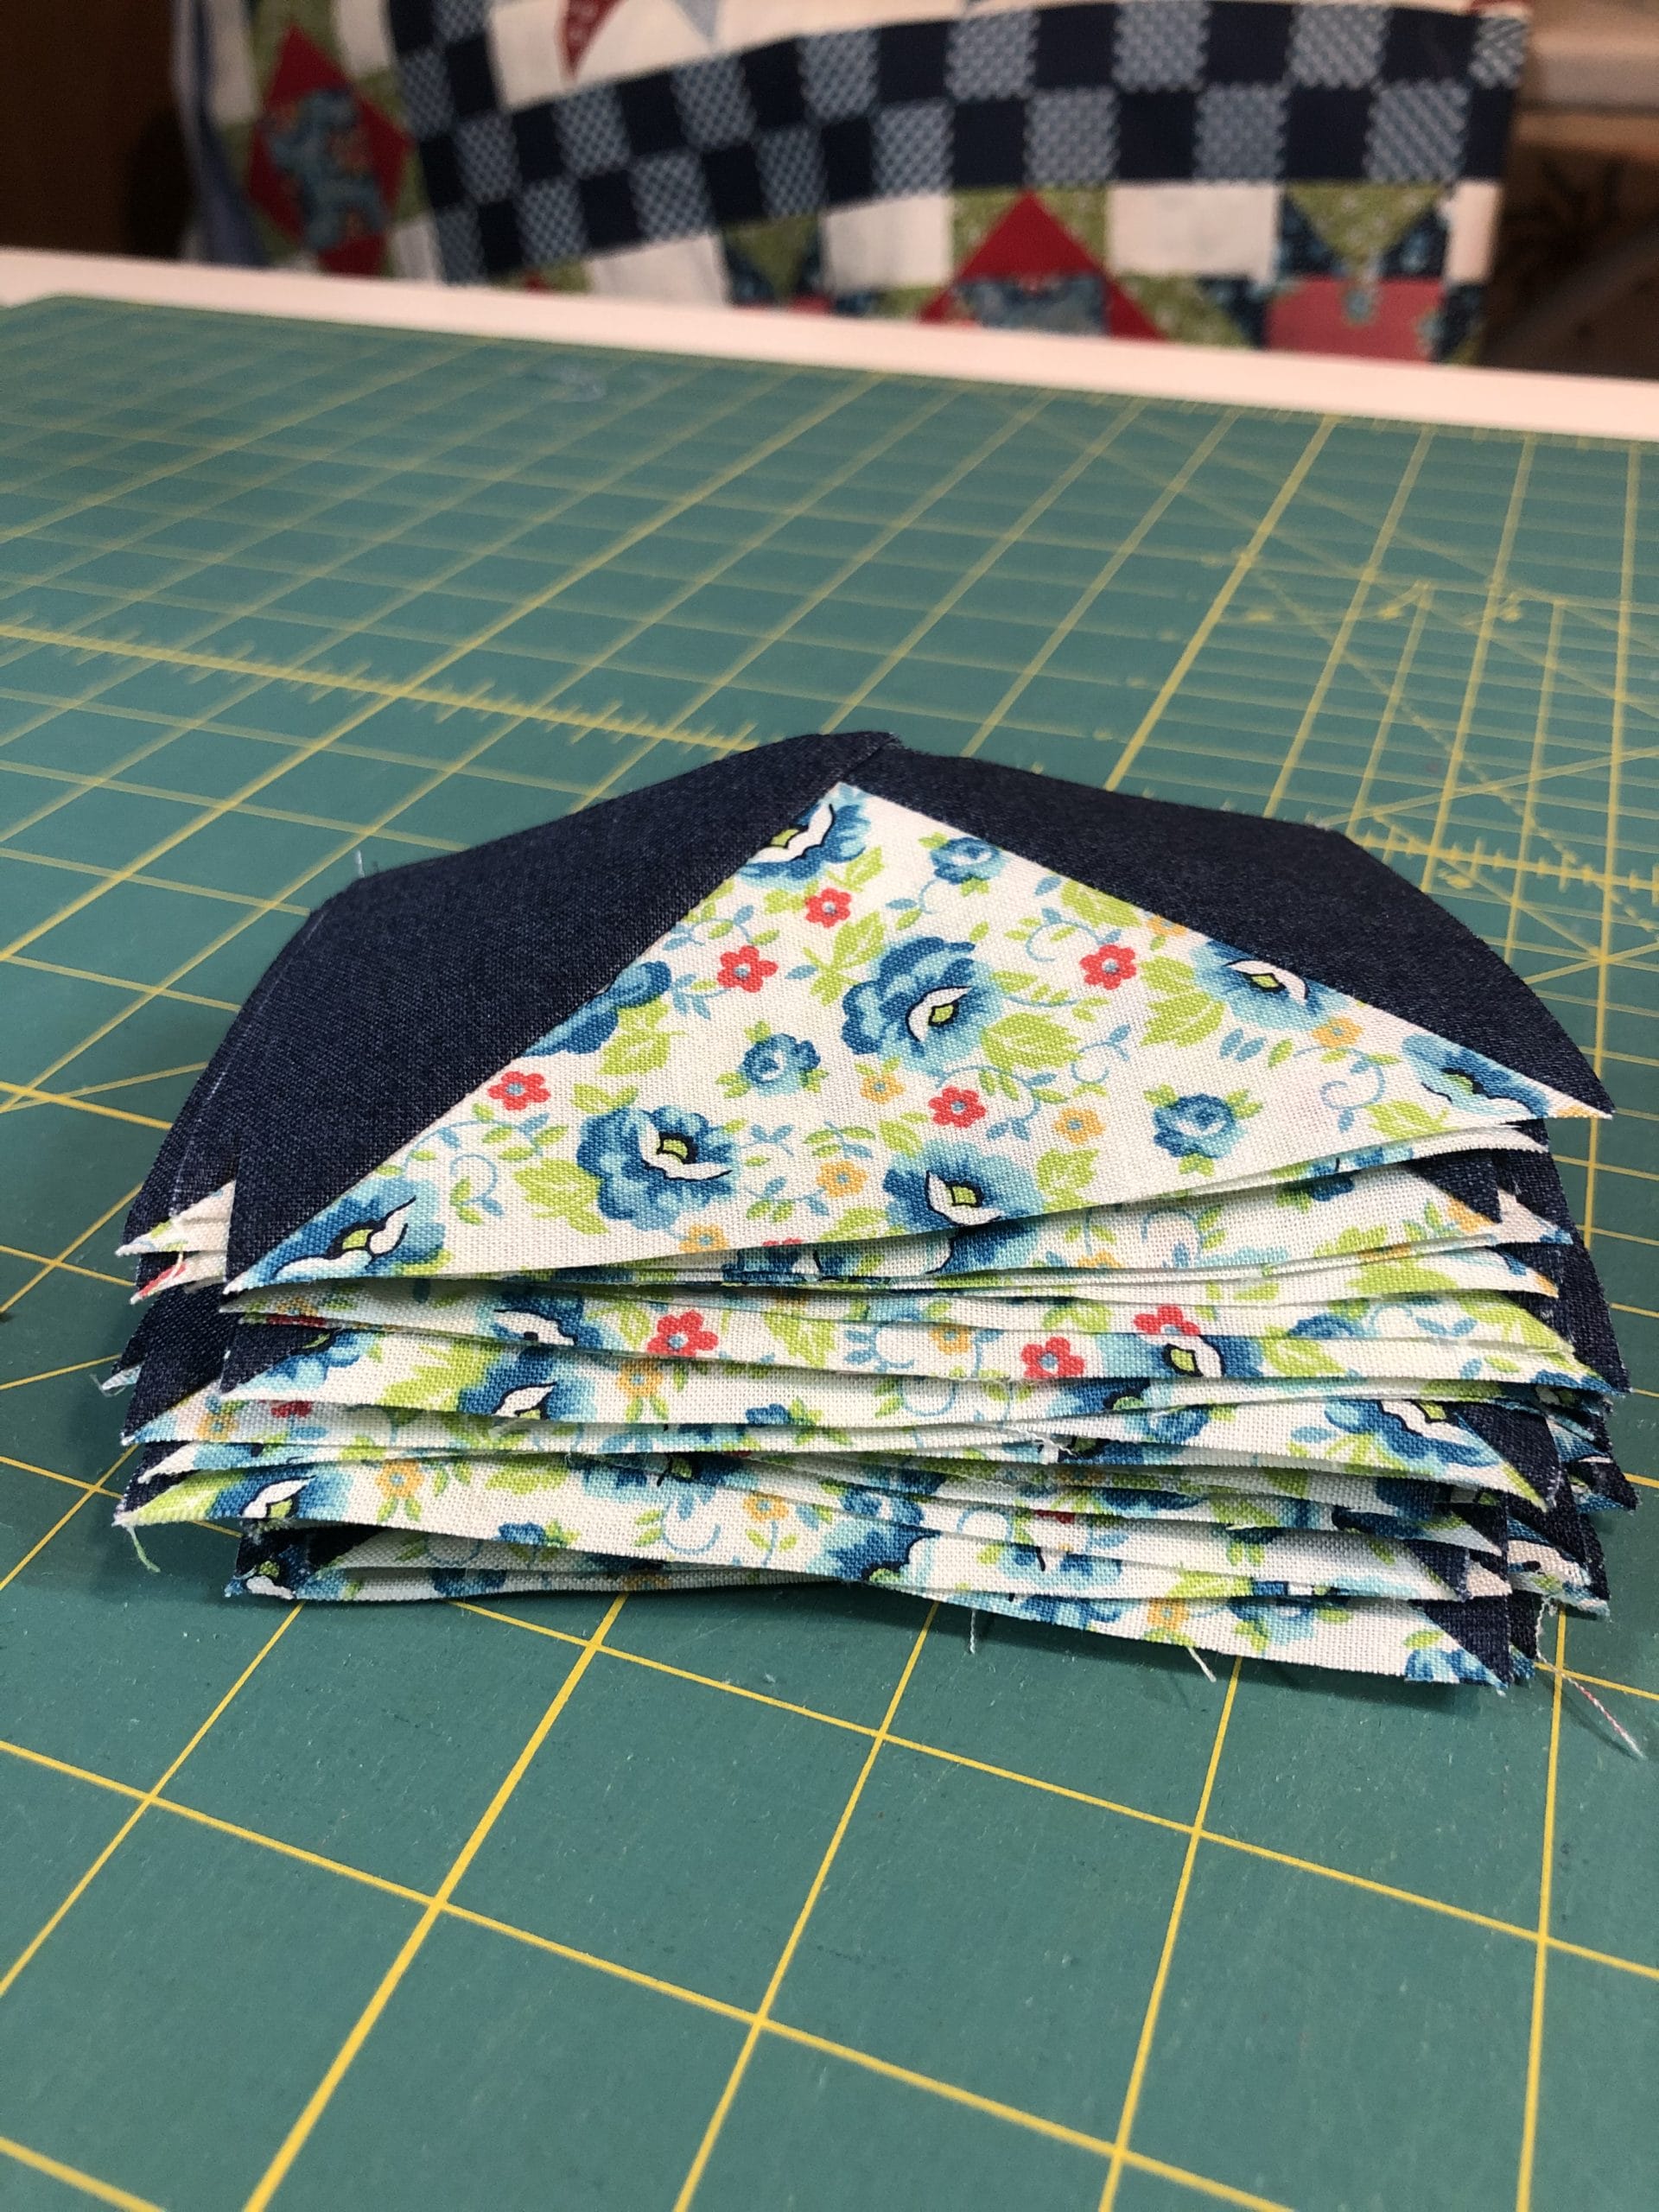
After sewing the first set of triangles to the right side, trim those tails off before sewing on the next D square to the bottom. Again, you want to make sure that the B and D pieces line up, this time along the left side, which will leave a triangle tail on the right.
These are pinned and ready to sew along the bottom edge.
Step 4:
Once you’ve pressed these open you will want to trim off the last tail.
If you find that your triangle units aren’t straight along the D triangles, it’s okay to even them up just a tiny, tiny bit. Don’t trim too much though, or you’ll end up with a block that is too small, which will make worse.
Now you will sew these units to the G triangles, and if all has gone well, you should end up with four 4-1/2” squares. I like to starch these again at this point, just to keep them from stretching or warping.
Ready for the sewing machine!All squared up.
Step 5:
Here comes the fun/tricky part. First, you will take two of the units you made in step 3, and sew them to each side of the center A square, with the Ivory, Solid pieces on the outsides.
Step 6:
Take the blocks you made in step 4 and sew them to each side the remaining two units from step 3. If you’ve followed the pressing directions, the Potpourri Ivory B square and the Germanium Red E triangles should nest together perfectly. Pin that seam intersection first, and then work your way out to the ends of squares, easing things in as needed to make sure the tops and bottoms of the squares also match up.
Once you have the three units of the block sewn, you can pin and sew them together to finish the block. You want to continue to pin the seams together first, to make sure they will nest together and line up, and then pin the rest before sewing. The key here is to make sure the flying geese units match up where they meet up in the corners around the center square. I usually pin there first and peek to make sure it all lines up.
If you look carefully at the picture below, you’ll notice that my units on the top row don’t line up perfectly on the bottom. The difference is less than 1/8″, but it looks worse in the photo. Since the difference was very minimal (if it wasn’t I WOULD rip out and start again to protect the integrity of the piecing), rather than rip out and start over (ugh!), here’s what I did: When sewing the top row together, I made sure that the seams lined up where they should with the center unit, and that the tops also where aligned. I still wanted make sure I’d have the 1/4″ seam allowance at the triangle point on top. Then I stitched it to the middle unit as usual. When the block is completed, nobody knows but me….and everyone who reads this lol! Since the difference was minimal, it doesn’t affect the integrity of the block. Even “professionals” don’t sew perfectly. And I’m happy to show my mistakes and the tips I use to compensate. Because we ALL make them!
Phew! You did it! I hope you’ve enjoyed the challenge and are happy with the results.
Have a Happy October, and I’ll catch you all next month!
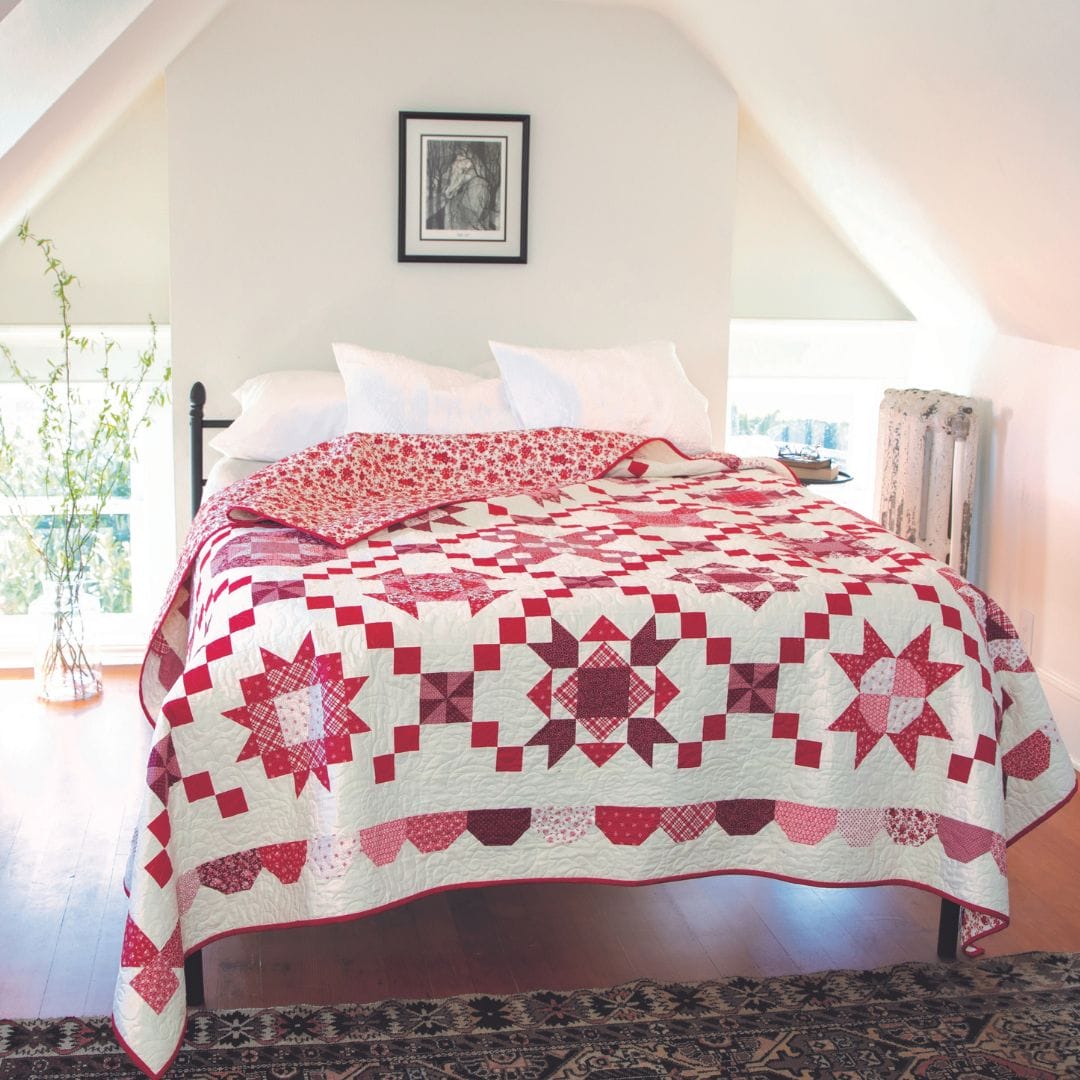
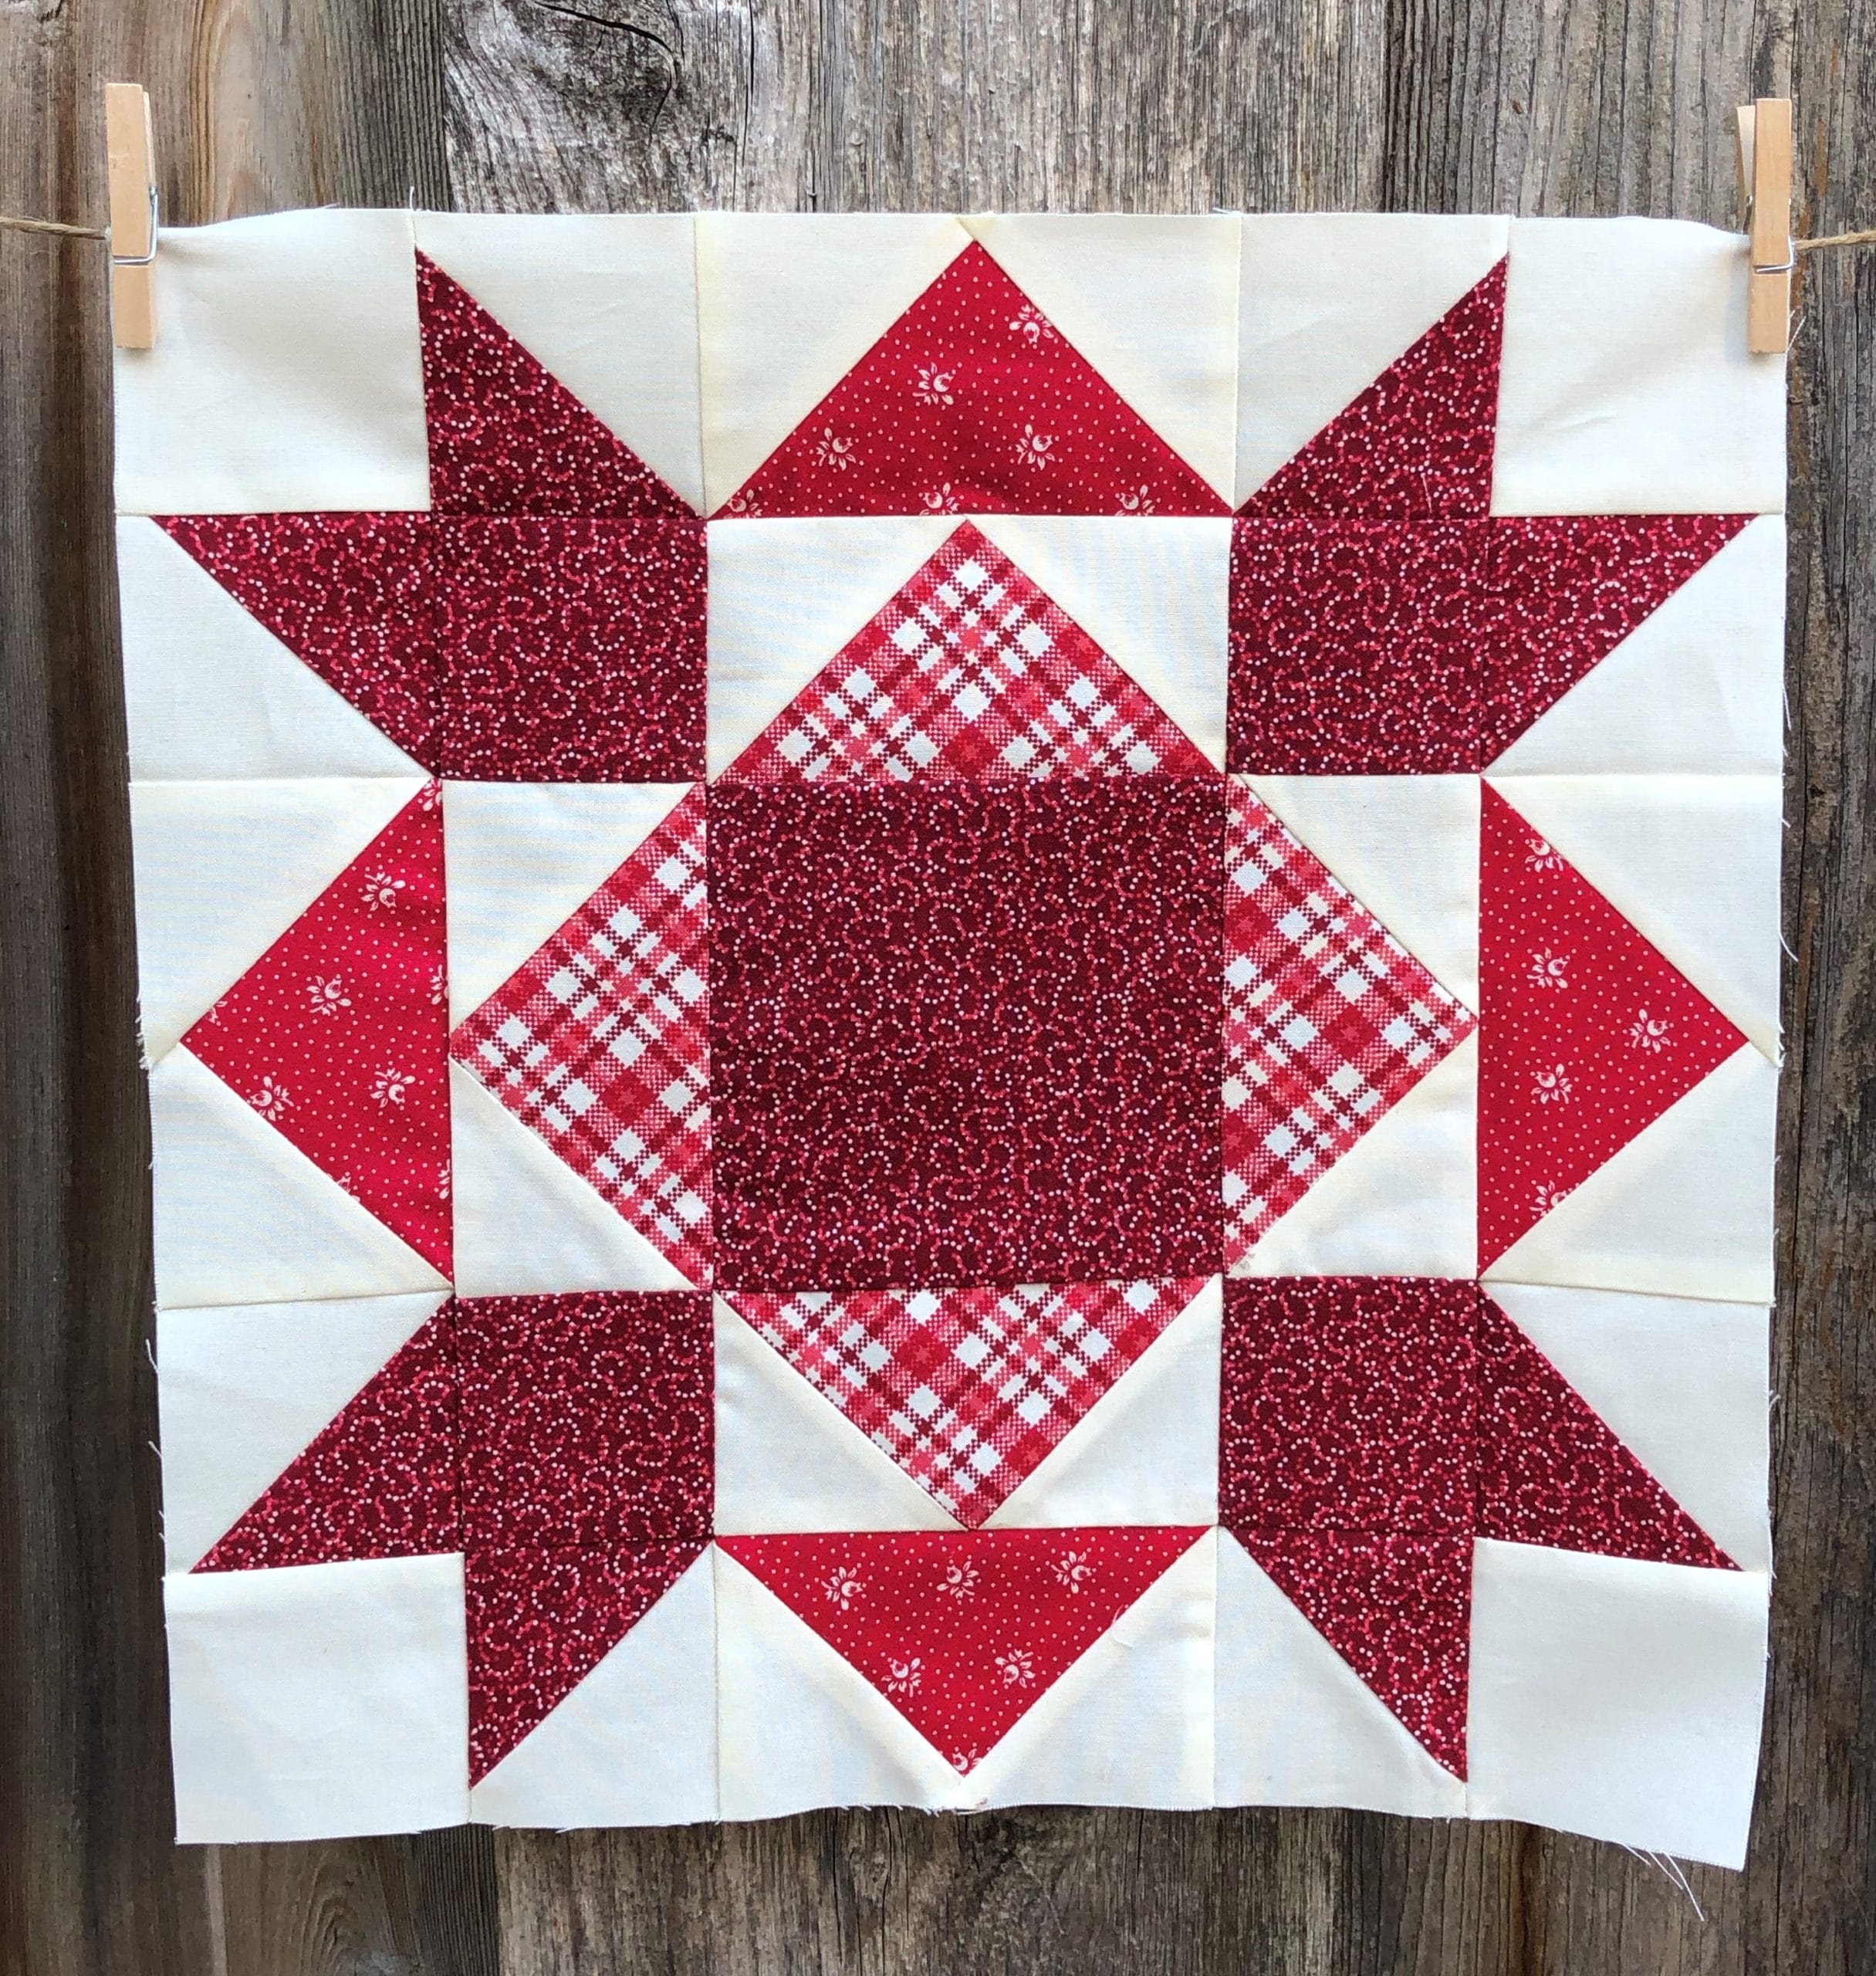
Hello friends! I’m excited to join you on this journey over the next twelve months while we sew up this not-so-little gem of a quilt called Ruby. I’ve always LOVED red and white quilts so I jumped at the chance to design one for Connecting Threads. I’m pretty happy with the results, and hope that you will be too, especially once it’s all finished.
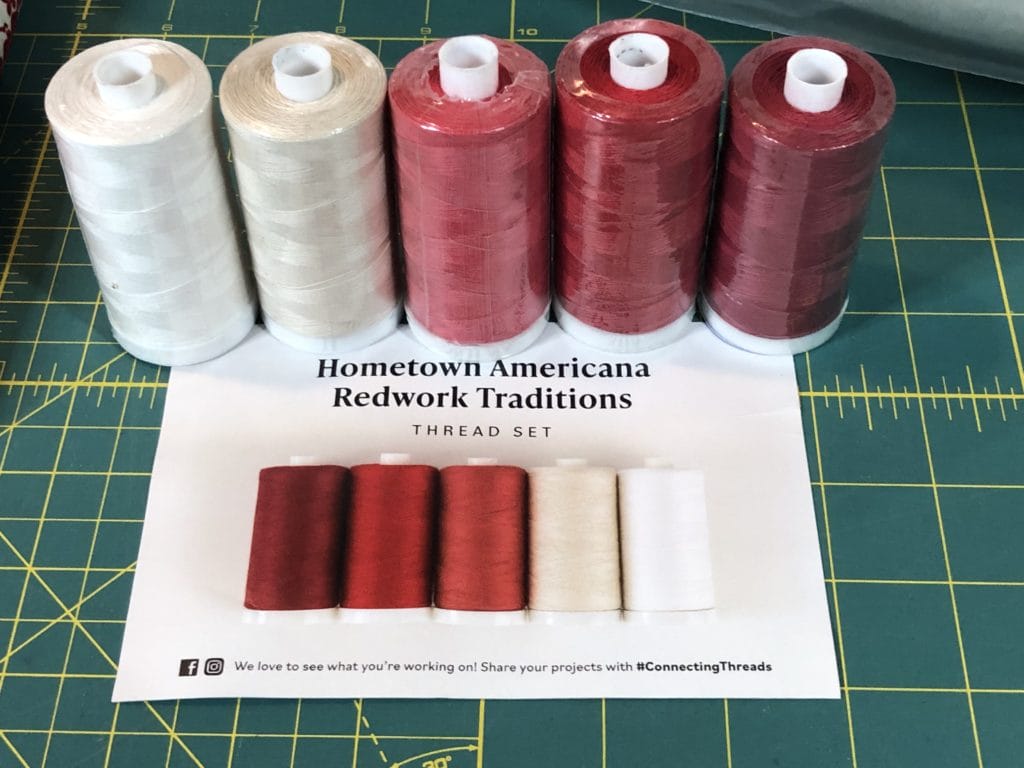
Threads
In preparation for this BOM, I snagged a few extra supplies from Connecting Threads. I love their thread and use it all the time anyway, so lucky for me there is a thread set that goes PERFECTLY with this quilt. It’s the Hometown Americana Redwork Traditions Thread set. Of course, you don’t have to use this thread to make the quilt, but since all the colors are perfect for whatever blocks we’ll be making, I just decided I wanted it from the start.
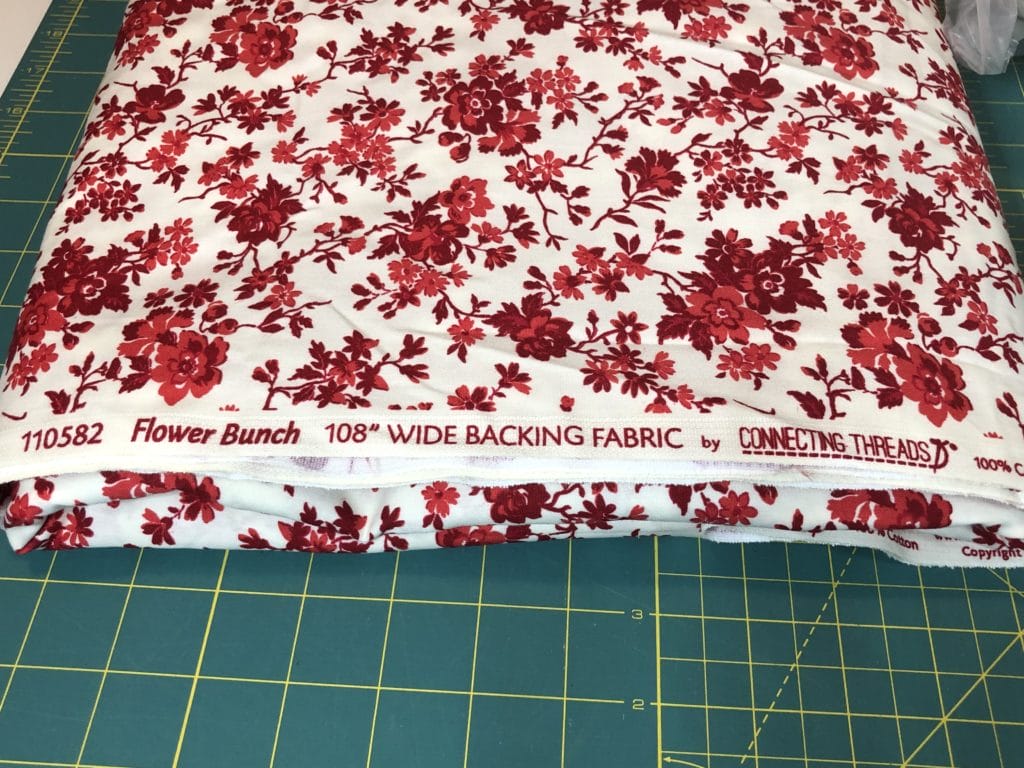
Backing Fabric
I also got backing fabric, because, depending on the popularity of any given CT fabric collection, there is a chance that the backing fabric I want might not be available by the time I’m ready for quilting. And since we will spend 12 months making the top, I really wanted to make sure I could get what I wanted. So while you don’t have to buy backing fabric now, I would strongly suggest you do, especially if you want something that coordinates.
The pattern states that you’ll need 9.75 yards of standard 44″ wide fabric for the backing. You can also choose to get 3 yards of the 108″ backing fabric as I decided to do. If you go that route, you’ll want to get 3 yards. I picked Flower Bunch (#110582), which coordinates perfectly with this quilt. In fact, it’s so pretty it could be a whole cloth quilt on it’s own. I love it!
Cutting
Before we begin cutting and sewing, I’d like to offer a few tips. I know many designers who write patterns in a way that has you cutting pieces slightly larger, and then trimming things down after sewing parts together, so that everything is just right when you are done. While there is absolutely nothing wrong with that, I chose to write my patterns so that everything is mathematically correct and let customers make their own adaptations as they see fit.
That being said, whenever I’m personally making a quilt, I generally cut all my pieces just a scant bigger (like about 1/16” at most), and I also sew everything just a scant under the ¼” seam allowance. This always gives me great results, and allows for me to square things up as needed.
Here is a photo of about how much bigger I cut my pieces, just to give you an idea. If you look closely at the ruler, you can see this piece is just a bit bigger than the 5-1/4″ measurement that is stated in the pattern.
Of course, feel free to cut and sew as you see fit, I’m just letting you know what I do that helps me to get the results I’m after. And don’t worry about having enough fabric if you want to cut things a bit bigger with this kit. I’ve allowed for AMPLE fabric with this BOM, so you should be all good!
This Month’s Blocks
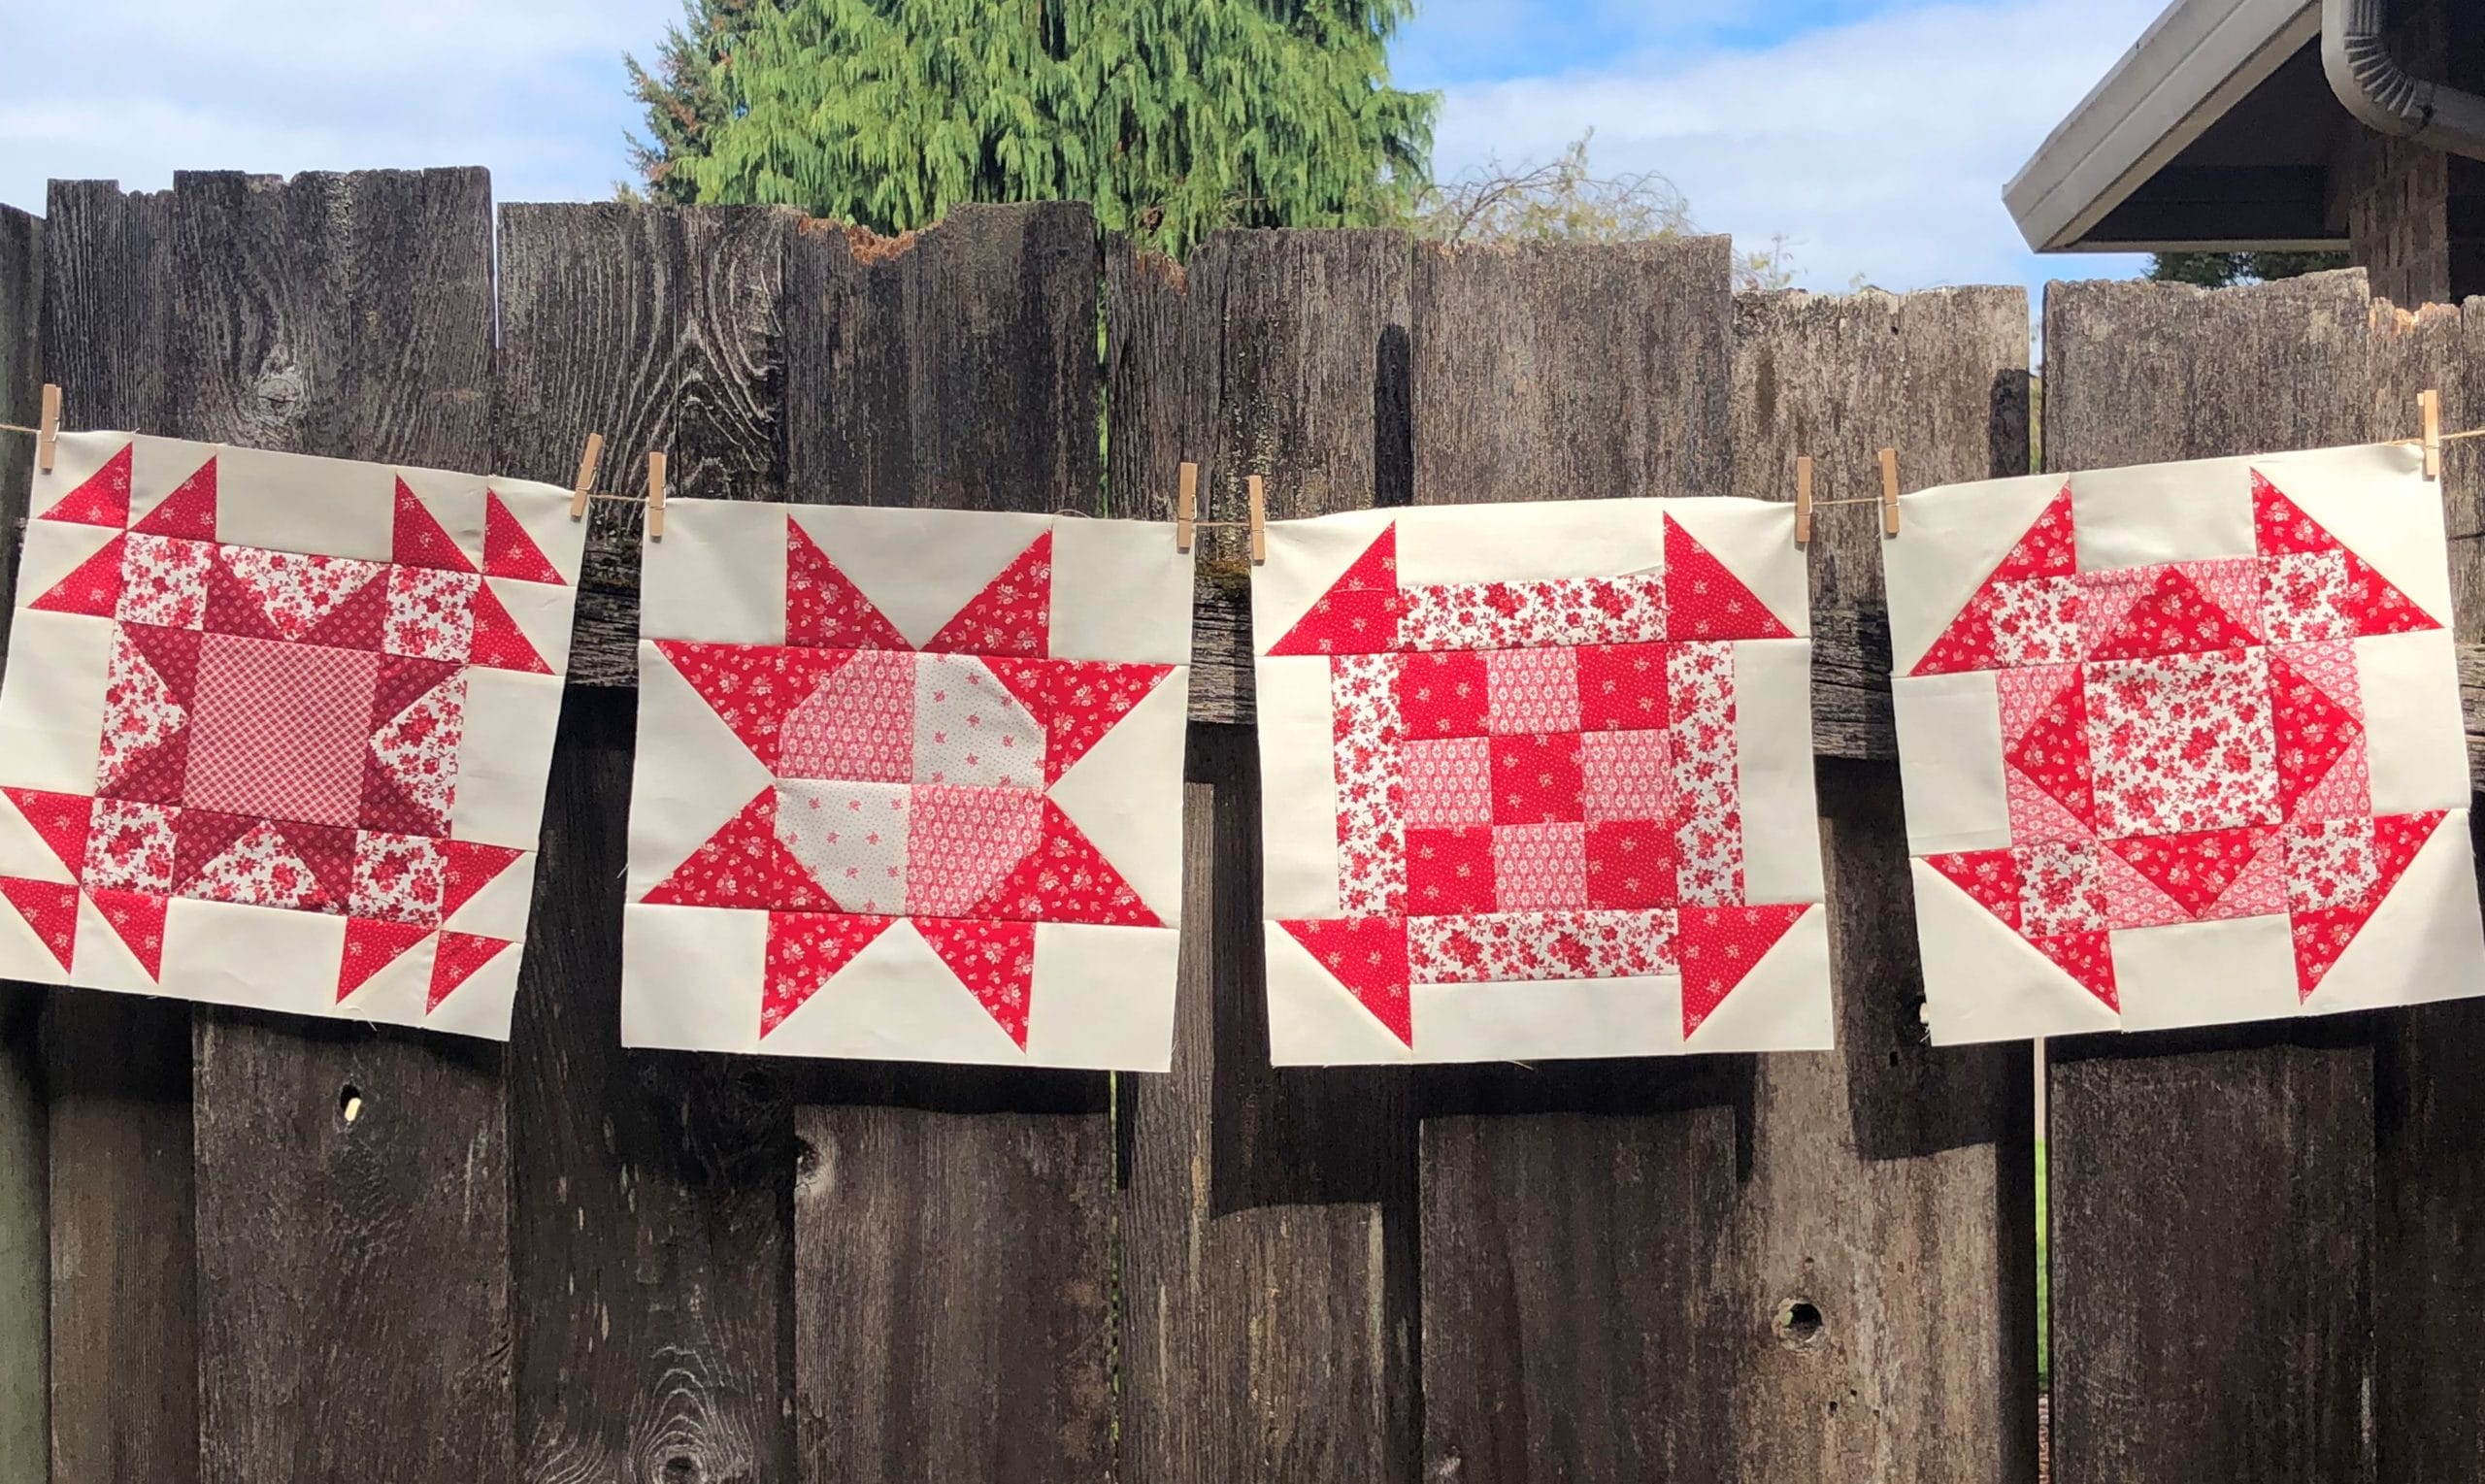
Okay, let’s get started with this month’s blocks! Here are the first four we will be making:
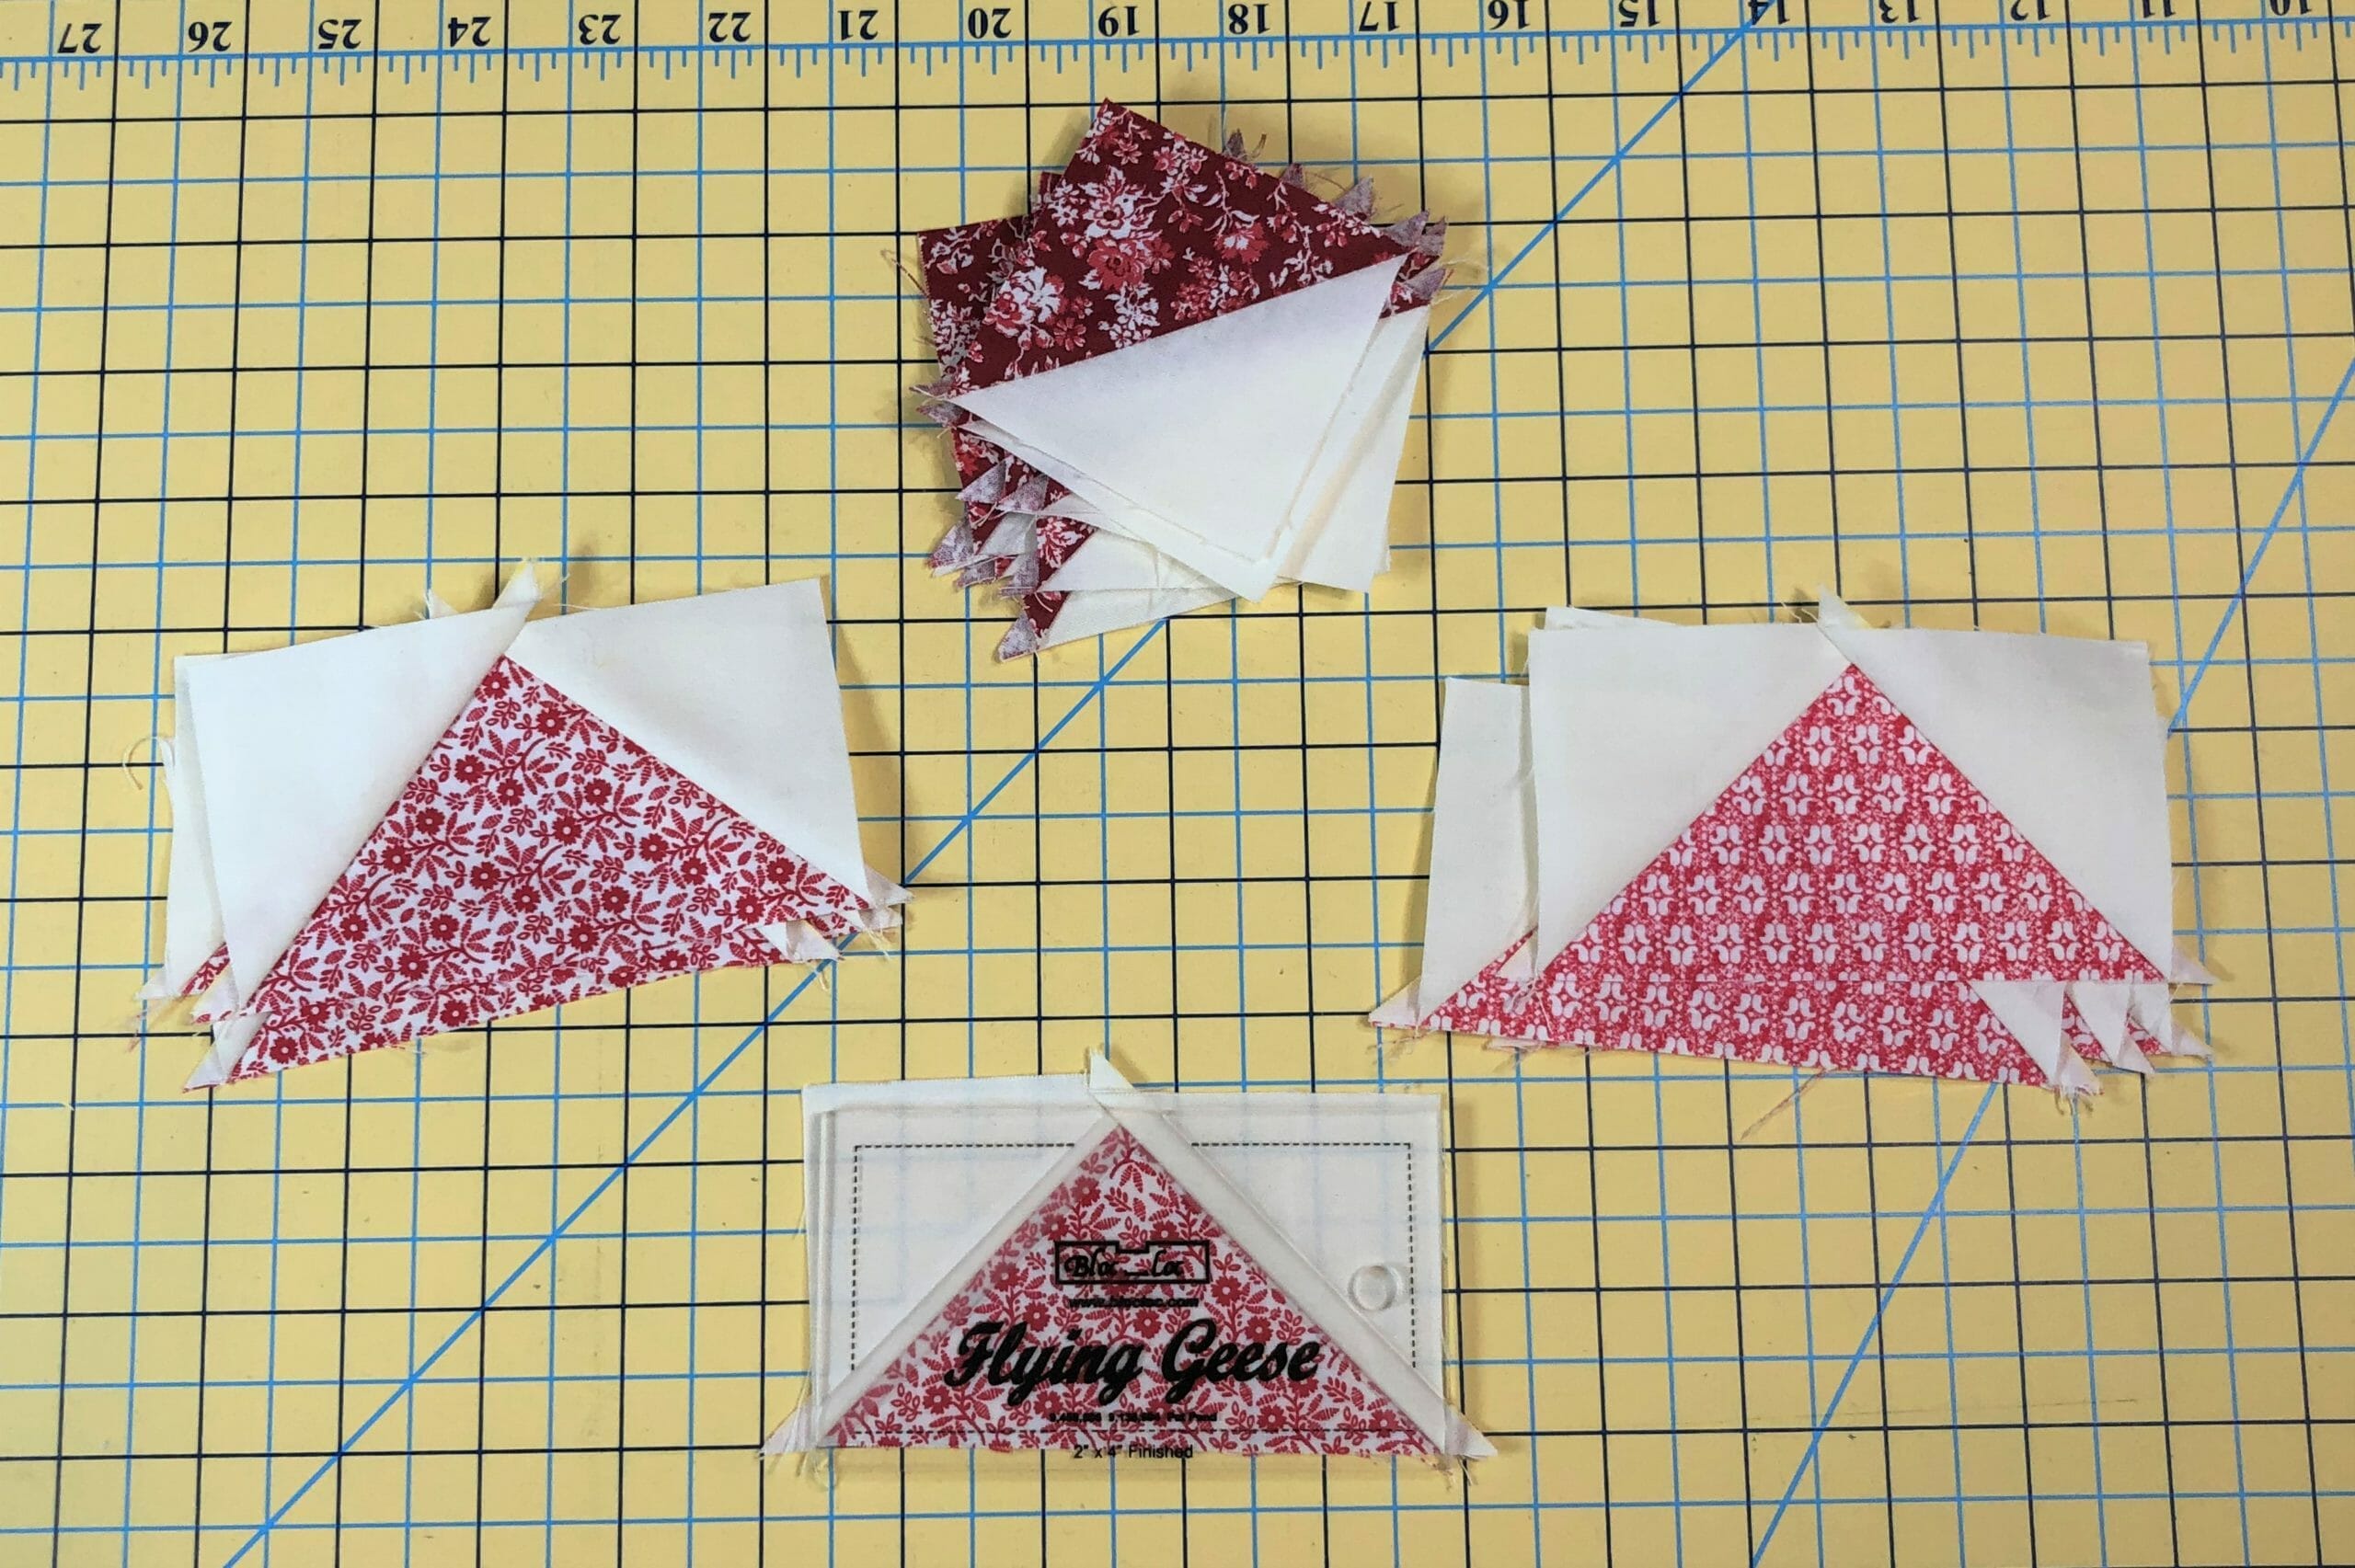
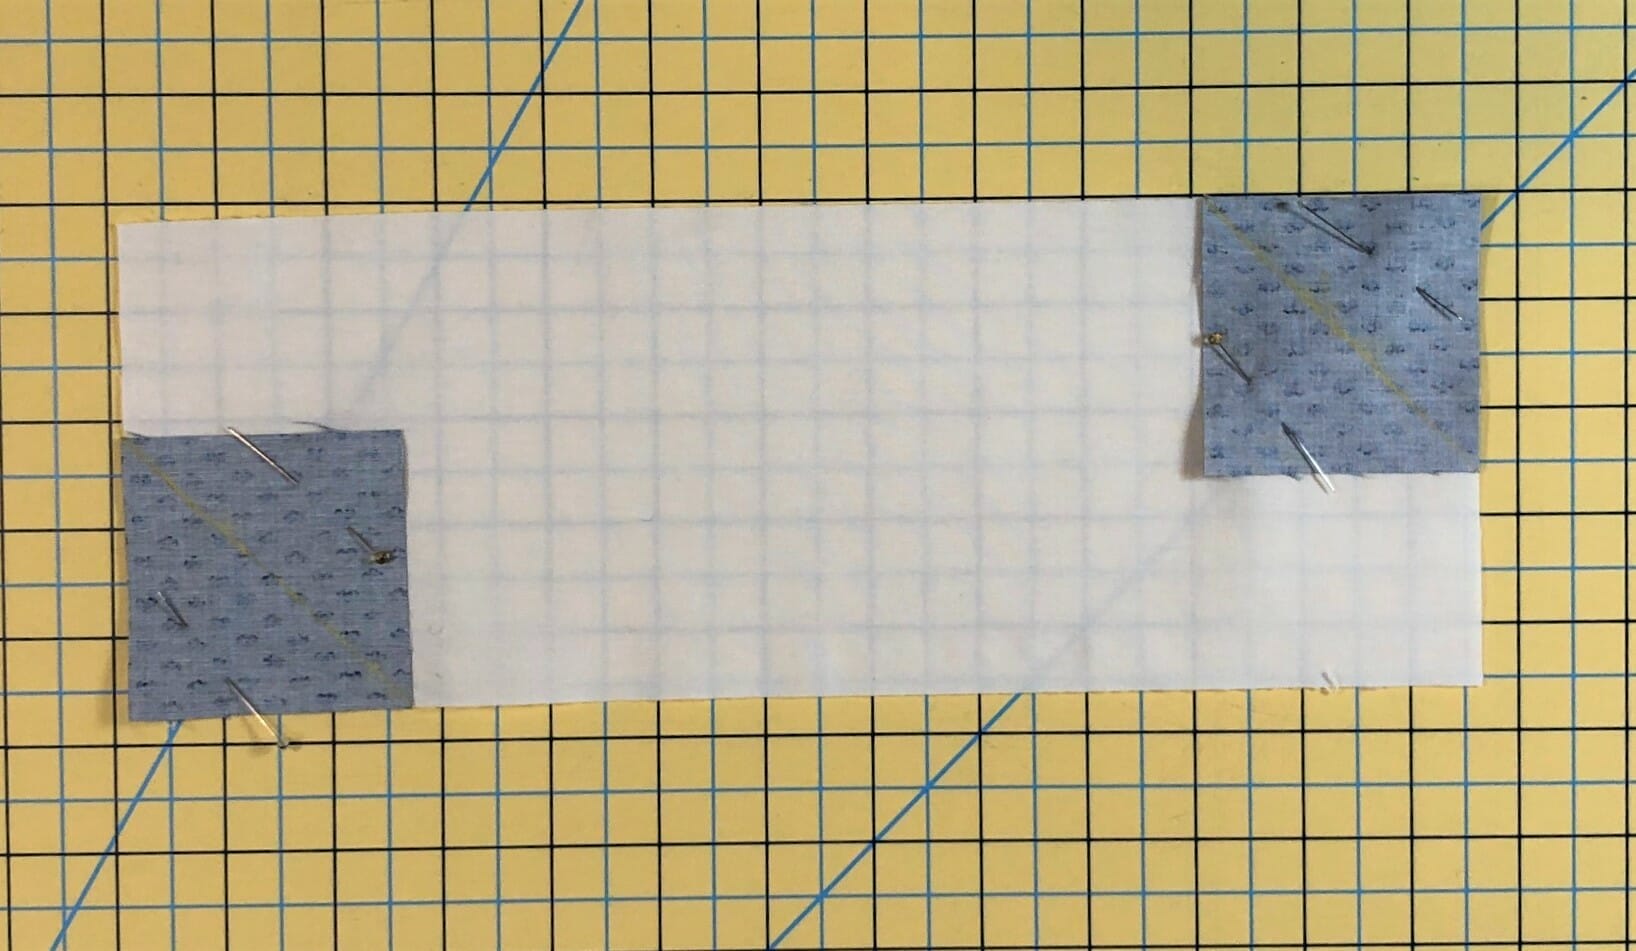
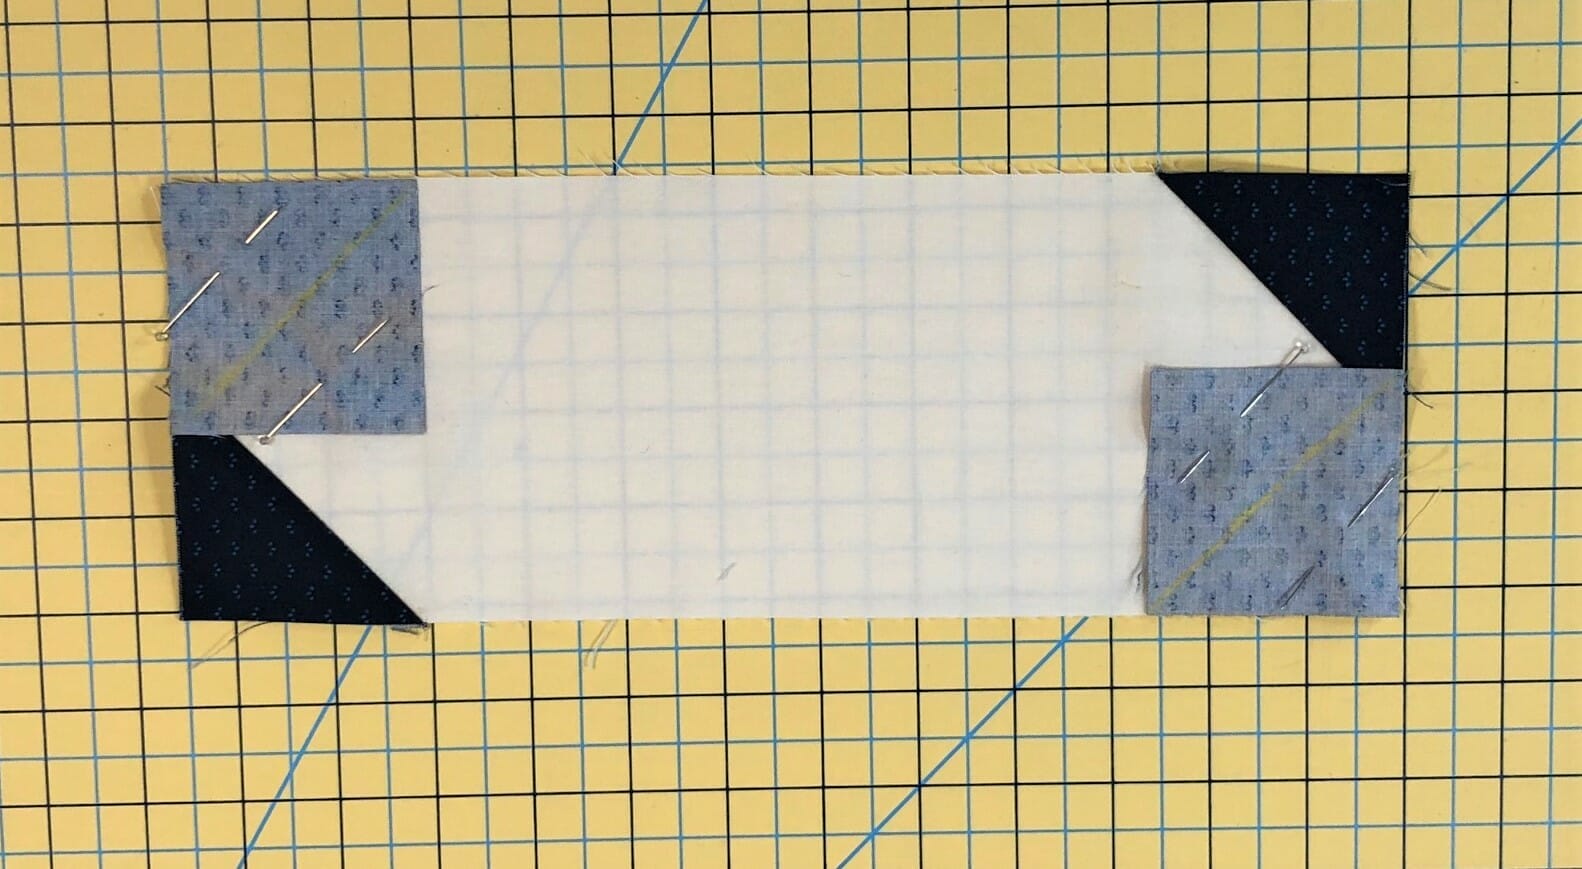
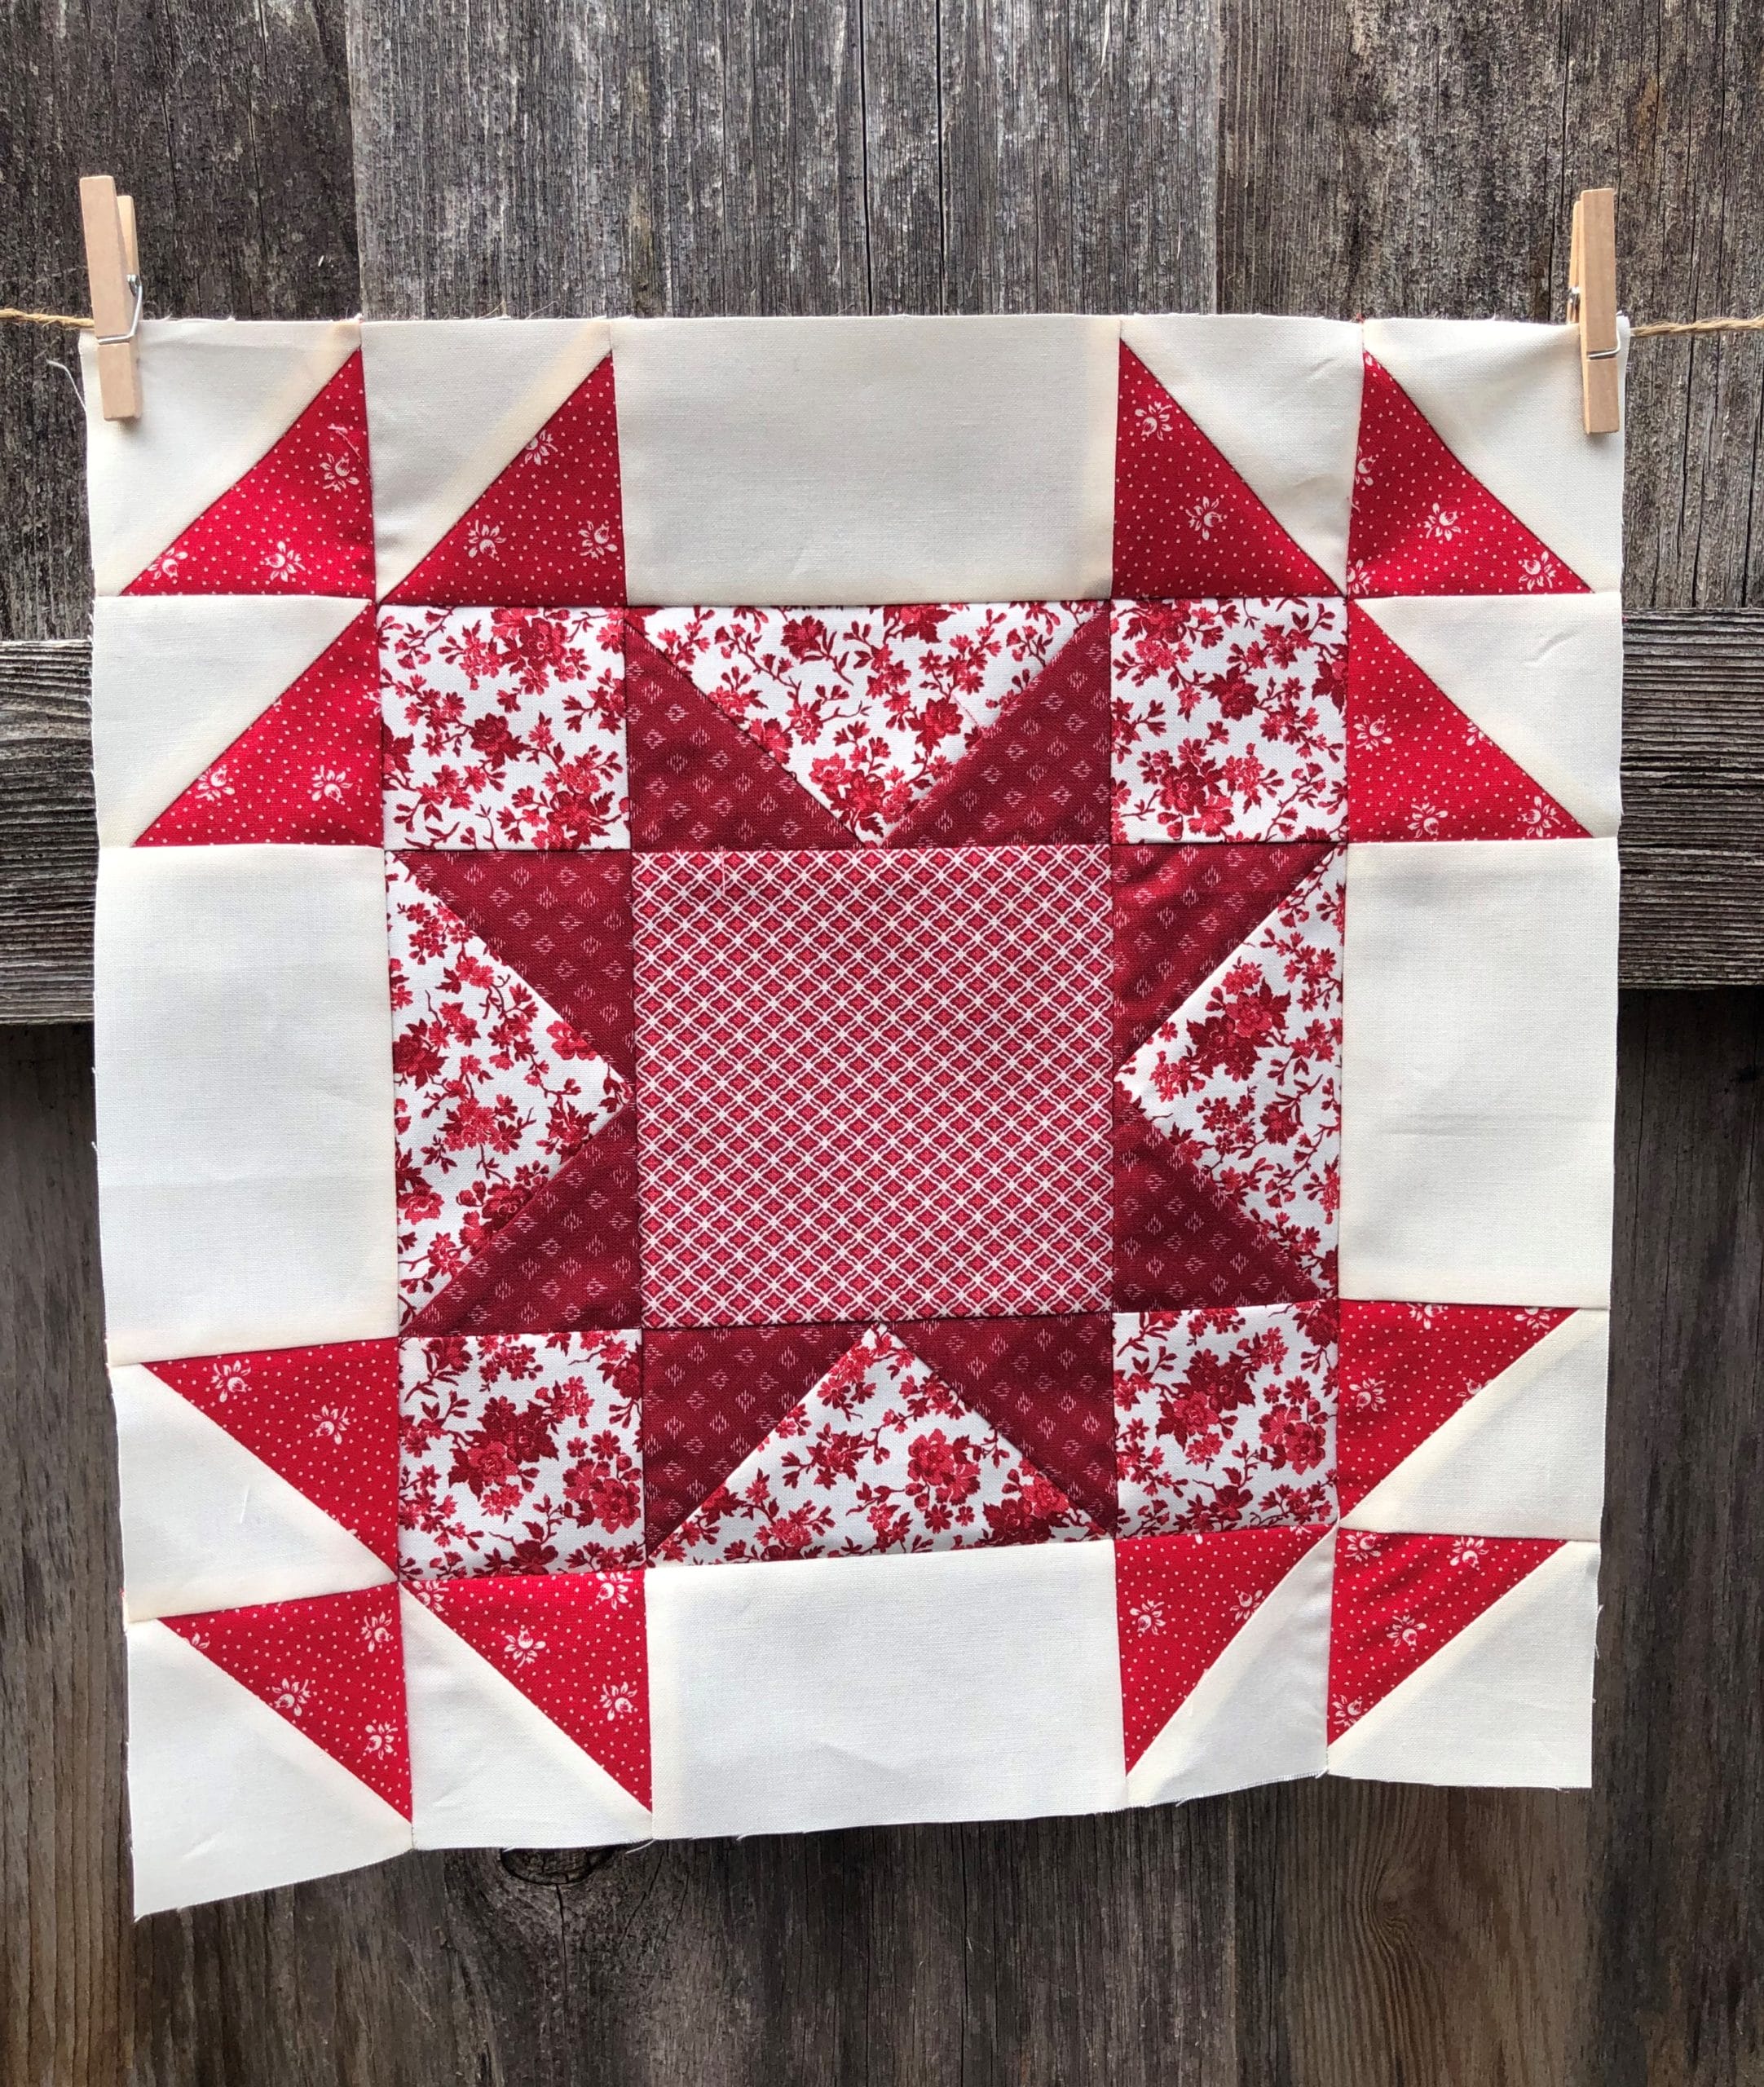
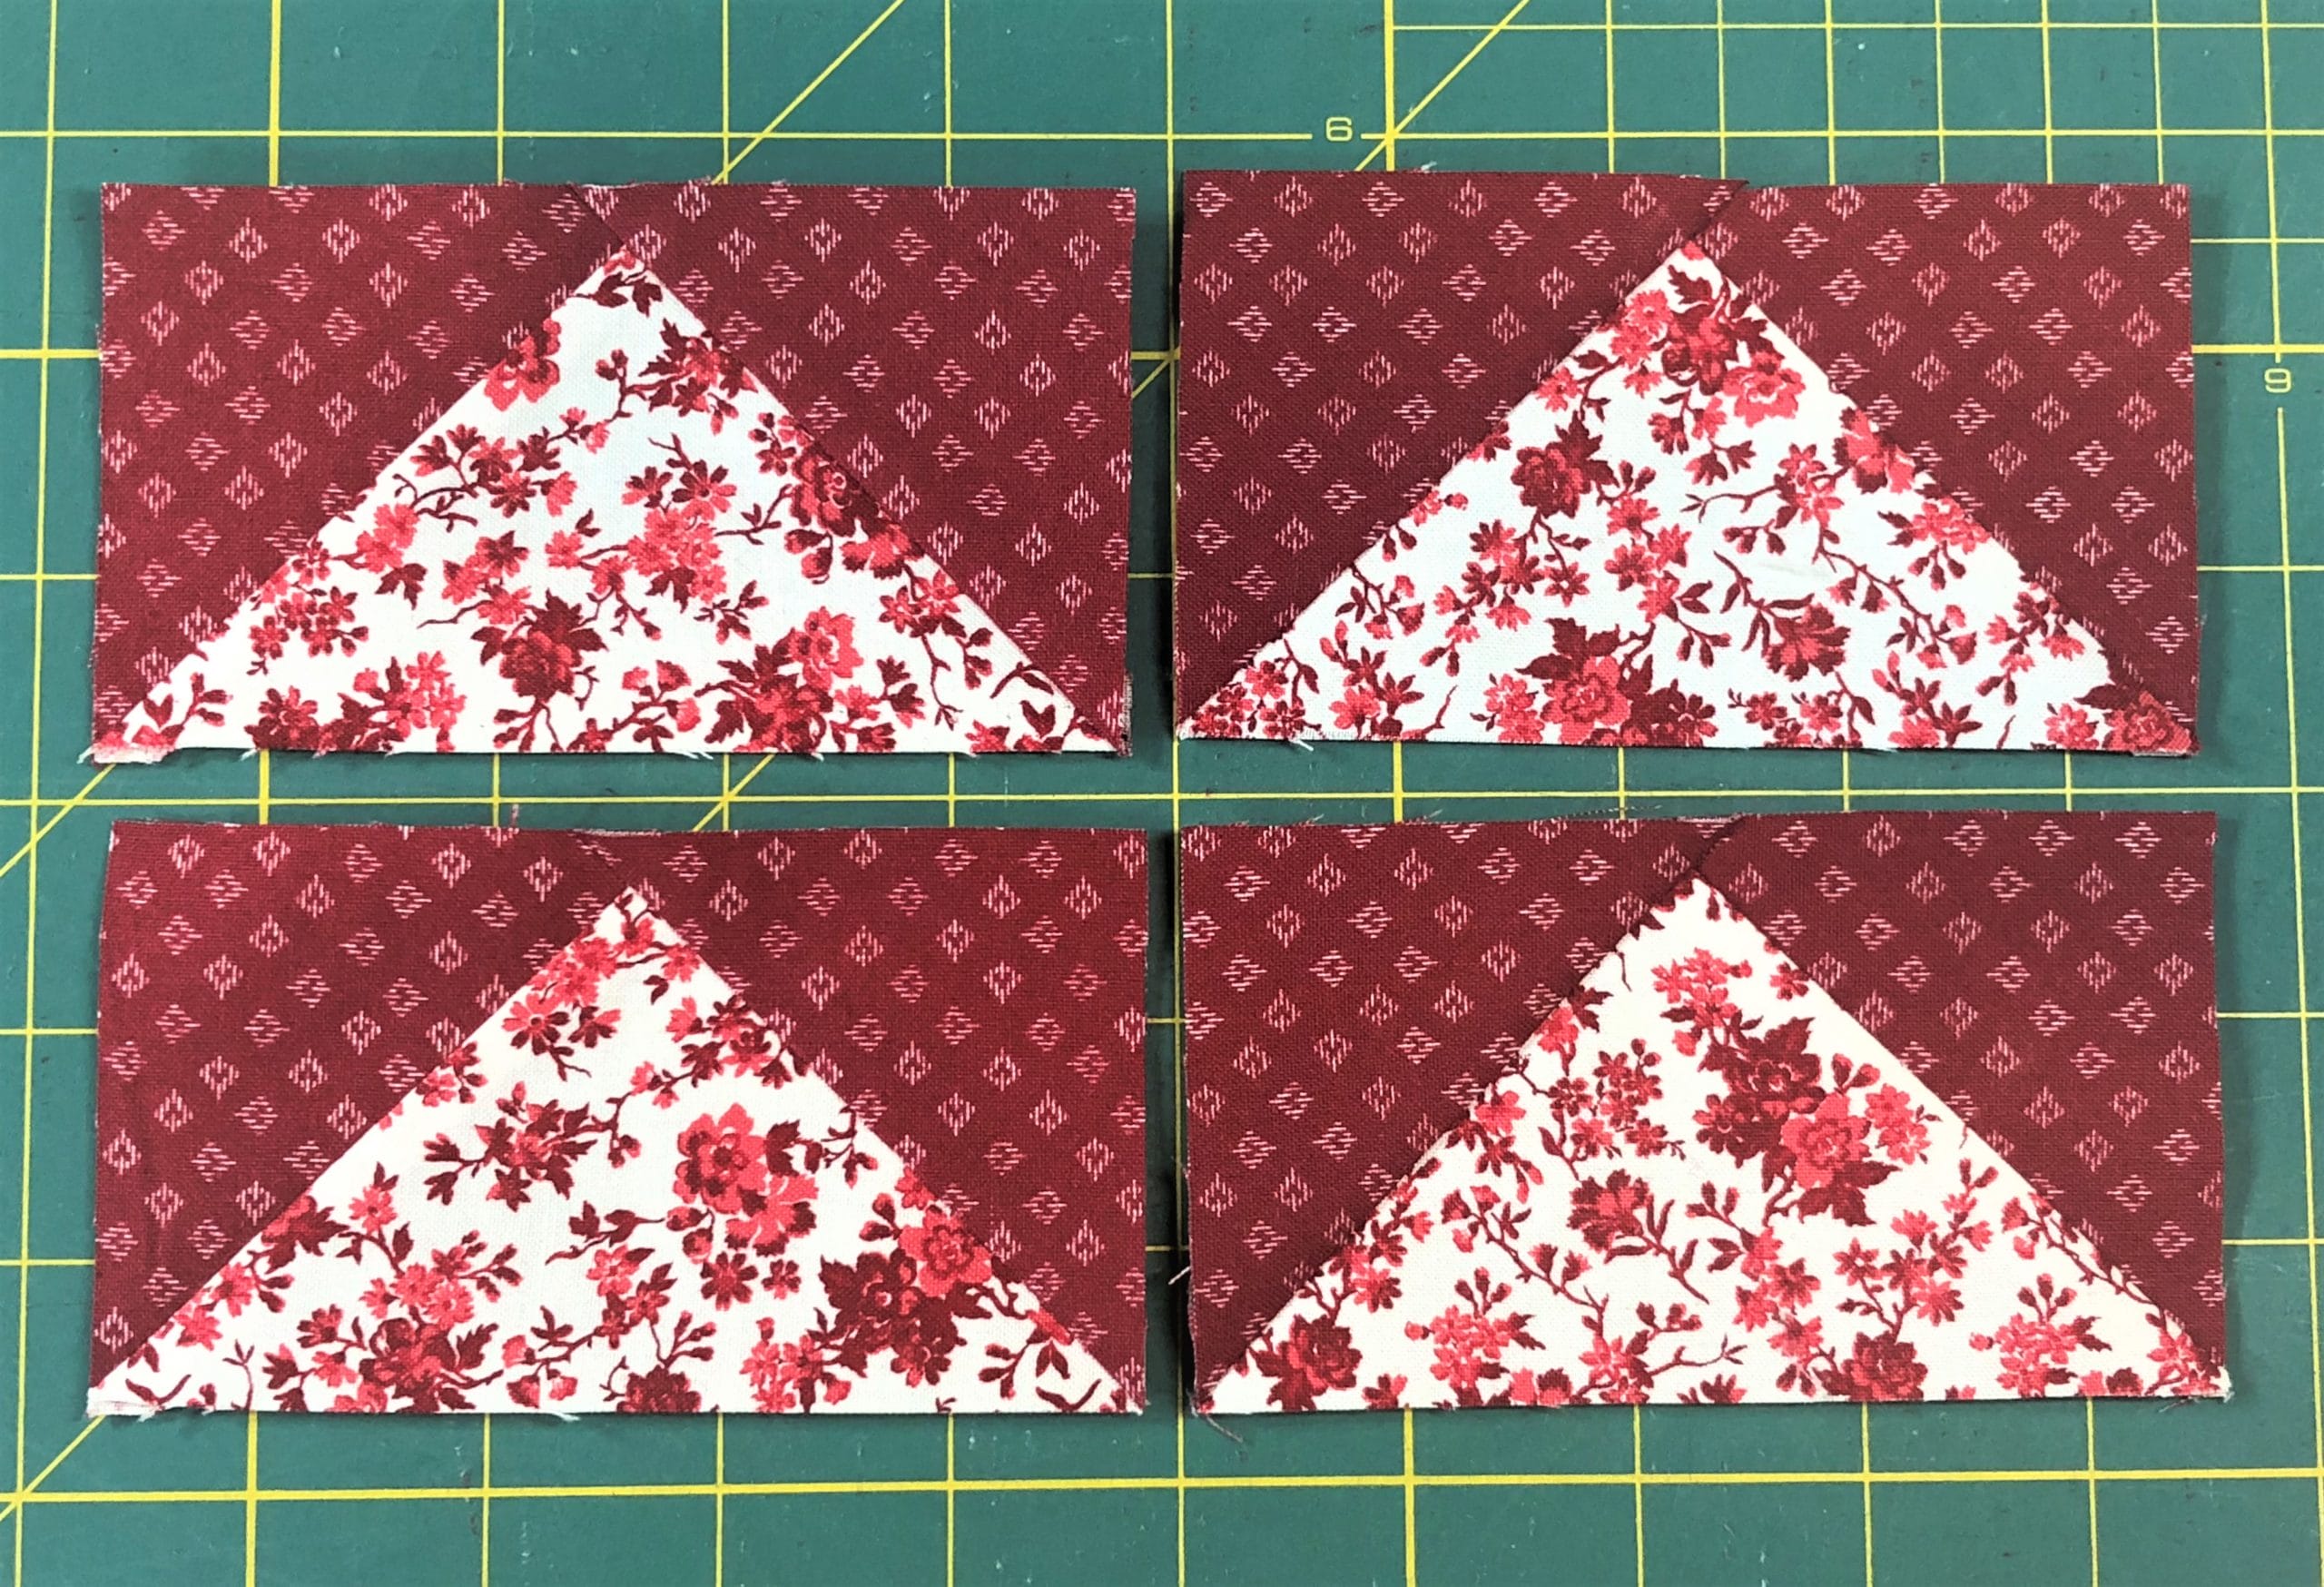
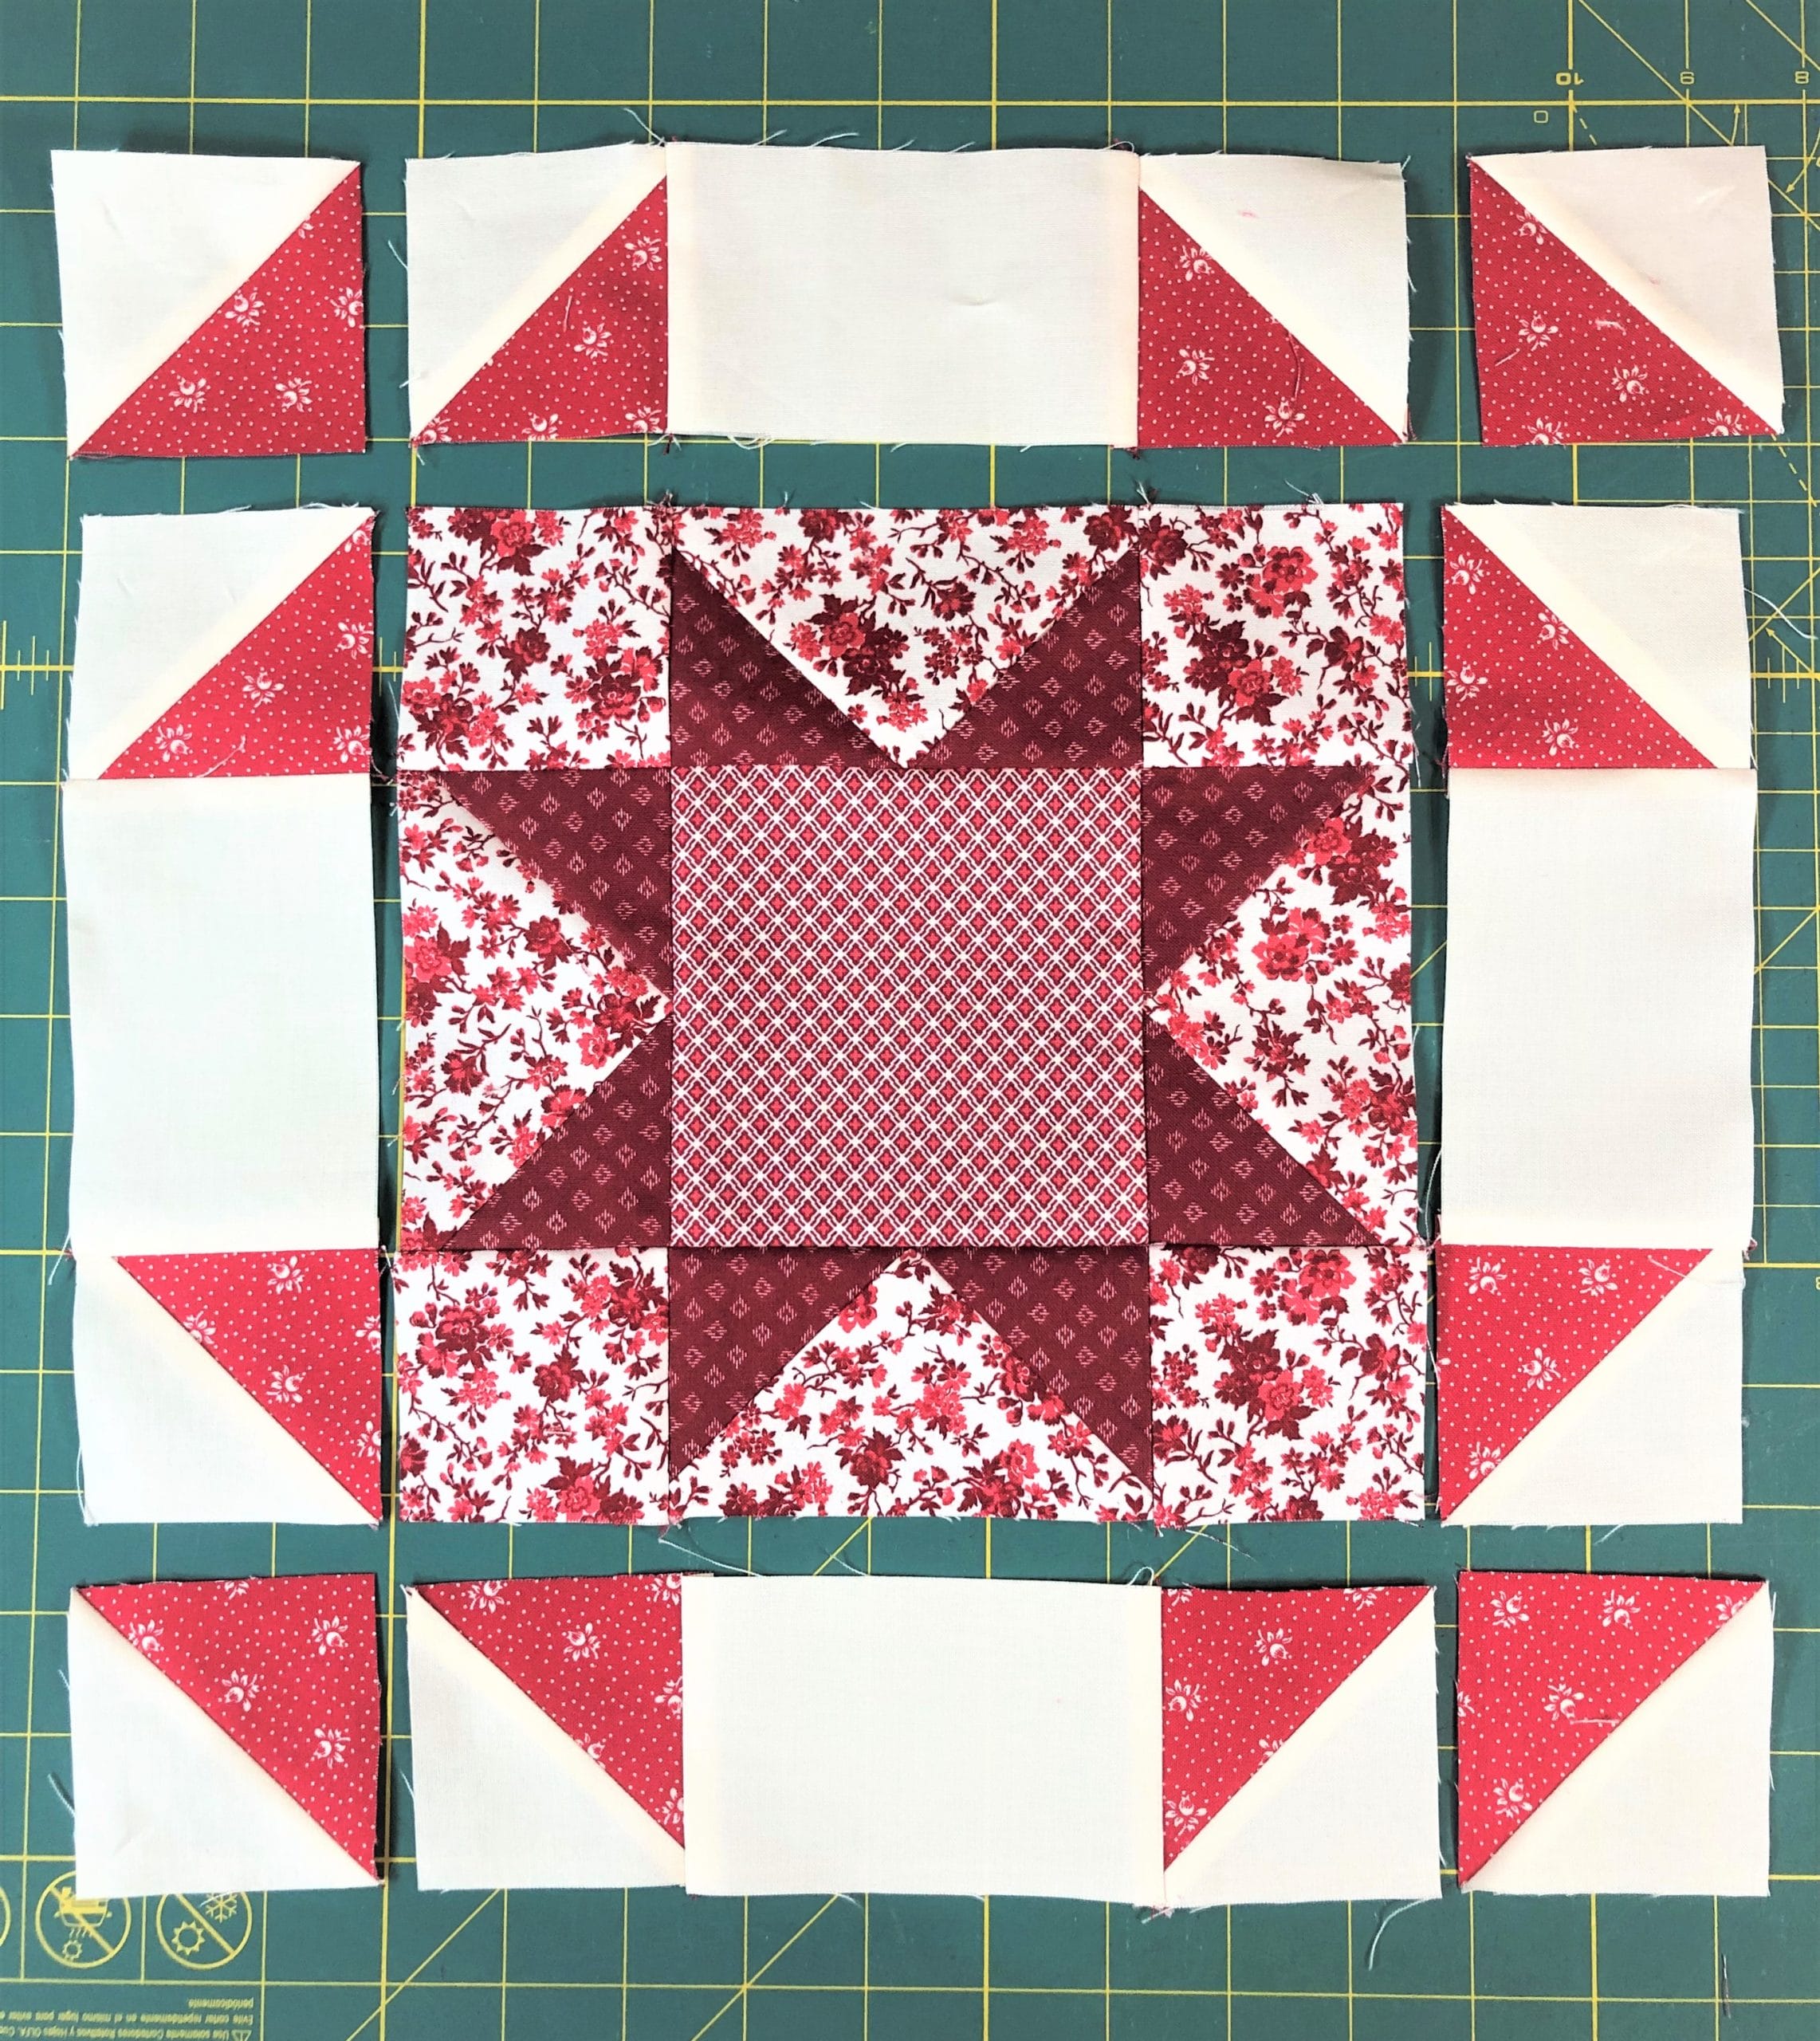
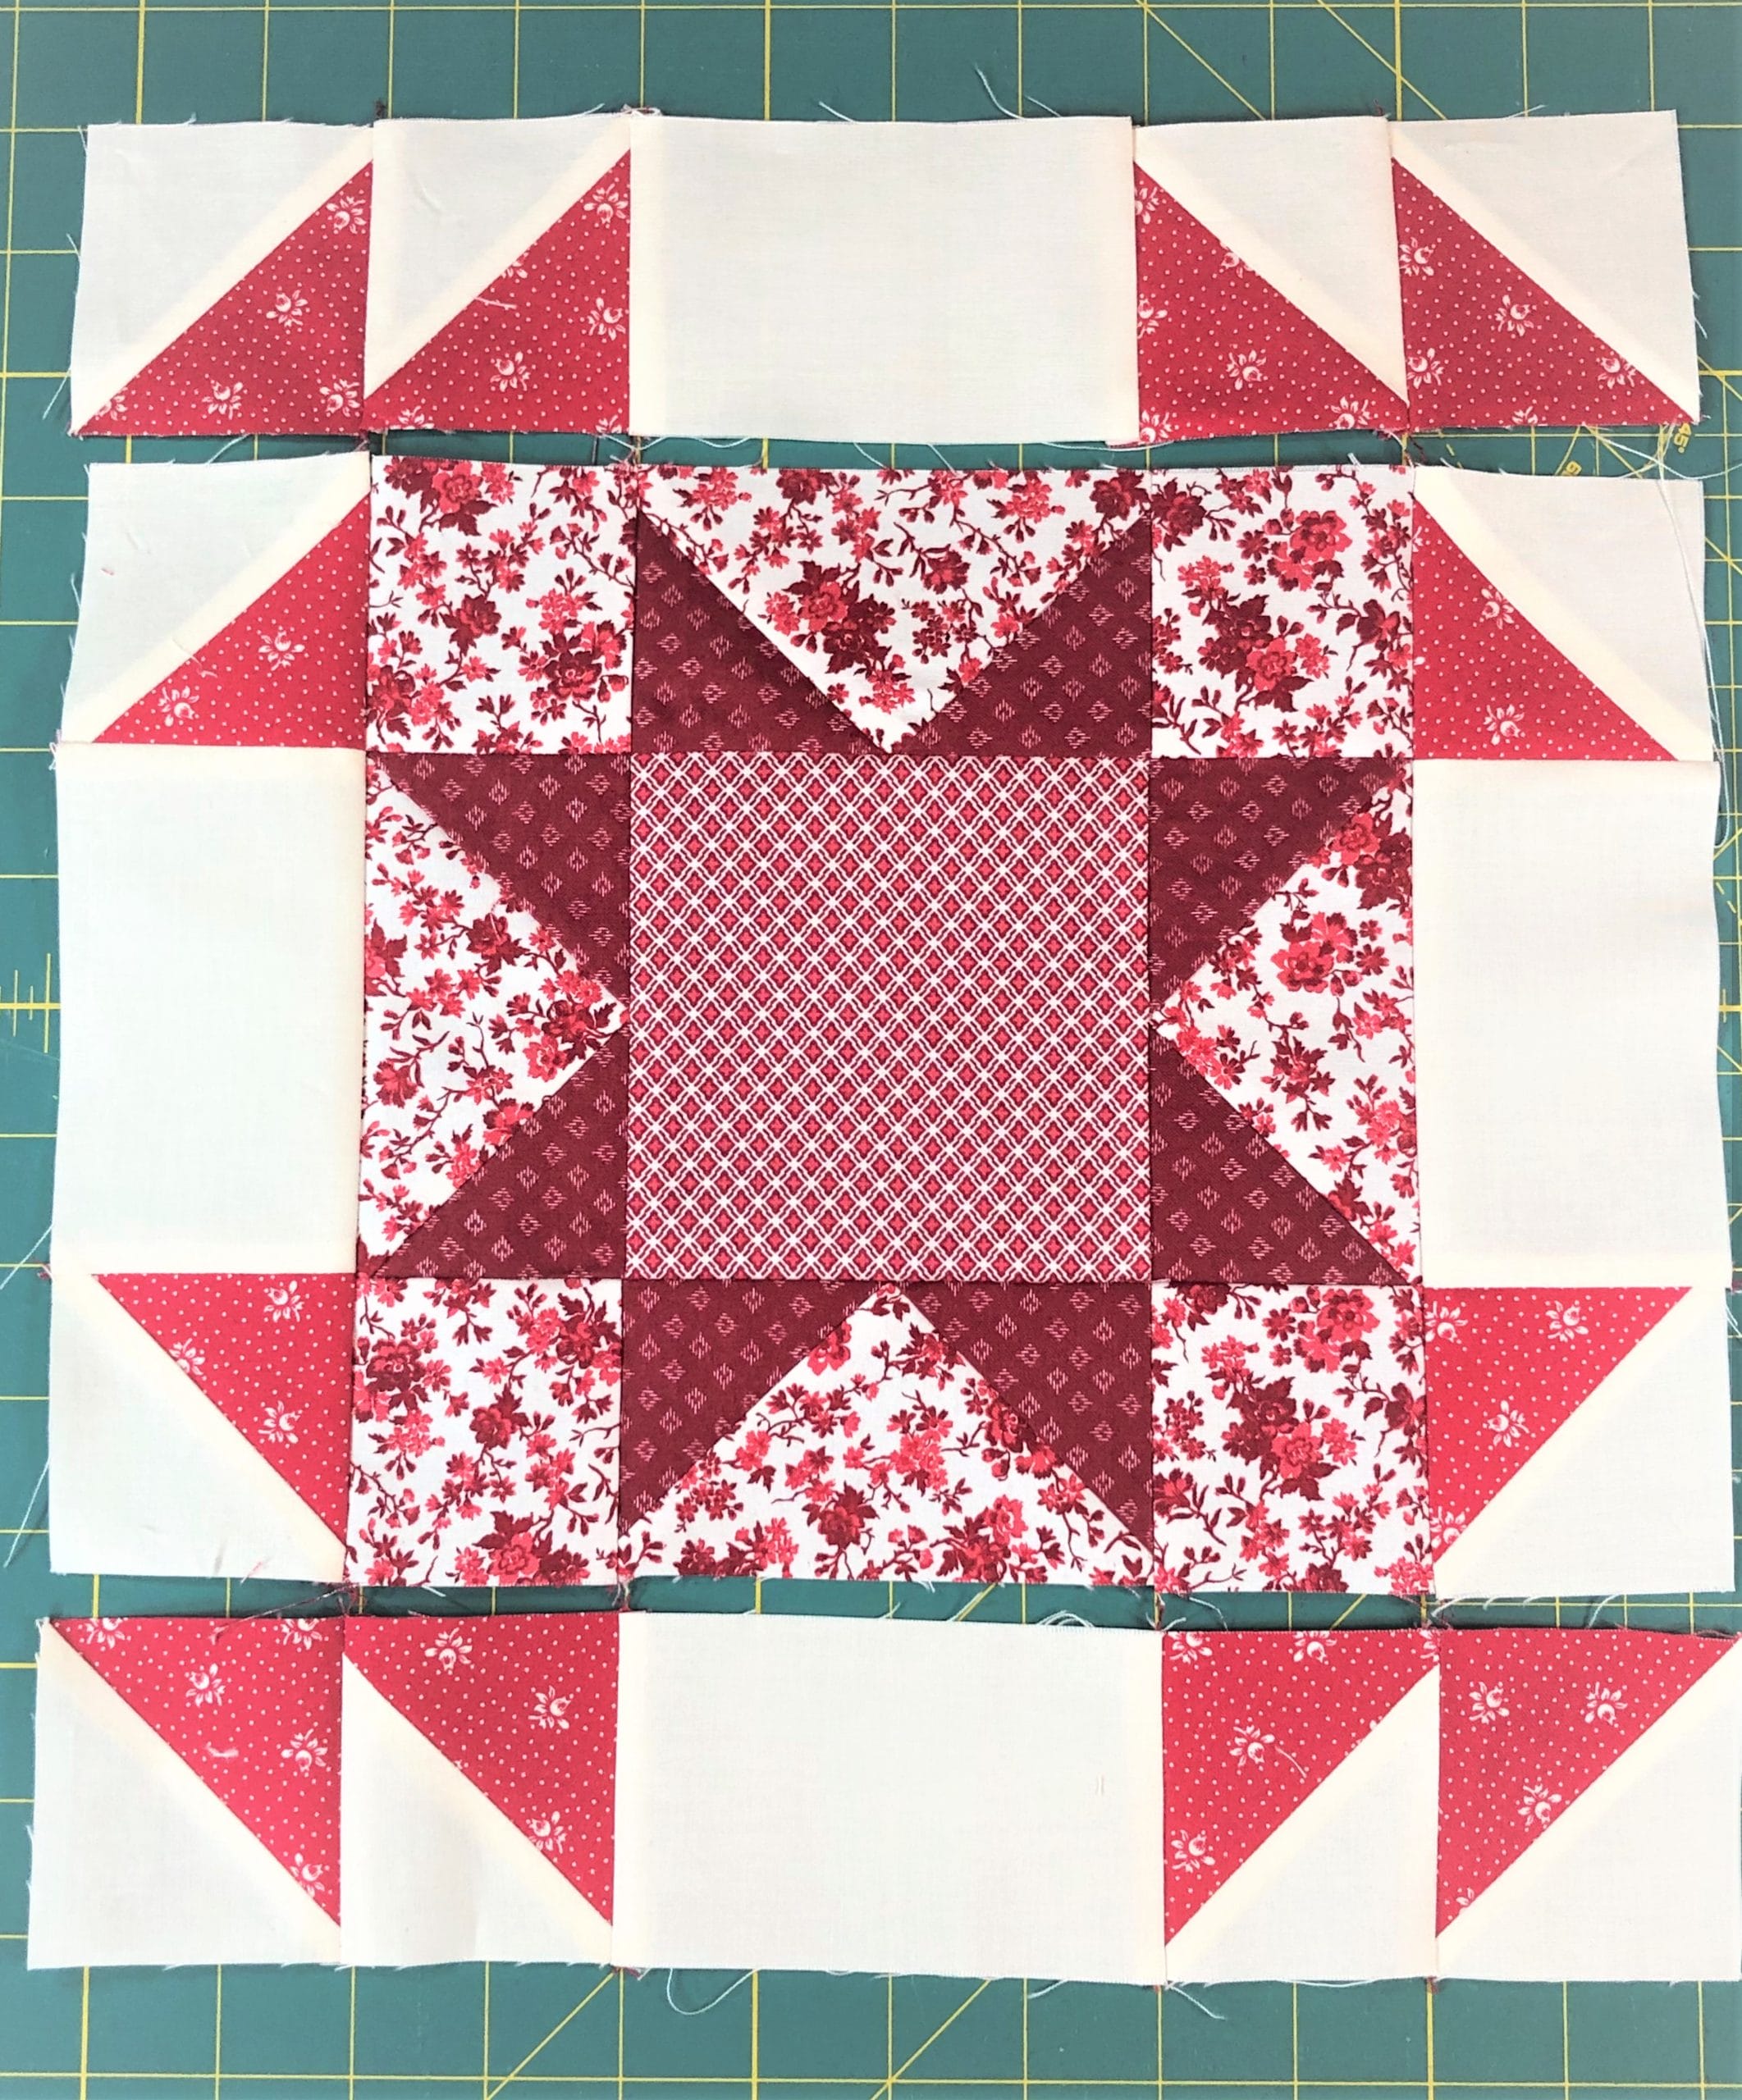
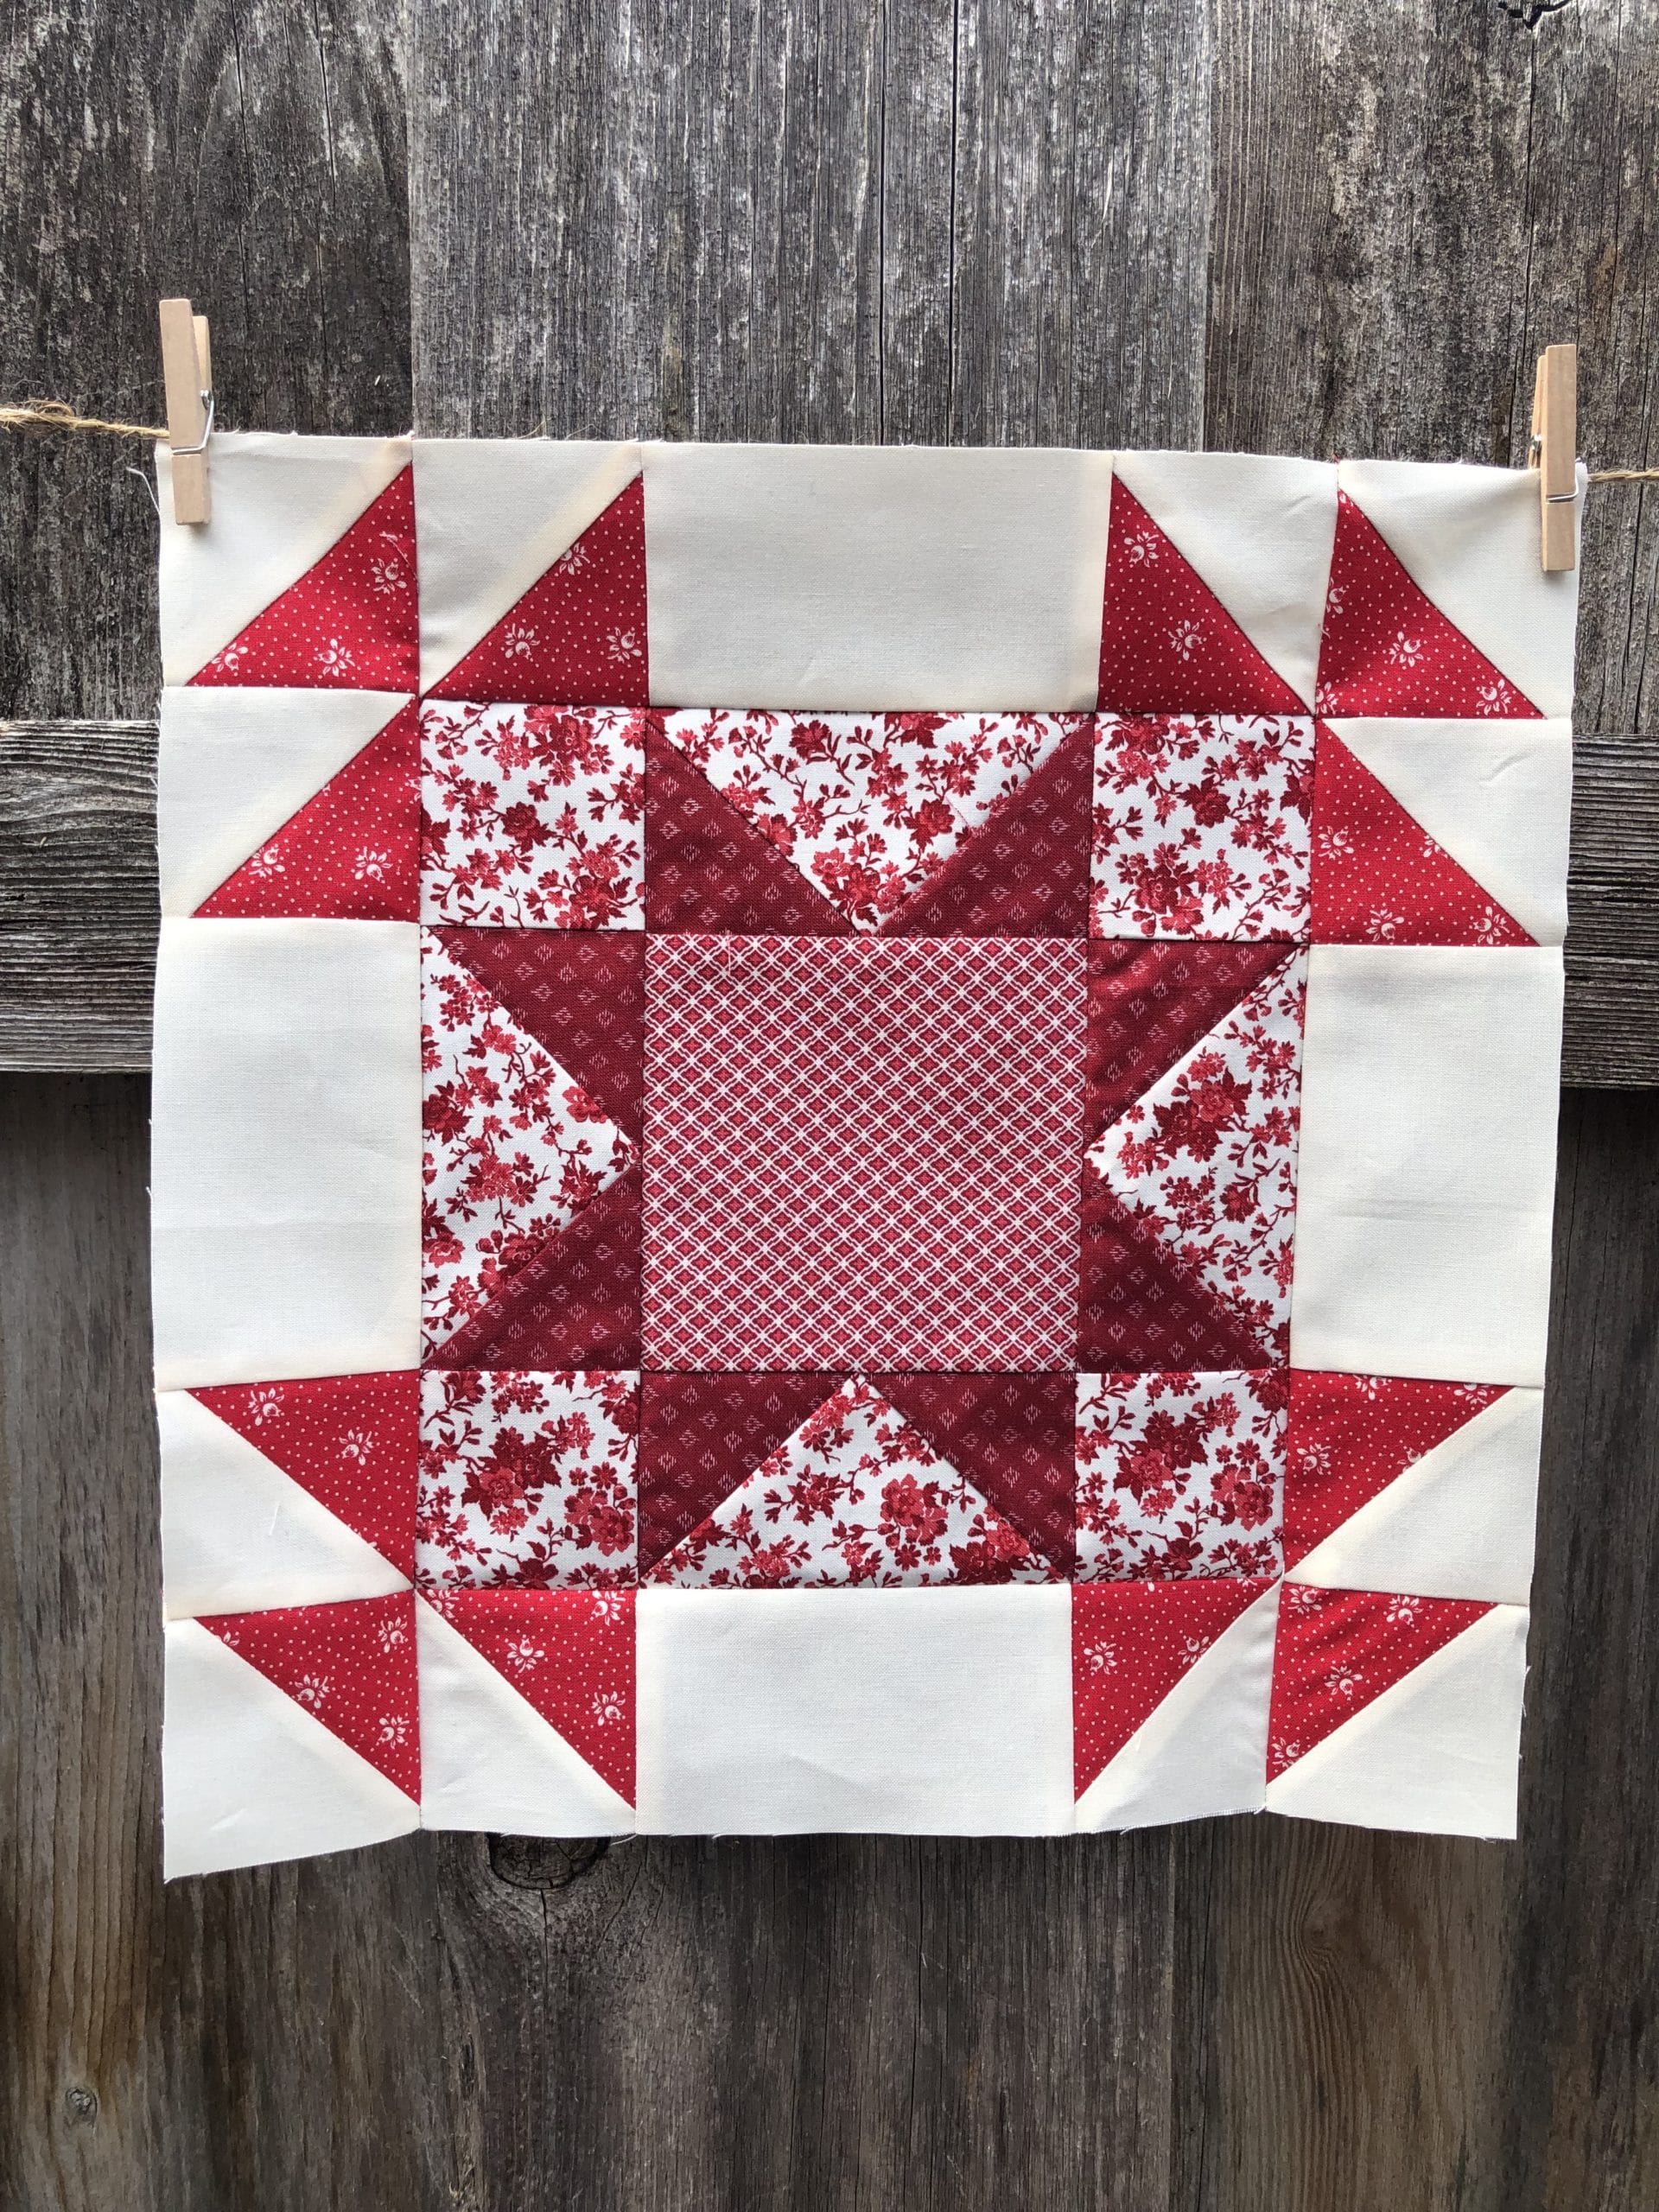
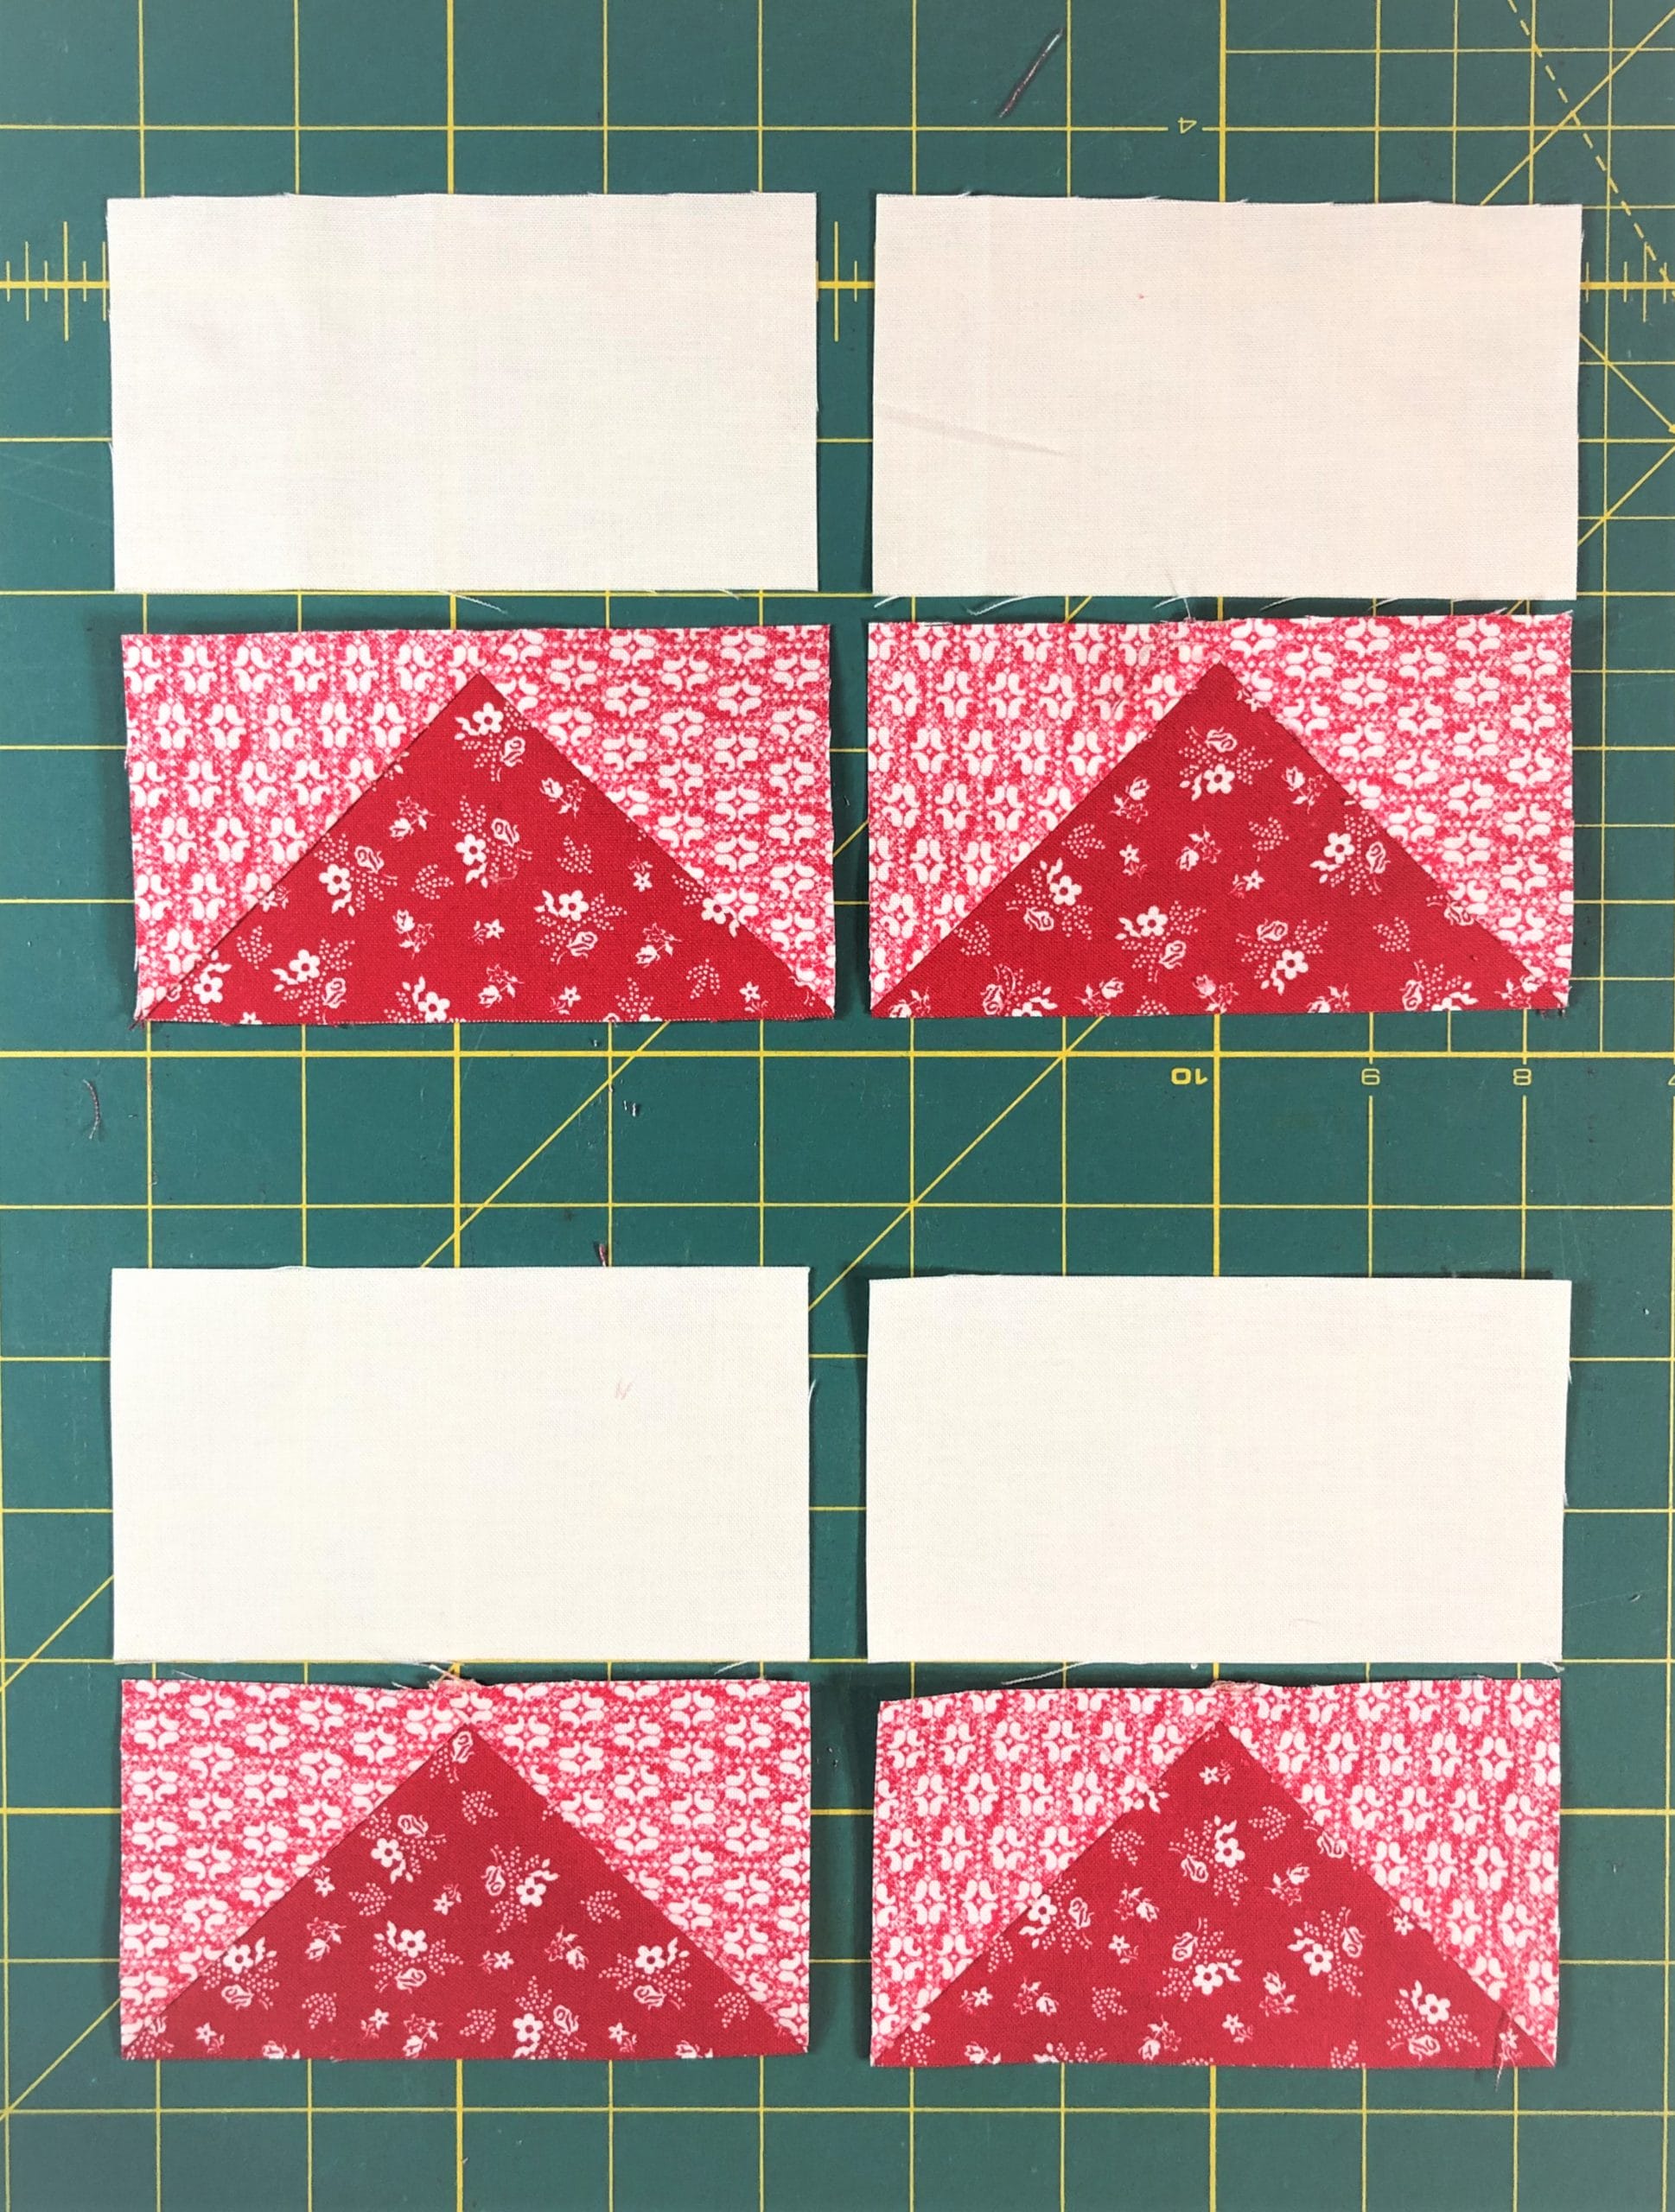
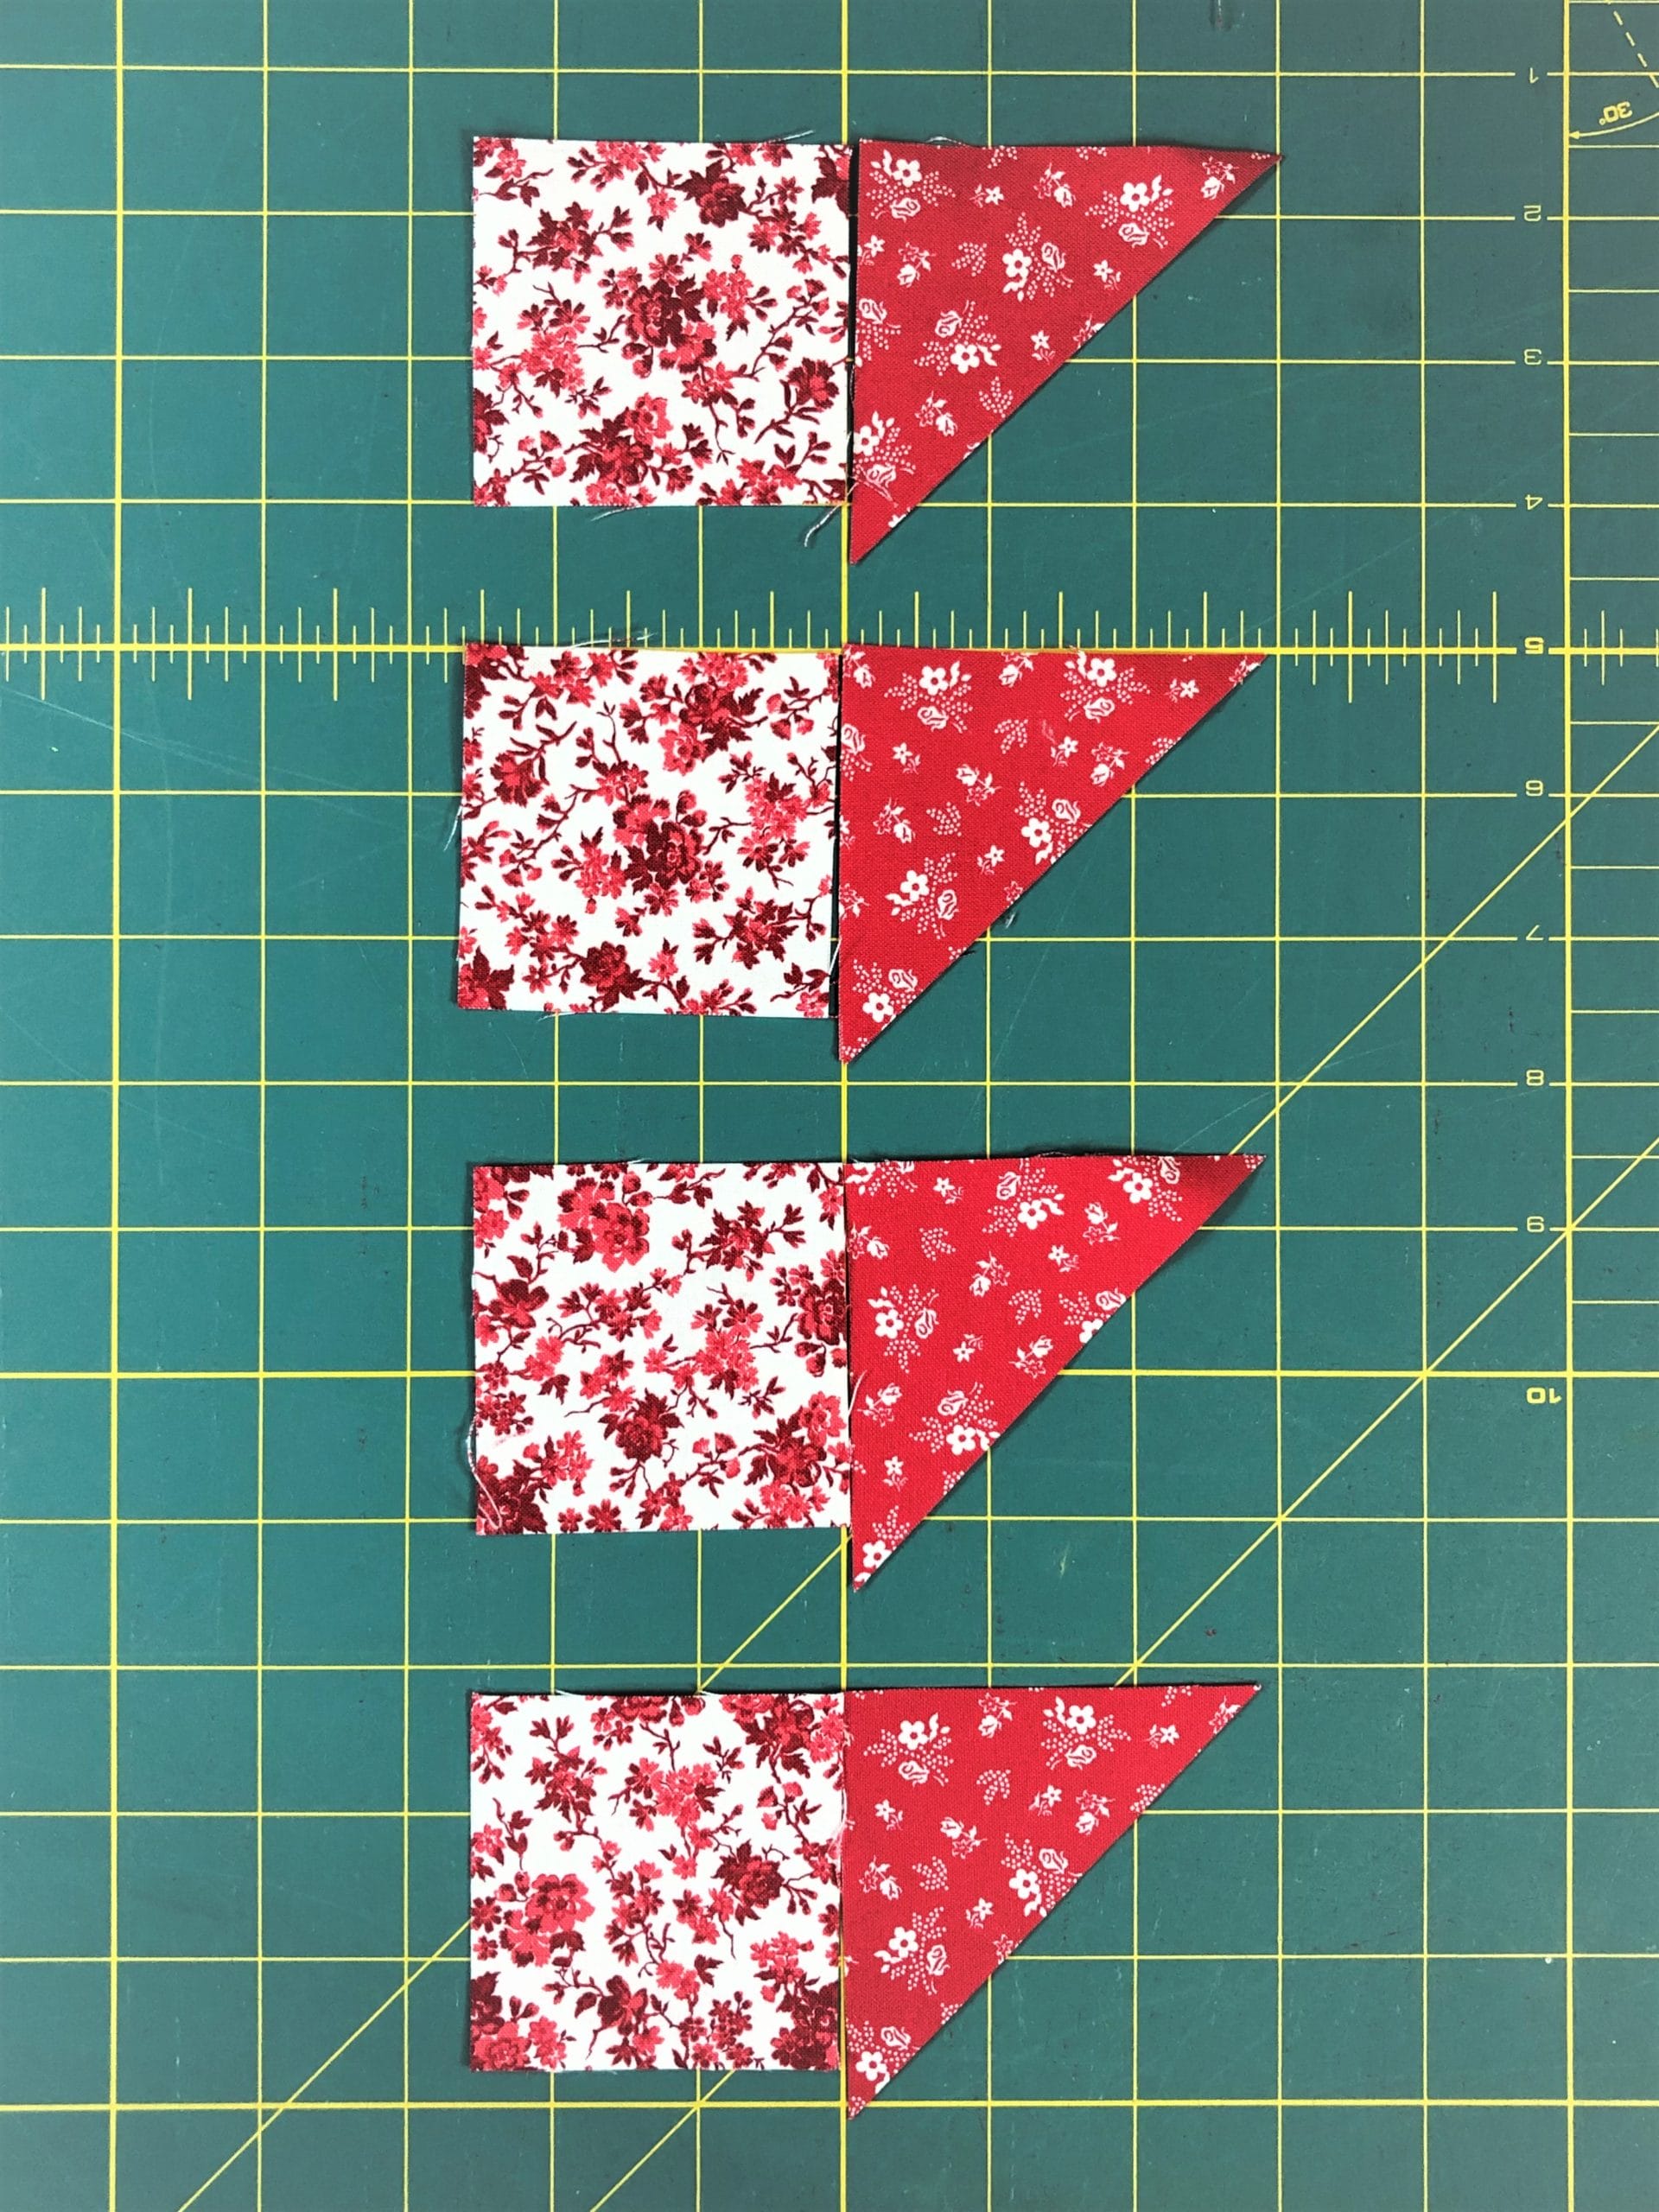
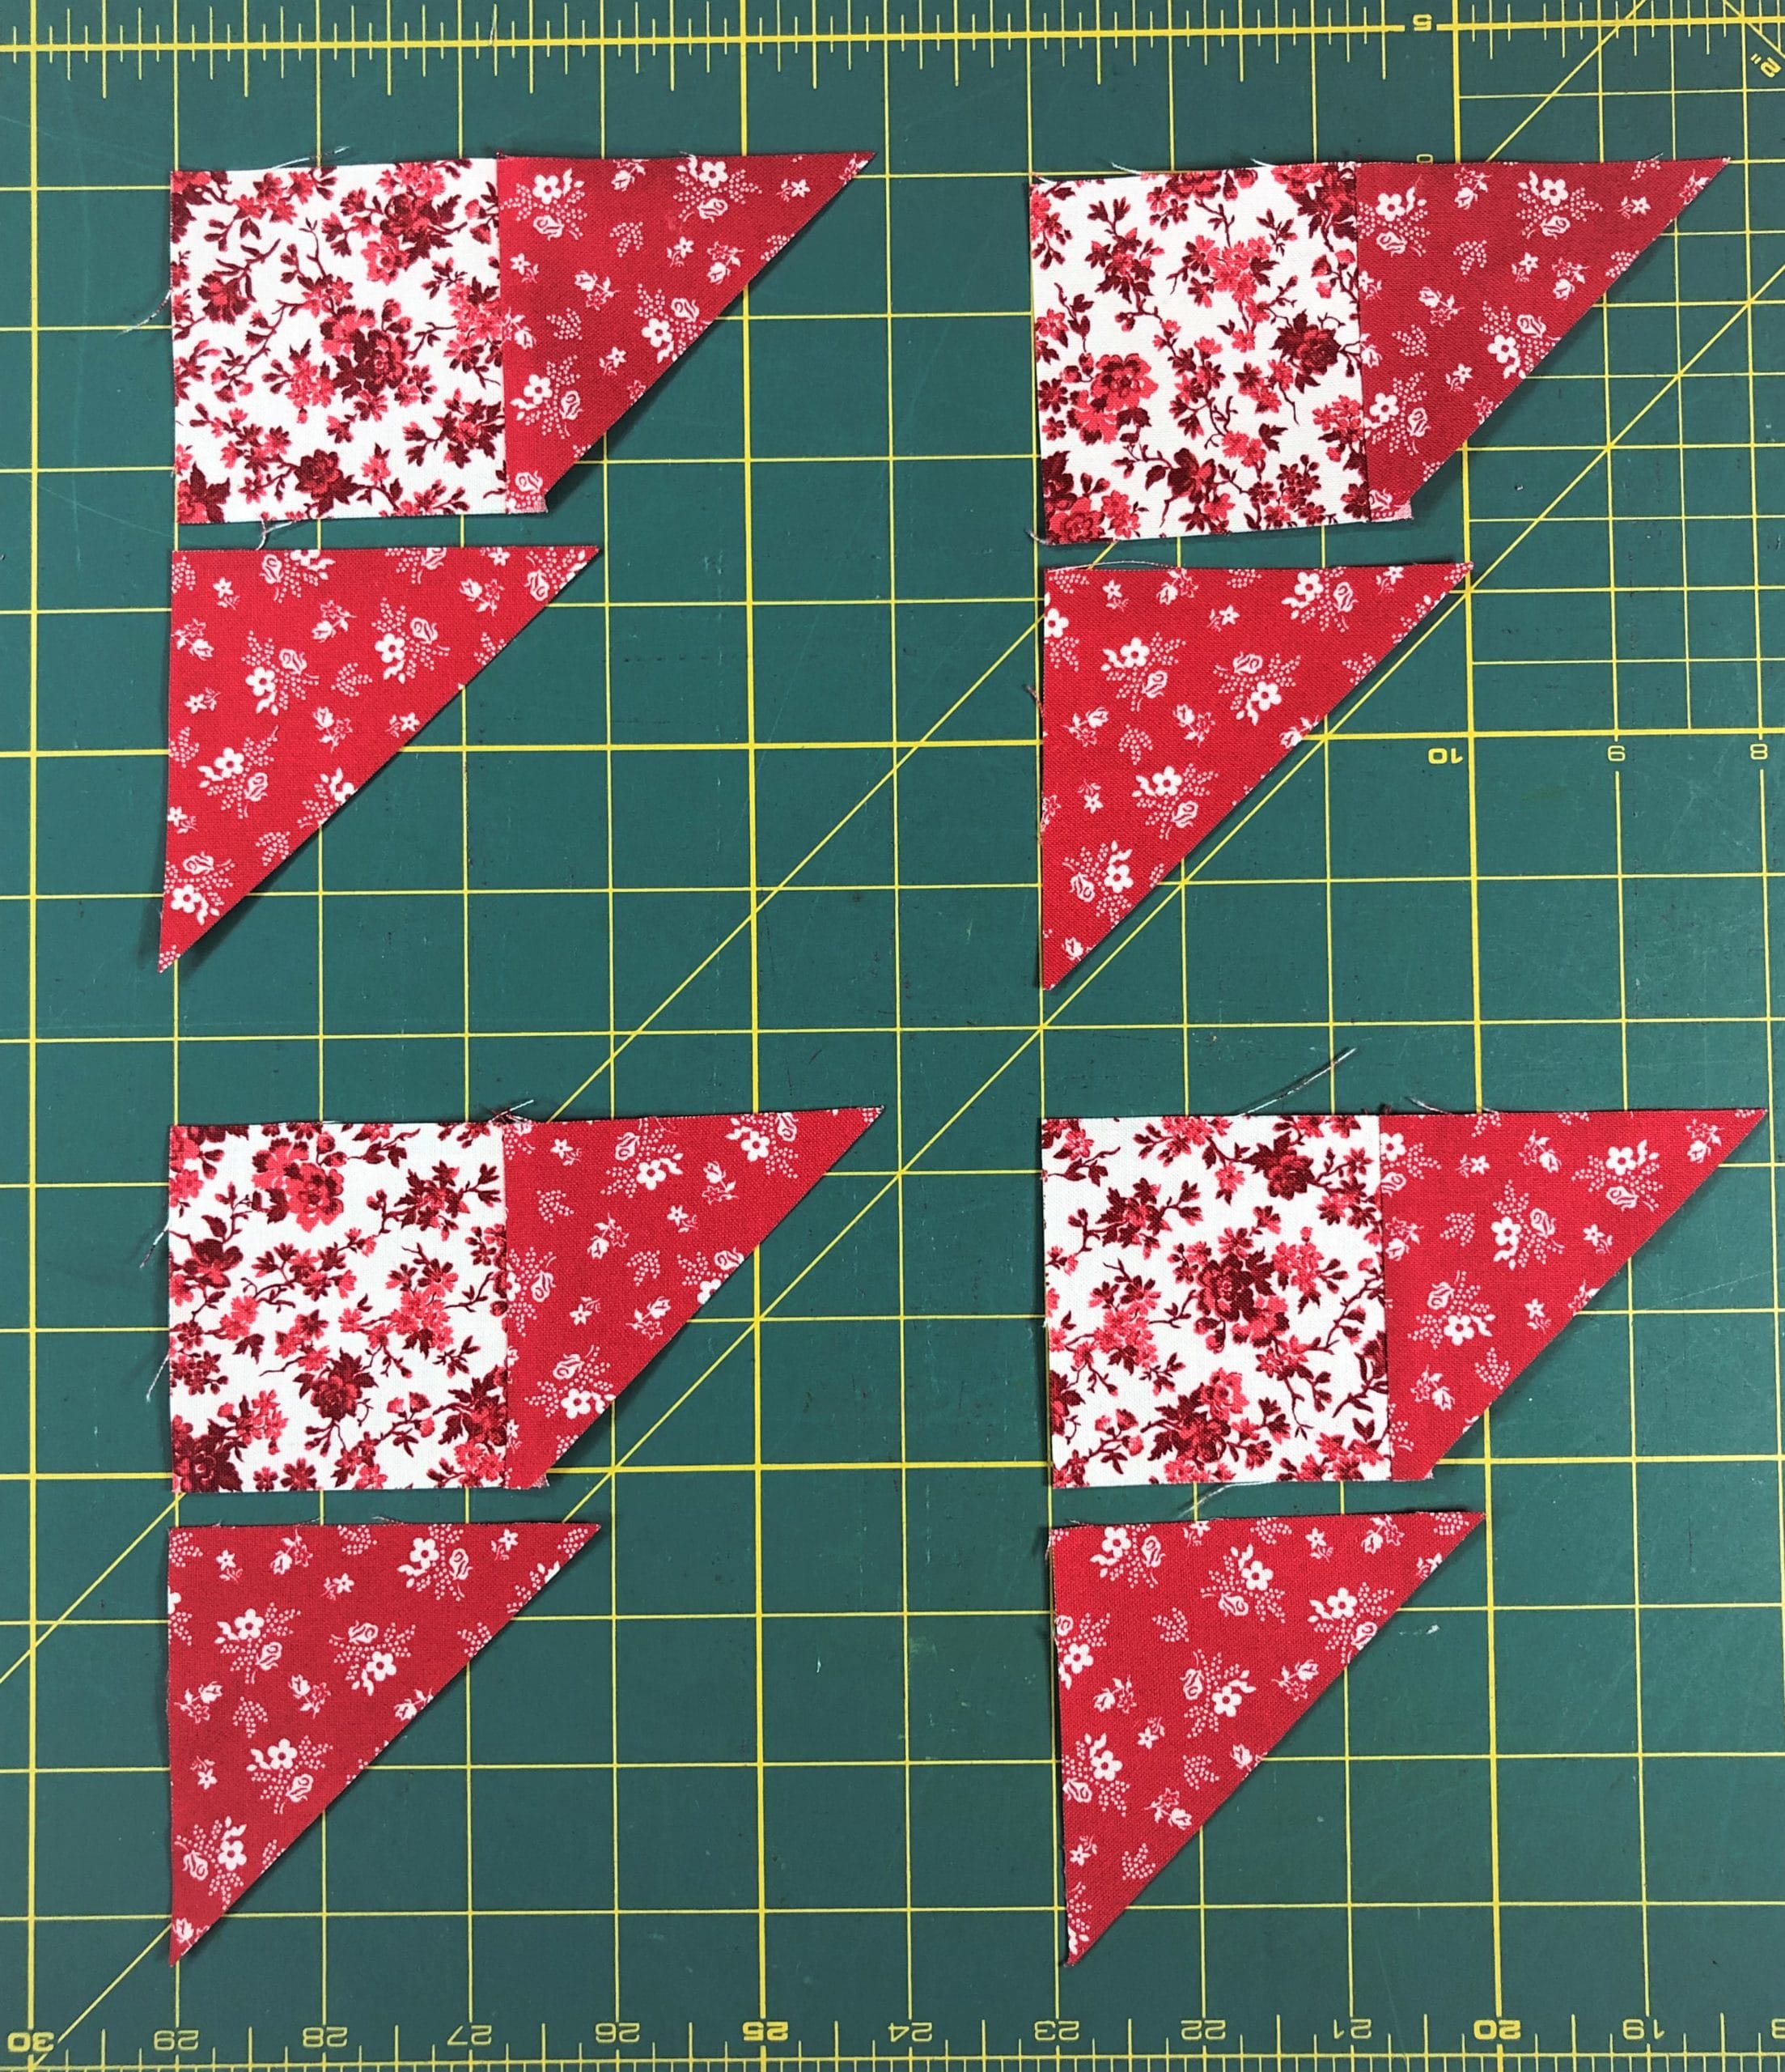
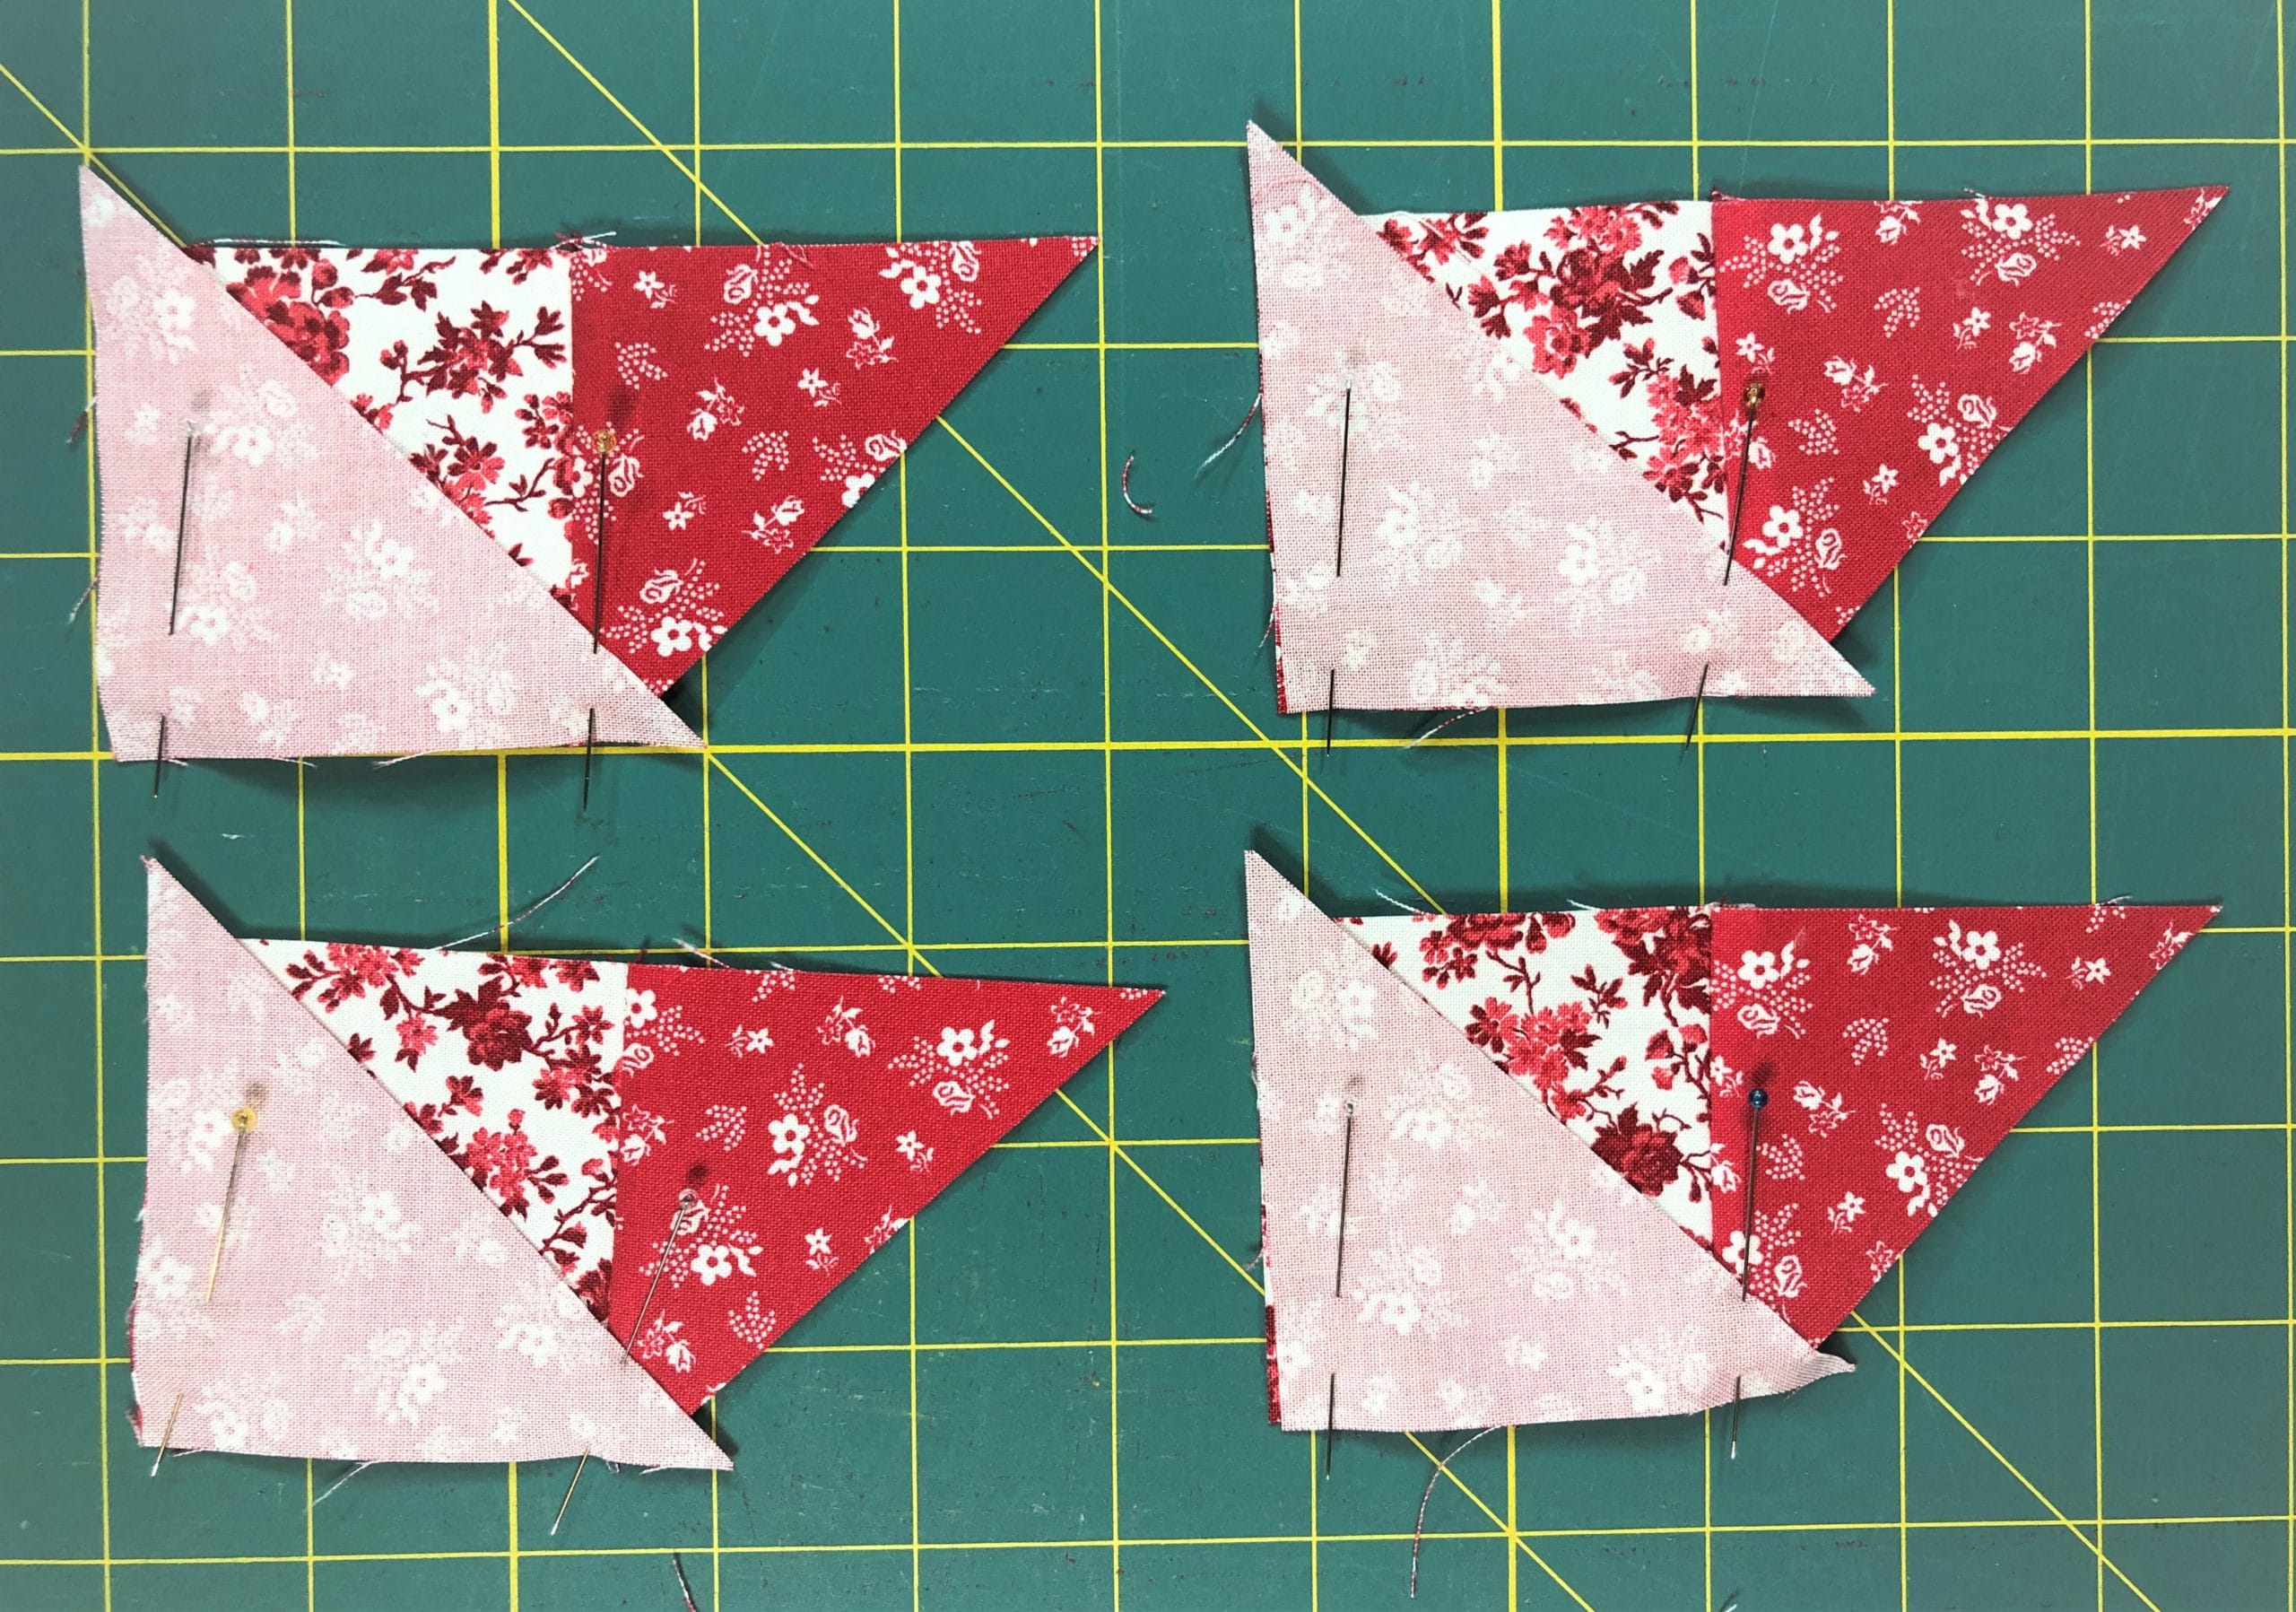
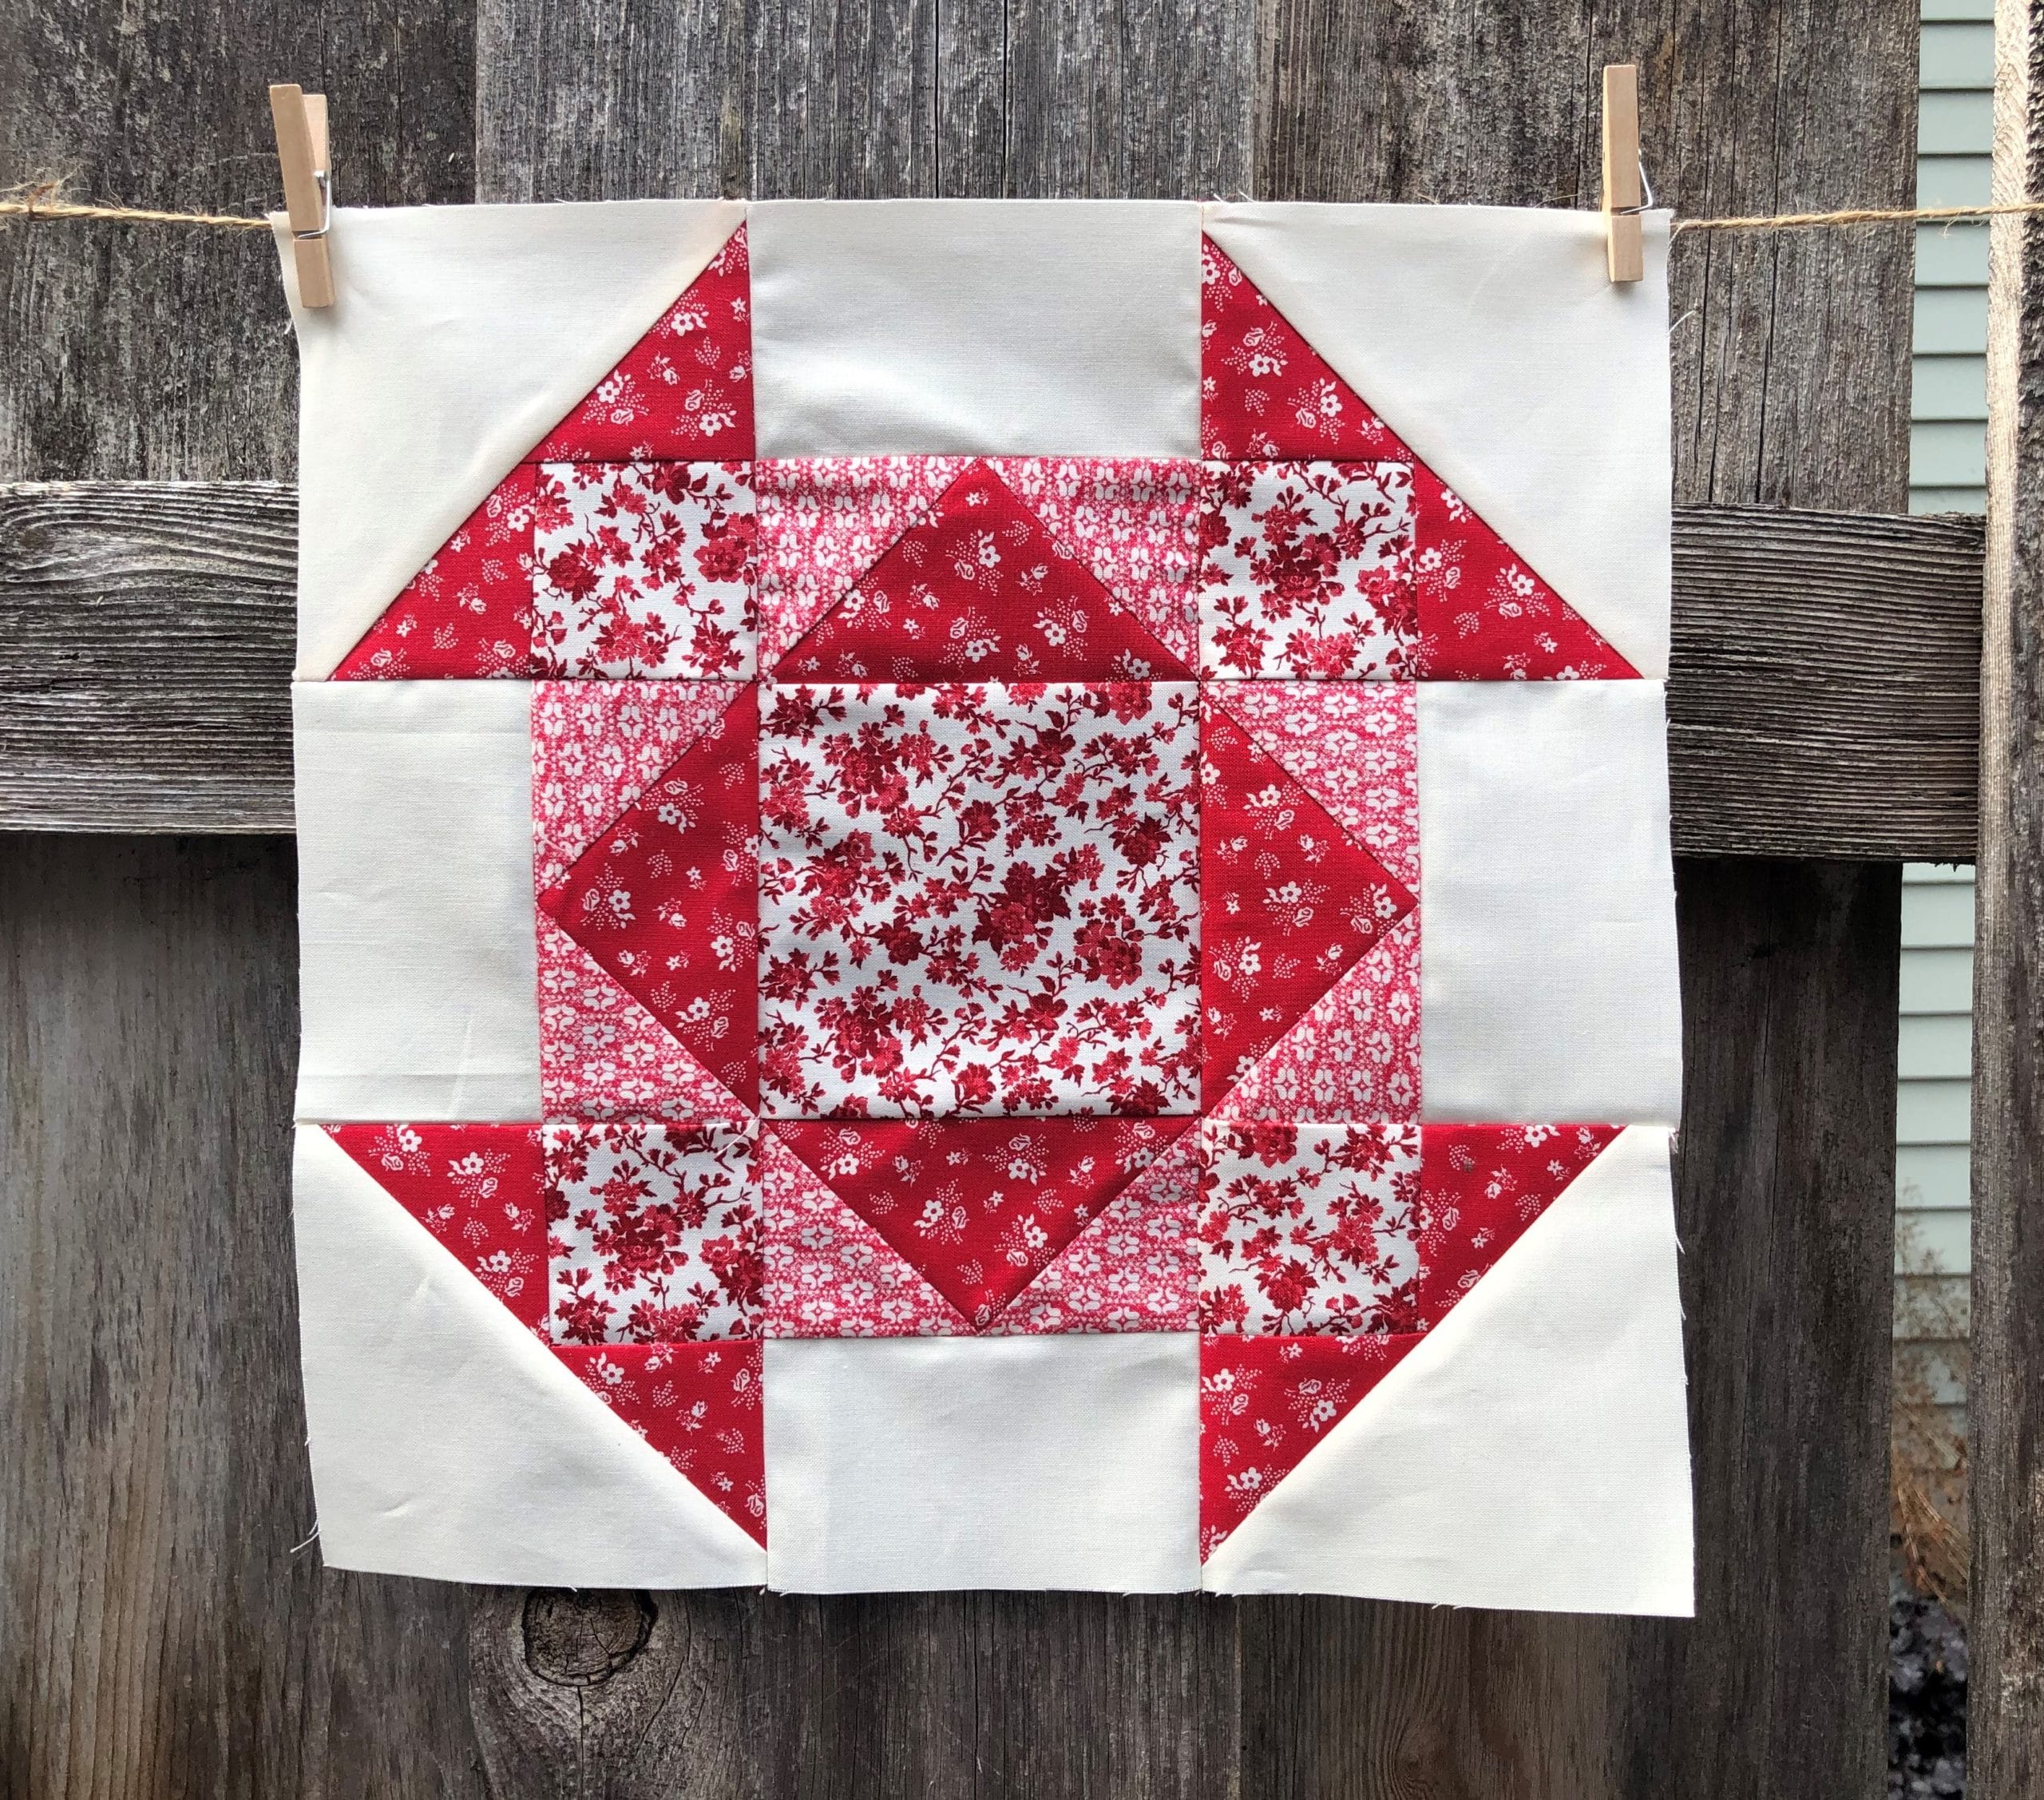
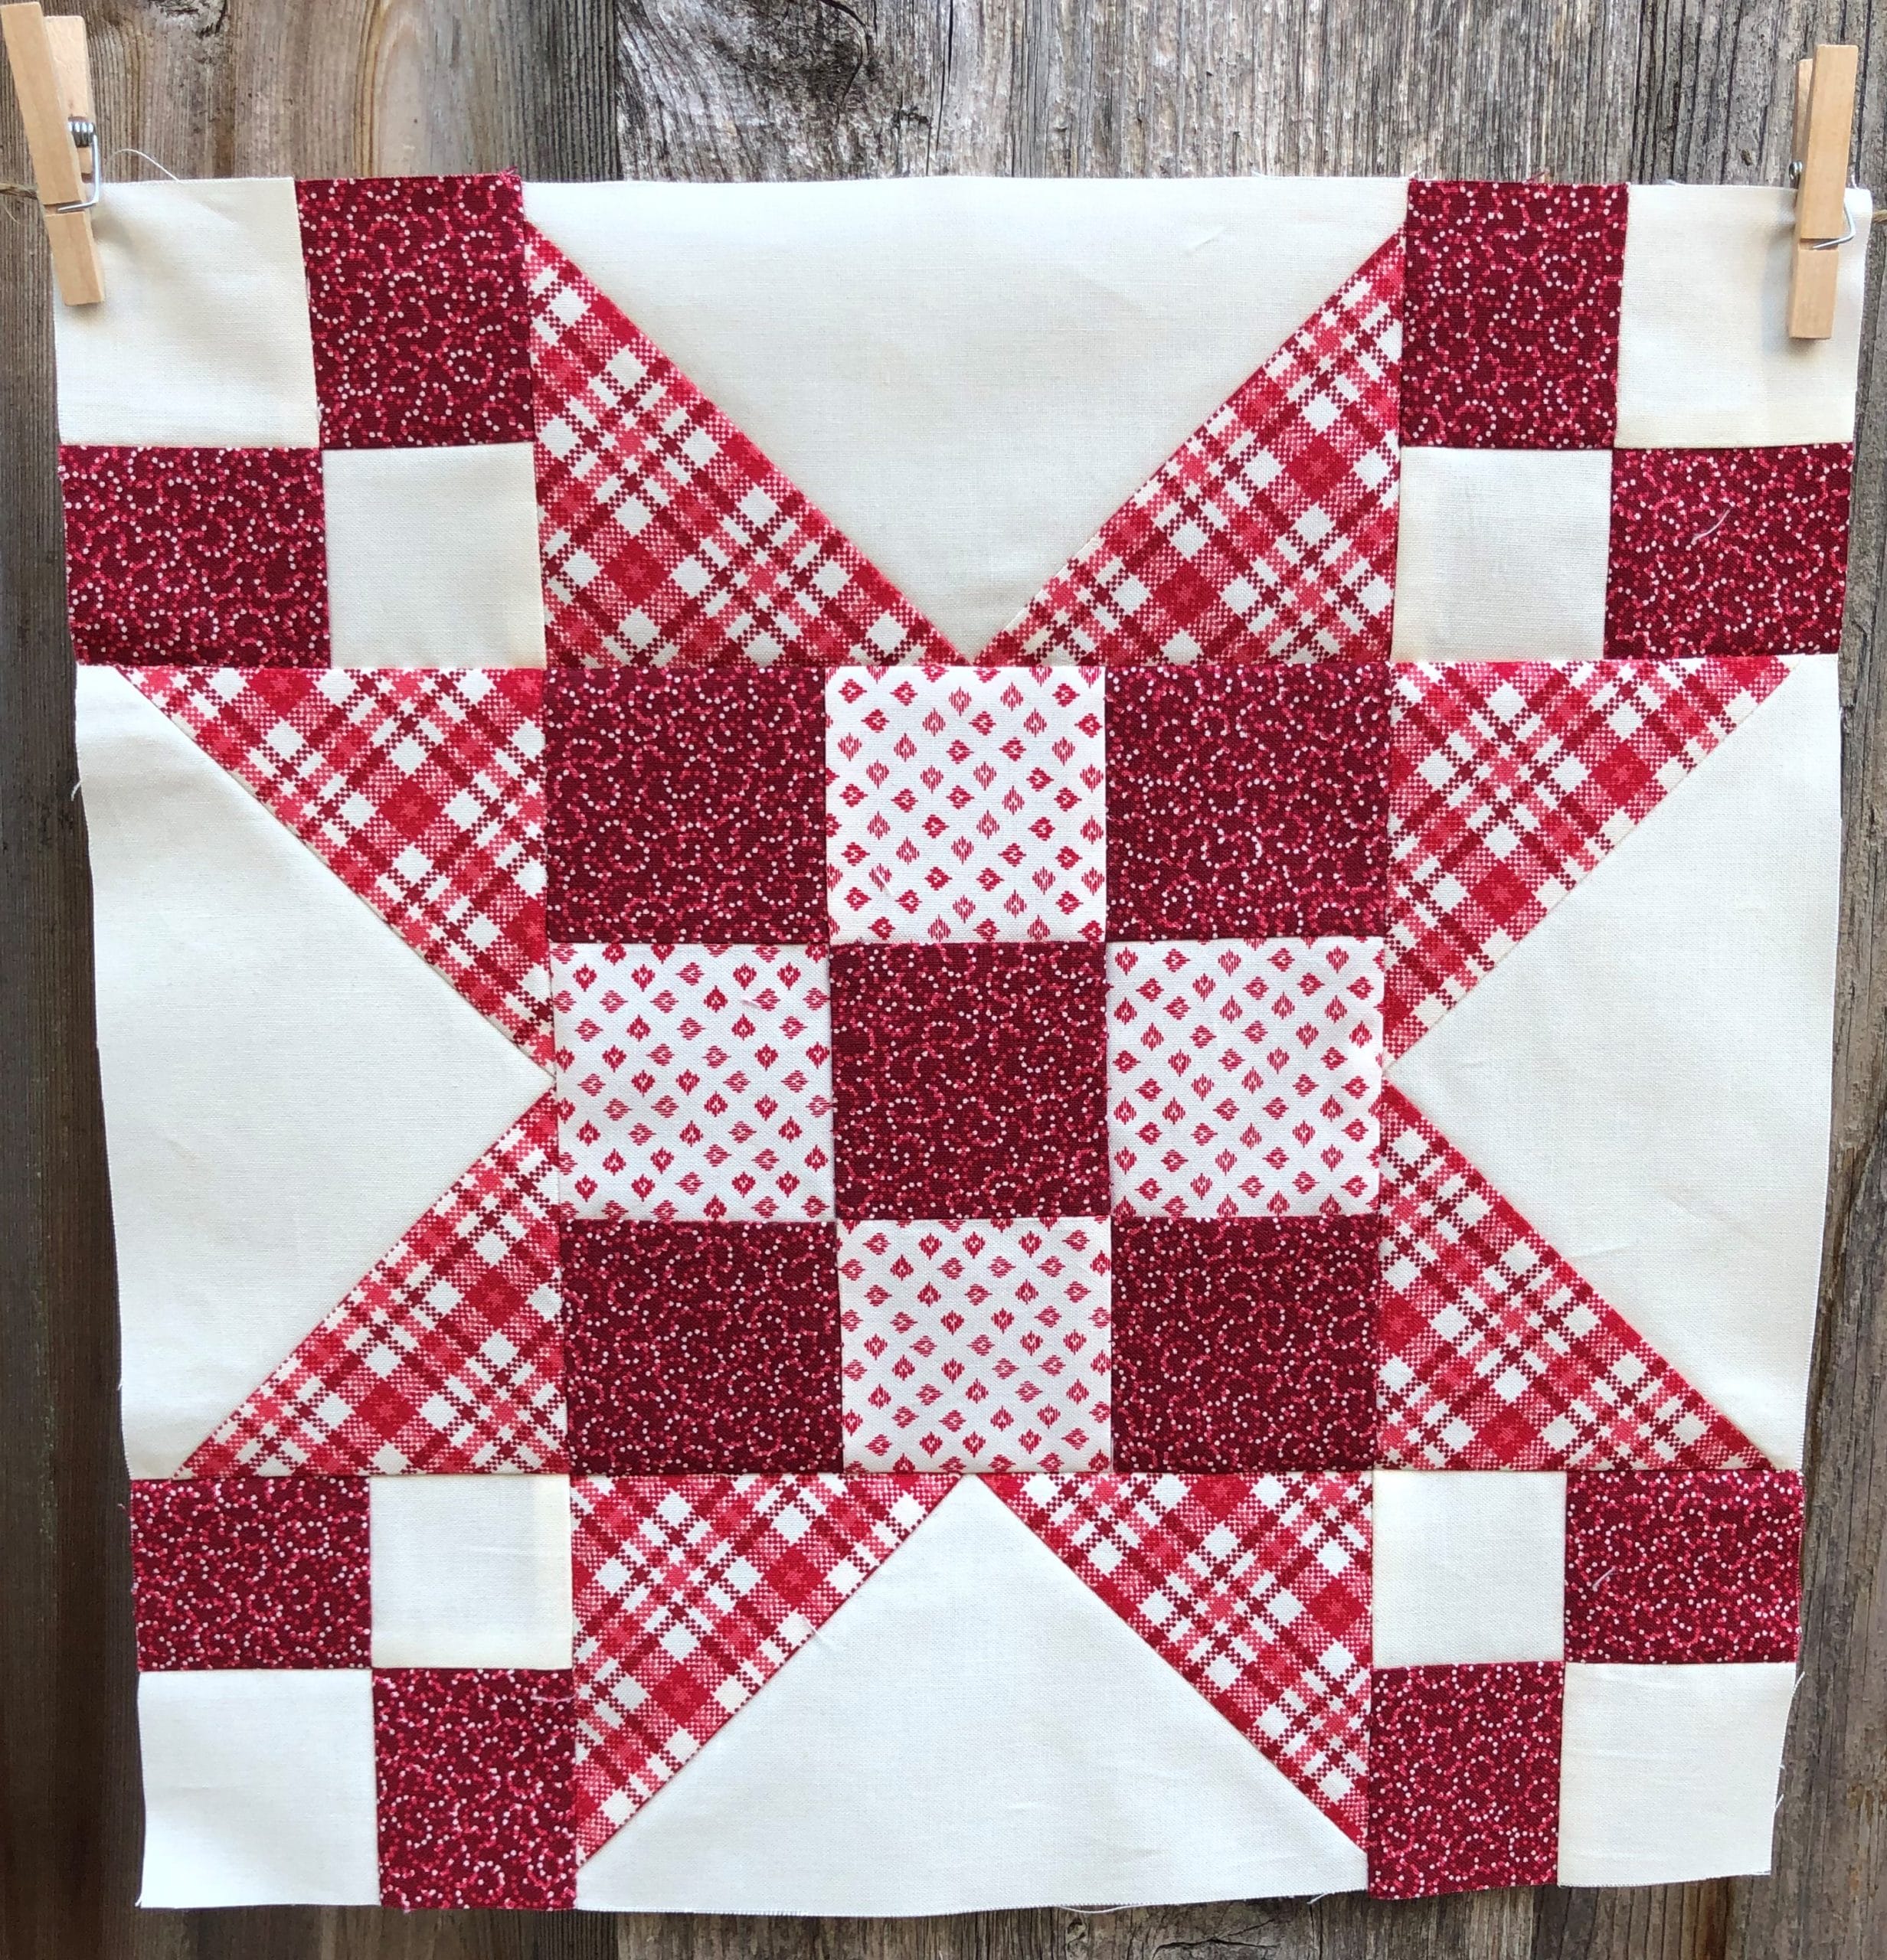
BLOCK 14
If any of you have made previous quilts of mine, you probably know that I LOVE the no-waste method for making flying geese. I think mostly because it bothers me to cut those triangles off with the traditional method and throw them away. I know there are those super talented quilters who can magically come up with something amazing out of those tiny triangles, but I’m not one of them. I used to always save them, thinking that someday I would create a masterpiece, but I would inevitably throw them away sometime later, always feeling a bit guilty. Dumb, I know, but using the no-waste method I don’t have any guilt haha!
Below are some photographs of steps 1 and 2 for block 14, just so you can see what this looks like in ‘real life’.
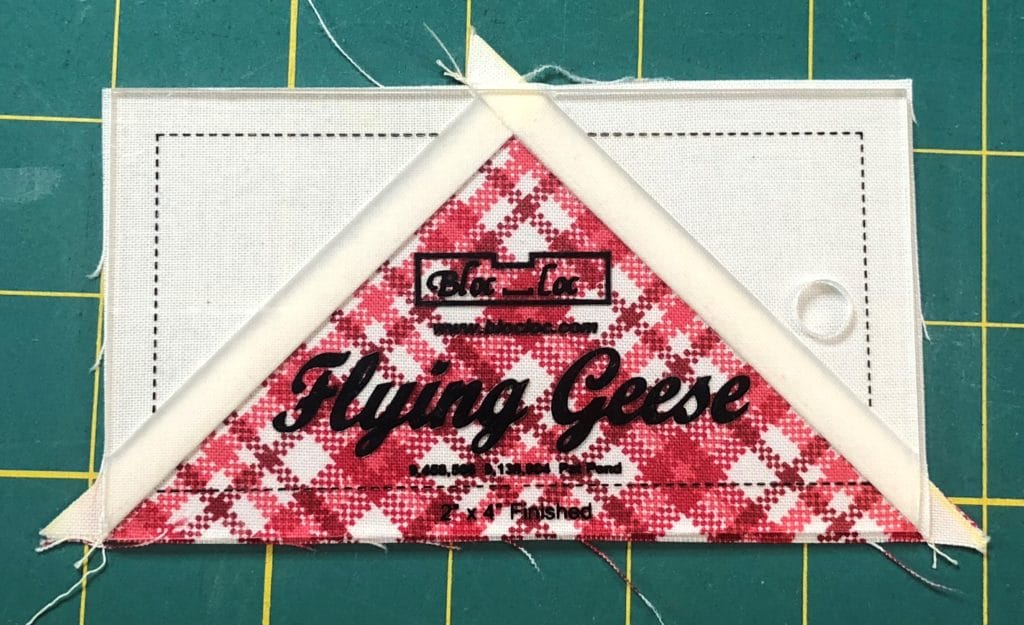
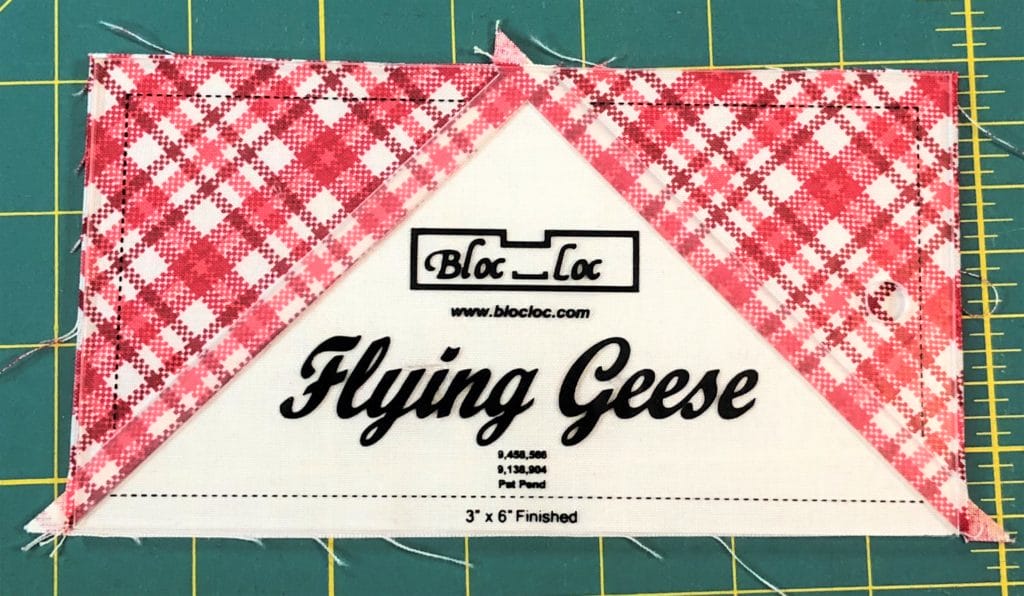
When I’m all done pressing my flying geese, they always need a good trim, and I use the Bloc-Loc flying geese tool to square up my units. This is another tool that is entirely optional. They aren’t cheap but I really like how all my flying geese end up absolutely perfect when I use this to trim them.
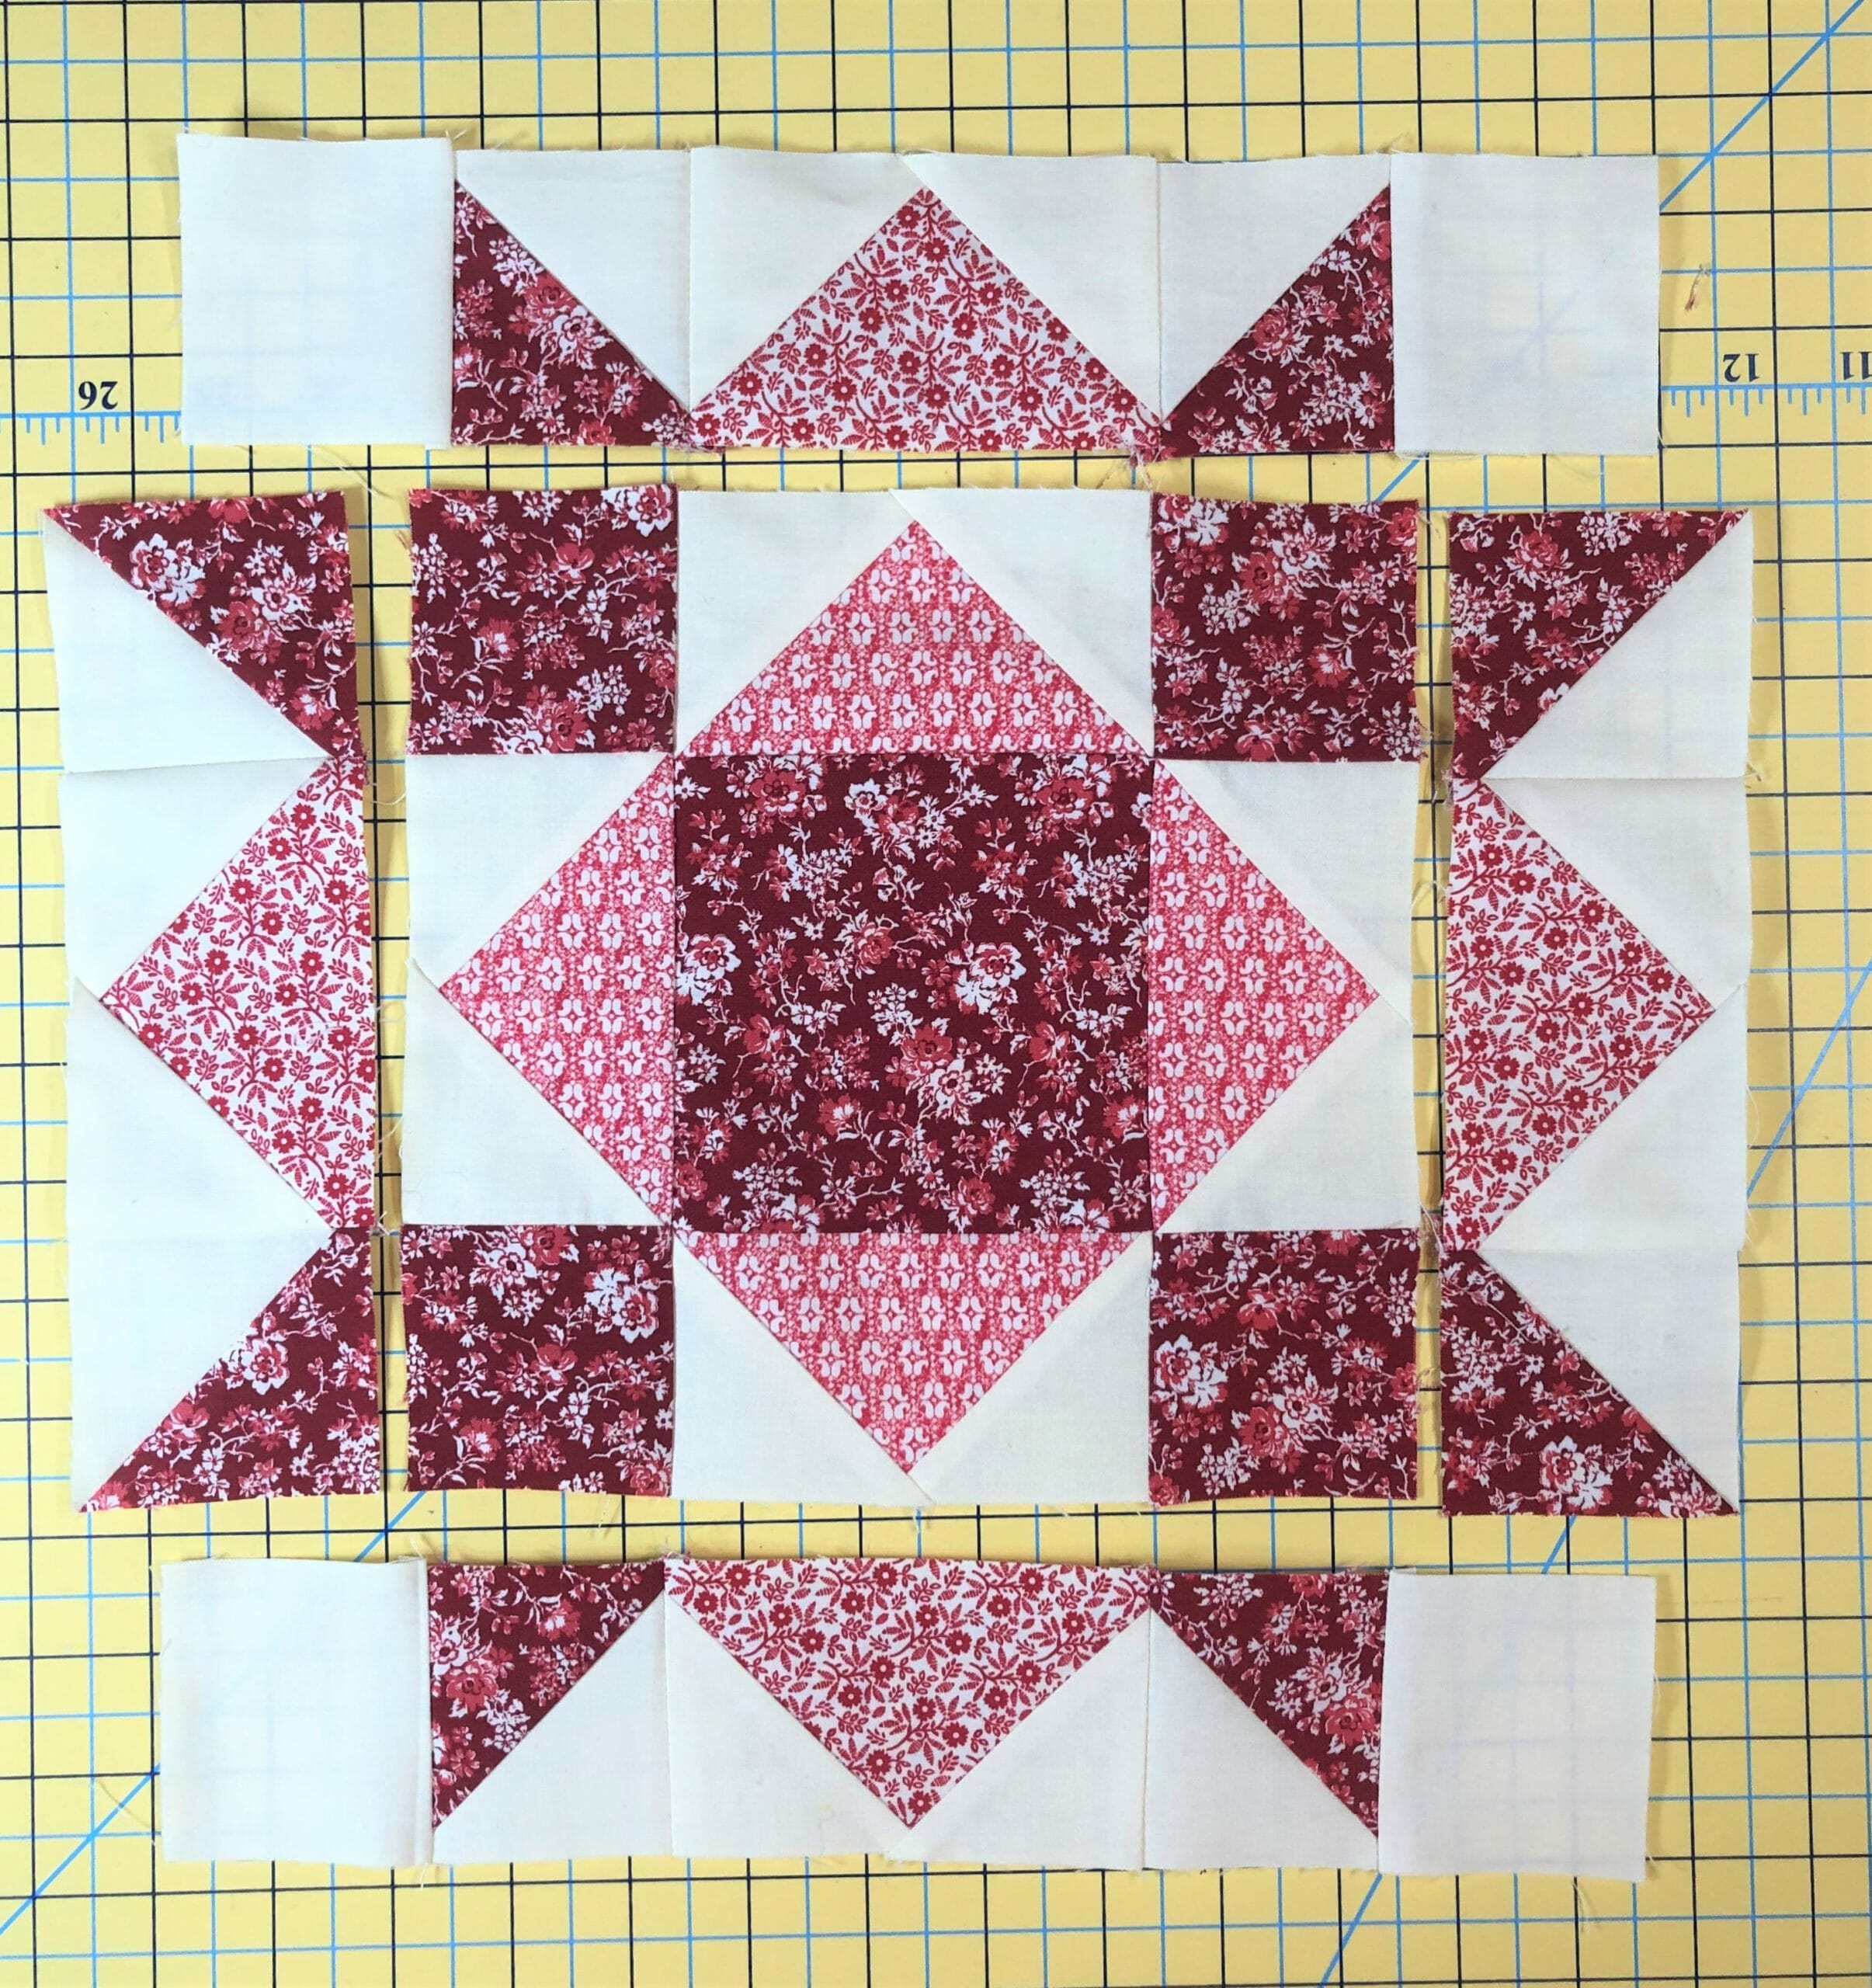
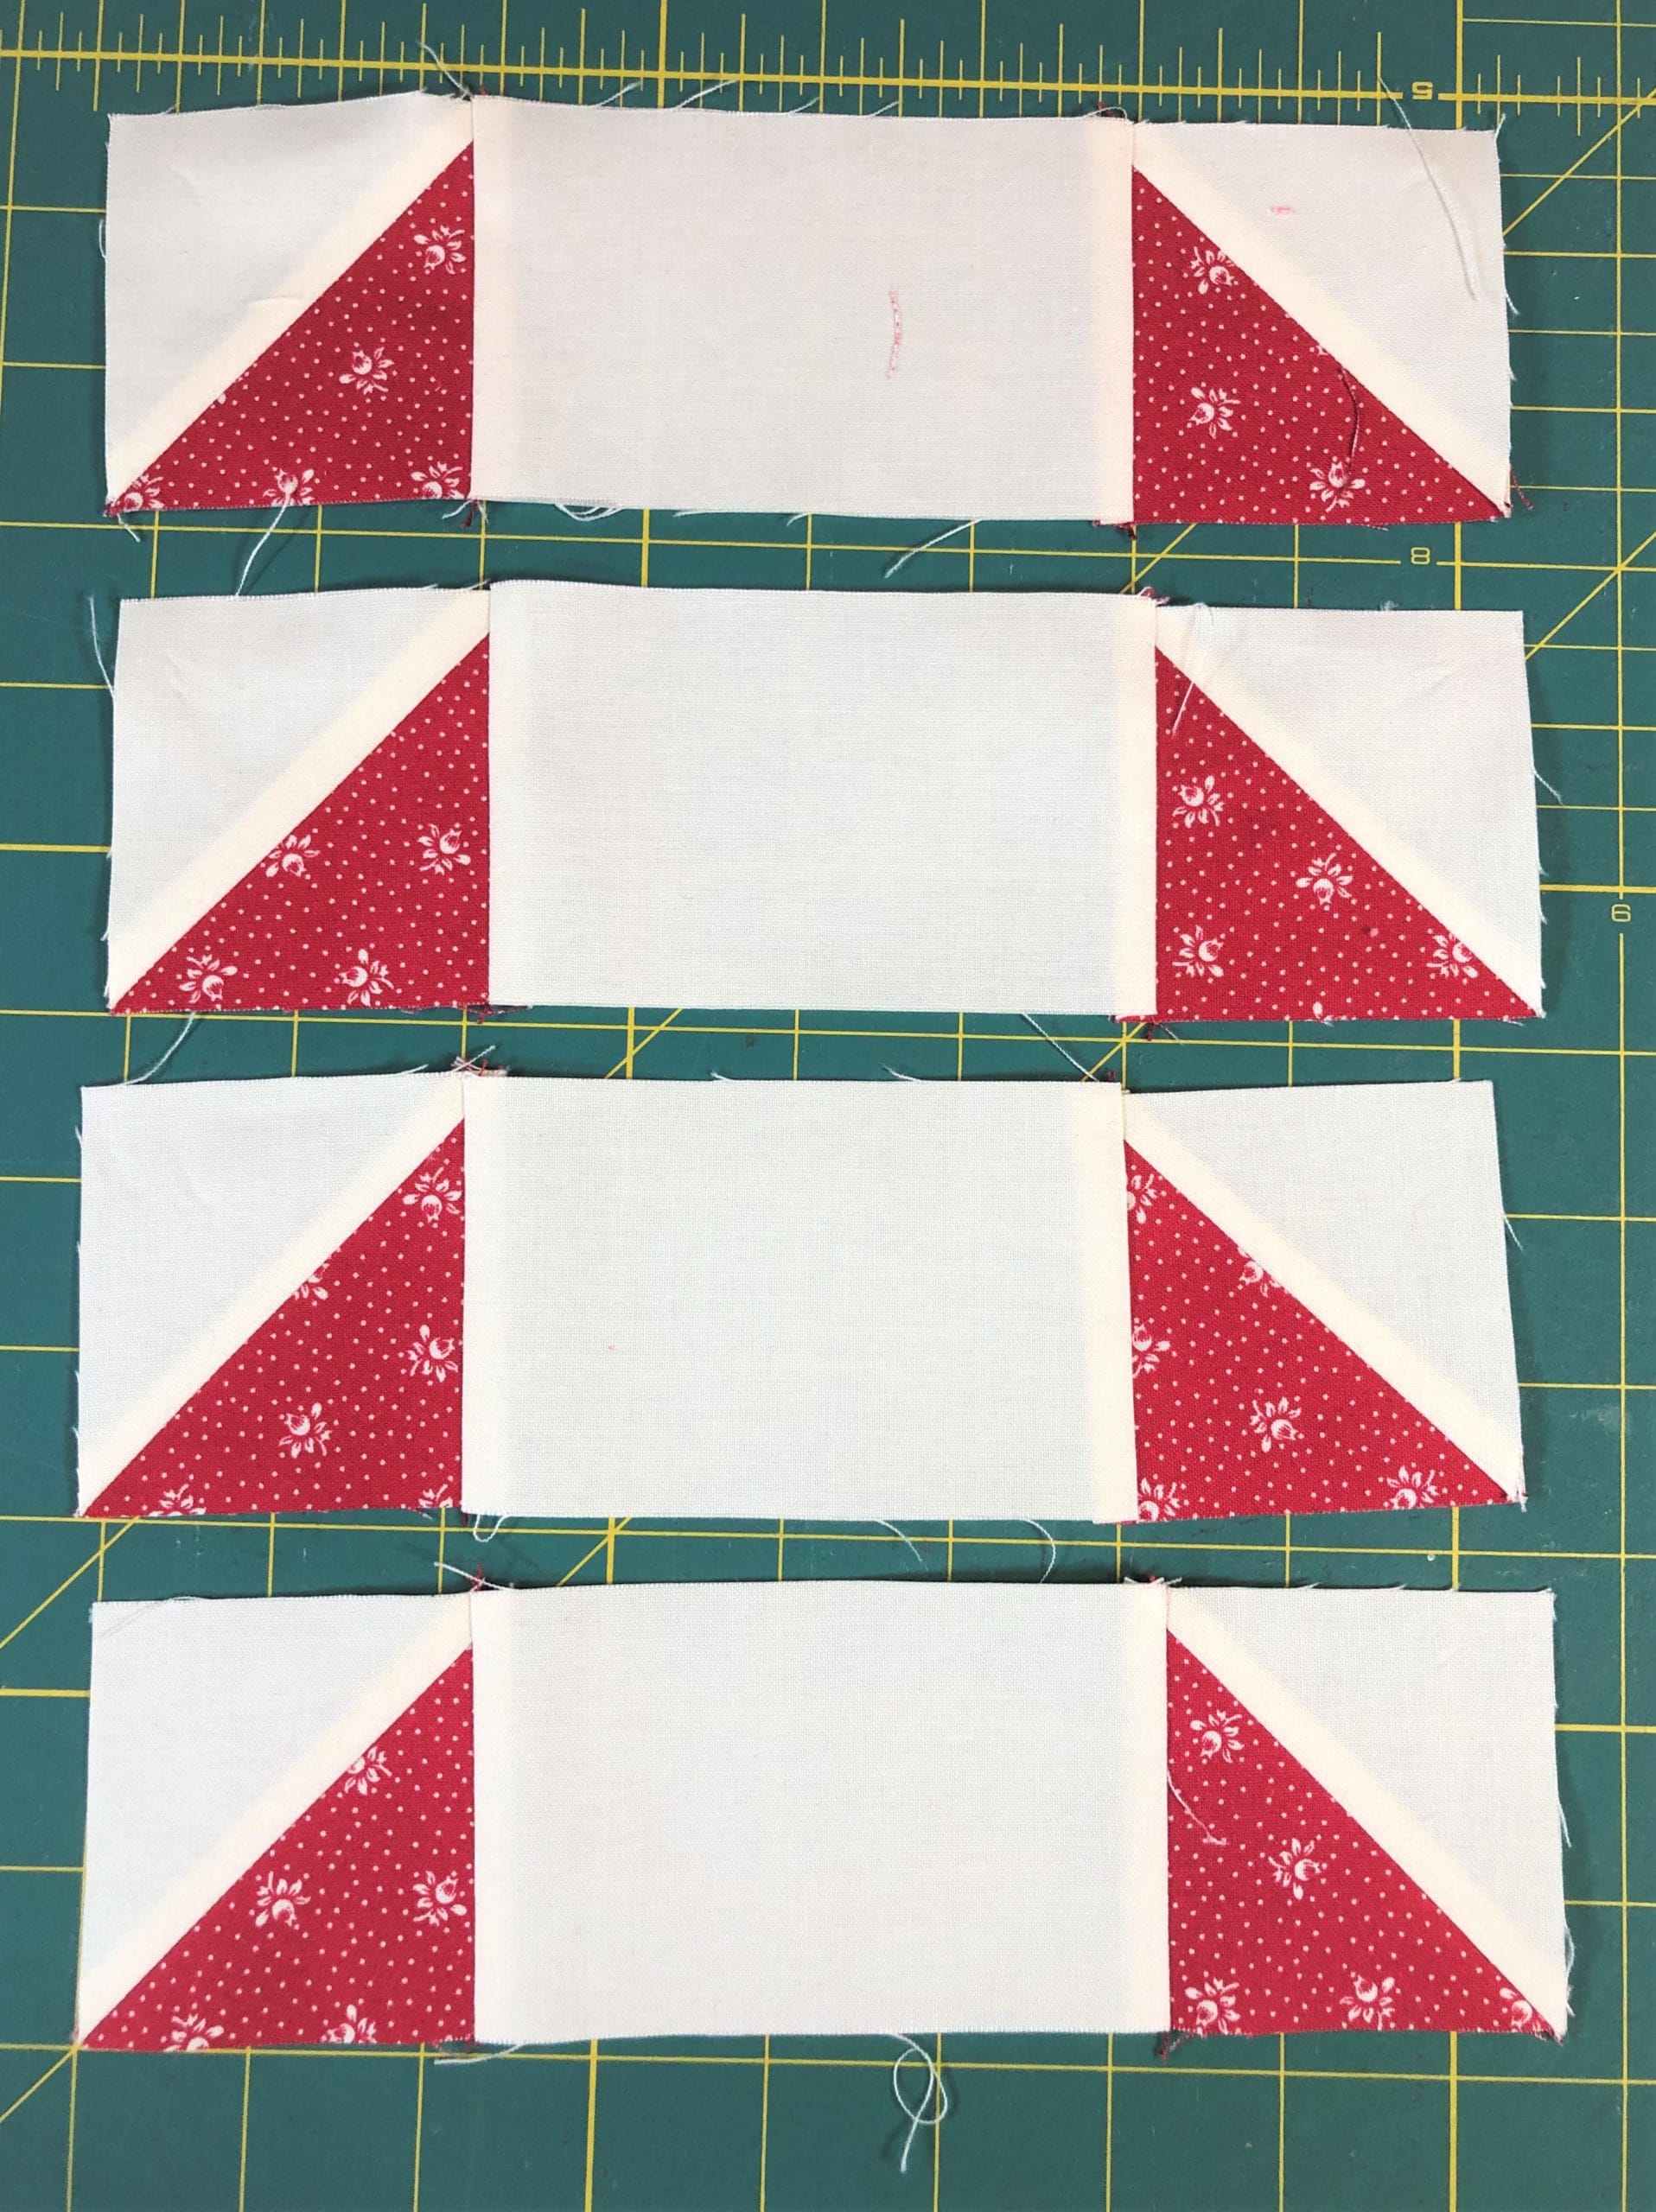
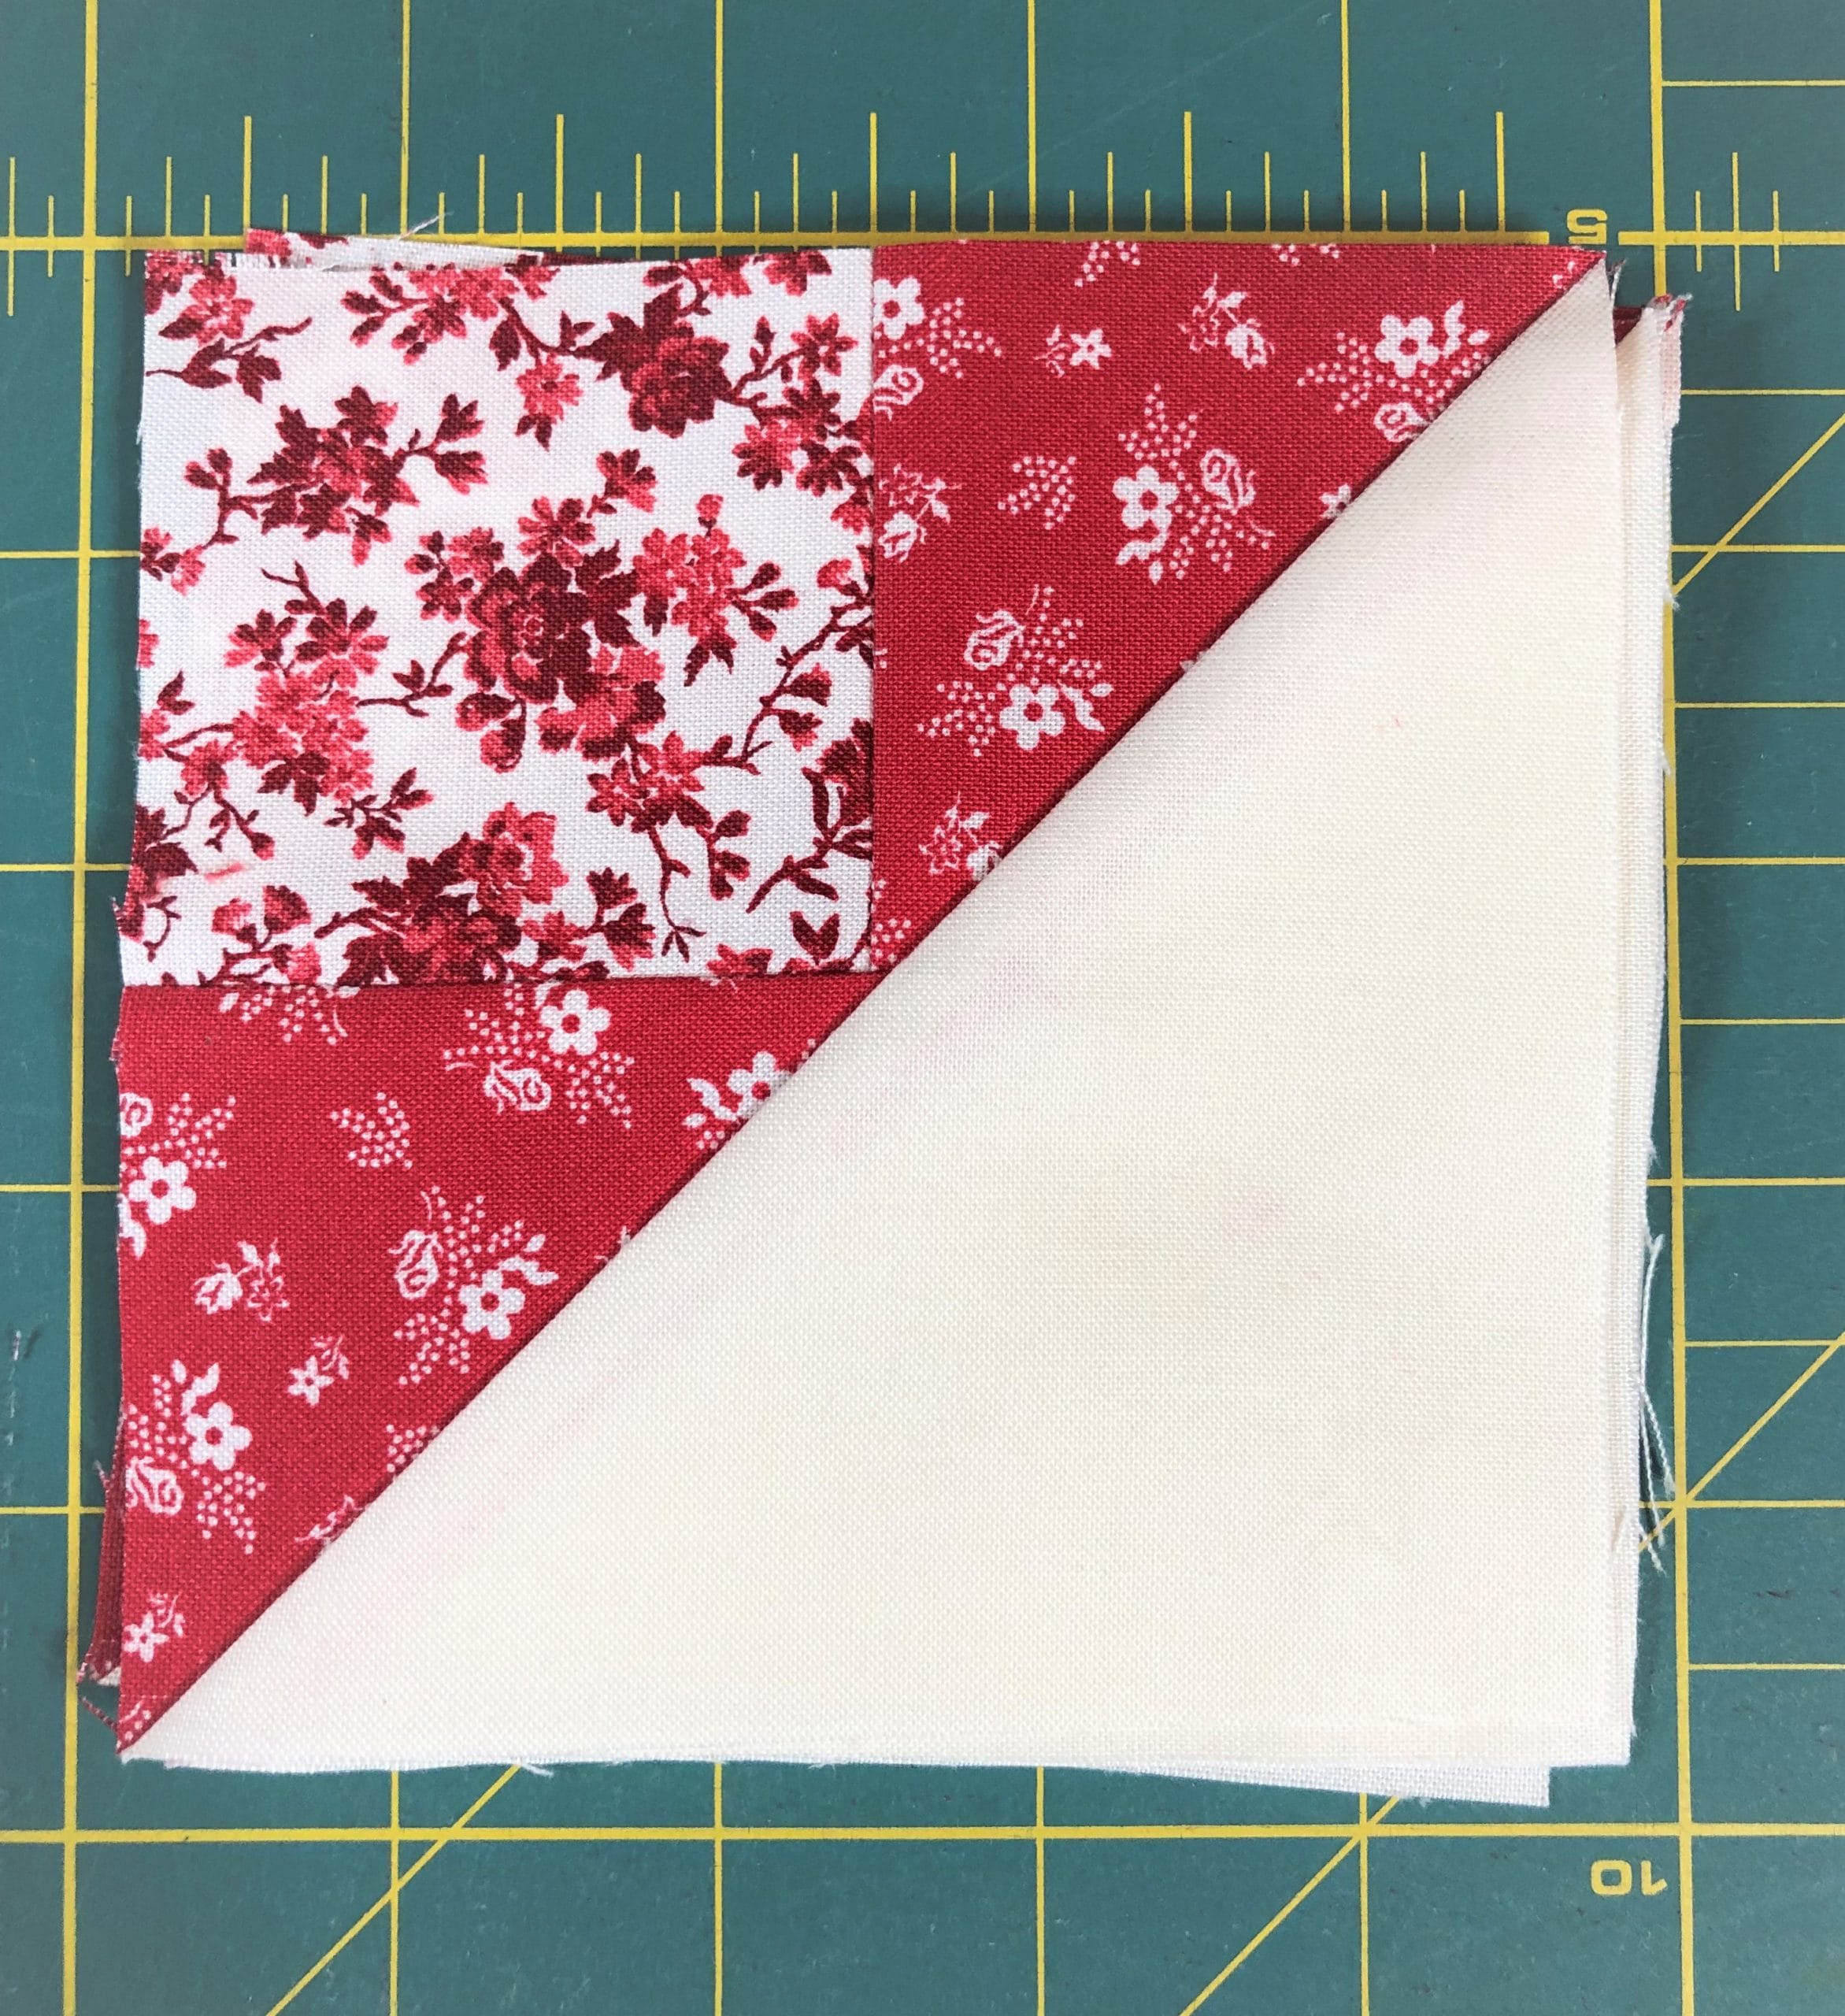
After making the first set of flying geese, you’ll attach them to the A square, along with the B squares, to make the center portion of the block.
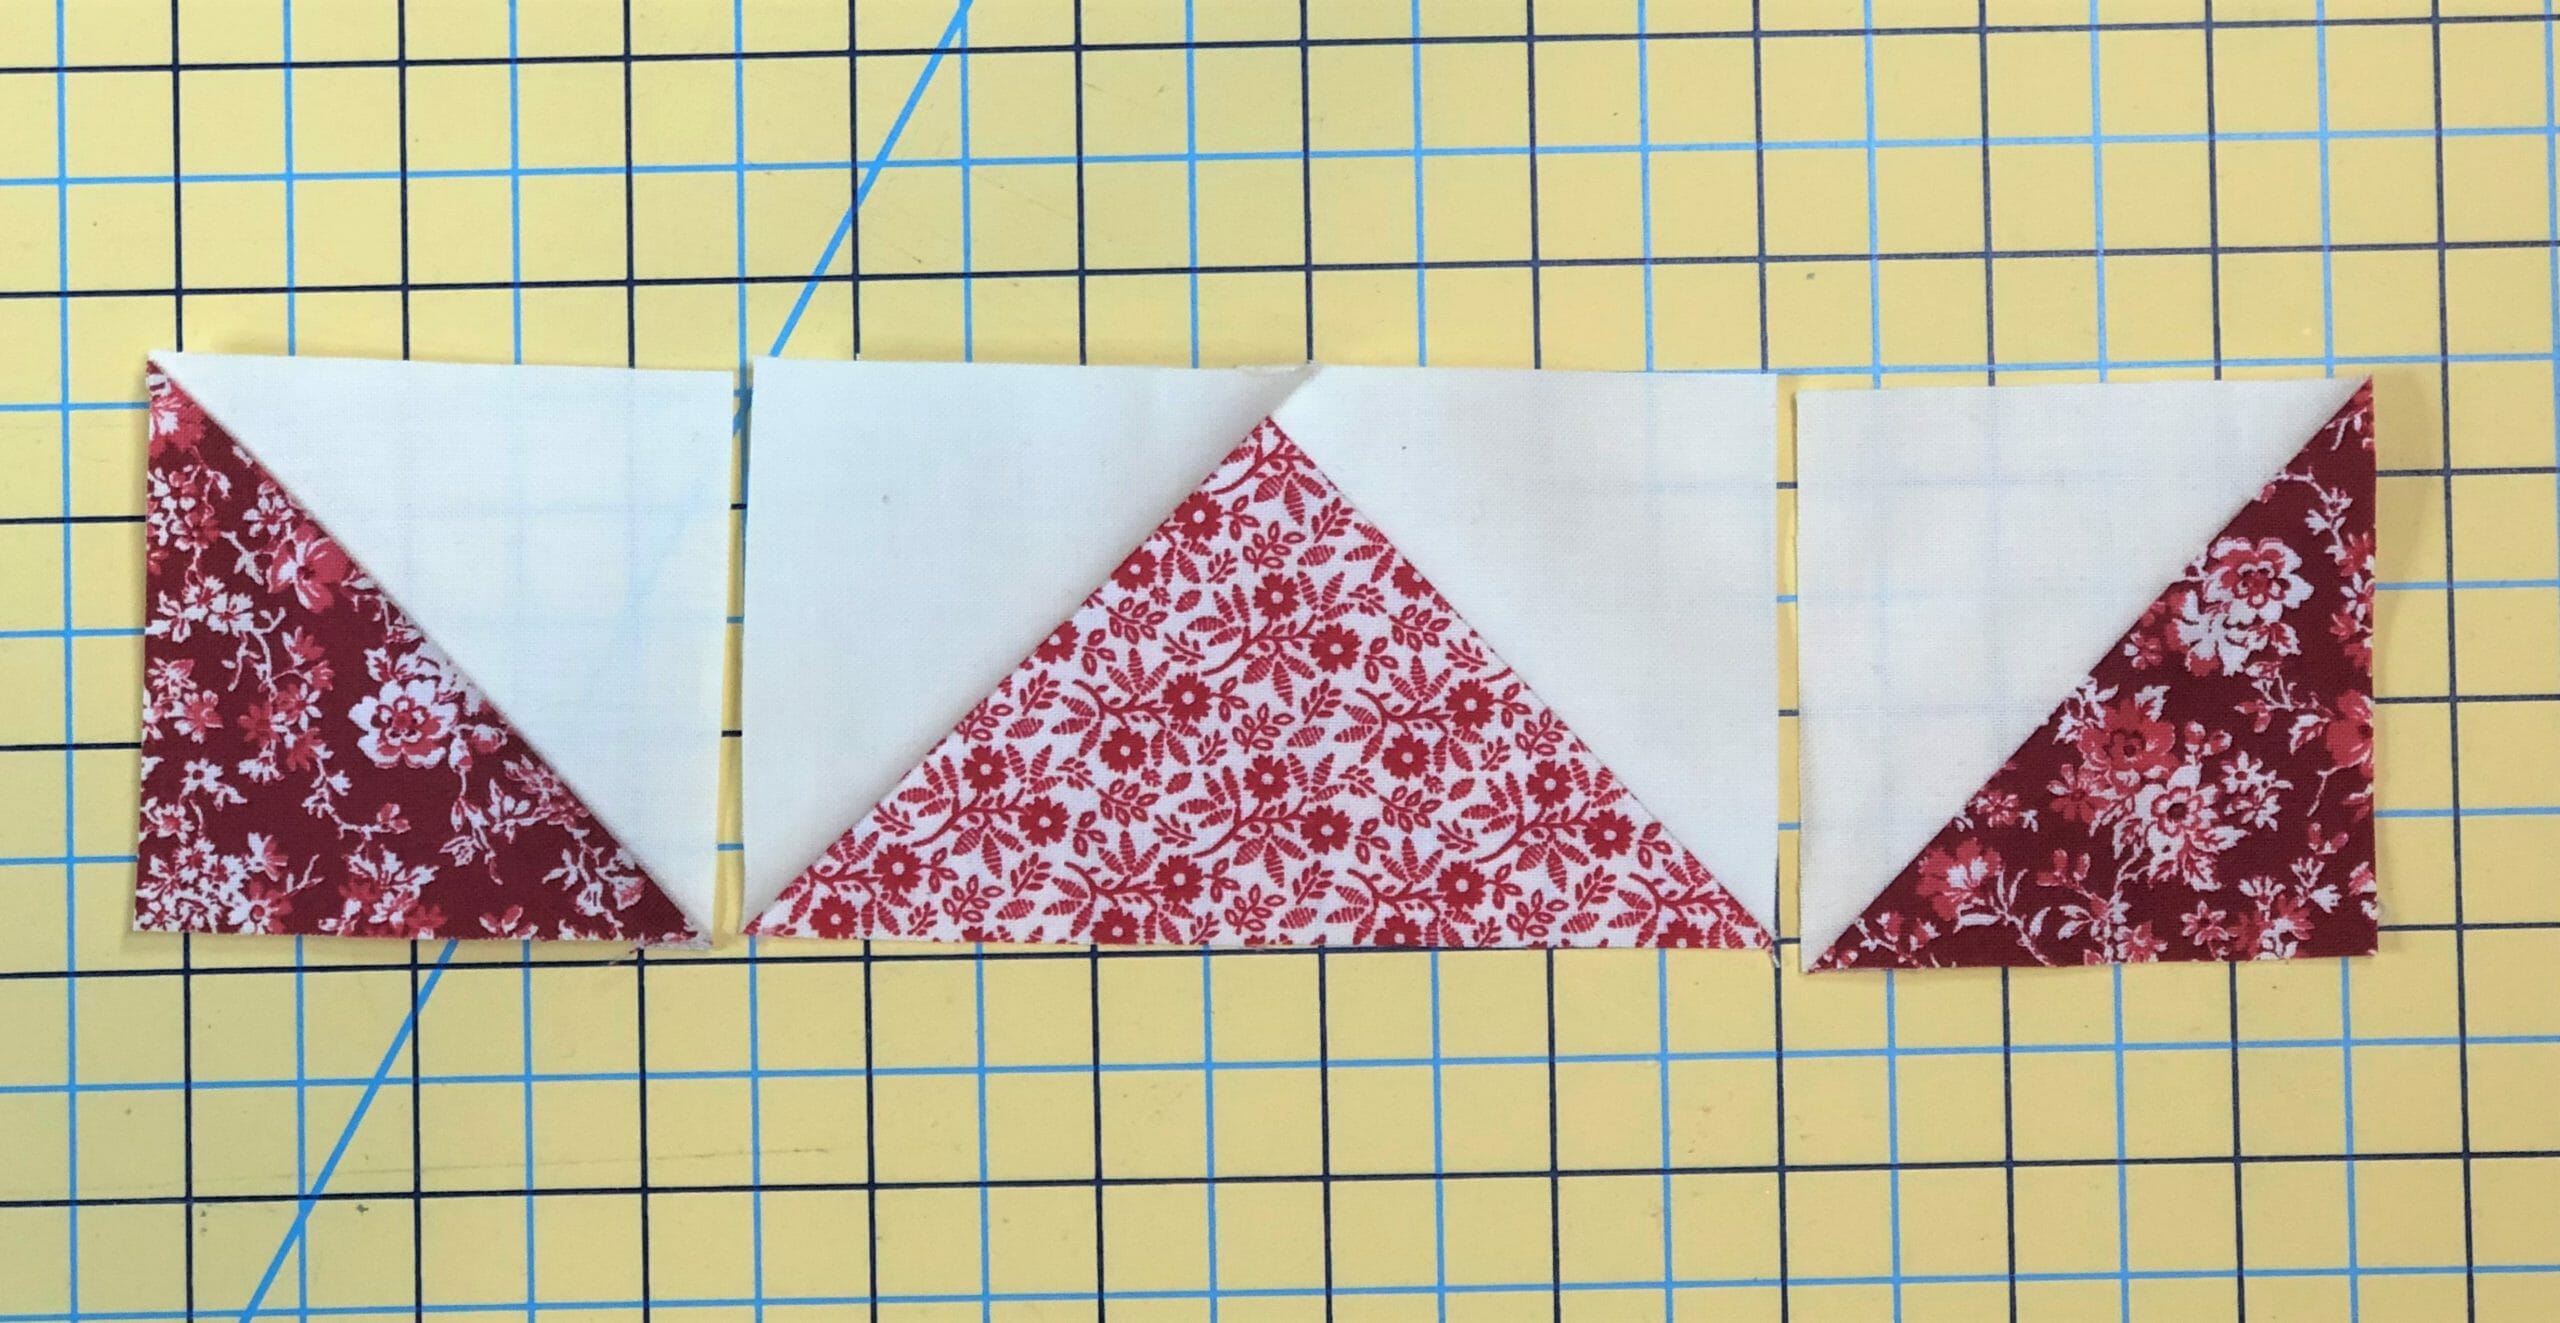
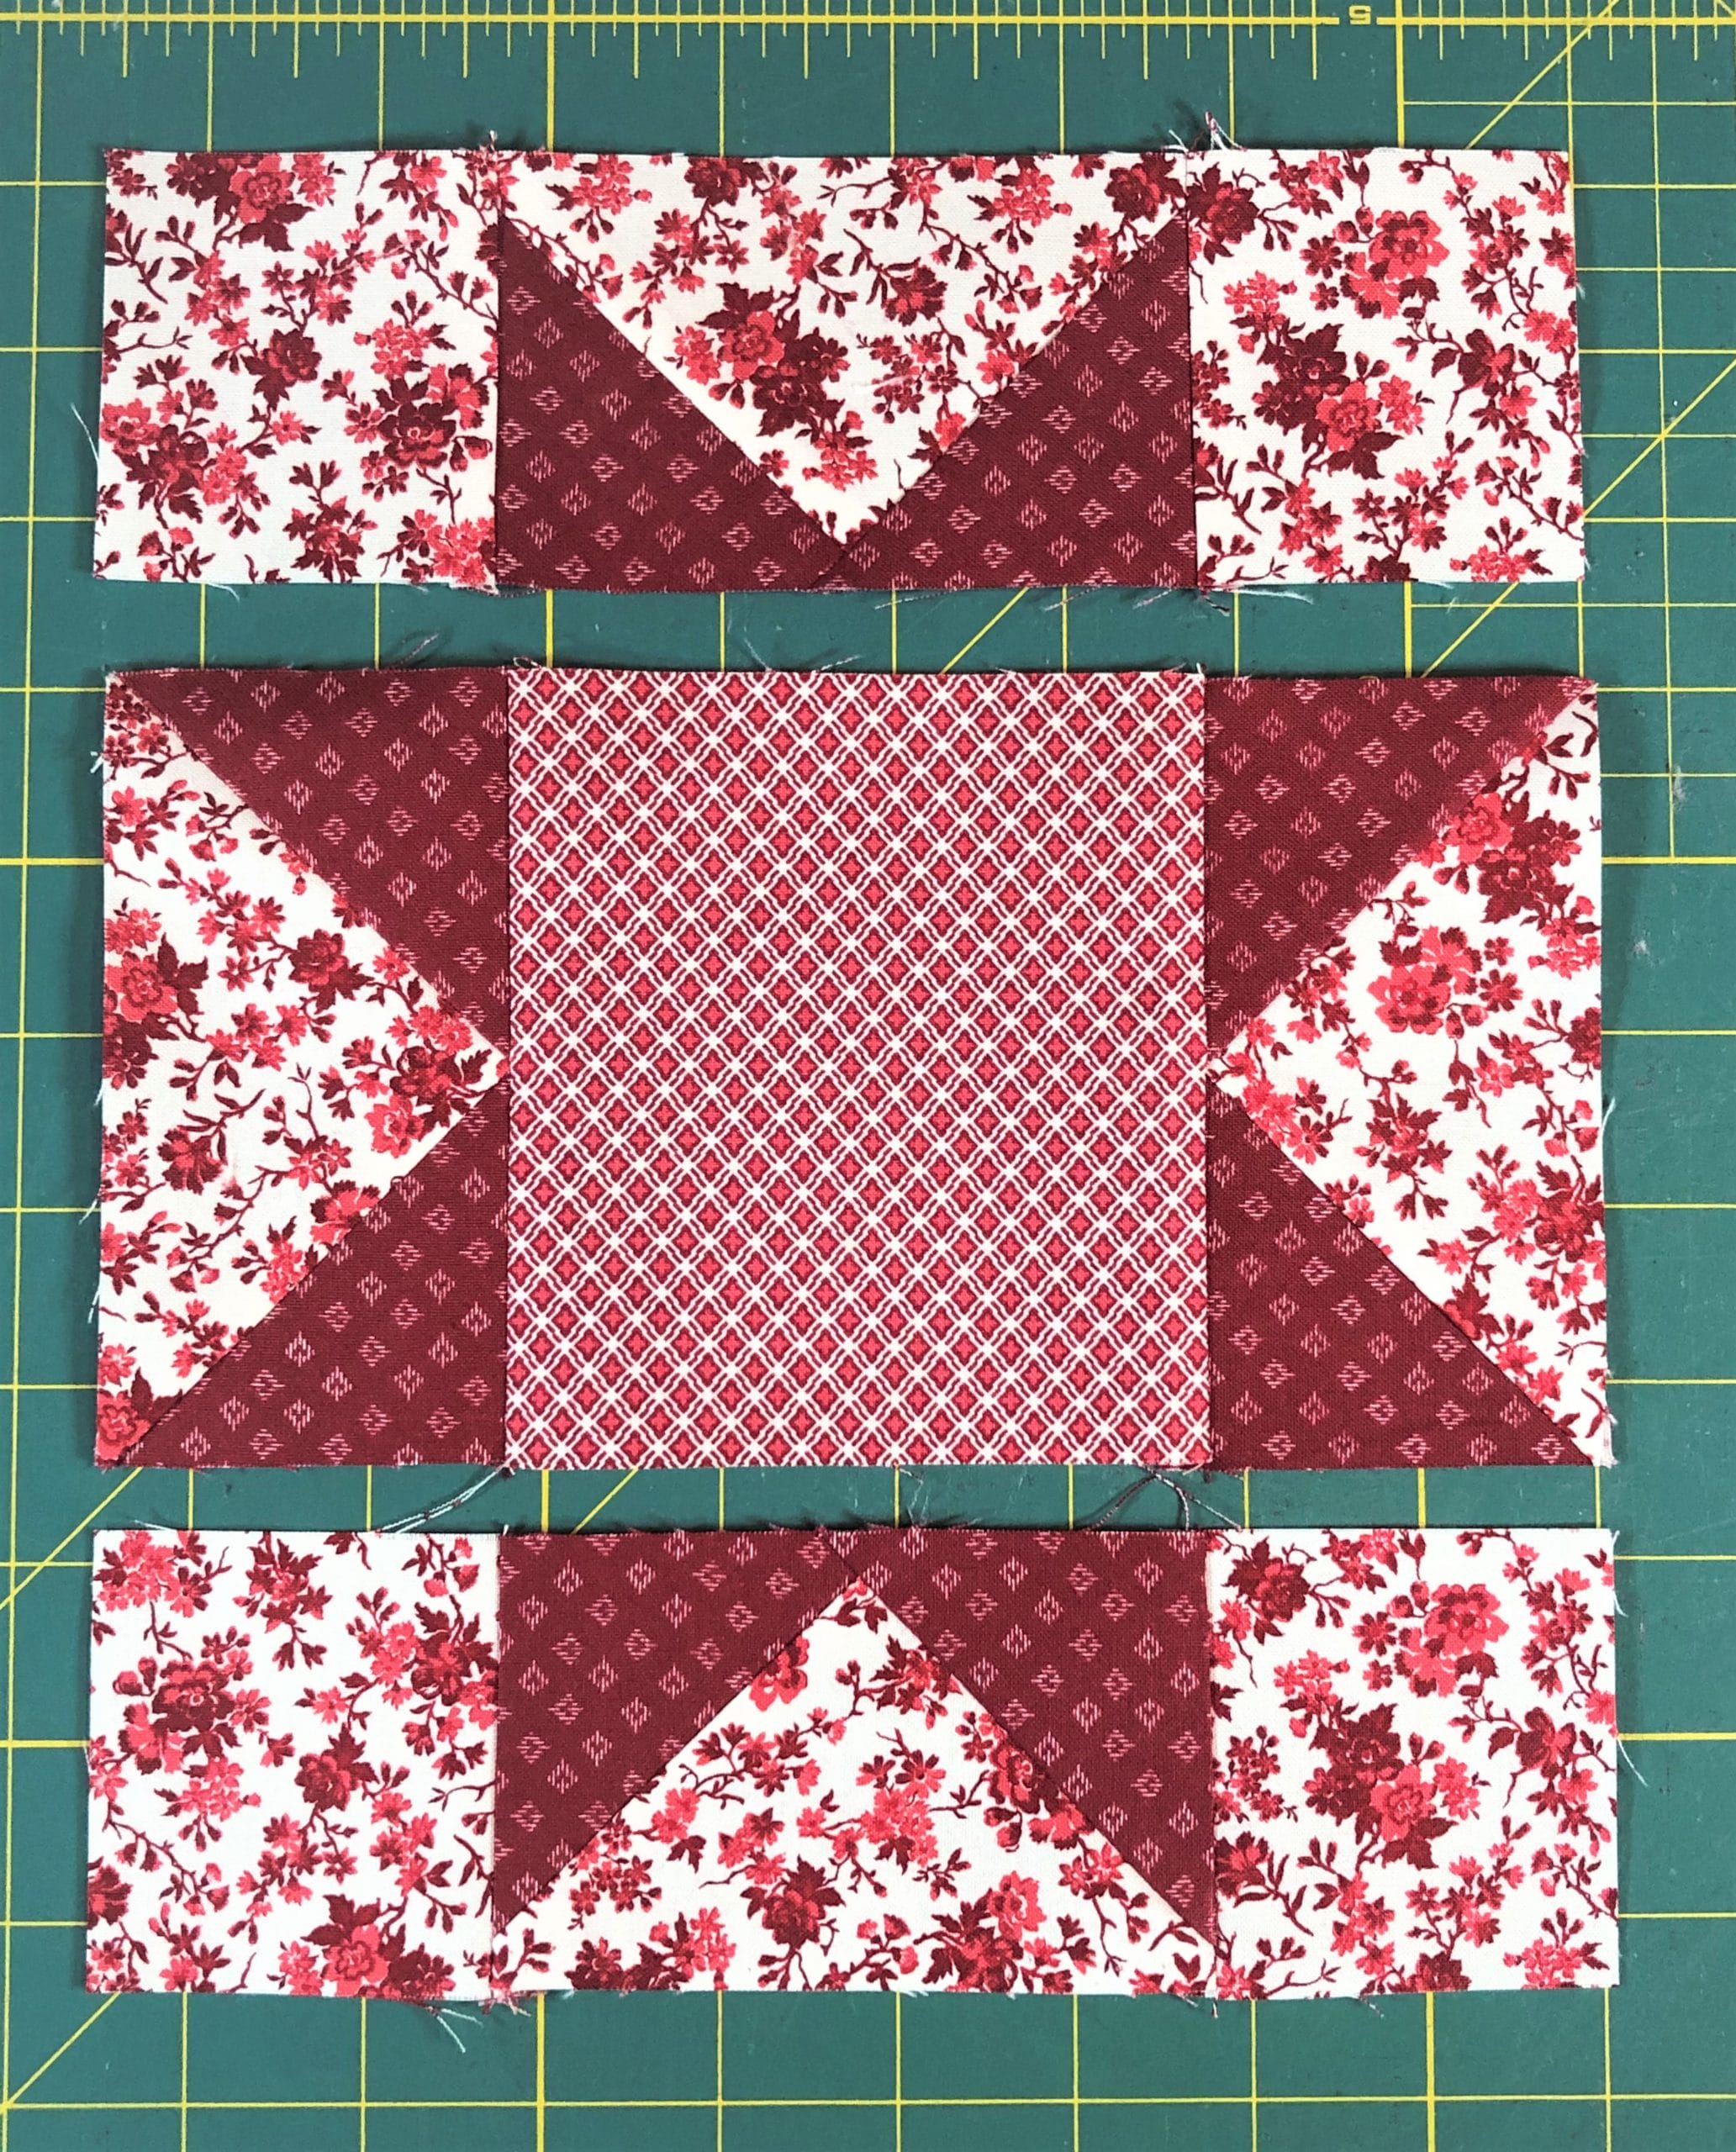
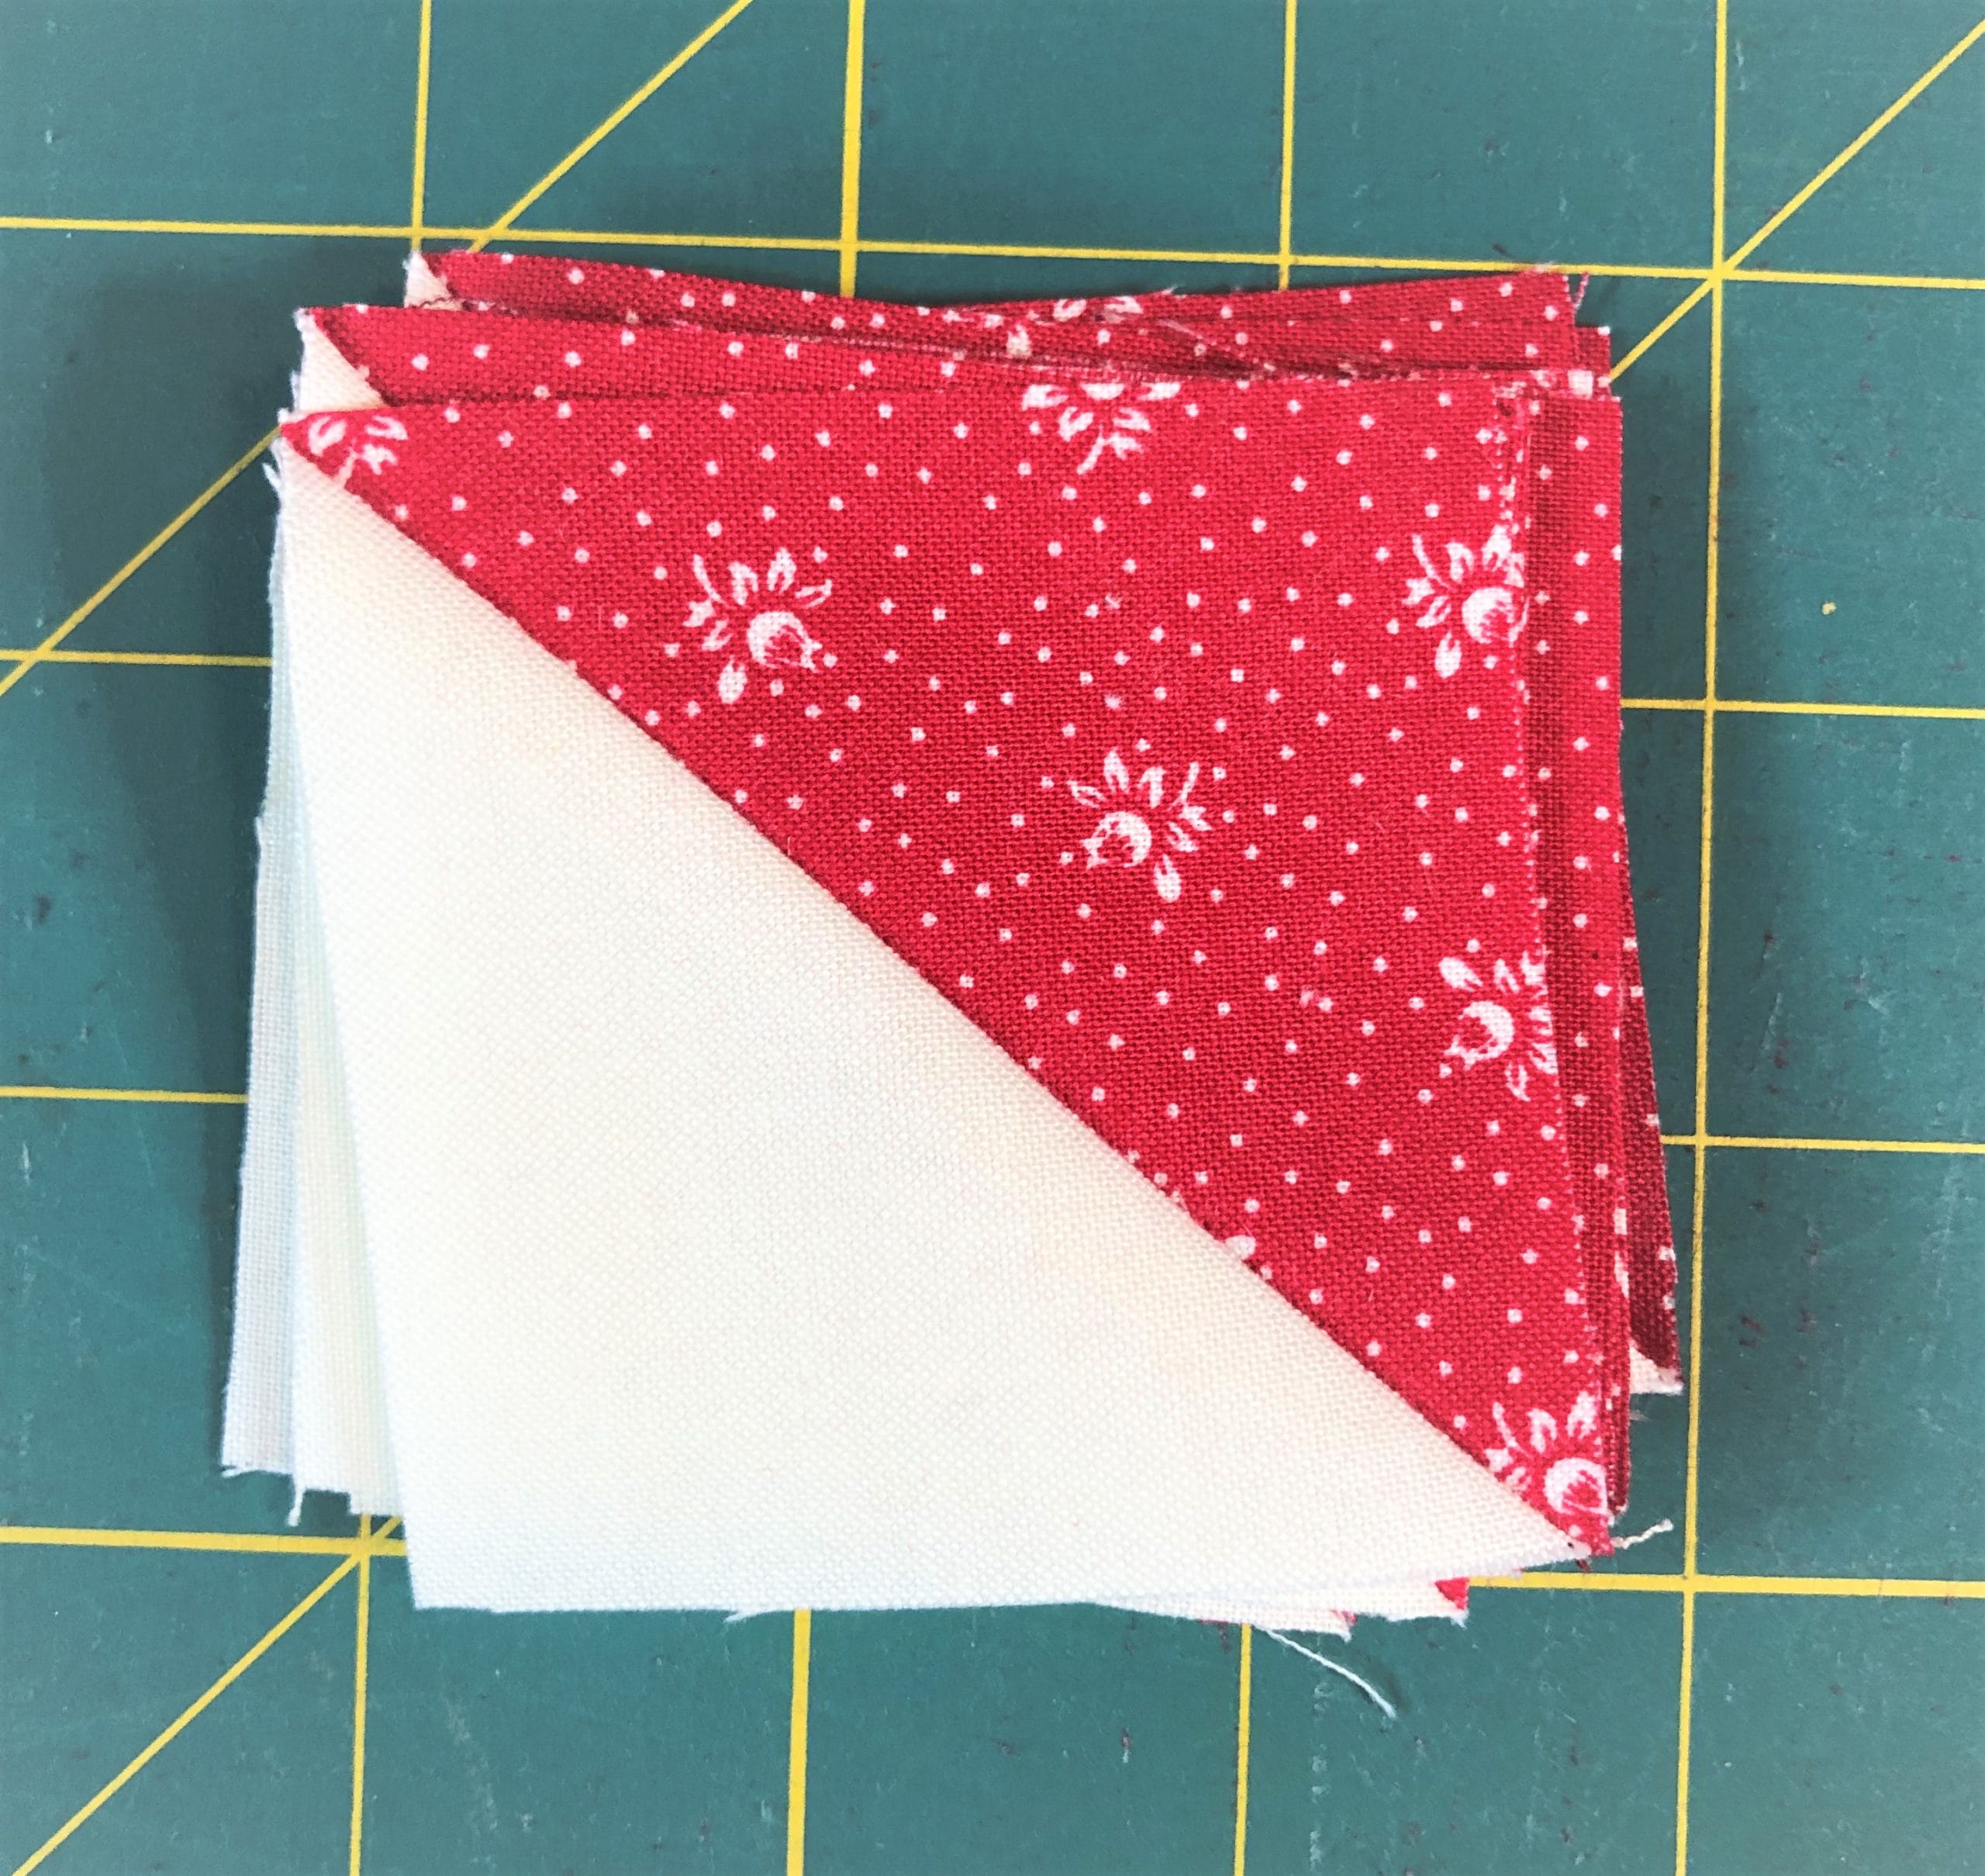
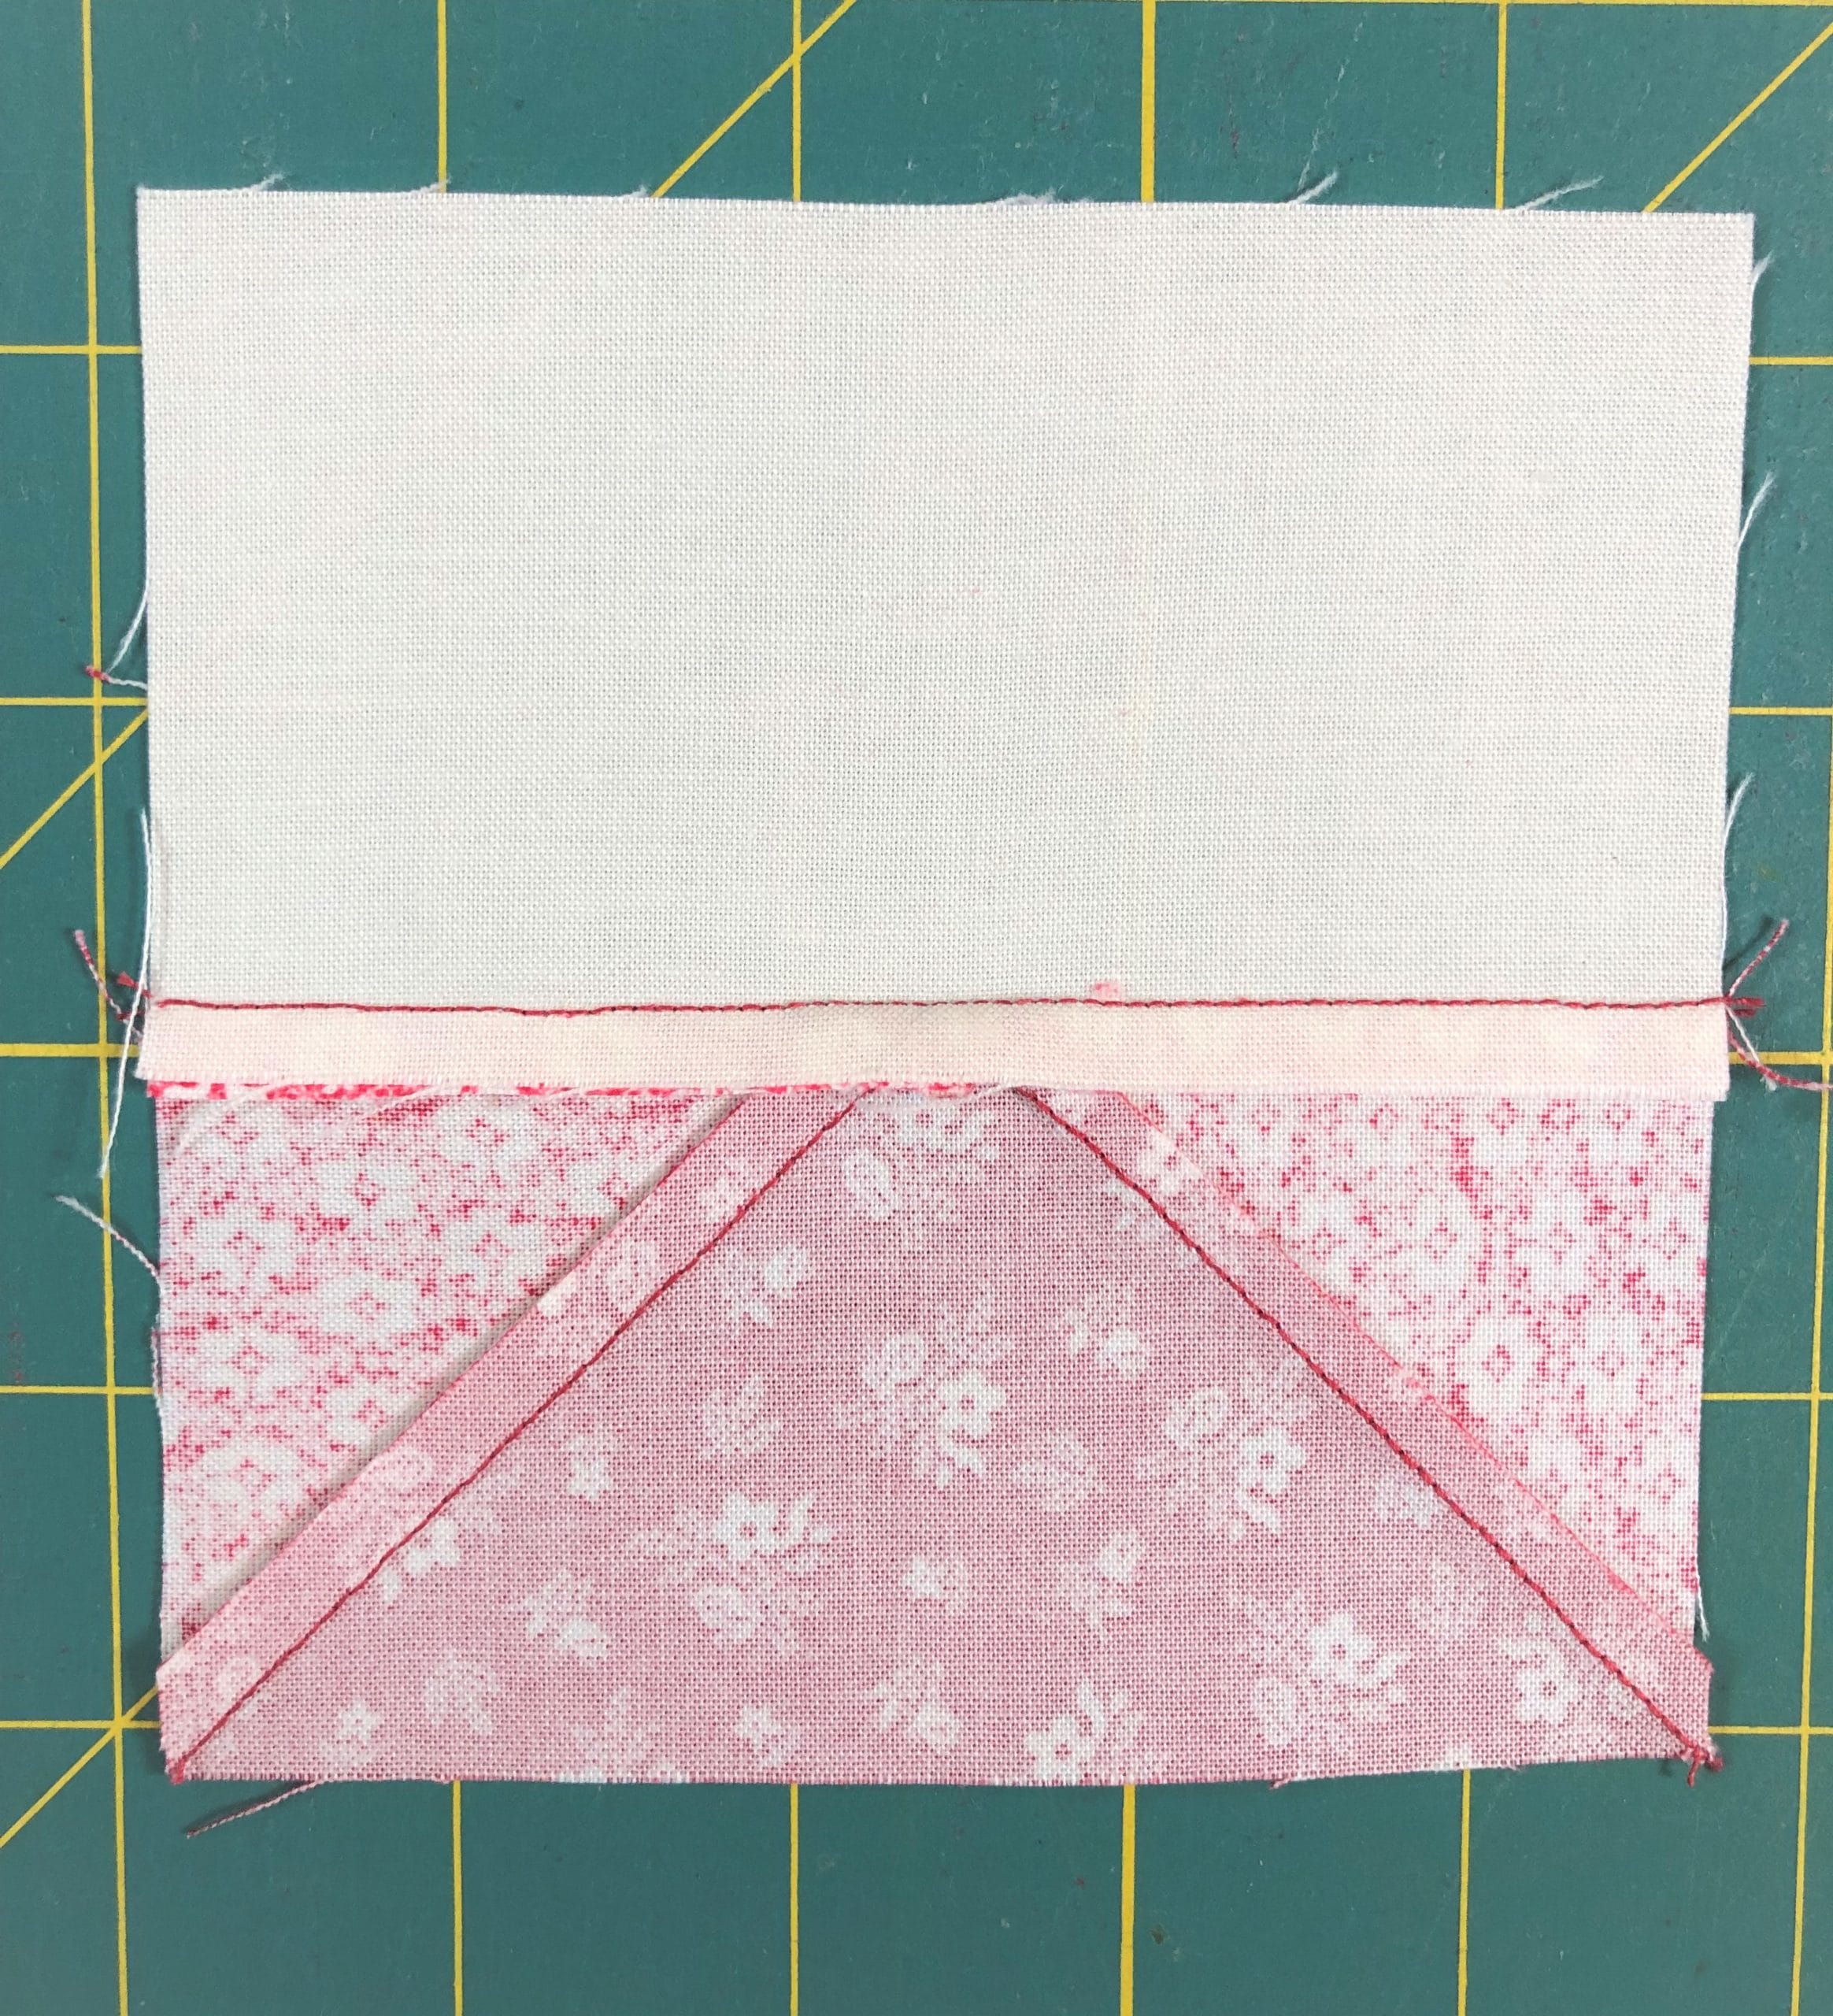
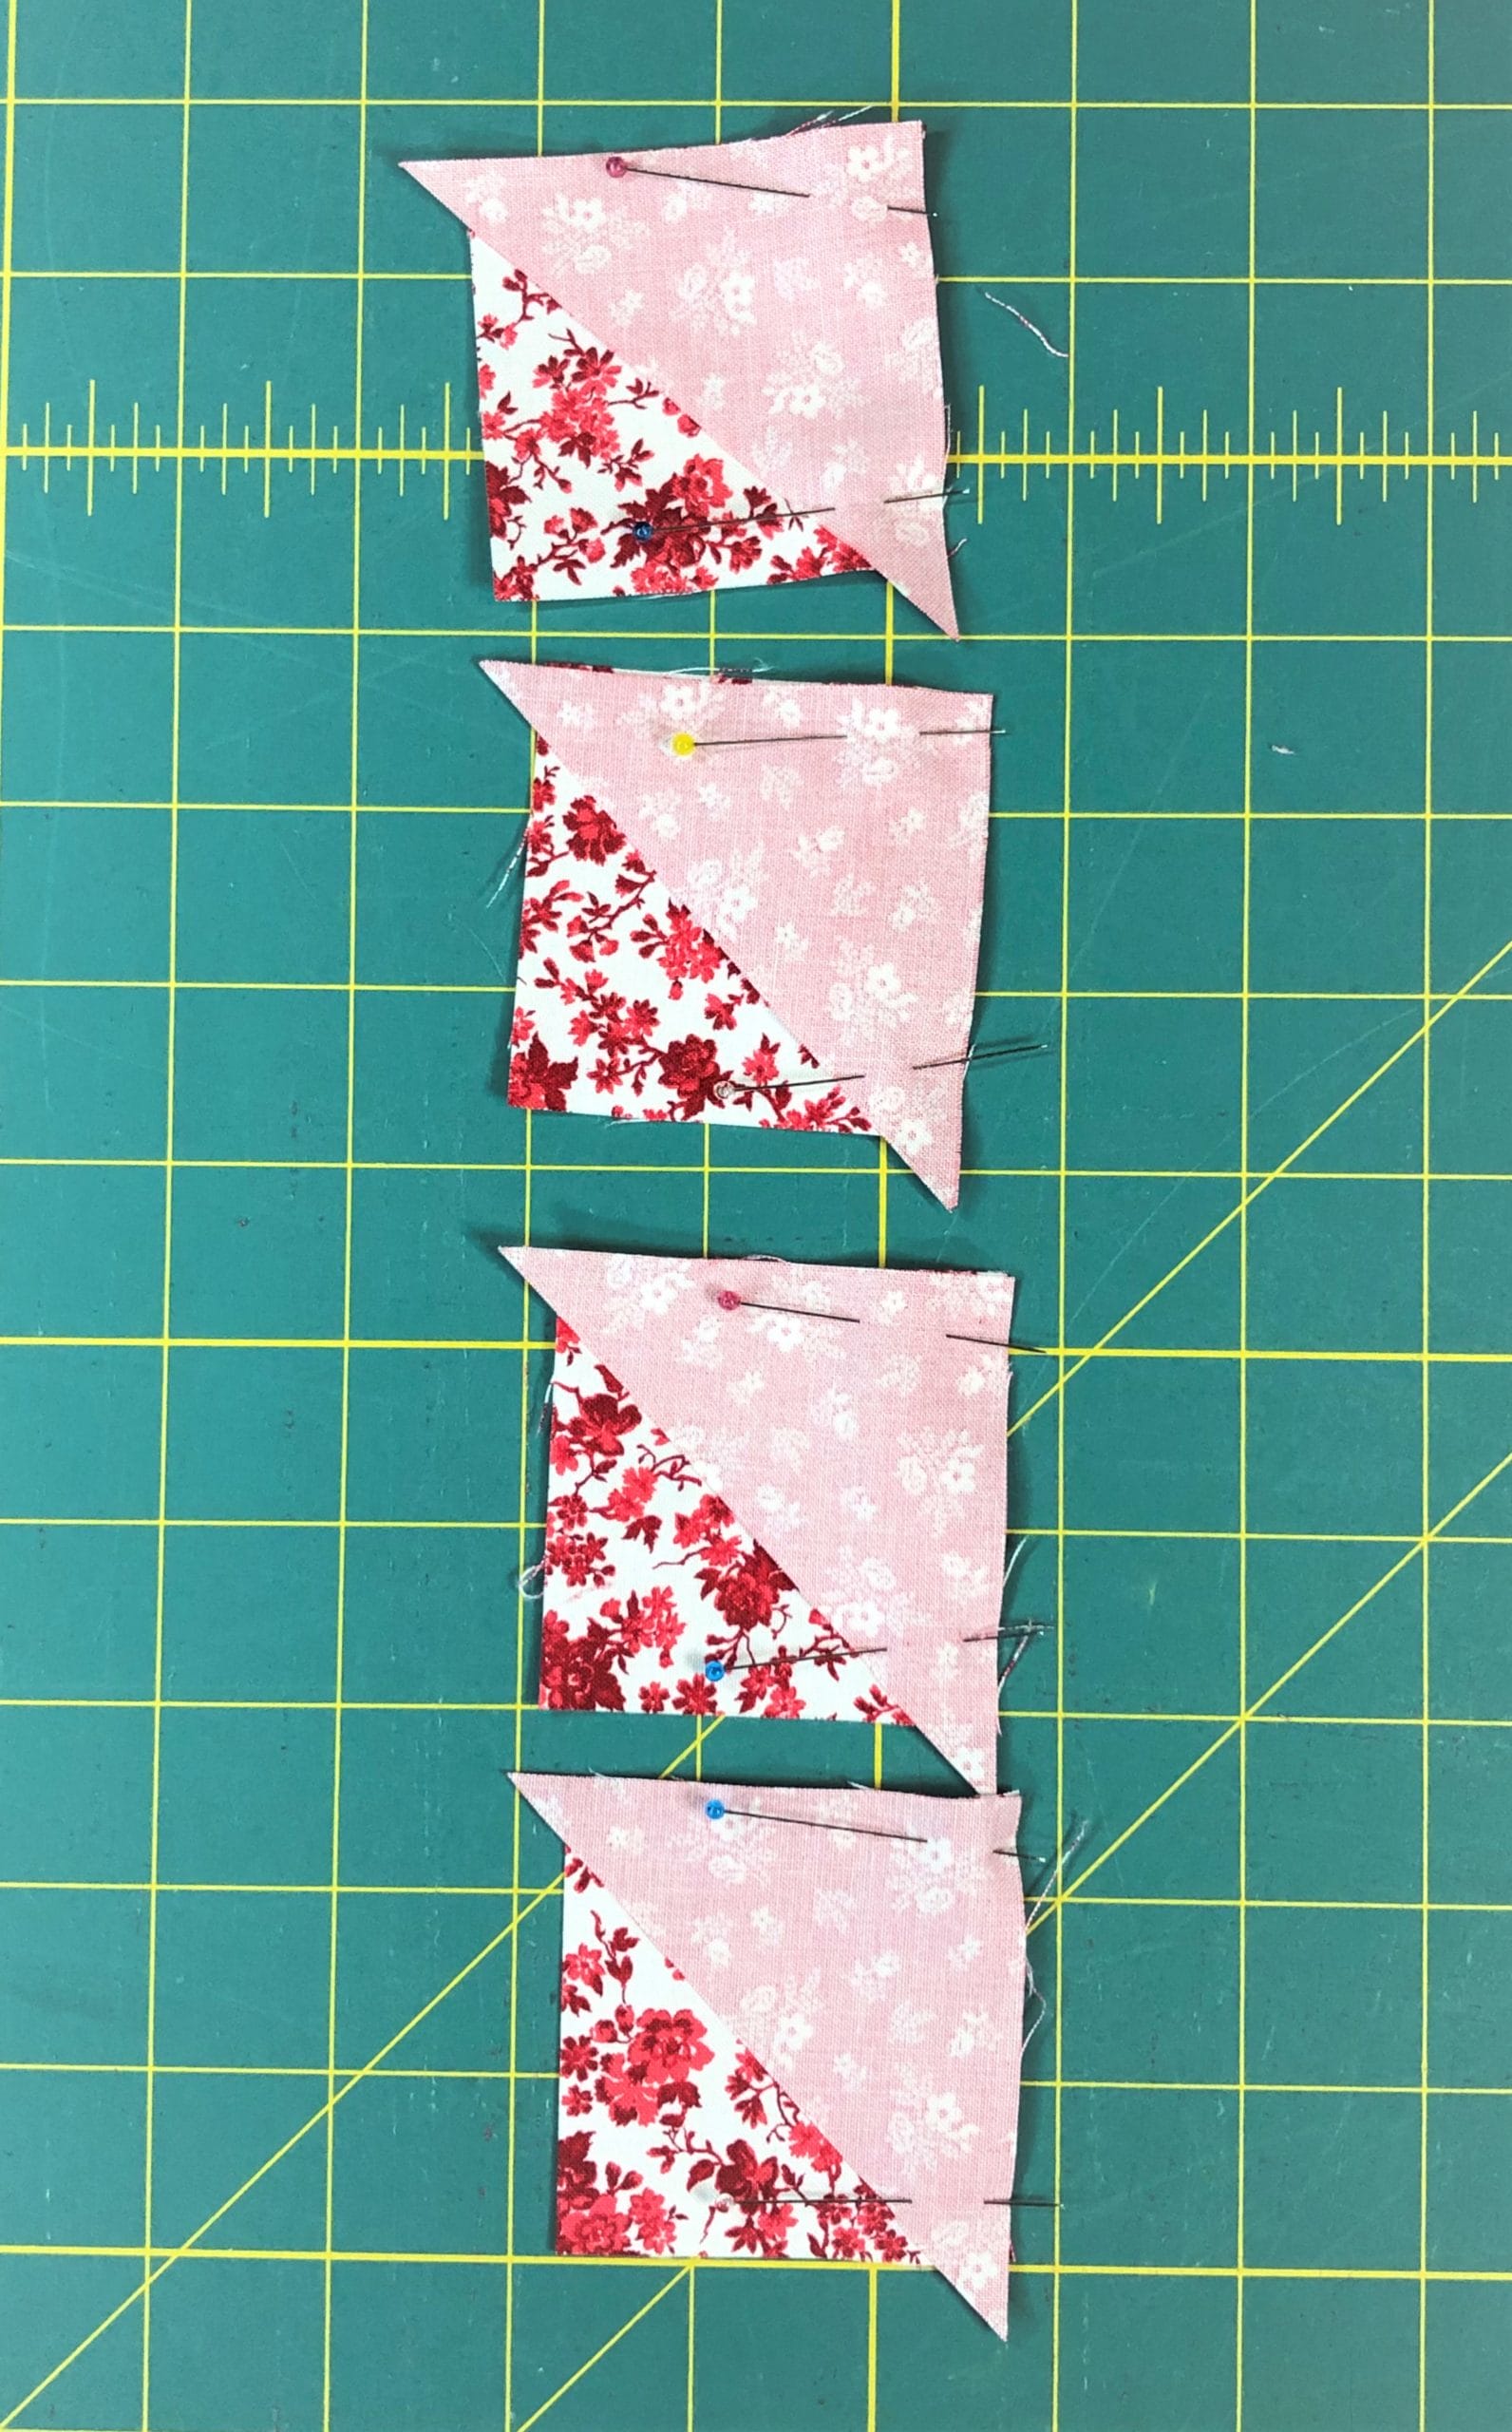
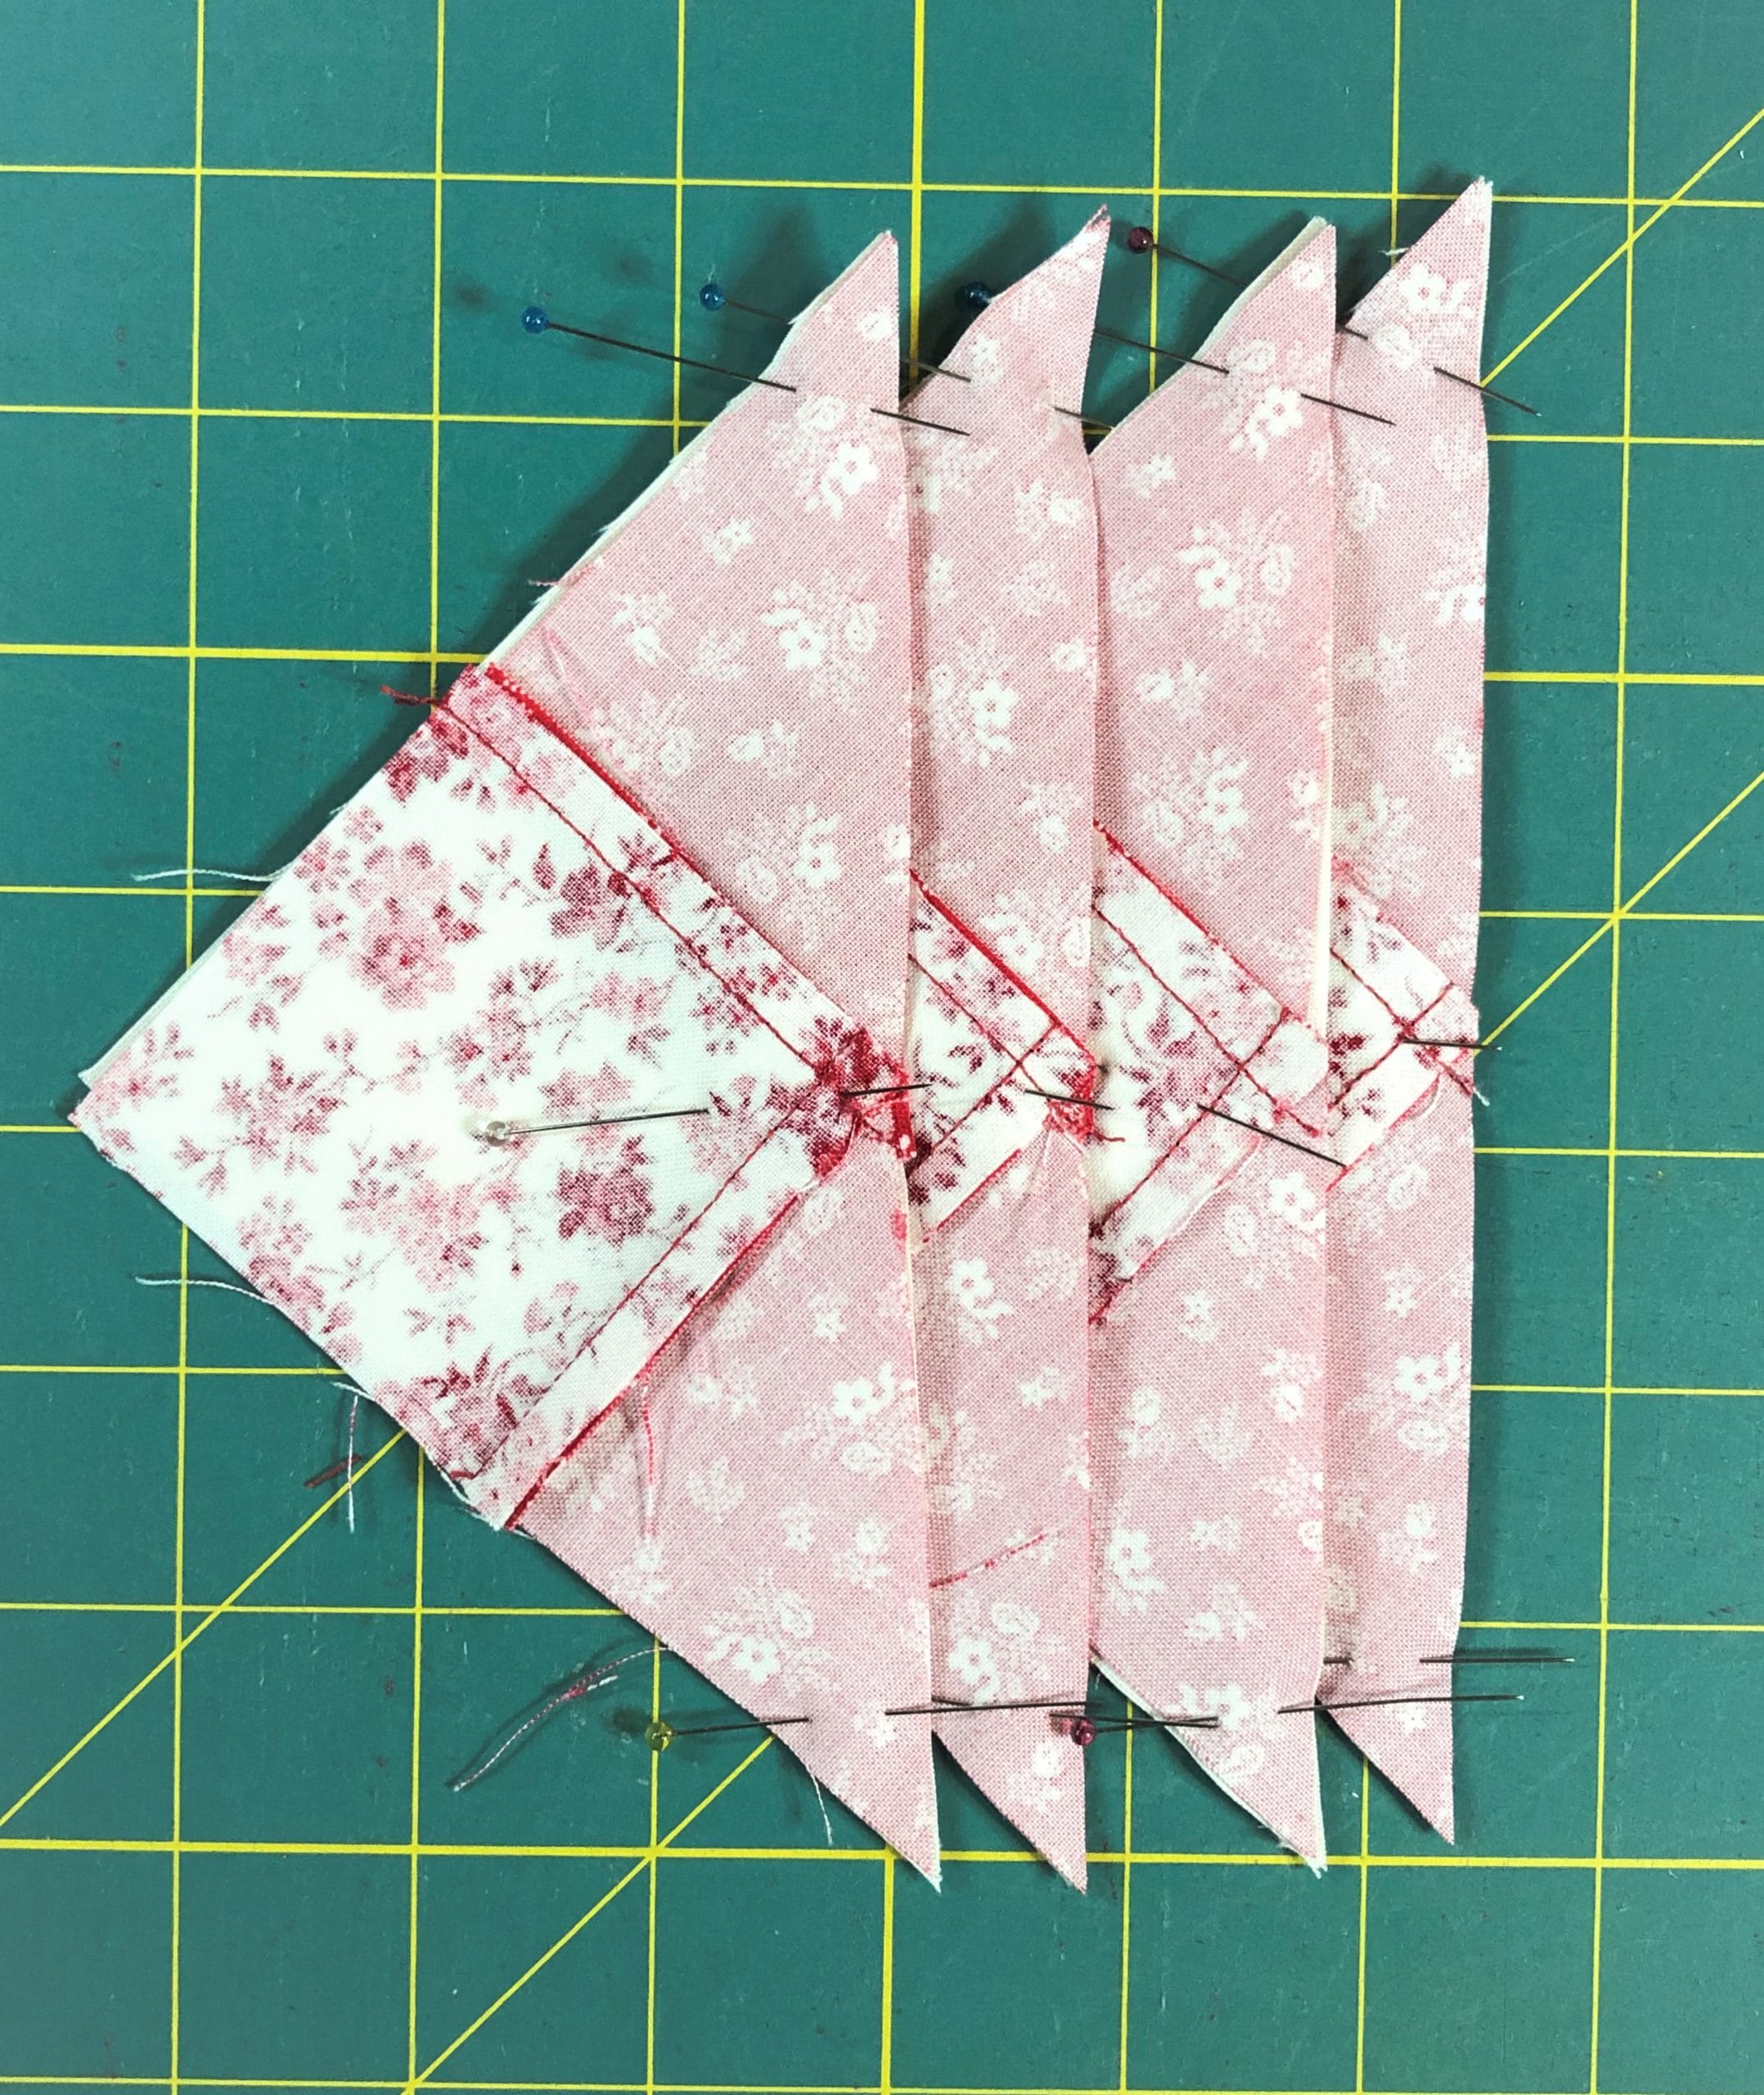
Next we will make some more flying geese in steps 4 and 5, followed by 8 half-square triangles in step 6. These flying geese are the same as above, and half-square triangles are pretty straight forward.
The Half-Square triangles are marked, pinned, and ready for sewing. You will stitch 1/4″ away from each side of the marked line.Here they are, sewn on both sides of the line and trimmed so they can be pressed toward the dark side.
Somehow, while sewing and trimming, I didn’t snap a pic of the completed half-square triangles, but you can see them below all trimmed up and ready to go. In step 7, we will sew these units together like so:
Now it’s time to sew all the components together. Pay attention to the pressing arrows so that all the units will nest together. If all goes according to plan, the block should measure 12-1/2” square.
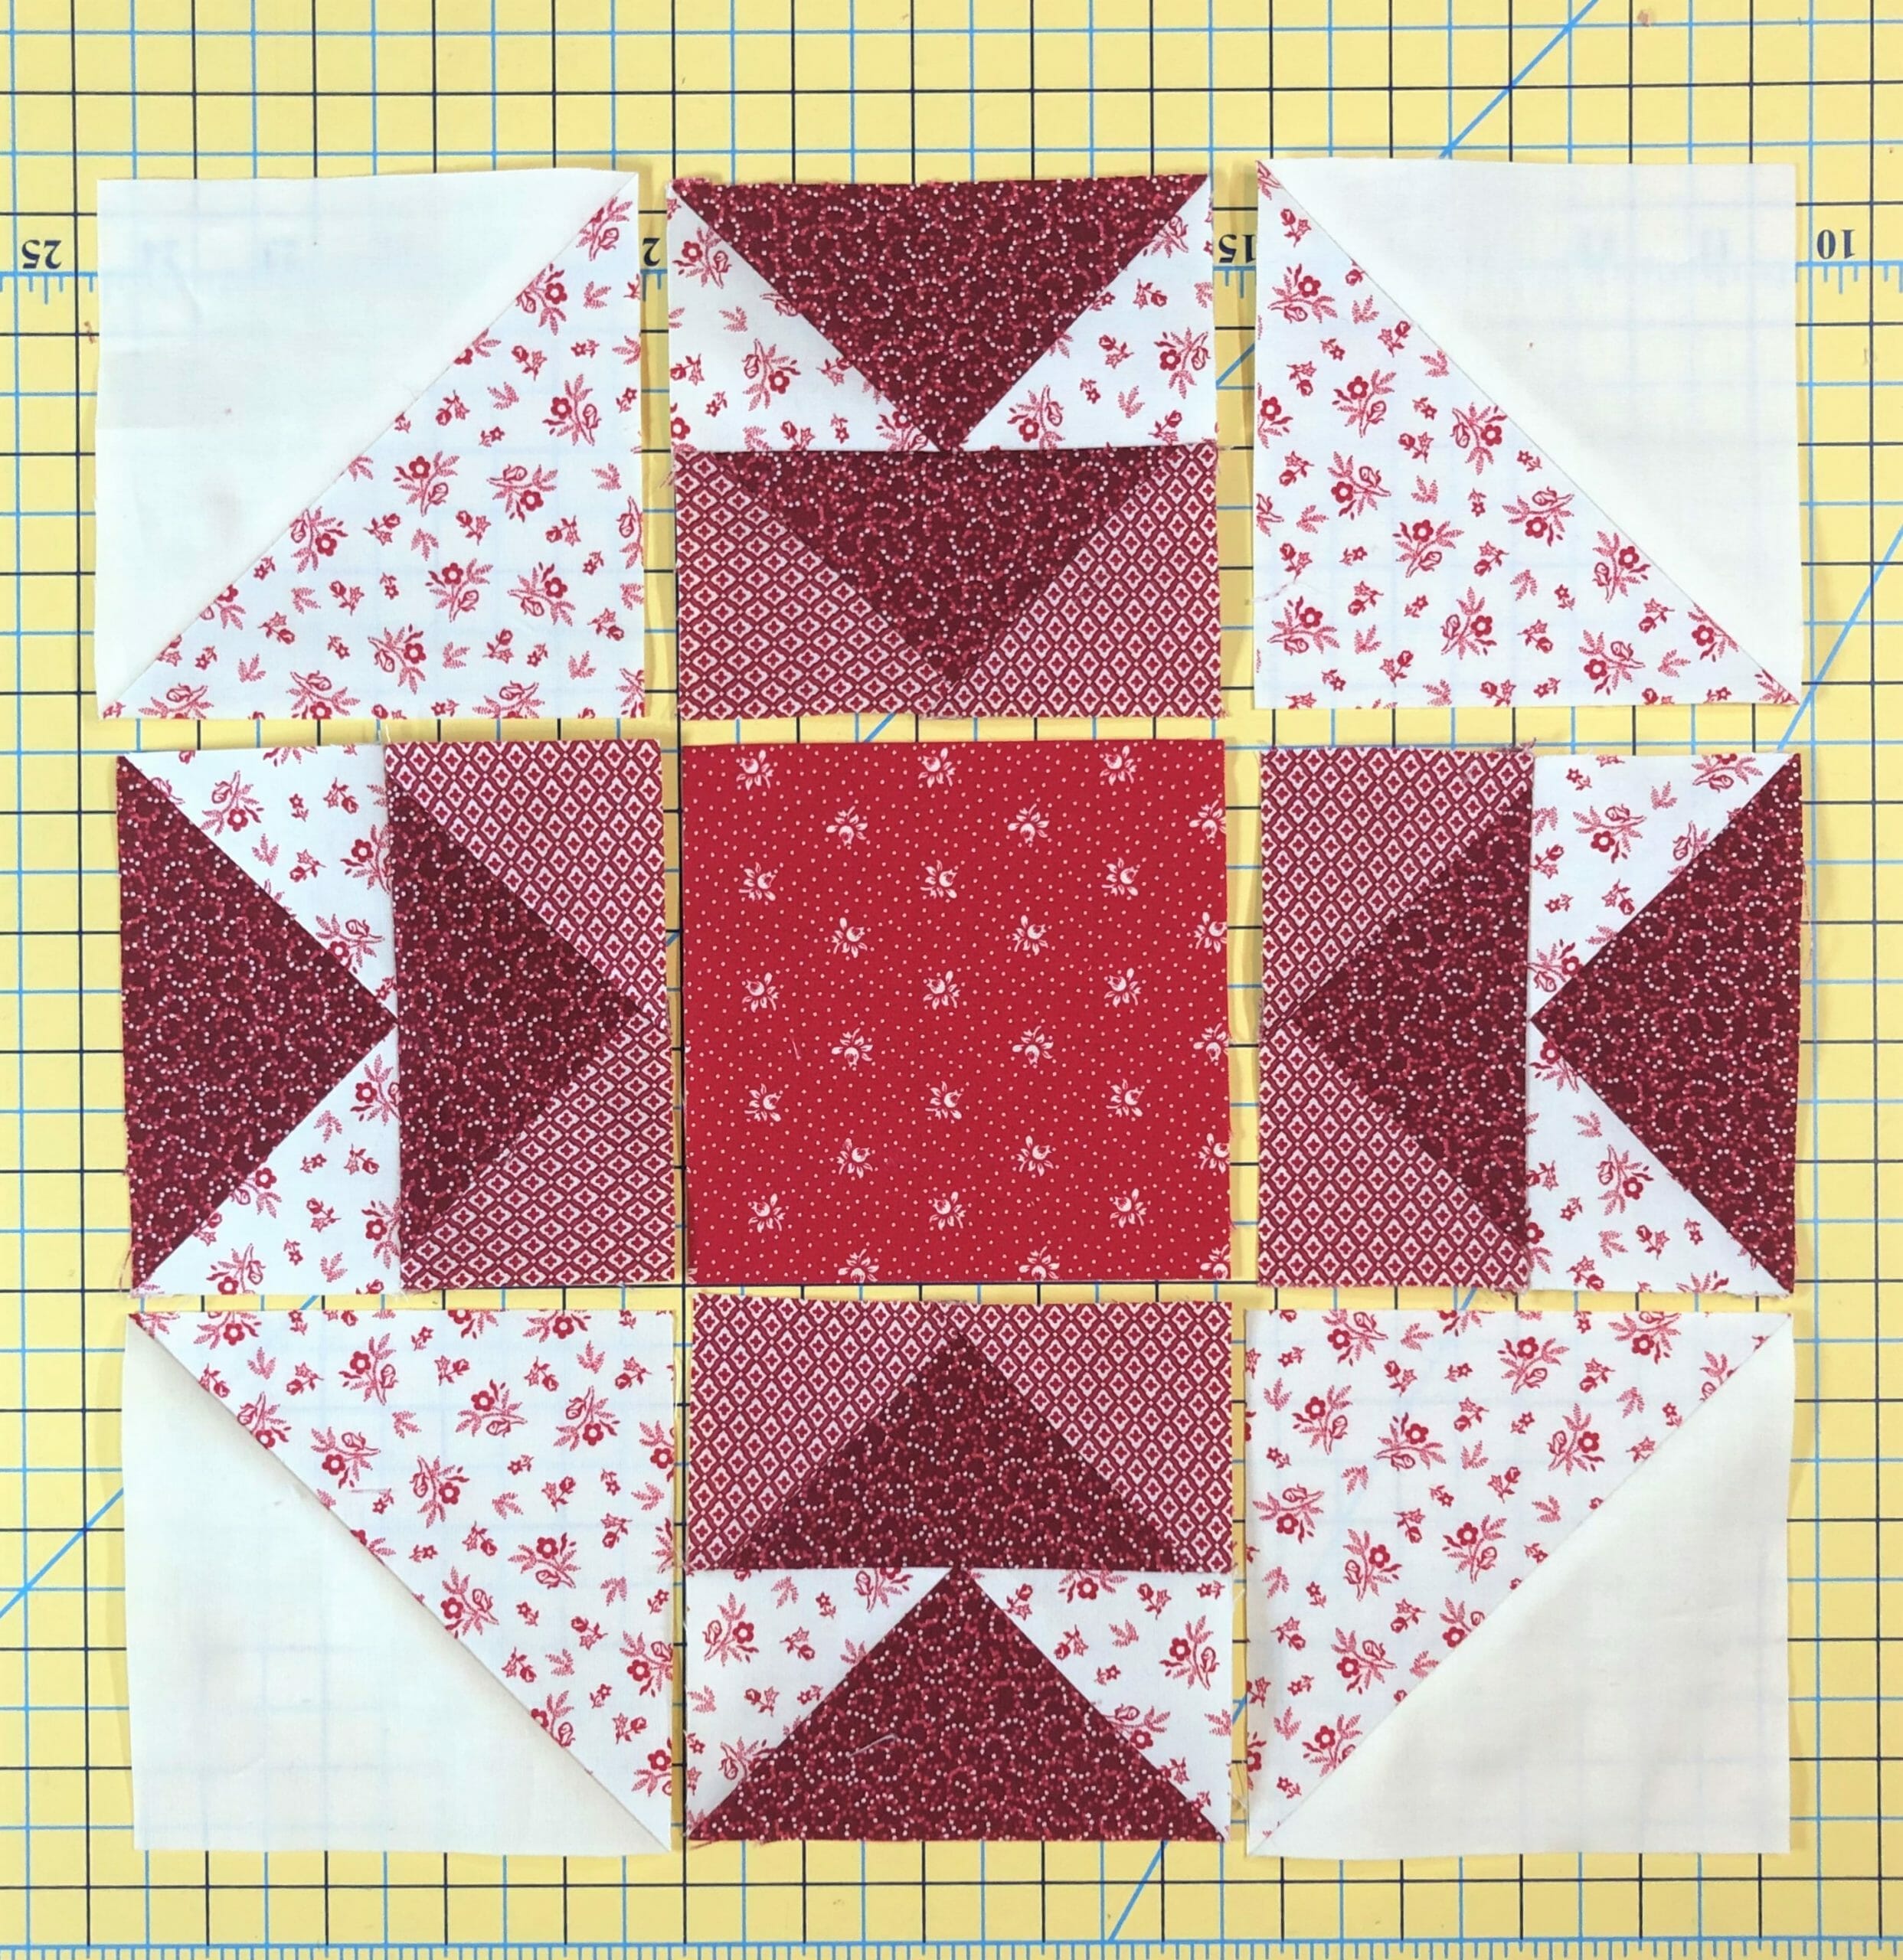
BLOCK 16
This block is traditionally called the Ohio Star block, and it’s one of my favorites, probably because it’s pretty easy!
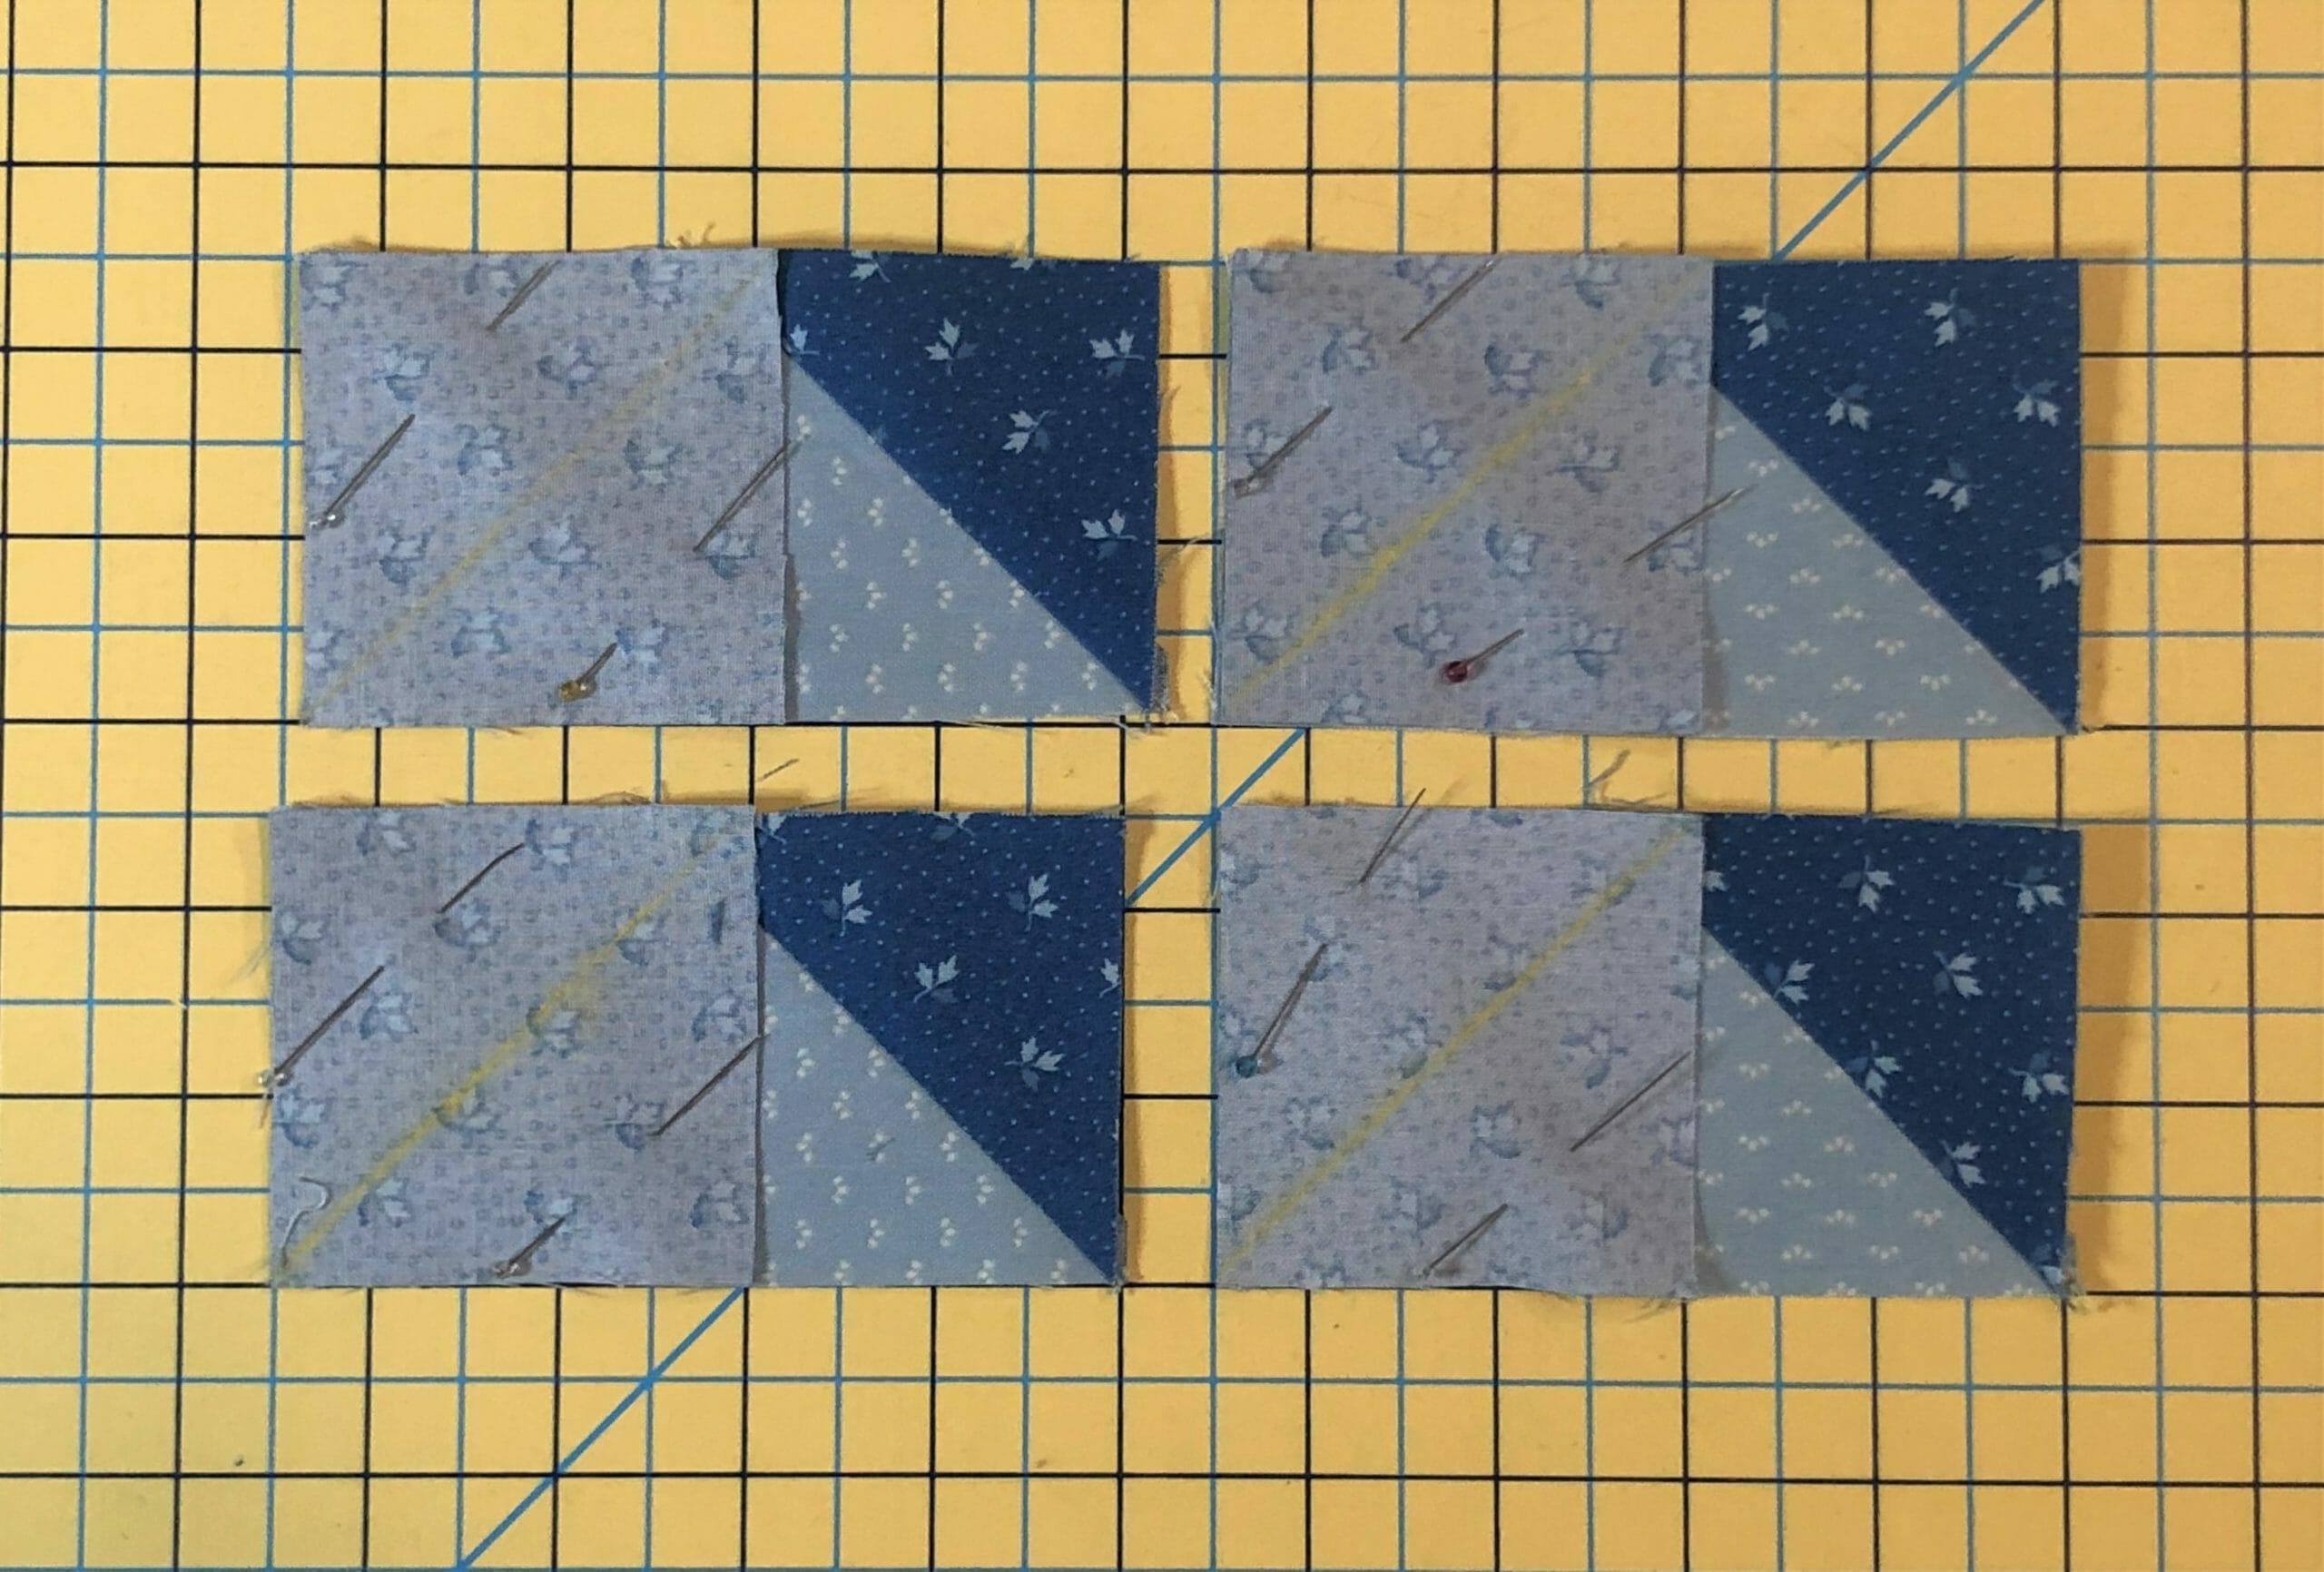
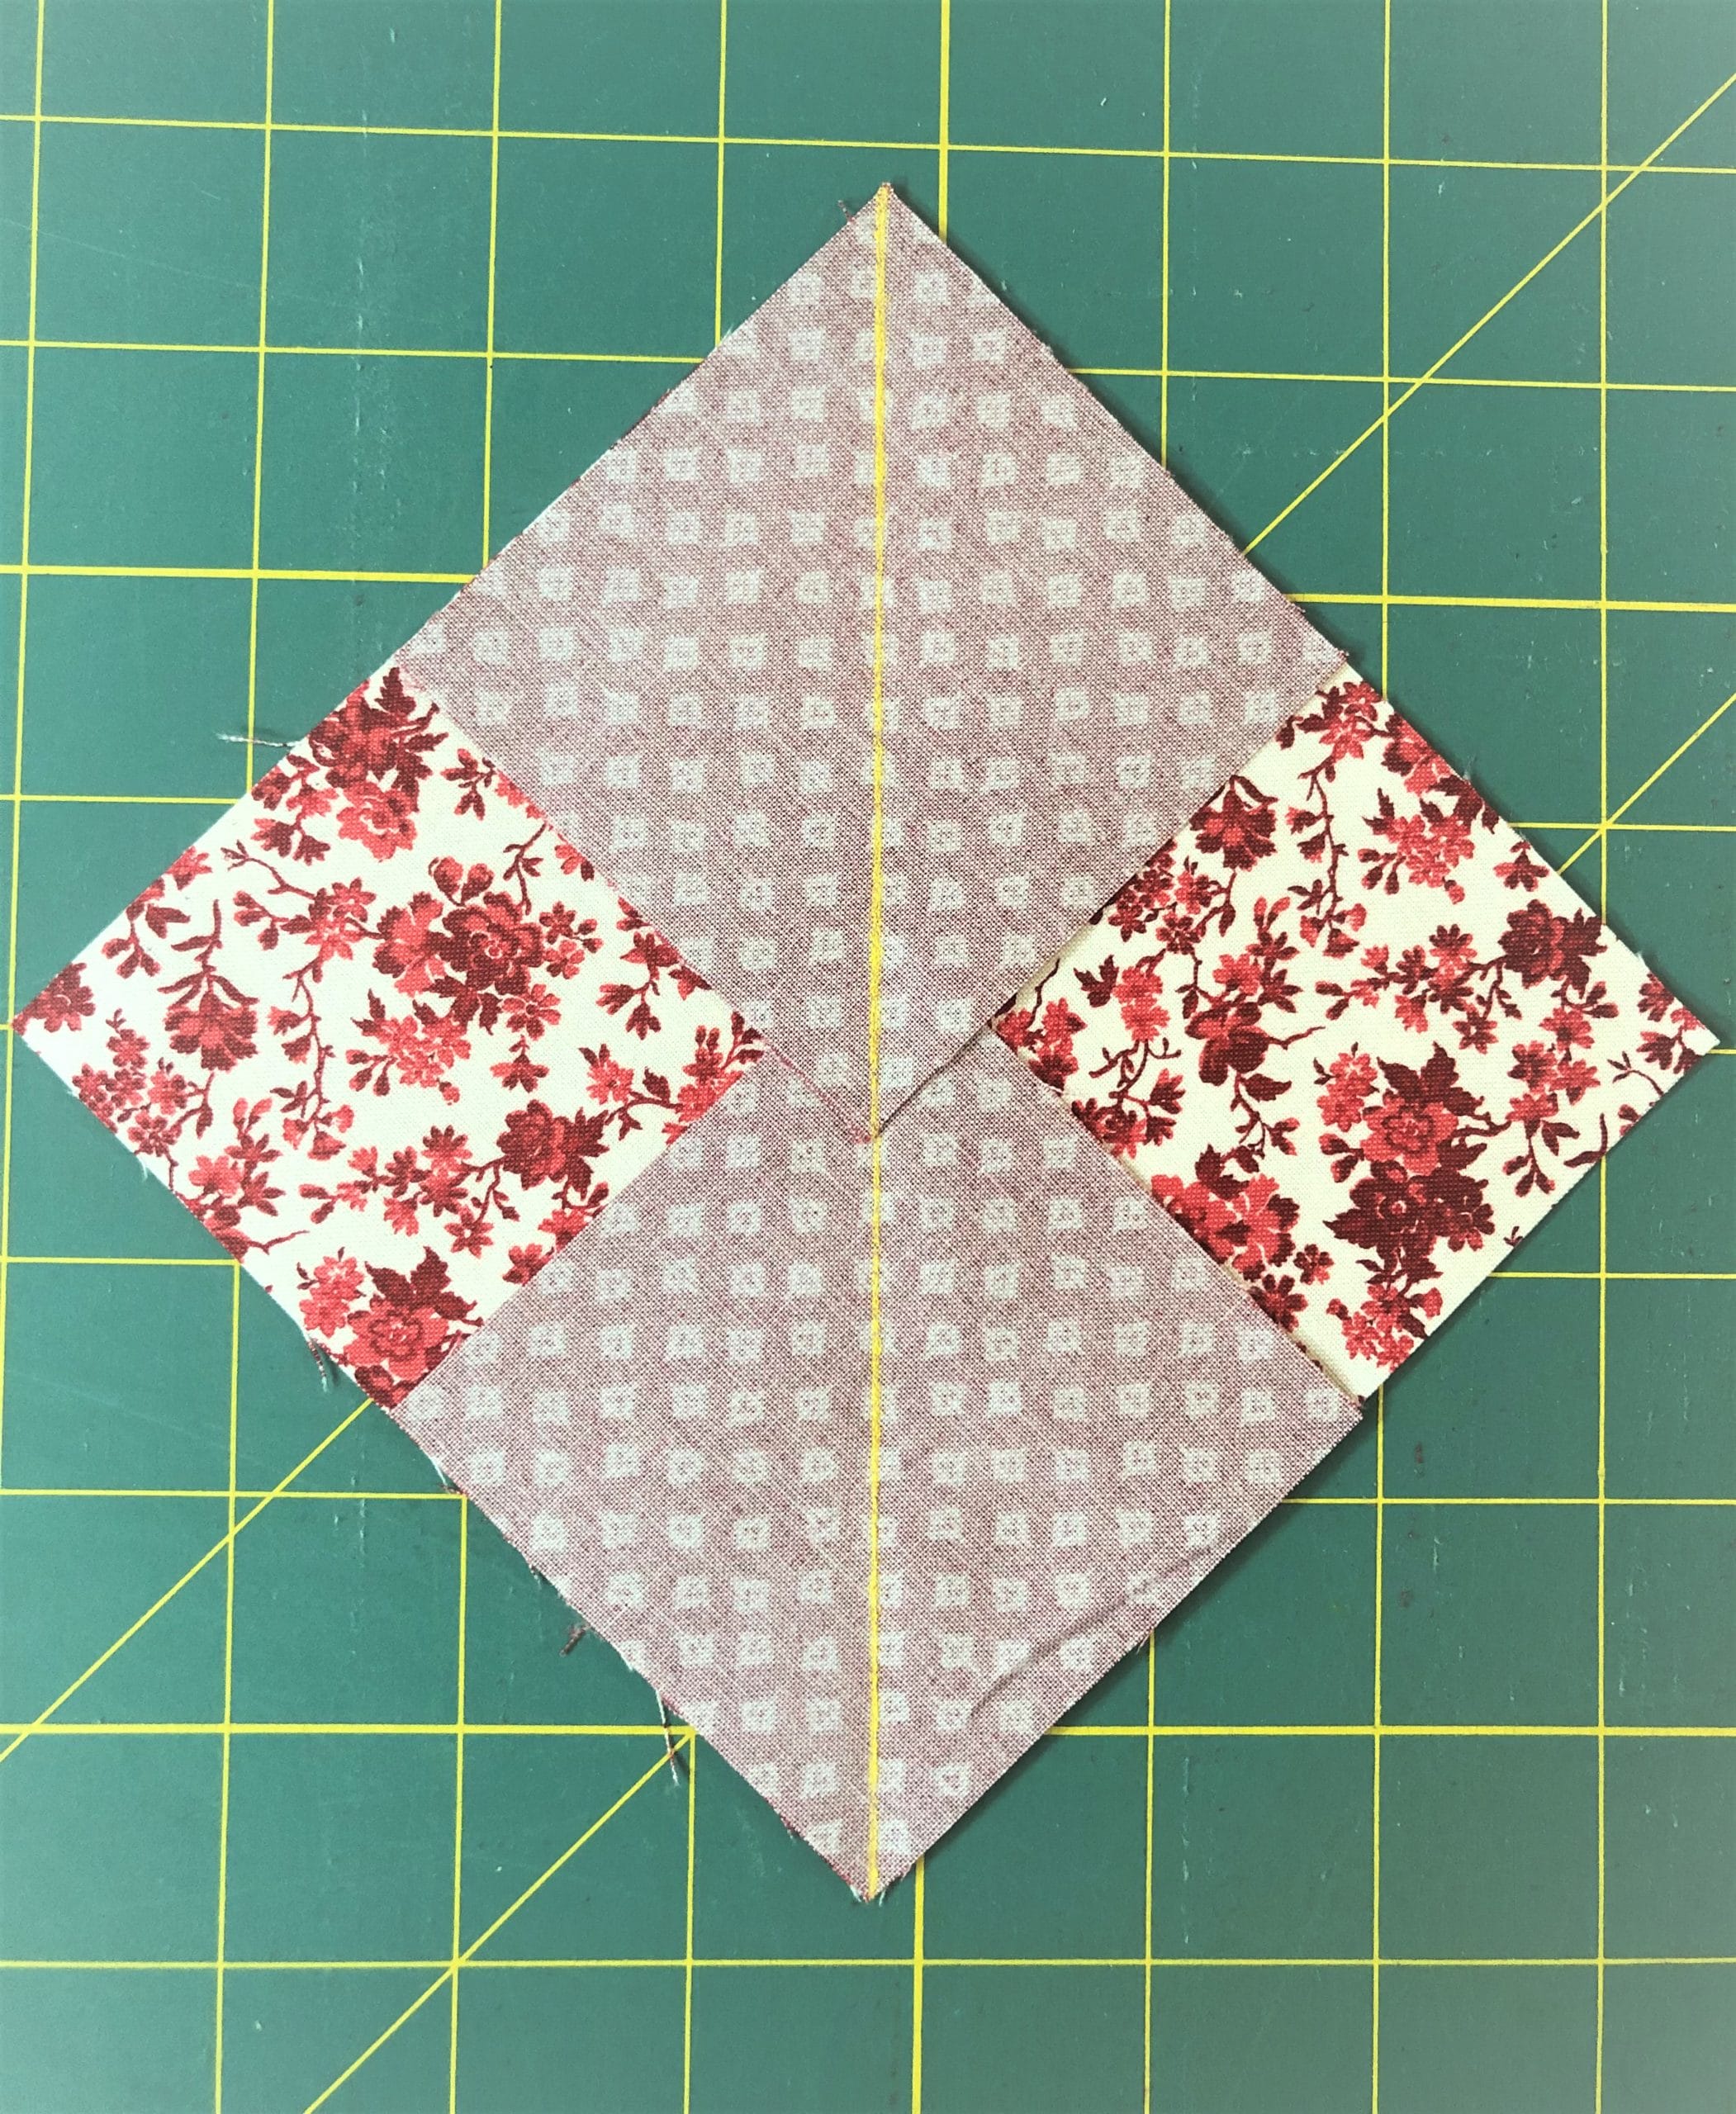
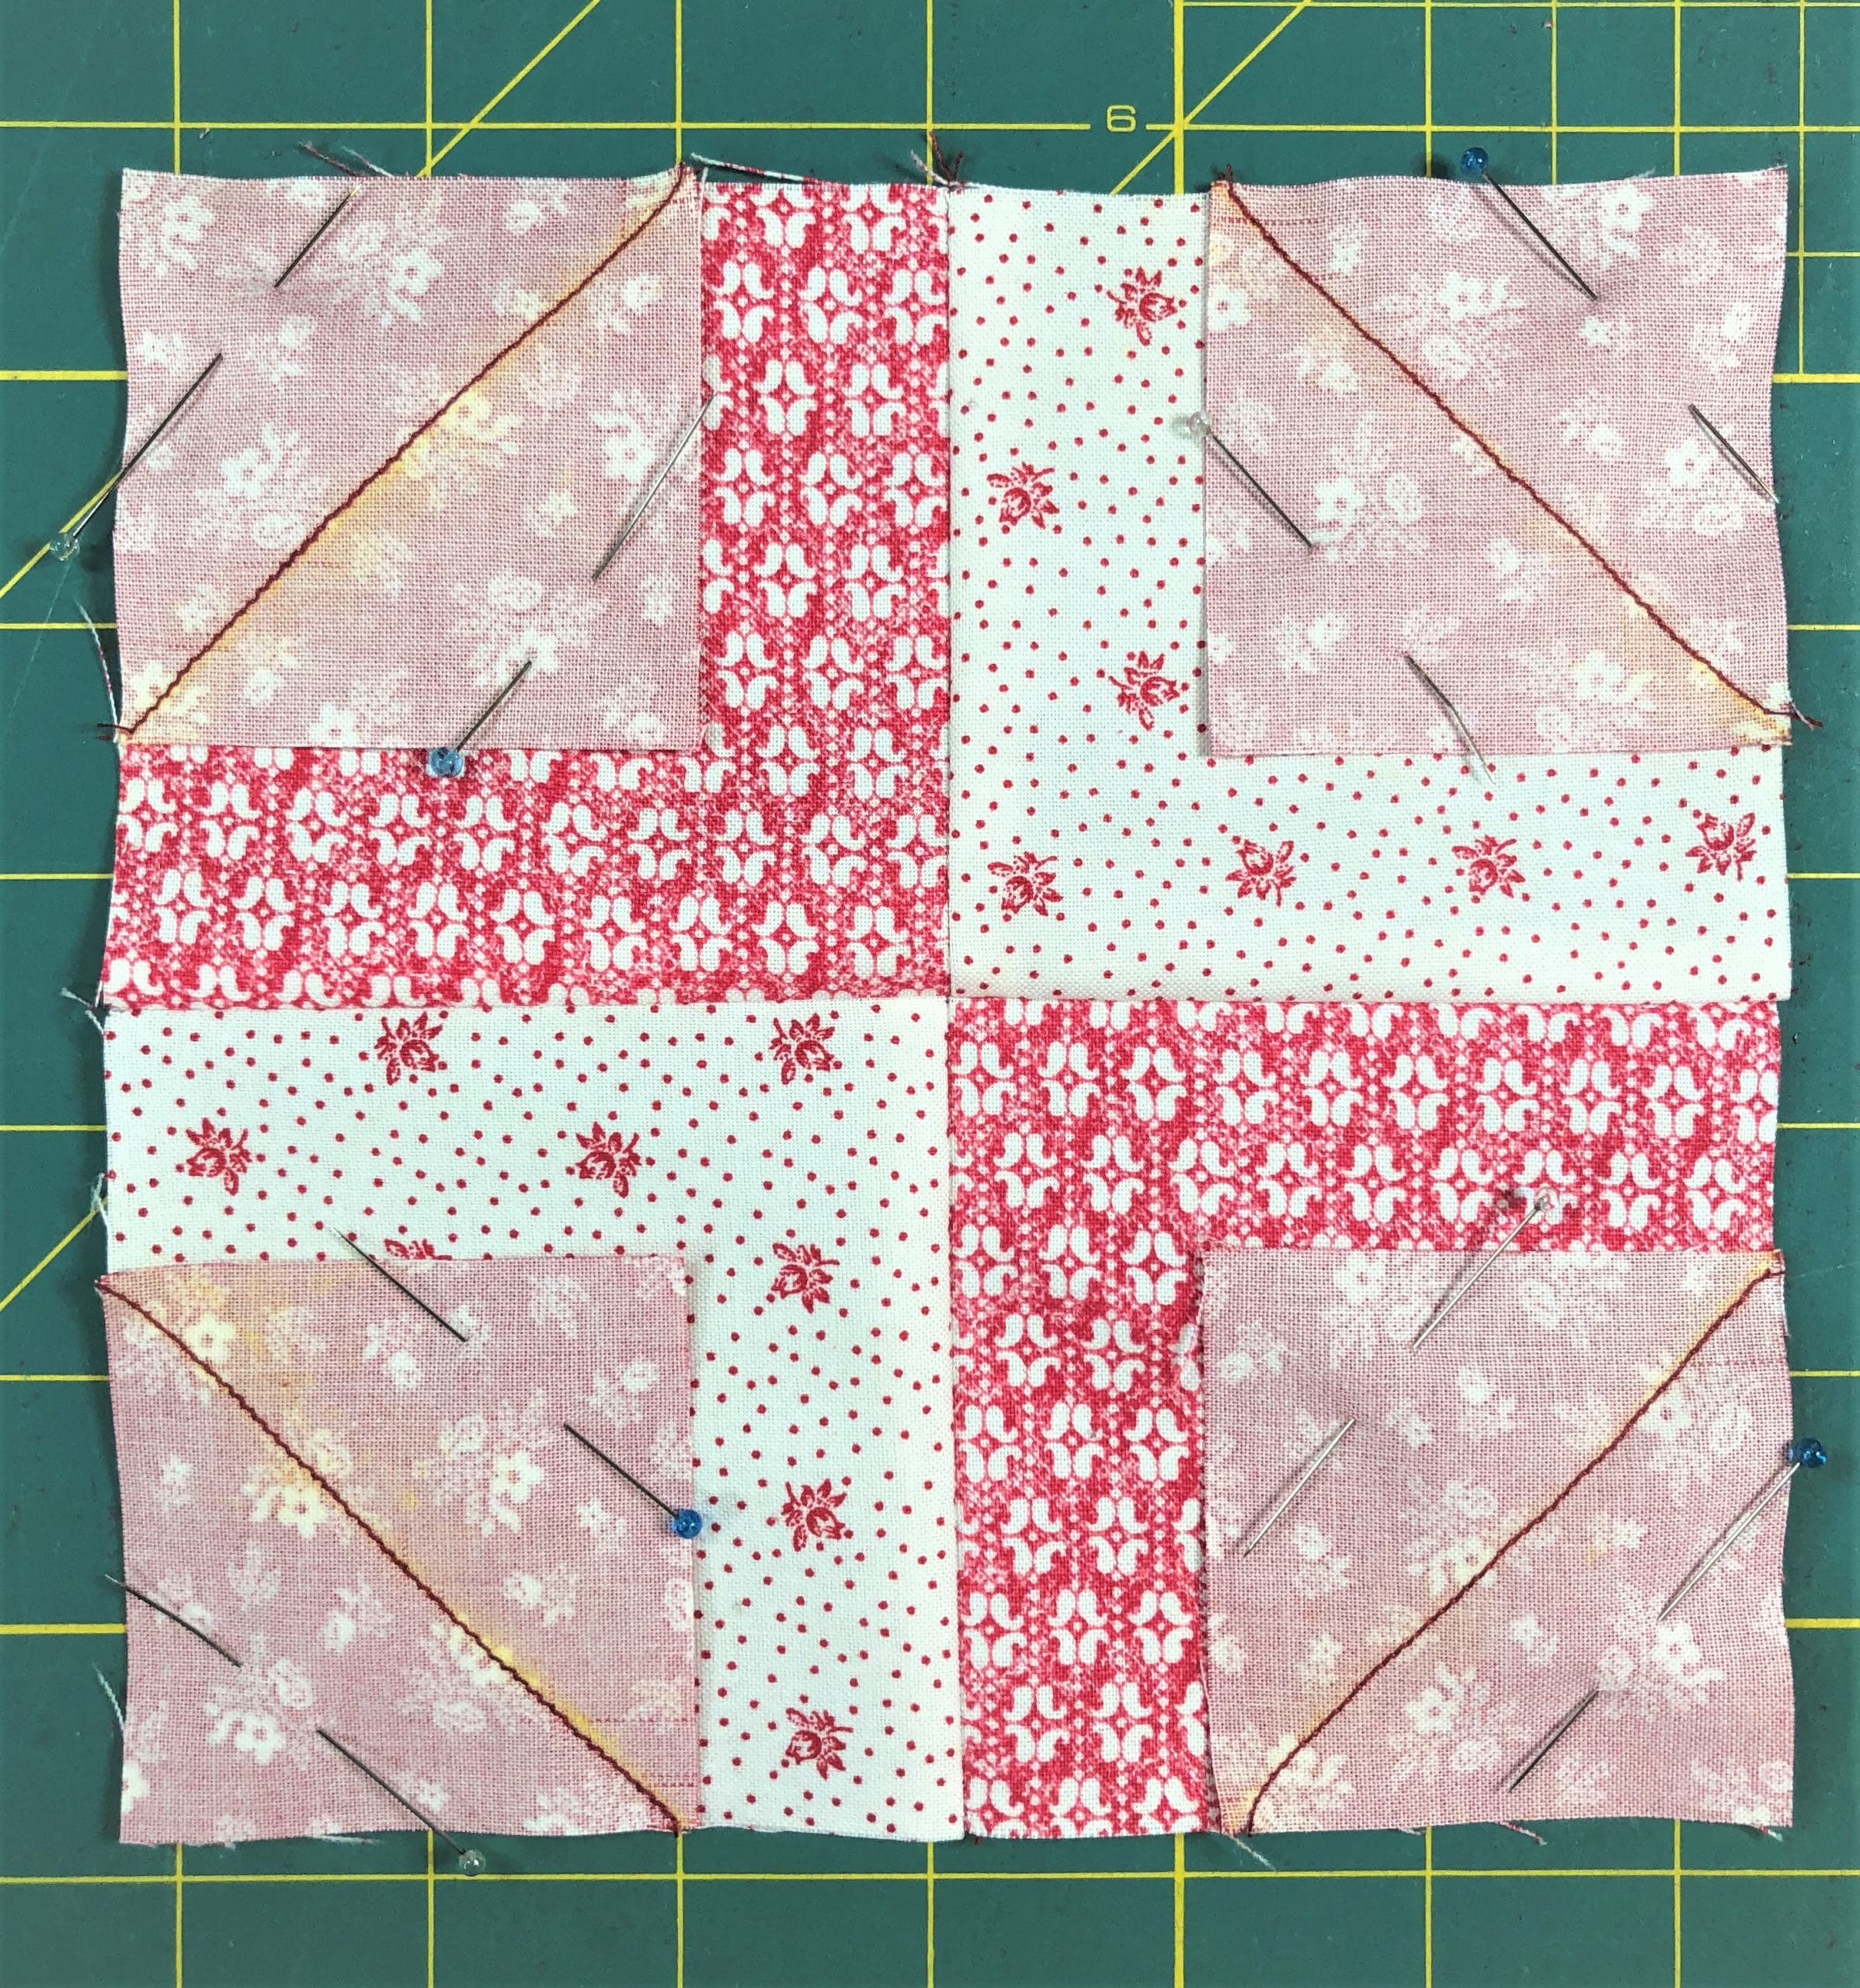
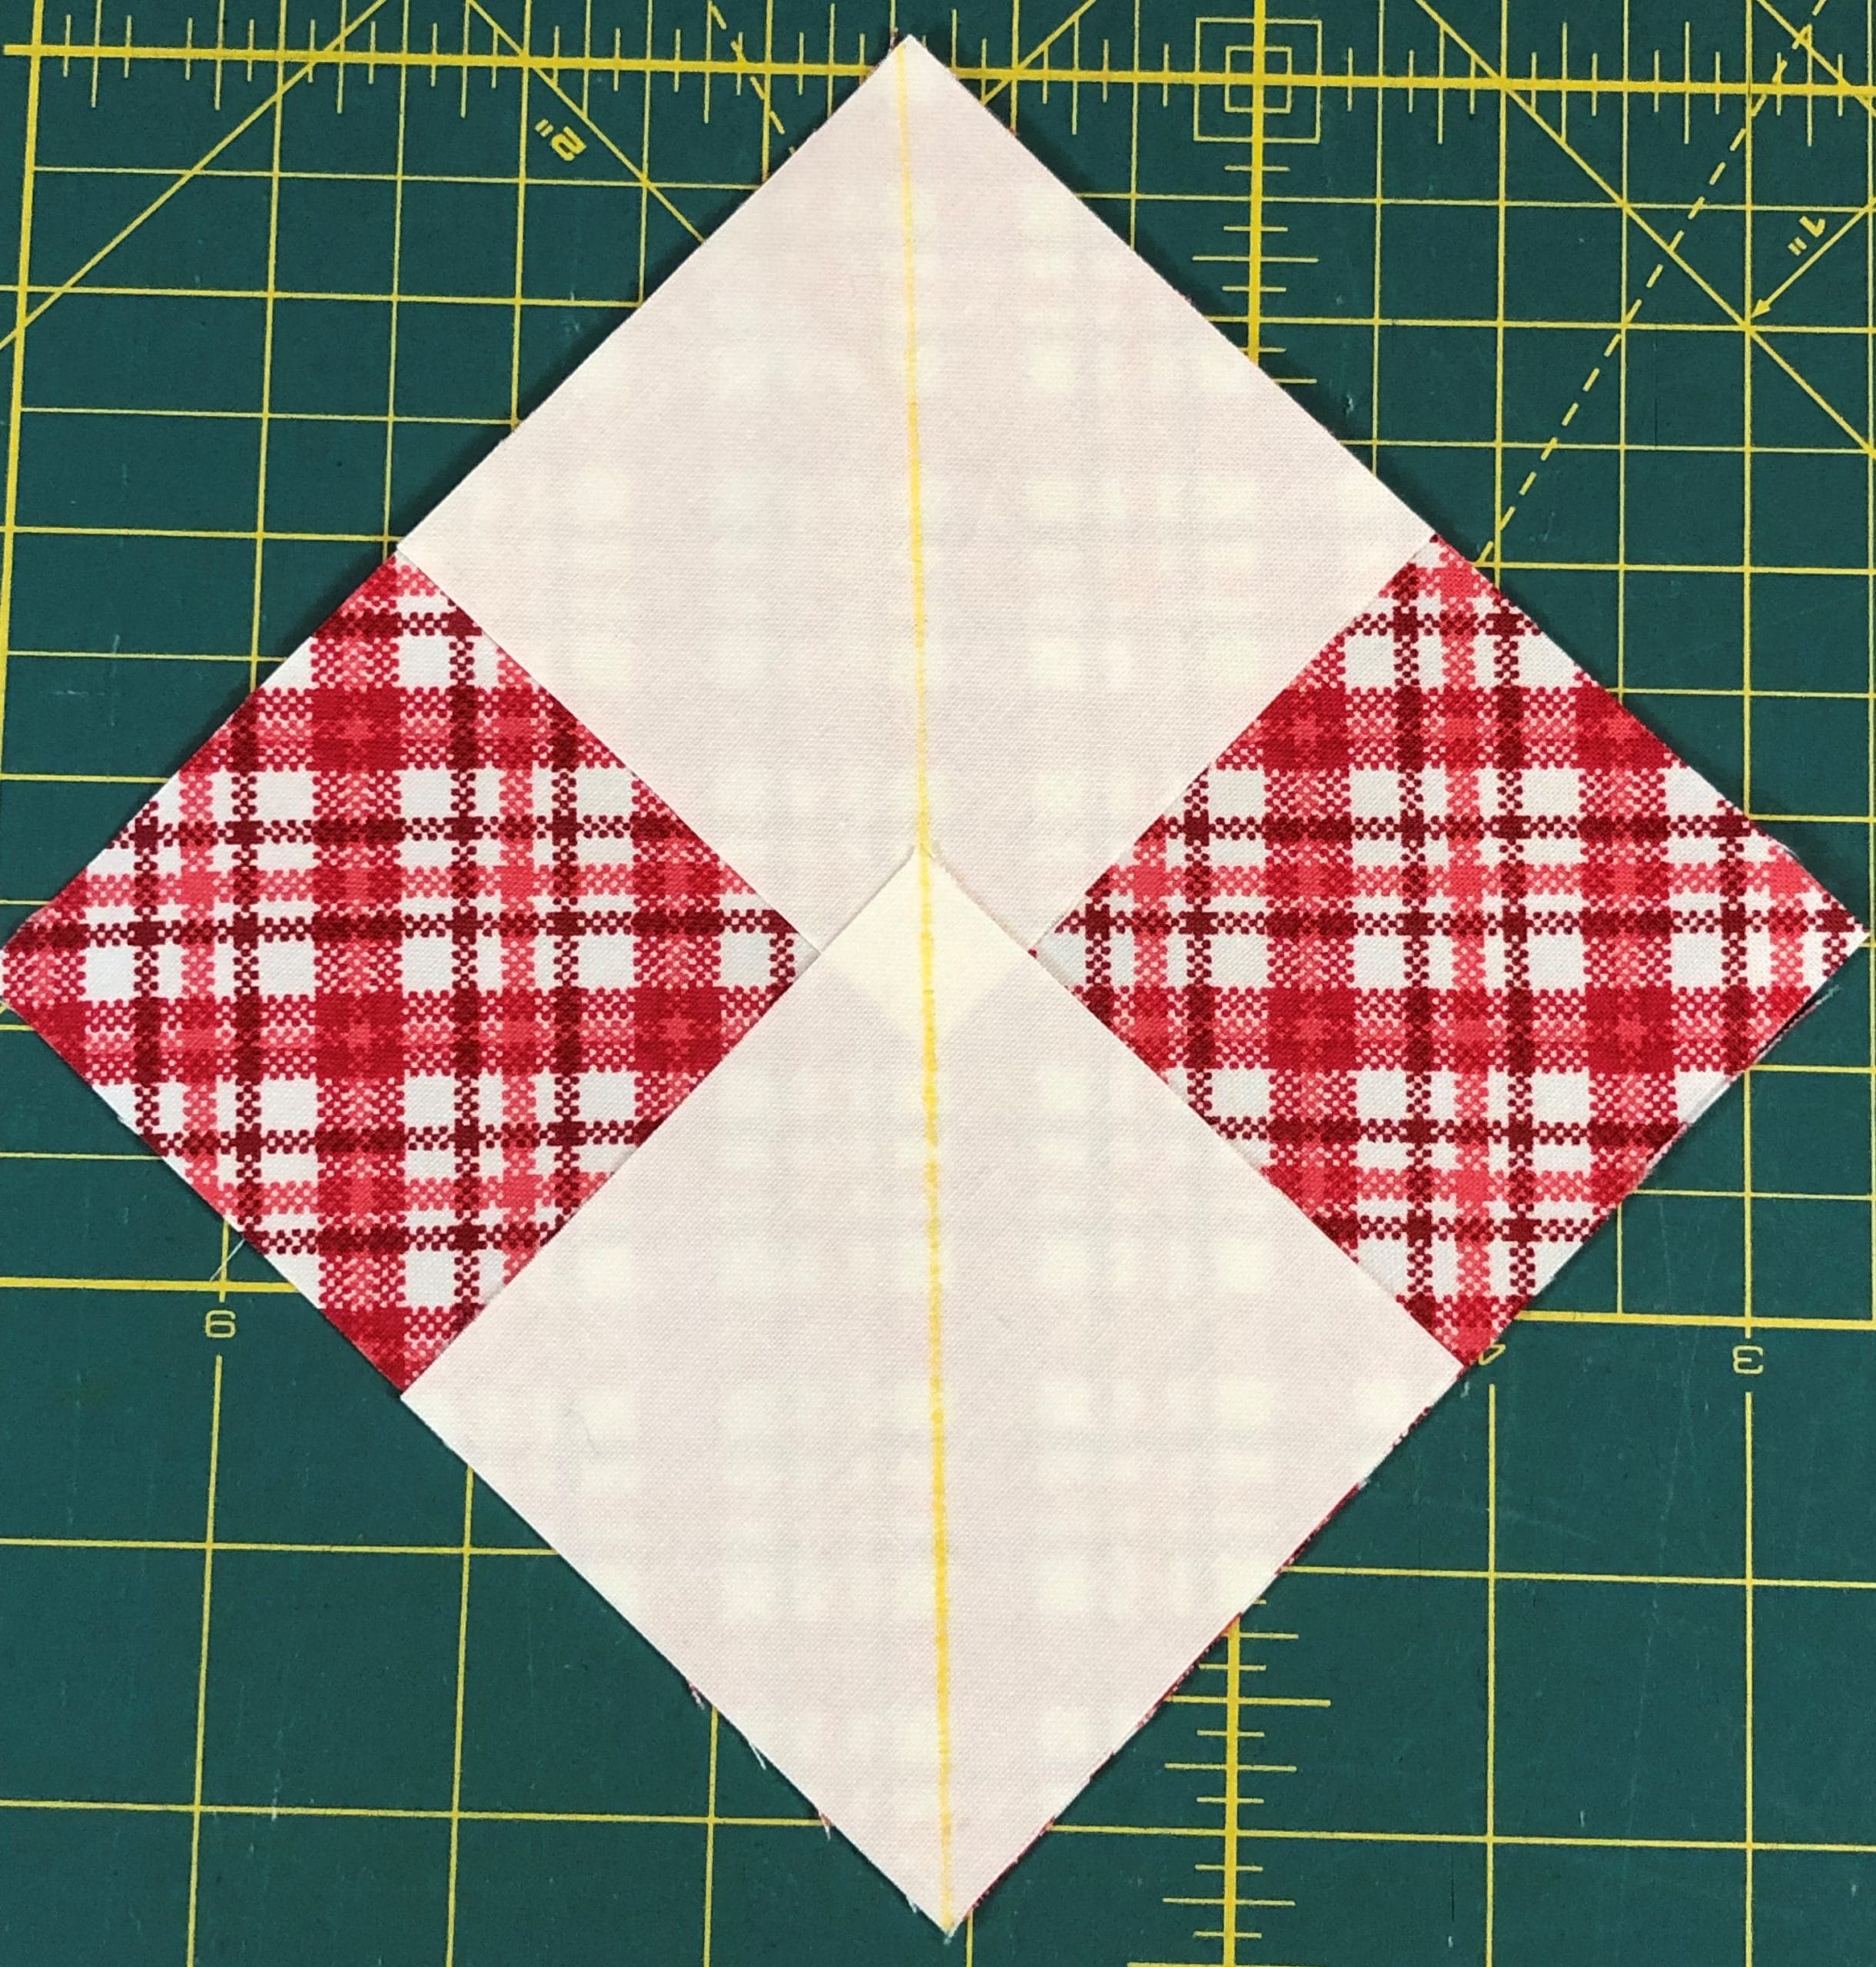
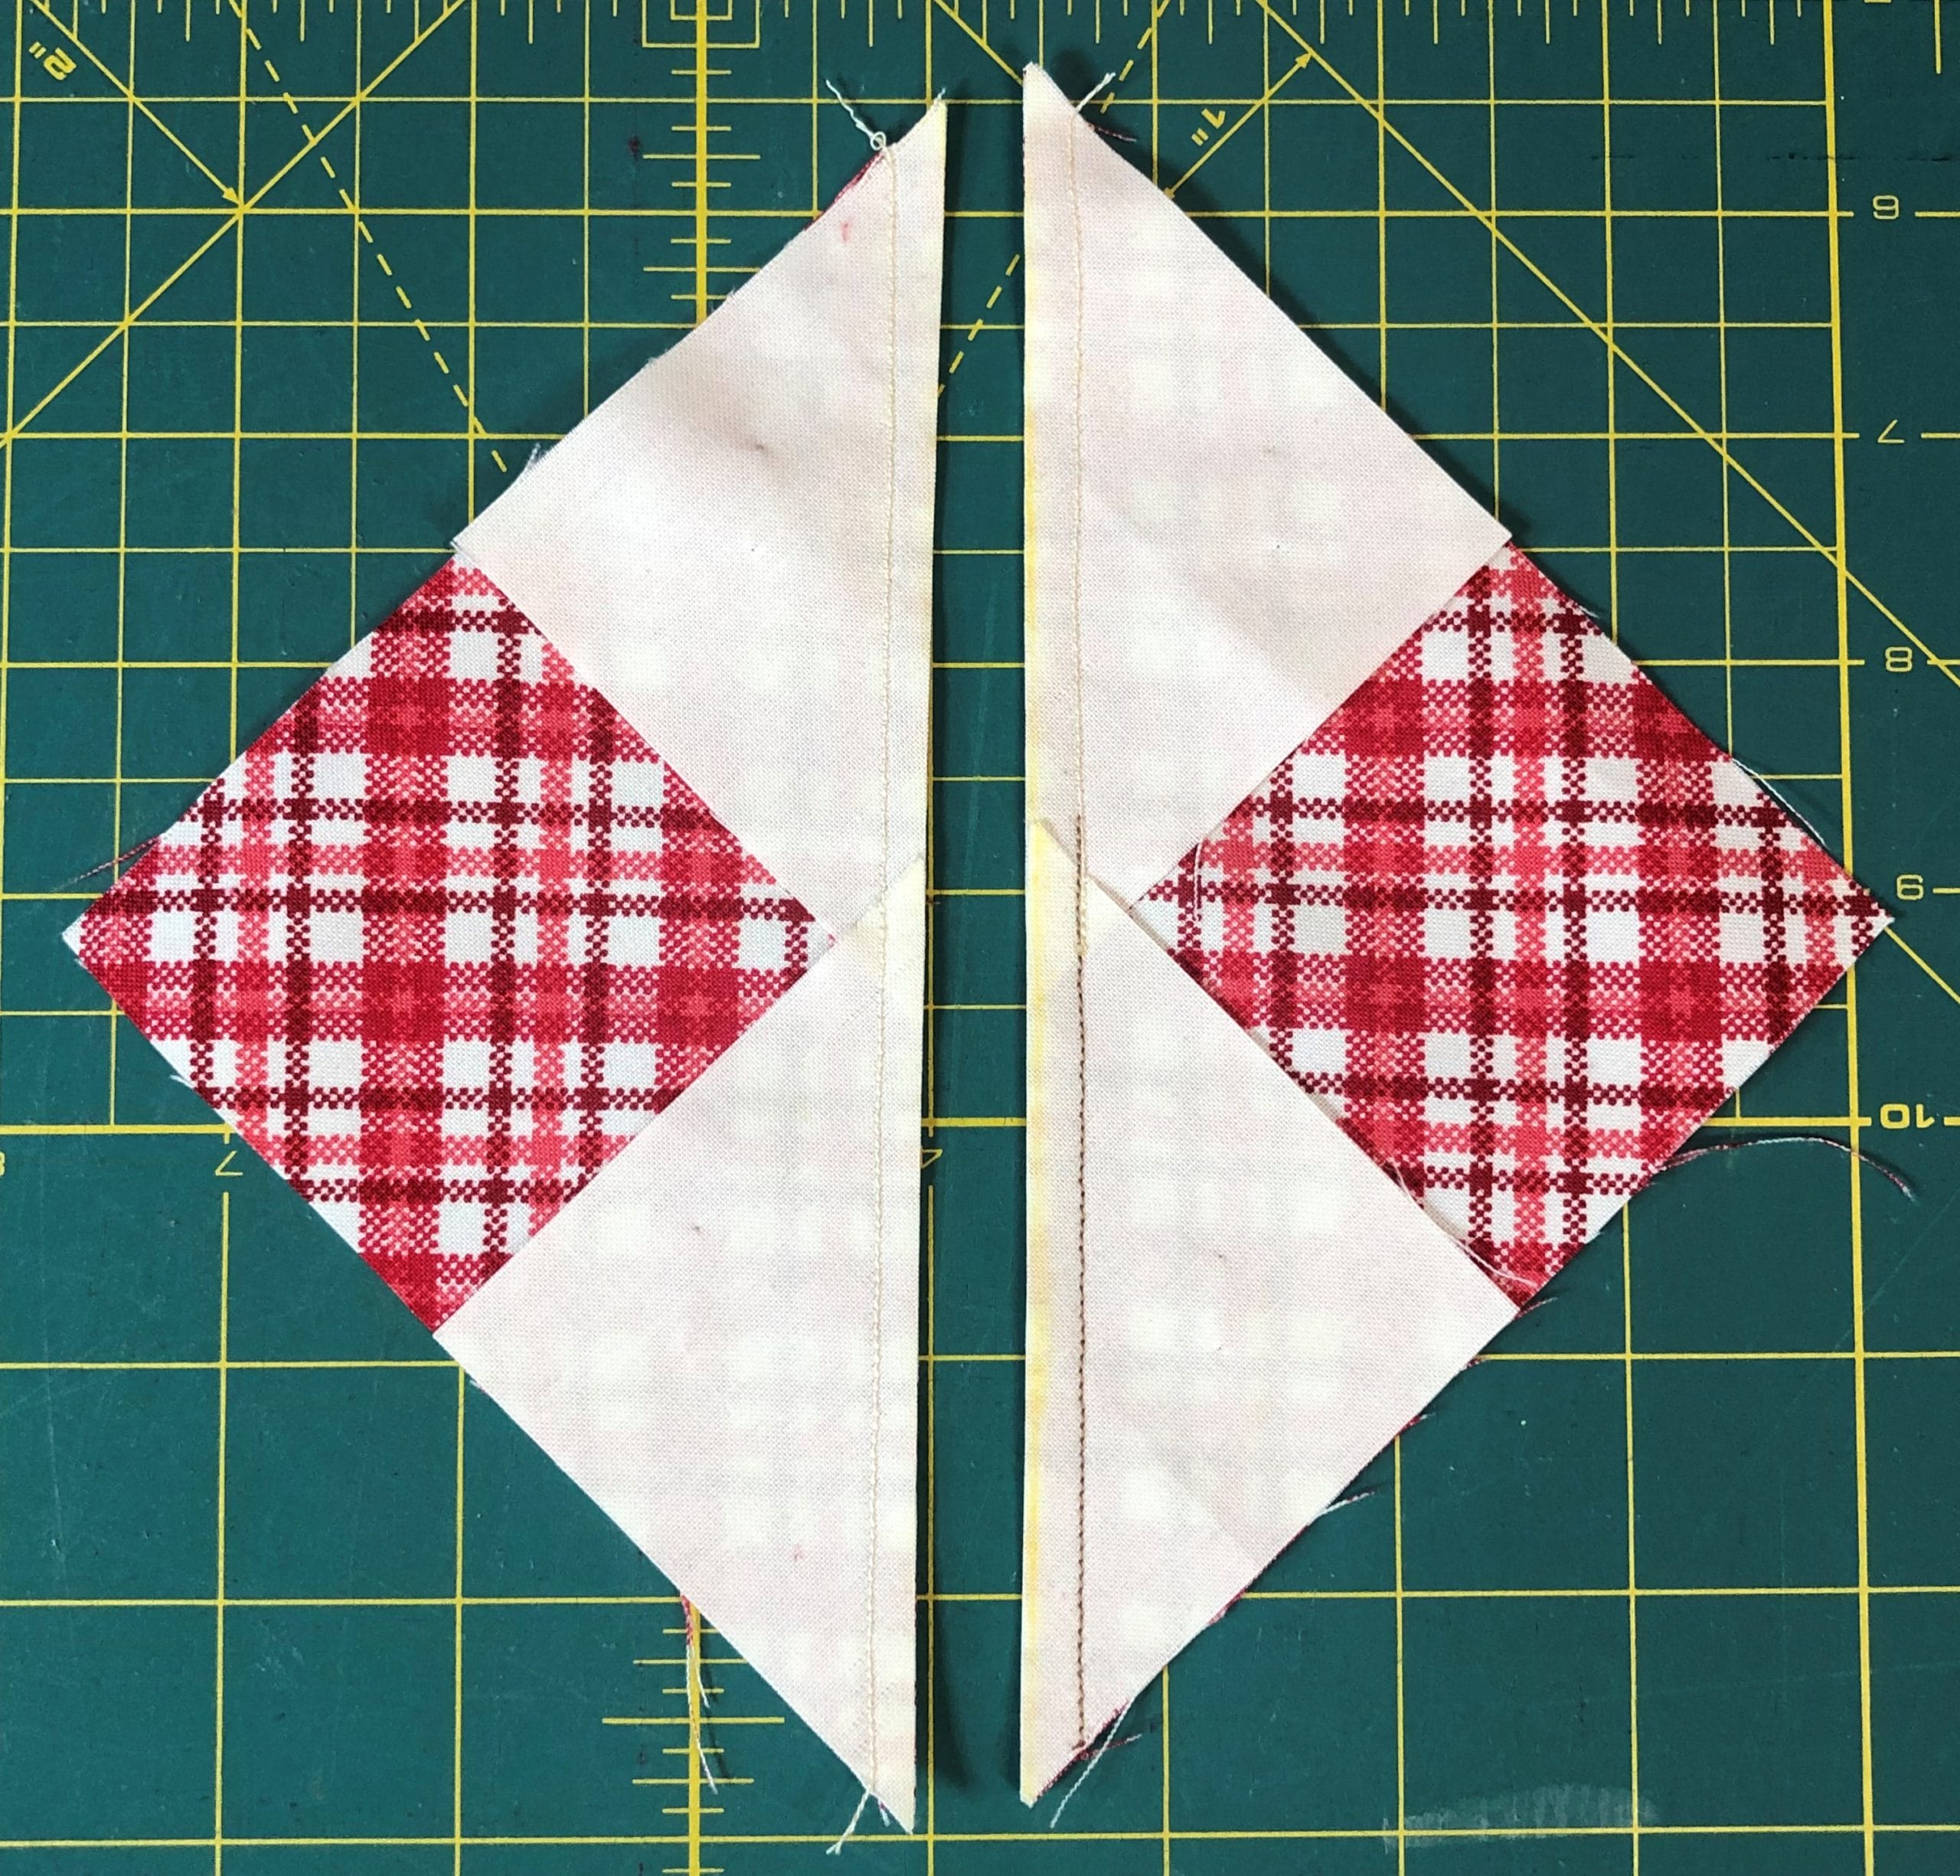
We will begin by making some quarter-square triangle blocks. You’ll start by making two sets of half-square triangles: Two will be with the A and C fabrics, and two will be with the D and C fabrics. Usually at this point I would trim these up, but when making quarter-square triangle blocks, I always wait until the very end to square everything up, because with these blocks, it doesn’t really matter until the end. Plus it gives me some extra wiggle room in case I need it later.
Next, we will pair a C/A square (from step 1) with C/D square (step 2), and place them so the C triangles are on opposites sides, like so:
Notice how the Scadoodle, Scarlet fabric is on the left side for the top block, and on the right side for the bottom one.
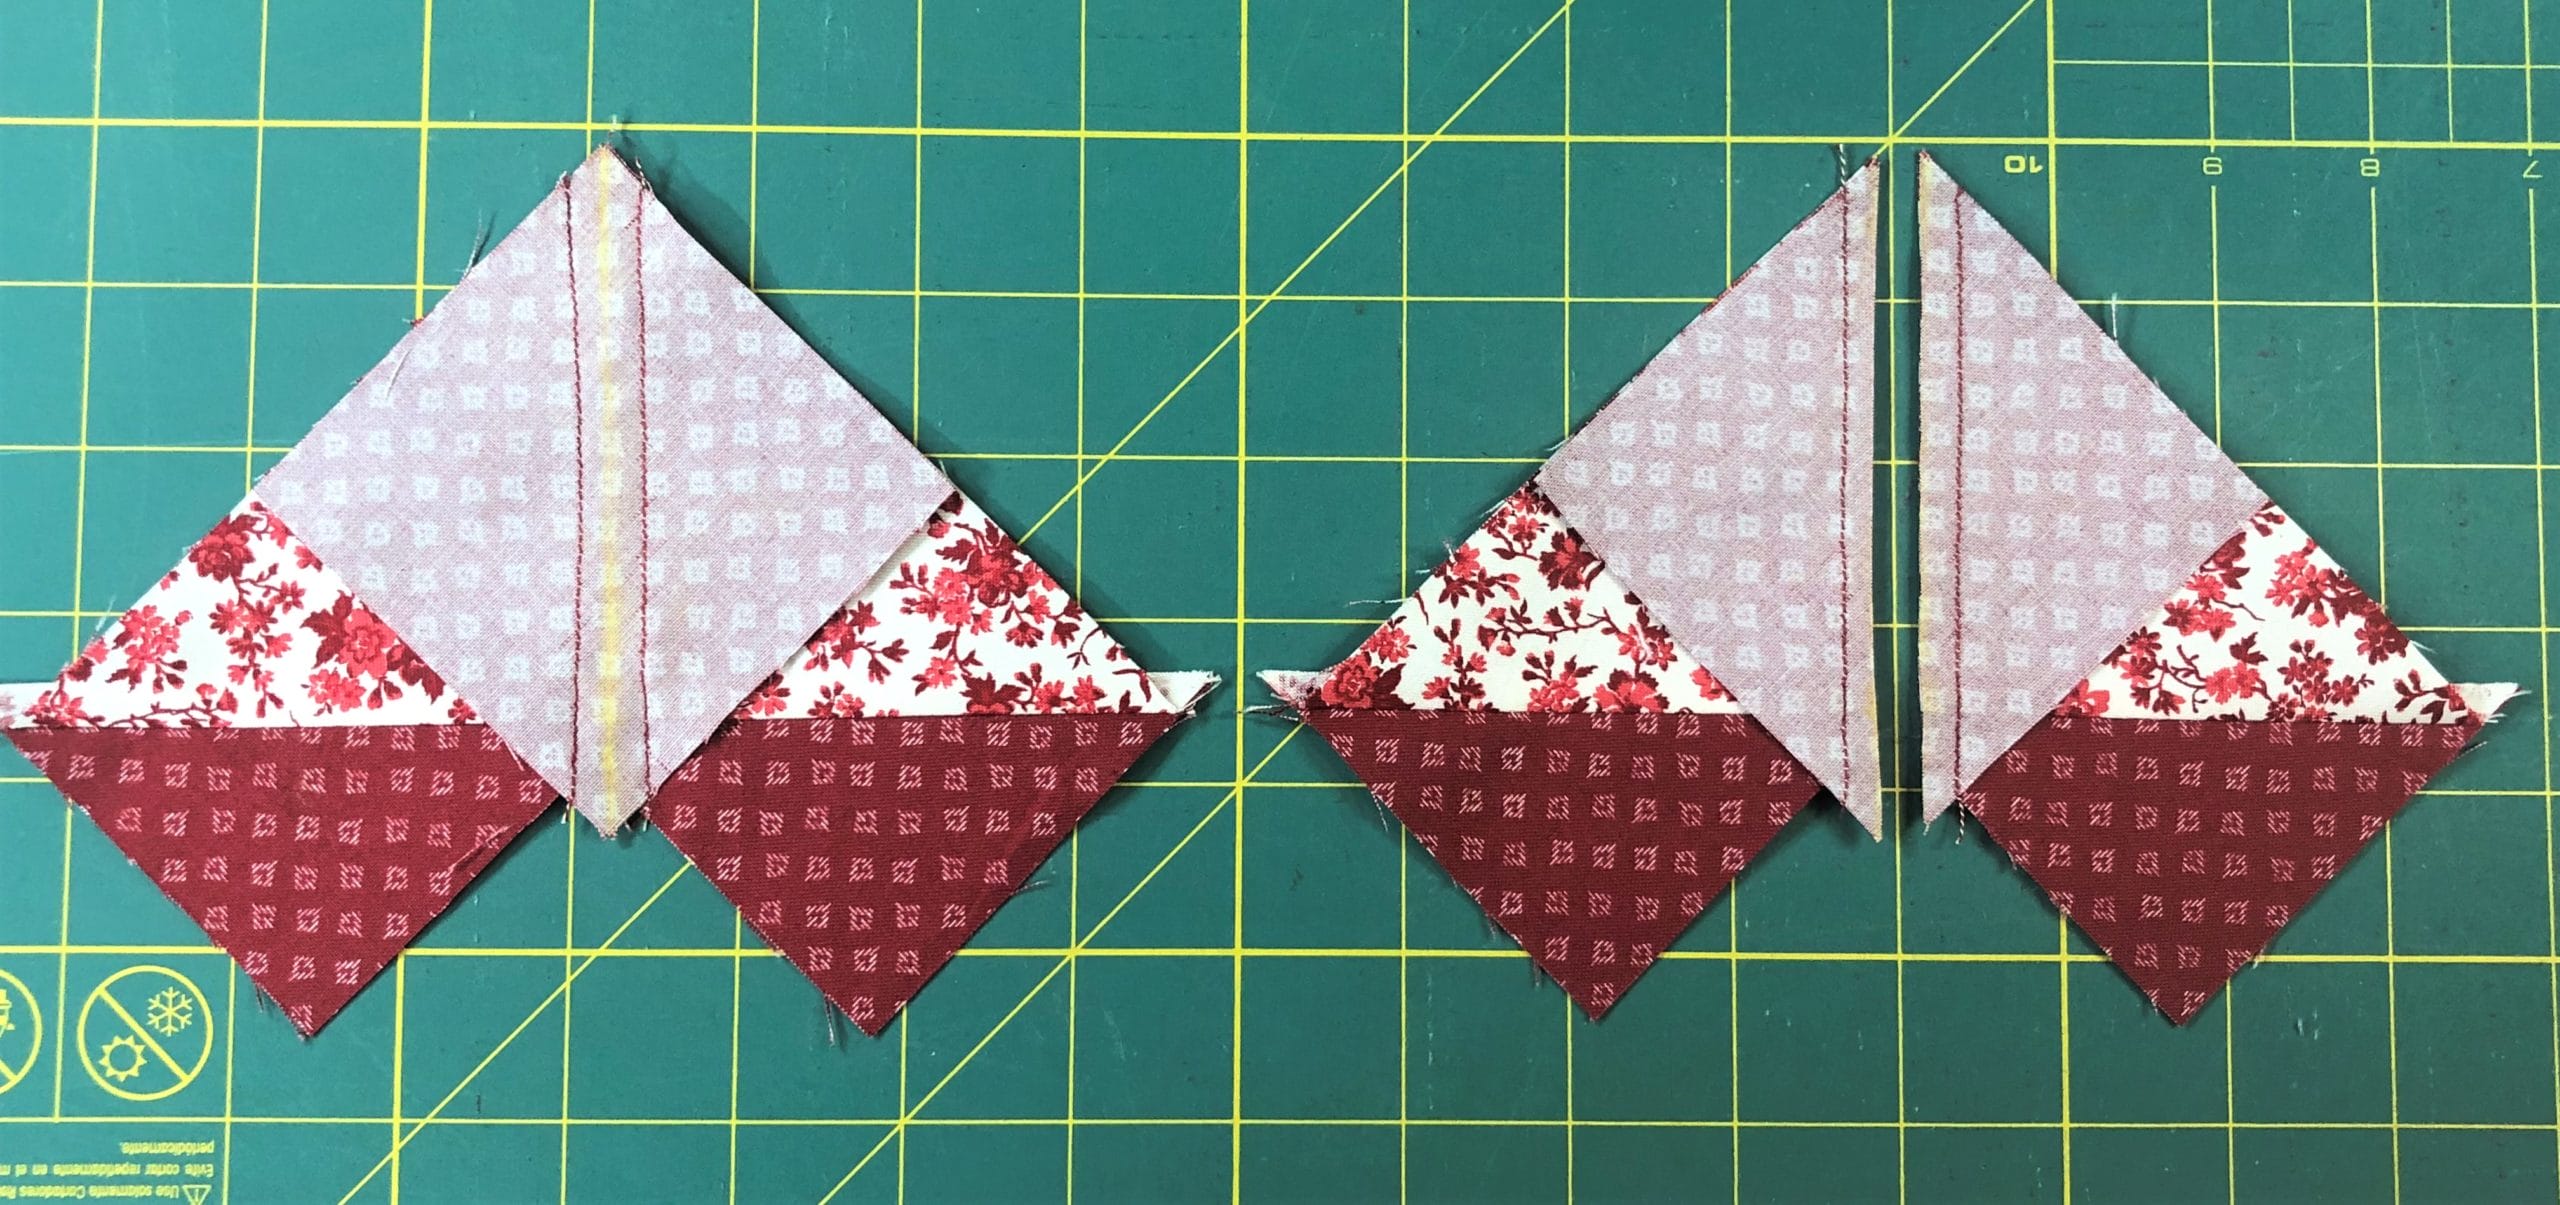
Draw a line across the square, and then stitch on either side of the marked line.
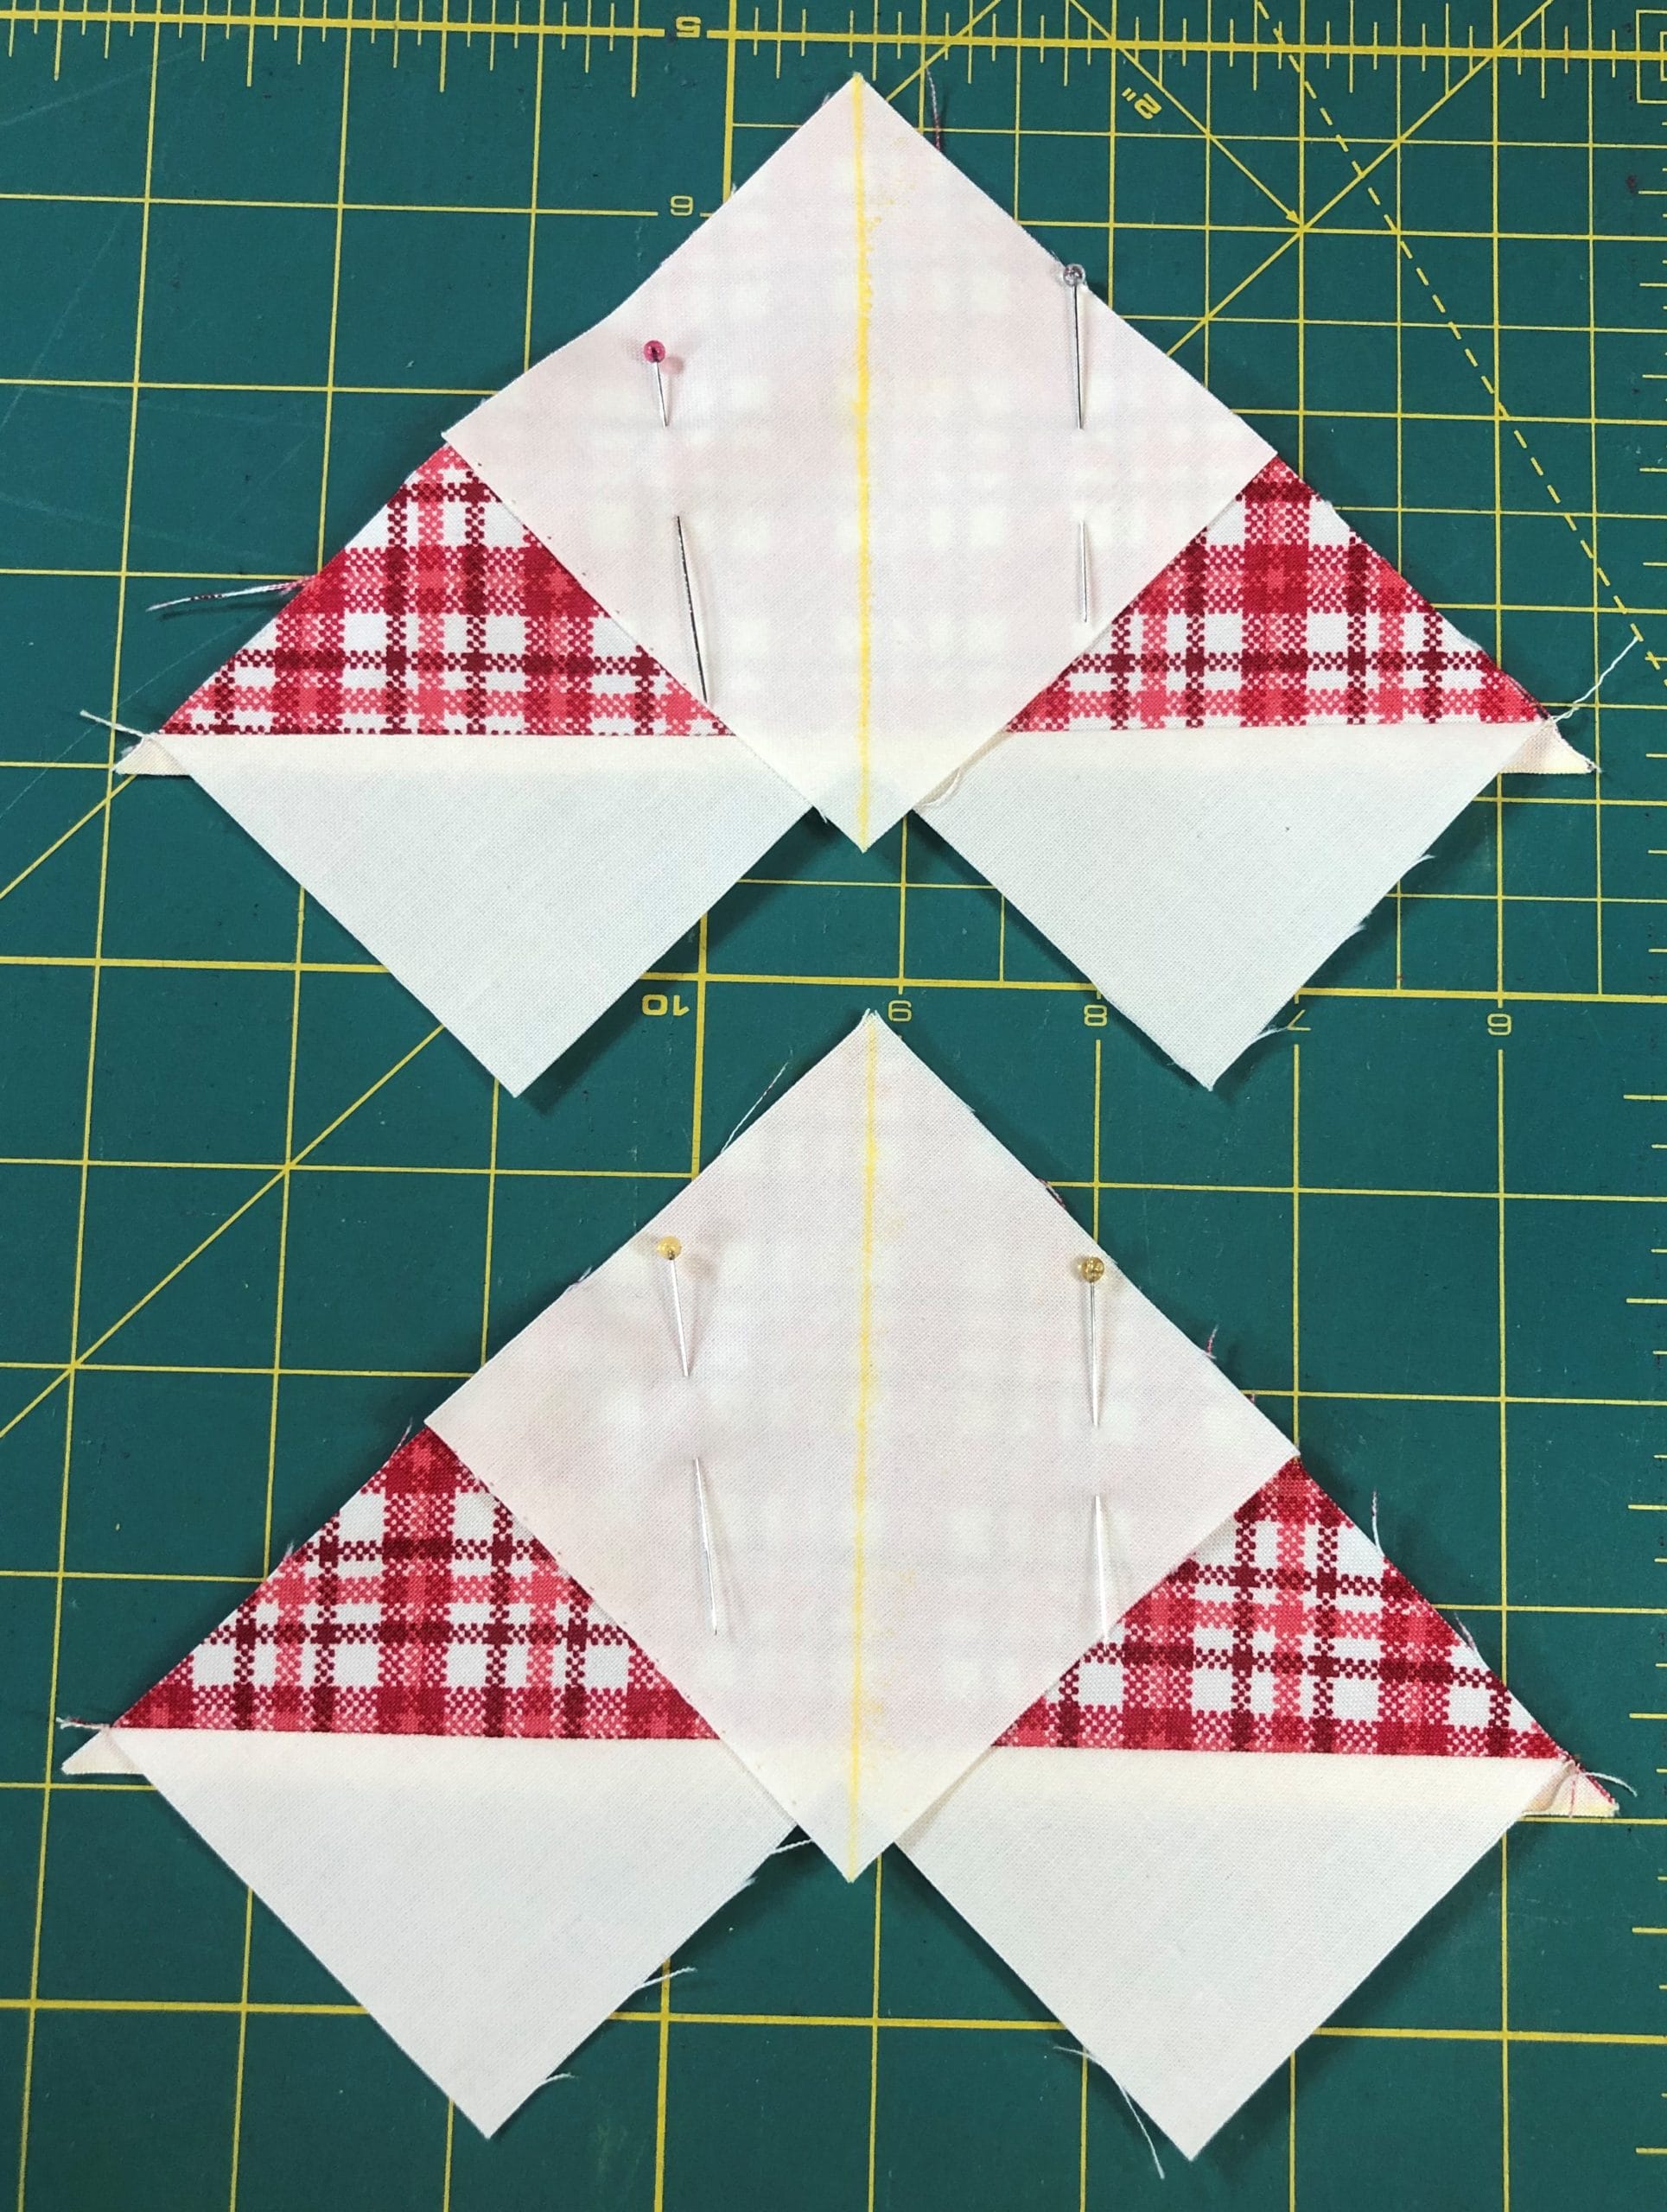
After you cut ON the marked line, you’ll end up with two quarter-square triangle units. You’ll repeat this so that you’ll have a total of 4 of these squares. Trim them up to be 4-1/2” square.
Now it’s time to assemble the block. This block is pretty simple, but you’ll just want to make sure that all of your Corsage II Ivory triangles (A) are framing the center B square. I always lay out all my pieces before sewing so that I make sure everything is oriented correctly.
BLOCK 21
This block is also pretty straightforward. Again, you’ll want to pay attention to the pressing arrows so that when the block is all sewn together you’ll have those seams in the right direction.
You’ll start by making a modified 9-patch like so:
I’ve sewed the rows for the 9-patch and am now ready to sew them together.
Next you’ll move on to making some more of those no-waste flying geese. This is the same drill as before with the previous block. And once those are finished you’ll add some of the background F and G pieces to the ends of them like you see here:
Now all you have to do is attach those completed flying geese units to sides, and top and bottom of the center unit, and you are good to go!
BLOCK 22
Before we begin the instructions for these blocks, I have to apologize for a silly mistake in the cutting instructions. You’ll notice that the last fabric is labeled “Background (White)”, which is obviously not correct, since there is no White fabric in this pattern. This is a generic term I use when writing patterns, which gets changed to the actual fabric name for the final edit. The dumb thing is, I MARKED THIS IN RED PEN to change it, and then somehow didn’t. Ugh. Anyway, please know that “Background White” is really Solid, Ivory.
UGH! Seriously!
Now on to sewing! We’ll start by making a simple 9-patch and then make, you guessed it, even more no-waste flying geese. (Gee, this sounds kinda similar to the last block…)
Then we’ll make a few easy 4-patch units – Four of them to be exact.
After I sew each F square to a B square, then I sew the pairs together to make the 4-patch units.
The only thing to worry about when assembling this block is the orientation of the corner 4-patch units. As you can see from the picture, the Ivory F squares should be in the outer corners. At least, that’s how I’ve done it. That being said, since this is YOUR quilt, you can switch up the orientation if you so desire, and put those red squares in the corners instead. It’s entirely up to you, just make sure that whatever you do, it’s on purpose. That advice probably applies to more than just quilt blocks, haha!
The rows are sewn together and ready to finish the block.
I hope you’ve enjoyed these first few blocks. Next month we’ll get started on some of those Irish Chain pinwheels. Stay tuned!
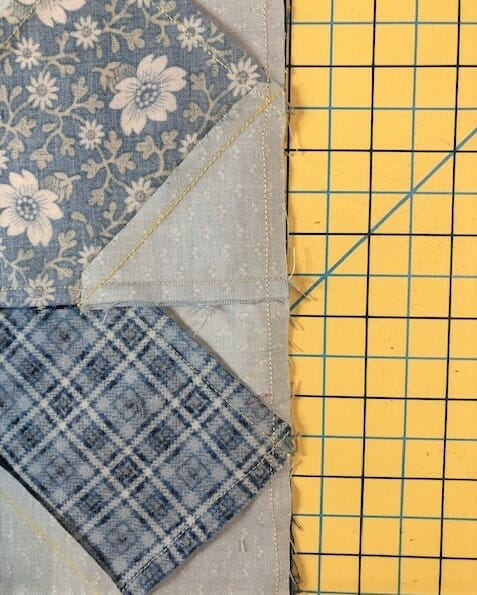
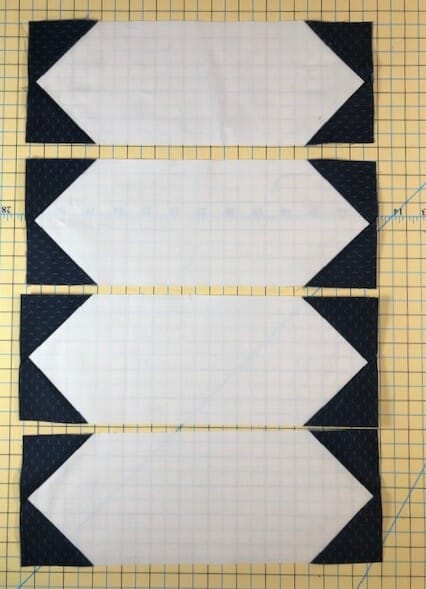
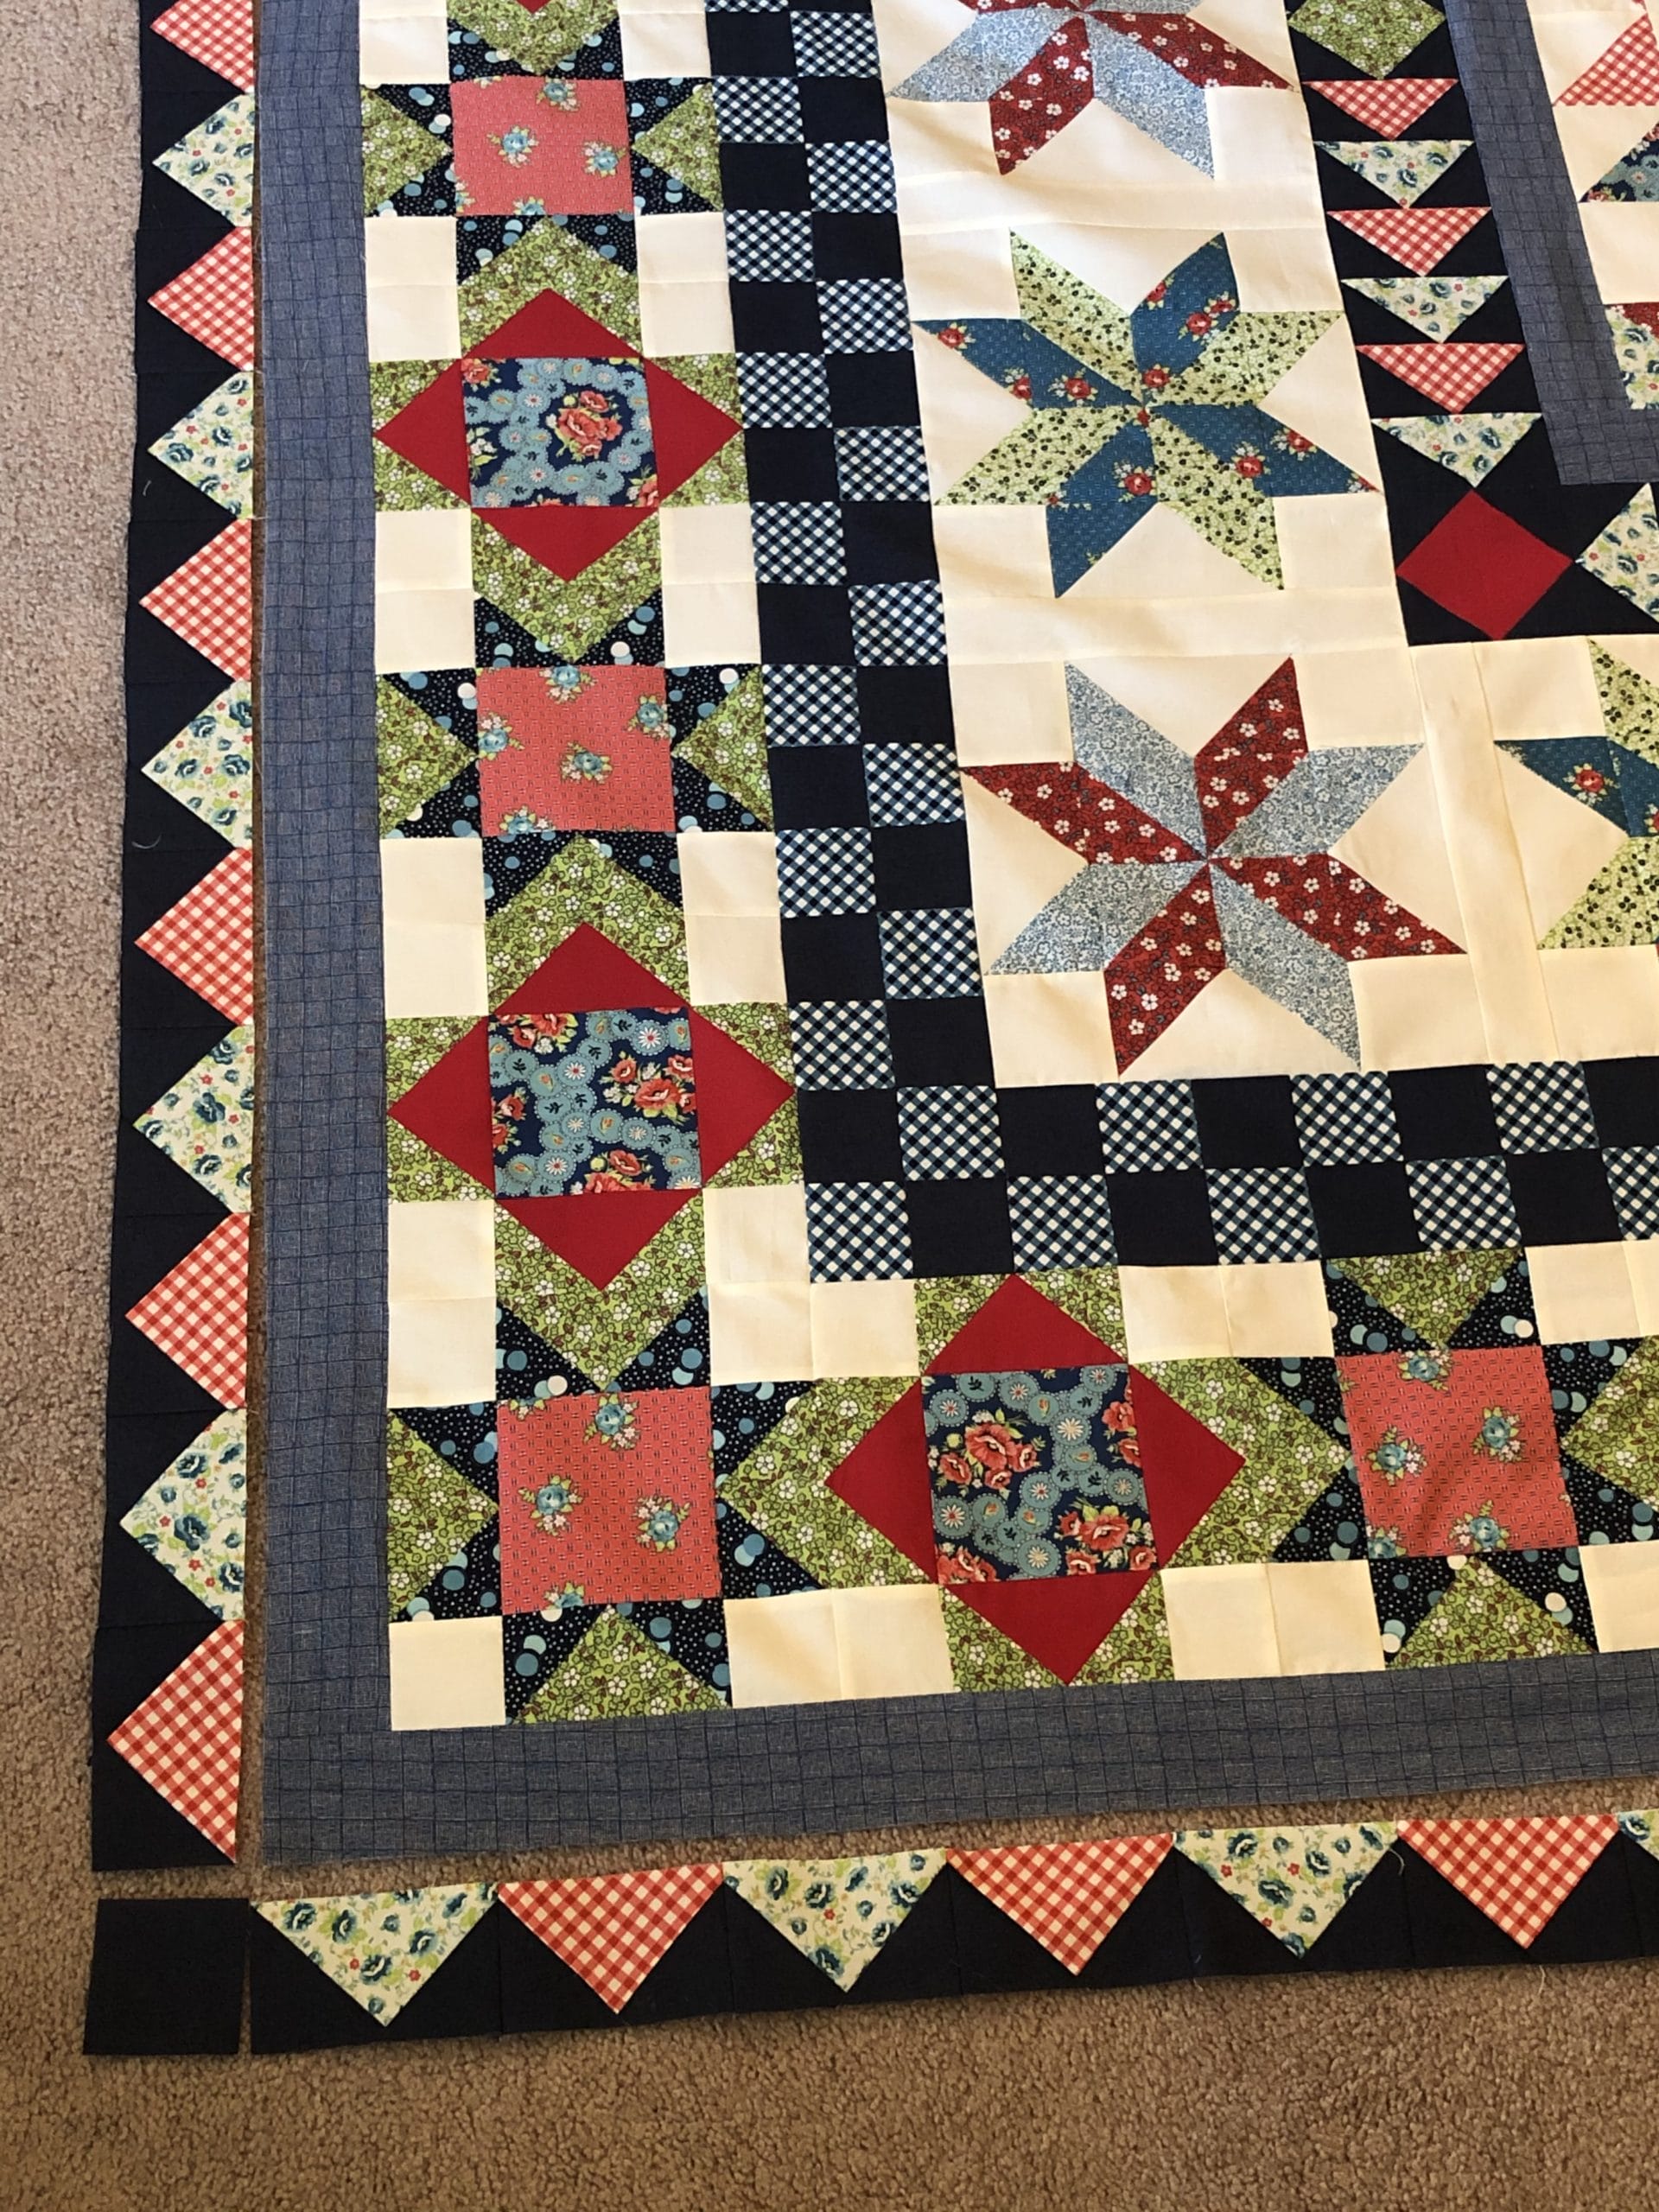
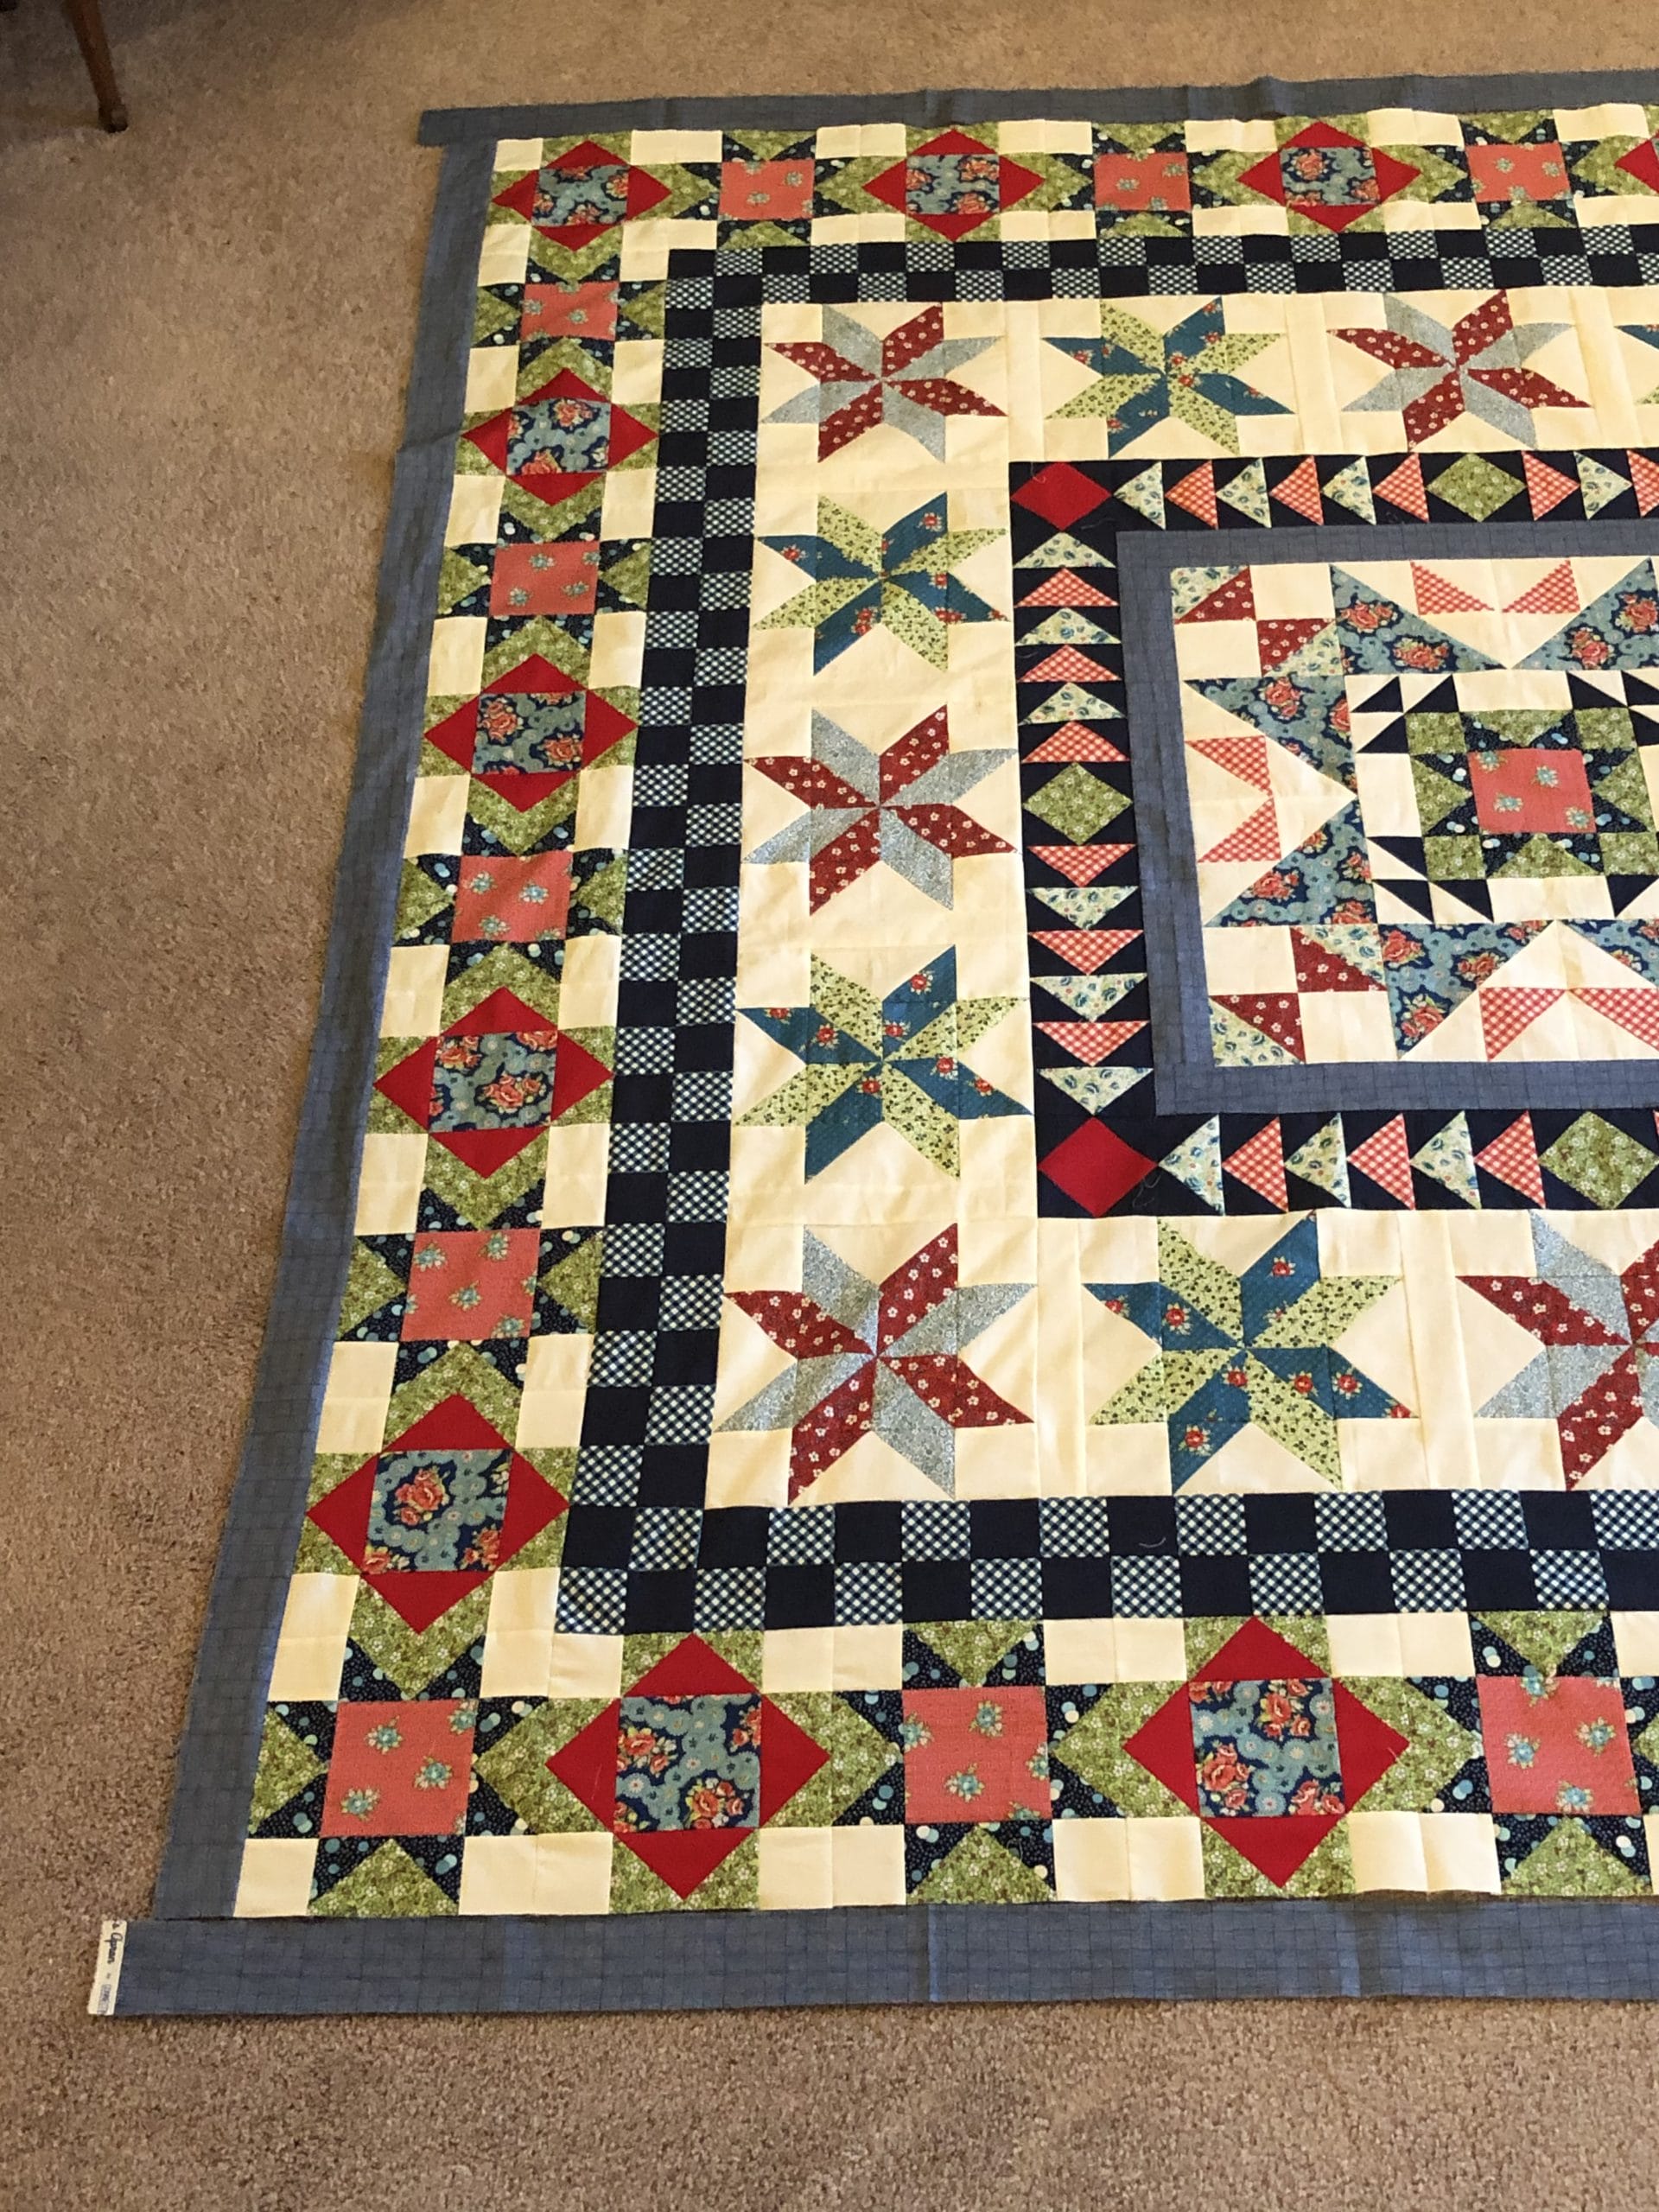
We did it! We’ve finally made it to the finish line! Four our very last month we will be making a few more flying geese, then sewing our flying geese rows together and on to the quilt. After that, all we have left to do is attach those final navy borders and we are done!
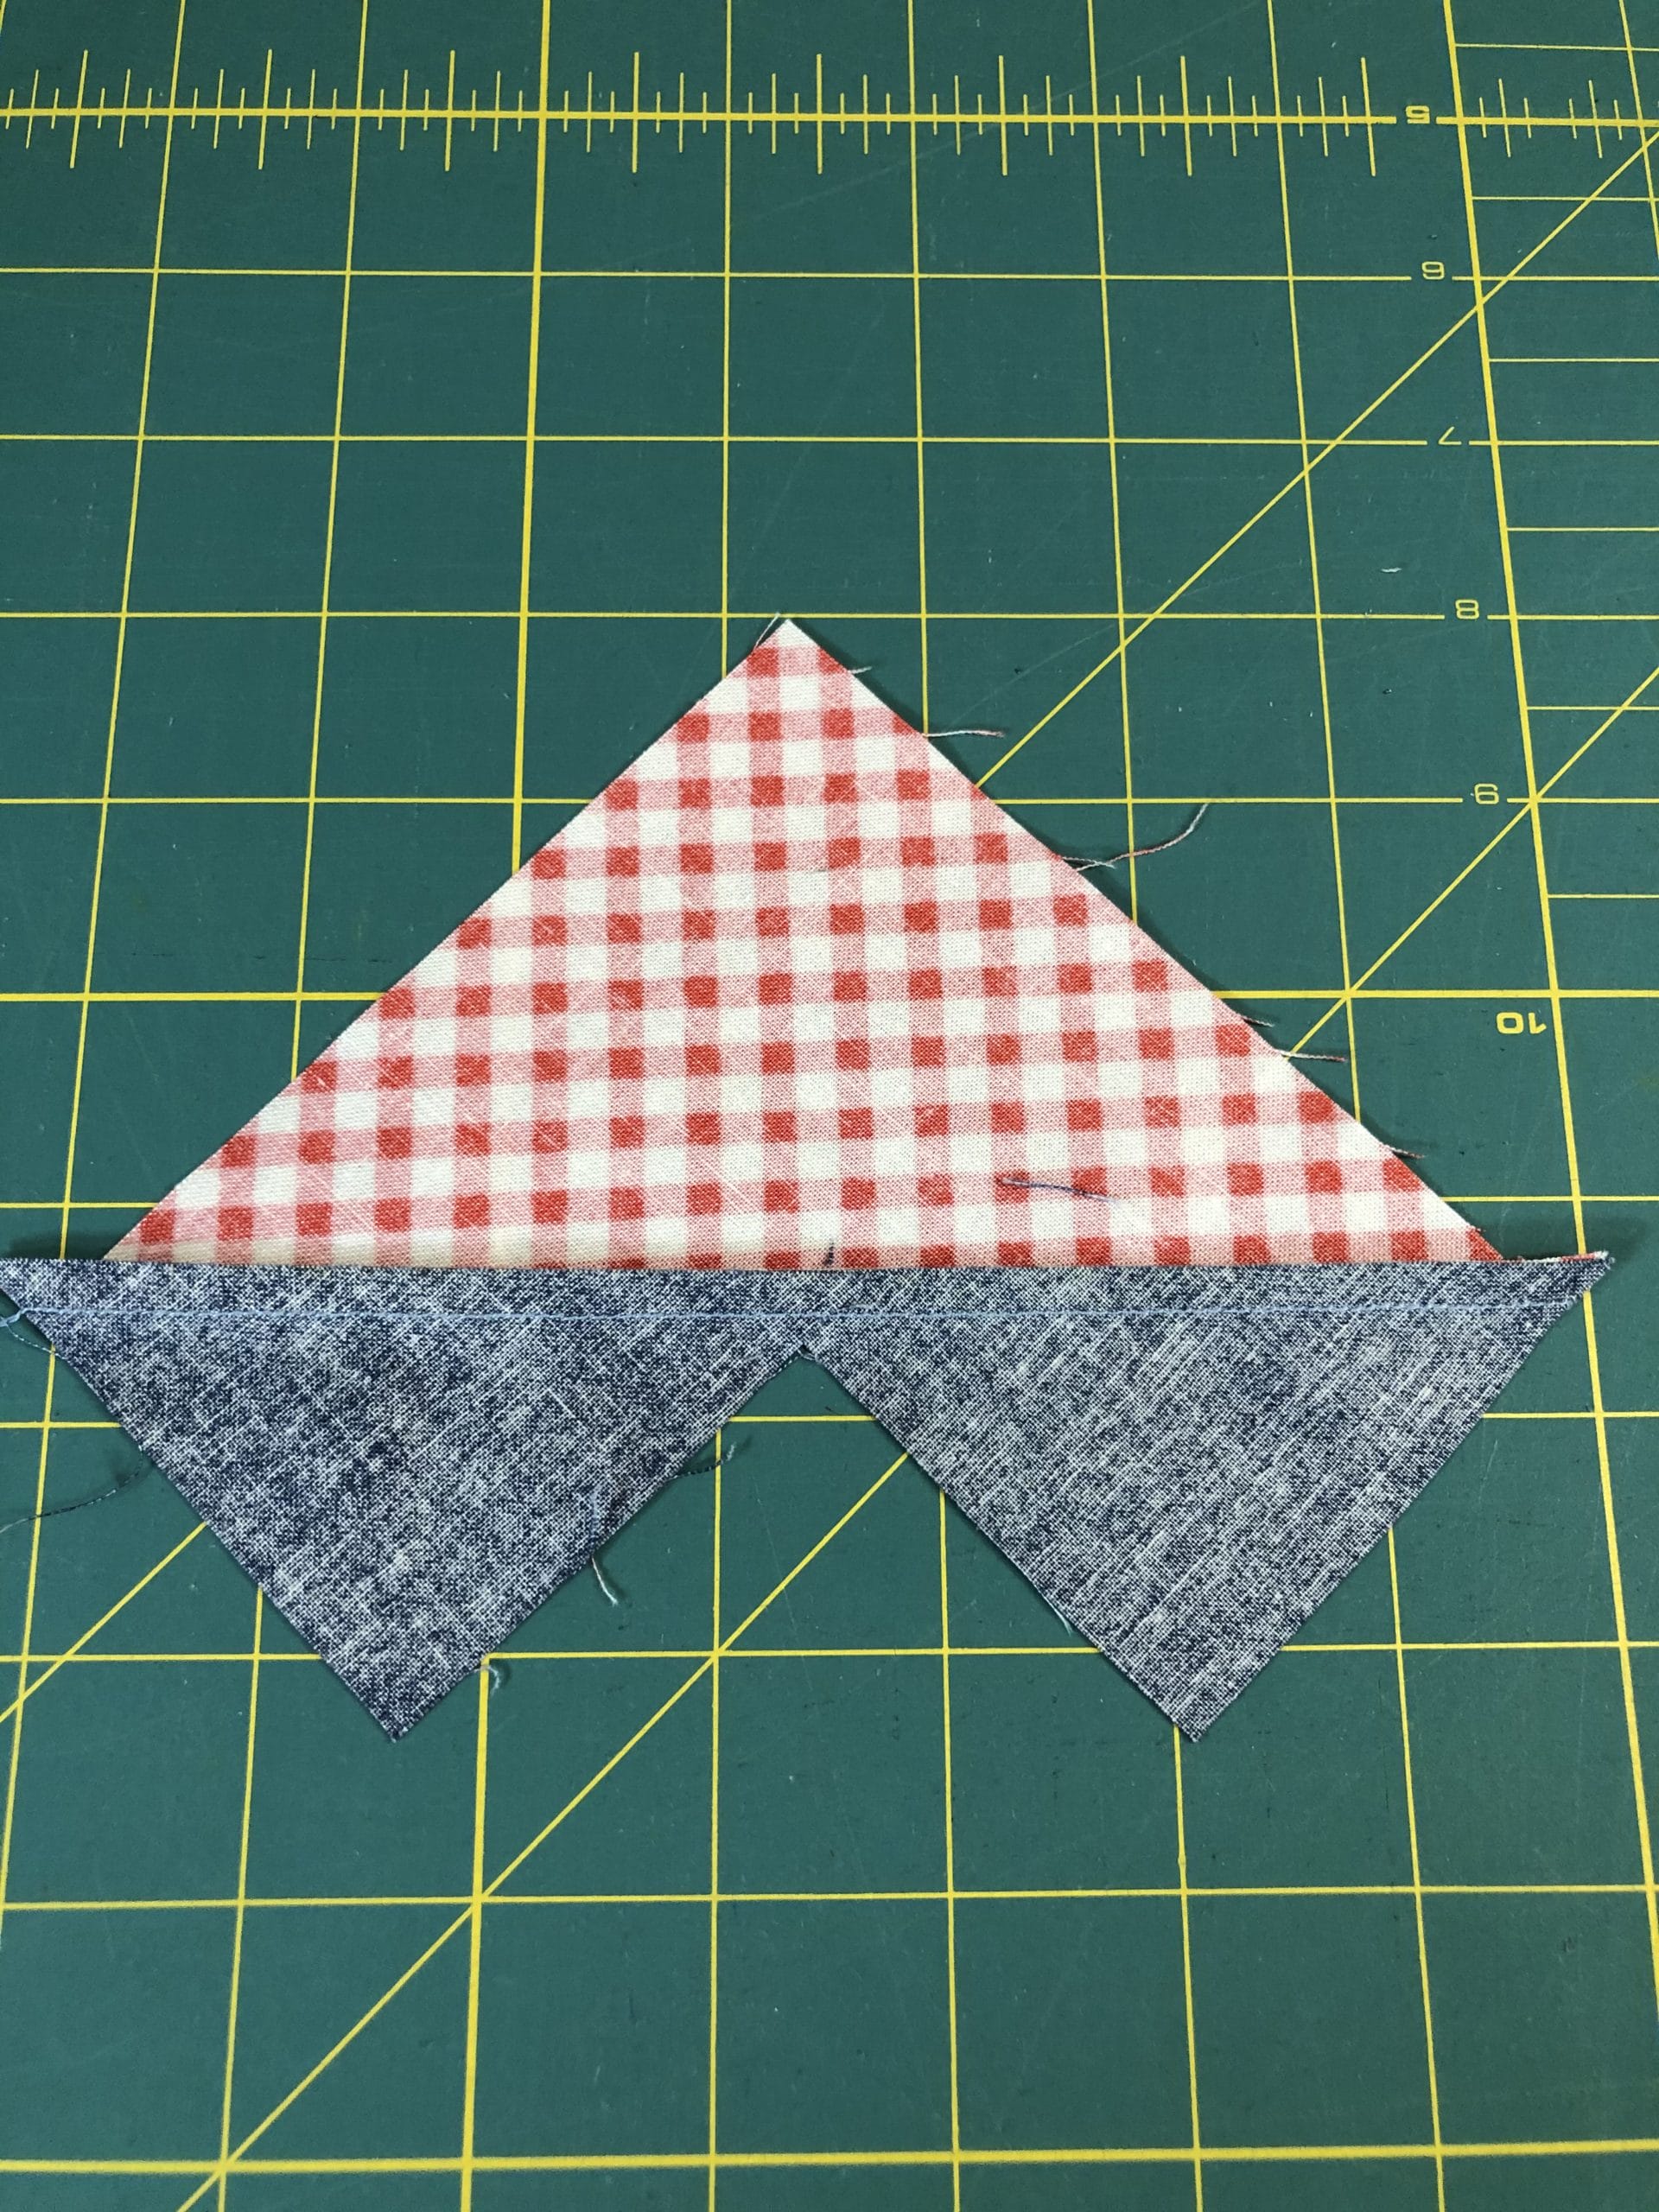
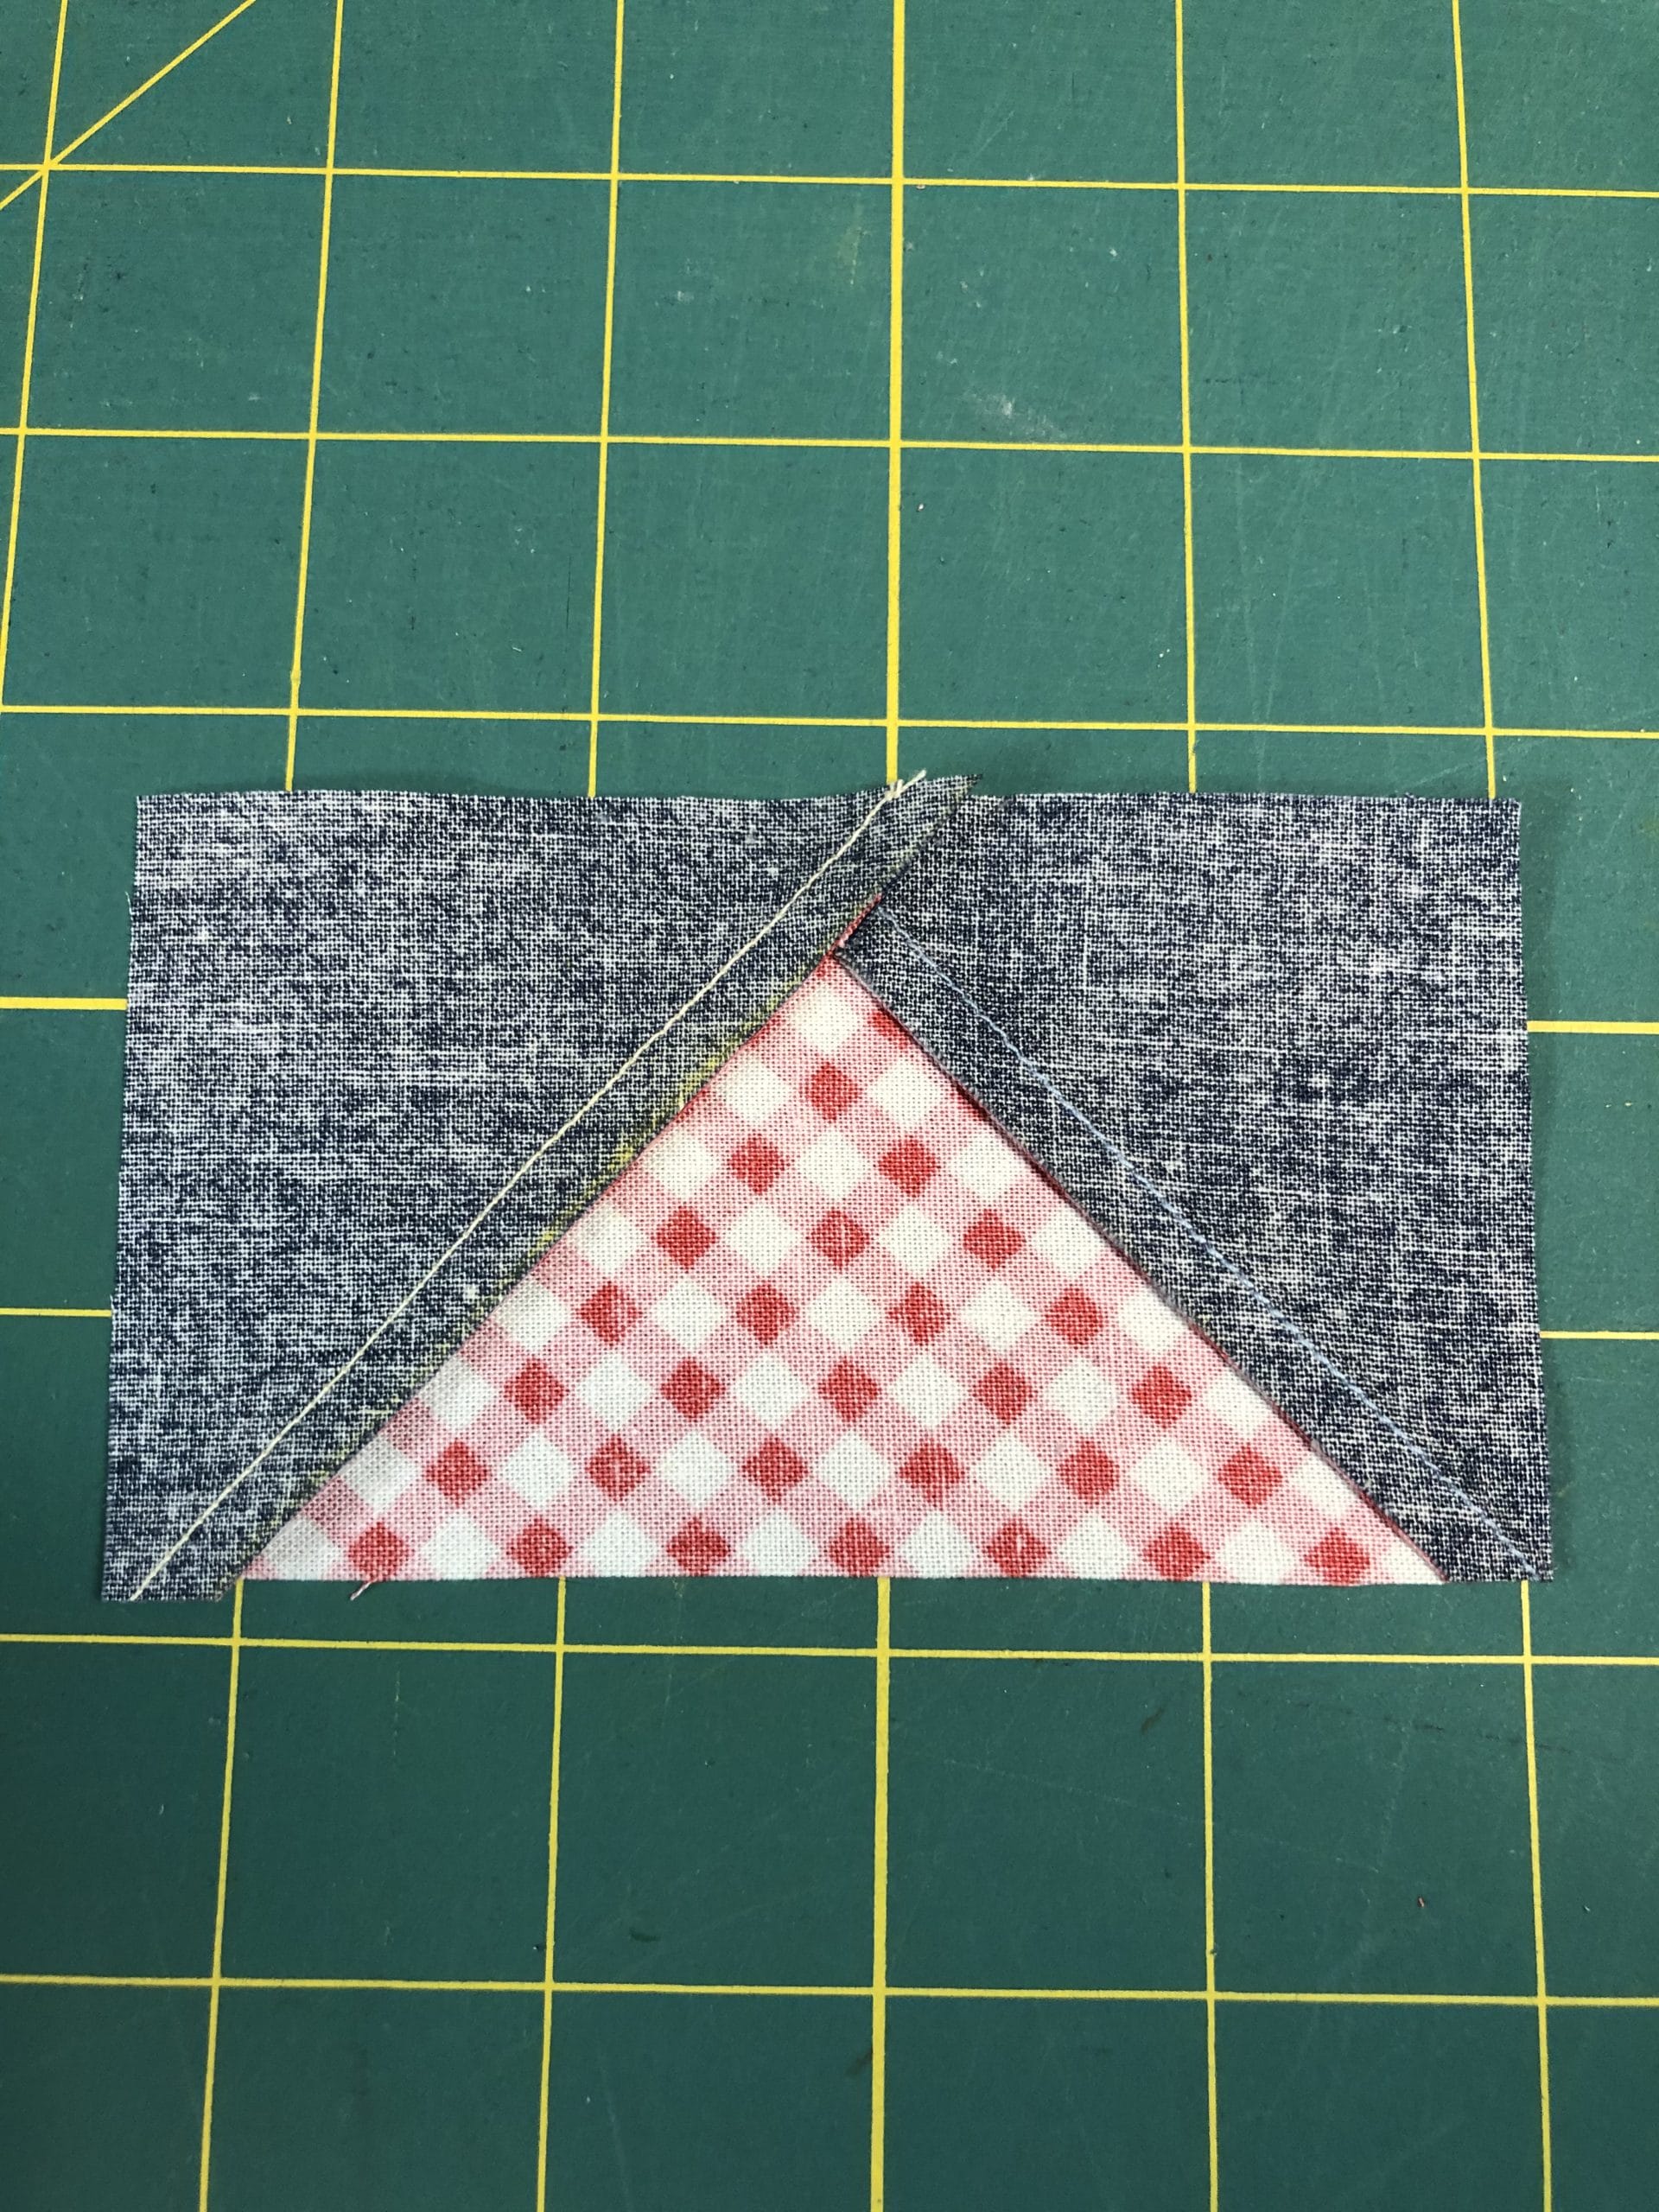
Our last flying geese adventure for this quilt involves the same procedure as all the previous flying geese, with one notable exception. This time, we will iron our seams INWARD, rather than outward. I know that is counter-intuitive, but this will enable us to get all the seams to nest together when we make the border.
Press the navy seams UP toward the red gingham at this step.
Here is a photo of what the back of the flying geese will look like when ironed.
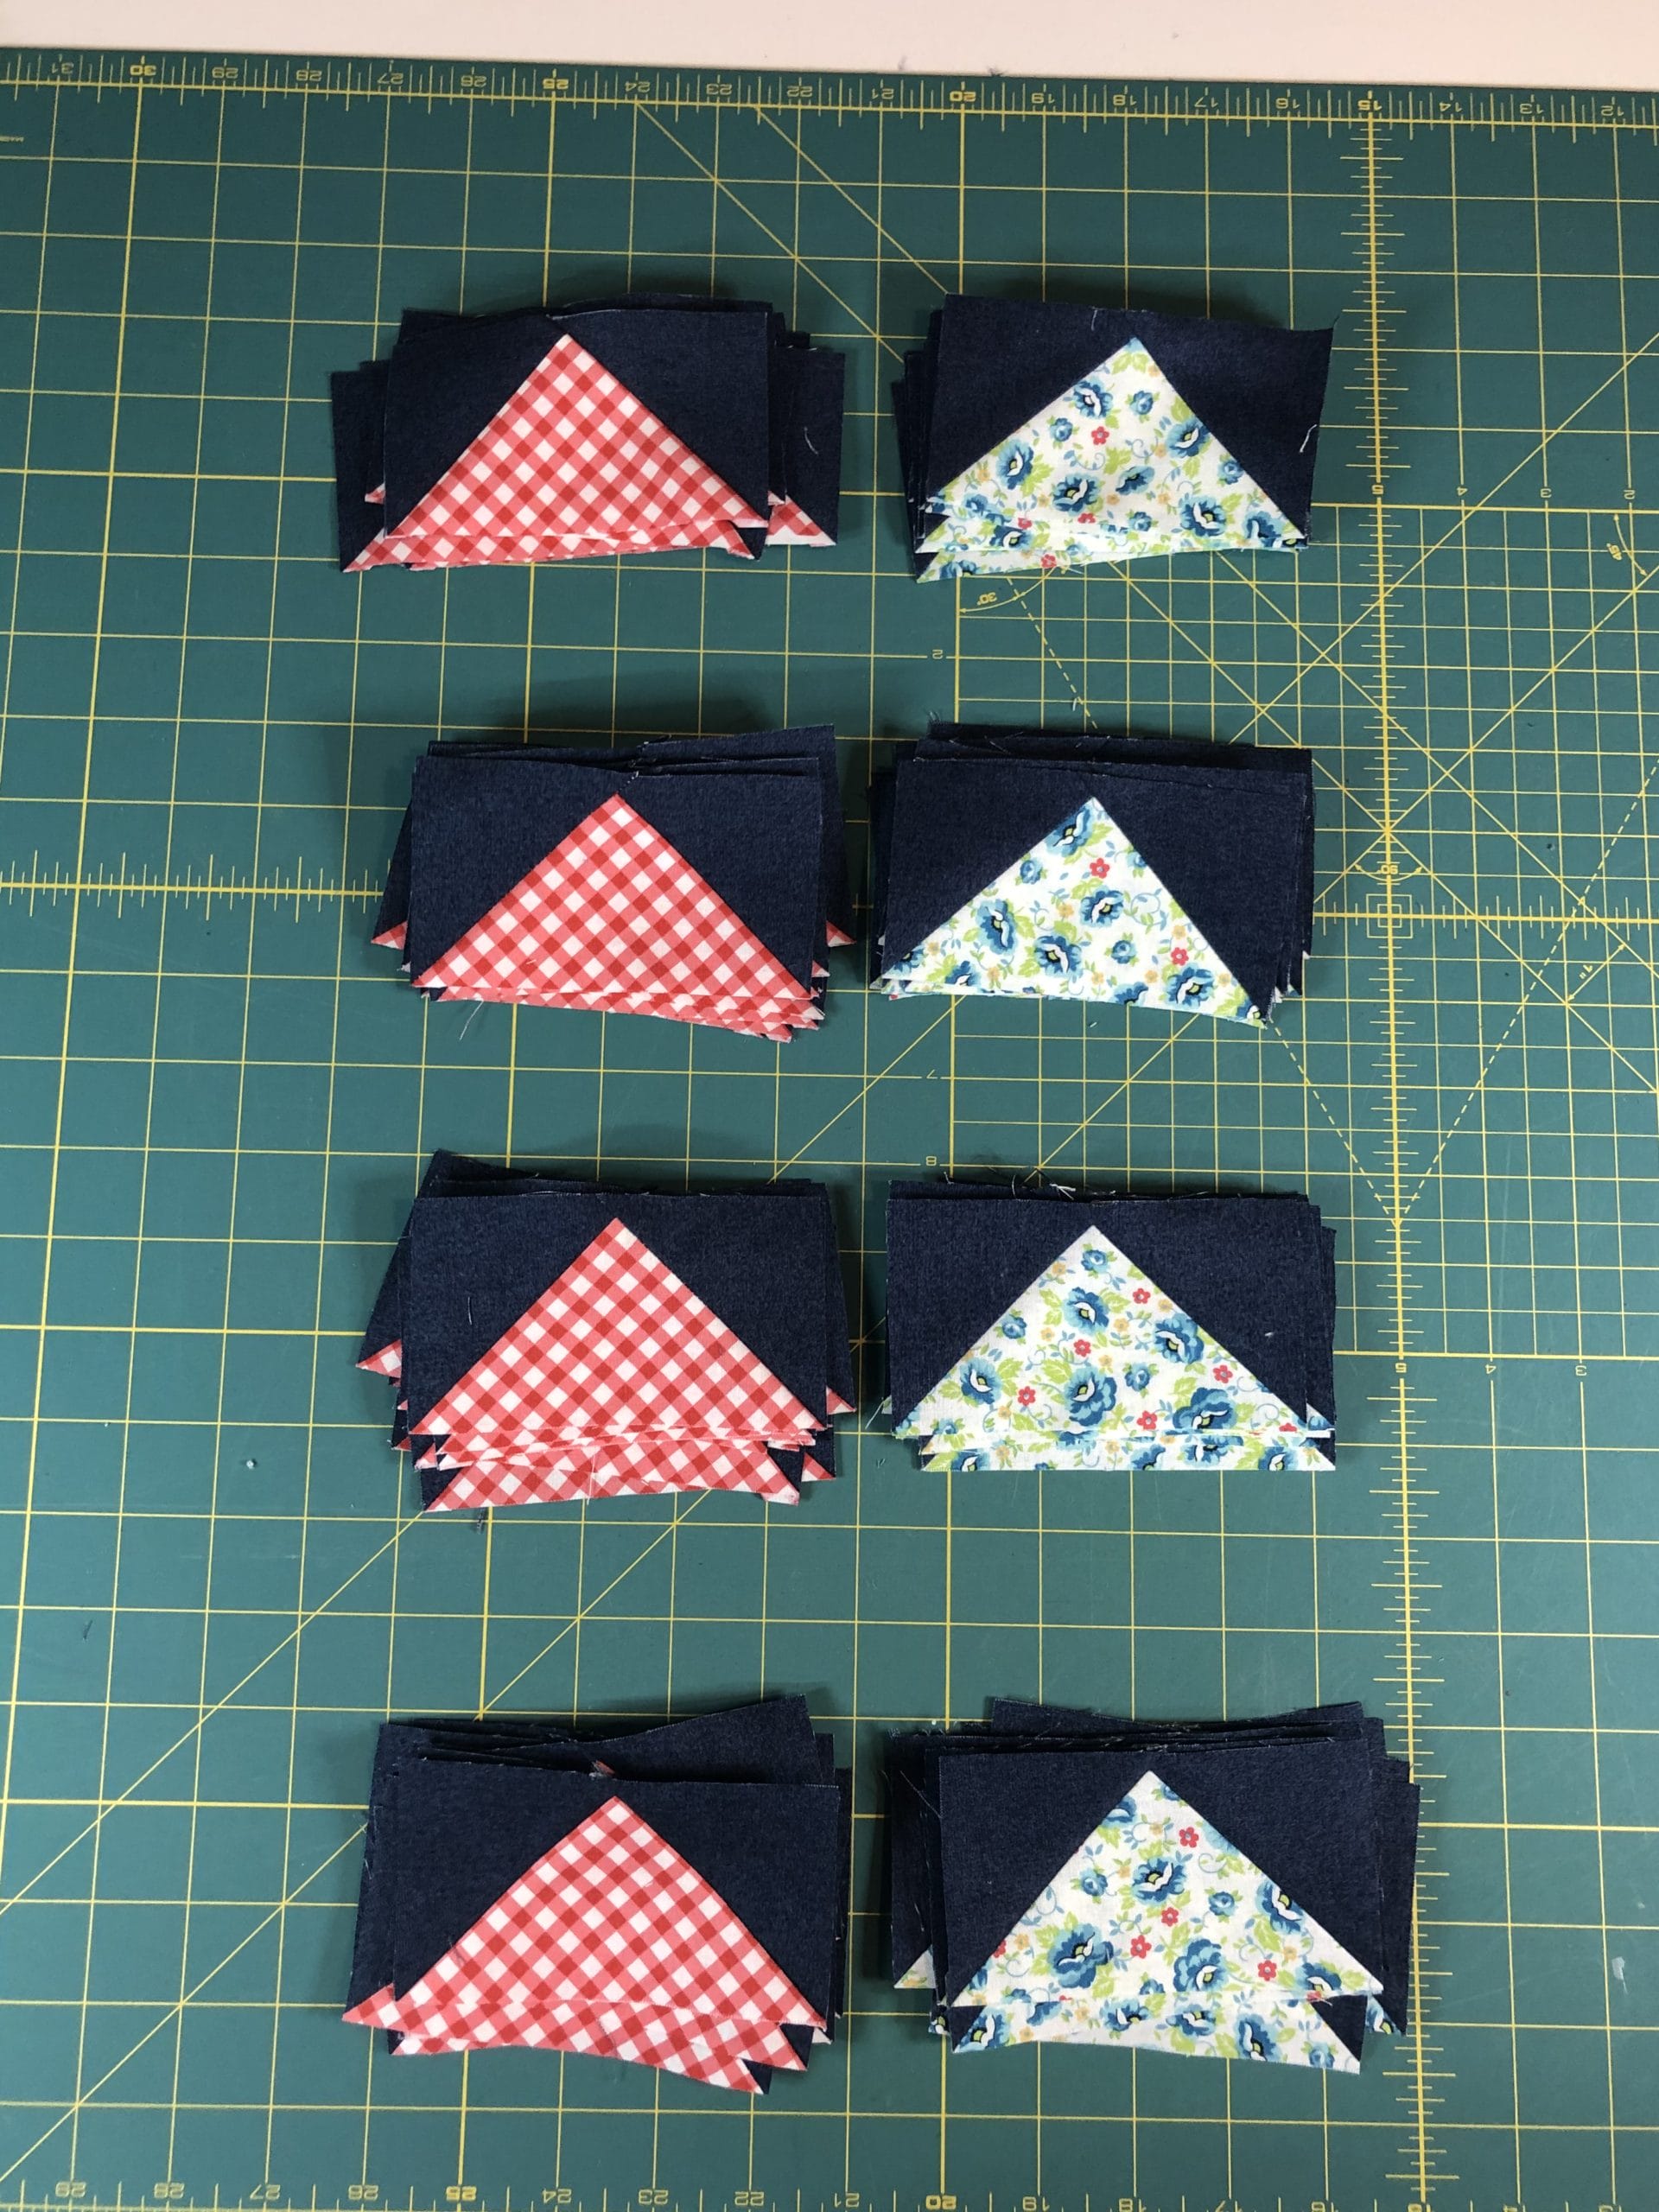
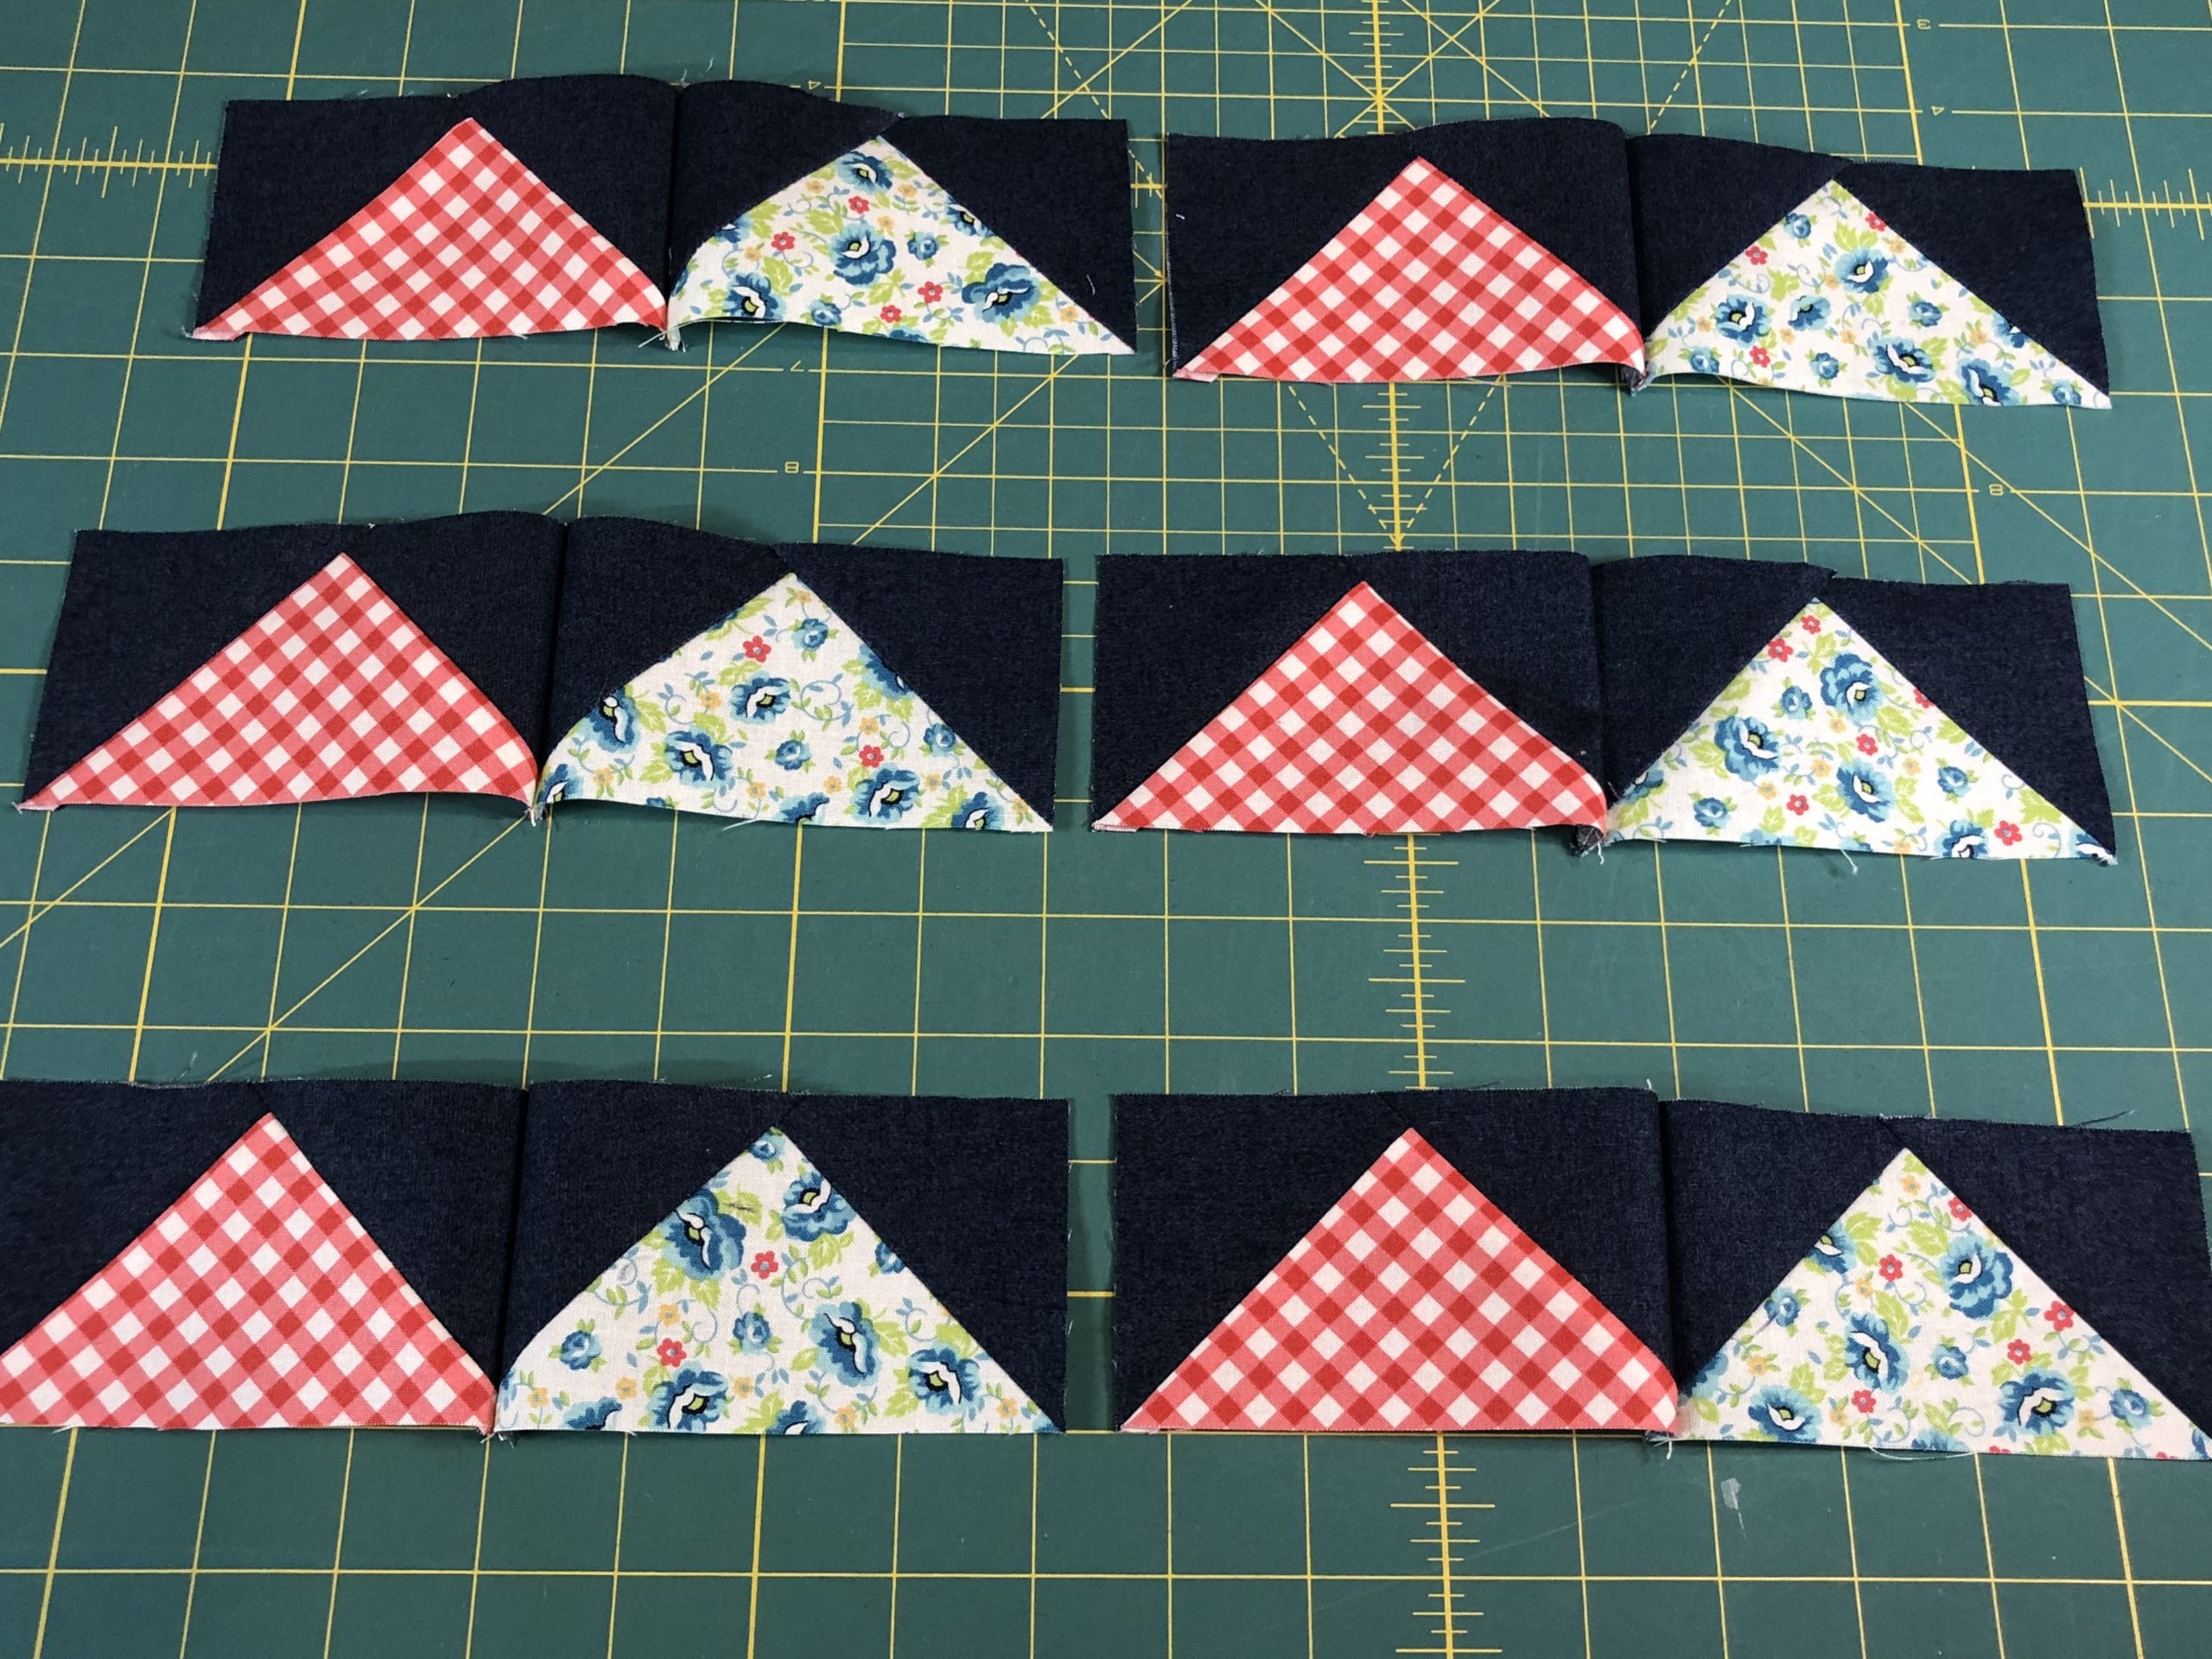
Now that we’ve finished all those geese, it’s time to make our border! We will alternate between the red gingham units we just made and the pale blue floral units we made last month. I began by sewing these as pairs, and then sewed the pairs together as needed to make the borders.
I separated out all the pairs to prep for sewing.The pairs are all sewn together and ready for making those borders.
When I sewed these borders on I actually lucked out that they fit almost perfectly. Sometimes I’m not so lucky though. Back in my Month 5 Blogpost I discussed ways to fix pieced borders that don’t fit quite right, so feel free to refer back to that if you need some tips for easing things in.
When I laid out my flying geese rows to prep for pinning and sewing, I was happy to see they all fit perfectly.
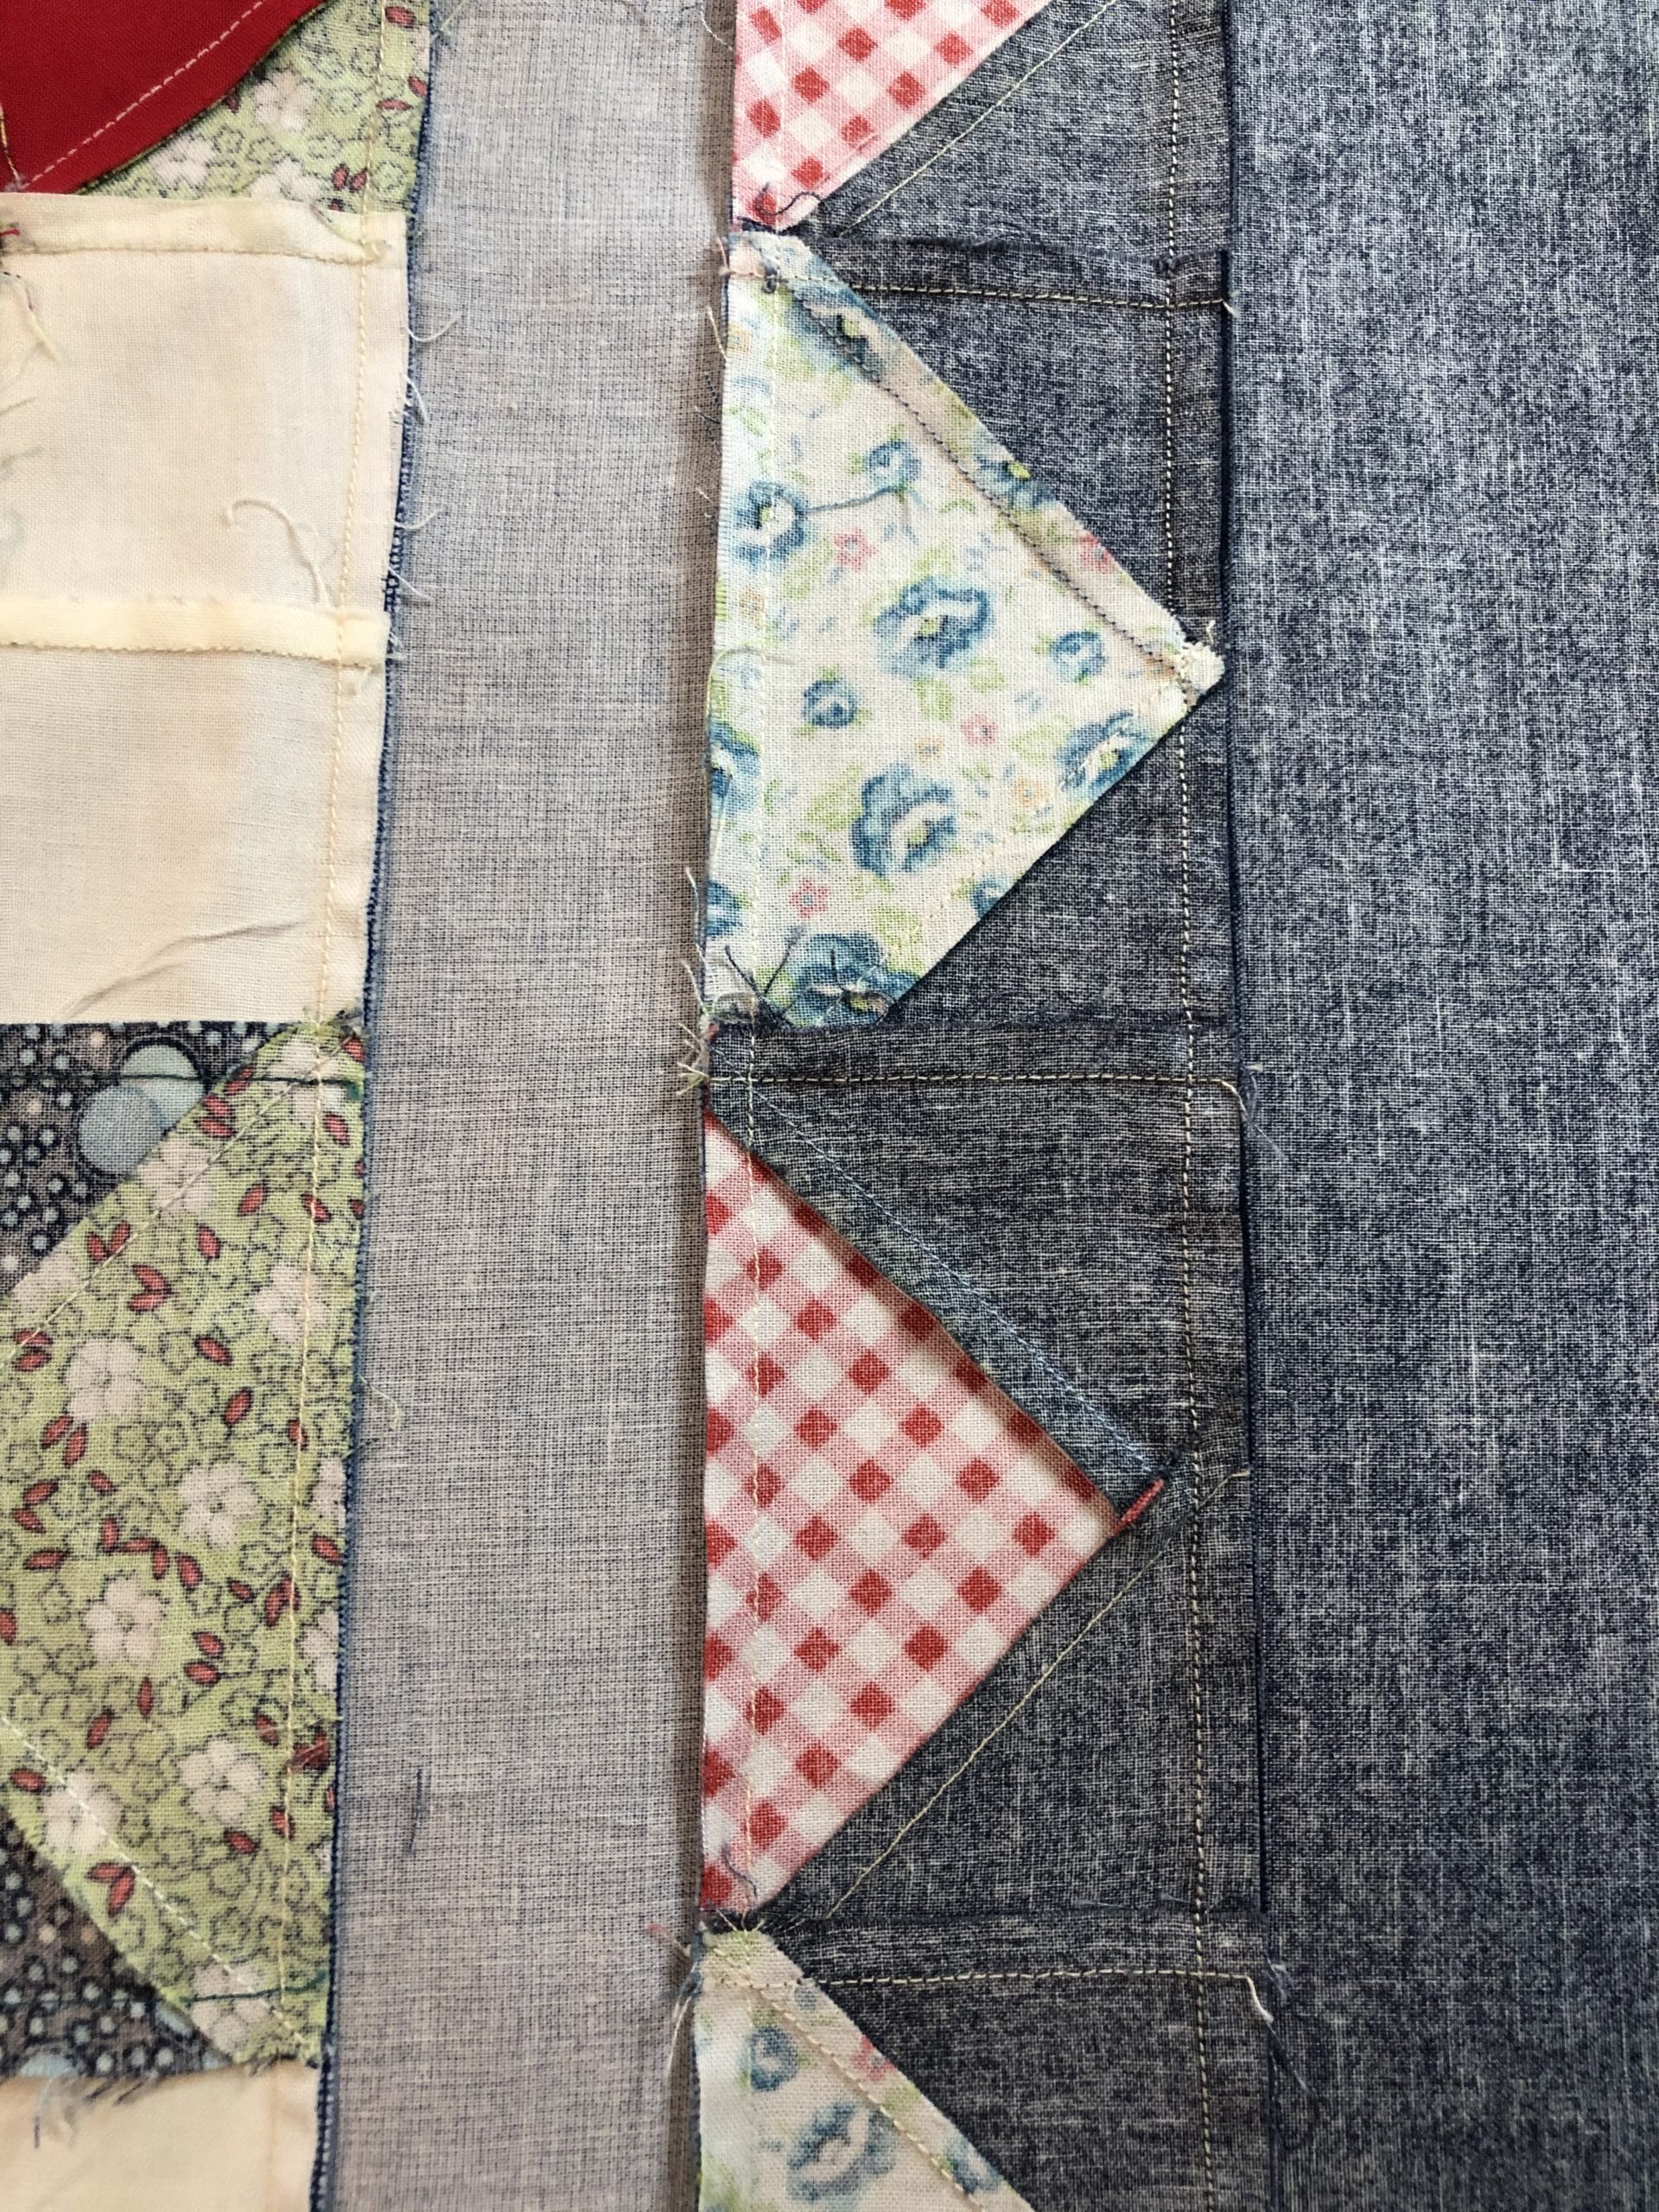
On to our final borders – Hooray! I confess I got so excited to finish that I just went to work sewing and didn’t take any pictures of the final navy borders being sewn. But here is a photo of how I pressed all the borders when done. I pressed away from the flying geese borders on both sides.
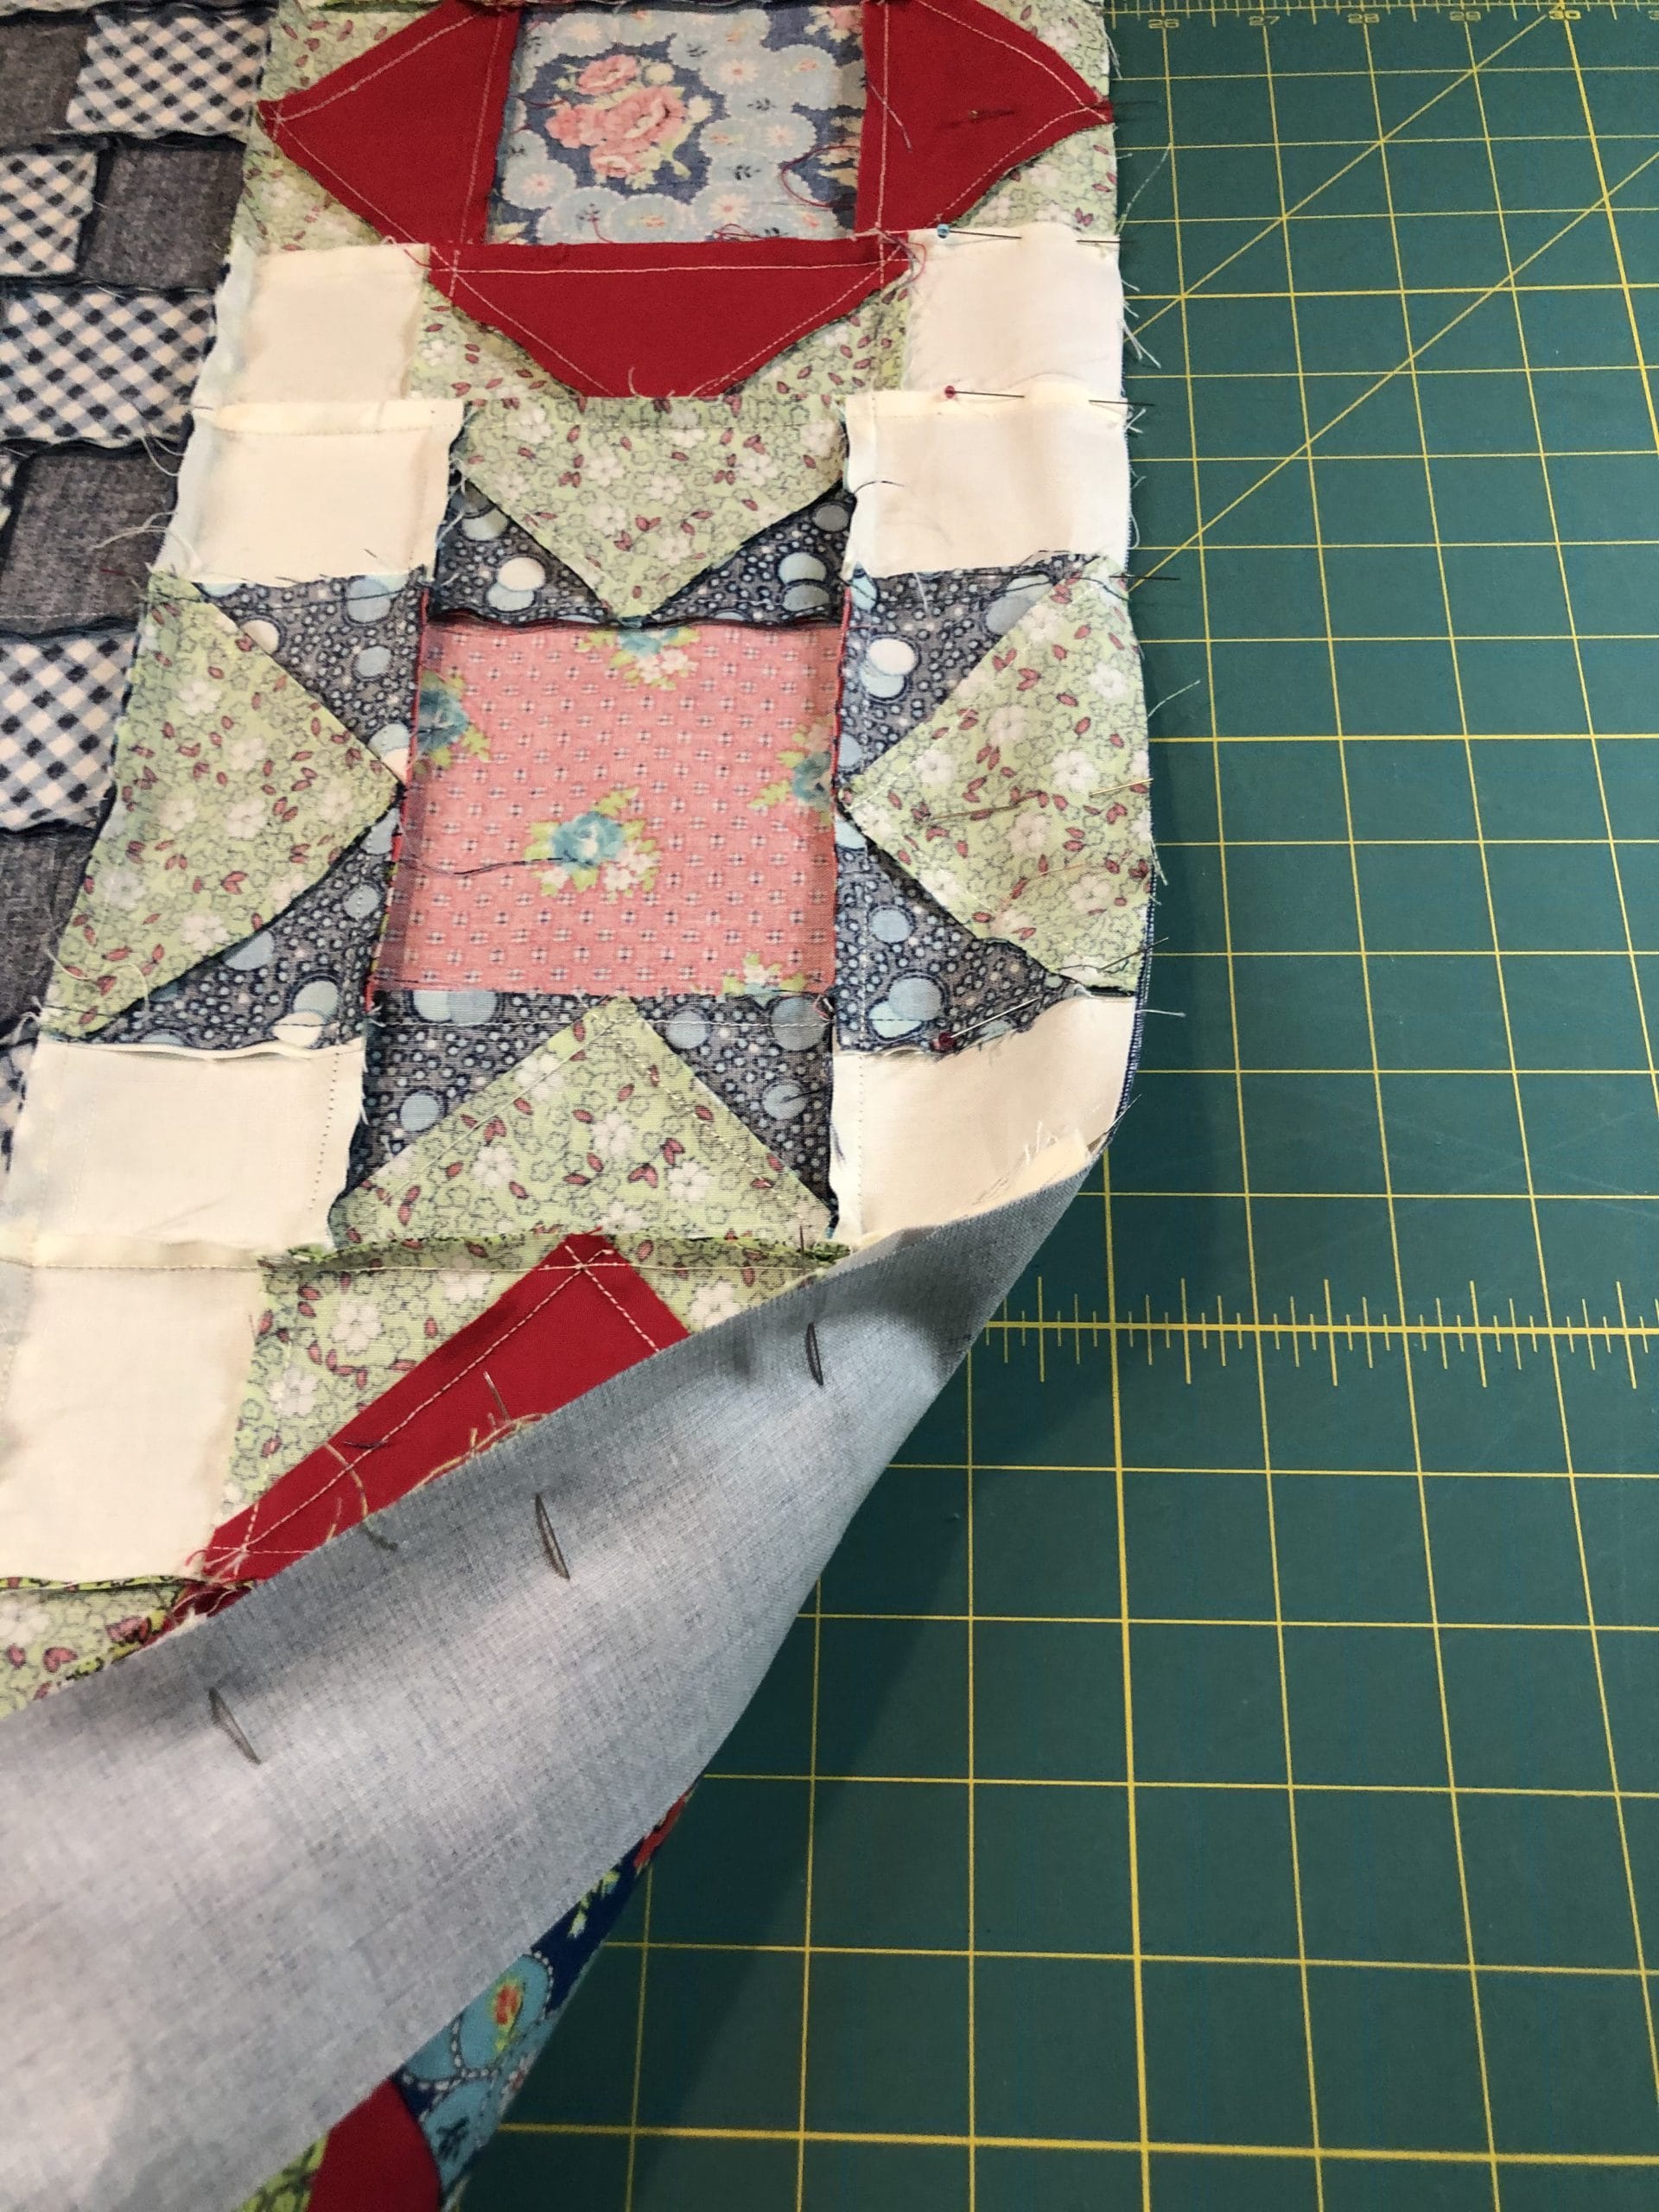
I will also mention that whenever I’m sewing a pieced border to a strip of fabric, I always sew with the pieced side up. Does that make sense? I just like to see where all the seams are. This also allows me to make sure I’m not cutting off any points as I sew.
I realized that I had quite a bit of leftover navy fabric after I was done with my flying geese. This may be due to the fact that Connecting Threads sent me all the yardage in one unit total, rather than cutting each fabric in to the monthly installments that you all received. So I decided to take advantage of the extra by making my borders all just a bit wider that I recommend in the pattern. Don’t hate me, but I just couldn’t resist! I was able to cut my borders 6 in. wide, rather than the 2-1/2” in the pattern. Naturally I did this without considering whether or not I will have enough of the navy gingham for the binding, because clearly I wasn’t thinking ahead. Ugh. Fortunately for me, I chose the same navy gingham for my backing and ordered plenty extra, so I should be able to save myself from my lack of foresight.
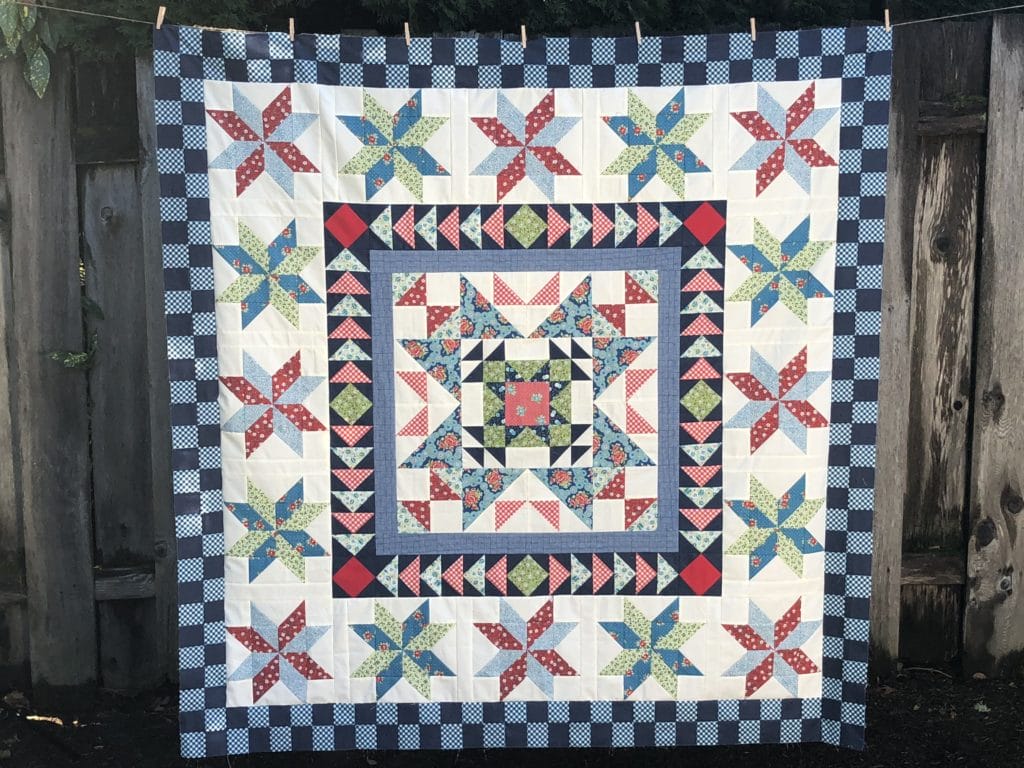
Here is my finished quilt top (in the picture below). Please ignore the mysterious hands of my husband and son holding it from behind haha! Thanks in part to the wide borders, it was way too big for my backdrop stand, so my family had to assist me while standing on the benches on our deck to keep this quilt from dragging on the ground. And the wind would NOT stop, so getting a semi-decent picture was a bit of a challenge.
Now I just have to send this off for quilting and then I can put it on my bed. I can’t wait!
Thank you all for joining me these past months. I have thoroughly enjoyed taking this quilting journey with all of you! I hope you all are happy with your finished project, and that you will think about joining me again for another Block of the Month sometime in the future.
This month is easy peasy, especially after all the work we did on this quilt last month!
All we have to do is sew on a simple border, and then make ourselves some flying geese.
I may have mentioned this before, but whenever I’m sewing borders I always give myself some wiggle room and cut the borders longer than necessary. This way I can trim them to the perfect size after they are sewn on.
I also always pin my borders so that the solid border is on the bottom as I sew. This allows me to see all the the blocks to make sure I’m sewing on the points where they intersect. Also, you can see from the photo below that I’m a Lefty, so my pins are going the “wrong” way, haha!
I had enough fabric length to use two 2-1/2 x WOF strips for all four borders. The top and bottom borders didn’t have too much hanging over, as you can see below, but it was still enough to get the job done and have room to trim.
My favorite tool to trim my corners is a giant 20-1/2” square ruler. Using such a large ruler helps me to make sure the quilt is squared up nicely.
Now on to more flying geese! I’m sure you are all pros at this by now, since there are SO MANY in this quilt. I feel like I should almost apologize for all the flying geese I put in to this design. I think I’ve actually worn out my Bloc-Loc tool doing so much trimming! But to me, the work is worth it, because I absolutely love how this quilt turned out.
SO MUCH trimming to be done…
Always remember you can cut all your pieces just a hair bigger than necessary so that you have wiggle room to trim your pieces to perfection.
I won’t bore you all with another tutorial for no-waste flying geese, since this has been well covered in previous blog posts for this quilt.
Here are all my flying geese, trimmed up and waiting for next month, when we can finally finish this quilt! Hooray!
Well friends, we are now officially past the half-way mark with this quilt. Yay!
This month will be a lighter month as far as sewing goes, but since we are full swing into the holiday season, hopefully it will be a welcome reprieve for everyone. Don’t get me wrong, sewing is my happy place, but at this time of year I love me some cookie baking, Hallmark movie watching, gingerbread house decorating, carol singing filled days. I hope you all have time at this season to do what fills you with joy!
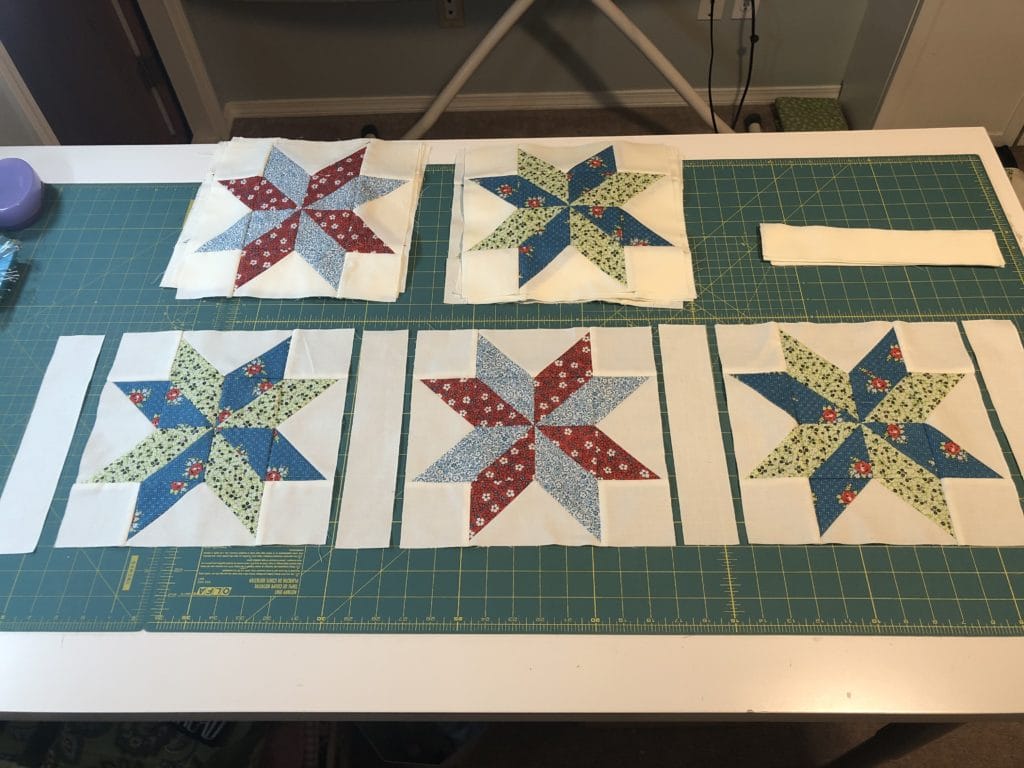
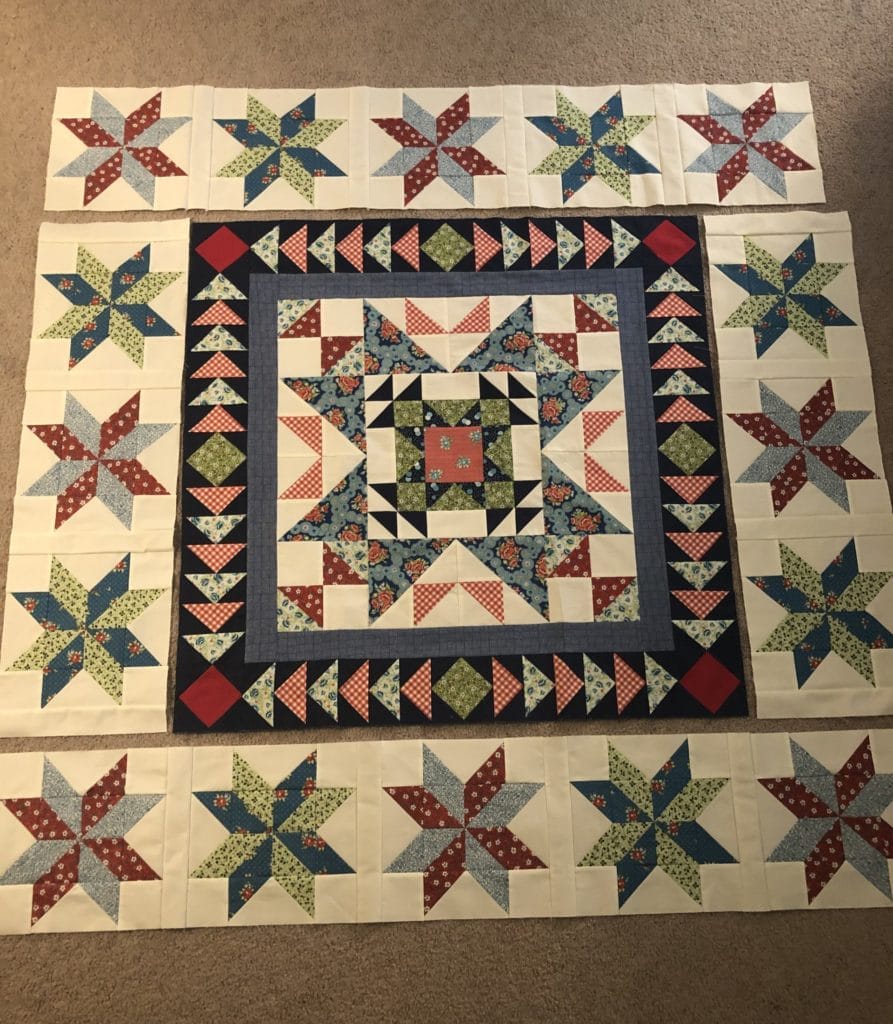
I know a few of you got ahead of yourselves and tried to sew the star blocks together before getting this month’s instructions, and couldn’t understand why they didn’t fit. Now that you all have your instructions and fabric, you can see that these little stars have some sashing strips sewn between them. See? It all works out in the end!
Here are my stars and sashing strips all ready for pinning and sewing:Now they are sewn together, with the corner stars set aside.
All of my seams are pressed toward the A strips. Once I was finished with step 1, I added the final stars to two of the strips.
Now everything is pieced and ready for the Star Block borders to be sewn to the center.
Sometimes, no matter how well we try and sew, sometimes things don’t fit together as planned. It happens to EVERYONE, not matter how much experience you have. We are human and fabric has give to it. If you find that your Star Block borders are a bit off, you can adjust them by either taking in or letting out the sashing strips as needed. No one will ever know!
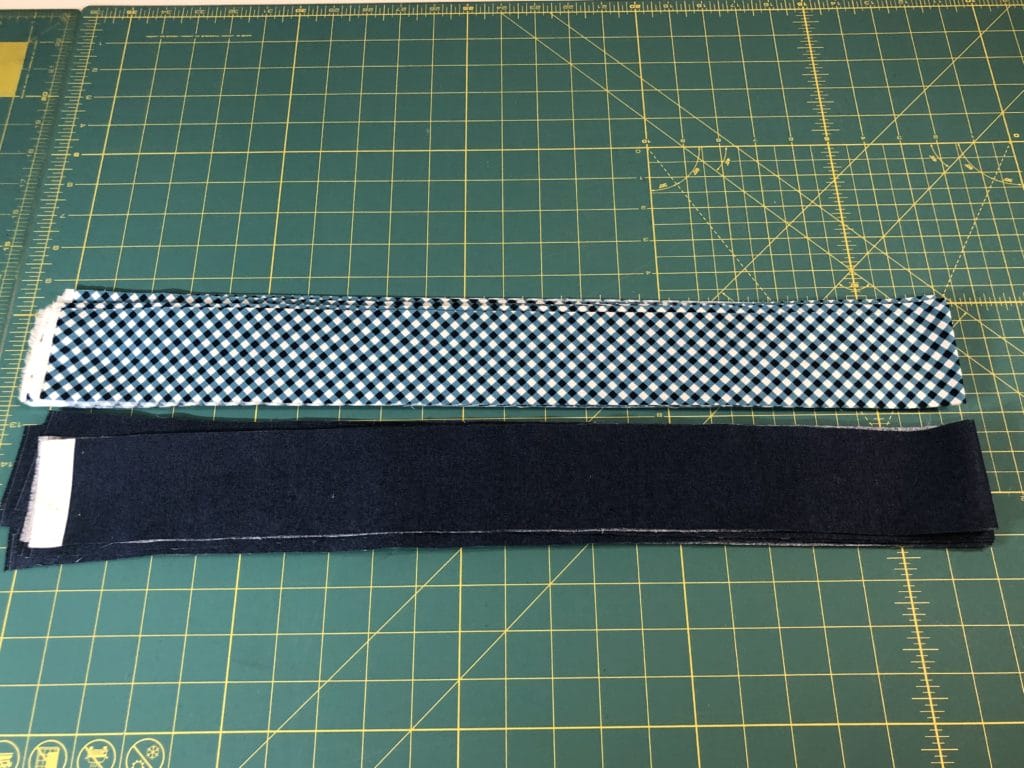
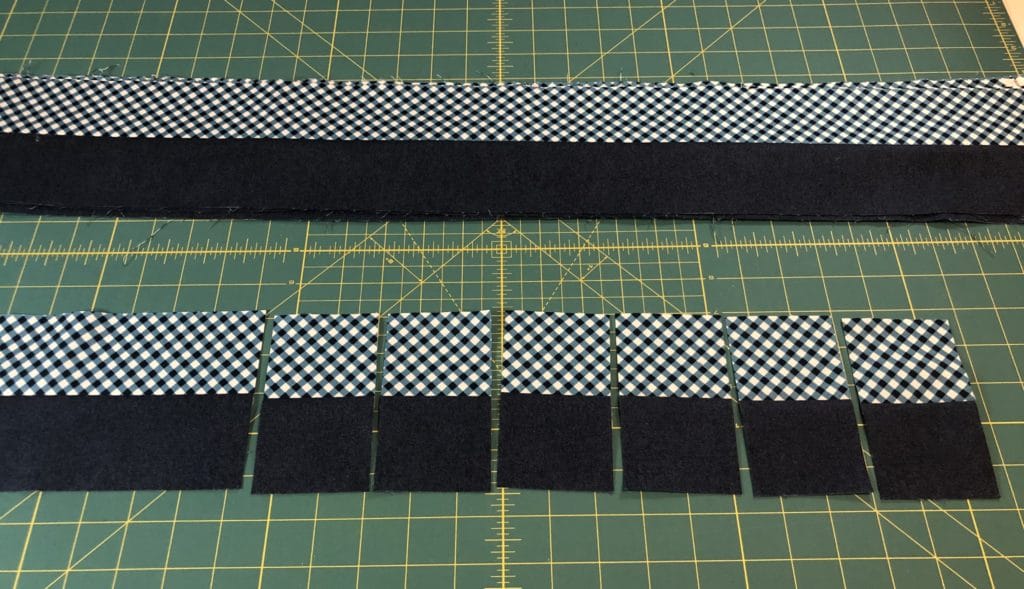
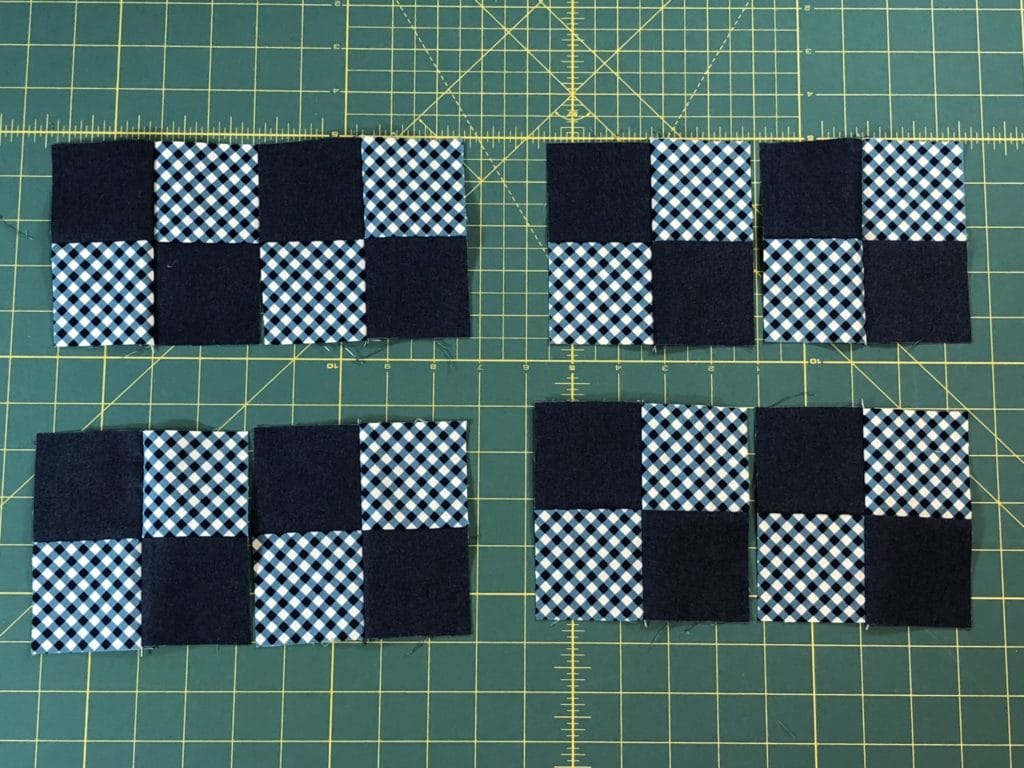
Now it’s time to make those checked borders. Here are all my strips cut and ready for sewing.
By sewing and cutting eight sets of the B/C strips you will have PLENTY for making the borders. I ended up with over half of the last set leftover.
I decided to sew all mine into pairs, and then double each time until I had the correct sized strip sets. However, if you do this method, be mindful that the shorter sets use 28 B/C units and the longer ones use 32 units, so you will need to be counting as you go.
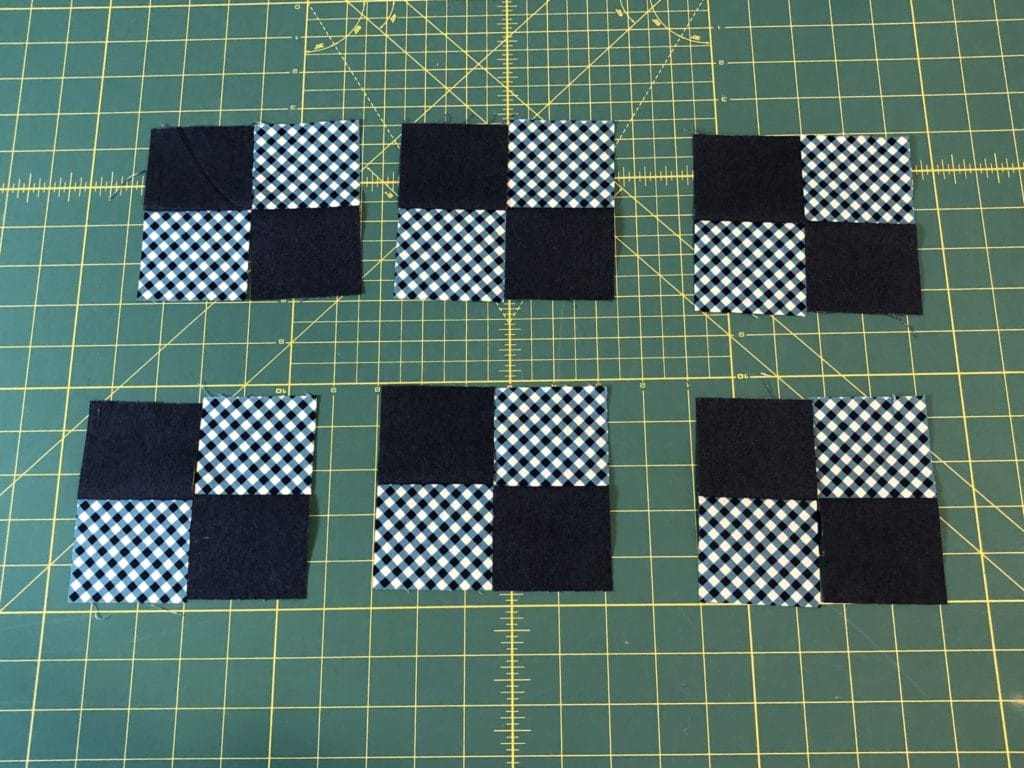
Here I am getting ready to sew my 4-patch units into 8-patch units.
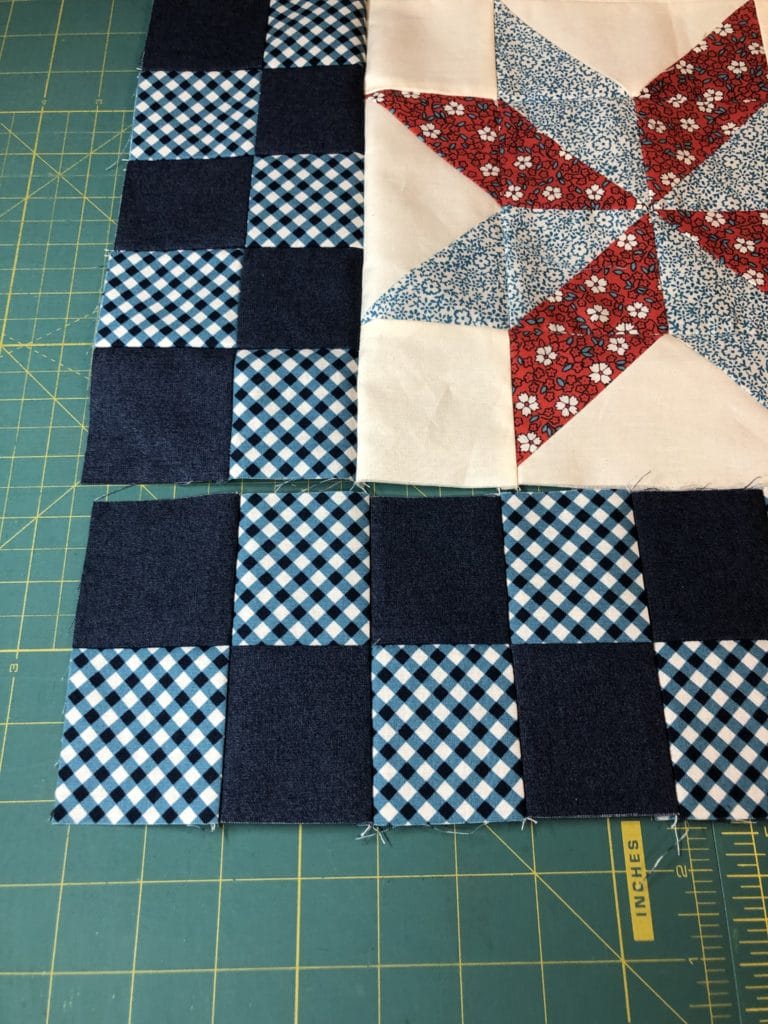
I kept sewing and doubling up until I ended up with what you see below. The top two strips get sewn together to make the top and bottom borders, and the bottom two strips are sewn together to make the shorter side borders.
Also, as I got busy sewing along I did this:
Oops! This is the WRONG way to sew the borders!
Yep, I wasn’t paying attention and ended up with like fabrics that would have been sewn together once I attached my top and bottom checked border rows. Once again, I’m not good at following directions, especially my own! Fortunately it’s an easy fix: I just took the last B/C unit off one end, and then sewed it to the other end.
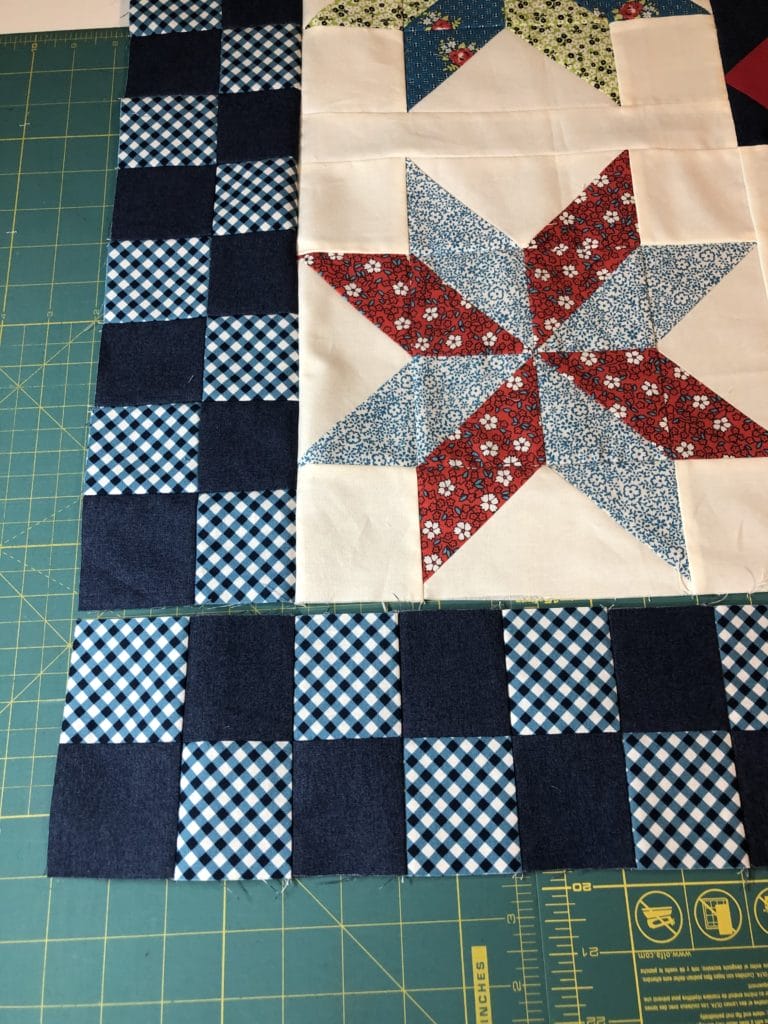
Much better!
Whenever making any type of pieced border, it can be tricky to make sure things fit properly. Even a 1/32 difference in seam allowance can have a big effect when you are piecing together dozens of squares. I’ve made hundreds of quilts, and I still every once in a while end up with something being way off. Here are a couple of tips I use that may help.
For border strips that are too long: After I’ve ironed my border, if it’s off by around a ½ inch or less, one of my favorite tricks is to spray the pieced strip with MaryEllen’s Best Press, and let it rest. I don’t iron it again before sewing. I just let it dry and it shrinks up just enough to usually fit pretty well. After I sew it together then I press and it works like a charm!
If my pieced border is REALLY long, I will go back and increase the seams in multiple places by just a hair. There’s no need to rip anything out, just sew right next to the old seam. You need to be careful that you don’t increase each individual seam by too much, or it will throw off how things fit and nest together in the coming months. So it’s better to do a tiny bit on multiple seams, rather than just adjust a few seams by a large amount.
For border strips that are too short: If my borders are just a bit too short, then I can usually stretch them a bit and ease them in, but if they are way off, then I get friendly with my seam ripper. I generally will rip out multiple seams and then re-sew them just a scant under the ¼” seam allowance until it fits. It’s not fun or easy, but it works.
This quilt is really starting to get big!
Have a wonderful holiday season, and Happy Quilting!
The moment we’ve all been waiting for has finally arrived. After months of sewing blocks, we get to put this quilt all together and finish!
I know many of you jumped right in after finishing last month’s blocks and have already assembled the main portion of the quilt. Once you have the quilt blocks all laid out, it’s not too difficult to see how it all goes together.
I must admit I got a little carried away myself sewing the blocks together, and forgot to take pictures of some of my sewing. Fortunately you all have the pattern to refer too!
Once the center portion of the quilt is put together, it’s time to make and sew the borders. Whenever I have solid borders to add to a quilt, I ALWAYS cut my borders an inch or two longer, just to make sure I have plenty for squaring up the corners.
This month’s kit comes with 1-1/2 yards of the White Swirl fabric for the border strips, which means that you don’t need to piece your border strips for the A-D pieces, since you can cut them length-wise on the fabric. If you want to do this so that your borders don’t have seams, make sure you cut all of the A-D strips before cutting out all of your E squares for the pieced border.
Of course, yours truly forgot this and just went to town cutting strips running the width of fabric before I realized what I’d done. Sooo….I got to do some piecing for most of my white border strips. But it works either way, and there is plenty of fabric. I just have a few strategically placed seams in some of my borders.
Yep, I went a little strip crazy and got ahead of myself here.
Now it’s time to make the half-square triangles for the pieced borders. Since you all know by now how to make these, I won’t worry about that part. But I’d like to share a little bit about fabric placement and color. Since this quilt is very colorful, I wanted to make sure that the border was a continuation of what was happening in the main body of the quilt. So I made sure to cut two F squares from each fabric in the quilt. This quilt has a lot of greens, blues, and reds, but not as many oranges and yellows, so I went ahead and cut a couple of extra squares of the orange and yellow fabrics so that my border would look more balanced.
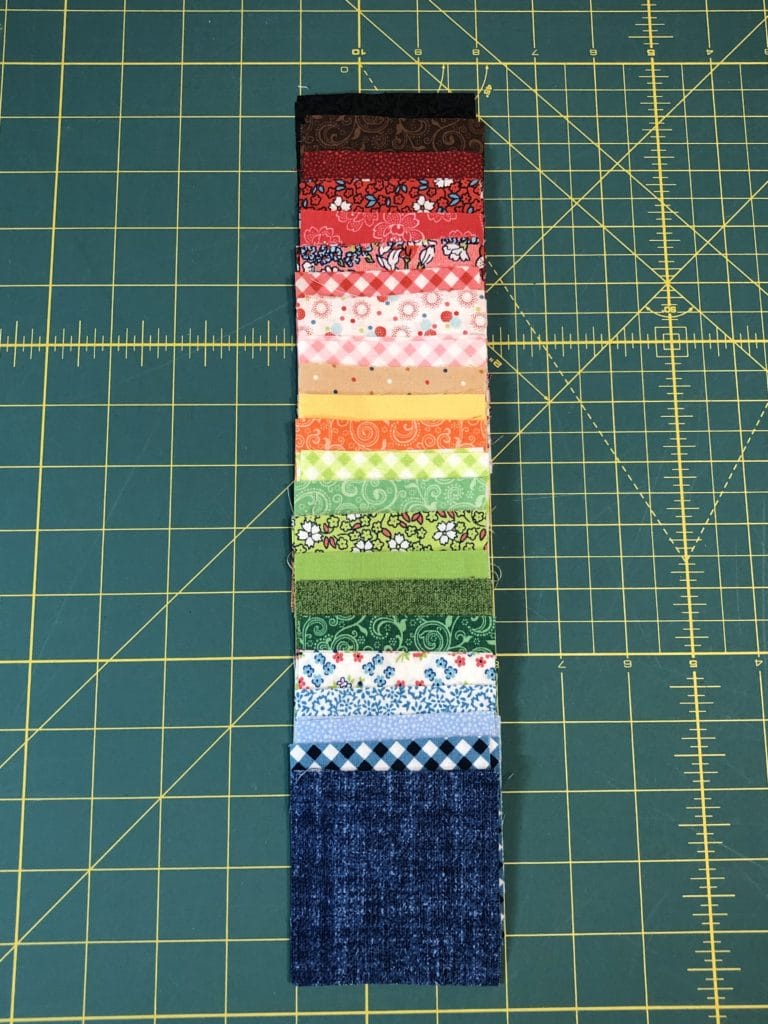
Here are all my squares ready for sewing: You can see I’ve made sure I have all the colors of the rainbow represented.
Next, comes the fun part! I know many quilter who at this stage would just start sewing these half-square triangles together at random and surprise themselves with the finished product. I admire their moxie, but I have always had a hard time doing that. I’m one of those crazy people who neurotically places ALL my squares around the quilt on my design wall and then stands back to look at it. I want to make sure I don’t have too many fabrics of similar color or value next to one another. I may move the things around a dozen times before I am satisfied. (Bananas, I know!) Then when I’m happy with the results, I pull out my trusty phone and take pictures of everything before I begin sewing.
This photo is not great, but you can see how I have placed the E/F squares around the quilt to get an idea of how it will come together.
Plus, the added advantage is that I can also make sure that I have all my triangles oriented correctly, especially in the corners.
As you may notice from the photo above, I also sew the squares together in segments, and continually return things to my design wall and refer to my photos to make sure I’m not goofing things up as I go along. It takes a little longer this way, but it’s rare that I have to rip anything out.
Whenever making any type of pieced border, it can be tricky to make sure things fit properly. Even a 1/32 difference in seam allowance can have a big effect when you are piecing together dozens of squares. I’ve made hundreds of quilts, and I still every once in a while end up with something being way off.
Here are a couple of tips I use that may help
For border strips that are too long
After I’ve ironed my border, if it’s off by around a ½ inch or less, one of my favorite tricks is to spray the pieced strip with MaryEllen’s Best Press, and let it rest. I don’t iron it again before sewing. I just let it dry and it shrinks up just enough to usually fit pretty well. After I sew it together then I press and it works like a charm!
If my pieced border is REALLY long, I will go back and increase the seams in multiple places by just a hair. There’s no need to rip anything out, just sew right next to the old seam. You need to be careful that you don’t increase each individual seam by too much, or it will throw off your triangle points when it’s attached. So it’s better to do a tiny bit on multiple seams, rather than just adjust a few seams by a large amount.
For border strips that are too short
If my borders are just a bit too short, then I can usually stretch them a bit and ease them in, but if they are way off, then I get friendly with my seam ripper. I generally will rip out multiple seams and then re-sew them just a scant under the ¼” seam allowance until it fits. It’s not fun or easy, but it works.
Once we have all the pieced borders attached, we can sew on the final border strips and the top is FINISHED!
Thanks so much for making this quilt with me! I hope you enjoy it for many years to come!


 Tutorials
 6.6.2022