Tag Archives: BOM

Seasons BOM Month 5
11.10.2020

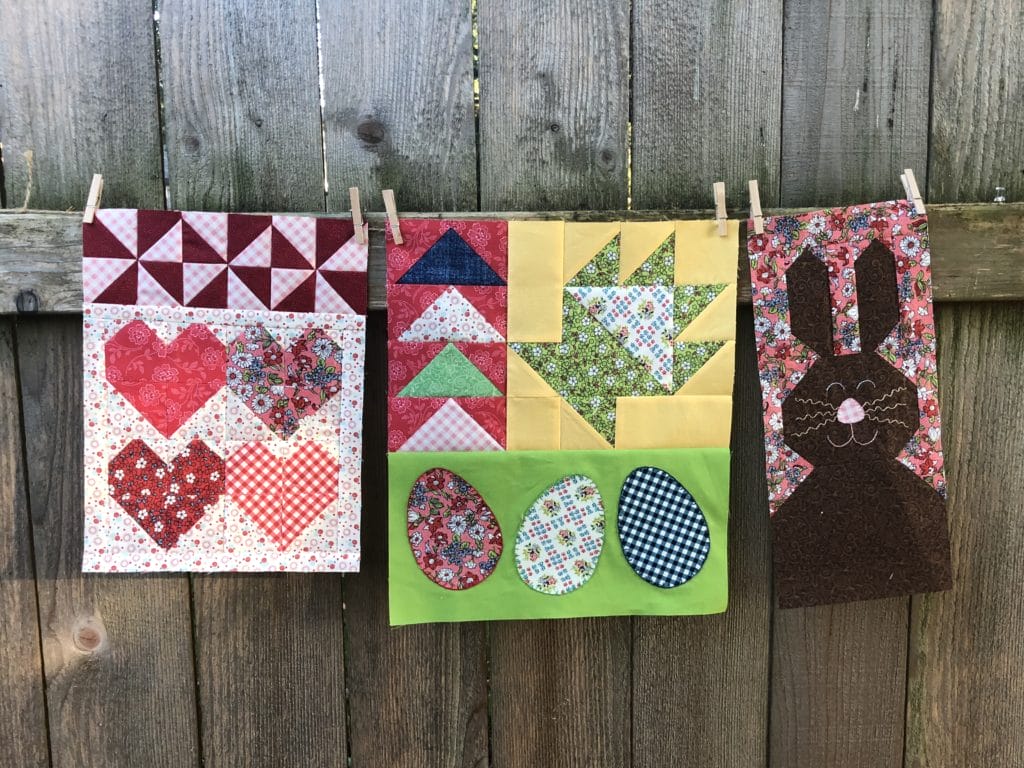
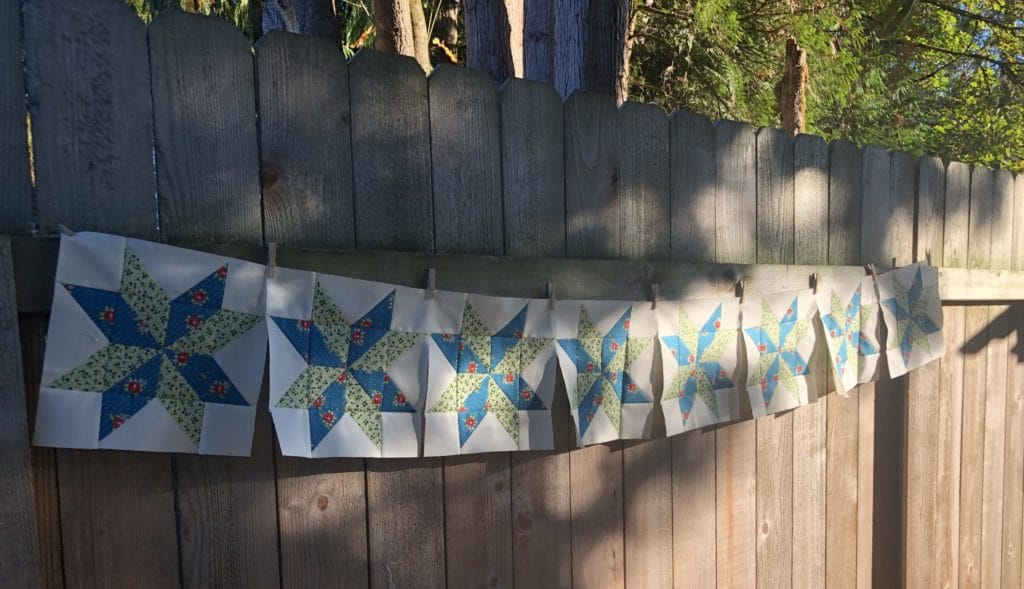
Can you guys believe we are already on month 5? We are on the home stretch! This month we will be making the last three blocks for this quilt, so that next month we can finally put this beauty together and finish! Yay!

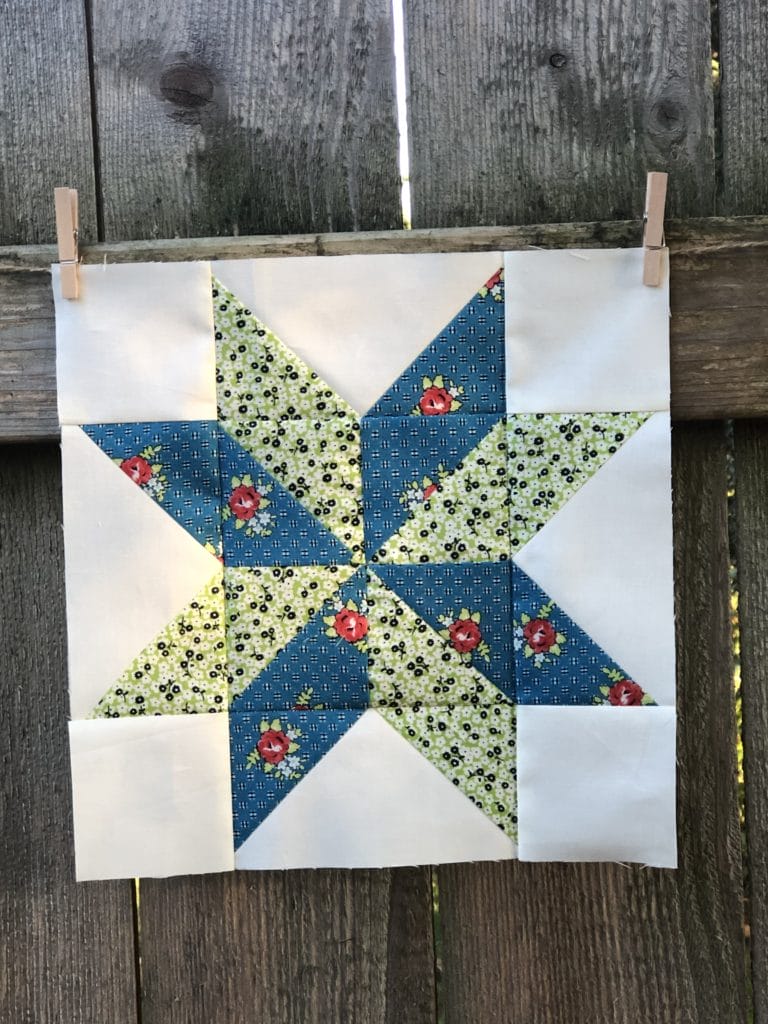
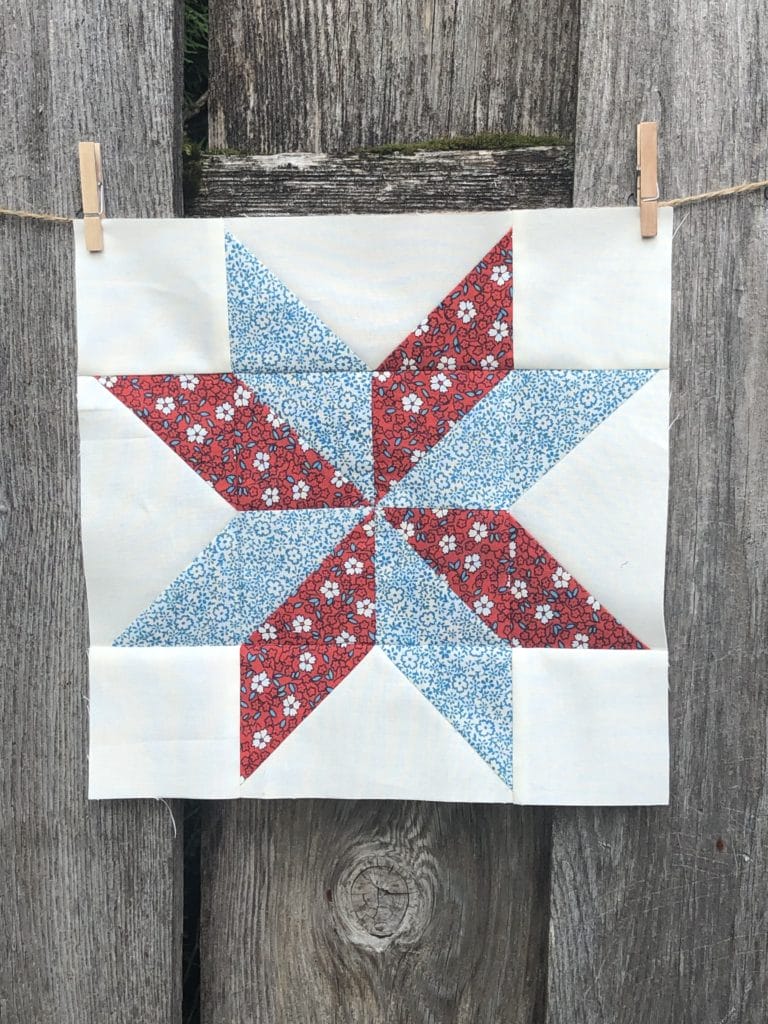
Hearts and Pinwheels

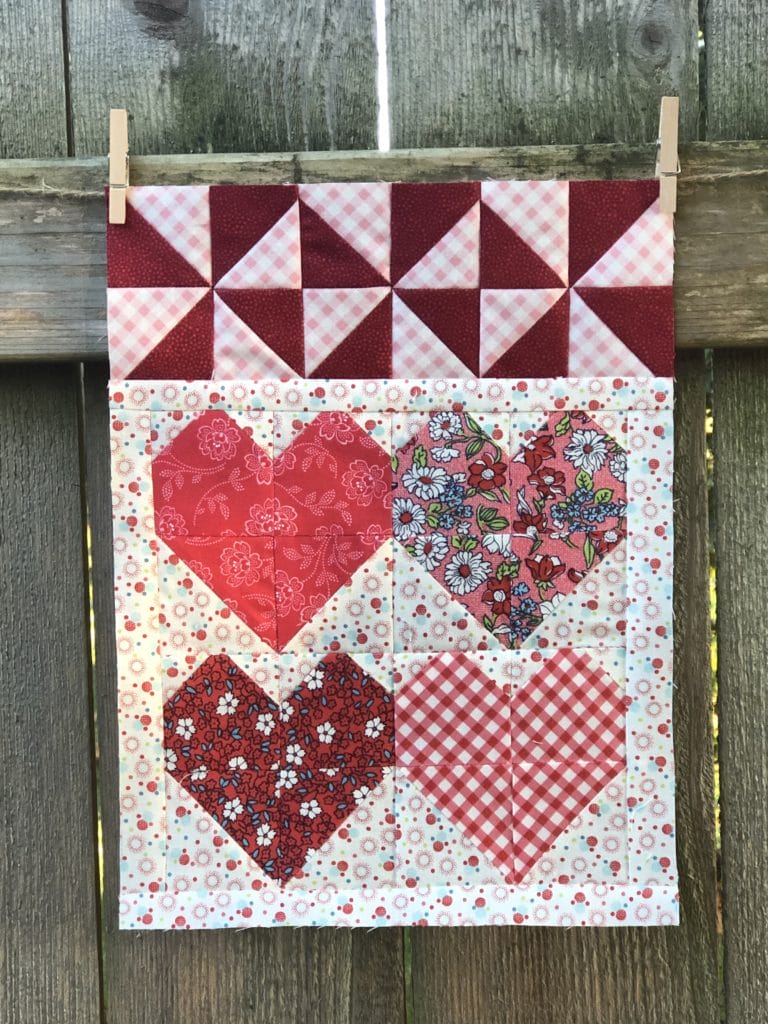
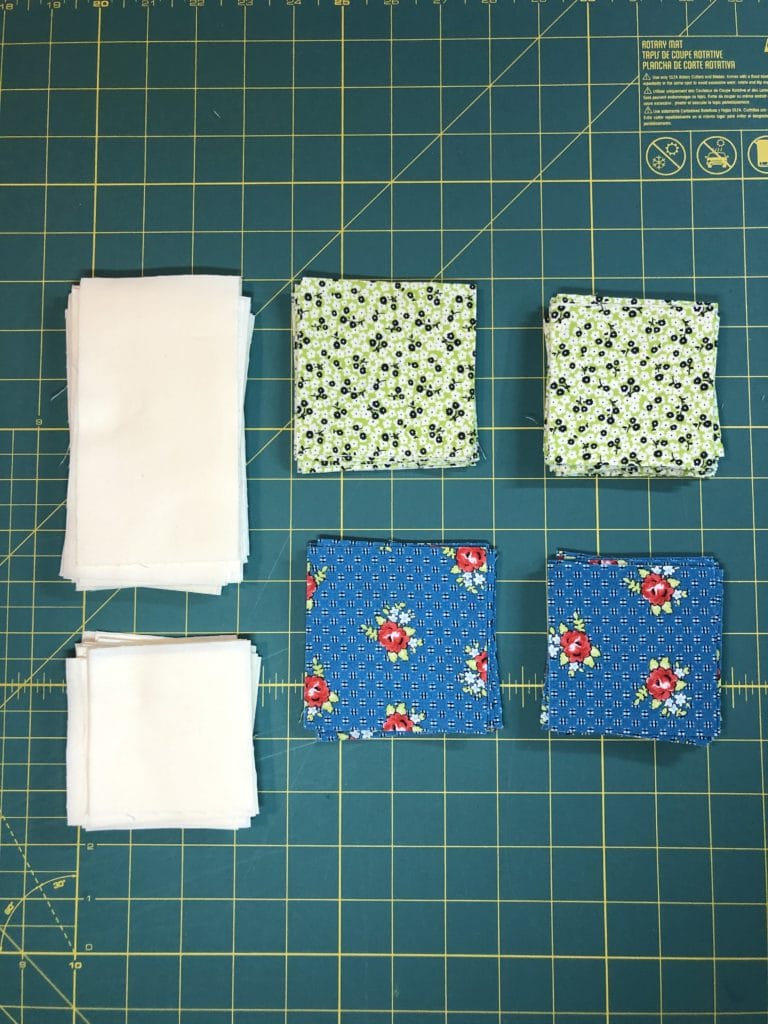
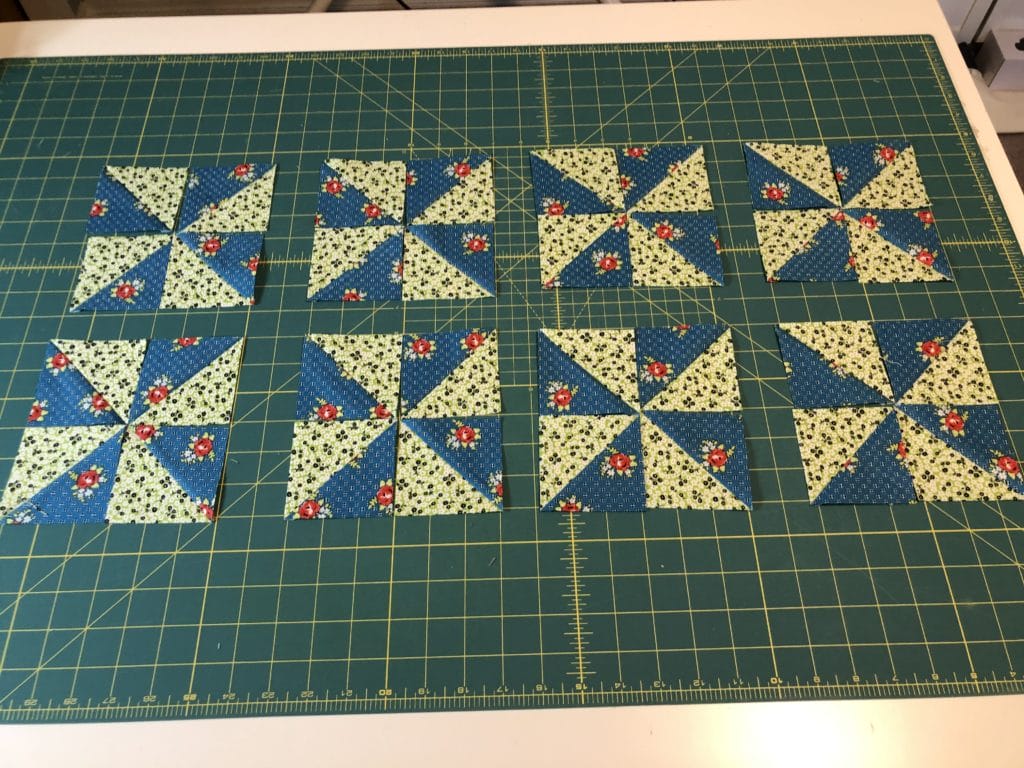
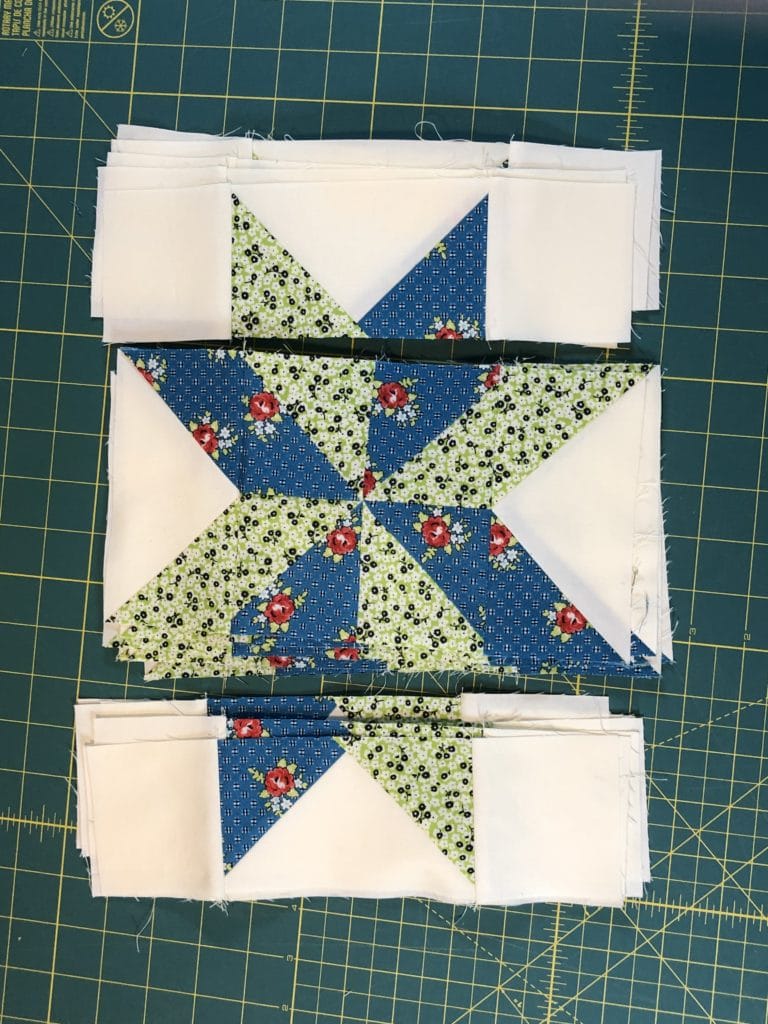
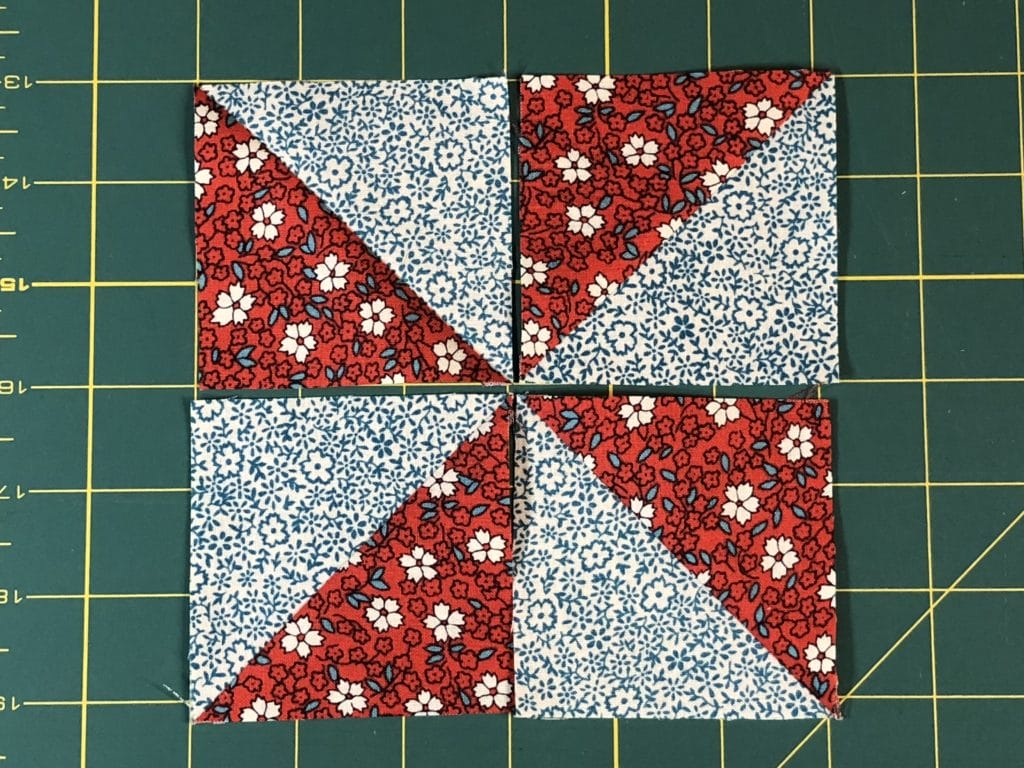
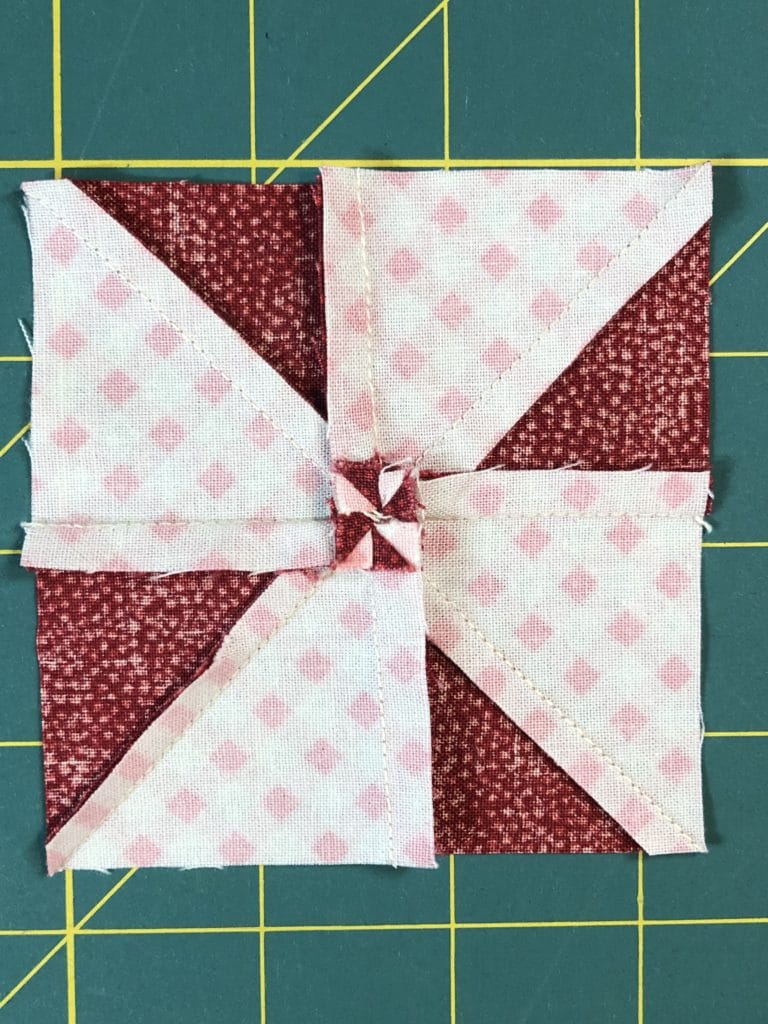
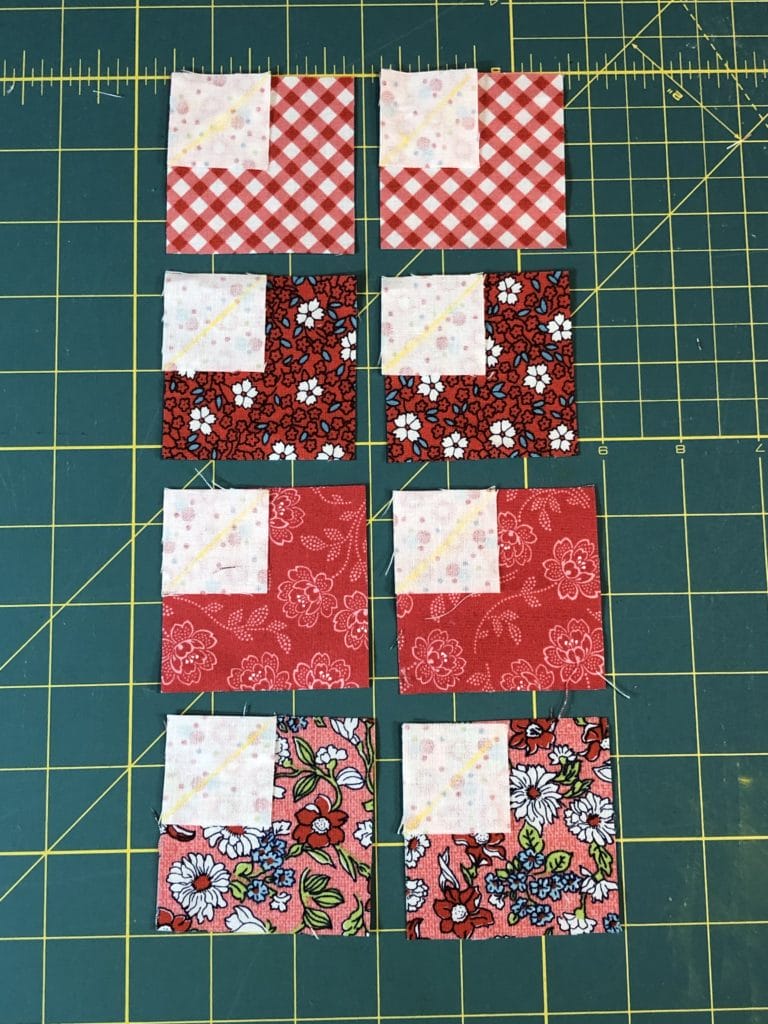
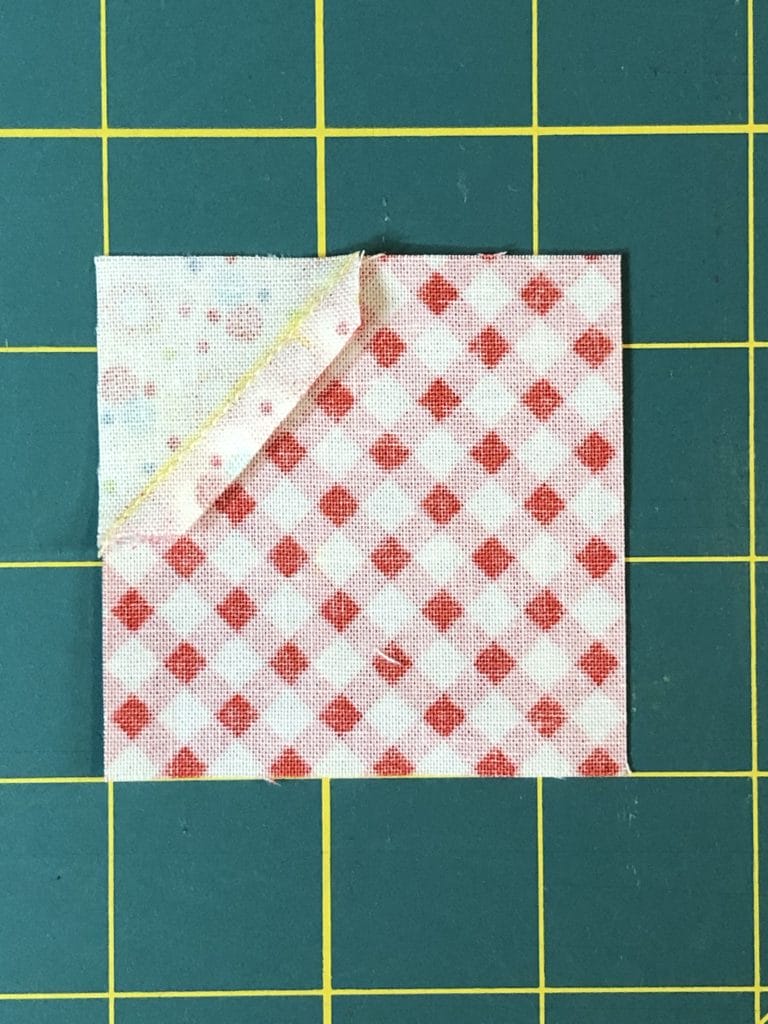
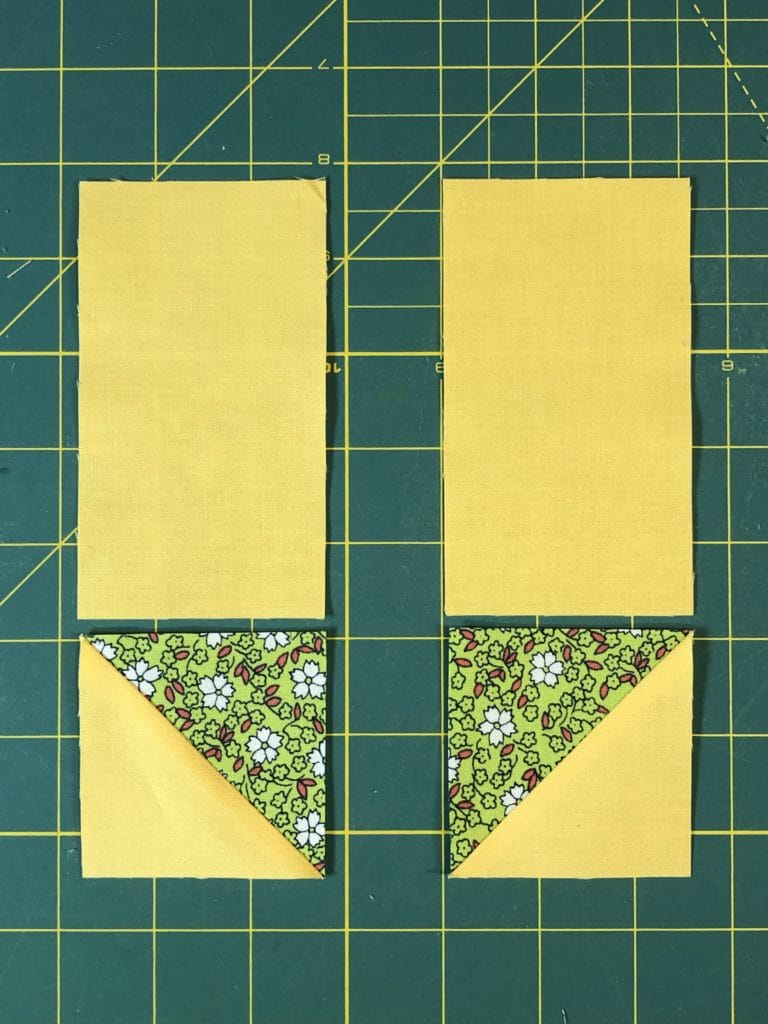
I love pinwheels! I know it can be tricky sometimes to get all the points to match up in the center, but unless I’m way off, I usually don’t get too picky with them. Pinwheels are made from creating half-square triangles and arranging them into a pinwheel block.

All my Half-Square Triangles are laid out and ready to sew.

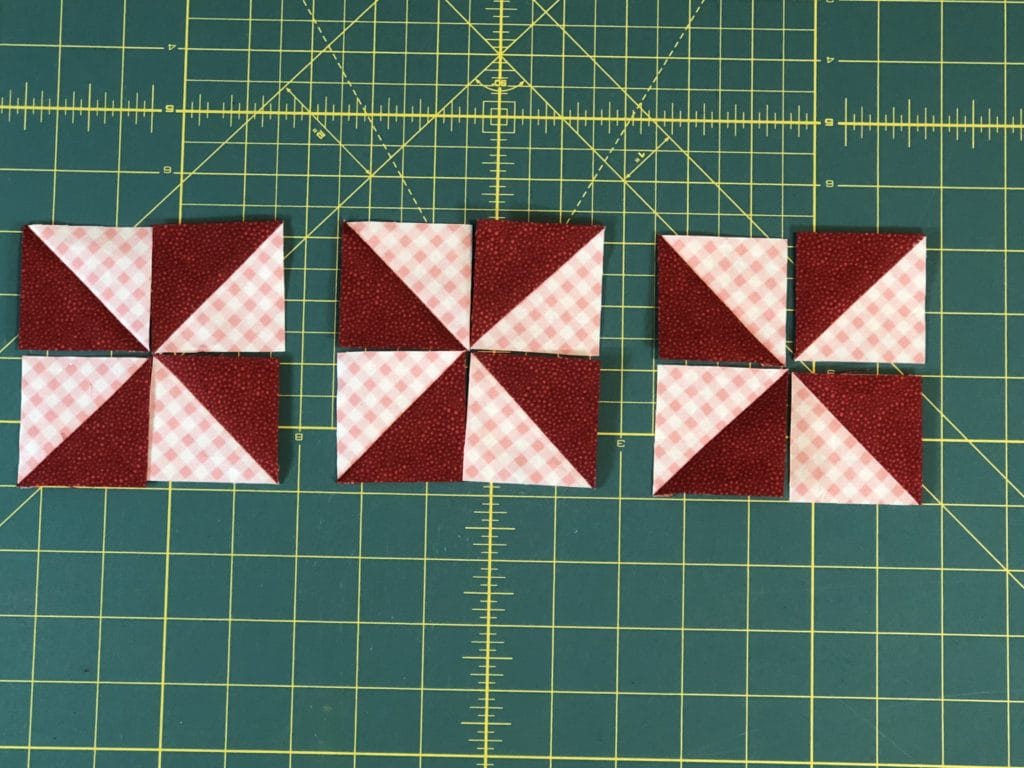
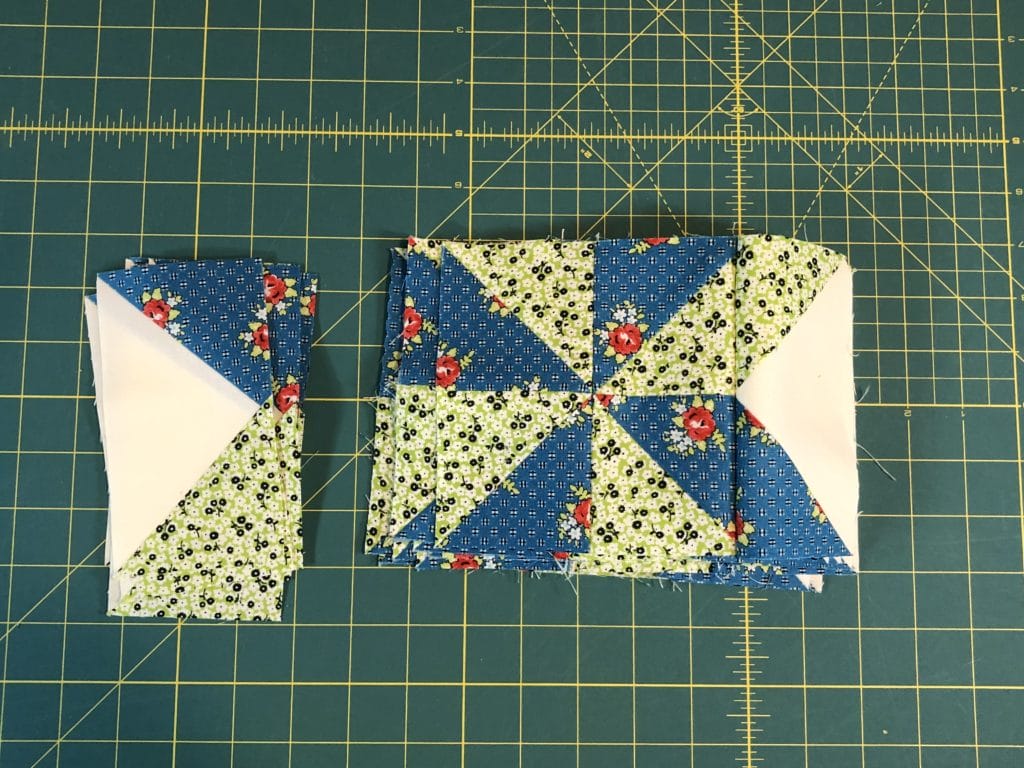
I also open the seams in the center so that they will lay flat when pressed. I don’t know who thought of this idea, but it was a trick I learned years ago. Perhaps many of you do this too. You want to open the seams so that you end up with a pinwheel design on the back side when you press them. It might be hard to make out in the photo, but hopefully you all get the idea.

If you Google “Pressing Pinwheel quilt blocks” You will find a couple of video tutorials that can explain it better than I can here.

Here is a photo of the backside of a pinwheel block. You can see how the seams are pressed open in the center so the block will lay flat.

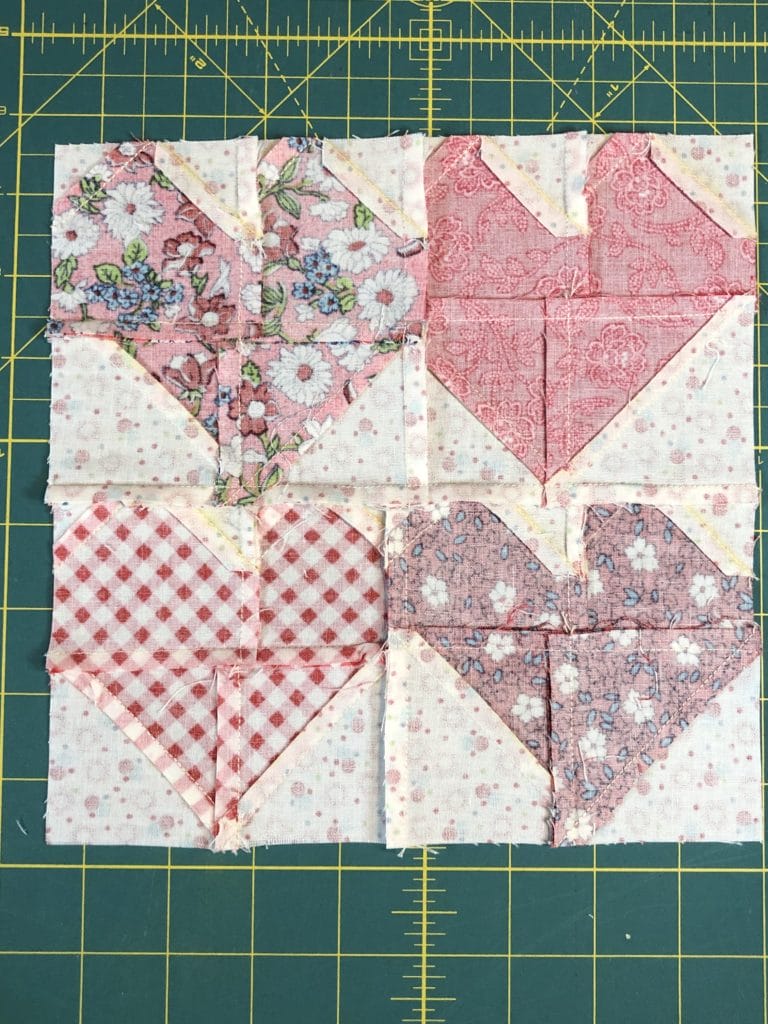
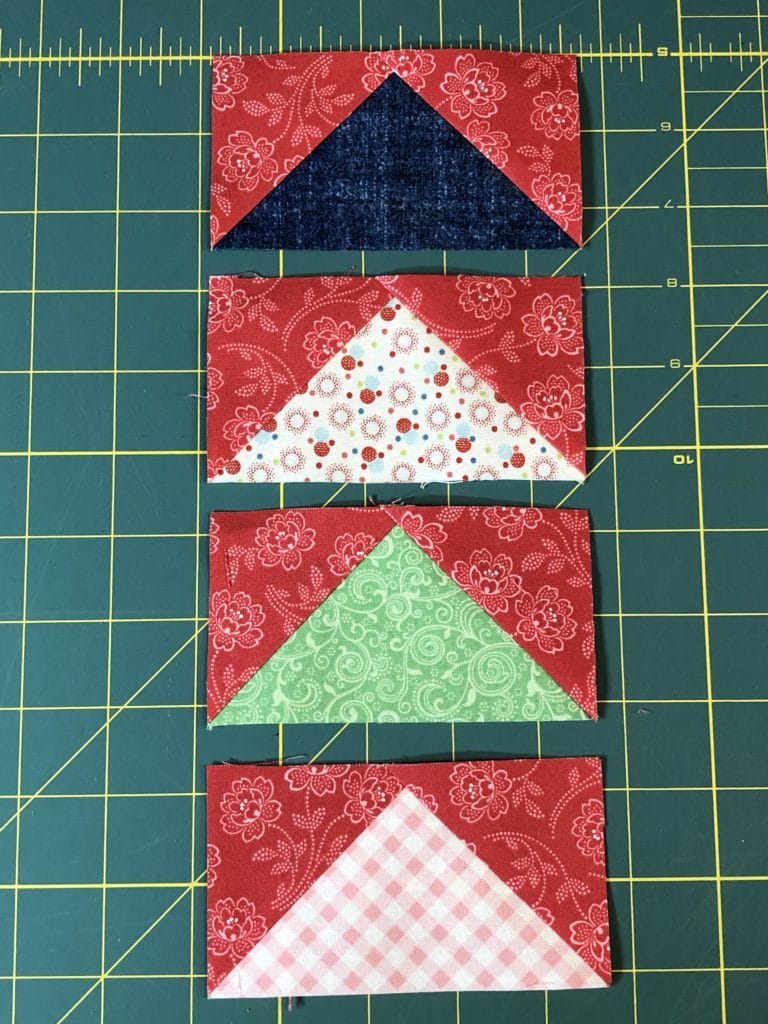
Now it’s on to the hearts portion of this block.

I think these just might be the first hearts I’ve ever designed in a quilt. I’m not sure what that says about me, but in any case, no quilt celebrating all the seasons and holidays of the year would be complete without some sweet Valentine hearts. Here is how I put mine together:

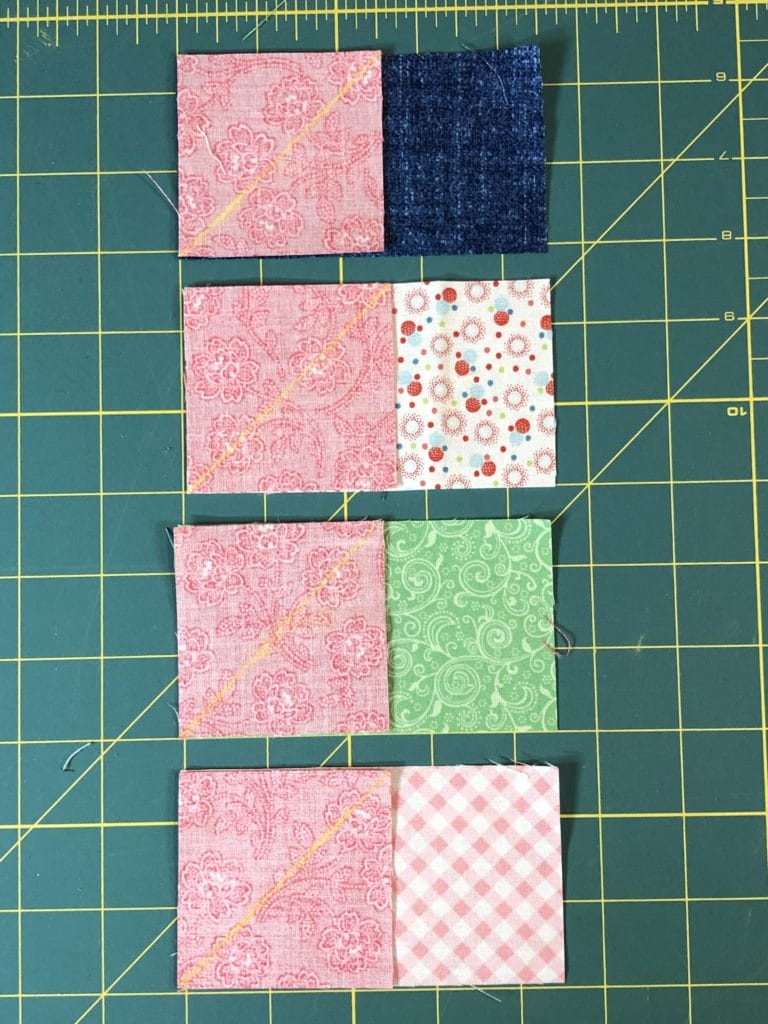
I like to do a lot of assembly line sewing, so I’ve laid out all the units sew I can sew everything at the same time.

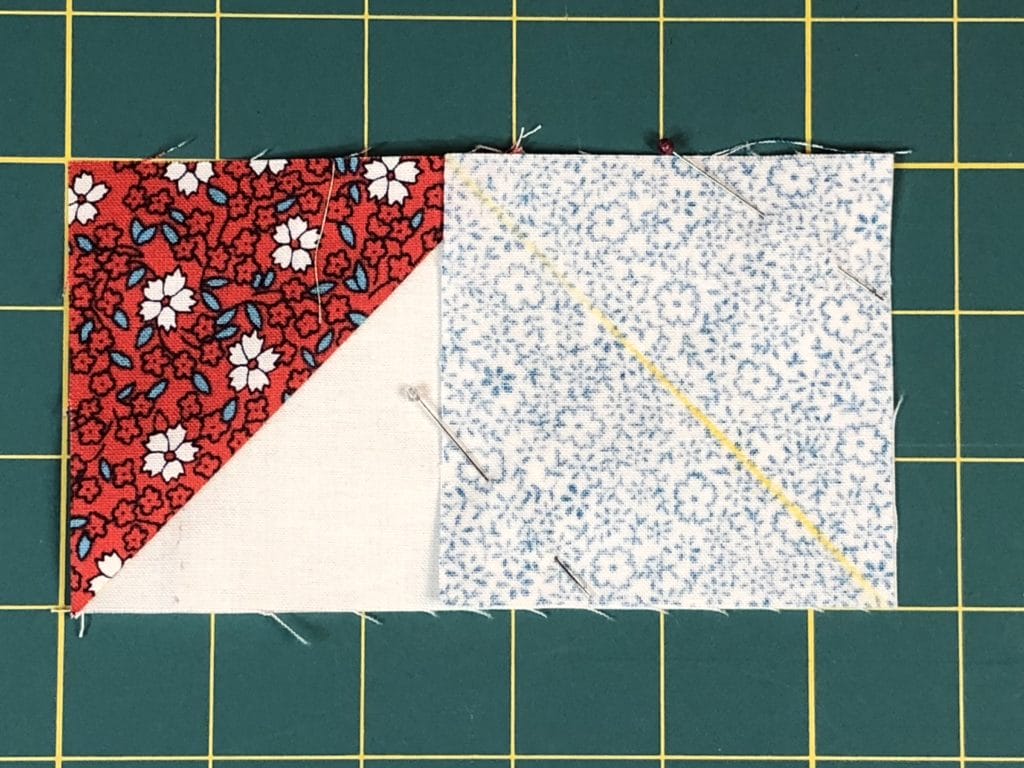
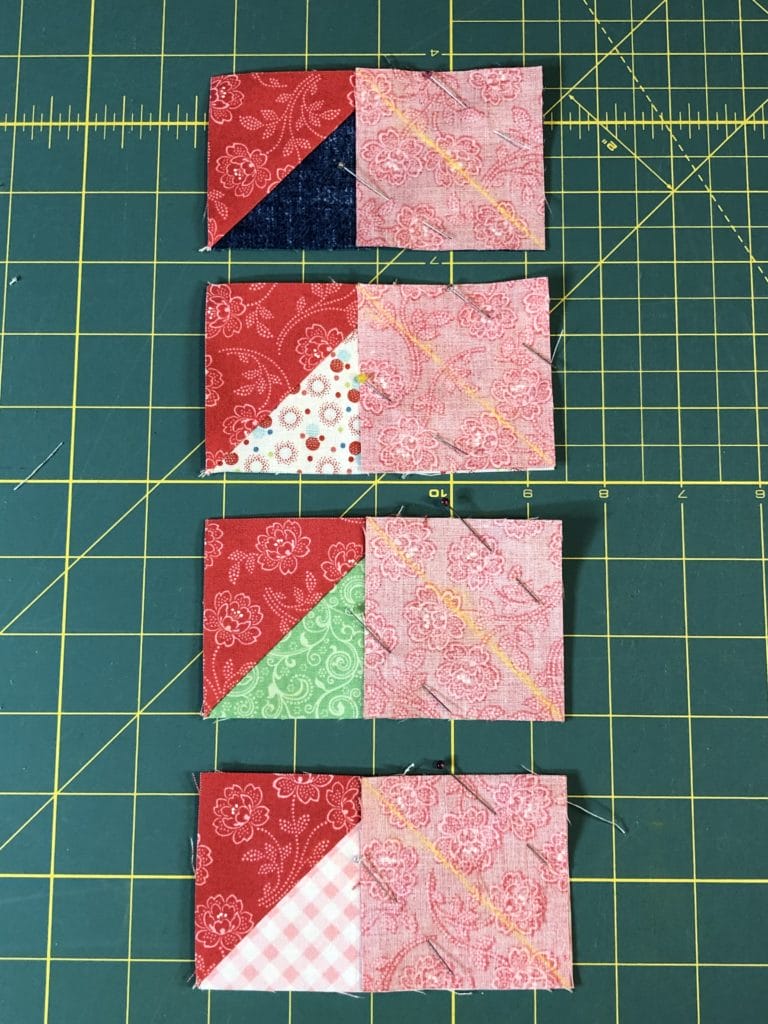
Make sure after you sew the first “C” squares on that you iron the seams downward toward the “H” squares as shown below. The second “C” square will be ironed upward. This will allow the seams to nest together later.

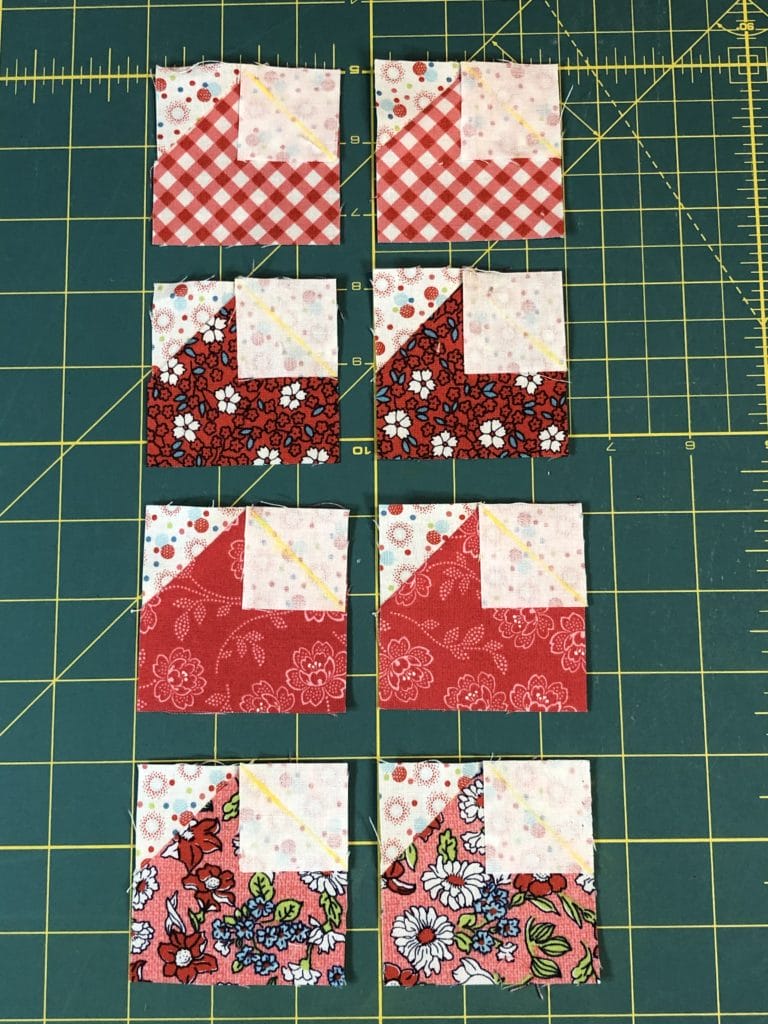
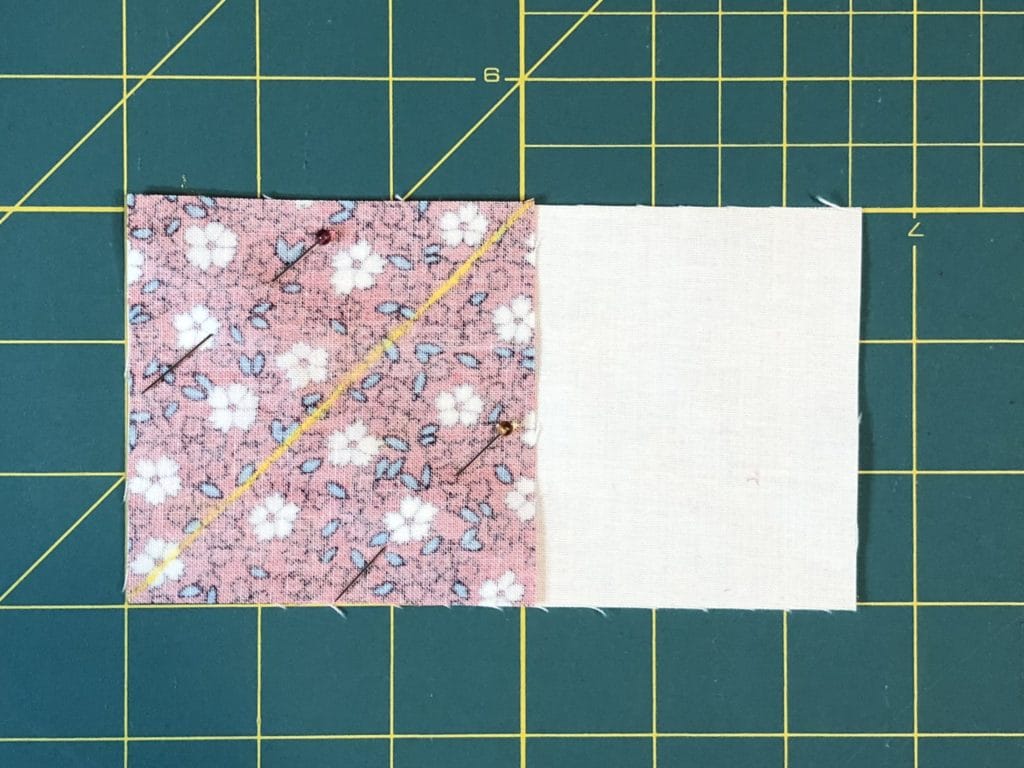
Below you can see I’ve laid out my C/H pieces with the Half-Square triangle units I made in step 5 of the pattern.

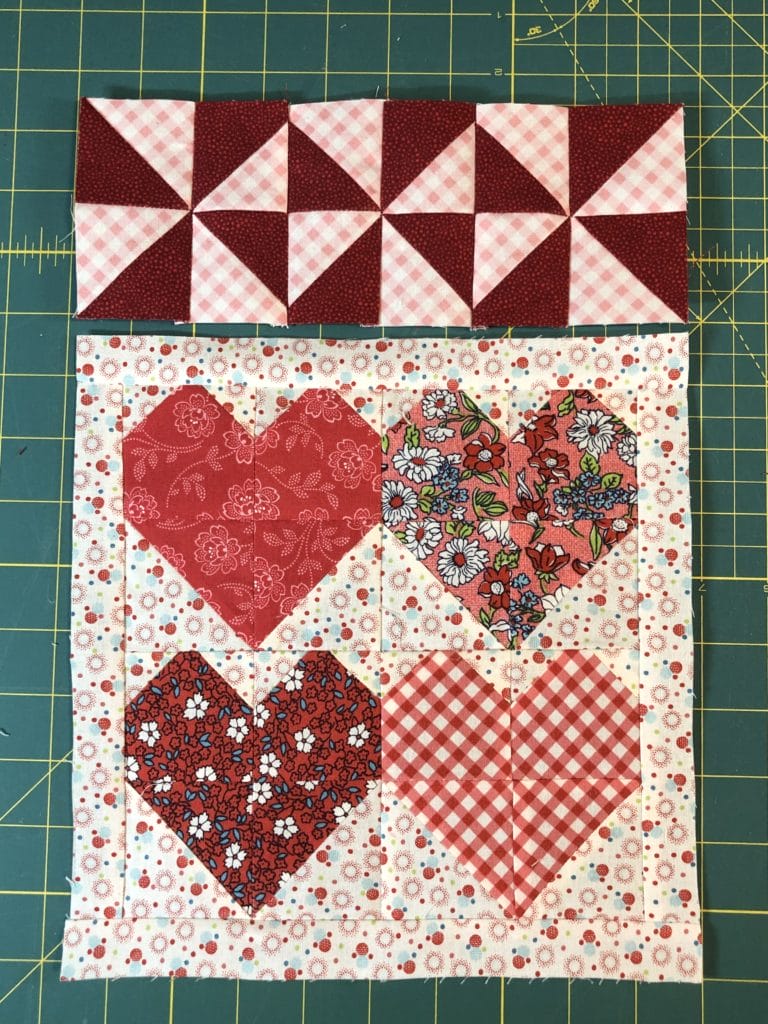
Once the individual hearts are sewn we can put them all together and add the narrow borders. When you sew the four hearts together, you may choose to press the seams open to reduce bulk, or you can re-press some of the seams on the hearts to allow them to nest together.

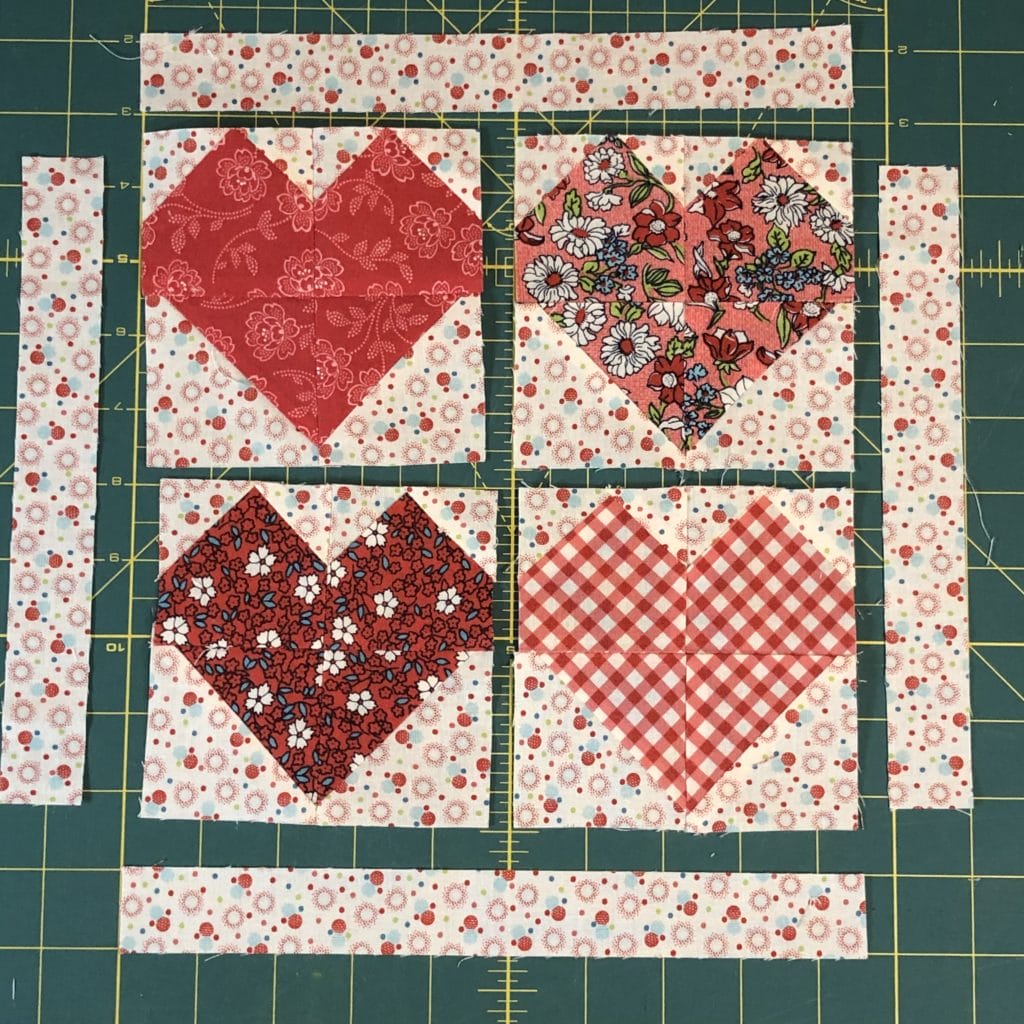
Here is a photo of the back side of my block. You can see that I chose to adjust some of the seams within the individual heart blocks so that my seams would all nest together. But pressing the seams open works just fine too, so as I always say, do what makes you happy.

And now we can add the pinwheel row to the top to finish the block!

Springtime Block

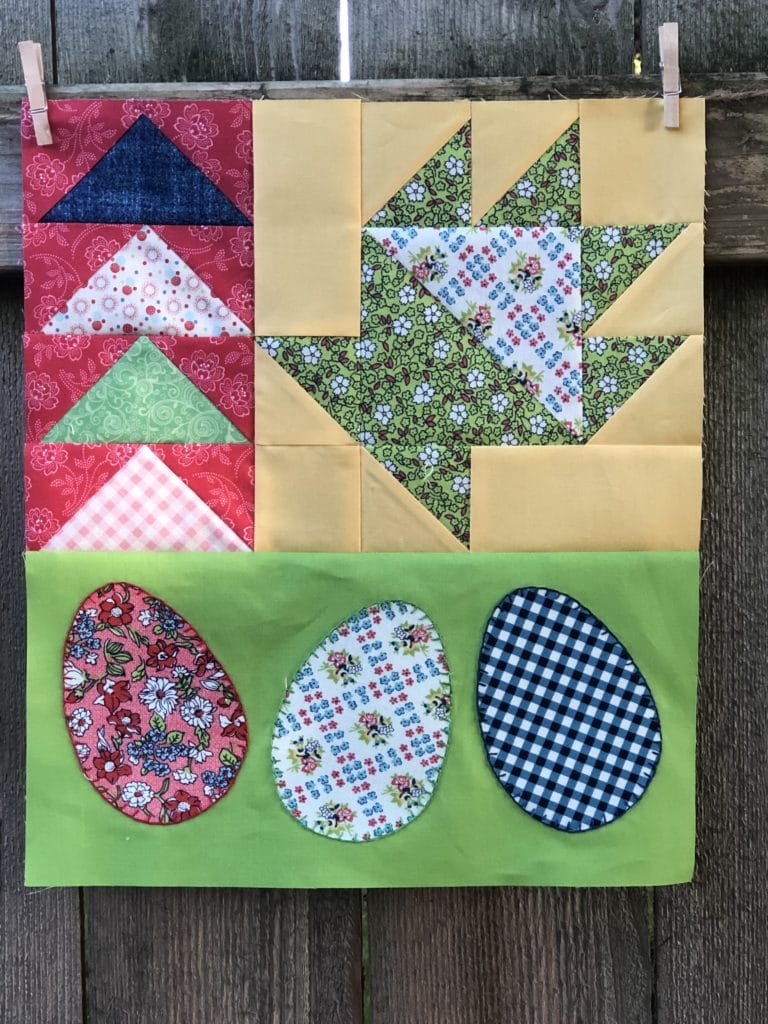
For the Eggs applique, this time I decided to do some hand stitching with some embroidery floss. I went for thread colors that would help the eggs pop a little more. For some reason I can’t ever seem to make a quilt the same way twice! I really tried to behave myself throughout this project, so that you could see it sewn as the original, but this time I just couldn’t help myself!

The basket just some squares and Half Square Triangles sewn together, so it hopefully isn’t too difficult for all of you. Just pay close attention to the instructions and pressing directions. This will enable the seams to nest together when it is sewn to the flying geese section.

Don’t forget in step 3 to sew each pair of A/D squares going opposite of each other, just like in the photo below.

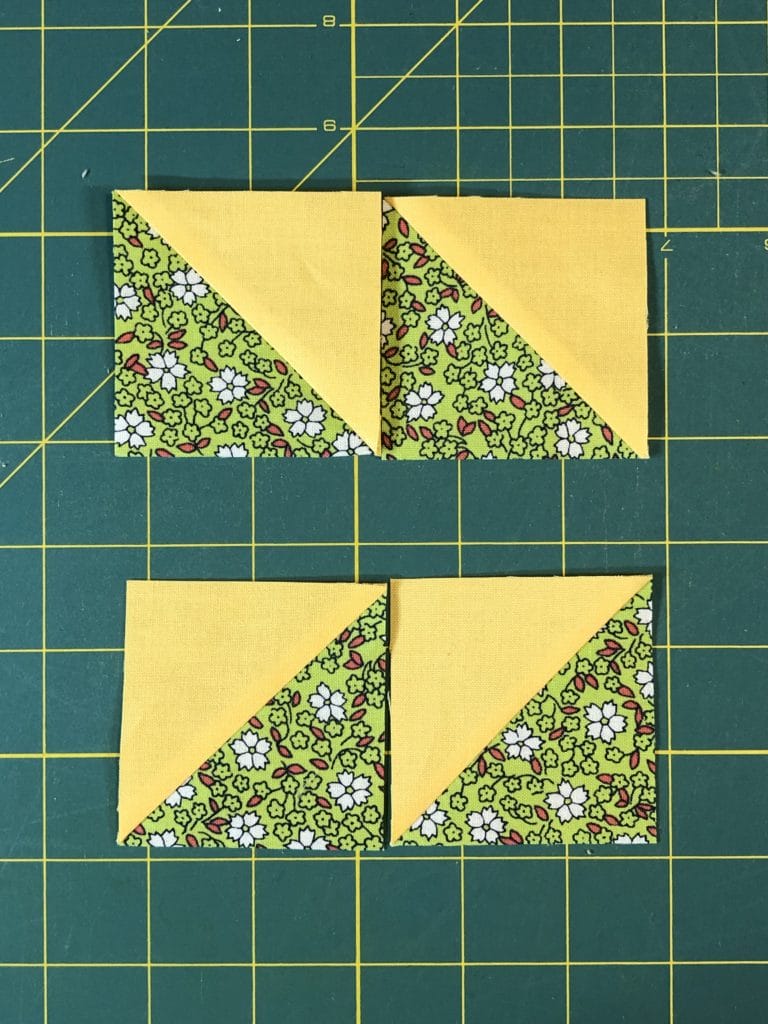
These units below are from step 5, and are mirror images of each other as well.

And now I’ve laid out all the components for the Basket Block and I’m ready to sew it all together.

Flying Geese unit

Here are some photos of how I made the little row of flying geese. I know sometimes flying geese can be a pain to make. I’ve found that if I sew just BARELY inside the line, I end up with a better looking unit when I’m done.

Now all the units are ready to sew together! Except of course, if you look carefully at the photo below, I still have yet to stitch around my eggs. Apparently I forgot to take another photo after doing that, but before I finished the block. Oops! Sometimes I get carried away with my sewing and forget I’m supposed to be taking pictures too.
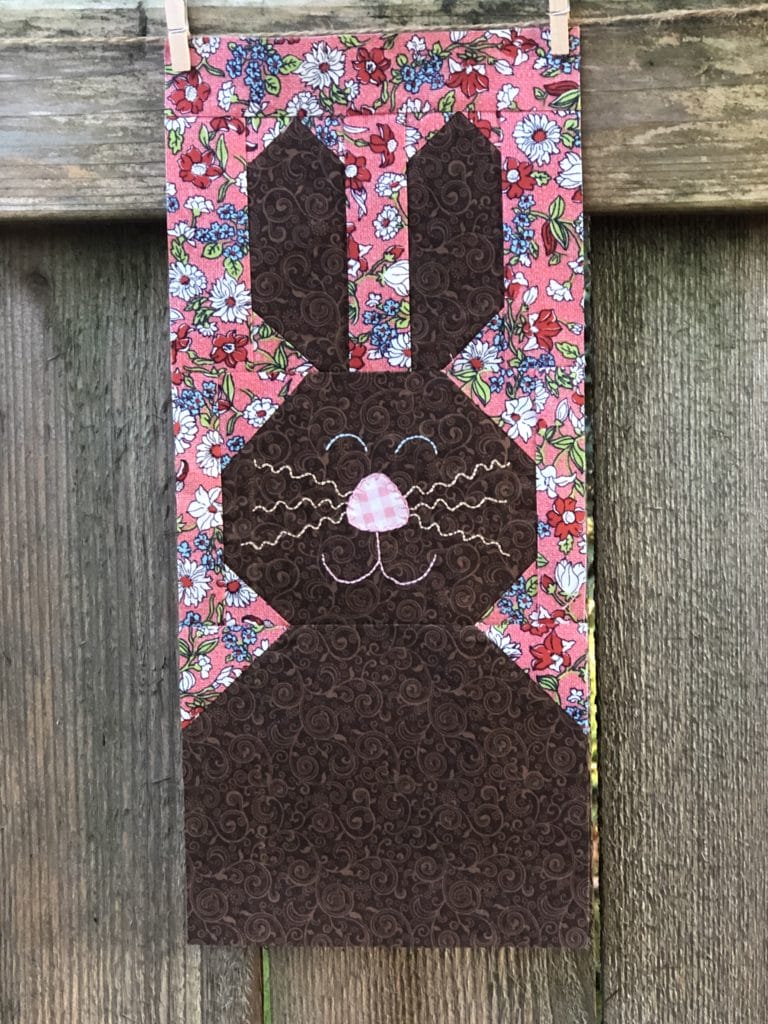
Bunny Block

This little cutie is one of my favorites on this quilt. Here is how I put it together:

Getting ready to sew the ears

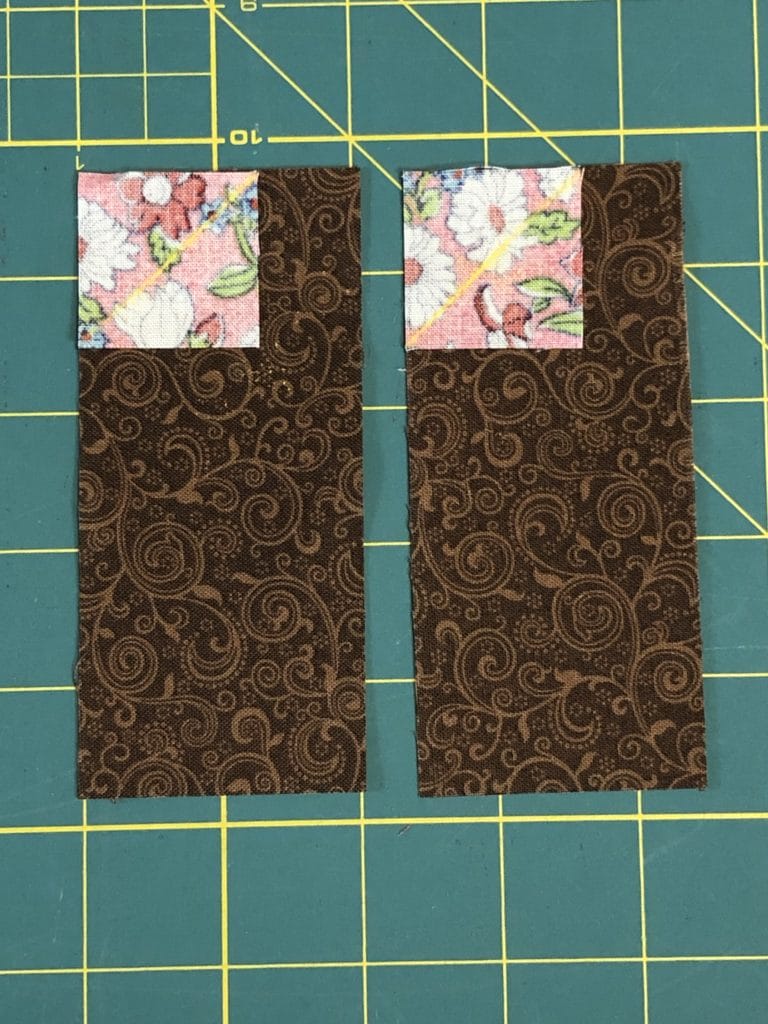
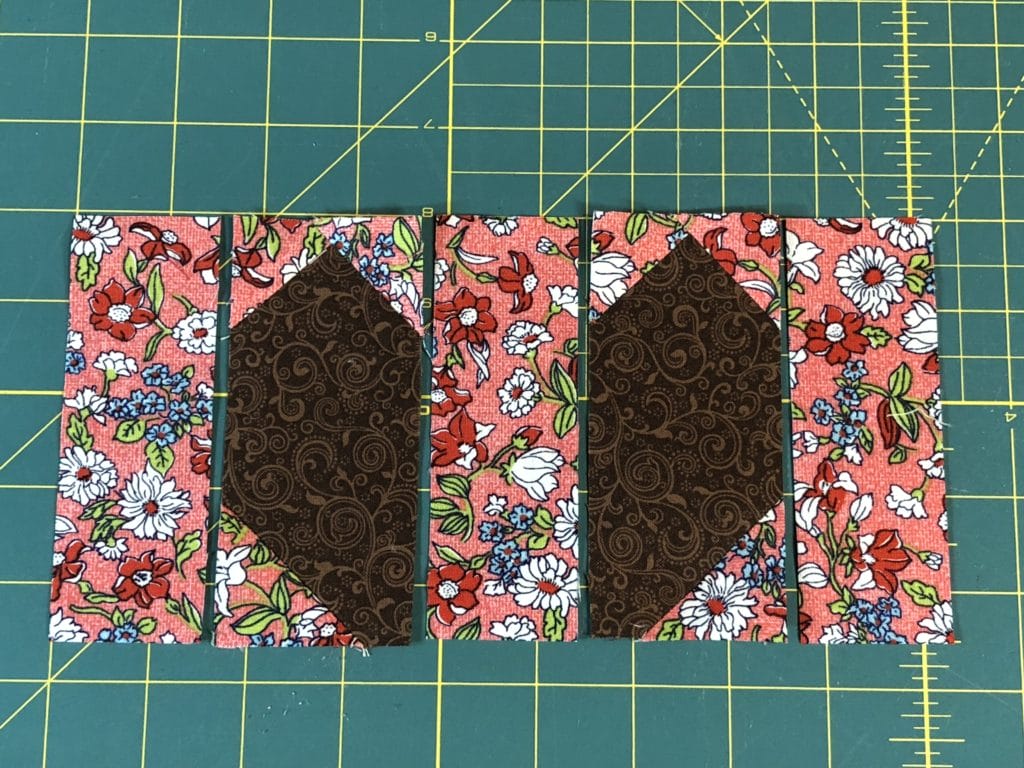
Once the ear points are done on top portion, you need to sew one E square to the bottom each unit, making sure the ears will be mirror images of each other. So as you can see below, one E square goes on the bottom left, and the other E square will be sewn to the bottom right.

And now you can sew the B strips in between the ears.

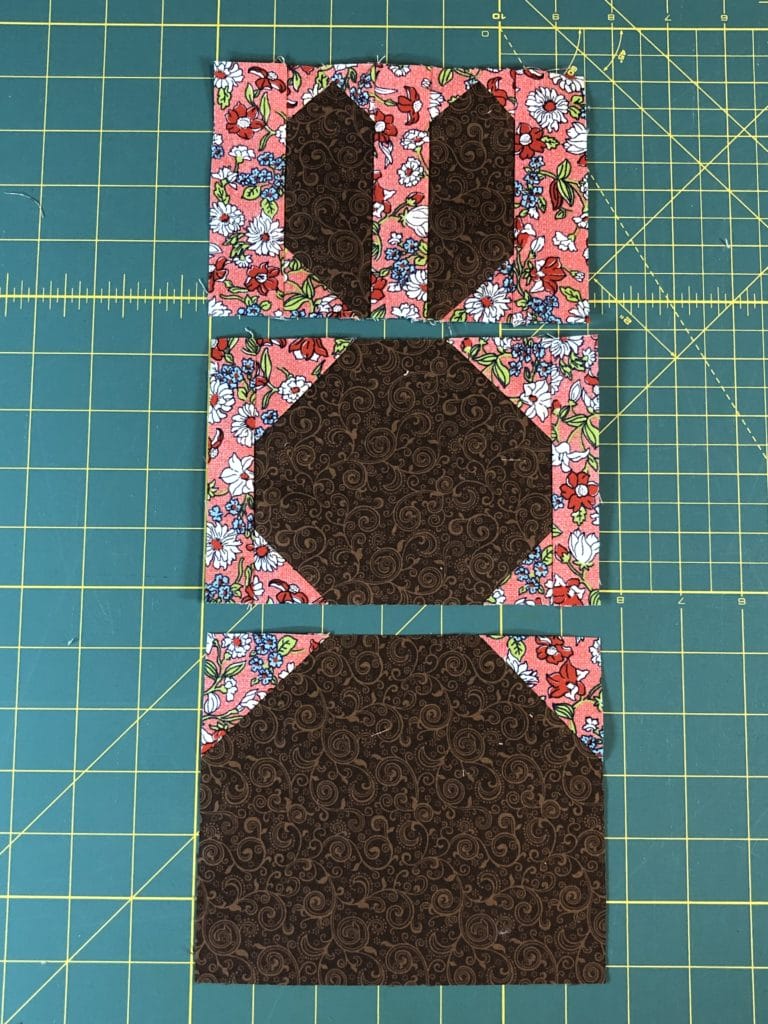
The face and body units of the bunny go together pretty much the same as the ears, by sewing the various squares on marked lines, then trimming and pressing as directed. Just make sure that your bunny’s head has the larger F triangles at the top and the smaller E triangles are at the bottom.

Now we can sew all the components together. If you look at the photo below, you may notice two things missing: 1.) I still haven’t sewn on the bunny’s face. 2.) I forgot to add the A strip to the top of the ears. Clearly I can’t follow directions, even when they are my own! But don’t worry, I fixed it all, as you will see.

For the face, this time around I decided to go crazy and use some different colored threads for the eyes, whiskers, nose, and mouth. In the pattern it says to use white embroidery thread, but I can’t ever seem to do the same thing twice. I guess I get bored easily?

Anyway, I decided to use a light blue thread for the eyes, some tan for the whiskers, and then a light pink for the nose and mouth.  If I were to make this bunny a THIRD time, I would probably use a darker blue for the eyes, and also perhaps use a darker pink fabric for the nose too.

My embroidery skills have always been a bit lacking. My bunny’s mouth is a bit crooked.

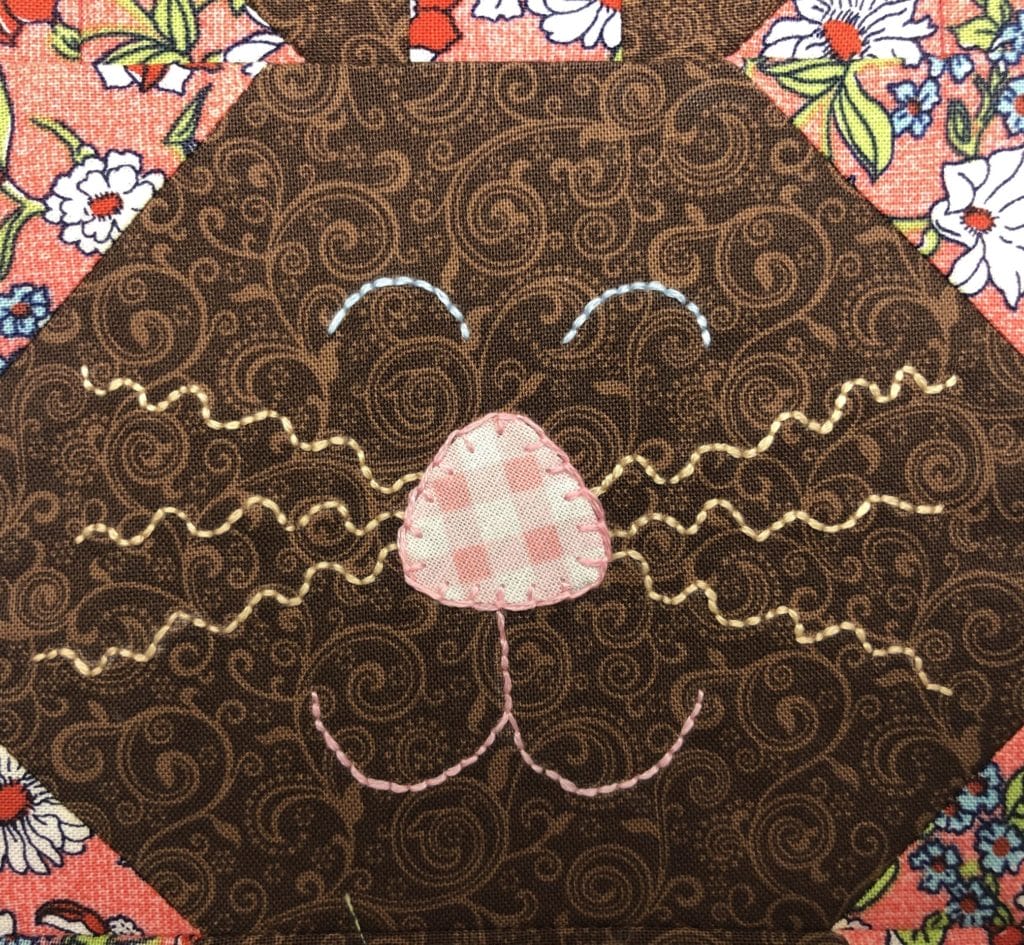
To trace on the face, I used Saral transfer paper in white. I’ve had mine for forever, and I bought it from Connecting Thread’s sister company called Artist’s Club, which is no longer in business. It comes in either a roll or sheets, and they both work equally well. I checked online and you can get it at most major retailers.

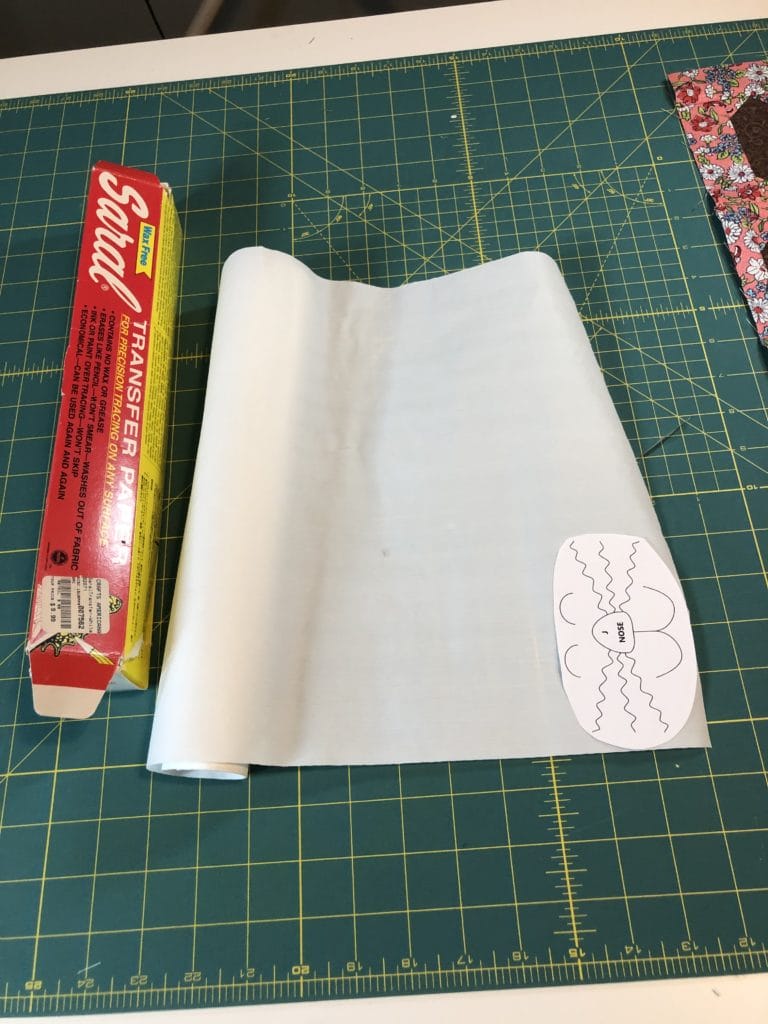
I cut out the face from the pattern, and then slipped a similar sized piece of the transfer paper underneath to trace it on to the brown fabric. I just eyeballed where I wanted it, trying to make it centered from right to left. I used a stylus to trace on the lines.

You can see the scrap of Saral paper underneath the pattern. And yes, I am left-handed, so this may look backwards to most of you.

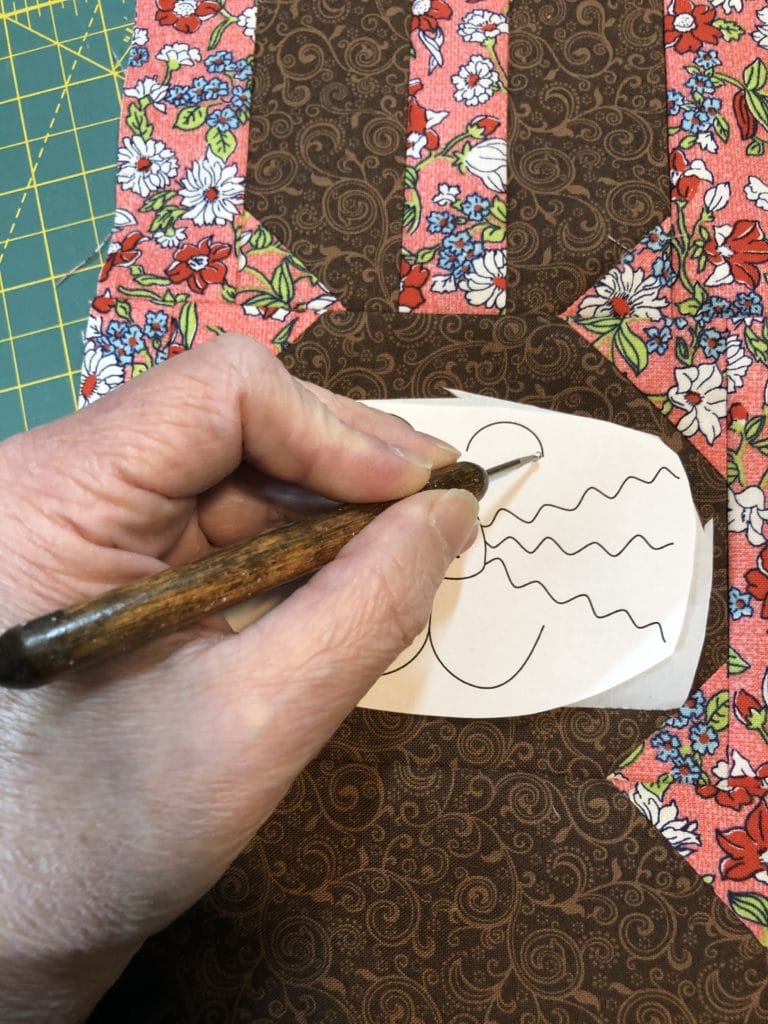
As you can see, the lines are faint, but it was enough for me to see where to sew.

If you look carefully at this photo, you will notice one of my bunny’s ears is WAY off. Not sure what I did there, but I decided not to care. I may add a flower later to cover it up. Or I may not.

And, I also noticed that I have the bunny’s nose UPSIDE DOWN. Sheesh! How did I not notice it until now?! Quite embarrassing! Clearly I don’t look at a lot of bunnies in my day to day life, because I designed and wrote the pattern this way, and didn’t even realize it until this week. So, feel free to turn that nose around so that your sweet bunny can have a normal face haha! Or, your bunny can have a backwards nose like mine. I figure when this quilt is all put together, most people won’t notice, right?

I hope you’ve enjoyed making all these blocks. I’m so excited for next month when we finally get to put it all together!

Happy Quilting! – Kristin


Annabelle BOM Month 4
11.7.2020

If this month feels like Déjà vu, you aren’t going crazy. The blocks we are sewing this month are exactly the same as last month, only with different fabrics. So I won’t bore you by giving you another tutorial about how I sewed the block together. You can’ refer to last month’s blog post for help on that if you need.

This month I thought I’d give you a tiny glimpse into how I sew blocks together when I have a lot to make at once. Whenever I’m sewing I always try to streamline things as much as possible. Perhaps many of you do this too. I like to get everything cut out and marked at once, and then I try to sew as many components as I can at the same time.

Here I’ve cut out everything I’ll need for all eight blocks.

To start, I’ll be sewing the flying geese units and the HST (Half Square Triangle) units for the pinwheel centers at the same time, so I’ve got everything pinned and ready to go.

I know some of you mentioned in the Facebook Group for this Block of the Month that you were saving your cut corners from the flying geese units, and I must confess I’ve been doing the same. When I cut off the corners, I just leave the pin in the portion that is cut so that I can go back and sew them together later. When I figure out what I’m going to do with the bonus HSTs I’ll let you all know. First I have to get this quilt finished. 🙂

Here is my table full of lots of lovely chain piecing. Clearly I need a bigger table! I keep telling my husband this but he doesn’t believe me. Also, I would need a bigger room for a bigger table, which means buying a new house. Seems reasonable to me! Somehow, he is not convinced…

Once I’ve finished off my flying geese and HSTs, I get ready for some quality trimming time. I always trim and true up my pieces with each step. So once my pinwheel centers are made, I will check them again just to make sure they are all the correct size.

When I made last month’s blocks I was in a hurry and didn’t pay attention to my own directions. So I ended up sewing ALL of my pinwheels incorrectly and they didn’t match up as they were supposed to. Ugh! I had to rip everything out and re-do them. So this time I was determined to do it right the first time, which meant laying out all my pinwheel blocks and checking them with the flying geese units before I began pinning and sewing them all together.

While I was sewing my pinwheels, I was also sewing the “B” squares to the ends of half of my flying geese so that the top and bottom units of the star blocks would be ready to go.

I always press open the centers of my pinwheel units so that they will lay flat. There are some great tutorials on YouTube that show how to do this much better than I can show you here with still shots, but in a nutshell, you want to open your seams so that you will get a pinwheel design on the back side too.

Once I’d finished up with the pinwheels and the top and bottom flying geese units, all I had left to do at this point was sew the remaining flying geese to the sides of the pinwheel units and then I could finish the blocks.

Here they are hanging on my fence, all finished and ready to go.

I can’t wait to get these sewn together and add the checkered border next month. I’m sure you all feel the same! It’s hard to sew these blocks and then wait to add them in the quilt. But don’t worry! We will be finished with this beauty before you know it. We are now almost halfway done. Hooray!

Until next month, Happy Quilting! – Kristin


Annabelle BOM Month 3
10.6.2020

Hi there everyone!

As I’ve probably mentioned before, I LOVE LOVE LOVE  Star blocks! Which I guess is why this quilt has a lot of them in it. They are my design weakness!

For this month we will be making eight of these little cuties. They are each 10-1/2” square, and will give you lots of practice with flying geese.  (I know, it’s just what you all wanted!)

For these flying geese I use the traditional stitch and flip method. This is the method I used to use all the time when I first started quilting and writing patterns. Then I learned the no-waste method and I have been hooked on that ever since. However, because of the way this block is constructed, we will be using the old-fashioned way. It’s tried and true and does the job.

But I’m getting ahead of myself. Before we get to those flying geese, we will need to make some pinwheel centers for our blocks, starting with some half-square triangles.

I have moved the top fabric down simply so you can see the red print fabric underneath. You want your squares matched up on all the corners before you begin sewing.

Make sure as you press your F/D squares that all the seams are pressed toward the red print fabric and then all your seams will nest together nicely.

Here are my half-square triangles ready to be trimmed. Not my favorite job but it has to be done!

Make sure all your pinwheel are sewn just like the diagram in the pattern. You want the red and blue prints to be placed in the same orientation so that things will all match up later.

The half-square triangles are ready to sew together to make the pinwheel centers.

After your pinwheel blocks are finished, it’s time to make those flying geese.

Place the Red C squares on the left side of each of the A rectangles, and follow the directions.

Then place the Blue E squares on the right side to finish them up. I like to sew just outside of my marked line so that I have some room to square up my flying geese when they are done.

Now we can sew all the components for the block together!

Here below I have laid out all the pieces to make sure everything is in its proper place.

Each print matches up with its counterpart.
This picture is a little crooked, but you get the idea.

If you’ve sewn your pinwheel blocks together correctly, all the red fabrics and blue fabrics should line up with each other, giving the illusion that they are one continuous piece.

Once you get going, these blocks come together pretty fast. I hope you have enjoyed making these sweet little stars!

SPOILER ALERT: If you look at the finished quilt on the front page of your pattern, you will notice that we have more of these star blocks to make, just in different fabrics. So be prepared to make a few more of these cuties later on!

Take care, and Happy Quilting! – Kristin