Tag Archives: Seasons

Seasons BOM Month 6
12.8.2020

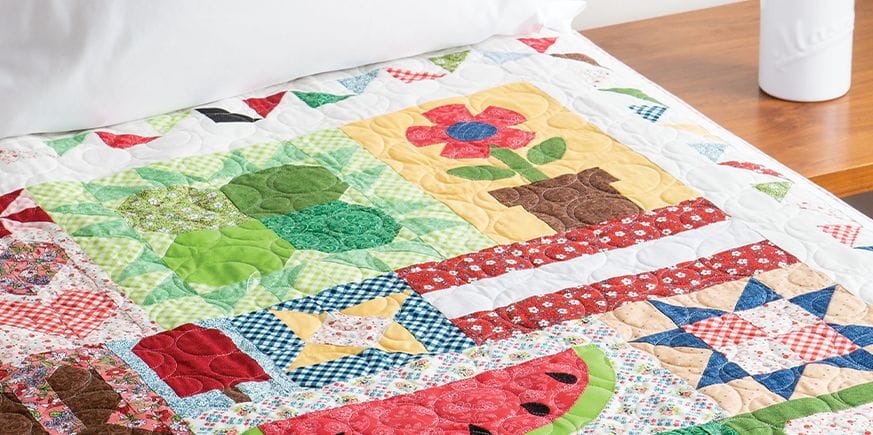
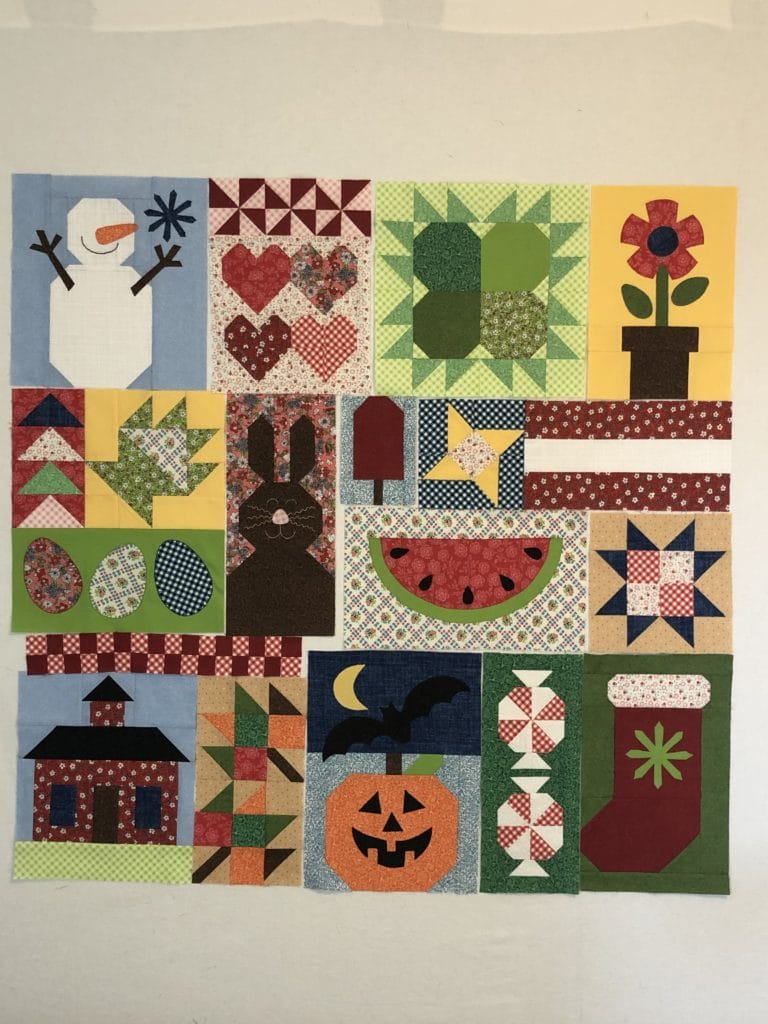
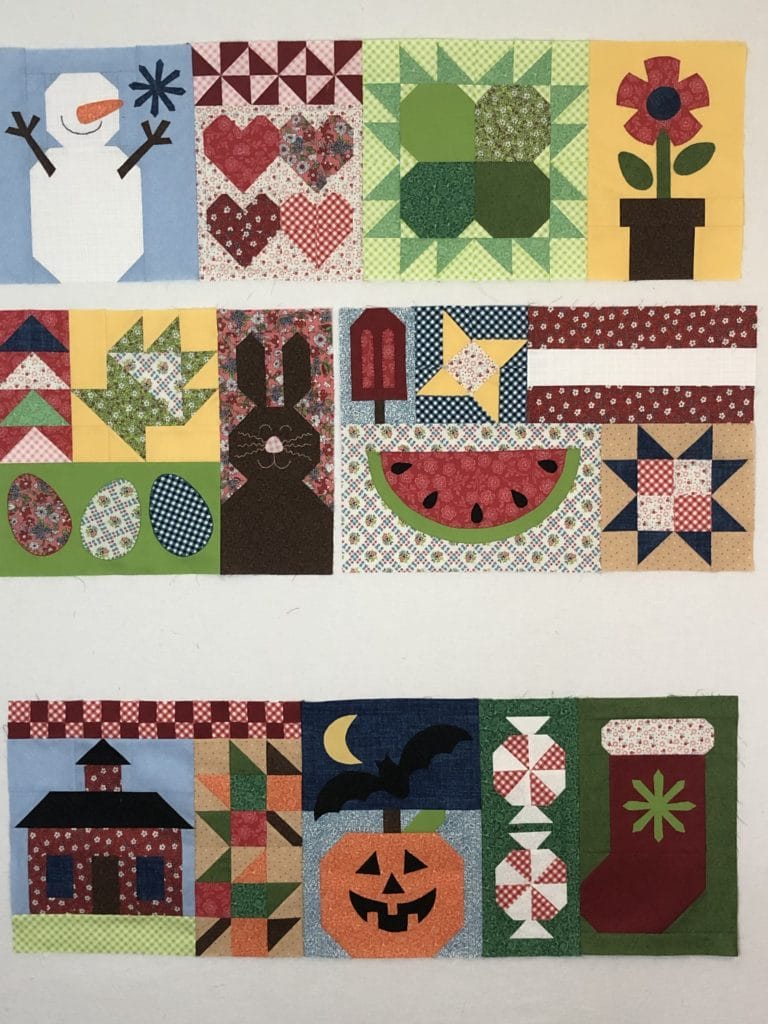
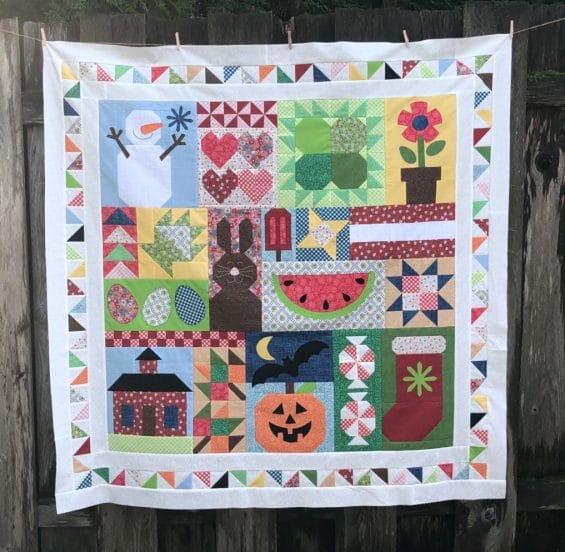
The moment we’ve all been waiting for has finally arrived. After months of sewing blocks, we get to put this quilt all together and finish!

I know many of you jumped right in after finishing last month’s blocks and have already assembled the main portion of the quilt. Once you have the quilt blocks all laid out, it’s not too difficult to see how it all goes together.

I must admit I got a little carried away myself sewing the blocks together, and forgot to take pictures of some of my sewing. Fortunately you all have the pattern to refer too!

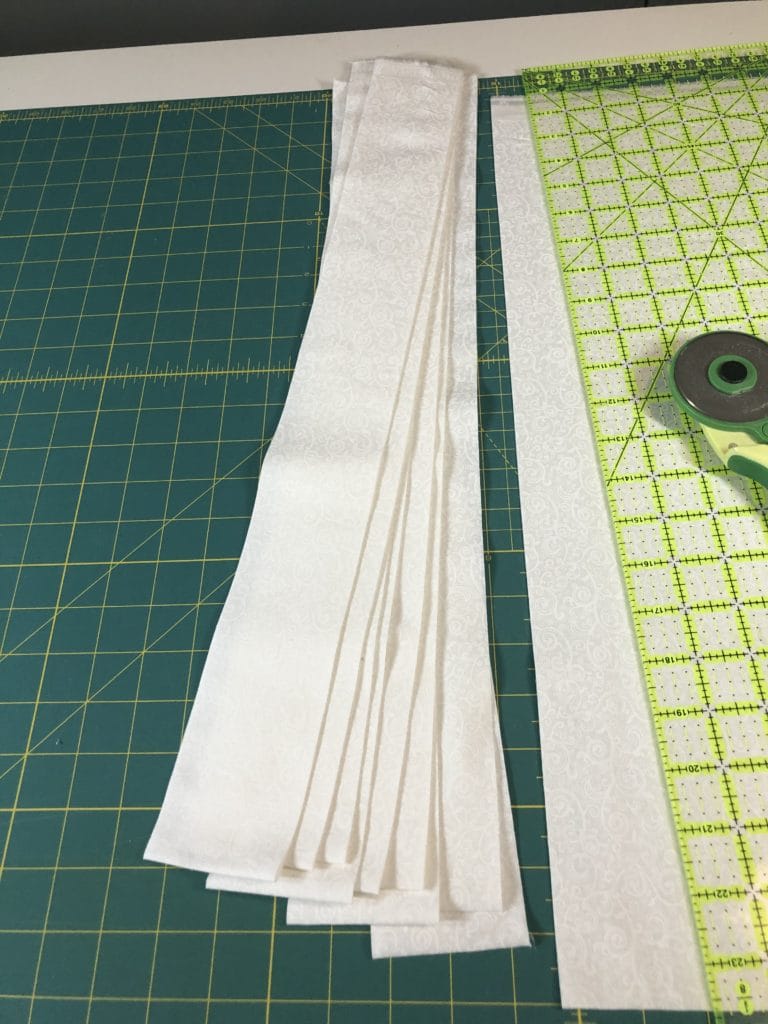
Once the center portion of the quilt is put together, it’s time to make and sew the borders. Whenever I have solid borders to add to a quilt, I ALWAYS cut my borders an inch or two longer, just to make sure I have plenty for squaring up the corners.

This month’s kit comes with 1-1/2 yards of the White Swirl fabric for the border strips, which means that you don’t need to piece your border strips for the A-D pieces, since you can cut them length-wise on the fabric. If you want to do this so that your borders don’t have seams, make sure you cut all of the A-D strips before cutting out all of your E squares for the pieced border.

Of course, yours truly forgot this and just went to town cutting strips running the width of fabric before I realized what I’d done. Sooo….I got to do some piecing for most of my white border strips. But it works either way, and there is plenty of fabric. I just have a few strategically placed seams in some of my borders.

Yep, I went a little strip crazy and got ahead of myself here.

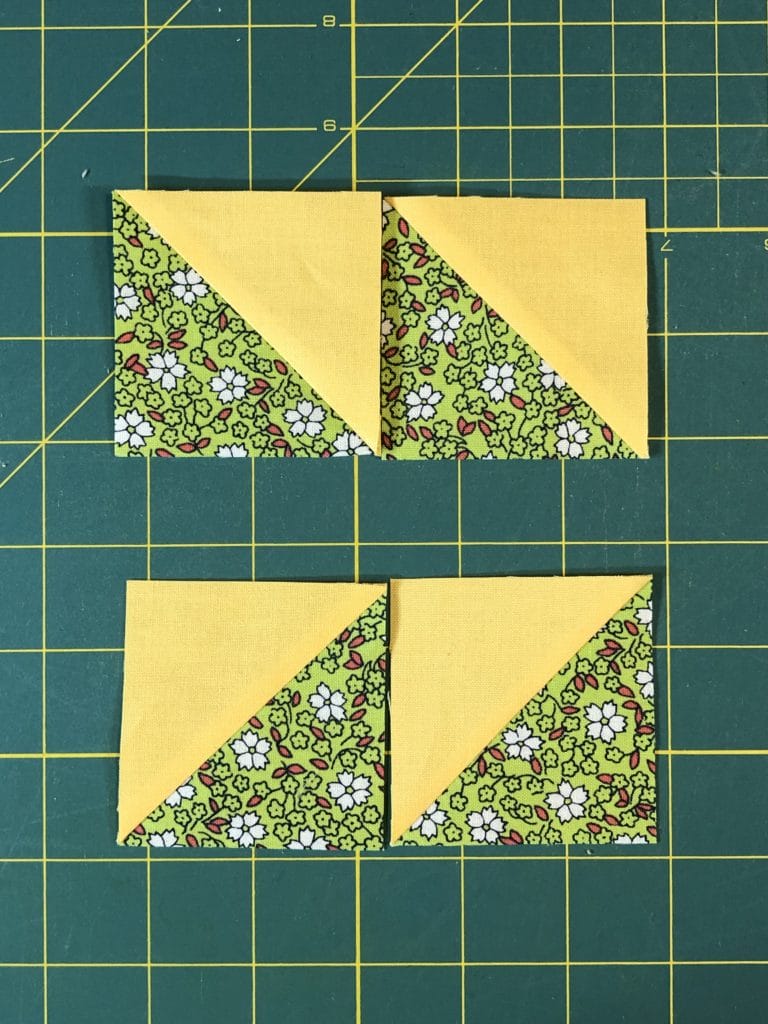
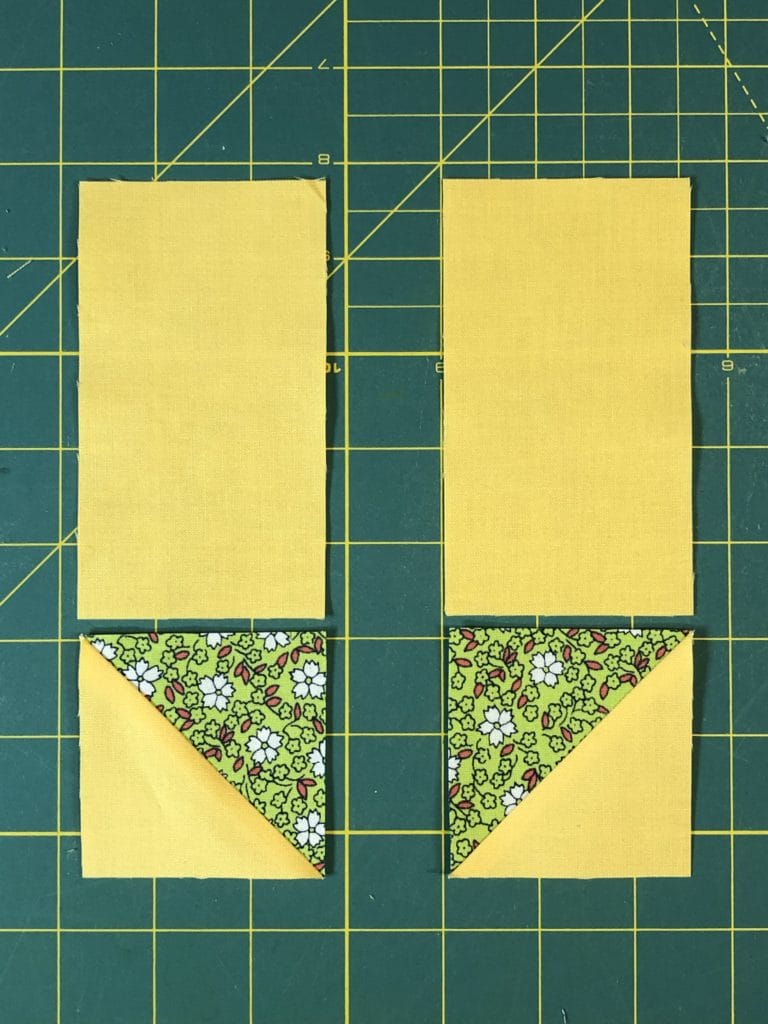
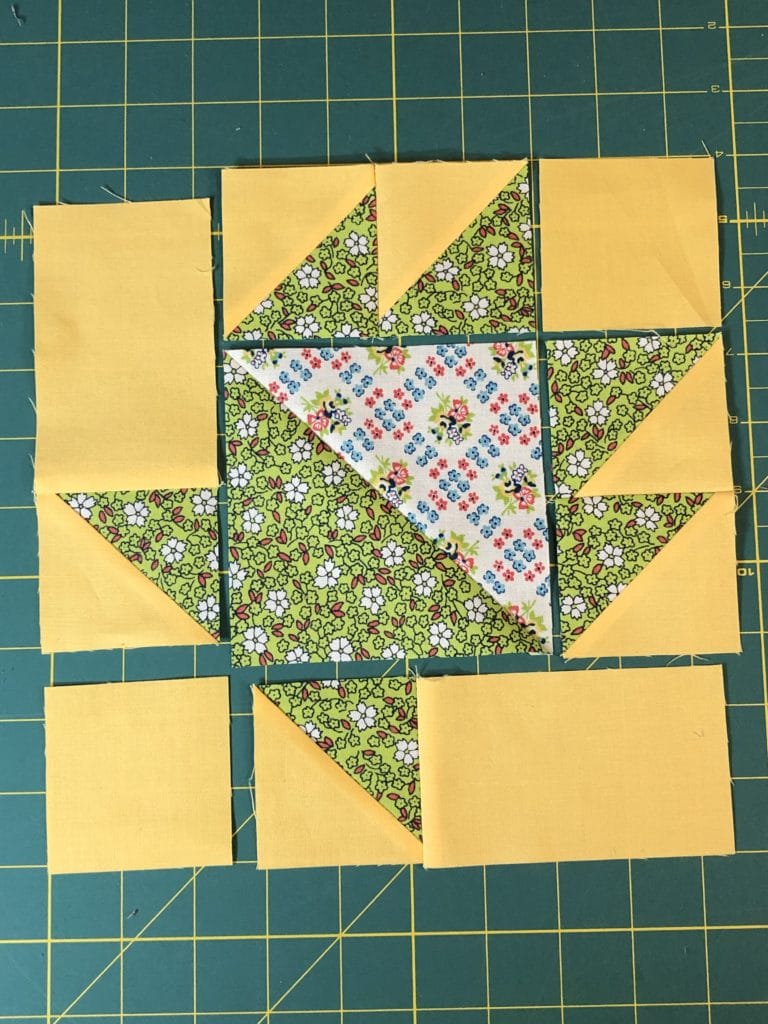
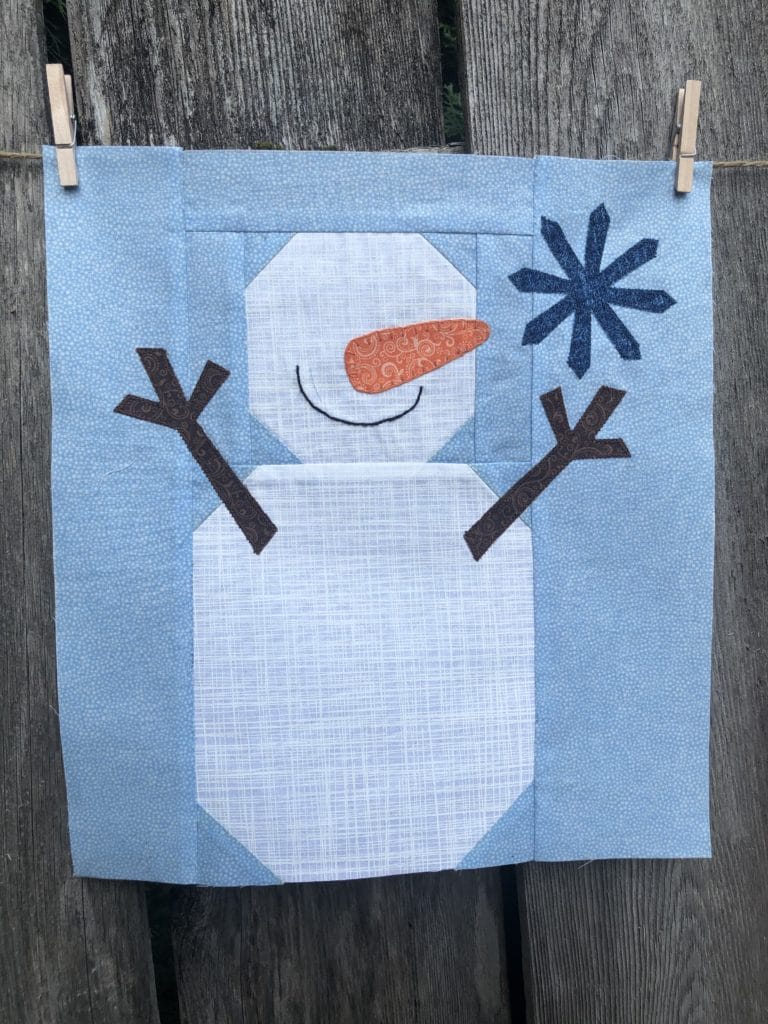
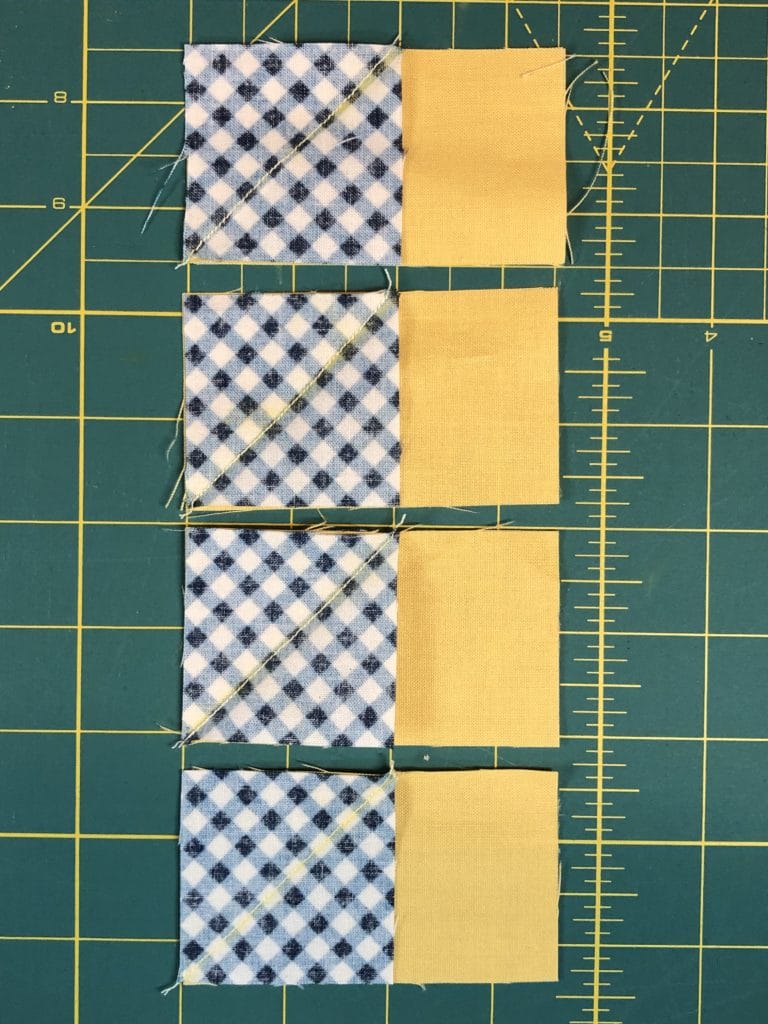
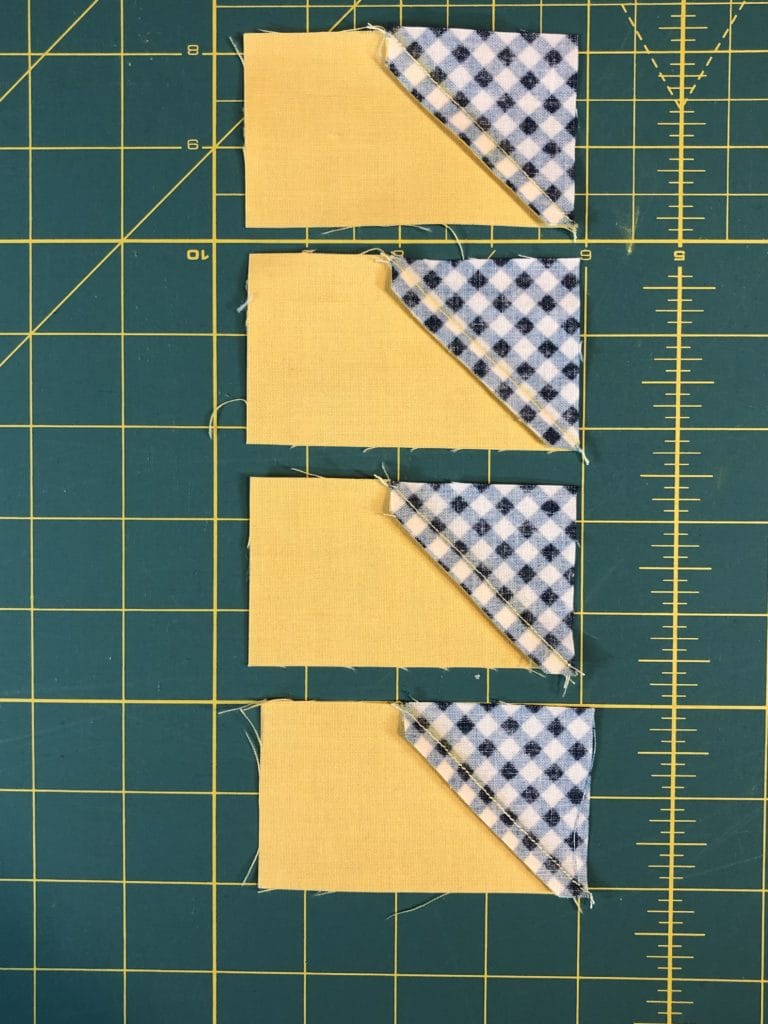
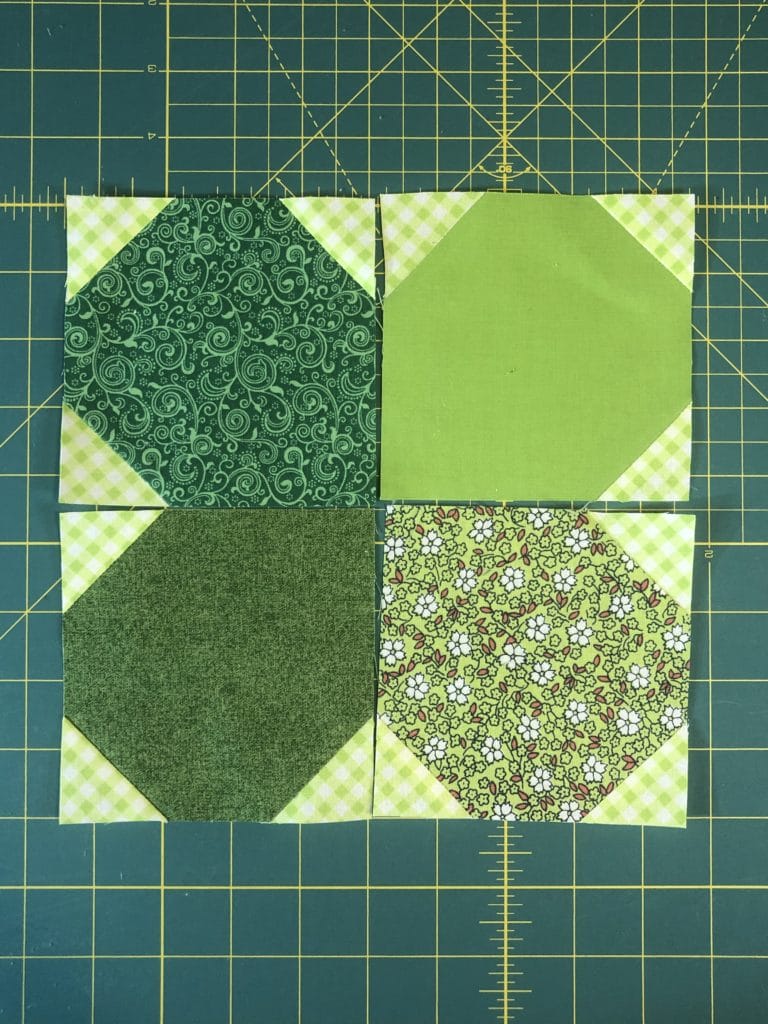
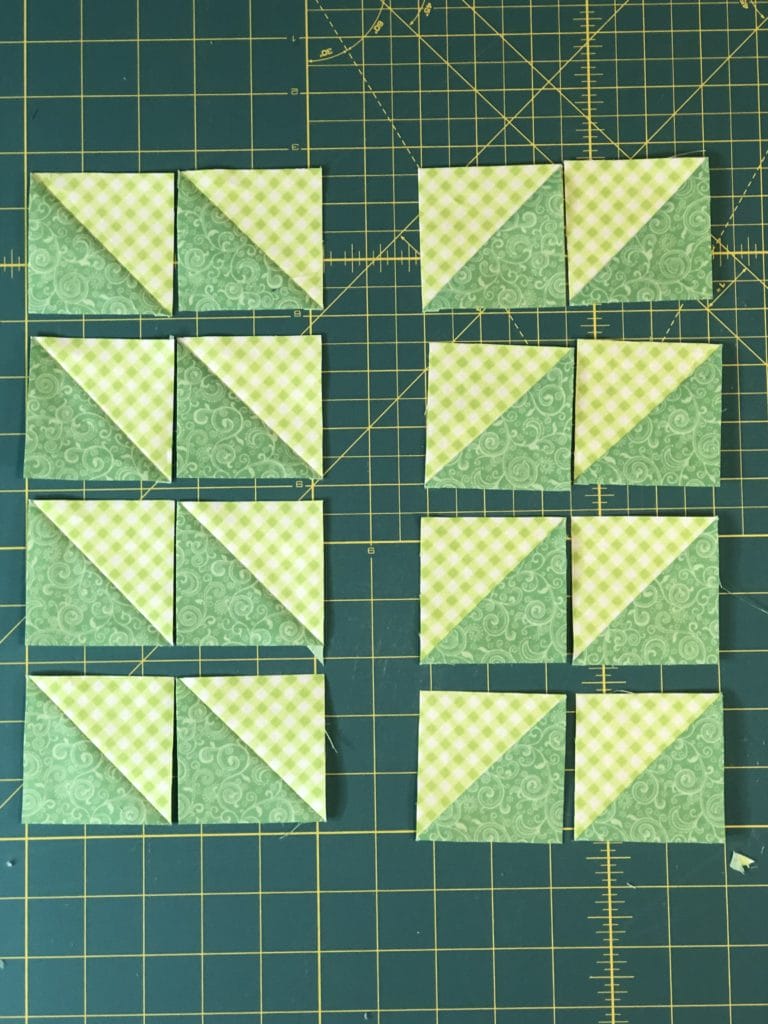
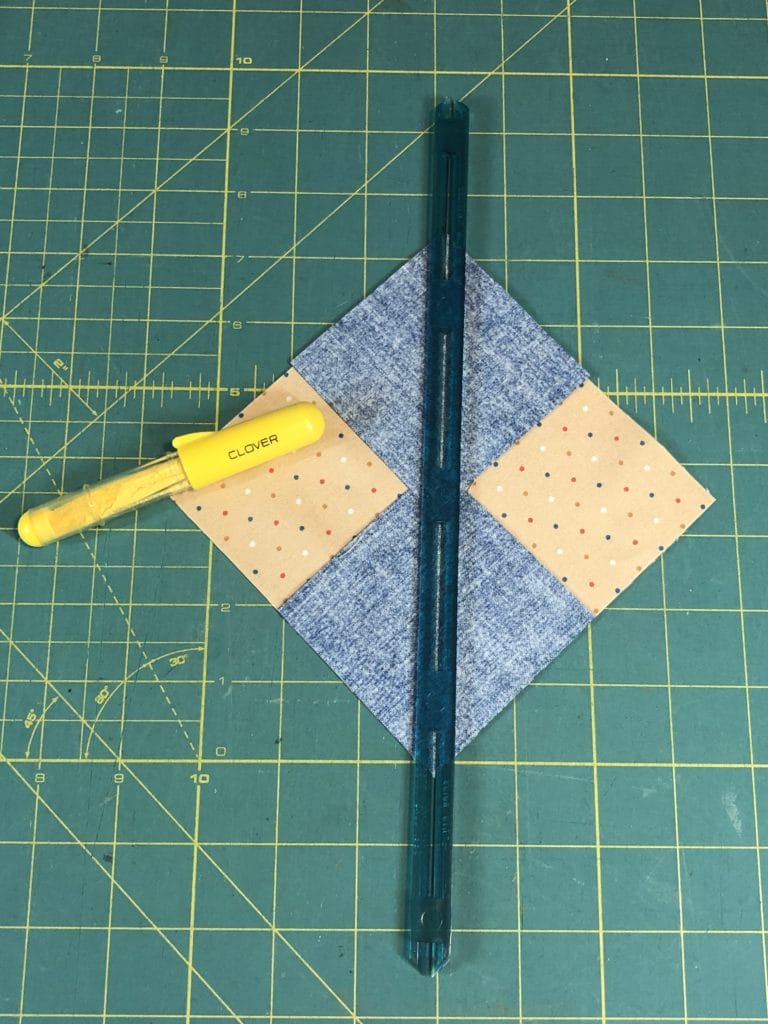
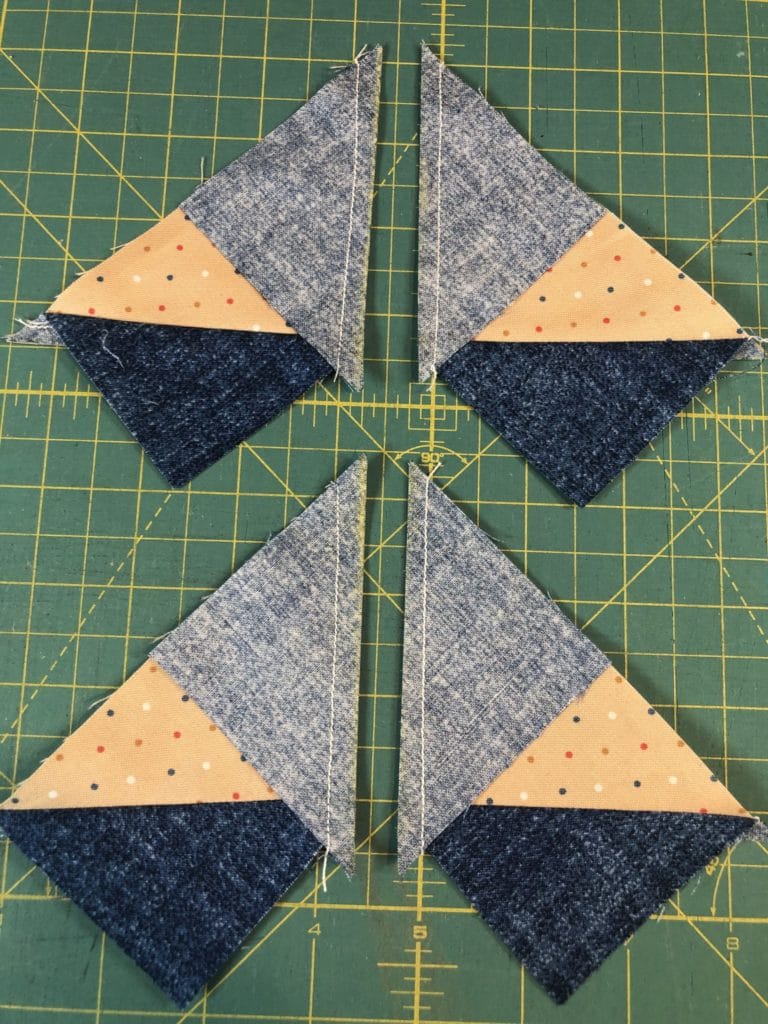
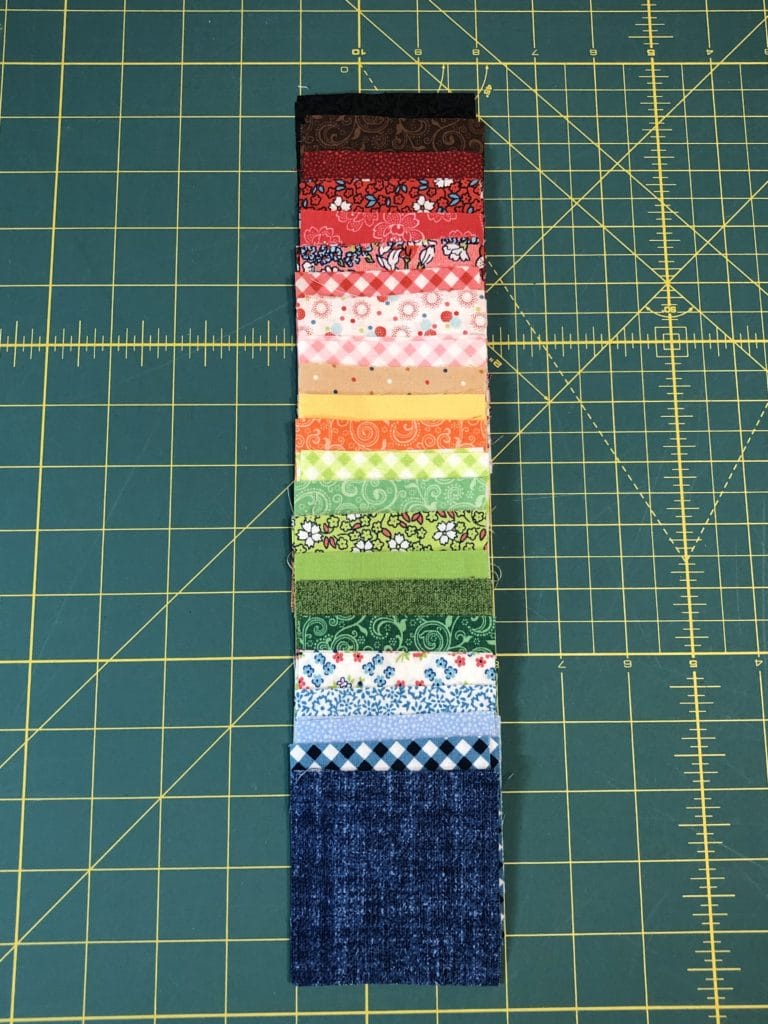
Now it’s time to make the half-square triangles for the pieced borders. Since you all know by now how to make these, I won’t worry about that part.  But I’d like to share a little bit about fabric placement and color. Since this quilt is very colorful, I wanted to make sure that the border was a continuation of what was happening in the main body of the quilt. So I made sure to cut two F squares from each fabric in the quilt. This quilt has a lot of greens, blues, and reds, but not as many oranges and yellows, so I went ahead and cut a couple of extra squares of the orange and yellow fabrics so that my border would look more balanced.

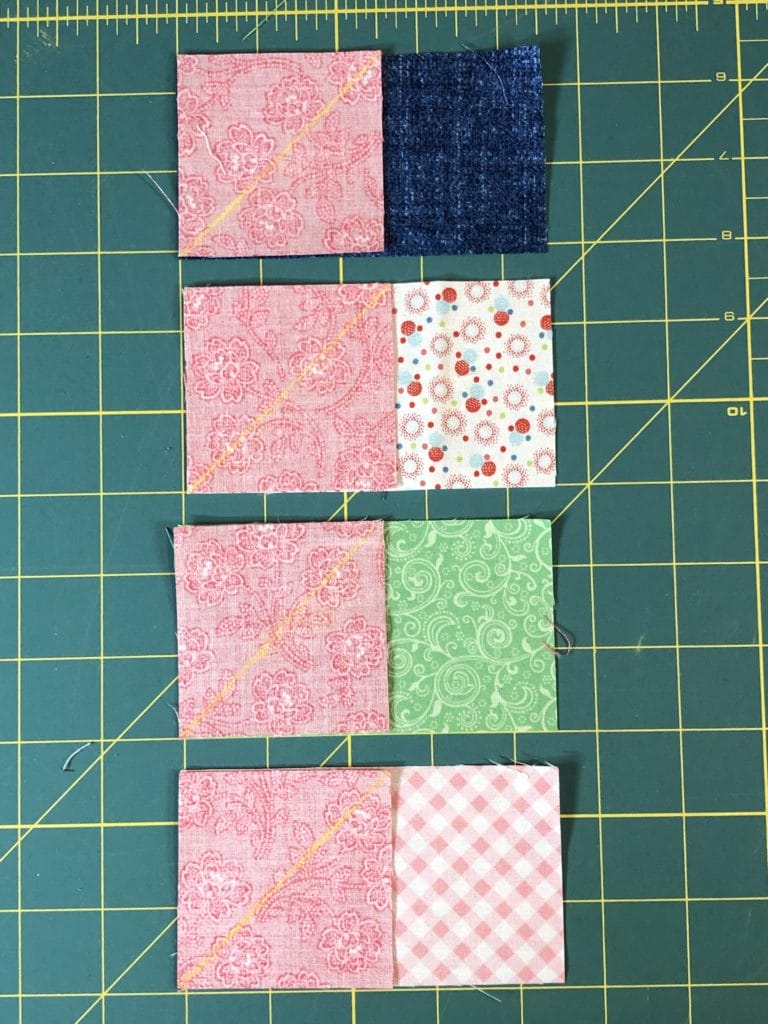
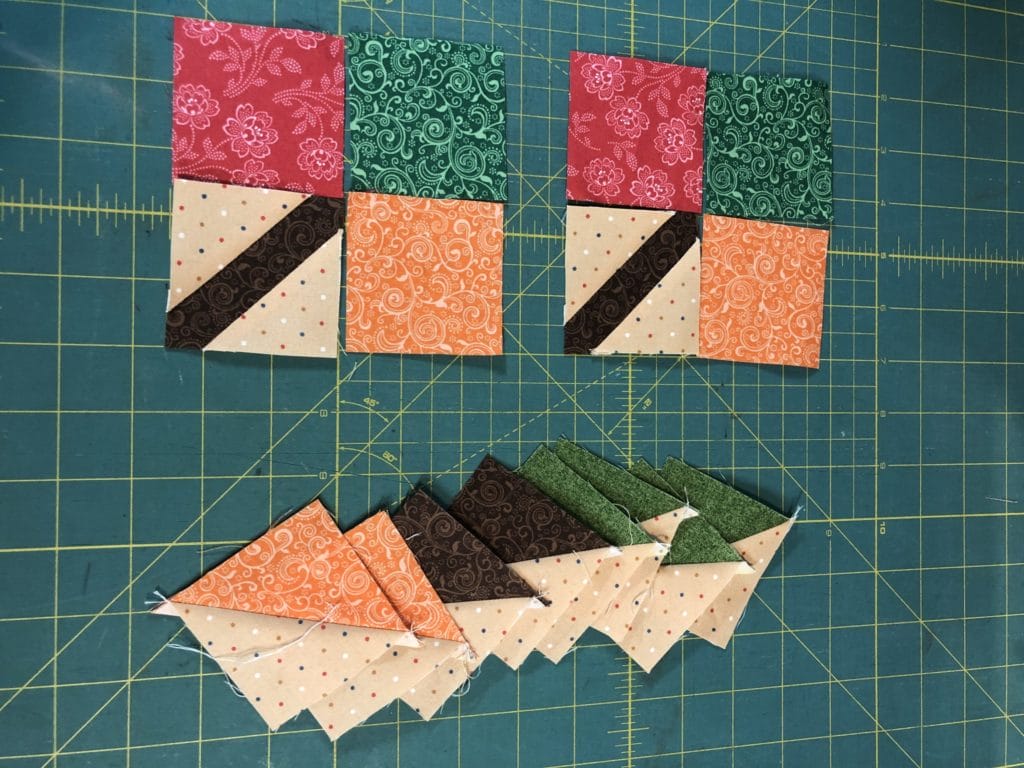
Here are all my squares ready for sewing: You can see I’ve made sure I have all the colors of the rainbow represented.

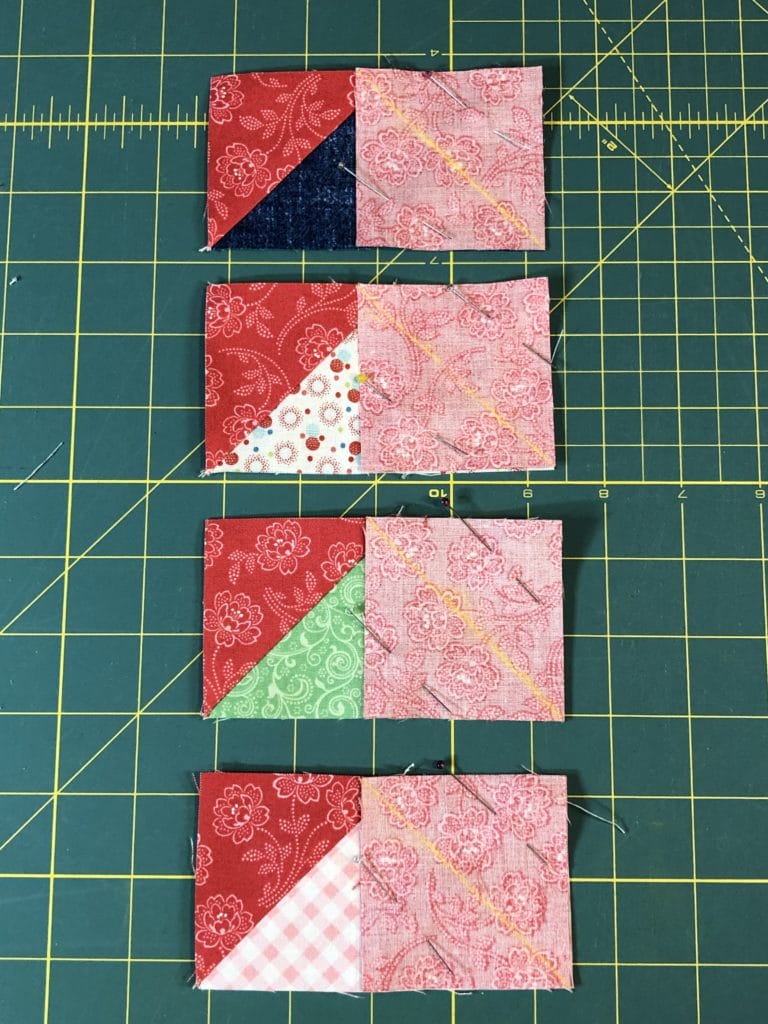
Next, comes the fun part! I know many quilter who at this stage would just start sewing these half-square triangles together at random and surprise themselves with the finished product. I admire their moxie, but I have always had a hard time doing that. I’m one of those crazy people who neurotically places ALL my squares around the quilt on my design wall and then stands back to look at it. I want to make sure I don’t have too many fabrics of similar color or value next to one another.  I may move the things around a dozen times before I am satisfied. (Bananas, I know!) Then when I’m happy with the results, I pull out my trusty phone and take pictures of everything before I begin sewing.

This photo is not great, but you can see how I have placed the E/F squares around the quilt to get an idea of how it will come together.

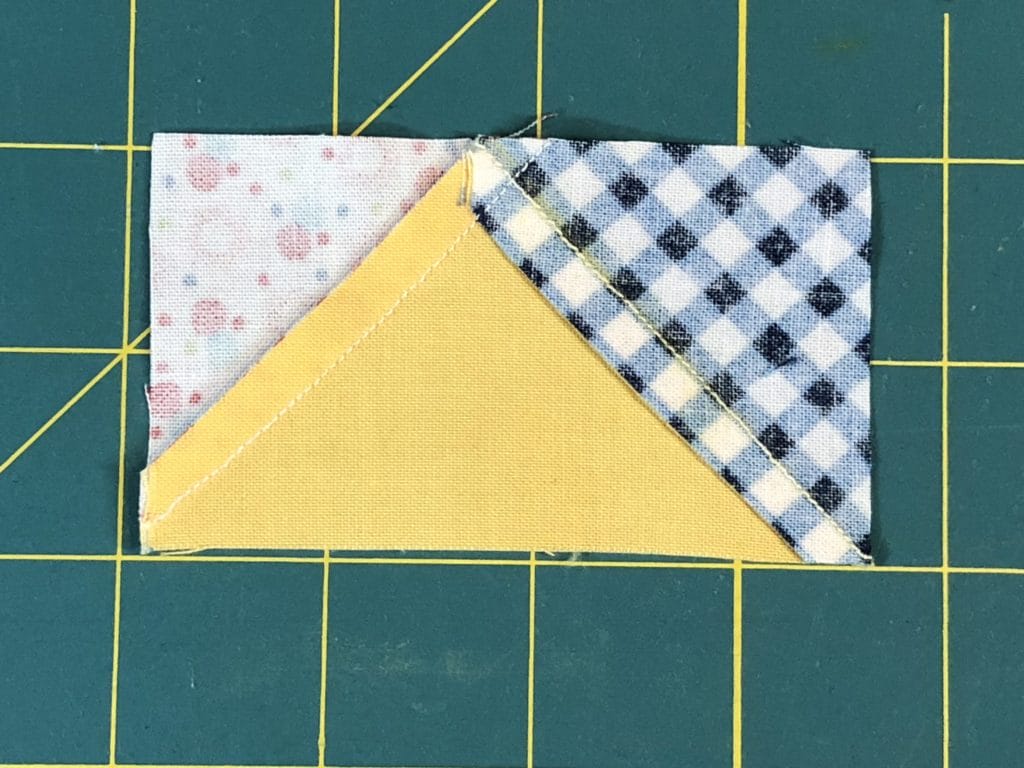
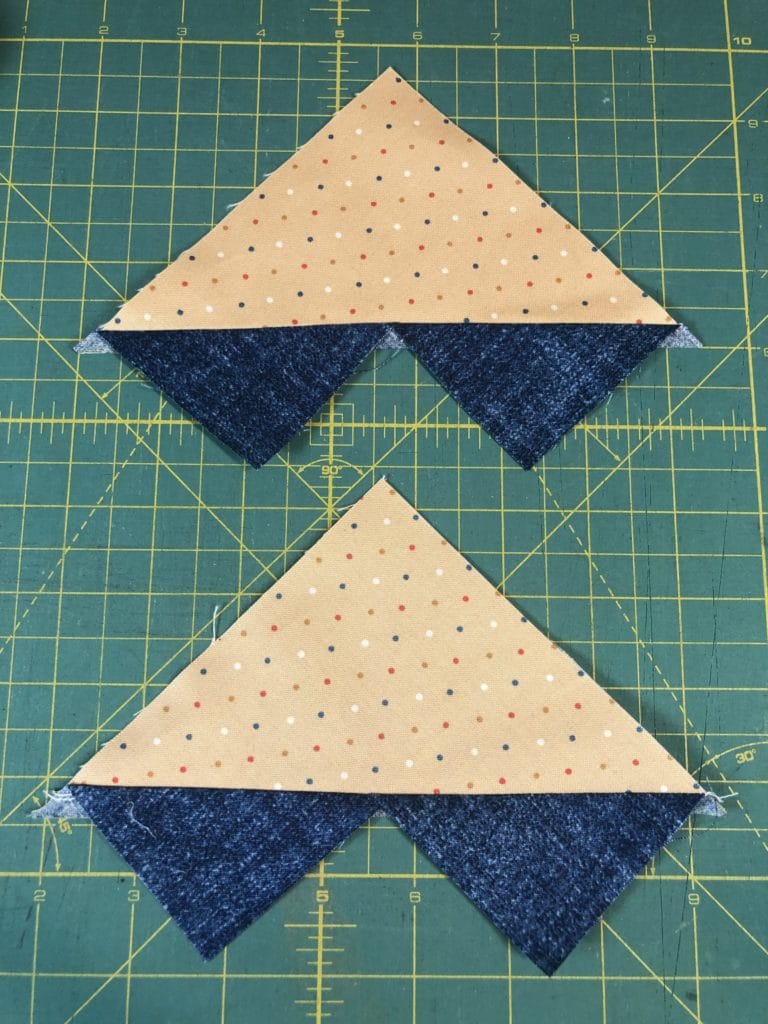
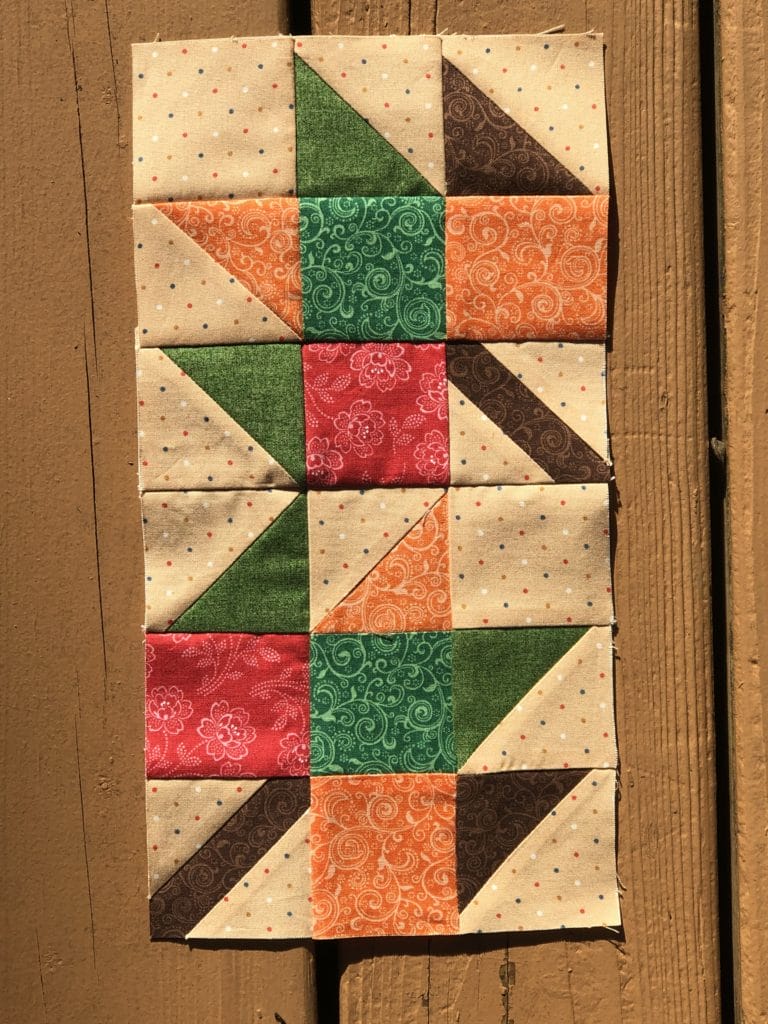
Plus, the added advantage is that I can also make sure that I have all my triangles oriented correctly, especially in the corners.

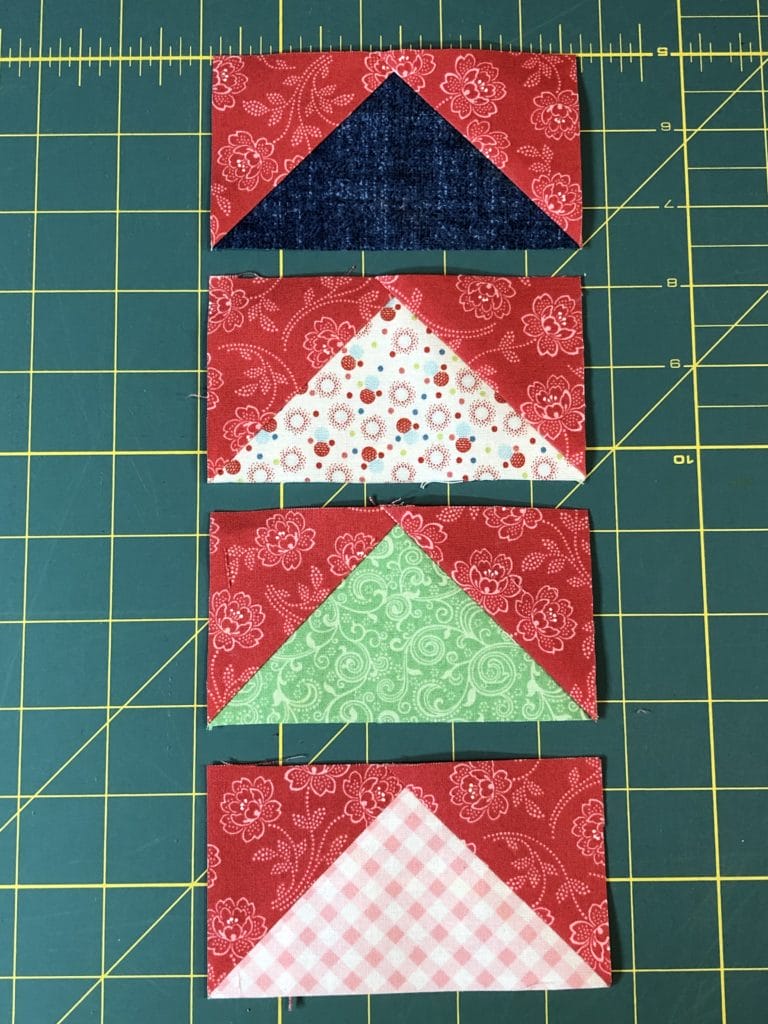
As you may notice from the photo above, I also sew the squares together in segments, and continually return things to my design wall and refer to my photos to make sure I’m not goofing things up as I go along. It takes a little longer this way, but it’s rare that I have to rip anything out.

Whenever making any type of pieced border, it can be tricky to make sure things fit properly. Even a 1/32 difference in seam allowance can have a big effect when you are piecing together dozens of squares. I’ve made hundreds of quilts, and I still every once in a while end up with something being way off.

Here are a couple of tips I use that may help

For border strips that are too long

After I’ve ironed my border, if it’s off by around a ½ inch or less, one of my favorite tricks is to spray the pieced strip with MaryEllen’s Best Press, and let it rest. I don’t iron it again before sewing. I just let it dry and it shrinks up just enough to usually fit pretty well. After I sew it together then I press and it works like a charm!

If my pieced border is REALLY long, I will go back and increase the seams in multiple places by just a hair. There’s no need to rip anything out, just sew right next to the old seam. You need to be careful that you don’t increase each individual seam by too much, or it will throw off your triangle points when it’s attached. So it’s better to do a tiny bit on multiple seams, rather than just adjust a few seams by a large amount.

For border strips that are too short

If my borders are just a bit too short, then I can usually stretch them a bit and ease them in, but if they are way off, then I get friendly with my seam ripper. I generally will rip out multiple seams and then re-sew them just a scant under the ¼” seam allowance until it fits. It’s not fun or easy, but it works.

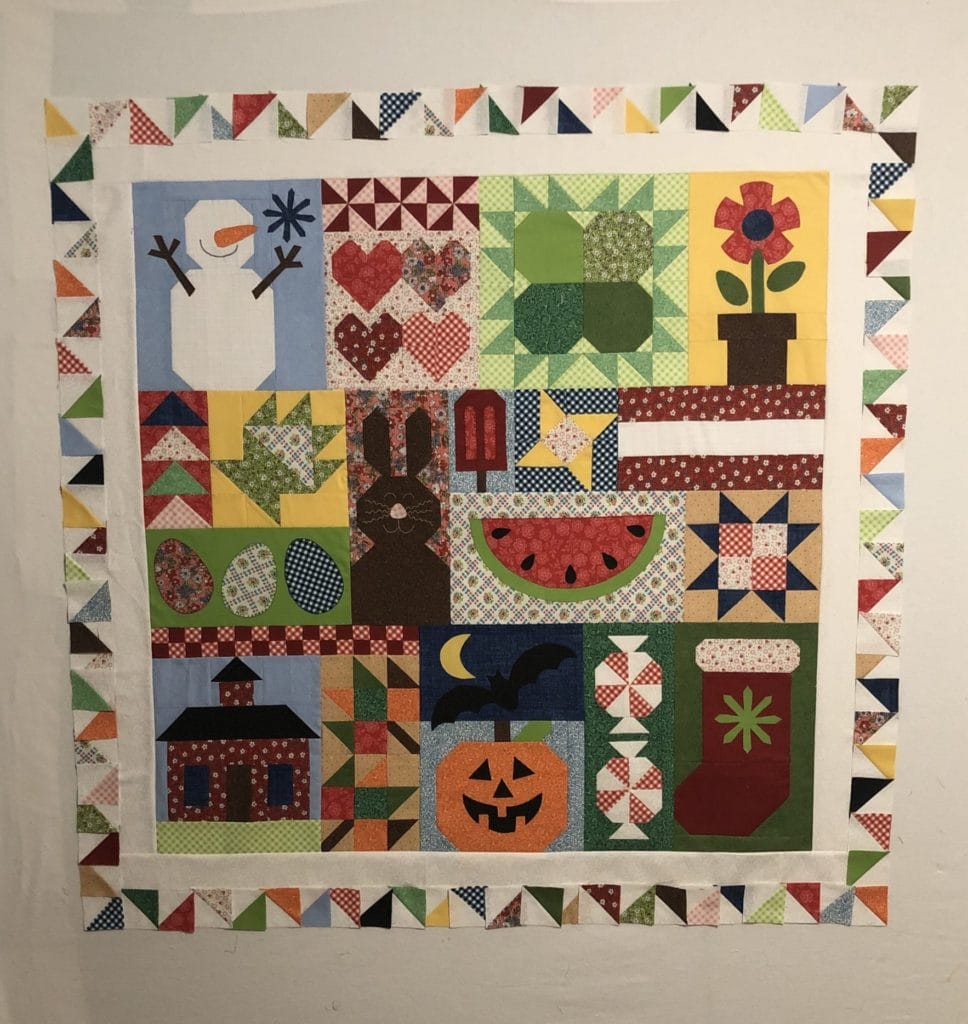
Once we have all the pieced borders attached, we can sew on the final border strips and the top is FINISHED!

Thanks so much for making this quilt with me! I hope you enjoy it for many years to come!

-Kristin


Seasons BOM Month 5
11.10.2020

Can you guys believe we are already on month 5? We are on the home stretch! This month we will be making the last three blocks for this quilt, so that next month we can finally put this beauty together and finish! Yay!

Hearts and Pinwheels

I love pinwheels! I know it can be tricky sometimes to get all the points to match up in the center, but unless I’m way off, I usually don’t get too picky with them. Pinwheels are made from creating half-square triangles and arranging them into a pinwheel block.

All my Half-Square Triangles are laid out and ready to sew.

I also open the seams in the center so that they will lay flat when pressed. I don’t know who thought of this idea, but it was a trick I learned years ago. Perhaps many of you do this too. You want to open the seams so that you end up with a pinwheel design on the back side when you press them. It might be hard to make out in the photo, but hopefully you all get the idea.

If you Google “Pressing Pinwheel quilt blocks” You will find a couple of video tutorials that can explain it better than I can here.

Here is a photo of the backside of a pinwheel block. You can see how the seams are pressed open in the center so the block will lay flat.

Now it’s on to the hearts portion of this block.

I think these just might be the first hearts I’ve ever designed in a quilt. I’m not sure what that says about me, but in any case, no quilt celebrating all the seasons and holidays of the year would be complete without some sweet Valentine hearts. Here is how I put mine together:

I like to do a lot of assembly line sewing, so I’ve laid out all the units sew I can sew everything at the same time.

Make sure after you sew the first “C” squares on that you iron the seams downward toward the “H” squares as shown below. The second “C” square will be ironed upward. This will allow the seams to nest together later.

Below you can see I’ve laid out my C/H pieces with the Half-Square triangle units I made in step 5 of the pattern.

Once the individual hearts are sewn we can put them all together and add the narrow borders. When you sew the four hearts together, you may choose to press the seams open to reduce bulk, or you can re-press some of the seams on the hearts to allow them to nest together.

Here is a photo of the back side of my block. You can see that I chose to adjust some of the seams within the individual heart blocks so that my seams would all nest together. But pressing the seams open works just fine too, so as I always say, do what makes you happy.

And now we can add the pinwheel row to the top to finish the block!

Springtime Block

For the Eggs applique, this time I decided to do some hand stitching with some embroidery floss. I went for thread colors that would help the eggs pop a little more. For some reason I can’t ever seem to make a quilt the same way twice! I really tried to behave myself throughout this project, so that you could see it sewn as the original, but this time I just couldn’t help myself!

The basket just some squares and Half Square Triangles sewn together, so it hopefully isn’t too difficult for all of you. Just pay close attention to the instructions and pressing directions. This will enable the seams to nest together when it is sewn to the flying geese section.

Don’t forget in step 3 to sew each pair of A/D squares going opposite of each other, just like in the photo below.

These units below are from step 5, and are mirror images of each other as well.

And now I’ve laid out all the components for the Basket Block and I’m ready to sew it all together.

Flying Geese unit

Here are some photos of how I made the little row of flying geese. I know sometimes flying geese can be a pain to make. I’ve found that if I sew just BARELY inside the line, I end up with a better looking unit when I’m done.

Now all the units are ready to sew together! Except of course, if you look carefully at the photo below, I still have yet to stitch around my eggs. Apparently I forgot to take another photo after doing that, but before I finished the block. Oops! Sometimes I get carried away with my sewing and forget I’m supposed to be taking pictures too.

Bunny Block

This little cutie is one of my favorites on this quilt. Here is how I put it together:

Getting ready to sew the ears

Once the ear points are done on top portion, you need to sew one E square to the bottom each unit, making sure the ears will be mirror images of each other. So as you can see below, one E square goes on the bottom left, and the other E square will be sewn to the bottom right.

And now you can sew the B strips in between the ears.

The face and body units of the bunny go together pretty much the same as the ears, by sewing the various squares on marked lines, then trimming and pressing as directed. Just make sure that your bunny’s head has the larger F triangles at the top and the smaller E triangles are at the bottom.

Now we can sew all the components together. If you look at the photo below, you may notice two things missing: 1.) I still haven’t sewn on the bunny’s face. 2.) I forgot to add the A strip to the top of the ears. Clearly I can’t follow directions, even when they are my own! But don’t worry, I fixed it all, as you will see.

For the face, this time around I decided to go crazy and use some different colored threads for the eyes, whiskers, nose, and mouth. In the pattern it says to use white embroidery thread, but I can’t ever seem to do the same thing twice. I guess I get bored easily?

Anyway, I decided to use a light blue thread for the eyes, some tan for the whiskers, and then a light pink for the nose and mouth.  If I were to make this bunny a THIRD time, I would probably use a darker blue for the eyes, and also perhaps use a darker pink fabric for the nose too.

My embroidery skills have always been a bit lacking. My bunny’s mouth is a bit crooked.

To trace on the face, I used Saral transfer paper in white. I’ve had mine for forever, and I bought it from Connecting Thread’s sister company called Artist’s Club, which is no longer in business. It comes in either a roll or sheets, and they both work equally well. I checked online and you can get it at most major retailers.

I cut out the face from the pattern, and then slipped a similar sized piece of the transfer paper underneath to trace it on to the brown fabric. I just eyeballed where I wanted it, trying to make it centered from right to left. I used a stylus to trace on the lines.

You can see the scrap of Saral paper underneath the pattern. And yes, I am left-handed, so this may look backwards to most of you.

As you can see, the lines are faint, but it was enough for me to see where to sew.

If you look carefully at this photo, you will notice one of my bunny’s ears is WAY off. Not sure what I did there, but I decided not to care. I may add a flower later to cover it up. Or I may not.

And, I also noticed that I have the bunny’s nose UPSIDE DOWN. Sheesh! How did I not notice it until now?! Quite embarrassing! Clearly I don’t look at a lot of bunnies in my day to day life, because I designed and wrote the pattern this way, and didn’t even realize it until this week. So, feel free to turn that nose around so that your sweet bunny can have a normal face haha! Or, your bunny can have a backwards nose like mine. I figure when this quilt is all put together, most people won’t notice, right?

I hope you’ve enjoyed making all these blocks. I’m so excited for next month when we finally get to put it all together!

Happy Quilting! – Kristin


Seasons BOM Month 4
10.9.2020

Hi there friends!

Can you believe we are already on month 4? Time flies when you are having fun! This month we will be making FOUR blocks (which I guess is fitting since we are on our fourth month of this BOM).

Our first block is a cute little Snowman trying to catch a Snowflake.

First we are going to make the snowman’s head. I know some of you don’t like those tiny little corner pieces, but as I’ve said before, sometimes it’s a necessary evil in order to get the correct proportions. But fortunately these little corners don’t need to match up with anything, which makes it a bit less frustrating. Just sew on the marked lines and you will be fine.


After you’ve made the head, we will add on the side pieces, and then add his nose.

In order to get the nose where I wanted, I also drew in the snowman’s smile and placed the buttons where they will eventually be sewn on. Once I felt happy with everything, I ironed on the nose and stitched around it. You can also go ahead and backstitch the snowman’s smile at this time too. But for some reason I didn’t actually do that until the end. I’m not very good at following directions, even my own! The snowman’s eyes and buttons will be added after the top is totally finished and quilted.


It’s hard to tell from this picture, but there is a faint blue line where I will sew on the mouth later.

Once you’ve added the snowman’s body and sides, you can applique his arms and snowflake. Make sure you account for your seam allowances as you place these. You don’t want to end up with some of your snowman’s fingers being cut off down the road.

This snowman block is ready to be sewn together.

Since this isn’t the first time we are doing applique for this project, I won’t bore you again with the details of how I applique. In case you forgot, please go back to the Month 1 blog post and re-read.

All my applique pieces are ironed on and ready for stitching.

Sometimes it can be intimidating, especially if you are new to sewing machine applique, to try and navigate some of these smaller pieces. There is nothing wrong with hand sewing a blanket stitch with some embroidery thread if you are a little nervous about using your machine. In fact, I did just that with my snowman’s nose, simply because I wanted the look of the extra lines on the carrot. I also think it would be darling to use some silver embroidery floss and hand stitch a simple snowflake instead of the applique. Or maybe even add a few of them! My point is, you do what you feel comfortable doing, and don’t be afraid to think outside the box.

Now he’s all done! I know he looks a little unfinished right now without his eyes and body buttons, but your long-armer will thank you later. My snowman smile turned out a little crooked, but I decided to leave it. My little snowman just has extra character!

FLAG BLOCK:

For this block we will be using the traditional method of making flying geese, also known as stitch and flip. I used to use this method for all my patterns until I discovered the joys of no-waste flying geese. But there are times that the no-waste method just doesn’t work, and this is one of those times. Since we are using two different fabrics for our corner triangles, we need to sew these cuties on one at a time.

Stitched and ready for trimming.

Please make sure that your first triangles (the blue gingham) are pressed down toward the yellow, not away from it as is customary. This will enable you to nest your seams together later. However, white bubble fabric triangles are pressed away from the yellow. So one corner is ironed down, and the other is ironed up. Make sense?

Notice how the seams are pressed down toward the yellow rectangle.
This is what your seams should look like from the back.

Now you can add the C rectangles, and then the flying geese units can be sewn together to make the star for our flag block, and all the points should nest together.

Sew on a few stripes, and you’re all done!

All finished!

WATERMELON BLOCK:

VERY IMPORTANT TIP: Before you begin cutting, please know that you will need a 6-1/2” x 12-1/2” piece of the Solid Lime Green fabric for next month’s Easter Eggs block. You should easily have enough for this, but I just want you to keep that in mind. As you can see from mine, I have PLENTY left over, and I even made two Green Snowflakes for my Stocking block with this piece.

Since the applique template comes in two pieces, you will need to match up the images before you can trace them out. First I matched up the vertical solid line, then I made sure the top of the watermelon and the curved bottoms lined up.

Here I am just trying to get the vertical lines to match up.

As you can see below, my pattern has been secured with with a piece of scotch tape and I have a sheet of the Seam-A-Seam Lite laid over the top ready for tracing. This pattern JUST fits onto one sheet.

My pattern is ready to trace using the Seam-A-Seam Lite.

This block is entirely applique, and most of it is pretty easy. Usually when sewing bigger applique pieces, like the watermelon flesh, I like to only use my Steam-A-Seam around the edges. This helps to keep things more supple and easier to quilt later. But I wasn’t thinking while making this block, and before I knew it, I’d ironed on the whole piece to my fabric. Oops! Fortunately the Seam-A-Seam Lite that I use is pretty light weight. (I guess that’s why they call it LITE, haha!)

Make sure you have your pieces centered before you iron them in place. I usually just eyeball mine, but will sometimes take out a ruler to measure around the edges just to make sure. Once I ironed on the flesh and rind, I applique’d the rind first using matching Lime Green thread, and then went around my flesh with matching red thread.

So, remember at the beginning of this blog post I talked about doing applique for small pieces? Well these seeds are, shall we say, a bit on the small side too! Just like with the snowman, if you are nervous about getting your applique stitching to cooperate, you may want to hand stitch these, but it’s entirely up to you. When I was designing this, I looked hard for some seed buttons to use, because how cute would that be?! But alas, I couldn’t find any that would work. If any of you come across some, let me know.  Again, you do what works for you.

The seeds are sewn and the block is done!

SCHOOLHOUSE BLOCK:

I designed this school house block to honor my heritage. My father grew up in North Dakota, and the little school he attended growing up looked very much like this one. And near my house is the cutest little red two-room school house from the 1800’s that is now someone’s residence. How fun would that be? In any case, I just love how this block turned out.

This block is pretty easy, since most of it is squares and rectangles, except for the roof. Here are a few pictures of the block coming together.

All the pieces are laid out in their proper place.

Now look at the picture below- Does anyone see what I’ve done wrong here? Yep, the door section is upside-down. And the dumb thing is, I even laid it out properly! Ugh. So, I got to spend some quality time with my seam ripper and fix it.

Do NOT sew yours together like this!

This looks MUCH better!

I hope you’ve enjoyed making these blocks.  Four months down, and only two more to go!

Happy Quilting! – Kristin


Seasons BOM Month #3
9.9.2020

It’s hard to believe that we are going to be half way done with this quilt after sewing this month! Didn’t we all just start this project? I hope you are all having fun so far, because quilting should be fun! I have enjoyed seeing what all of your are doing with your previous quilt blocks on Facebook. Some of you are changing things up, adding embroidery, and other embellishments and I love it!

This month we will be making the Shamrock, Popsicle, and Hallow’s Eve blocks.

Let’s start off with the Shamrock Block: I like to assembly line piece whenever possible, so as you can see below, I’ve got everything marked and laid out so I can begin sewing on all these corners.

Here they are all trimmed and finished up and ready to be sewn together. Please note that in the directions for step #1 I’ve asked you to press the upper left C square down toward the center, while the other to C squares are pressed outward. This will allow you to nest all the seams together when you sew them all together.

For some reason I got a little excited, or perhaps too “in the zone” while sewing, and plumb forgot to take any pictures of making the half square triangles in step 3. Oops! So here they are below, all finished up.

As you can see, I’ve paired them all up to get them ready for sewing. Don’t forget that you want to make four units with the D triangles in the lower left, and four unit with the D triangles in the lower right.

After sewing all the pairs together. I sewed a LEFT unit to a RIGHT unit (See step 5). Then I took two of those units and sewed an A square to each end as I’ve outlined in the instructions. You can see below that I’m ready to finish off the block by sewing the strips to the sides.

If you find that your pieced strips aren’t matching up exactly, which happens to everyone, here is my little tip: I spray the longer unit with some Mary Ellen’s Best Press (or any other starch will work fine too), and it magically shrinks up just a bit which allows me to match things up better. I don’t know if it’s a kosher quilting thing to do, but it has helped me, so I thought I’d share. 🙂

Almost done!

And here is the finished Shamrock block, which should measure 12-1/2″ square.

Now we will make the cute little Popsicle block.

Yes, I know I’ve got more of those tiny little squares for you all to contend with for this block, but the good news is that they don’t have to match up with anything, so they will turn out just fine and there’s no need to stress.

When I am working with sewing on marked lines and trimming (otherwise known as stitch and flip) for such small pieces I like to sew just BARELY outside the marked line, like just a thread or two, on the side closest to the corner. This way I can make sure that when I trim and press the corners I will have just enough to true things up in case things get a bit wonky.

This block is pretty straight forward from here. The rest of the pieces are small too, but there isn’t anything too tricky with piecing.

Ready to sew together!

Now it is all done!

After sewing this I realized it would look SO cute with some embroidered detail lines shaped like two long skinny arched windows to make it look like it has the actual popsicle indentations in it. Maybe I’ll add those??? We’ll see!

And last but not least, the Hallow’s Eve block.

I’m so excited for Halloween! I’m still holding out hope that we can entertain some trick-or-treaters this year, but we shall see how things play out over the next month or so. (Don’t forget to wear your mask.) I love to decorate for Halloween, but I usually don’t do anything too scary because I want all the adorable preschoolers to come to my door. 😉

First let’s get this pumpkin together. And apparently I can’t follow my own directions. Notice below how I did my applique before sewing on the corner pieces? Oh well!

You can see below that I’ve added the corner pieces and have assembled what I need to make the stem and leaf. I used the solid lime fabric for the leaf, but there is enough of the other green fabrics for you to swap it out for something else if you prefer.

All I have left to do is add this dark blue piece and sew on the bat and moon. If you refer back to the month #1 blog post I talk a bit more about applique. I always use stabilizer when sewing my applique on, and I almost always use freezer paper for this. It’s cheap and easy!

And here is the finished block. I think it would also be fun to add some bat eyes, and maybe even some fangs!

We are now half way there! I can’t wait to see what you all do with this month’s blocks. Have fun and Happy Quilting! – Kristin


Seasons BOM Month #2
8.10.2020

I’m so excited to get going on the second installment of the Season quilt! This month we will sew another three blocks. Two are entirely pieced, and one has some applique. Let’s get started!

Our first block is the Potted flower. The potted base is pretty straight forward, but the applique this month involves some layering. You can go about this one of two ways: If you are using the fusible web to attach your pieces, you can do this all at once and then stitch everything once it’s all affixed. Or you can attach the stem and leaves first, stitch around those, and then add the flower petals and flower center to do afterward. Both ways work great! Just make sure your stem (piece F) is tucked underneath your flower petals and also goes to the edge of the block. If you need some tips on applique, please refer back to the Month #1 blogpost.

Our 2nd block is the Sawtooth Star – one of my all-time favorite easy blocks to make. Here are some pictures that will give a quick tutorial for making no-waste flying geese, which is my favorite way to make them.

Place your two C squares on to each D square just like you see below. You can draw your lines on ahead of time, or add them all at once after you lay them both on the D square. They will overlap in the middle, just like it says in the instructions.

I LOVE my Clover Chaco liner for marking lines. I also frequently use my “Add a Quarter” ruler for marking.

Now all you have to do is sew a 1/4″ seam on both sides of the marked line, and then cut directly on the marked line. This will give you two units like this:

Here is what it should look like after you’ve cut on the line and pressed the blue triangles down.

Now add and additional C square to each unit, and repeat the same process.

Here I’ve added the additional square to each unit, sewn a 1/4″ away from each marked line, and have cut on the line. All I have to do now is press the triangles down.

And now that they are pressed, all I have to do is square them up. My FAVORITE tool for doing this is the Bloc-Loc flying geese ruler. They make such quick work of trimming things up. I’m not sure who invented these amazing rulers, but they are a genius! It took me a while before I felt I could justify adding these to my ruler arsenal, but I’m SO glad I did! And no, I’m not a paid spokesperson, just a fan.

Here is one of my flying geese BEFORE trimming. As you can see, these handy bloc-loc rulers lock right into place, and all I have to do is run my rotary cutter around the perimeter of the ruler to make perfectly sized flying geese.

Our last block for this month is the Falling Leaves block. Fall is my FAVORITE season! I’m a sucker for sweaters, college football, and crisp cozy evenings. Plus, it means that the holidays are coming, which makes me downright giddy!

These blocks are mostly just a bunch of Half-Square Triangle units sewn together with a few plain squares. The most important thing to remember for this block is to follow the pressing arrows in the directions so that all your pieces will next together nicely.

Here are my Falling Leaves blocks in progress. I’ve got lots of happy half-square triangles waiting to be trimmed so they can join their plain square friends above.

Feel free to mix and match the units around to give it a scrappy look. Or if you prefer, you can make both of the 6-1/2″ blocks exactly the same – it’s up to you! In fact, if you are extra observant you will notice that the picture I’m showing below doesn’t exactly match the Falling Leaves block made in the sample on the cover page. I mixed up the brown and green units on one of the blocks. Apparently I can’t even follow my own directions! But guess what? It doesn’t matter, because no one will know unless they read this blog post haha!

Here they are all finished and pretty!

I can’t wait to see everyone’s finished blocks! Have fun, and Happy Quilting! – Kristin


Welcome to the Seasons Block of the Month!
7.1.2020

Hello and welcome to the Seasons Block of the Month! I’m so excited to have you with on this 6 month journey as we make this happy little quilt together.

Before we get started I have some important information. I inadvertently left off a few of the pressing arrows in the instructions for this first month (YIKES!). Needless to say, I was mortified, and unfortunately those patterns were already being packed and shipped from the warehouse, which meant it was too late to fix. So if you’d like to shoot me a quick email at thrilledtopieces@gmail.com, I’ll be happy to send you a pdf with the updated diagrams. And please accept my profuse apologies. There is nothing worse than getting a pattern that isn’t all there! And rest assured that I’ve triple checked the remaining months, and all will be well for future installments. So, hopefully we are one and done with any pattern errors!

Now on to the fun part! For the first month’s installment, we will be making the Stocking and Peppermint blocks, as well as the checkerboard strip. It’s Christmas in July!

For this stocking block we have a little bit of applique. I know applique can be intimidating to a lot of people, but it doesn’t need to be! For all the applique in this quilt I use Wonder Under to fuse my pieces on to the fabric, and then stitch around with a zigzag stitch on my machine.  I thought I would briefly share with all of you how I go about this.

First, I begin by tracing my design on to the back side (paper side) of the Wonder Under. Then I cut around the shape, giving myself some extra room around the design to make sure all the edged get nice and ironed on.

Here I’ve traced my design onto the paper side of the Wonder Under and have ironed it on to my fabric.

Then I carefully cut out the shape on the marked lines I drew. Somehow I forgot to take a picture of this. I guess I was just too excited to get sewing!

Next, took the K block and folded it in half both directions, finger-pressing a horizontal and vertical seam to find the center of the K piece. This helped me to make sure the snowflake was centered properly.

Finger-pressed to help find the center.

Now I can place my snowflake on the center and iron it in place.


Also, I use a bit of freezer paper for stabilizer on the back before I begin sewing. I simply iron the shiny side of the freezer paper to the back side of the fabric before I begin stitching.

I usually go VERY slow on my machine, sometimes even turning my machine wheel by hand to make sure my stitches go right where I want them to be, especially when I get to the sharp turns.

Then when I’m all done, I GENTLY remove the paper. If I’m having trouble getting it off, I spritz the paper with a mist of water and then it picks off pretty easily. As you can see, there is still some residual paper on the back, but it’s just fine to leave it like this. No one will ever see this ugliness when it’s all done!

Yucky back side of my applique. And yes, I also need to trim the sides to get rid of the threads.
See, it looks just fine from the front. NO ONE will EVER know our secret!

And now your applique is finished! Yay!

I also thought this little snowflake would look darling if it was hand stitched with a blanket stitch using white embroidery floss. But I figured I’d better stick with what I did in the actual pattern for all of you.  But I was tempted….! Anyway, on to the rest of the stocking…

The rest of the block is pretty straight forward. I know those little corners on the stocking cuff are small, but it was a necessary evil to get the proportions I wanted.

Almost finished….
Finally done!

Hooray! You just finished the Stocking Block!

I love these cute little peppermints! (I guess that’s why I designed them, lol!) They would be so fun to make on their own as a cute little Christmas pillow too.

Here is a photo of the steps for sewing the peppermint wrapper ends (step 4 for this block). Don’t they look like they are just poorly sewn flying geese? Don’t worry! This is exactly how they are supposed to look and the finished product will turn out just fine, I promise! If you don’t believe me, refer to the picture above. 🙂

And finally, the checkerboard row. I always love me some checks in a quilt, so I found a way to sneak these in.

Here they are, all ready to be sewn together.

I hope you enjoyed making these blocks with me. Thanks so much for popping by, and be on the lookout for Month #2.

Happy Quilting! – Kristin