


 Tutorials
 3.6.2023
Hello friends!
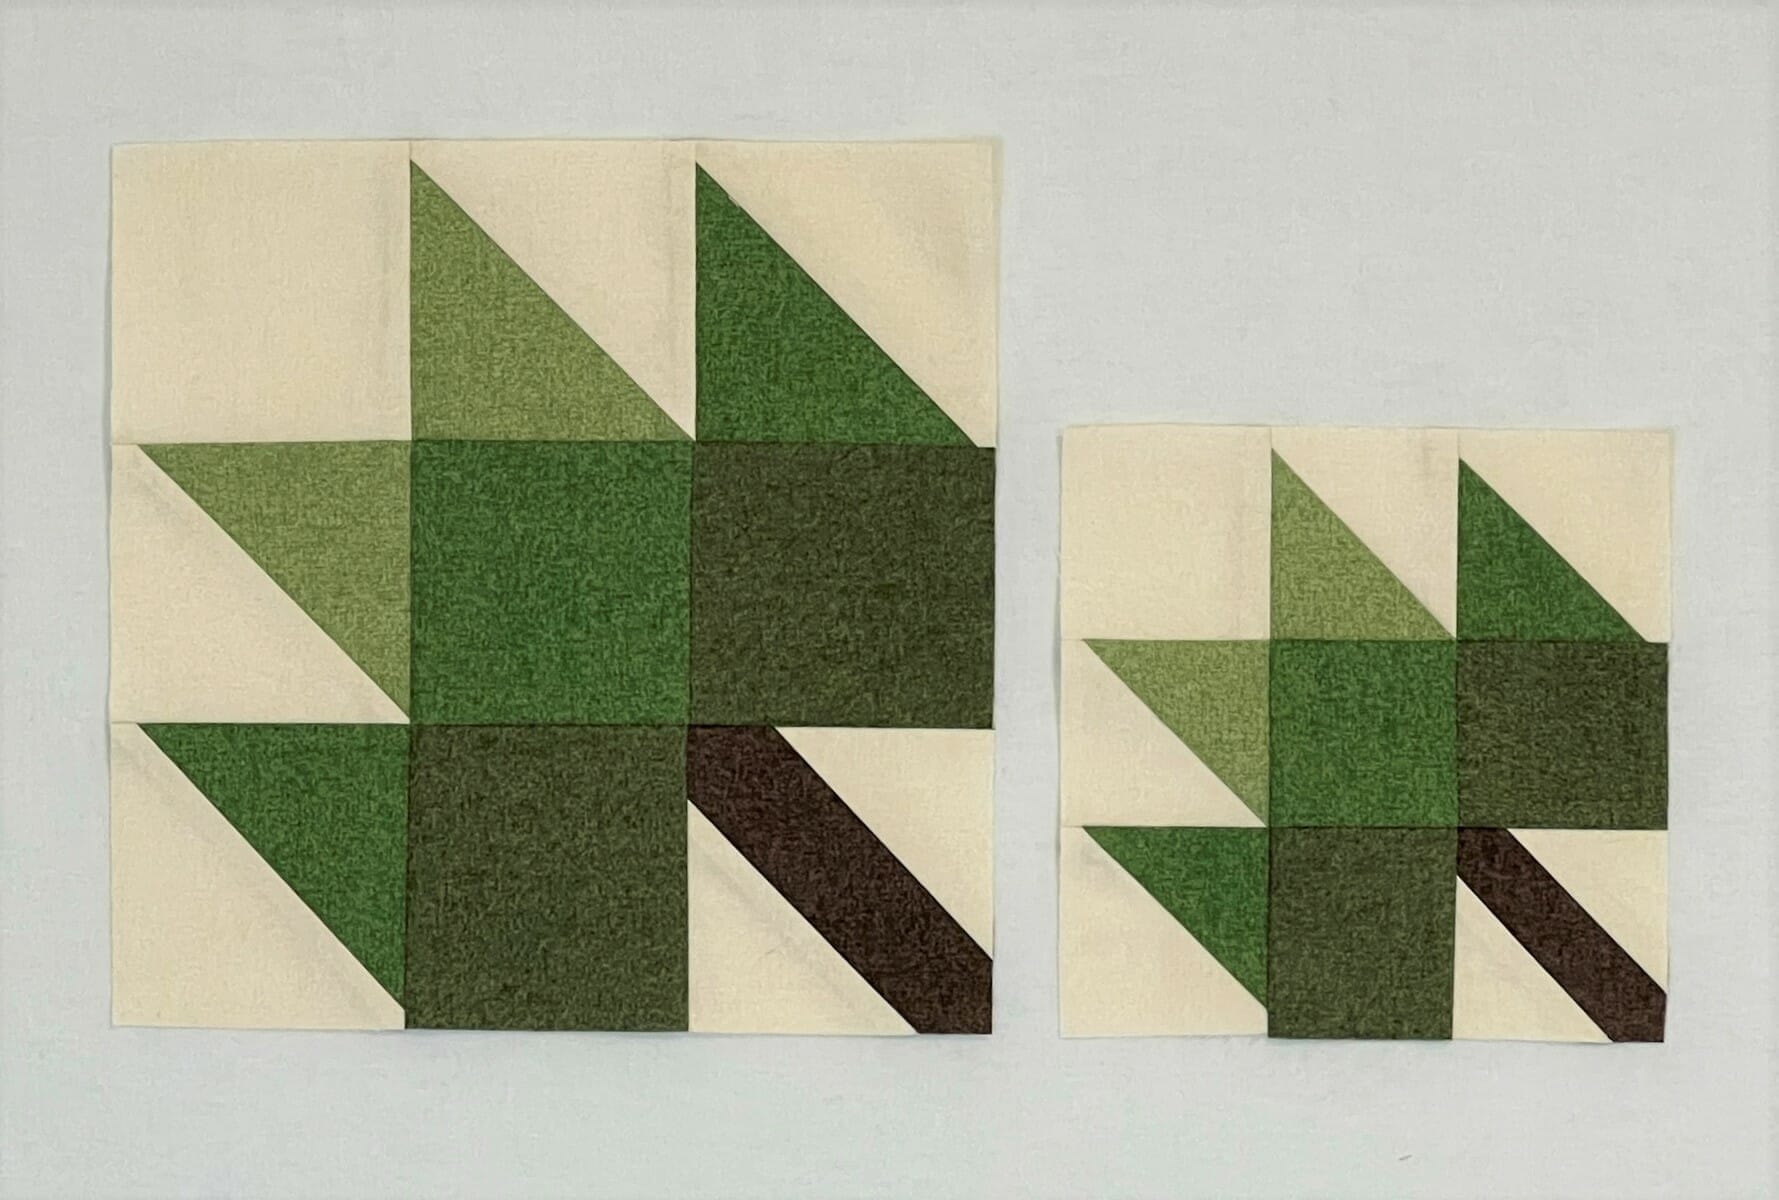
It’s finally time to begin making our leaf blocks. We have a lot of them in this quilt, and we’ll be taking them one color at a time over the next few months. This month we are all green!
This month is a bit unique because our green leaf blocks come in two sizes. Each size is made using the same steps and techniques, and I’ll show you how it’s done. Most of the instructional photos I’ll be showing you are ones I took making the large blocks, so you’ll see things done in sets of 4, since that’s how many we need.
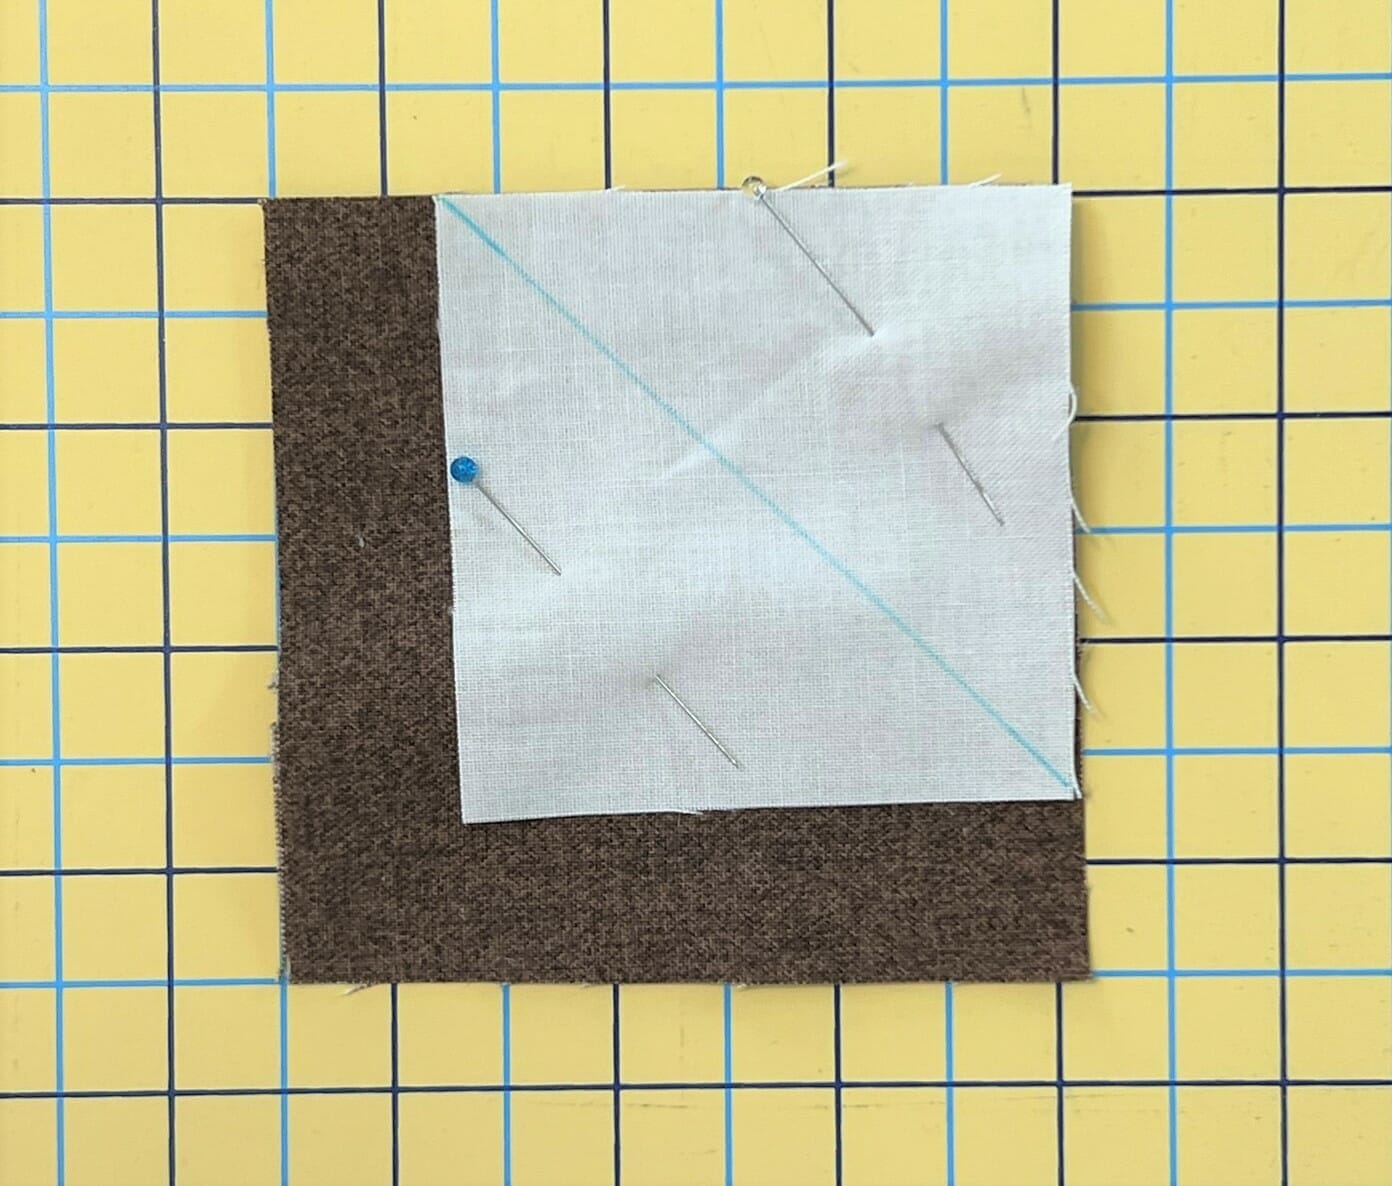
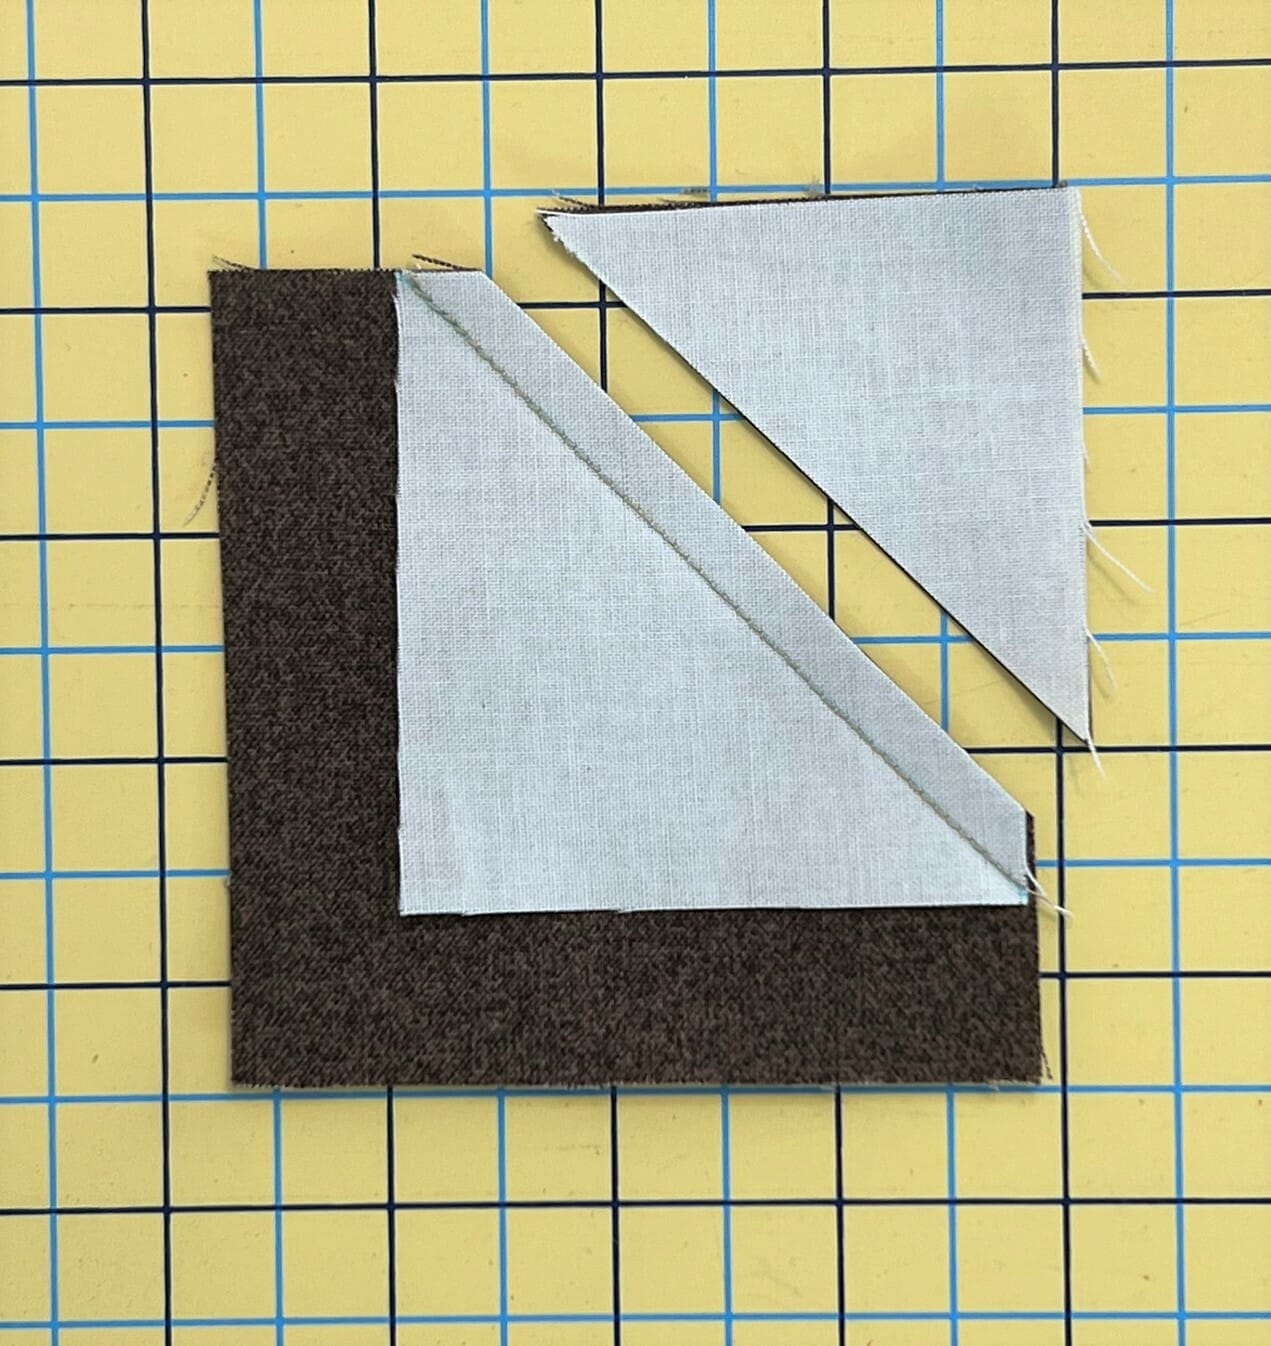
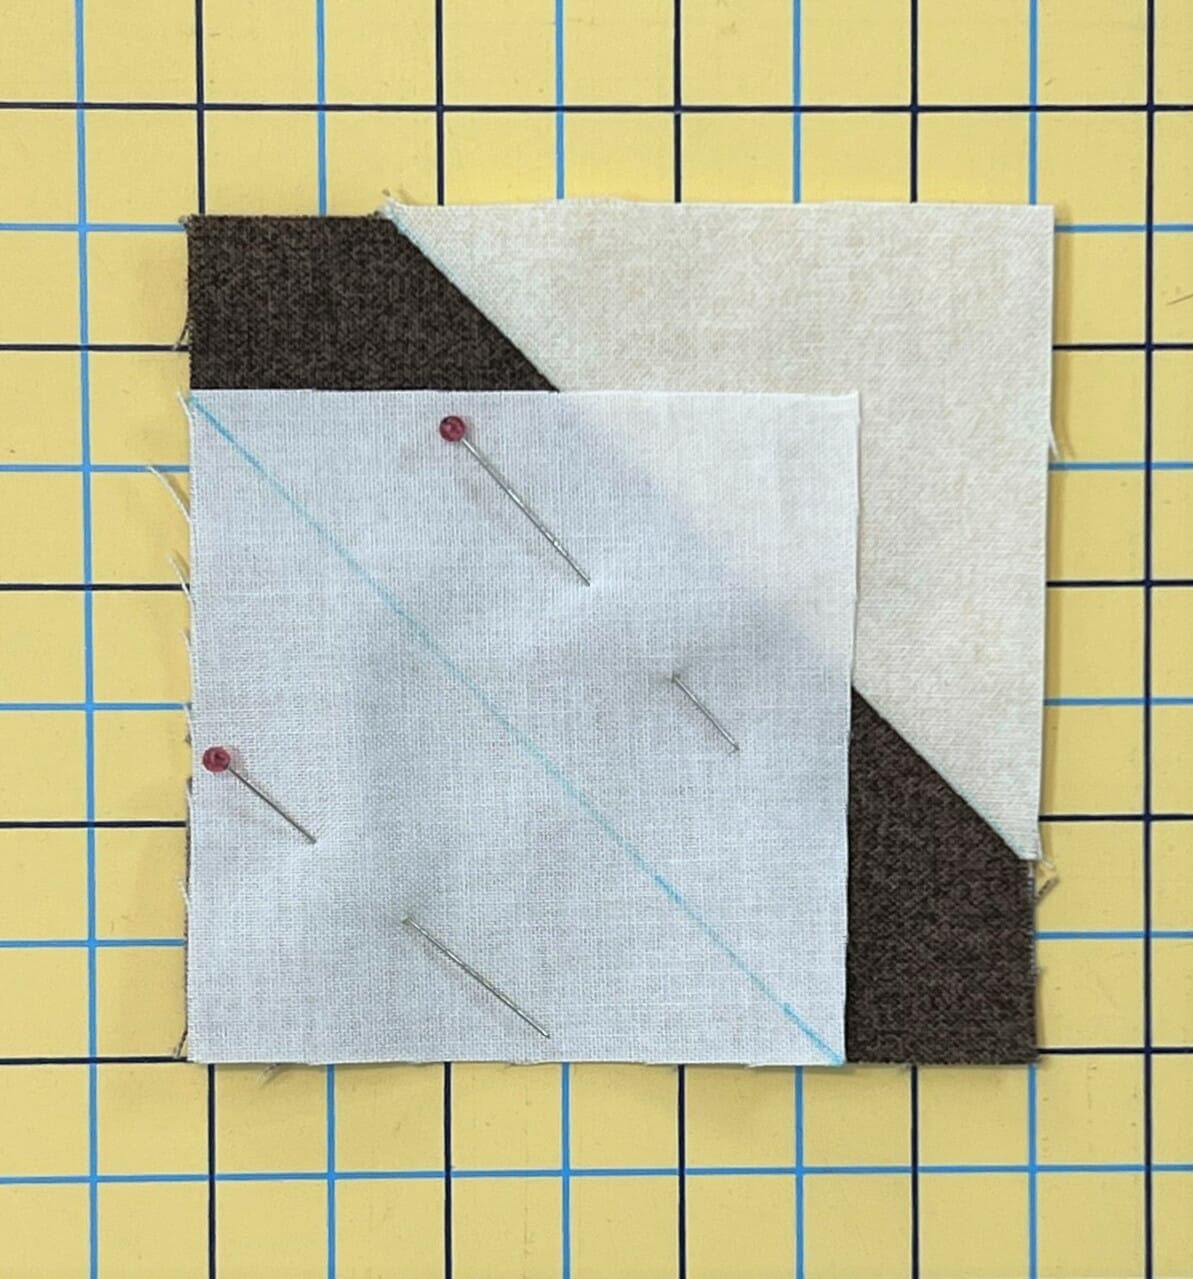
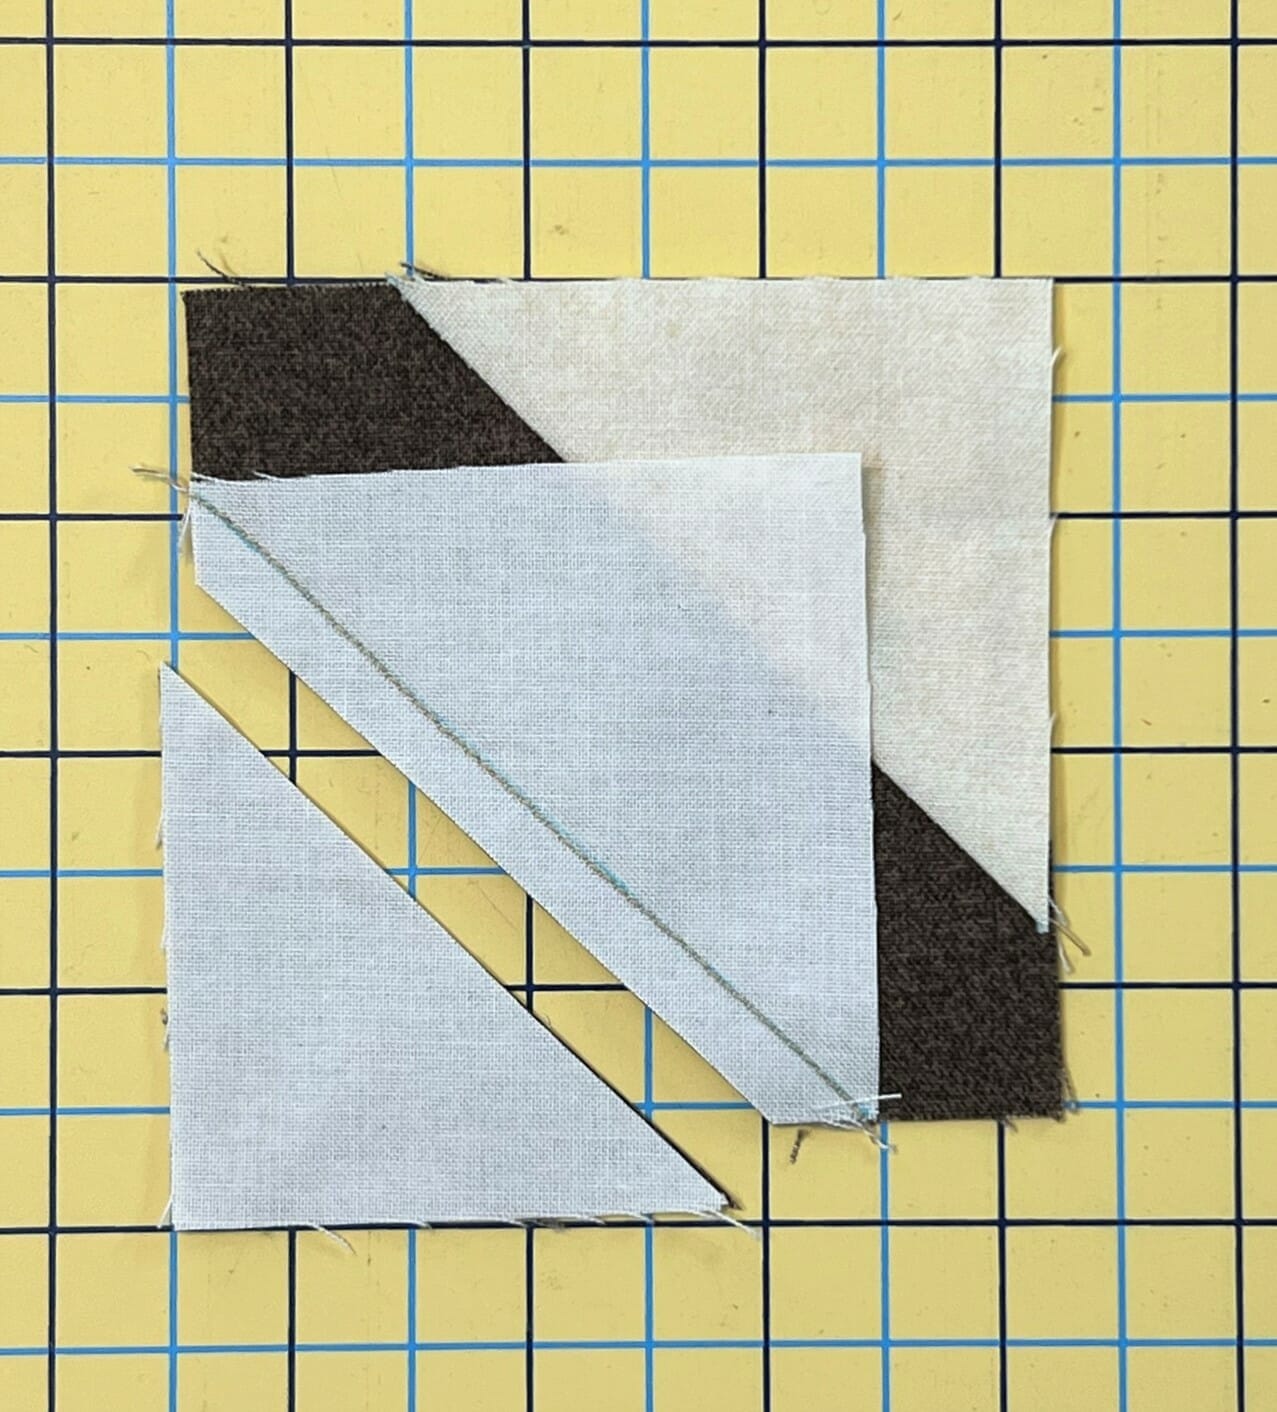
We’ll begin by making the Stem block, which is just a larger brown square with two smaller cream colored squares placed on opposing corners, one at a time. With each square you’ll sew on the marked line and then trim the excess, leaving a ¼” seam allowance when done. One tip I find helpful is to sew just barely on the outside of the marked line (on the side closest to the brown corner). This helps ensure that the corners of the block won’t come up short after they are pressed. I also square these up when I’m done to make sure they are perfect.
Below is a series of photos that will show you all the steps to making these:

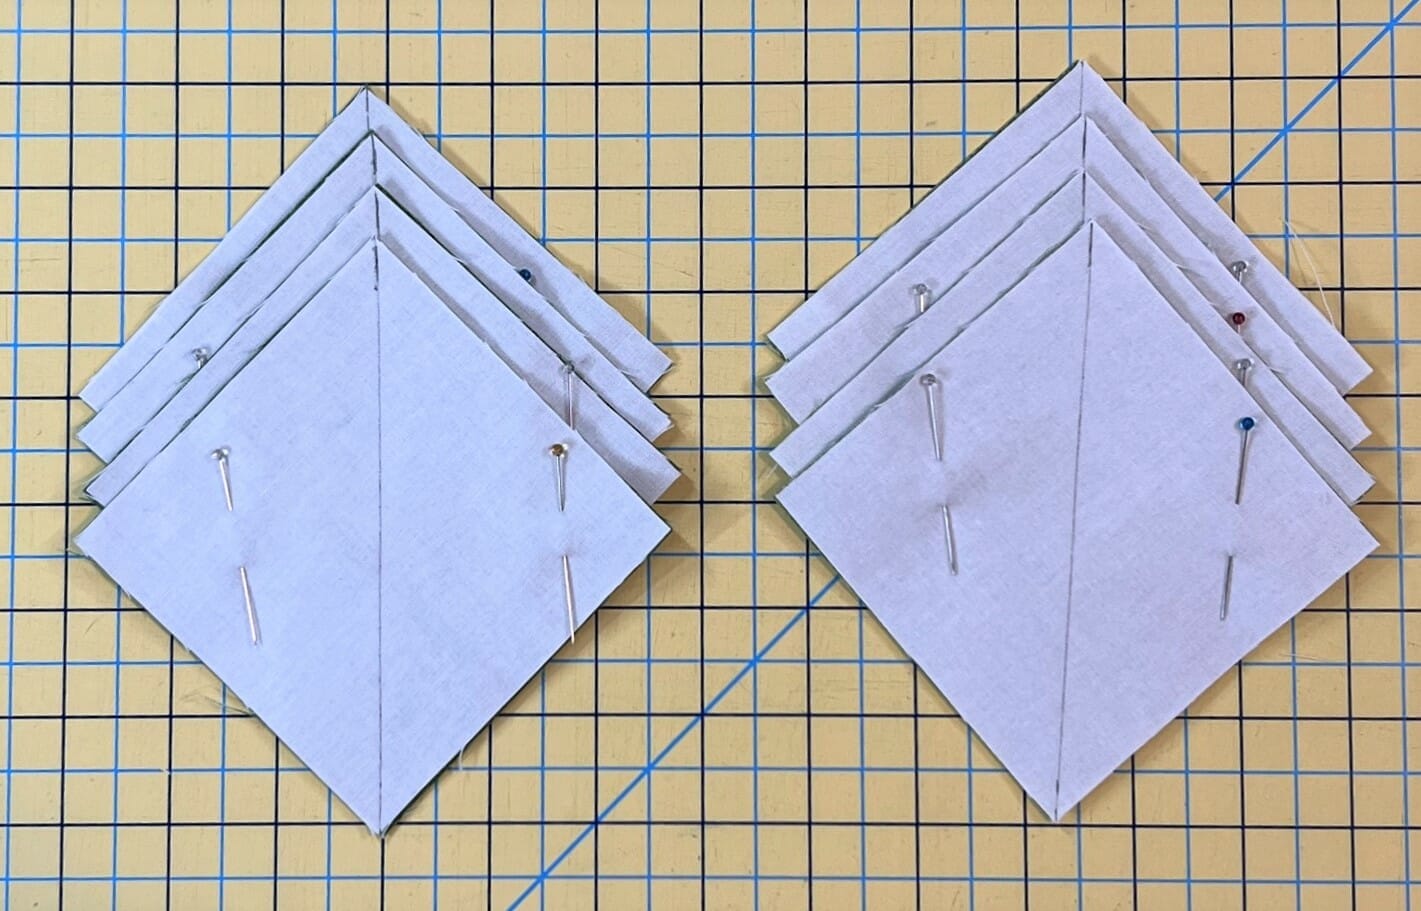
Next we’ll make some Half Square Triangles. I like to assembly line sew, so I combined steps 2 and 3 while sewing, which made for quick work getting all the G/C and G/D HSTs finished. As I’ve mentioned before, you can cut your squares a bit larger and then trim them down after sewing.
Here you can see both sets are pinned and ready to sew on both sides of the marked lines:
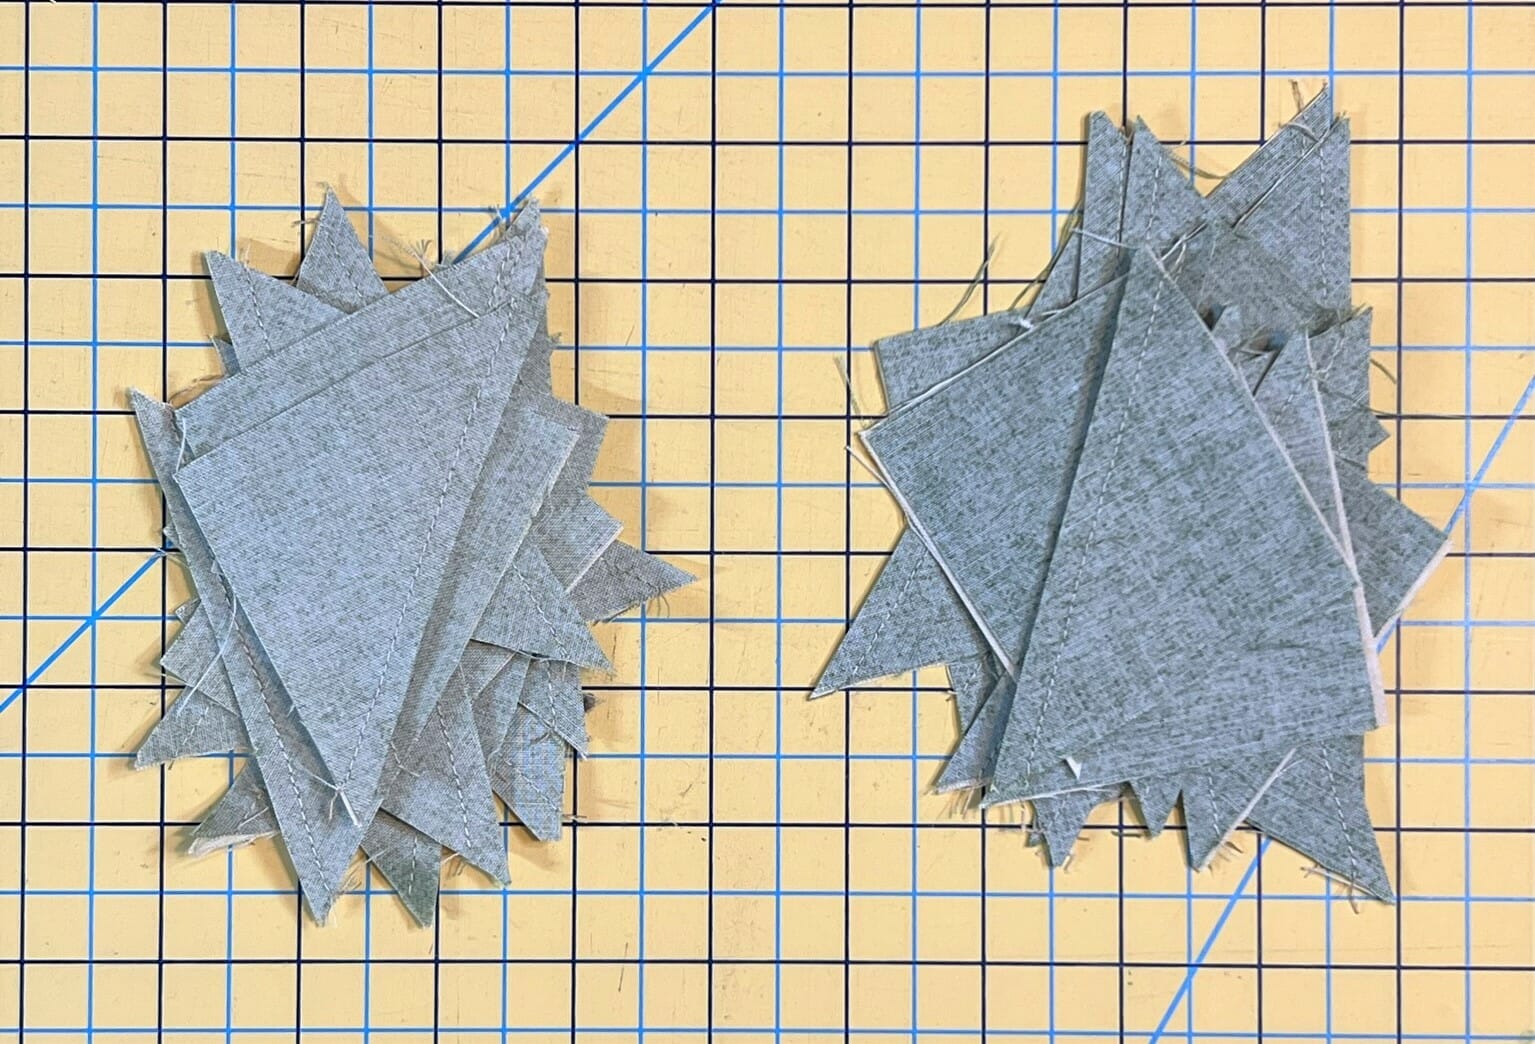
After sewing on both sides of the marked lines, each one is cut ON the line. Below you can see my messy piles of cut HSTs, ready for pressing.
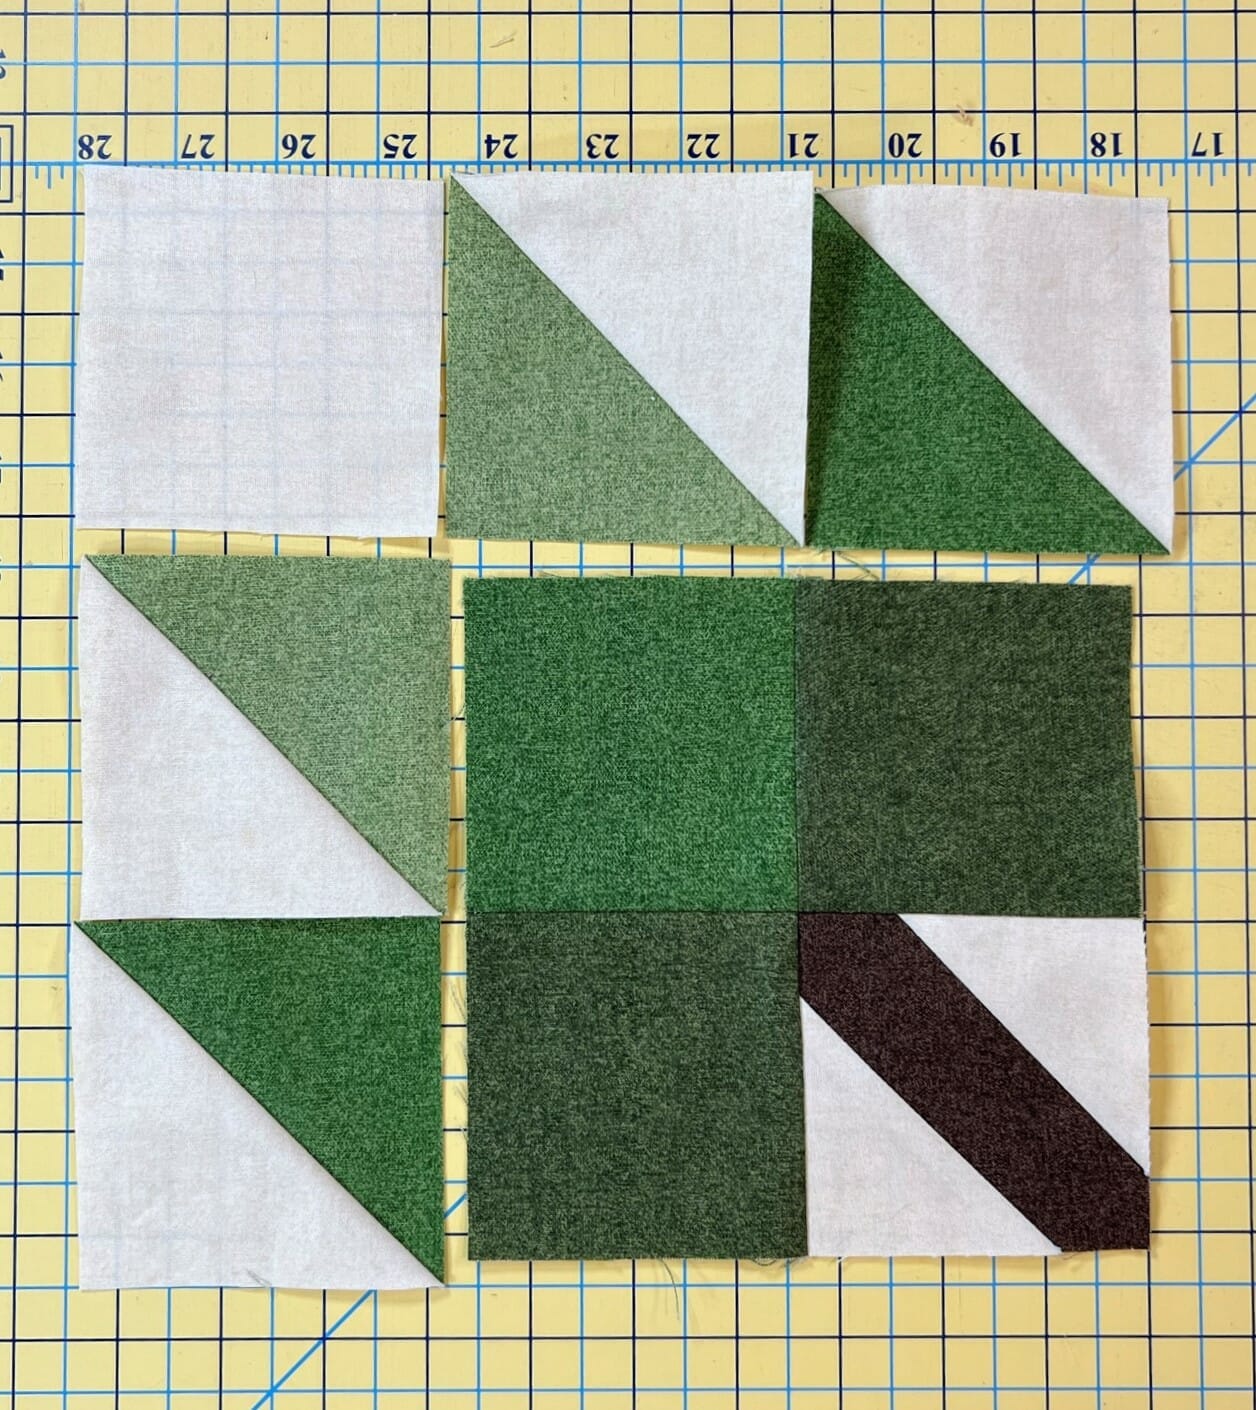
After making our HSTs, we’ll set those aside and get the base portion of the leaf sewn in step 4. Really this step is just sewing a simple 4-patch, with one of the squares being the stem. I like to lay all my pieces out before sewing to make sure I’ve got everything in the right place. I feel this is especially important with these blocks, because these green fabrics are so similar that it can be easy to get confused. Just remember that the blocks go from the darkest at the base of the leaf to the lightest at the tips.

Now it’s time to sew those HSTs into pairs. Once again I laid everything out on my cutting mat and gave everything a good look before pinning and sewing. For some reason seeing how the whole block is supposed to look helps my brain figure things out better, which means less mistakes and ripping out later.
After sewing the outside strips together, I lay everything out again and take another look to make sure I have everything facing the right direction and all the colors are where they should be. So far so good!
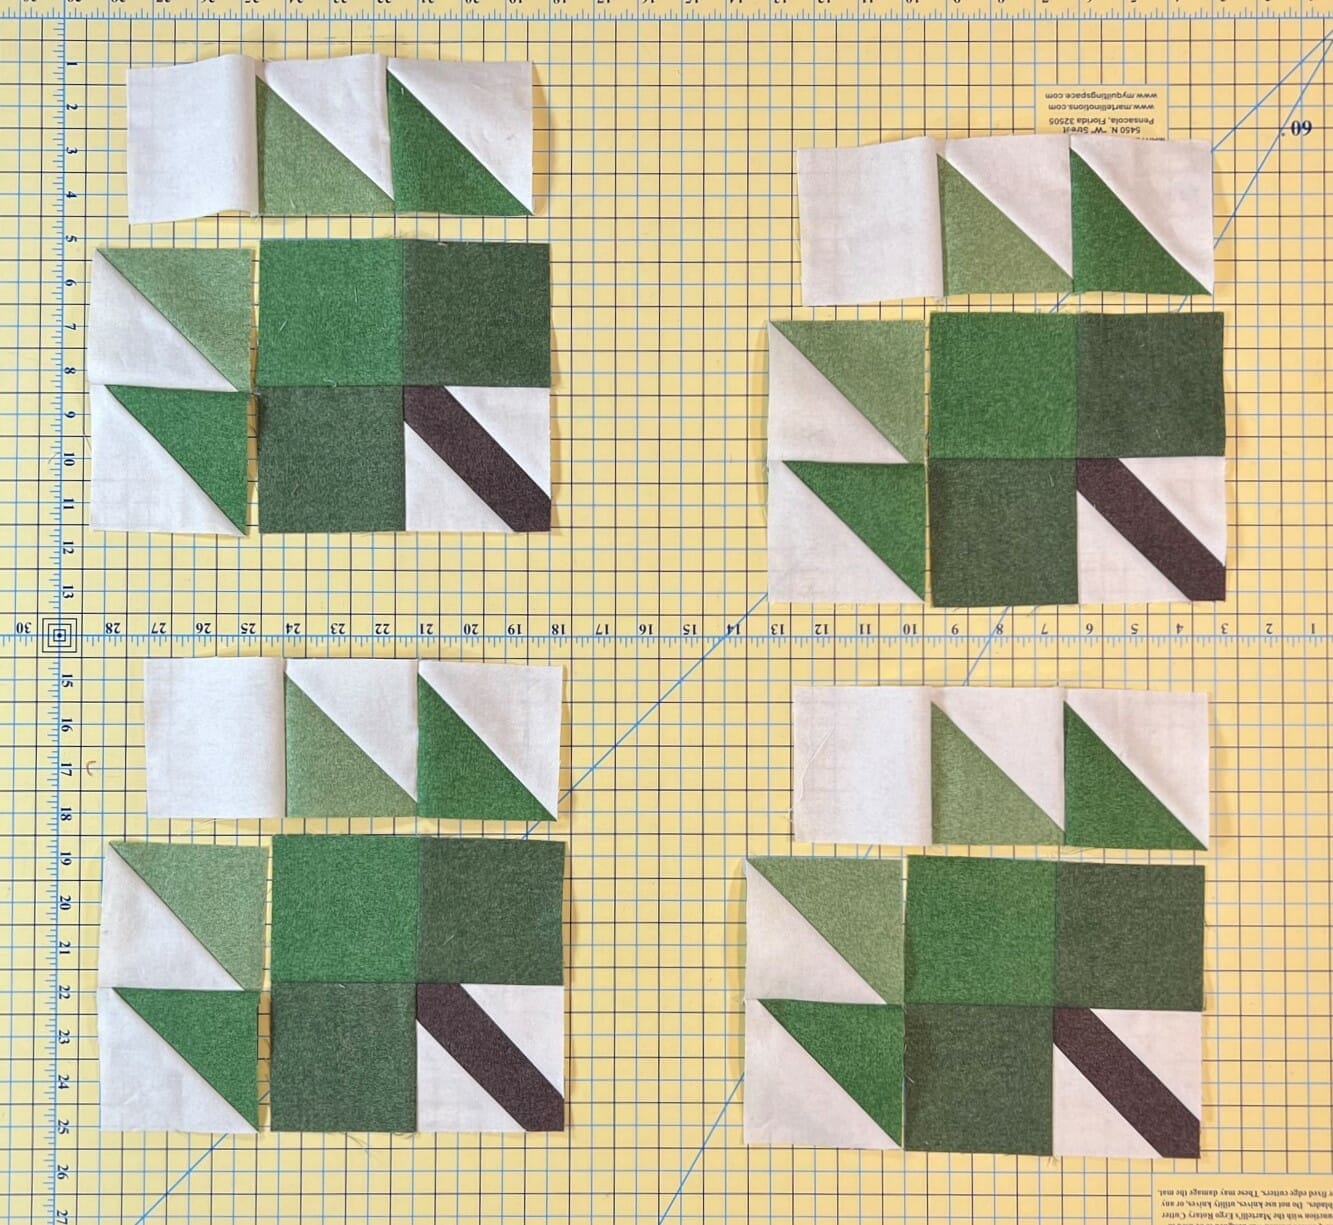
Once you’ve mastered the large blocks, you can go ahead and make the smaller version using the same process as before. As you can see, I did those assembly line style too.
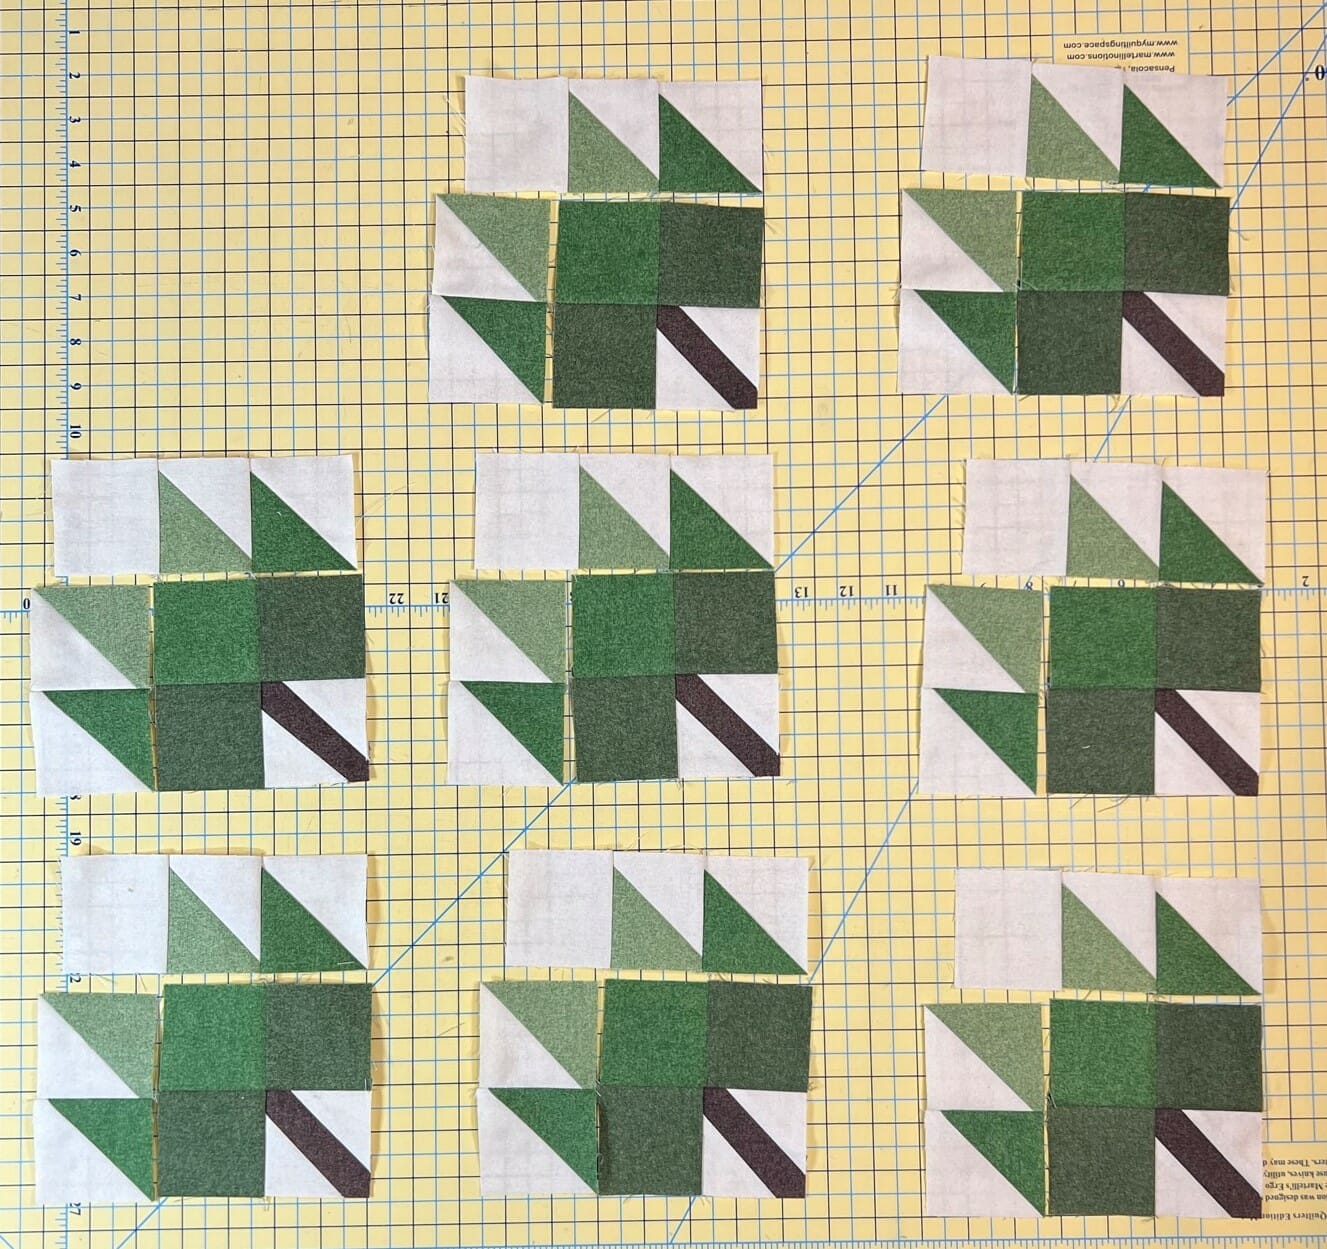
And here are all the finished blocks! You’ll make 4 large and 8 small in total.

I hope you enjoyed making these leaf blocks as much as I did. We’ve got many more to go coming up. And in case you are curious, next month we’ll be tackling the red leaves.
Until then, Happy Quilting!
Kristin

