


 Tutorials
 2.8.2023
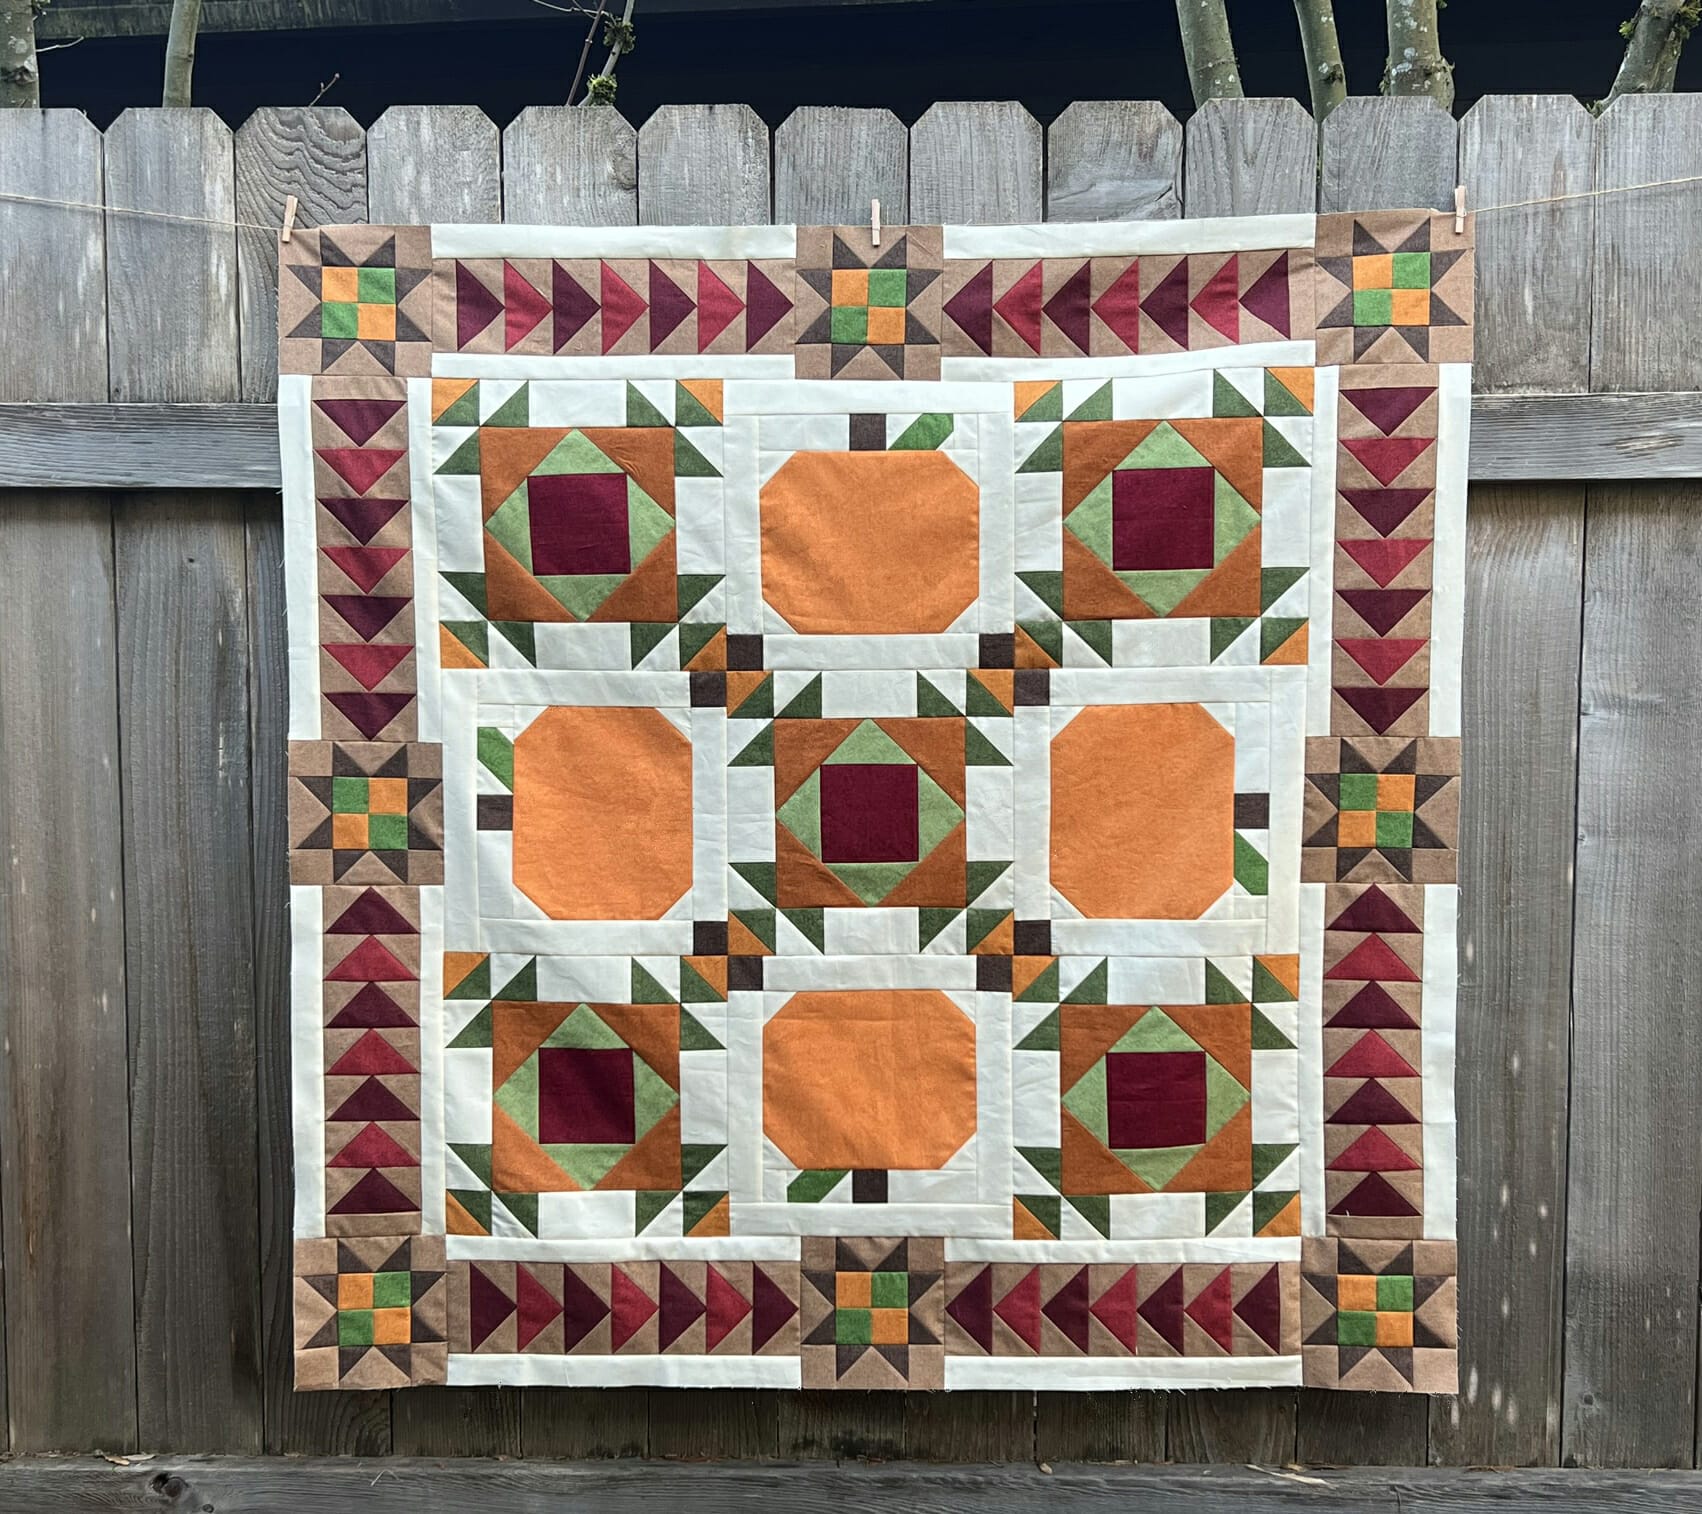
Hello everyone!
I hope you are all enjoying this BOM so far. This month we are back to adding some elements to the center of our quilt, which means we’ll be making lots of flying geese this month!
There are many ways to make flying geese, and over the years I’ve used a couple different methods in my patterns. The most common way is the stich and flip, which is what my instructions are in this pattern, and on page 11 for steps 1 and 2, you’ll find the instructions for this method. I covered this in last month’s blogpost so feel free to refer back to that if you want a refresher.
But I have to confess, my favorite way to make flying geese is the No-Waste method. Many of my patterns include instructions for how to make flying geese this way. I feel I get more accurate results and can make them faster. I also love the added bonus of using less fabric, meaning LESS WASTE, hence the name.
So since we are making A LOT of flying geese this month, if you’d like to try the No-Waste method, I thought I’d share how to do it. Of course, if you’d prefer to stick with the instructions as written, by all means, please do so! But if you’re up for something new here’s what you’ll need to do:
Disregard the cutting for pieces A, C, and D, and cut the following instead:
For A – Cut Fifty-Six 2-7/8” squares (I usually cut a scant 3” square for these) Mark each one diagonally with a pen or pencil.
For C – Cut Eight 5-1/4” squares
For D – Cut Six 5-1/4” squares
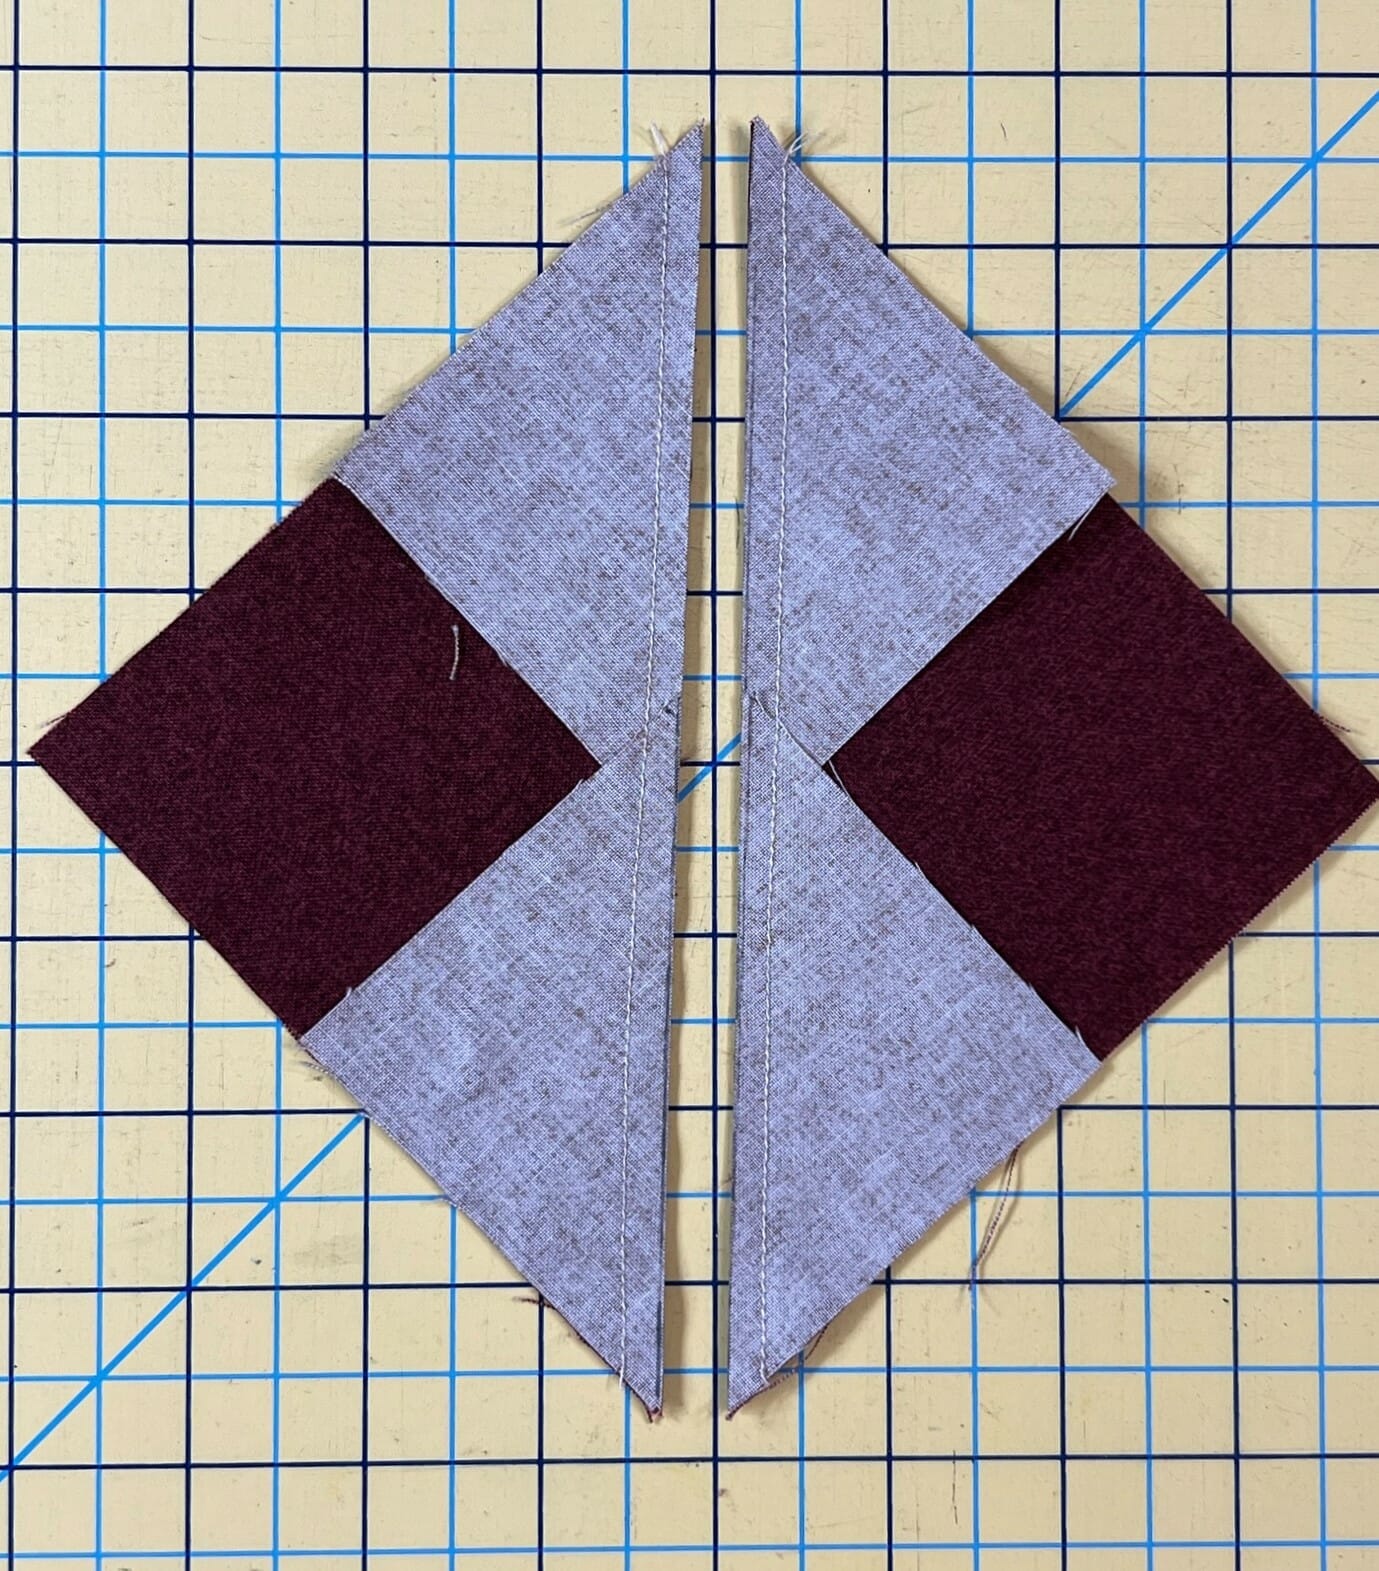
Place Two A squares on each C and D square like you see in the picture. I’m going to show the A/C flying geese in the photos, but you’ll do the same for the A/D flying geese. The A squares will overlap in the center. Pin these in place and then stitch ¼” away from the marked line, on BOTH sides of the line.

When done, cut on the marked line and then press the A triangles away from C and D.
Now place an additional A square on each piece as shown below. Then again sew ¼” away from both sides of the marked line, just like you did before.
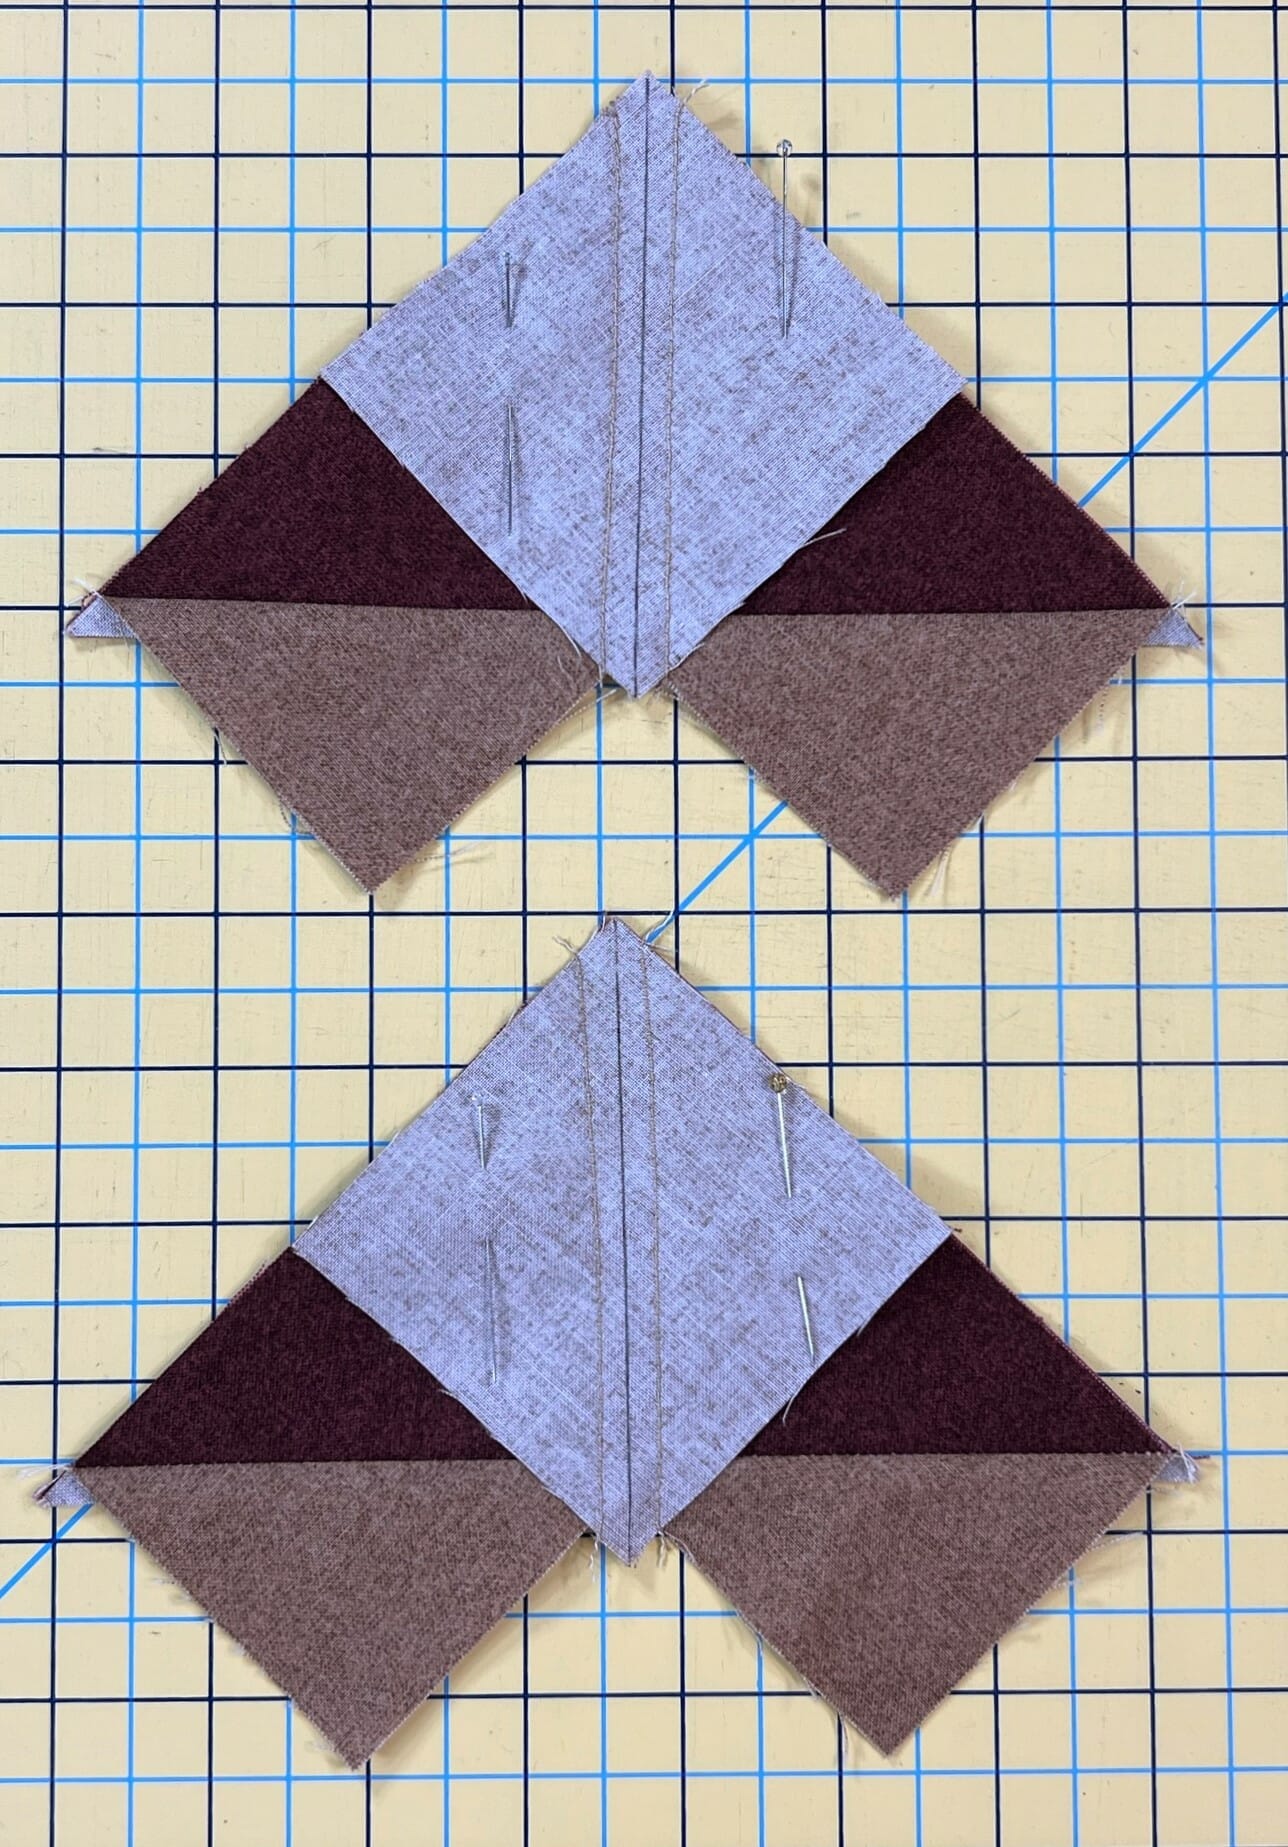
When done, cut on the line, then press each A triangle away from C and D.
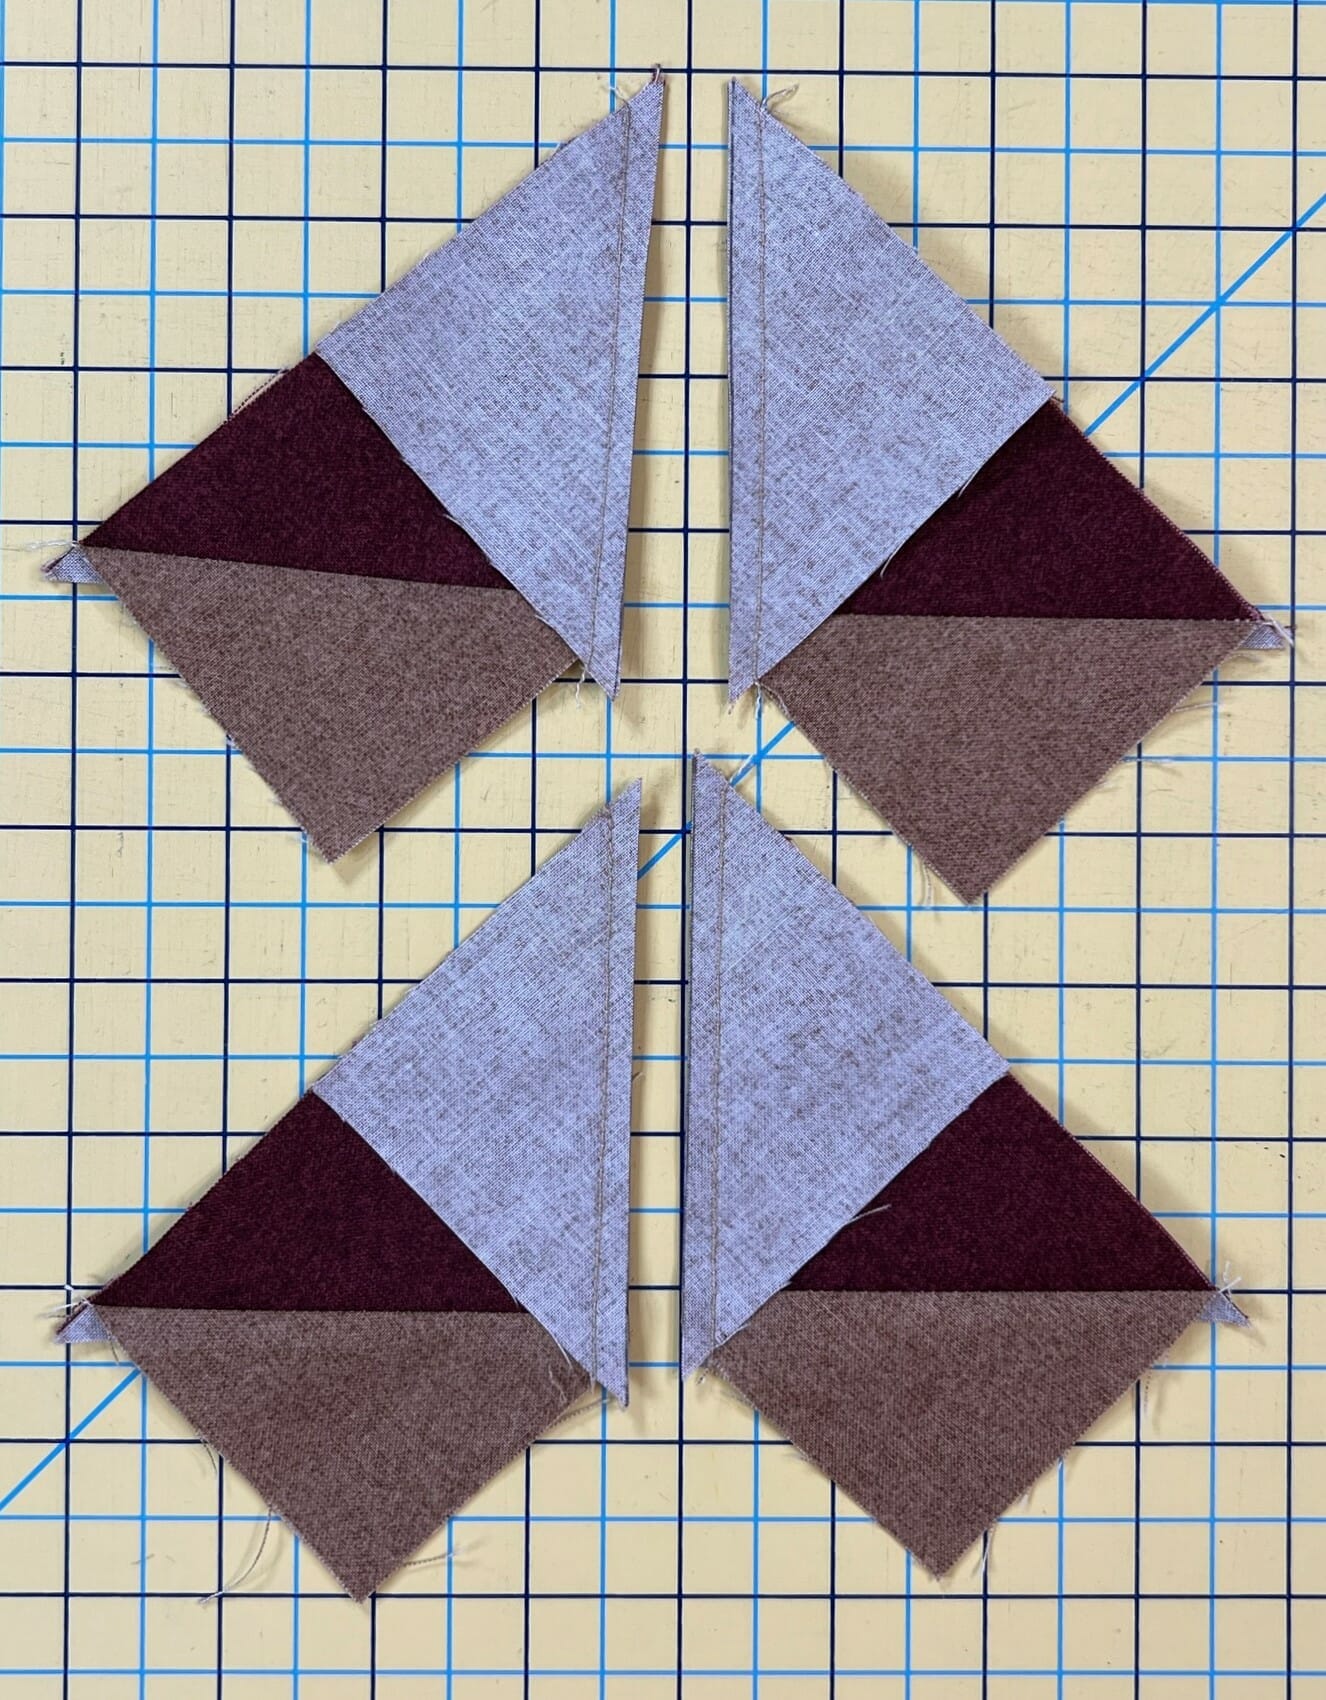
Presto! You now have four flying geese for each 5-1/4” square! Make sure you measure and trim these as needed to 2-1/2” x 4-1/2”. I know there are a few more methods out there, so drop a comment to tell me your favorite!
Once all your flying geese are made it’s time to sew them into strips – eight to be exact. Each of the eight strips will consist of three A/D units sewn in between four A/C units.
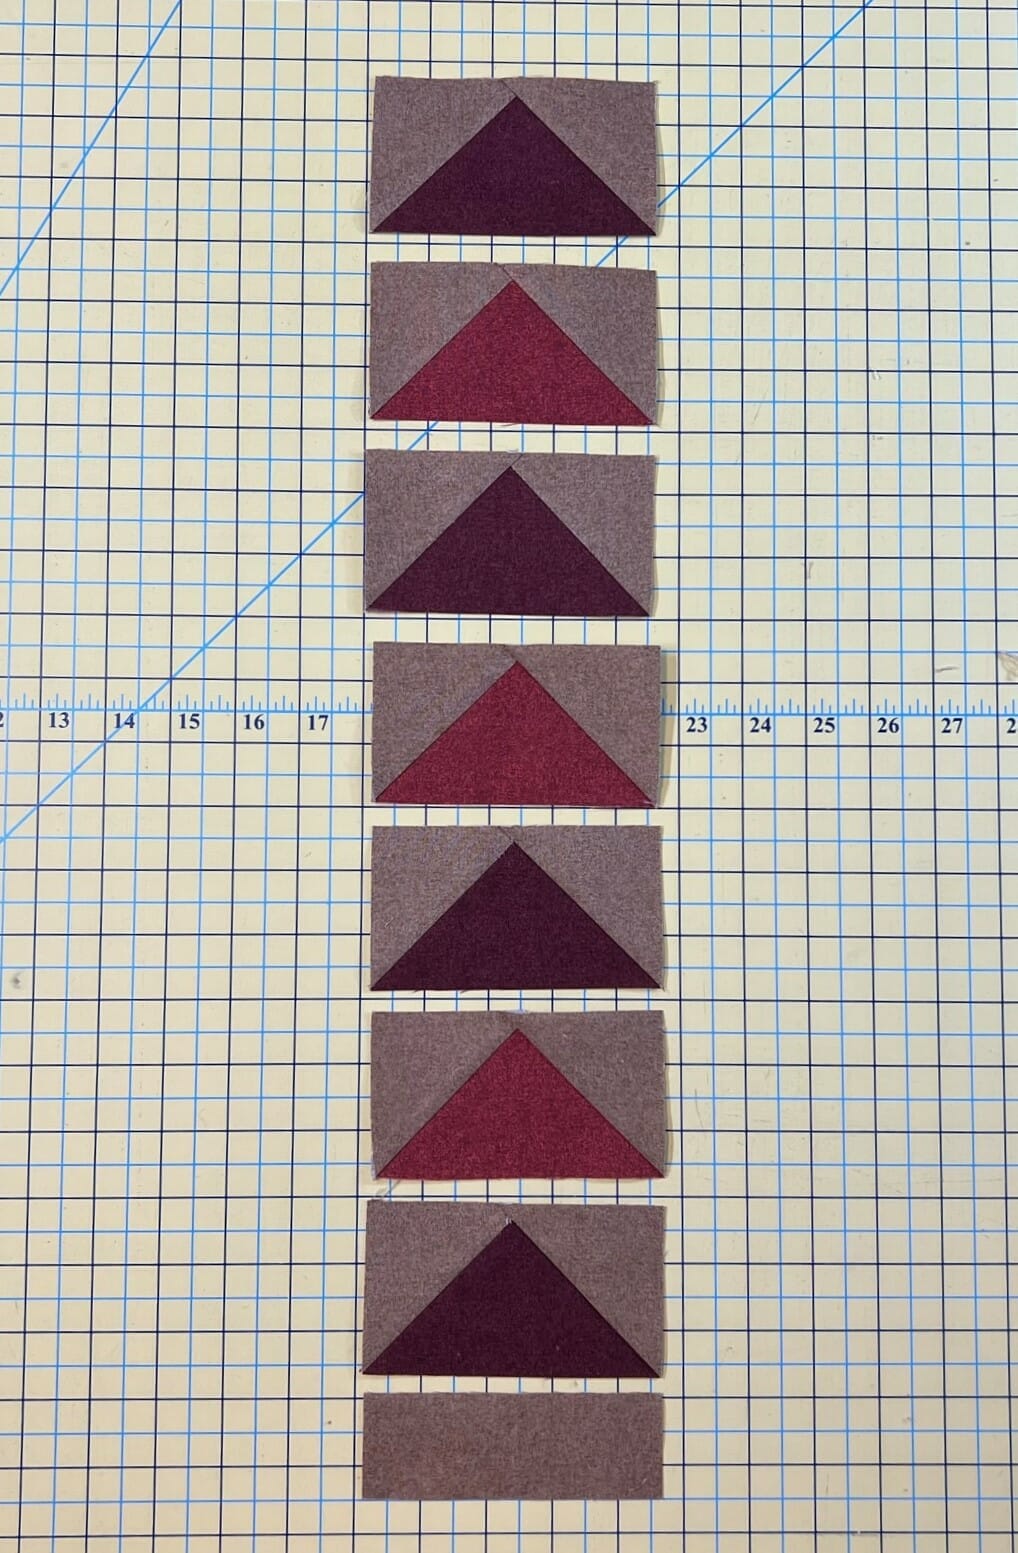
I laid mine out like you see above, and then I sewed them together in sections like you see below.
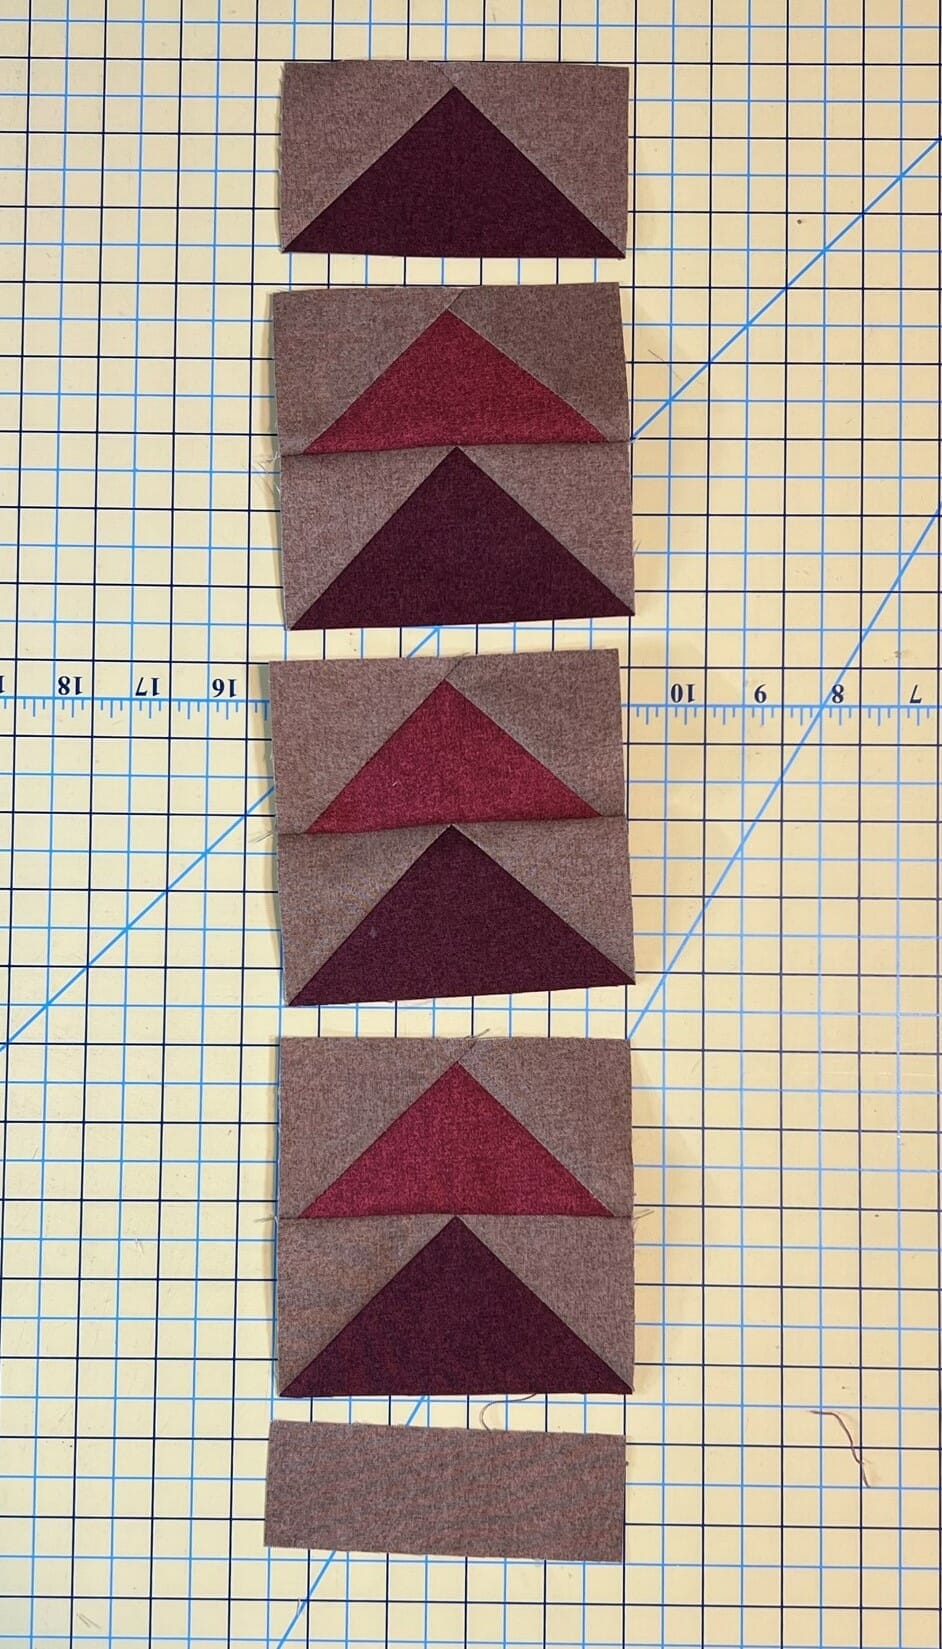
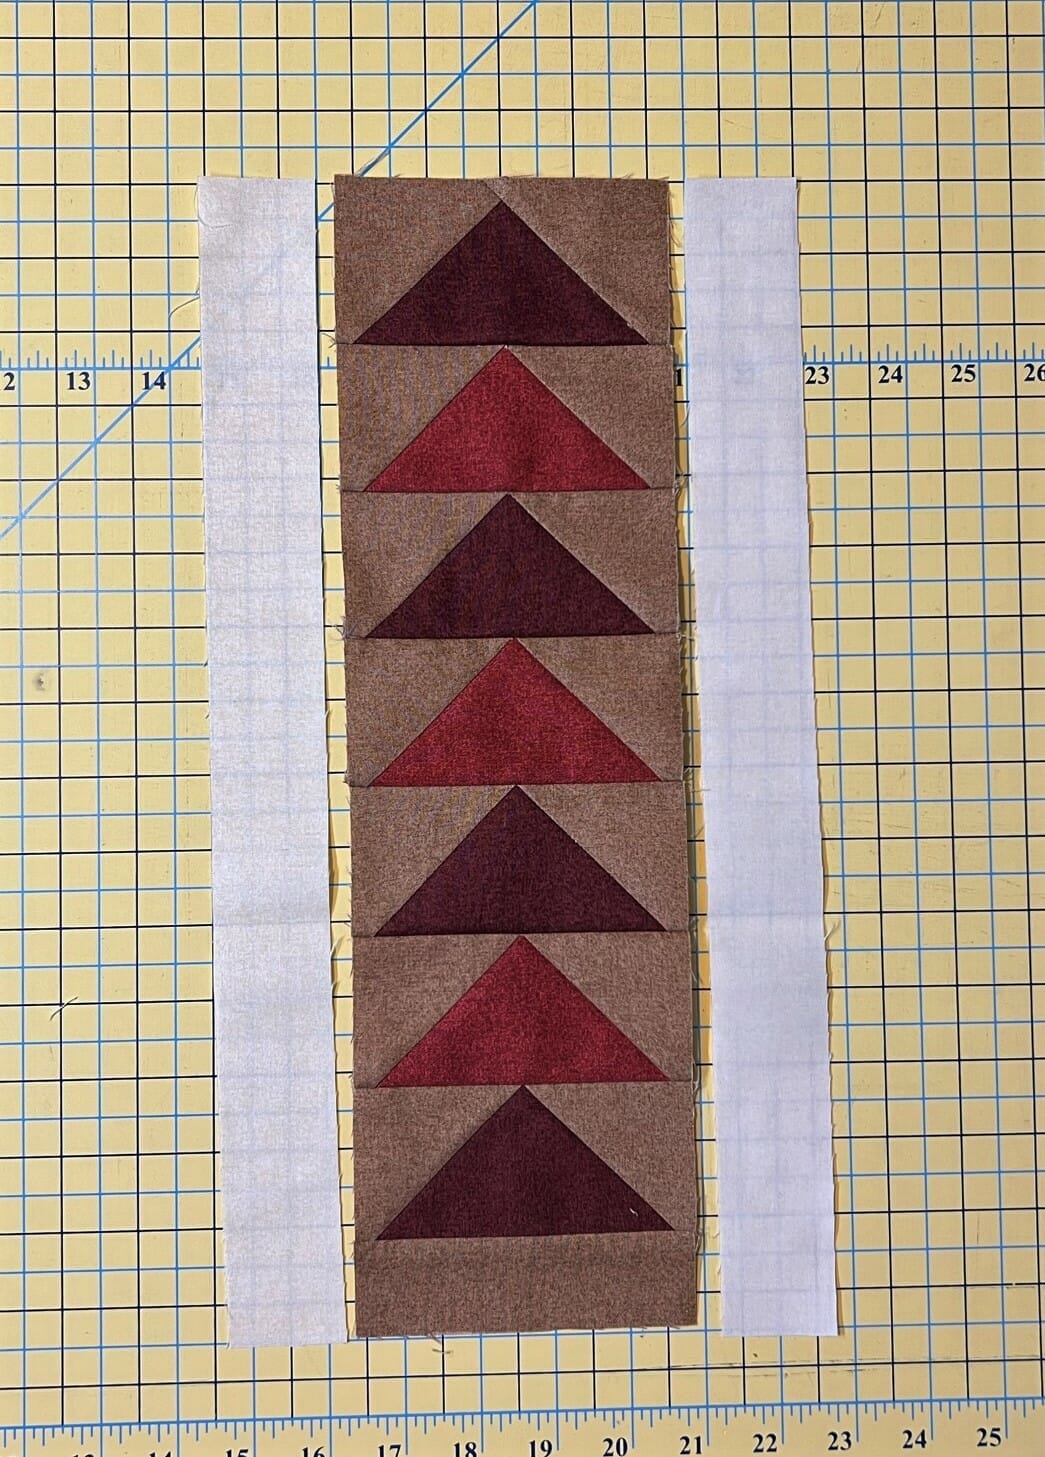
There’s no ideal way to press these, but I found that pressing them away from the flying geese triangle points worked best. After the eight units are sewn together, don’t forget to attach the small B strip to the bottom of each one.
It is key to make sure each unit measures 15-1/2” long when done. One way to make sure these will be accurate, is to cut each E strip exactly, and then ease in the flying geese strips as you attach the E strips to the sides. This way, in step 4, you will end up with the correct measurements. If the flying geese units are too long, you can spray some starch on them and let them rest. This is a little trick I use that shrinks up the fabric just a bit and helps with easing things in.
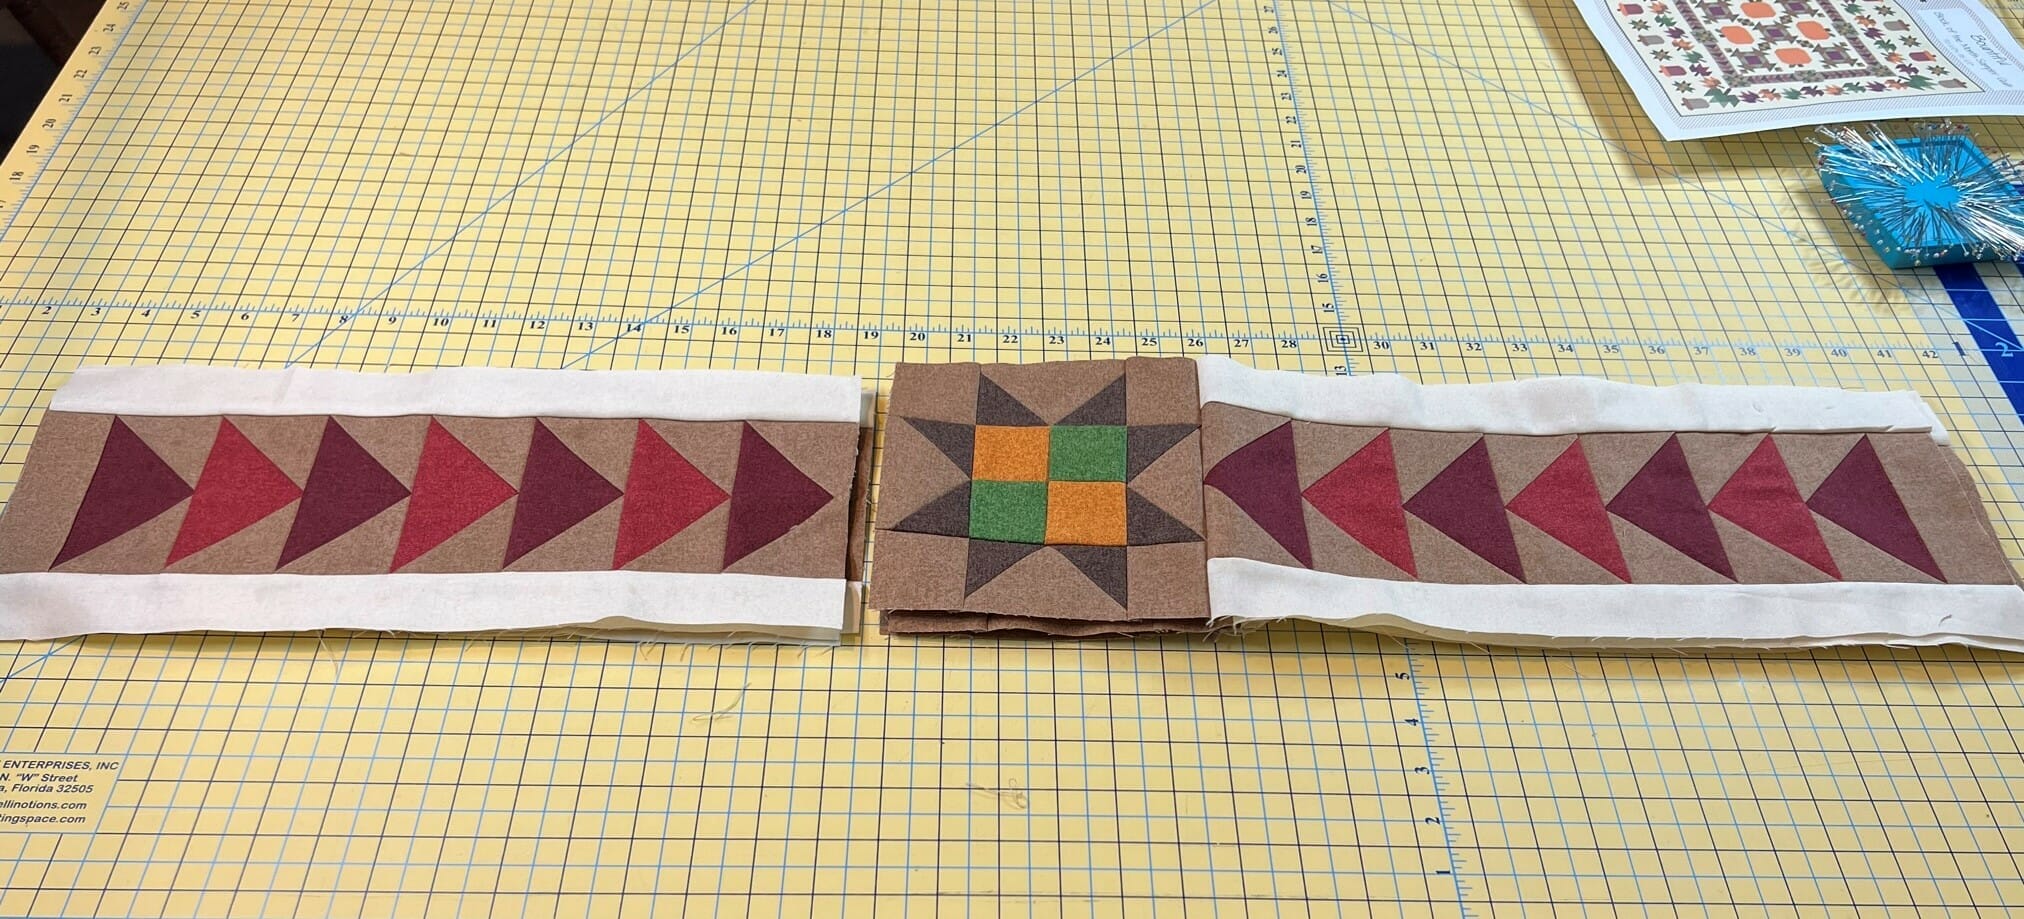
Now it’s time to sew the Sawtooth Star blocks from last month to the flying geese strips. For mine, I tried to pay attention to the orientation of the 4-patch units in the center of each block when attaching them to the flying geese. I have my quilt so that the center Sawtooth Star blocks rotate their orientation, but the corner ones are all facing the same direction. I did this so that there was some semblance of order to them, while still allowing for the quilt to be rotated any direction I choose. This is one of those things that probably doesn’t matter too much, but if you want them to be oriented the same way, you’ll want to lay them all out first before you begin sewing. In the photo below I’d already completed step 5, but you can still see how I placed those Sawtooth Star blocks.

Once I had everything oriented how I wanted, I did some assembly line sewing.
After you have the strips all sewn as directed, you can attach them to the center portion of the quilt. Hopefully everything comes together accurately, since we’ve been measuring everything as we go. And with that, we are done for the month! Yay!

I remember when I was designing this quilt, I thought to myself that just the portion that we’ve done to this point could be its own stand-alone project. Wouldn’t this be cute as a table topper? And just the right size too! If any of you are ambitious enough to make a second one and use it as a small project, I’d love to see!
But please don’t think this is an excuse to stop! In the coming months we will be making some pretty leaves to frame what we’ve done so far. It’s going to be fun!
Until next time, Happy Quilting!
-Kristin

