


 Tutorials
 5.26.2023
NOTE: these blog posts for the Amherst quilt top are part of a limited series for our Block of the Month subscription program. Sign-ups for the Amherst BOM are no longer available. You can learn more about our upcoming Block of the Month subscriptions here.
Hello everyone and welcome to my latest Block of the Month! I know some of you have joined me for previous BOMs, and others are brand new. I’m humbled that so many of you like my designs enough to make them for yourselves, and I want each of you to have a positive experience with my patterns. I sincerely hope that all of you will enjoy making this quilt over the next nine months, and maybe even learn something new! Here’s what we’ll be covering this month:
Before we begin, I’d like to cover a few basics. If you’ve followed any of my previous BOM blogs, you’ll know that I’m a big fan of pre-starching all my fabric. I never cut anything out until after I’ve starched and pressed my fabrics. My go-to starch is MaryEllen’s Best Press, but I’m sure any starch will do. This step isn’t technically necessary, but I feel I get much better piecing results this way. It just keeps the fabric from stretching or getting wonky when I sew.
As you will notice, there are a few subtly directional fabrics in this collection. The Flower Chain print, which we are using here in month 1, is probably the most noticeable, but it’s not glaringly so. In fact, if you look closely at the white background fabric, it’s technically a directional fabric as well. When sewing this quilt, I did NOT make myself crazy trying to fret over which direction any of the fabrics were facing. In fact, I didn’t pay attention to it much at all. I treated all the fabrics like they were non-directional, so feel free to do the same.
If you think you will be bothered to look at your quilt and have some of those flower chains facing a different direction, then you can plan and sew accordingly. But if you email me and ask me to help you figure out which way to sew things so that everything is going the same direction, I probably won’t be much help, lol!
All of my patterns are mathematically correct, so that means that if you are making a Half Square Triangle, and it’s supposed to be 2” square once it’s all finished and sewn into the quilt, my pattern will tell you to cut those squares at 2-7/8”. That being said, please feel free to cut you pieces a bit bigger to start and trim things down later. I’ve allowed for enough extra fabric for you to do this throughout the quilt.
Truth be told, I tend to cut all my pieces just a tiny hair bigger regardless of what I’ll be doing with them, because I’m a big fan of trimming and sizing all my units as I go. And by a hair bigger, I mean about 1/32” bigger, so not much at all. But that’s just my personal sewing style, so you all do whatever works for you. If you cut everything out just as it says in the pattern, and use an accurate ¼” seam allowance, you should be just fine.
Okay, let’s get sewing!
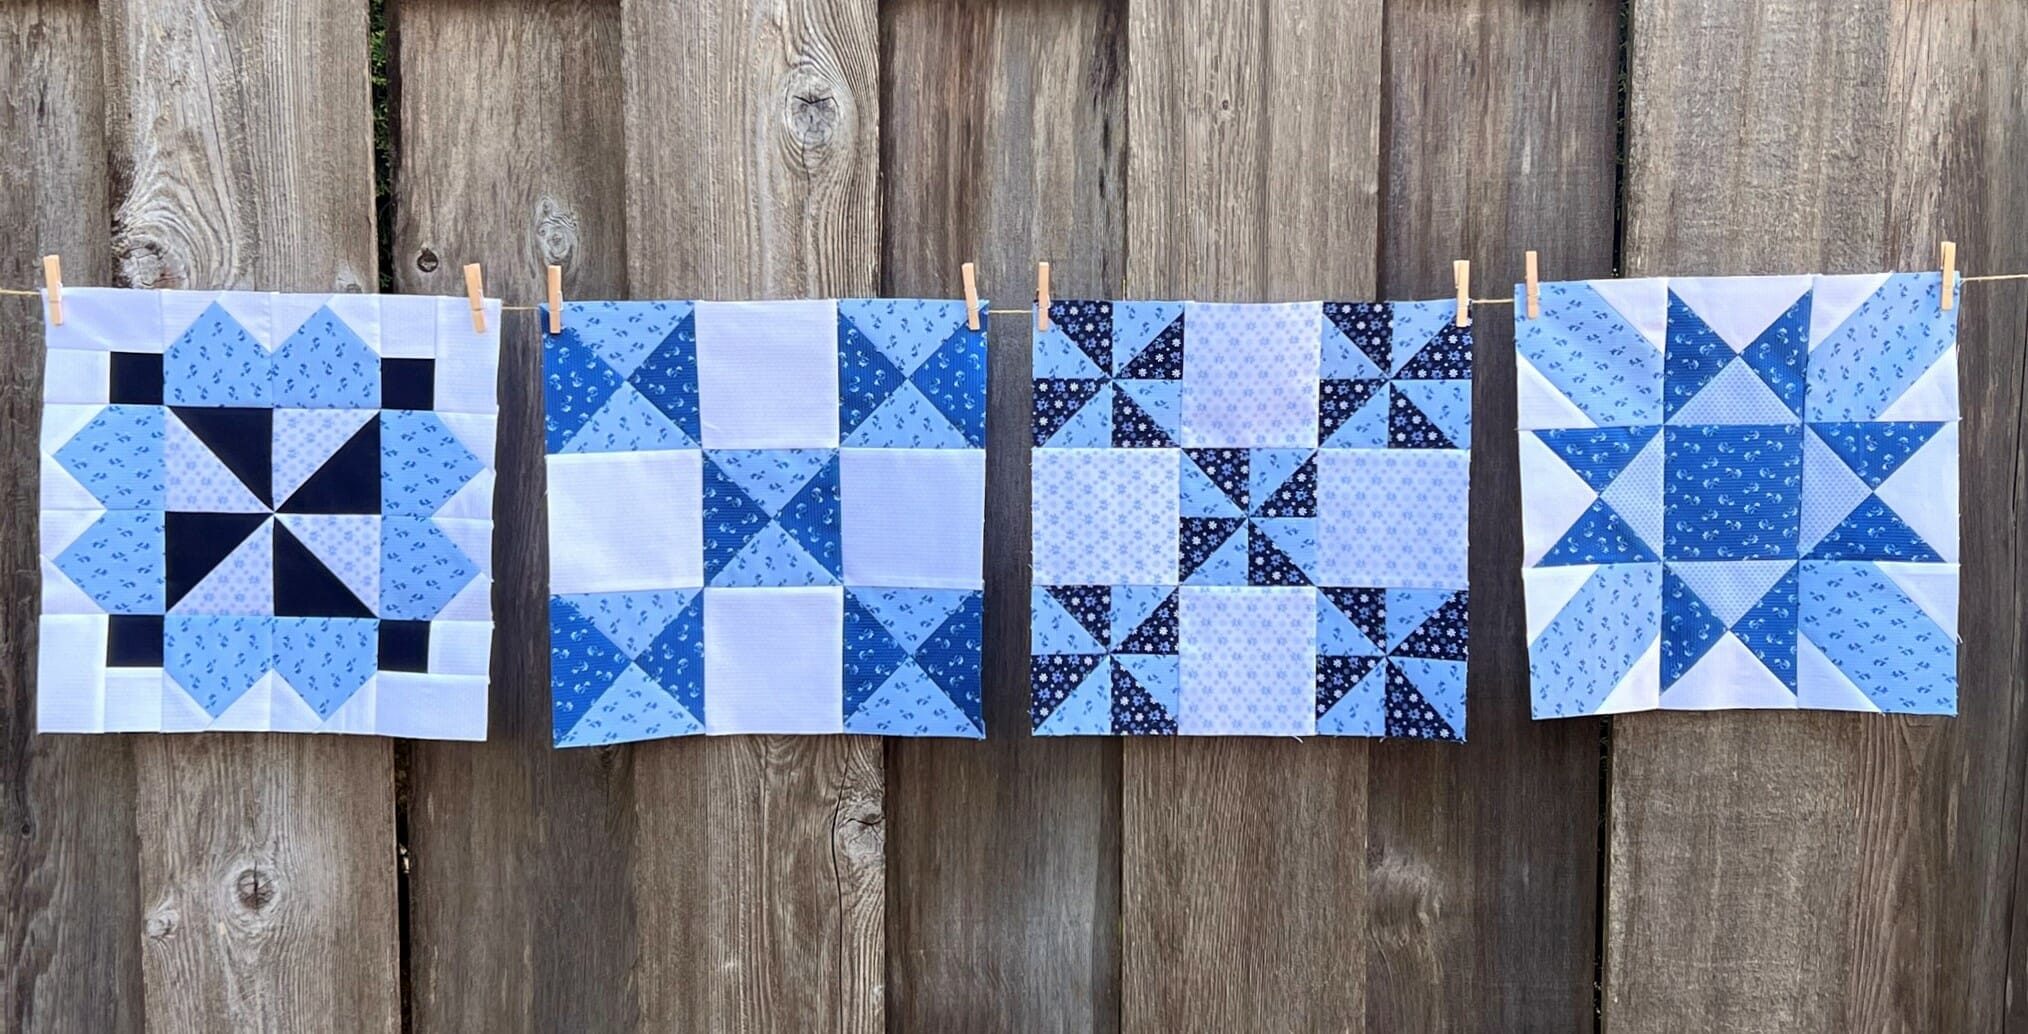
For this first month, we’ll be making four blocks, so I’ll take you through them in the order they appear in your pattern.
Block 5
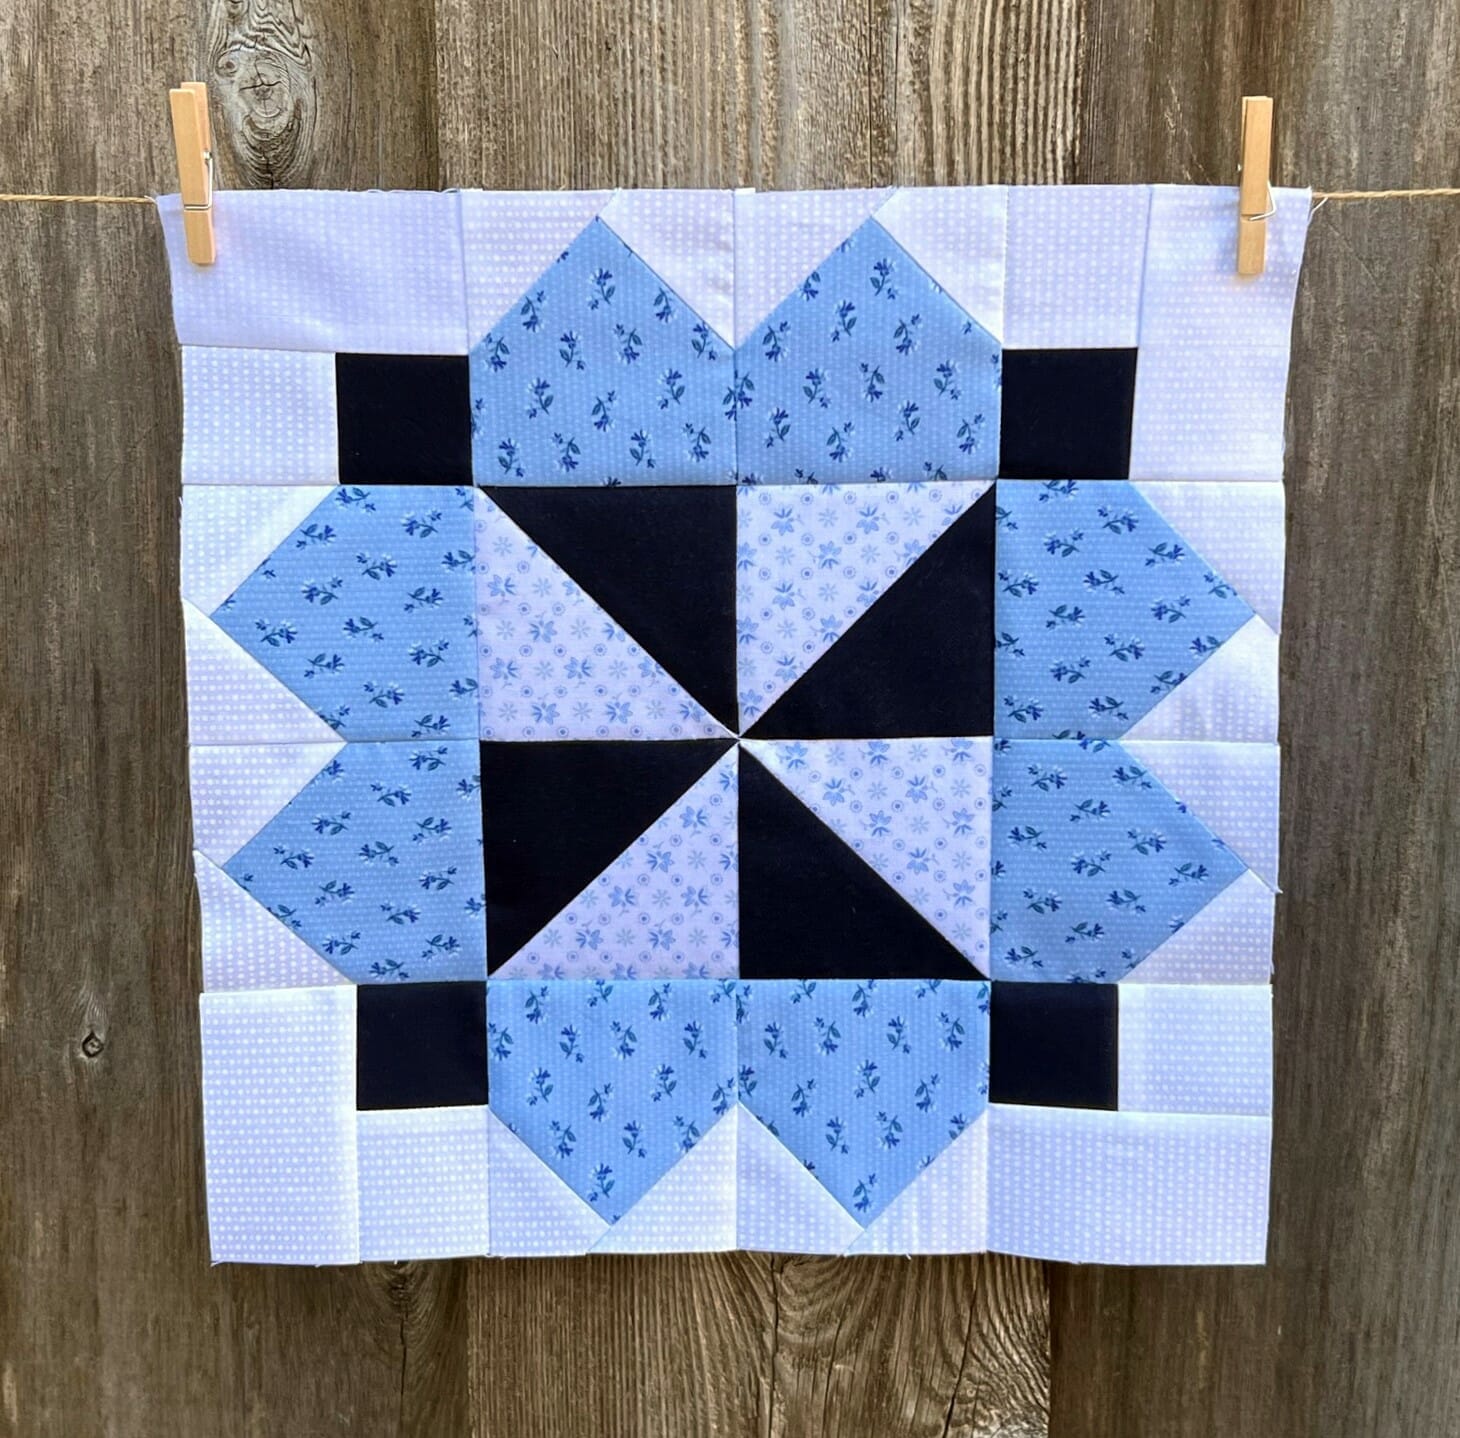
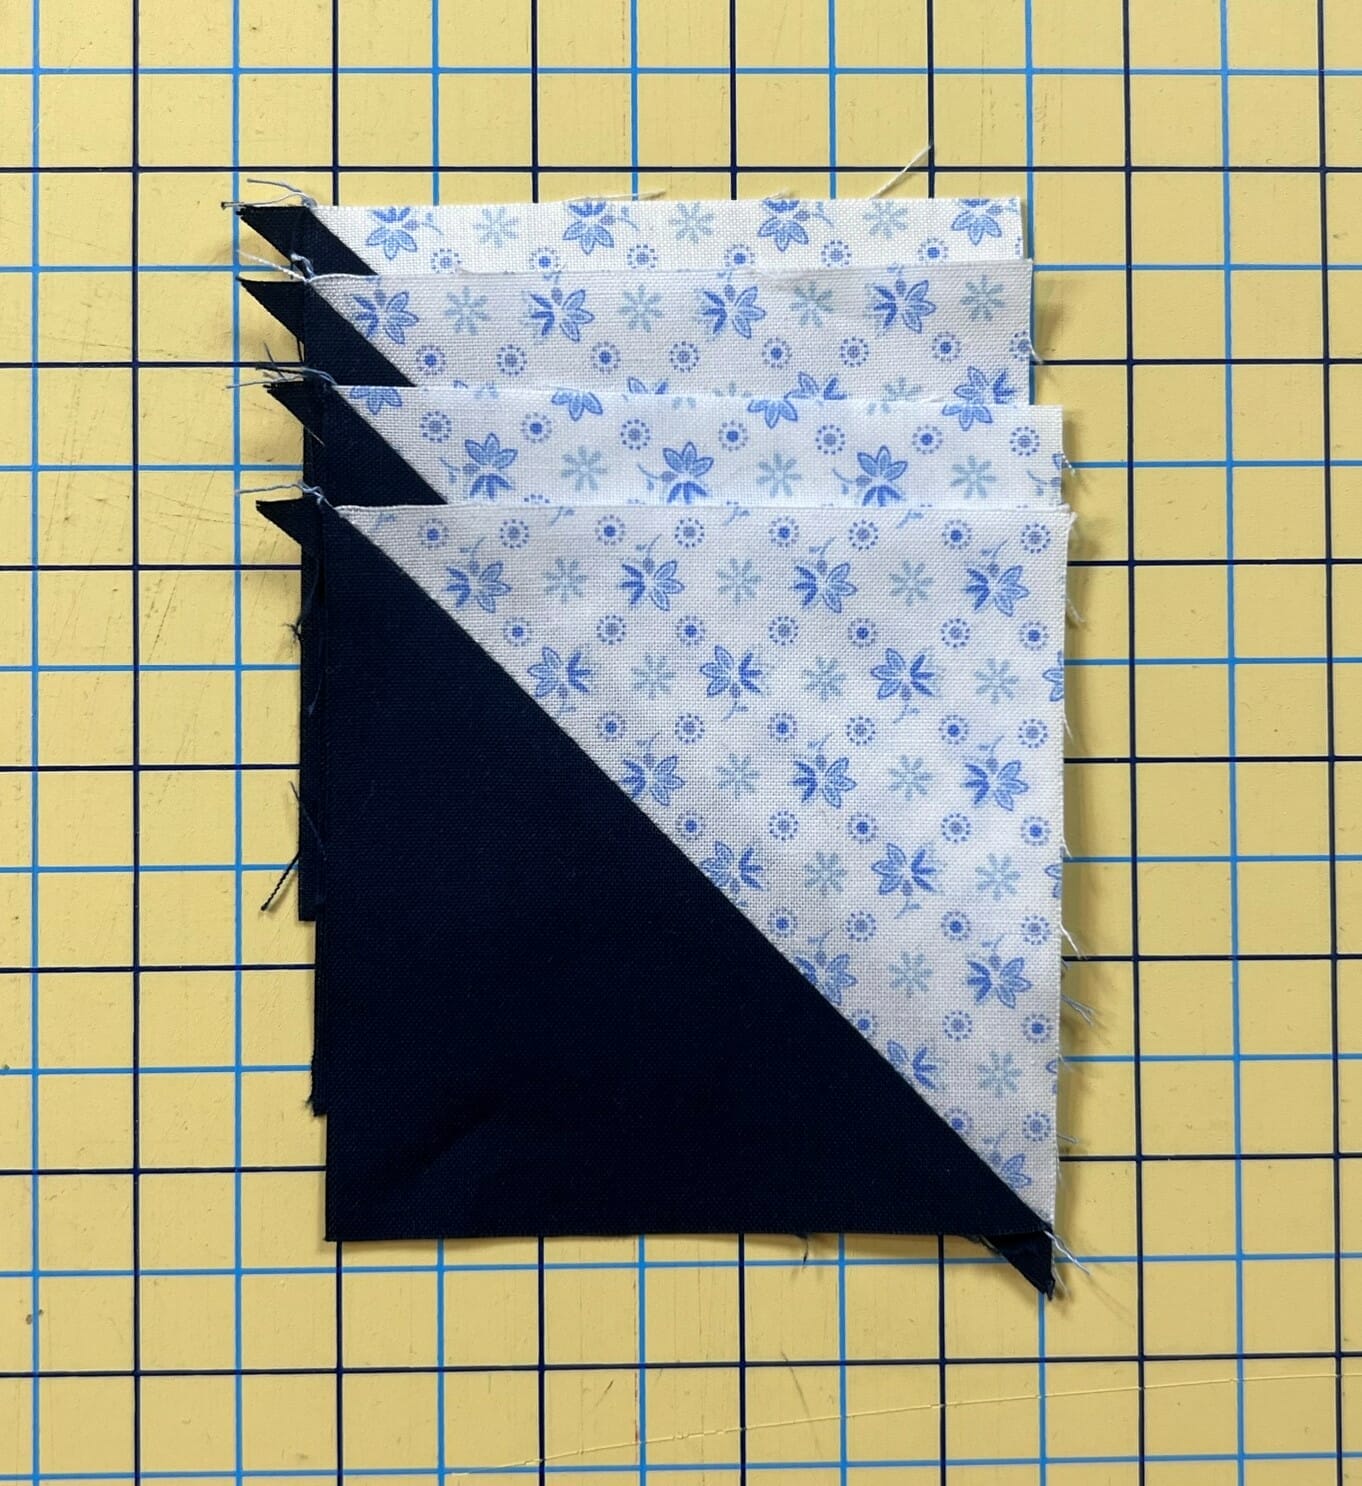
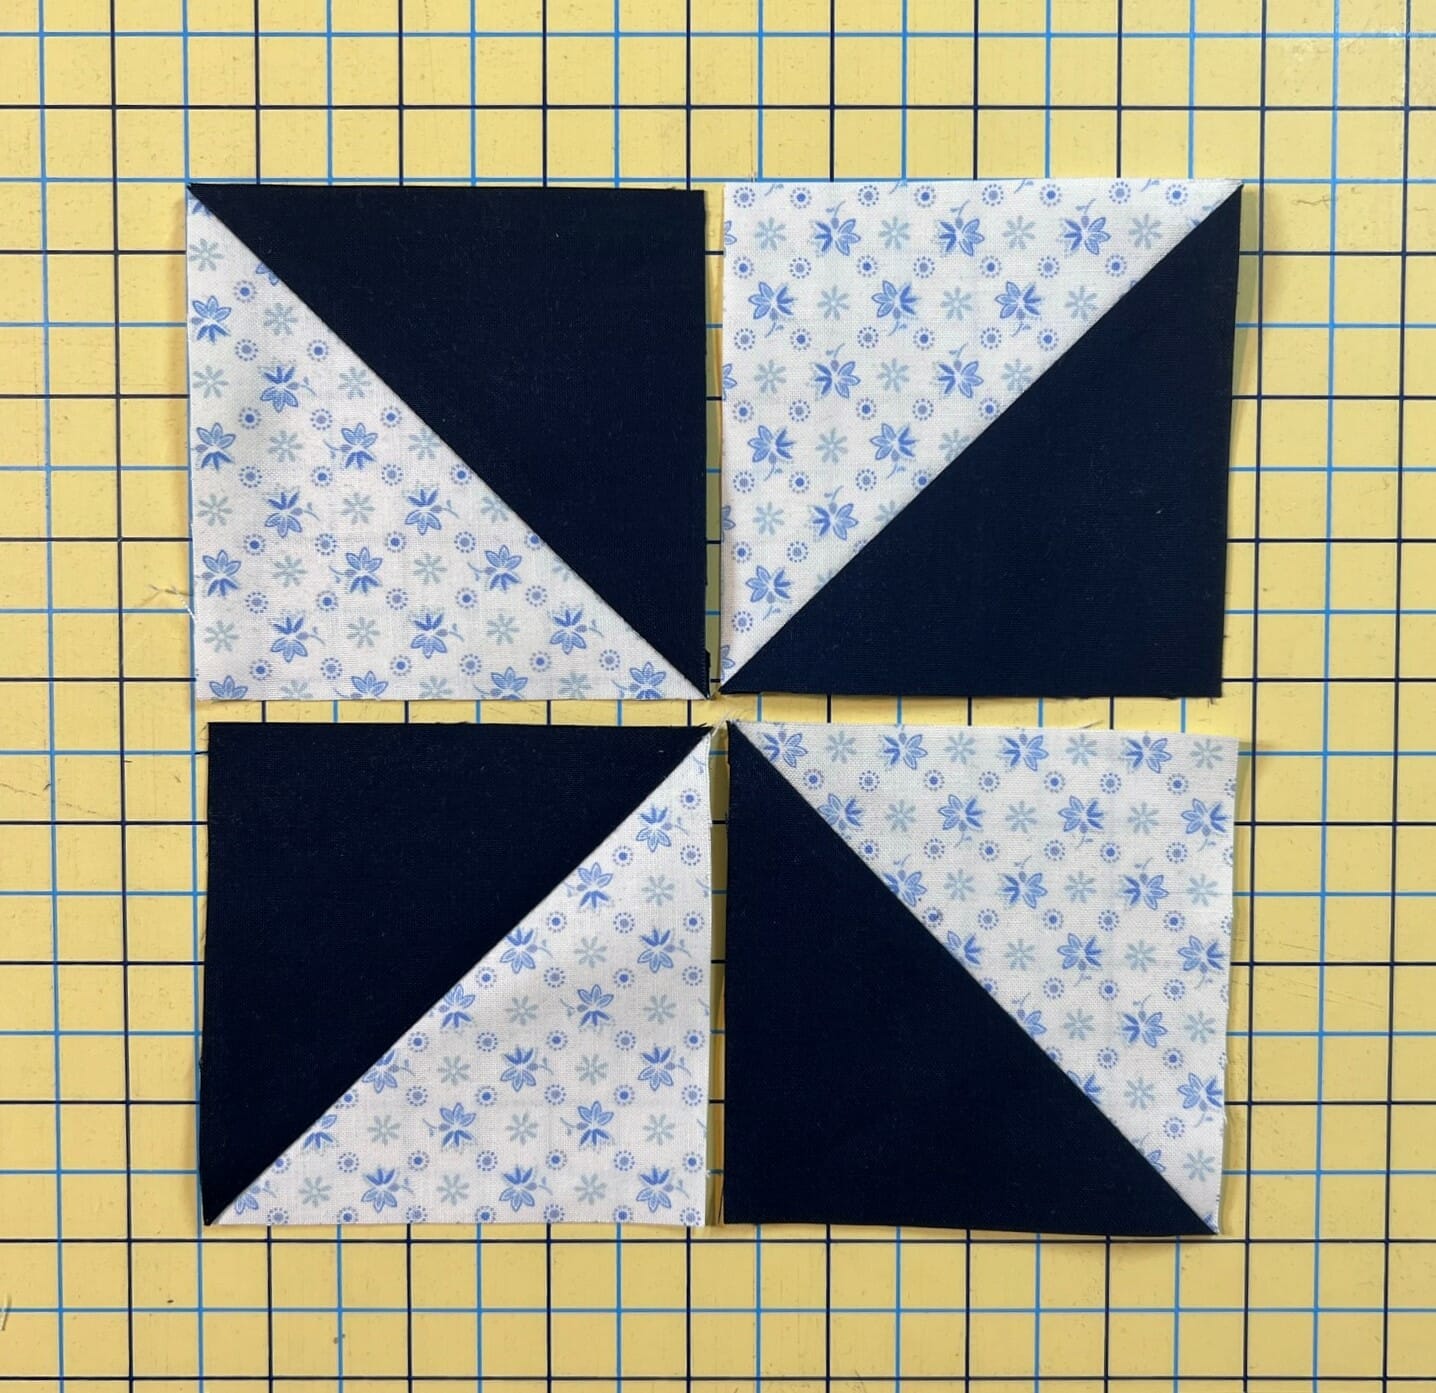
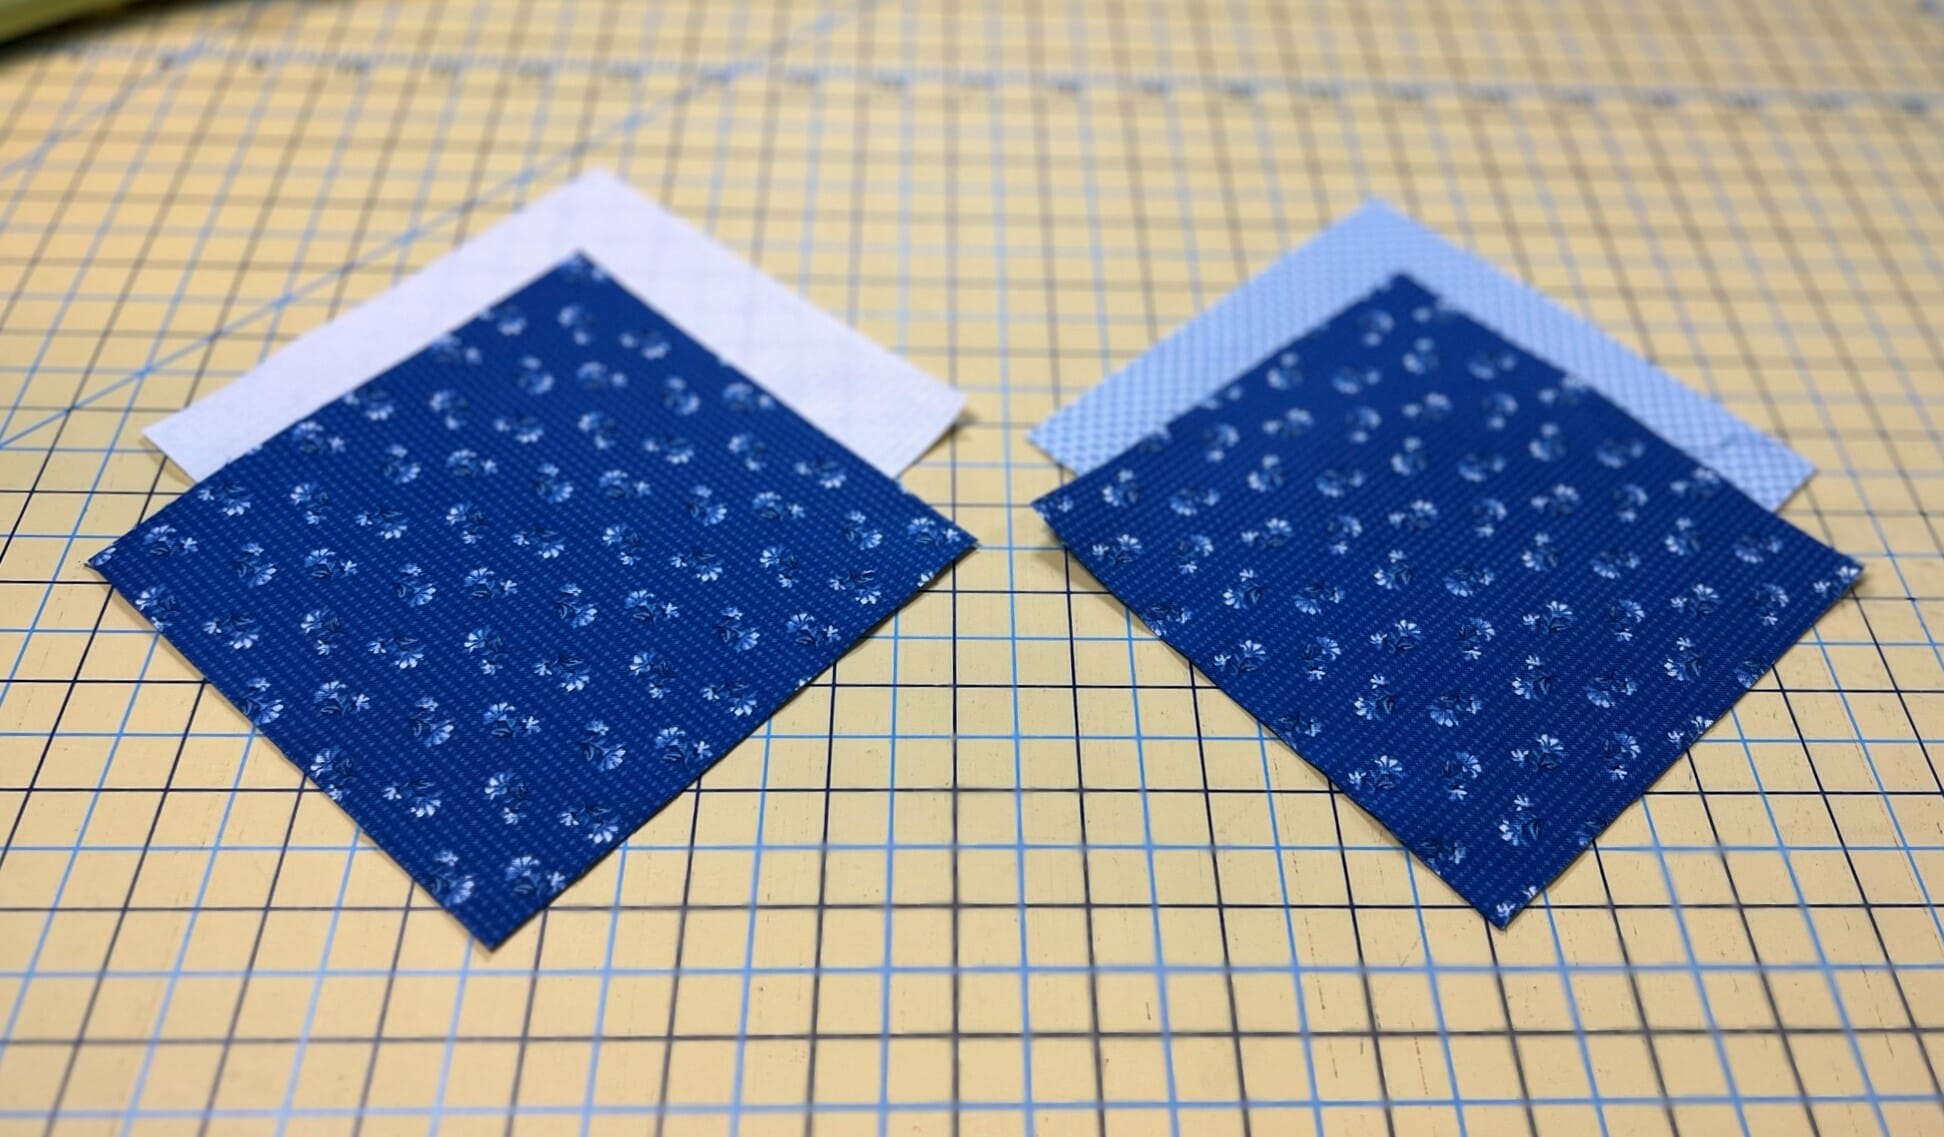
We’ll start this block in the center, by making a pinwheel, using the HSTs made in step one. Below are a couple of photos of my HSTs in progress…
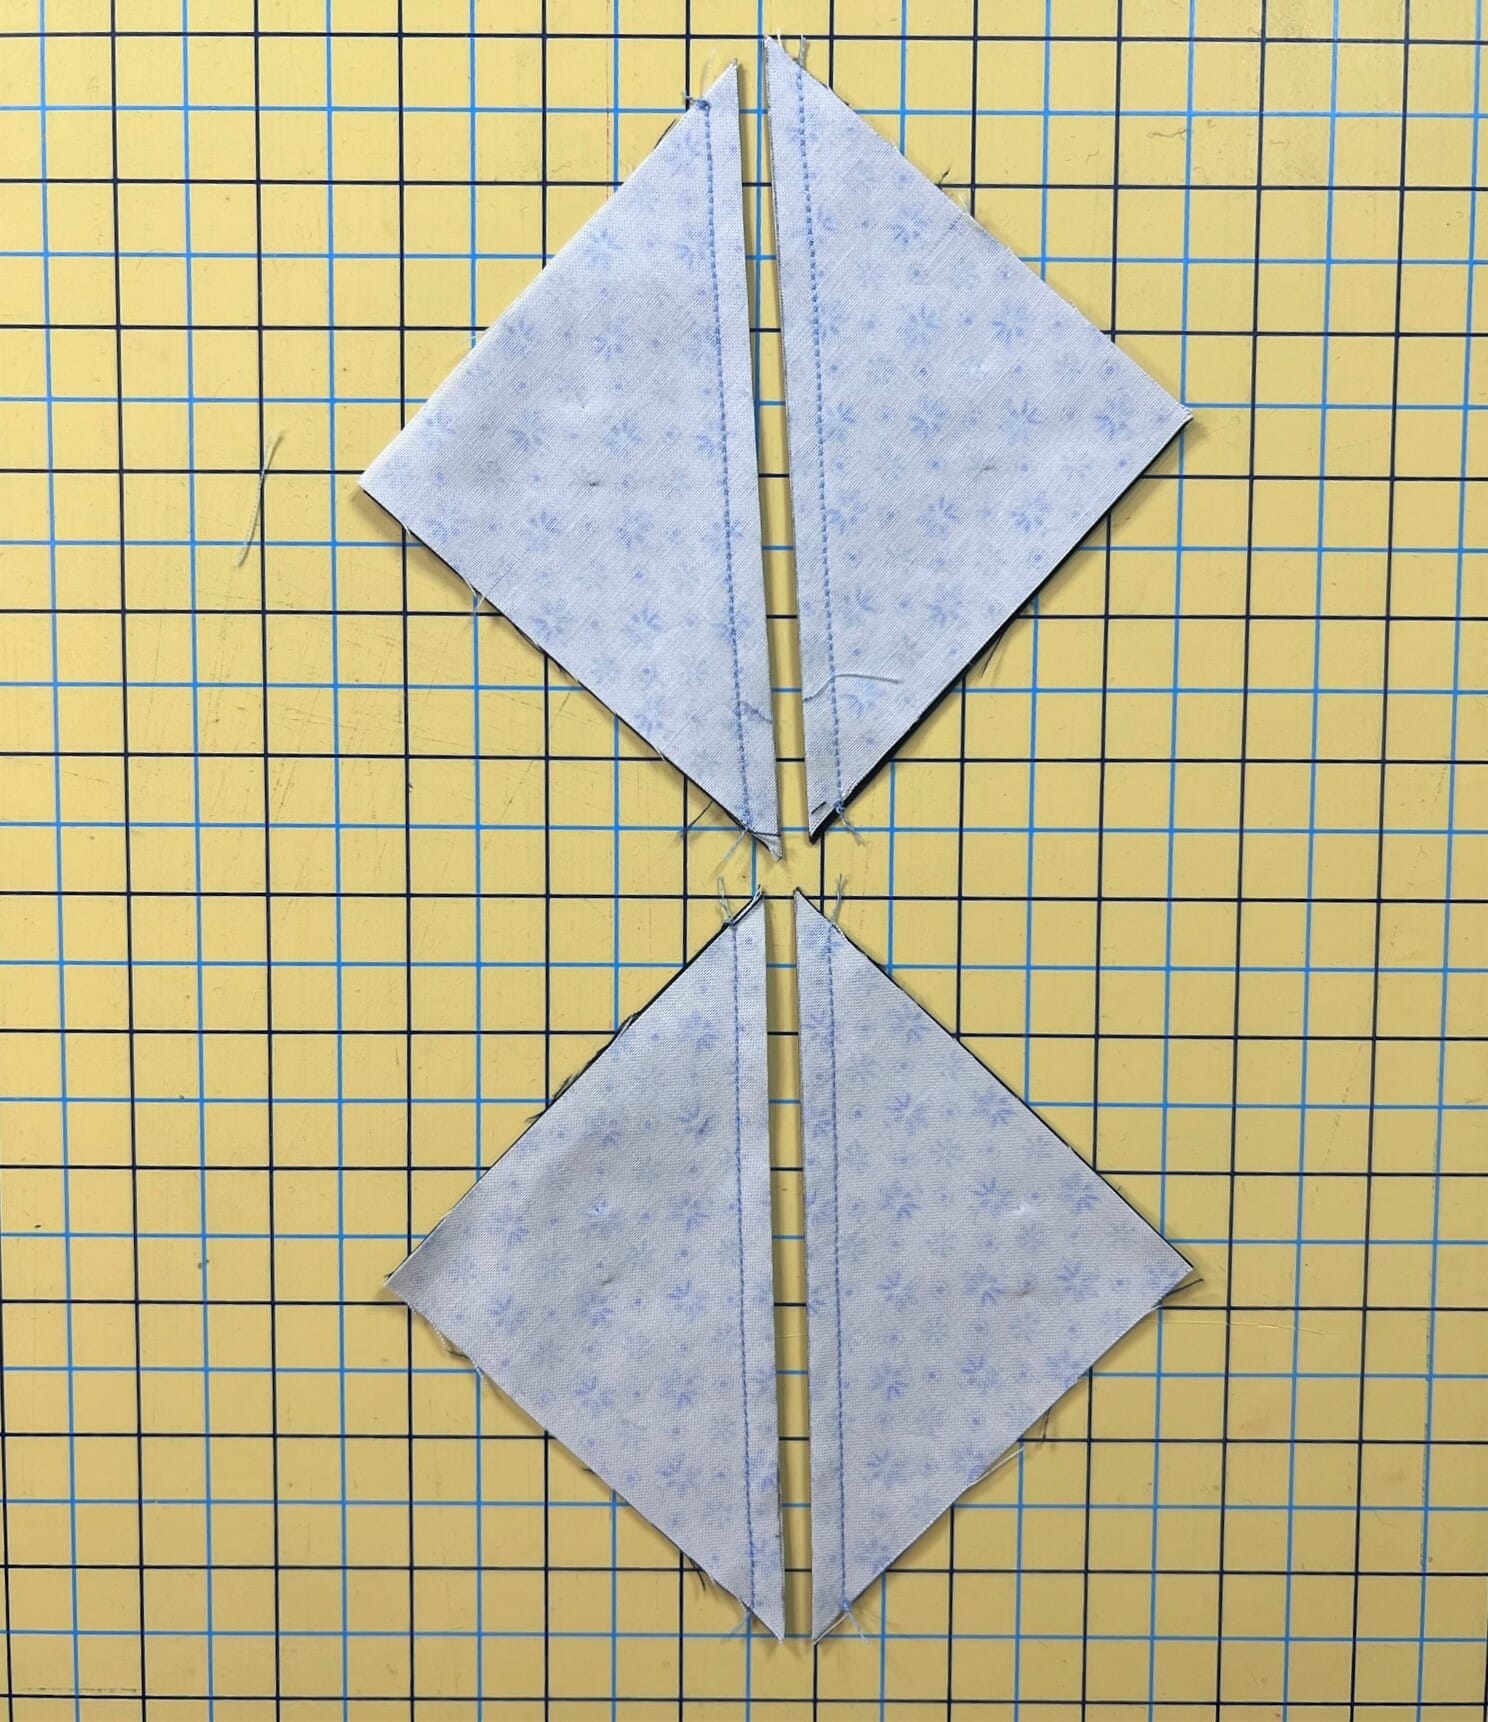
Once they were sewn on each side of the line I pressed them to look like this: (They still need to be trimmed.)
Sometimes it can be tricky to get the centers of the pinwheels to line up. Once I’ve sewn the HSTs into pairs and I’m getting ready to sew the pairs together, I usually peek at where the points are matching up before I sew. One trick I use is to put a pin through both points to help me get things aligned. I hope this makes sense. It would be easier to explain in a video, but so far, we aren’t making those (yet) for these BOMs.
I also press the center portion of the pinwheel open, which makes a tiny pinwheel in the center, and allows the seams to be ironed in opposite directions, which reduces the bulk, and gives a better center where the points come together. My tiny pinwheel on this back side doesn’t look the greatest, but it only matters how the front looks, right?

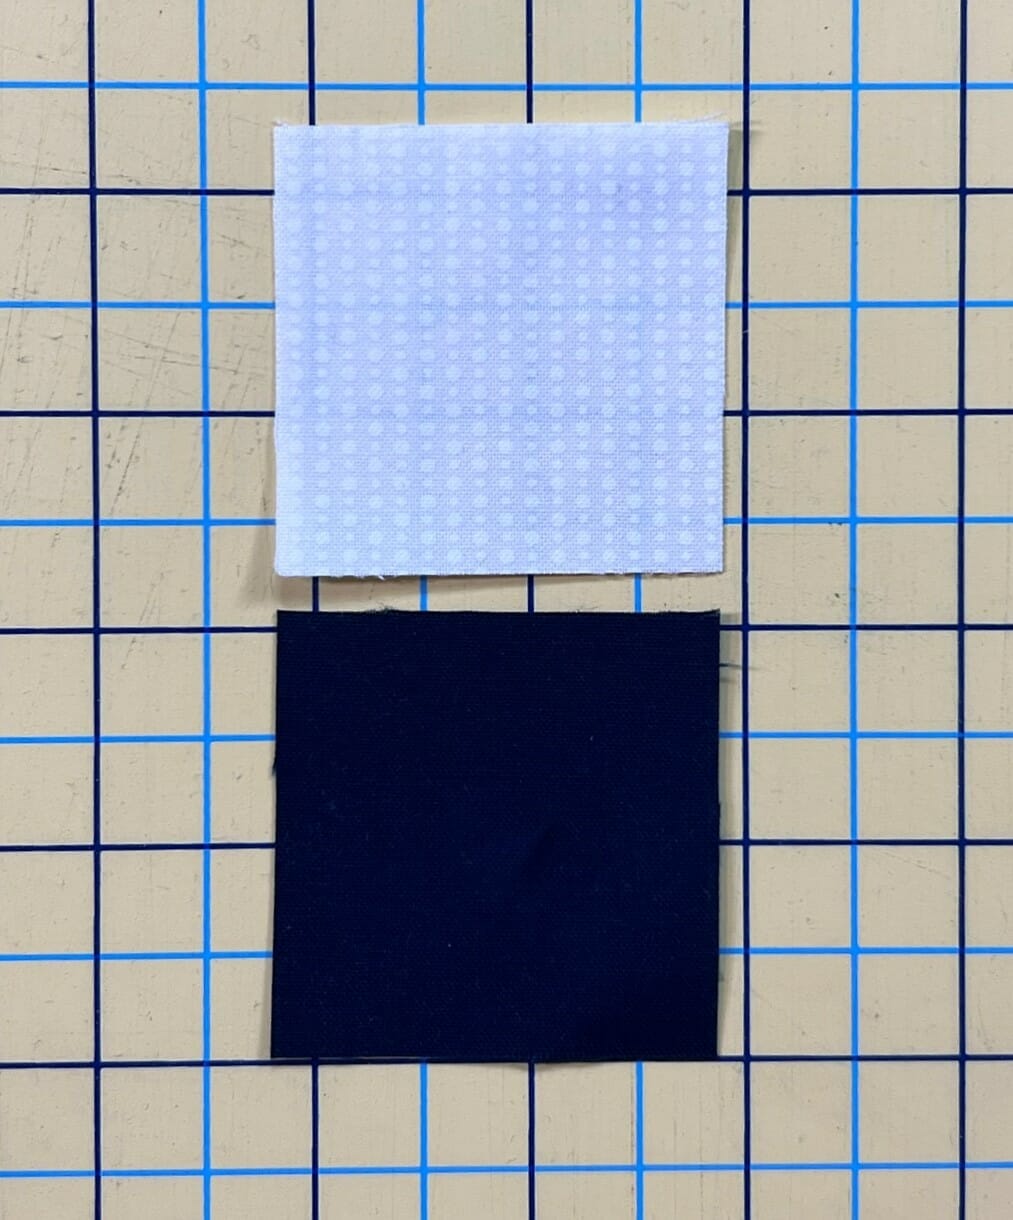
In step 3 we will use the stitch and flip method to make some smaller triangle corners for our D squares. I like to sew just barely outside the line, closest to the side of the corner. This helps to ensure that my corners won’t come up short once I’ve trimmed and pressed them.
I always check my sewing before trimming anything by folding the square along the seam to make sure the corners line up.
Also, be mindful on this step that you press the first triangle inward, and the second triangle outward. This will allow the seams to nest together in step 4.

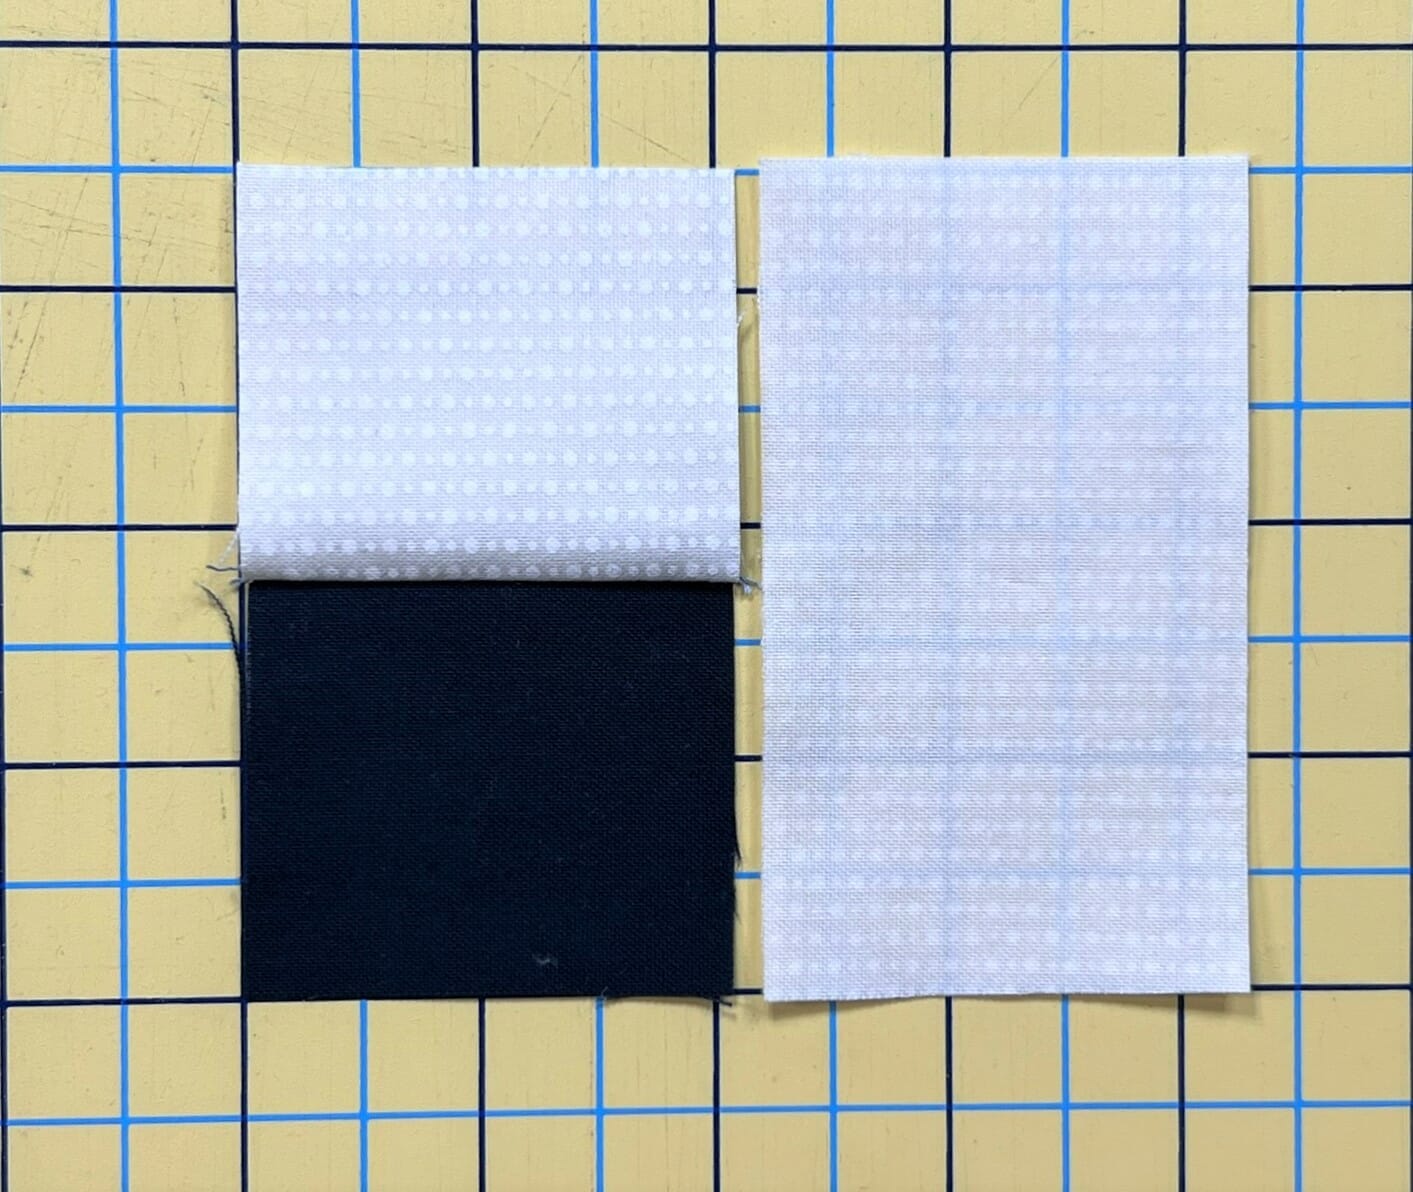
Steps 5 and 6 are pretty straightforward. We just sew a couple of squares together and then attach a rectangle to the side to make our four corner units for the block. Even though these are simple, it’s still important to check your measurements when done to make sure these are 3-1/2” square.
Now we can put all the units together to make the block. Start by sewing the paired C/D units to the sides. If everything has been pressed accordingly, the seams for the C/D units should nest with the pinwheel seams. If not, just re-press the C/D unit seams the other direction. It won’t make a bit of difference when we assemble the quilt later.
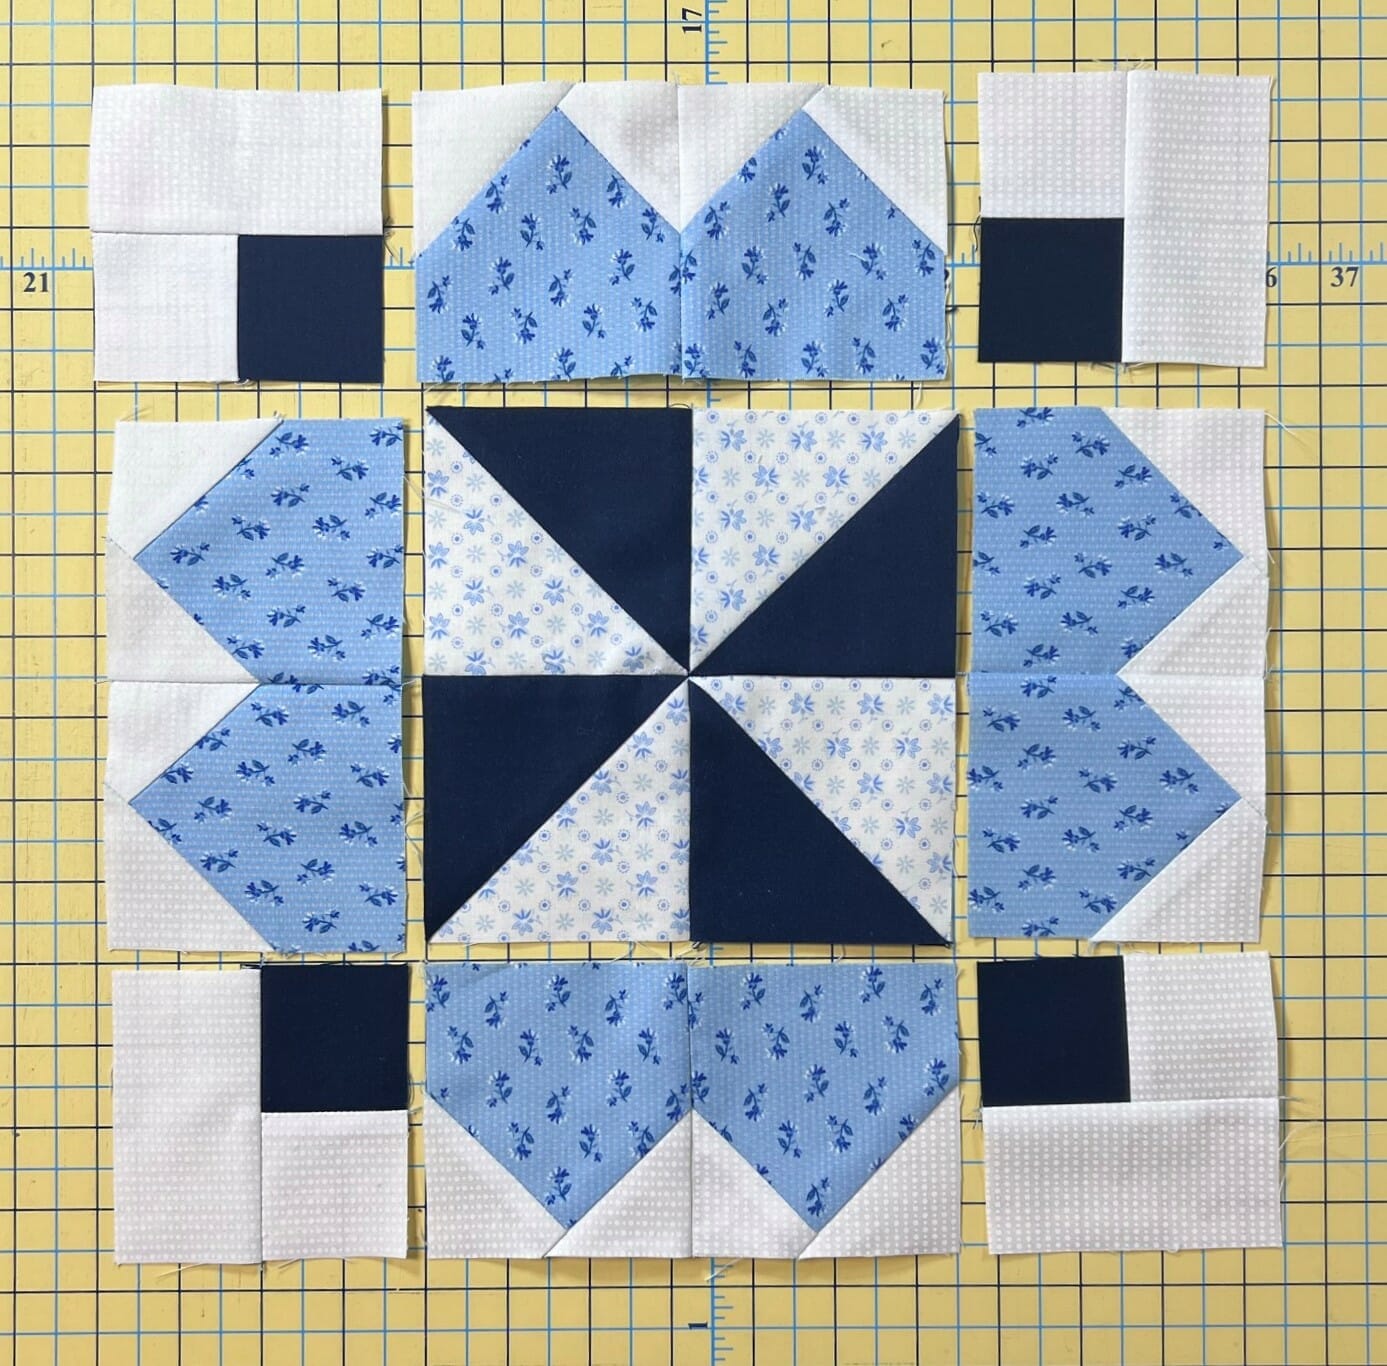
Next, sew the corner units to the sides of the remaining C/D units, and then sew those to the top and bottom of the center unit. All finished! If everything has gone according to plan, your block should measure at 12-1/2” square.
Block 8
You’ll be able to make this block in a jiffy! You’ll first make some more Half Square Triangles. Whenever I’m making Hourglass units (sometimes called Quarter Square Triangle units), I hold off on trimming anything until they are completely done. So for me, I won’t trim my HSTs at the end of step one. I like that I get a bit more wiggle room for getting them perfect at the end.
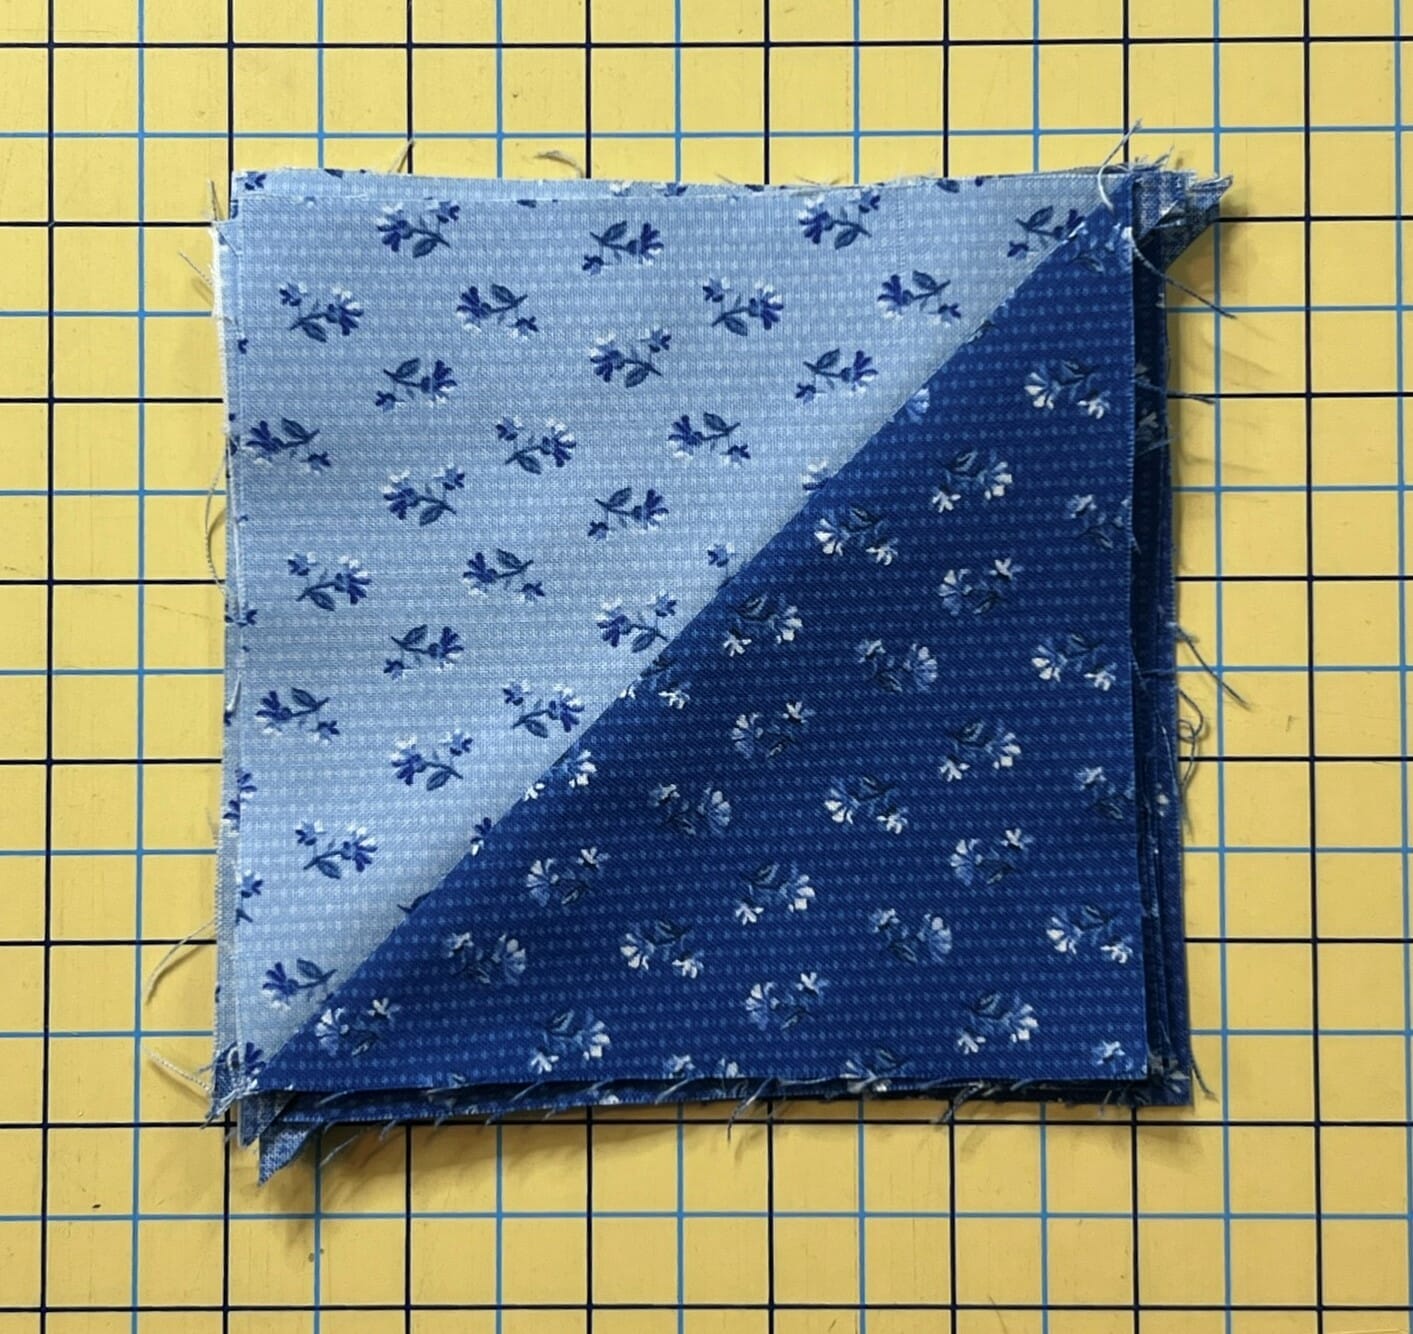
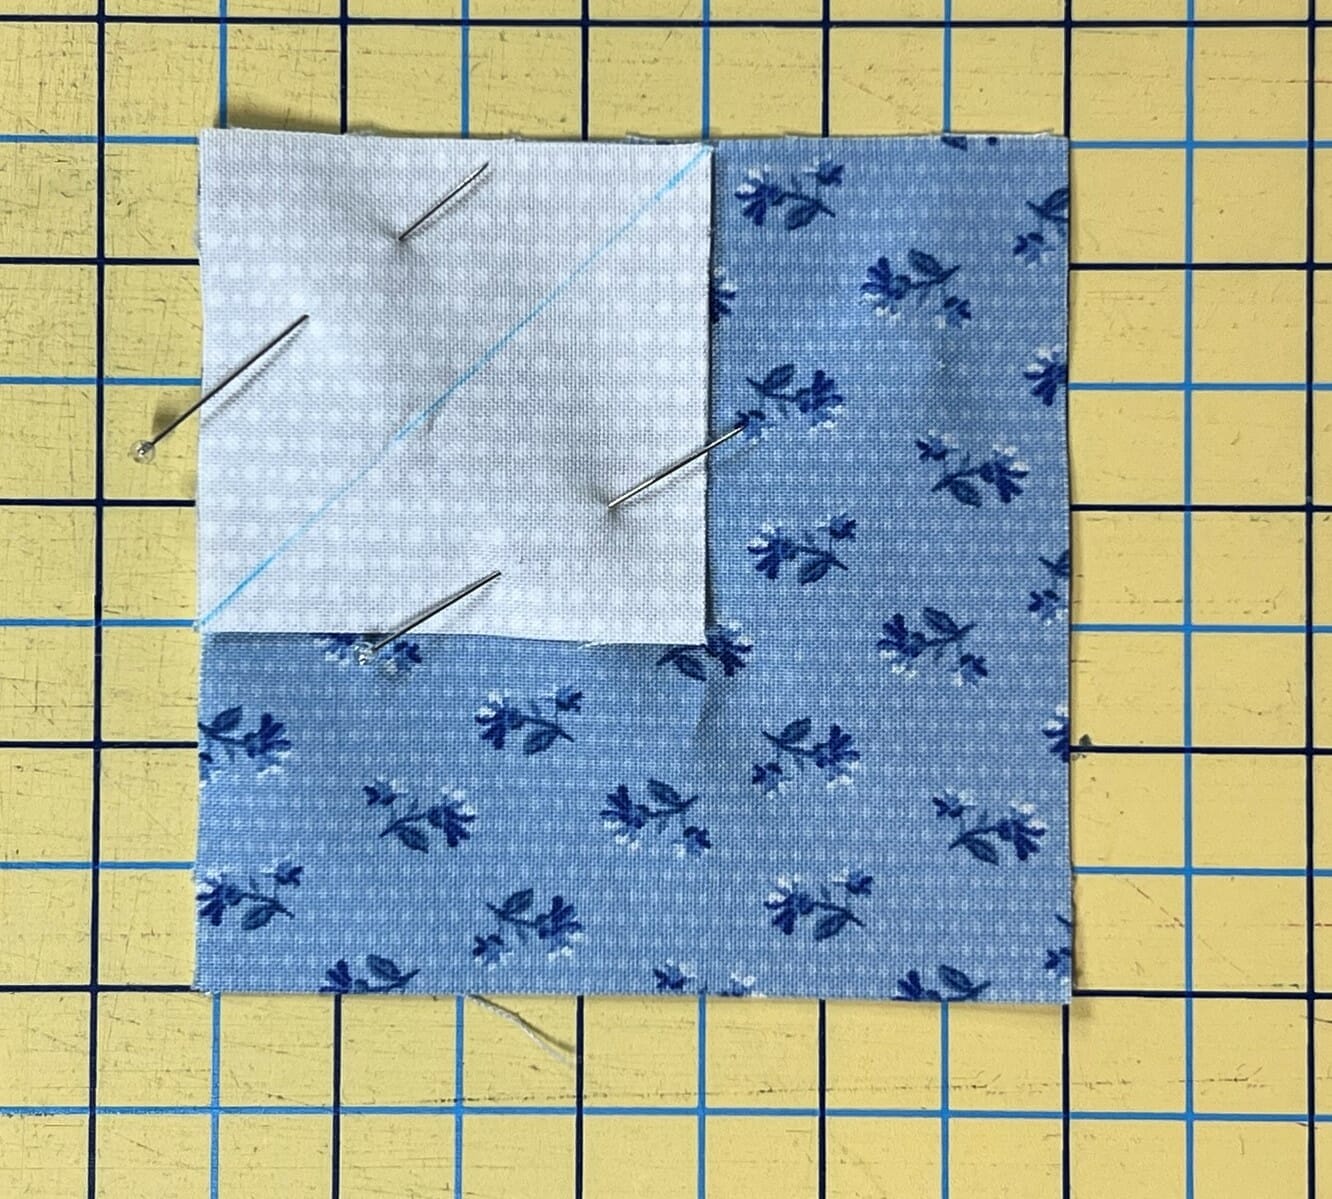
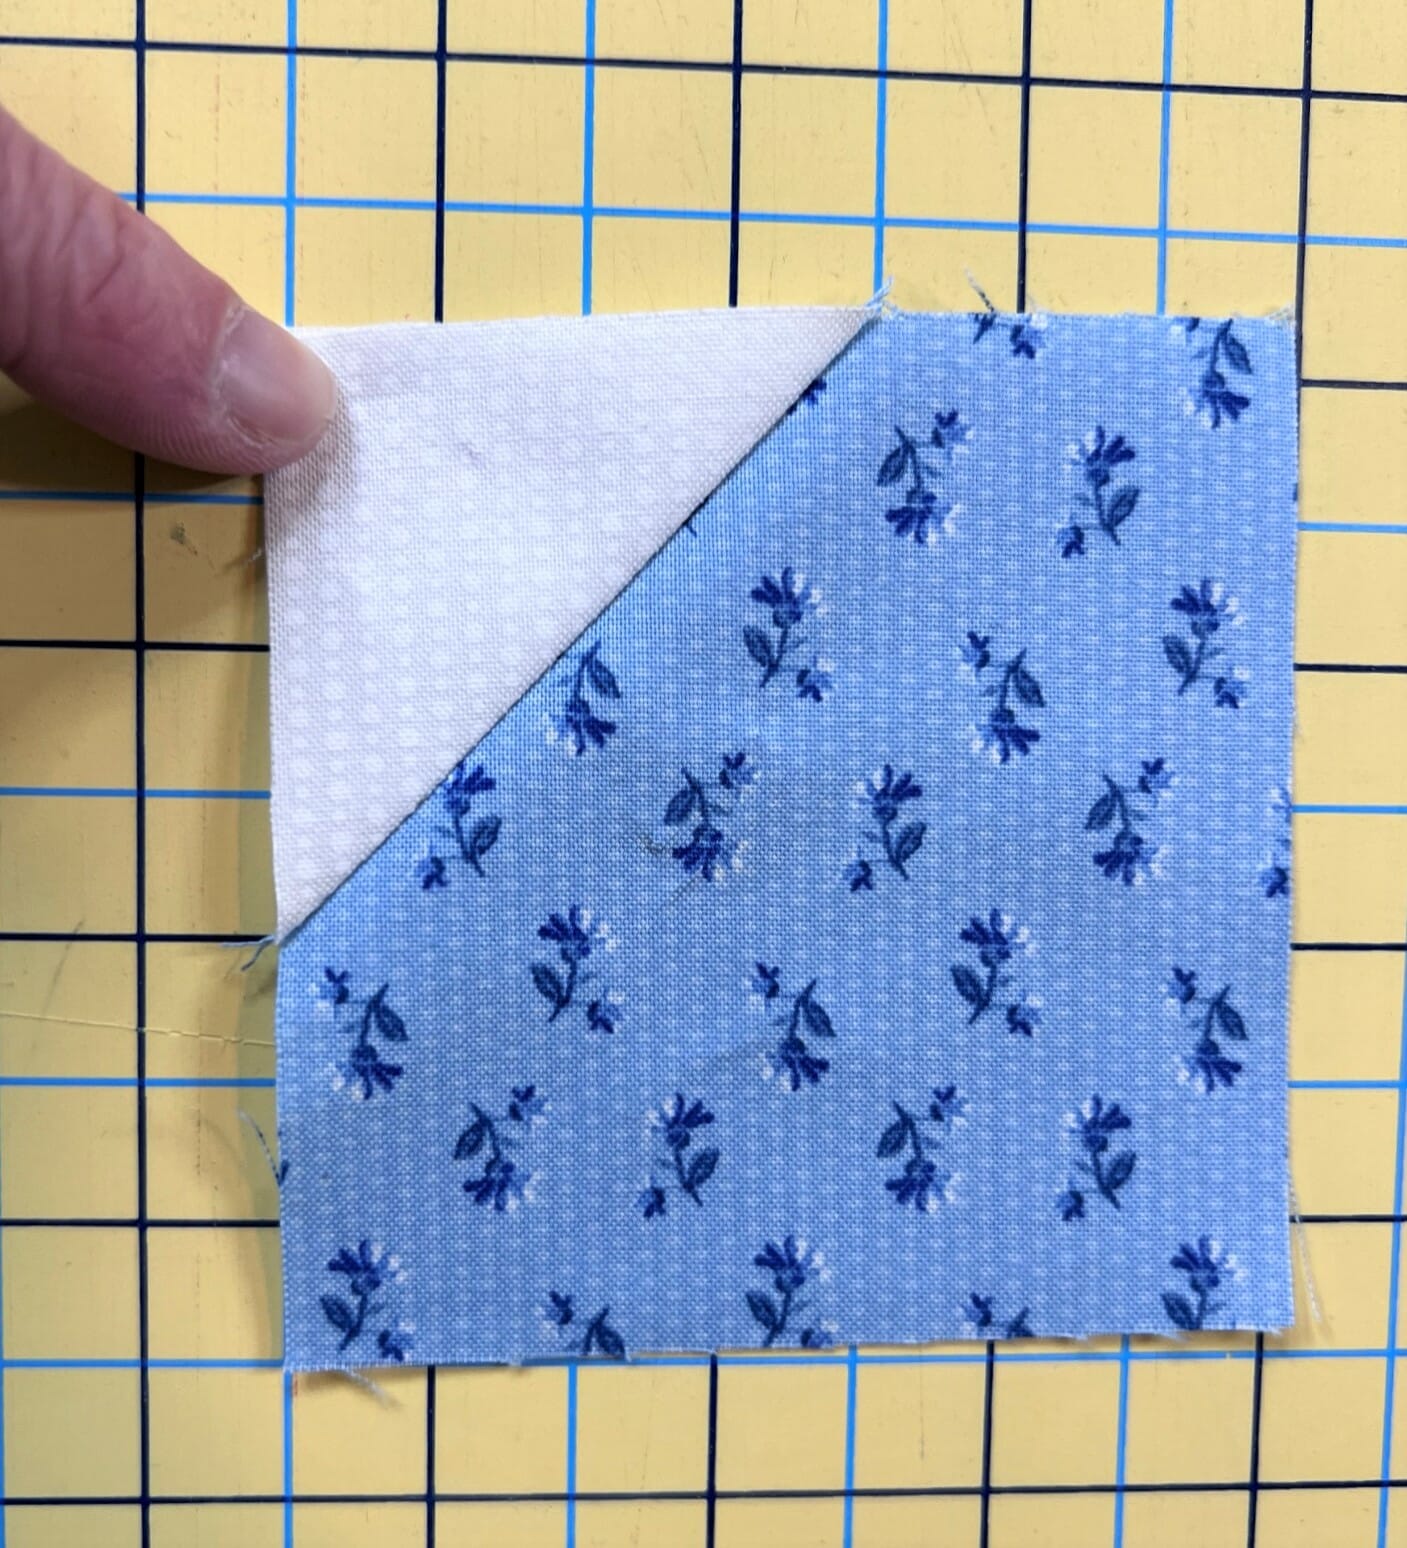
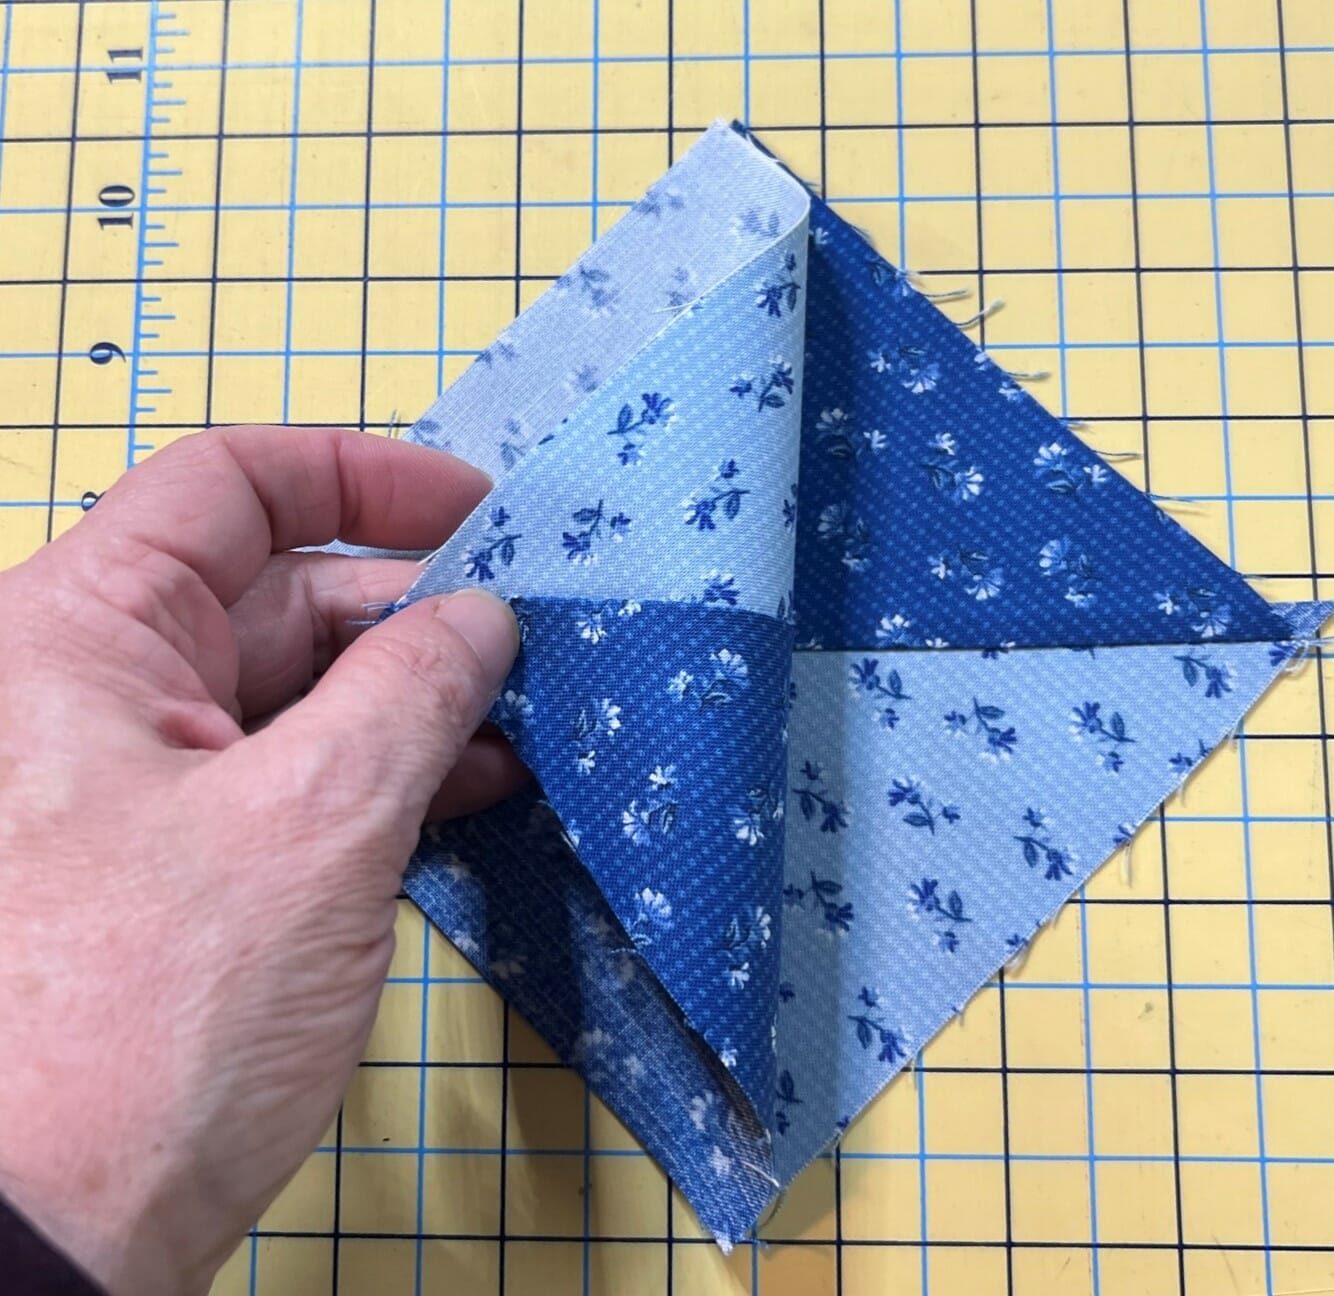
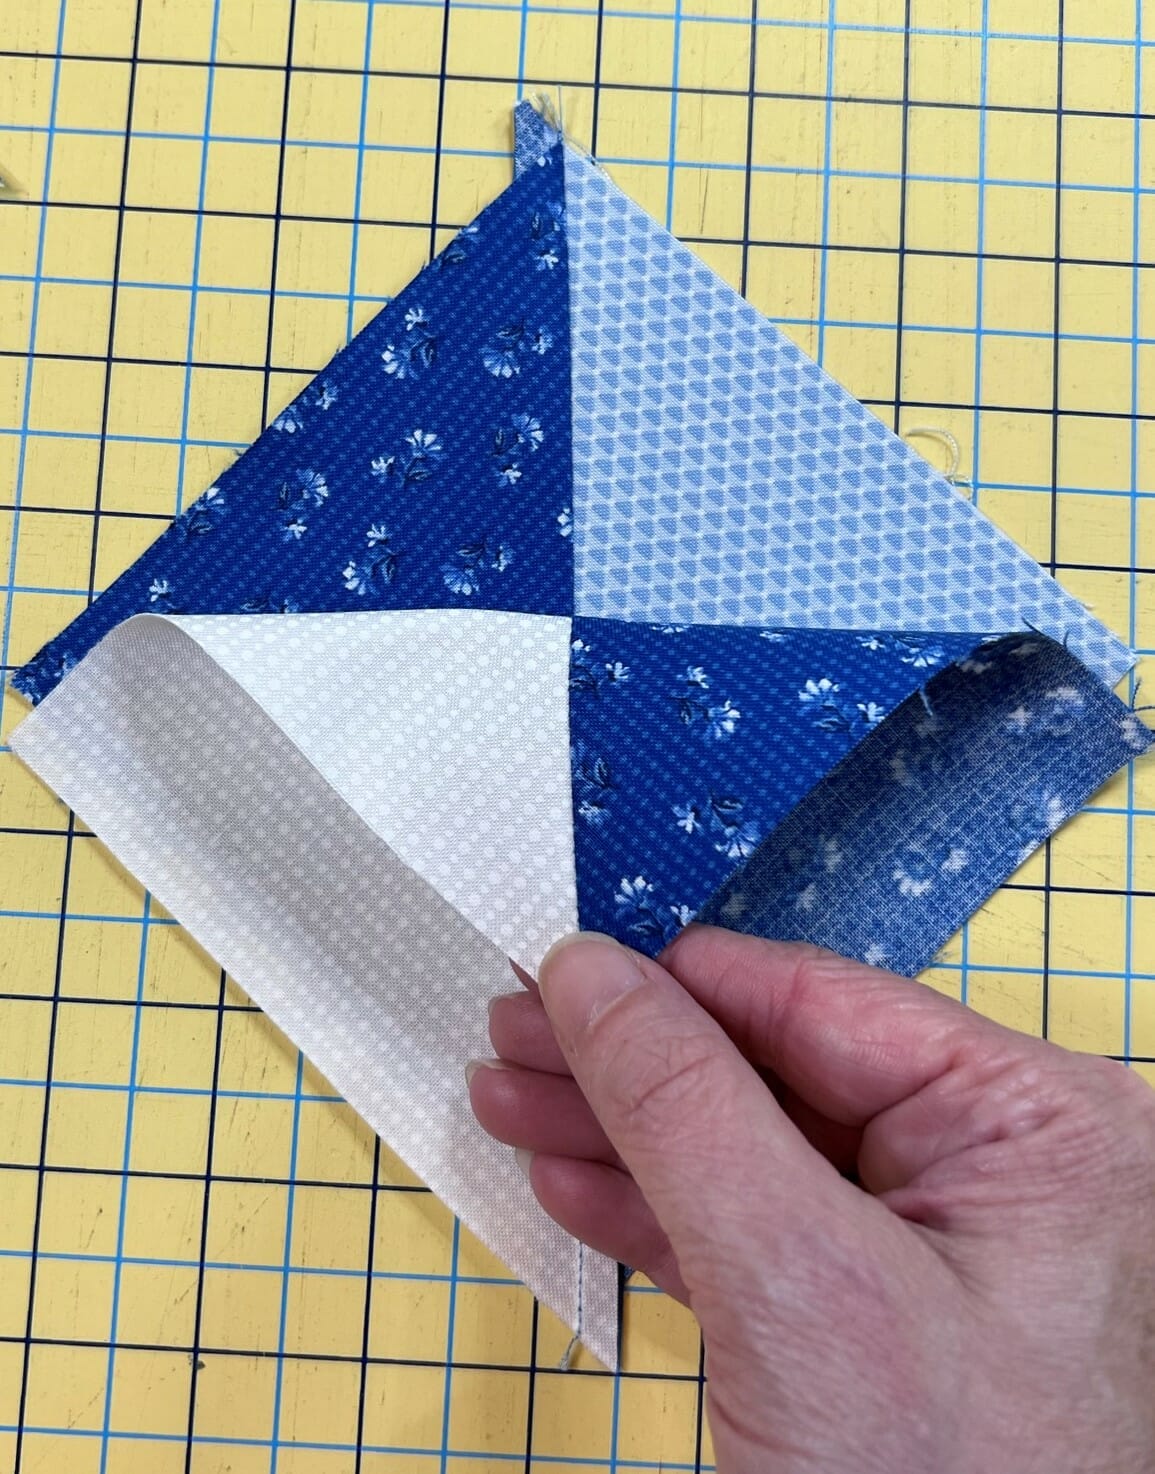
So once my HSTs are done, I’ll pair them up together and draw a perpendicular line. You don’t want to like fabrics on top of one another, but rather to be on opposite sides. You can check to make sure you’re pinning these together properly by peeling back the top layer. You want to see the hourglass like so:
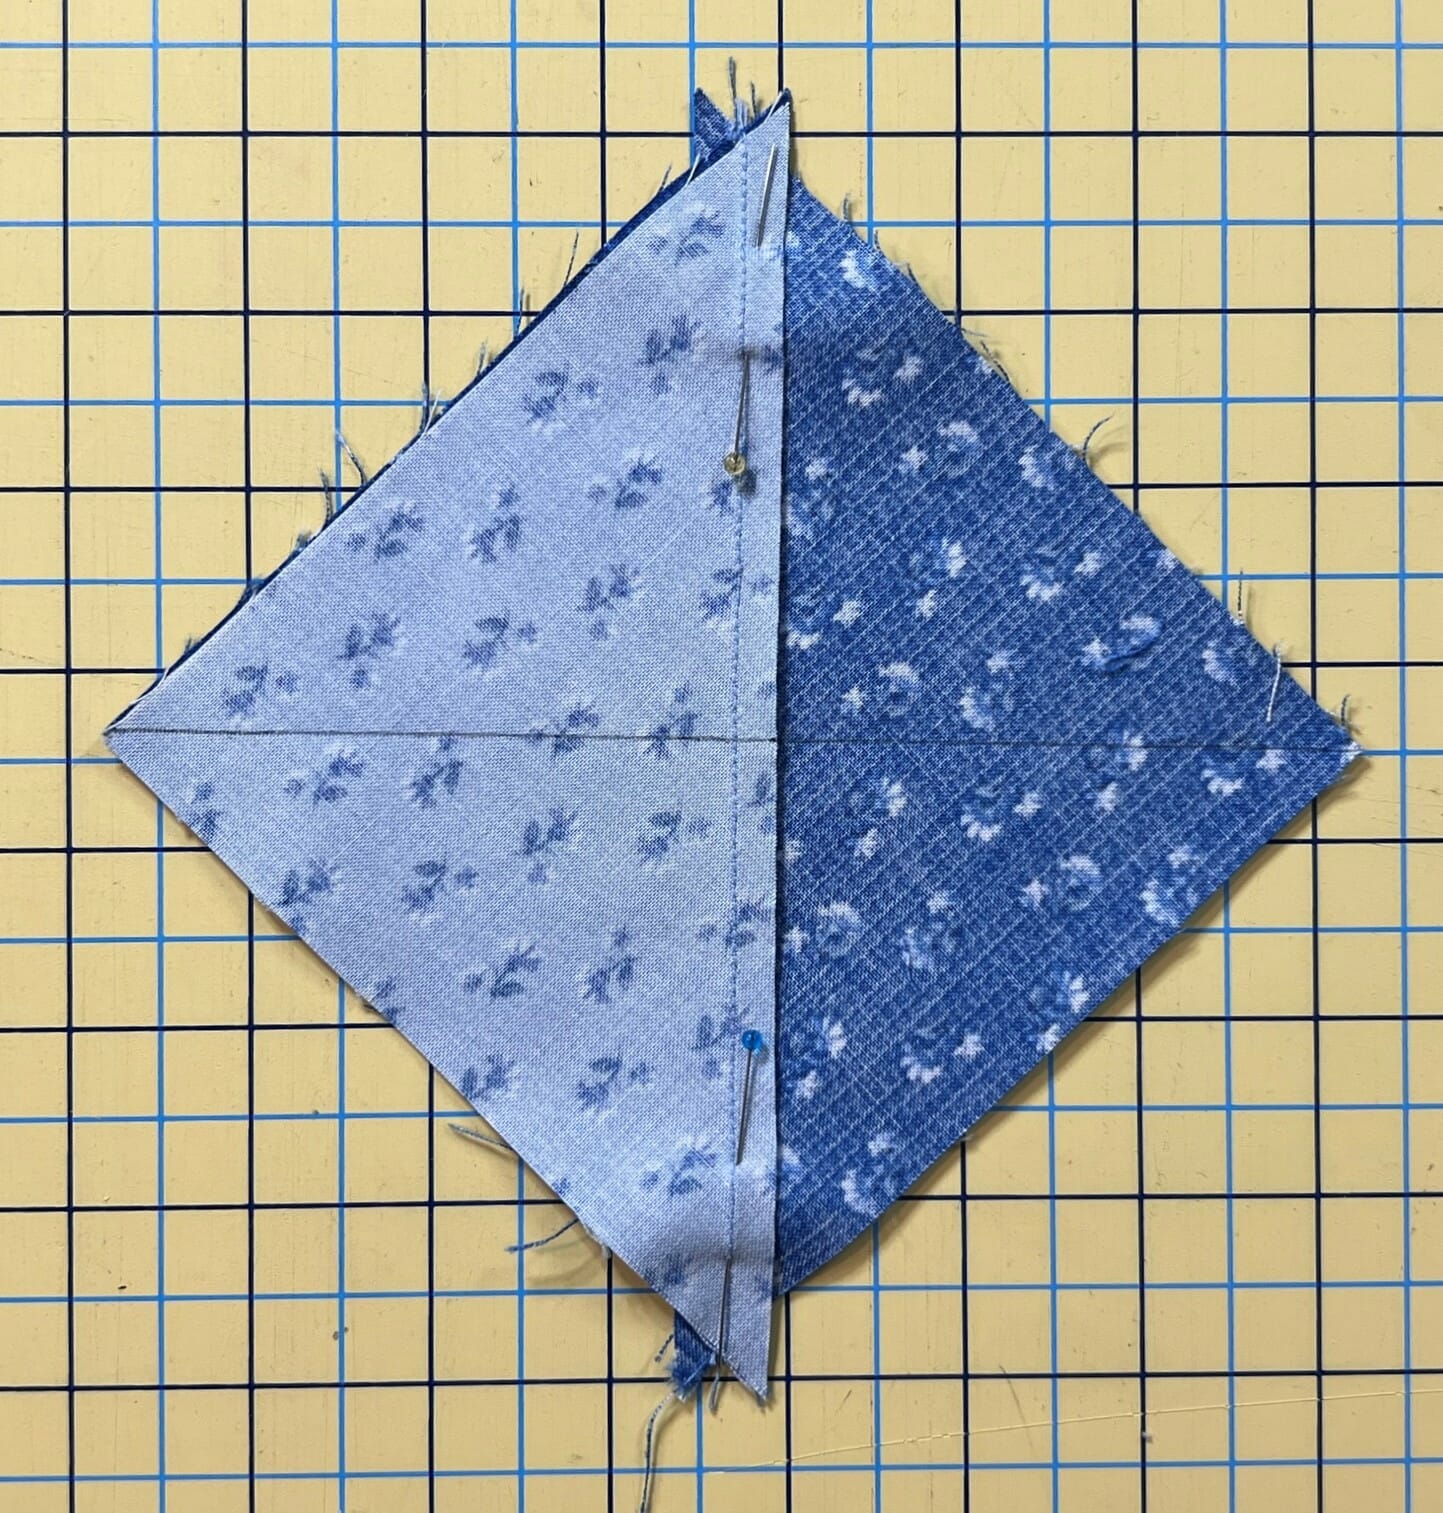
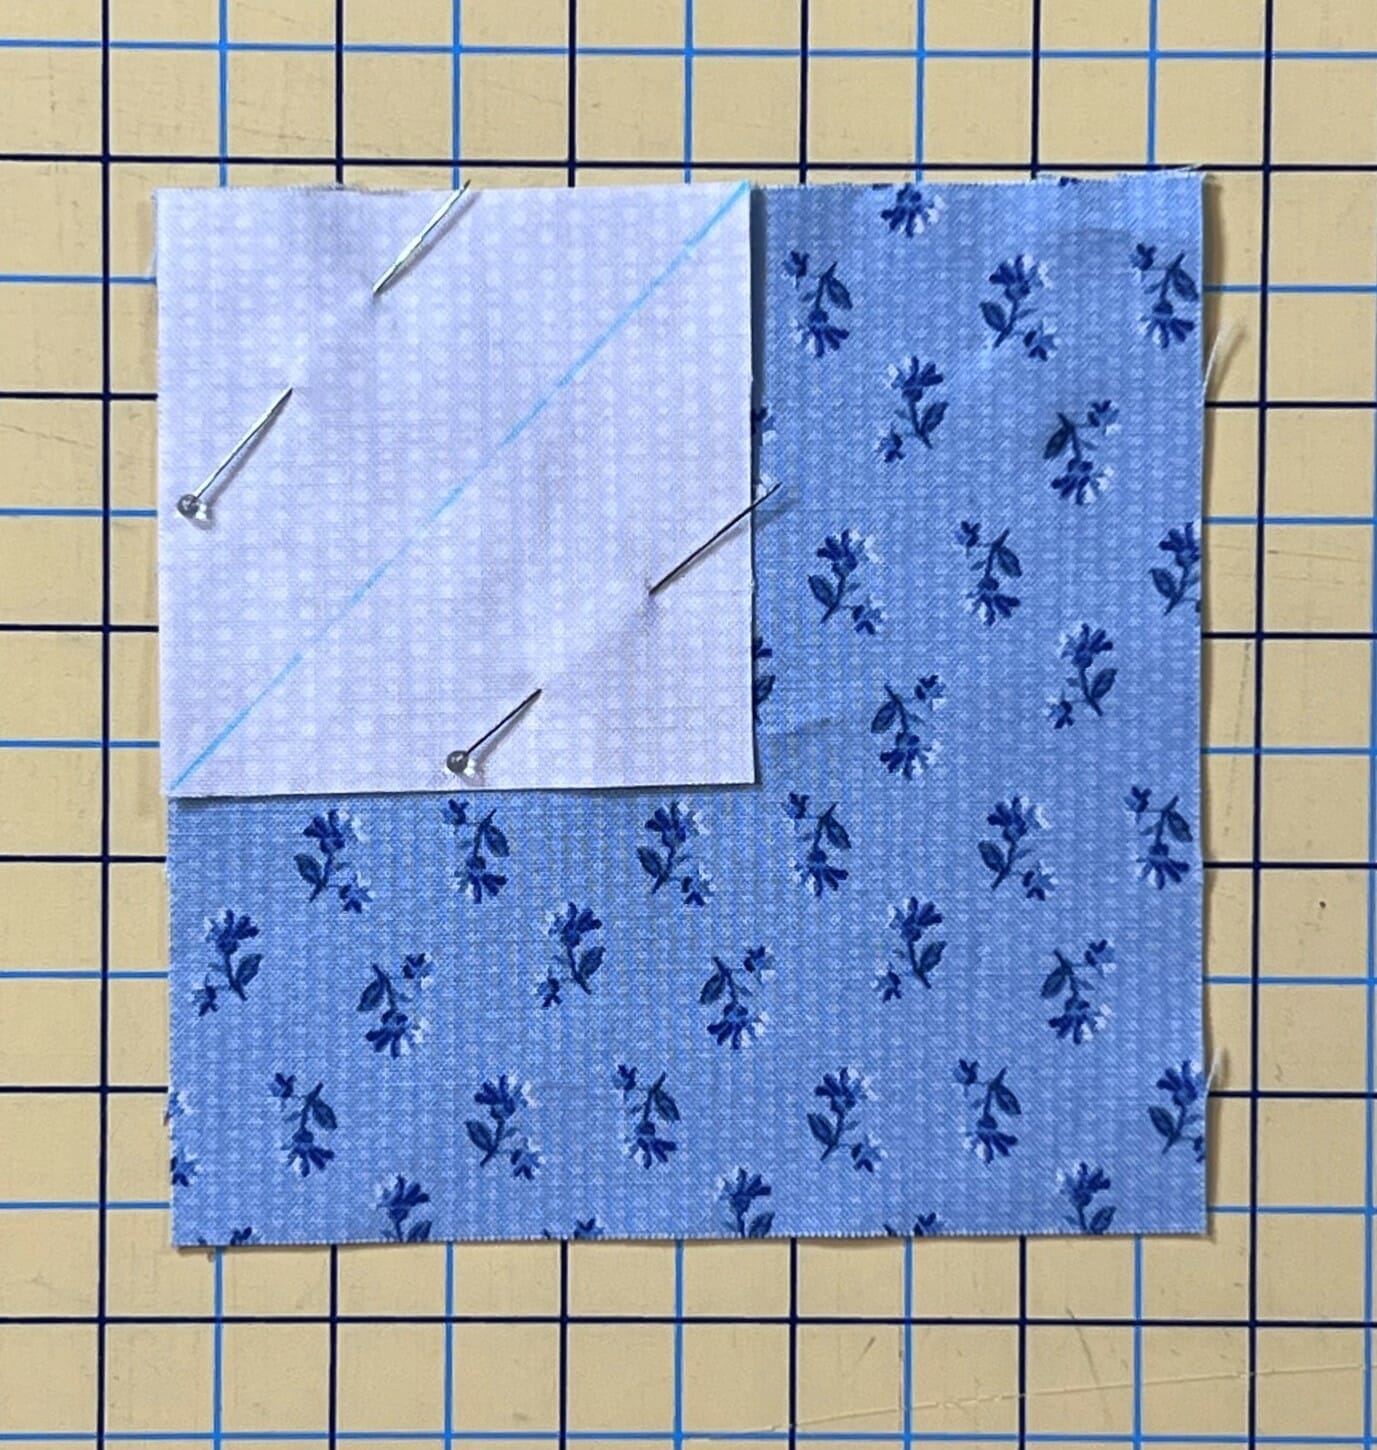
Here you can see that I’ve pinned everything in place, and have my line drawn. I also realized later, that I drew my line on the opposite side from what my diagram shows in the pattern. It doesn’t matter which side you mark your line on, so long as the line is perpendicular to the seam for the HSTs.
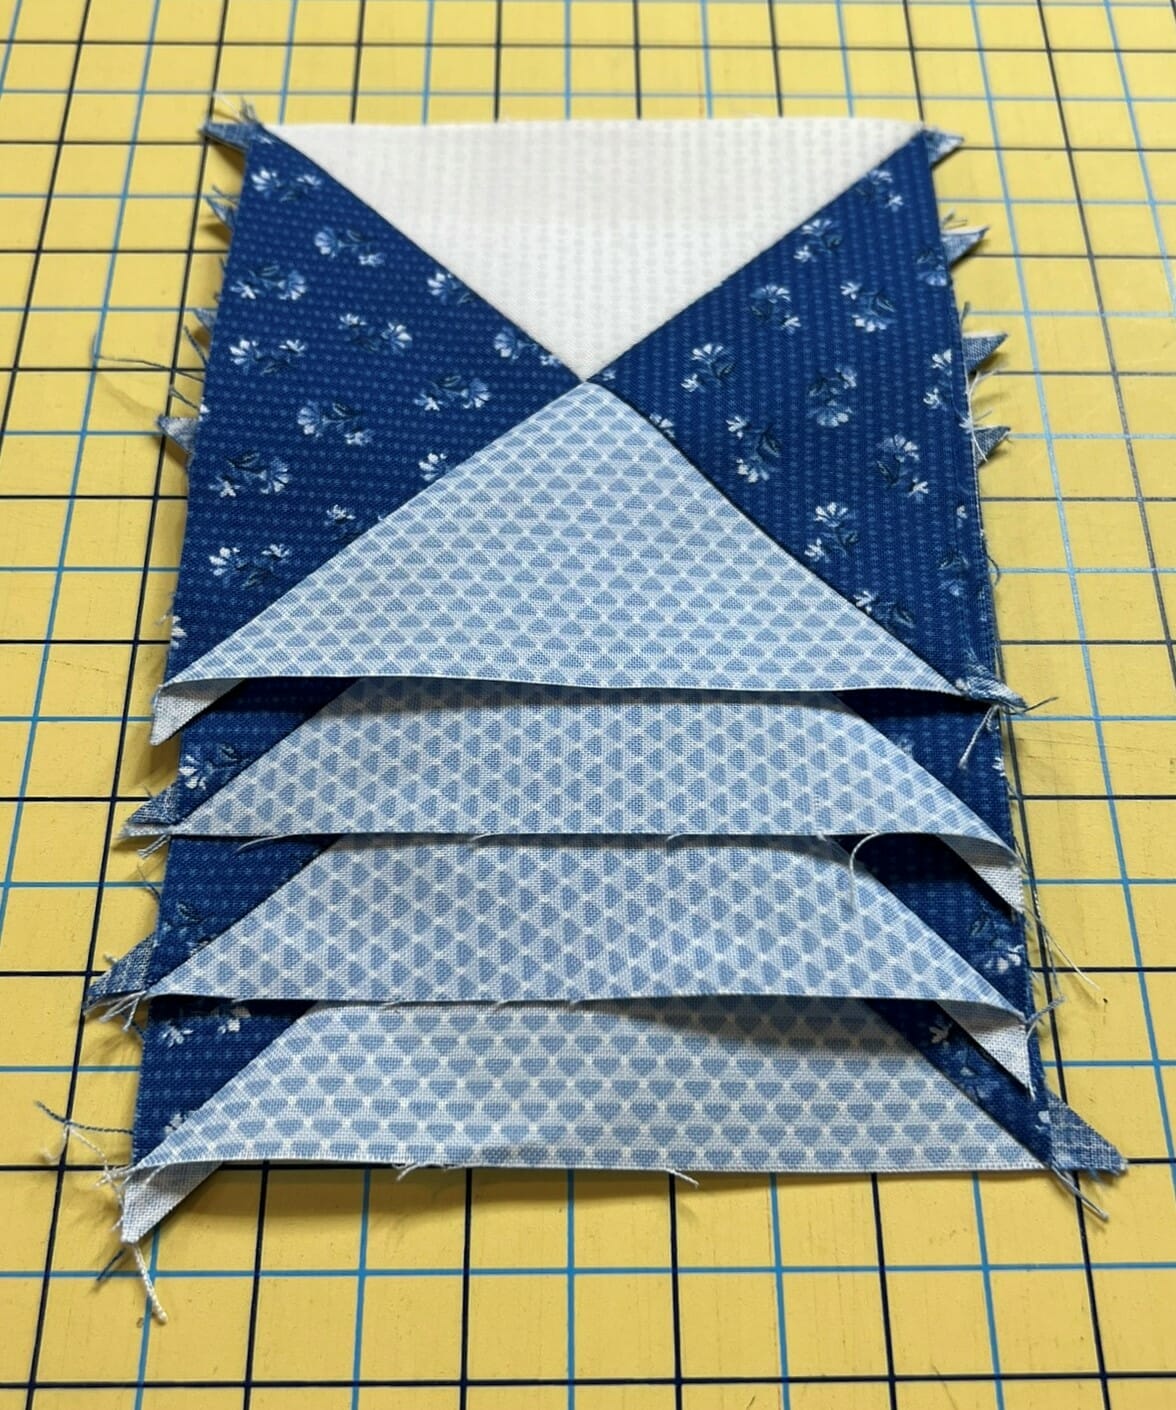
After sewing on each side of the marked line, simply cut ON the line, and then press these open to reveal your Hourglass units.

Now they just need a trim before I lay everything out.
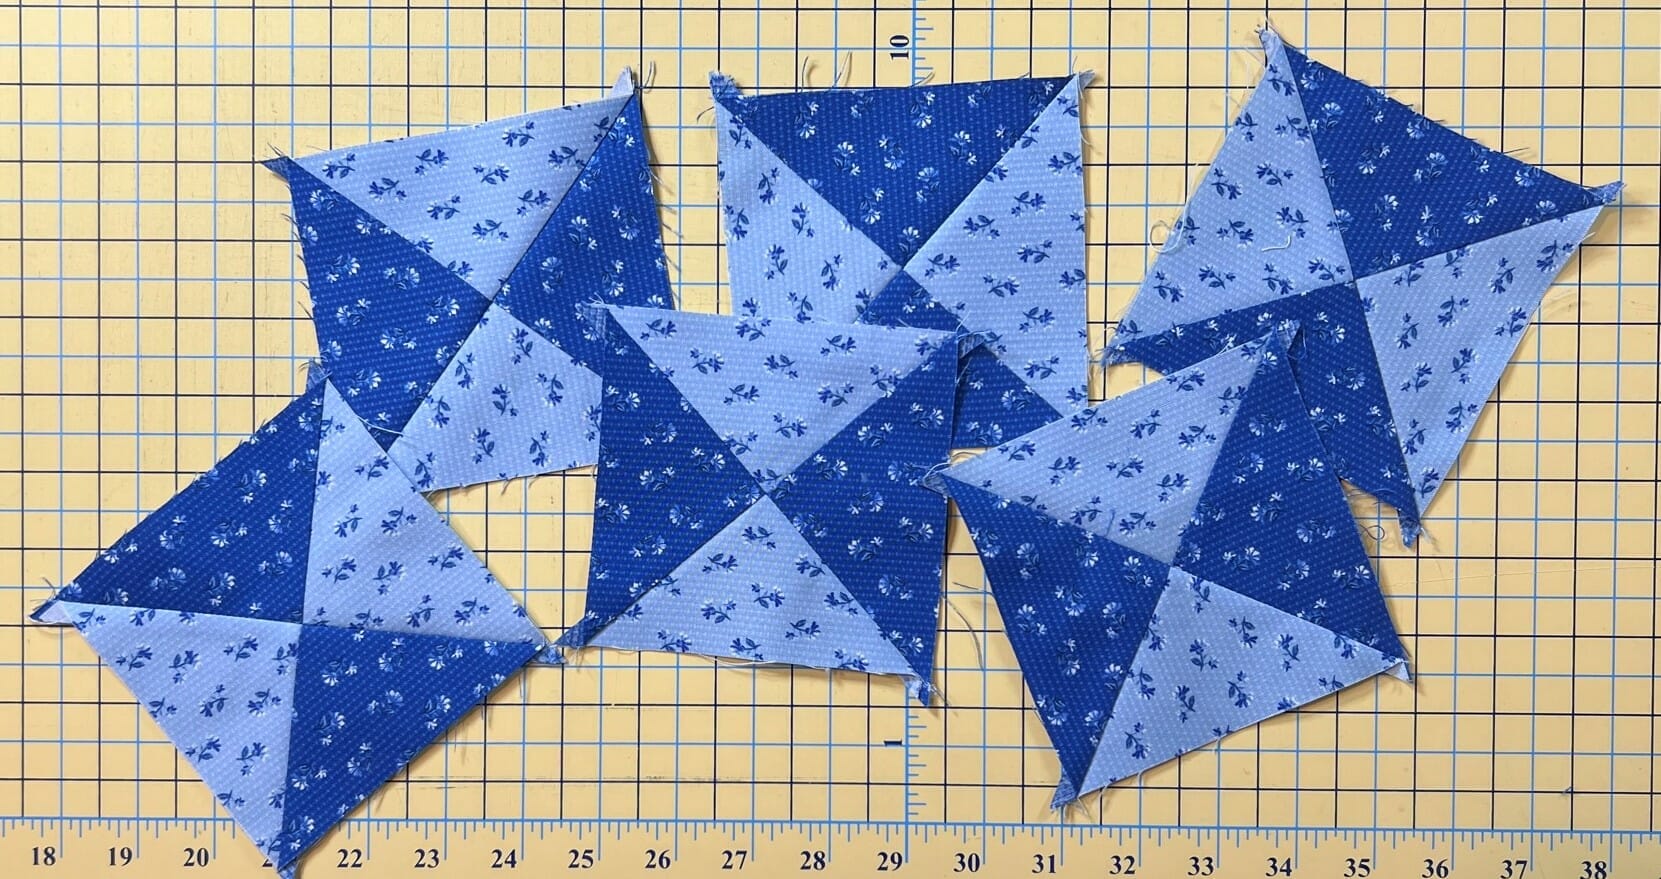
I don’t want any of my hourglass blocks to be turned the wrong way, so I like to double check everything before I begin pinning and sewing. And now the block is done! Easy Peasy!
Block 11
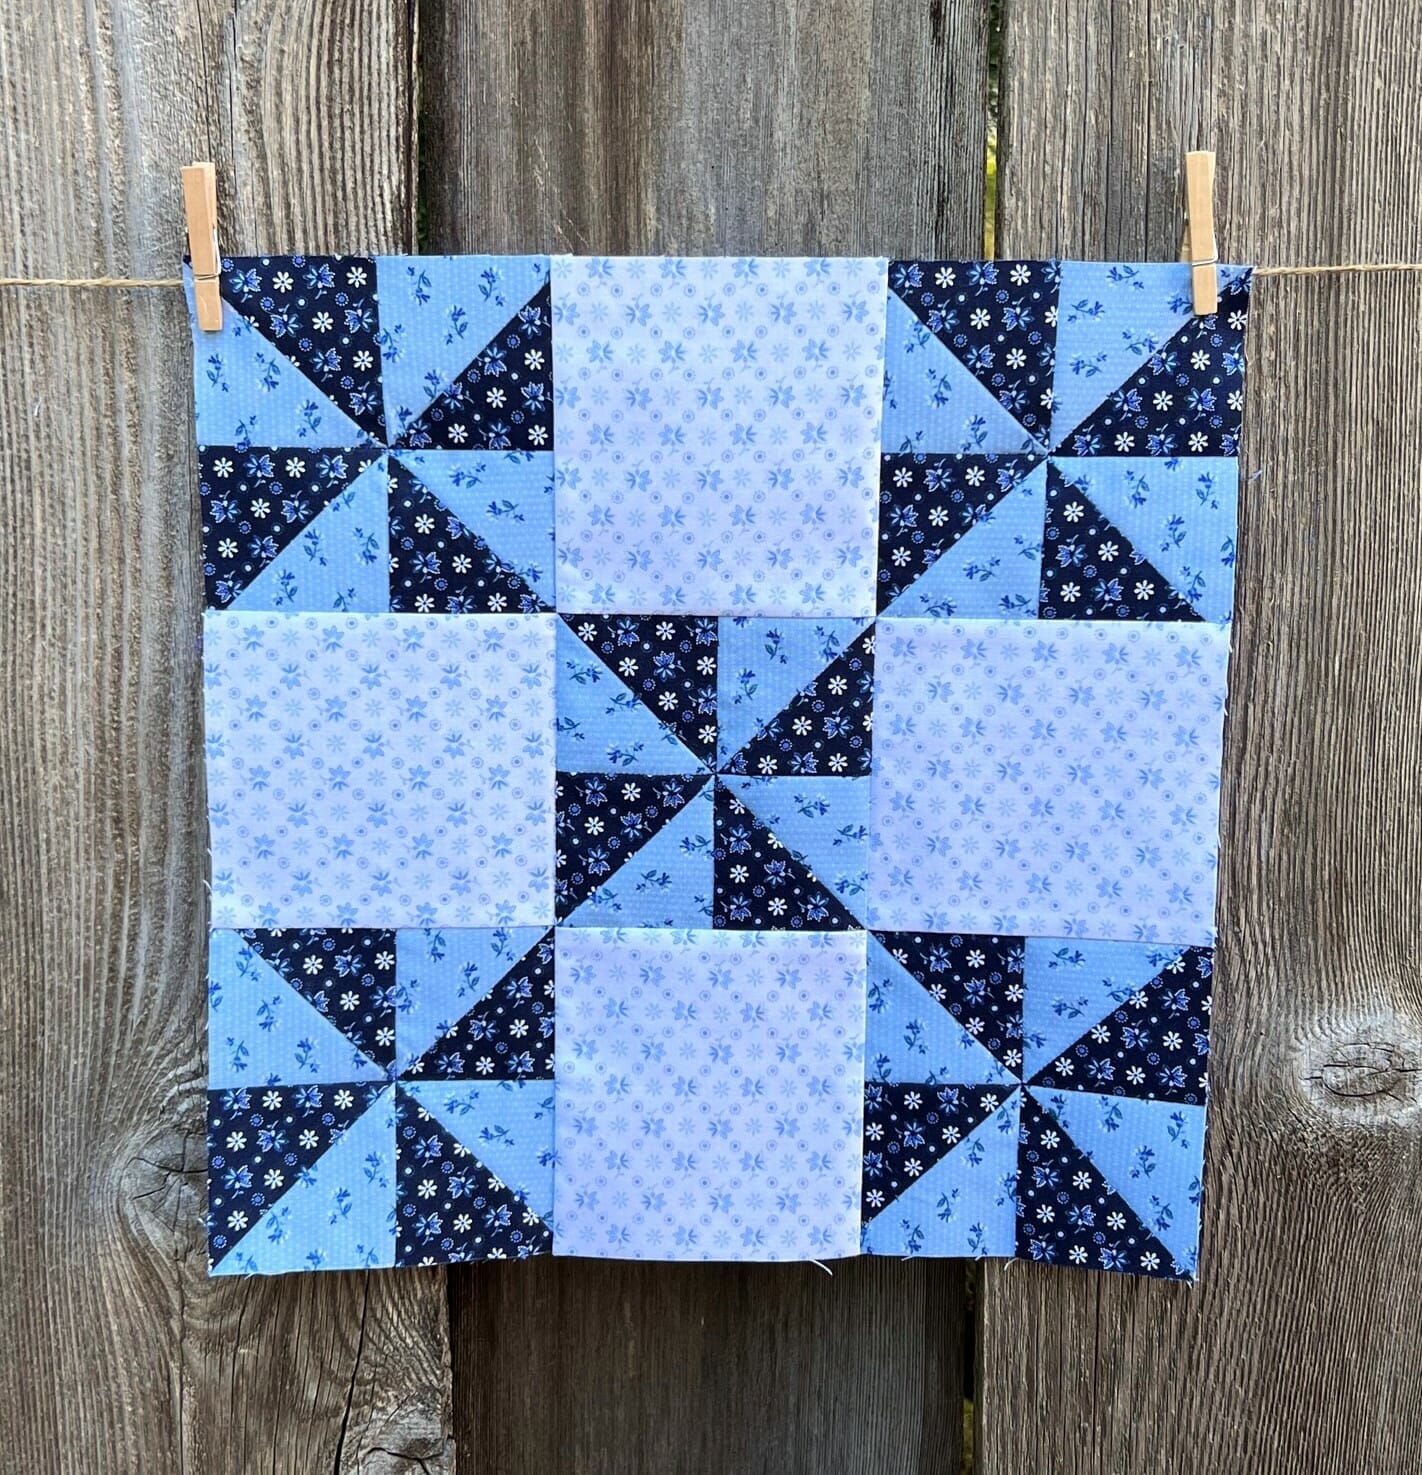
This block is almost like block 8, except that we’ll be swapping out those hourglass units for pinwheels instead. I love pinwheels in my quilts!
These pinwheels are made just like the ones we made in our first block (#5), only they’re a bit smaller, so I won’t bore you by repeating the pinwheel tips I gave earlier.

Again, I laid everything out before sewing the C squares with the pinwheels to complete the block.

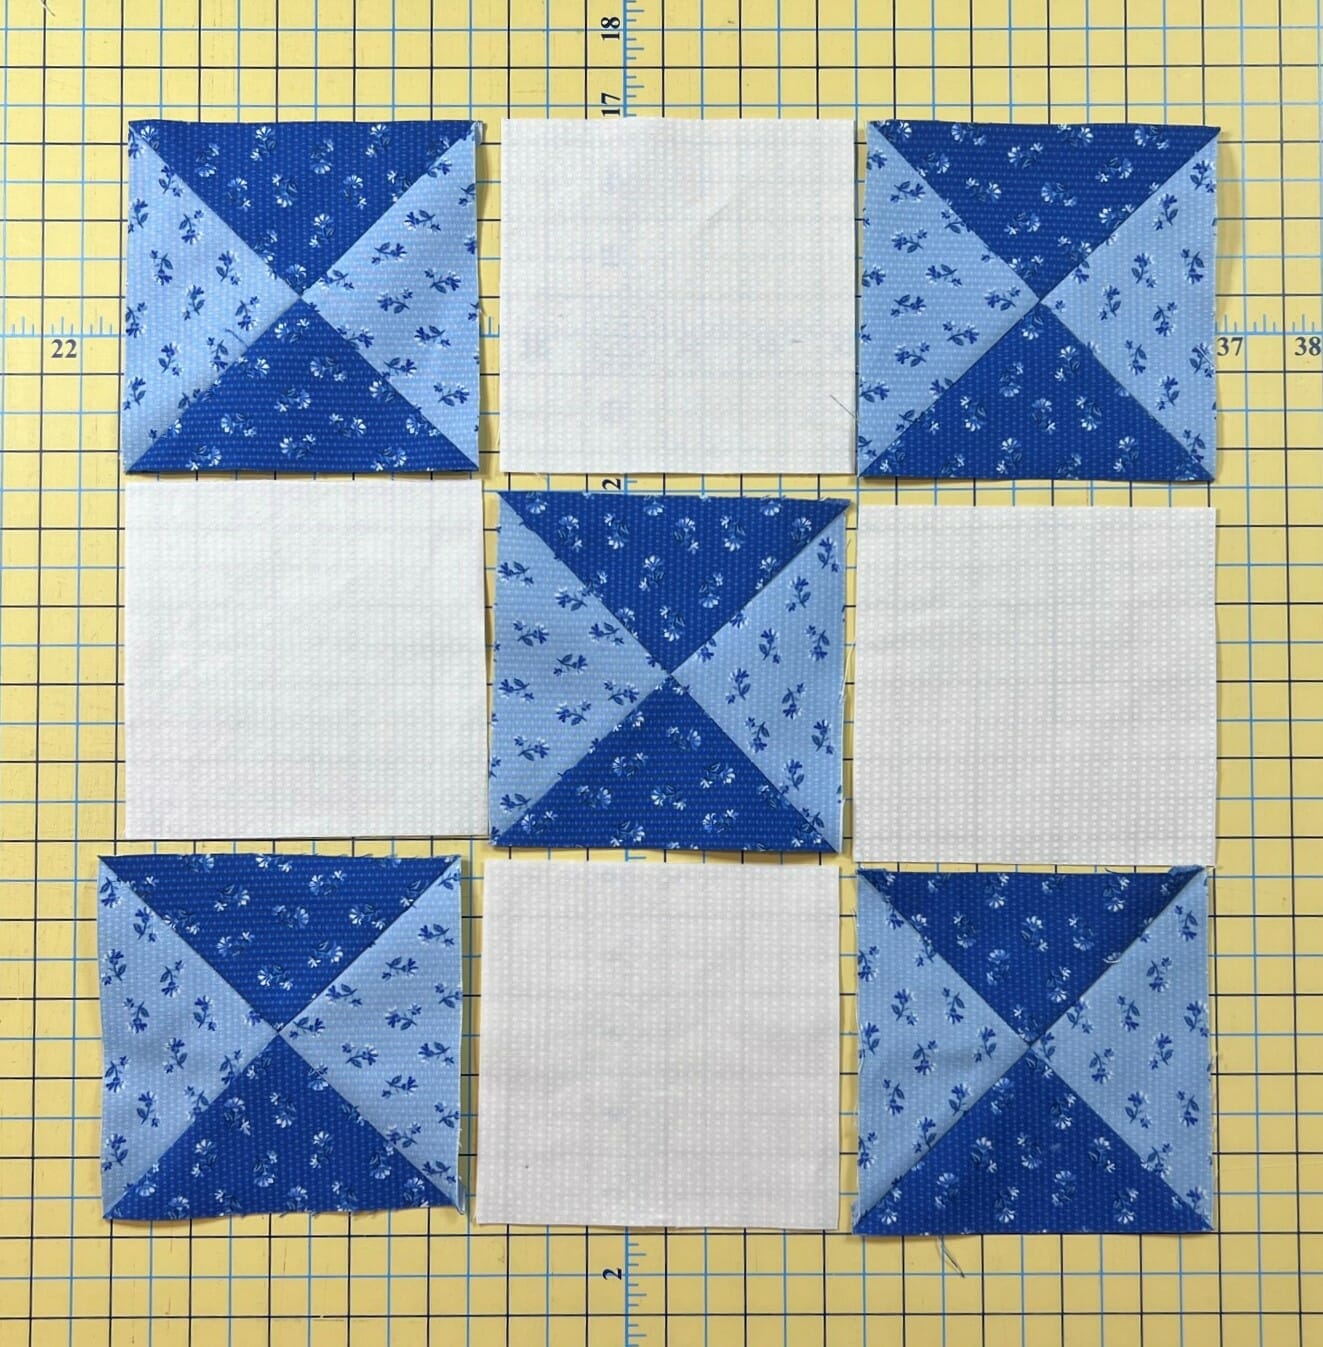
Block 18
Our last block for this month is an Ohio Star block.
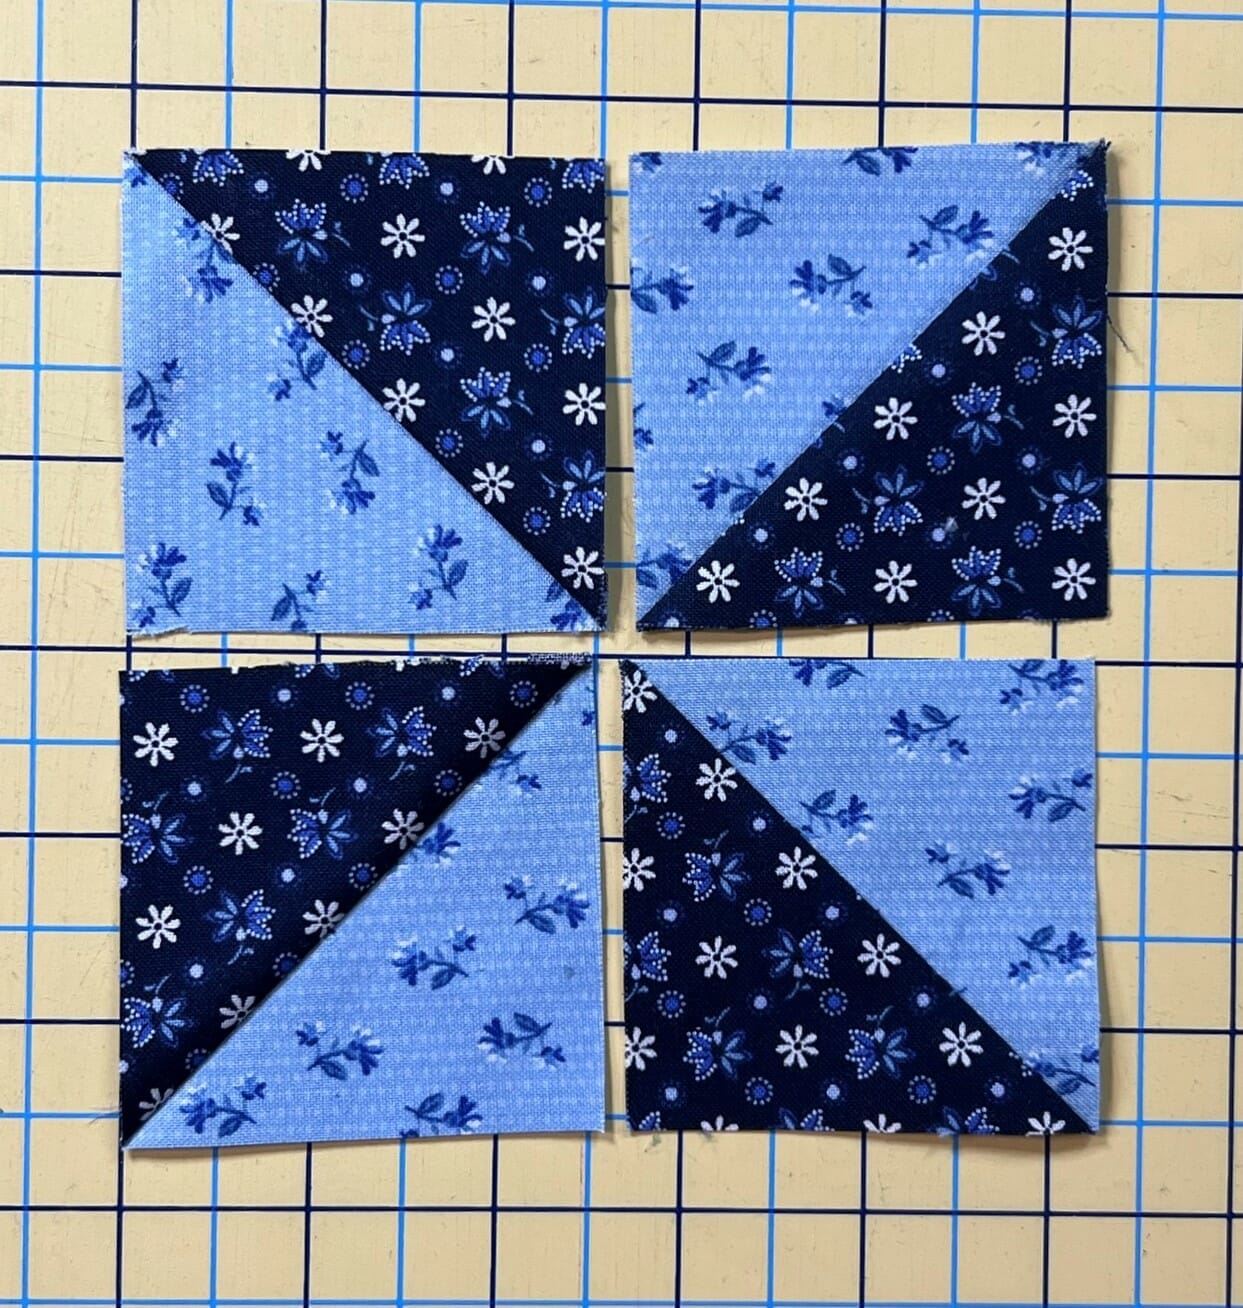
The first thing we’ll do is make more HSTs to turn into Hourglass units, just like we did for block 8. But this time we’ll make them in sets of two, one set will pair the Admiral Blue flower Chain fabric with the white background print, and the other set will use the same Admiral Blue print as before, but paired up with the Four Points Glacier fabric.

Once those are done (but not trimmed), we’ll pair up one of each unit to make our hourglass blocks. Just like before, you can check to make sure you’ve placed your HSTs properly by peeling back the top layer to check.
Next, pin everything in place, draw a perpendicular line, sew 1/4″ away from both sides of the line, then cut on the marked line, like you see below.

After they’re finished, just give them a quick trim to make sure they are 4-1/2” square.
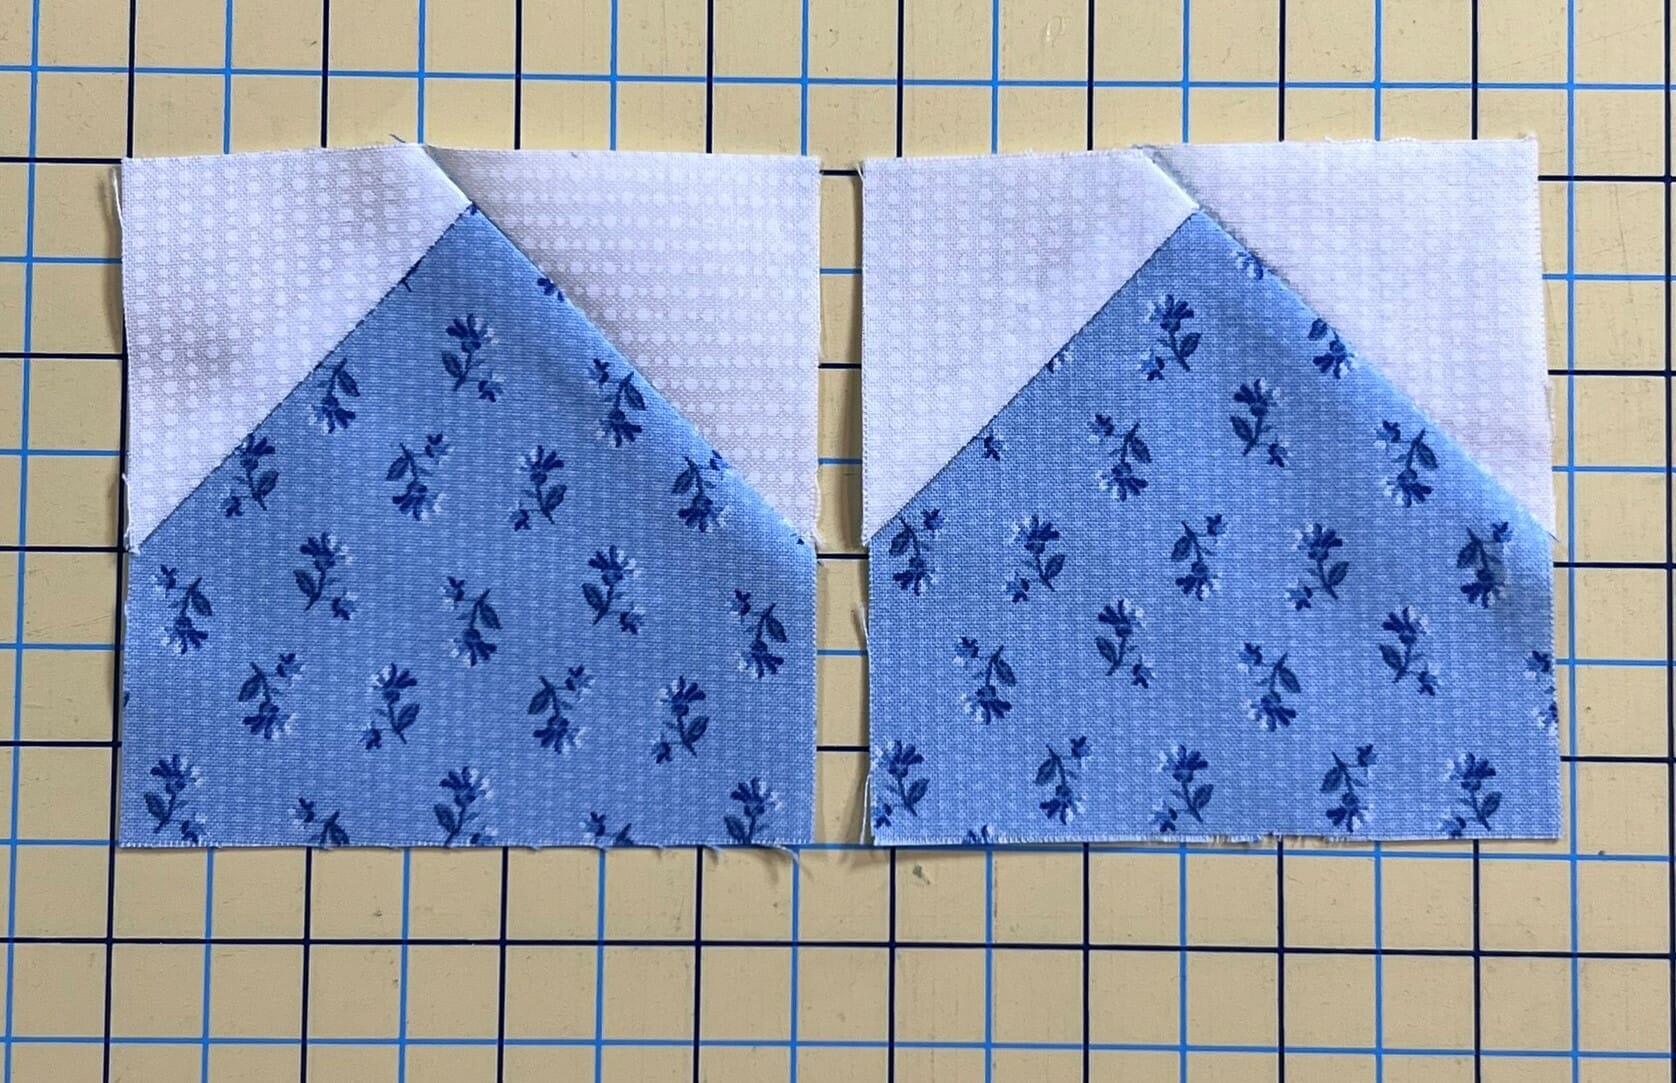
Our next units are made by pinning on two E squares- in the upper left and lower right corners of each D square. Sew on (or just outside the line like I mentioned doing in block 5), and trim the excess off before pressing outward. It actually doesn’t matter which way you press these, but I would definitely say that outward toward the corners makes the most sense.

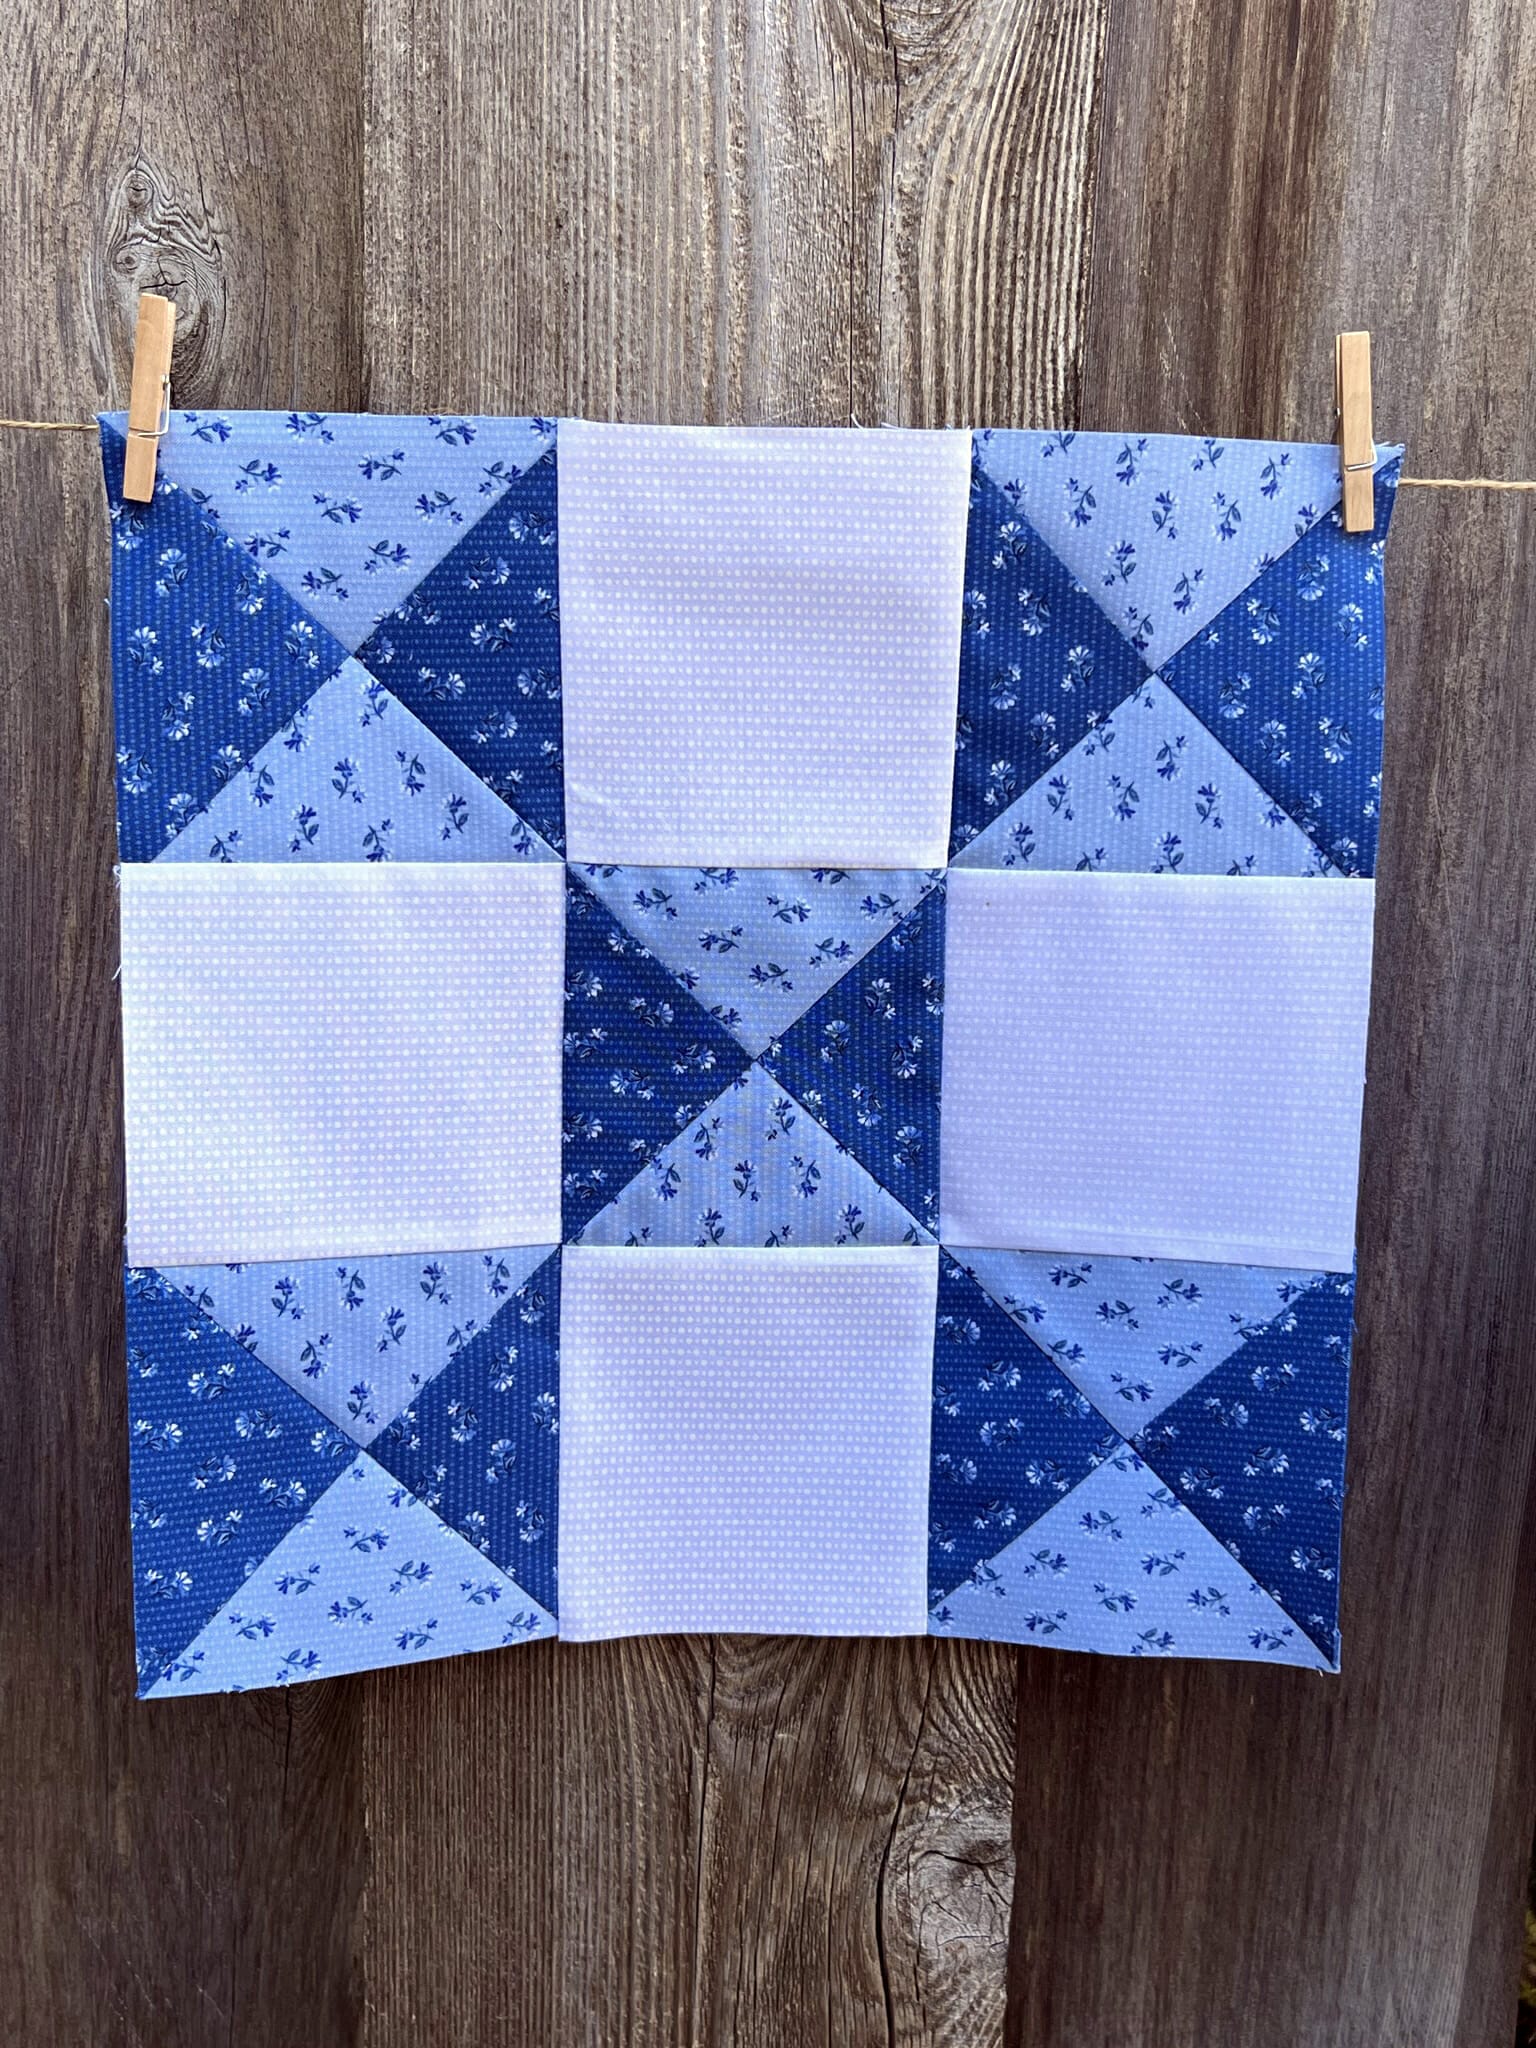
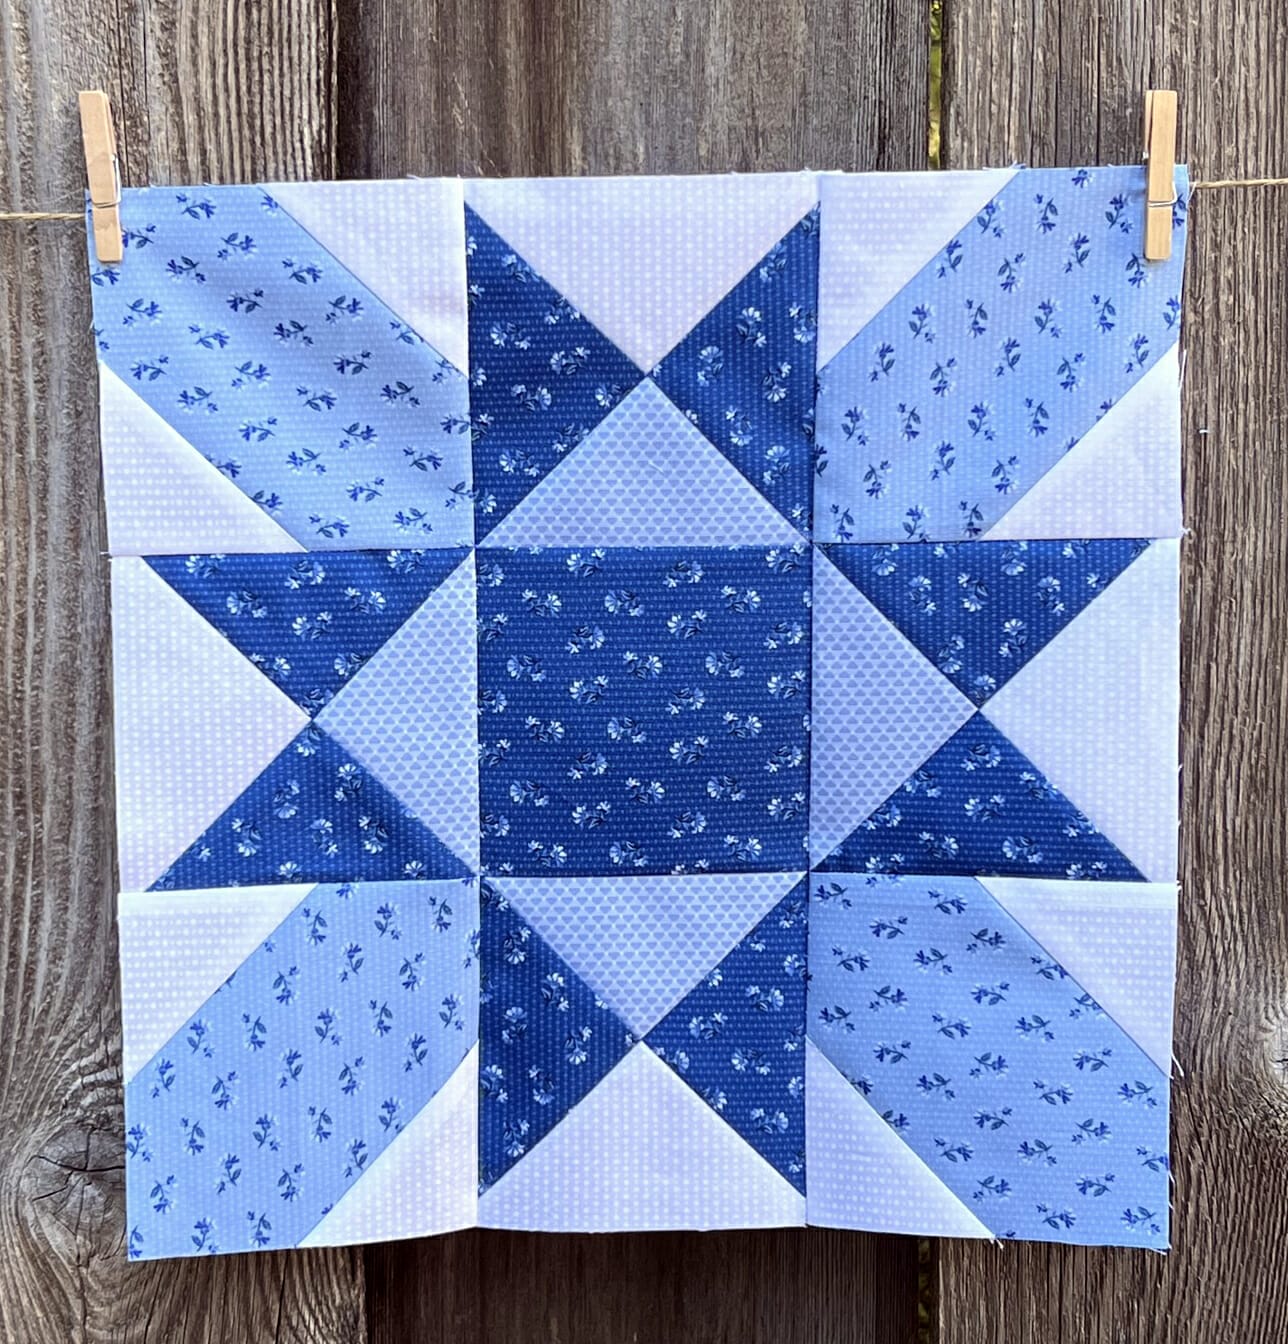
When laying out the block to prep for sewing, make sure the C (Four Points Glacier Blue) fabrics are framing the center A square, and that your D/E units are oriented to make an X within the block.
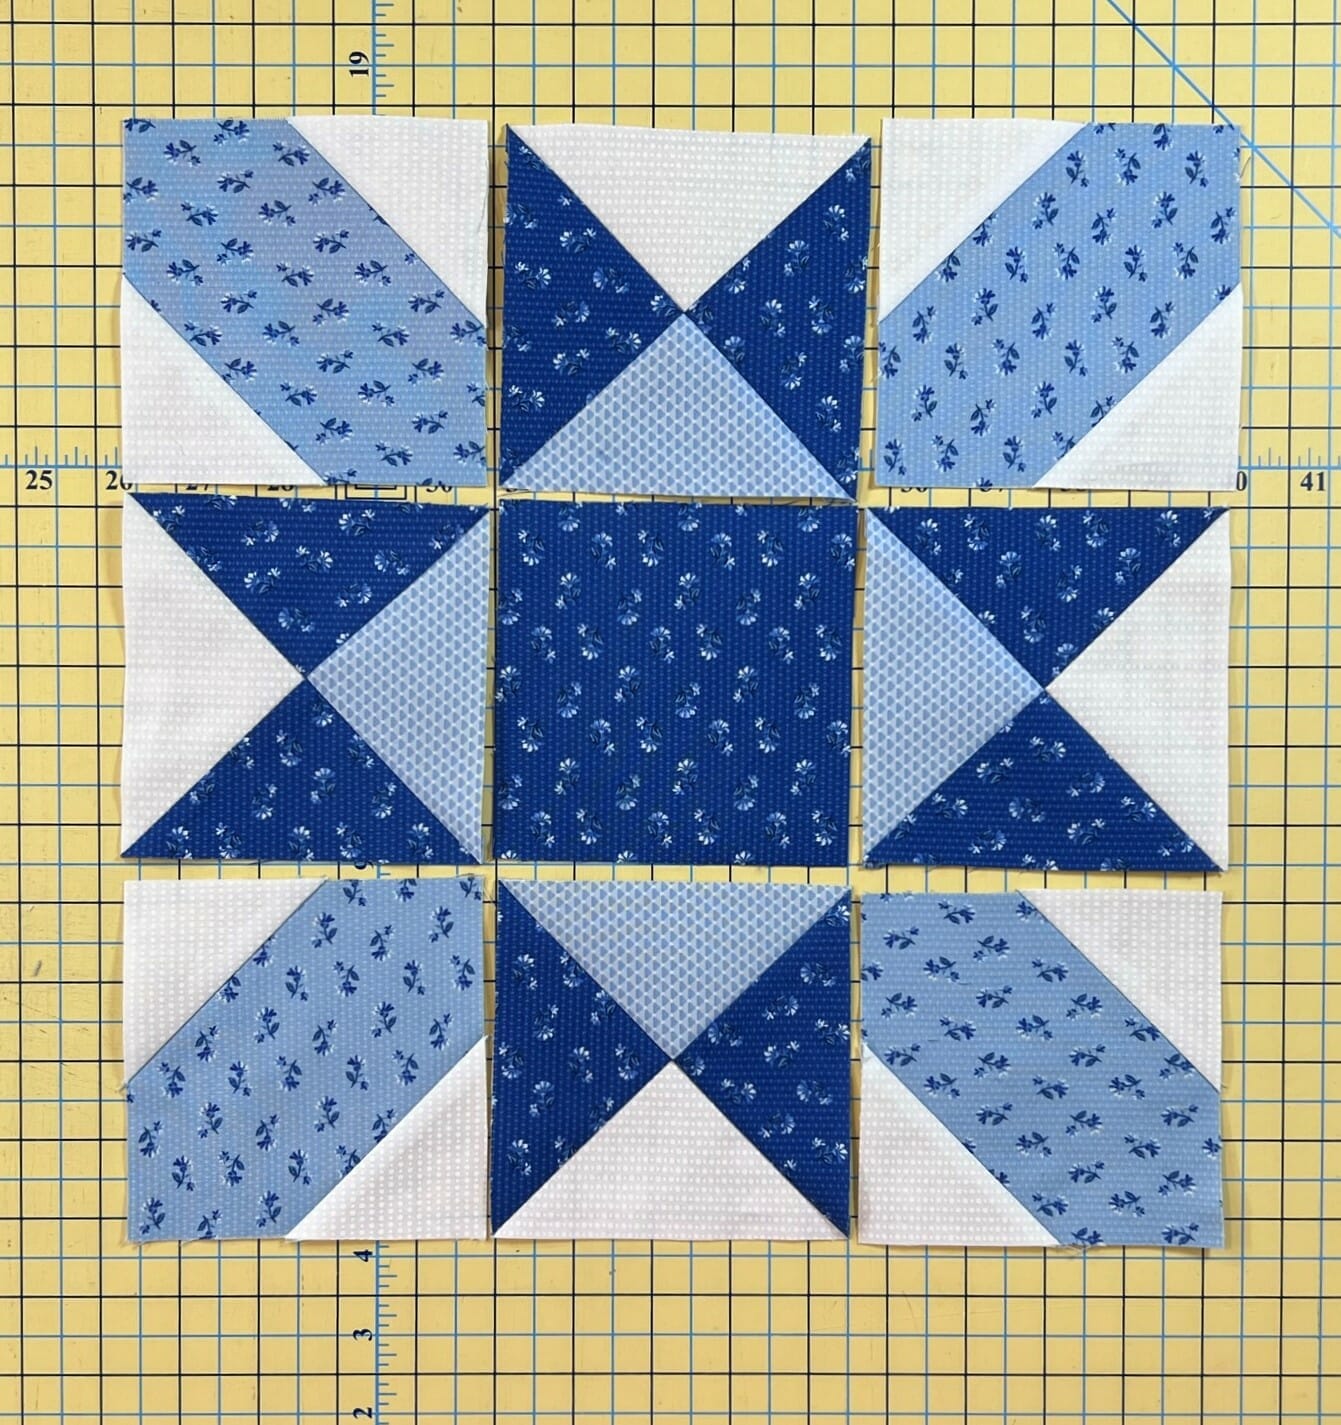
All finished!
Next month we’ll be making another four blocks, and I can’t wait to share them with you! Until next time… Happy Quilting!
Kristin

