Tag Archives: ruby

Ruby BOM – Month 9
4.5.2022

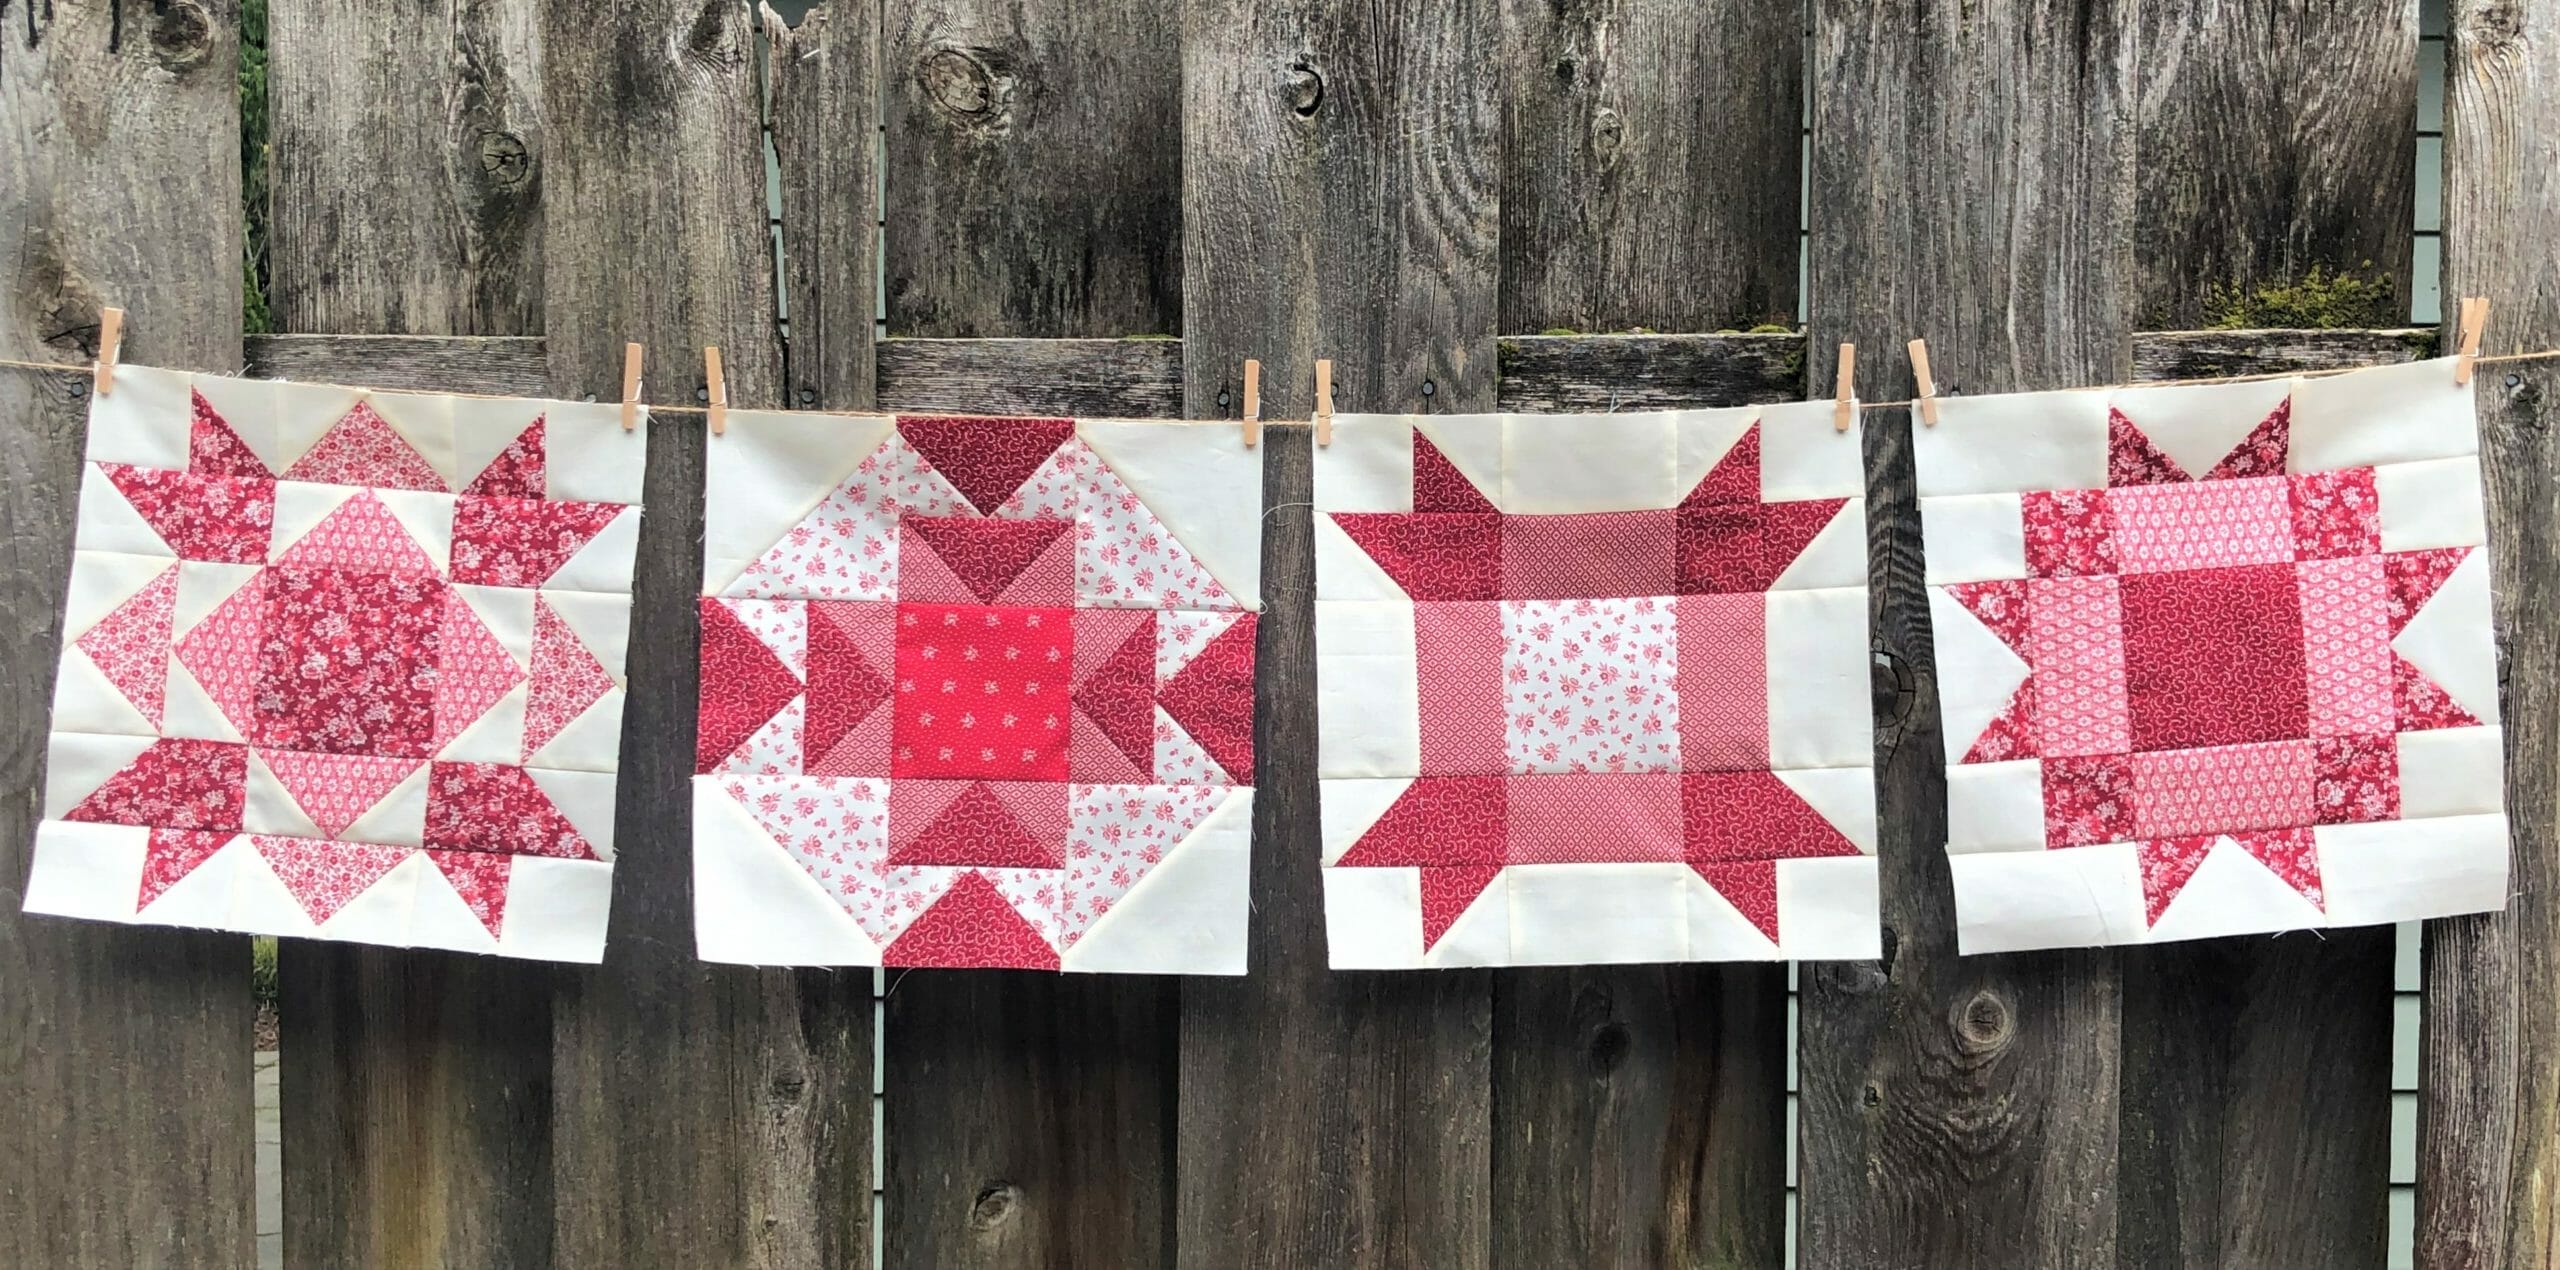
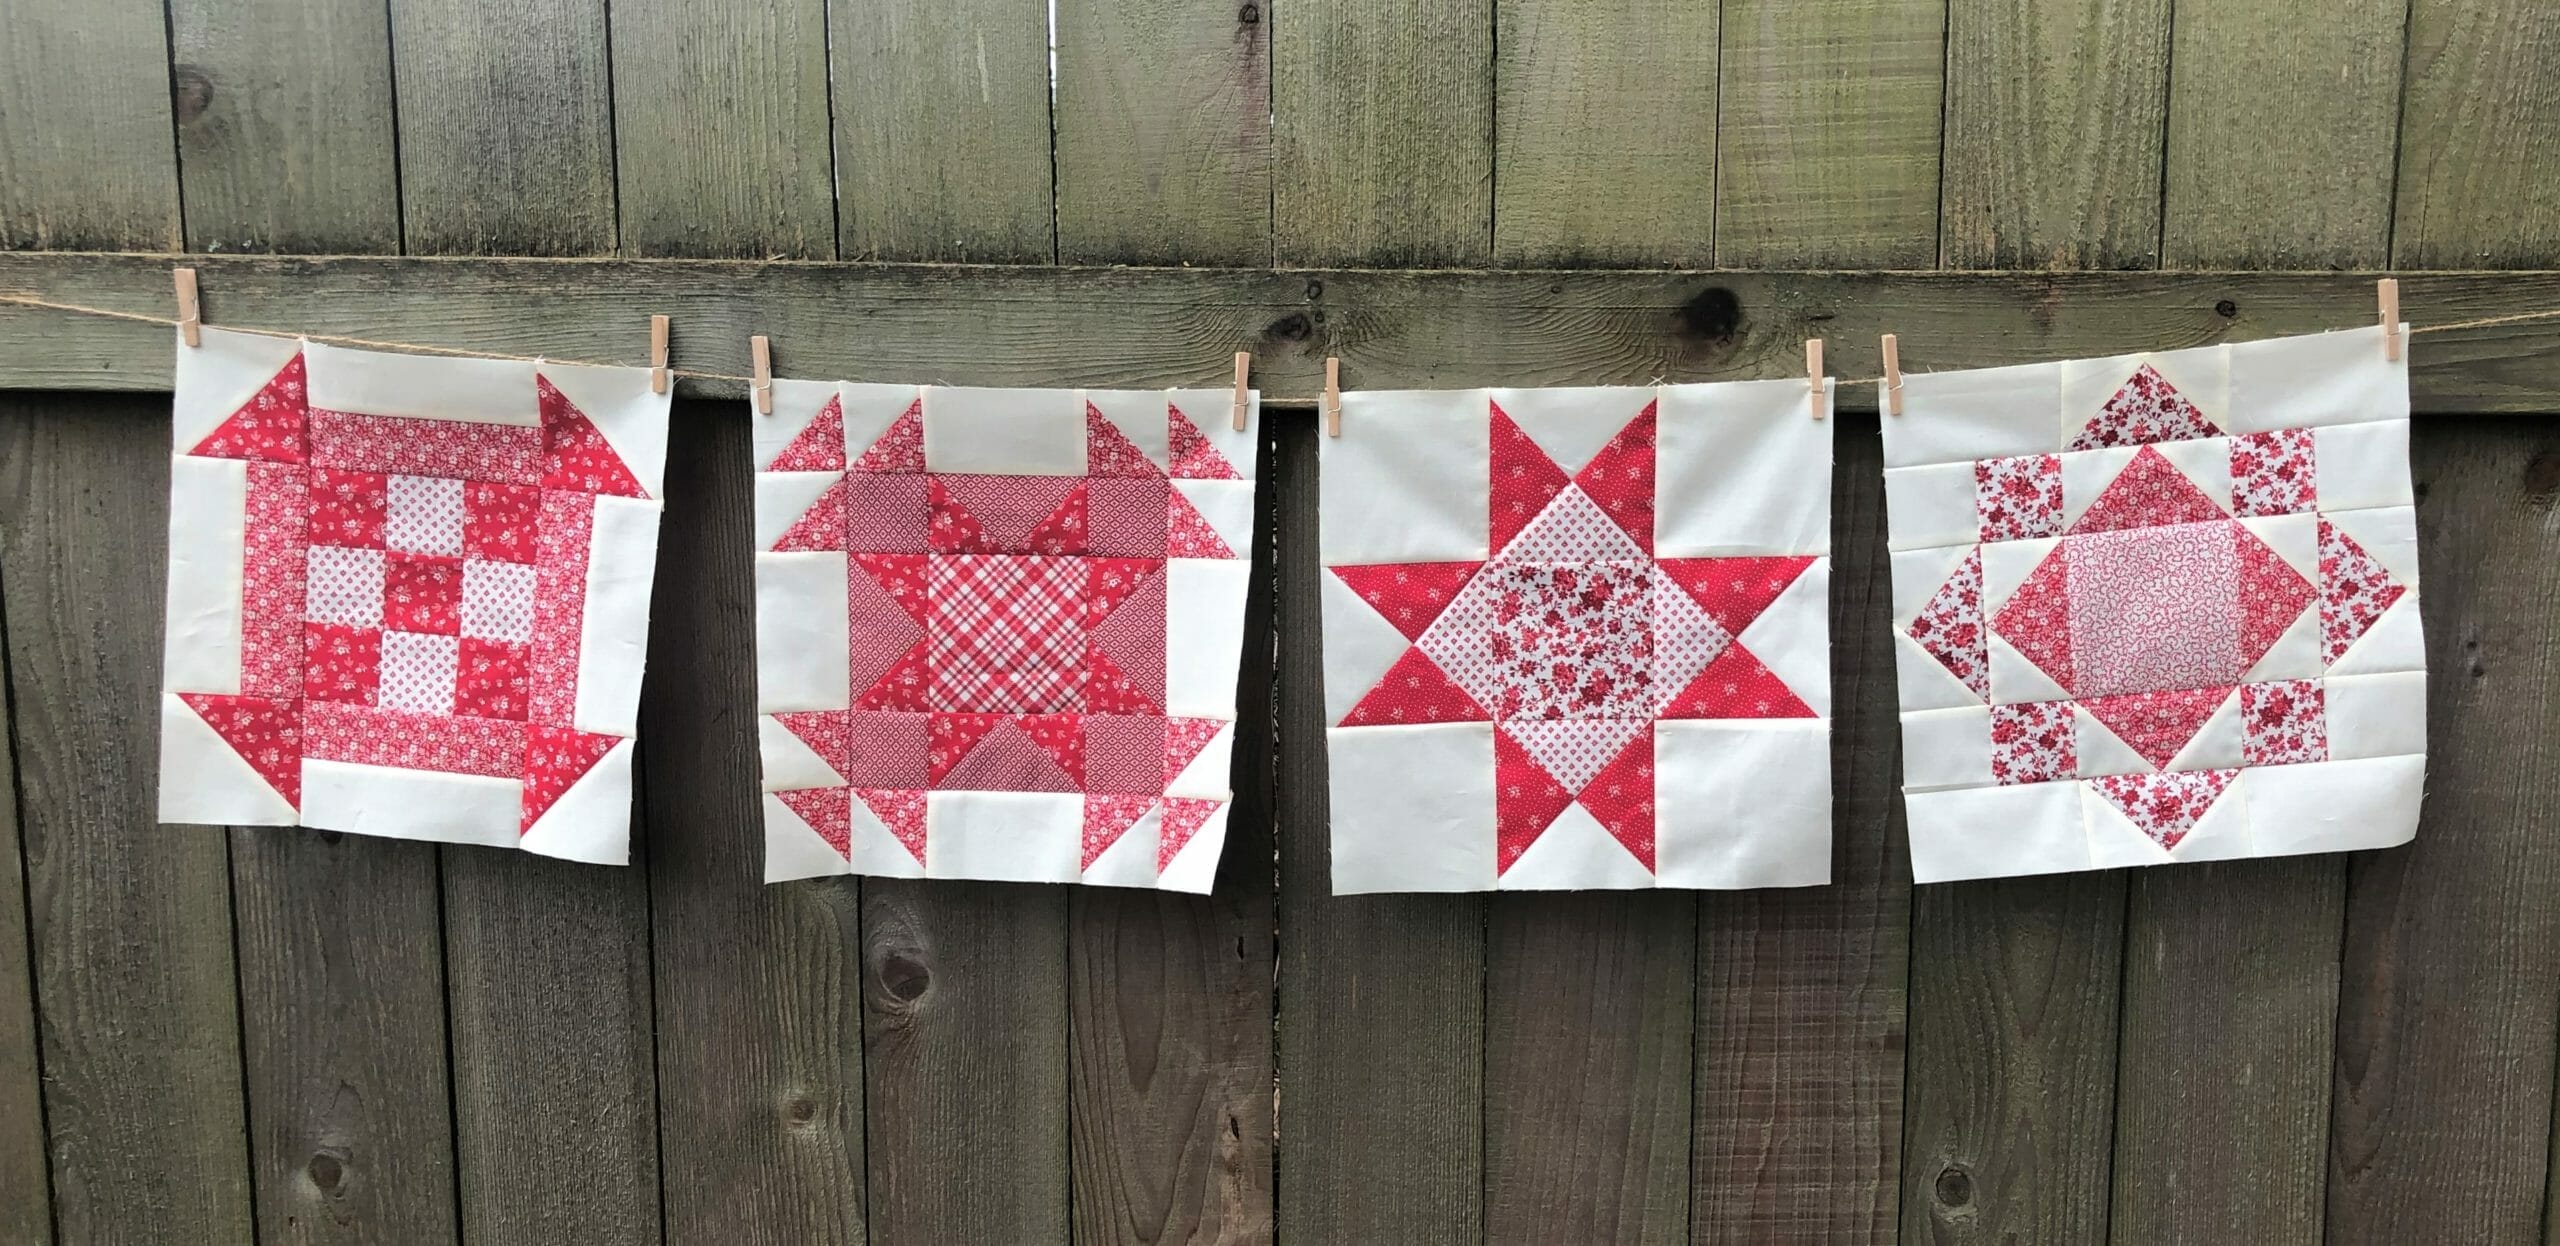
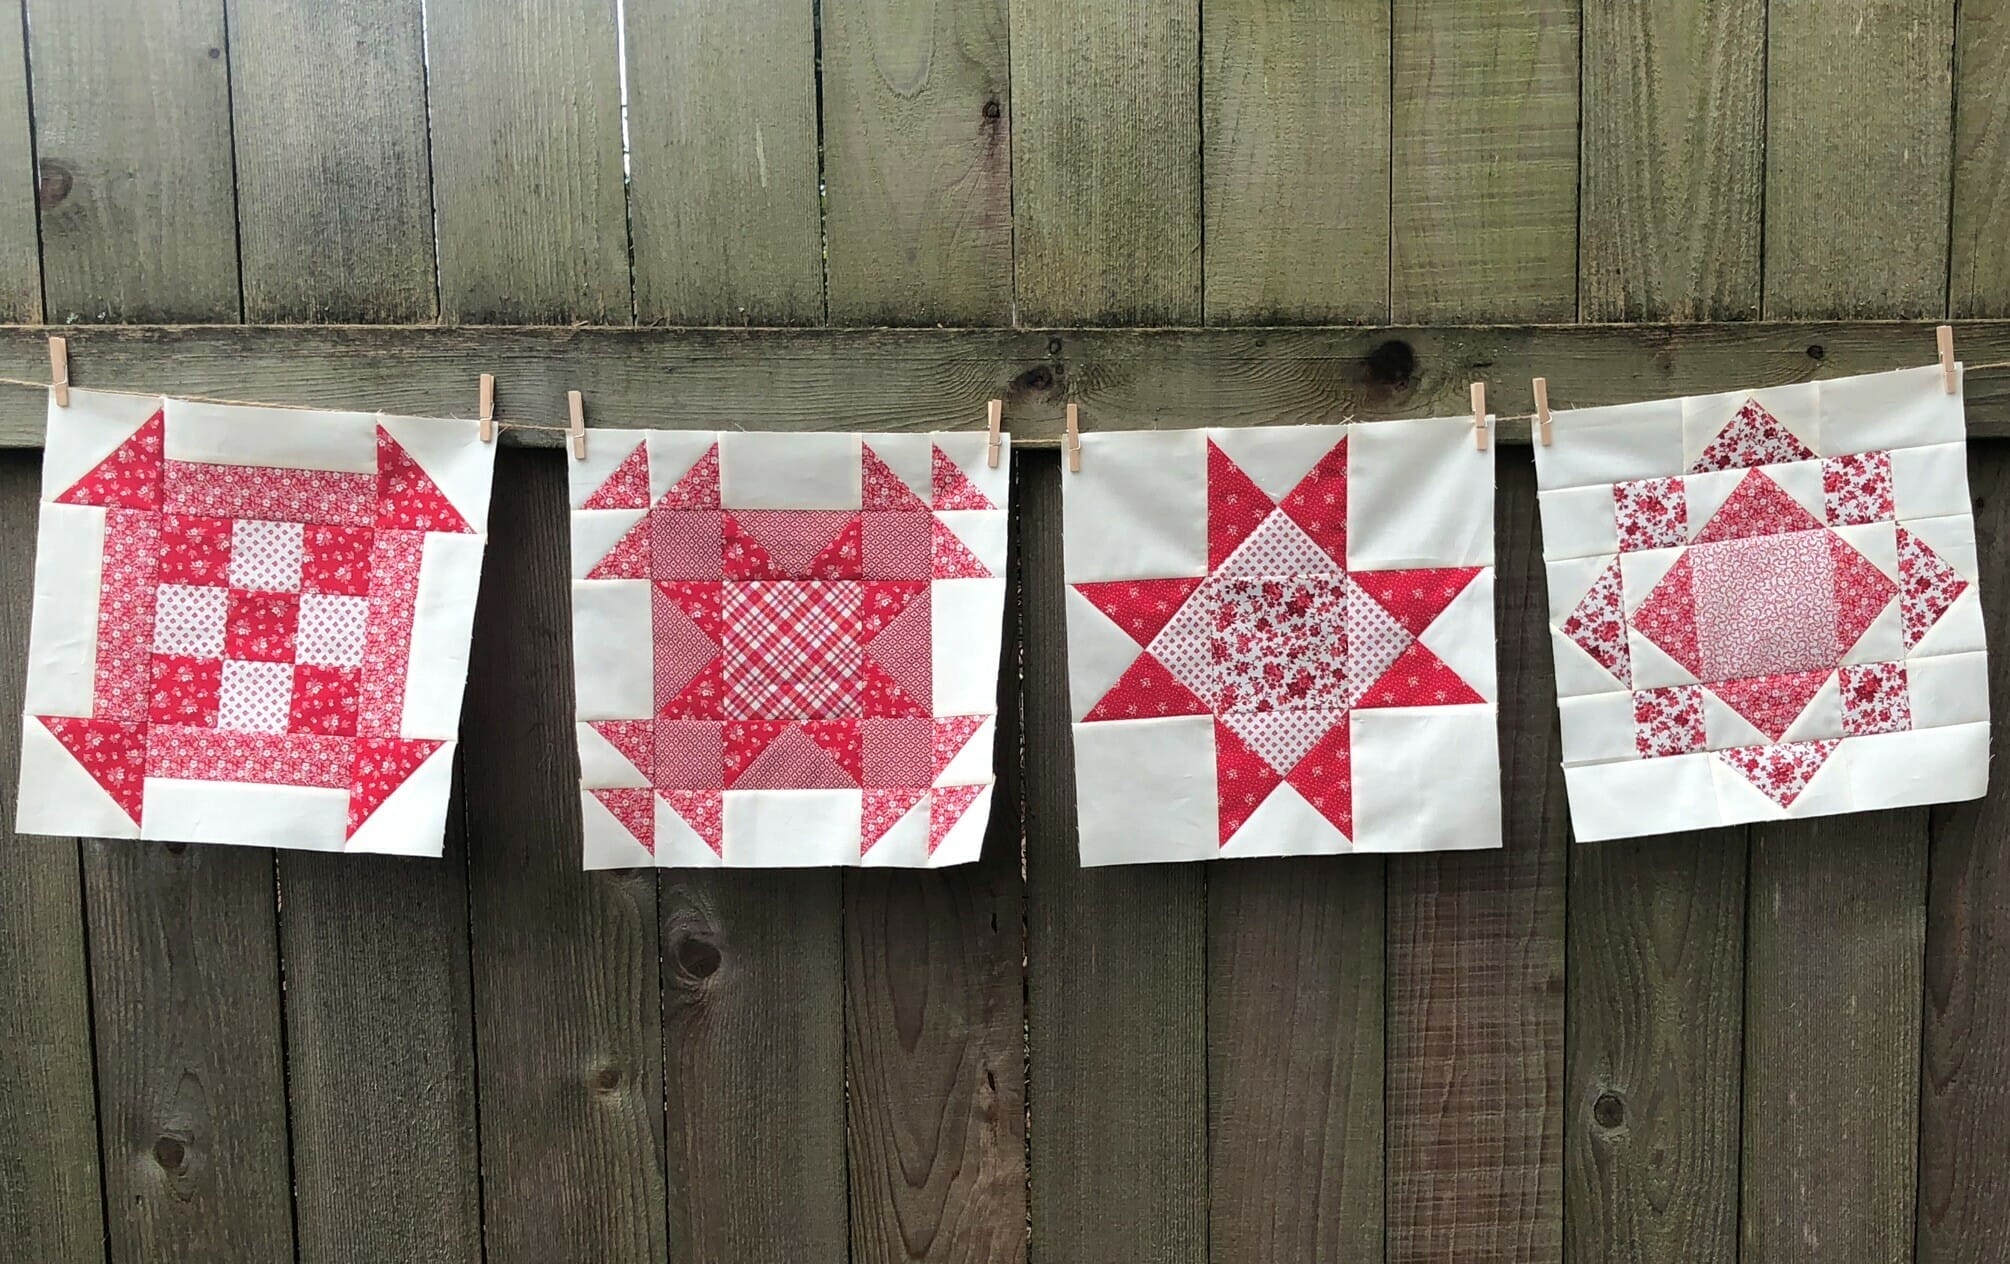
It’s me again! This month we will get to make another four unique blocks, and this time three are repeats, and one brand spanking new. Since by now, we should all be pretty familiar with the techniques used in these blocks, I decided to skip over the lengthy tutorials that I’ve covered in months past. But it’s always good to see what these blocks look like sewn up in their new fabrics, so let’s dive right in!

Block #1

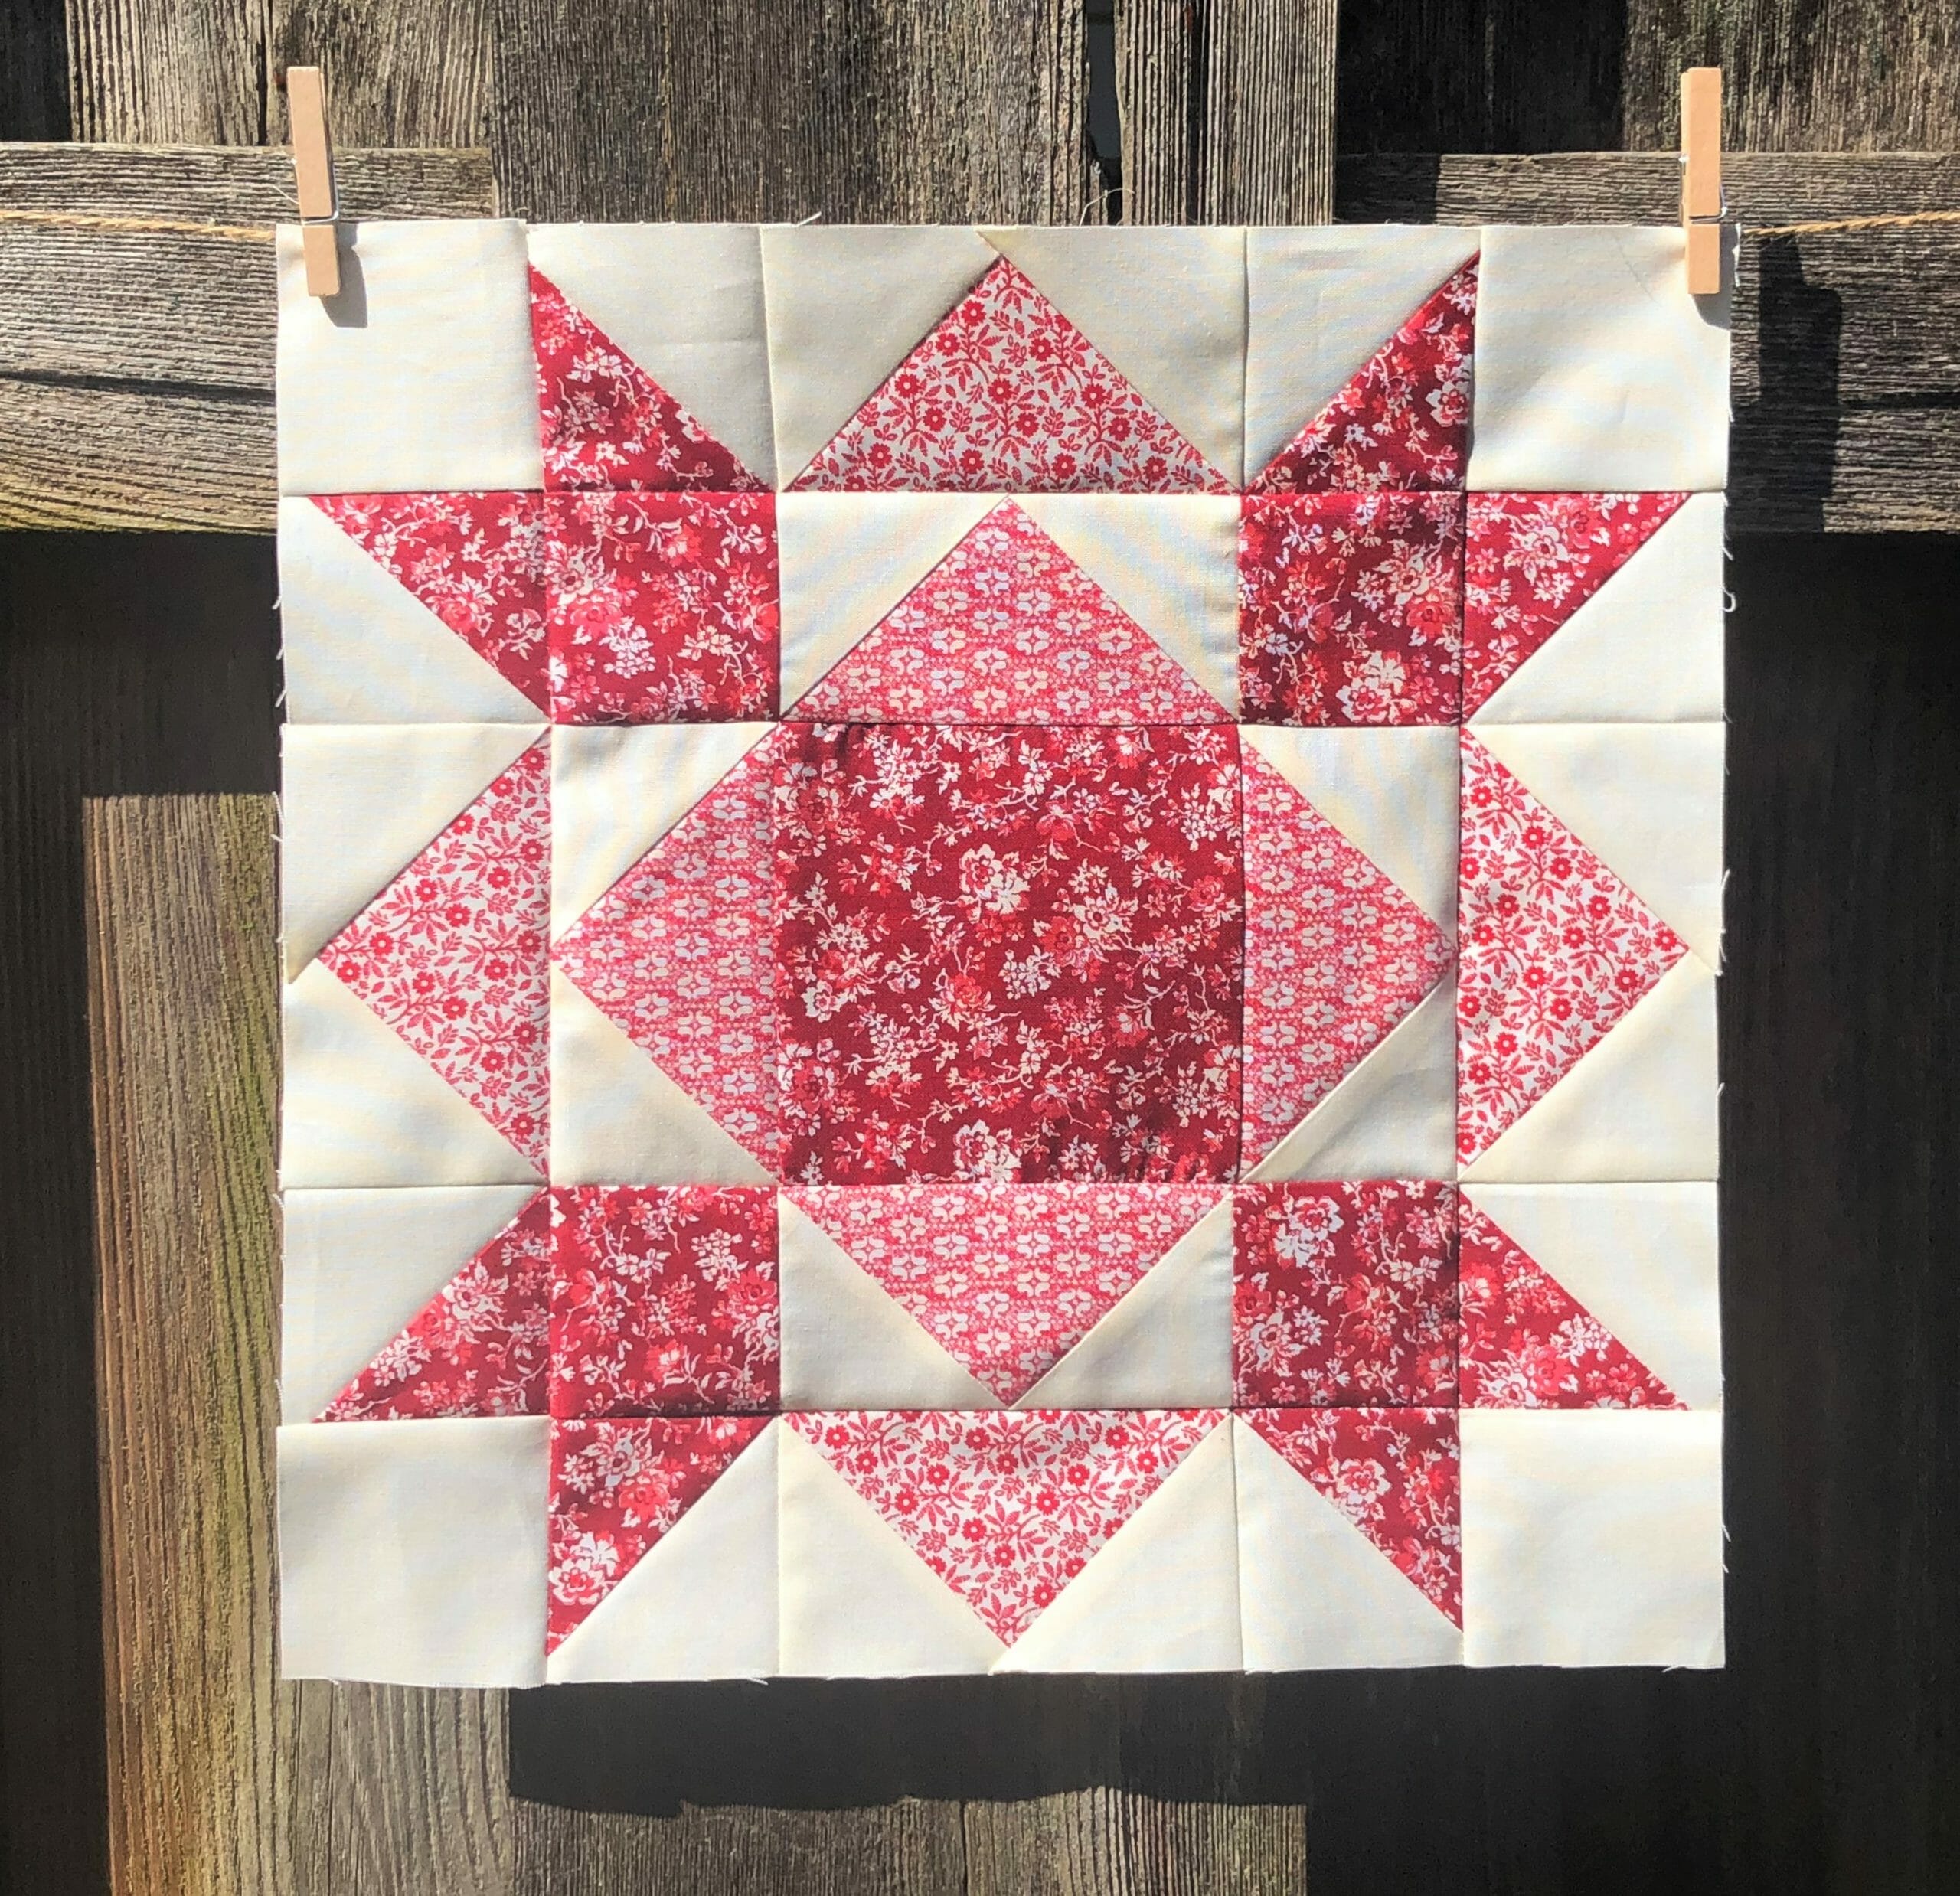
Now that it’s month 9, we FINALLY get to make the first block in the quilt. It’s about time! Technically, we made this same block WAY back in month 1, and it was block #14 then. And why didn’t I switch those and sew block #1 in month one and block #14 now, you ask? The short answer is FABRIC. When I’m planning block of the Month patterns, I need to pay attention to which fabrics will be shipped with which blocks, so blocks with like fabrics get grouped together. So now you know why things sometimes seem out of order. It all works out in the end though!

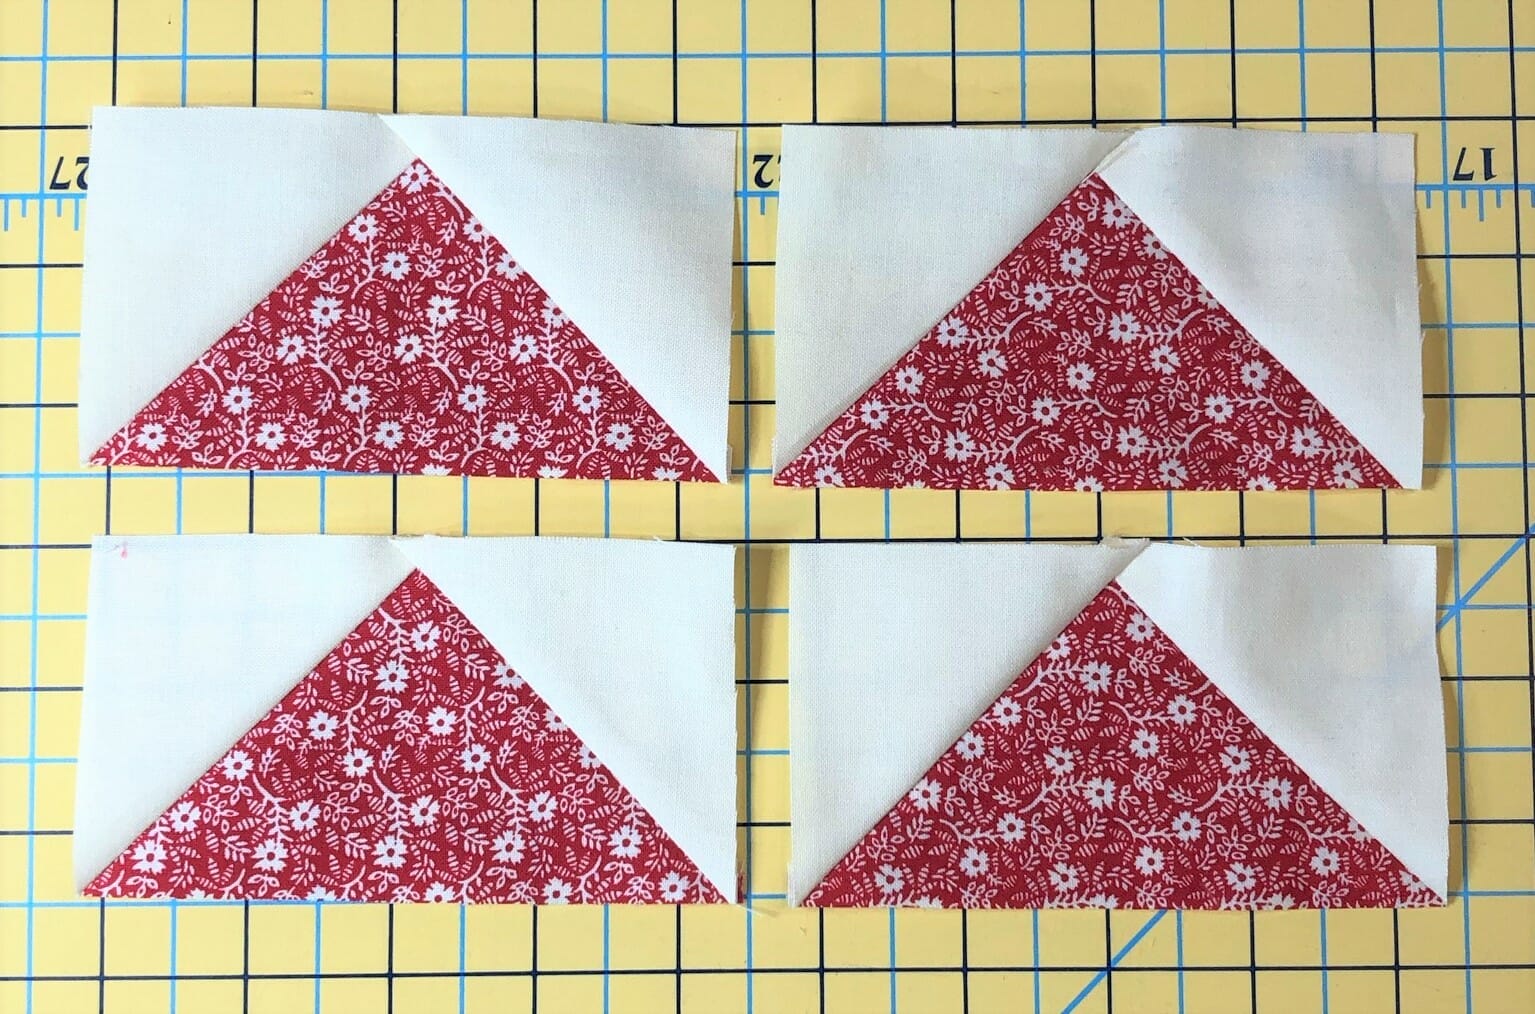
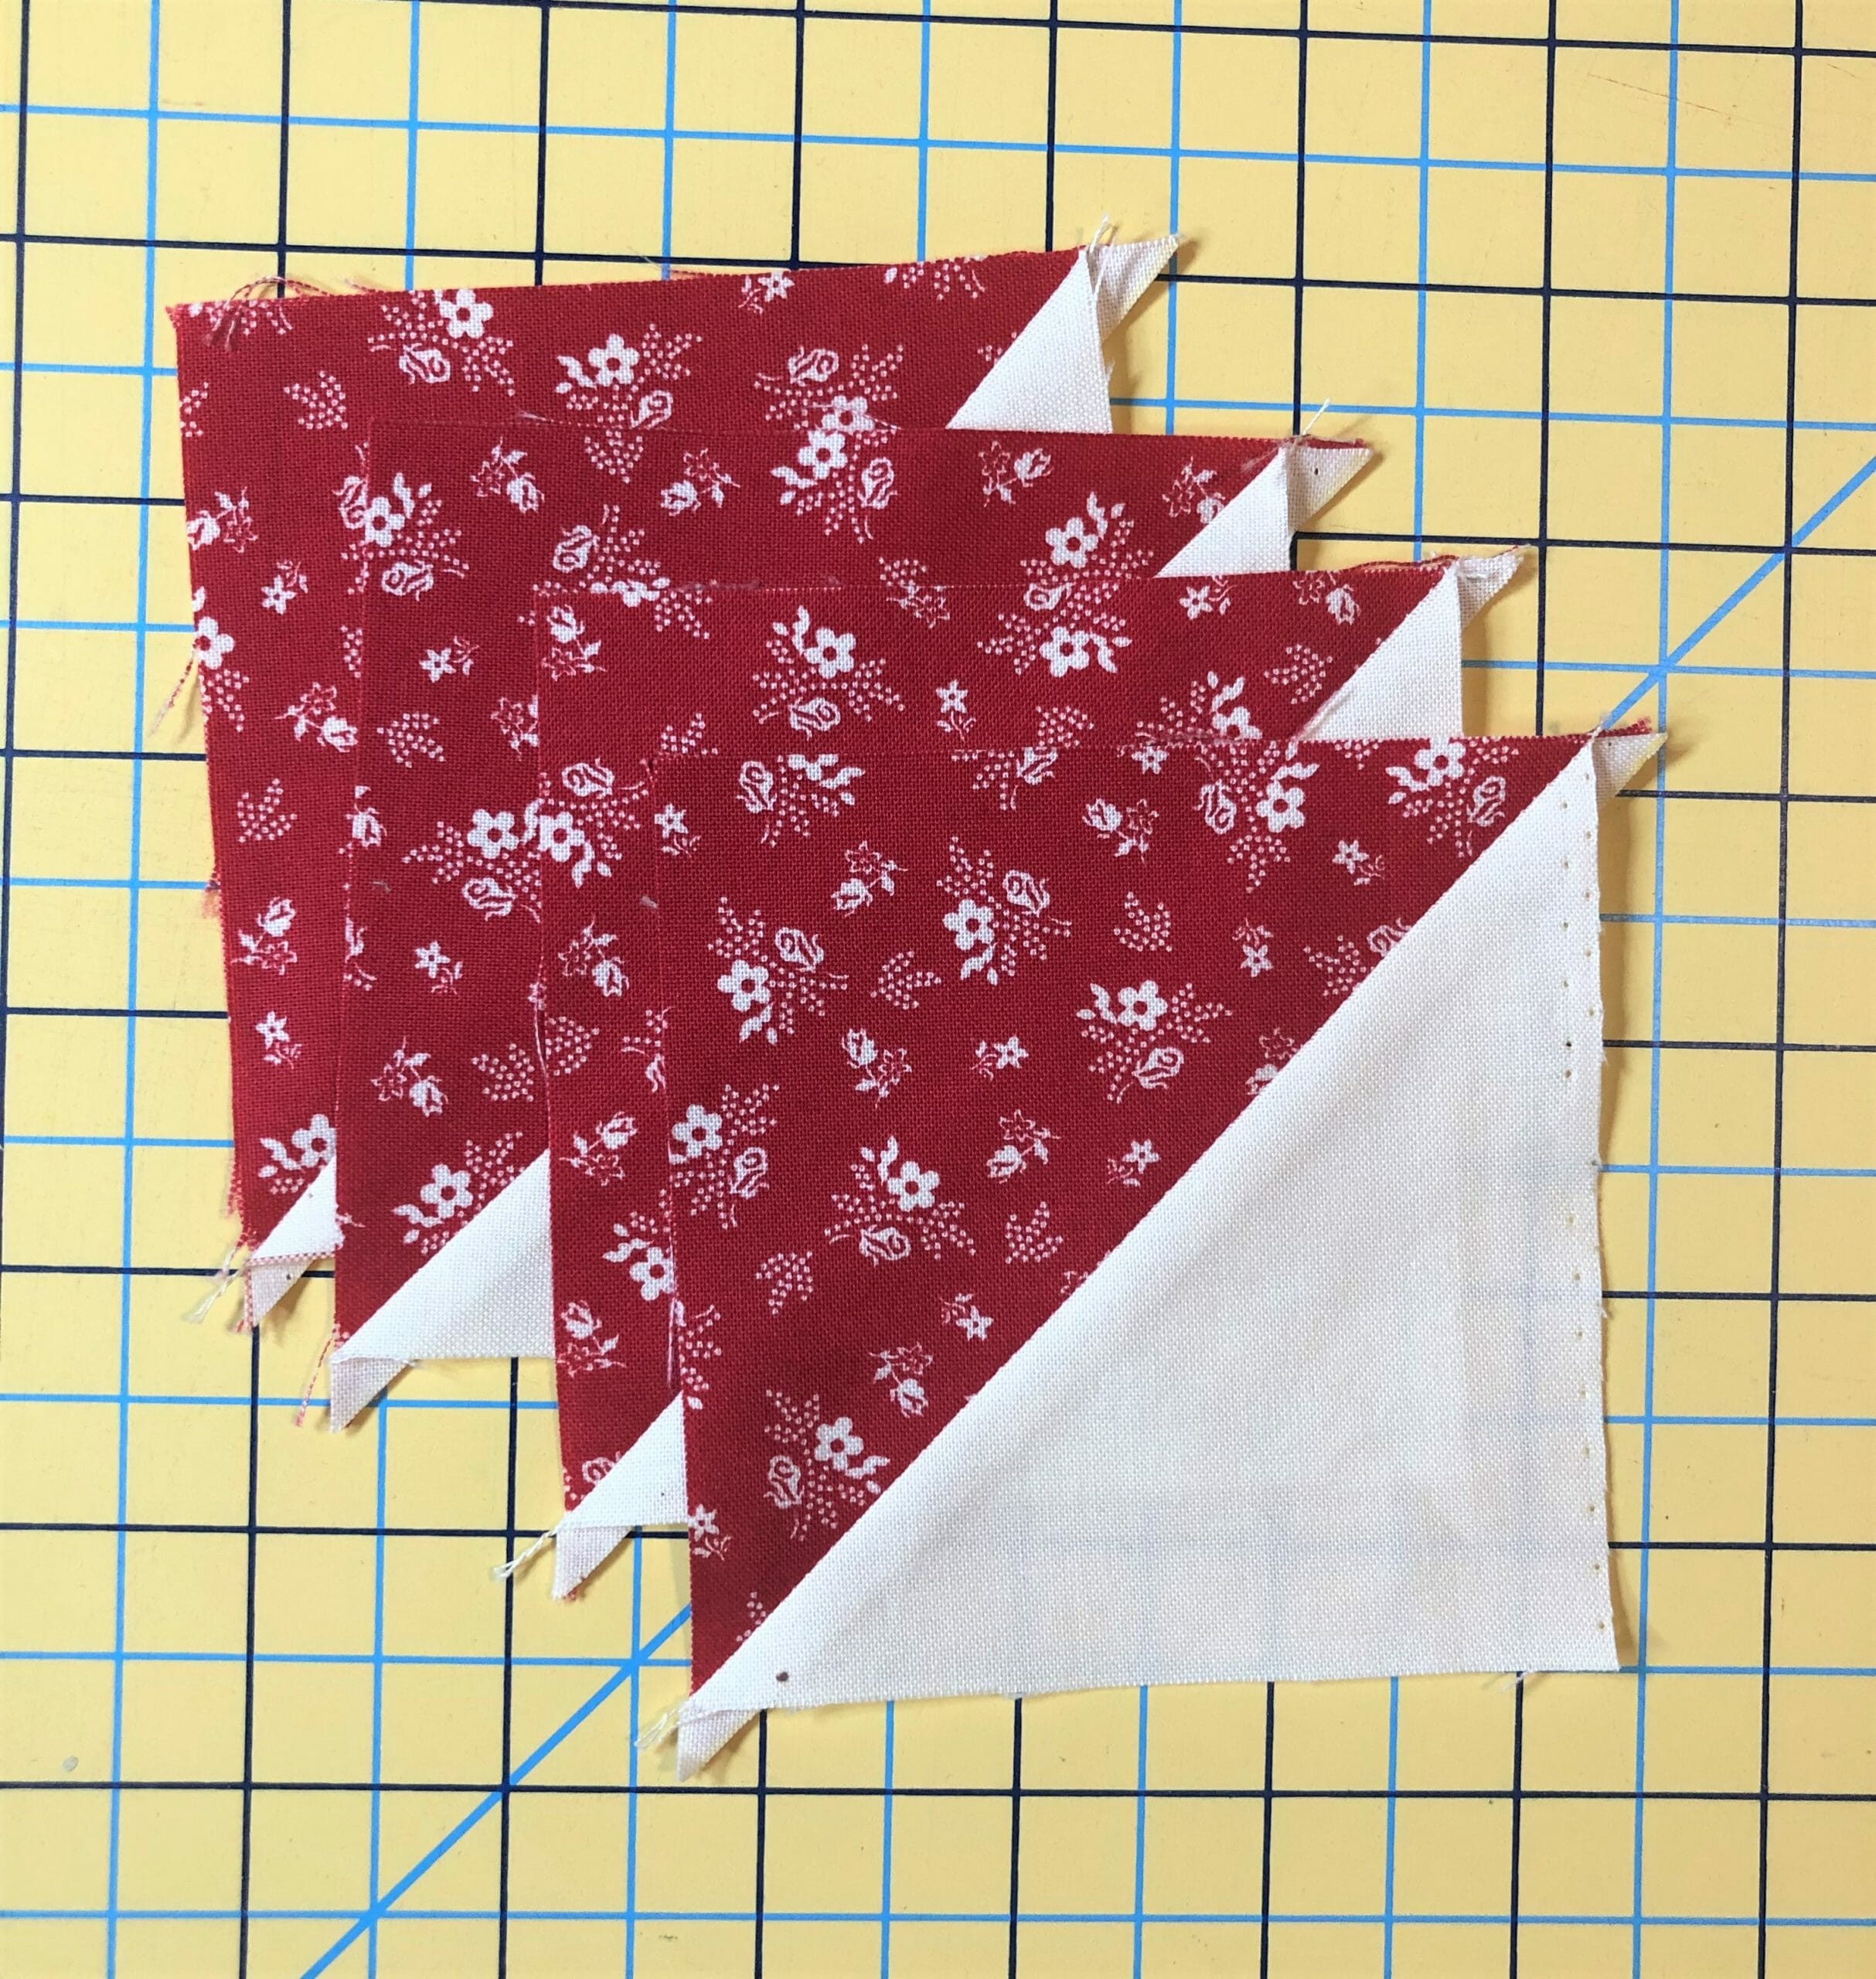
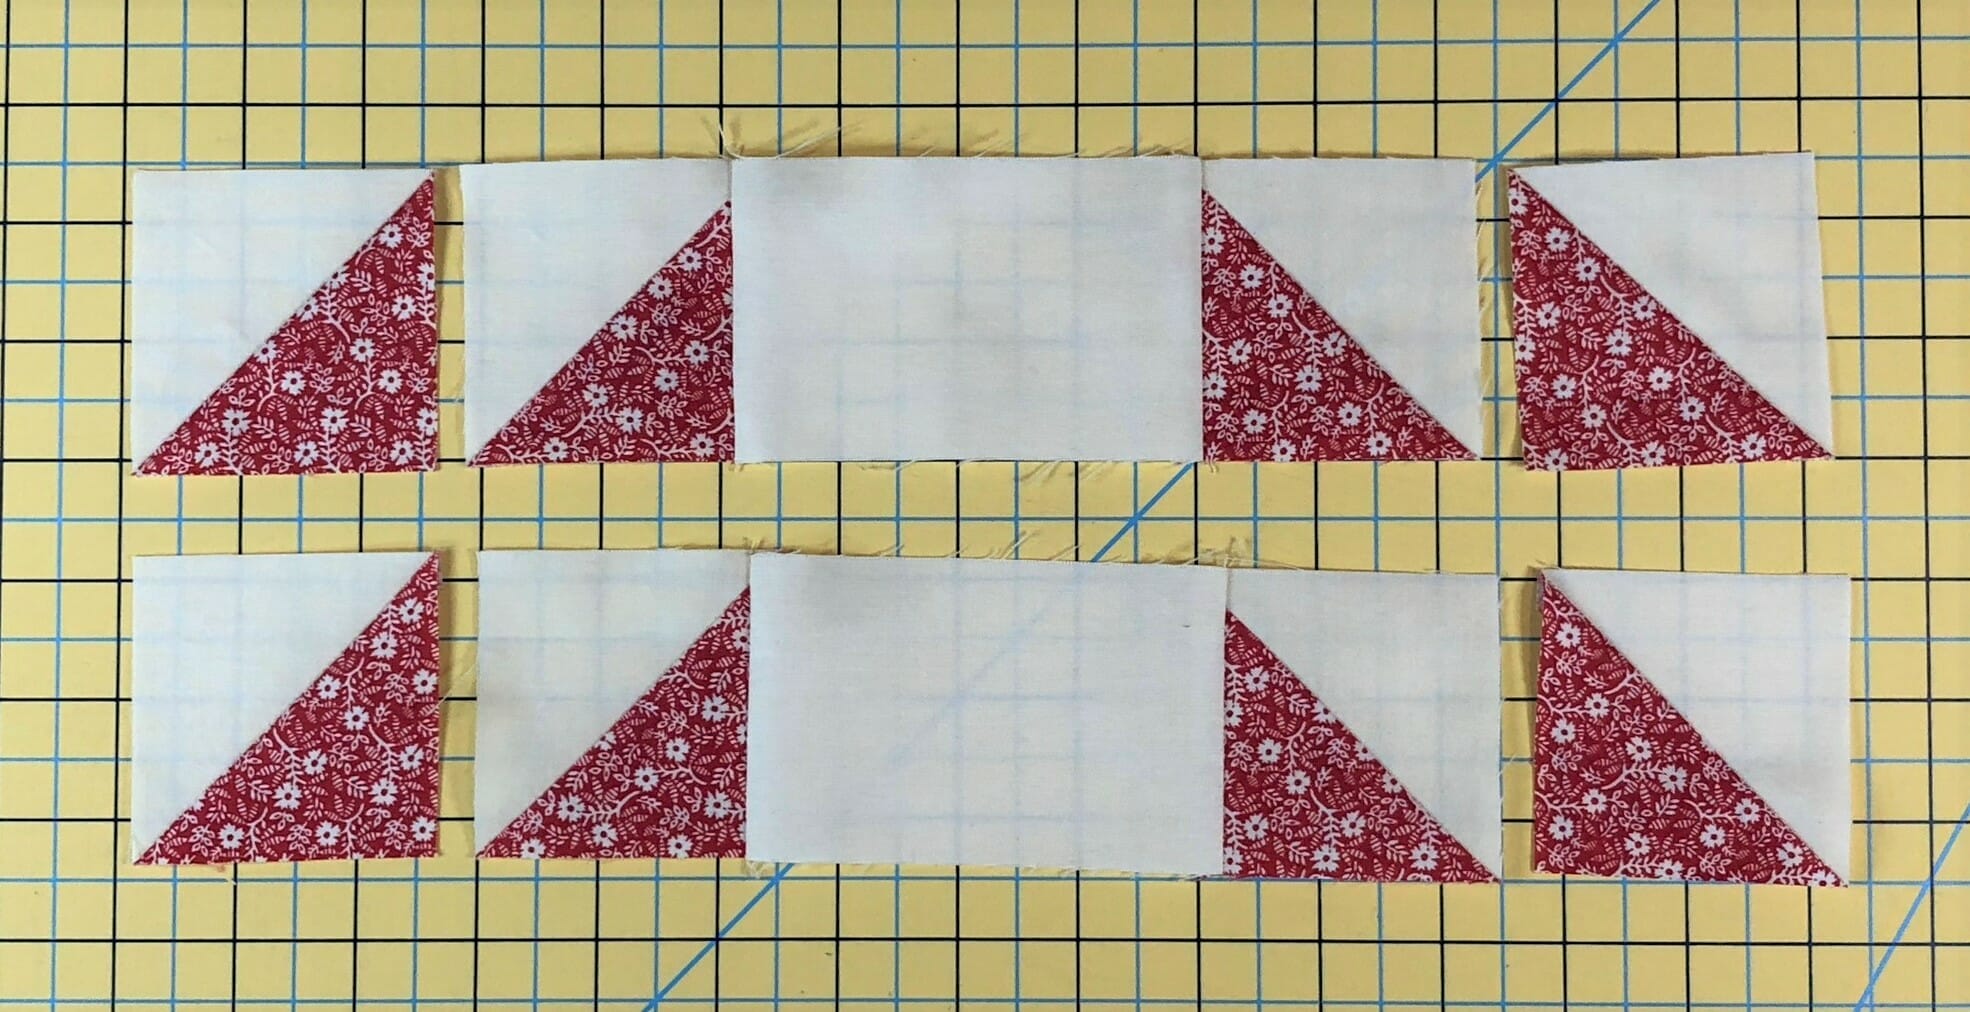
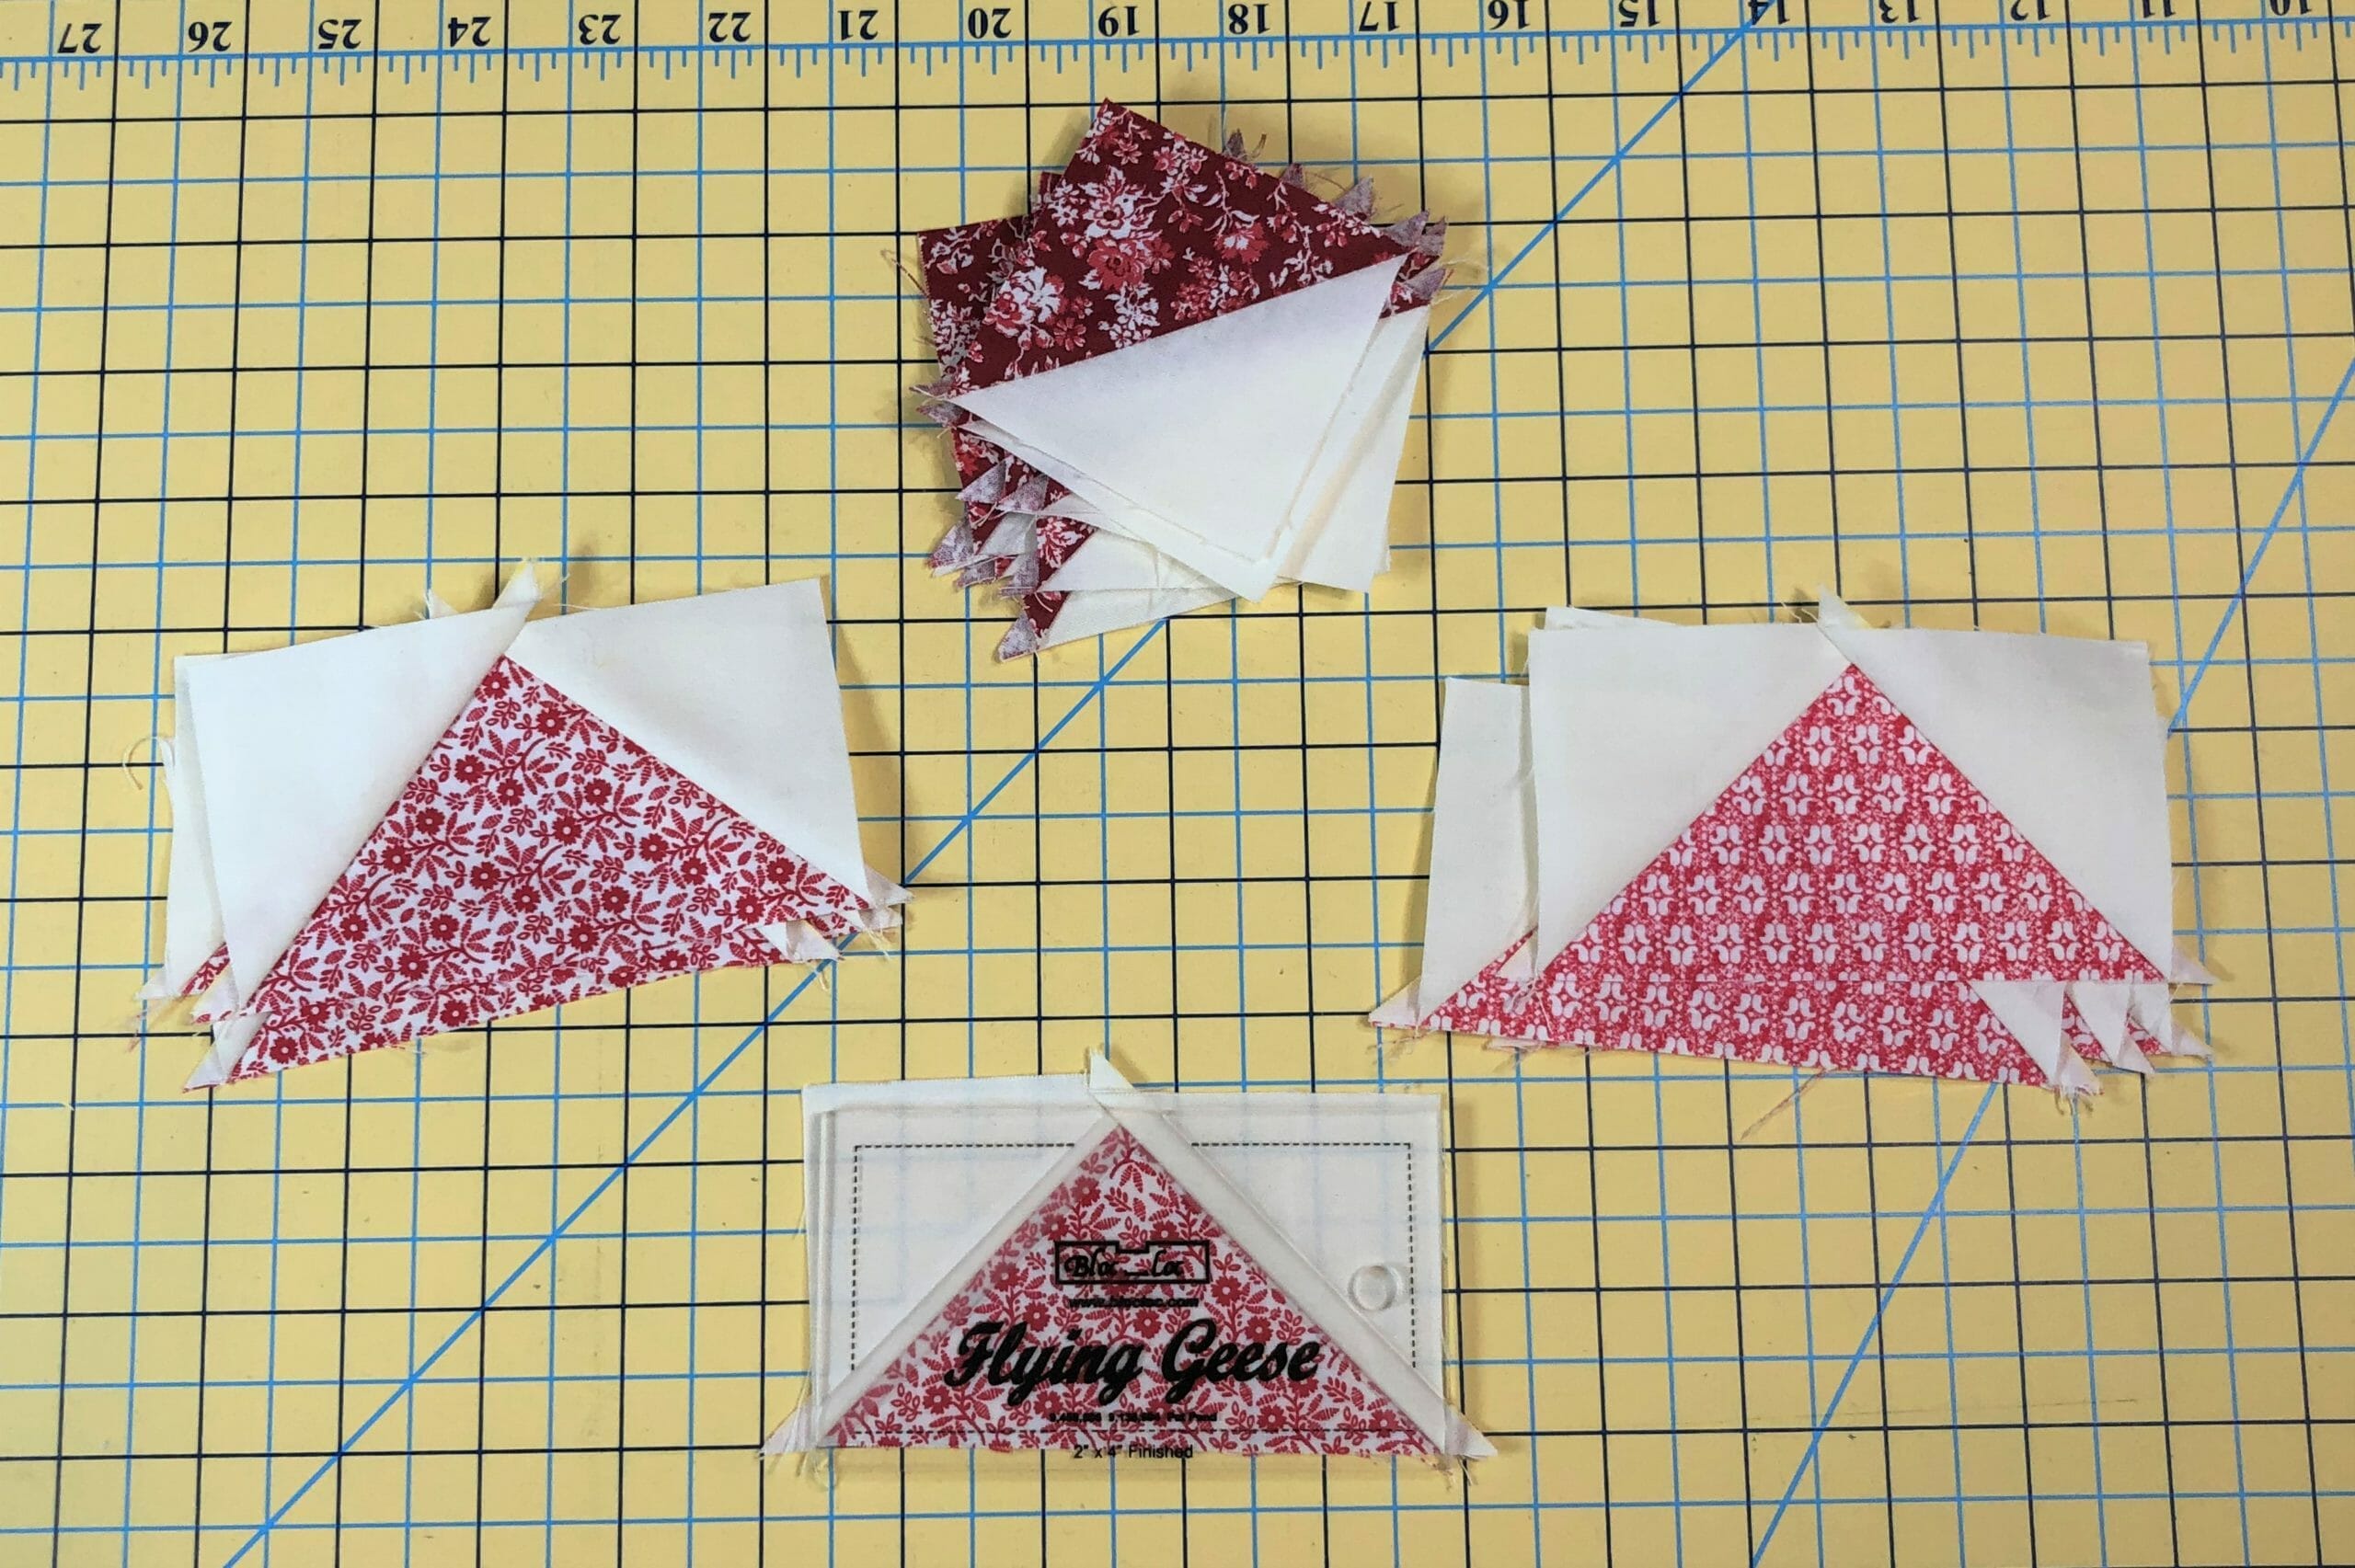
Speaking of being out of order, when sewing up this block, I began by making all of my flying geese and half-square triangles at the same time for this block. As you can see below, they are finished and ready for trimming, using my Bloc-Loc ruler to trim the flying geese units. Since you’ve all made these a million times by now, like I said earlier, I won’t bore you with the details.

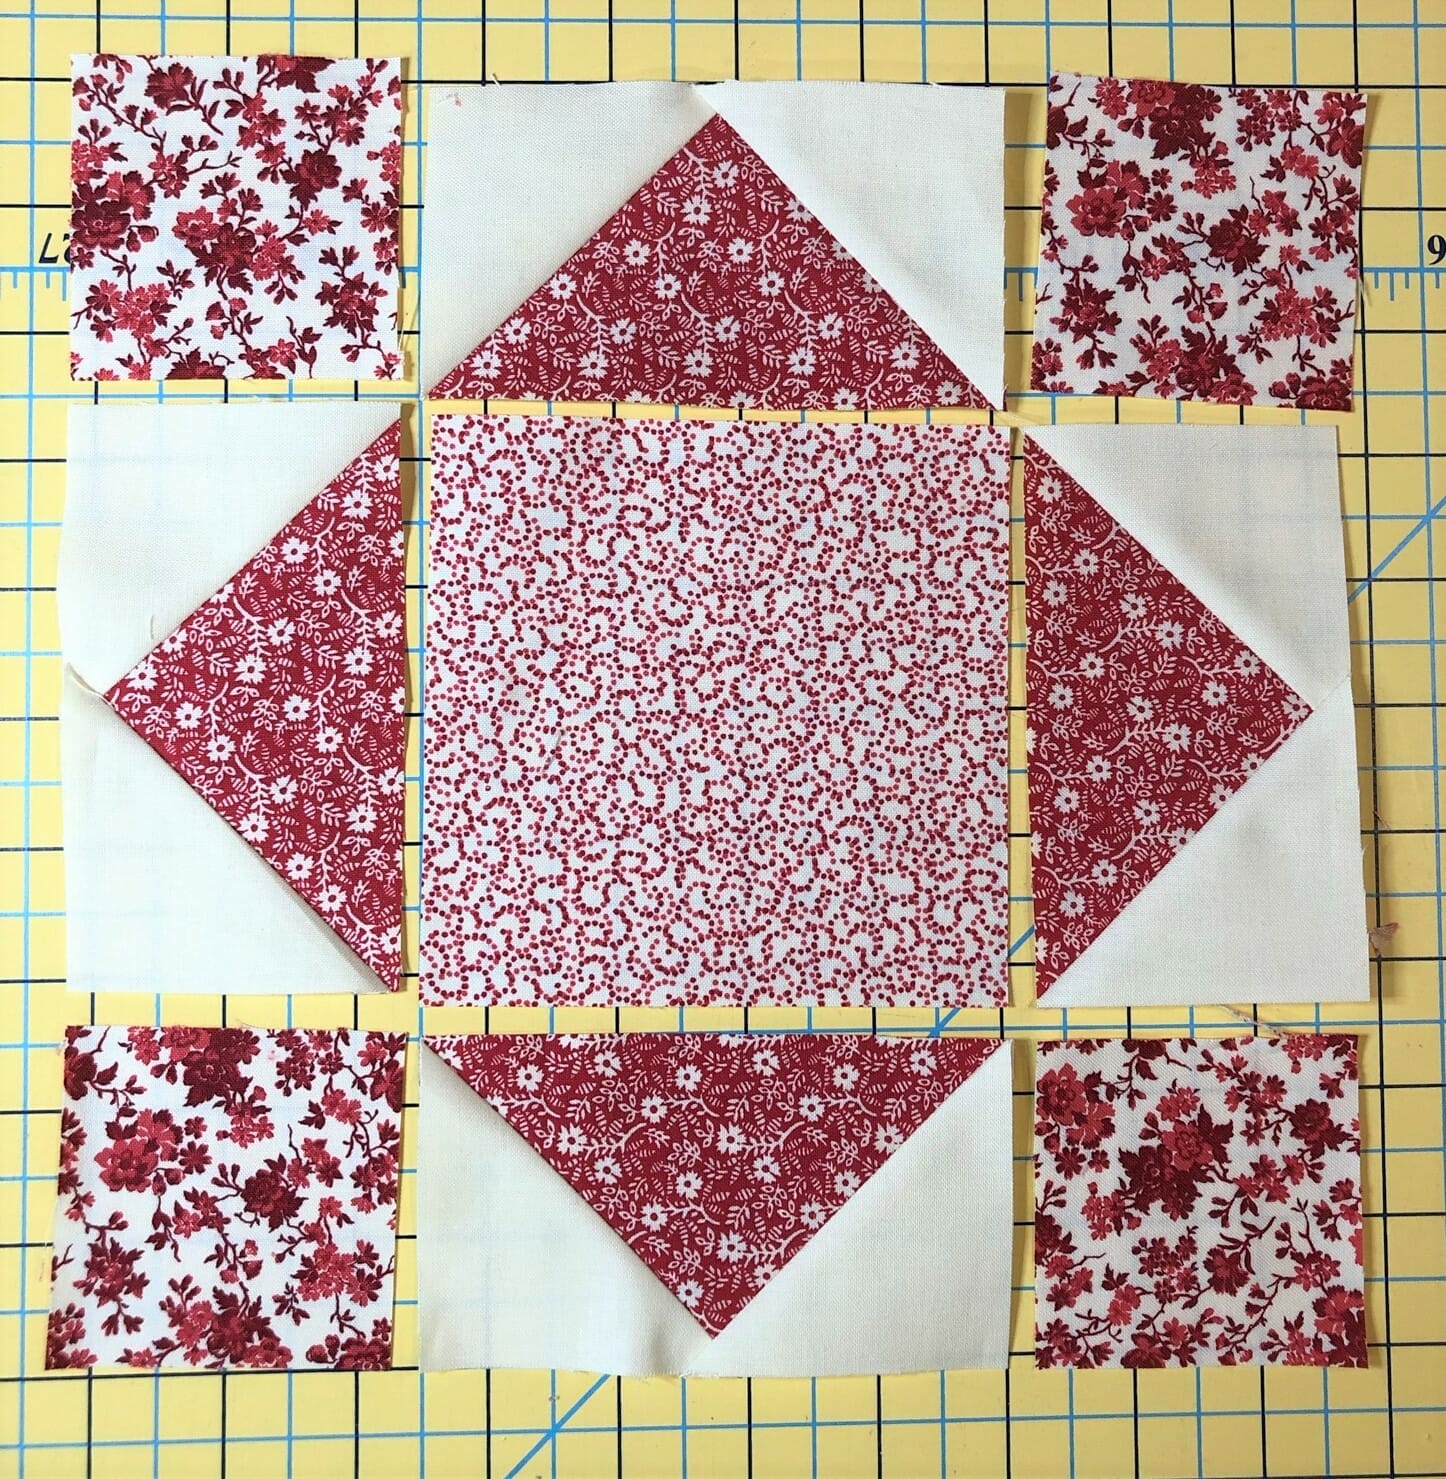
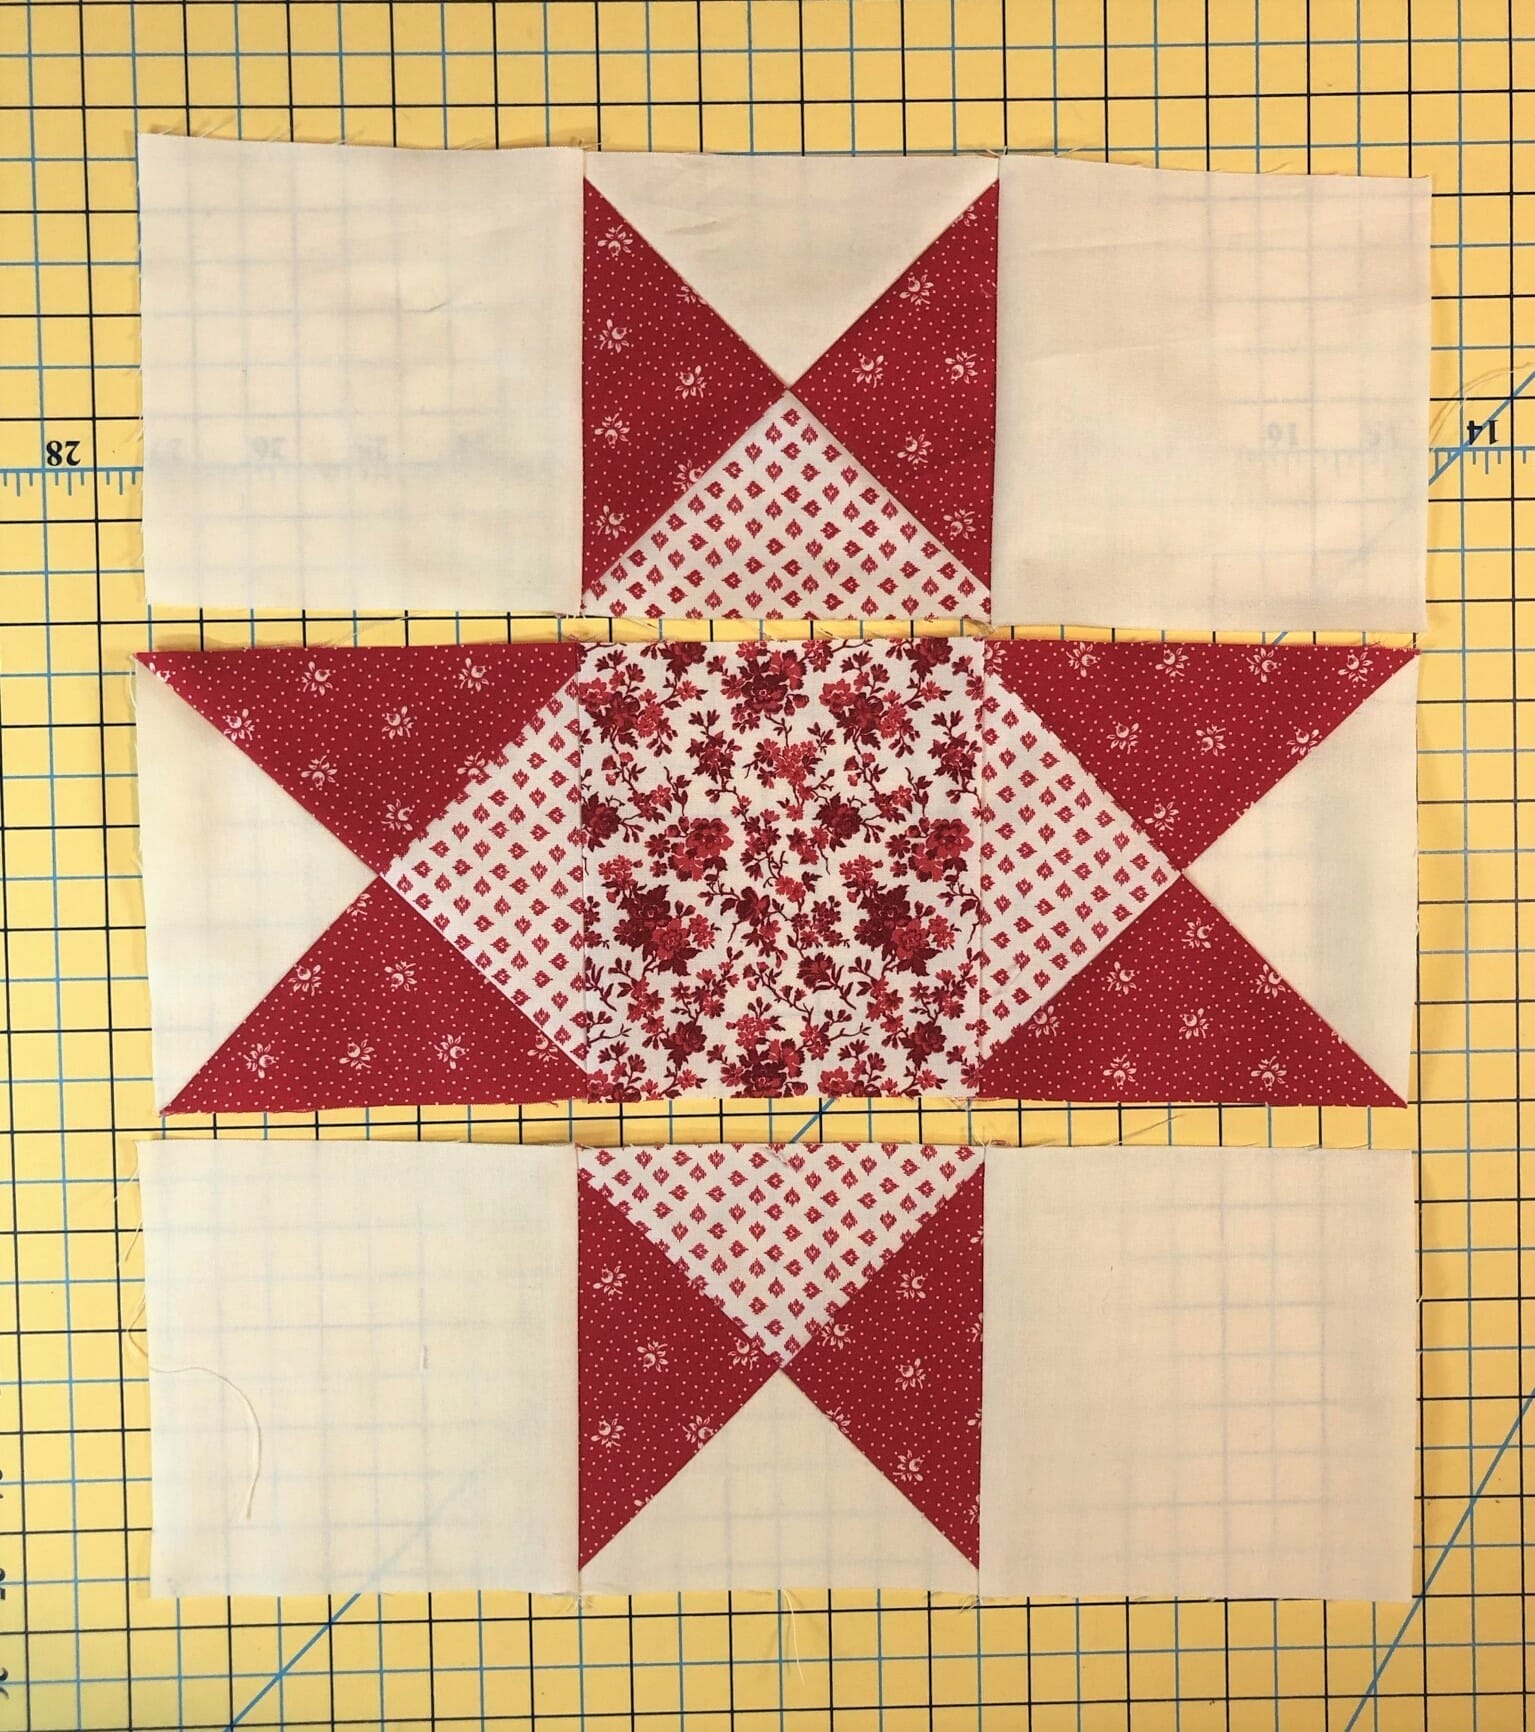
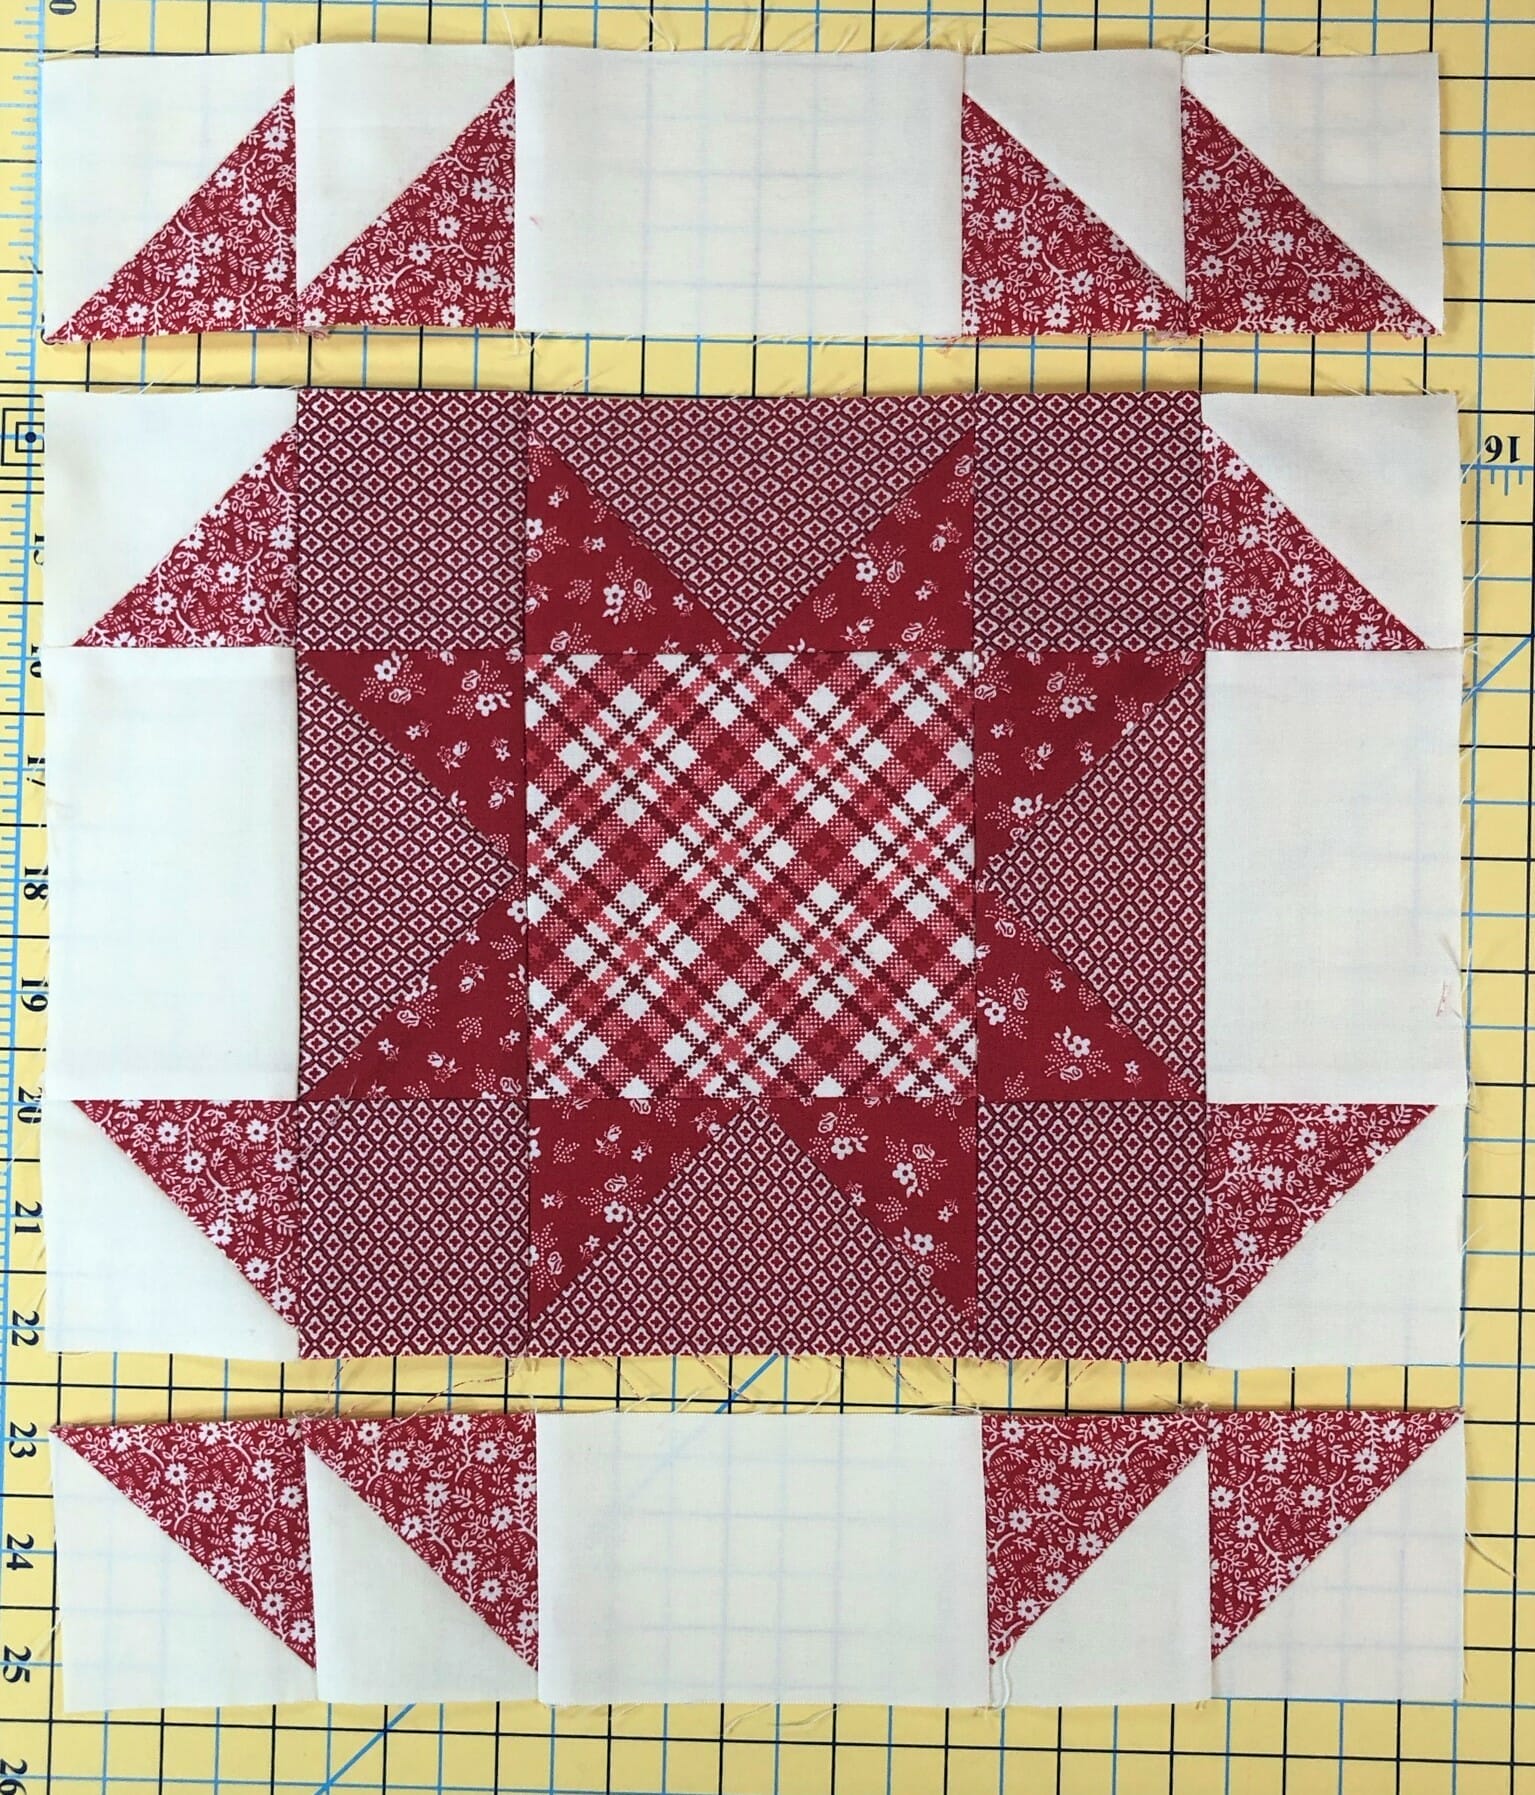
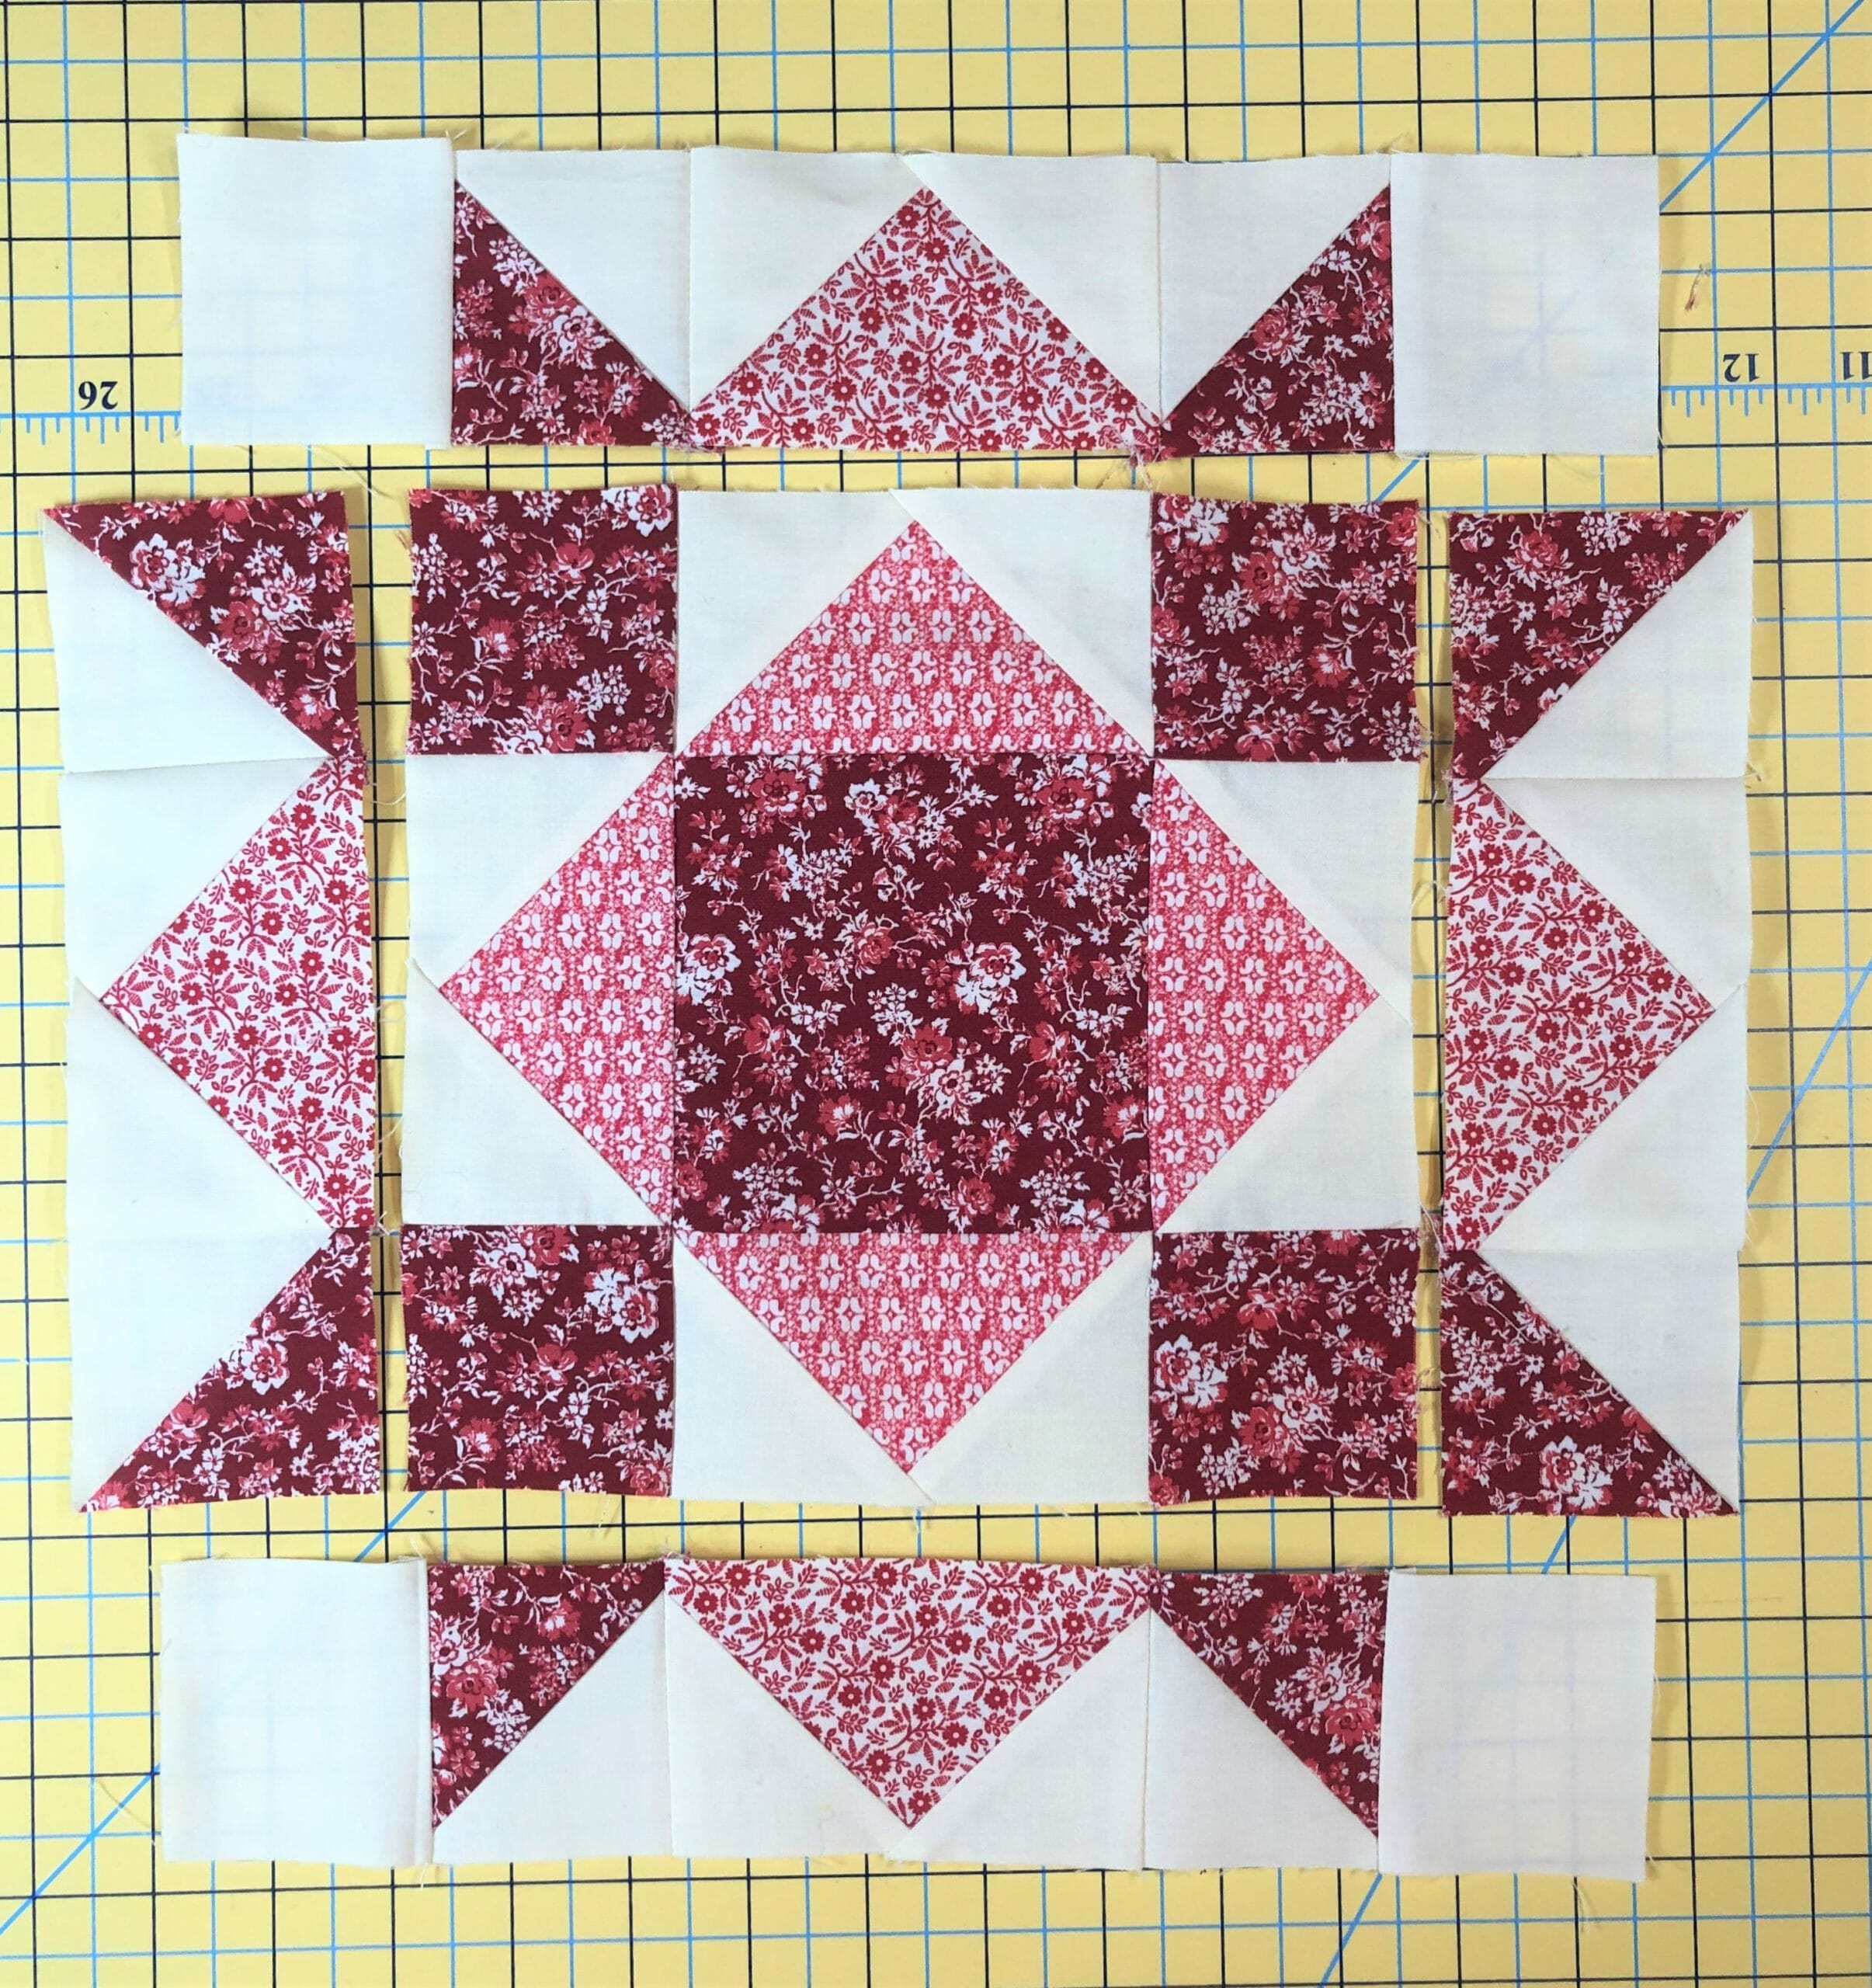
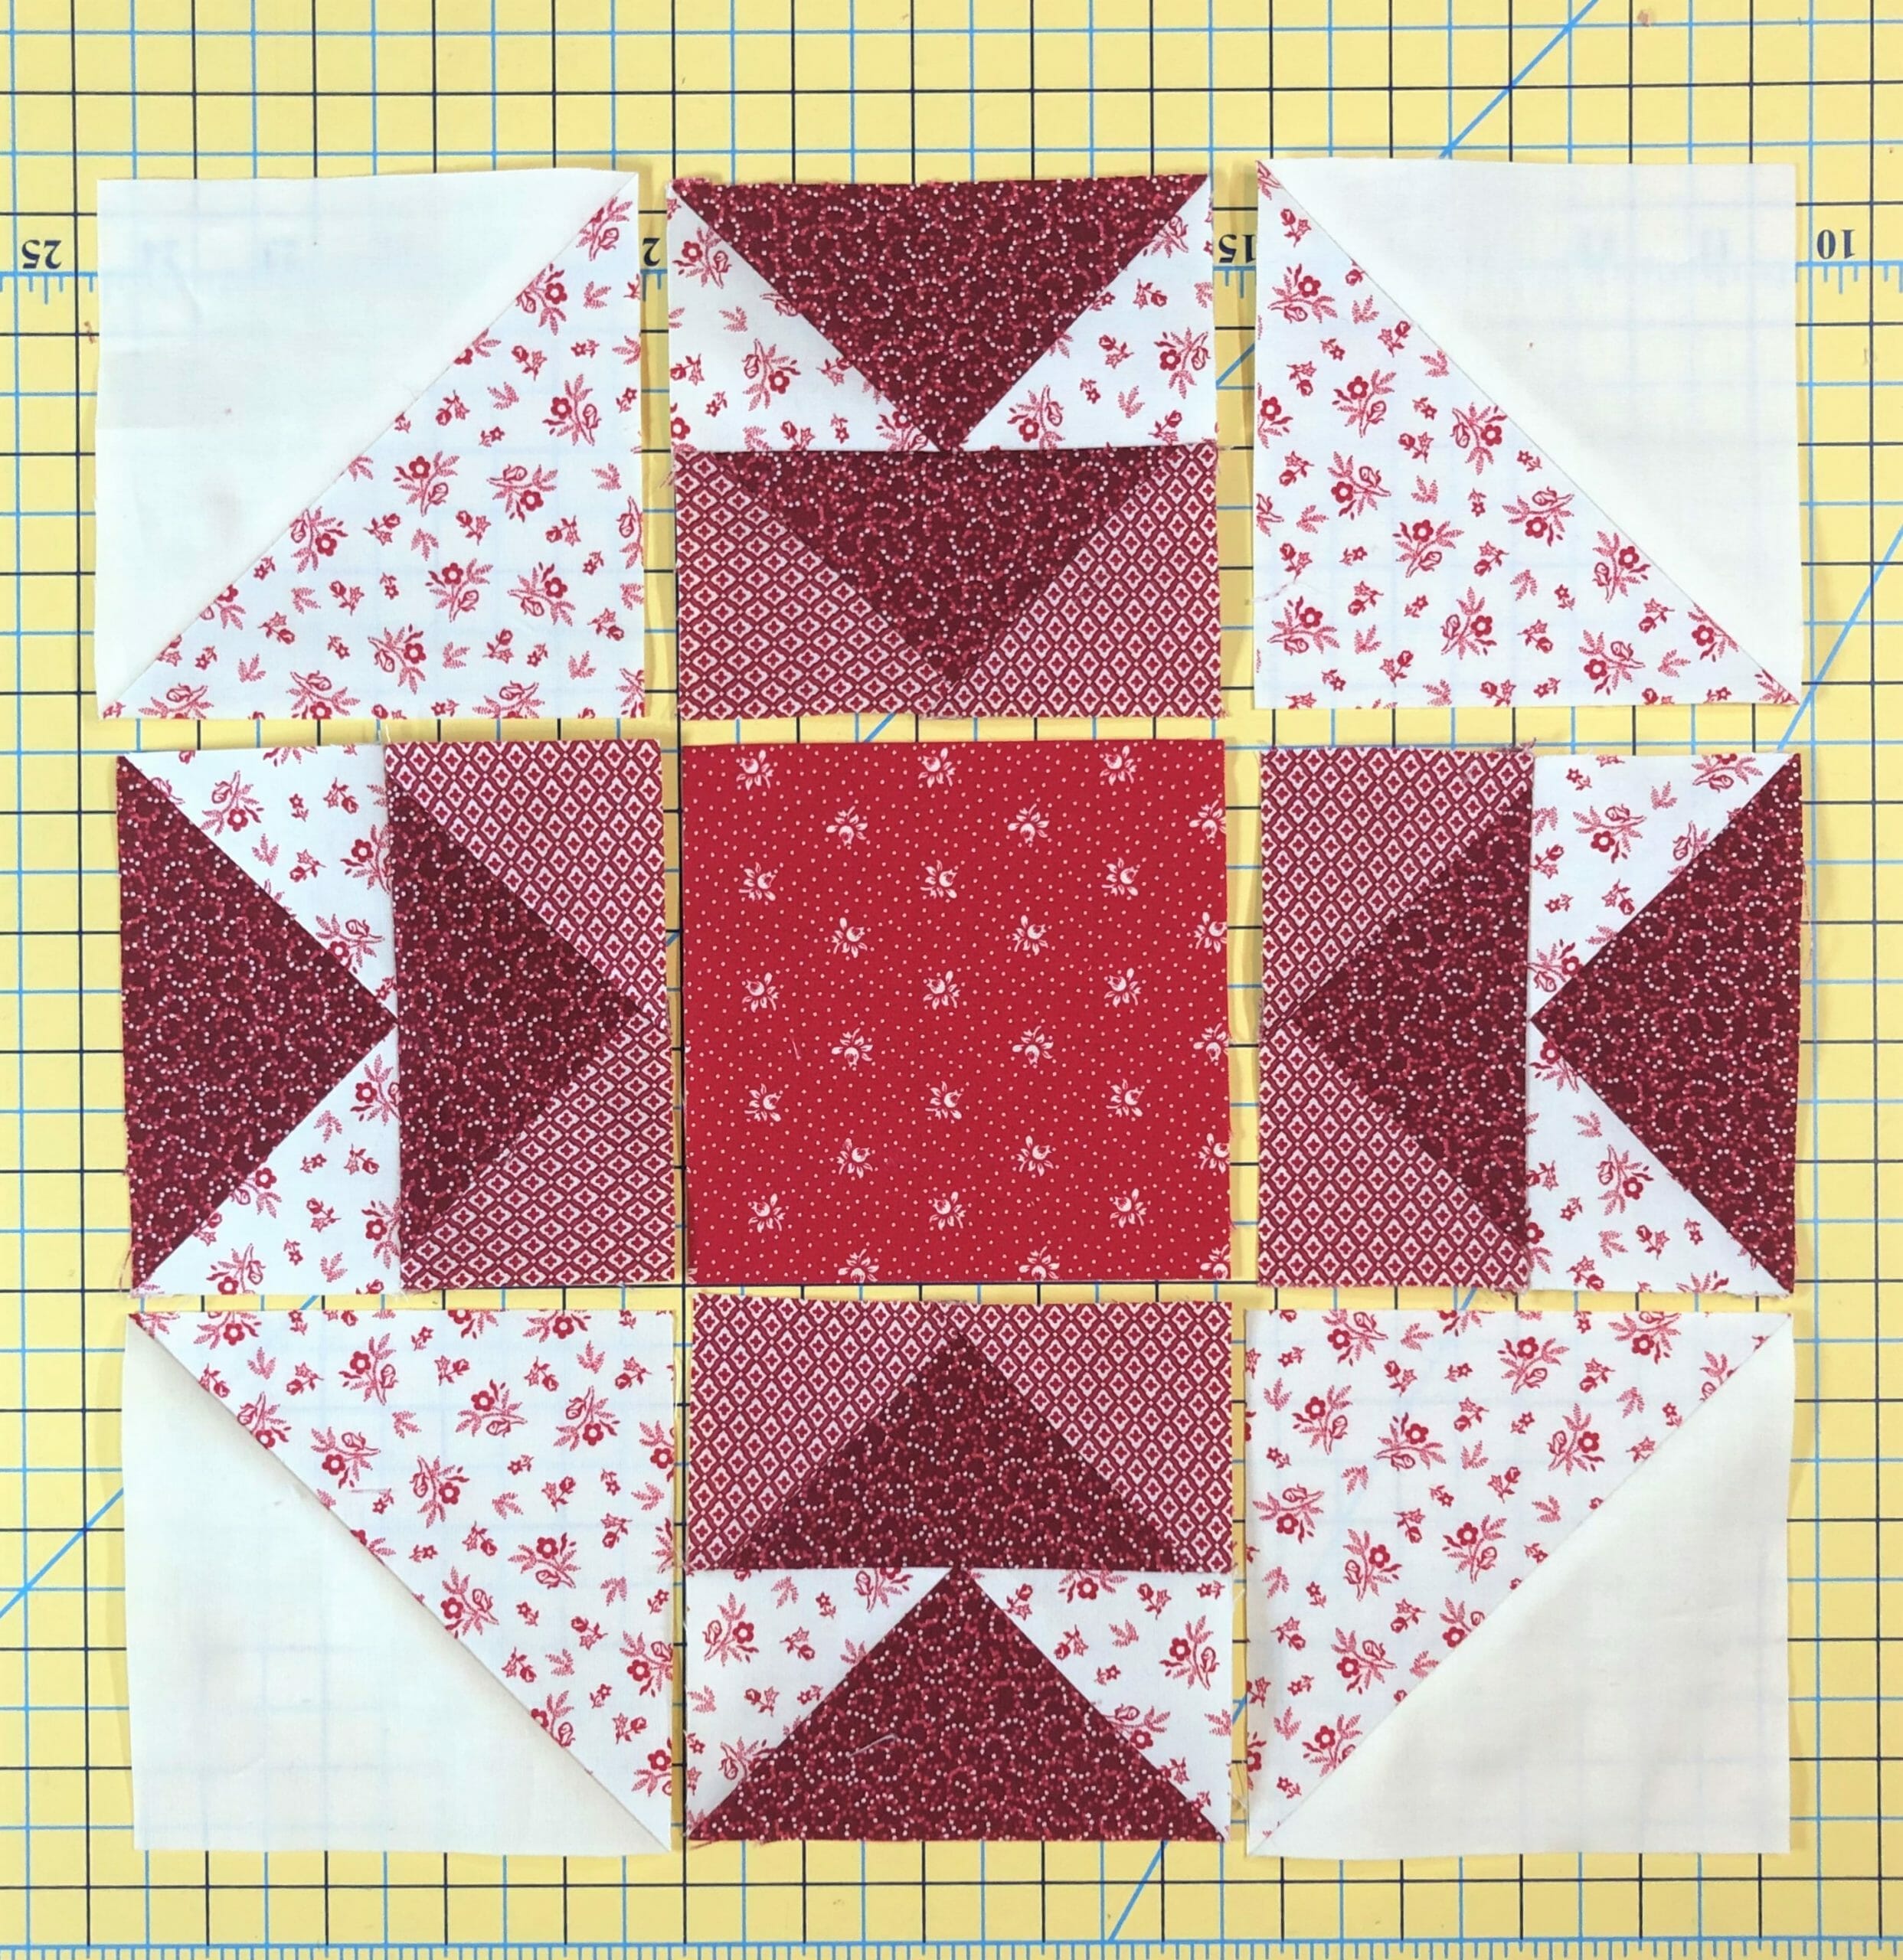
Once those were all finished and trimmed, I was able to get busy assembling the block. Here is the center portion of the unit, which I’ve laid out to begin sewing.

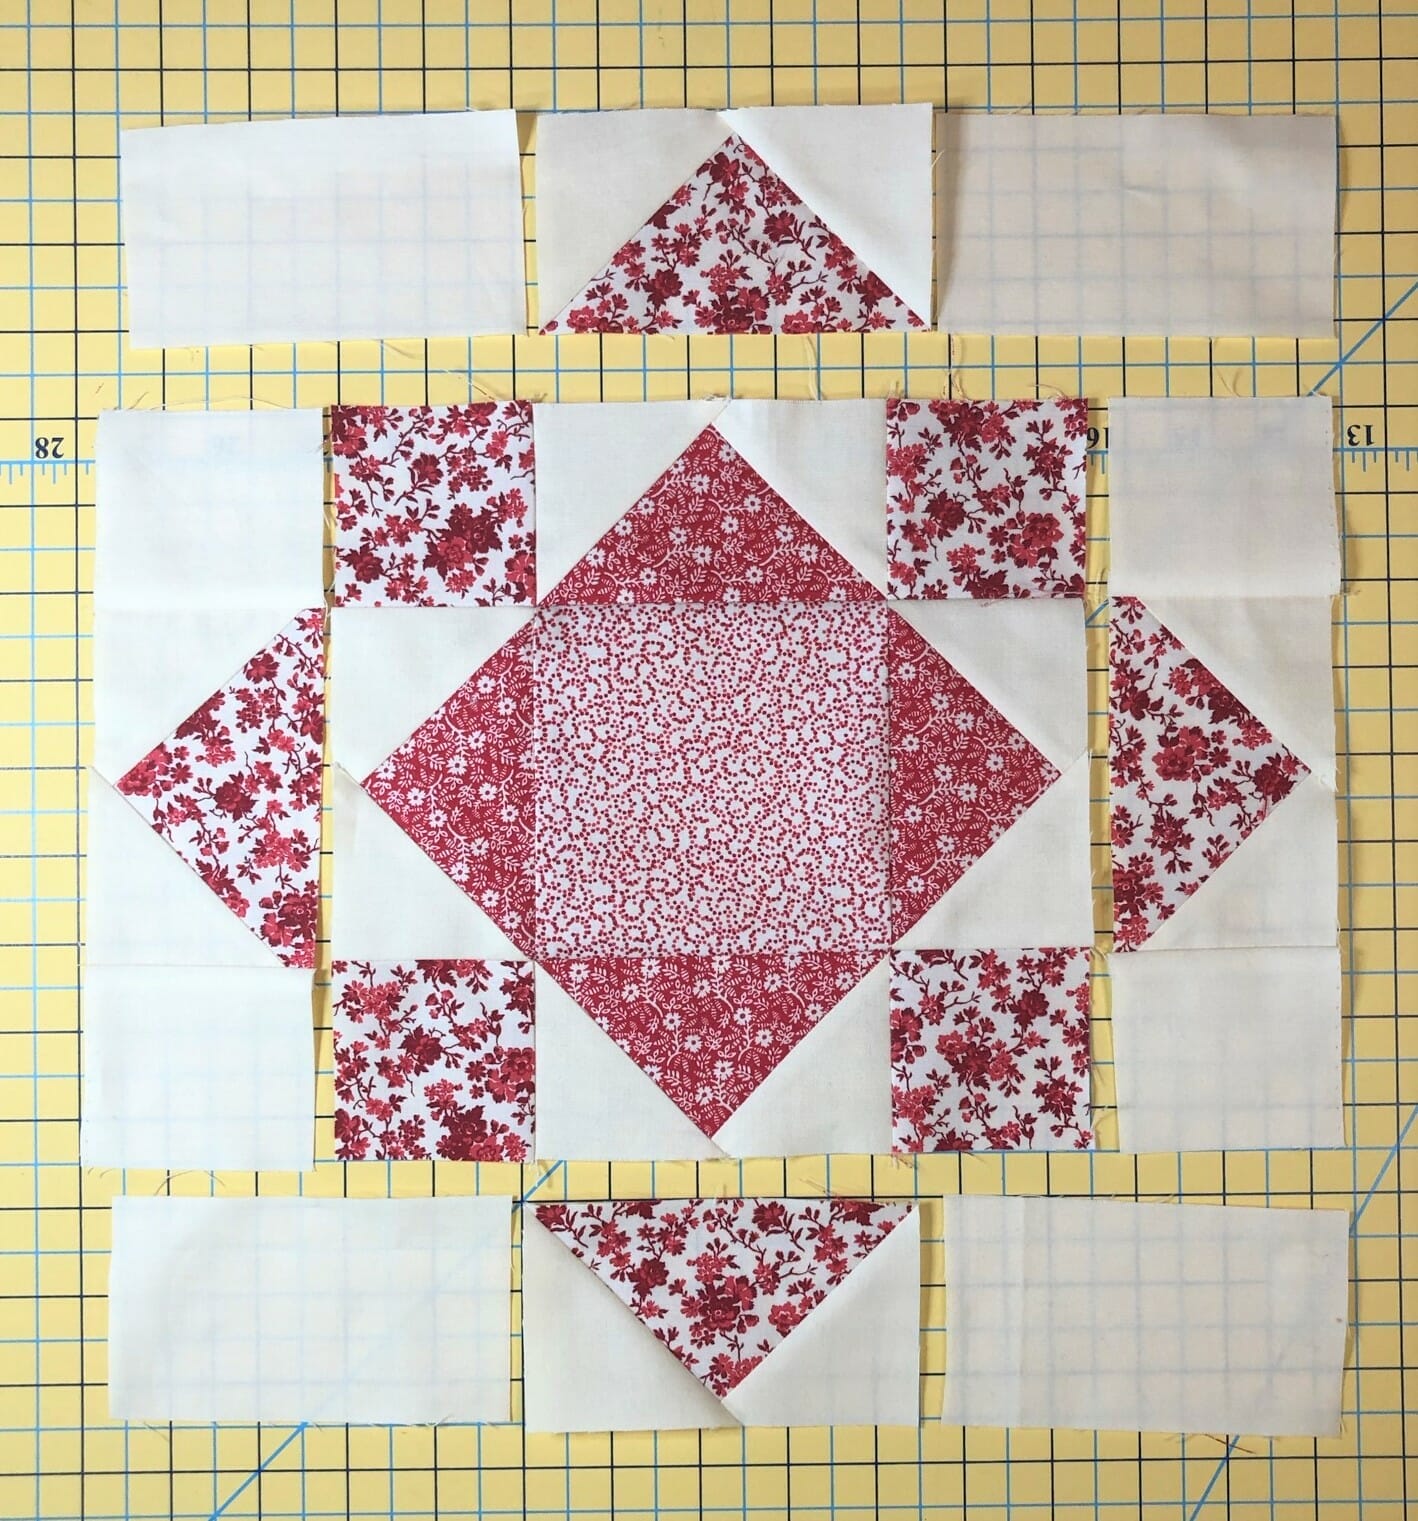
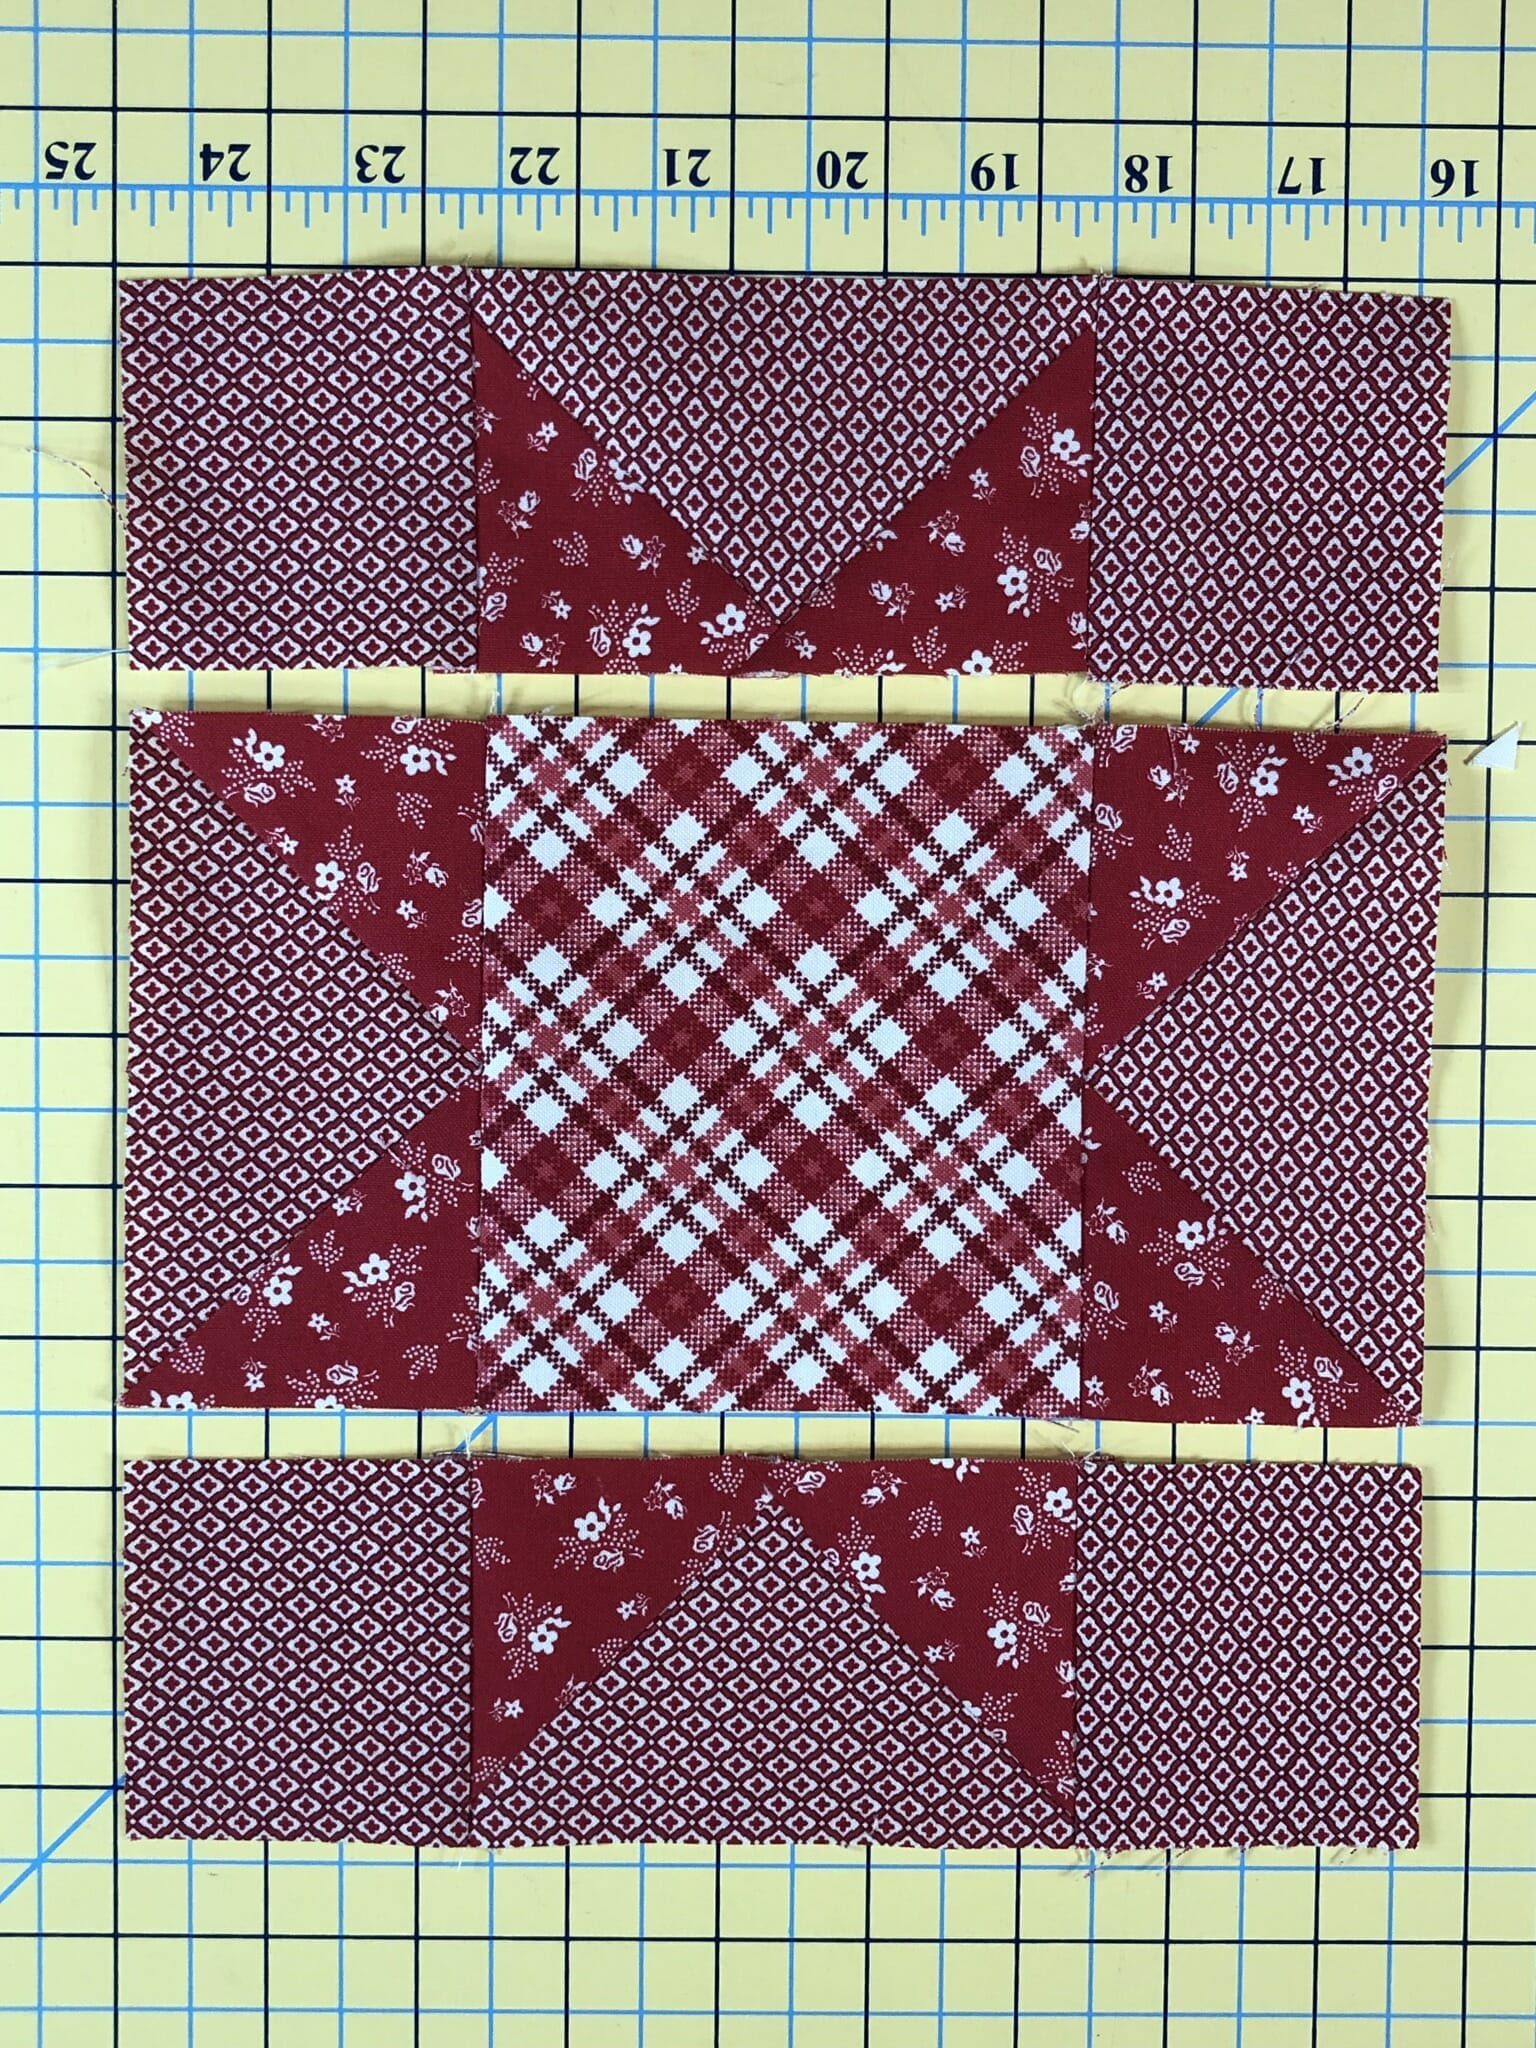
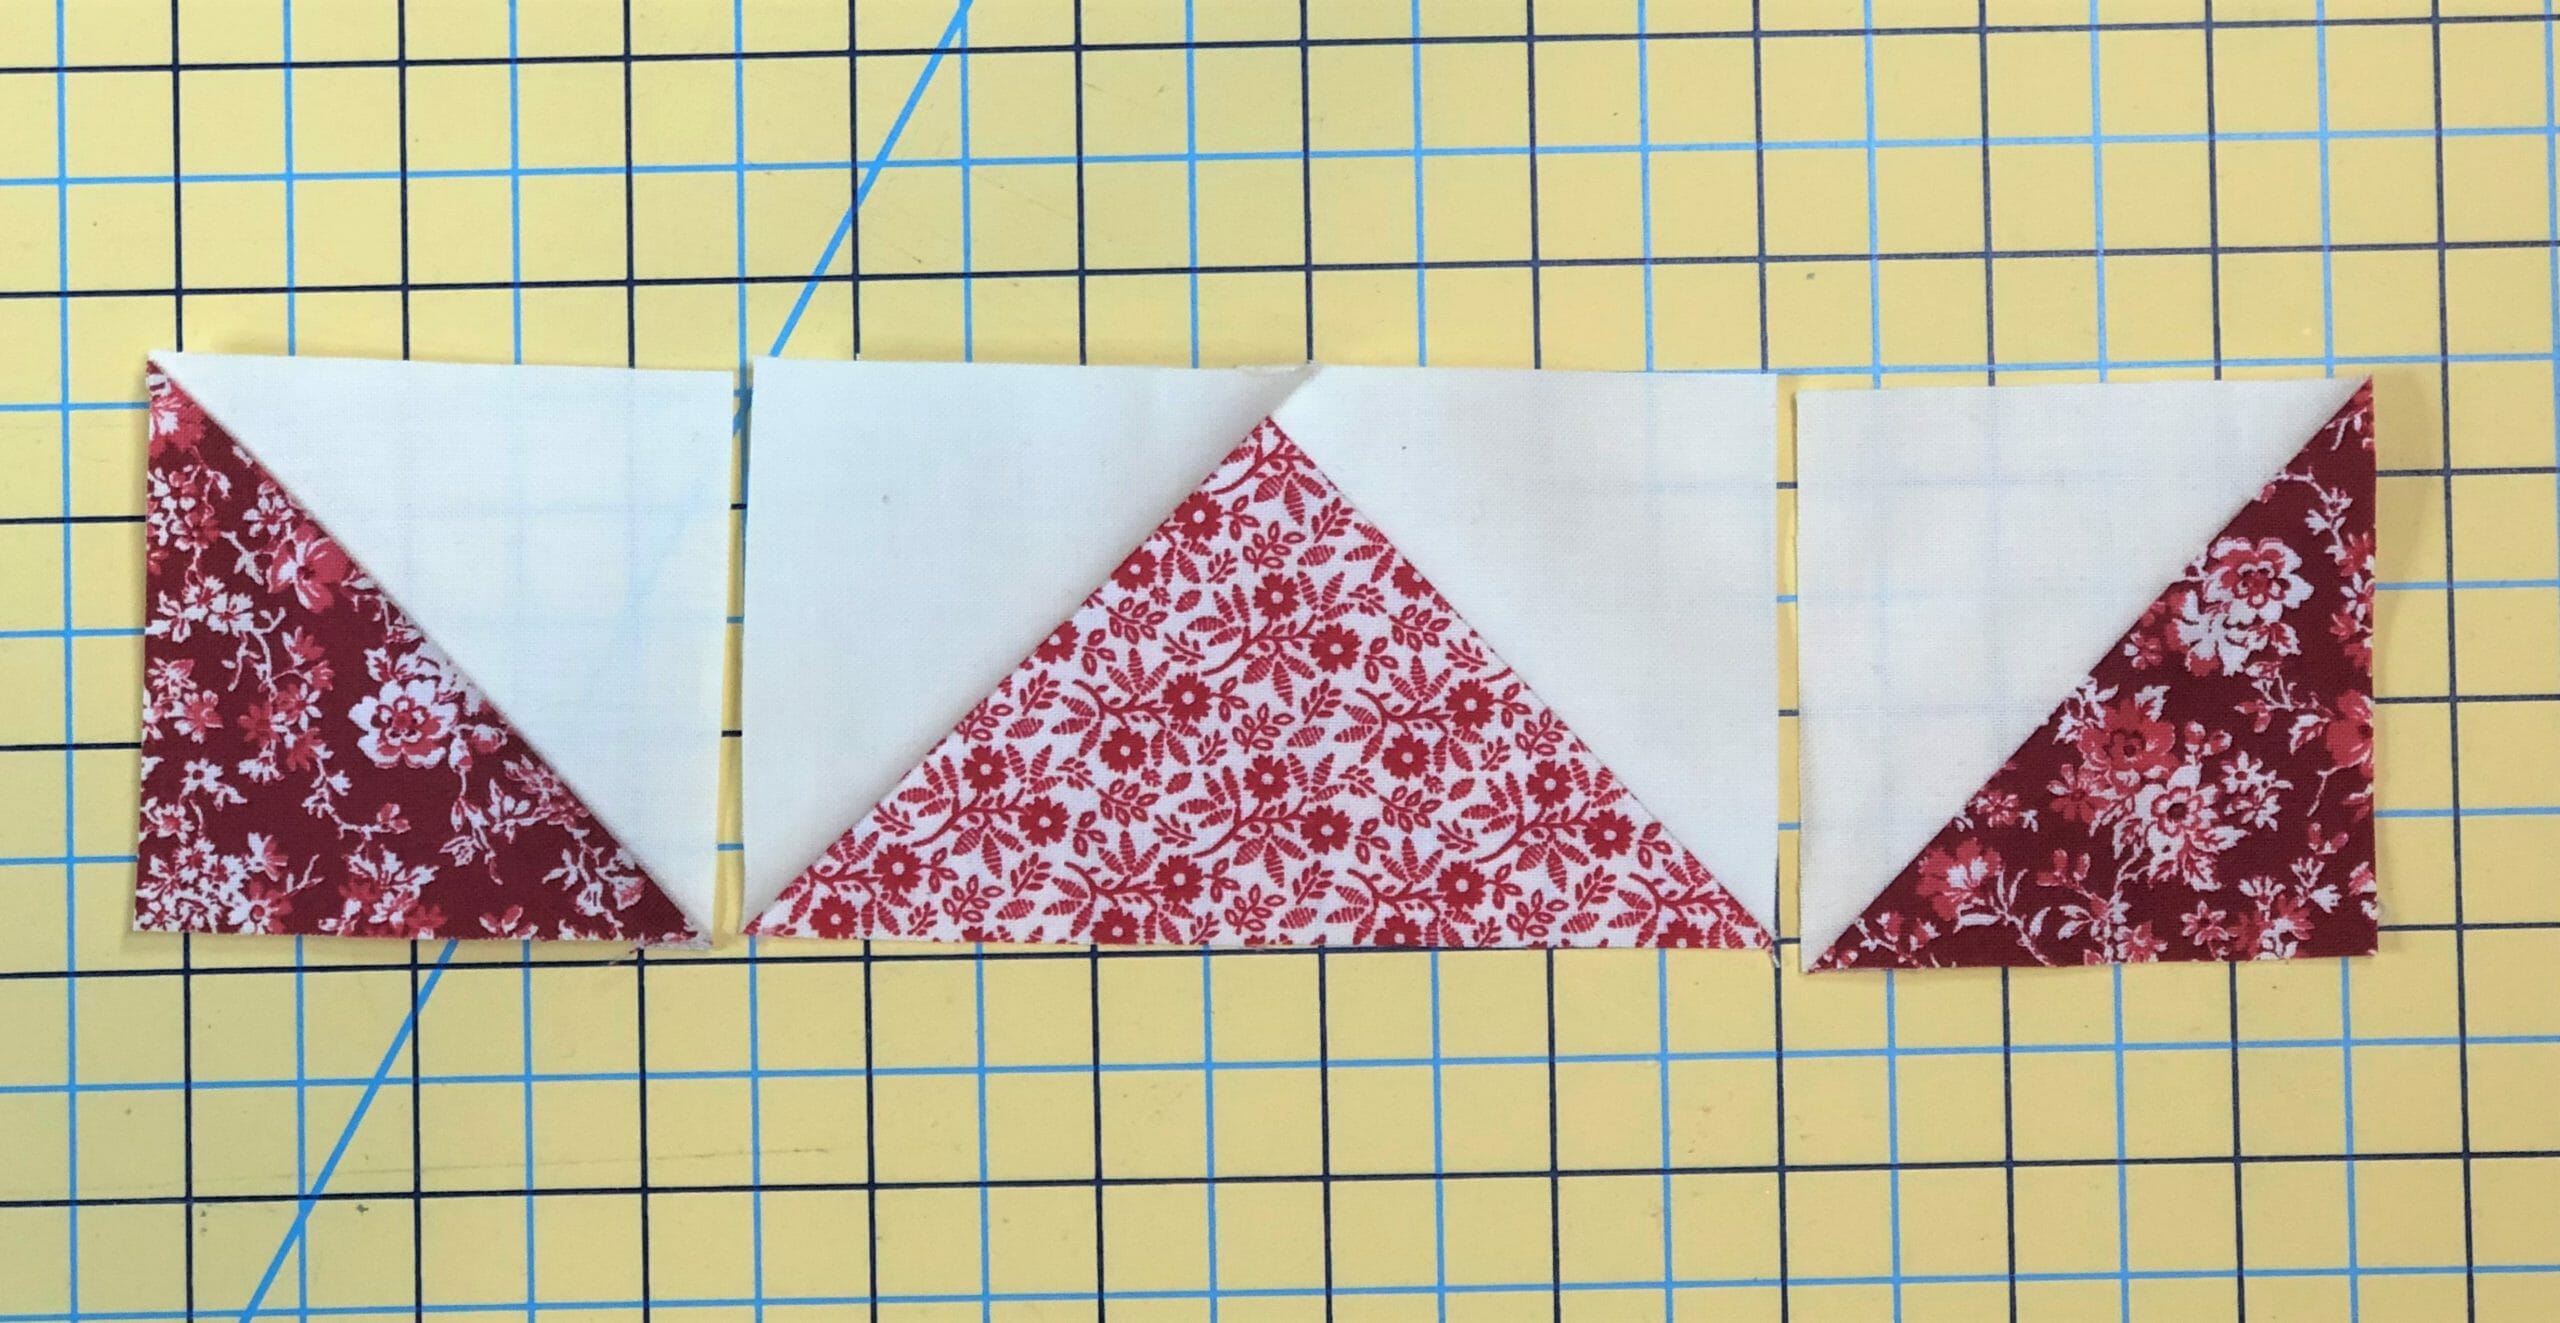
Next, we’ll take the remaining flying geese as well as some Half Square Triangles, then sew those together as shown in step 7. Make sure you press the seam inward toward the flying geese unit on each side so that your seams will nest.

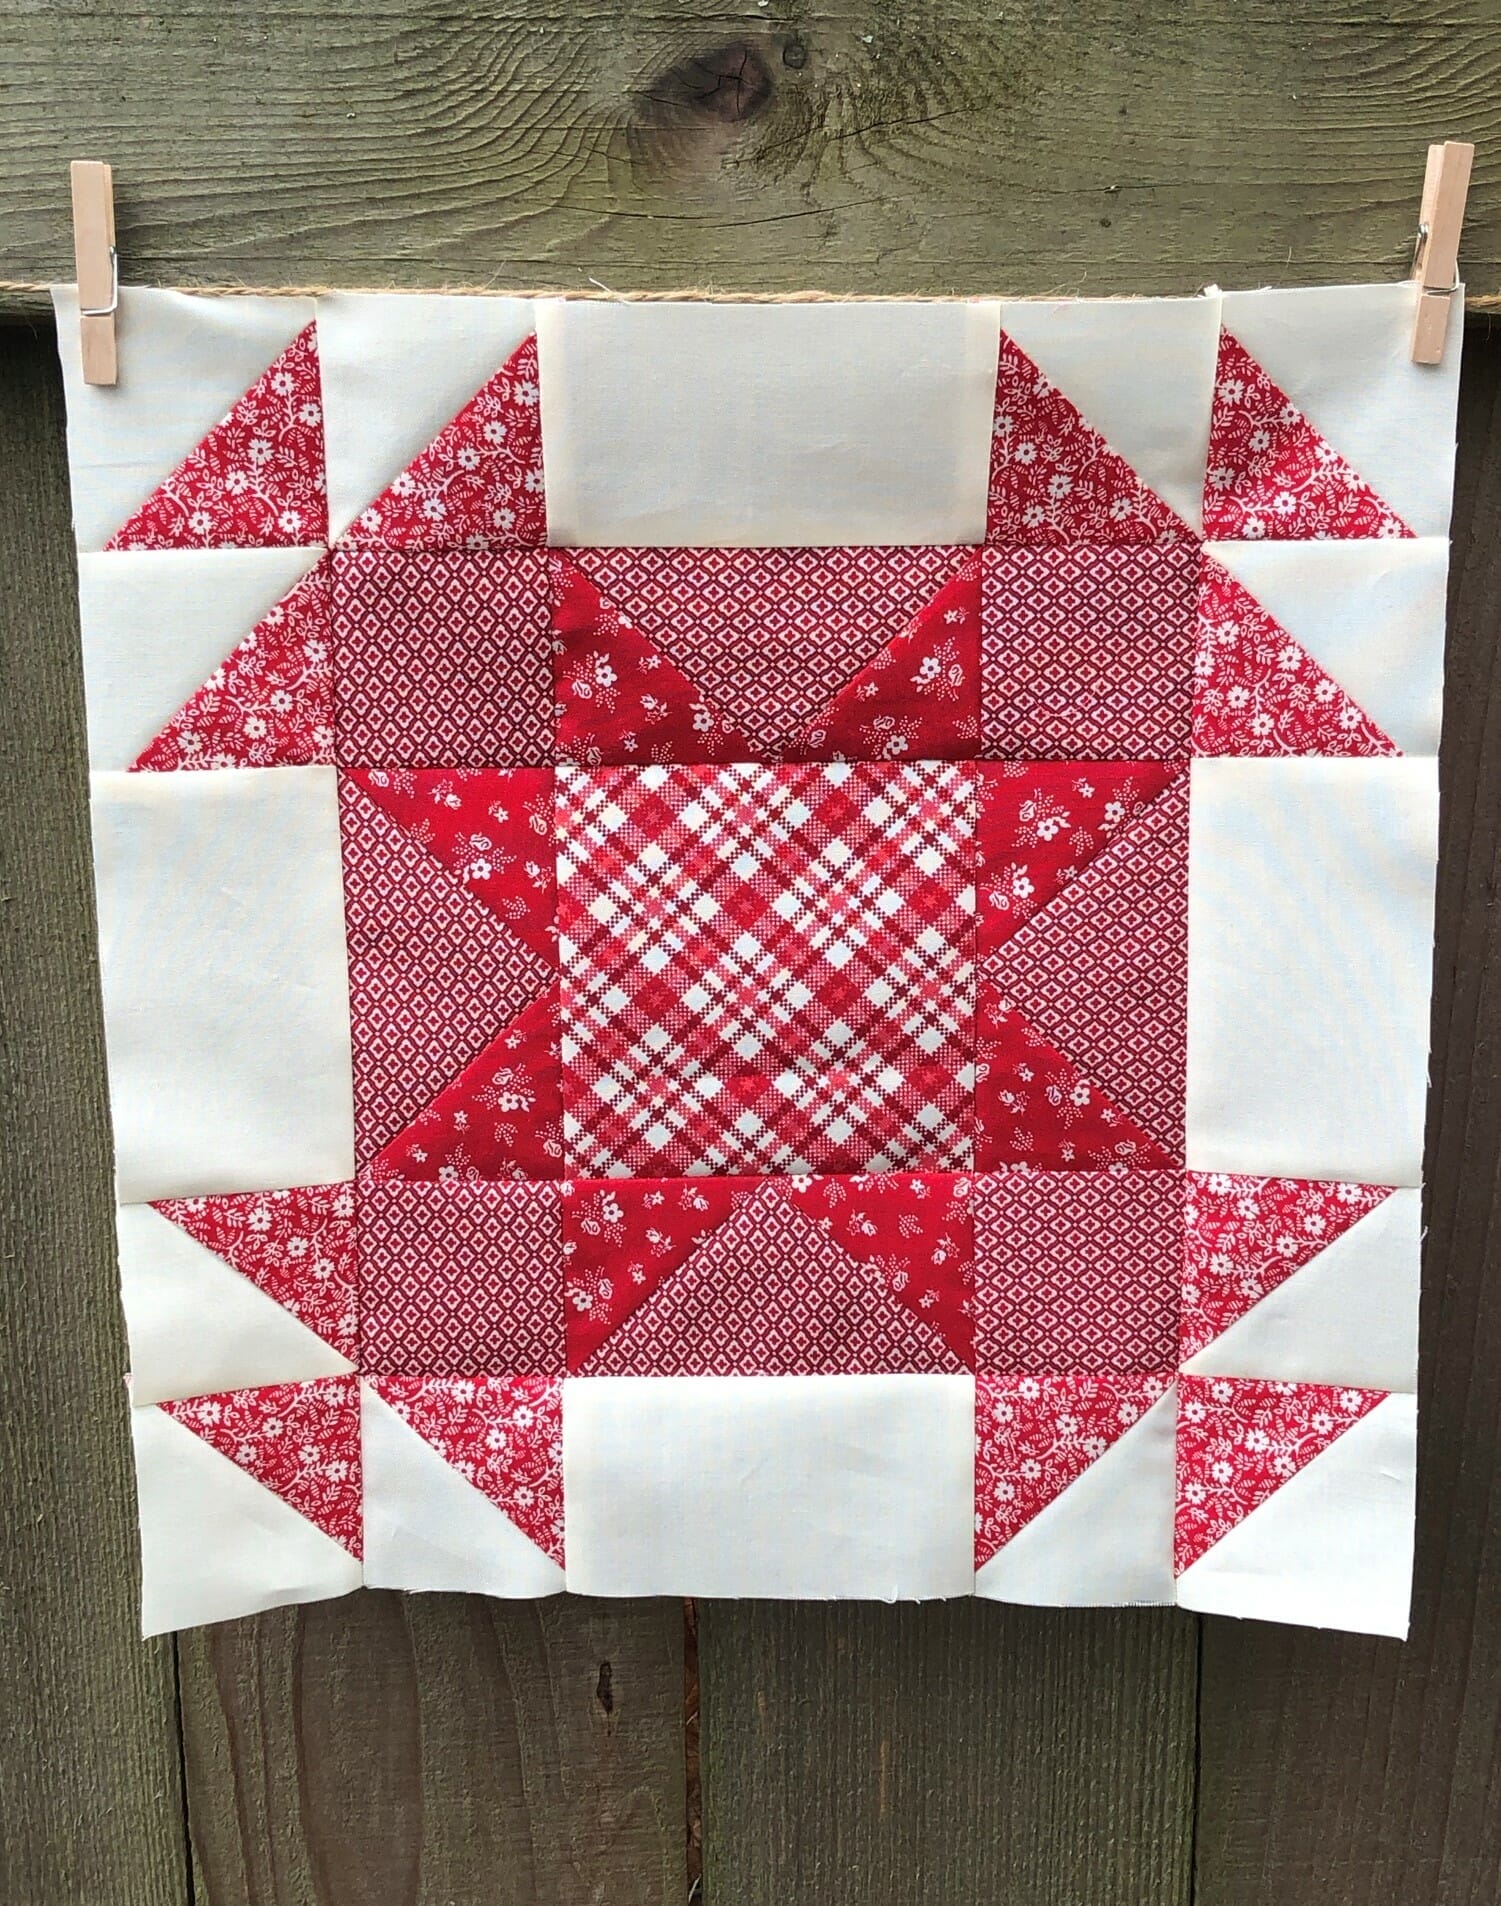
Now, all we have to do is sew those units to the sides, add our G squares to the remaining two units, and then get those sewn to the top and bottom, and the block is finished!

Block #5

This block is our only new one for the month. And this also means, that since it is new, we will be making it again in month 11, so be prepared.

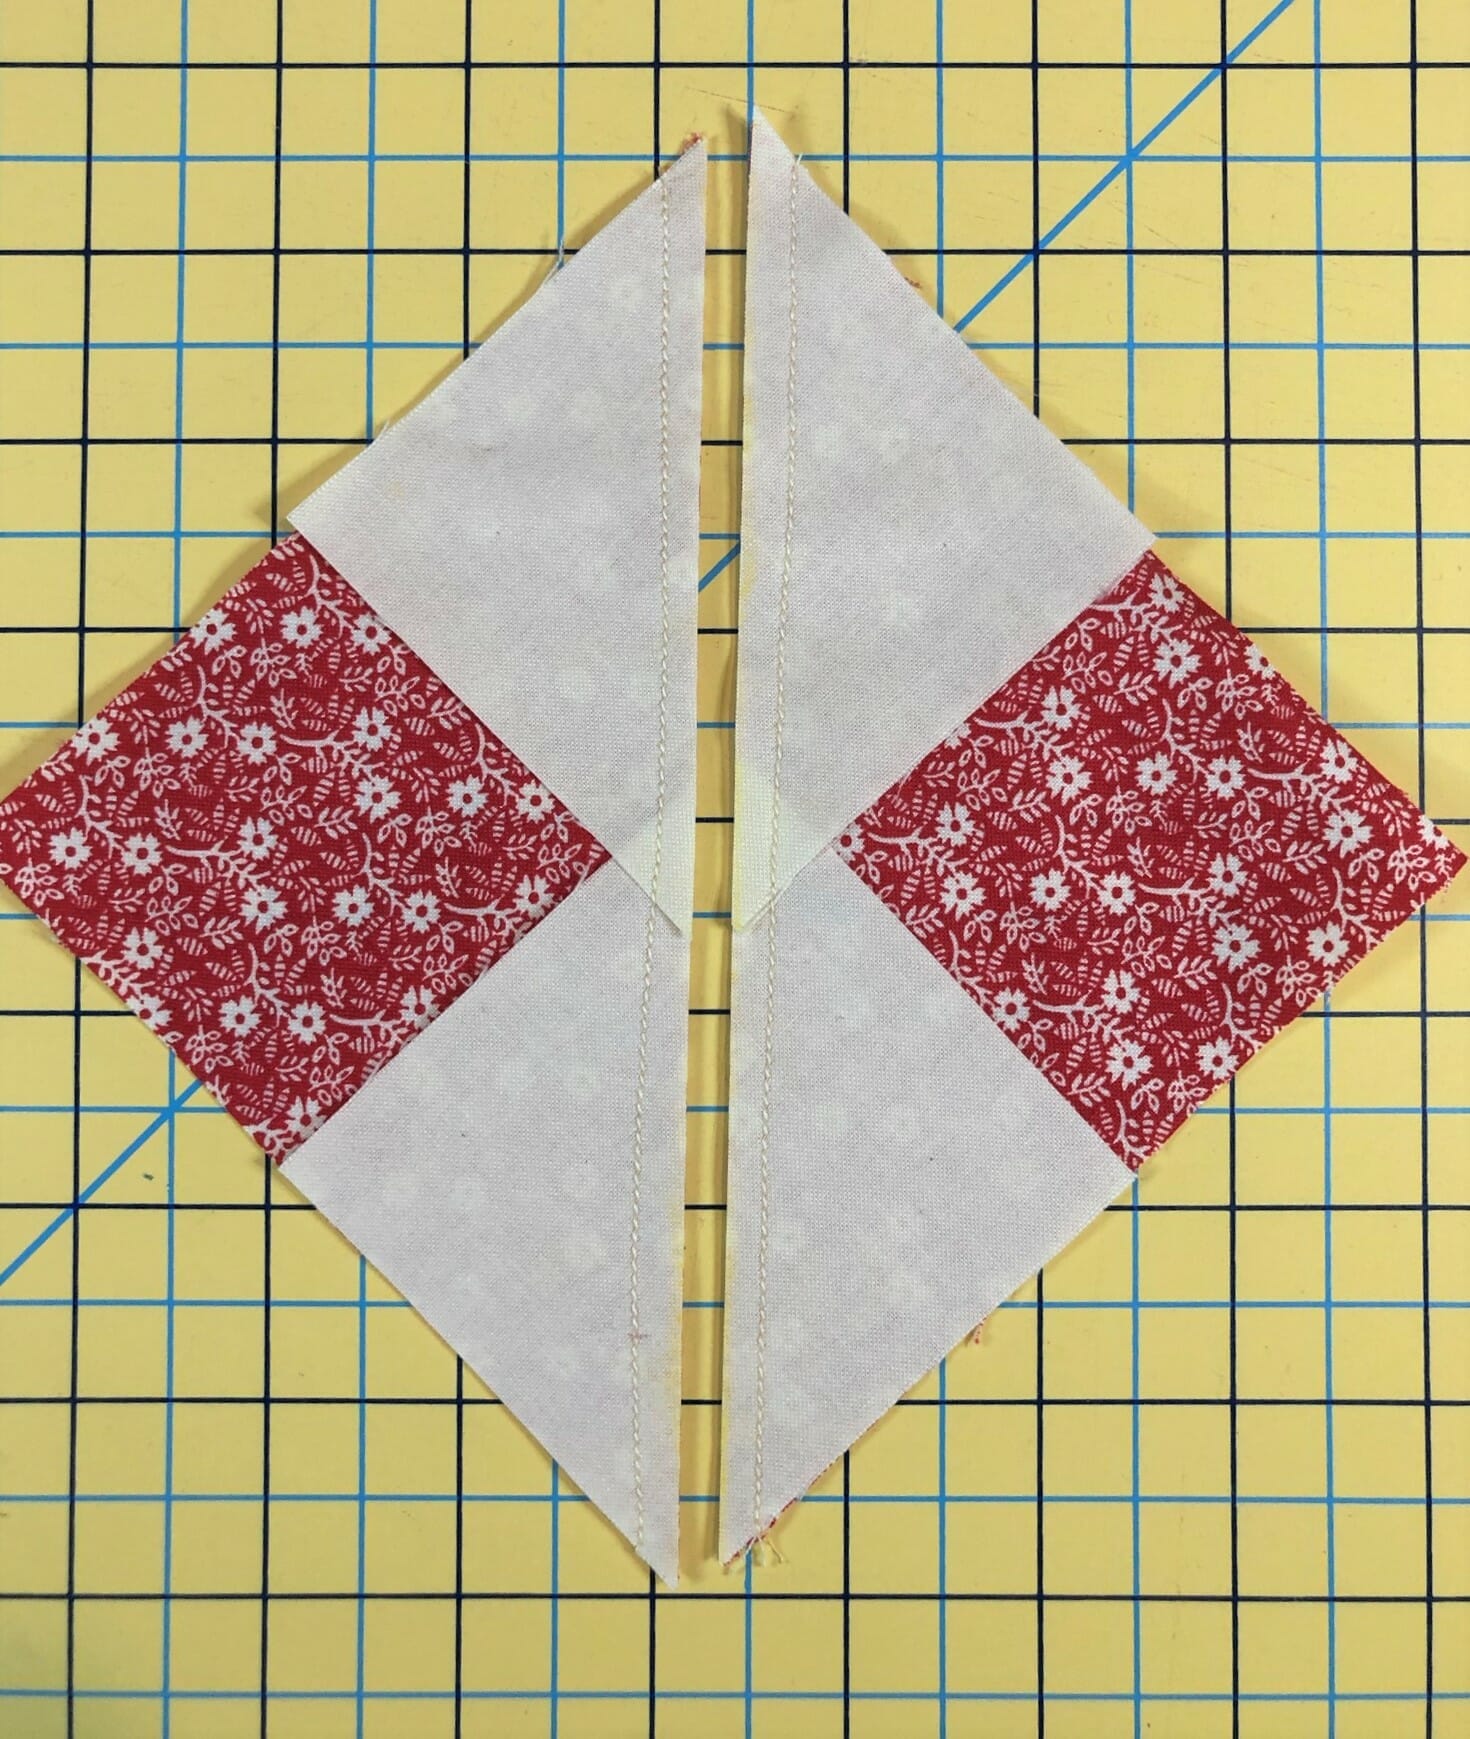
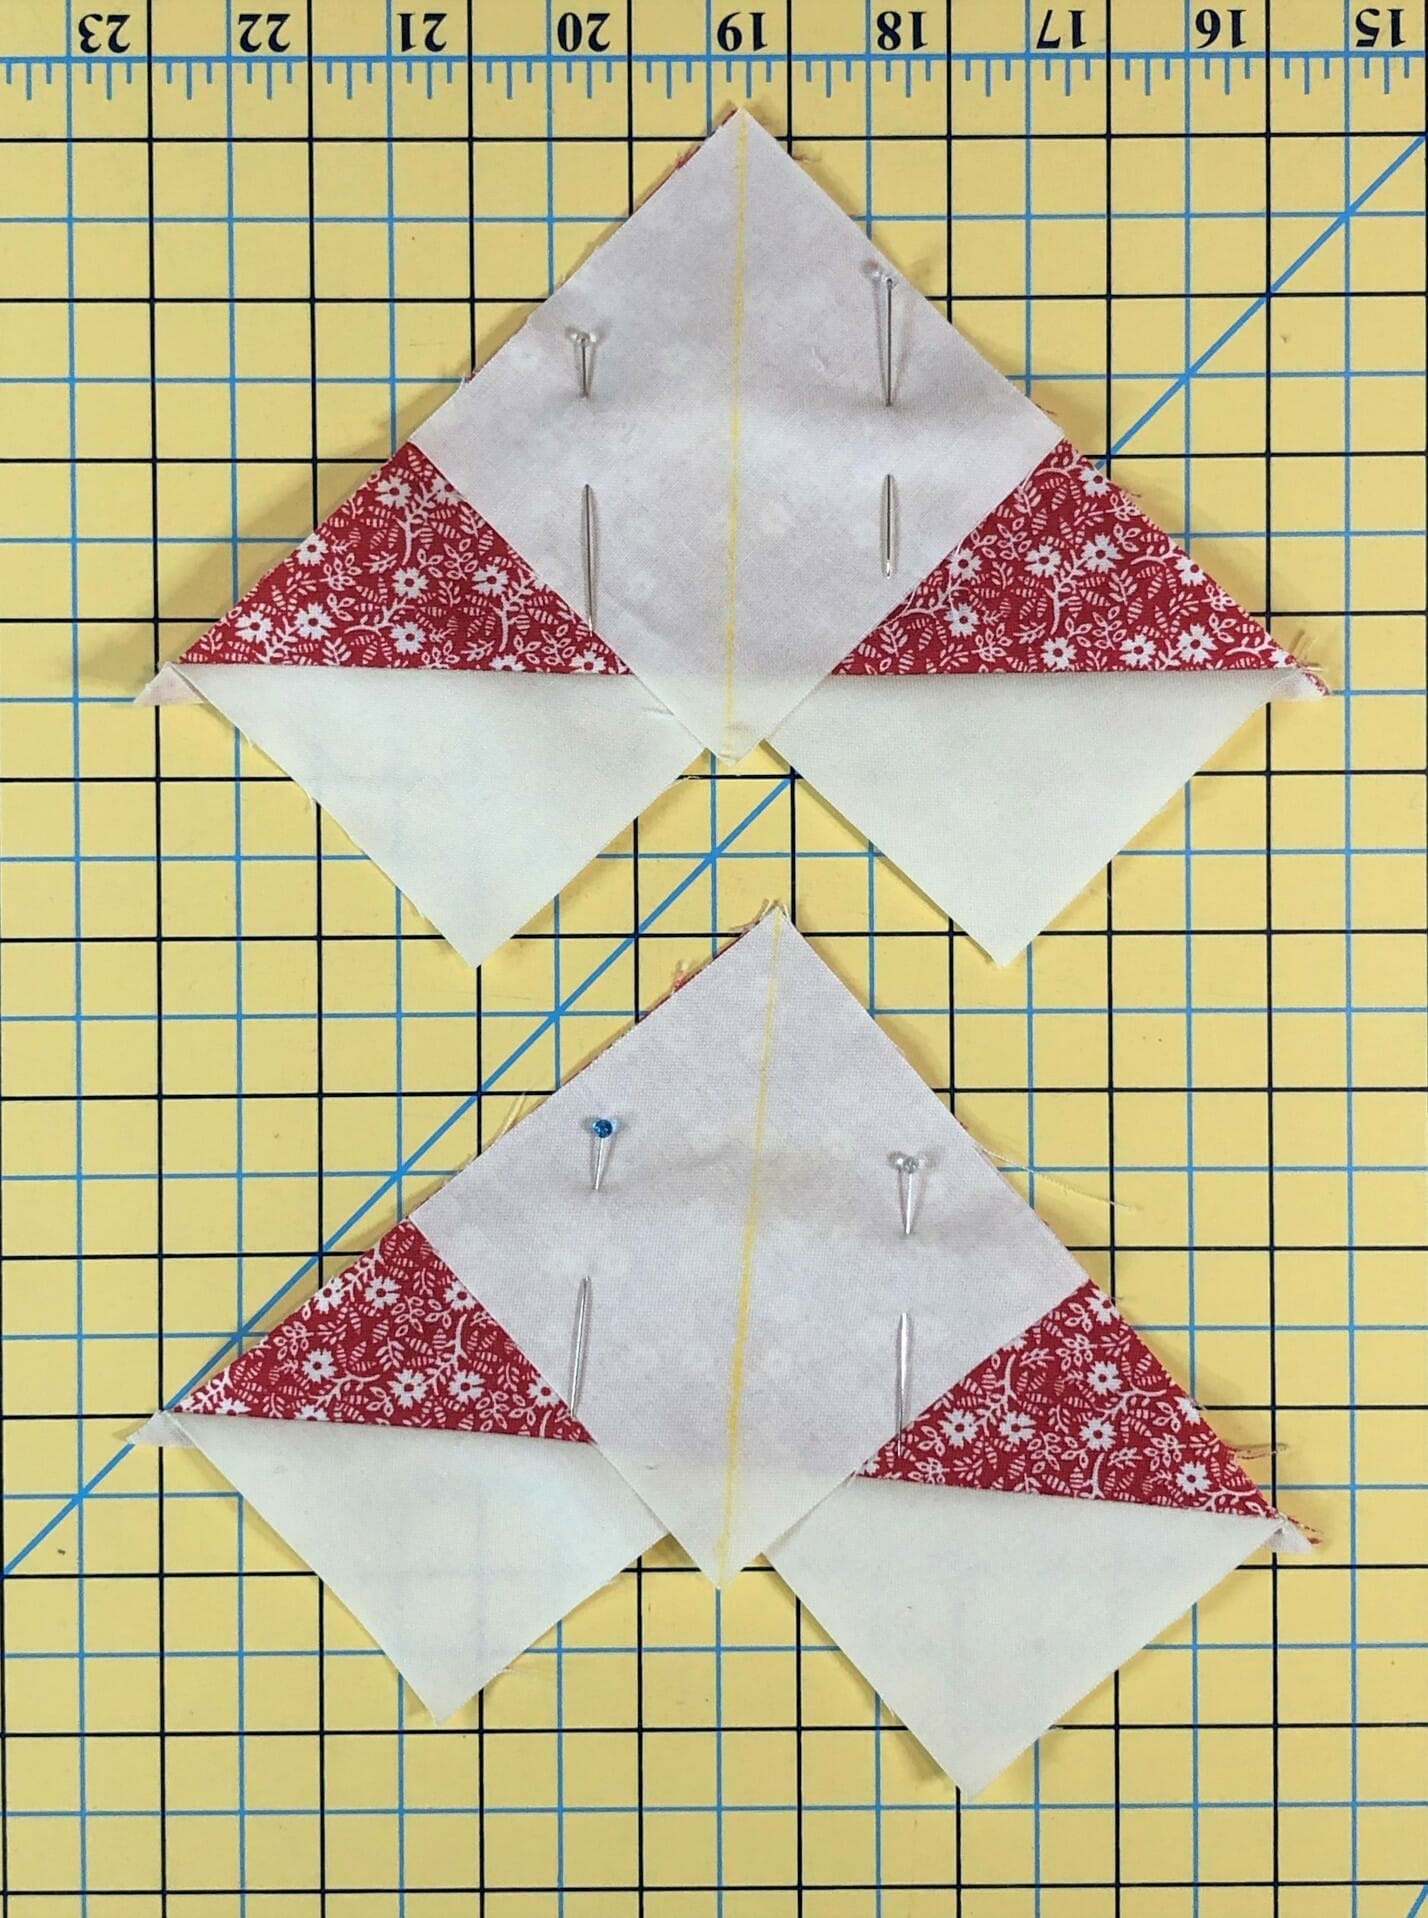
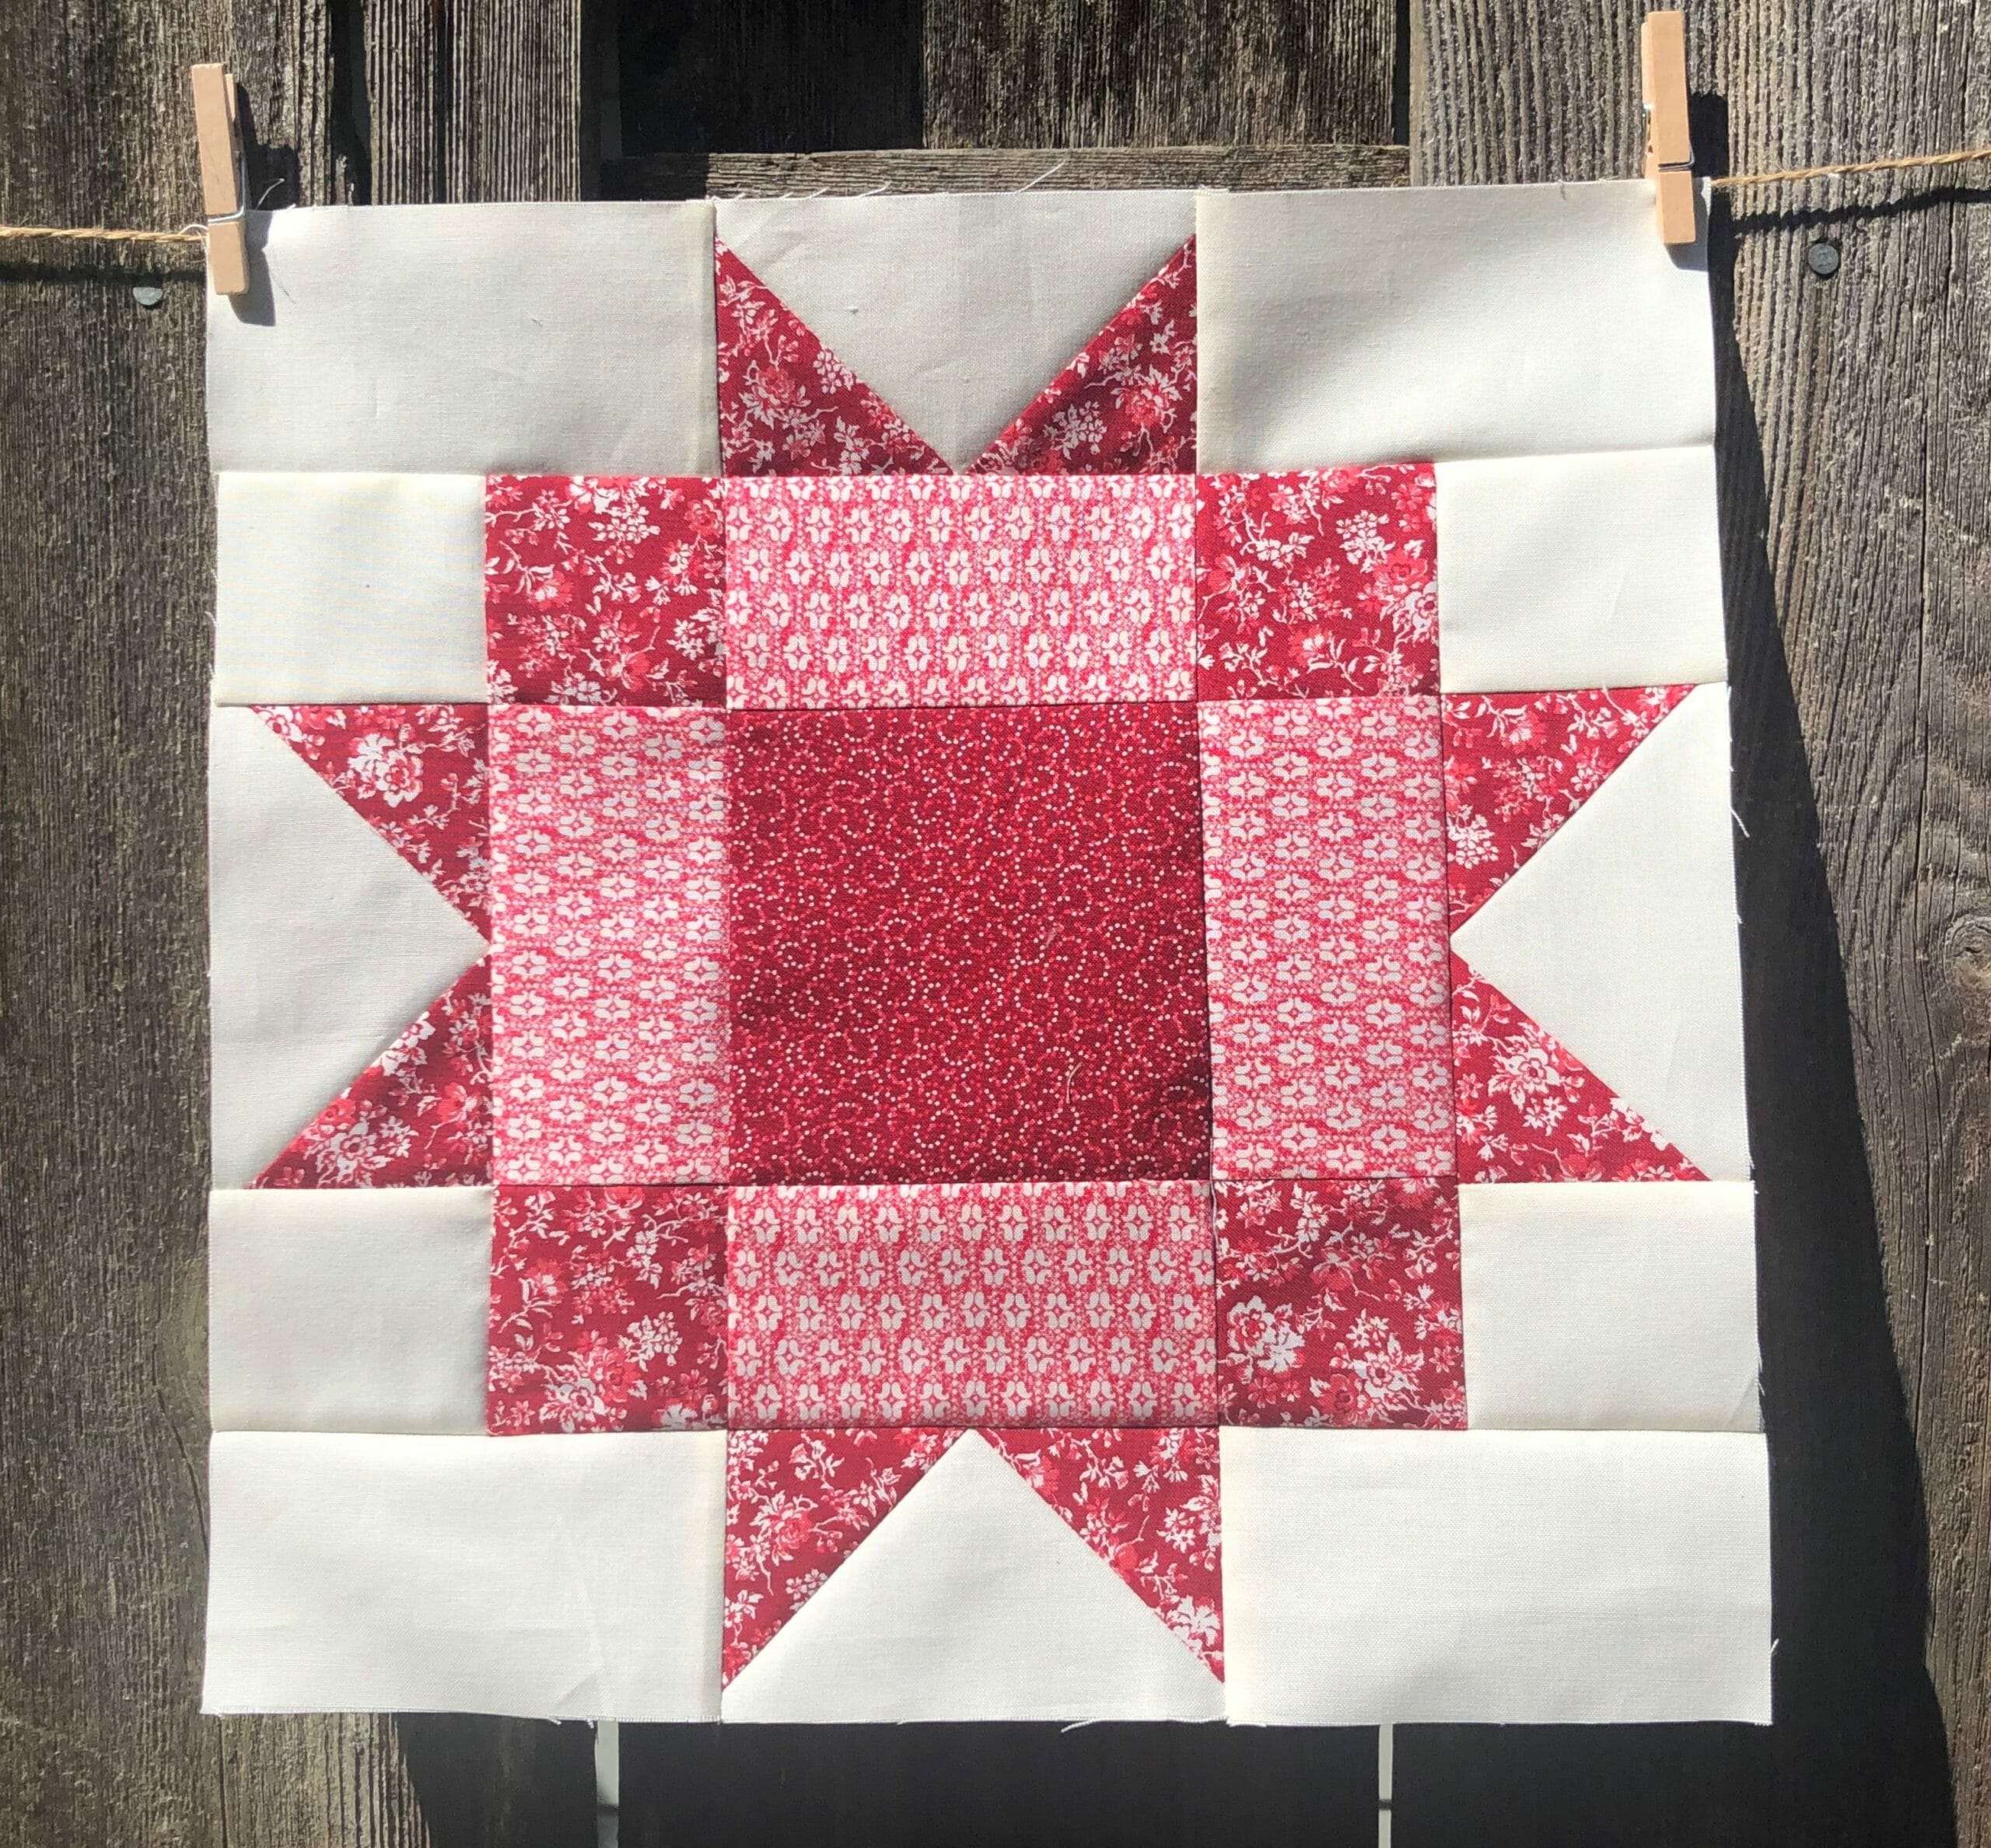
Right off the bat, we are making even MORE no-waste flying geese – in two colorways no less. Once you have both sets completed, you’ll sew them together like it says in step 5. Here is what that looks like in real life:

Next, you’ll make some more Half Square triangles – big ones this time. Always remember that you are free to cut out your pieces just a smidge bigger so that you have wiggle room to trim as needed.

And now we can sew all the units together 9-patch style. Follow the directions and make sure that all your flying geese are pointing inward toward the center square. This was one of those blocks where the seams can get a little bulky, so if you aren’t comfortable with that, remember that you can always choose to press any seams open to reduce that bulk. Otherwise, follow the pressing arrows and you should be just fine.
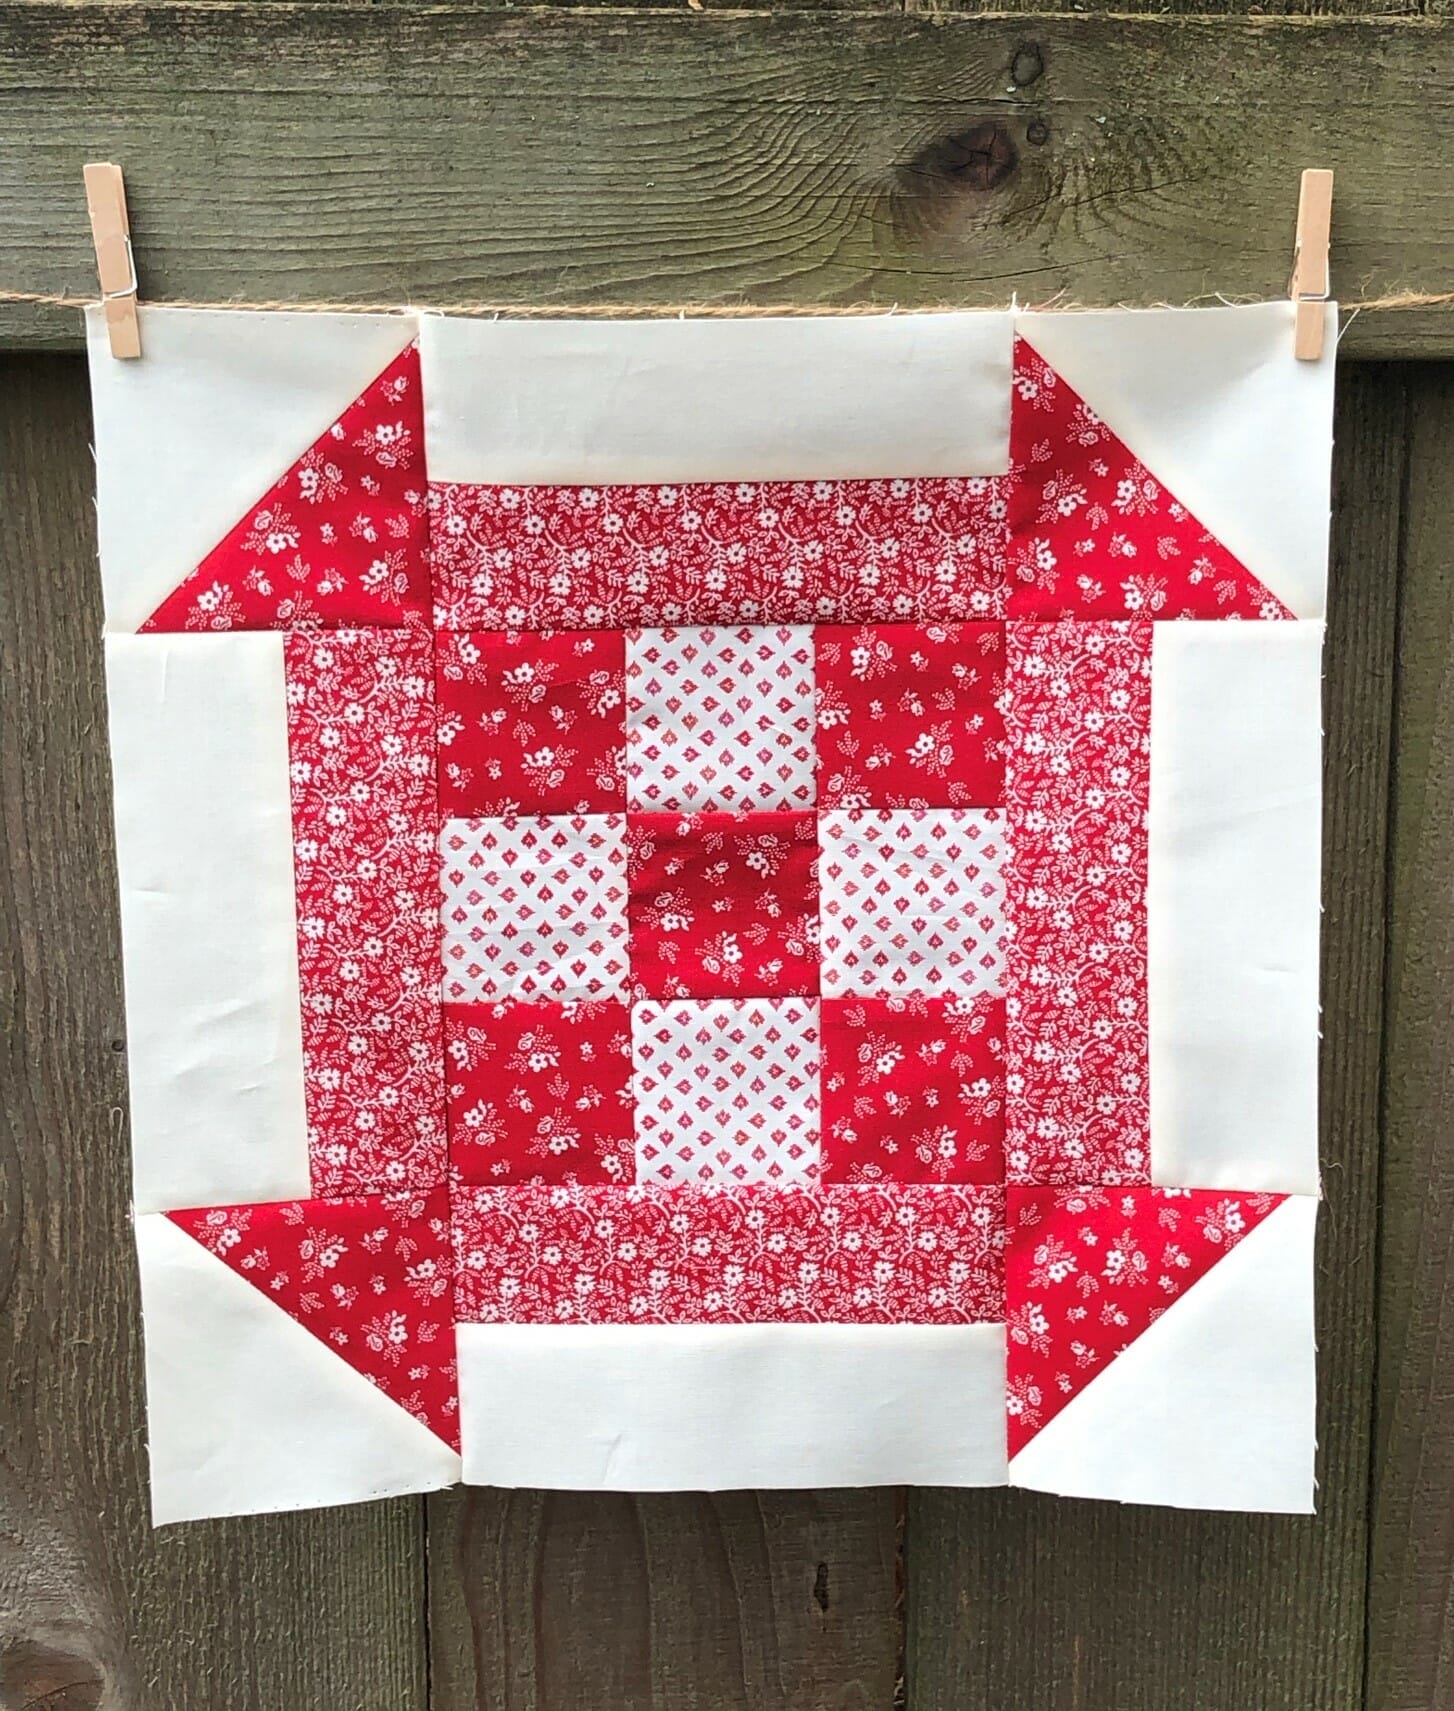
Block #12

This block is another repeat from month 1 and was known as block #21.

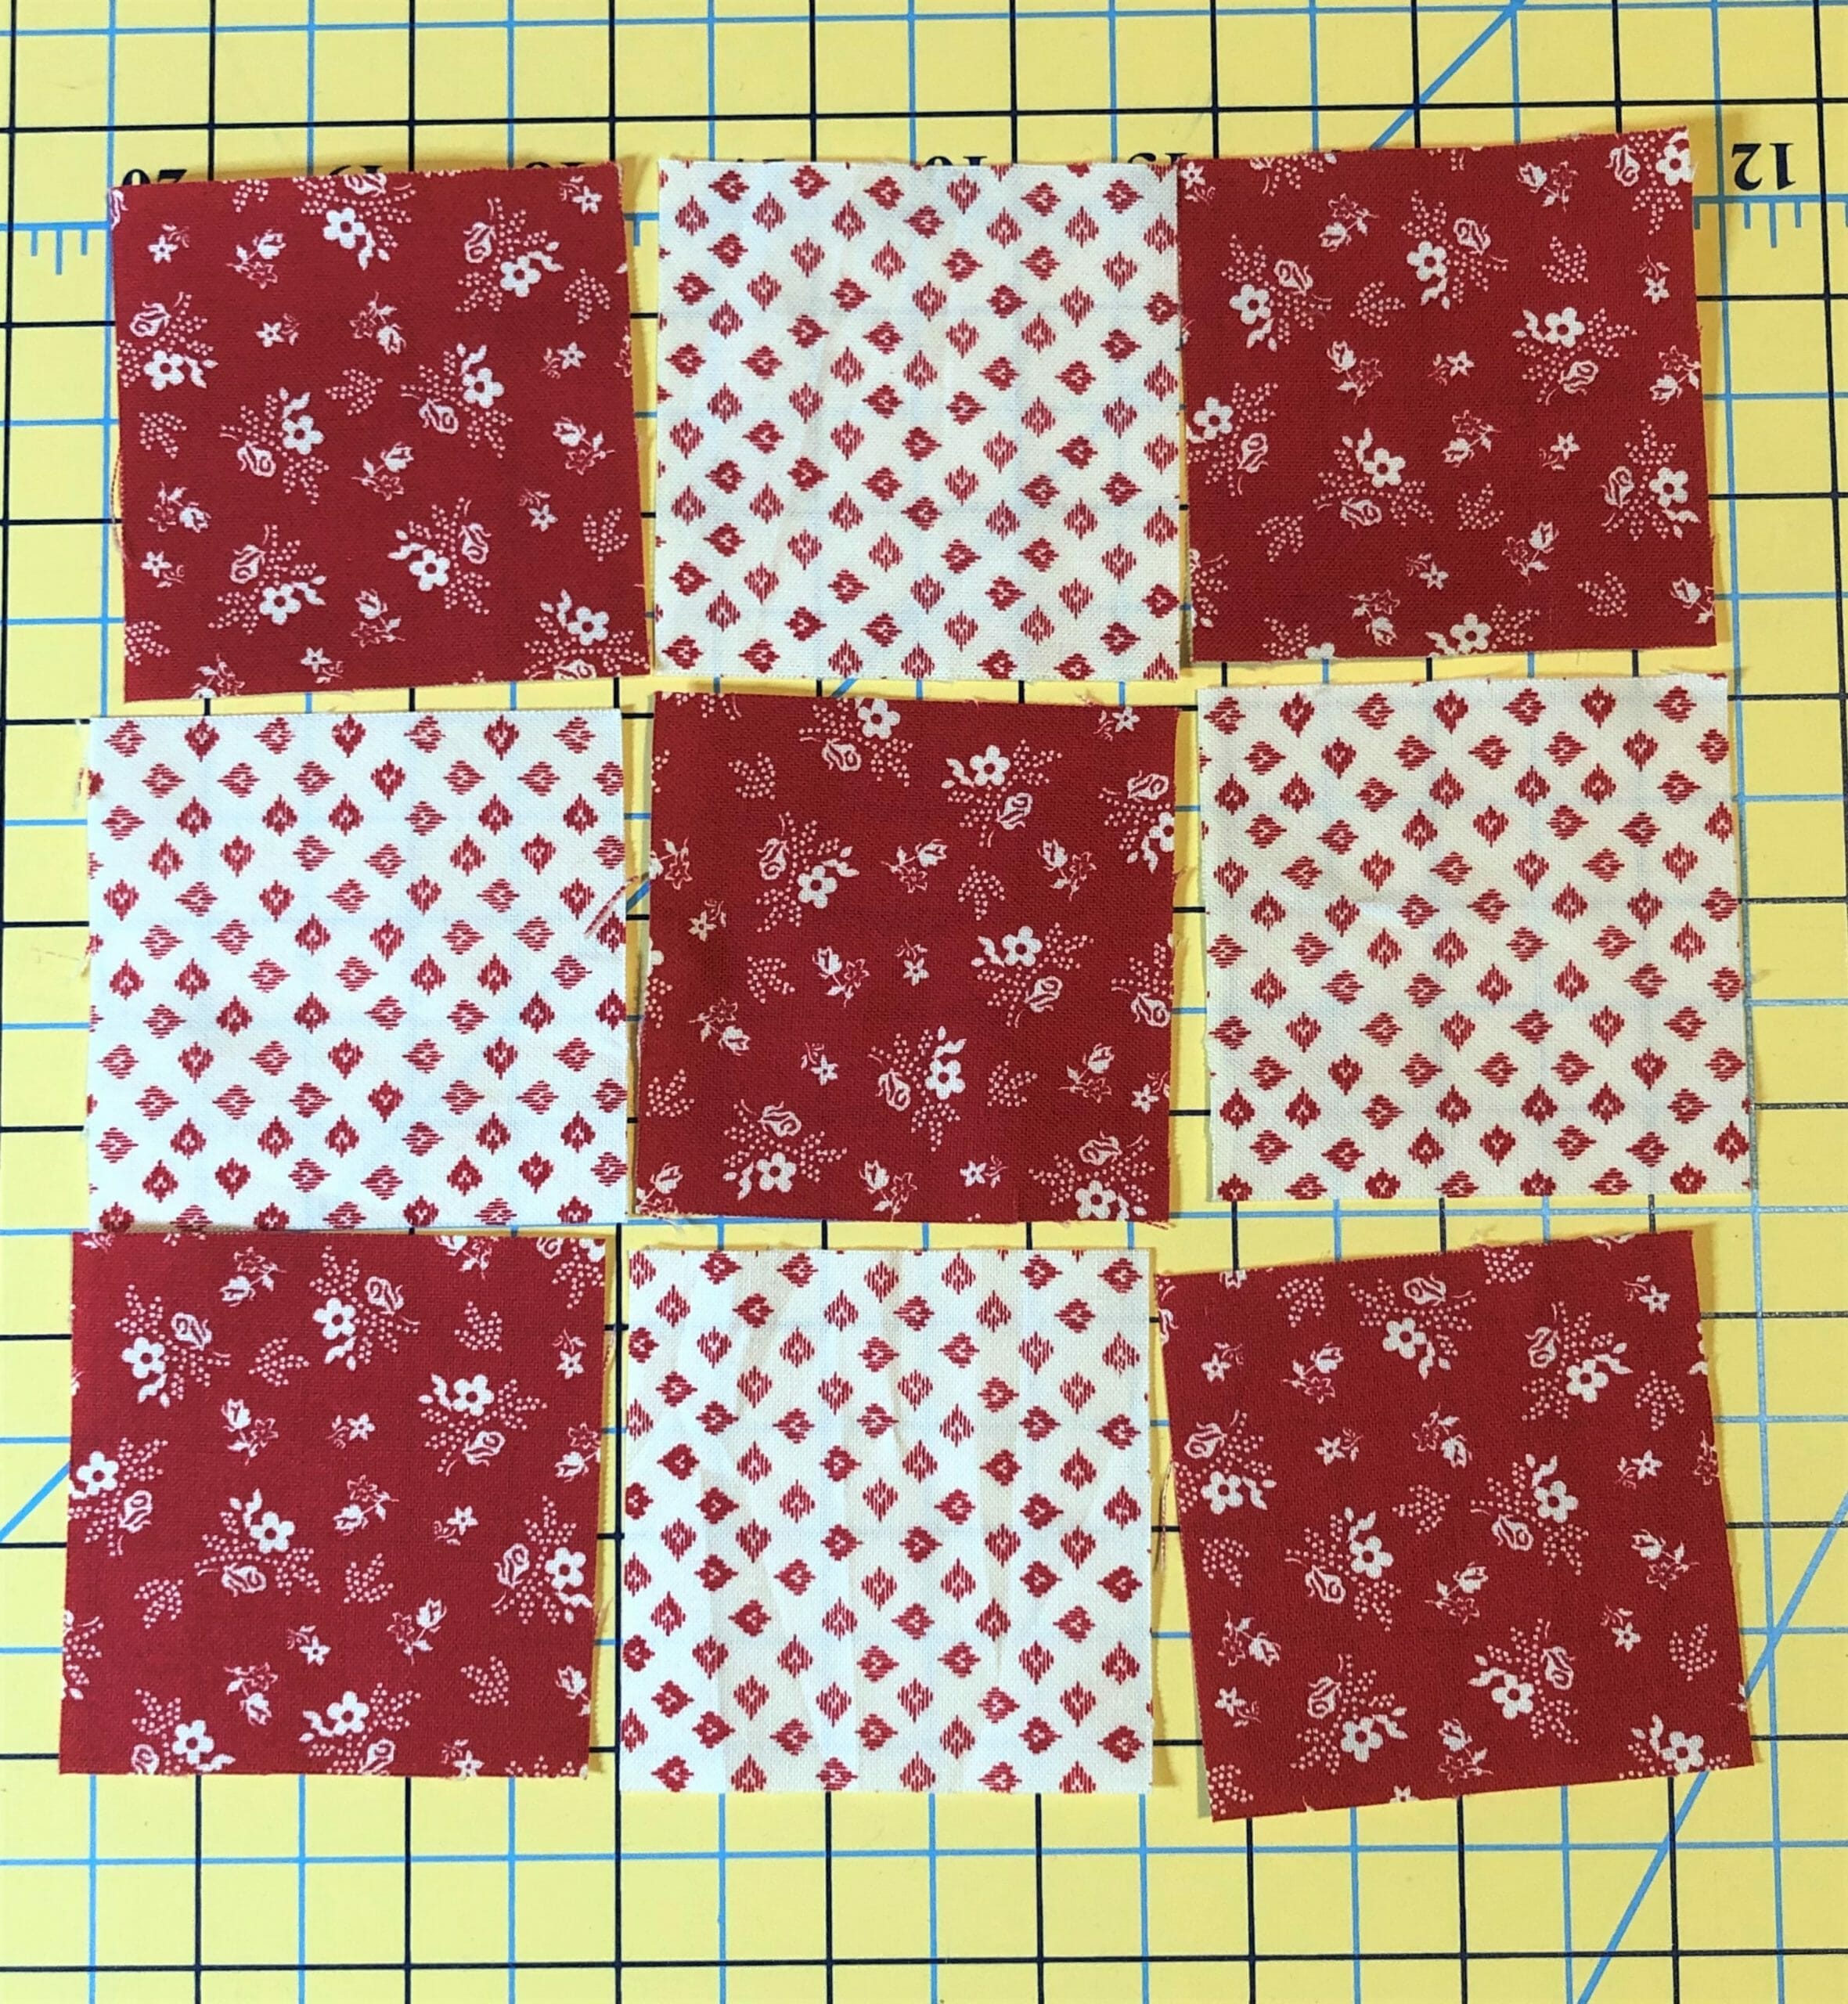
We start by making a simple 9-patch unit for the center like so:

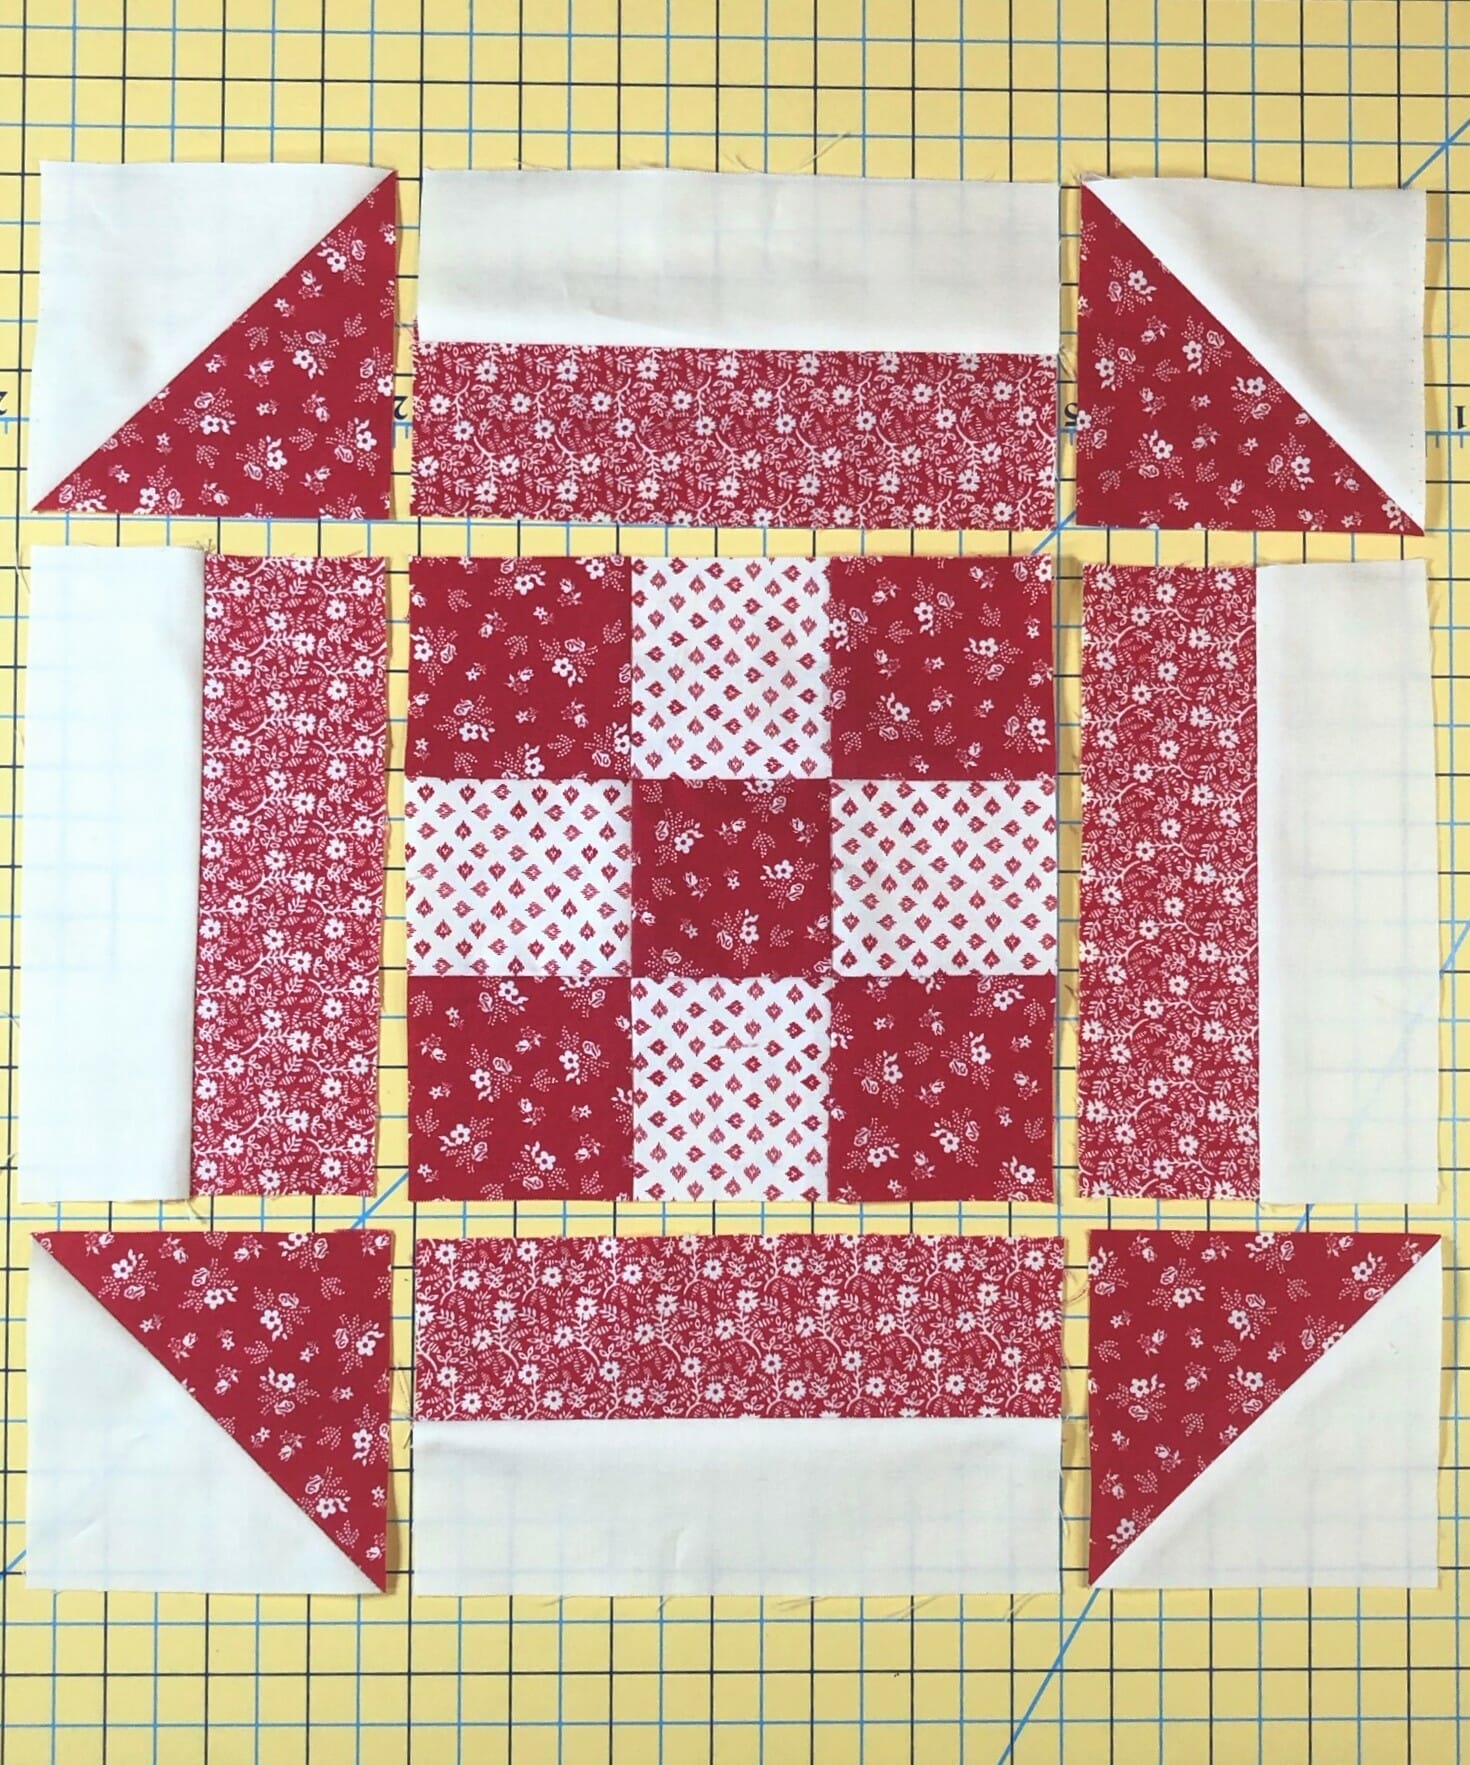
Next, it’s some more of those flying geese we know and love so well. Two of the completed flying geese units will have an F square sewn to each side, and the other two will have the longer G rectangles sewn to the ends.

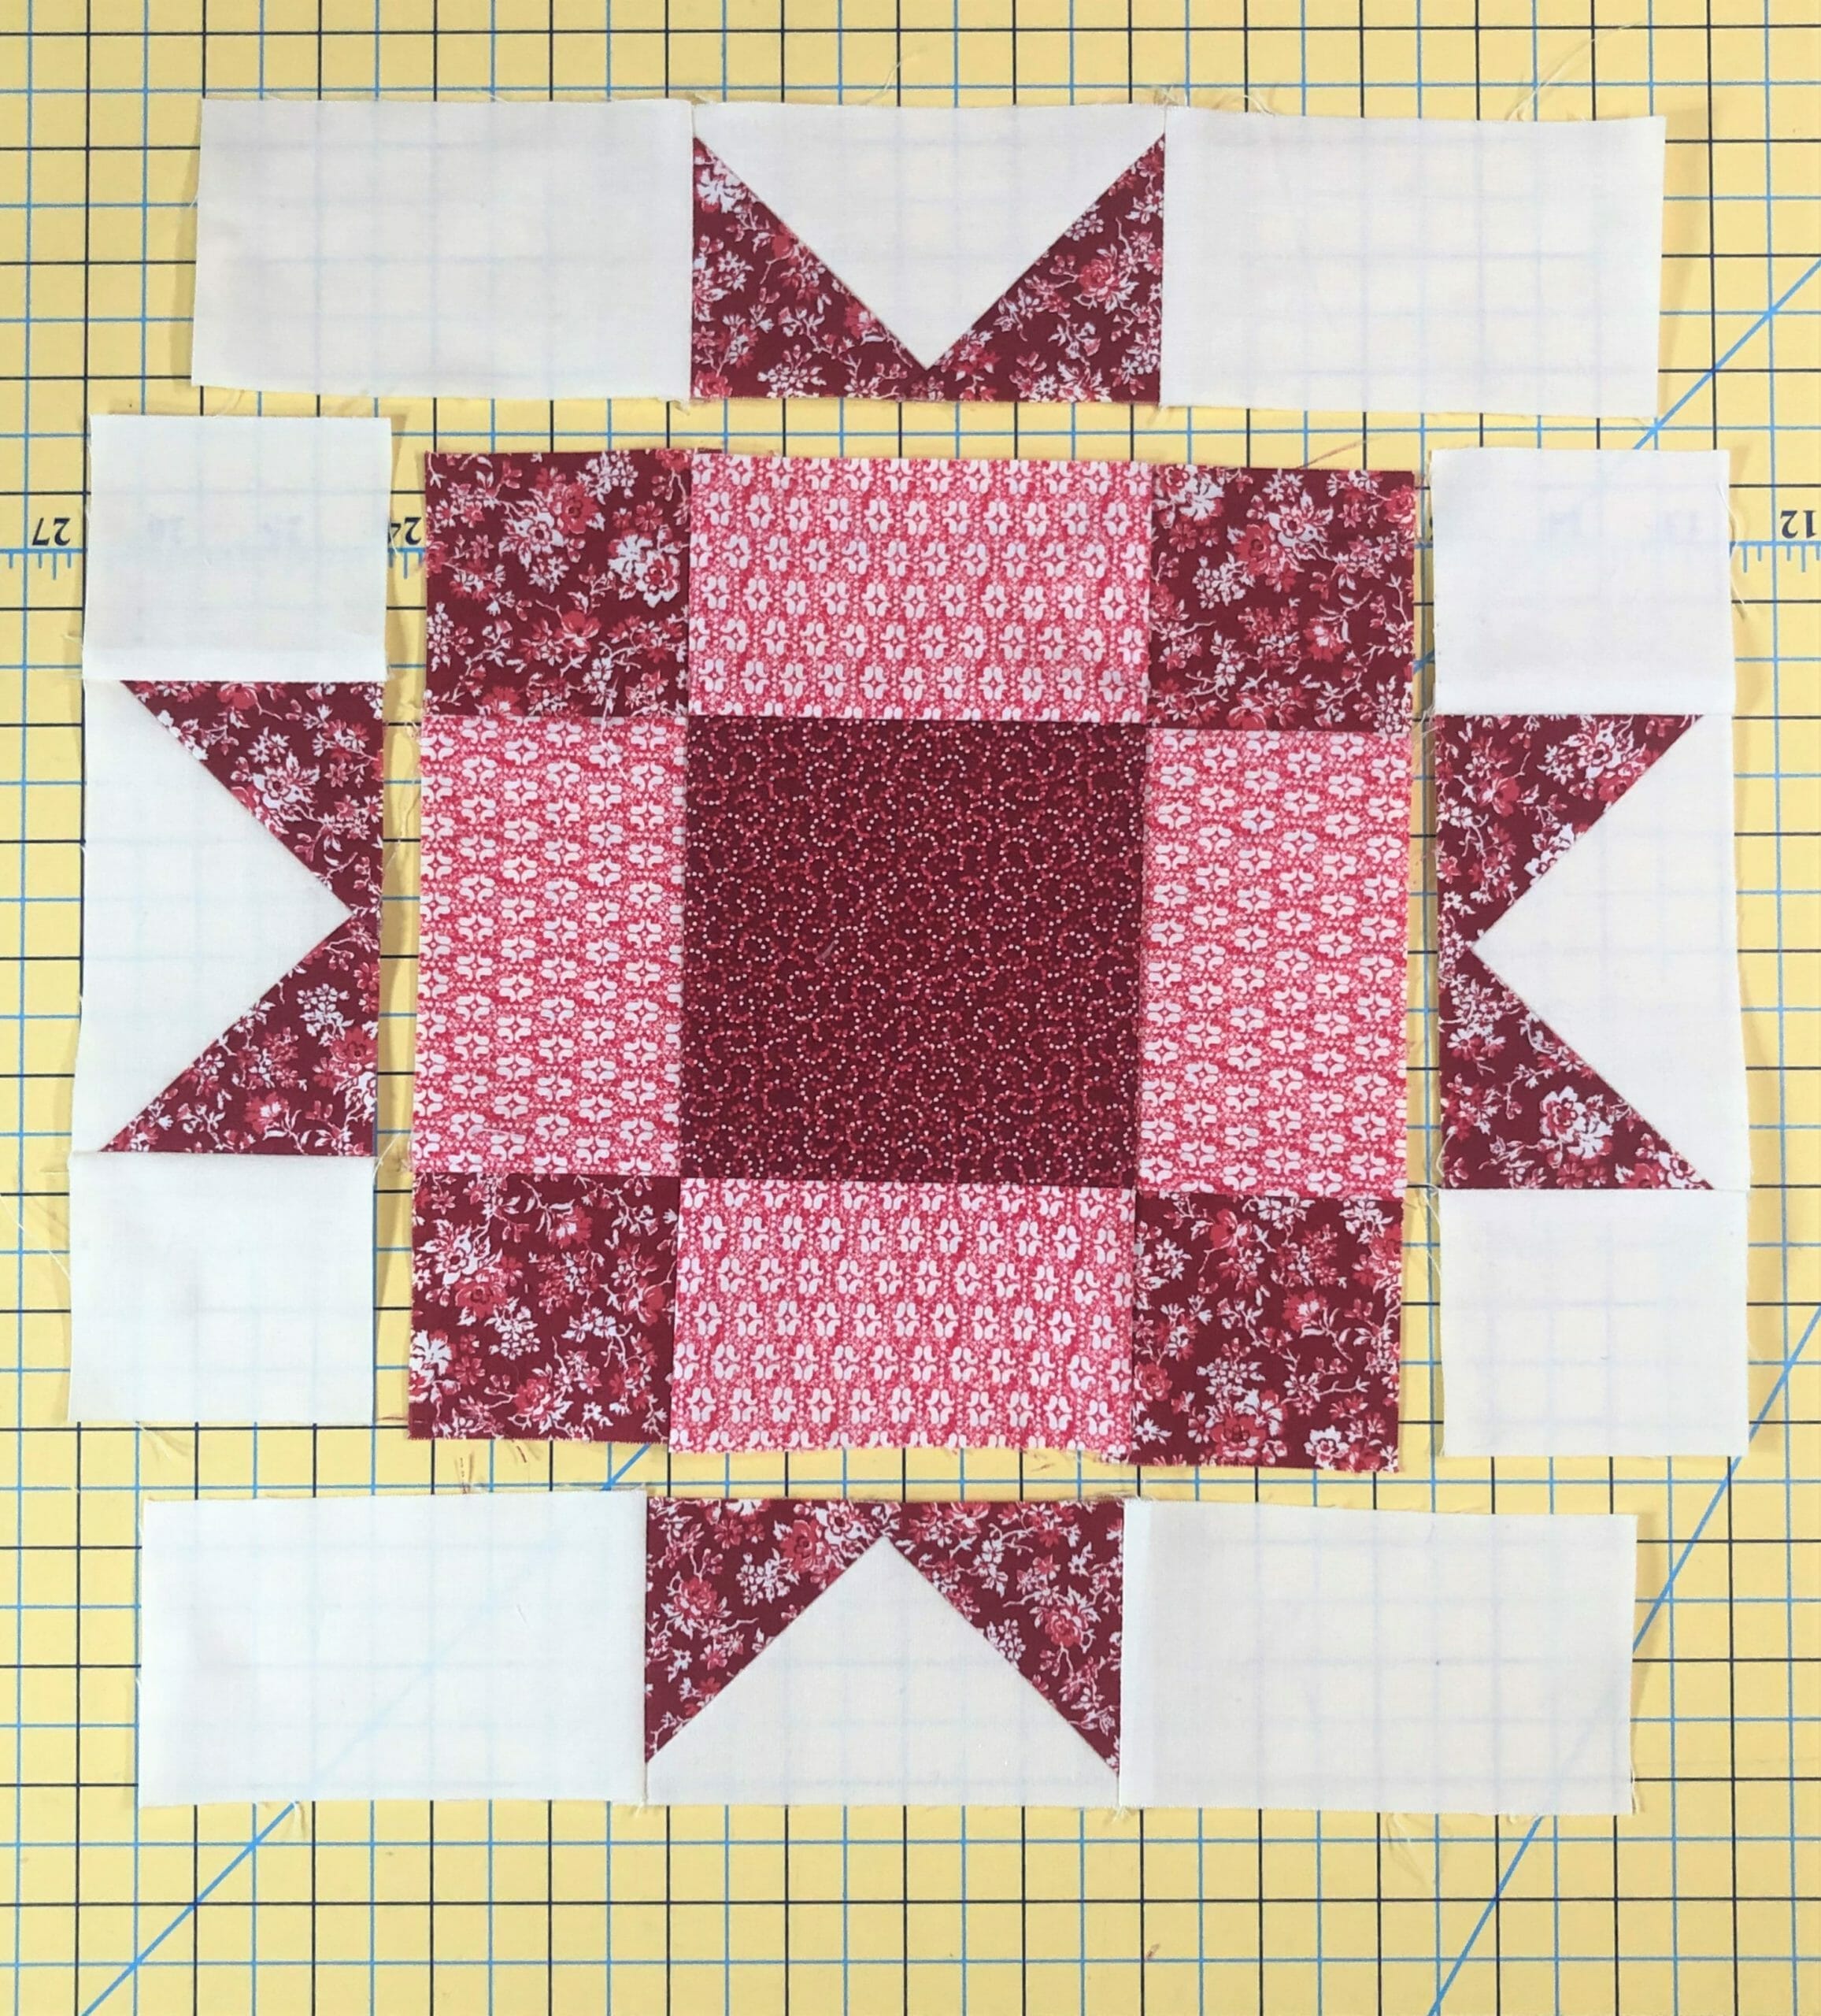
Now, all that’s left is to sew those to the center unit like you see above. Easy Peasy!

Block #24

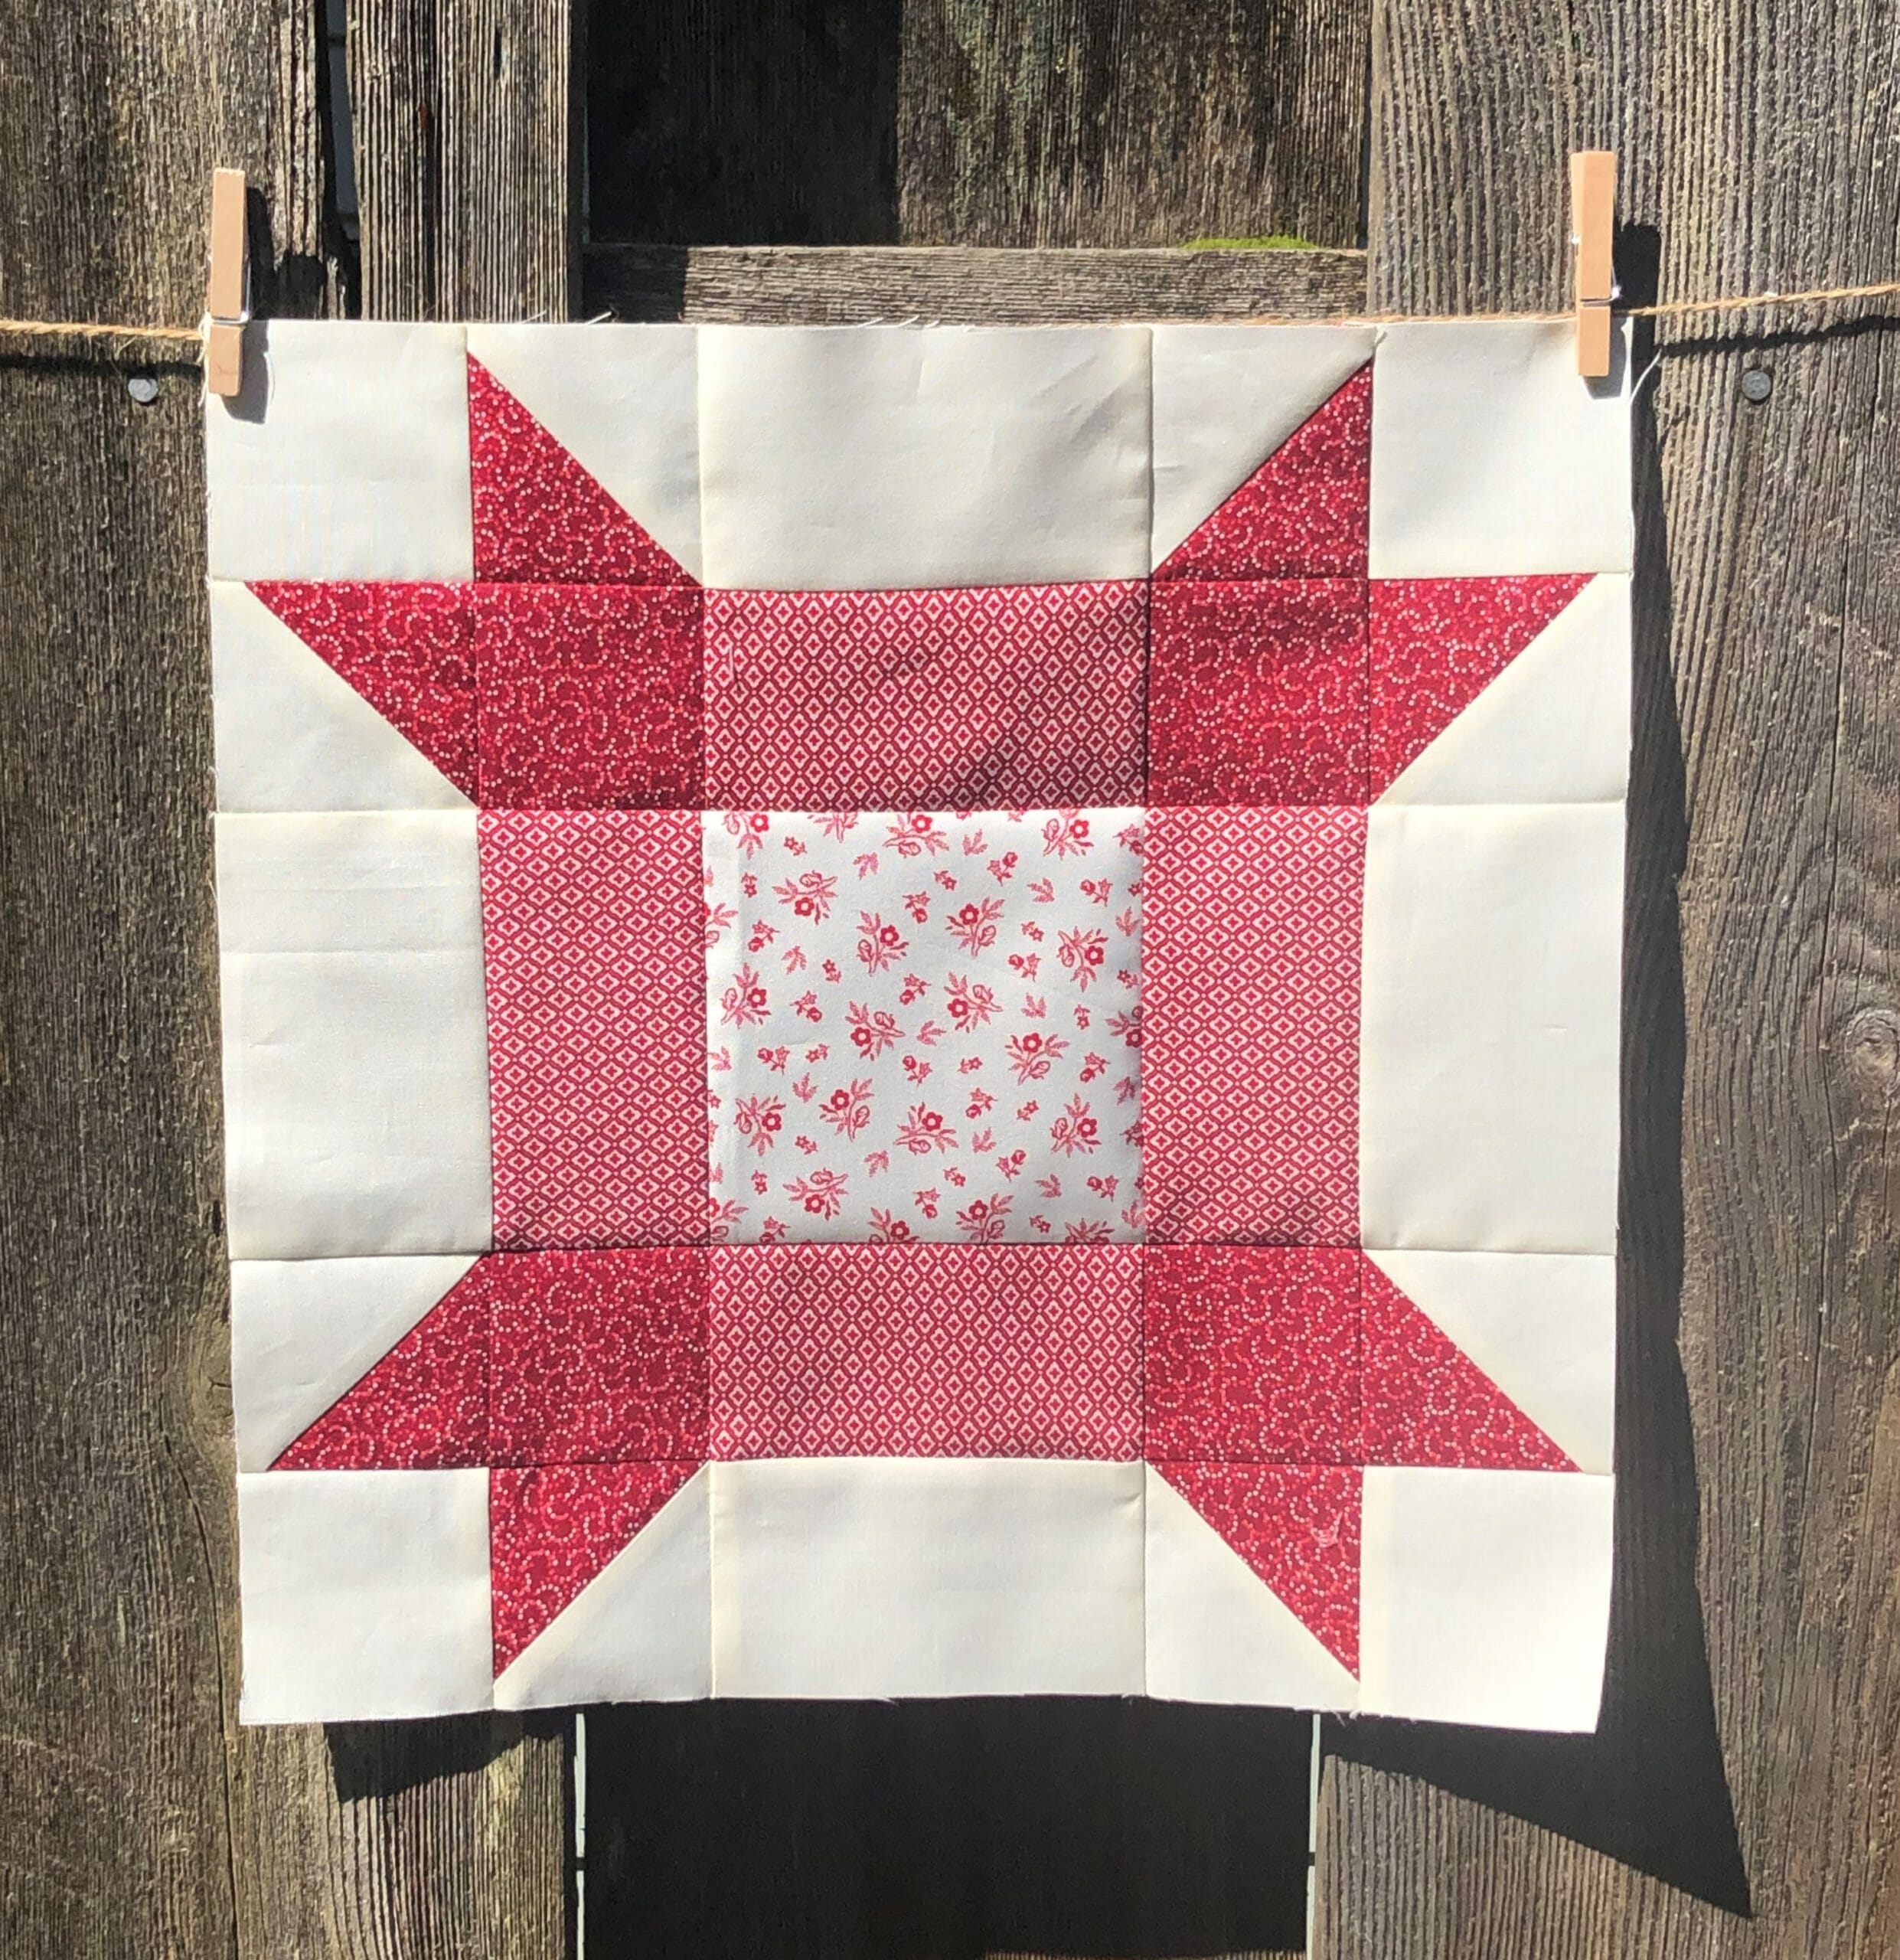
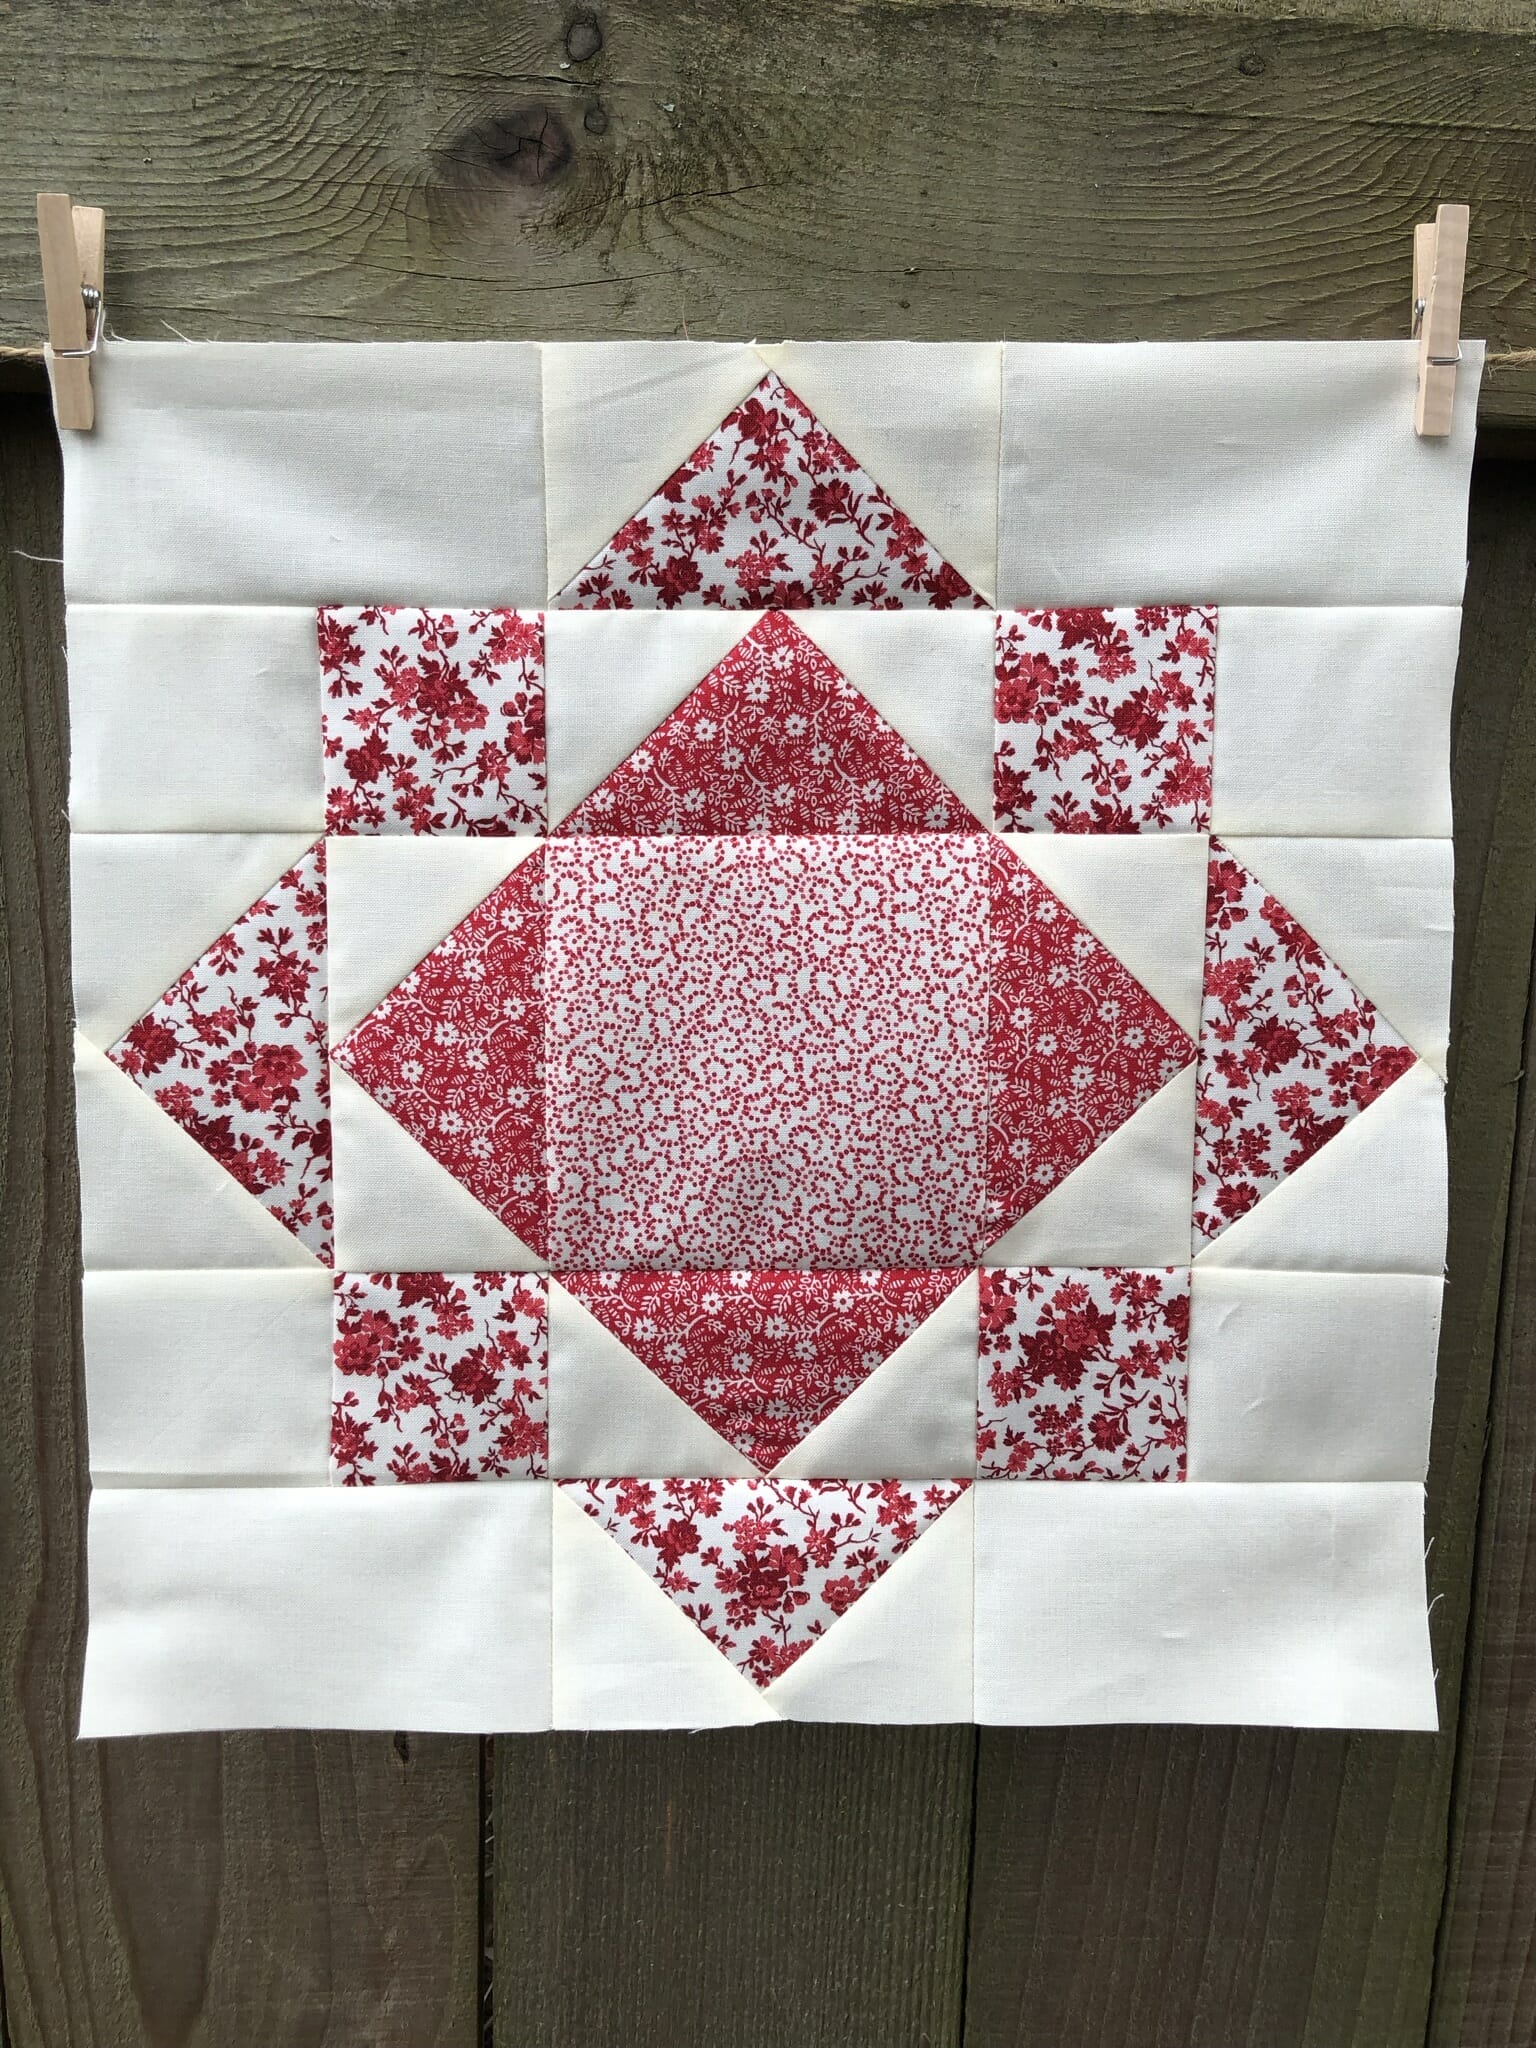
For our last block of the month – our ONLY block in our month 9 installment that doesn’t have ANY flying geese! How did that happen?! We made this block previously in month 5 as block #9 in case you want to refer back.

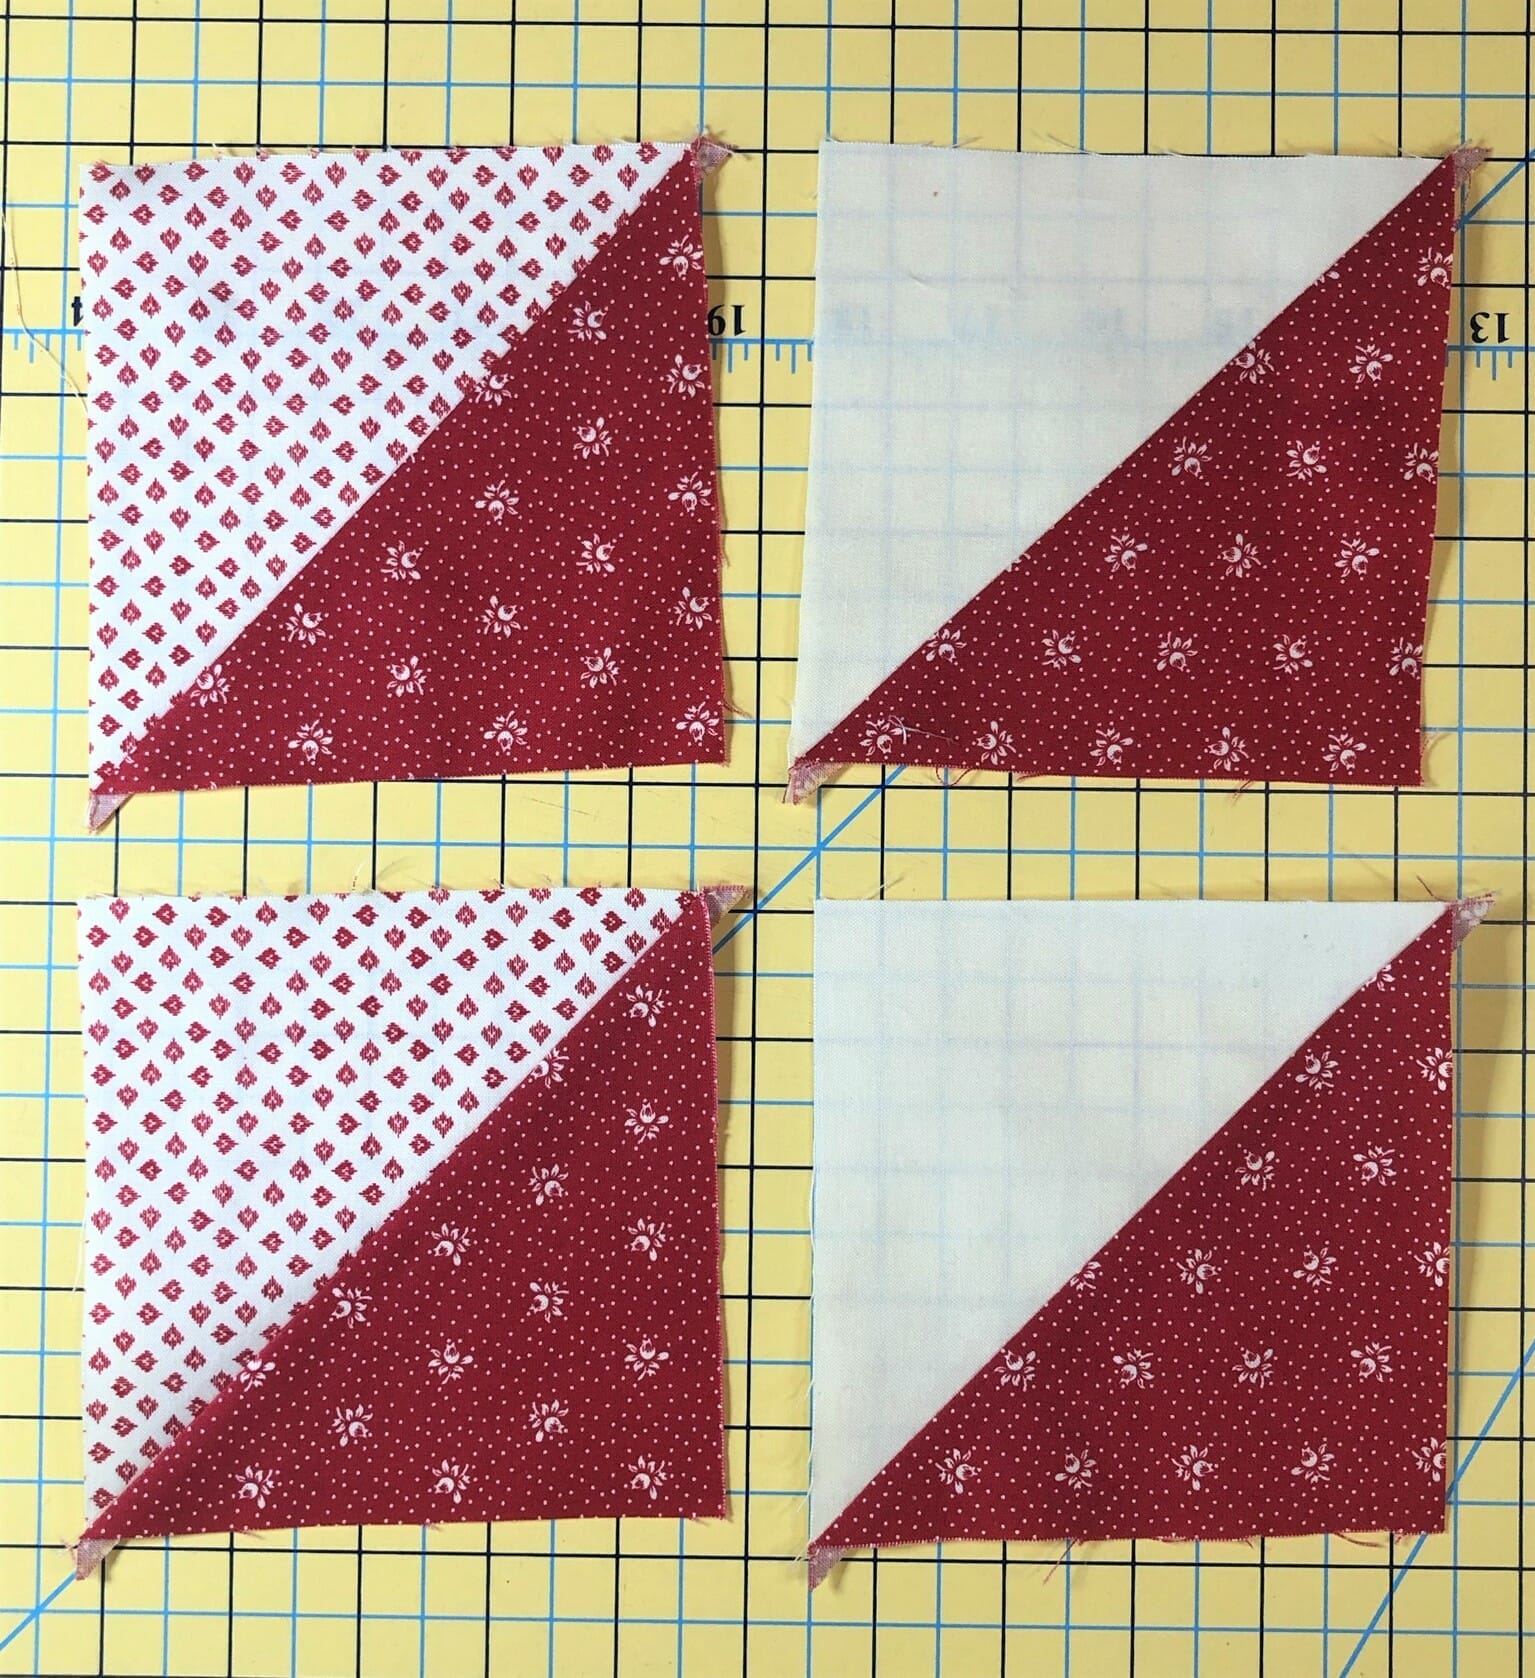
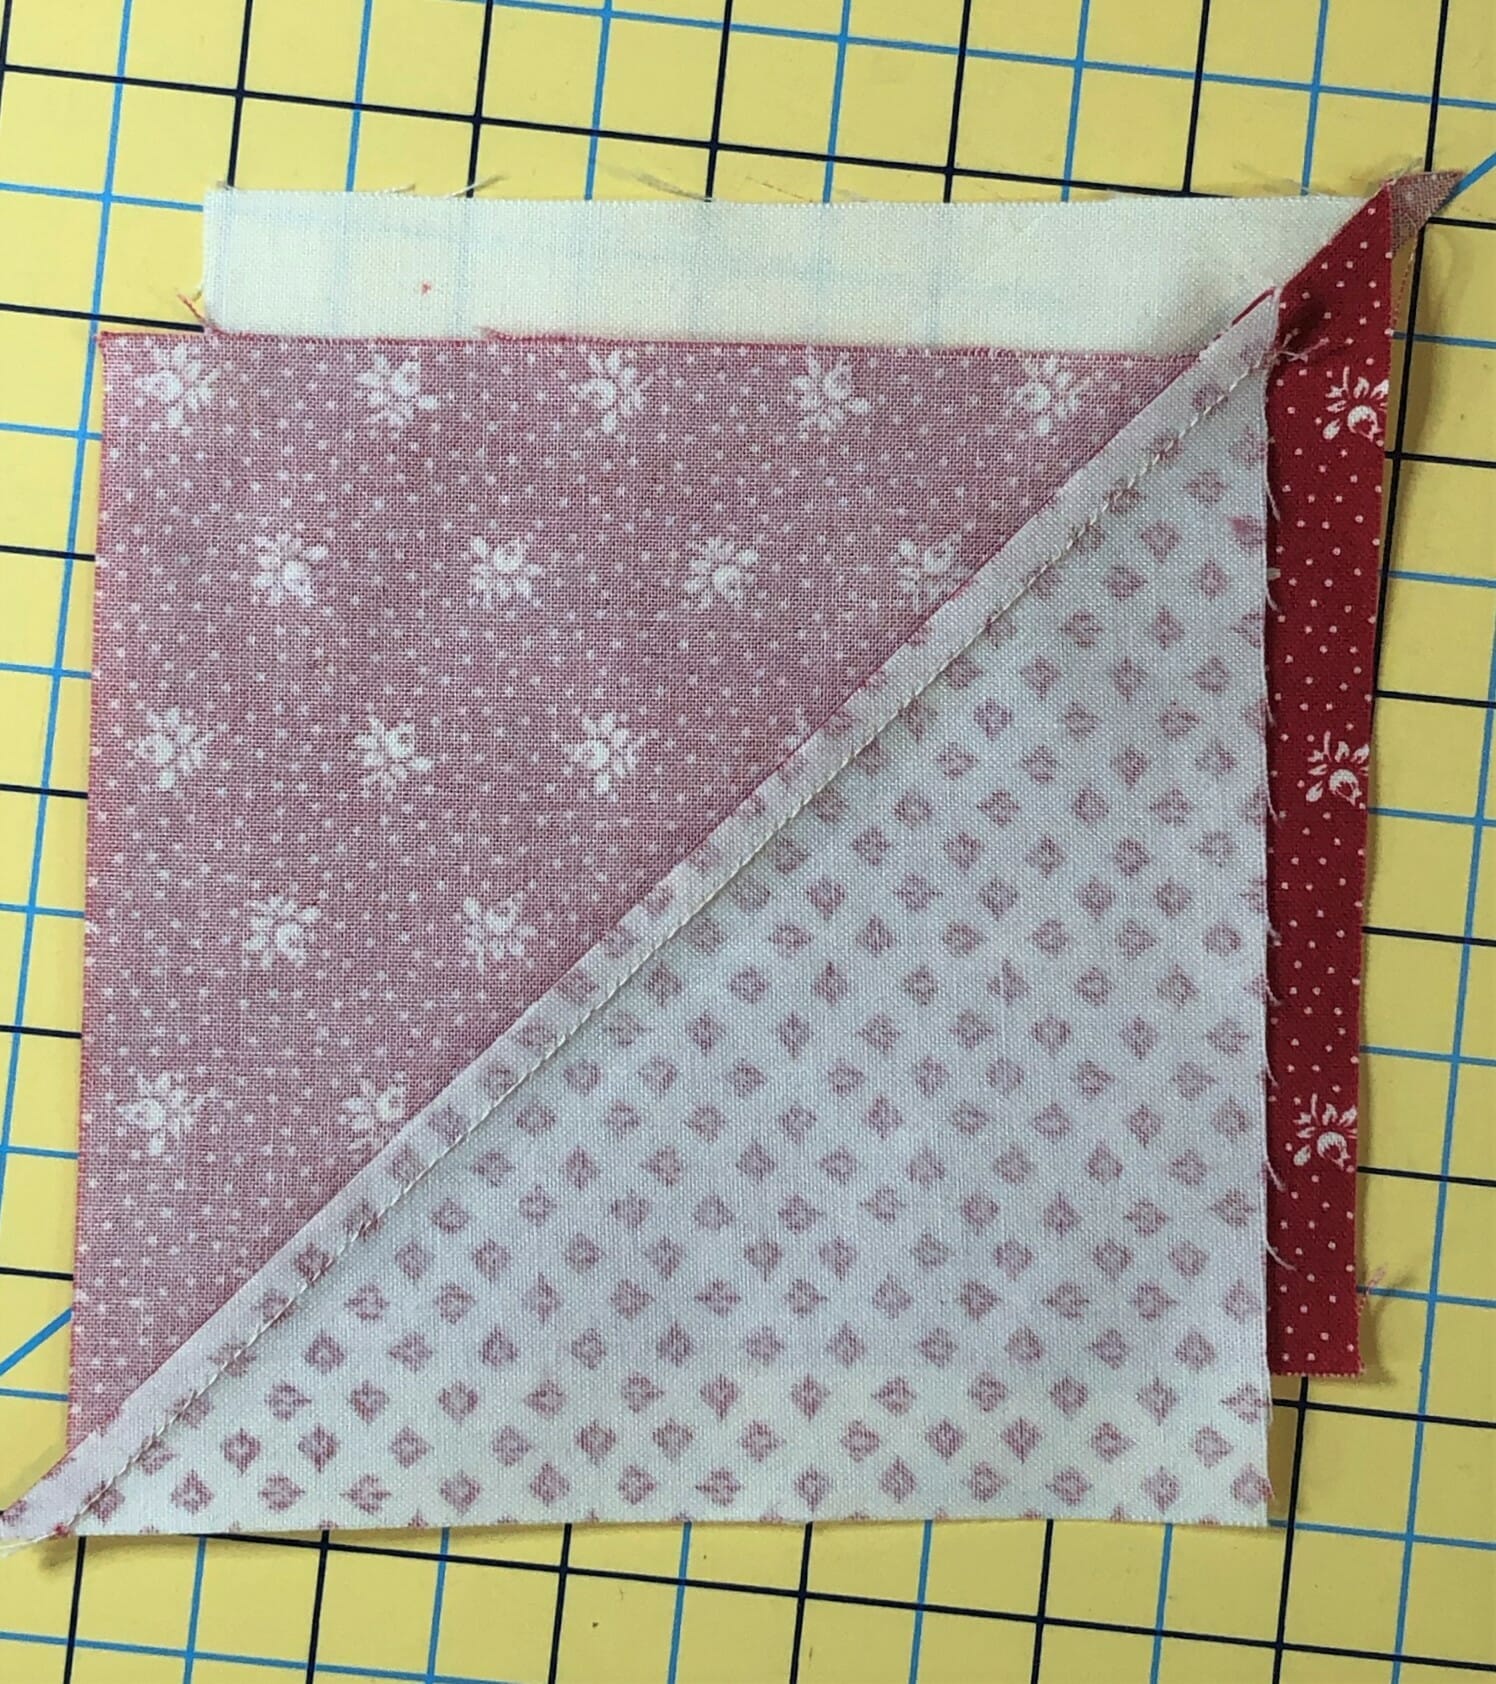
Begin by making some Half Square Triangles as directed.

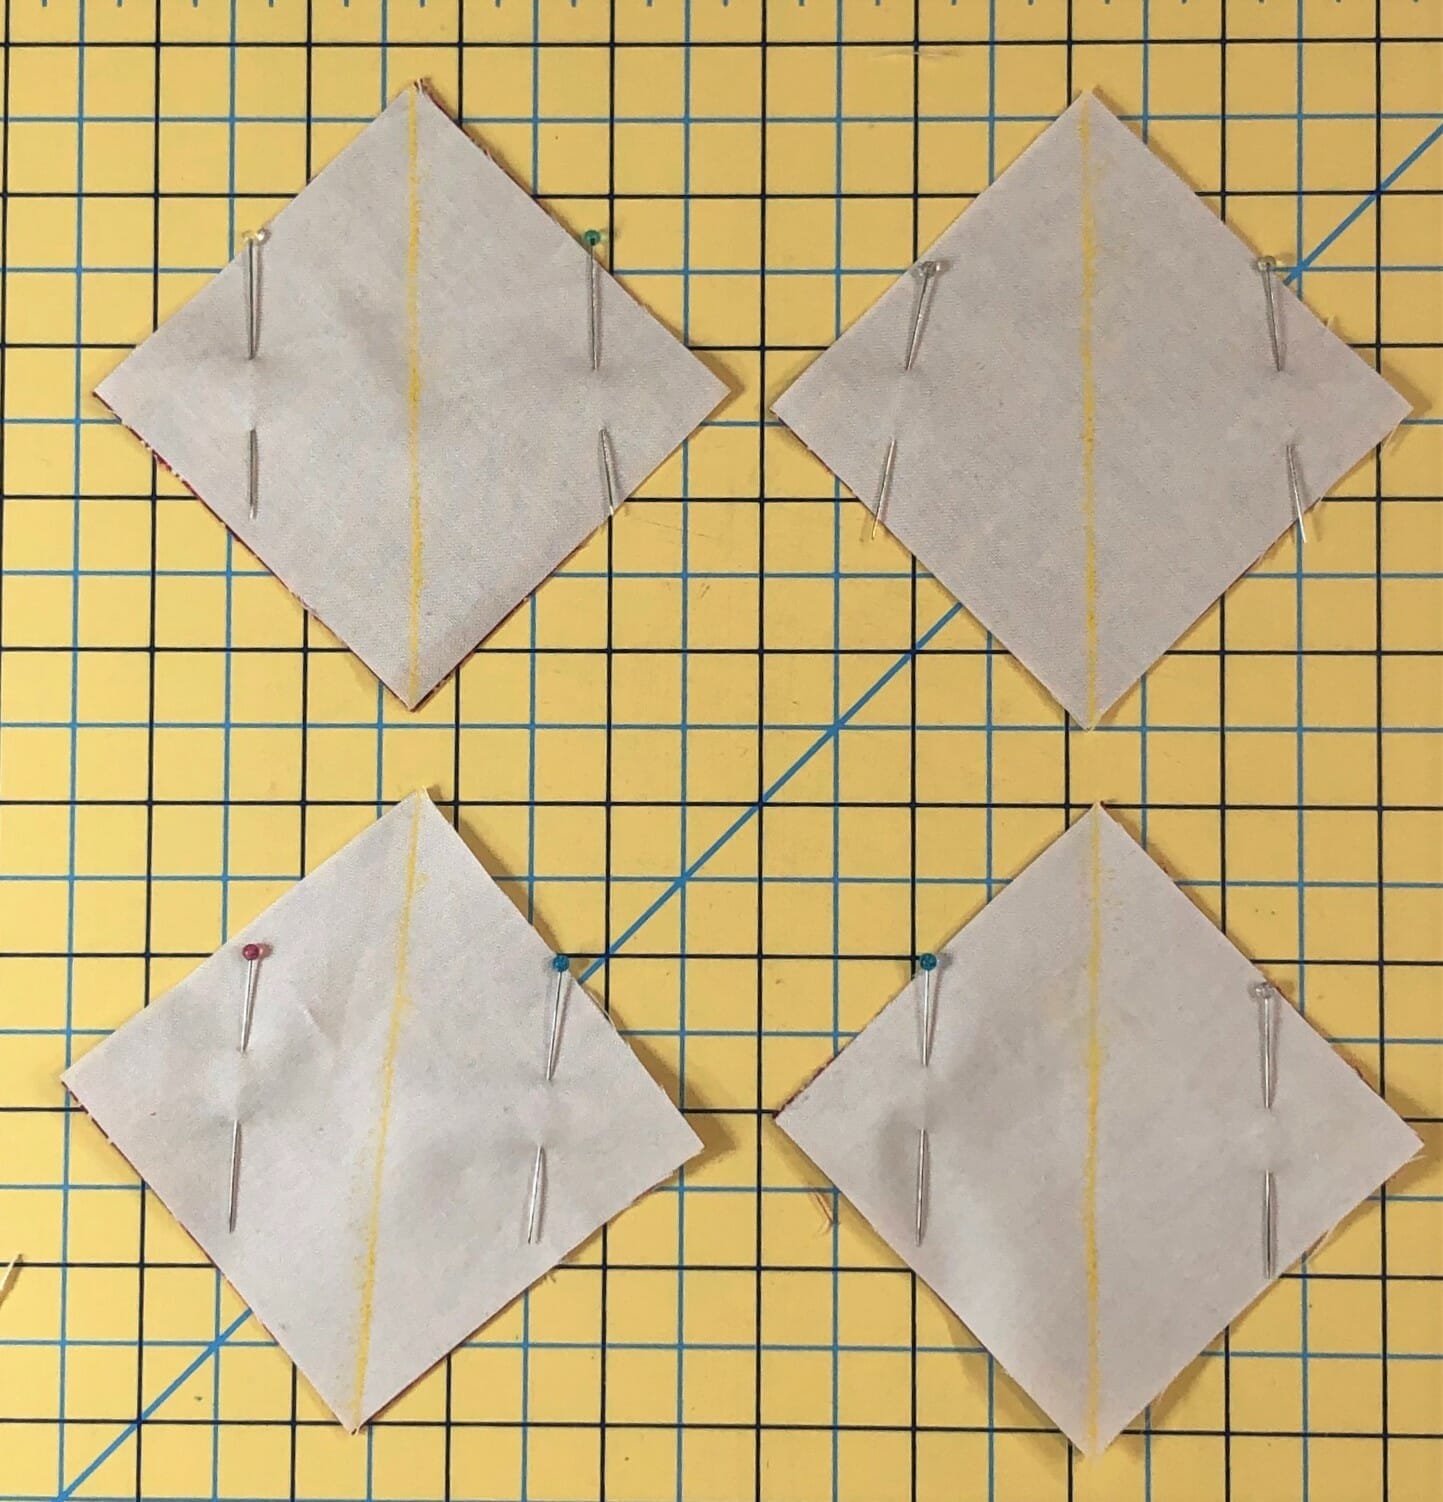
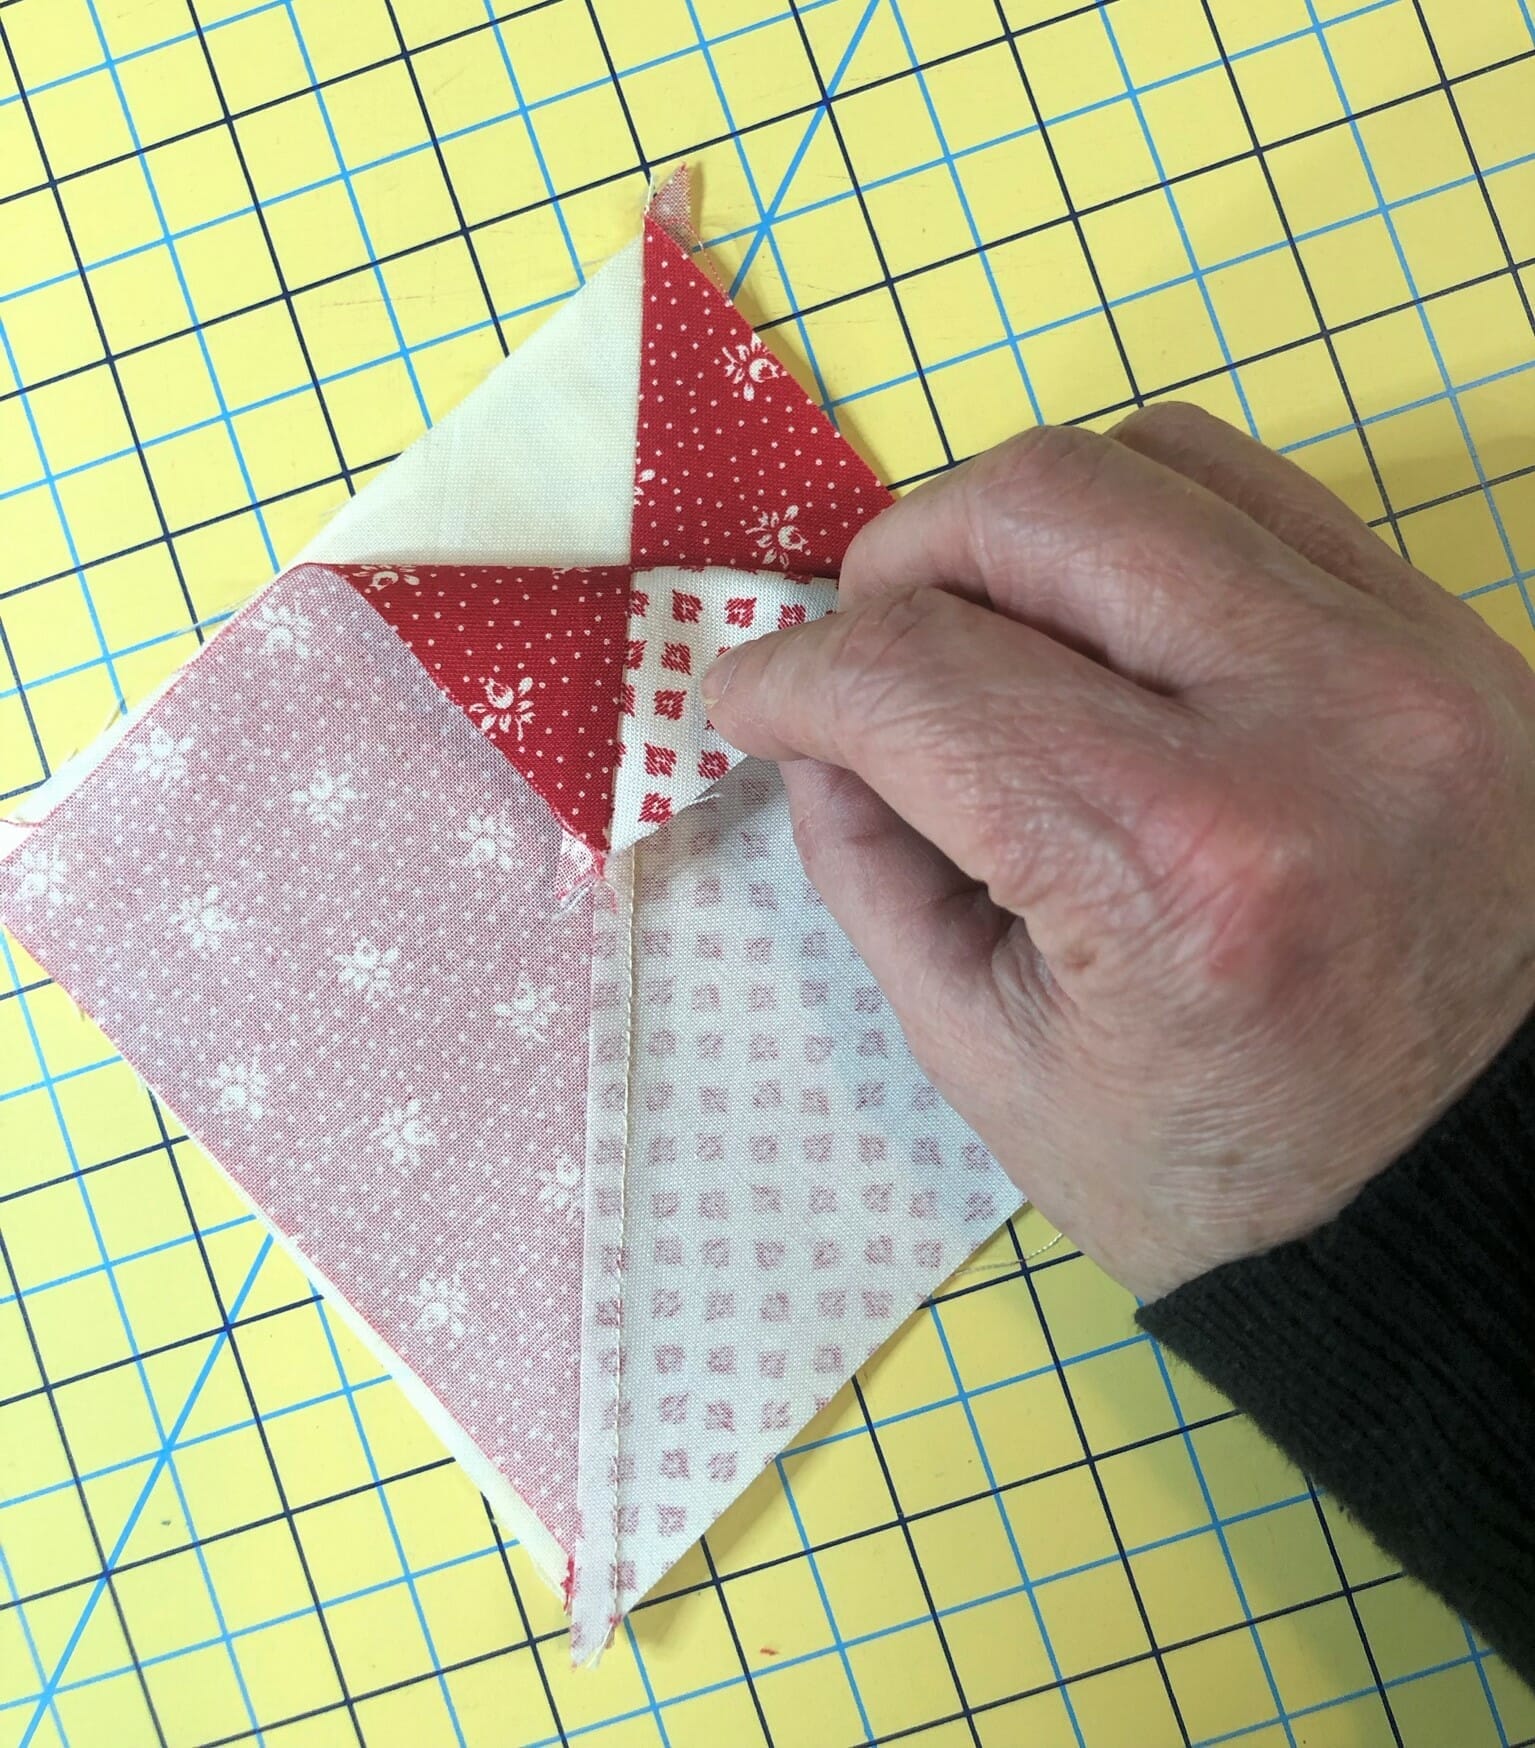
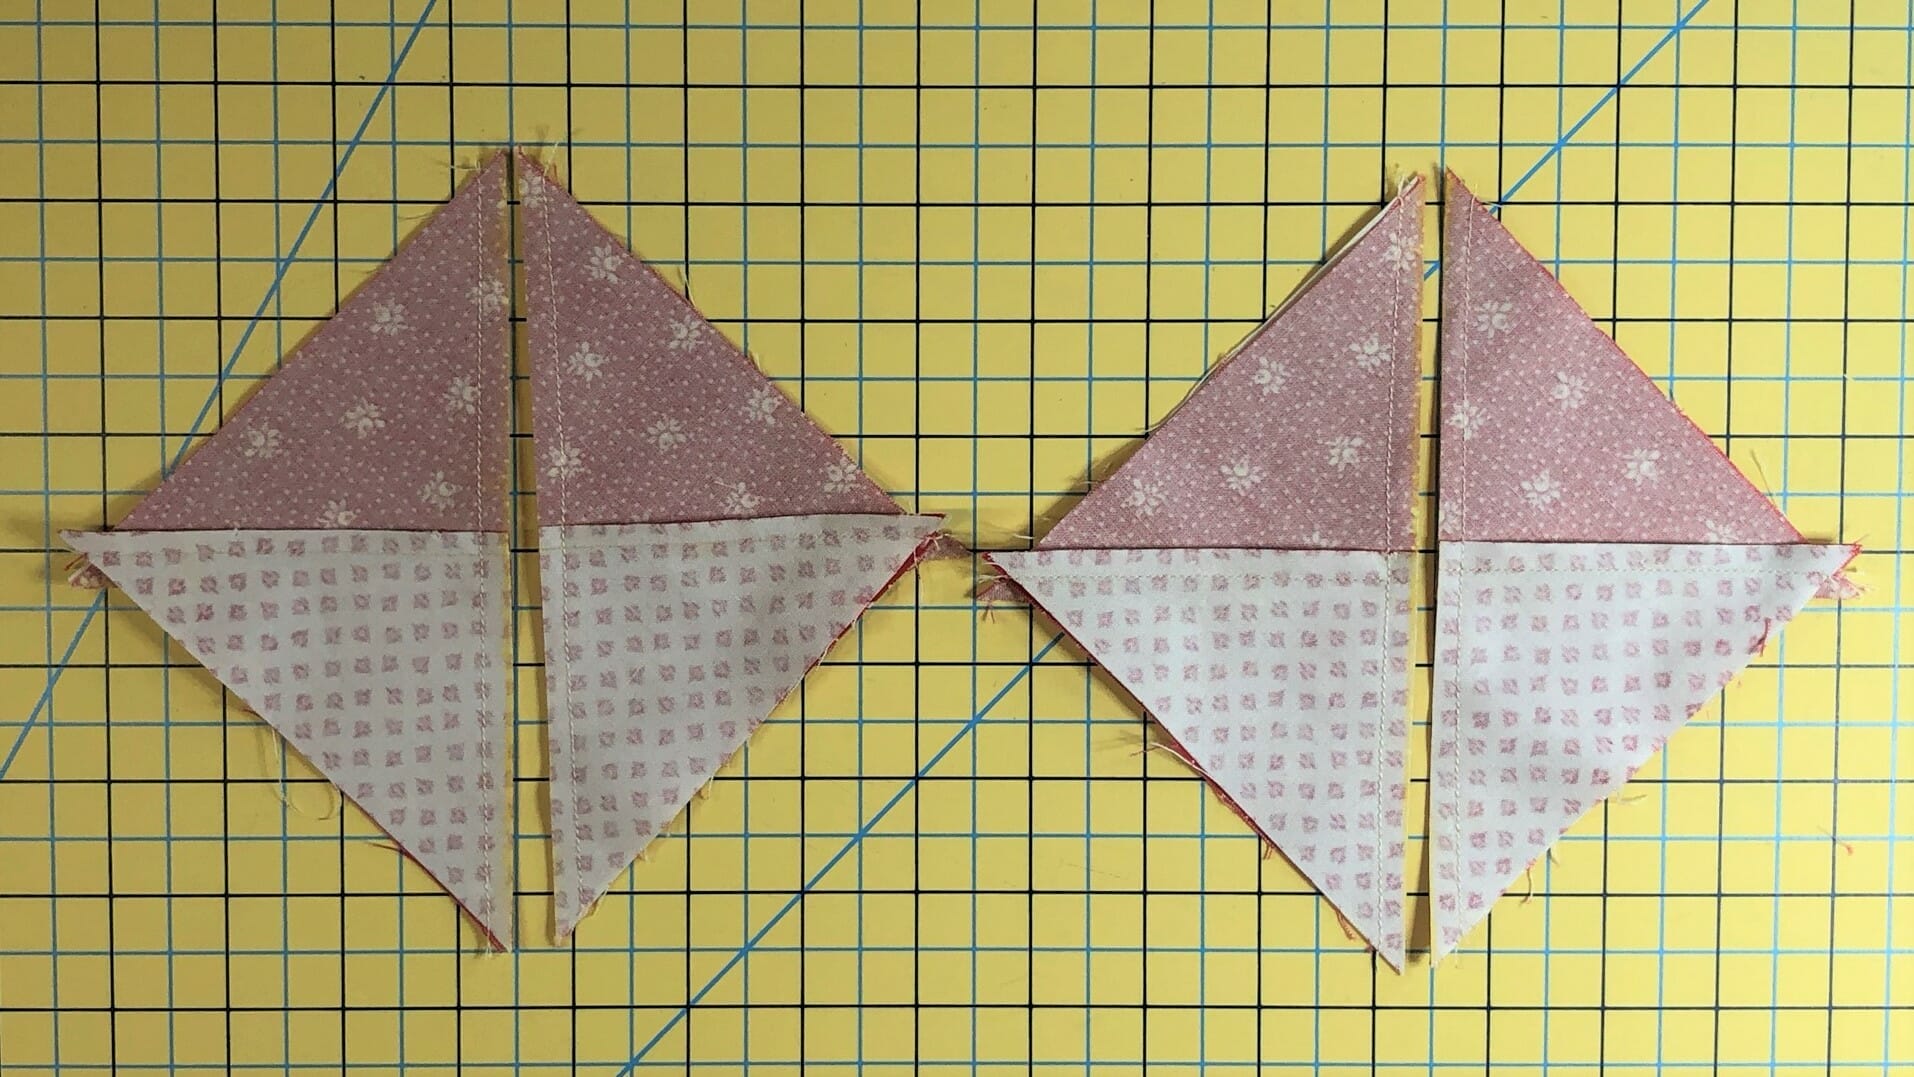
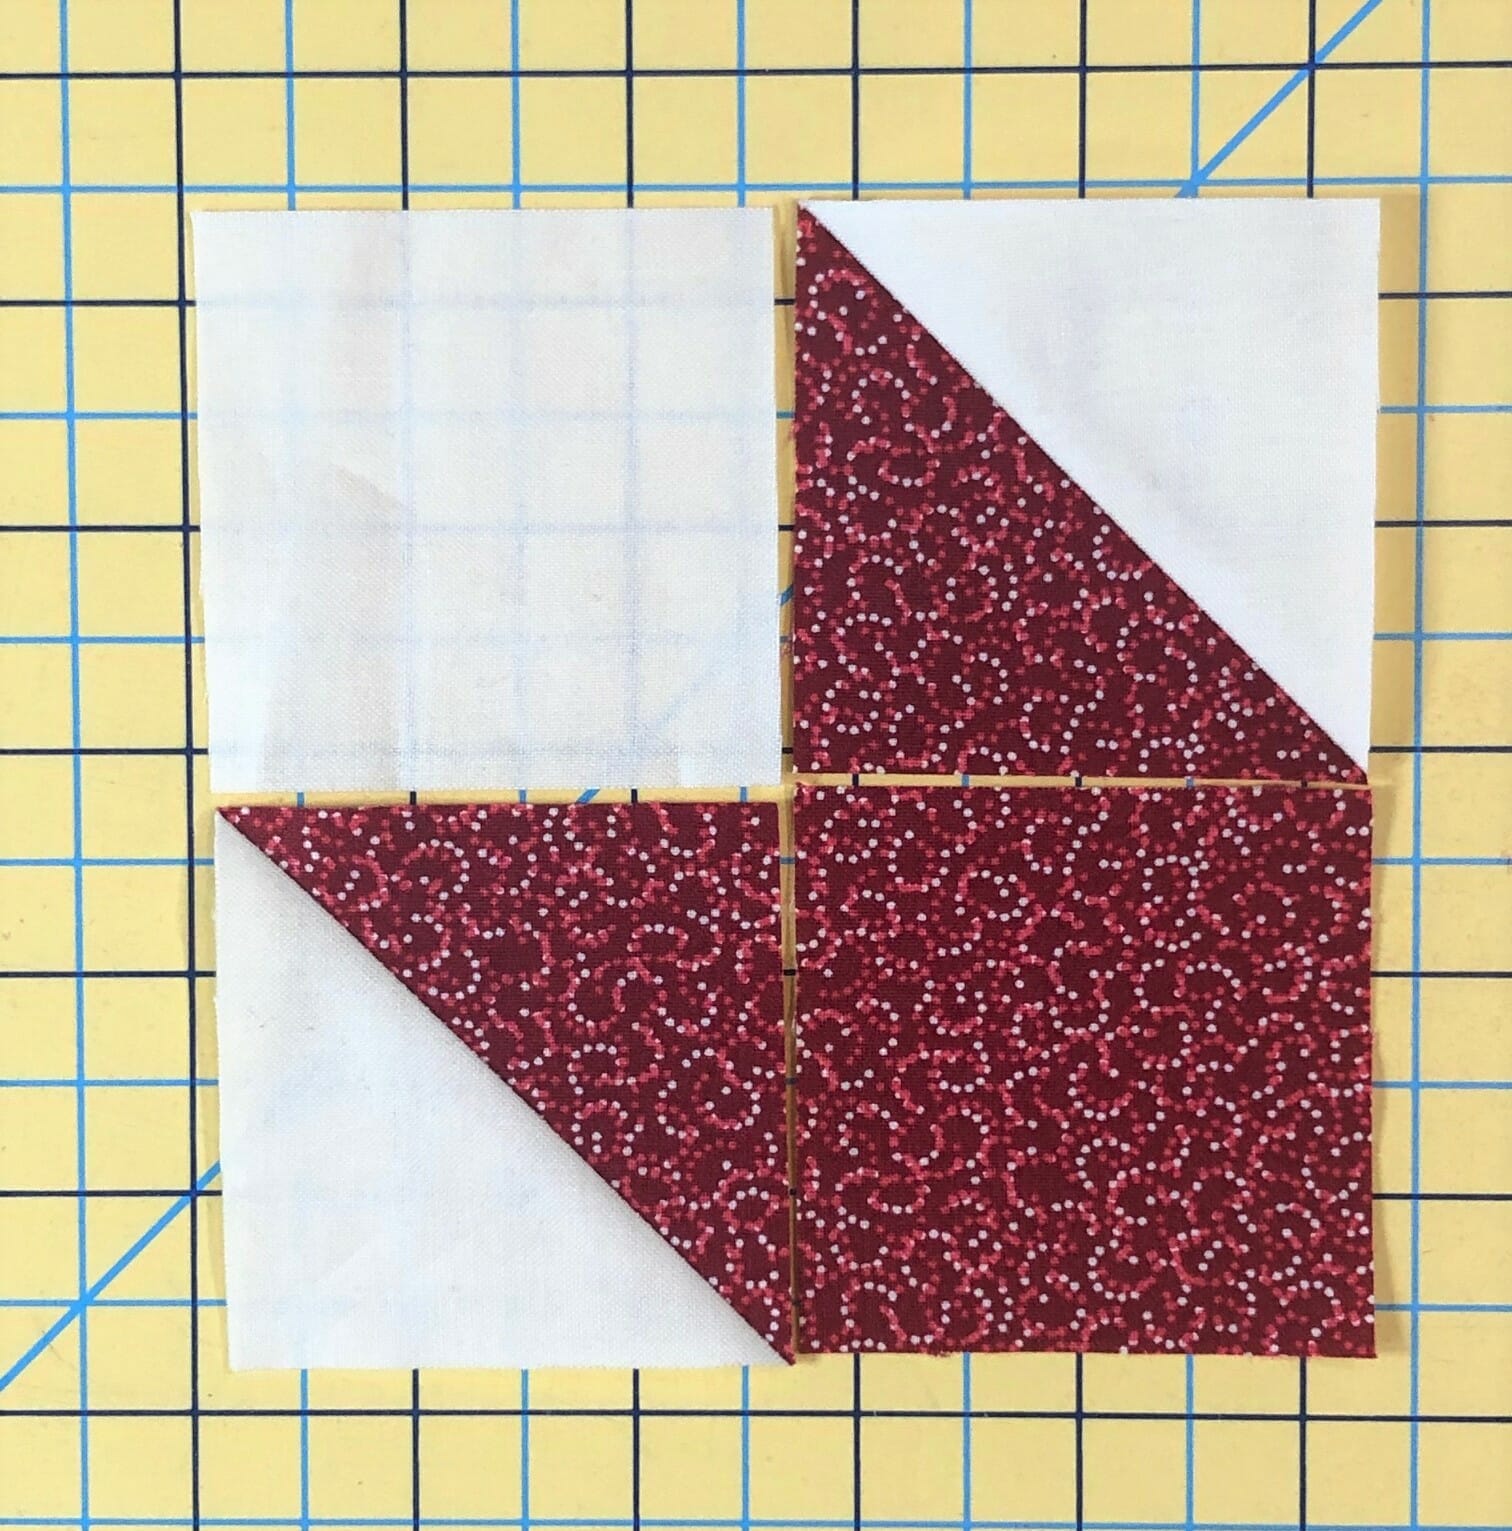
Now you’ll use those HSTs to make a simple 4-patch unit like so:

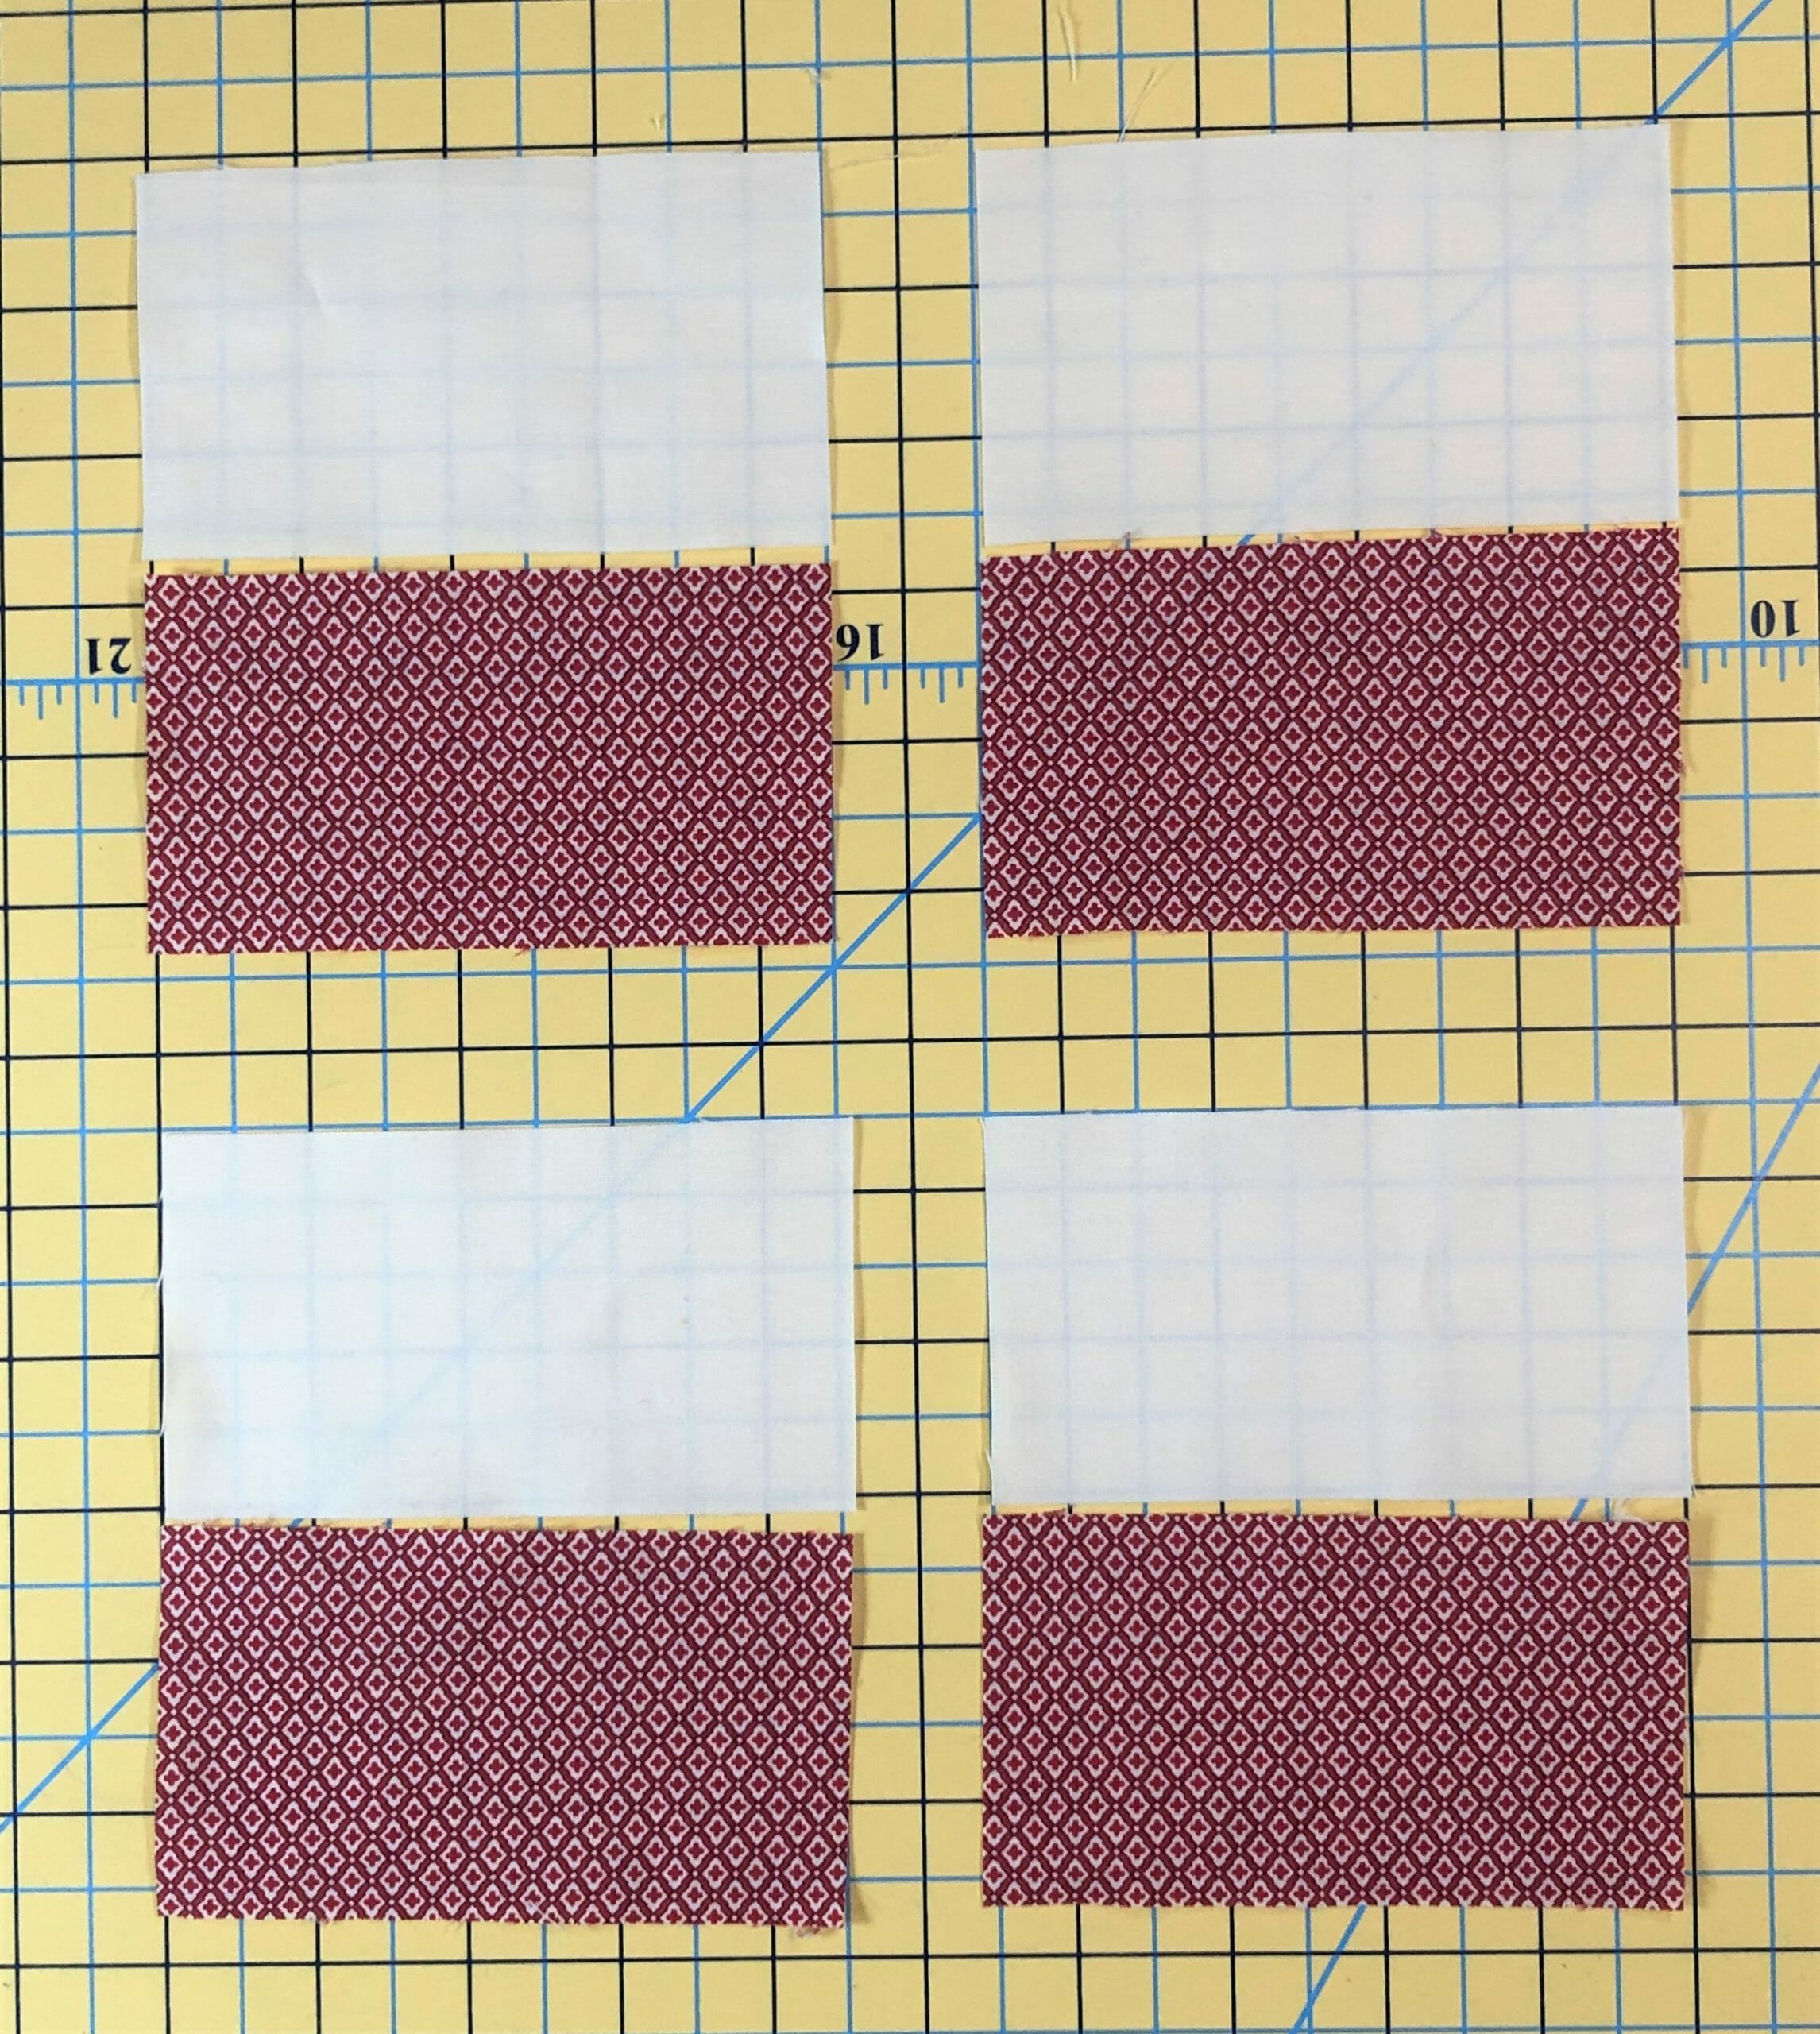
After sewing the E and B strips together, you’ll have everything you need to assemble the block.

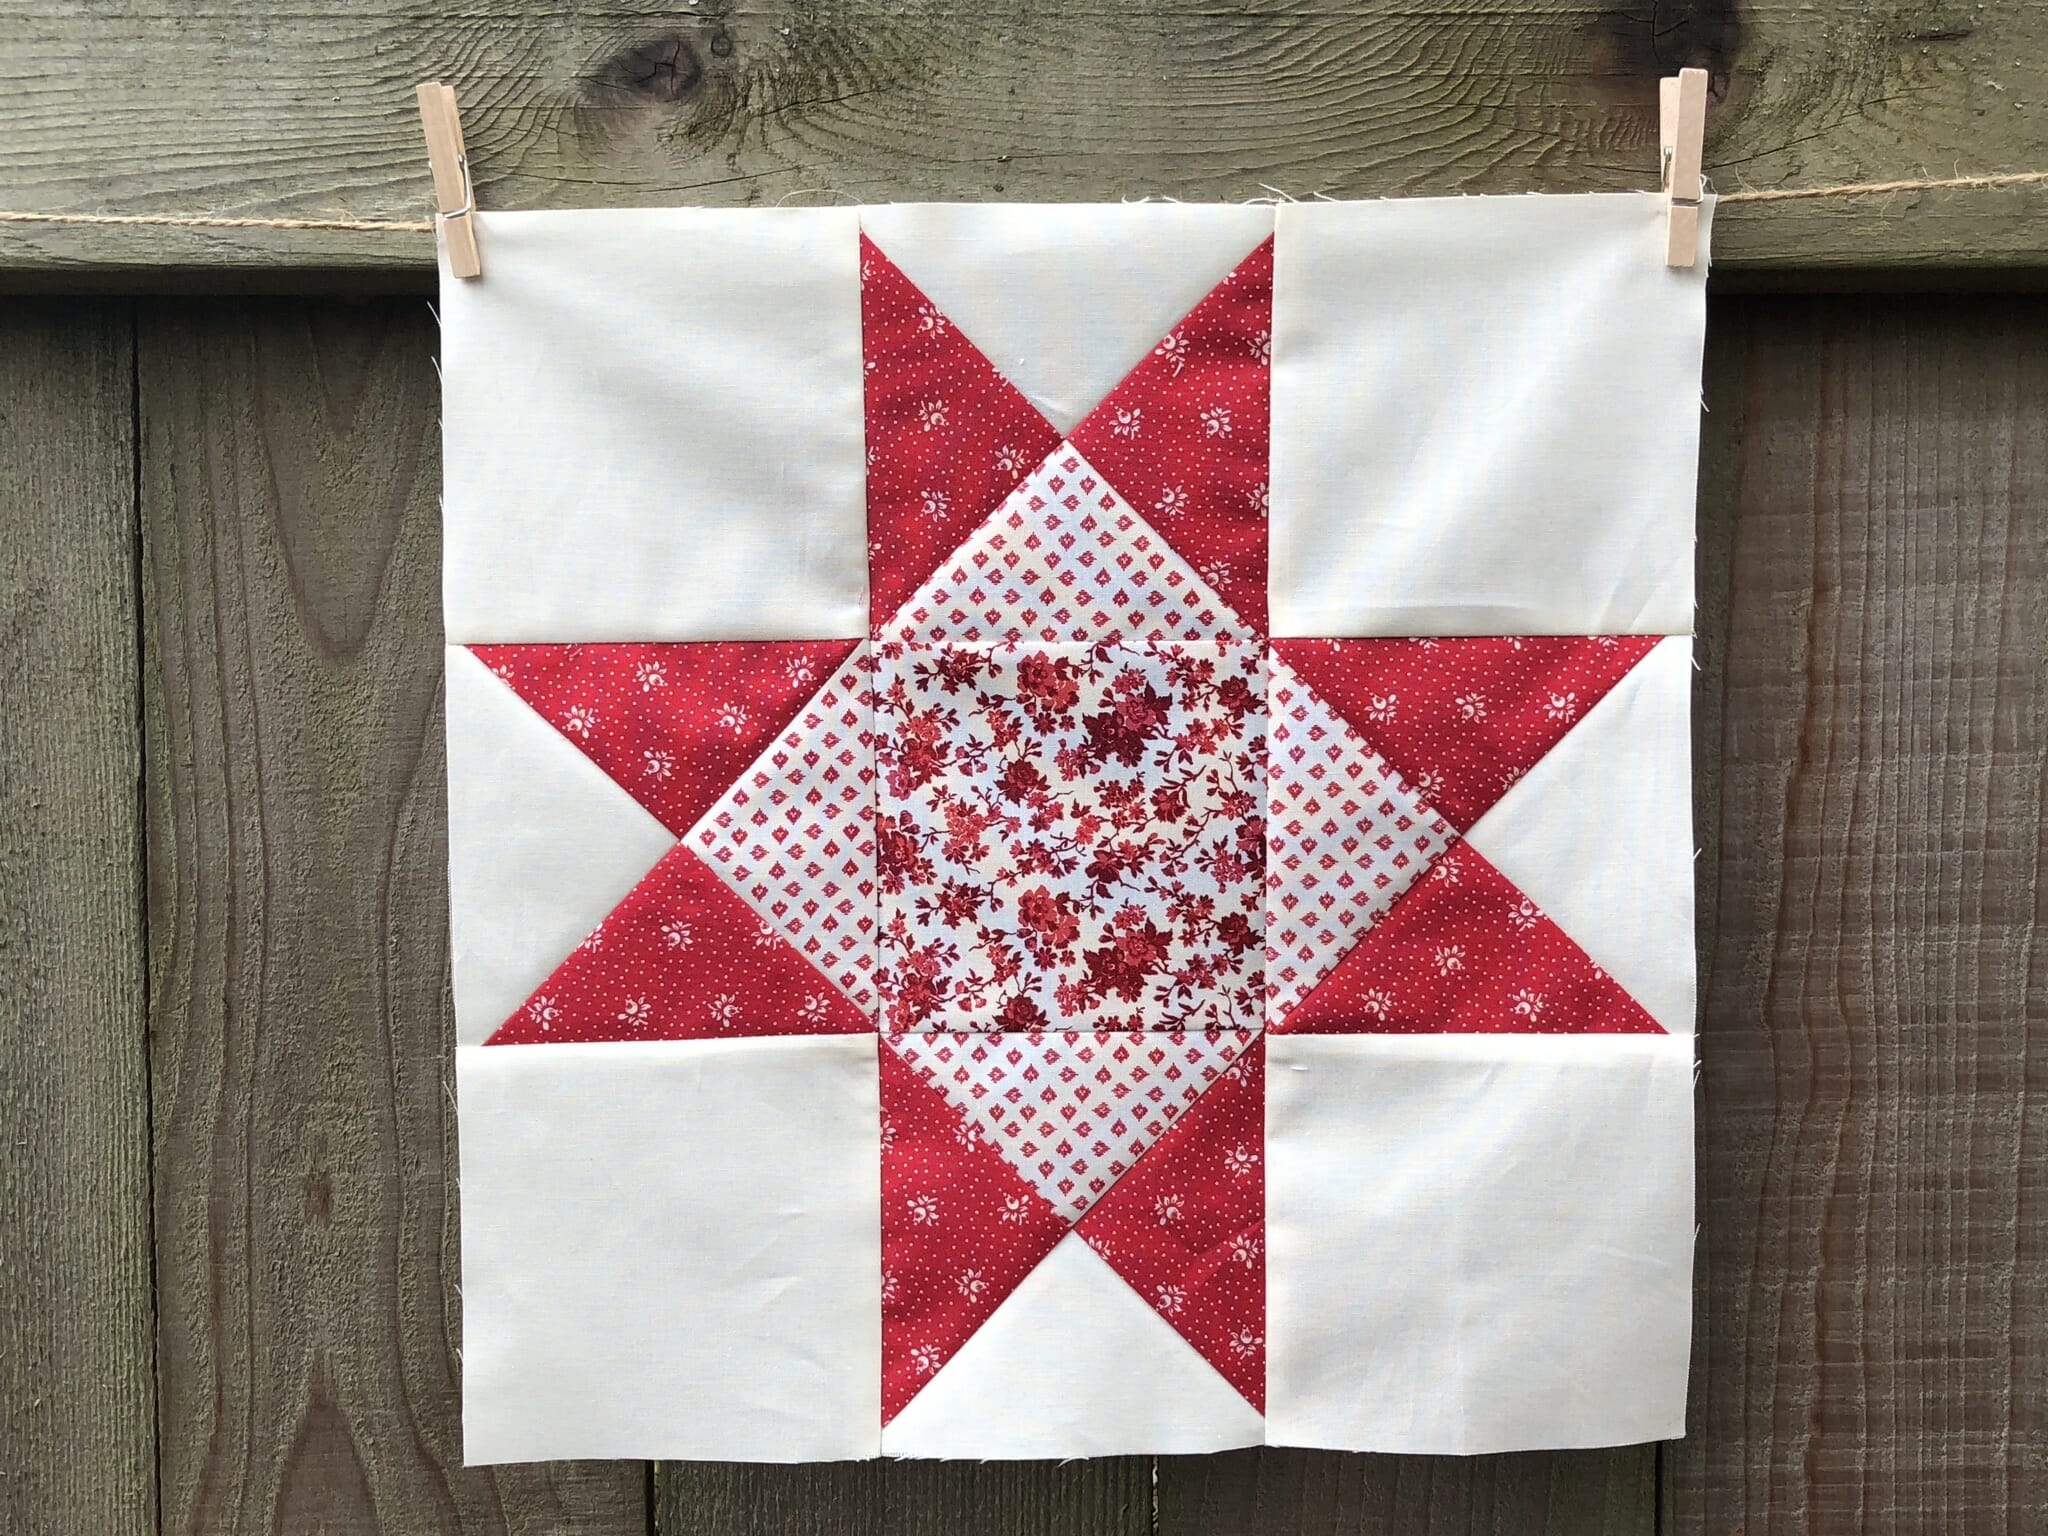
Here is my block, laid out and ready to sew together.

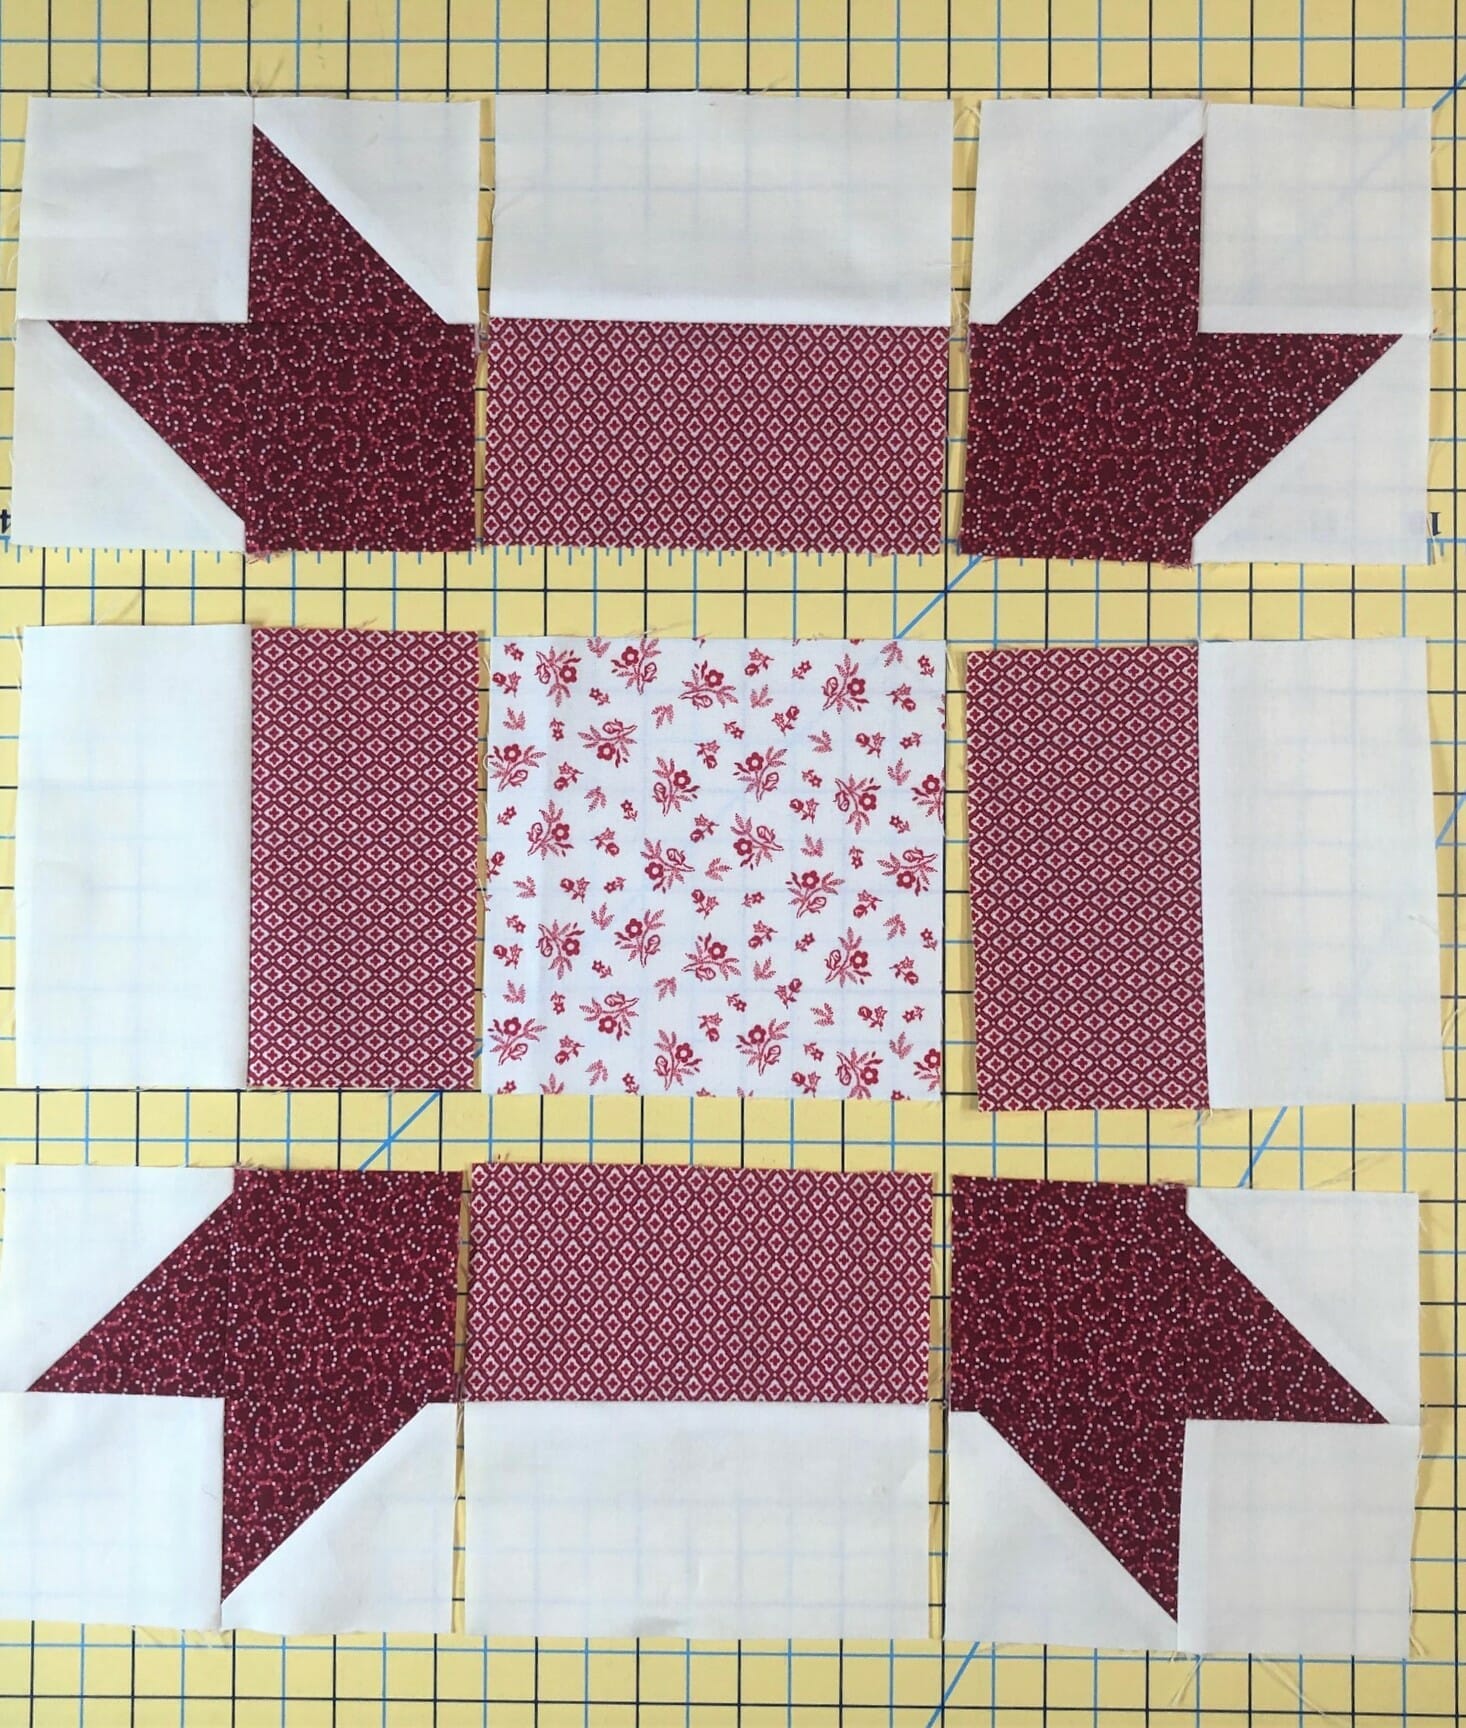
How easy was that? Another four blocks in the books!

Do you all realize that we only have one more month of Irish Chain blocks, and one last month of four unique blocks, then we are ready to finish our quilt?! We are SOOOO close to the finish line!

I hope you all have a wonderful, happy, and quilt-filled month!

Until next time…

Kristin


Ruby BOM – Month 7
2.7.2022

Hello friends!

This month we get to make another 4 unique blocks. Yay! And once again, some of them may look a little familiar. That’s because three of the four blocks for this month are ones we’ve sewn before. The only block this month that is brand spanking new is block #23. So I’ve decided to go a bit out of order for this blogpost and start with our new block for the month. Let’s dive in!

Block #23

This block begins with making some no-waste flying geese. By now, you know the drill on how to make these, but here are a few pictures to refresh your memories.

Once those are sewn and trimmed, I lay out everything for step 3 before I begin sewing the components together. I have a love/hate relationship with blocks that have the flying geese sewn outward to make a square in a square effect. I love using this block in designs, but sometimes when sewing it can be tricky to get those flying geese to match up in the corners and make a smooth-looking diamond shape in the block. So I really pay attention to how things are lining up as I’m pinning, and yes, I use LOTS of pins to keep everything in place for sewing.

Once you have the center section sewn together, it’s time to make even more flying geese.

 After those are done, I again lay everything out before I begin sewing. I always do this, and mostly it’s because way back when I first started quilting I would confuse myself and end up sewing things going the wrong way, so this helps me to see what I’m about to do before I start pinning. Because nothing is more aggravating than thinking you’ve finished sewing your block, only to realize that you did it wrong and have to rip it out. Ugh!

You can see in the picture below that I already sewed the F squares to the ends of the D/E flying geese. Sometimes I get ahead of myself!

Almost finished…

This block is also one that no matter which way you press the seams, you’ll end up with some bulk in spots. If this bothers you, feel free to press the seams open for steps 6 and 7. Personally, I just pressed the heck out of those seams according to my instructions. But if you want to adjust, by all means, feel free. Once your quilt is done, no one will see how you pressed anything anyway.

I really love how this block turned out. In fact, a loooong time ago, I even designed a whole quilt using this block as the base for my design.

Okay, now let’s go back to the beginning of the pattern and talk about the not-so-new blocks we’ll be making this month.

Block #2

This block is the same as block 15 from month 3, so you can refer back to that blog post HERE if you’d like a refresher. But it’s always good to see how this block comes together with the new fabrics, so I’m posting a few pics of how this month’s version comes together.

Here are the squares for the center 9-patch, ready for sewing.

After I made the 9-patch unit, I sewed the HSTs for the corners of the block.

Here are all the components of the block, ready to sew into rows.

Block #4

We originally sewed this block way back in month 1, and it was block #16, in case you want to refer back. The only slightly tricky thing about this block is making those quarter square triangle blocks, and making sure you’ve got everything in the right place as you sew and cut.

First, you’ll make your half-square triangles.

After those are done, you’ll pair up one of each kind and place them right sides together. They aren’t lined up in the photo below on purpose so that you can see how the Red Corsage II fabrics on the bottom and top units are to be on opposite sides. While I normally would trim my HSTs before sewing, when making Quarter Square triangle units, I always wait until I’ve finished them before trimming. That’s why you still see the tails in the photo.

If they are placed properly, you should be able to peel back the top unit and it should look like this:

I’ve skipped ahead a bit here, but this is what they should look like after you sew on either side of your marked lines and cut on the line. Now all you have to do is press them open and trim them to size.

Now you just have to lay the block out, sew the units into rows, like I’ve shown below, and then sew those rows together. Easy peasy!

I have always loved Ohio Star blocks. They are quick and easy, and just darling in quilts. The first quilt block I ever made in my whole life was an Ohio Star block, so maybe that’s why I adore them.

Block #11

Our last block for this month is another repeat from month 3 and was known as block #6 back then.

This block has lots of half-square triangles around the perimeter of the block, along with some more flying geese to make the center star points. The day I was working on this block I was listening to podcasts, as I tend to do while sewing, and got so engrossed in what I was listening to that I got a little carried away and kept forgetting to take pictures for all of you. Ack! So what you see below is what I have to show you. I’ll do better next month, I promise!

Here is the center star at about step 3, almost finished.

The top and bottom rows of the block are just about finished as you can see here:

And now the block is almost done!

This one is another personal favorite of mine, even though it’s a lot more work than the Ohio Star block. I really do need to make an entire quilt with this block. I know I would love it!  Perhaps I’ll make an FQ sampler…in my spare time haha! For now, I’d better just focus on getting this quilt finished, along with about 5 others that are partially done in my UFO pile. So many projects, and so little time!

Here’s one last look at all the completed blocks. I love them, and I hope you do too!

I hope you enjoyed putting this month’s blocks together, and I’ll catch you all next time!

Happy Quilting!

 Kristin