


 Tutorials
 4.3.2022
Welcome, everyone! I’m thrilled that so many of you have decided to join me in sewing up my latest Block of the Month quilt! Some of you may have already sewn some of my previous BOMs, but I suspect many of you might be new.
Each month I’ll be posting a little tutorial blog here, with tricks and tips to help you create the best quilt possible. And with this BOM we will also be adding some extra content over the coming months as promised, so be on the lookout for that too. It’s going to be so fun!
As we go along, please feel free to ask any questions in the comments section, and I’ll do my best to help you out. My email address is also on the pattern, so you are welcome to reach out to me that way as well.
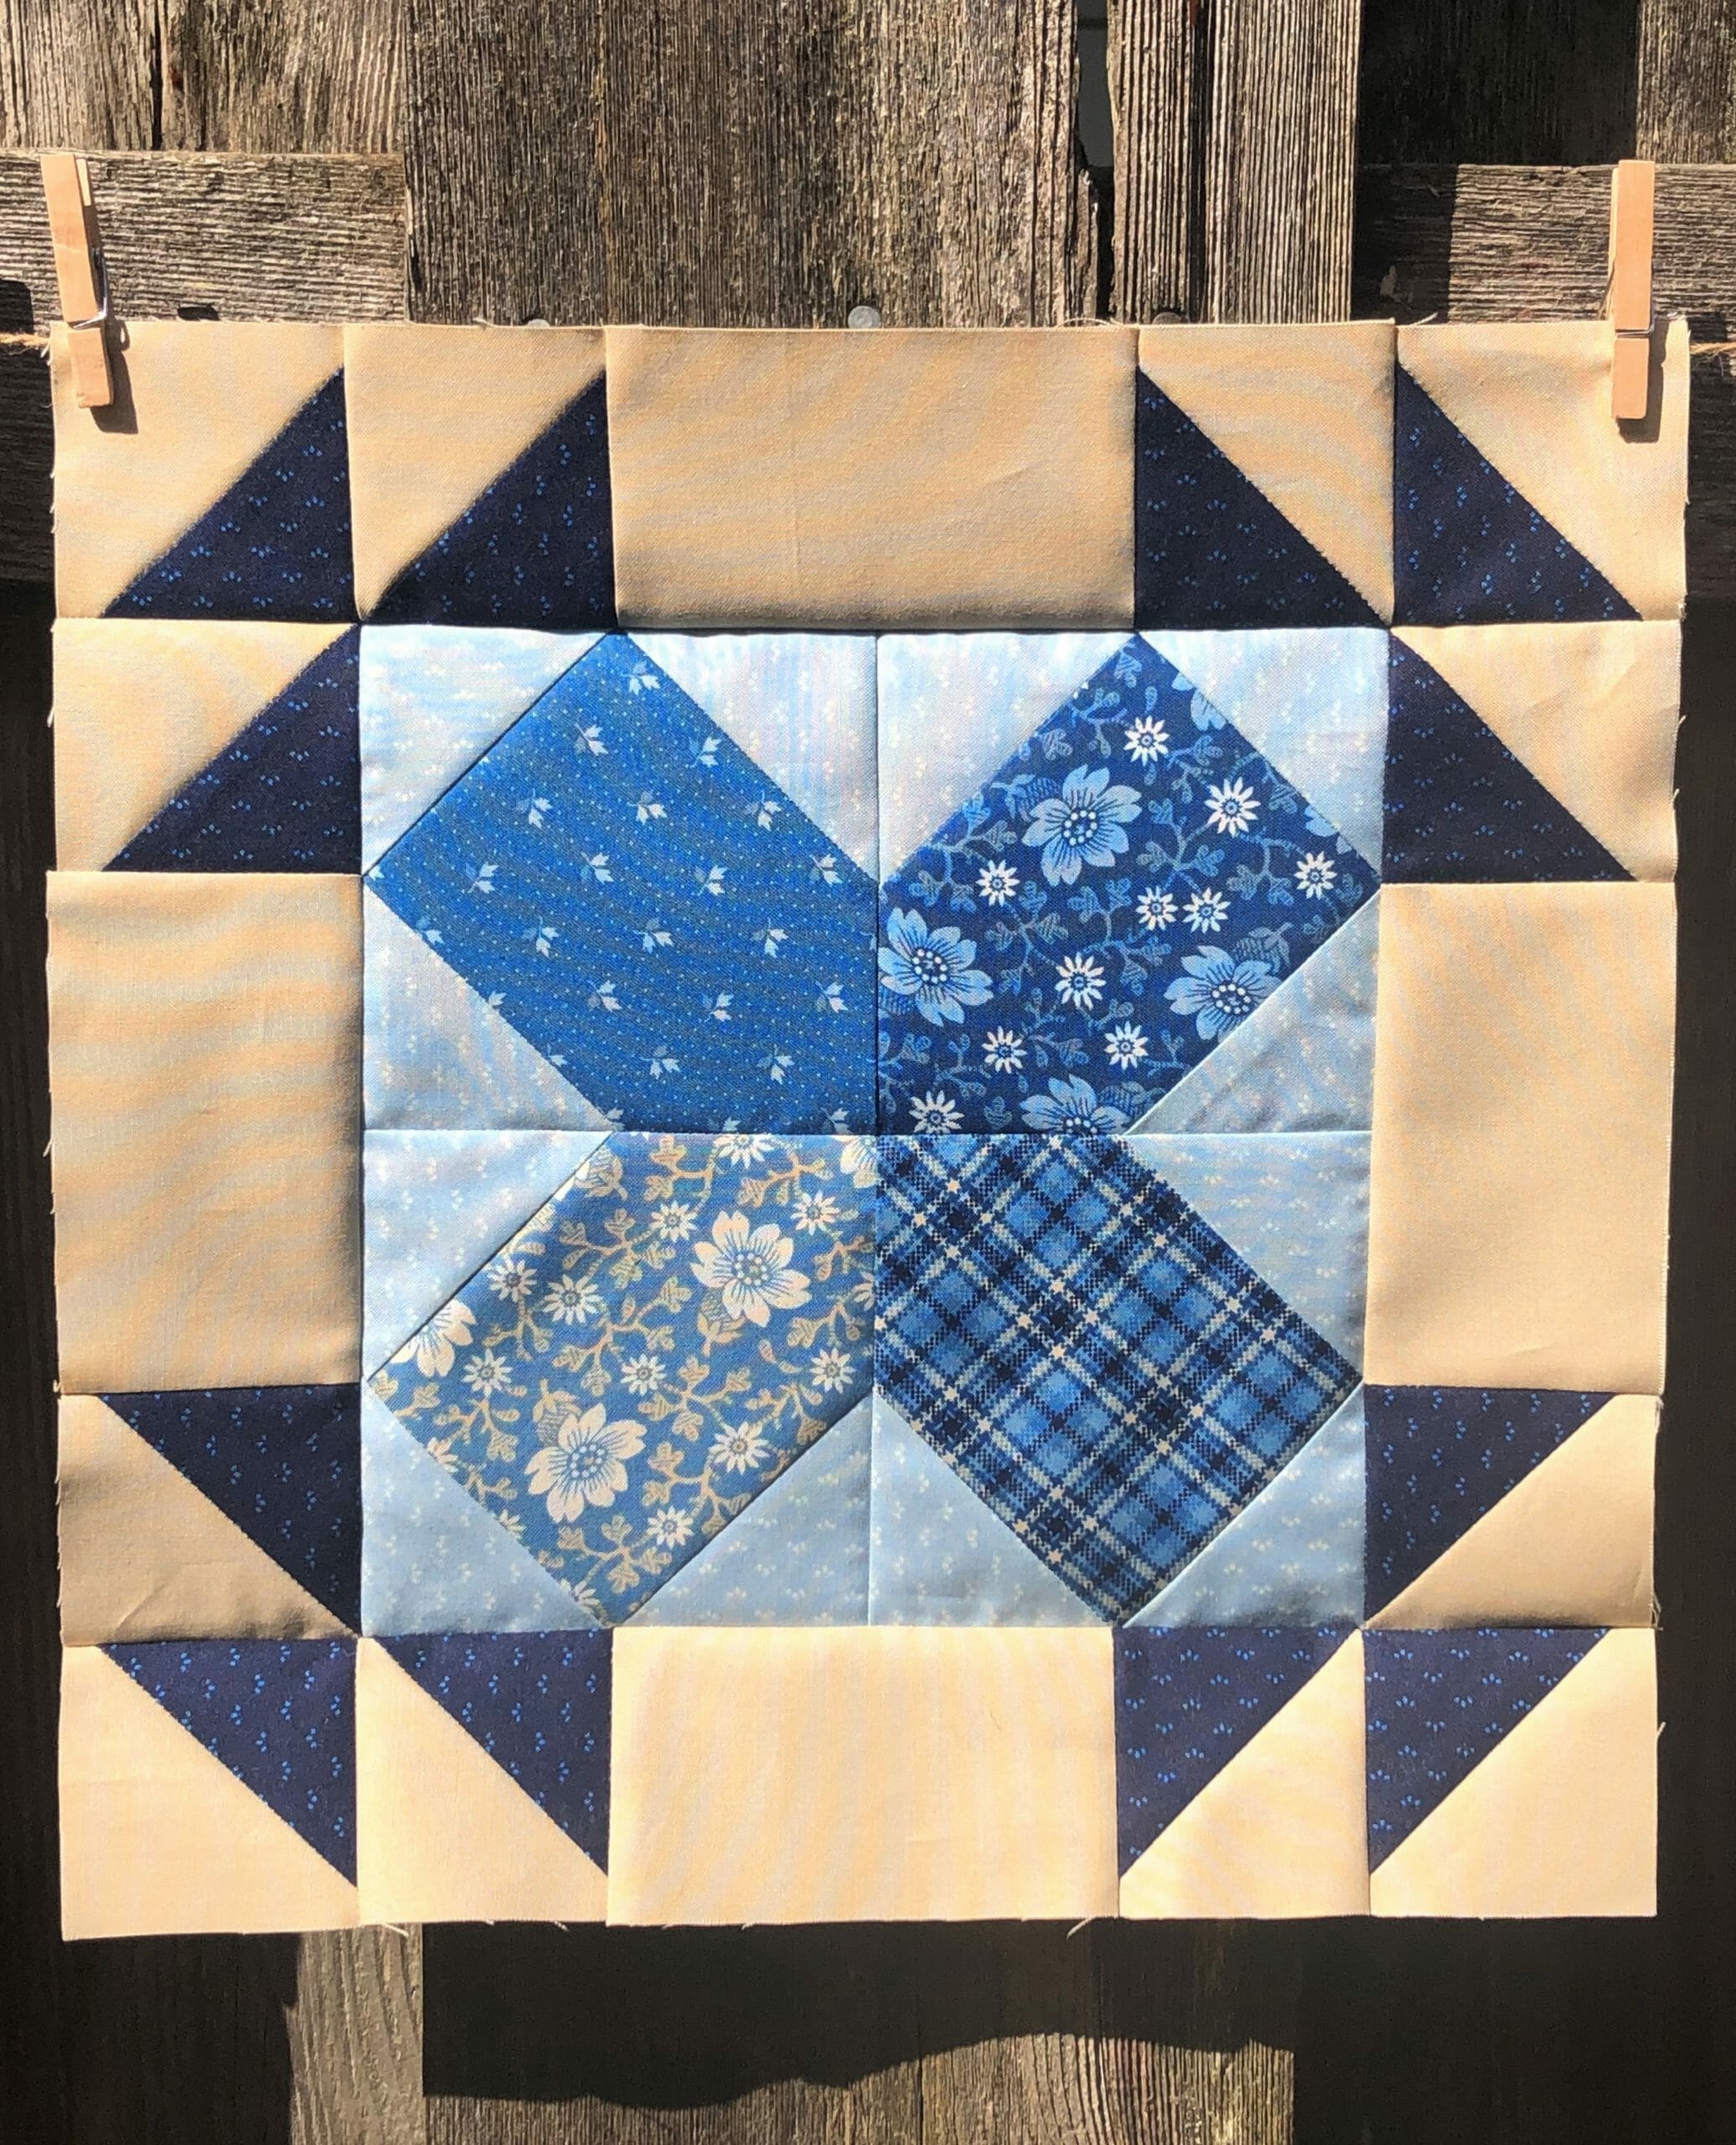
Now let’s get to business! Here are the three blocks we will make this month, photographed in no particular order:

Before we talk about these blocks one by one, I have a few general tips:
- I always make my cutting measurements mathematically correct in my patterns. Over the years I’ve tried many different methods of cutting and trimming in my instructions, and long story short, I came back to doing it this way.
This means that technically speaking, if you cut your Half Square Triangle pieces at 2-7/8” square, and follow the directions, using a correct seam allowance, you should end up with 2-1/2” HST squares in the end. However, I also allow for enough fabric in case you want to make your pieces a smidge bigger. In fact, if I’m being honest, no matter what quilt I’m sewing, I always cut my pieces just a hair larger, and then sew my seams just a hair under a 1/4”, and always come up with enough wiggle room to trim things up perfectly. My point is, that you do what works best for you, and know that you are free to cut your pieces a bit larger and trim them down later if that’s your preference.
- I also NEVER pre-wash my fabric. Again, this is a personal preference. And just FYI – Out of curiosity, I actually did a bleed test on the Droplet Navy for this quilt since it is so dark, and it didn’t bleed AT ALL. Hooray for great Connecting Threads fabric!
- I love to pre-starch all my fabric. I always starch and iron everything before I ever take a rotary cutter to a single piece. My preferred starch is MaryEllen’s Best Press – Caribbean Beach scent. And that’s just because I always want to be in the Caribbean, haha!
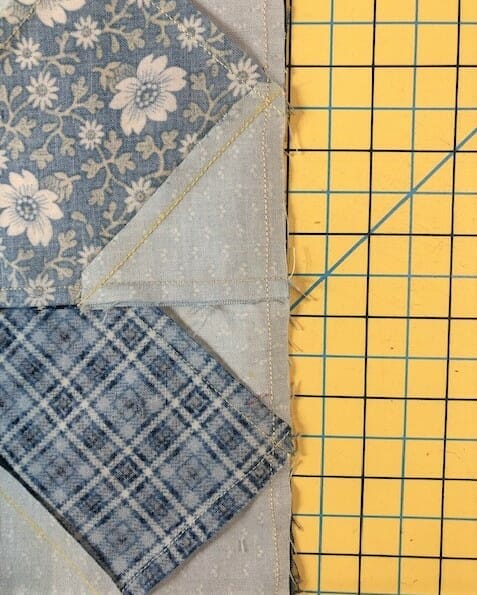
By now some of you have likely received your first installment of Open Skies. If you look at the pattern, you’ll notice that each block has the same half-square triangle border. We are going to get SO good at making these by the end of this quilt!
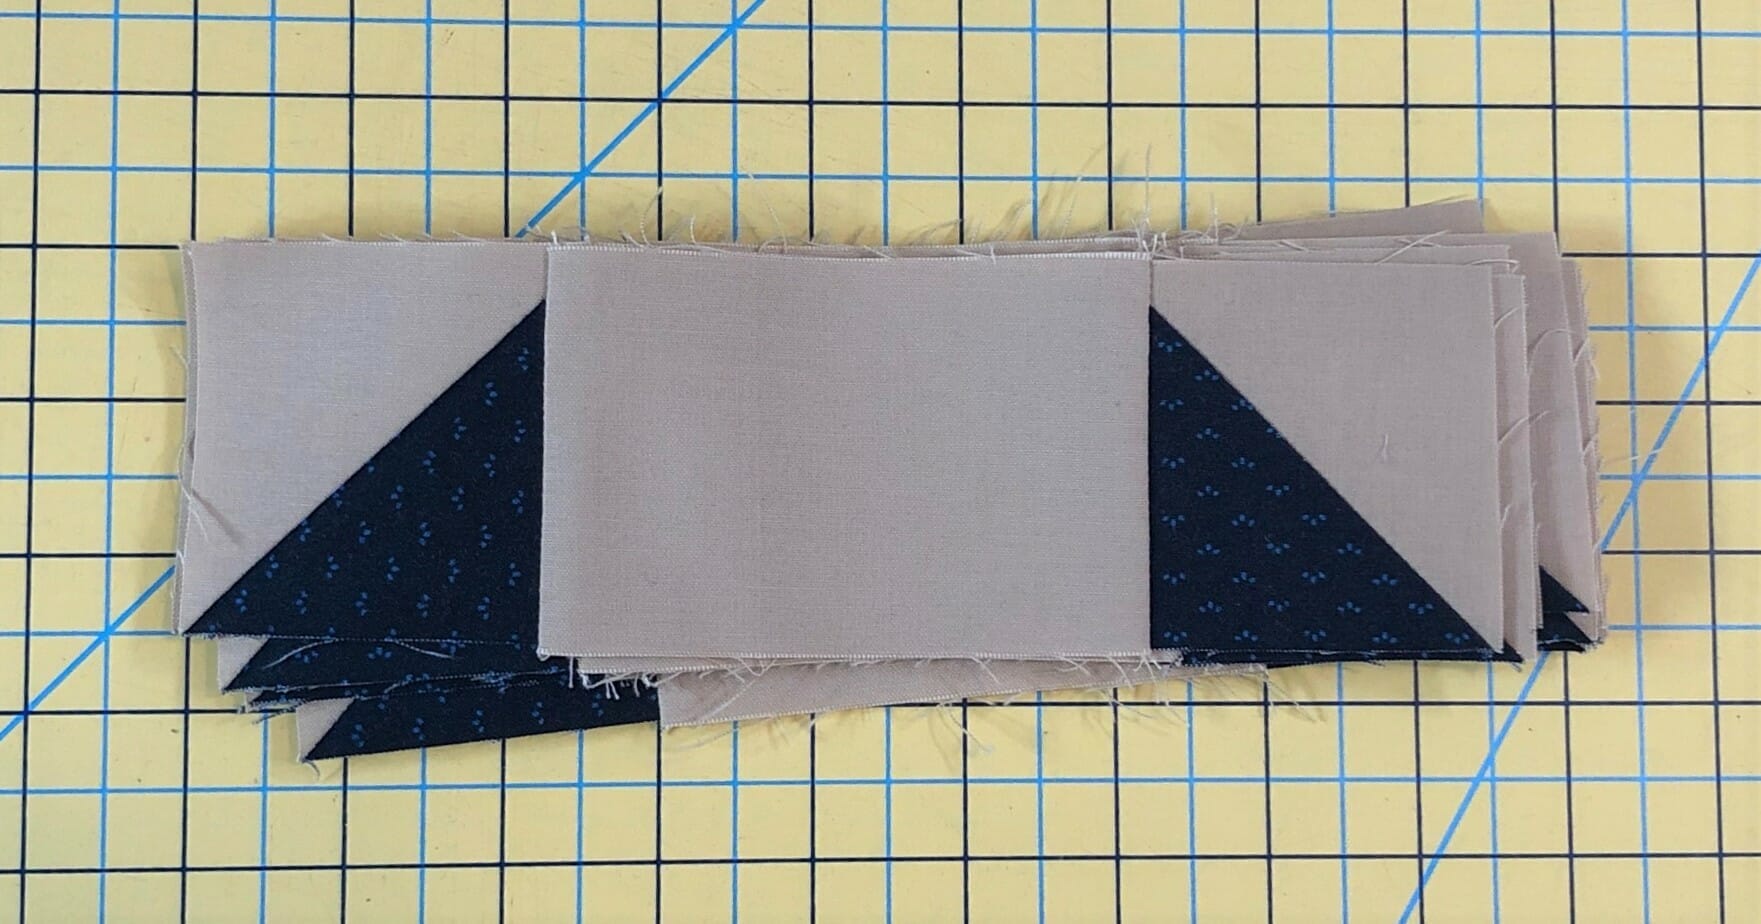
Knowing that each of the three blocks this month needed a total of 12 identical HSTs, I cheated a little bit and made all 36 at the same time before sewing up each of the blocks individually. So if you want to do the same, you’ll need to cut a total of 18 of both the B and C squares, then sew them up according to the directions.

A small side note, The Droplet Navy fabric is directional, but personally, I didn’t pay much attention to the direction of the print because I don’t think it is very noticeable in the final quilt. If it bothers you, then you are most welcome to figure that in with regards to how you sew these together. Since the Half Square triangles end up facing every which way in the blocks anyway, I decided to just get sewing and let the print be in whichever direction it ends up.

I like to look for shortcuts whenever I’m making a quilt – even with my own patterns! So I decided to assemble all the components for the outer borders before I began making the center portions of each block. But if jumping ahead with these messes you up, please ignore what I just said and follow my directions by sewing the blocks one by one.
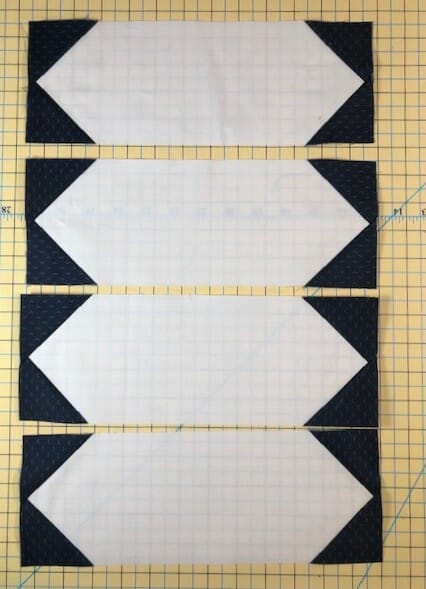
In the photo below I have a stack of 12 of the A/B/C units. This step is #3 in block #1.
Now on to the individual blocks we’ll be making this month!
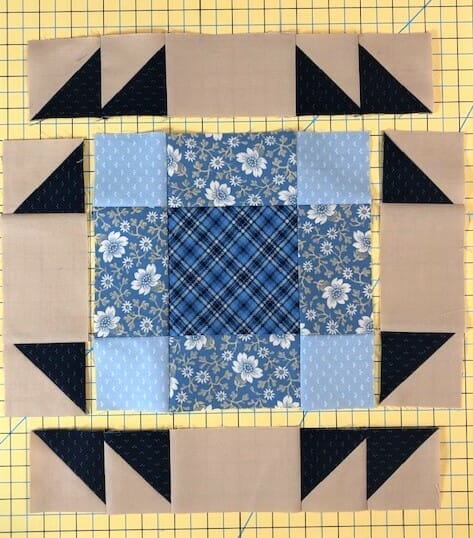
Block #1
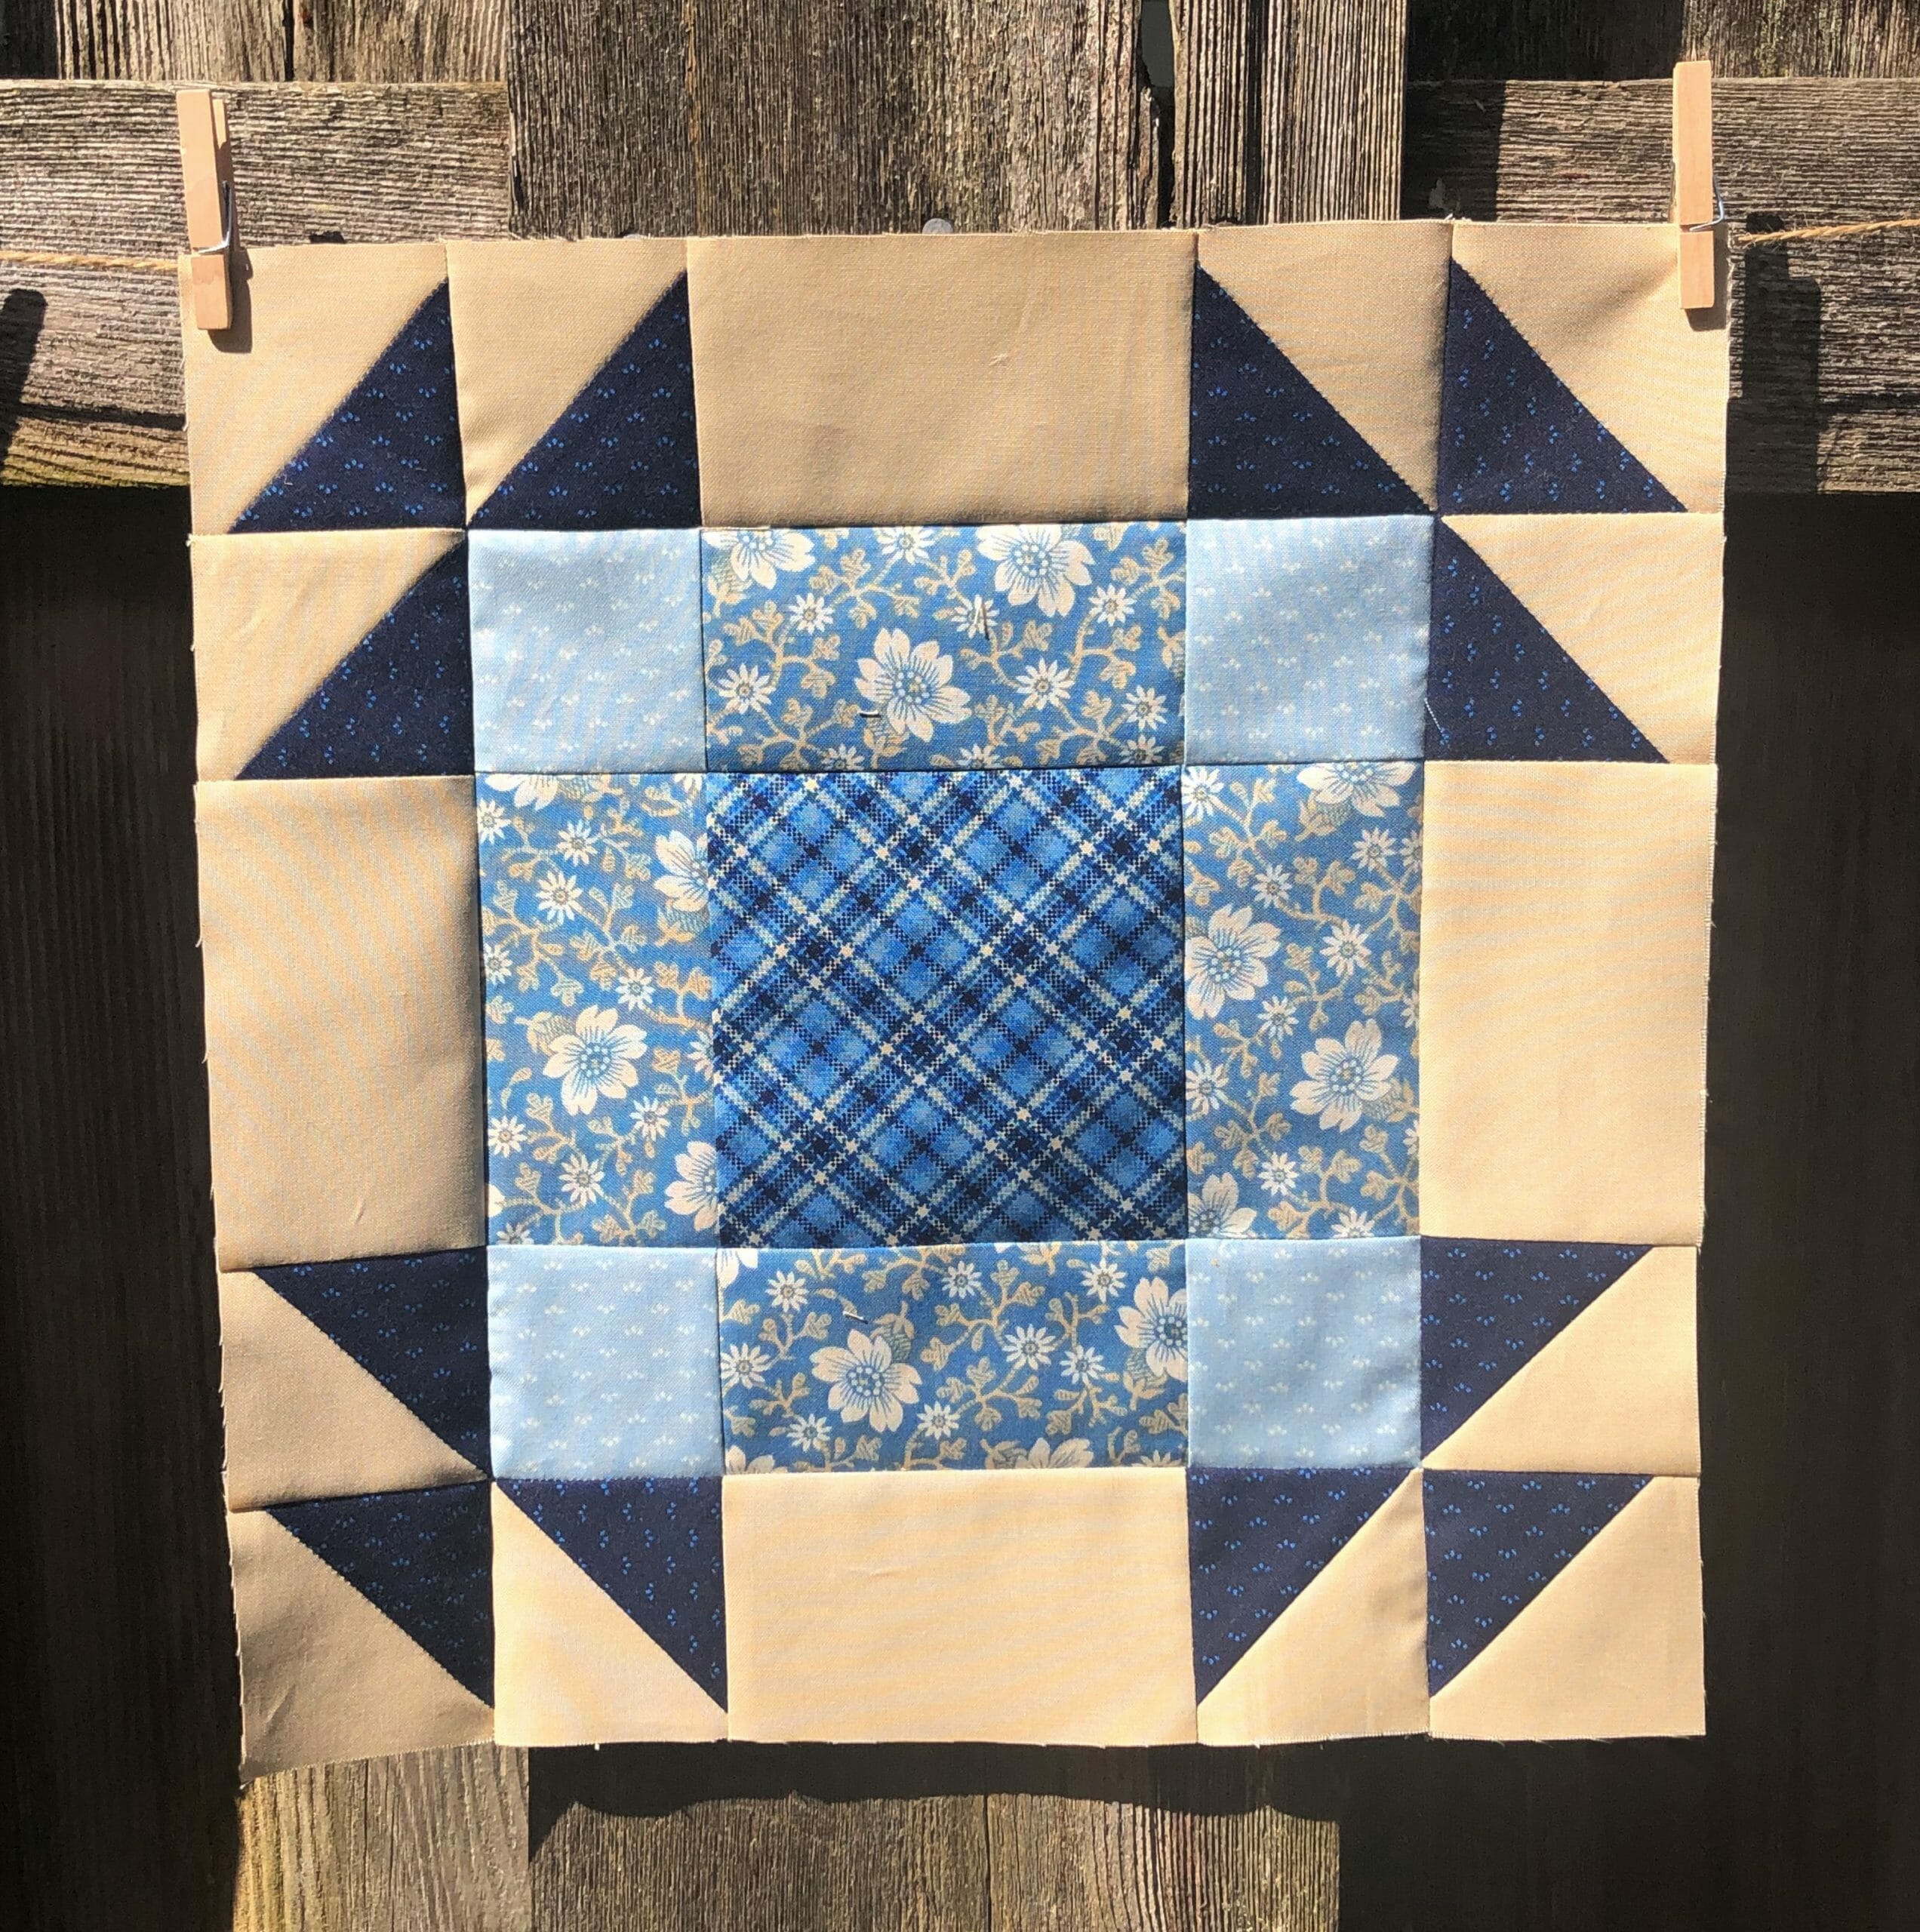
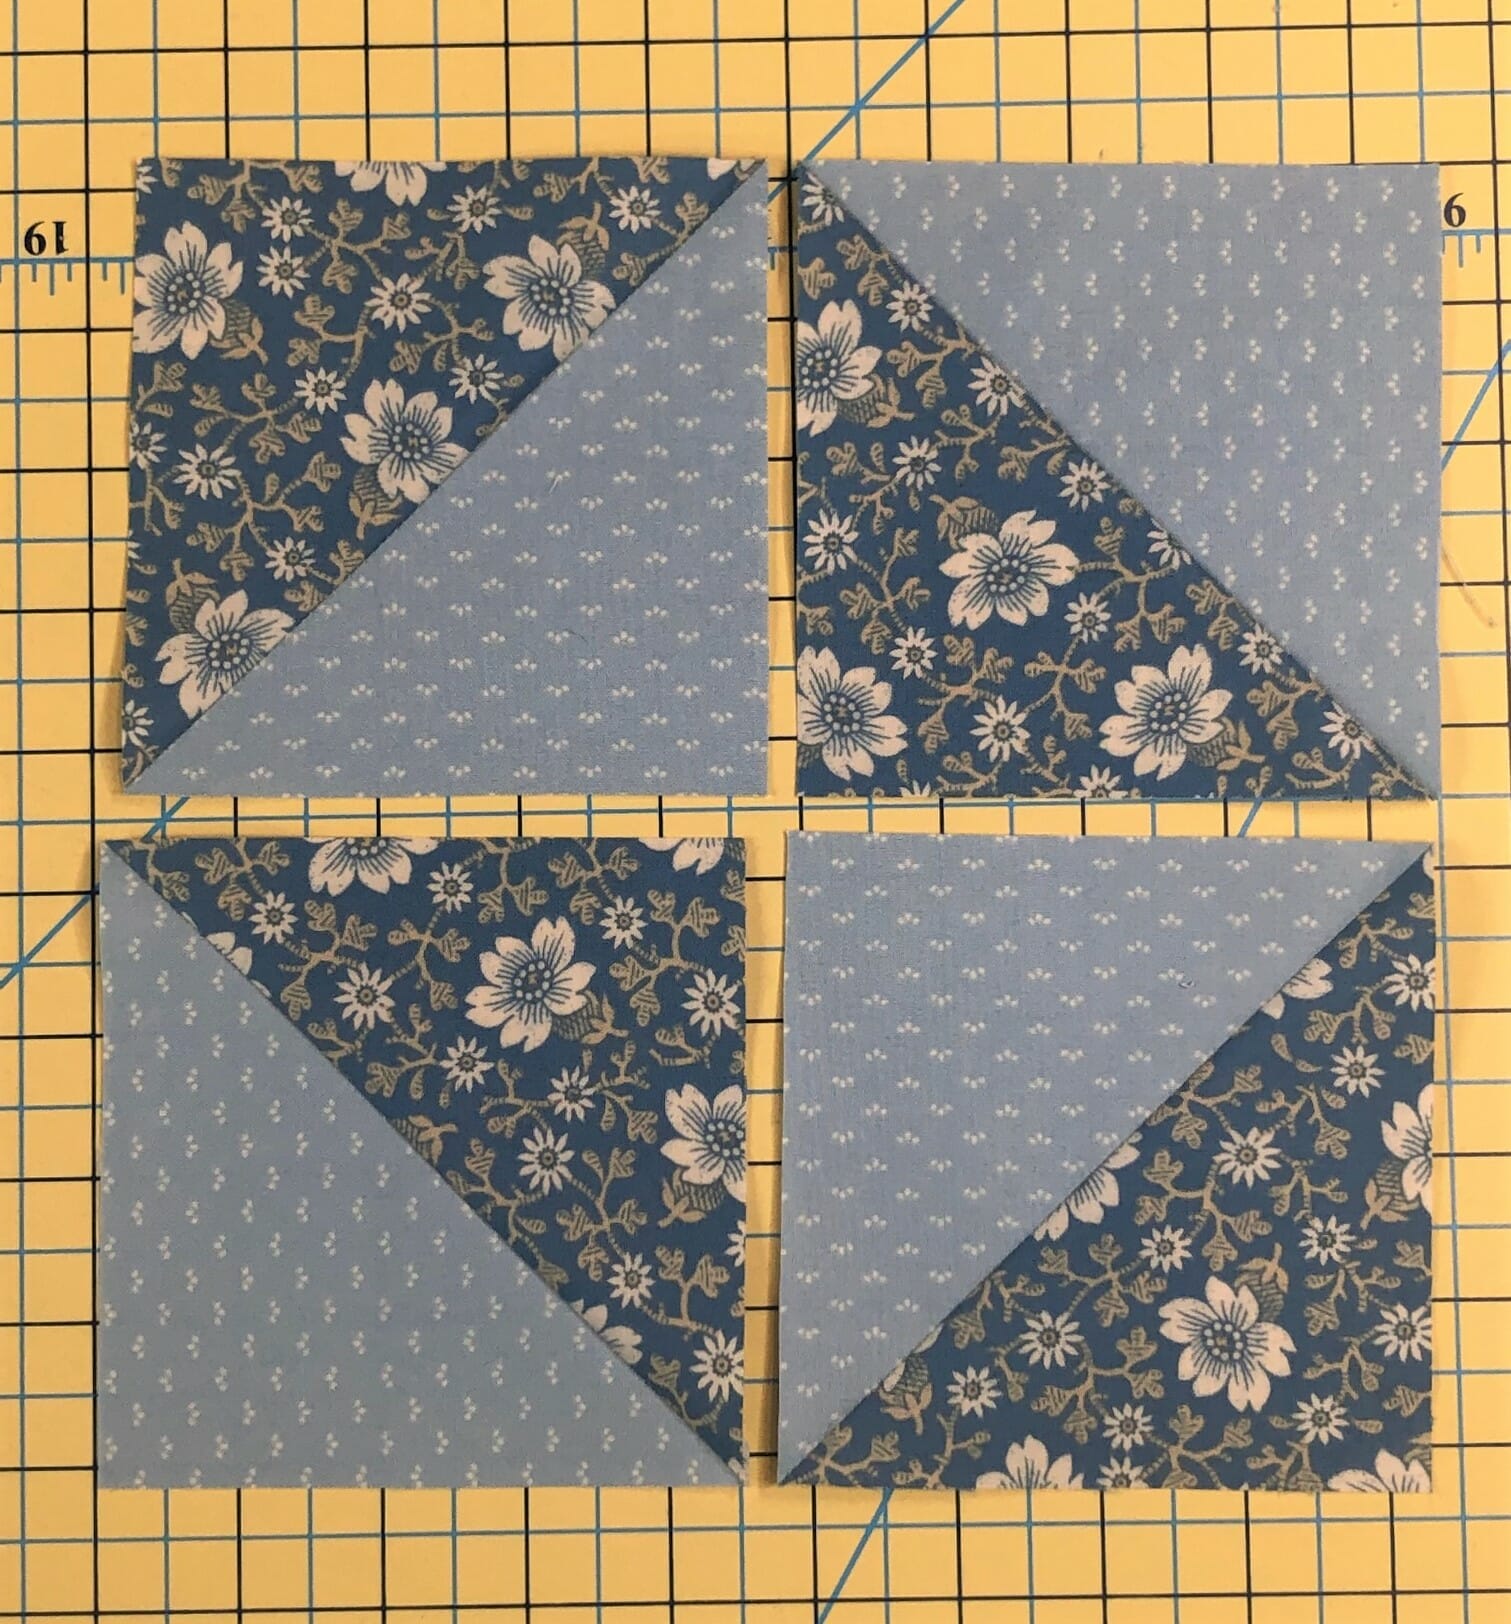
The first block we will be making has a very simple 9-patch unit in the center. This center uses another directional print with the Droplet Lt. Denim fabric. Again, it probably doesn’t matter too much, but you may choose to pay attention to the placement of those F squares in order to have the print all going in the same direction. It all depends on how picky you want to be.

Another tip for this block as well as all the others: Make sure you are following the pressing instructions in order to ensure that your seams will nest together properly in the end. This is especially important because of all those half-square triangles on the border. But if you mess up, don’t fret. You can always choose to press your seams open if you prefer.
Once the center is sewn, you can take your completed border sections and attach them as shown below. Before you begin sewing, it’s a good idea to double-check that all your HSTs are facing the correct direction around the perimeter. This is why I always lay things out first.
Block #11

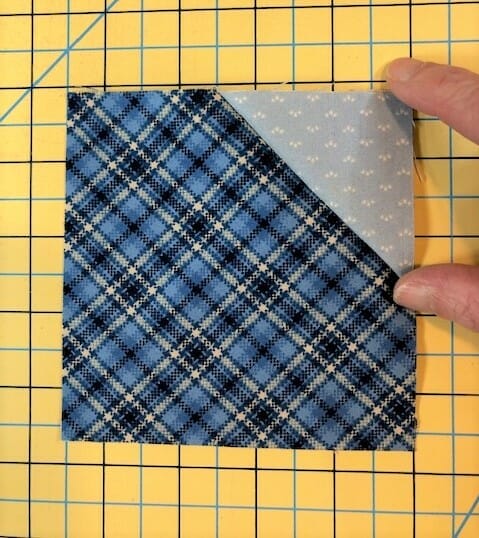
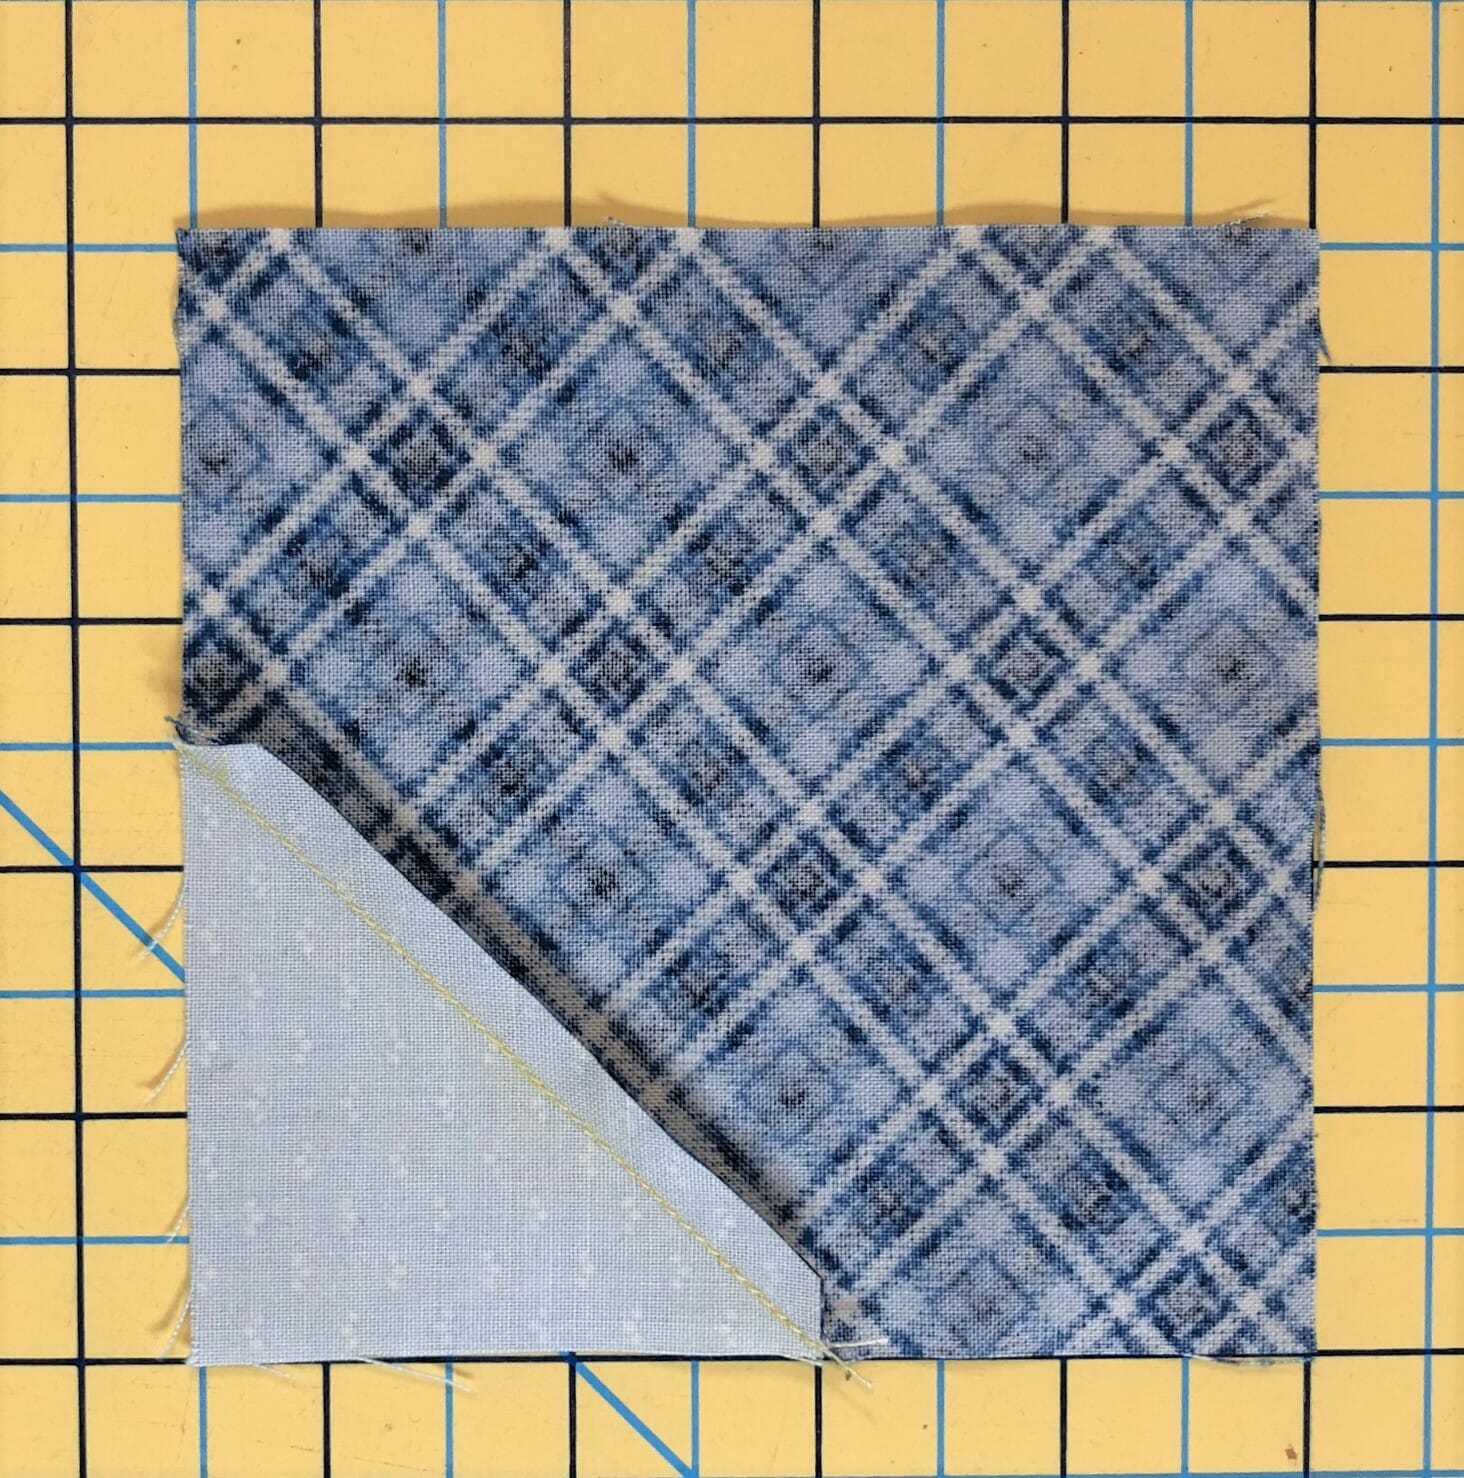
This block involves making even more HSTs, but the ones for the center are much larger. As I mentioned above, this is where it’s handy to cut your pieces just a smidge bigger, and then use a scant 1/4″ seam allowance, so that you can trim to perfection, or at least close enough!

Make sure you’ve got these in the correct orientation before you begin sewing like you see below.
And here is this block, ready for sewing the HST border around the outside.

There isn’t too much that is tricky with this block either, but I have one additional tip: When sewing the outer A/B/C units onto the center portion, you may want to pin and sew so that the central unit is on the top, and the A/B/C units are underneath. This will enable you to see where you are sewing through those D/E points on the sides of the center block, helping you to get them just right. The picture below will help illustrate what I mean:

Block #13
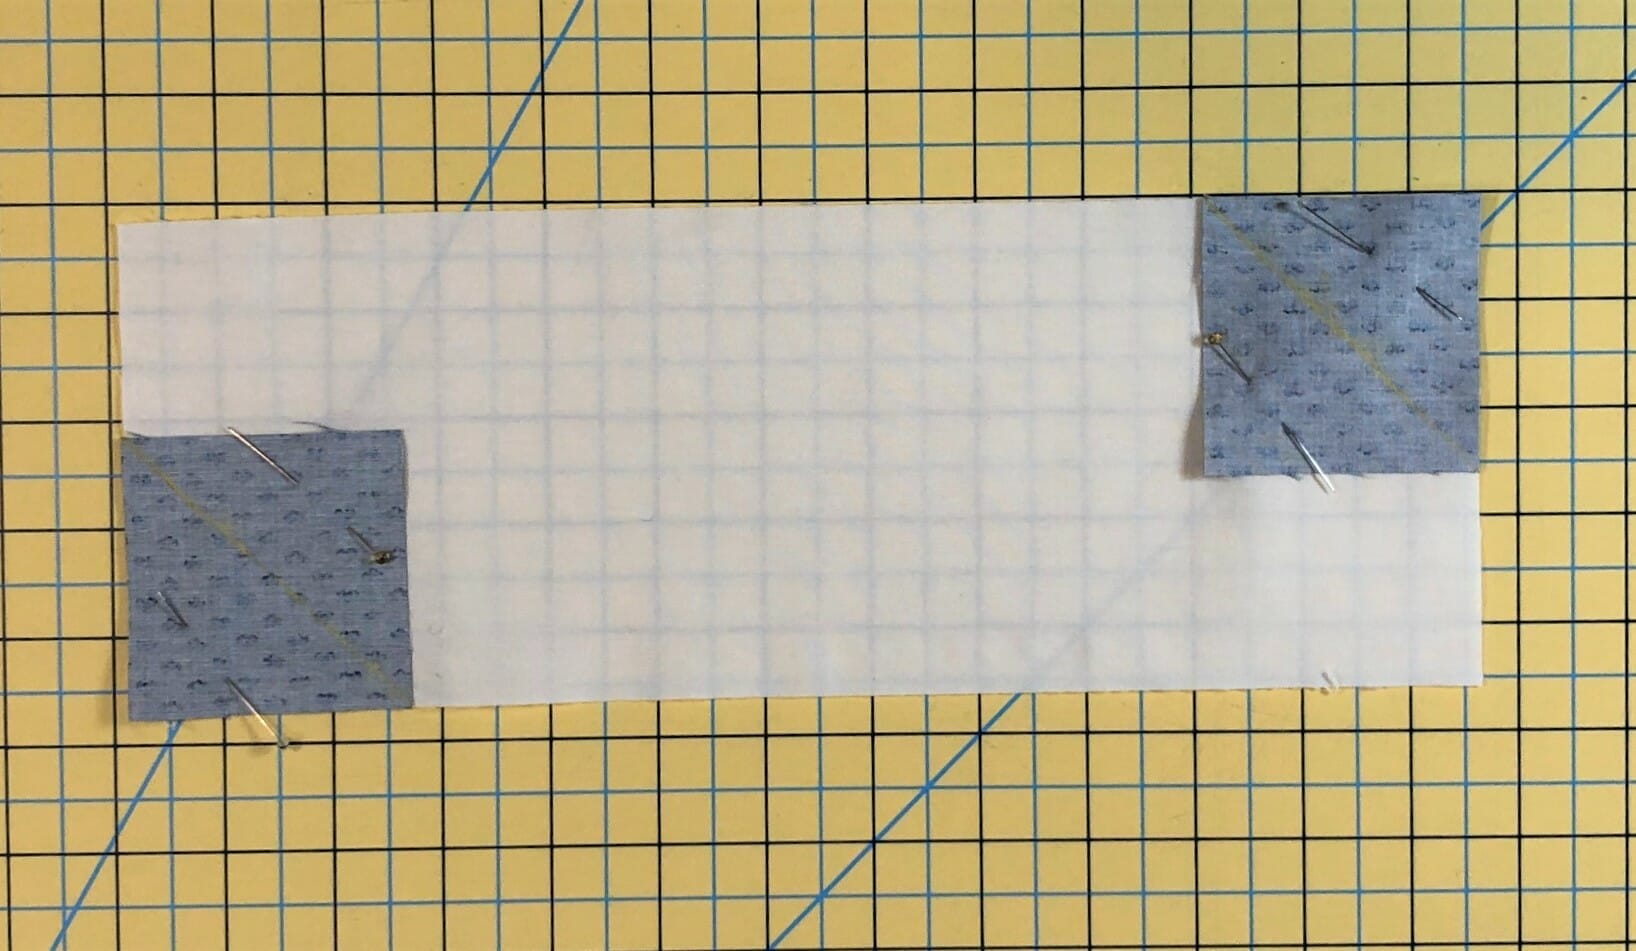
Our last block is probably the most challenging of the month. Each of the four D squares in this block will have three E squares sewn and trimmed to make an almost square in a square unit. Here you can see the first E squares pinned and ready to go.

Anytime I use the method of sewing on a line and then trimming to a 1/4 “ seam allowance, I always sew just a hair outside the line. This helps me to make sure when I trim and press, that I don’t end up with those triangle corners coming up short.
Before you trim, I suggest you flip up each E square and see if the corners match up. I always check this on every single one, and if it comes up short, then I know I need to rip out my stitching and try again. I know it’s tedious, but you’ll thank yourself later.

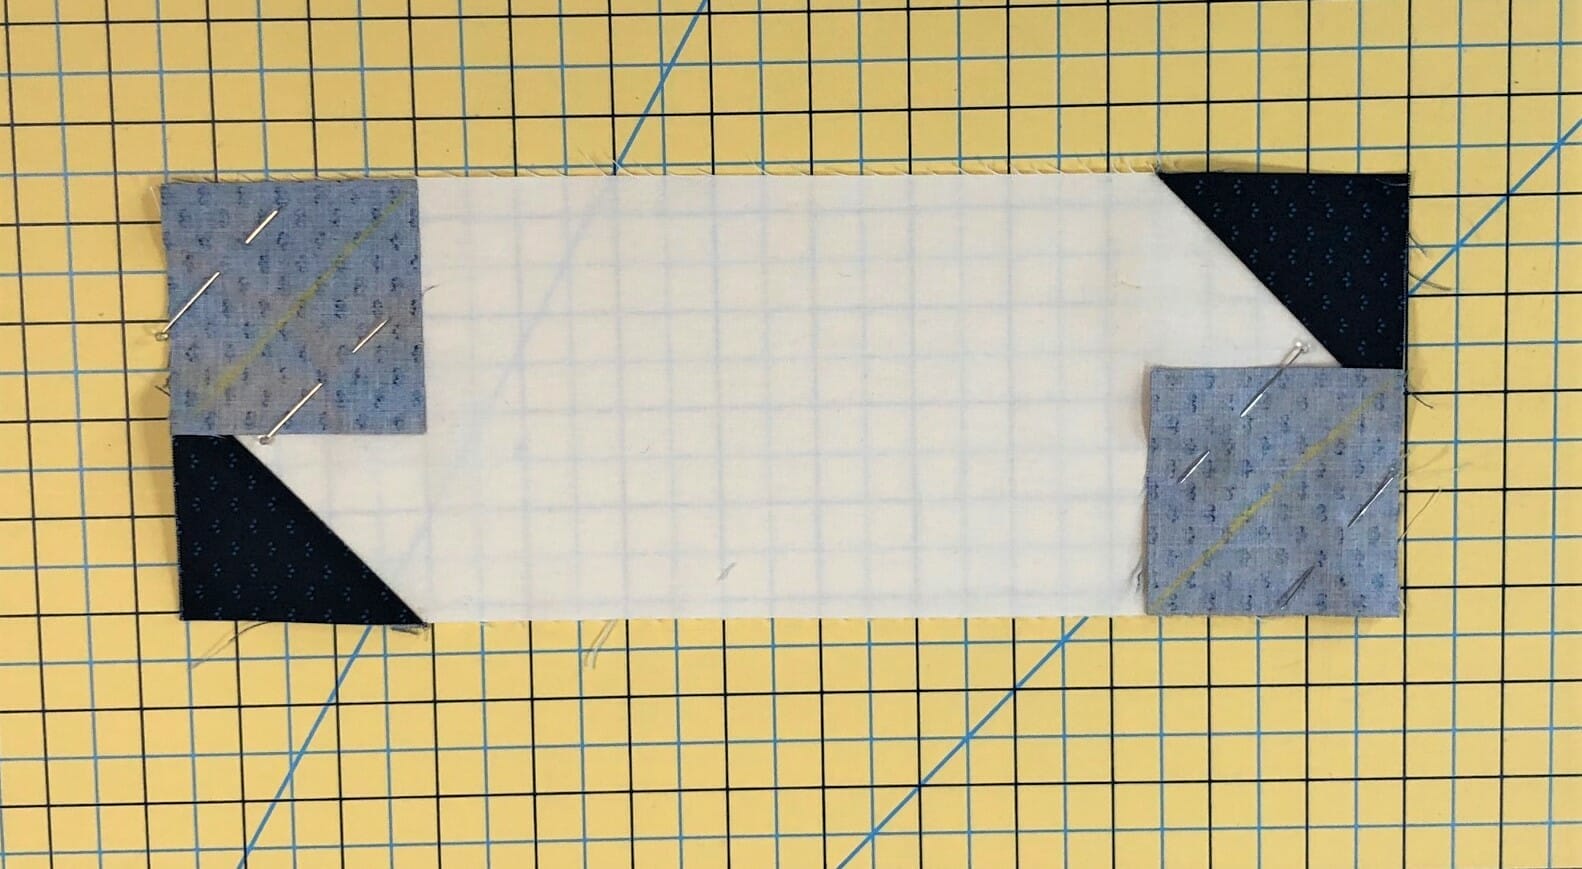
If you look at the directions, you will notice that the first E triangle is pressed TOWARD the D square, while the remaining two are pressed AWAY from the D square. This is especially important because this will once again allow for those seams to nest when you sew the units together.
Once you’ve finished with the first E squares, the remaining ones are pressed outward.

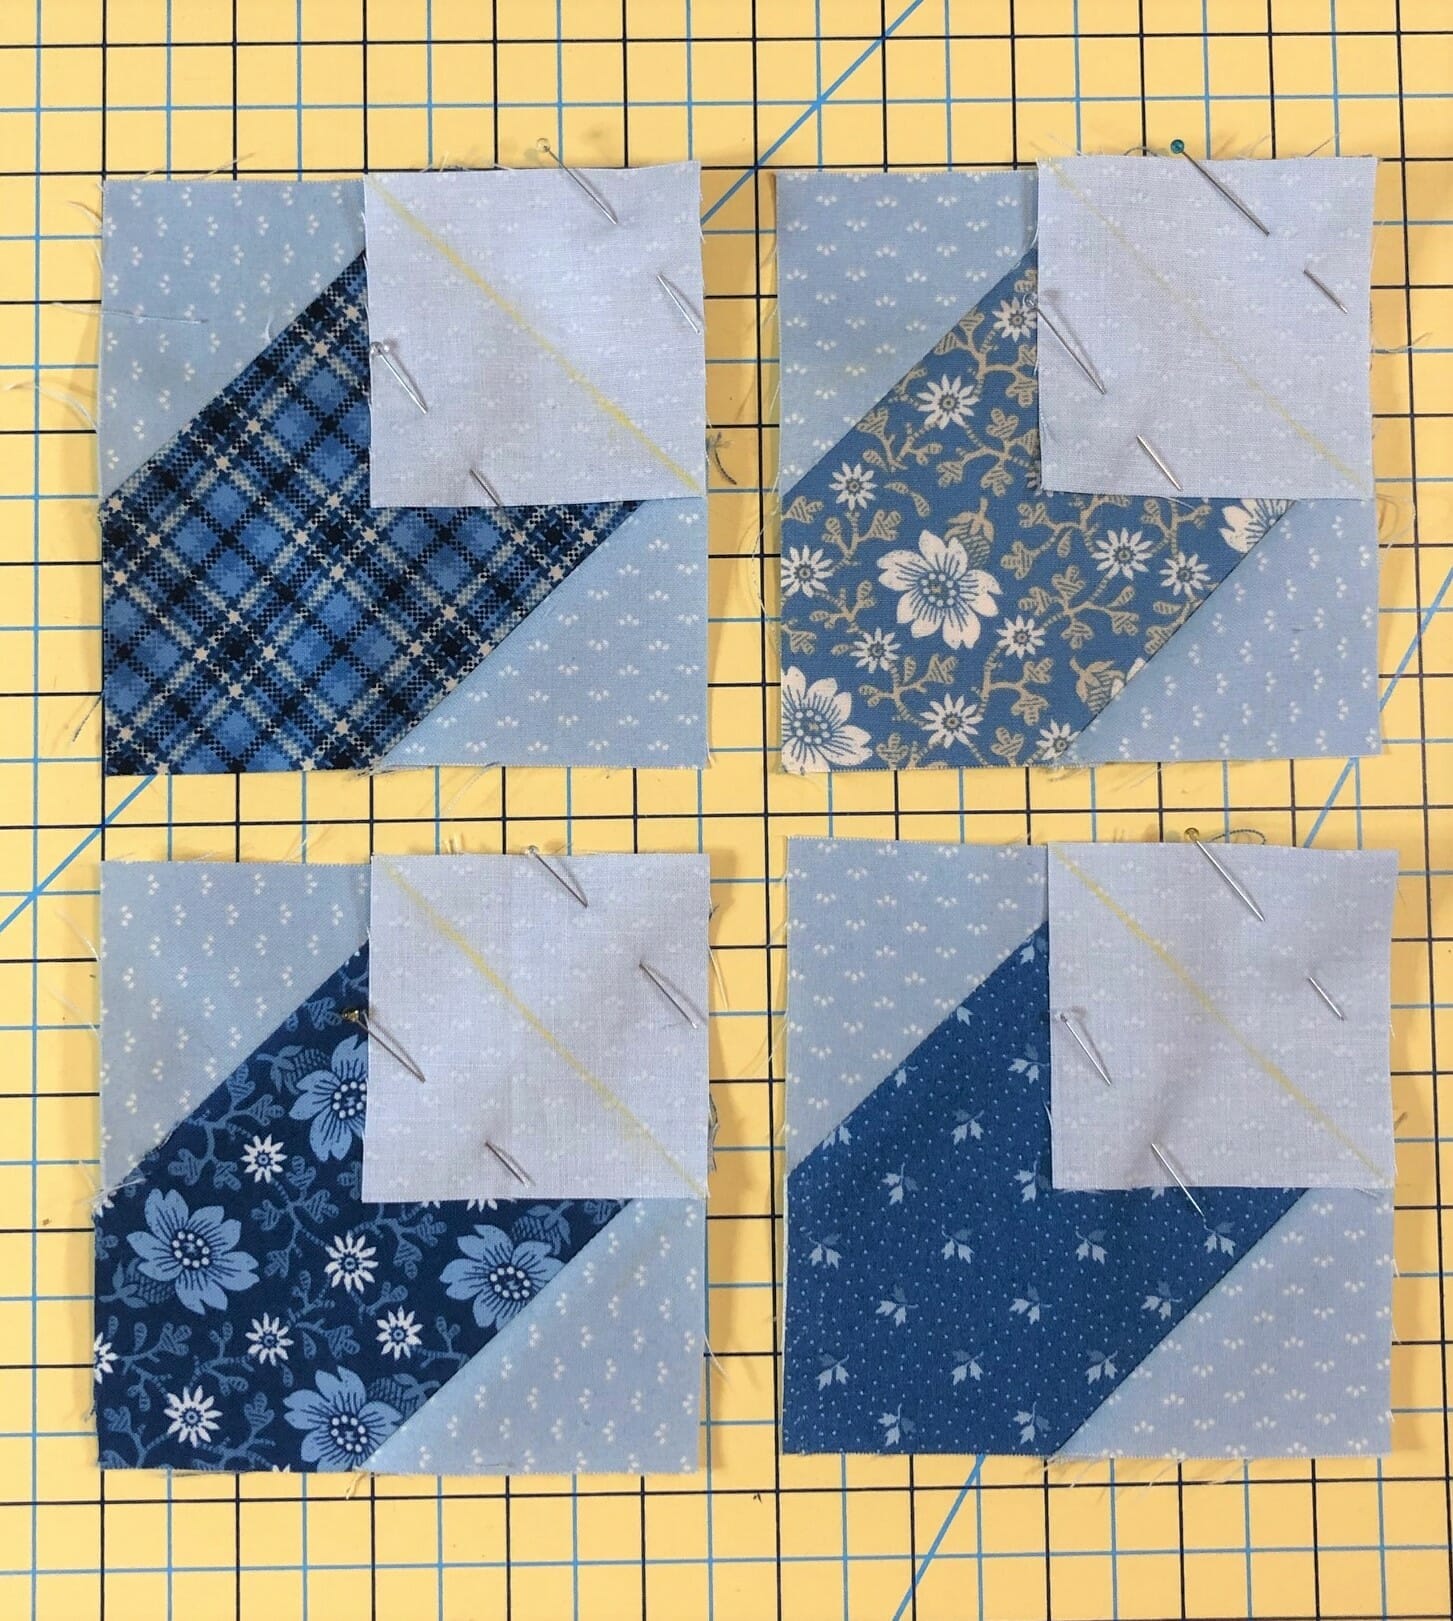
The placement doesn’t matter when you sew the four units together, so If you don’t like how I’ve arranged them, by all means, move them around to your liking.

This block would also benefit from having those outer A/B/C units on the underside as you sew in order to make sure you see where you are sewing and get those point intersections nice and crisp.
Sashing strips:
Last but not least, we will be making a few sashing strips. Since there are so many in this quilt, I thought it would be a good idea to knock some of these out every month. Again we are using that directional navy print, and again, I didn’t pay attention to the direction. I’m starting to sound like a broken record, aren’t I?
As I mentioned above, it’s helpful to sew just a hair outside the line with these, and flip up the corners before you trim to make sure they match up.
Below are the last two squares pinned and ready to sew. In addition to getting good at sewing Half-Square Triangles, we are also going to get really good at these sashing strips over the coming months!
Well, there you have it! The first three blocks and a few sashing strips are done! Next month we will make a couple more blocks, and even more sashing strips.
I look forward to sewing and chatting with all of you over the coming months. Until next time….
Happy Quilting!
Kristin

