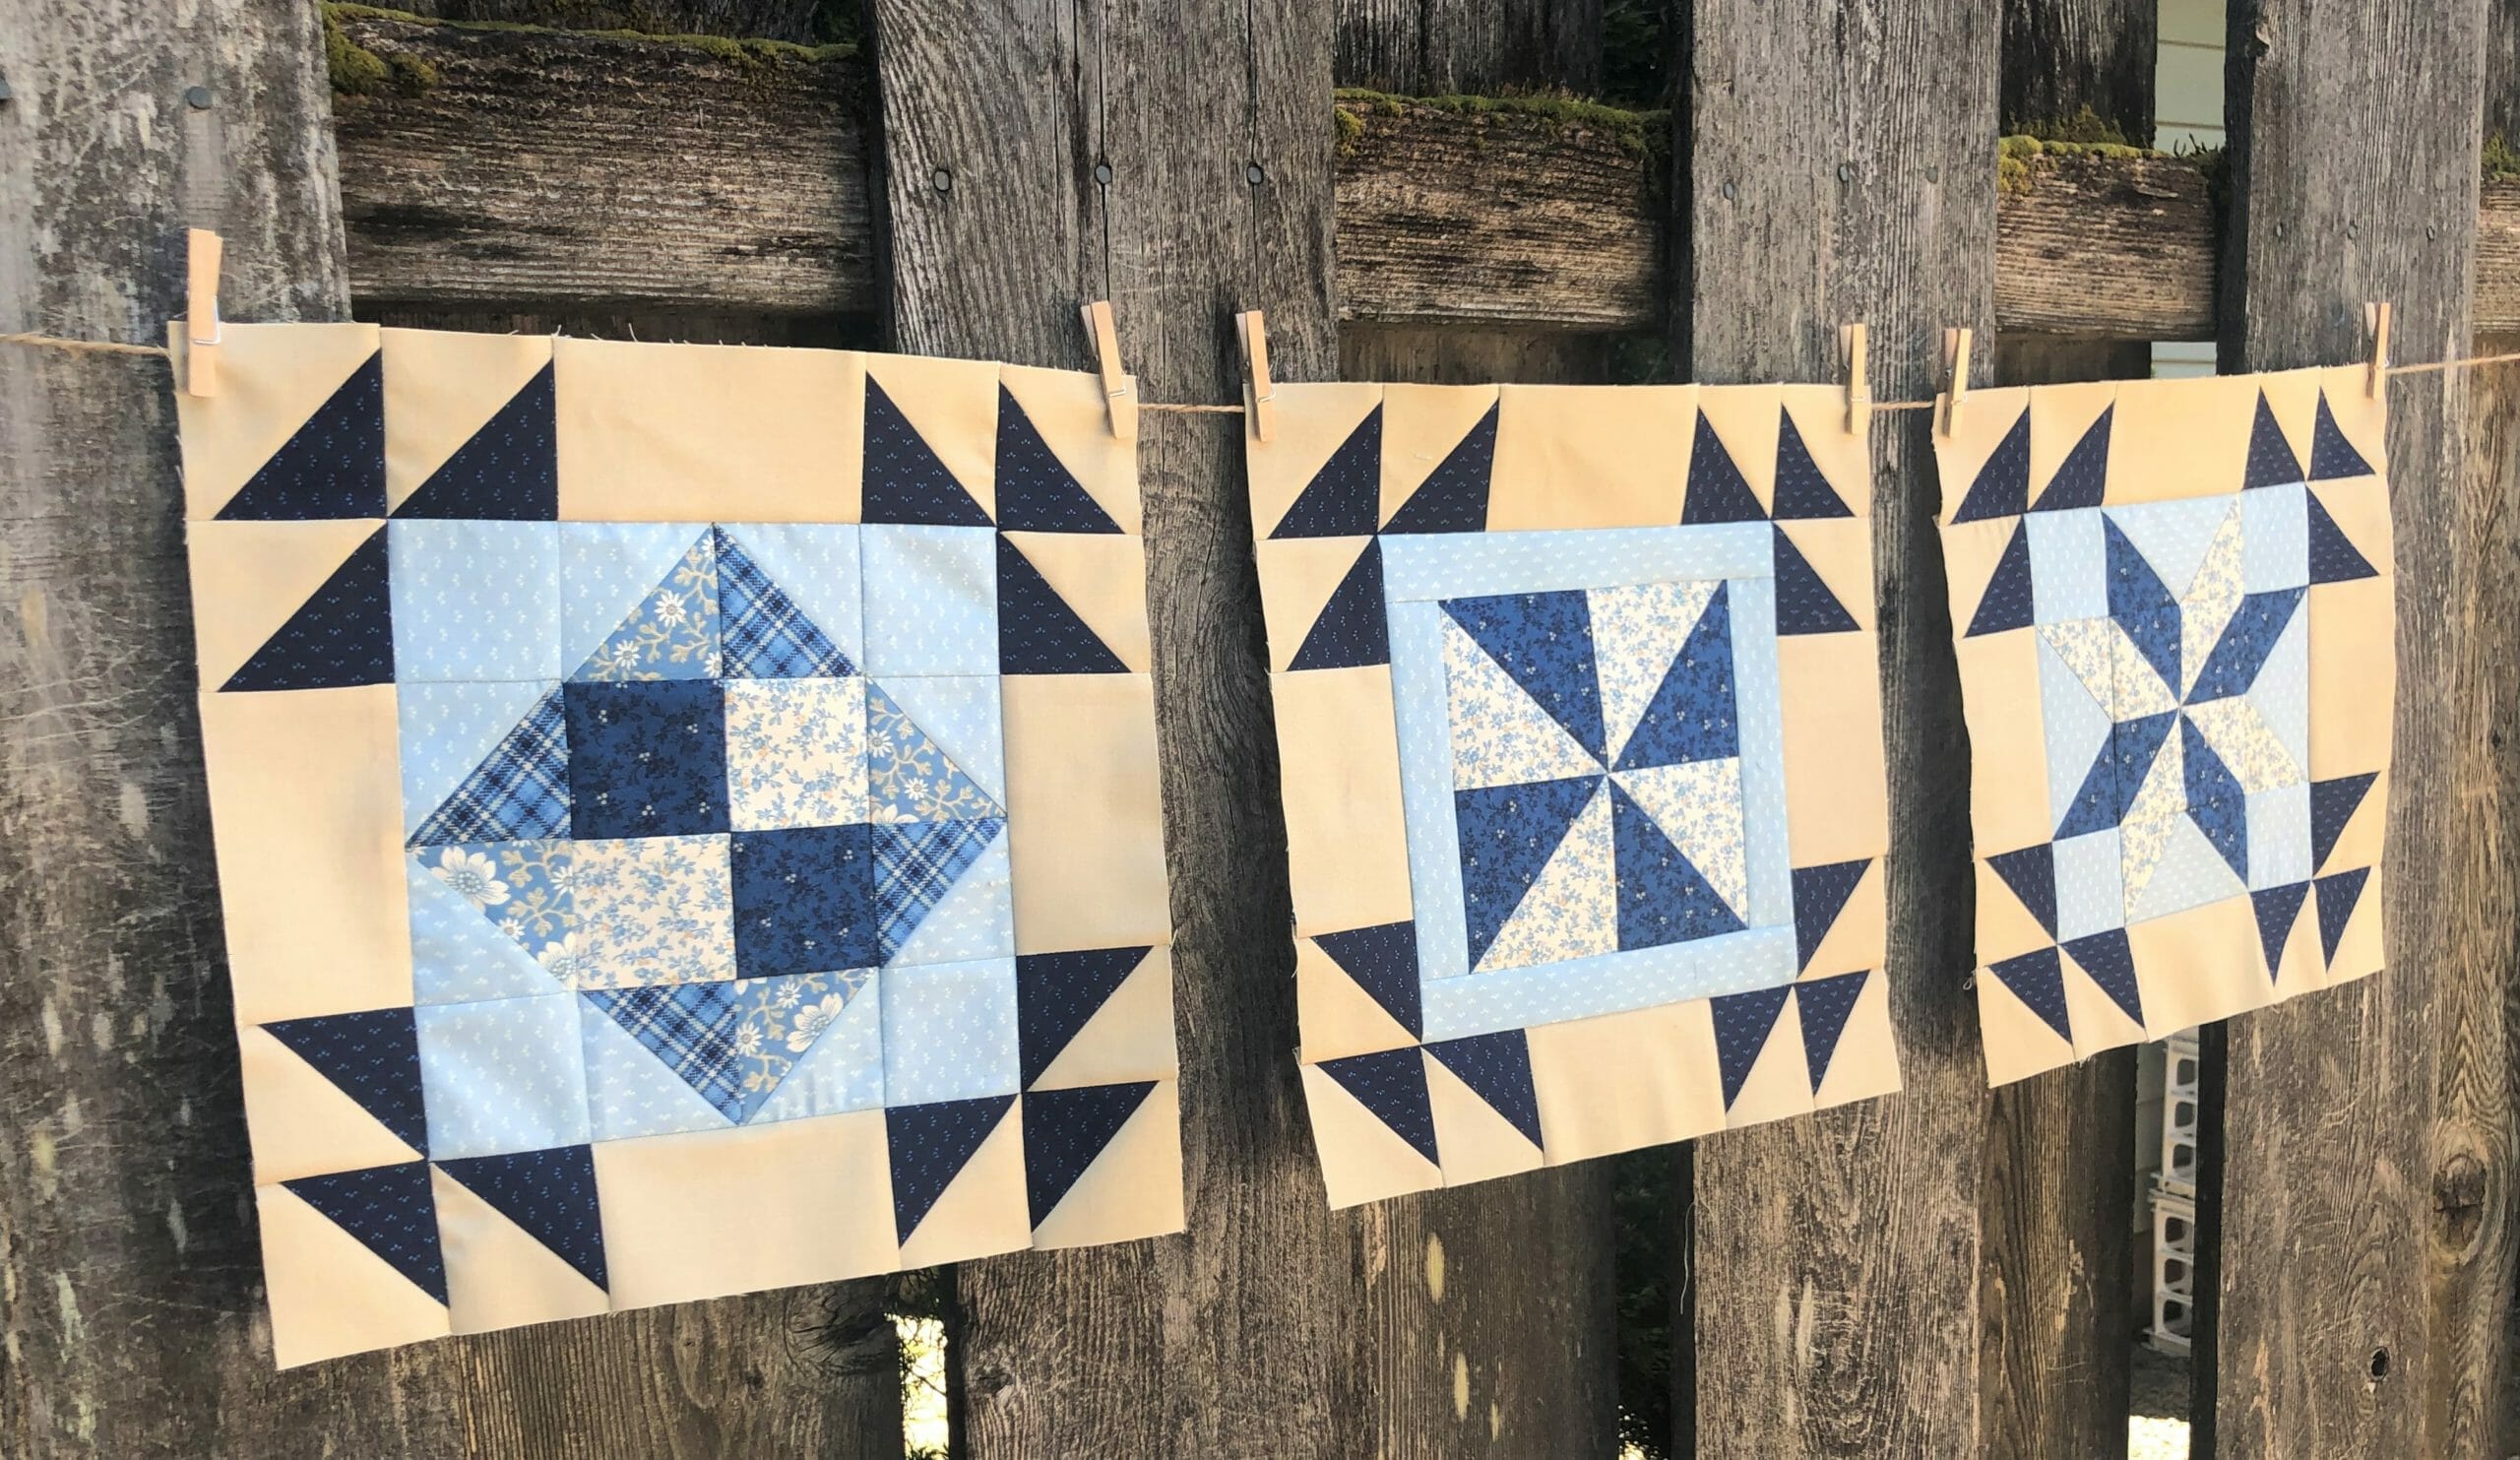
Tag Archives: Kristin Gassaway

Open Skies BOM – Month 3
6.6.2022

Hi everyone!

Before we begin with the month 3 blocks, let’s chat about a couple of things.

A few of you have asked questions about the scant ¼” seam allowance I suggest in the patterns, and it seems (no pun intended!) to be throwing some of you off. All of my patterns are written to be mathematically correct, so anyone who wants to use a straight ¼” seam allowance will be able to successfully make these blocks. I personally use a scant ¼” seam and then square up the units as I go. But if any of you prefer to use a standard ¼” seam when sewing, by all means, please do! Just make sure your seams are accurate and consistent, and measure as you go to make sure you’ll end up with the correct 12-1/2” square when each block is finished.

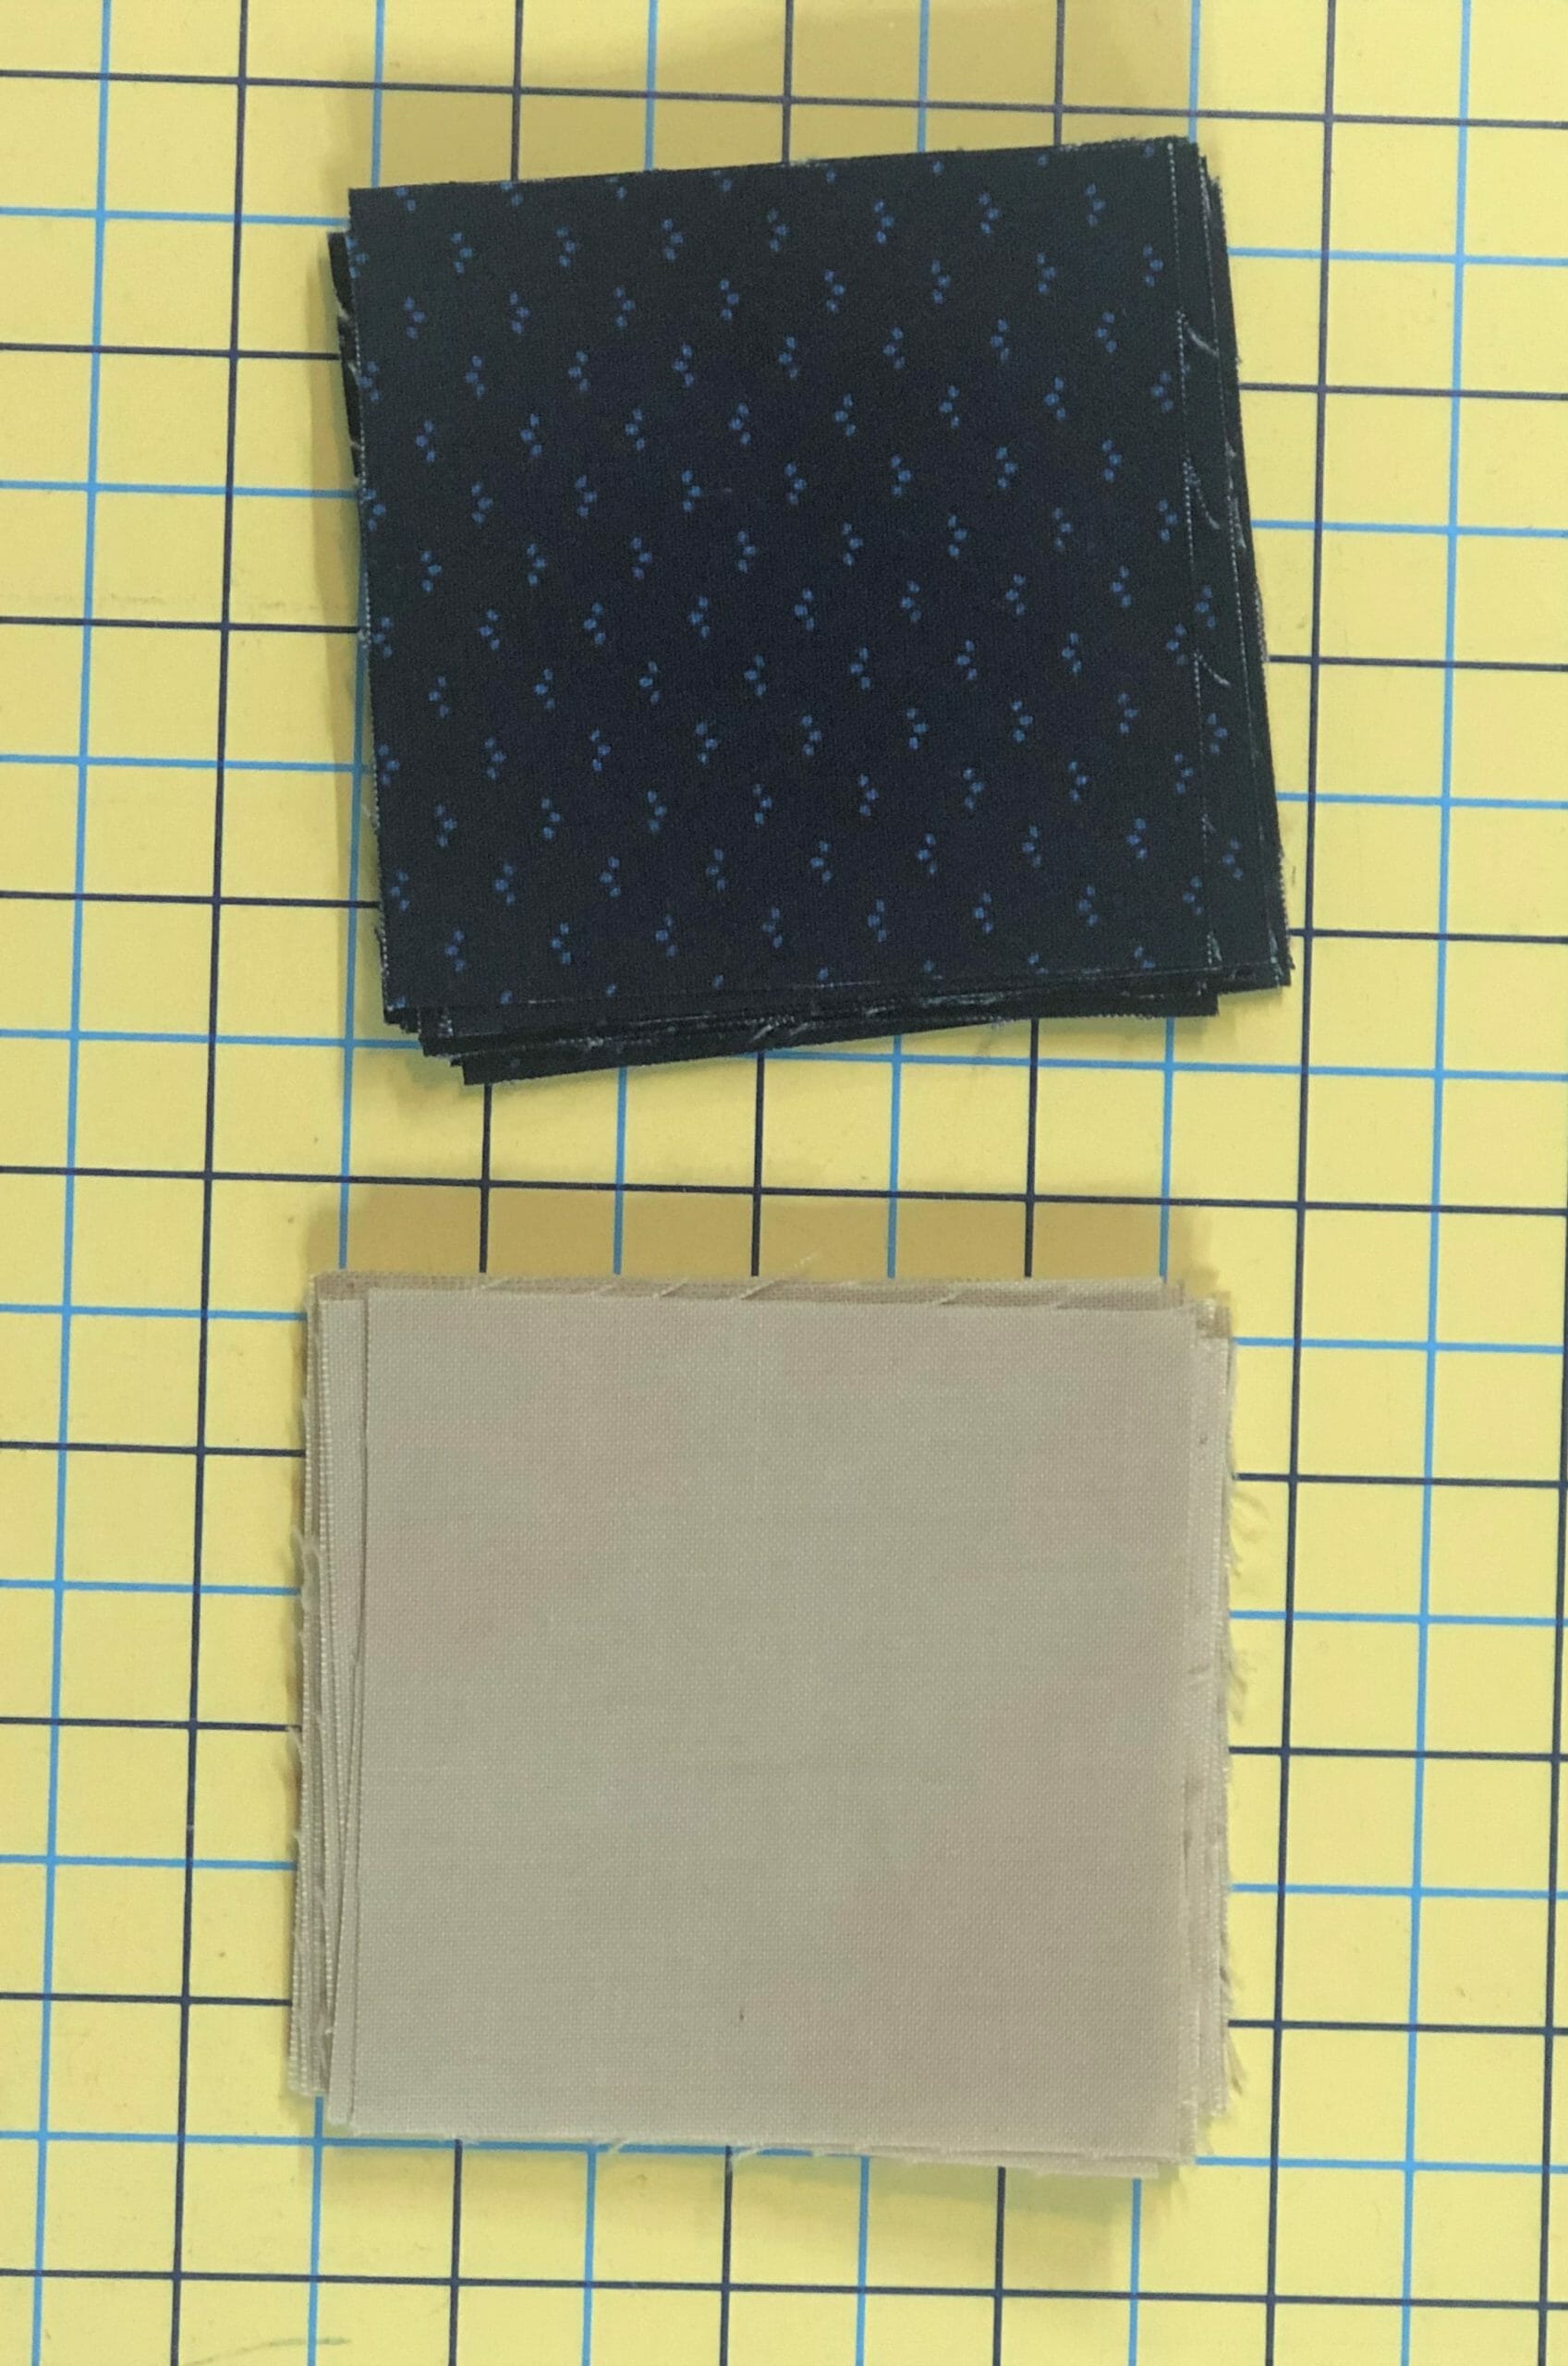
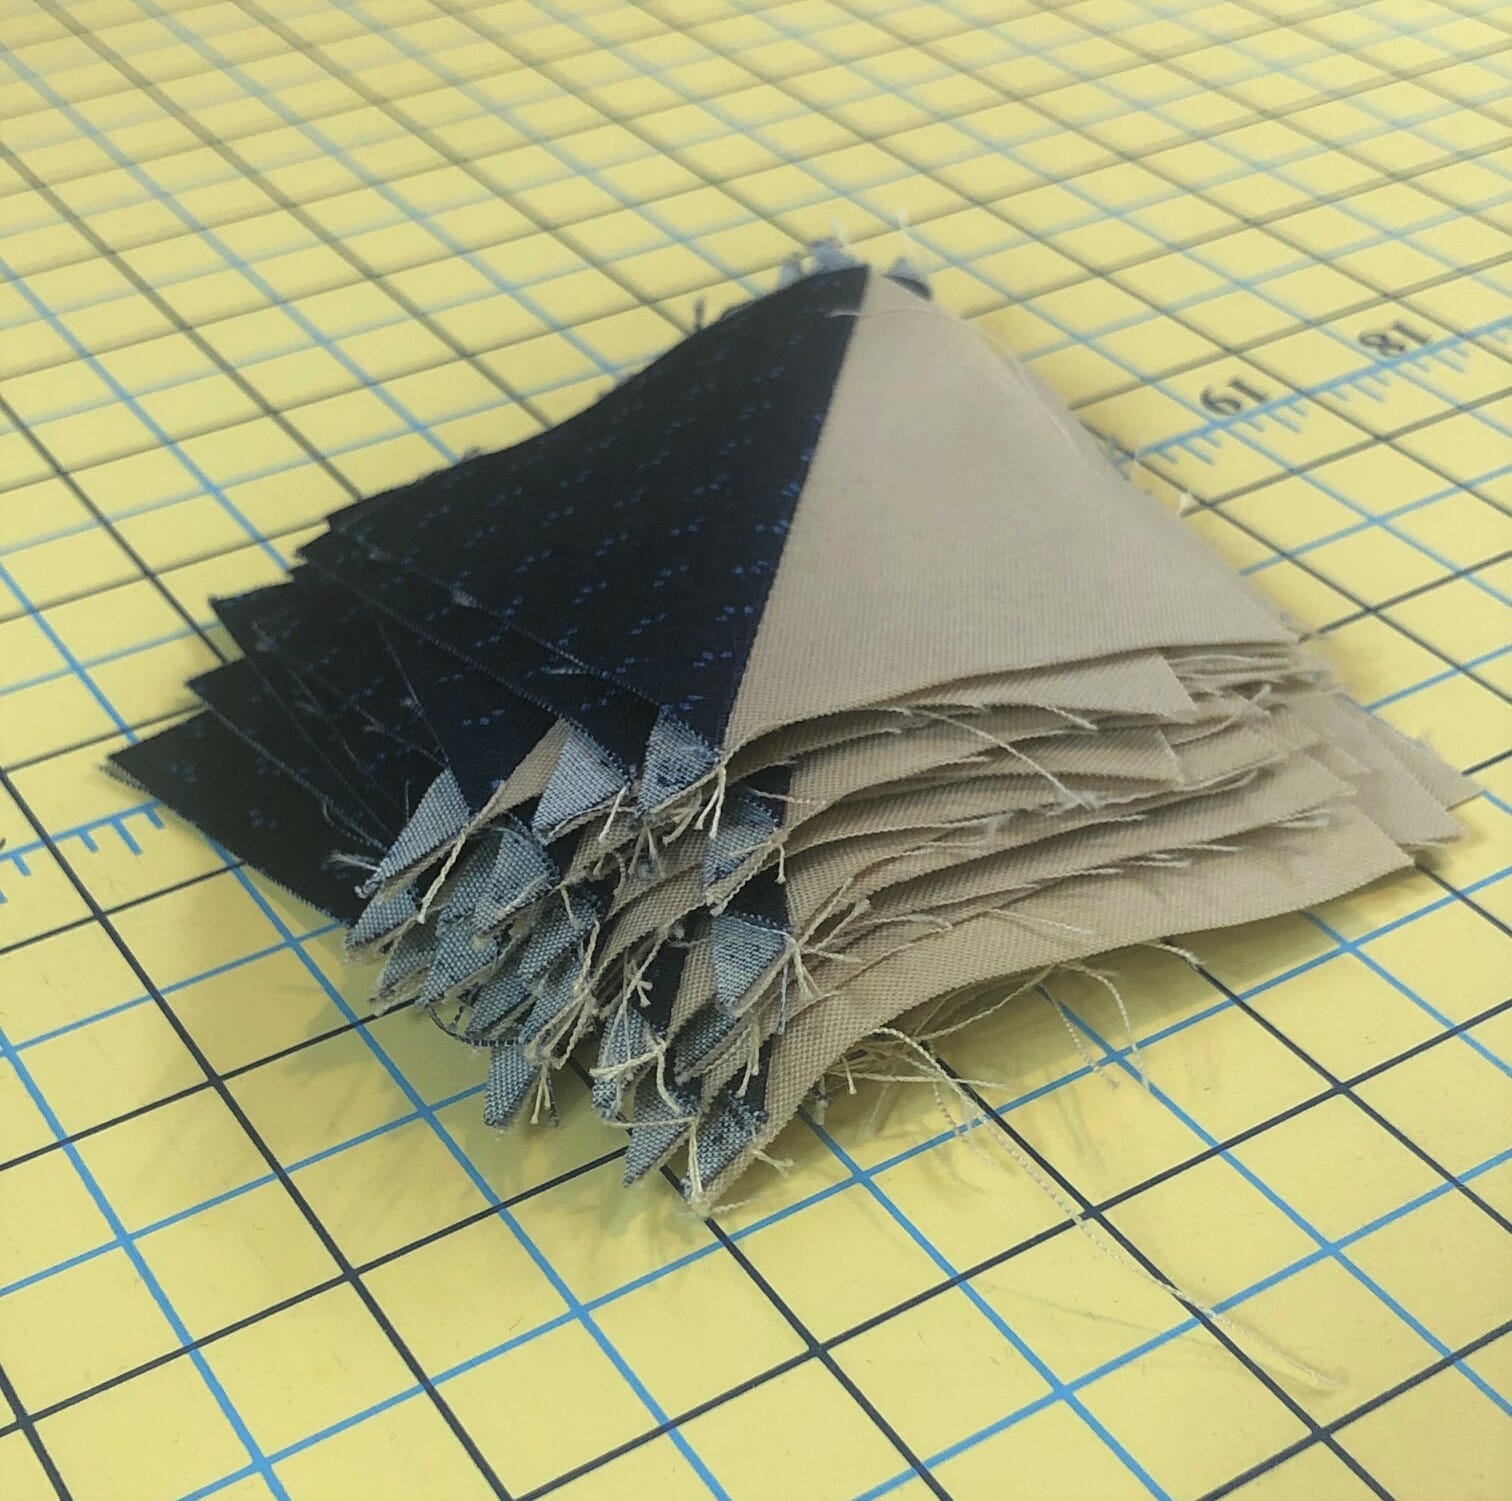
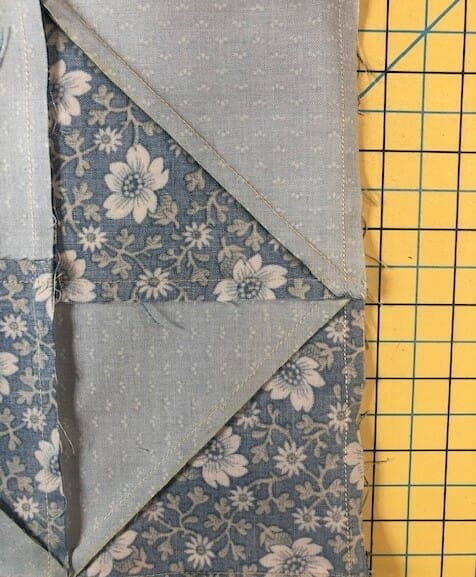
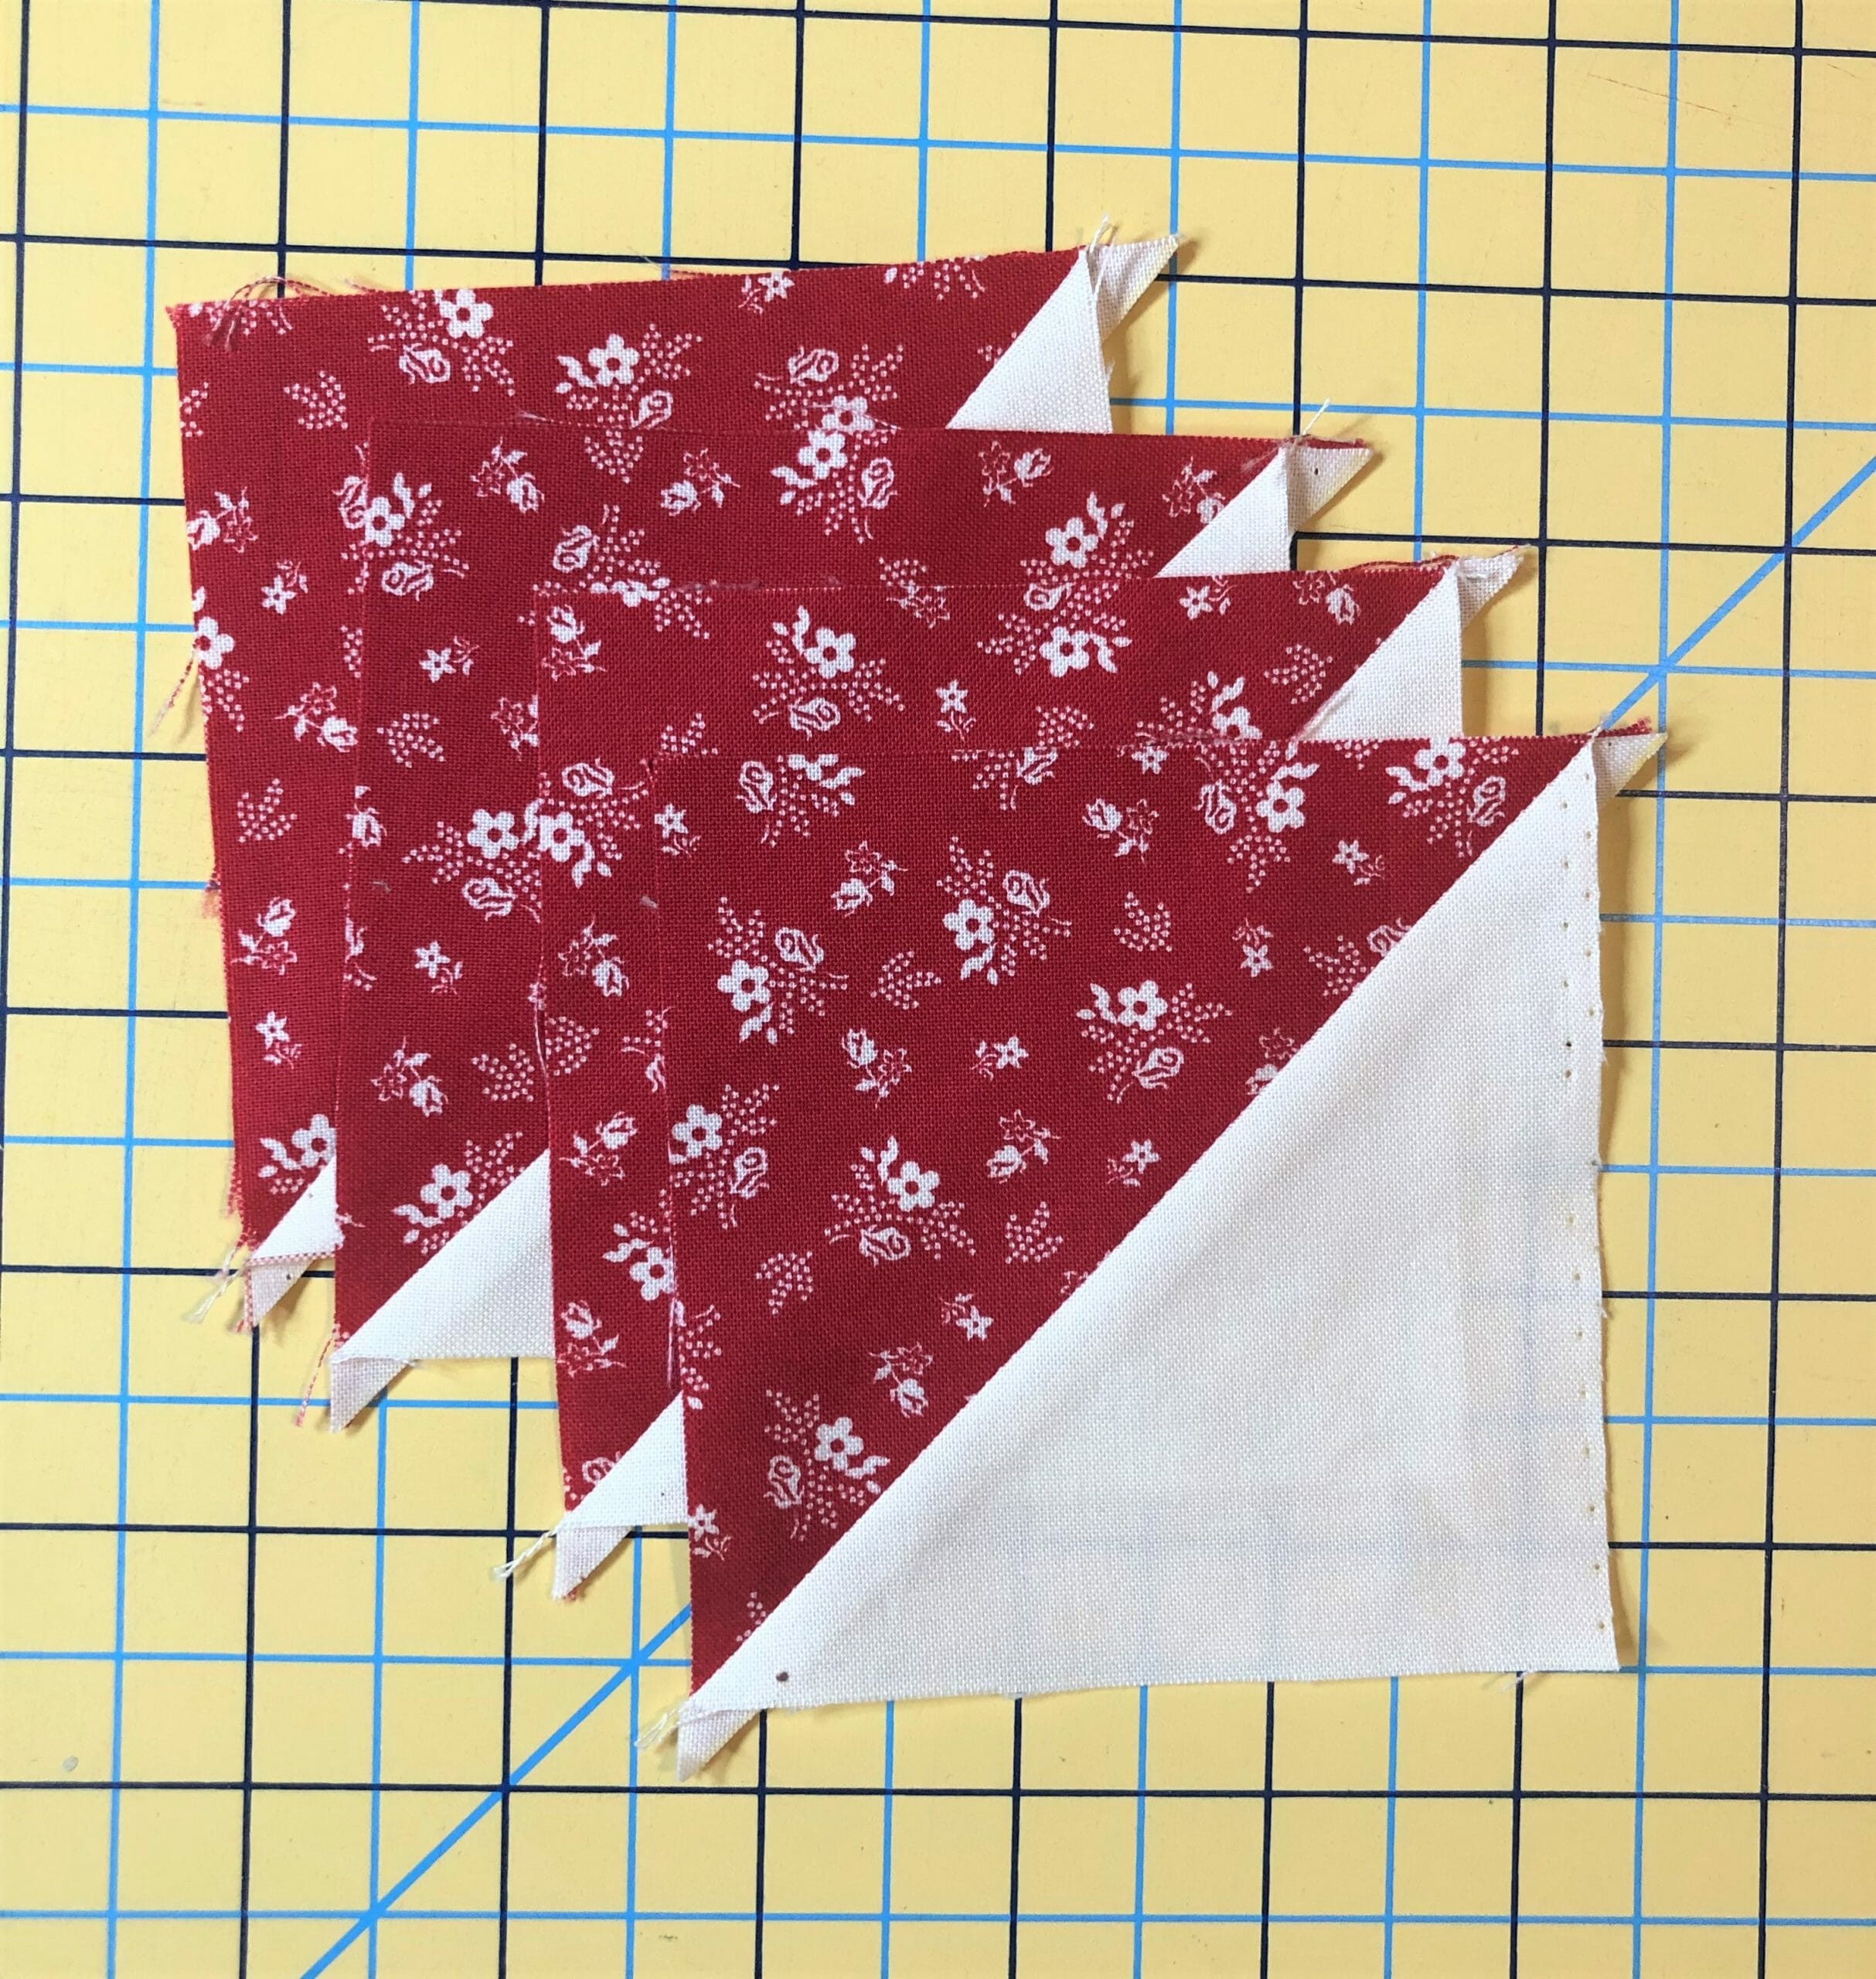
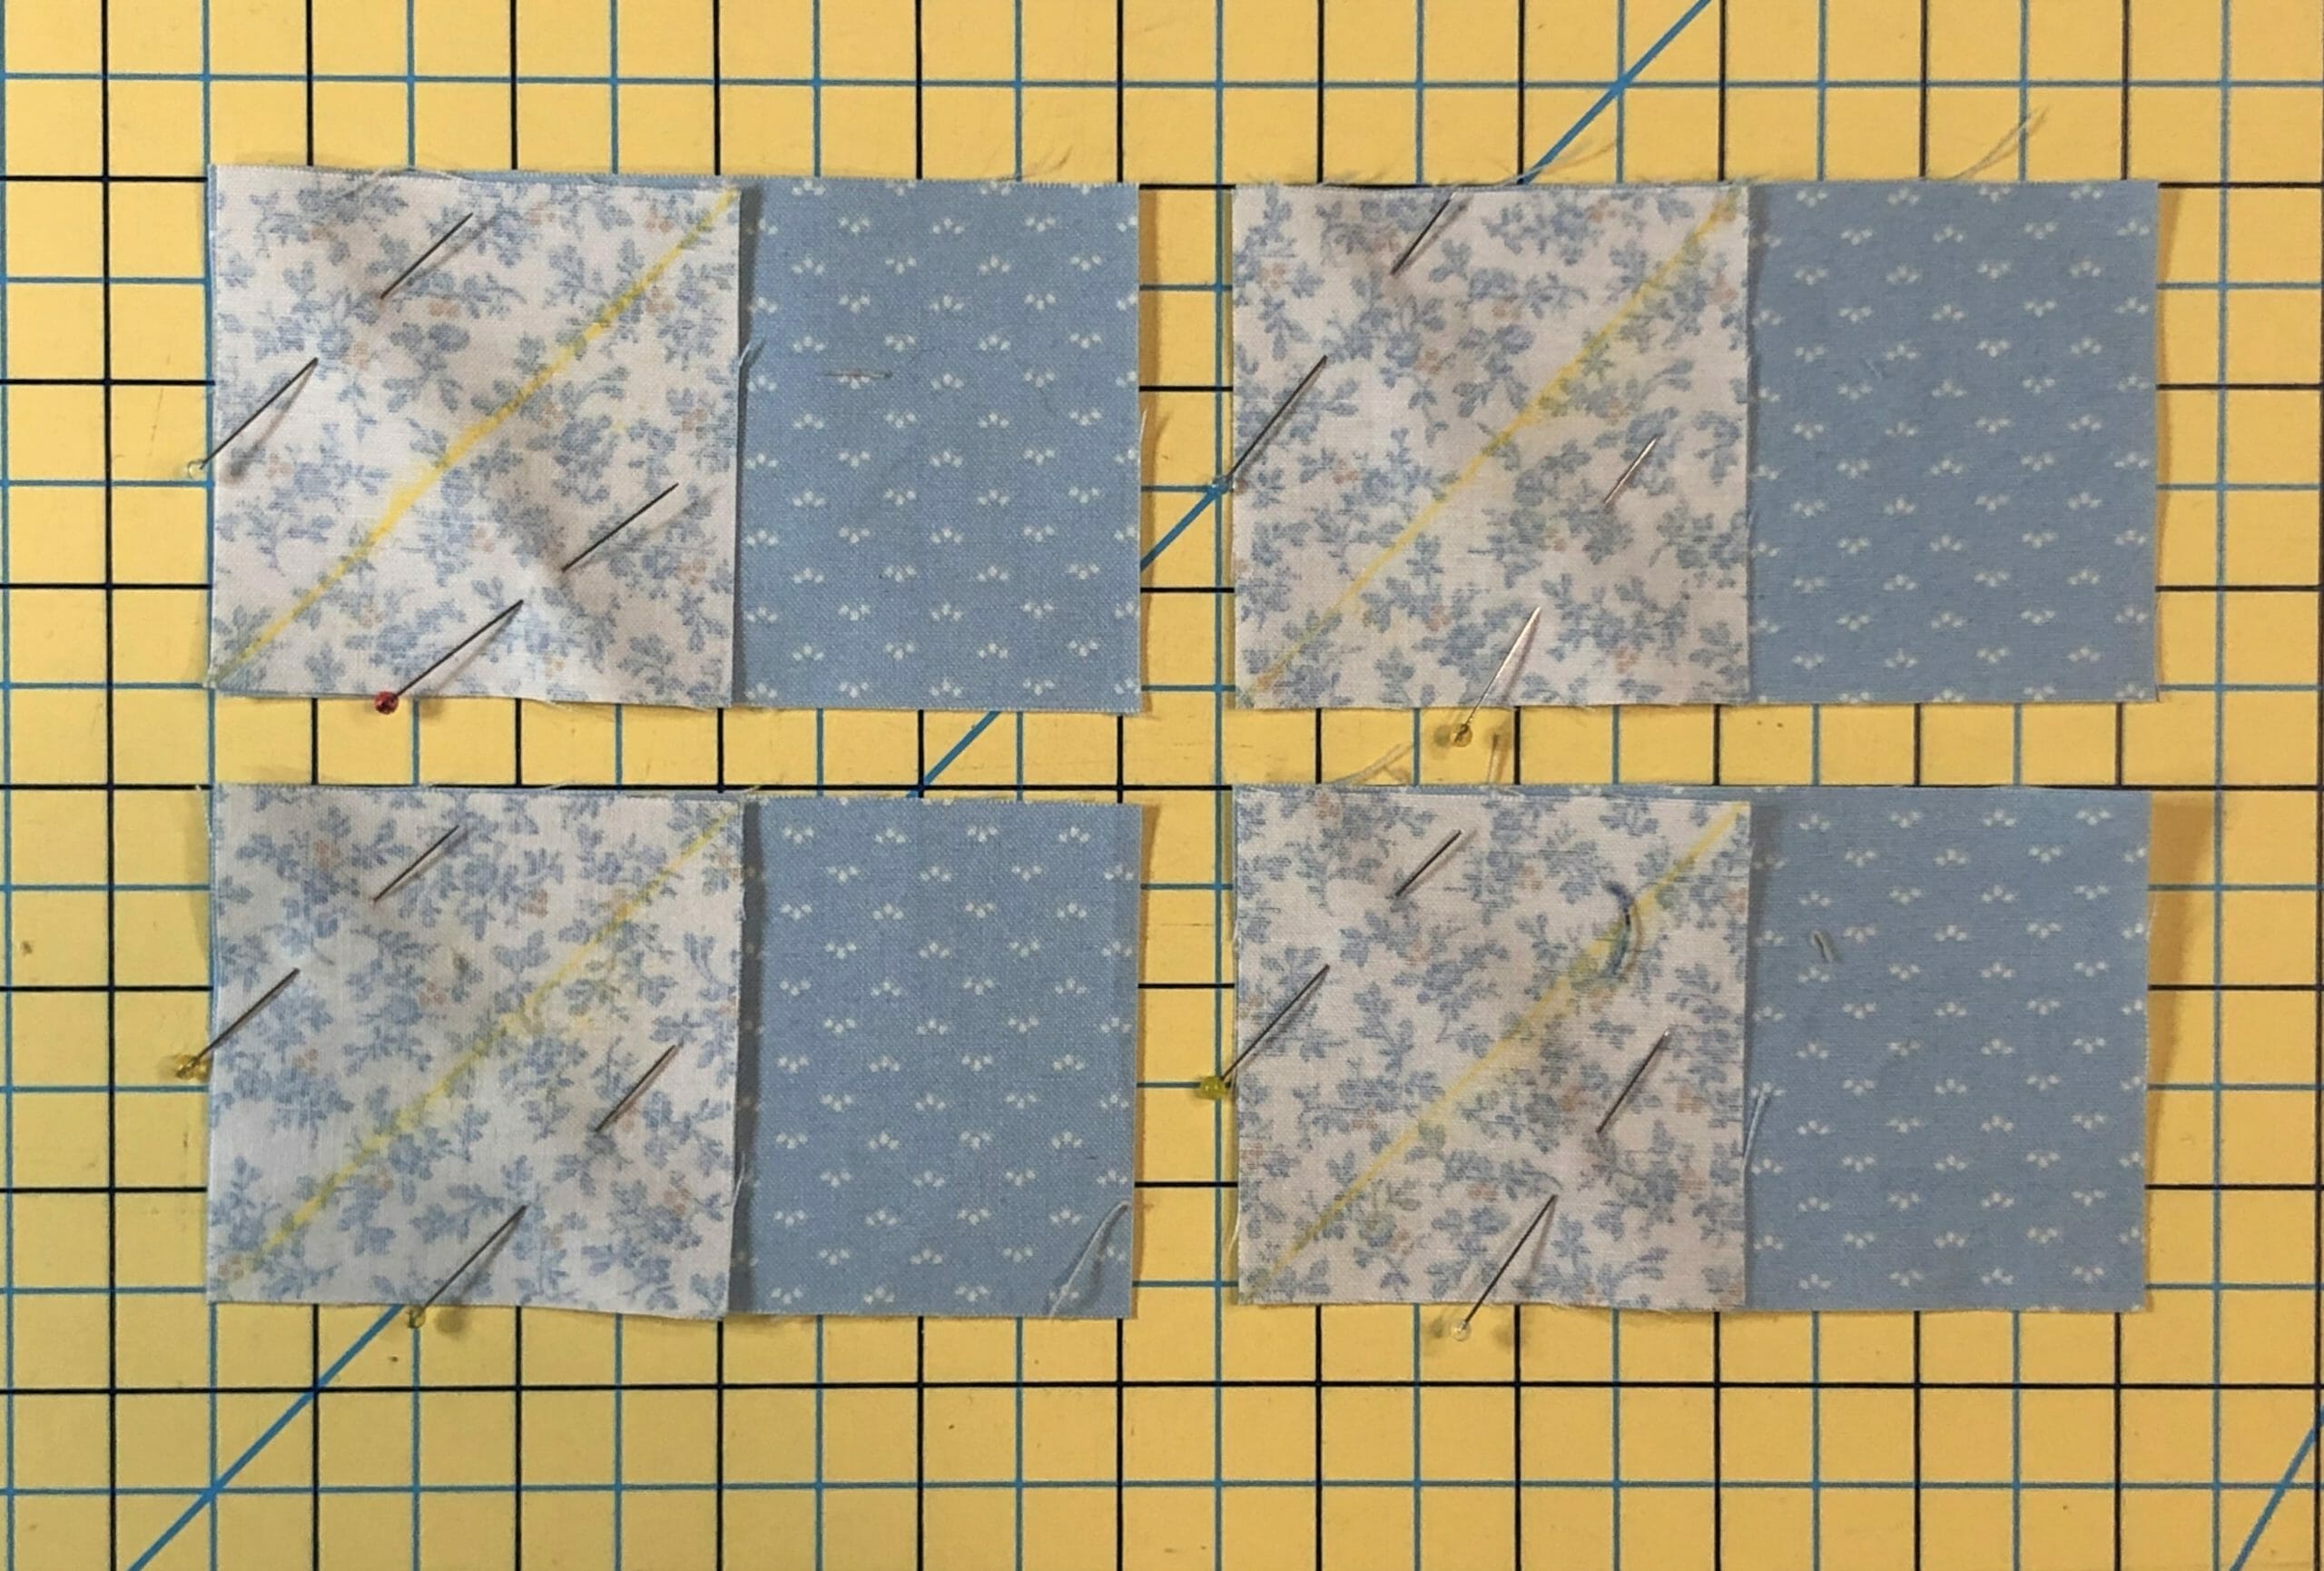
Also, in case you haven’t noticed by now, there are A LOT of half square triangles in this quilt. Everyone has their preferred method of making these, so please feel free to step outside the box. While I used the mathematically correct 7/8” measurements on the cutting for these, please know that there is enough fabric for you to round up the extra 1/8” if you like, and then trim to size when done.

I know some of you are also using the Eight at a Time method of making HSTs, which is great! There are a couple of great videos on YouTube you can look up if you are curious about this method. Like I said, do what works for you!

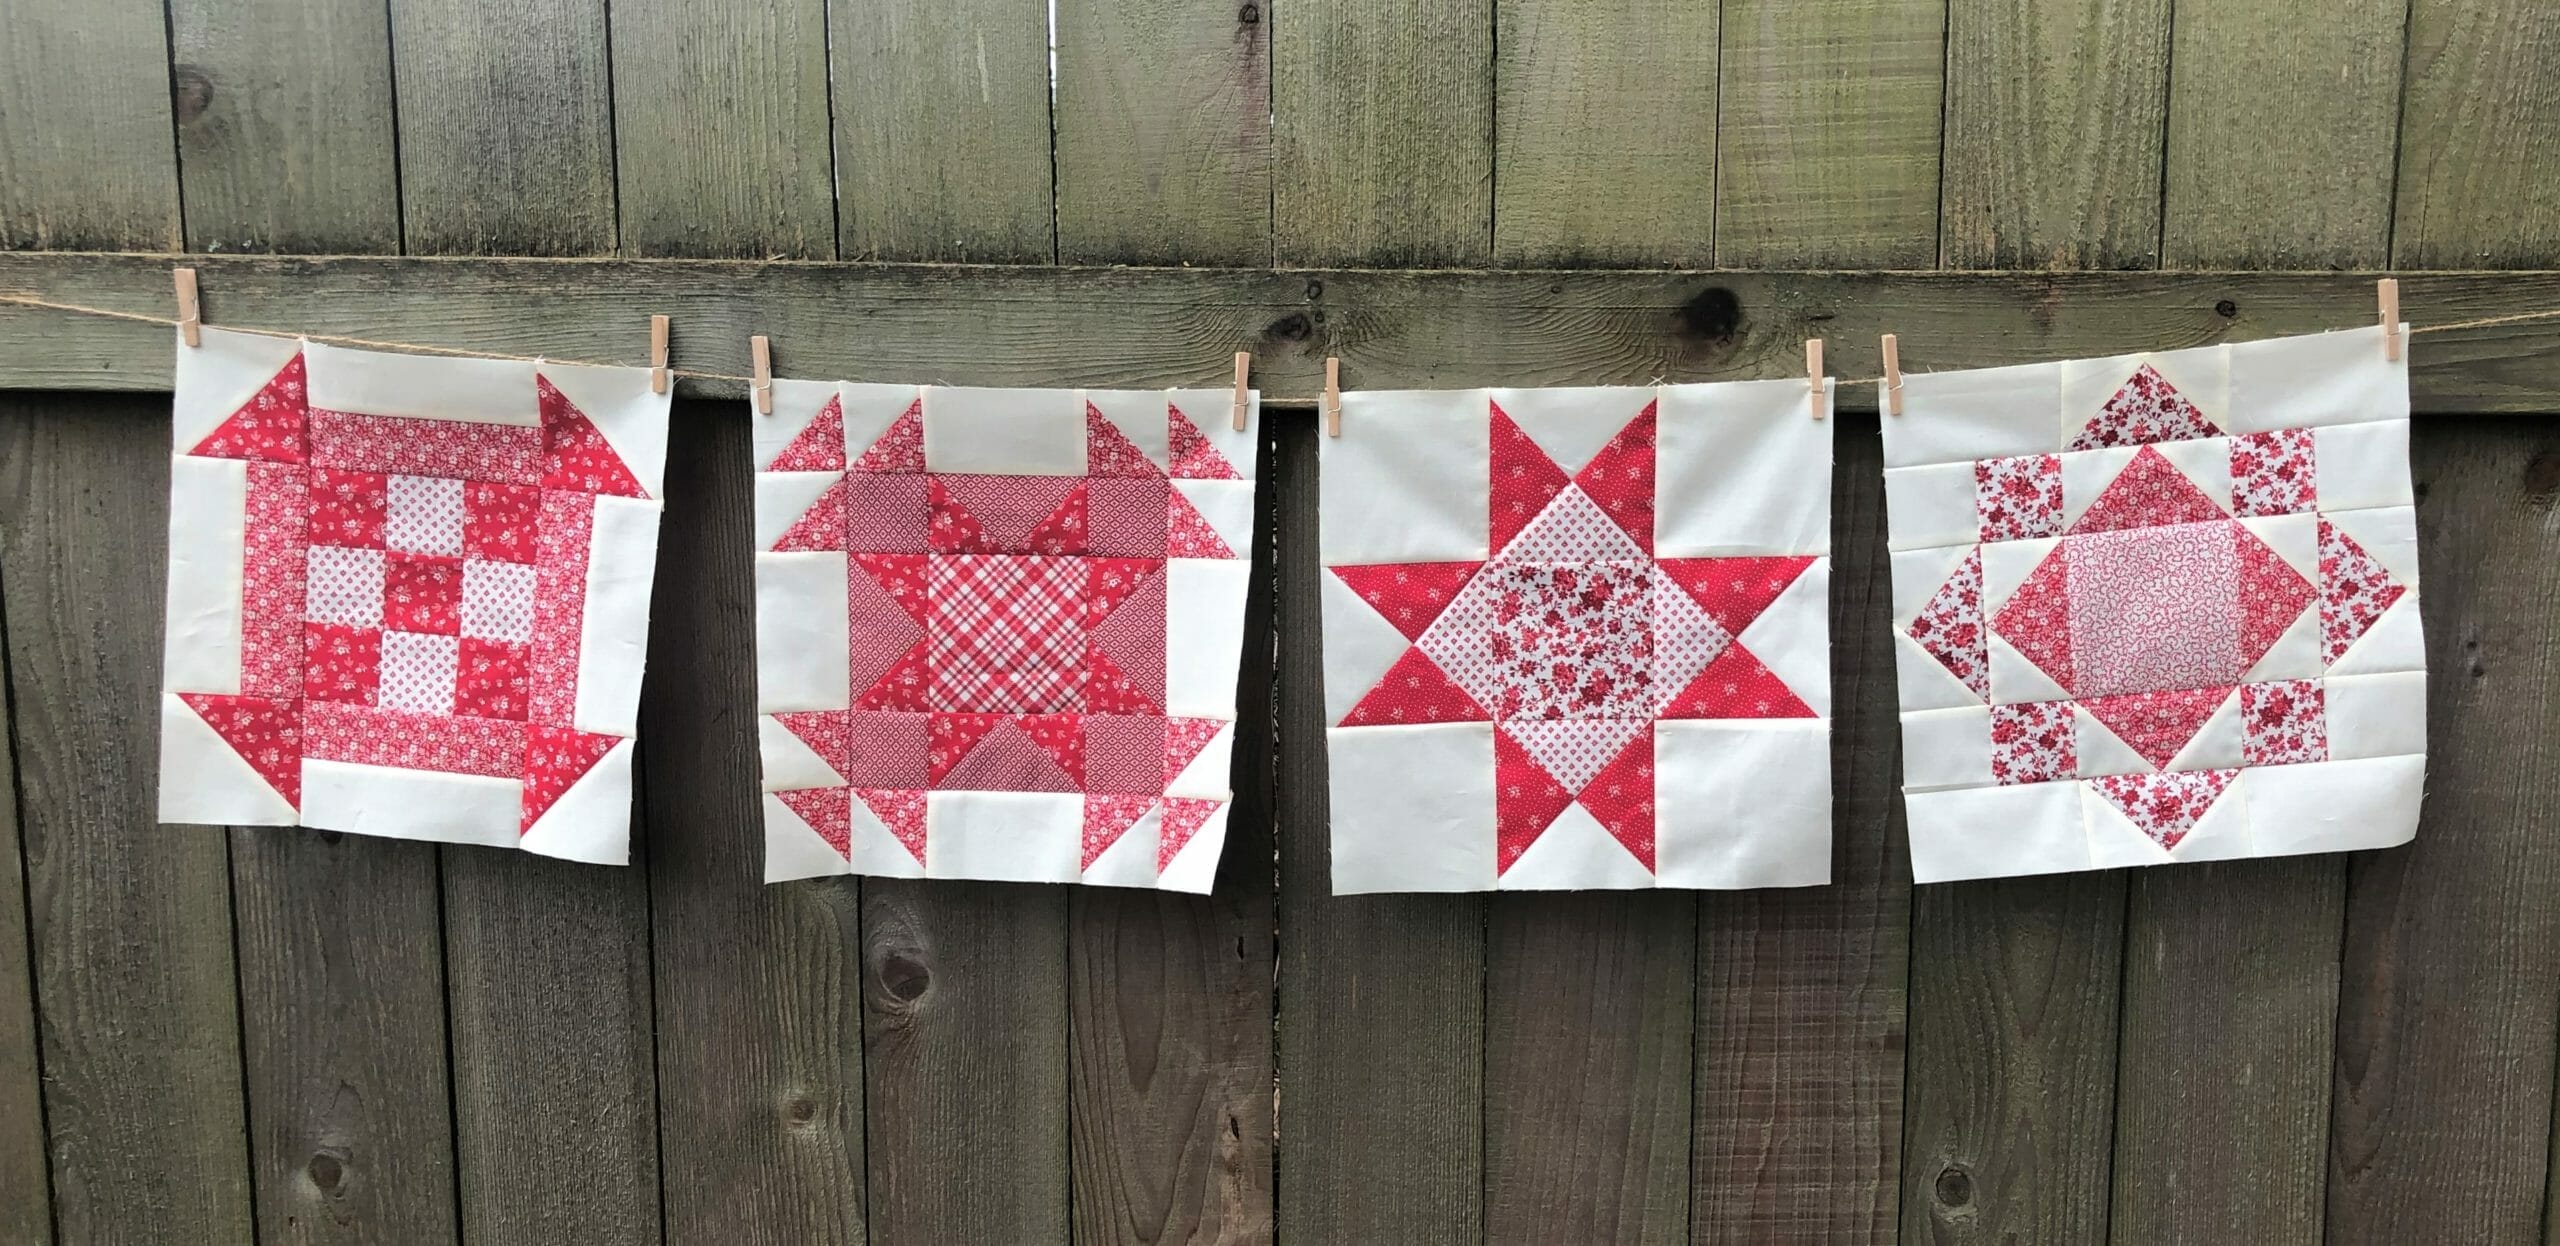
Okay, let’s talk about this month’s blocks!
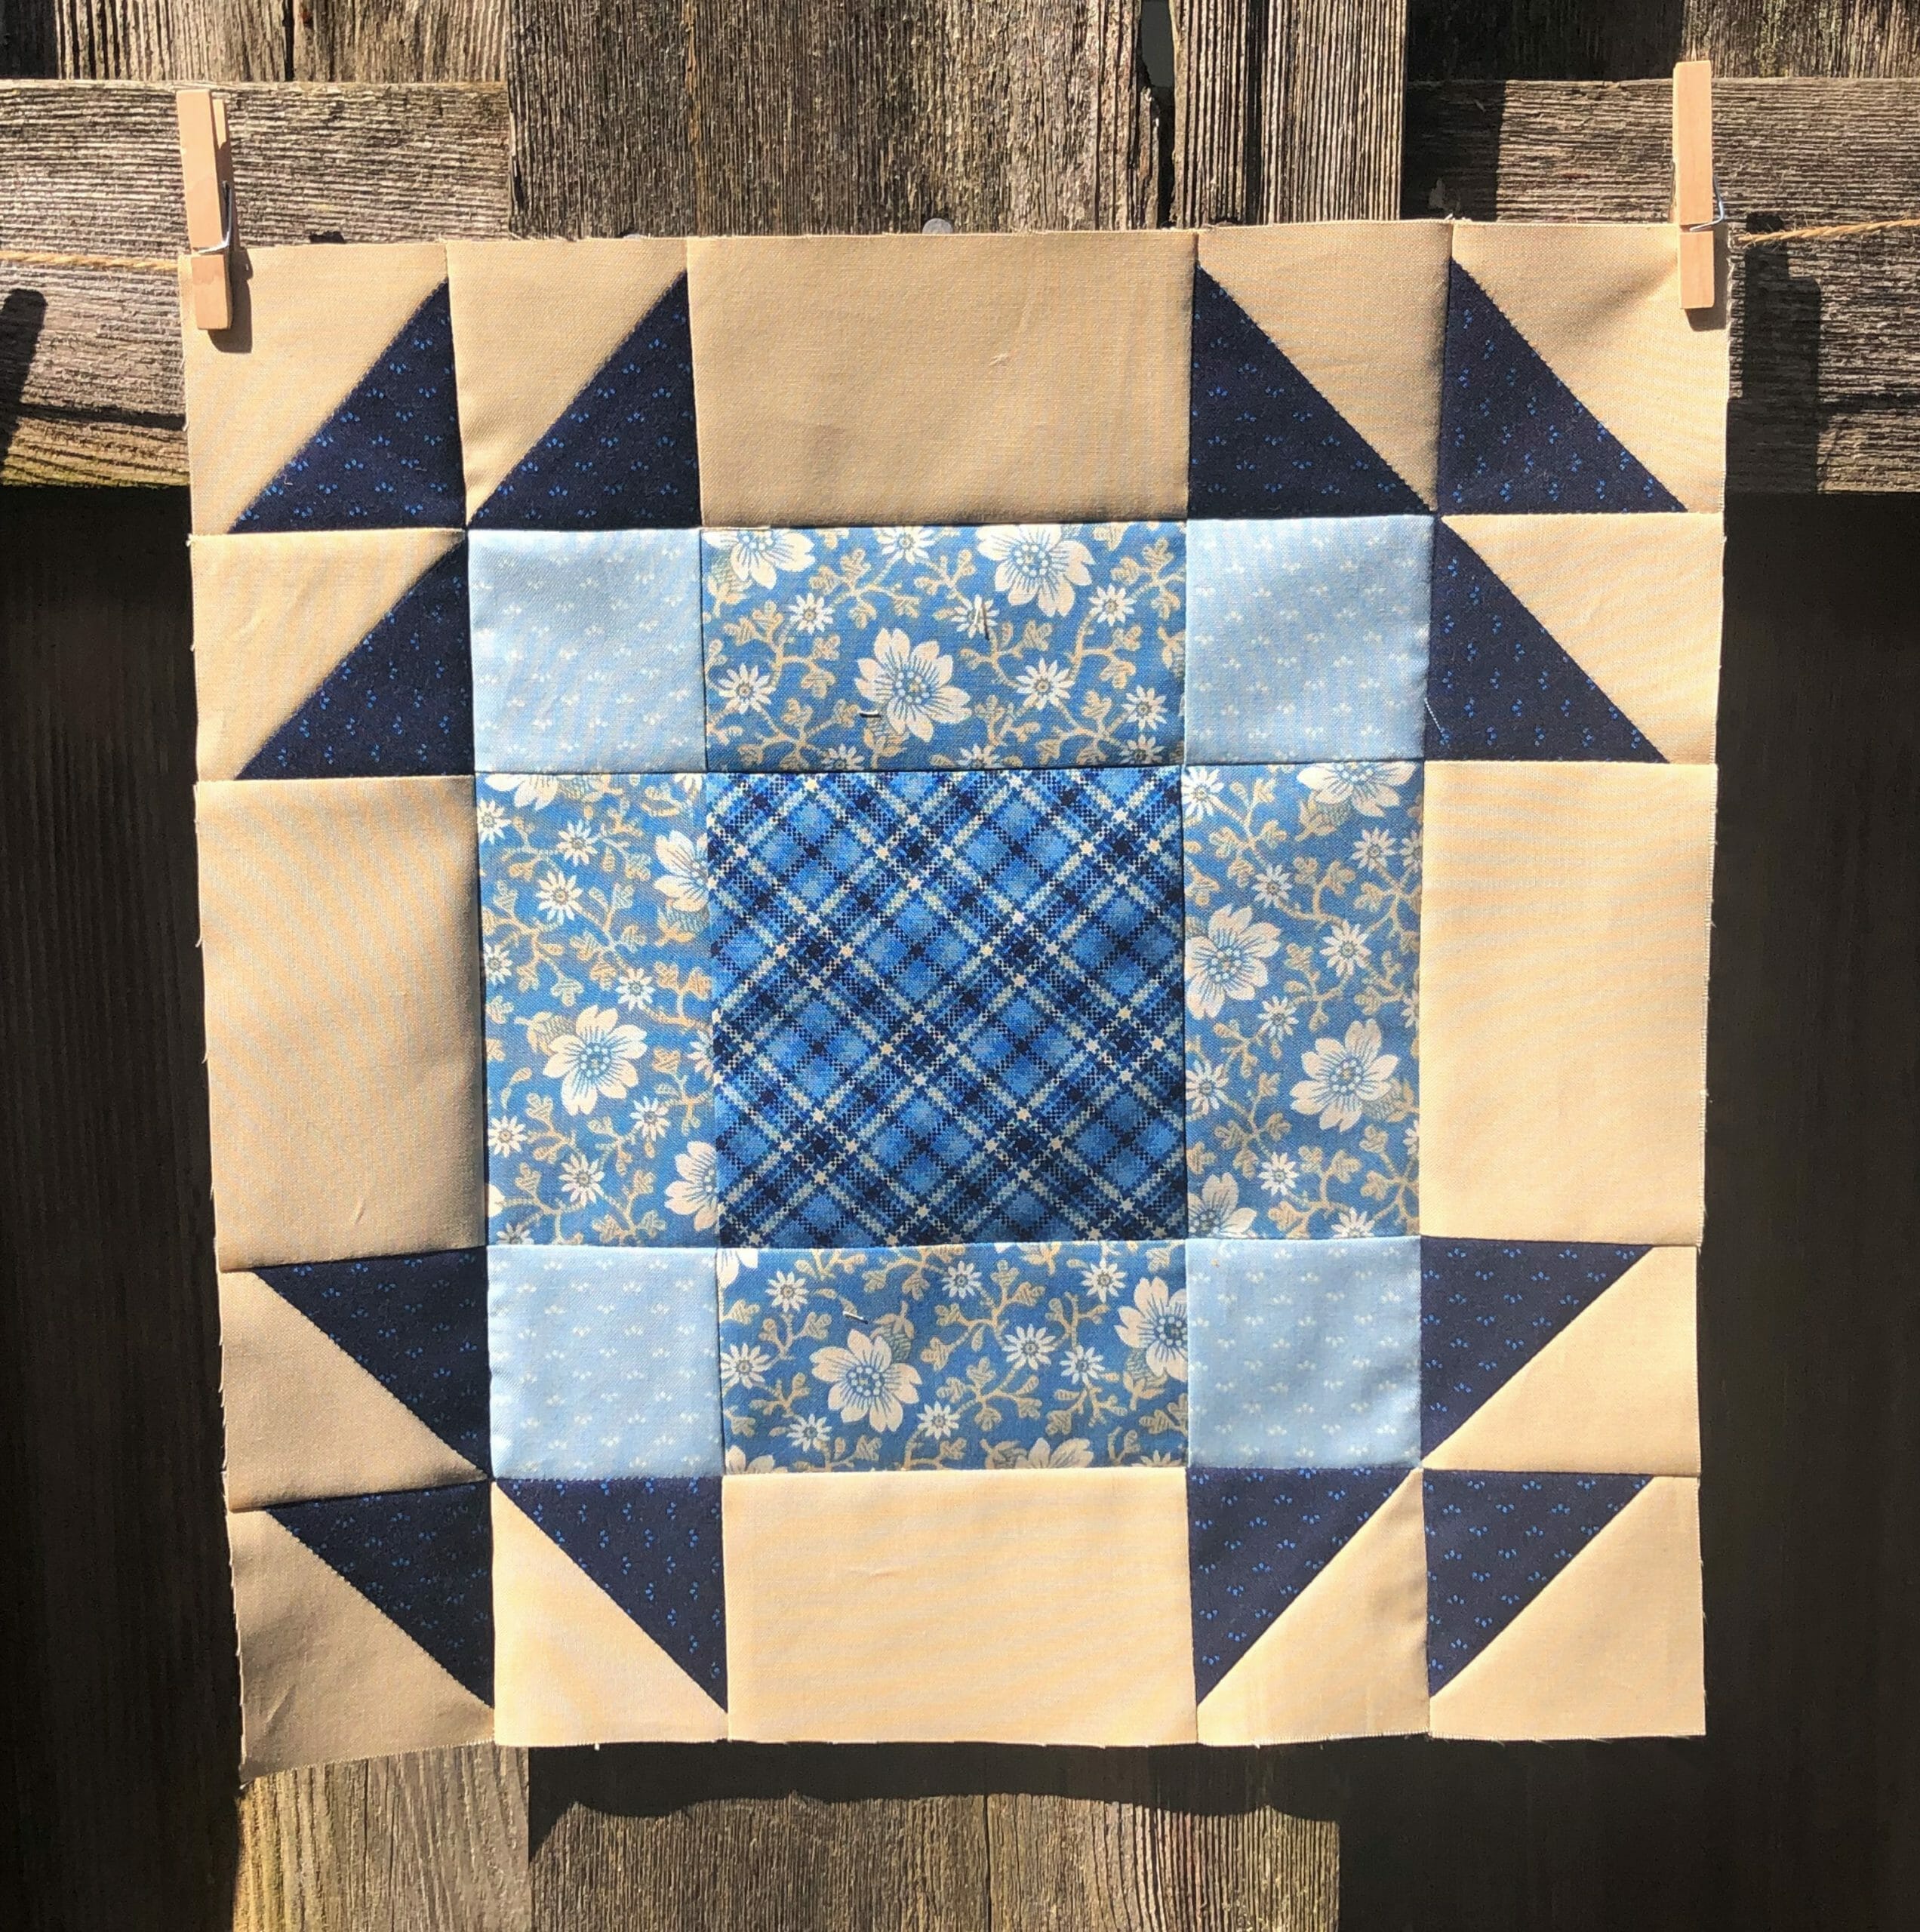
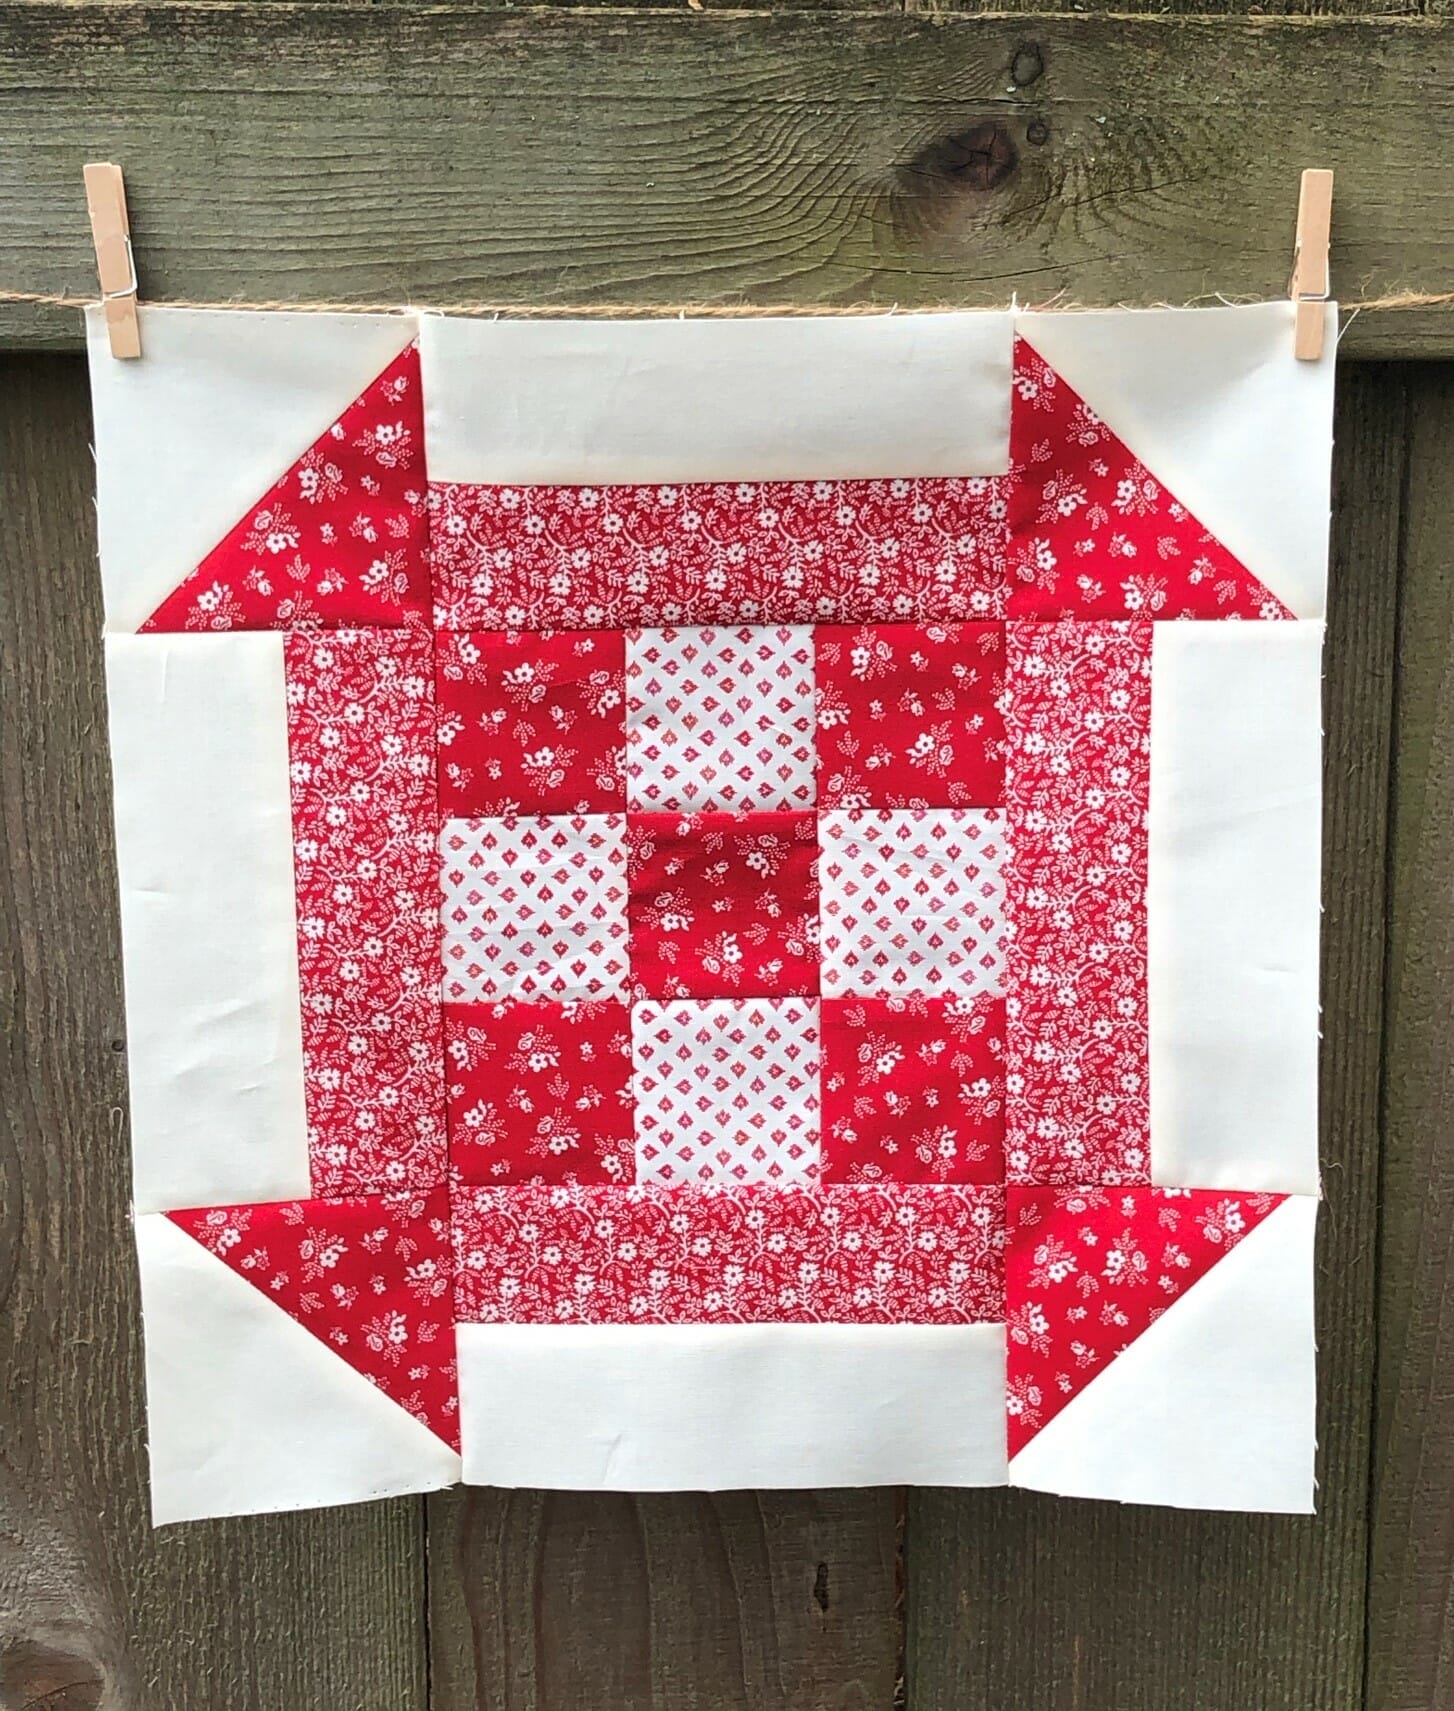
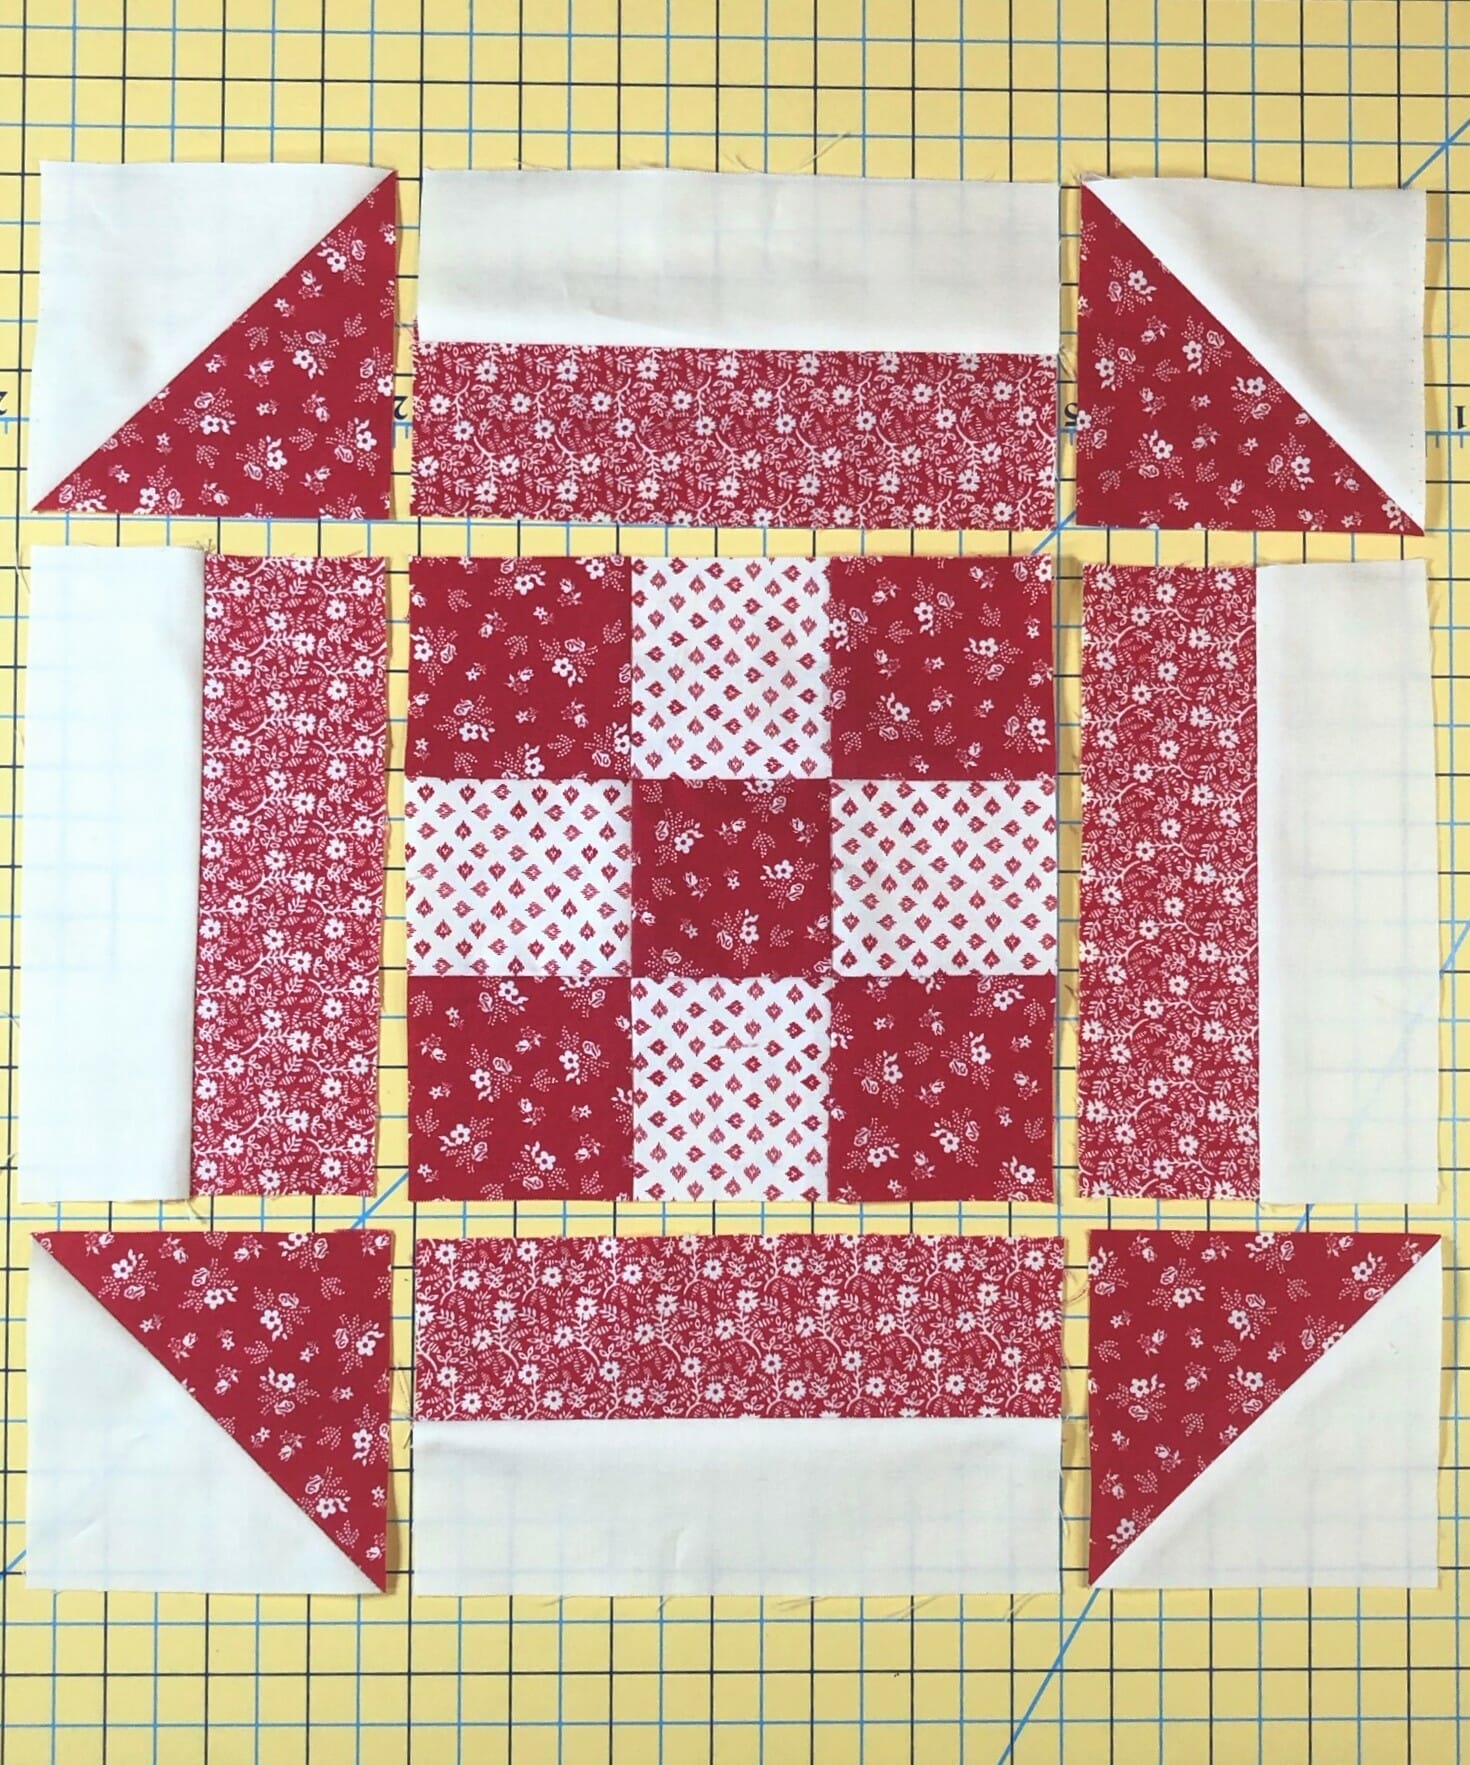
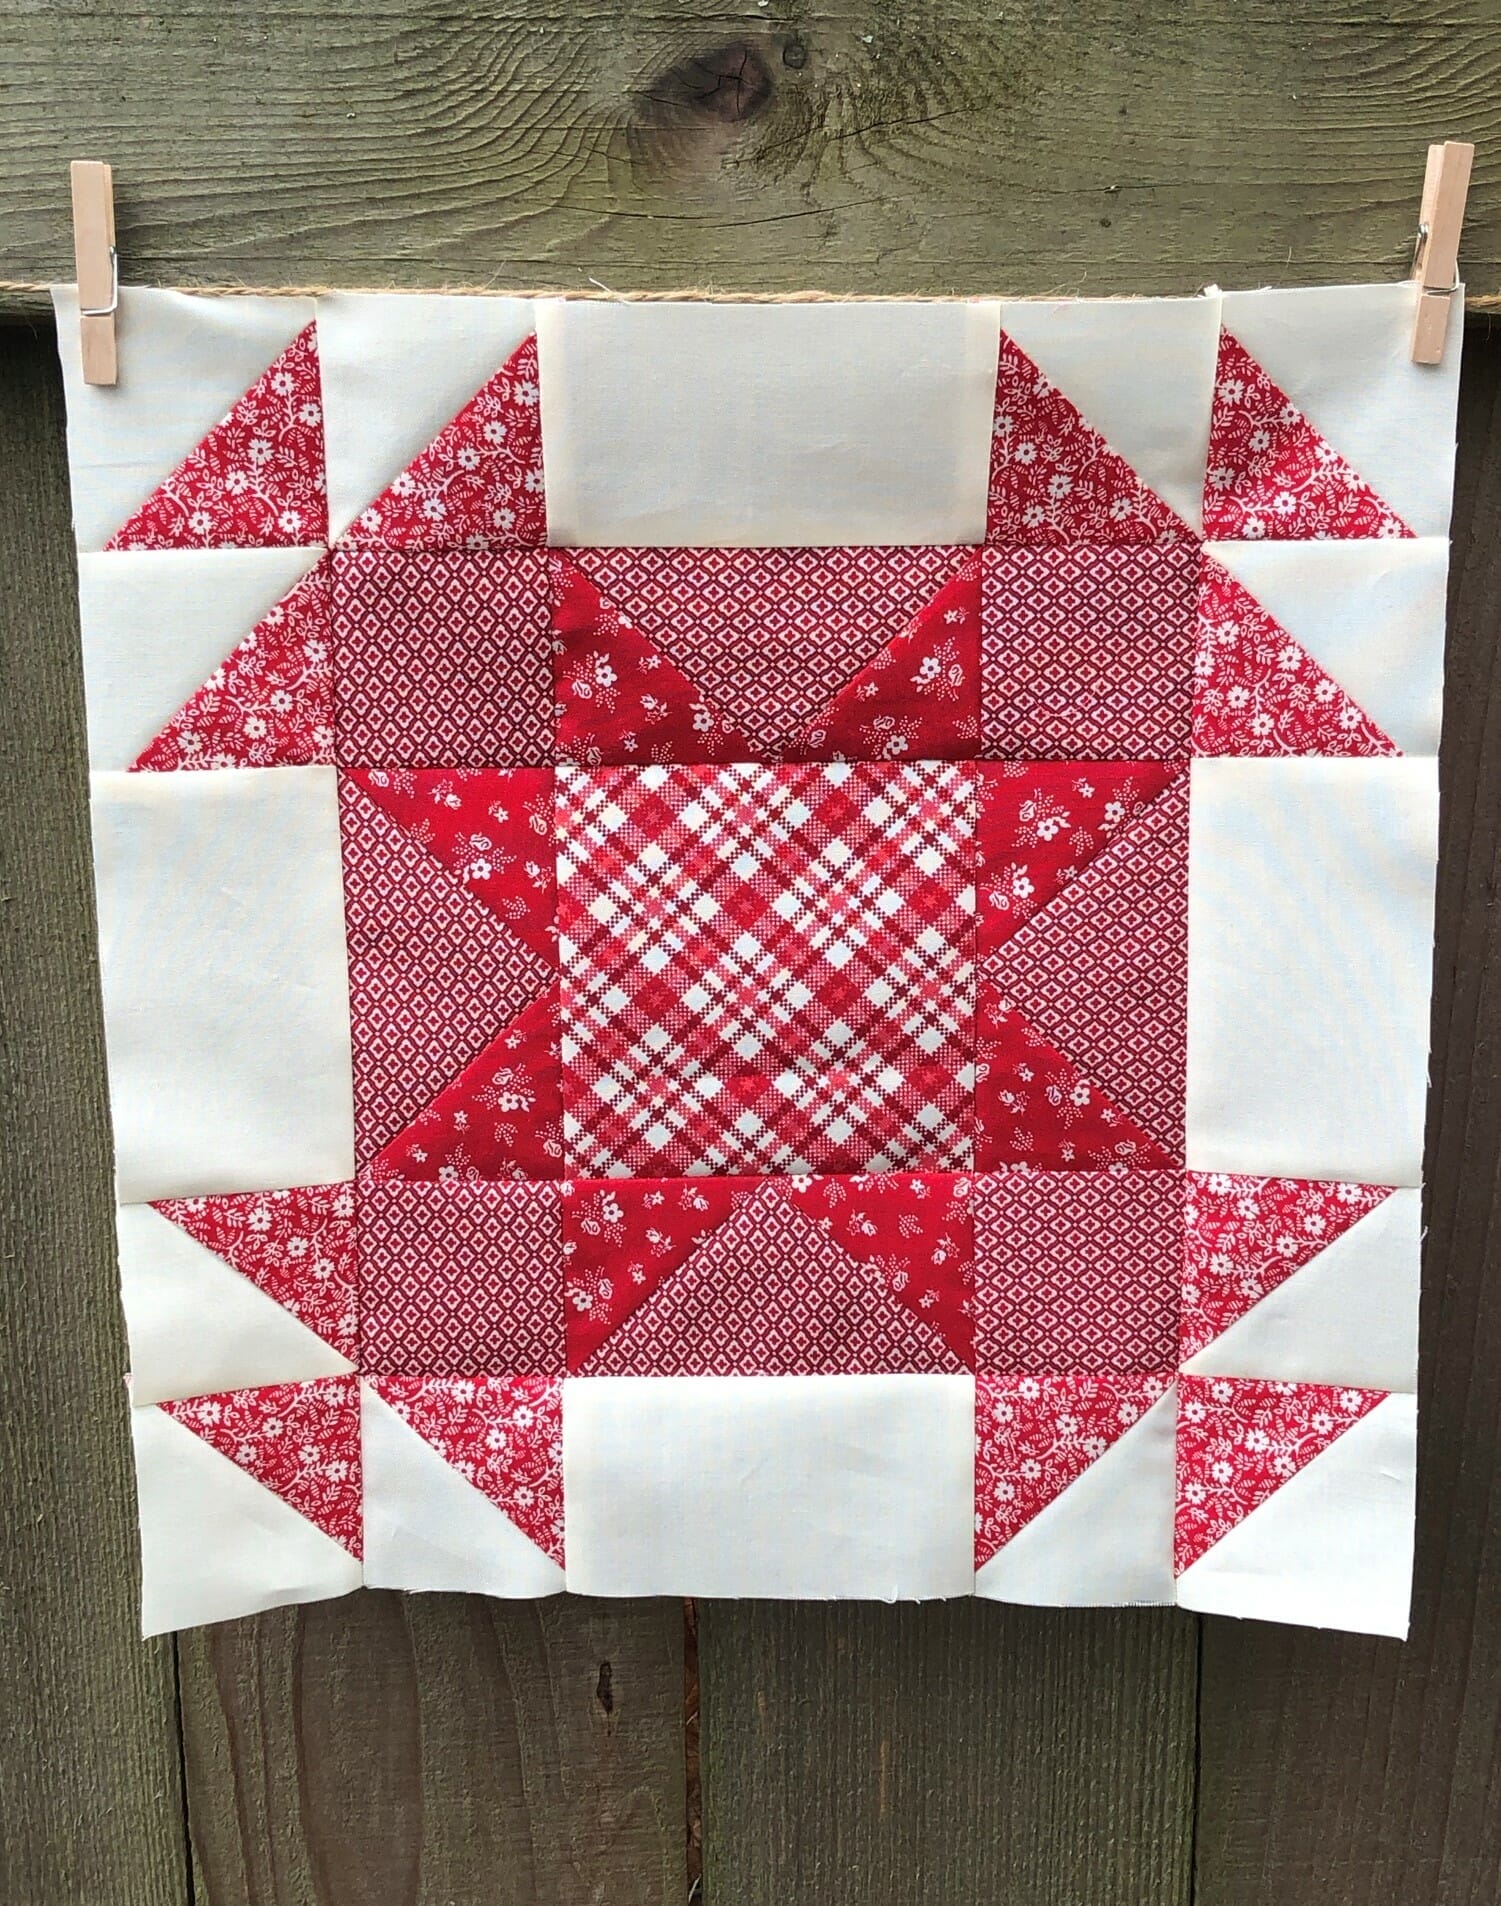
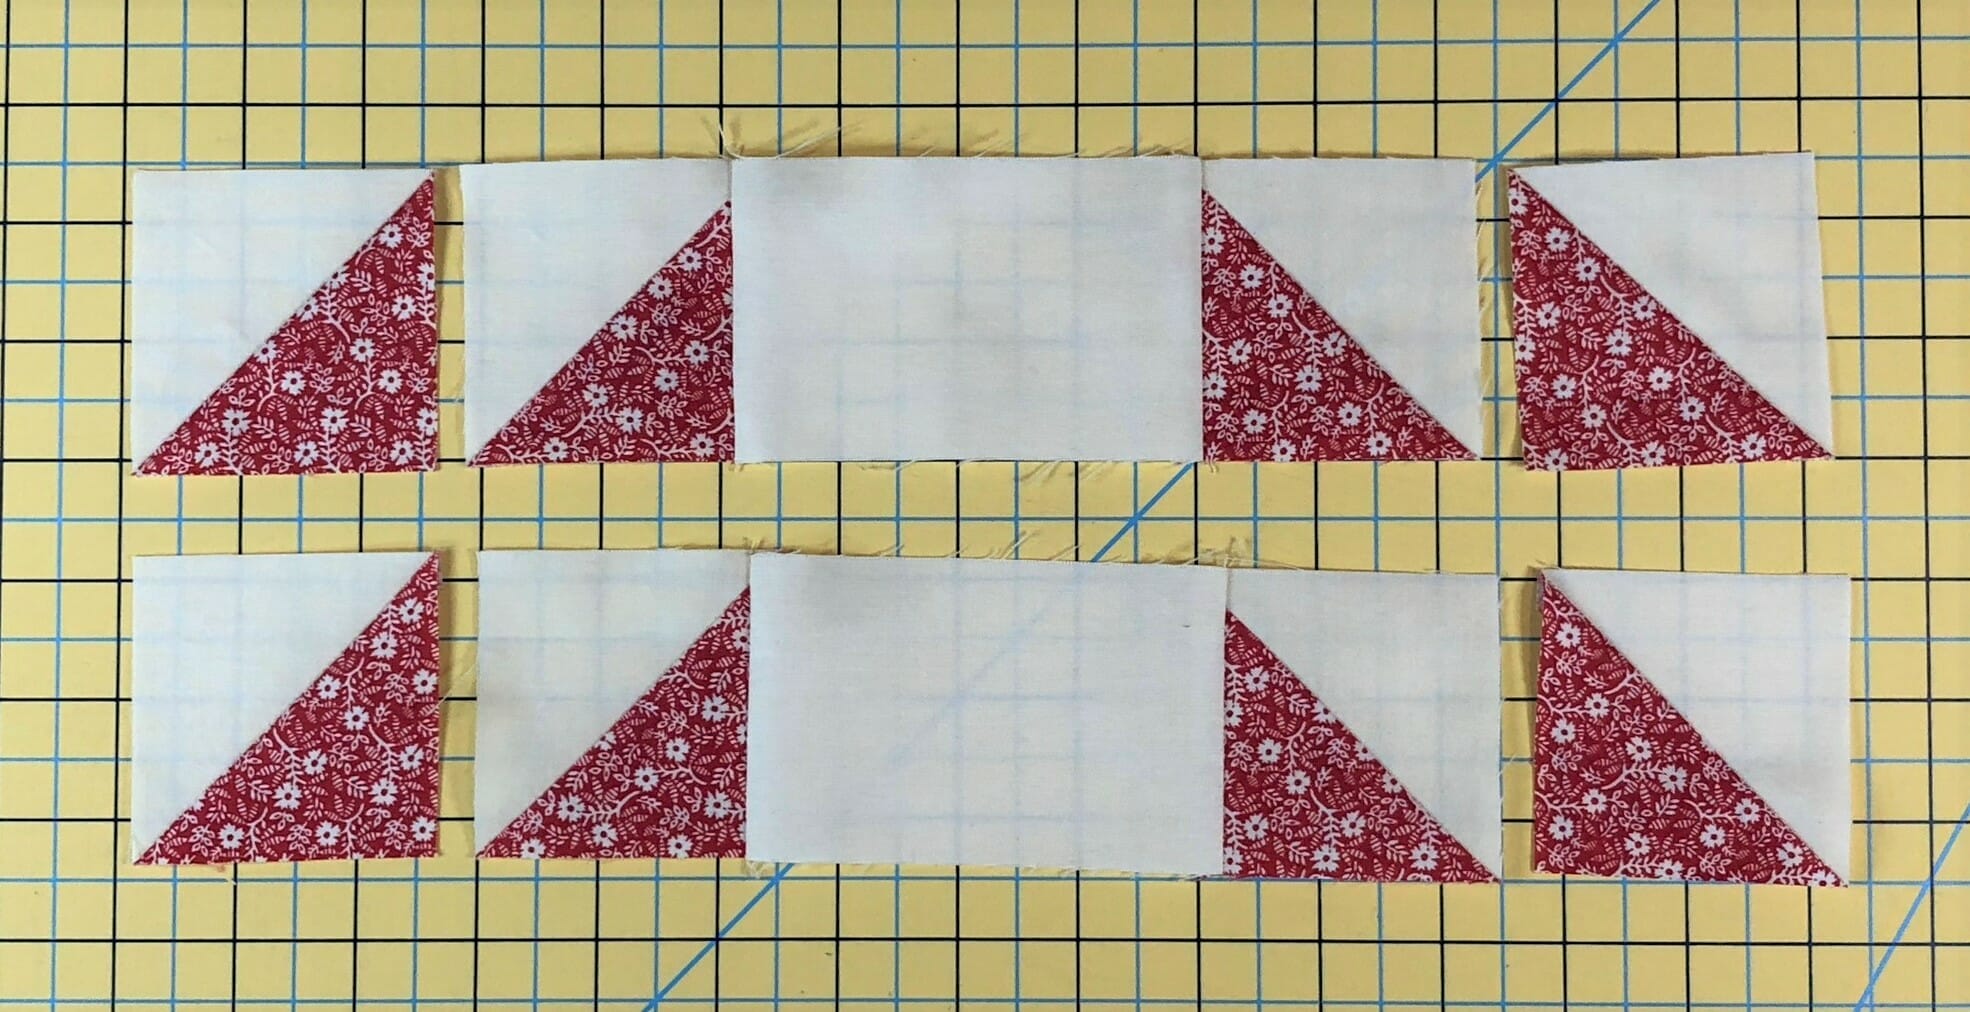
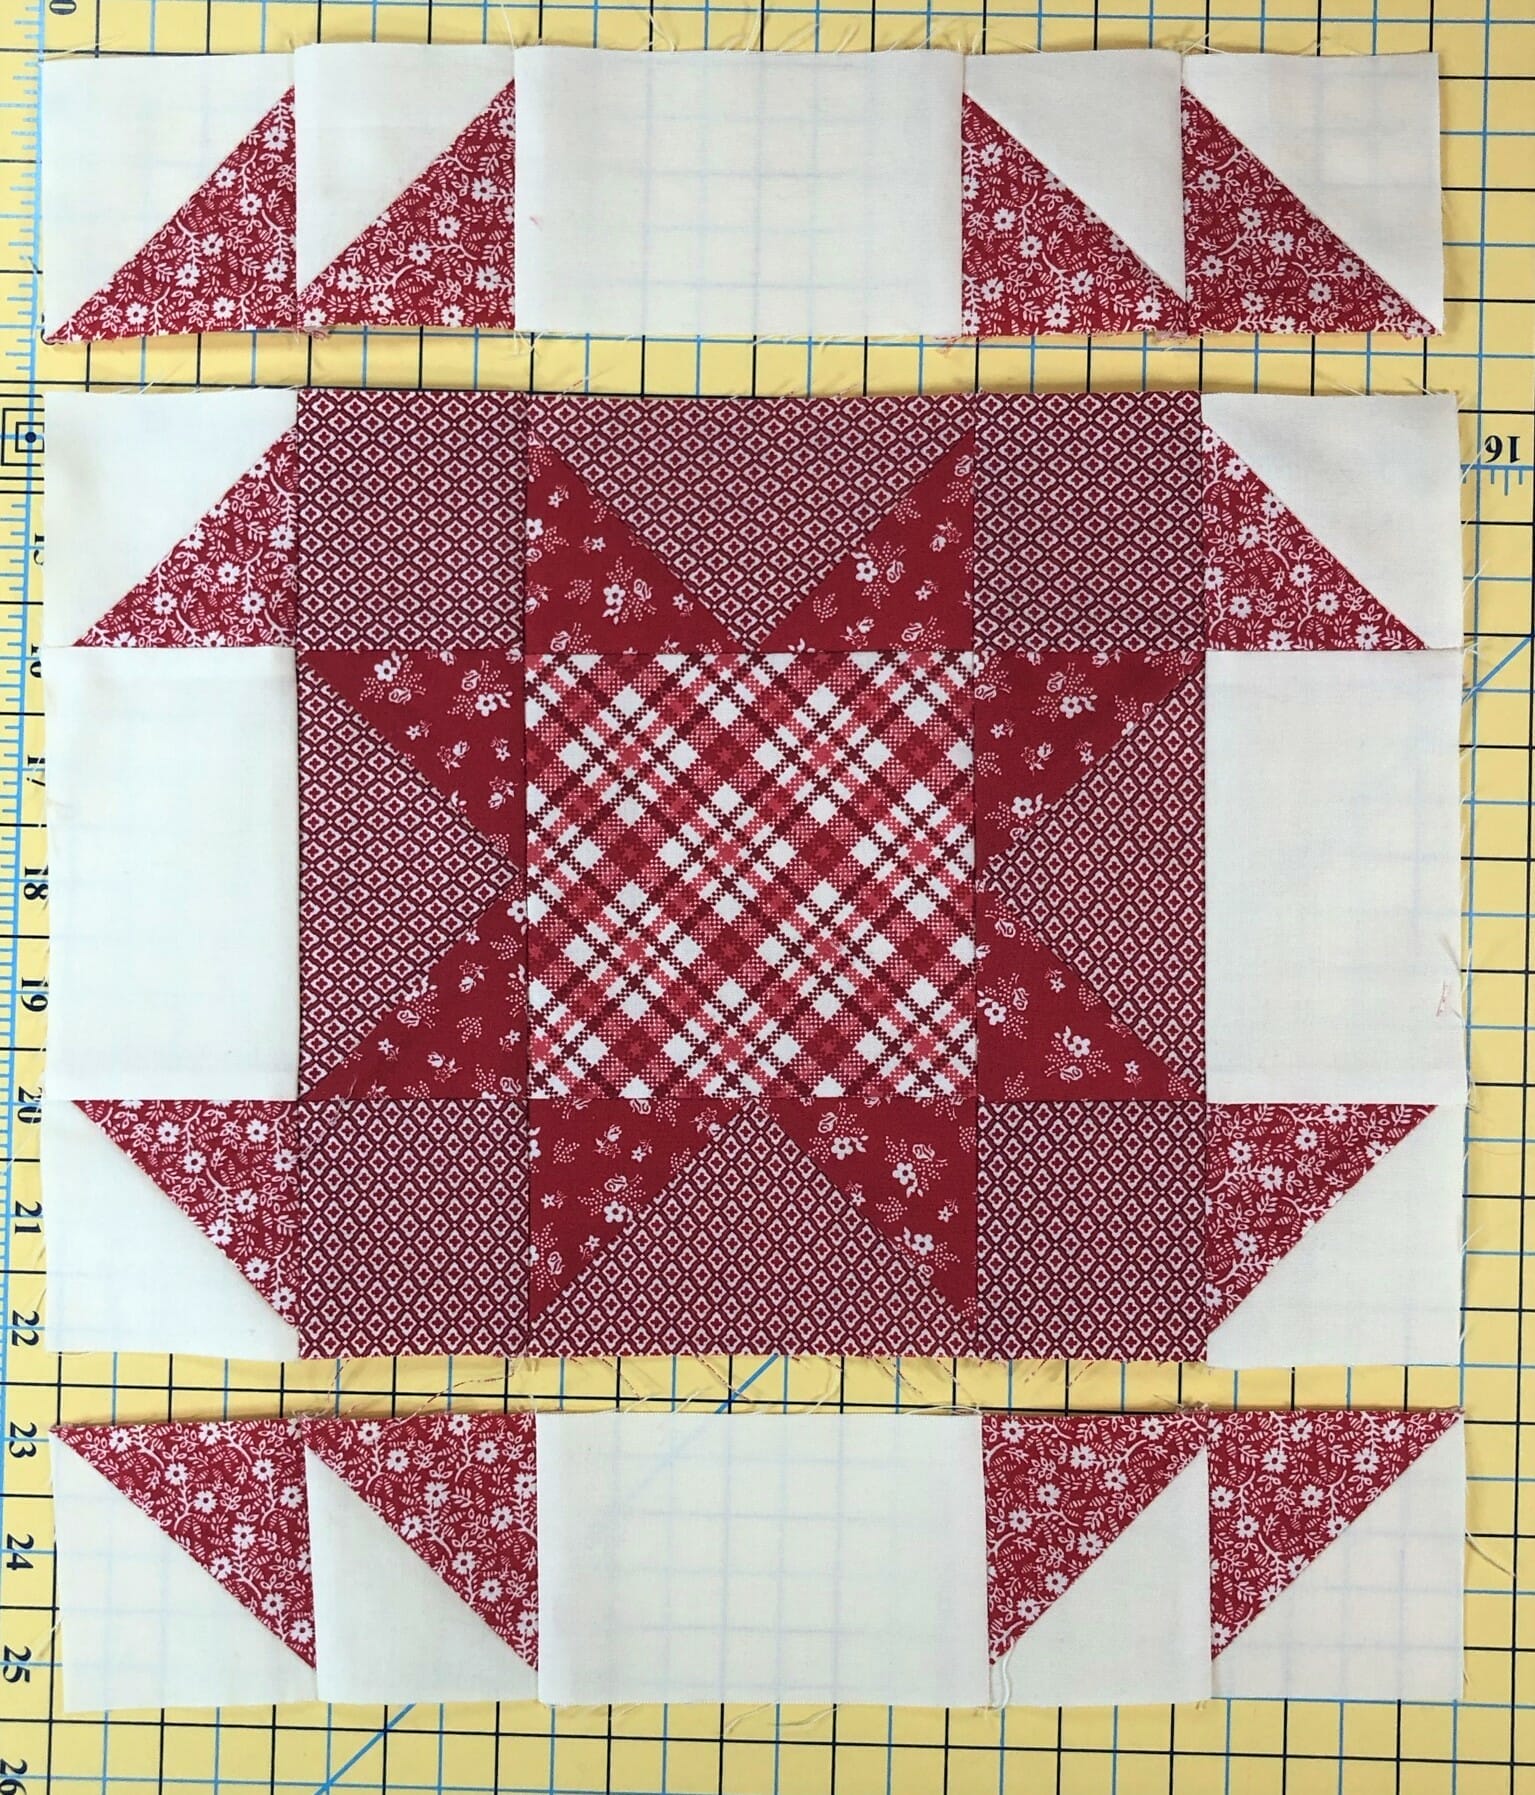
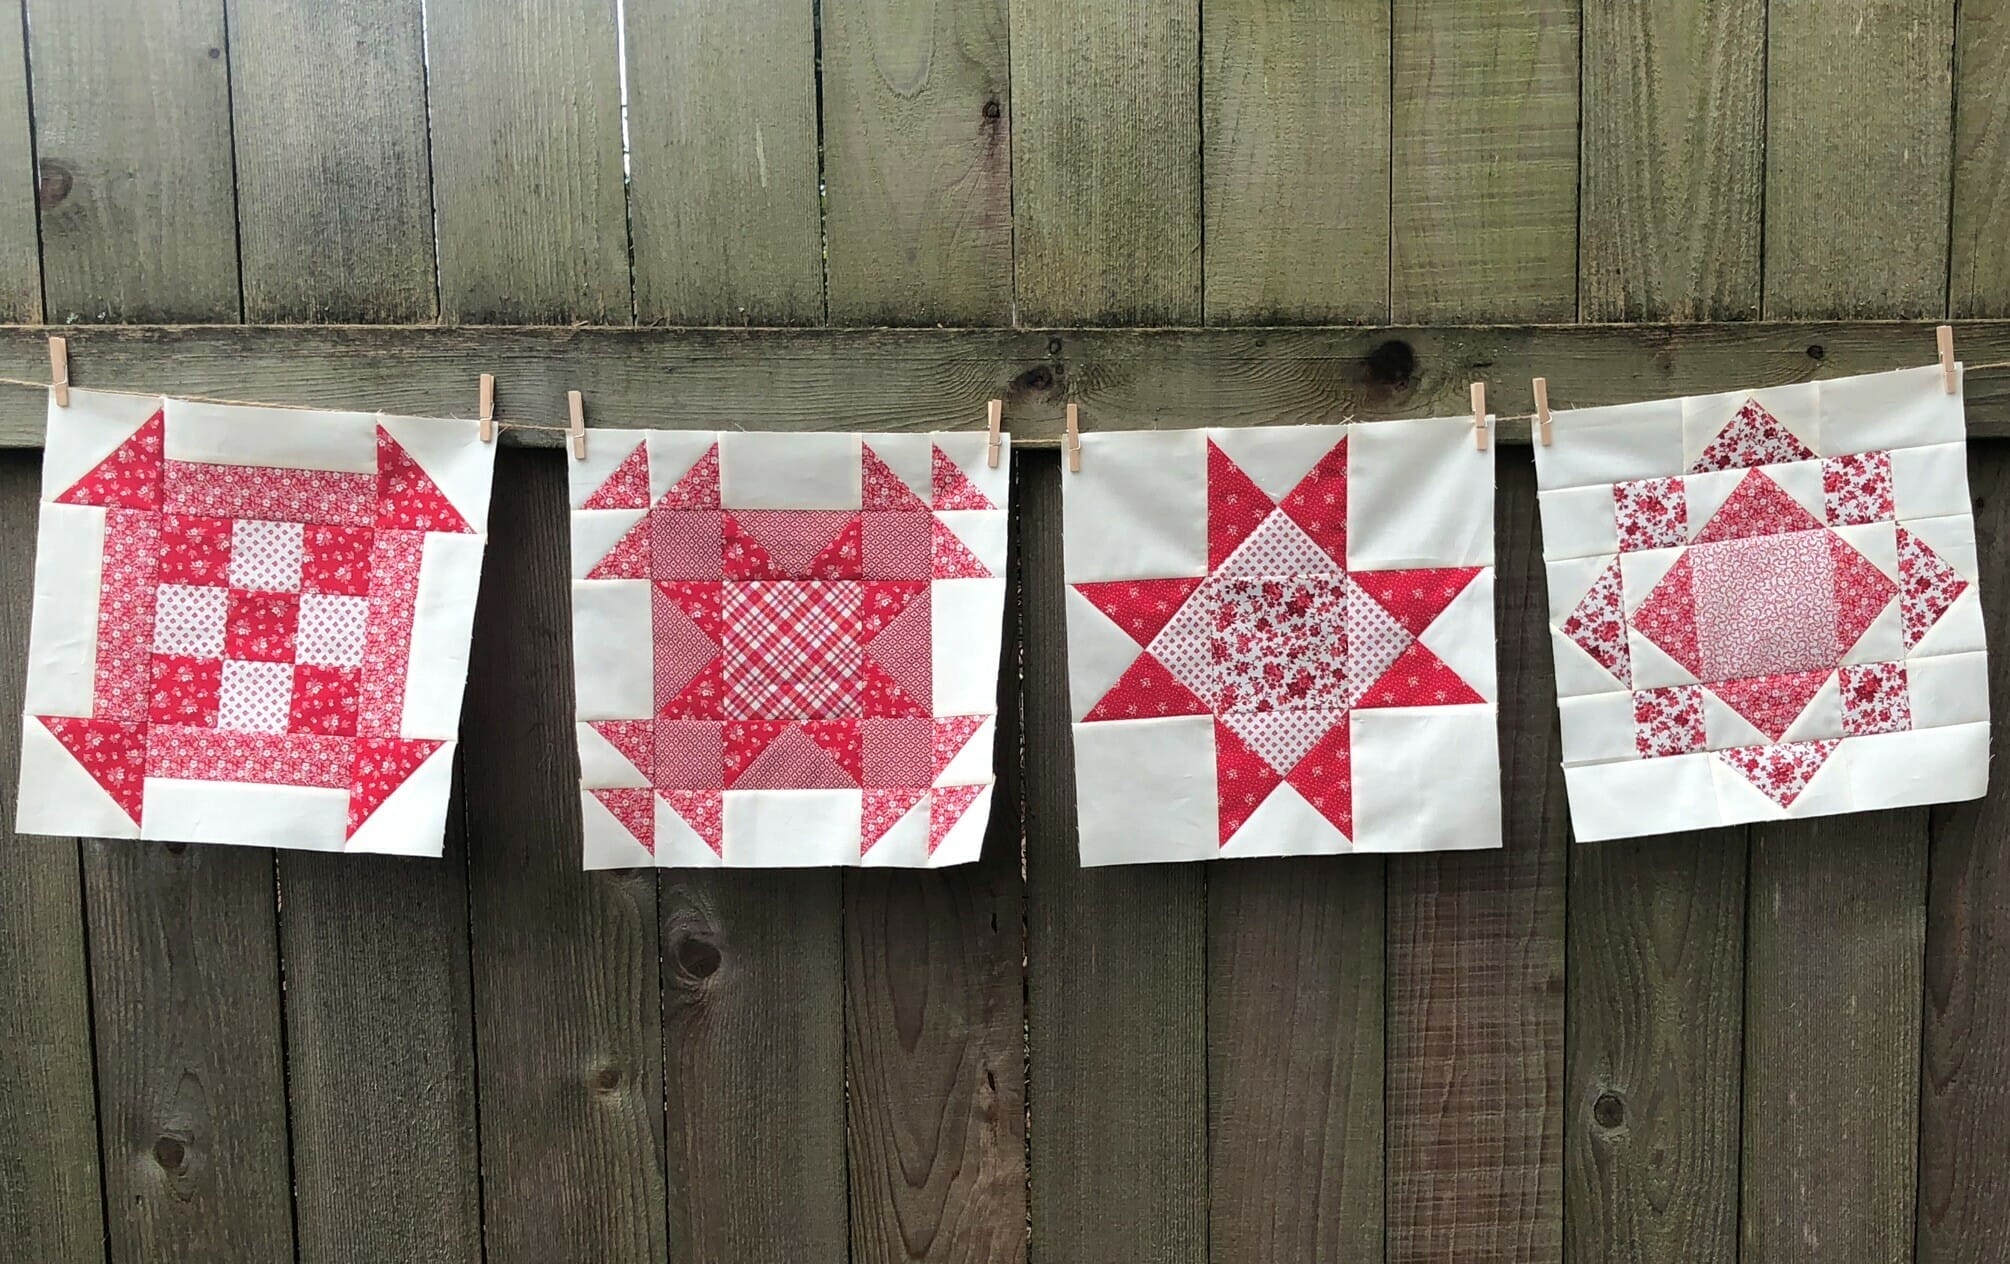
Block # 14

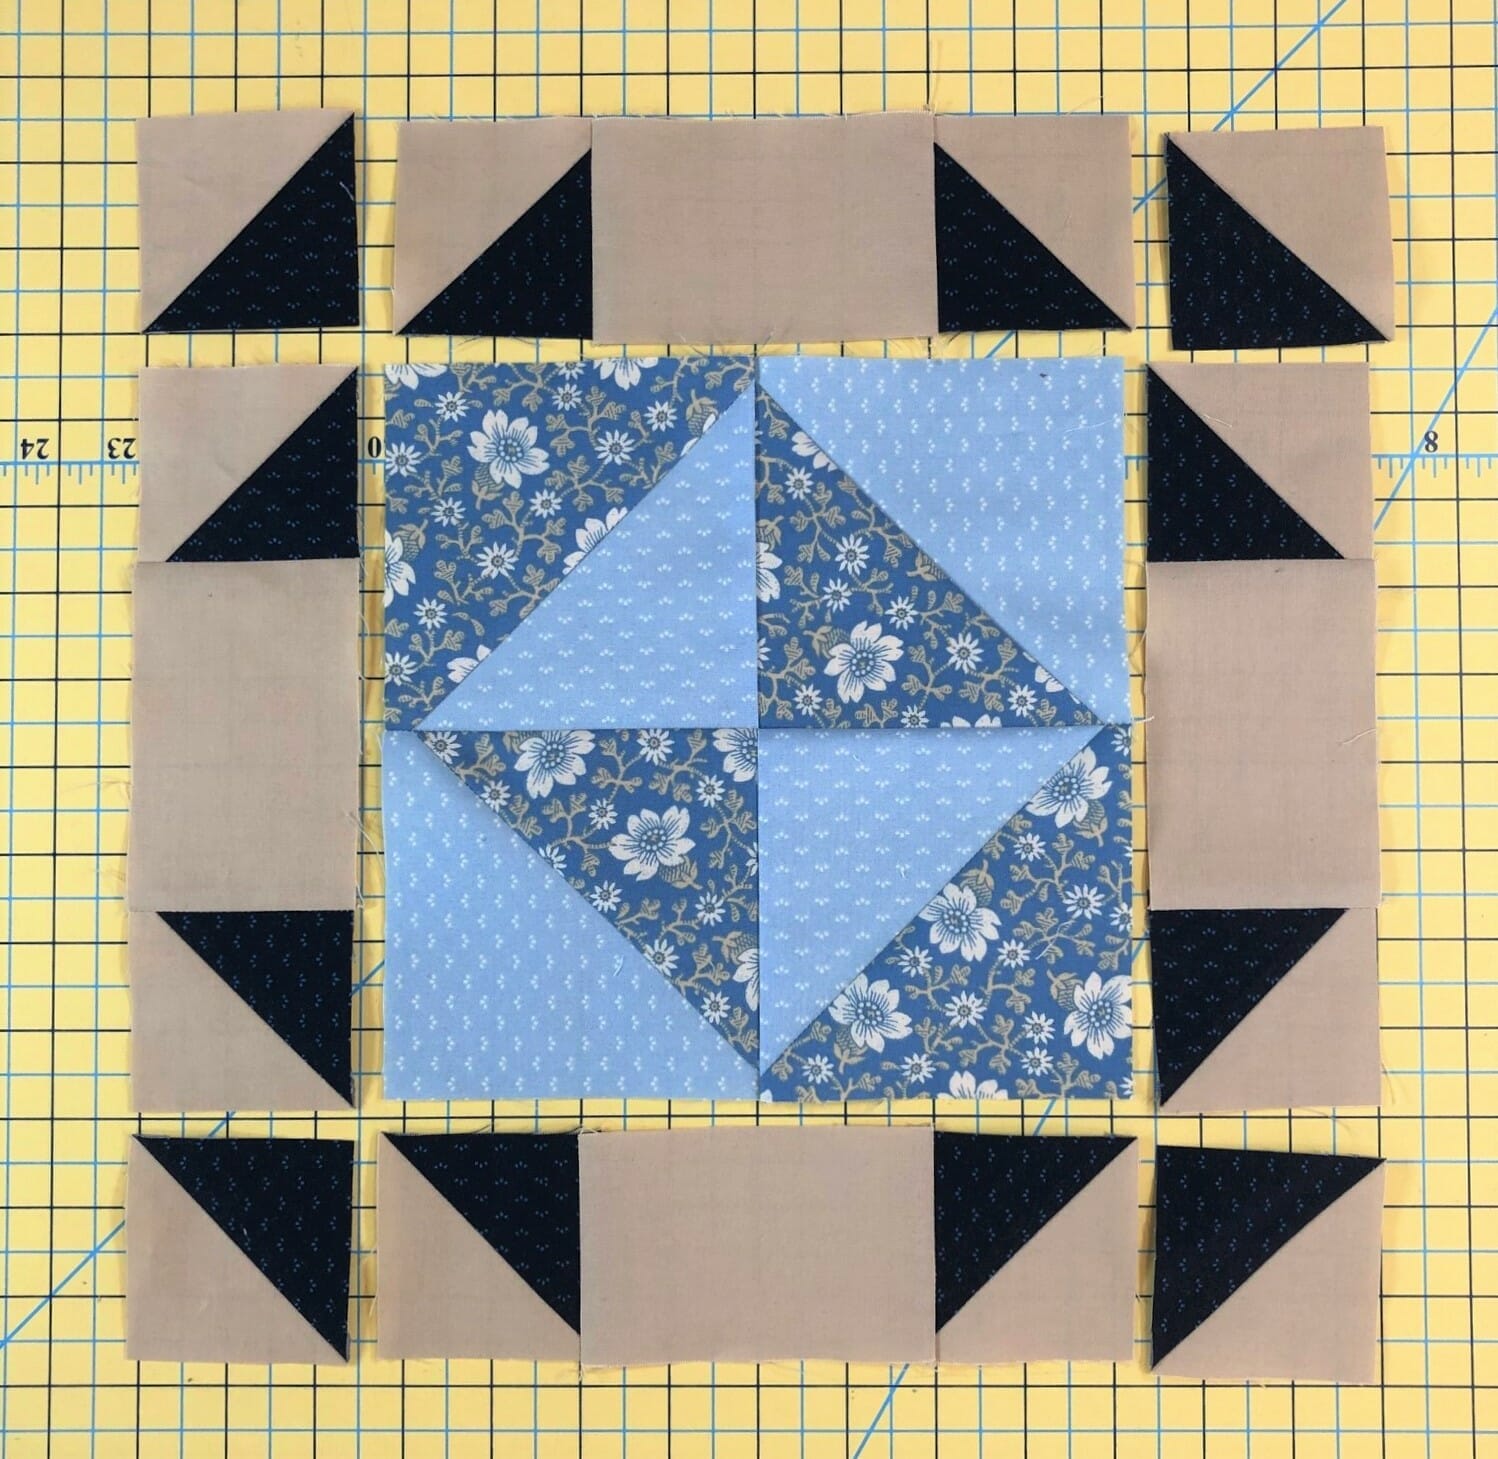
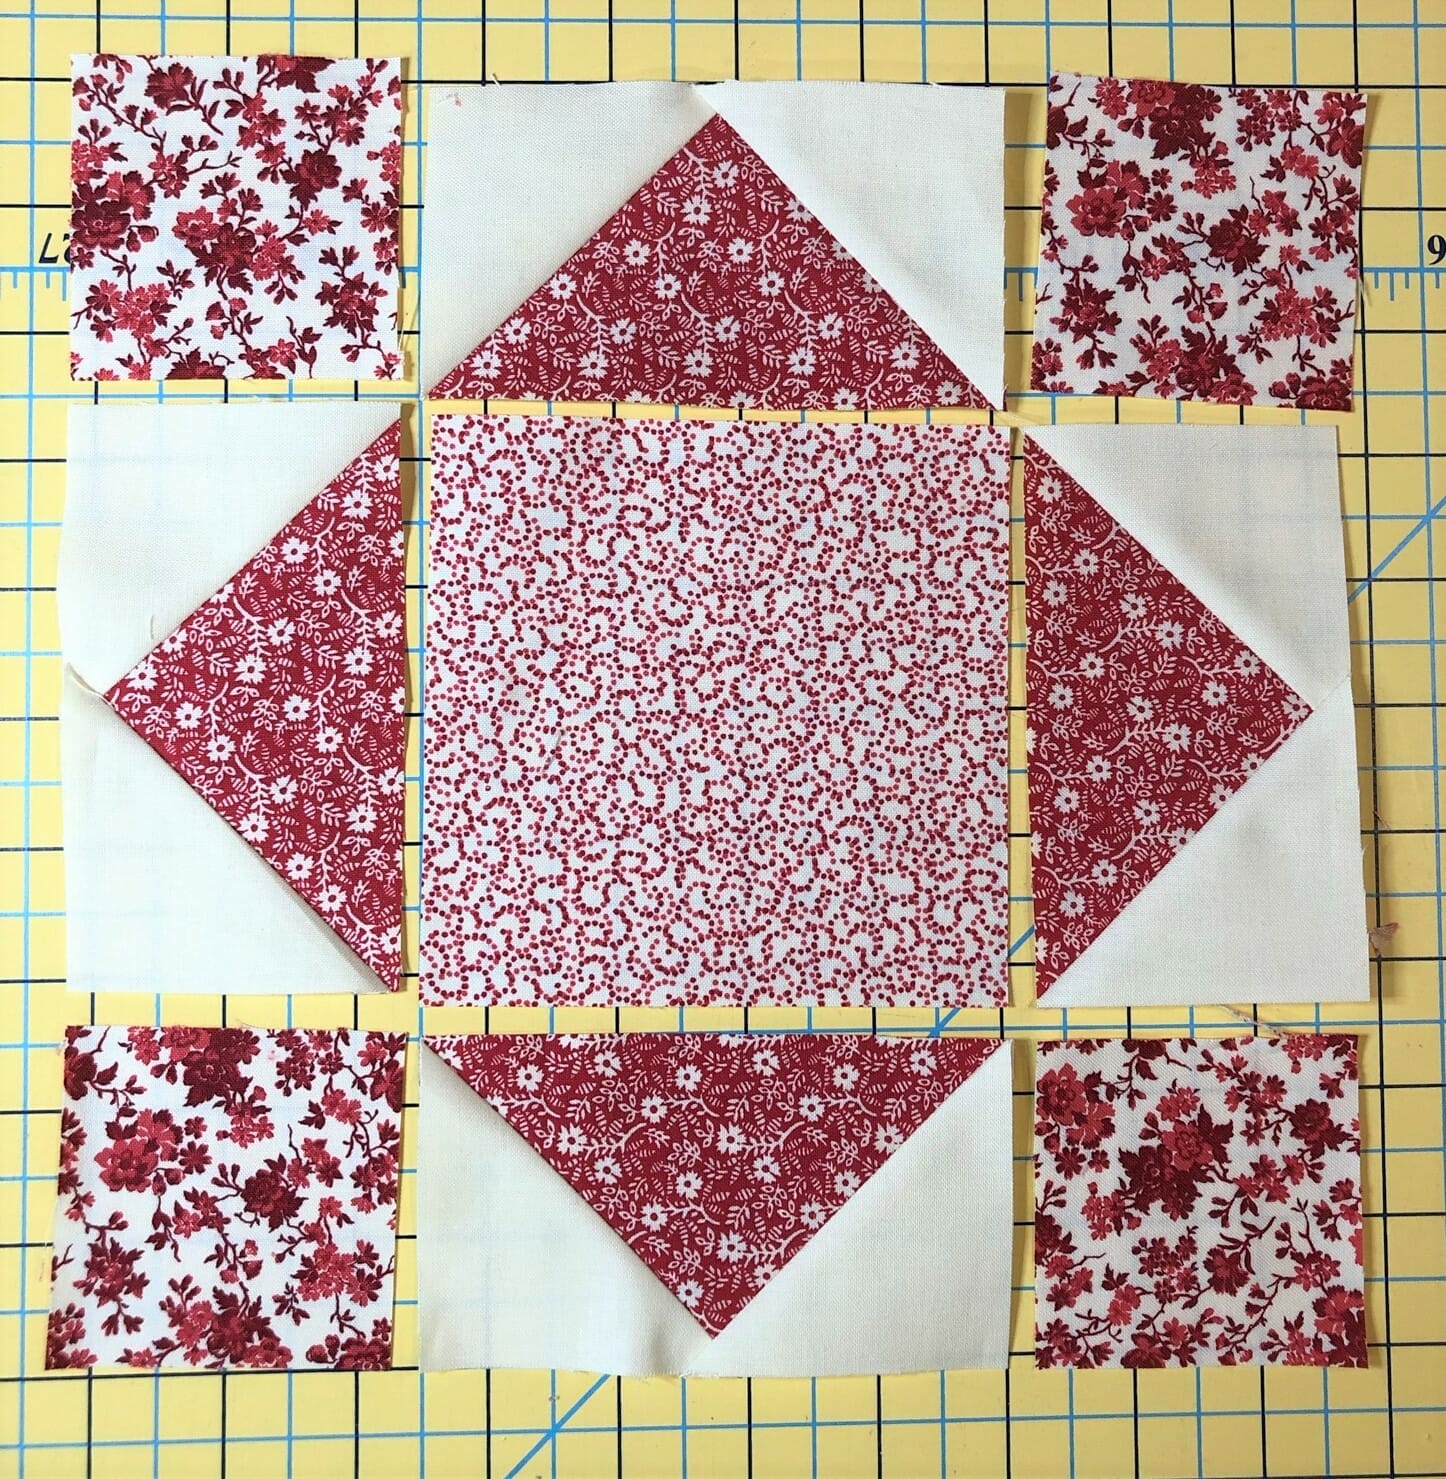
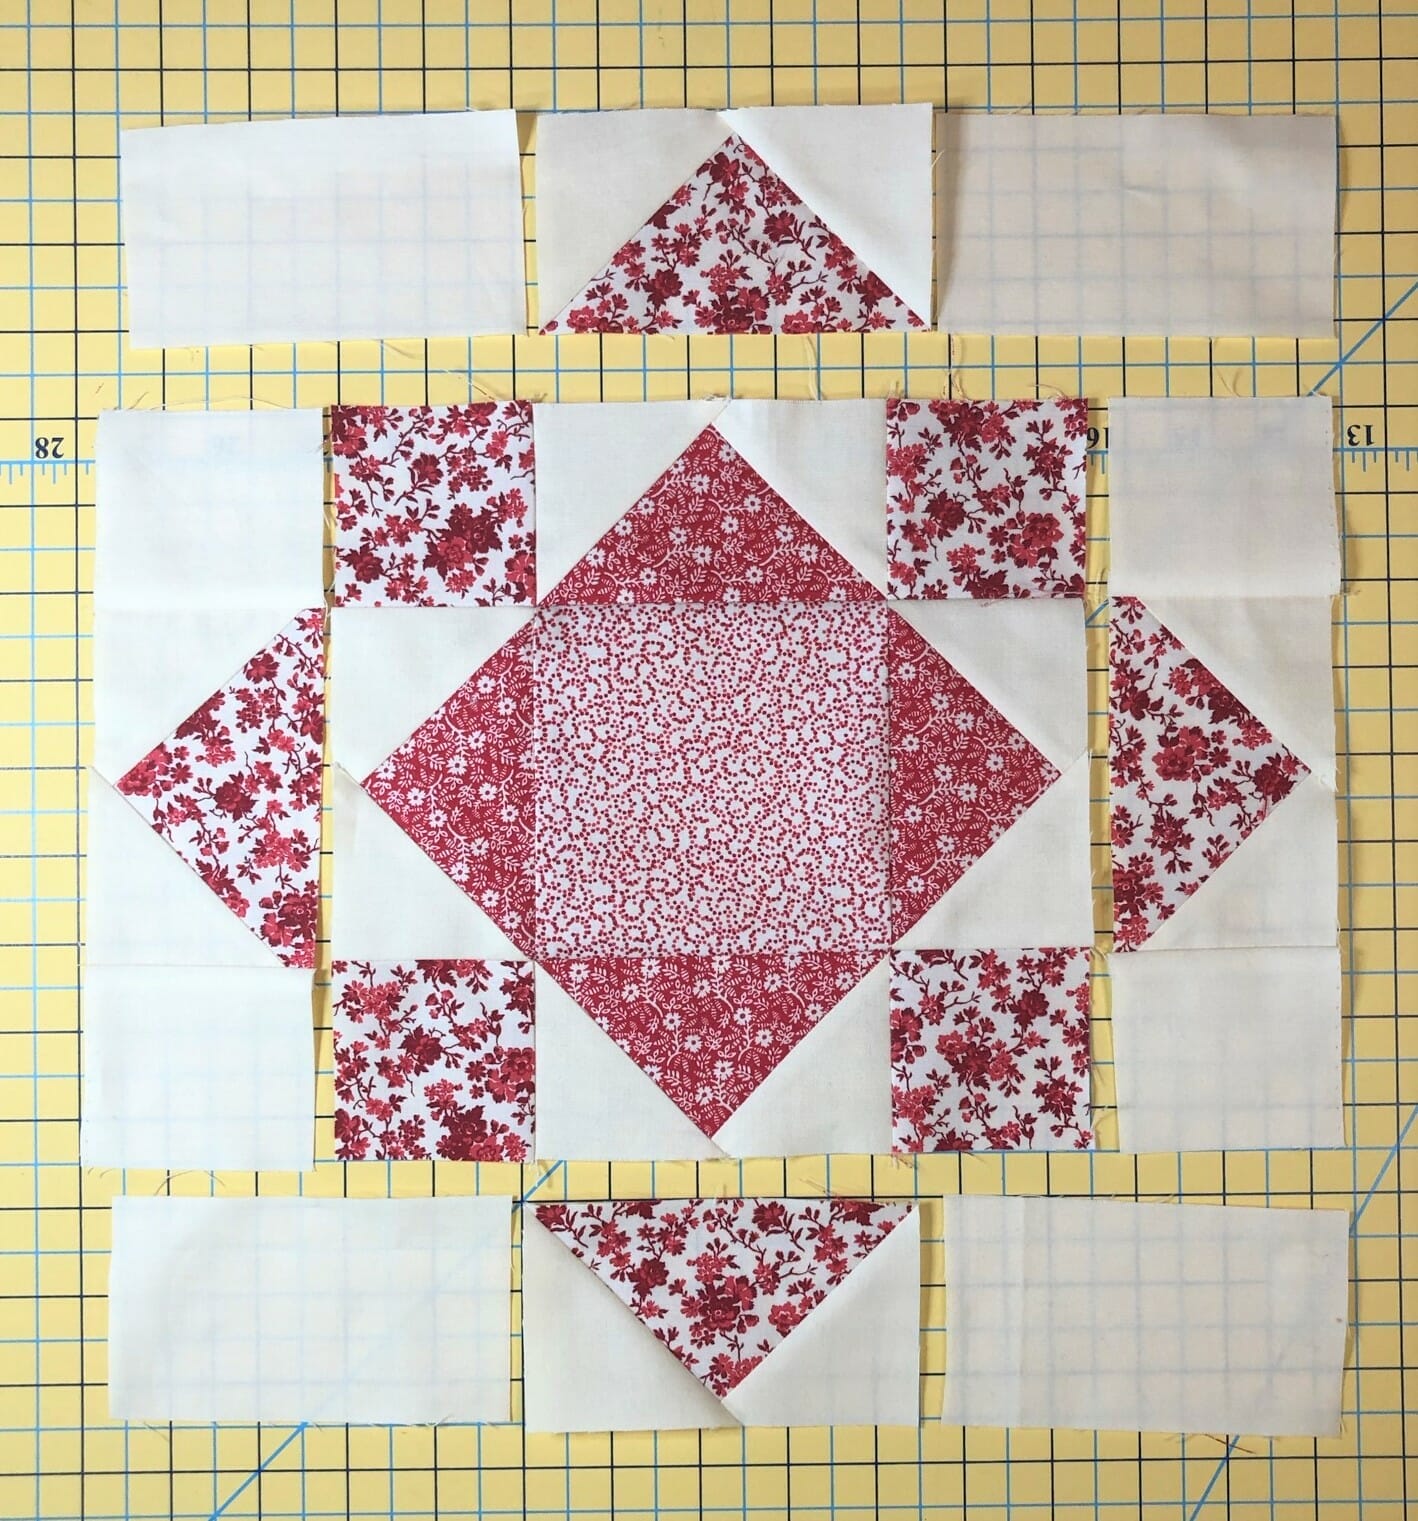
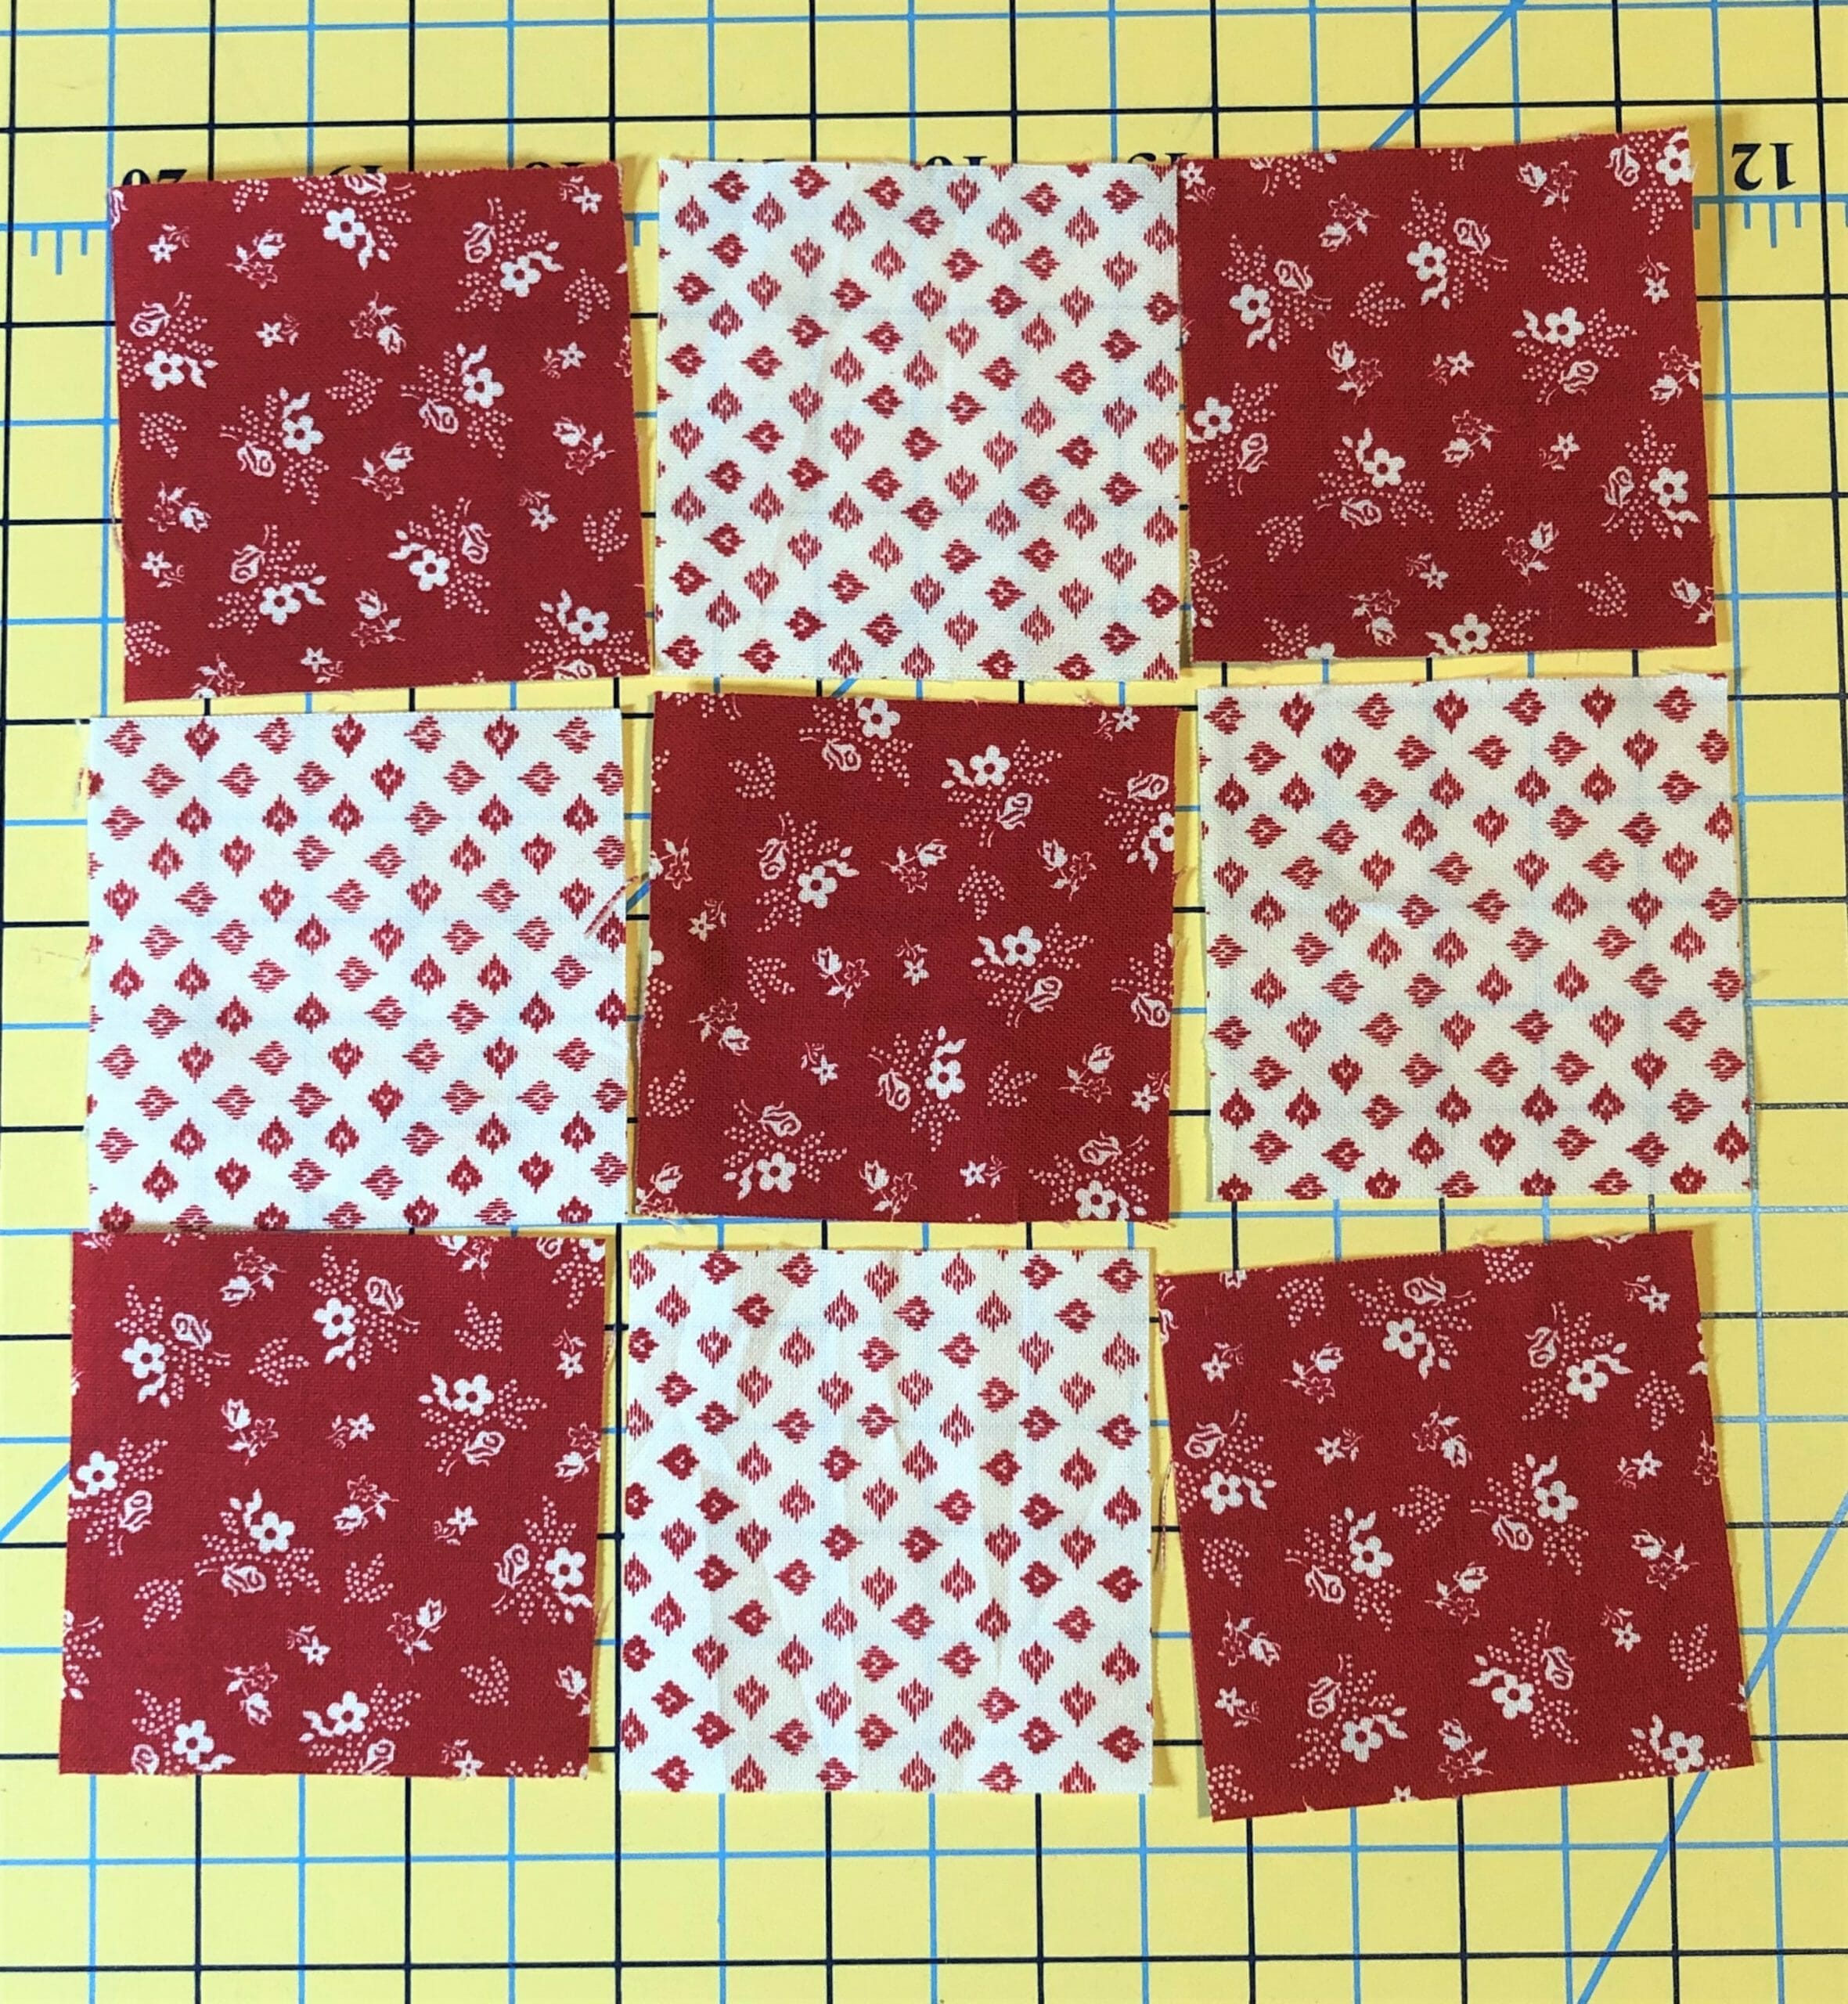
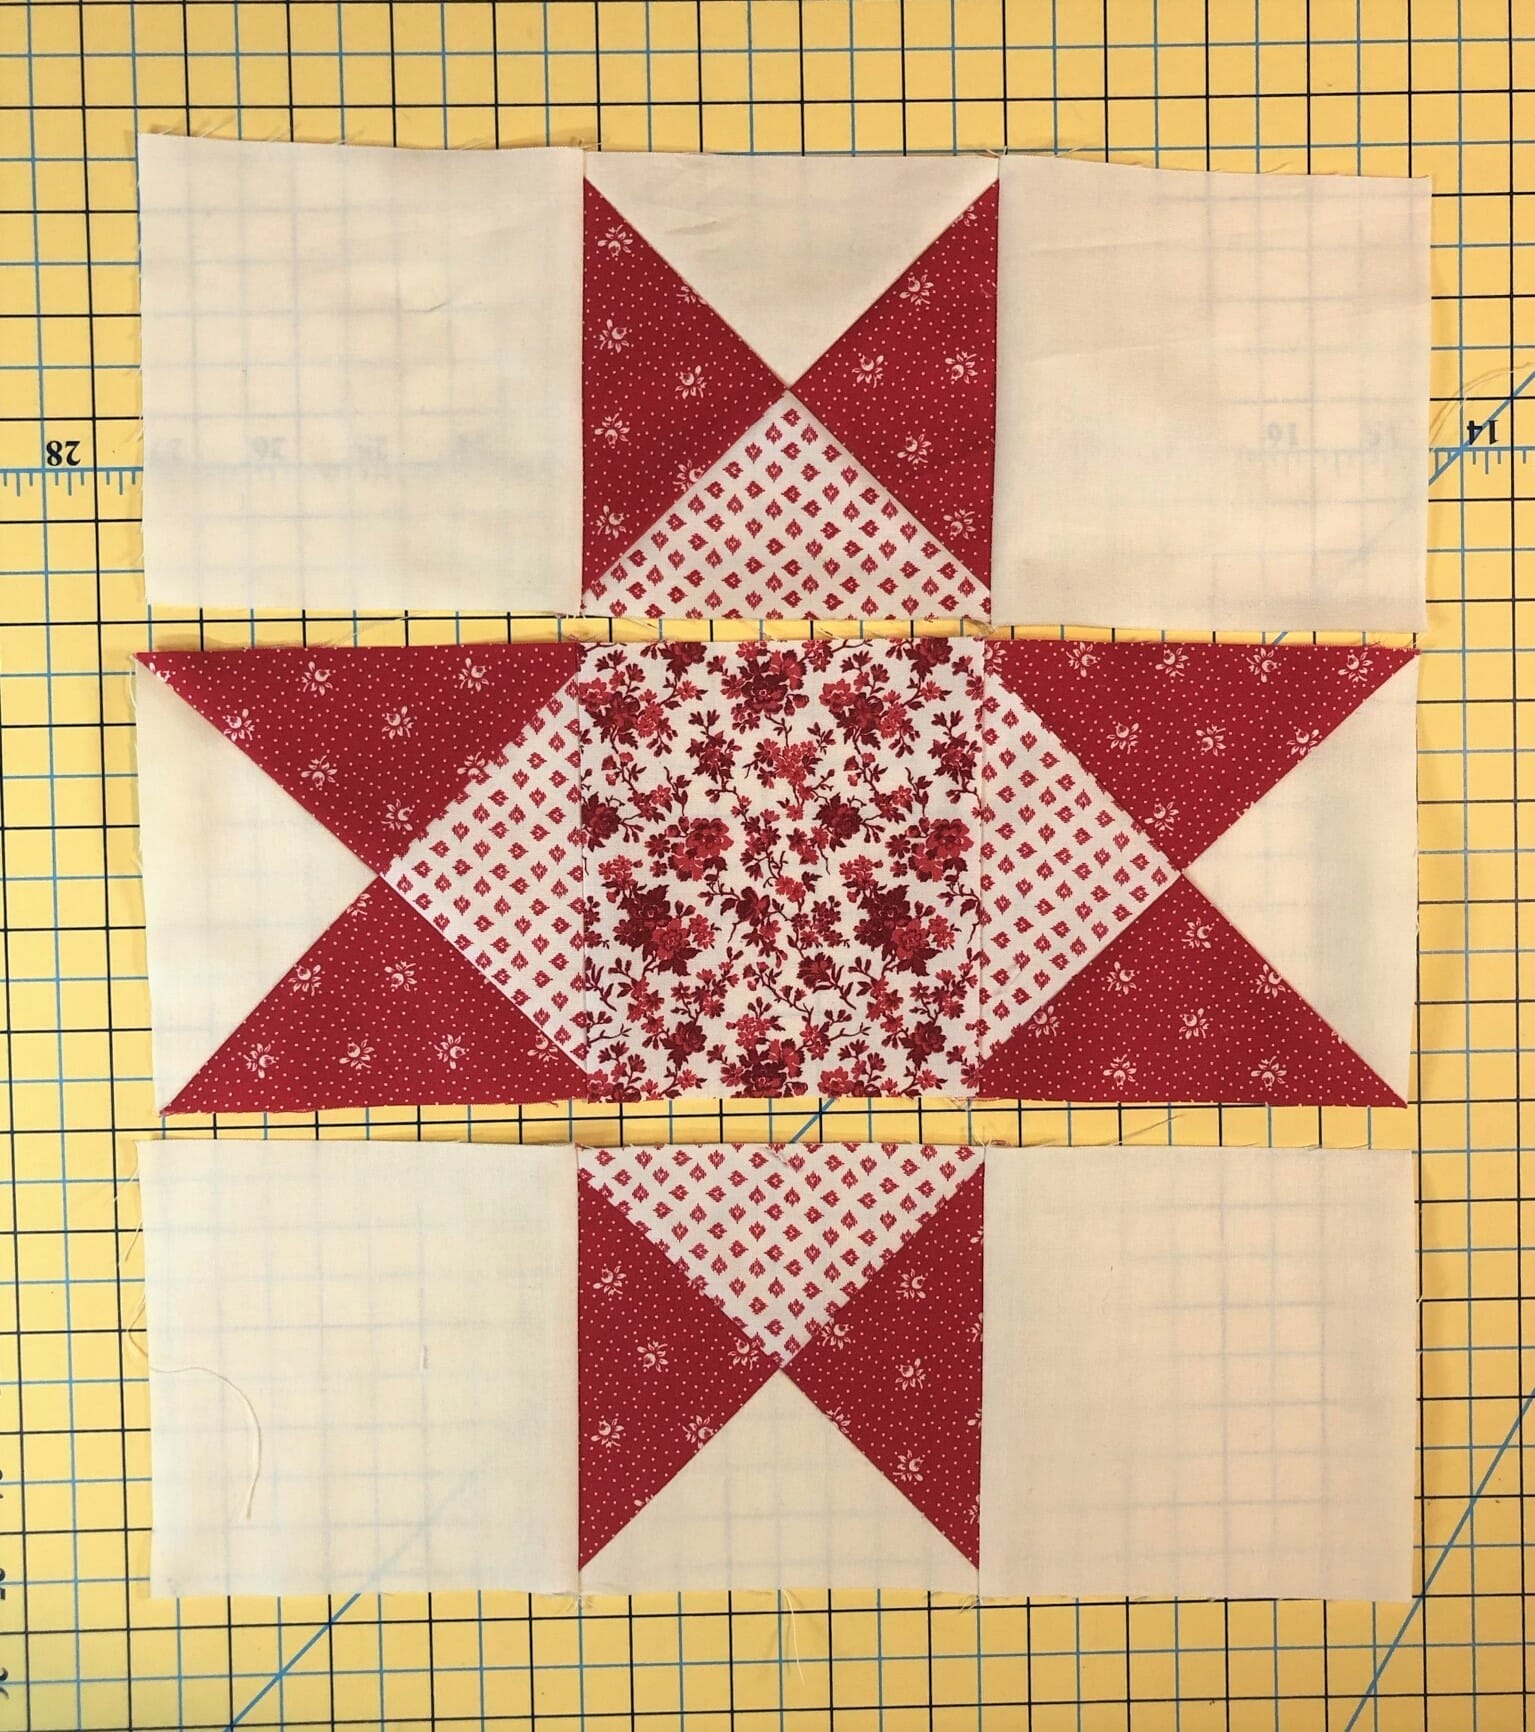
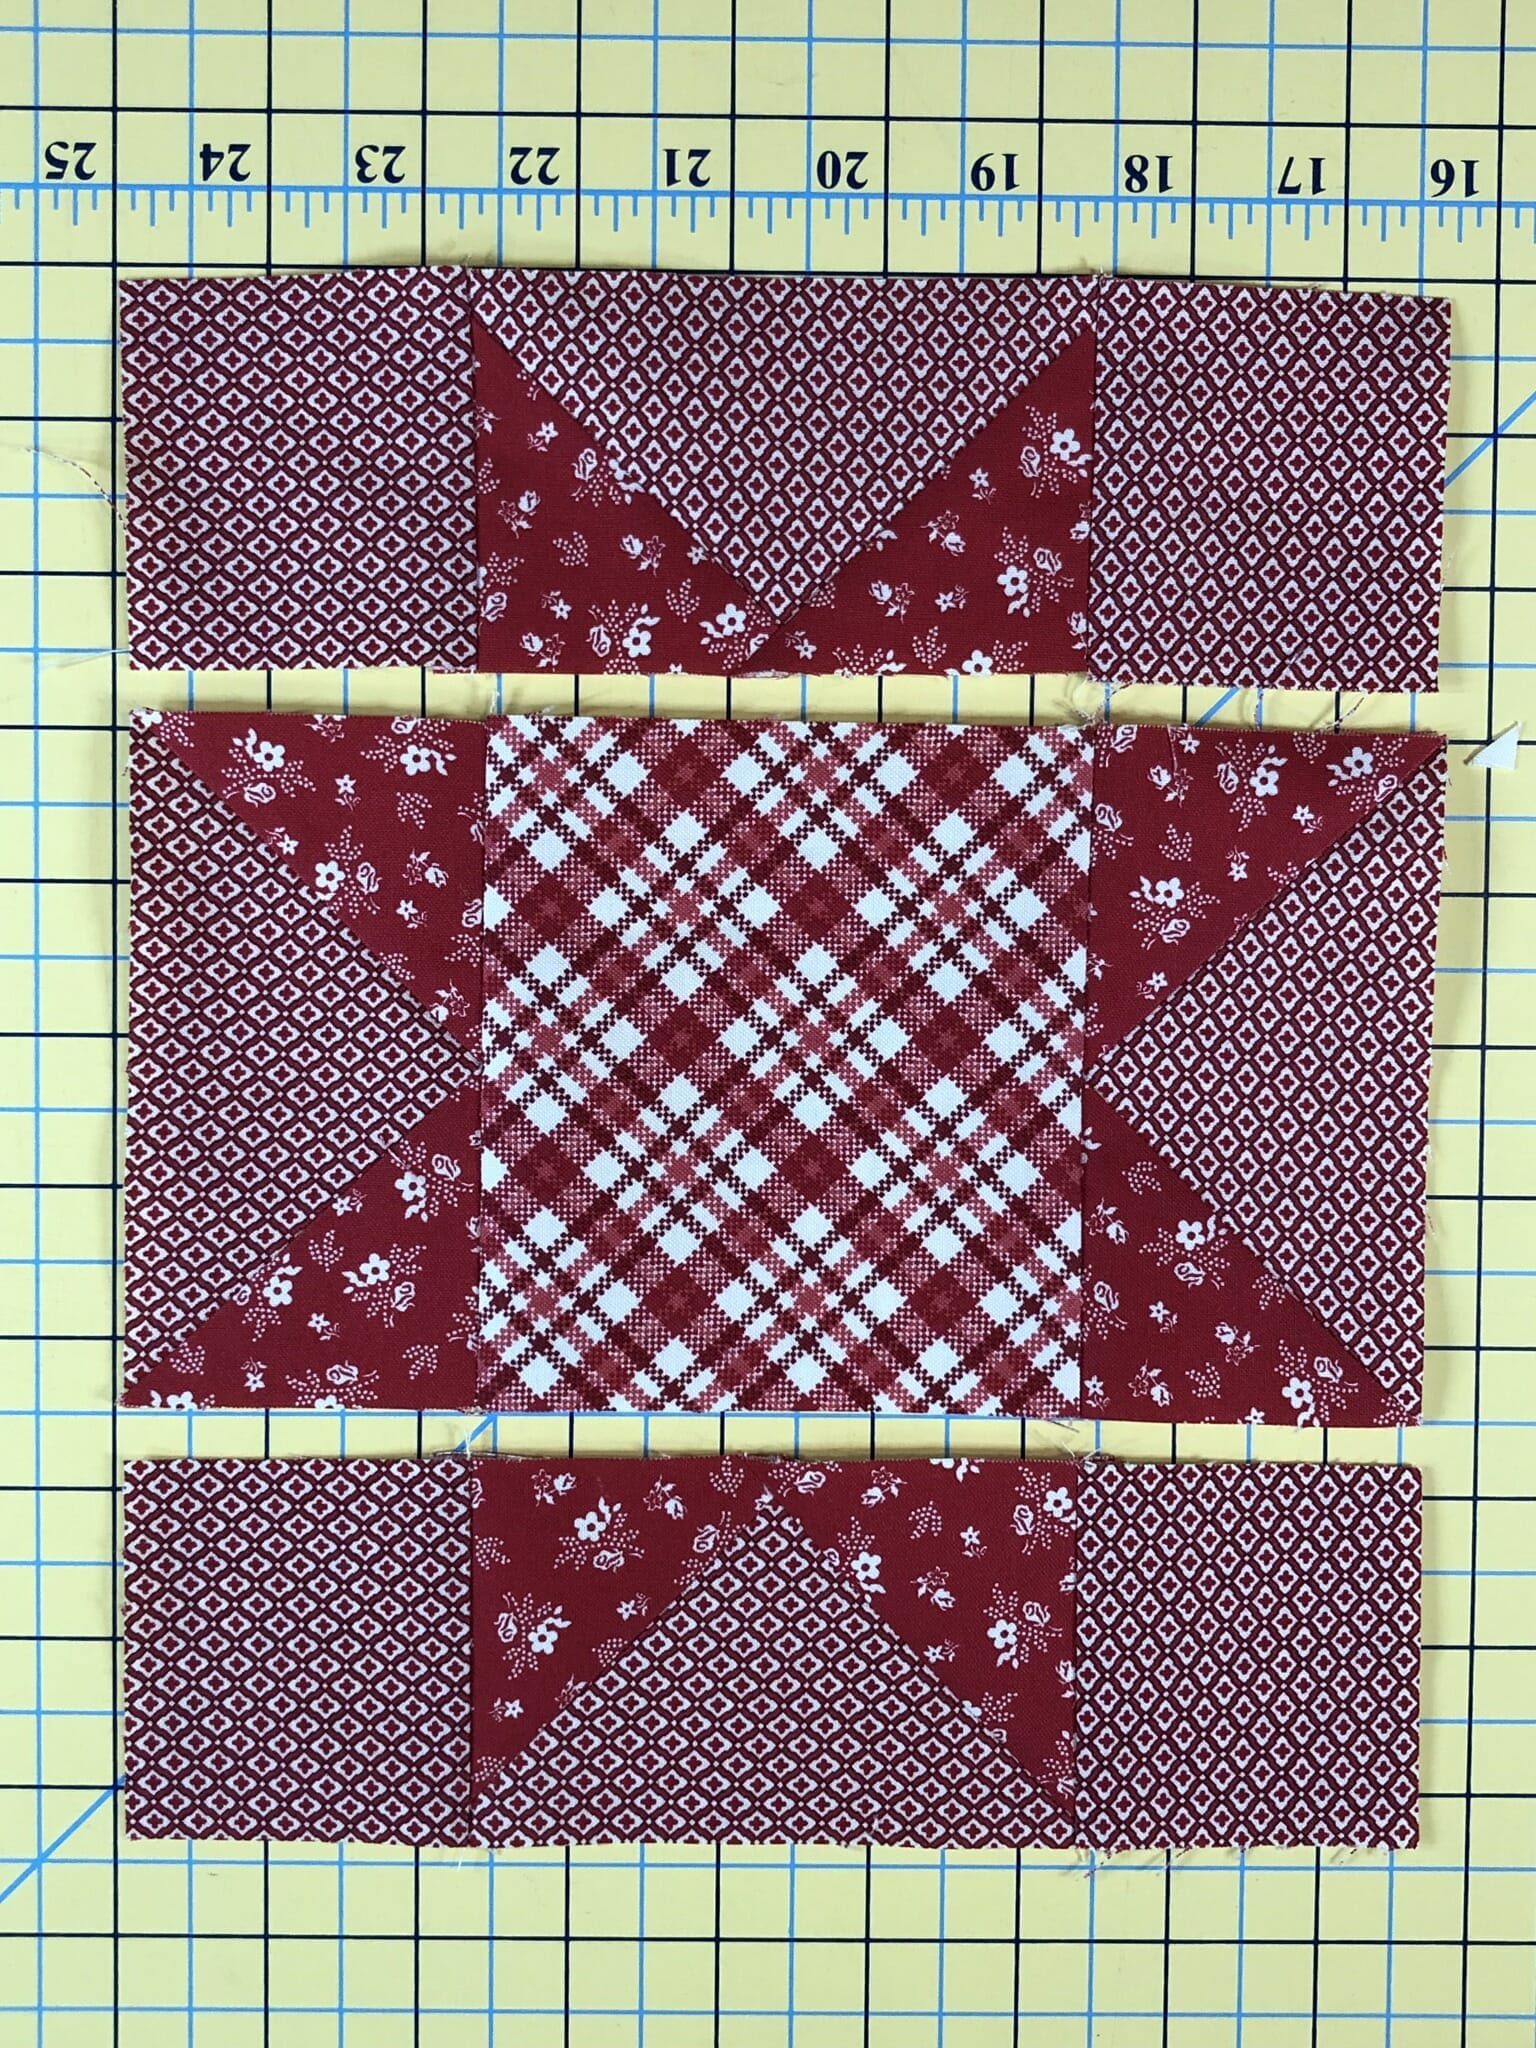
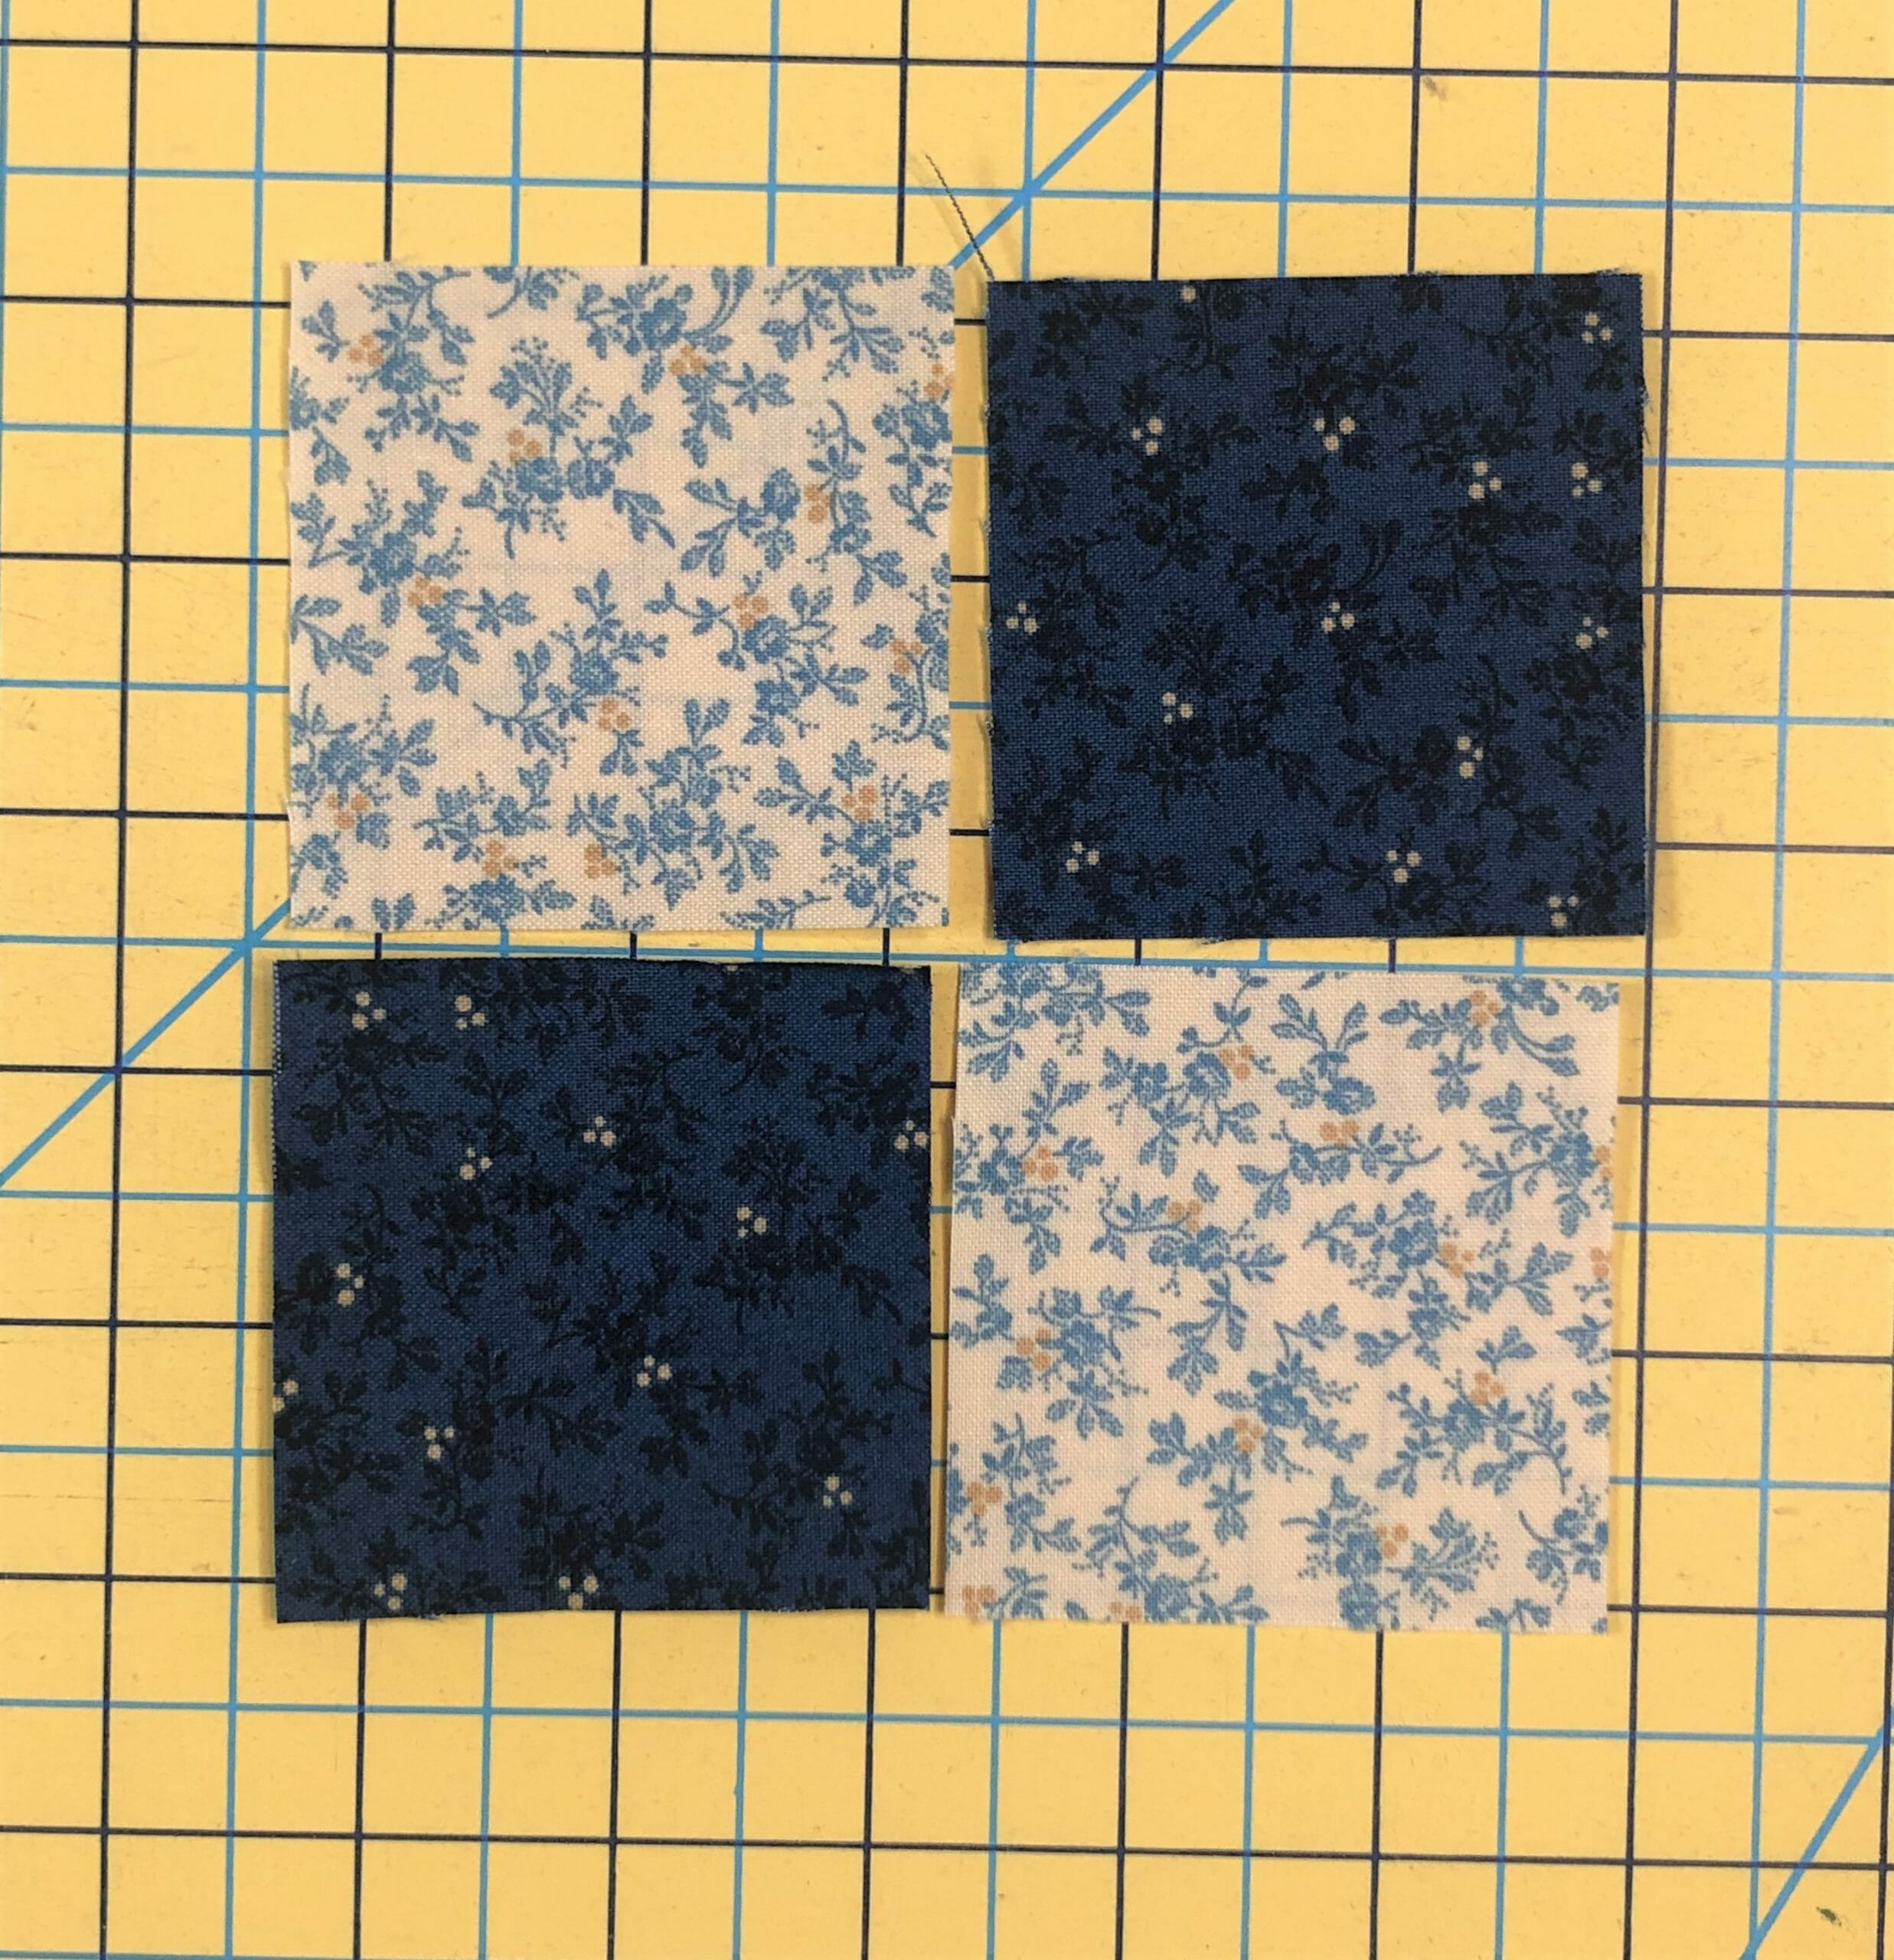
This block has lots of pieces, but it’s pretty straightforward. We’ll begin by making a simple 4-patch.

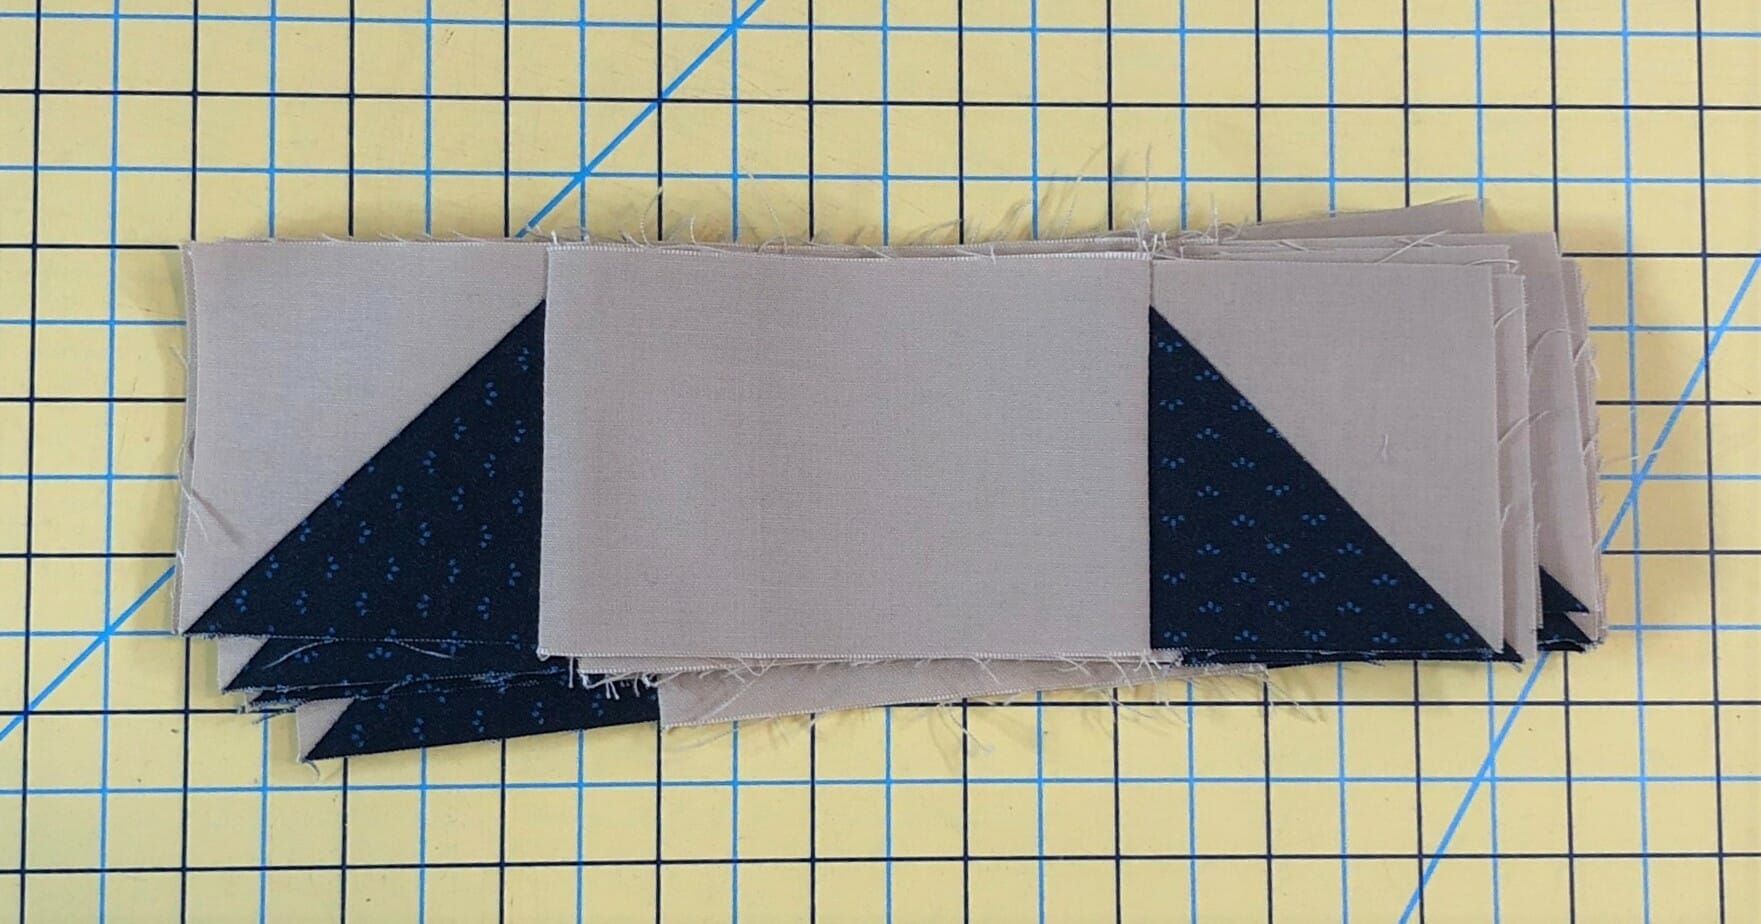
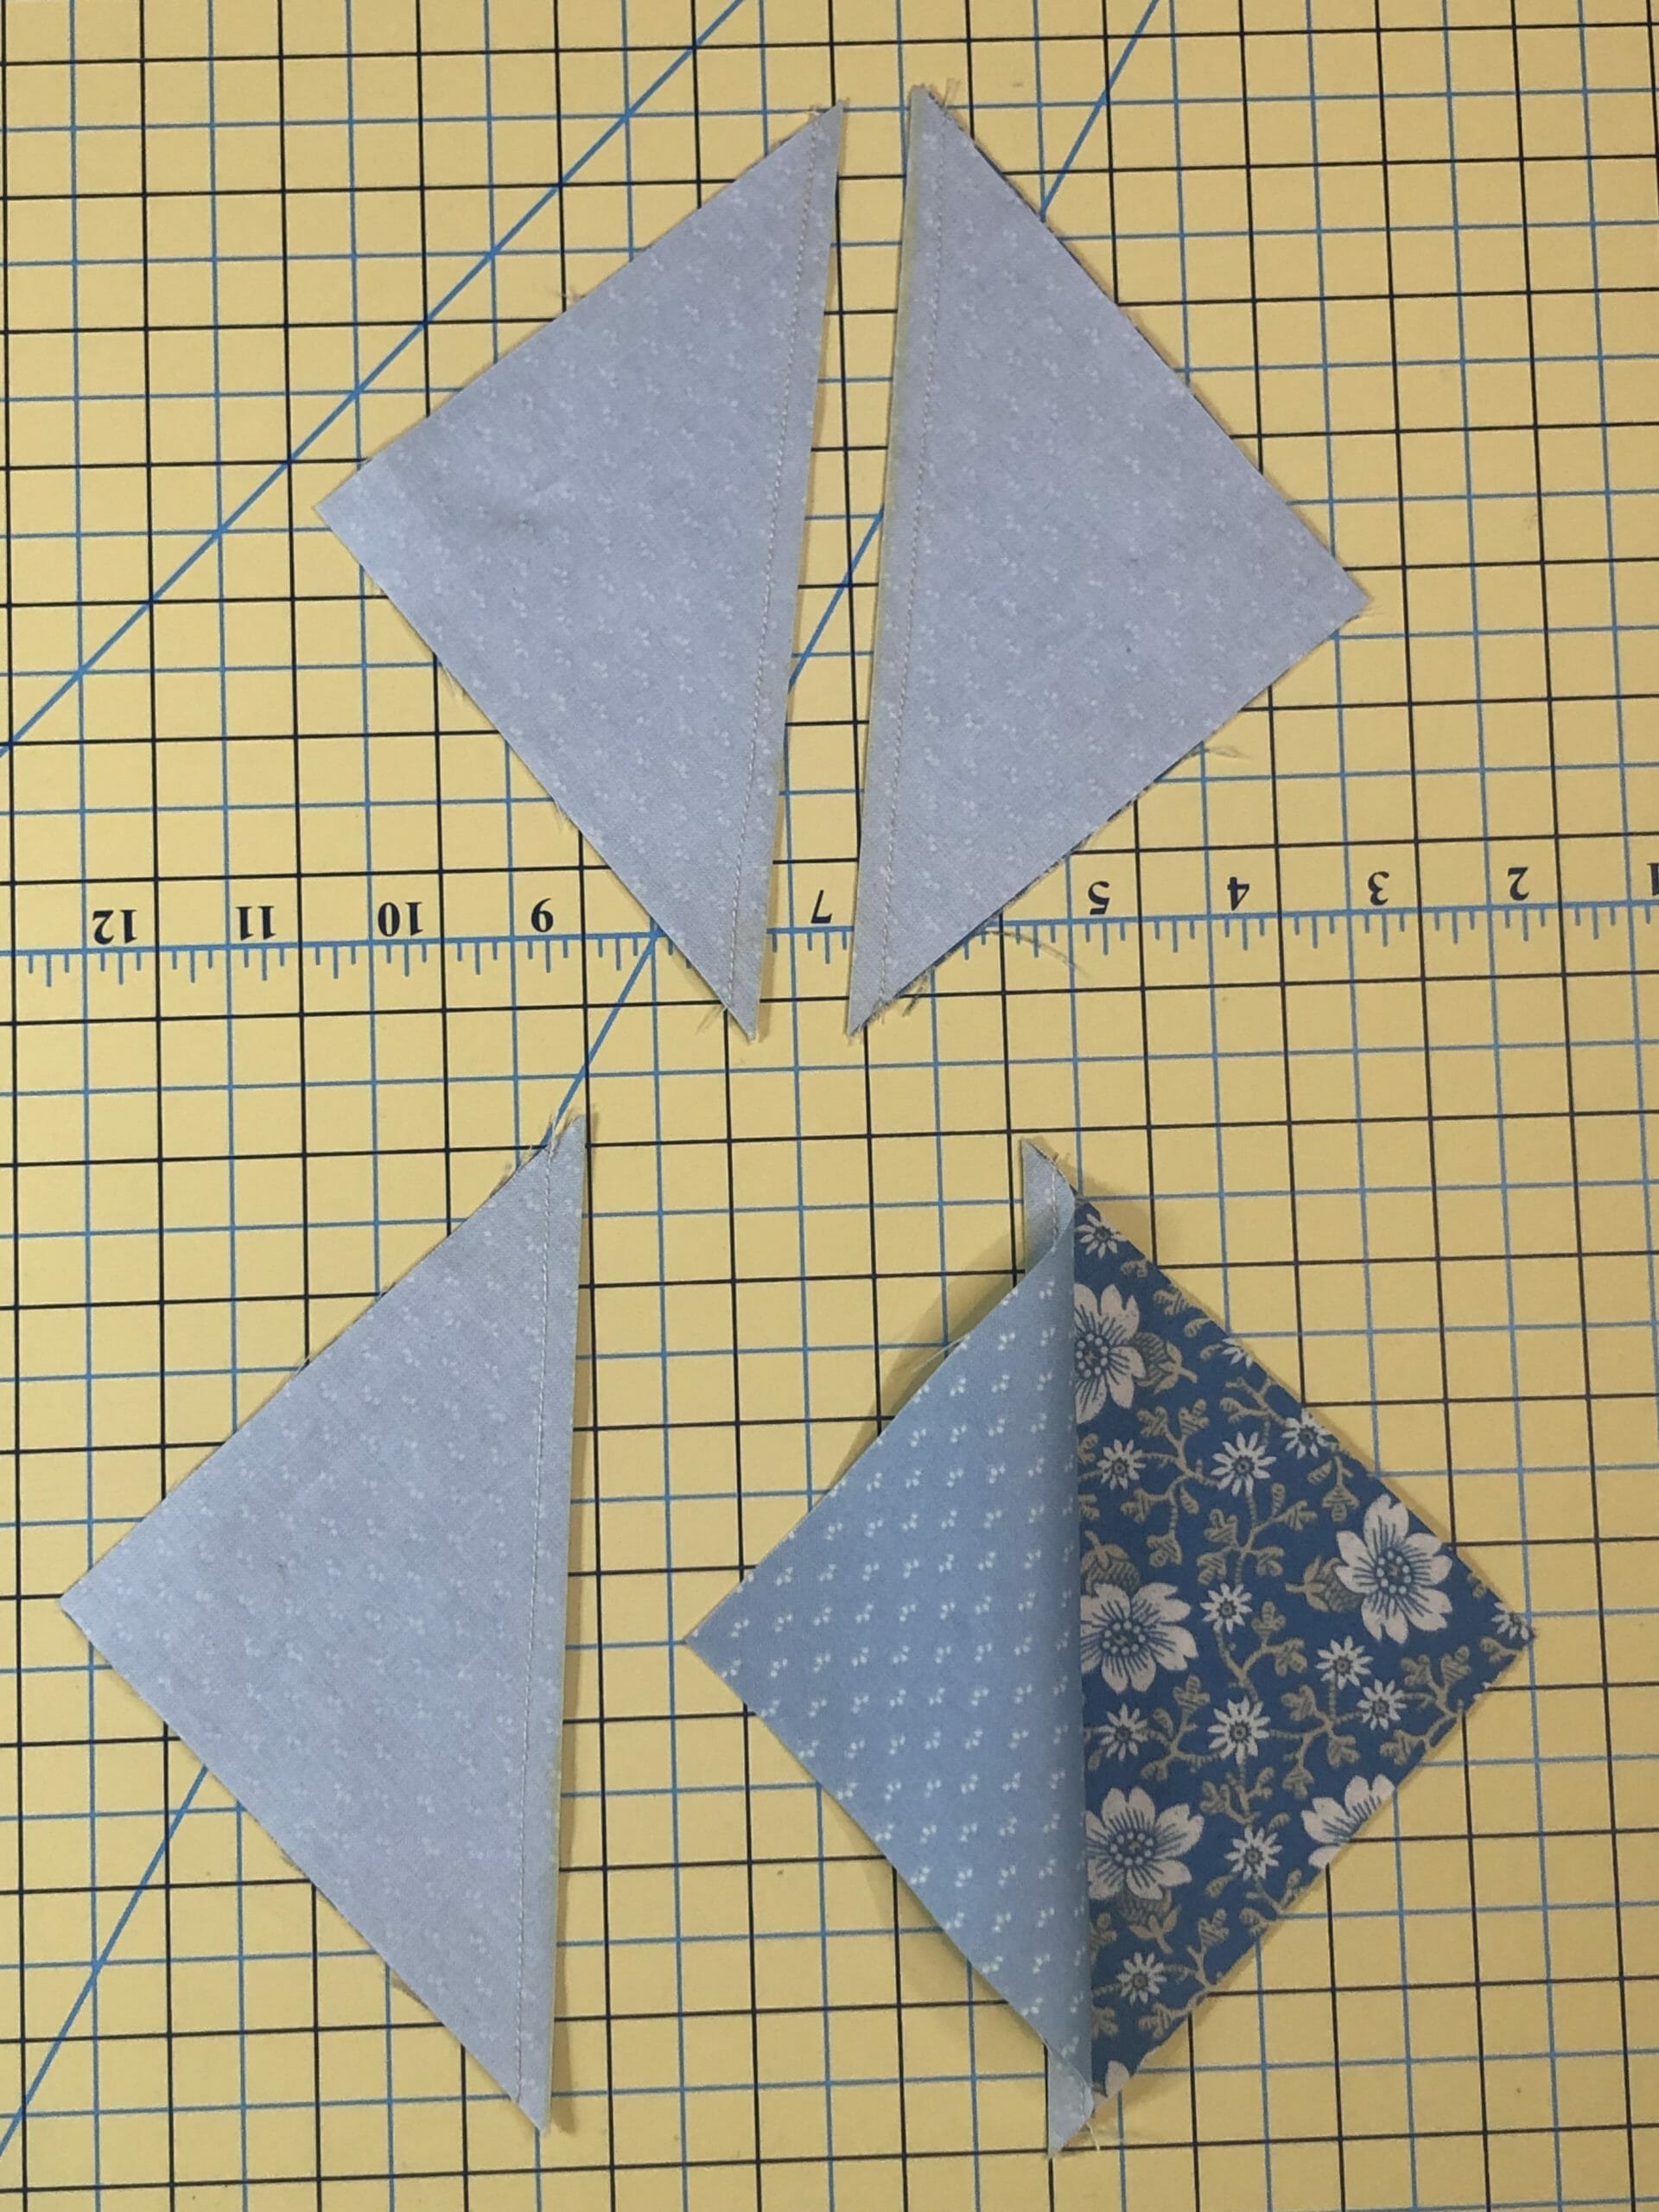
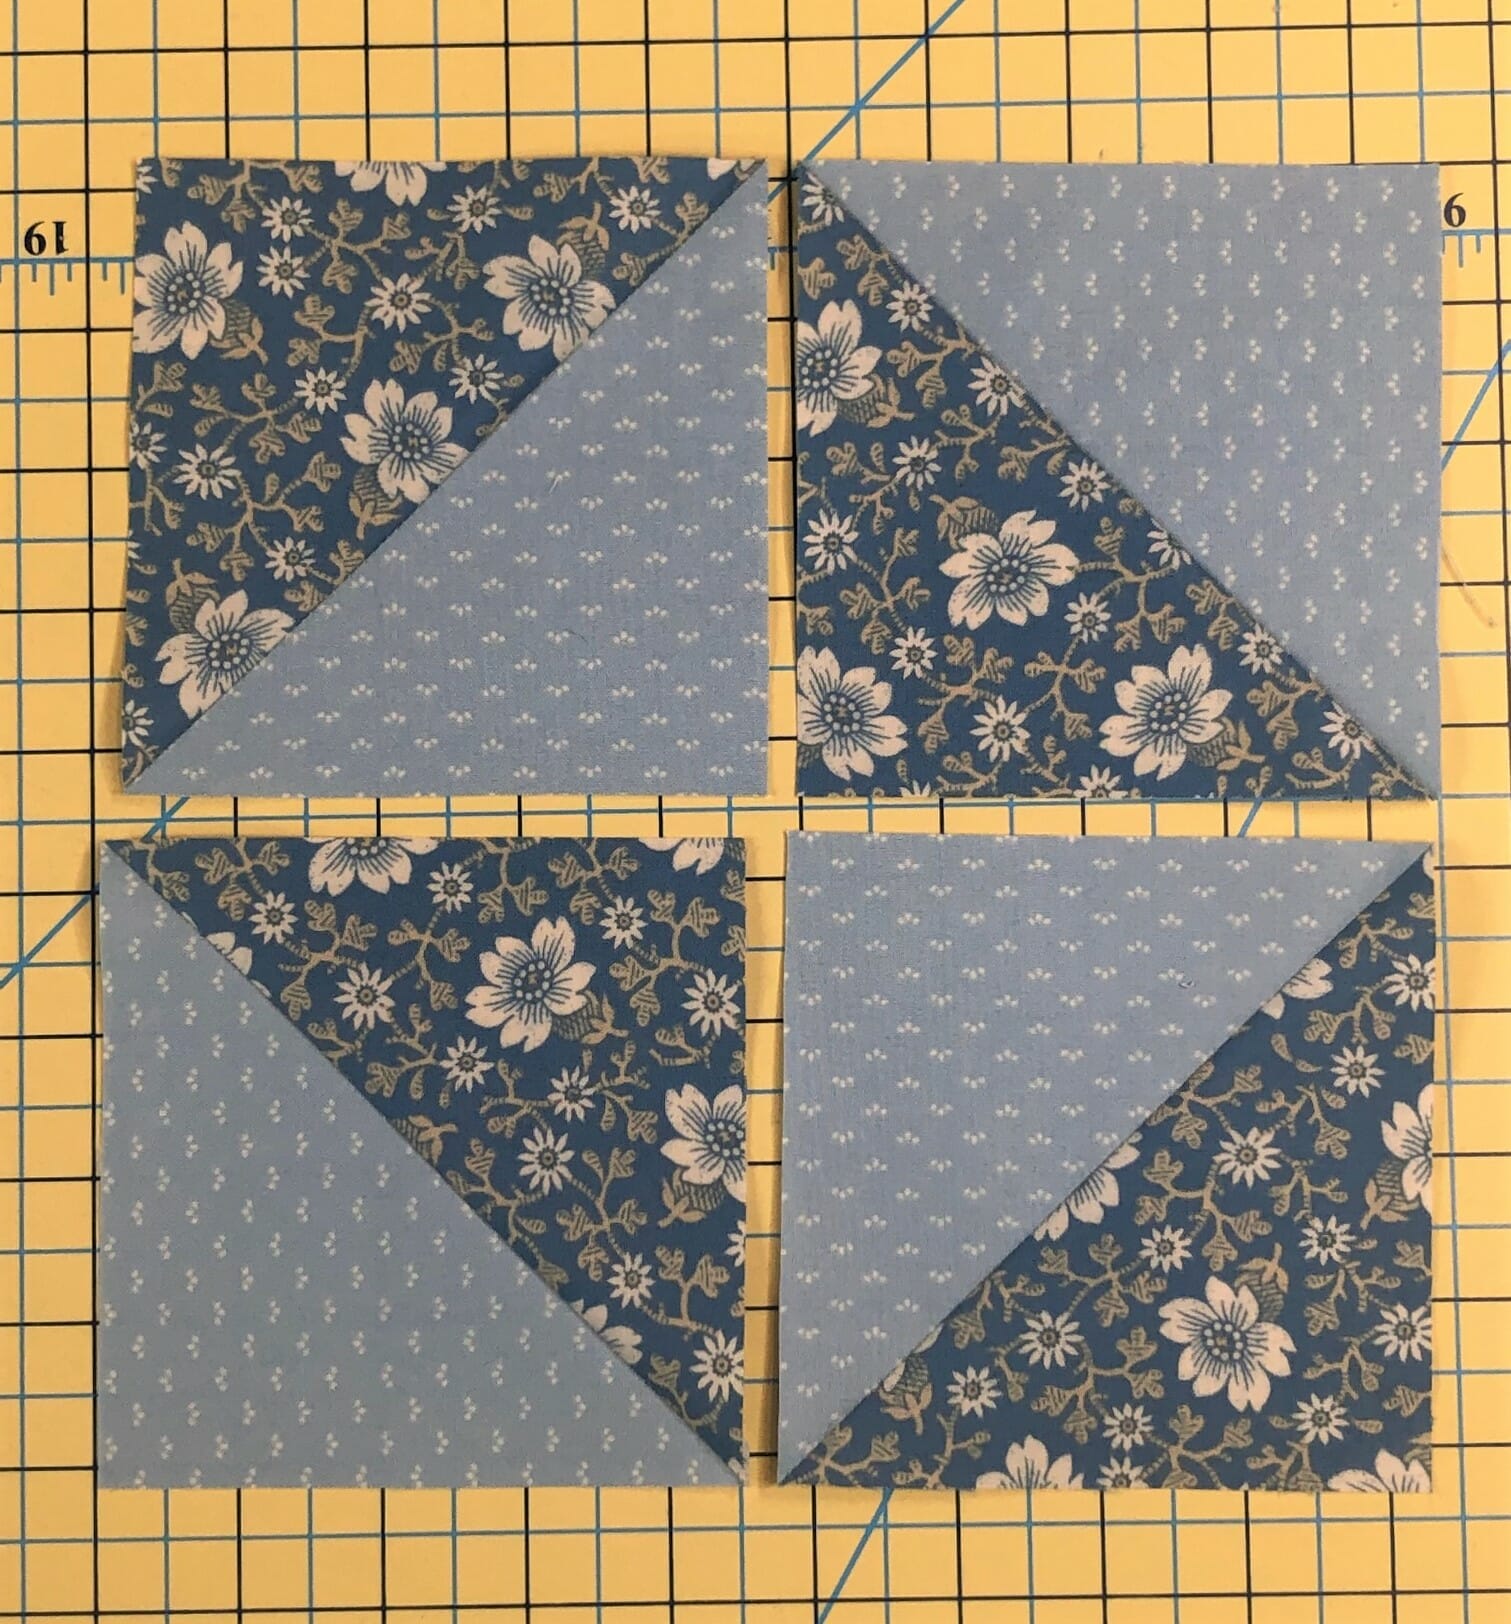
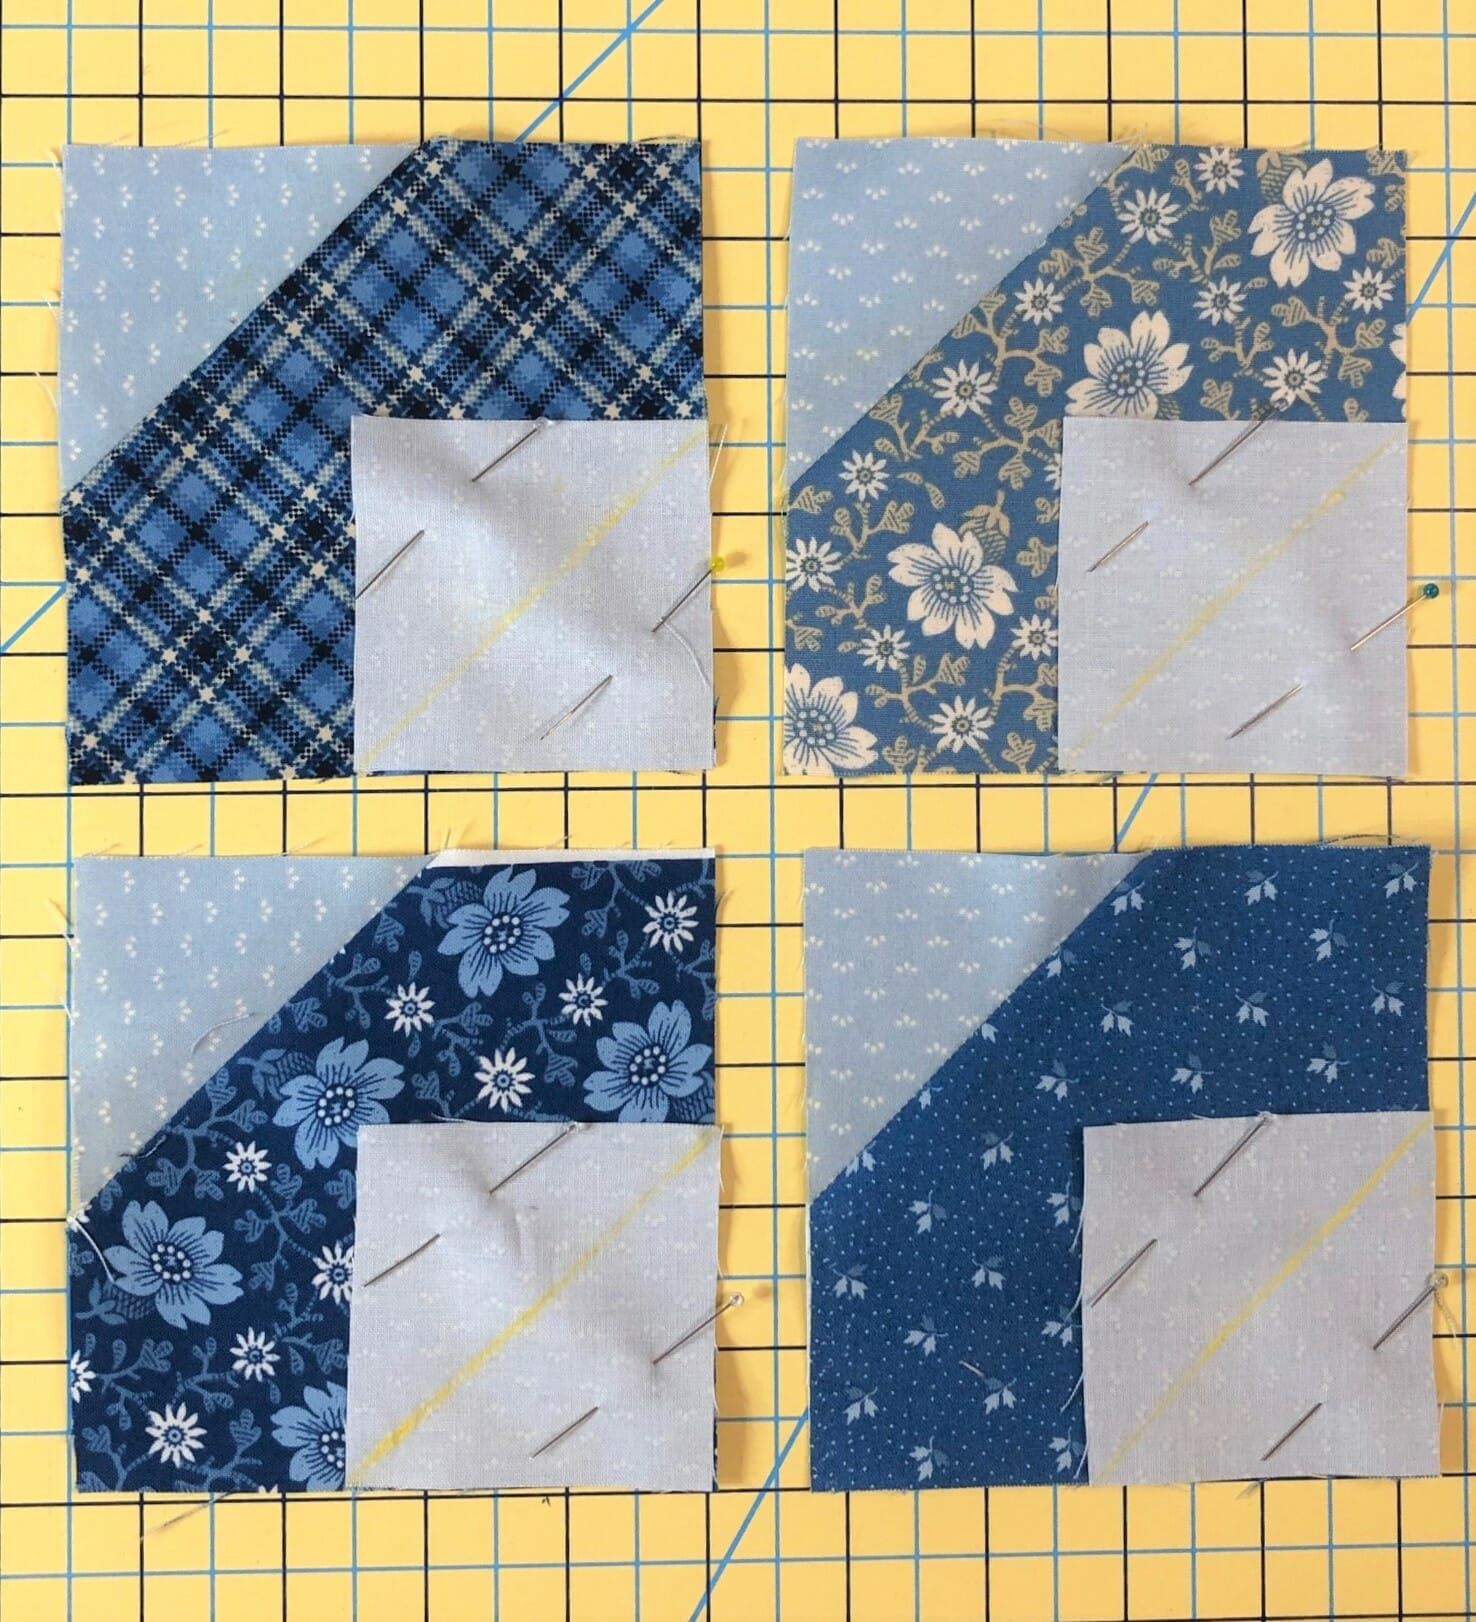
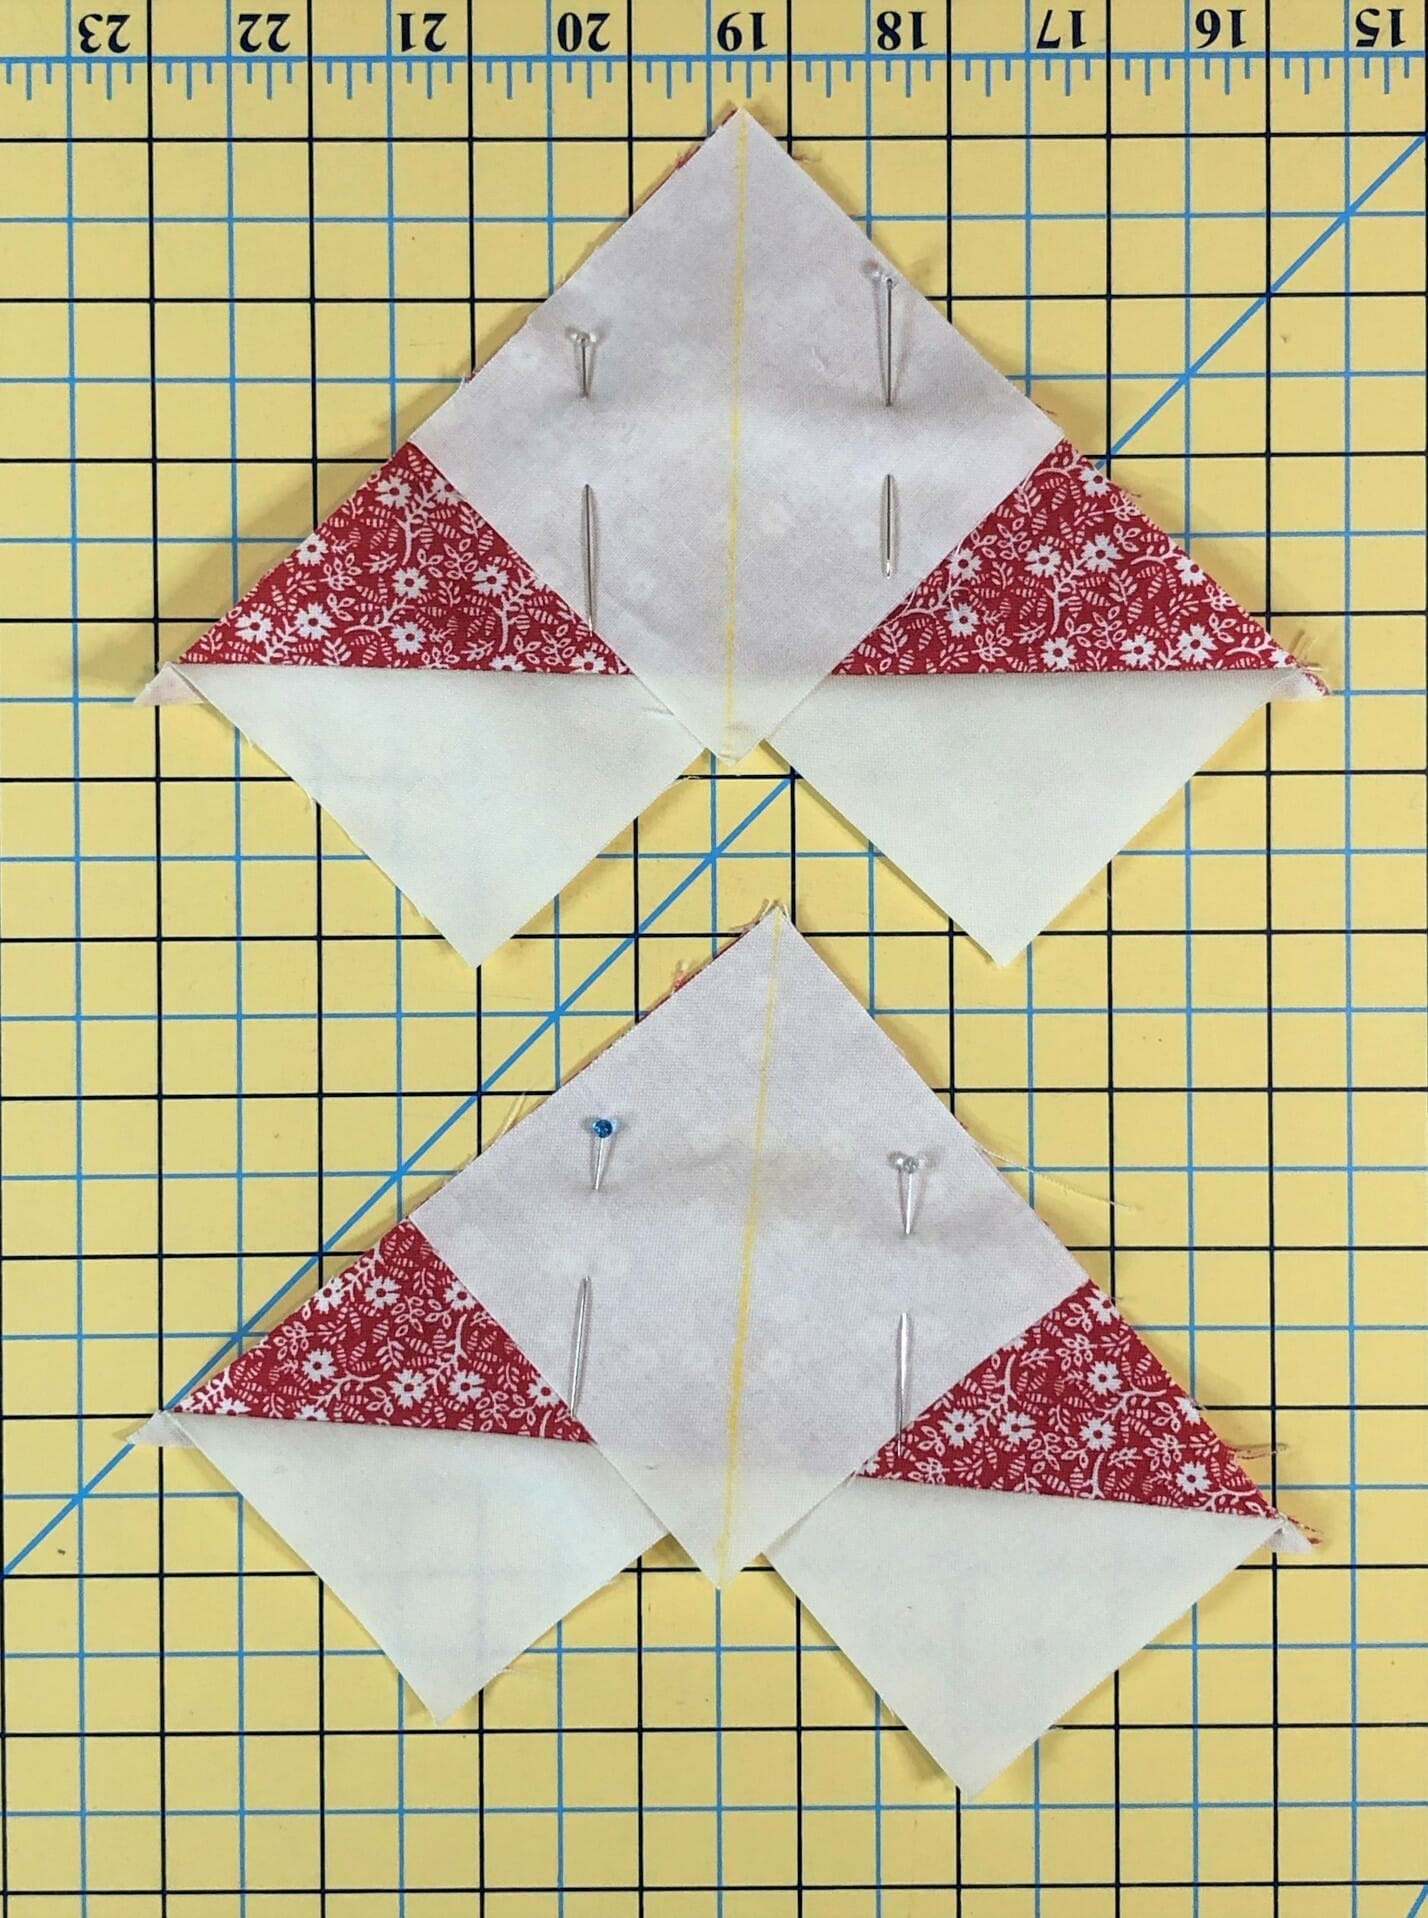
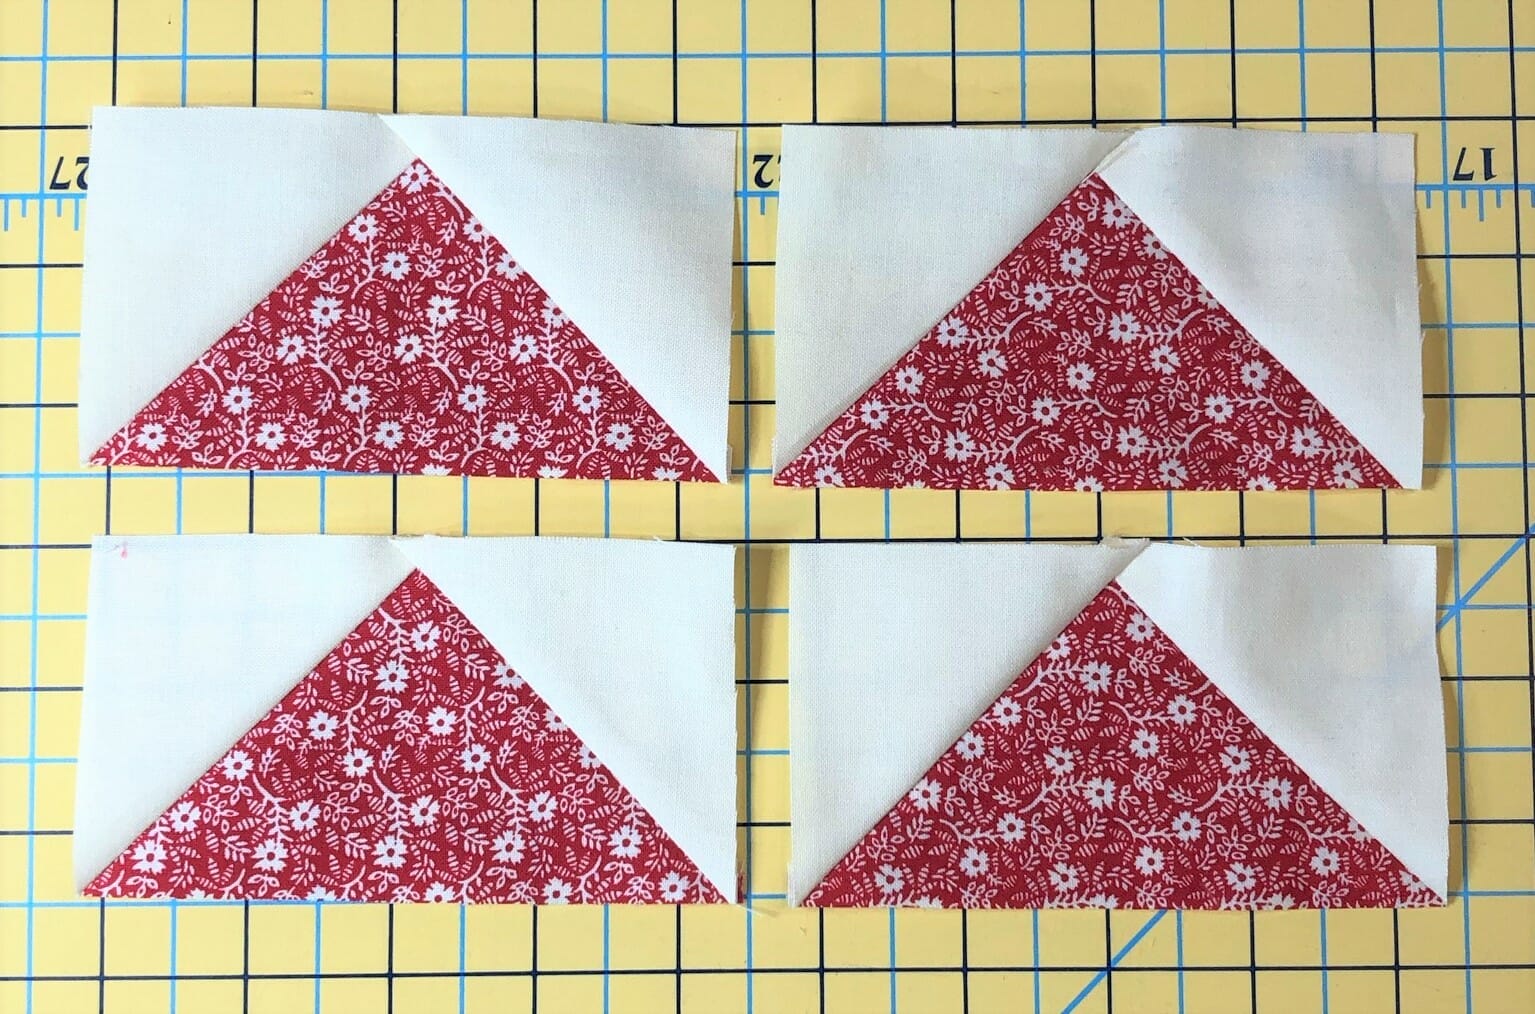
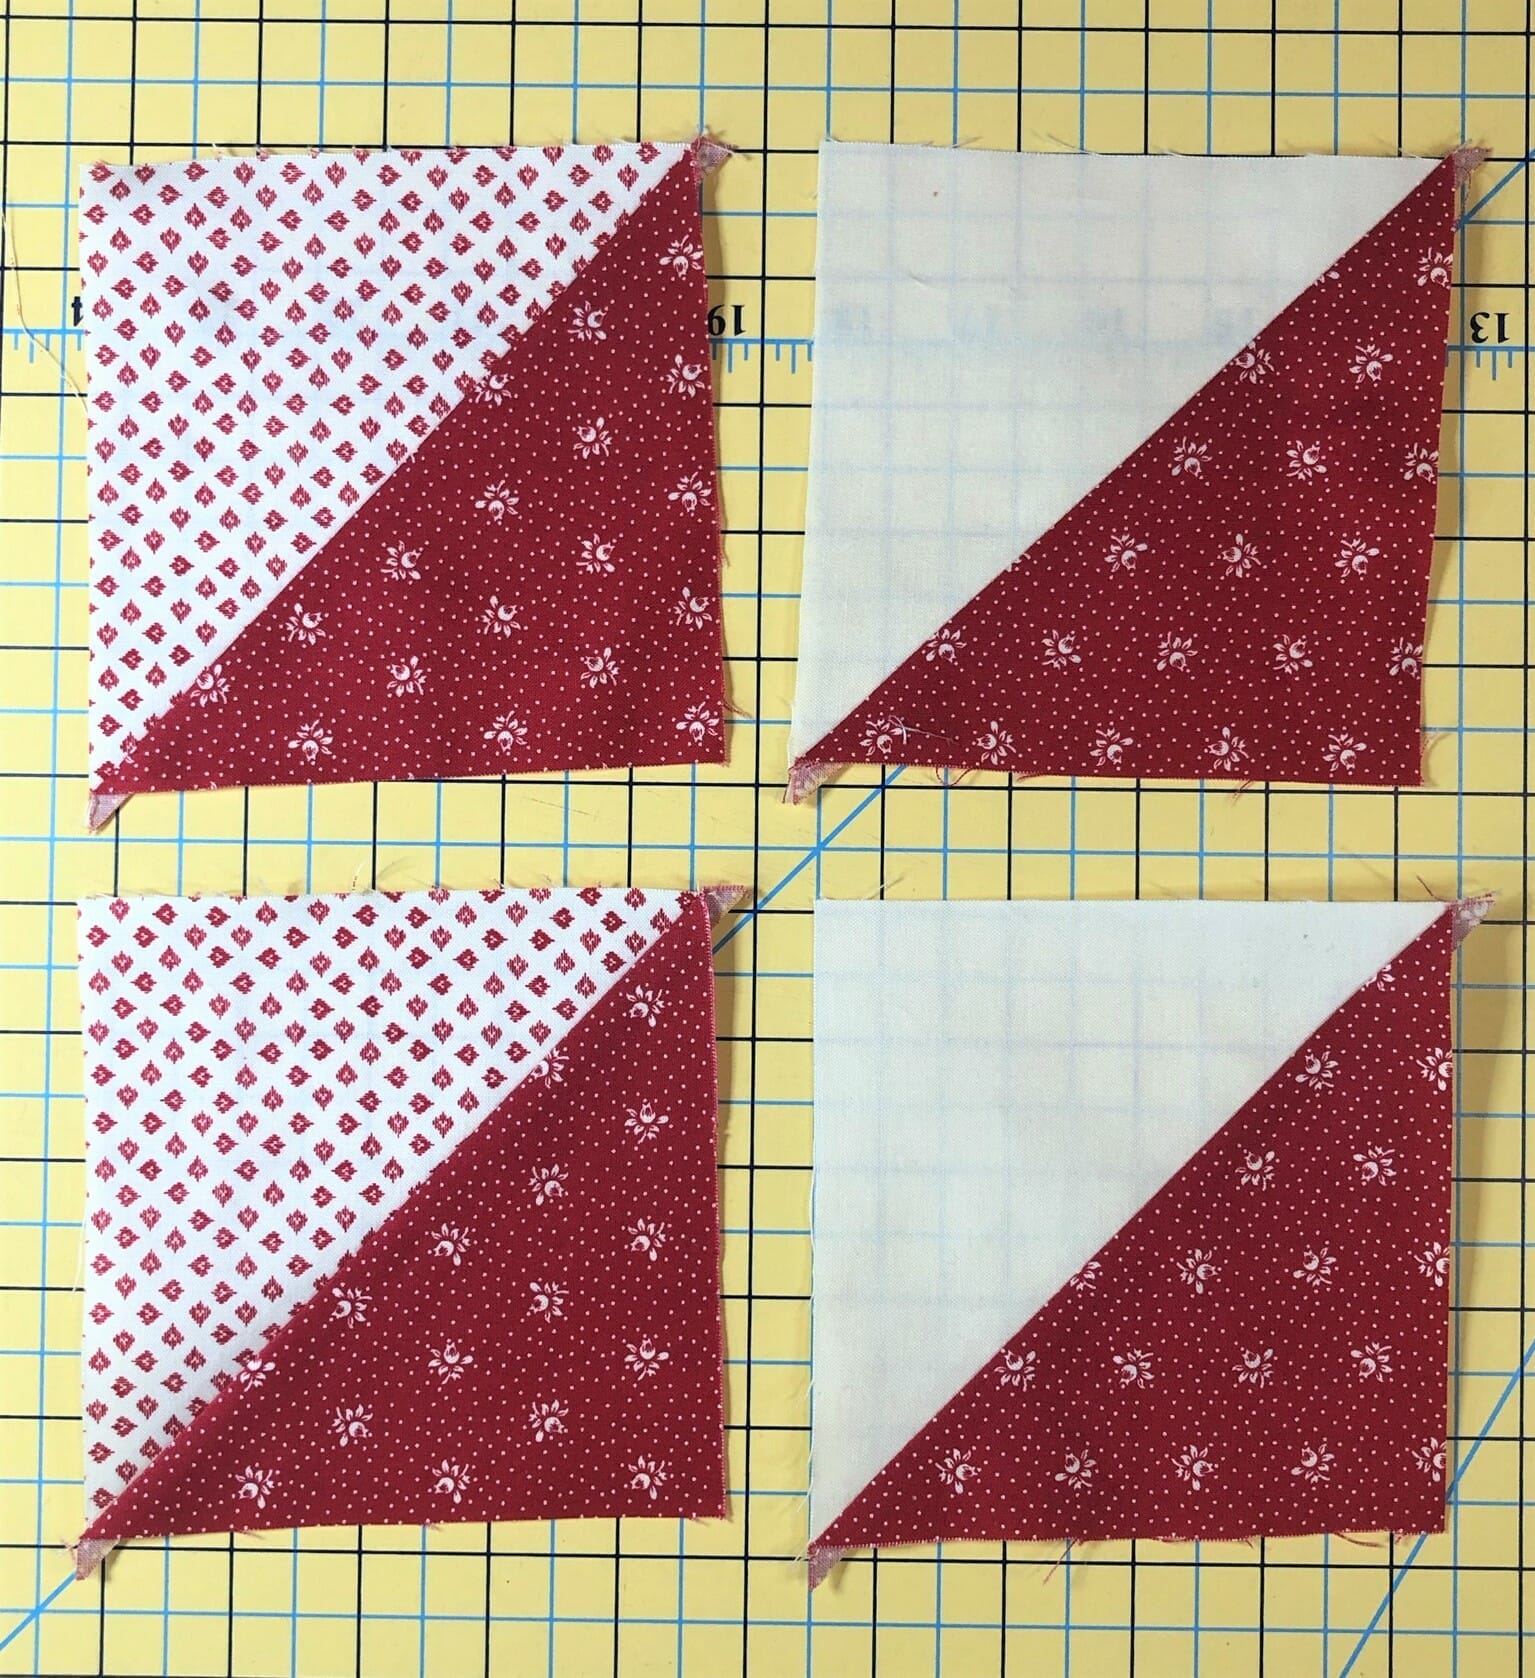
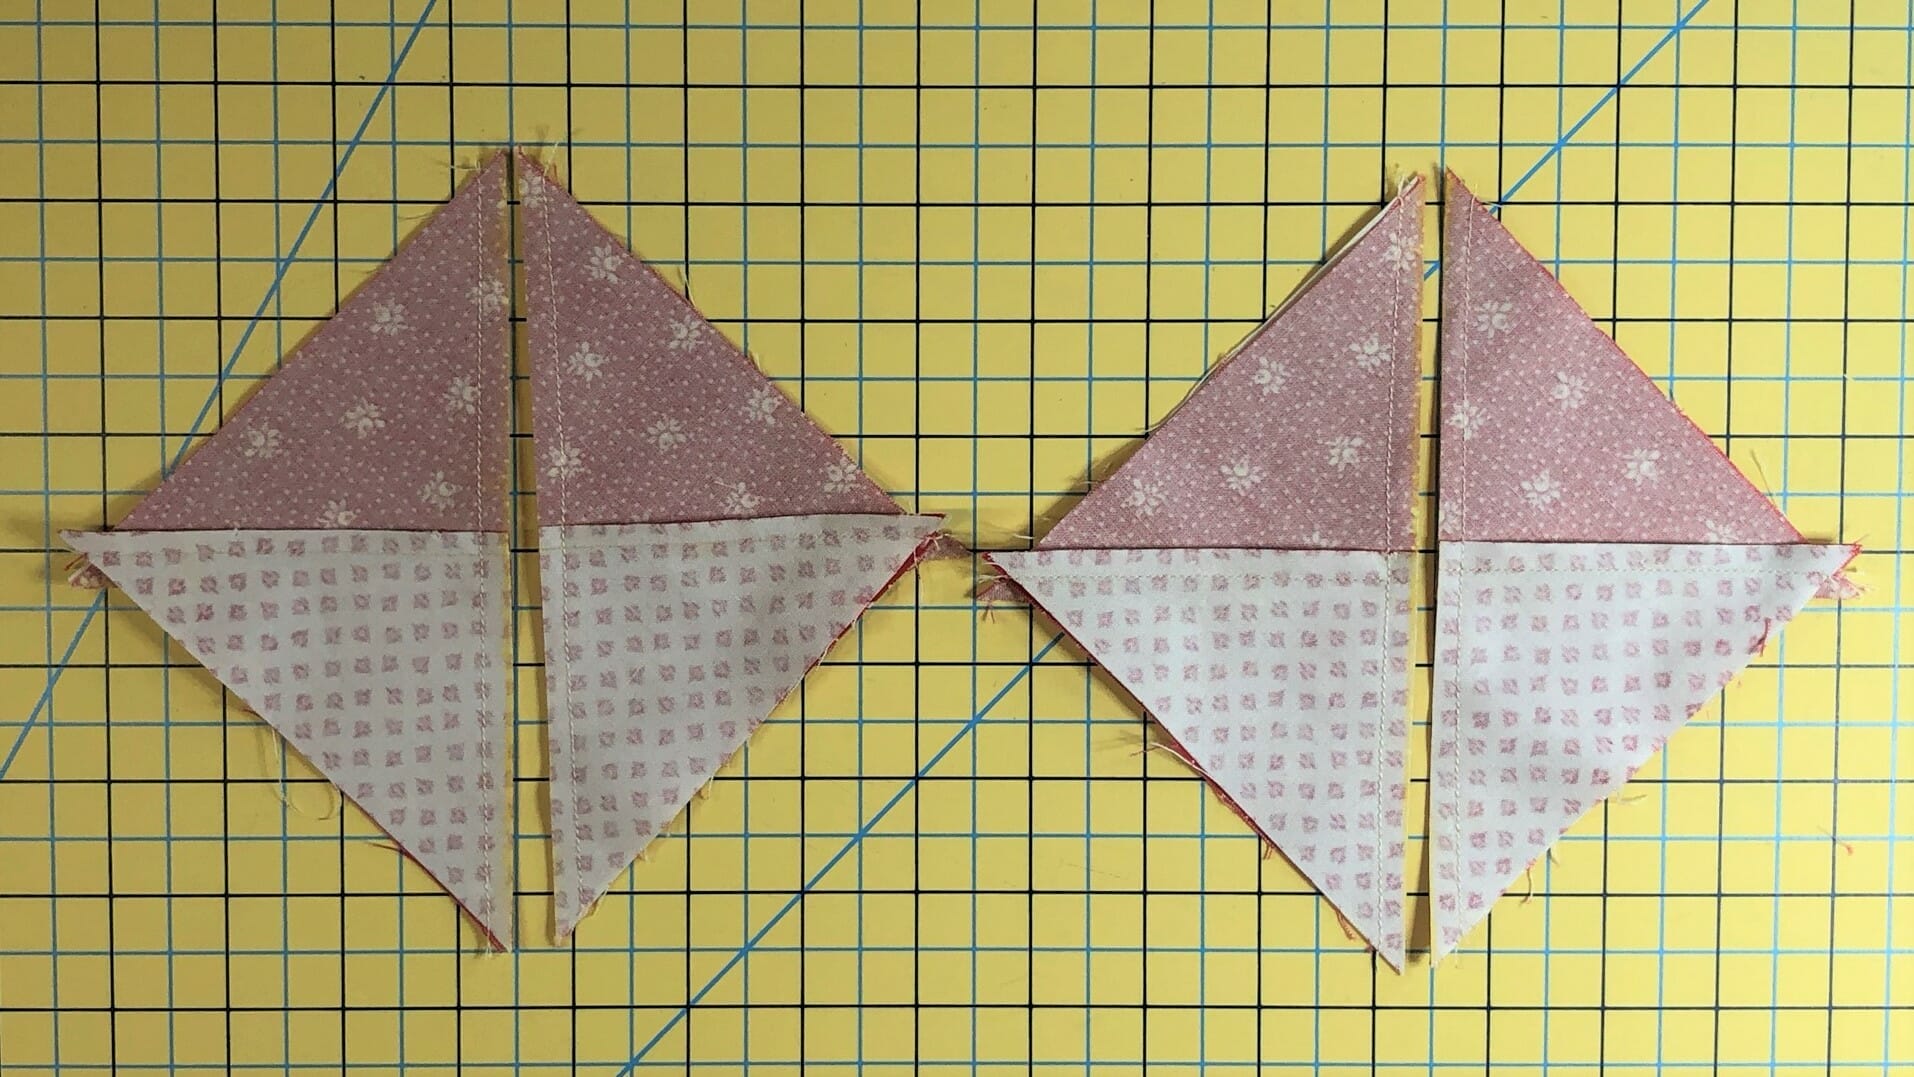
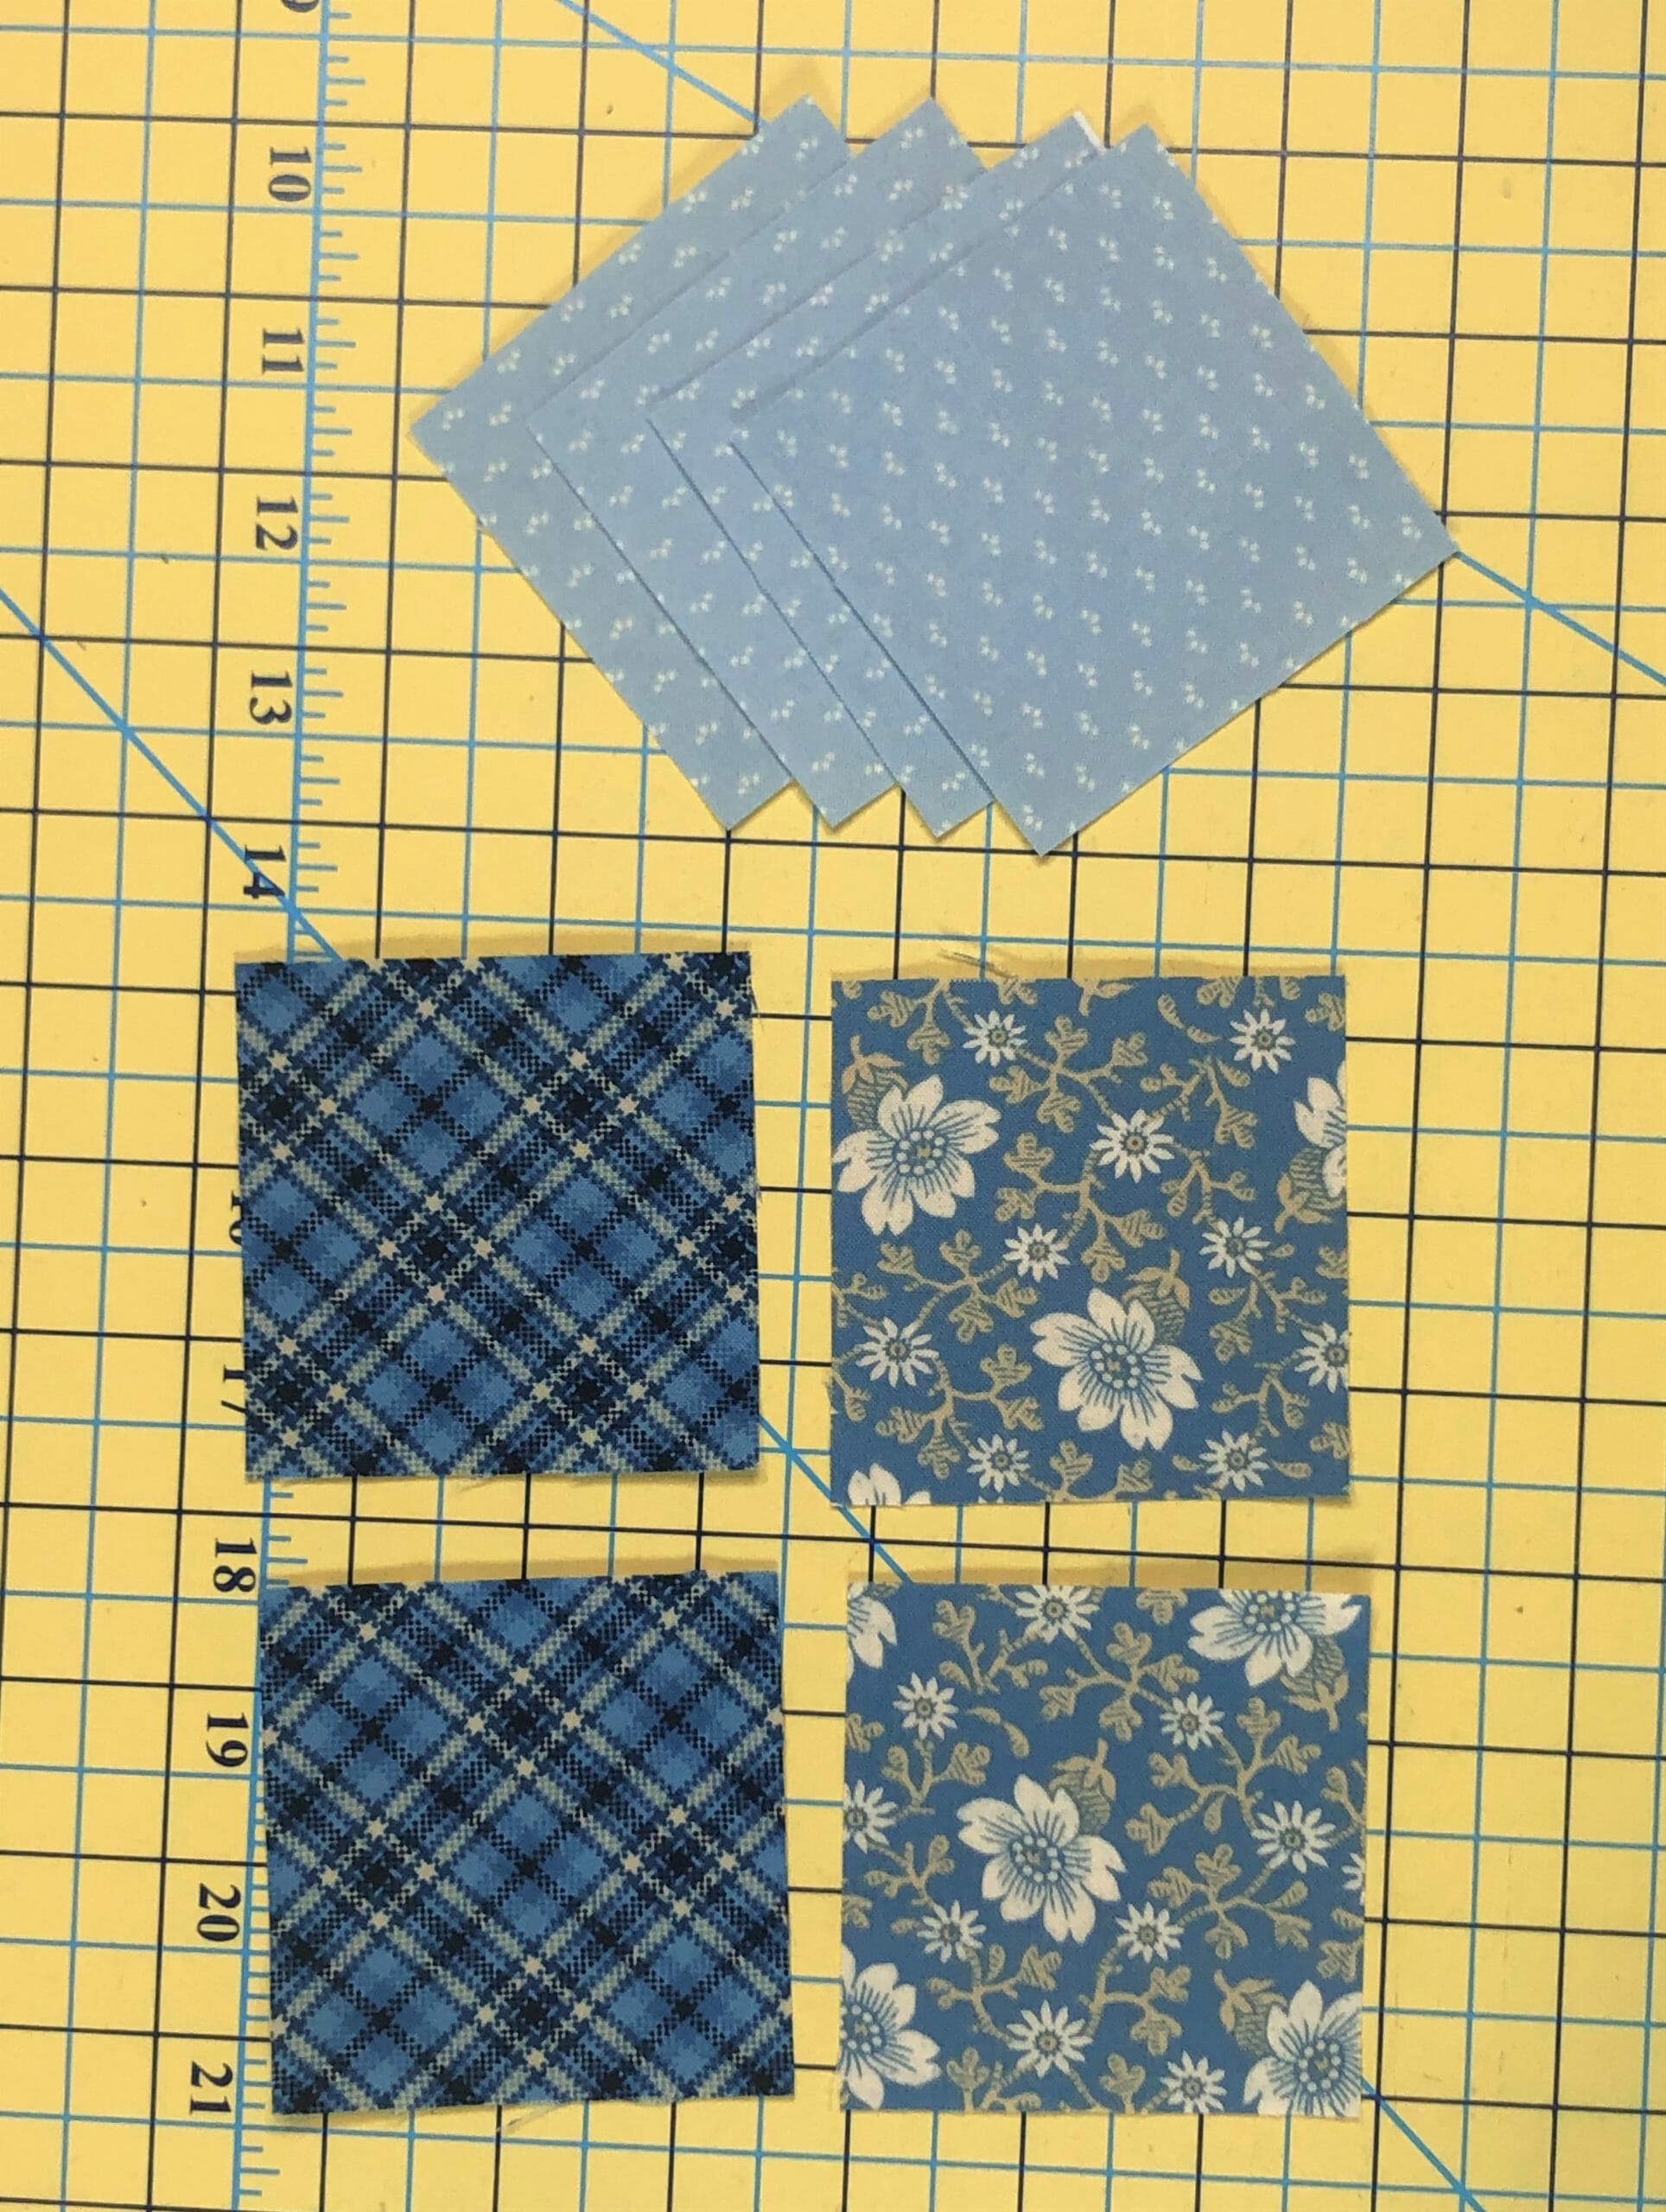
In steps 2 and 3 we will make eight half square triangles – four of each kind.

I’ve cut all the squares and am ready to pair them up and mark them for sewing.

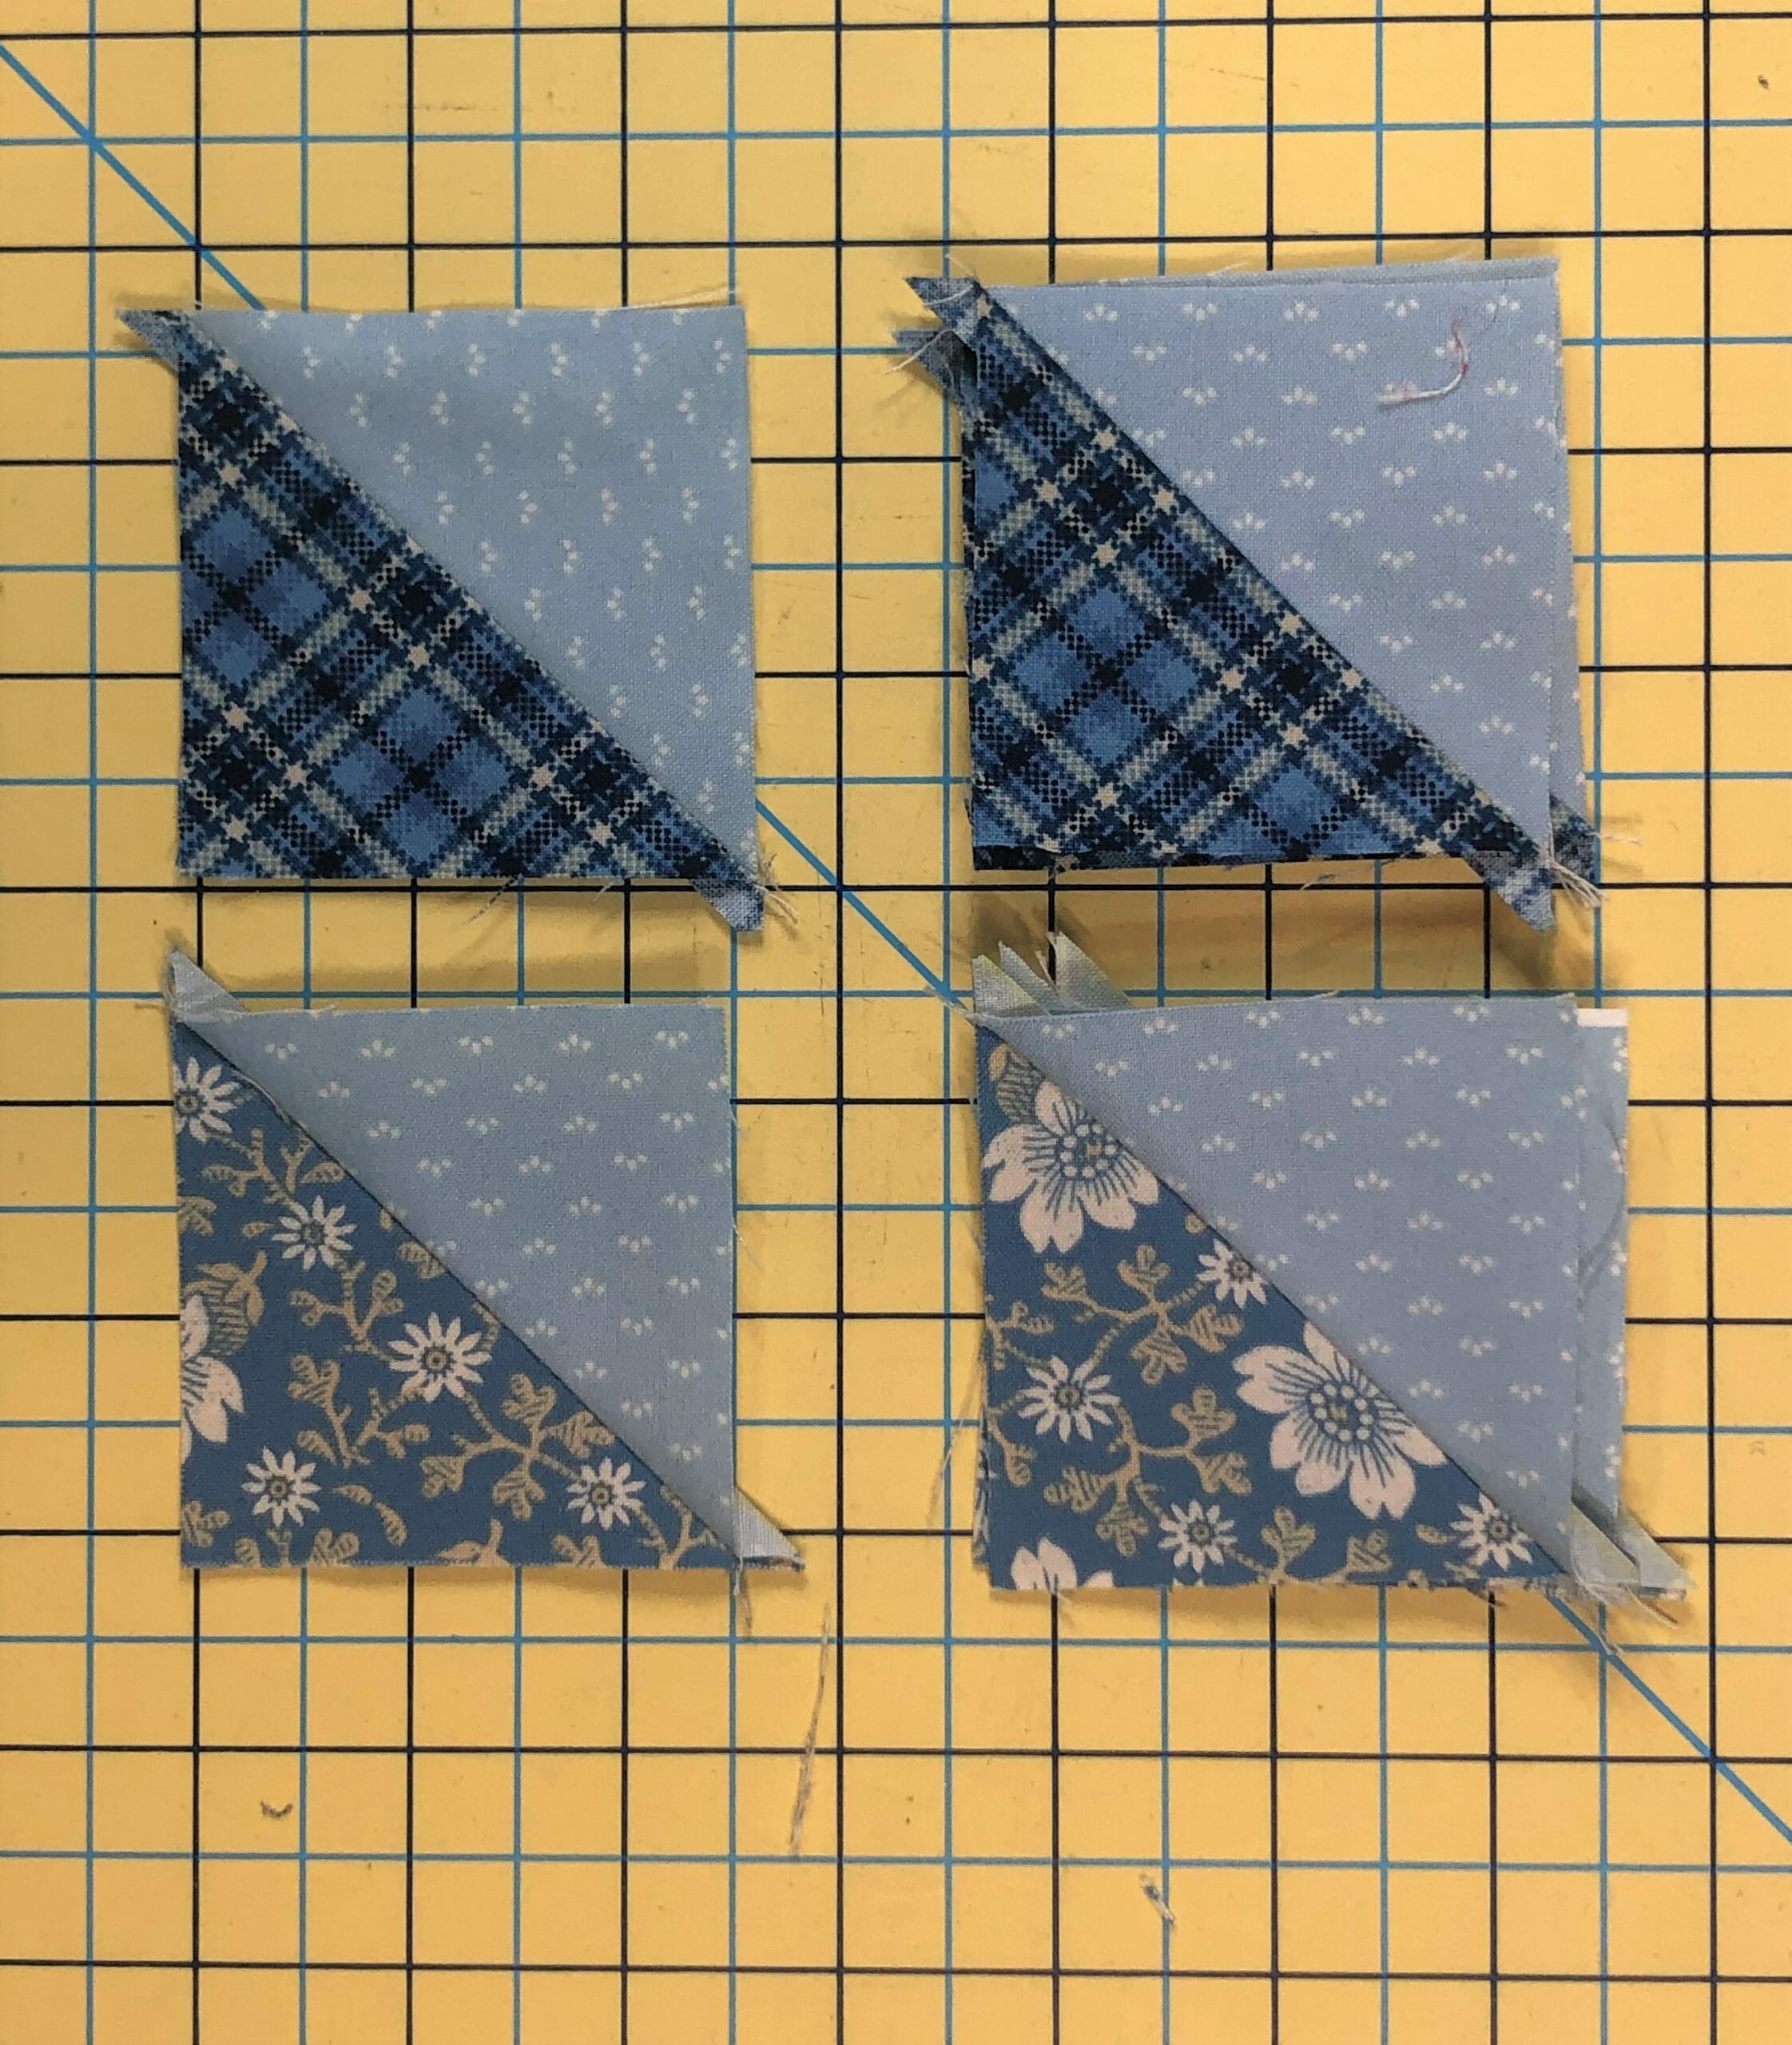
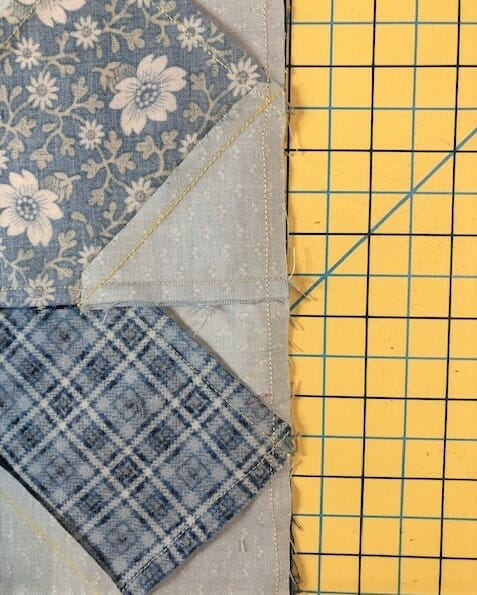
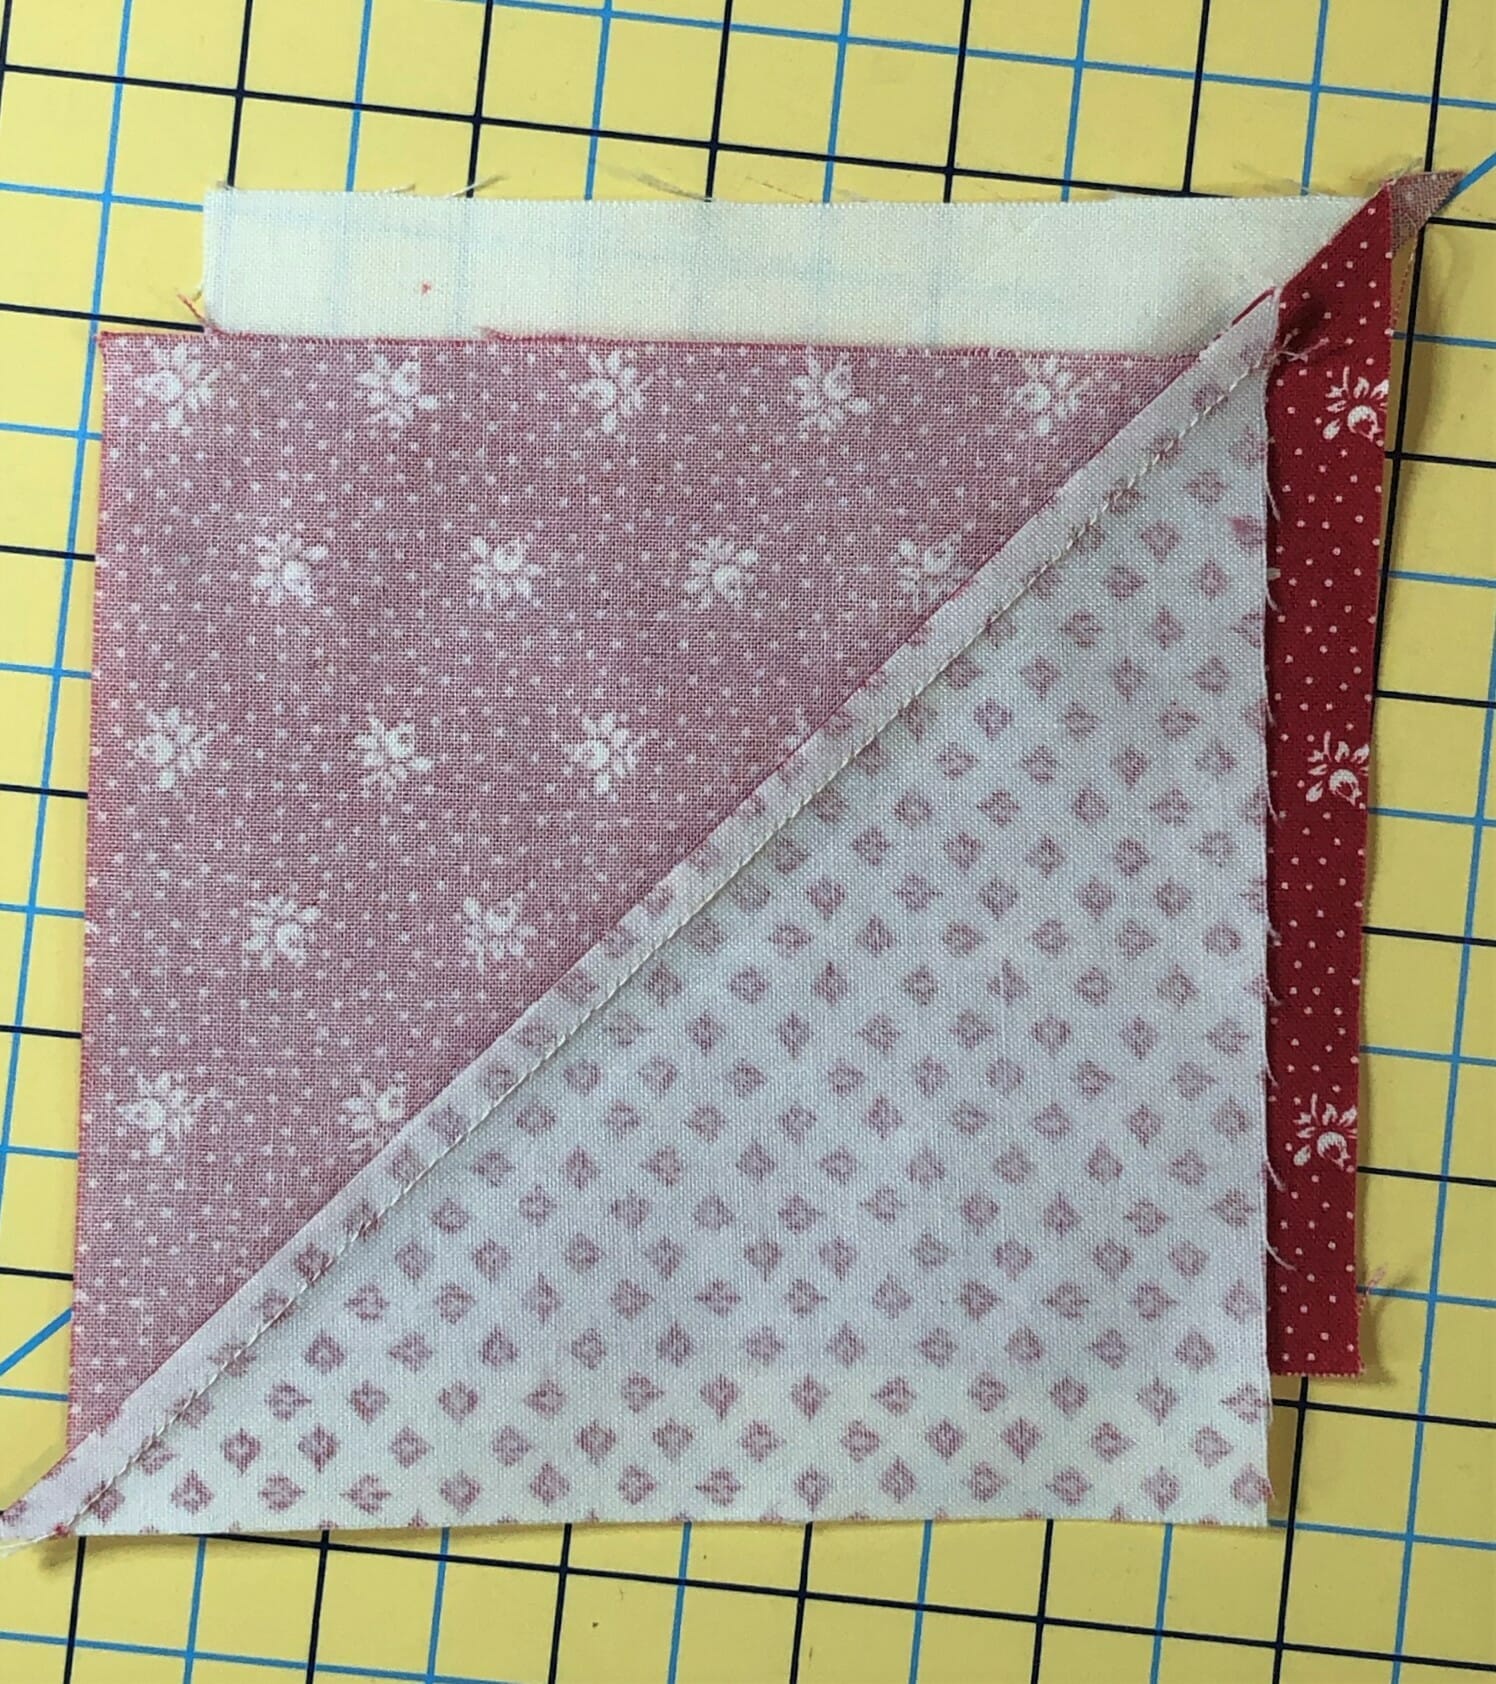
Once the HSTs are sewn and trimmed, I paired them up to get ready to sew them together. Just make sure to keep the Cabin Plaid on the right side of each unit as you sew.

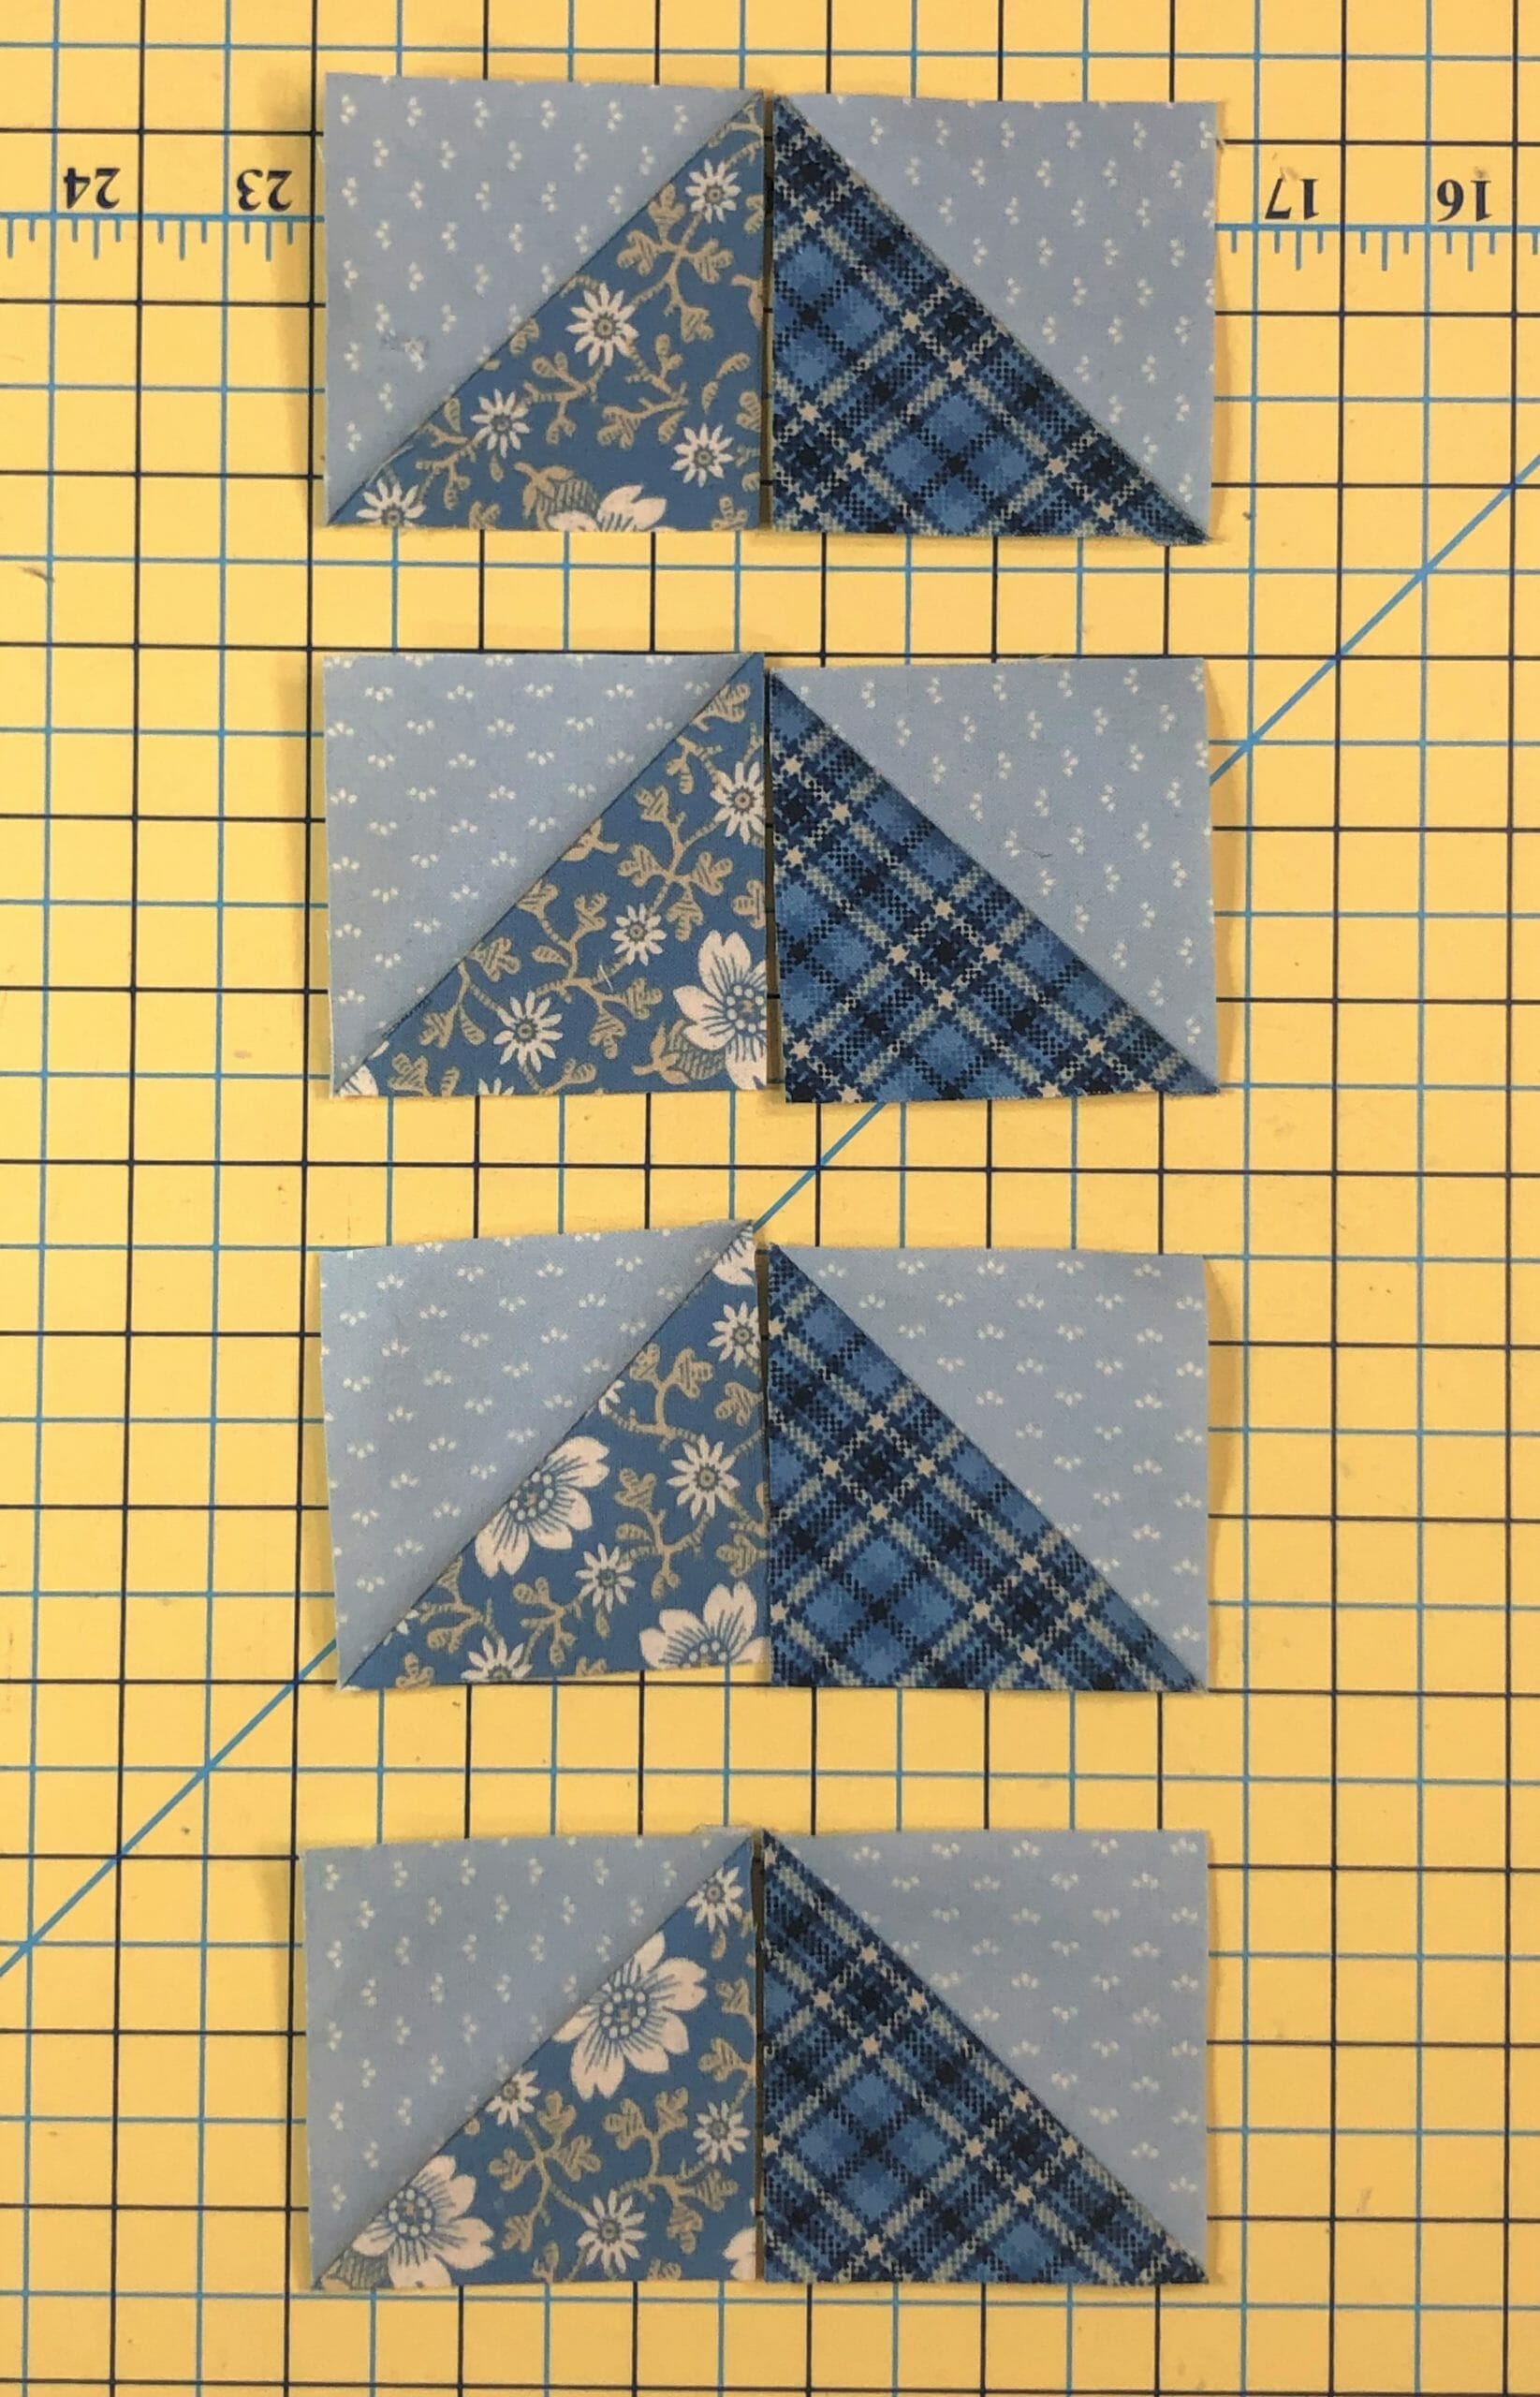
Take two of those completed pairs and sew them to the sides of the four patch. Sew the H squares to the ends of the remaining two units, and then sew those to the top and bottom to complete the center block. If you’ve followed the pressing arrows, all the seams should nest together.

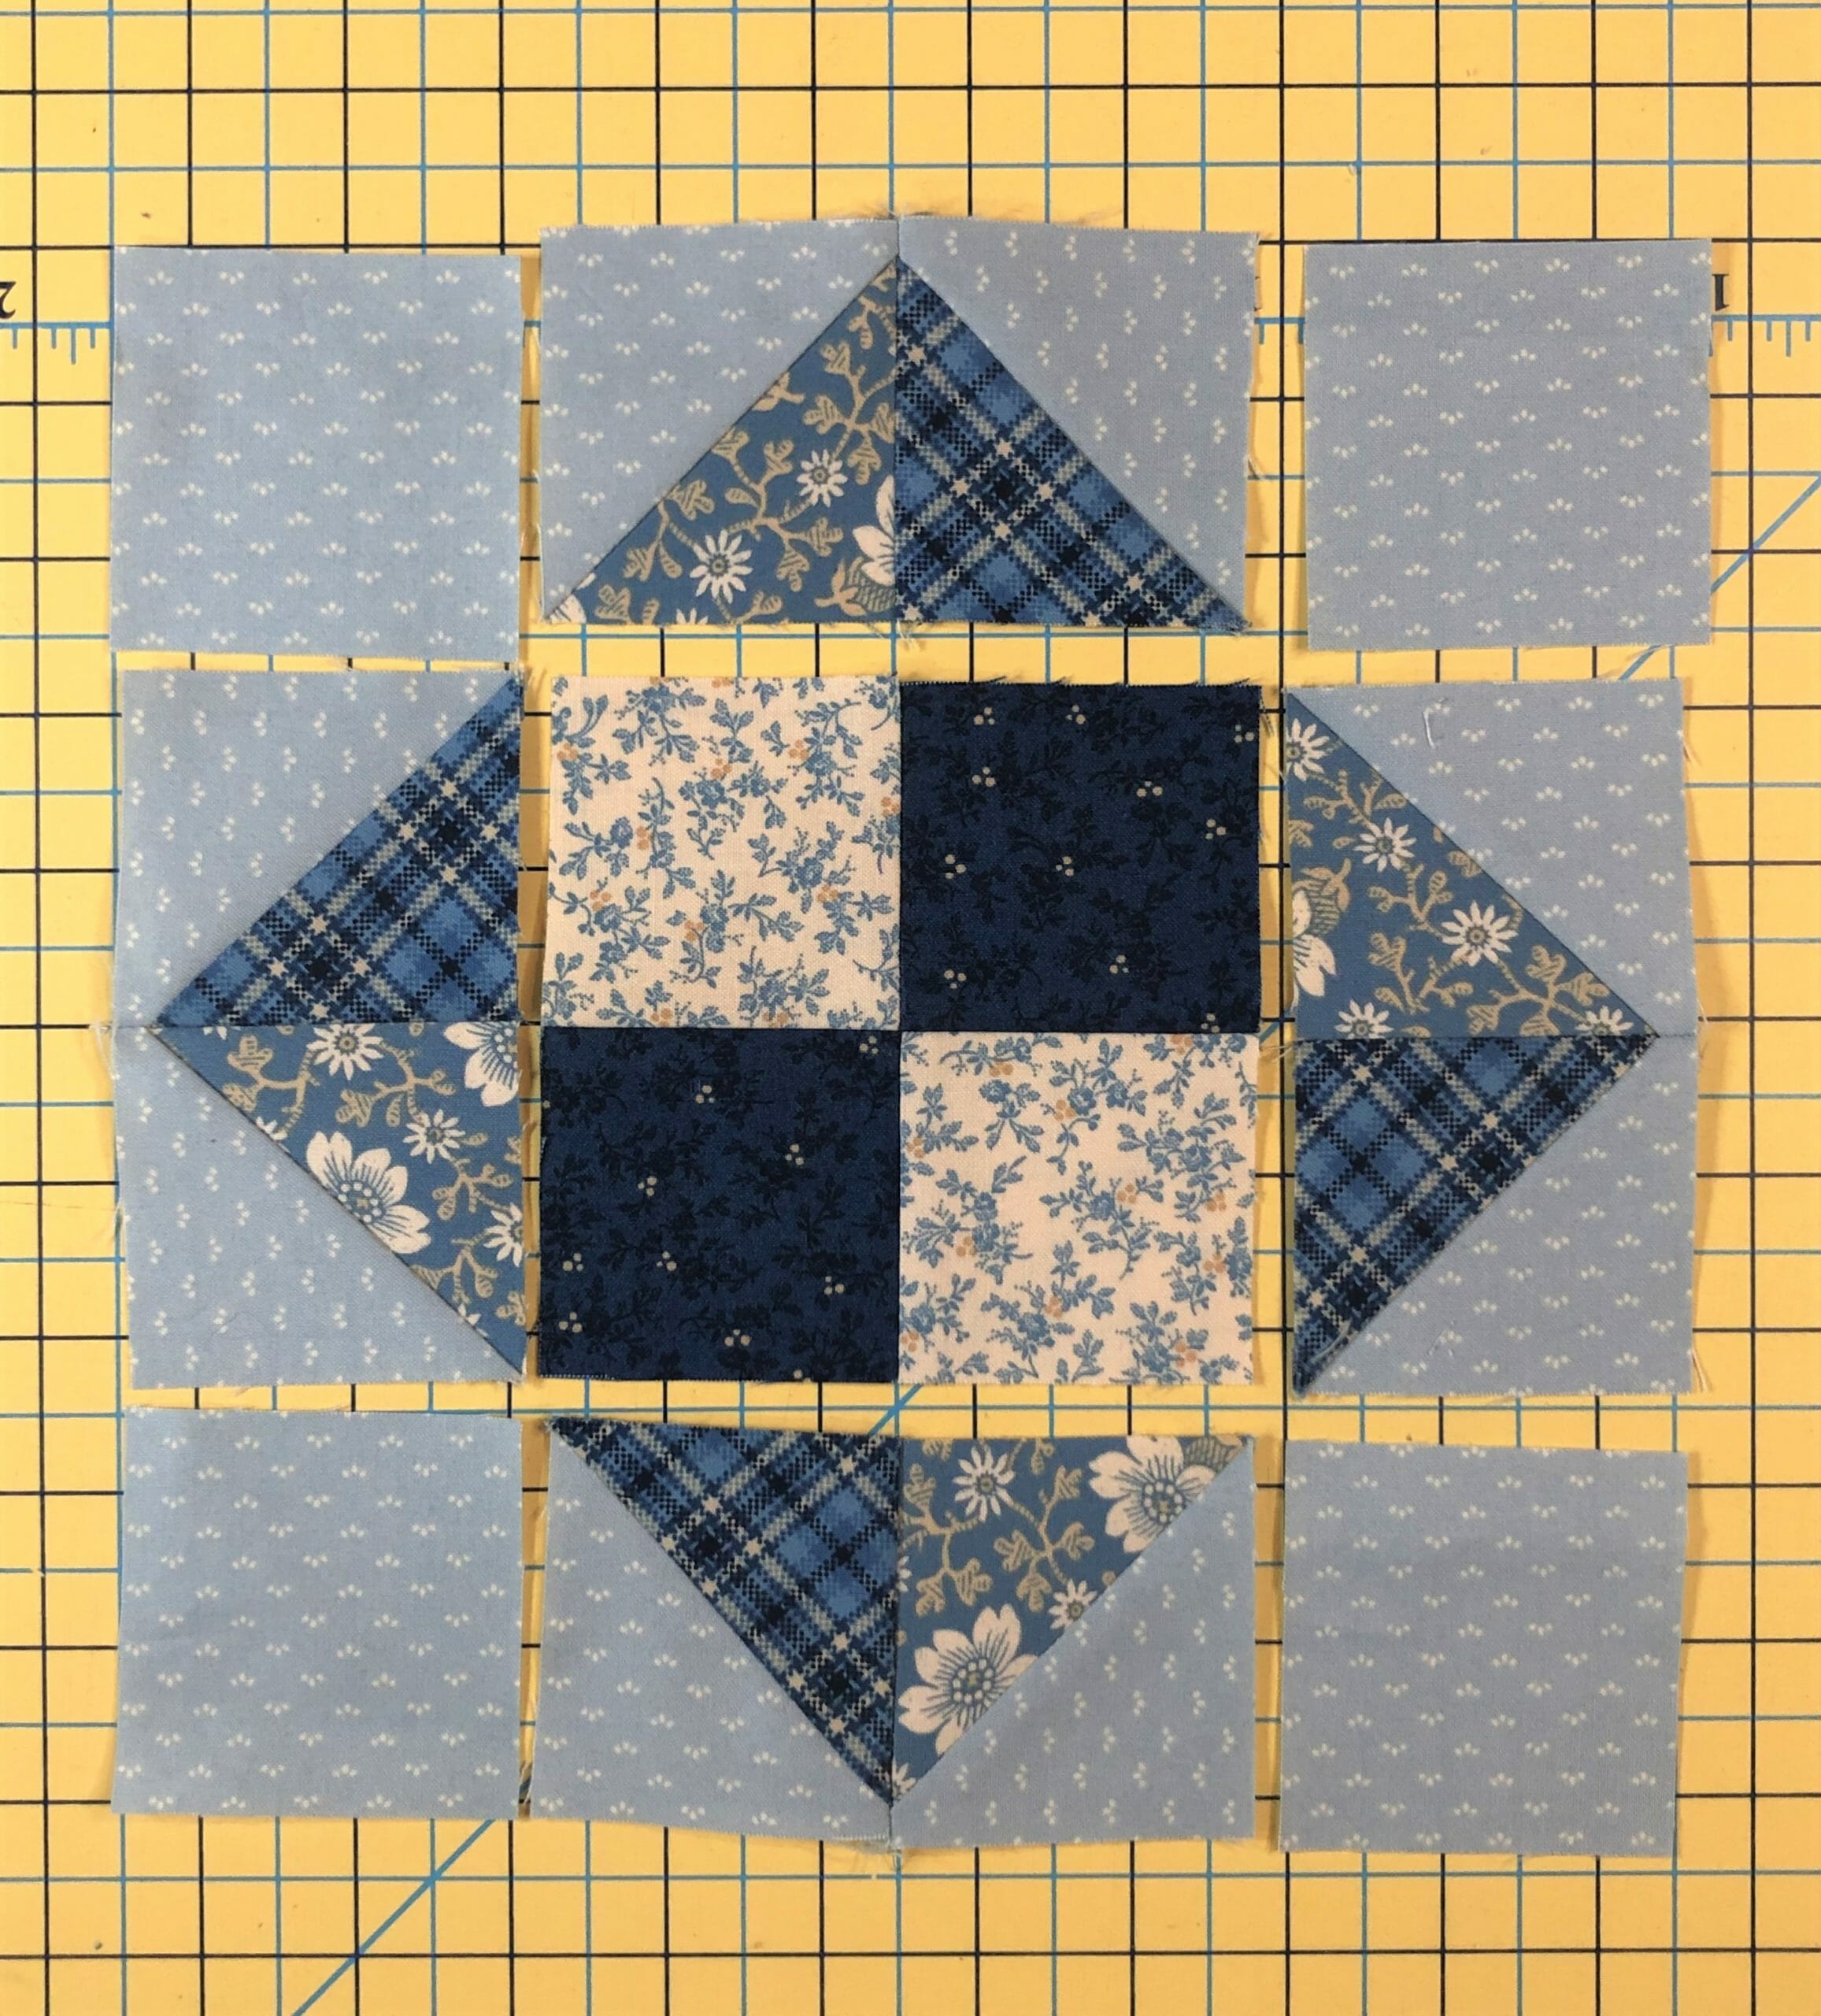
Now all we have to do is assemble and sew on our usual HST borders, and the block is finished!


Block # 18

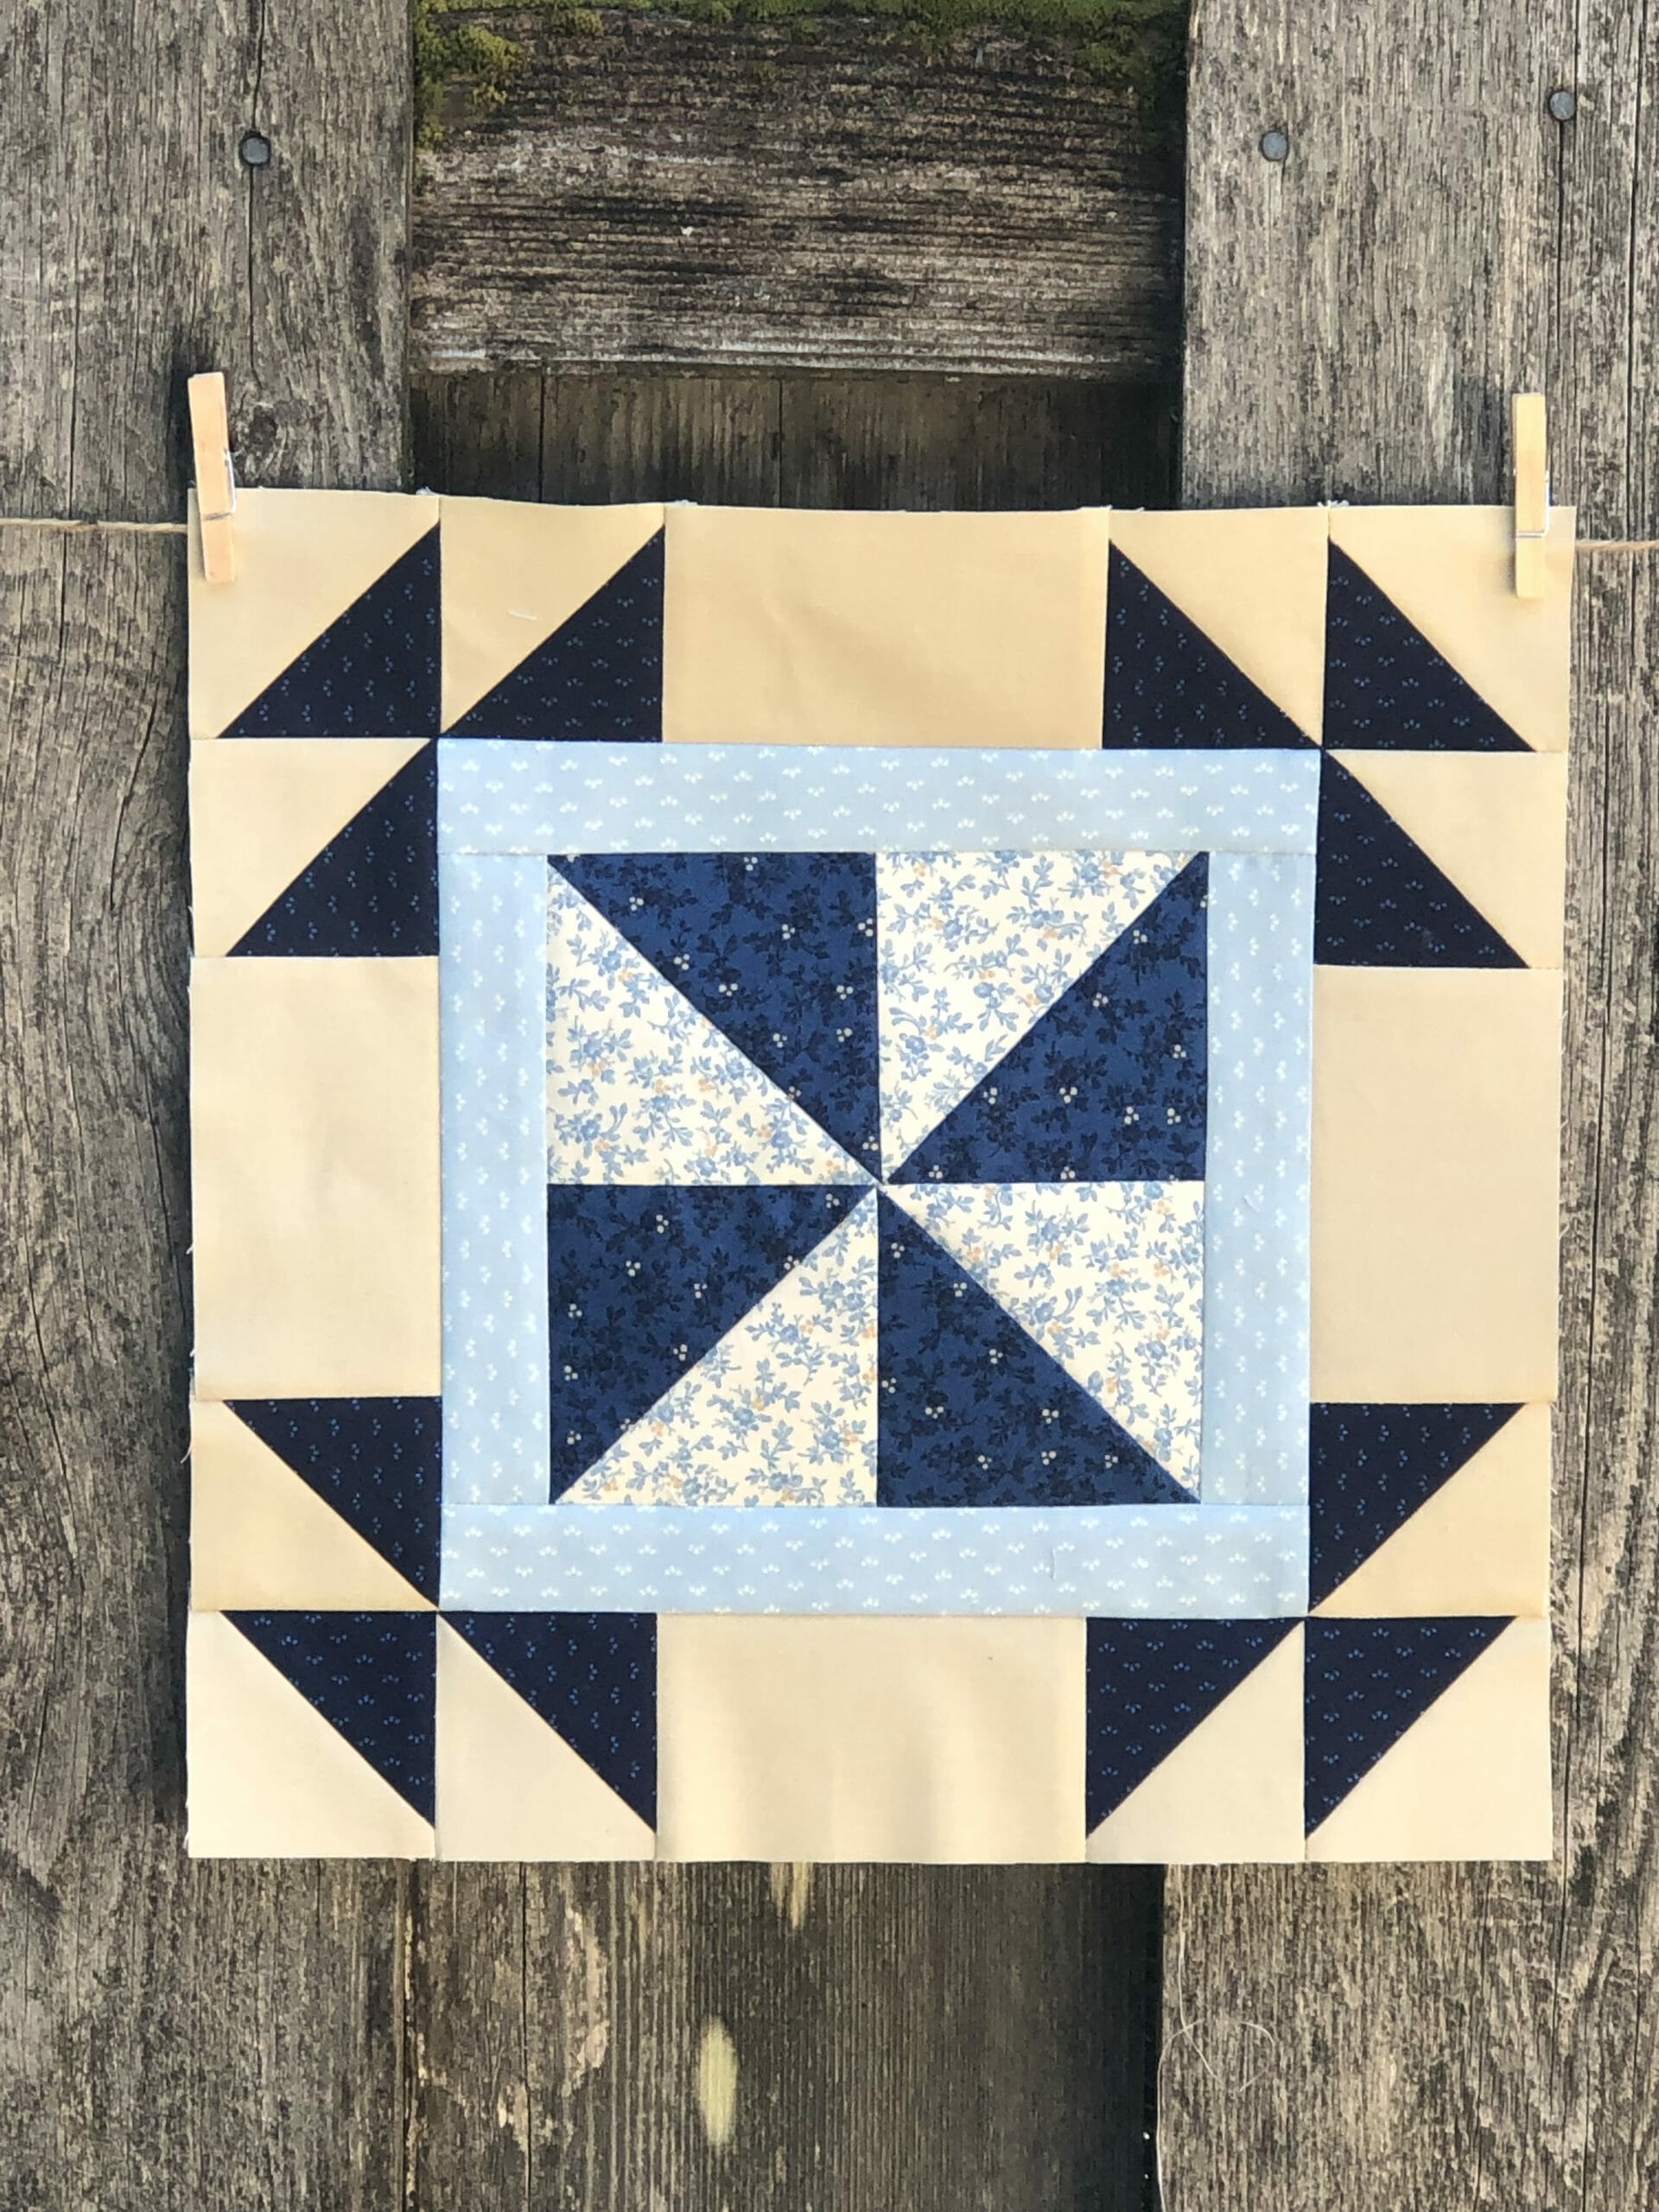
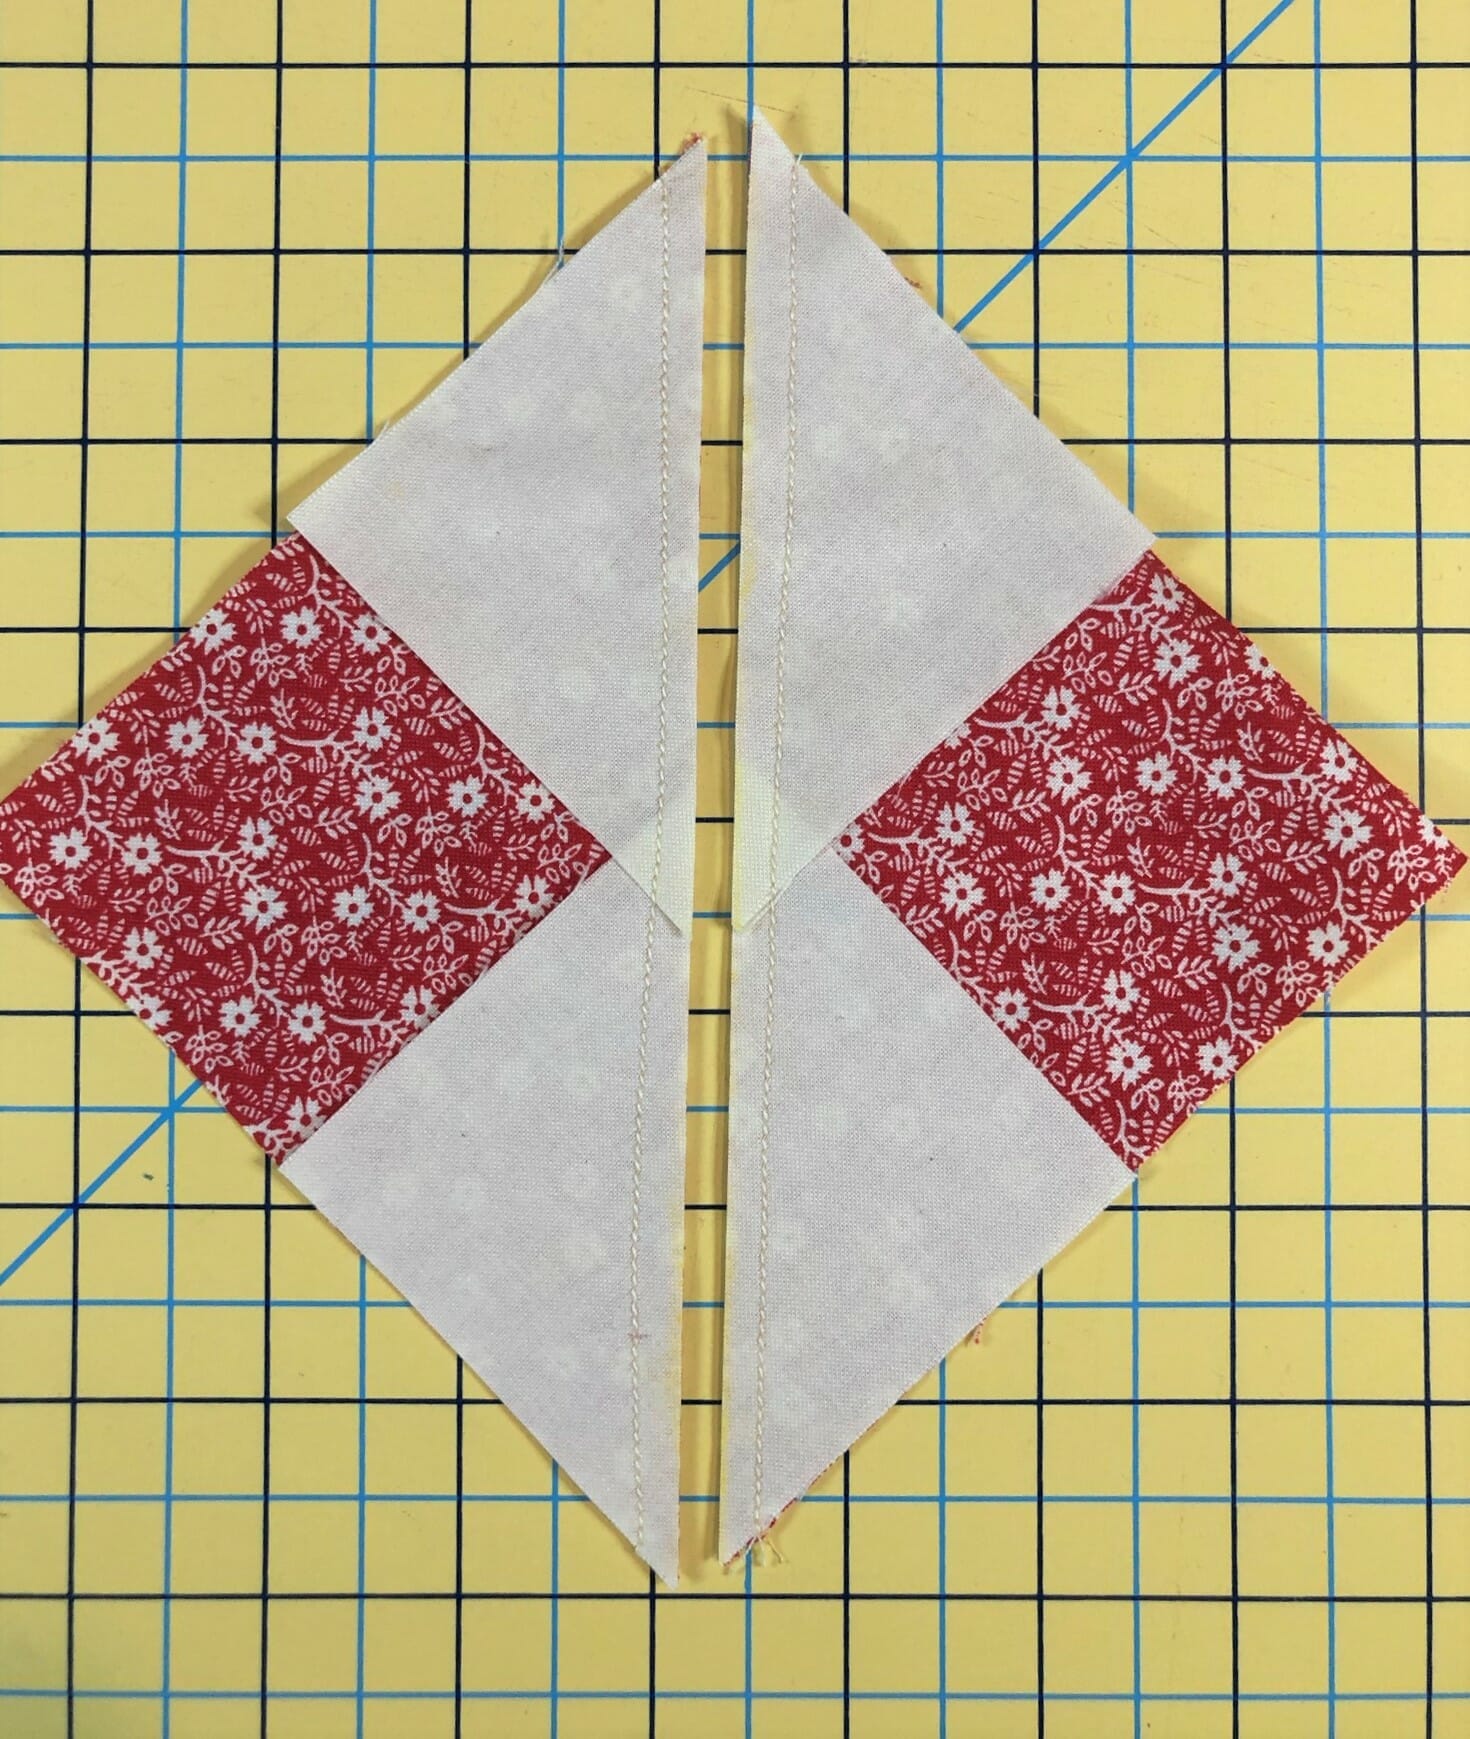
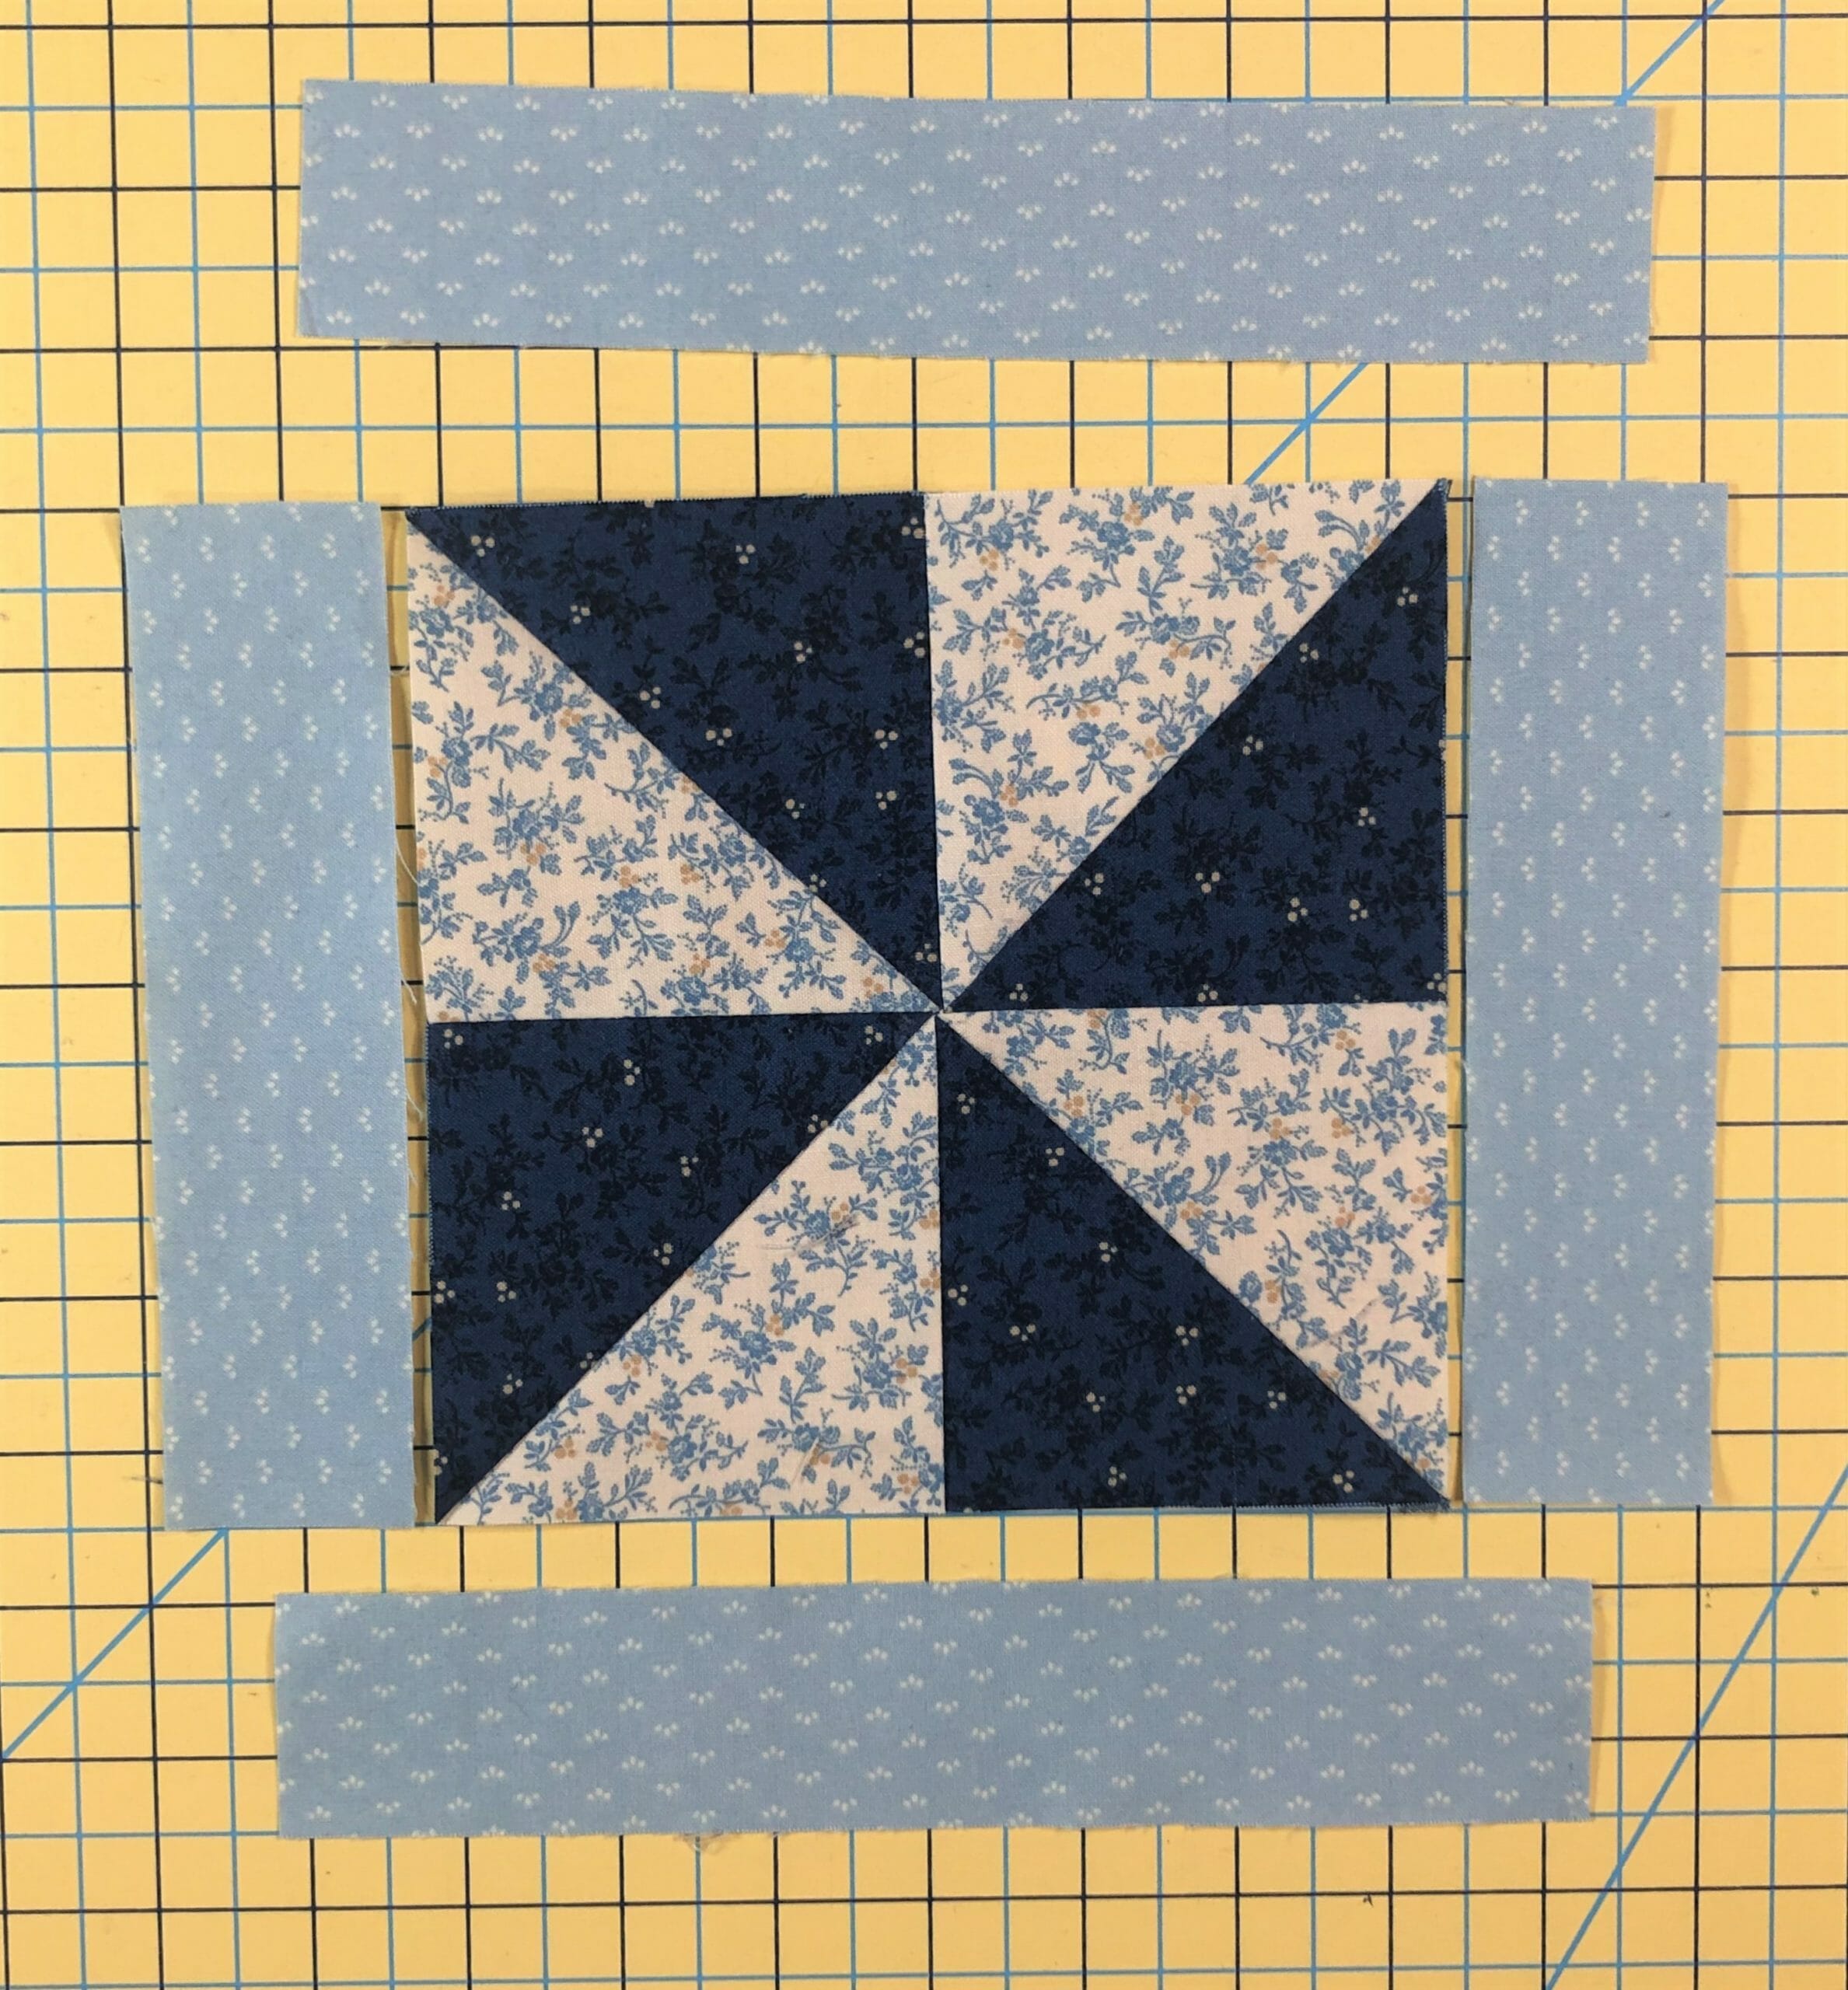
The center portion of this block is block is oh so easy! It’s just a large pinwheel with a border, and it comes together in a snap!

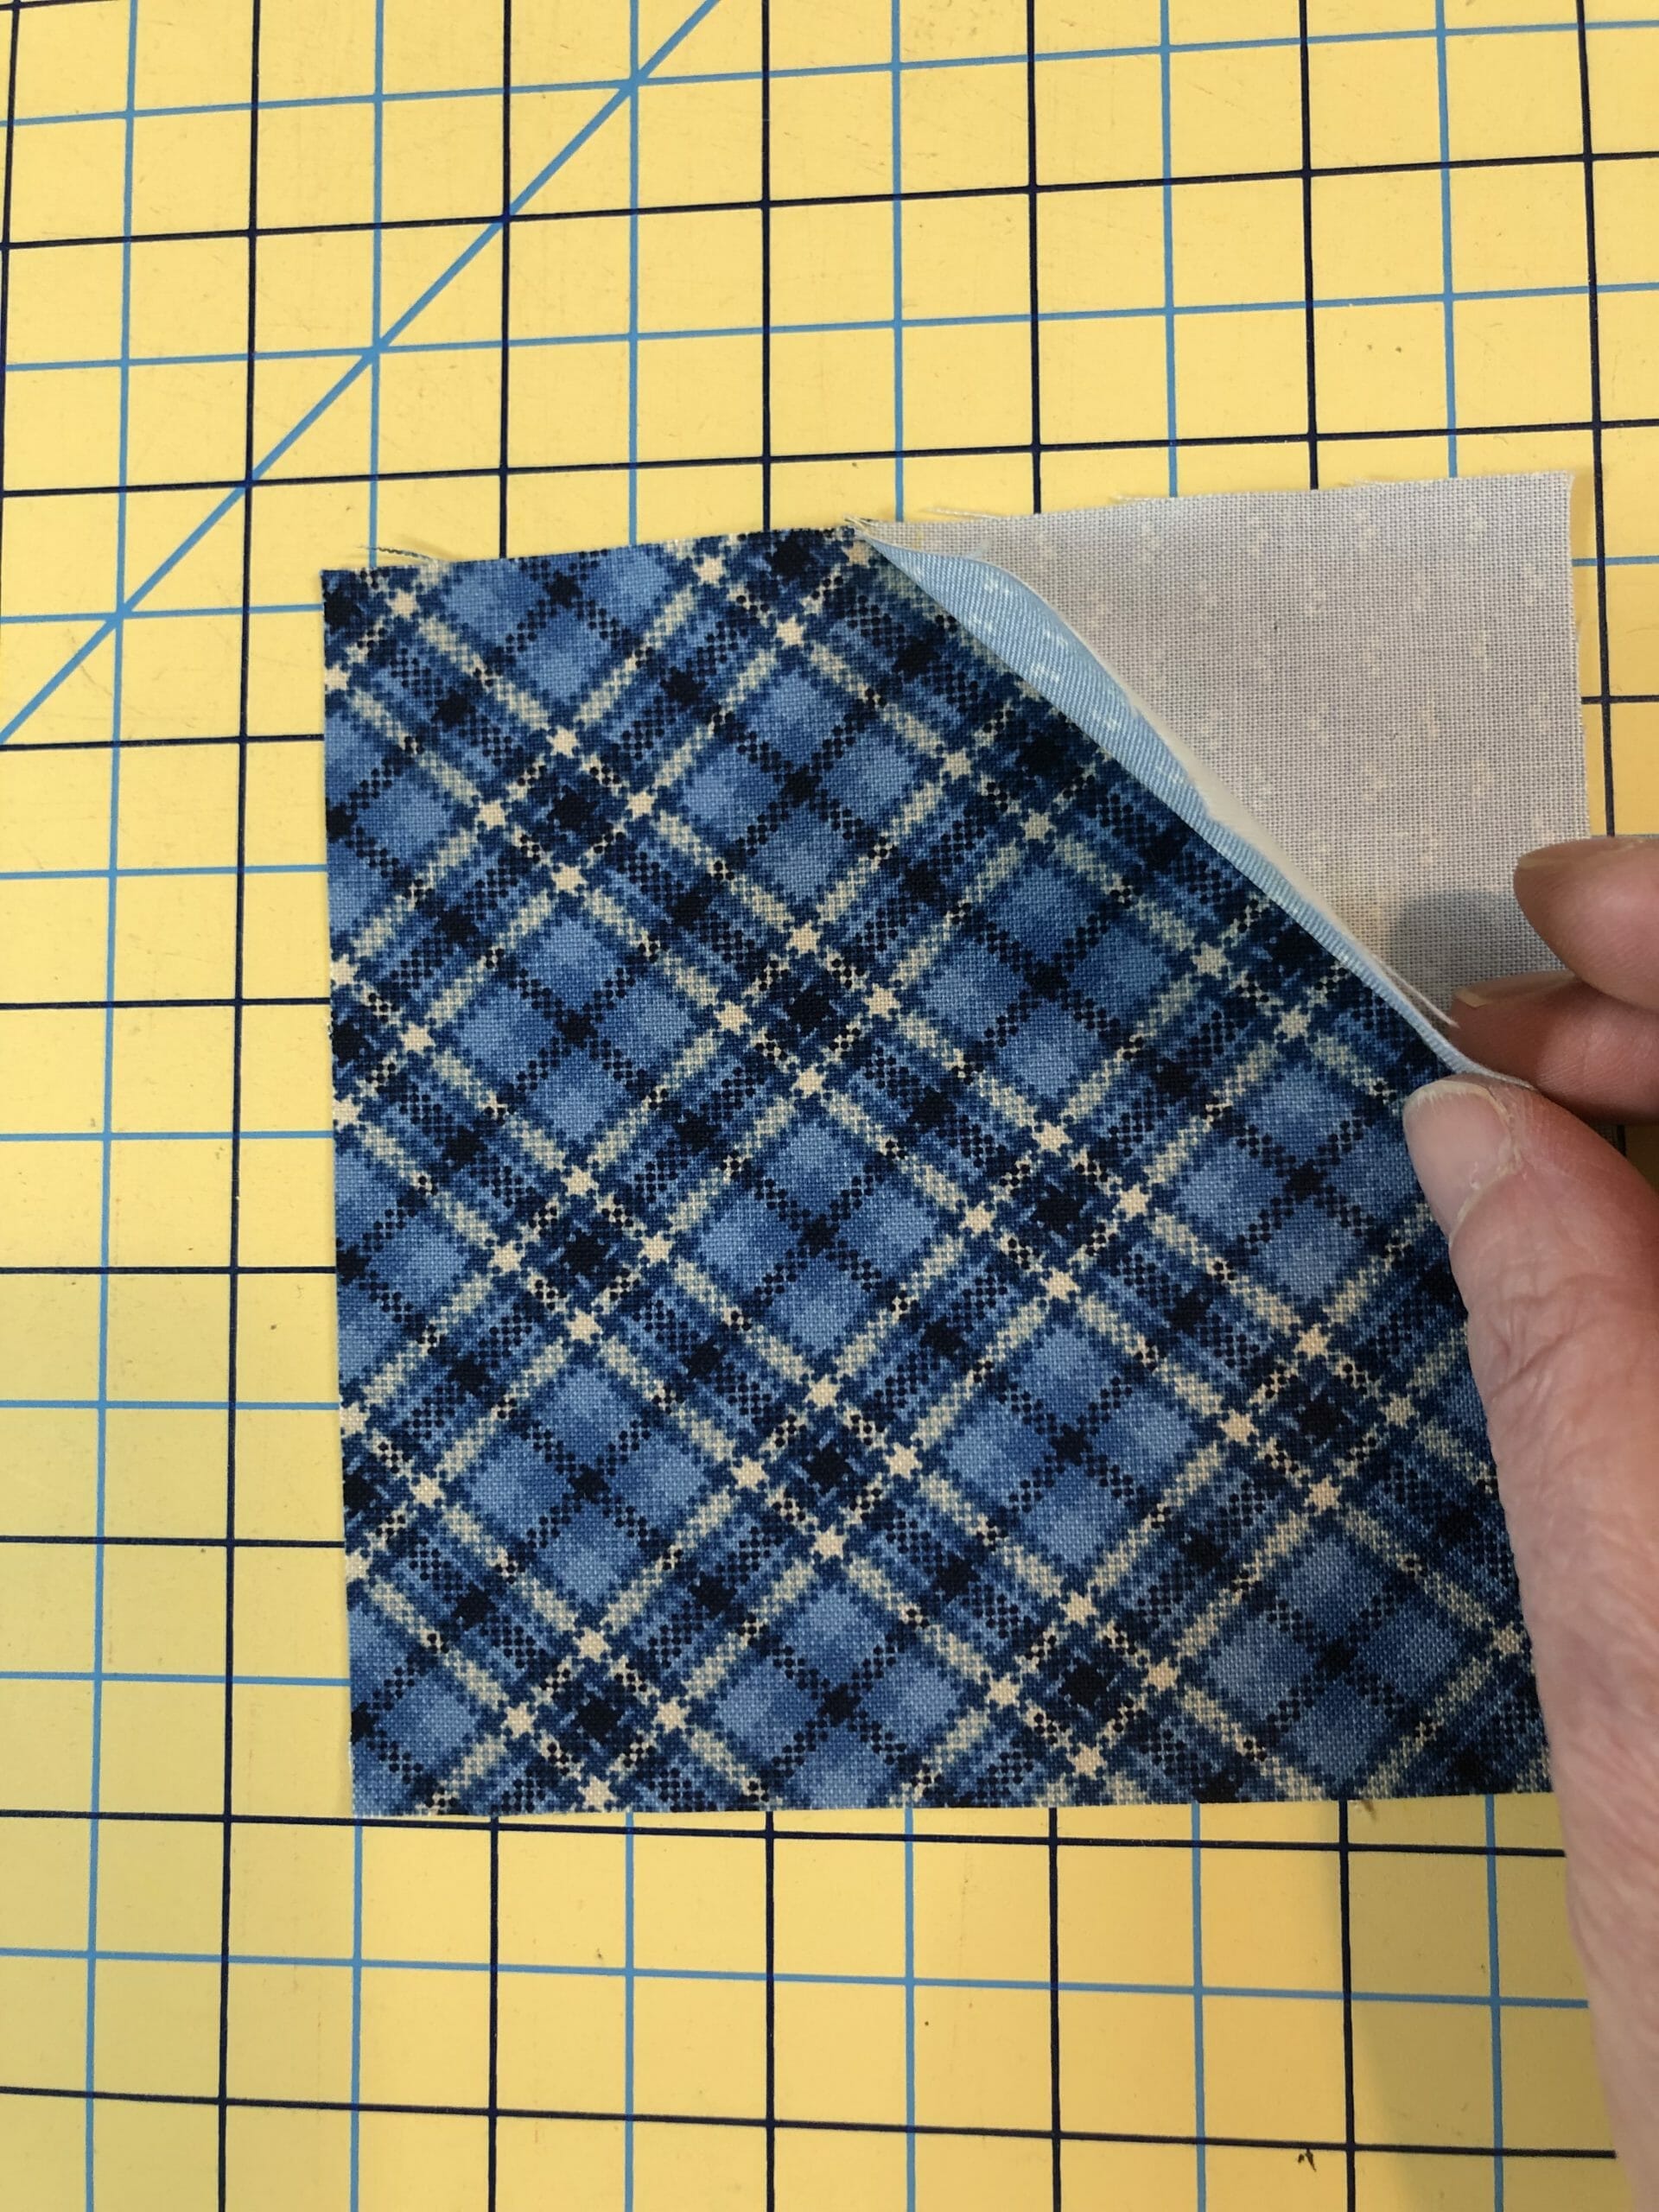
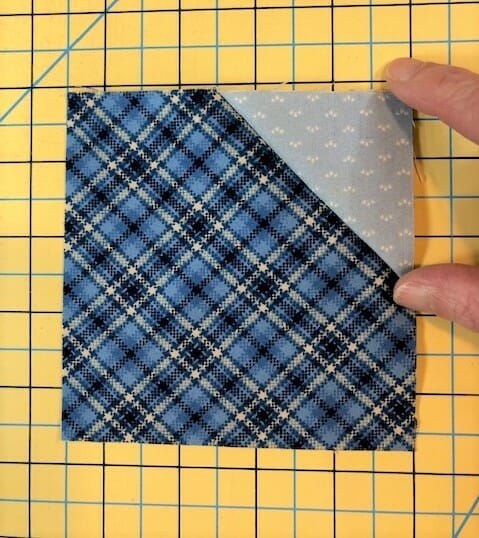
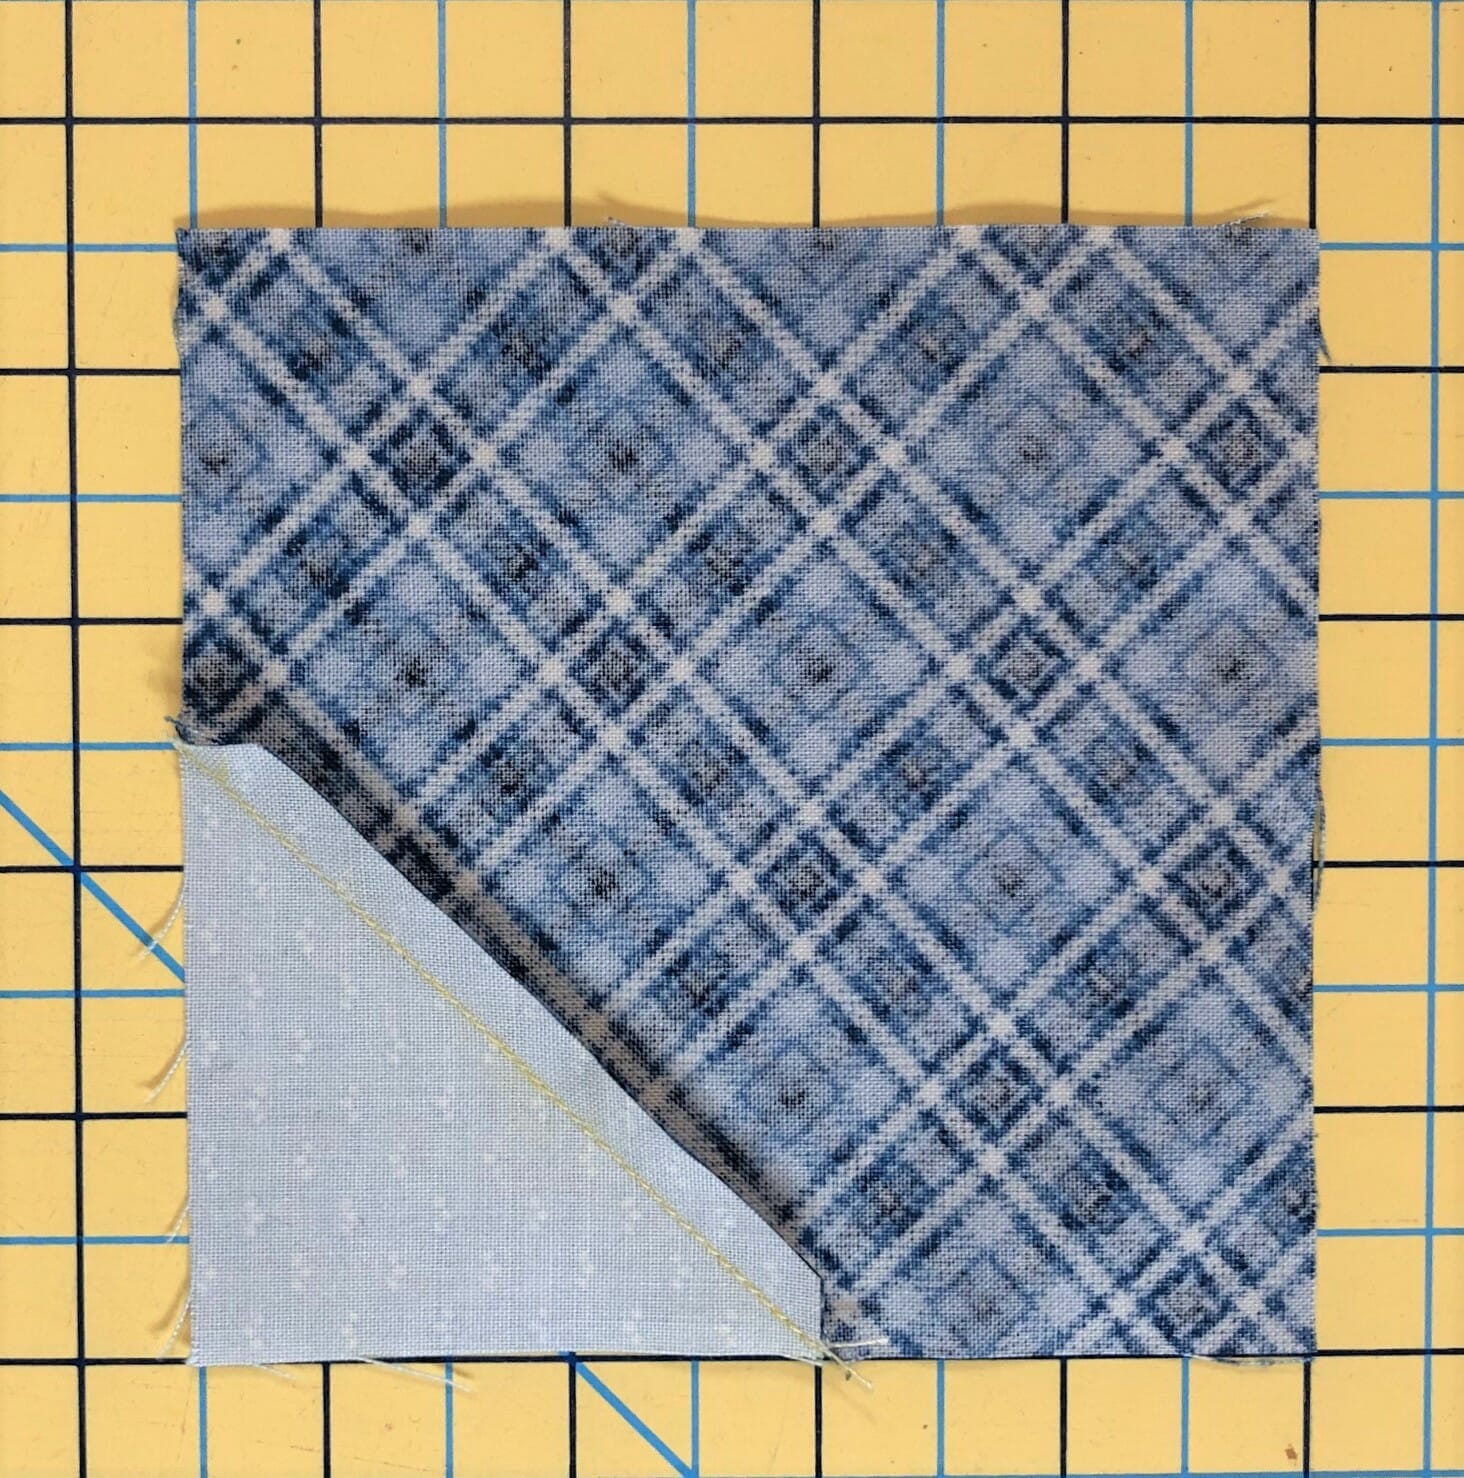
Start by making your four HSTs, and sew them together like the photo below. Make sure your pinwheel block measures 6-1/2” when done. This is when I like to use those scant ¼” seam allowances, so that I have wiggle room for trimming to size.

Then sew the F and G strips on as directed. One tip is to cut your strips a bit longer than necessary, and then trim them to line up with the pinwheel as you go. This is especially helpful with the top and bottom strips. This should measure 8-1/2” square when it’s done.

And of course, to finish things off, we will add those borders we are getting so good at.
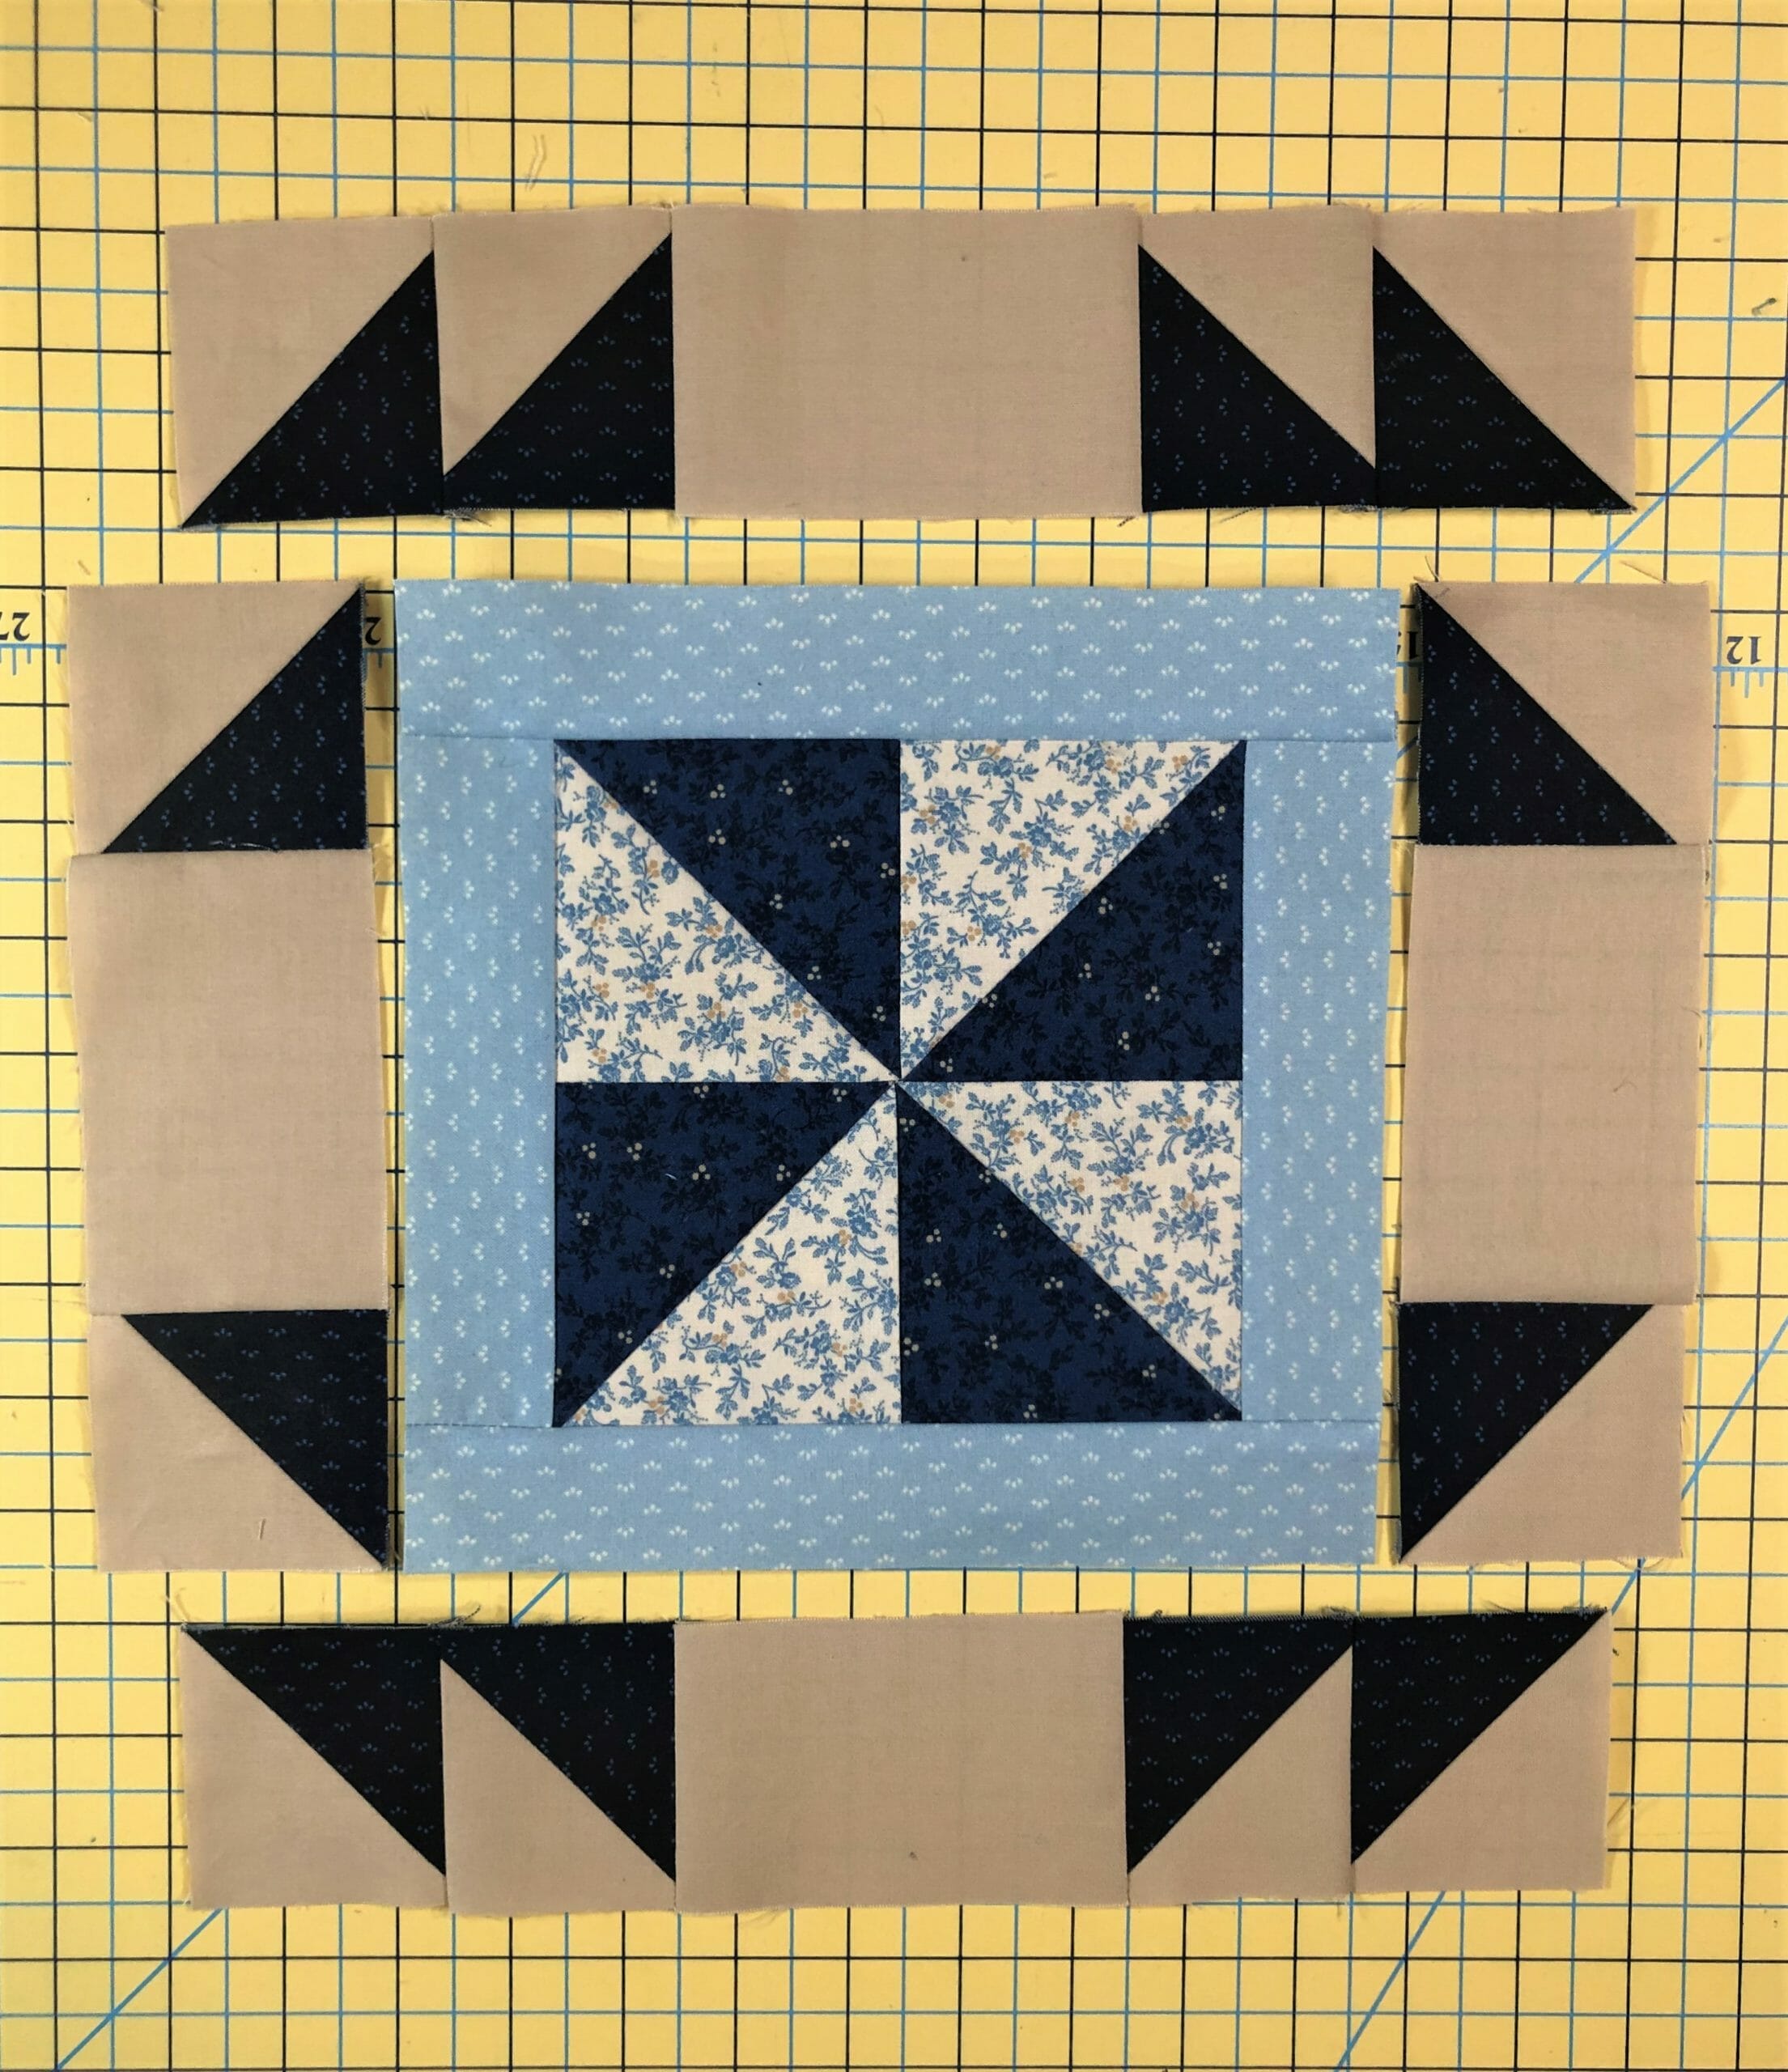
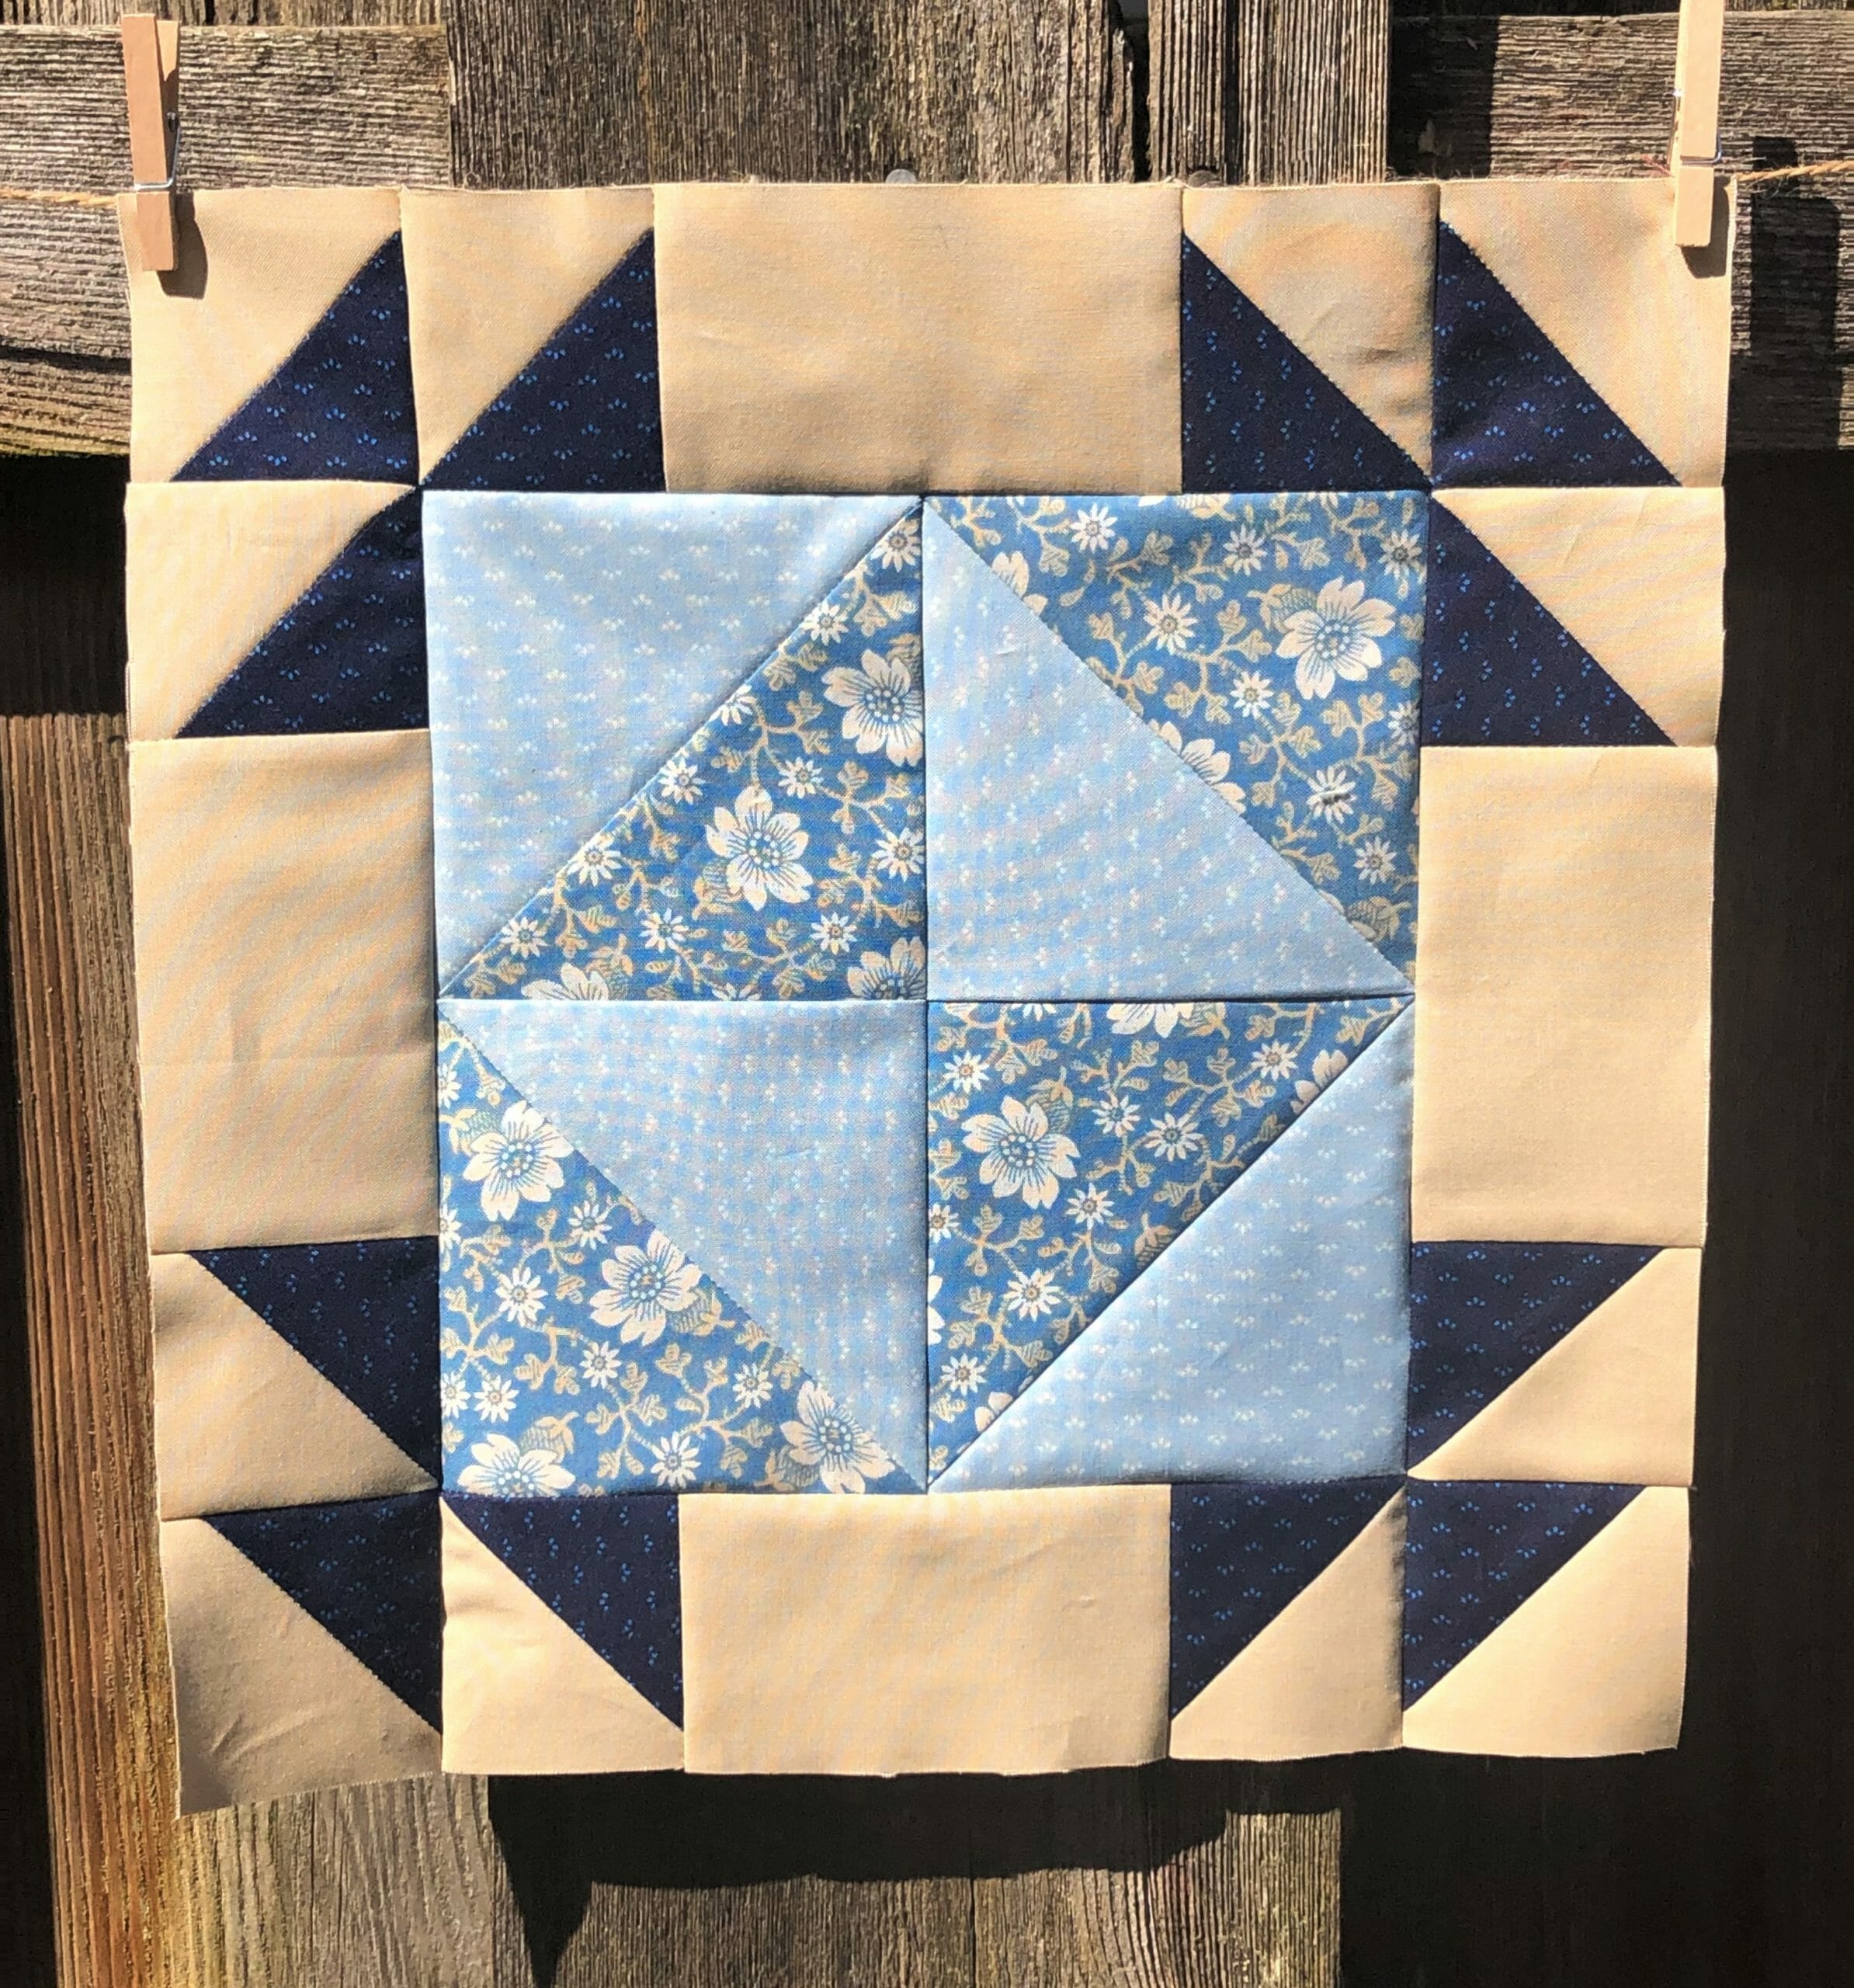
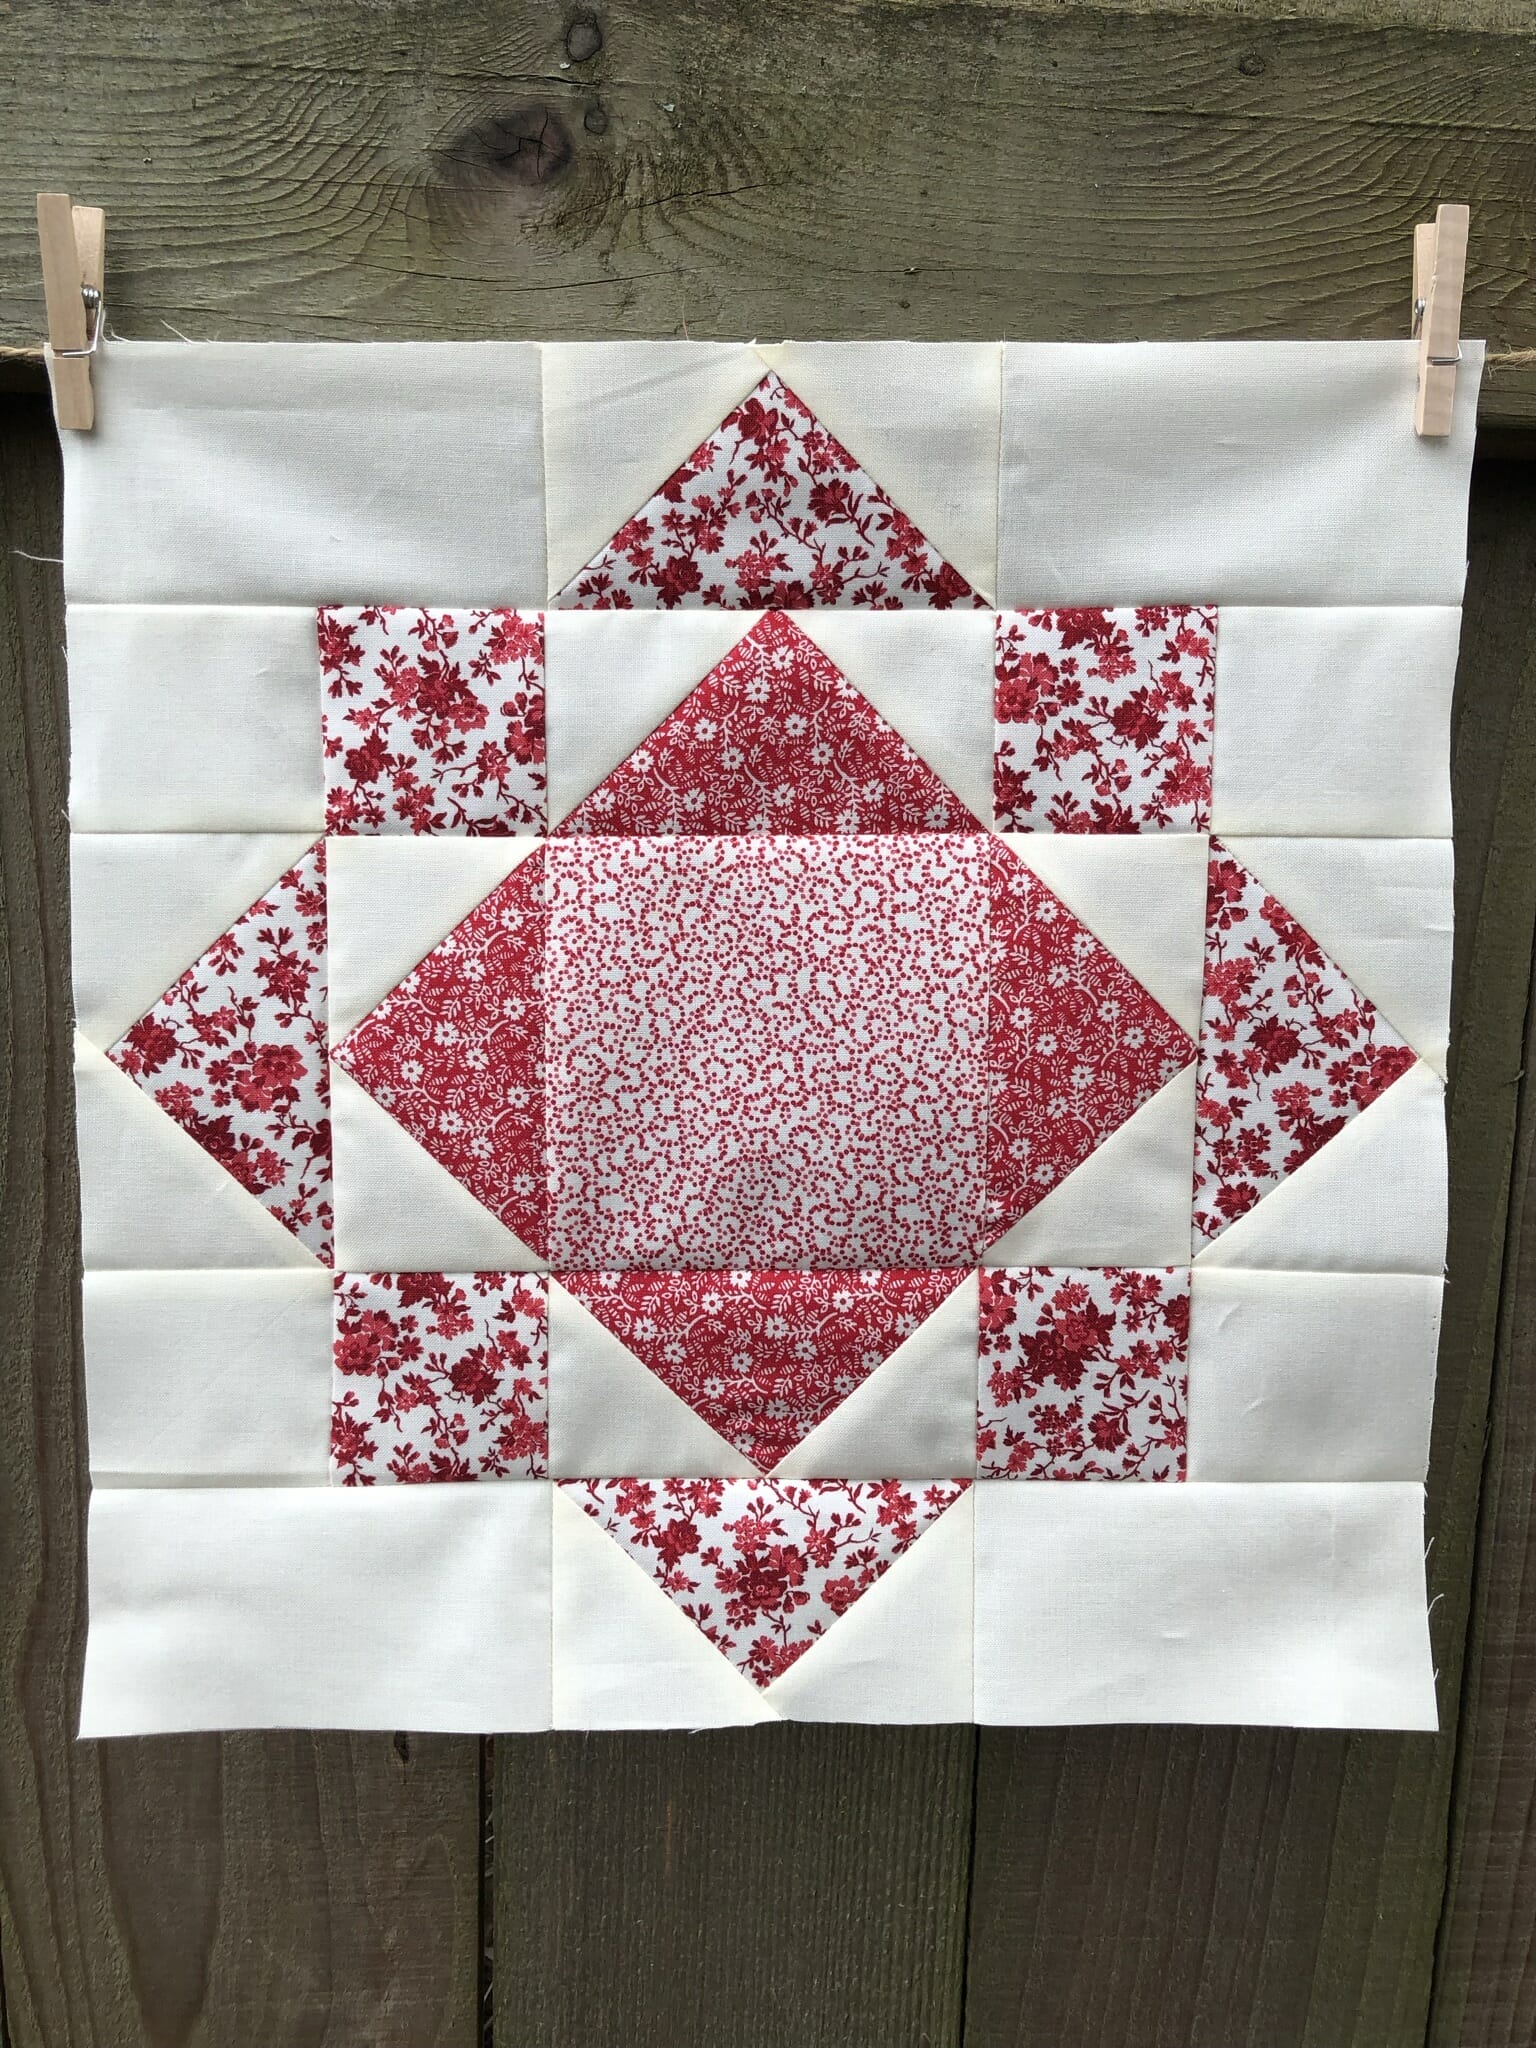
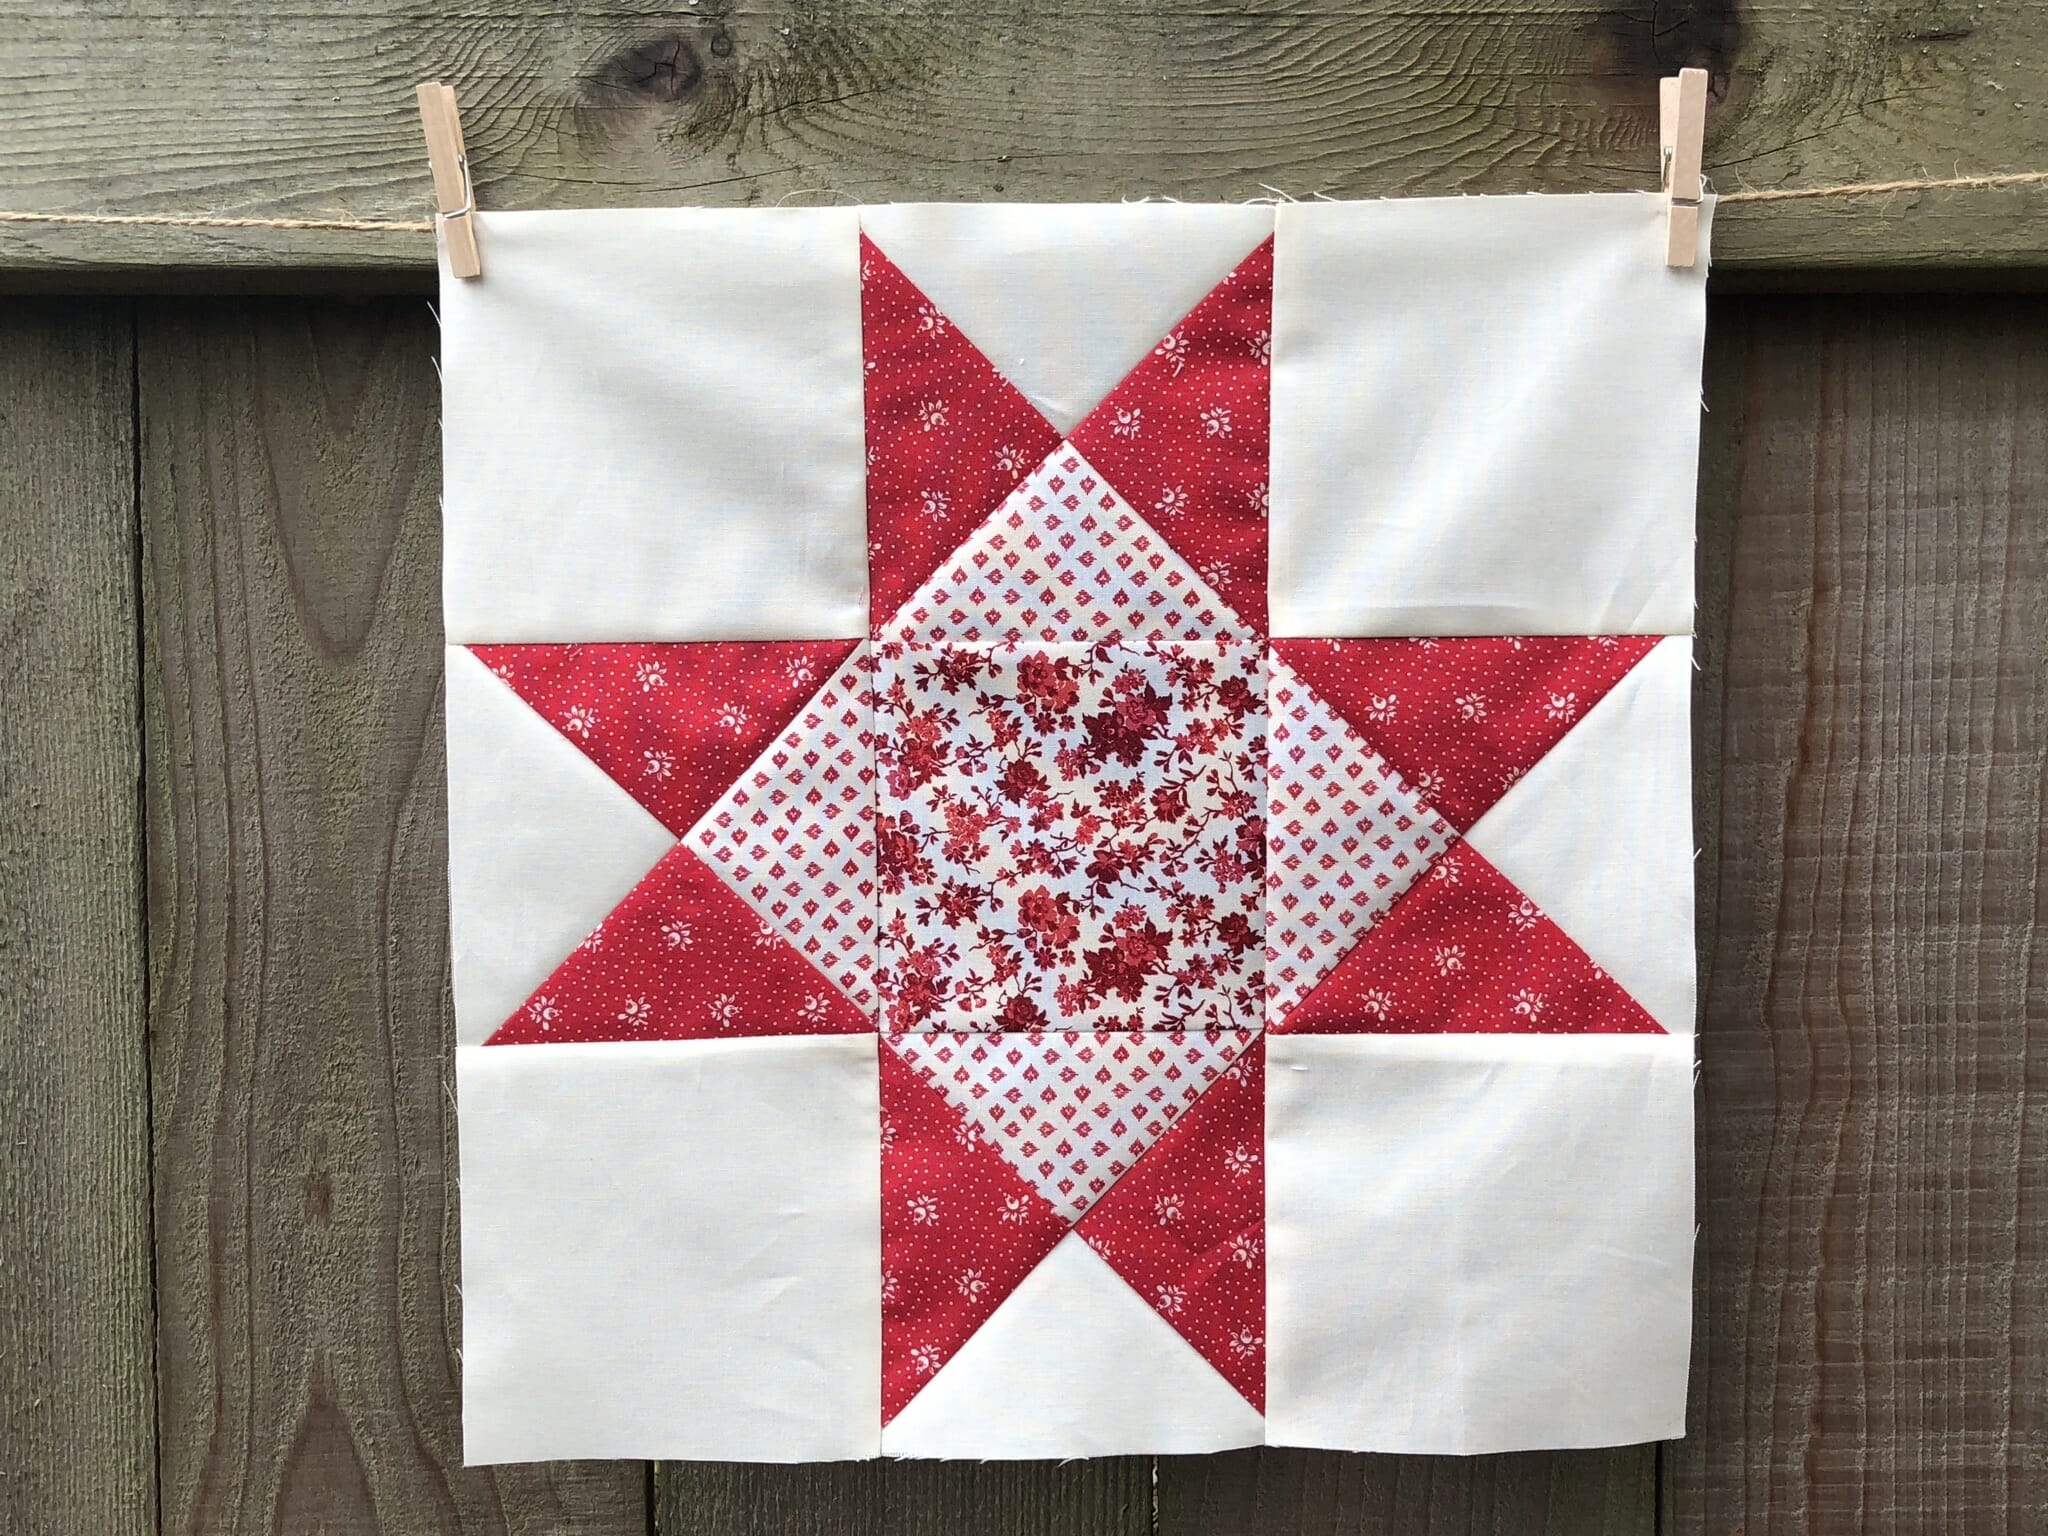
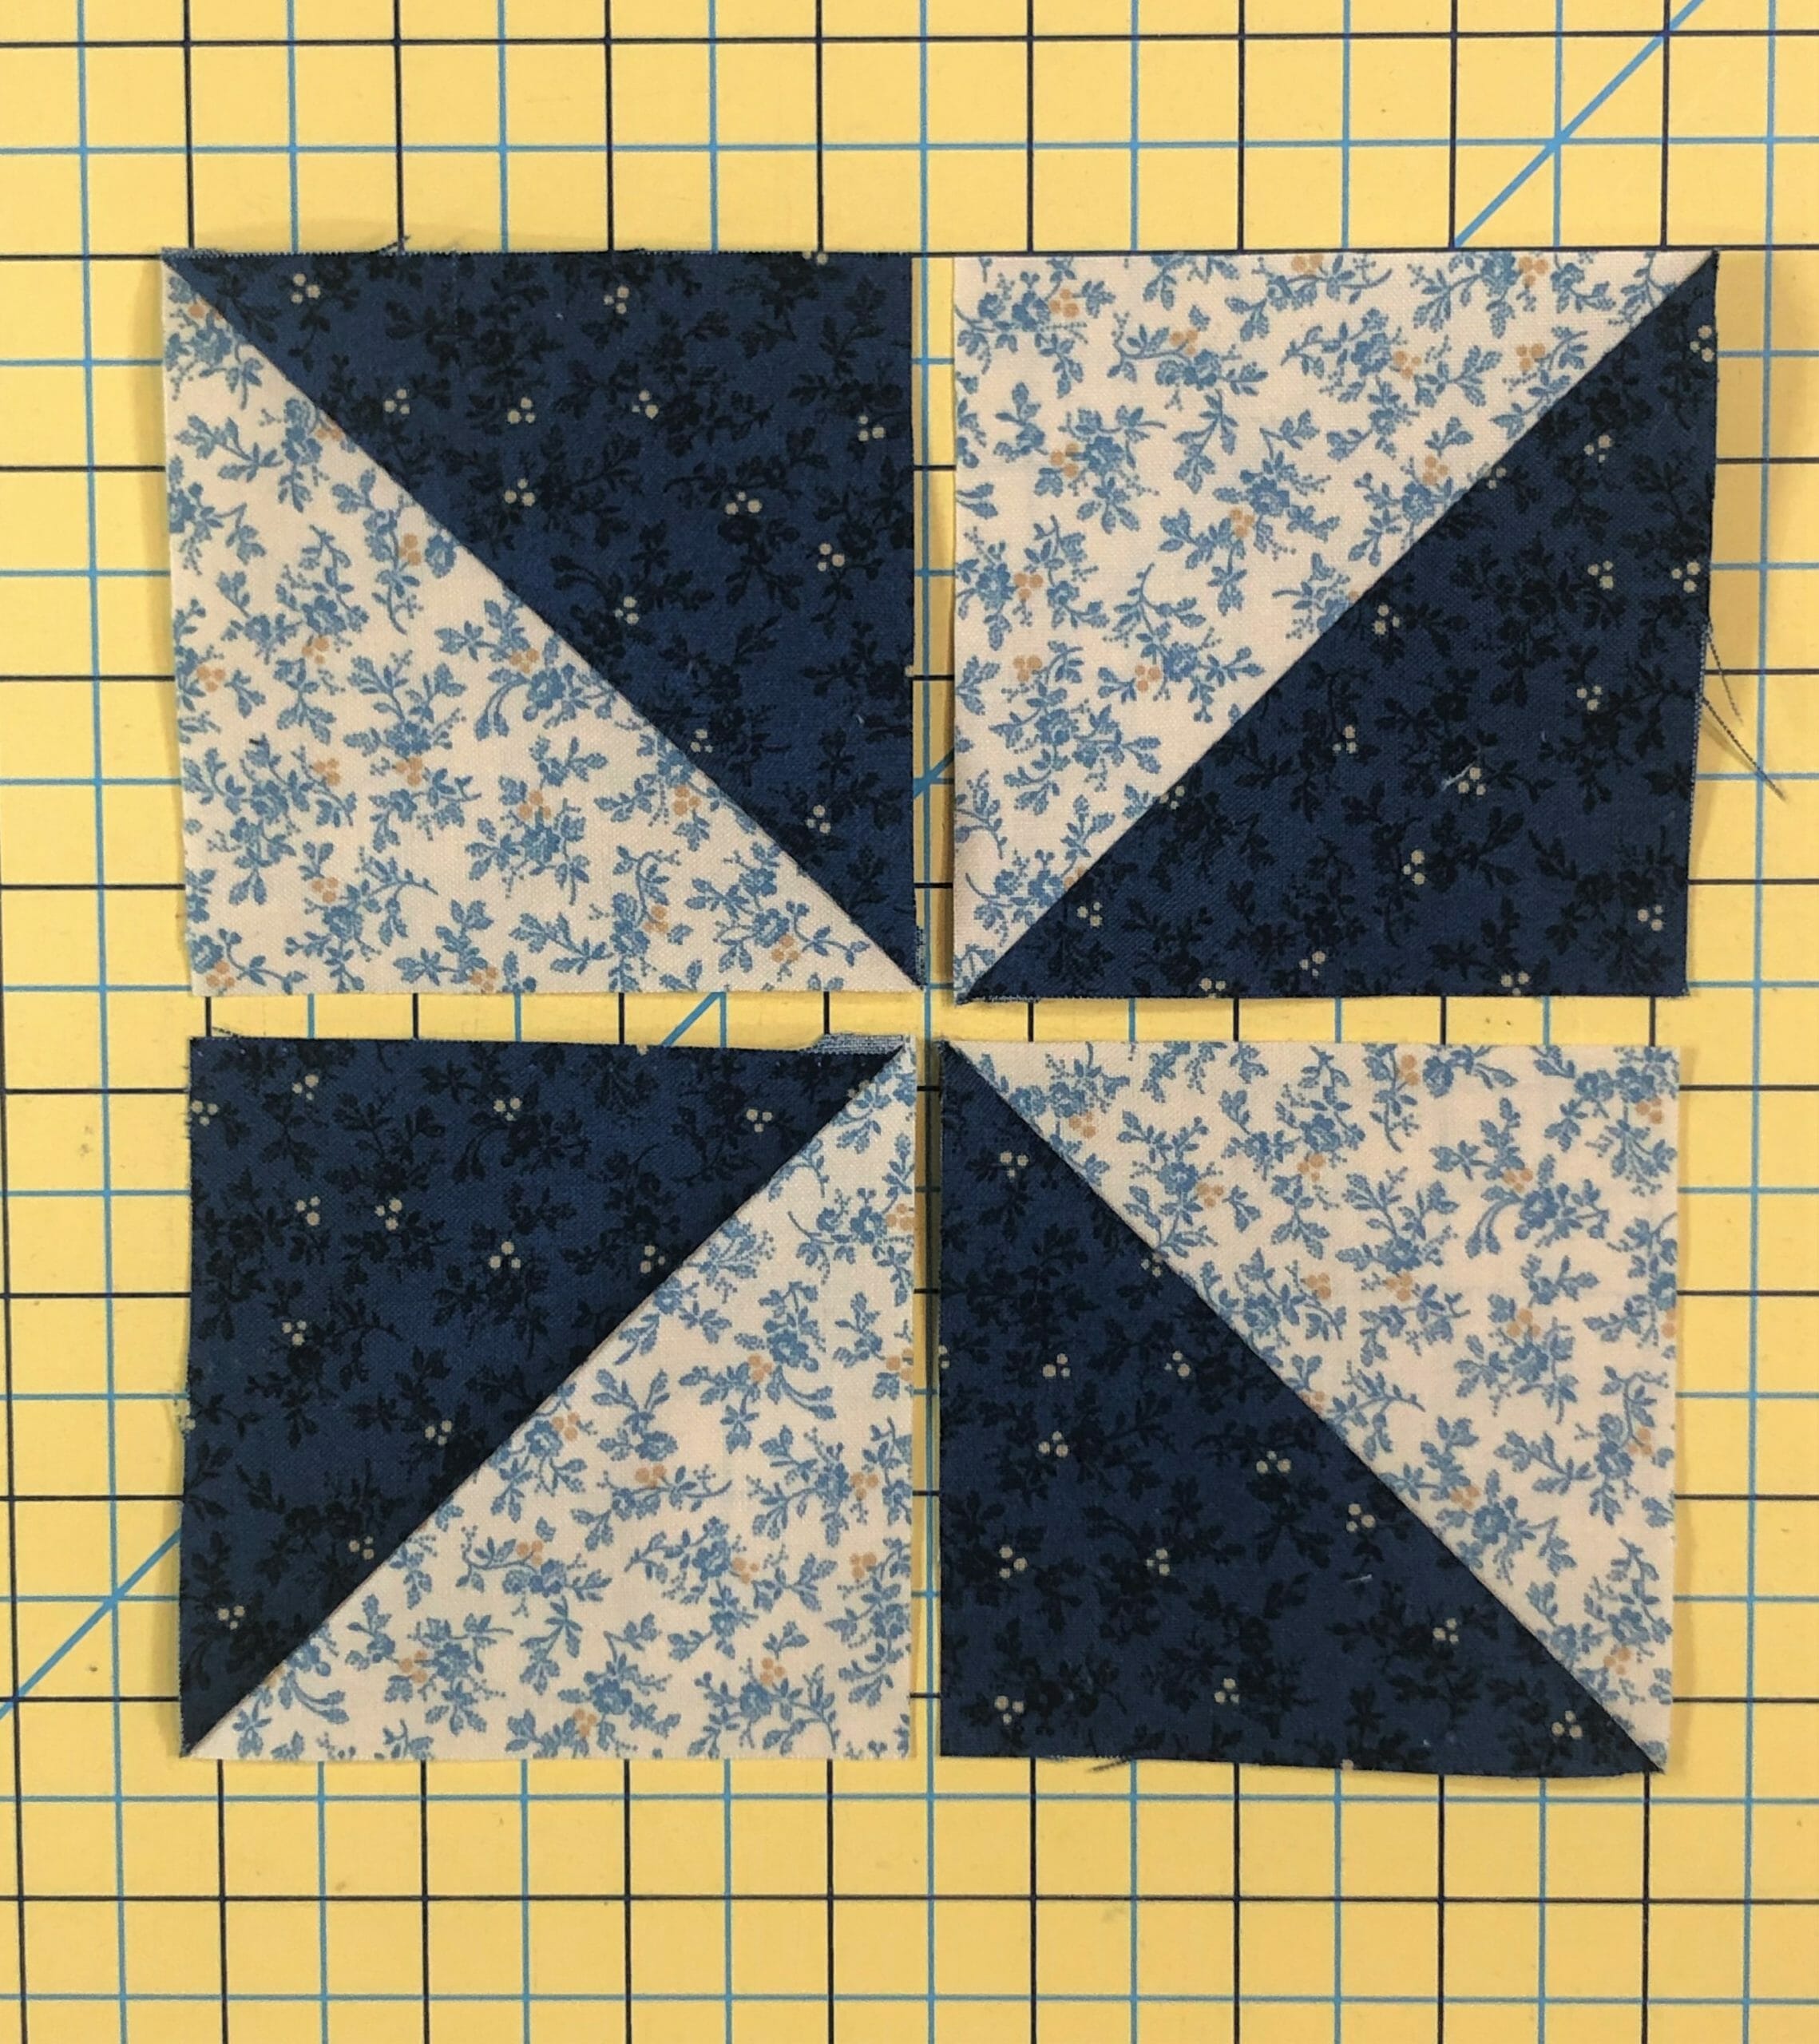
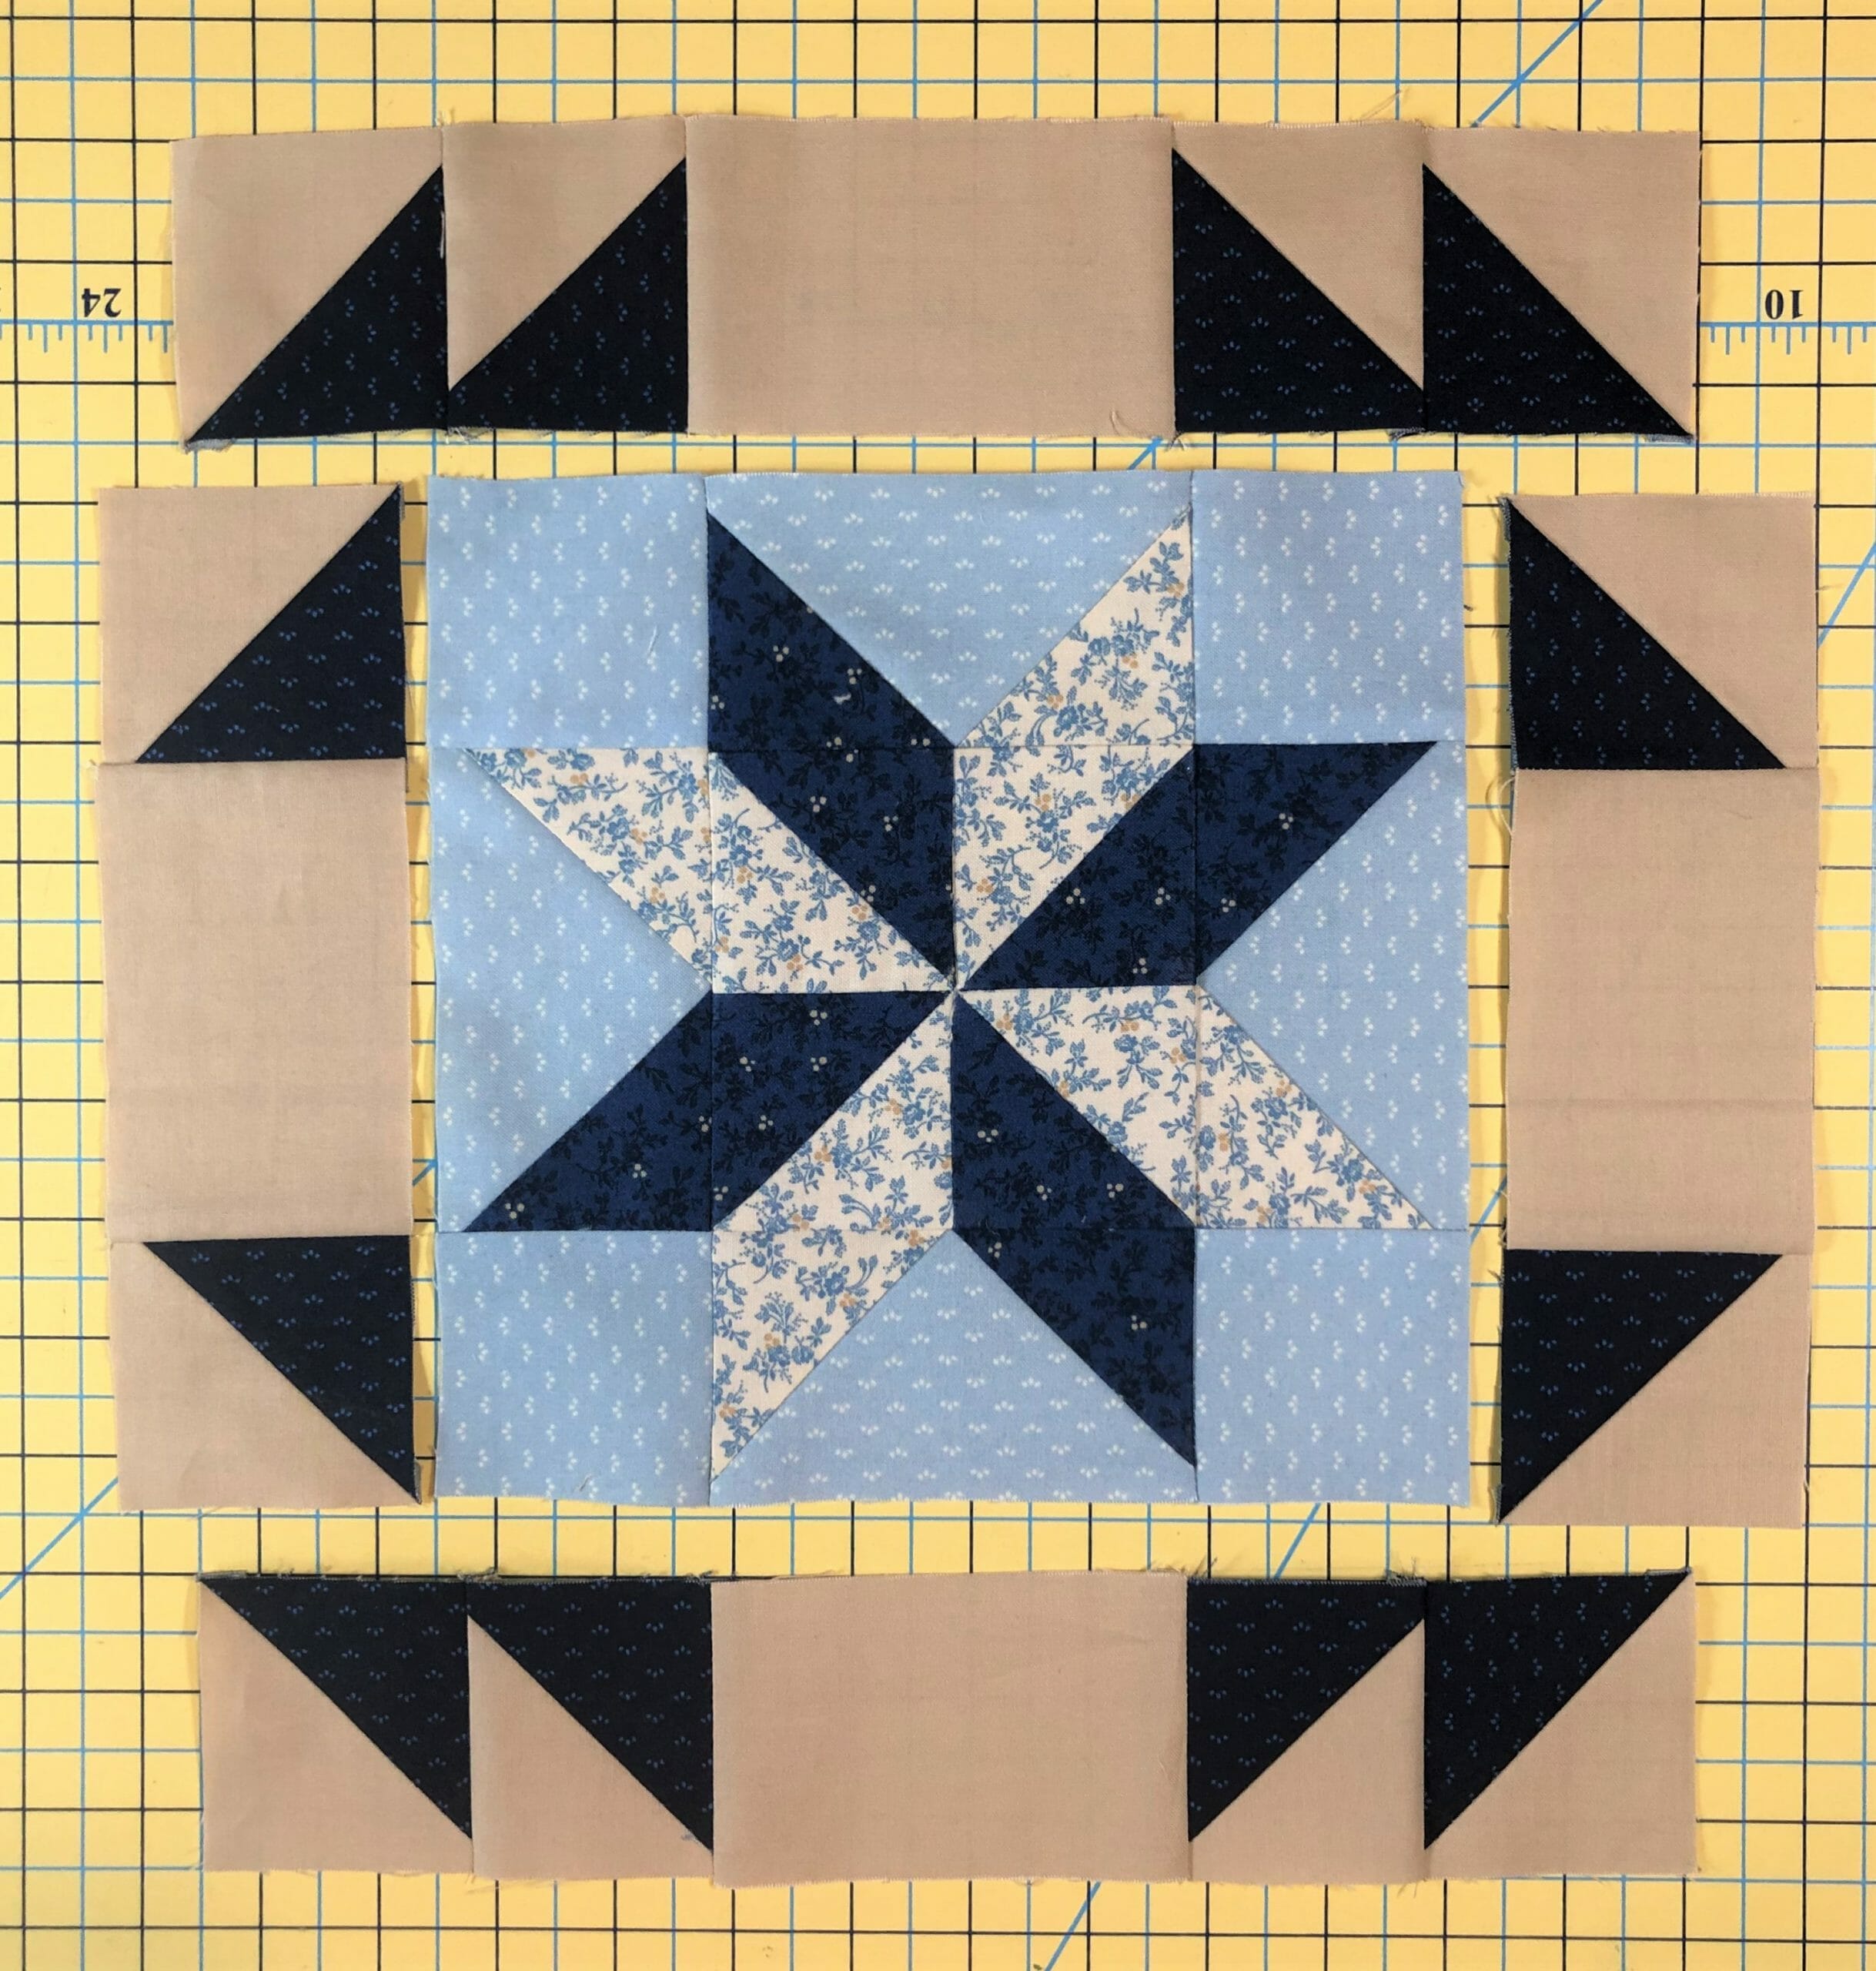
Block # 20

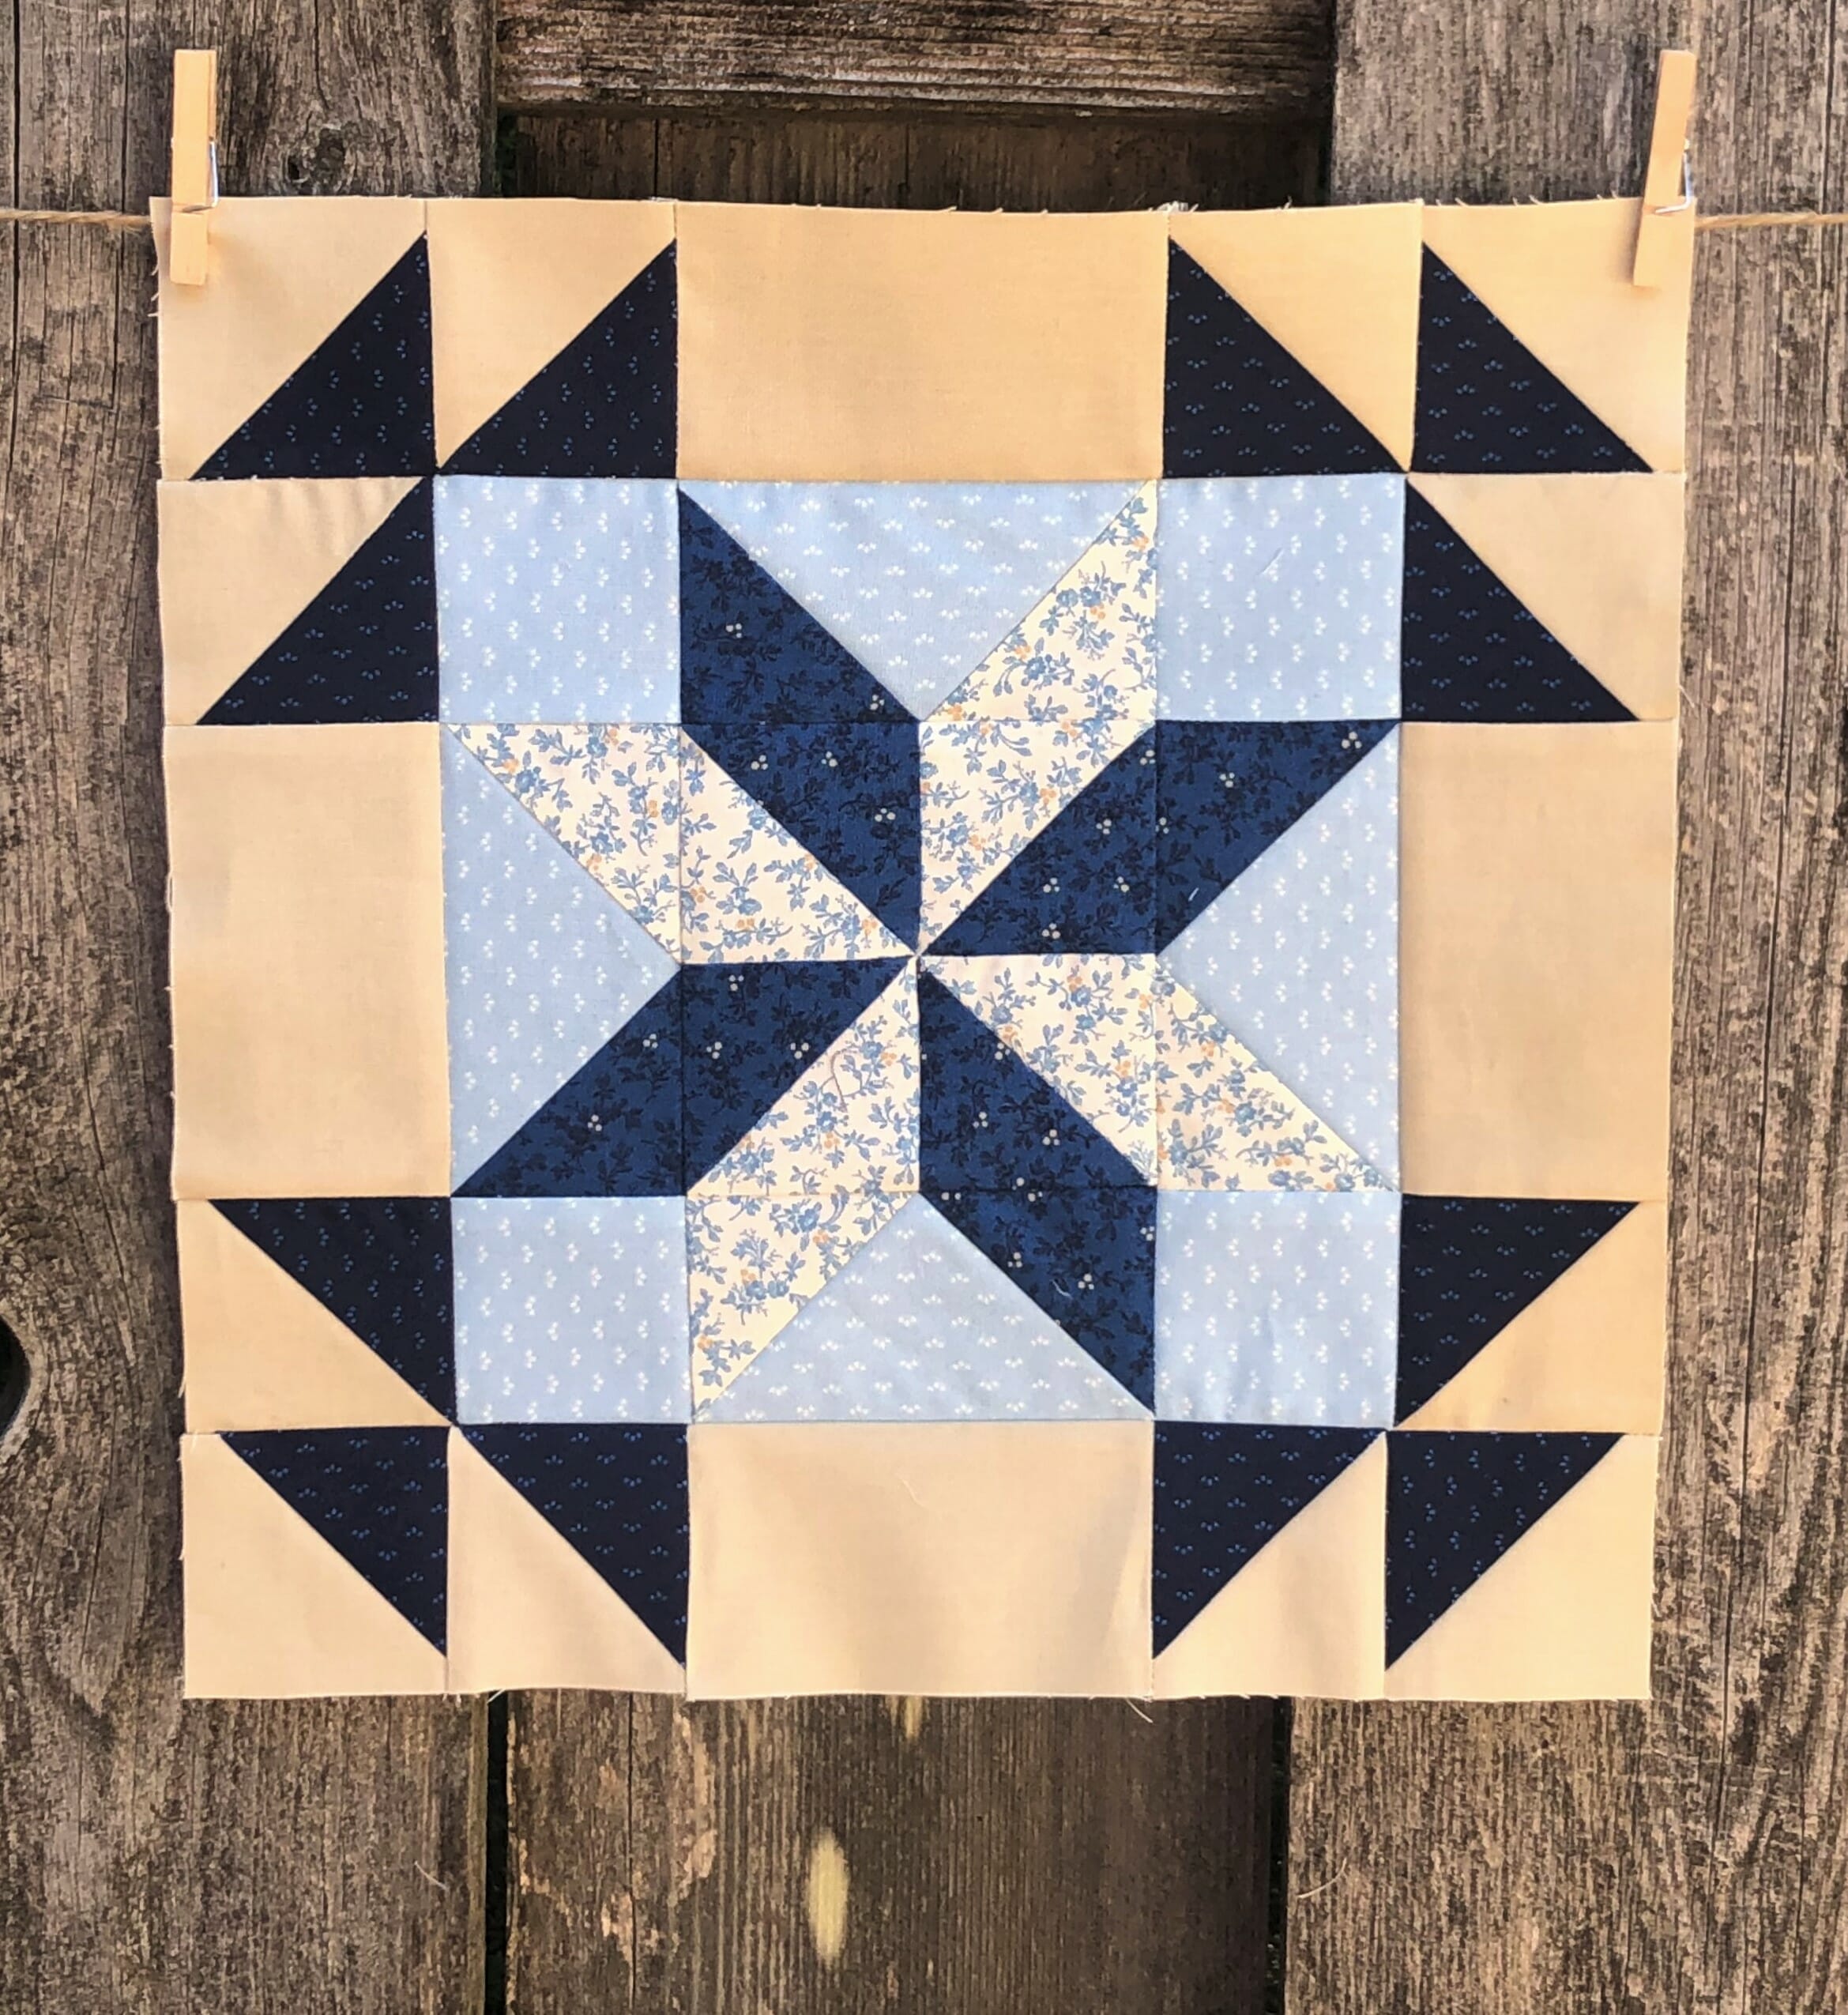
This block is an easy version of the Lemoyne Star. The traditional way to make these is to sew with Y seams and other fun stuff that I don’t personally want to attempt, so we’ll be making this the cheater way.

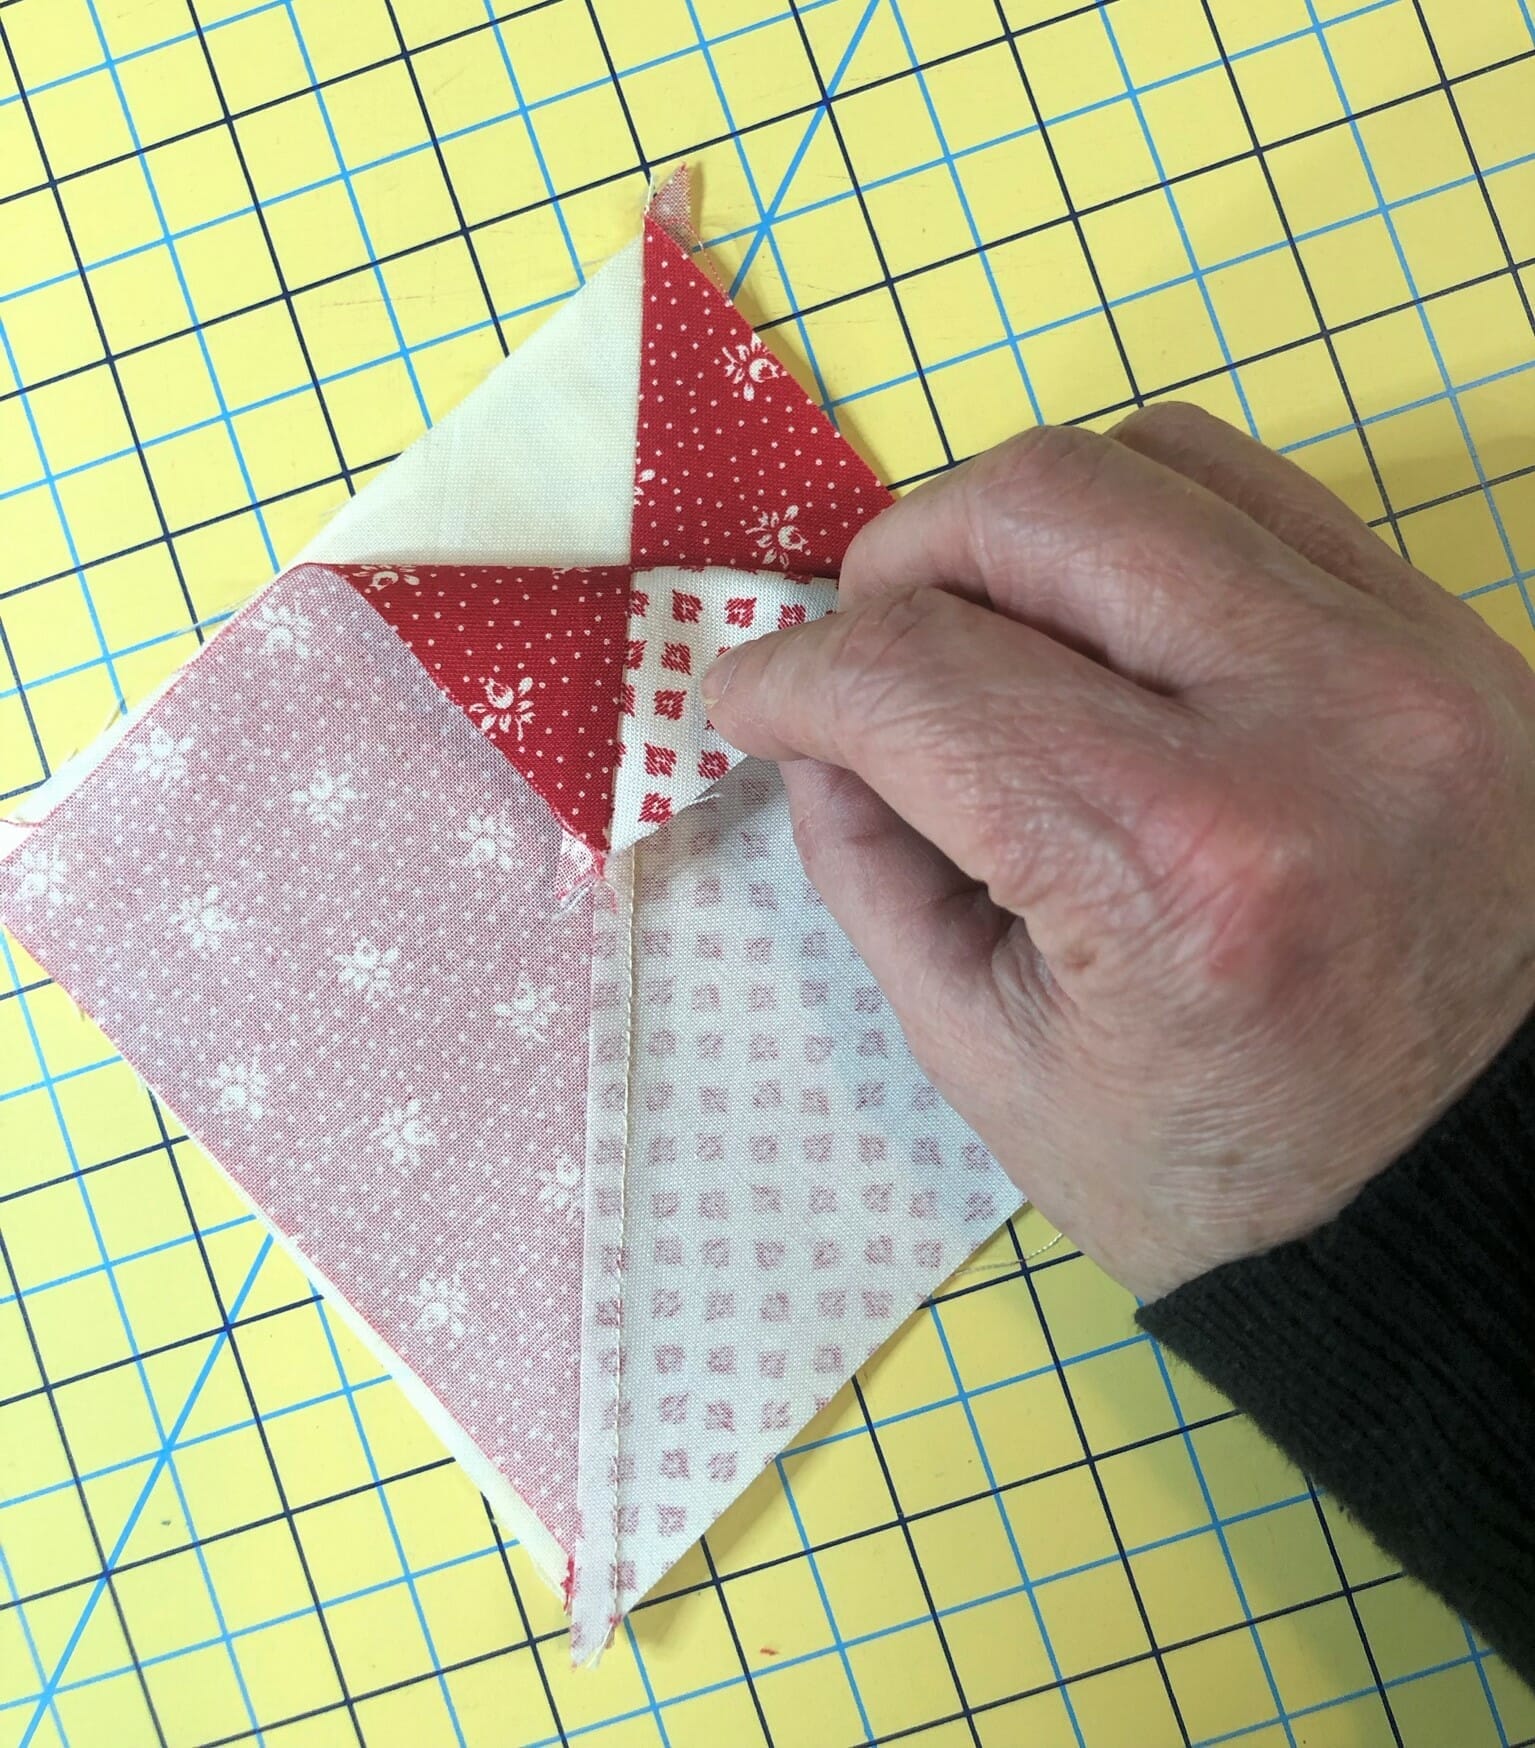
This block starts the same as the last one, by making a pinwheel unit from half square triangles. It’s important  that you have your pinwheel oriented correctly in order for this block to turn out. So please double check as you sew and make sure your D and F triangles are in their proper place, exactly like the diagram in the pattern.

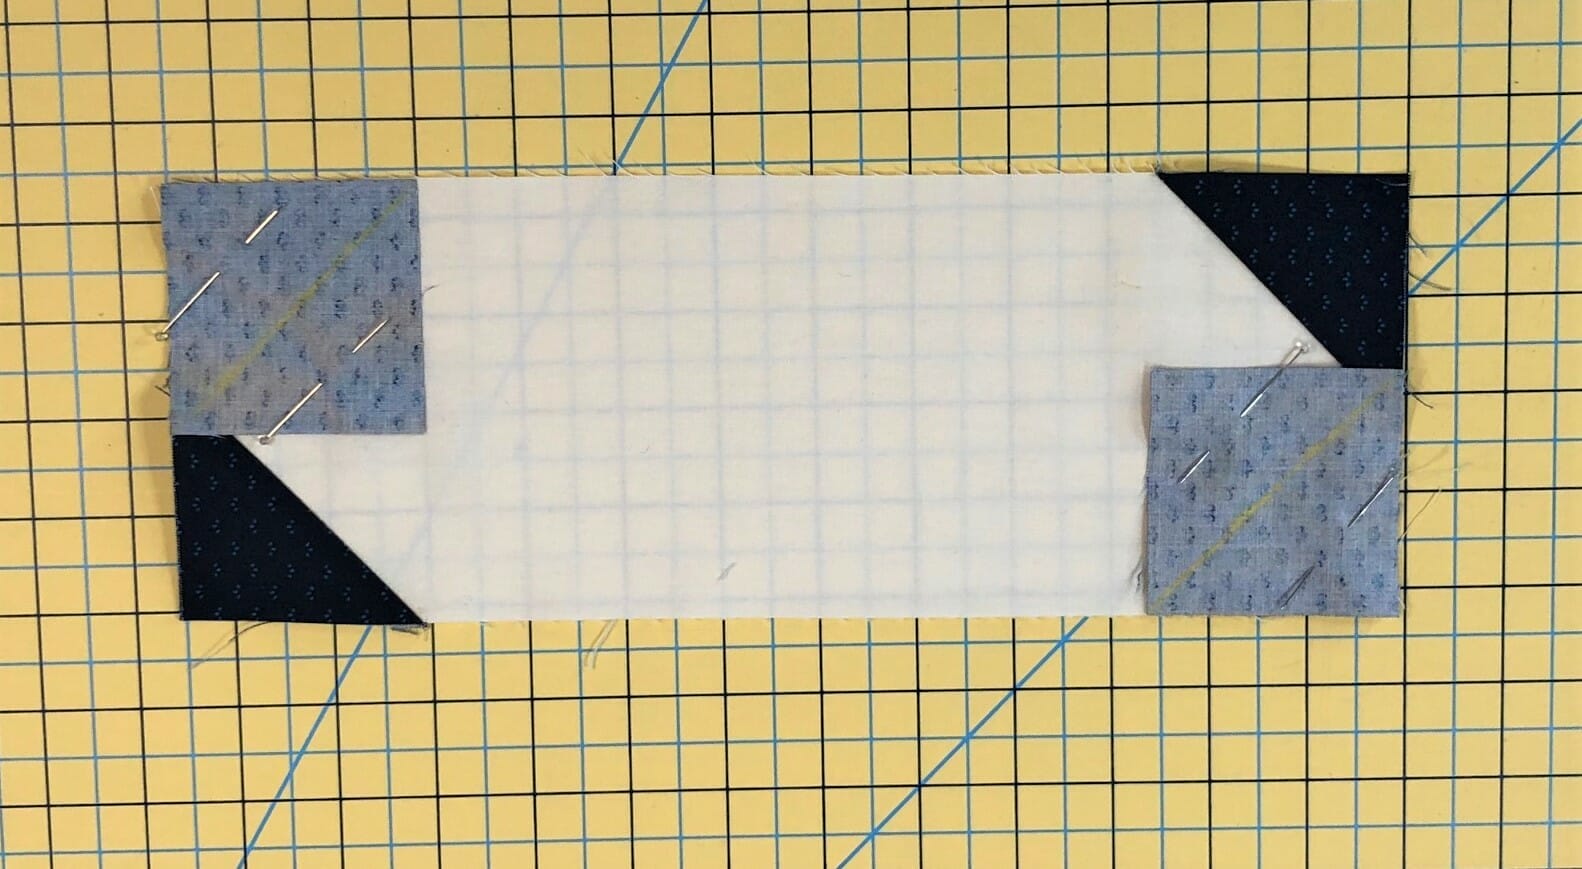
Next comes the flying geese units, and we’ll be using the stitch and flip method. Again, placement is key. You want to start with your Cream G squares on the left side first, followed by the Dark Blue E squares on the right for each unit.

Once you get those flying geese done, you can lay out the block and see that the Dark blues and Creams line up perfectly to make the star. How fun is that?!

With this is all sewn it measures 8-1/2” square, and now you can add your borders to complete the block.

And of course, there are always a few more sashing strips to make as well. I had someone ask if it matters that the A strips are cut crosswise on the fabric instead of lengthwise. I usually cut lengthwise whenever I can for sashing strips, but it’s not imperative. It’s true that cutting as suggested means less give for easing things in, but usually that’s not a problem if the blocks are measuring correctly. If this bothers you, you can cut three out using the FQ and cutting lengthwise, and save your fourth one for the months when you have the extra fabric for making eight, and just cut nine instead those months. It’s totally up to you!

Well, that’s it for this month. Please holler if you have any questions, either on here, or on the facebook group, and I’ll try my best to get to them. Thanks for stopping by!

 Happy Quilting! – Kristin


Open Skies Block of the Month – Month 1
4.3.2022

Welcome, everyone! I’m thrilled that so many of you have decided to join me in sewing up my latest Block of the Month quilt! Some of you may have already sewn some of my previous BOMs, but I suspect many of you might be new.

Each month I’ll be posting a little tutorial blog here, with tricks and tips to help you create the best quilt possible. And with this BOM we will also be adding some extra content over the coming months as promised, so be on the lookout for that too. It’s going to be so fun!

As we go along, please feel free to ask any questions in the comments section, and I’ll do my best to help you out. My email address is also on the pattern, so you are welcome to reach out to me that way as well.

Now let’s get to business! Here are the three blocks we will make this month, photographed in no particular order:

Before we talk about these blocks one by one, I have a few general tips:

  1. I always make my cutting measurements mathematically correct in my patterns. Over the years I’ve tried many different methods of cutting and trimming in my instructions, and long story short, I came back to doing it this way.

This means that technically speaking, if you cut your Half Square Triangle pieces at 2-7/8” square, and follow the directions, using a correct seam allowance, you should end up with 2-1/2” HST squares in the end. However, I also allow for enough fabric in case you want to make your pieces a smidge bigger. In fact, if I’m being honest, no matter what quilt I’m sewing, I always cut my pieces just a hair larger, and then sew my seams just a hair under a 1/4”, and always come up with enough wiggle room to trim things up perfectly. My point is, that you do what works best for you, and know that you are free to cut your pieces a bit larger and trim them down later if that’s your preference.

  1. I also NEVER pre-wash my fabric. Again, this is a personal preference. And just FYI – Out of curiosity, I actually did a bleed test on the Droplet Navy for this quilt since it is so dark, and it didn’t bleed AT ALL. Hooray for great Connecting Threads fabric!
  2. I love to pre-starch all my fabric. I always starch and iron everything before I ever take a rotary cutter to a single piece. My preferred starch is MaryEllen’s Best Press – Caribbean Beach scent. And that’s just because I always want to be in the Caribbean, haha!

By now some of you have likely received your first installment of Open Skies. If you look at the pattern, you’ll notice that each block has the same half-square triangle border. We are going to get SO good at making these by the end of this quilt!

Knowing that each of the three blocks this month needed a total of 12 identical HSTs, I cheated a little bit and made all 36 at the same time before sewing up each of the blocks individually. So if you want to do the same, you’ll need to cut a total of 18 of both the B and C squares, then sew them up according to the directions.

A small side note, The Droplet Navy fabric is directional, but personally, I didn’t pay much attention to the direction of the print because I don’t think it is very noticeable in the final quilt. If it bothers you, then you are most welcome to figure that in with regards to how you sew these together. Since the Half Square triangles end up facing every which way in the blocks anyway, I decided to just get sewing and let the print be in whichever direction it ends up.

Here is my stack of 36 HSTs – ready for trimming

I like to look for shortcuts whenever I’m making a quilt – even with my own patterns! So I decided to assemble all the components for the outer borders before I began making the center portions of each block. But if jumping ahead with these messes you up, please ignore what I just said and follow my directions by sewing the blocks one by one.

In the photo below I have a stack of 12 of the A/B/C units. This step is #3 in block #1.

Now on to the individual blocks we’ll be making this month!

Block #1

The first block we will be making has a very simple 9-patch unit in the center. This center uses another directional print with the Droplet Lt. Denim fabric. Again, it probably doesn’t matter too much, but you may choose to pay attention to the placement of those F squares in order to have the print all going in the same direction. It all depends on how picky you want to be.

Another tip for this block as well as all the others: Make sure you are following the pressing instructions in order to ensure that your seams will nest together properly in the end. This is especially important because of all those half-square triangles on the border. But if you mess up, don’t fret. You can always choose to press your seams open if you prefer.

Once the center is sewn, you can take your completed border sections and attach them as shown below. Before you begin sewing, it’s a good idea to double-check that all your HSTs are facing the correct direction around the perimeter. This is why I always lay things out first.

Block #11

This block involves making even more HSTs, but the ones for the center are much larger. As I mentioned above, this is where it’s handy to cut your pieces just a smidge bigger, and then use a scant 1/4″ seam allowance, so that you can trim to perfection, or at least close enough!

Make sure you’ve got these in the correct orientation before you begin sewing like you see below.

And here is this block, ready for sewing the HST border around the outside.

There isn’t too much that is tricky with this block either, but I have one additional tip: When sewing the outer A/B/C units onto the center portion, you may want to pin and sew so that the central unit is on the top, and the A/B/C units are underneath. This will enable you to see where you are sewing through those D/E points on the sides of the center block, helping you to get them just right. The picture below will help illustrate what I mean:

Maybe not the greatest photo, but if you look close, you can see where the stitched line goes right through the intersection of where the HSTs are joined.

Block #13

Our last block is probably the most challenging of the month. Each of the four D squares in this block will have three E squares sewn and trimmed to make an almost square in a square unit. Here you can see the first E squares pinned and ready to go.

Anytime I use the method of sewing on a line and then trimming to a 1/4 “ seam allowance, I always sew just a hair outside the line. This helps me to make sure when I trim and press, that I don’t end up with those triangle corners coming up short.

Before you trim, I suggest you flip up each E square and see if the corners match up. I always check this on every single one, and if it comes up short, then I know I need to rip out my stitching and try again. I know it’s tedious, but you’ll thank yourself later.

I’ve checked to make sure my corners line up, so now I can trim off the excess.

If you look at the directions, you will notice that the first E triangle is pressed TOWARD the D square, while the remaining two are pressed AWAY from the D square. This is especially important because this will once again allow for those seams to nest when you sew the units together.

The first E square is pressed TOWARD the D square like you see here.

Once you’ve finished with the first E squares, the remaining ones are pressed outward.

The placement doesn’t matter when you sew the four units together, so If you don’t like how I’ve arranged them, by all means, move them around to your liking.

This block would also benefit from having those outer A/B/C units on the underside as you sew in order to make sure you see where you are sewing and get those point intersections nice and crisp.

Sashing strips:

Last but not least, we will be making a few sashing strips. Since there are so many in this quilt, I thought it would be a good idea to knock some of these out every month. Again we are using that directional navy print, and again, I didn’t pay attention to the direction. I’m starting to sound like a broken record, aren’t I?

As I mentioned above, it’s helpful to sew just a hair outside the line with these, and flip up the corners before you trim to make sure they match up.

Firs two squares are pinned on.

Below are the last two squares pinned and ready to sew. In addition to getting good at sewing Half-Square Triangles, we are also going to get really good at these sashing strips over the coming months!

Well, there you have it! The first three blocks and a few sashing strips are done! Next month we will make a couple more blocks, and even more sashing strips.

I look forward to sewing and chatting with all of you over the coming months. Until next time….

Happy Quilting!

 Kristin


Ruby BOM – Month 7
2.7.2022

Hello friends!

This month we get to make another 4 unique blocks. Yay! And once again, some of them may look a little familiar. That’s because three of the four blocks for this month are ones we’ve sewn before. The only block this month that is brand spanking new is block #23. So I’ve decided to go a bit out of order for this blogpost and start with our new block for the month. Let’s dive in!

Block #23

This block begins with making some no-waste flying geese. By now, you know the drill on how to make these, but here are a few pictures to refresh your memories.

Once those are sewn and trimmed, I lay out everything for step 3 before I begin sewing the components together. I have a love/hate relationship with blocks that have the flying geese sewn outward to make a square in a square effect. I love using this block in designs, but sometimes when sewing it can be tricky to get those flying geese to match up in the corners and make a smooth-looking diamond shape in the block. So I really pay attention to how things are lining up as I’m pinning, and yes, I use LOTS of pins to keep everything in place for sewing.

Once you have the center section sewn together, it’s time to make even more flying geese.

 After those are done, I again lay everything out before I begin sewing. I always do this, and mostly it’s because way back when I first started quilting I would confuse myself and end up sewing things going the wrong way, so this helps me to see what I’m about to do before I start pinning. Because nothing is more aggravating than thinking you’ve finished sewing your block, only to realize that you did it wrong and have to rip it out. Ugh!

You can see in the picture below that I already sewed the F squares to the ends of the D/E flying geese. Sometimes I get ahead of myself!

Almost finished…

This block is also one that no matter which way you press the seams, you’ll end up with some bulk in spots. If this bothers you, feel free to press the seams open for steps 6 and 7. Personally, I just pressed the heck out of those seams according to my instructions. But if you want to adjust, by all means, feel free. Once your quilt is done, no one will see how you pressed anything anyway.

I really love how this block turned out. In fact, a loooong time ago, I even designed a whole quilt using this block as the base for my design.

Okay, now let’s go back to the beginning of the pattern and talk about the not-so-new blocks we’ll be making this month.

Block #2

This block is the same as block 15 from month 3, so you can refer back to that blog post HERE if you’d like a refresher. But it’s always good to see how this block comes together with the new fabrics, so I’m posting a few pics of how this month’s version comes together.

Here are the squares for the center 9-patch, ready for sewing.

After I made the 9-patch unit, I sewed the HSTs for the corners of the block.

Here are all the components of the block, ready to sew into rows.

Block #4

We originally sewed this block way back in month 1, and it was block #16, in case you want to refer back. The only slightly tricky thing about this block is making those quarter square triangle blocks, and making sure you’ve got everything in the right place as you sew and cut.

First, you’ll make your half-square triangles.

After those are done, you’ll pair up one of each kind and place them right sides together. They aren’t lined up in the photo below on purpose so that you can see how the Red Corsage II fabrics on the bottom and top units are to be on opposite sides. While I normally would trim my HSTs before sewing, when making Quarter Square triangle units, I always wait until I’ve finished them before trimming. That’s why you still see the tails in the photo.

If they are placed properly, you should be able to peel back the top unit and it should look like this:

I’ve skipped ahead a bit here, but this is what they should look like after you sew on either side of your marked lines and cut on the line. Now all you have to do is press them open and trim them to size.

Now you just have to lay the block out, sew the units into rows, like I’ve shown below, and then sew those rows together. Easy peasy!

I have always loved Ohio Star blocks. They are quick and easy, and just darling in quilts. The first quilt block I ever made in my whole life was an Ohio Star block, so maybe that’s why I adore them.

Block #11

Our last block for this month is another repeat from month 3 and was known as block #6 back then.

This block has lots of half-square triangles around the perimeter of the block, along with some more flying geese to make the center star points. The day I was working on this block I was listening to podcasts, as I tend to do while sewing, and got so engrossed in what I was listening to that I got a little carried away and kept forgetting to take pictures for all of you. Ack! So what you see below is what I have to show you. I’ll do better next month, I promise!

Here is the center star at about step 3, almost finished.

The top and bottom rows of the block are just about finished as you can see here:

And now the block is almost done!

This one is another personal favorite of mine, even though it’s a lot more work than the Ohio Star block. I really do need to make an entire quilt with this block. I know I would love it!  Perhaps I’ll make an FQ sampler…in my spare time haha! For now, I’d better just focus on getting this quilt finished, along with about 5 others that are partially done in my UFO pile. So many projects, and so little time!

Here’s one last look at all the completed blocks. I love them, and I hope you do too!

I hope you enjoyed putting this month’s blocks together, and I’ll catch you all next time!

Happy Quilting!

 Kristin