


 Tutorials
 11.30.2022
Hi friends! We are finally at the end of our Open Skies Block of the Month. Can you believe it?! Now that all our blocks and sashing our finished, it’s time to assemble and finish this quilt once and for all. I think some of you may have already started doing this last month, and I love it! You’ll just be one step ahead of the rest of us.
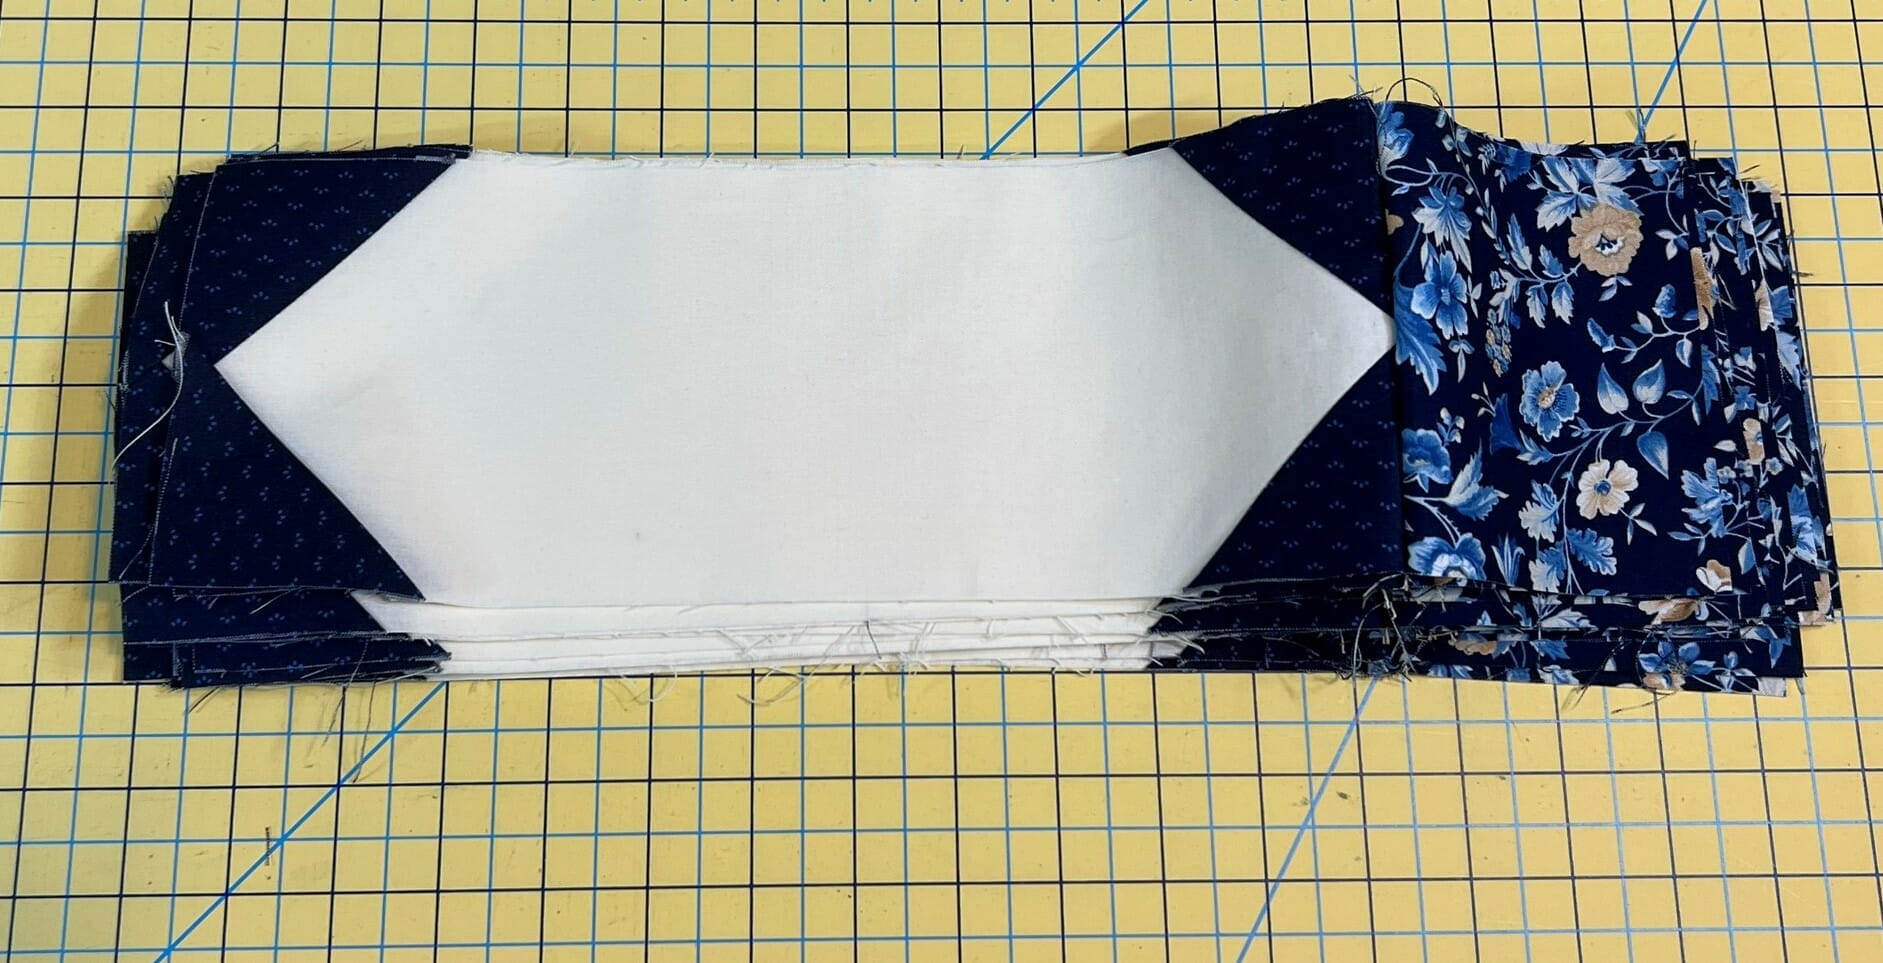
We’ll start by sewing the rows together first. There is a diagram included on pg. 51 of the pattern in case you want to make yours just like mine, but it’s entirely up to you. Feel free to play around with your block placement and see if you like a different arrangement better. I put mine up on my not-nearly-big-enough design wall, which wasn’t ideal, but I made it work. I also made sure my sashing strips measured 4-1/2” x 12-1/2” before I began sewing, and if they didn’t, they got a little starch and trim.

Once you’ve sewn your rows together, I would recommend pressing away from the blocks and toward the sashing strips. You can also choose to press the seams open if you prefer.
For step 2, you’ll be making the sashing strips that go in between the rows. If you’ve pressed toward your sashing strips in step 1, you’ll also need to press toward the sashing strips in step 2. Pressing away from the A squares seems counter-intuitive, but that’s what you’ll need to do to have your seams nest when it’s all sewn together. I did mine assembly line style and sewed a block to each remaining one to start.
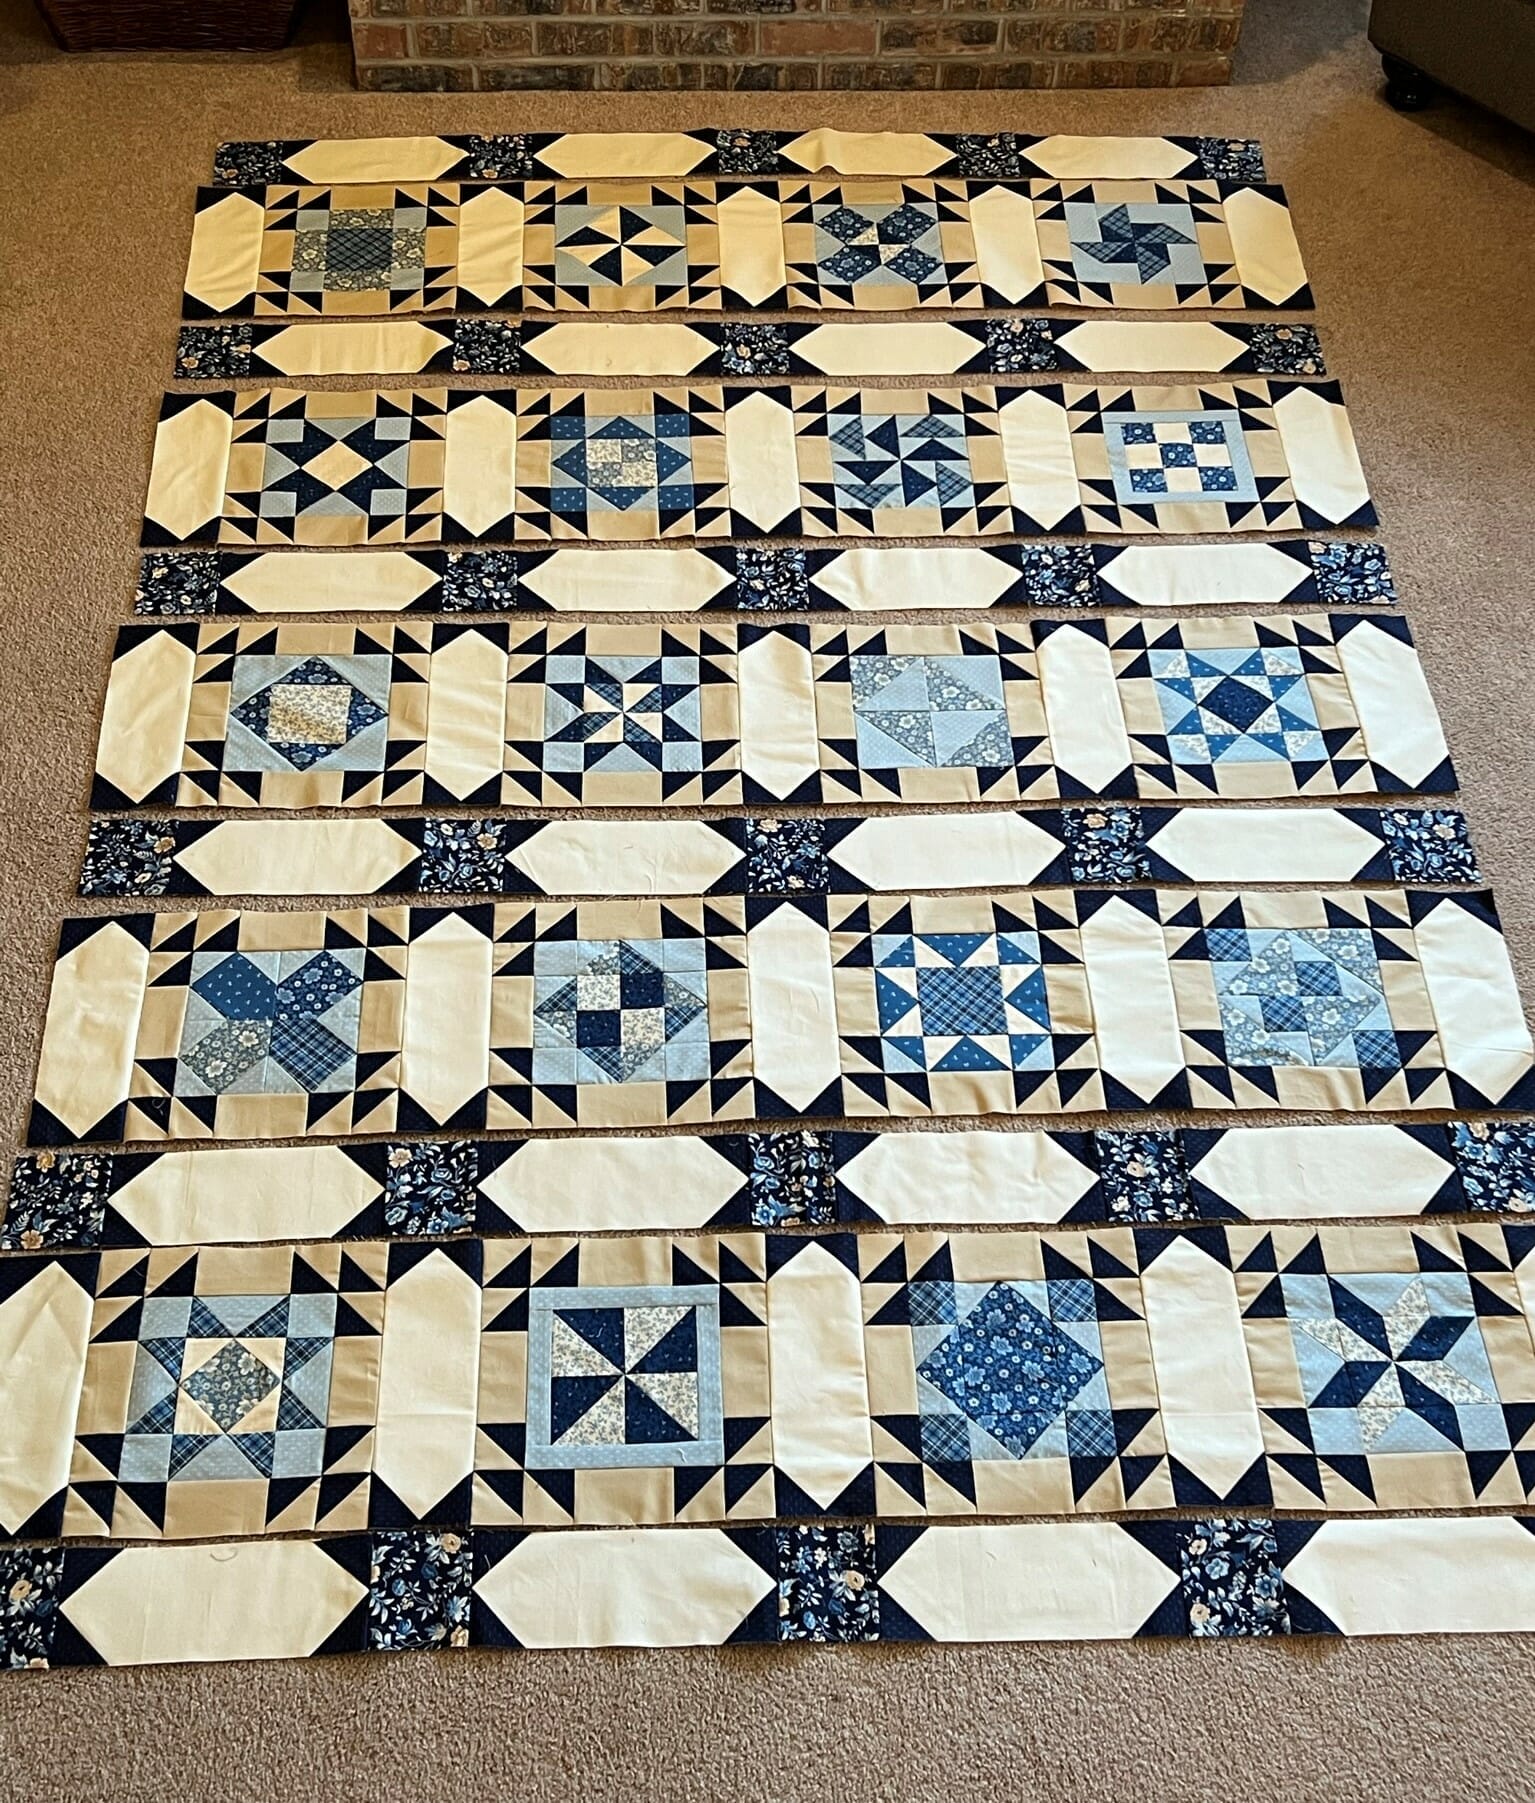
Now we can sew the rows and the sashing strips together! My living room floor had to substitute as my design wall at this point.
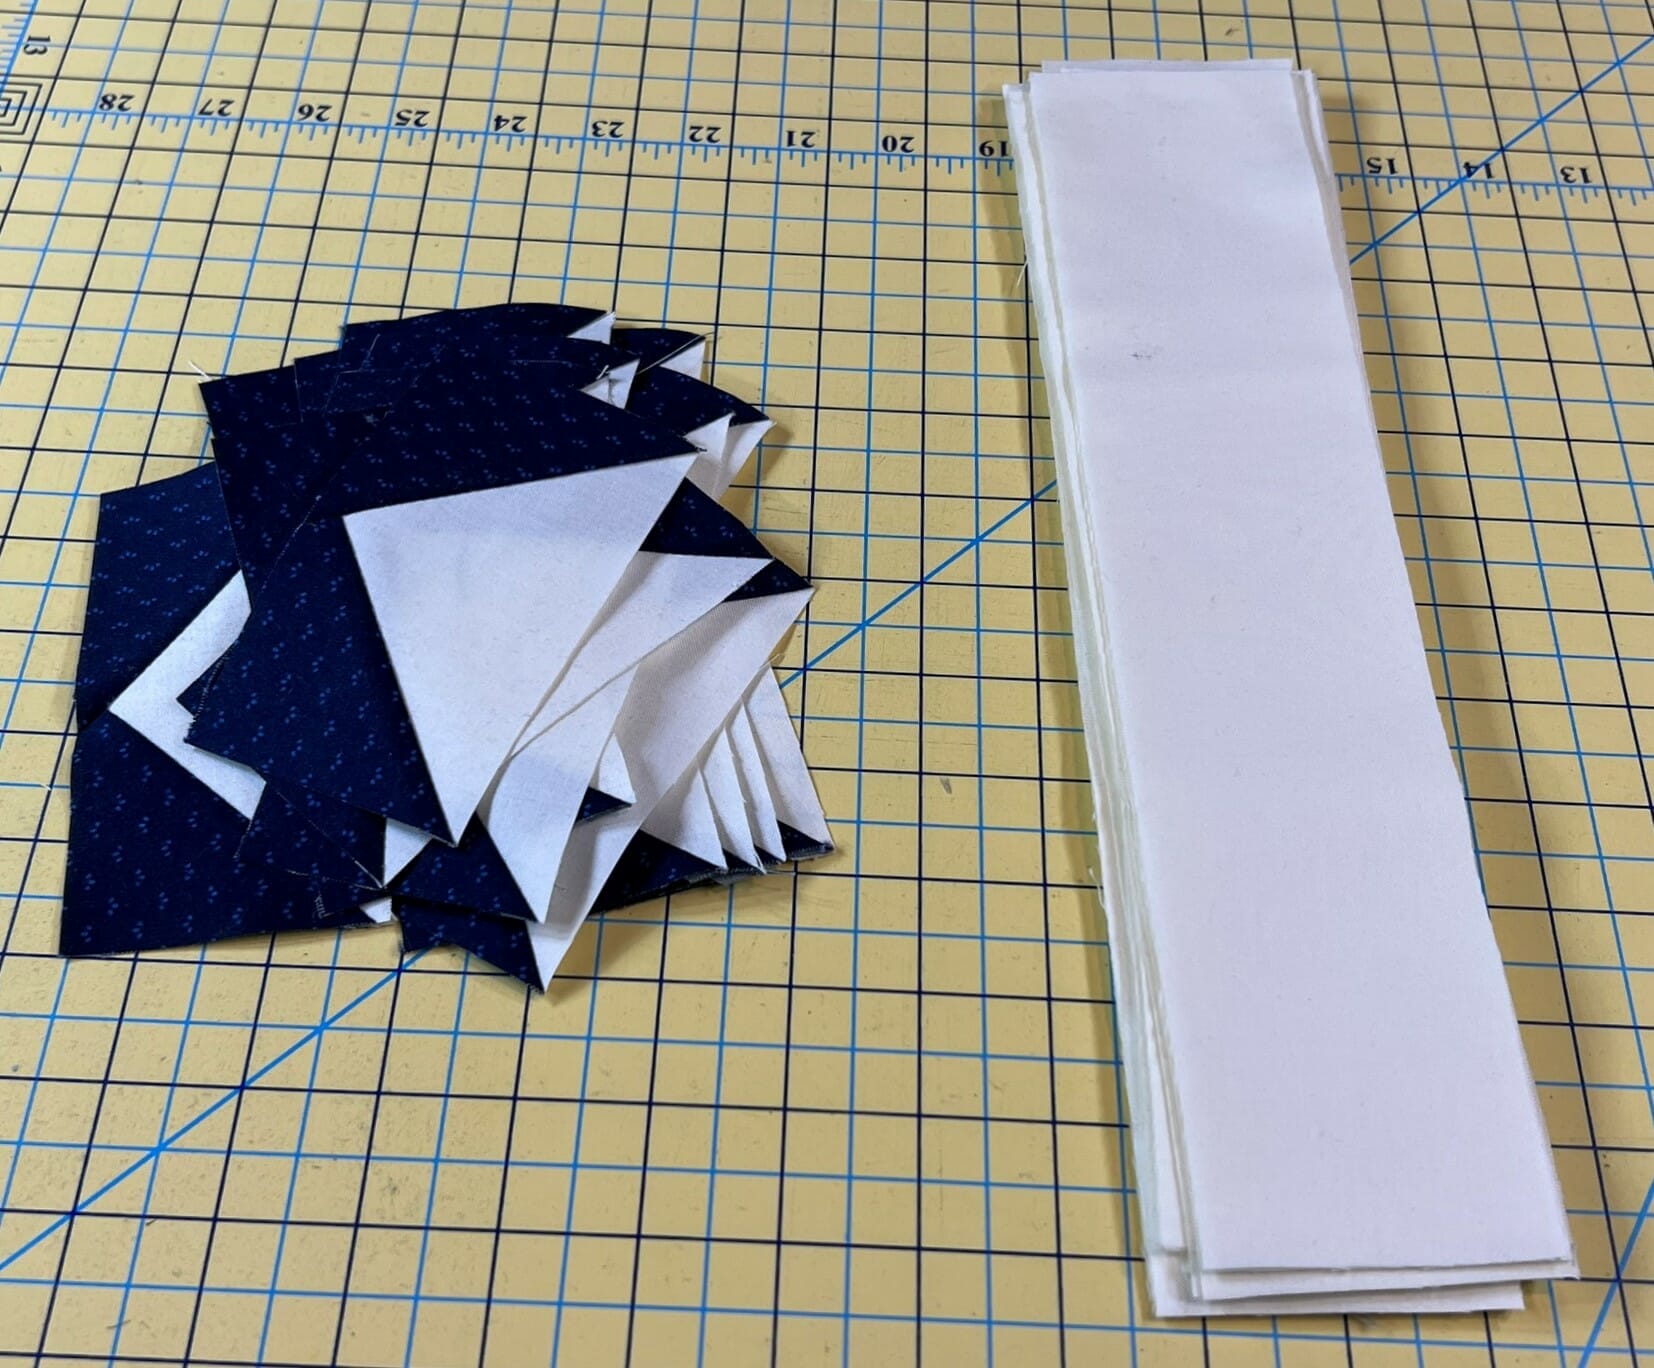
Even though the quilt looks practically finished at this point, we still have a little more piecing to do, in the form of some flying geese for our border. I won’t bore you with photos of that process. You all know the drill by now. But I WILL show you my messy pile of trimmed flying geese, along with the strips that are ready to be sewn to them.
Once those are done we will sew together some border strips in steps 5 and 6. Since I knew I needed to sew a flying geese unit to each E strip, I started with some assembly line piecing and went from there.
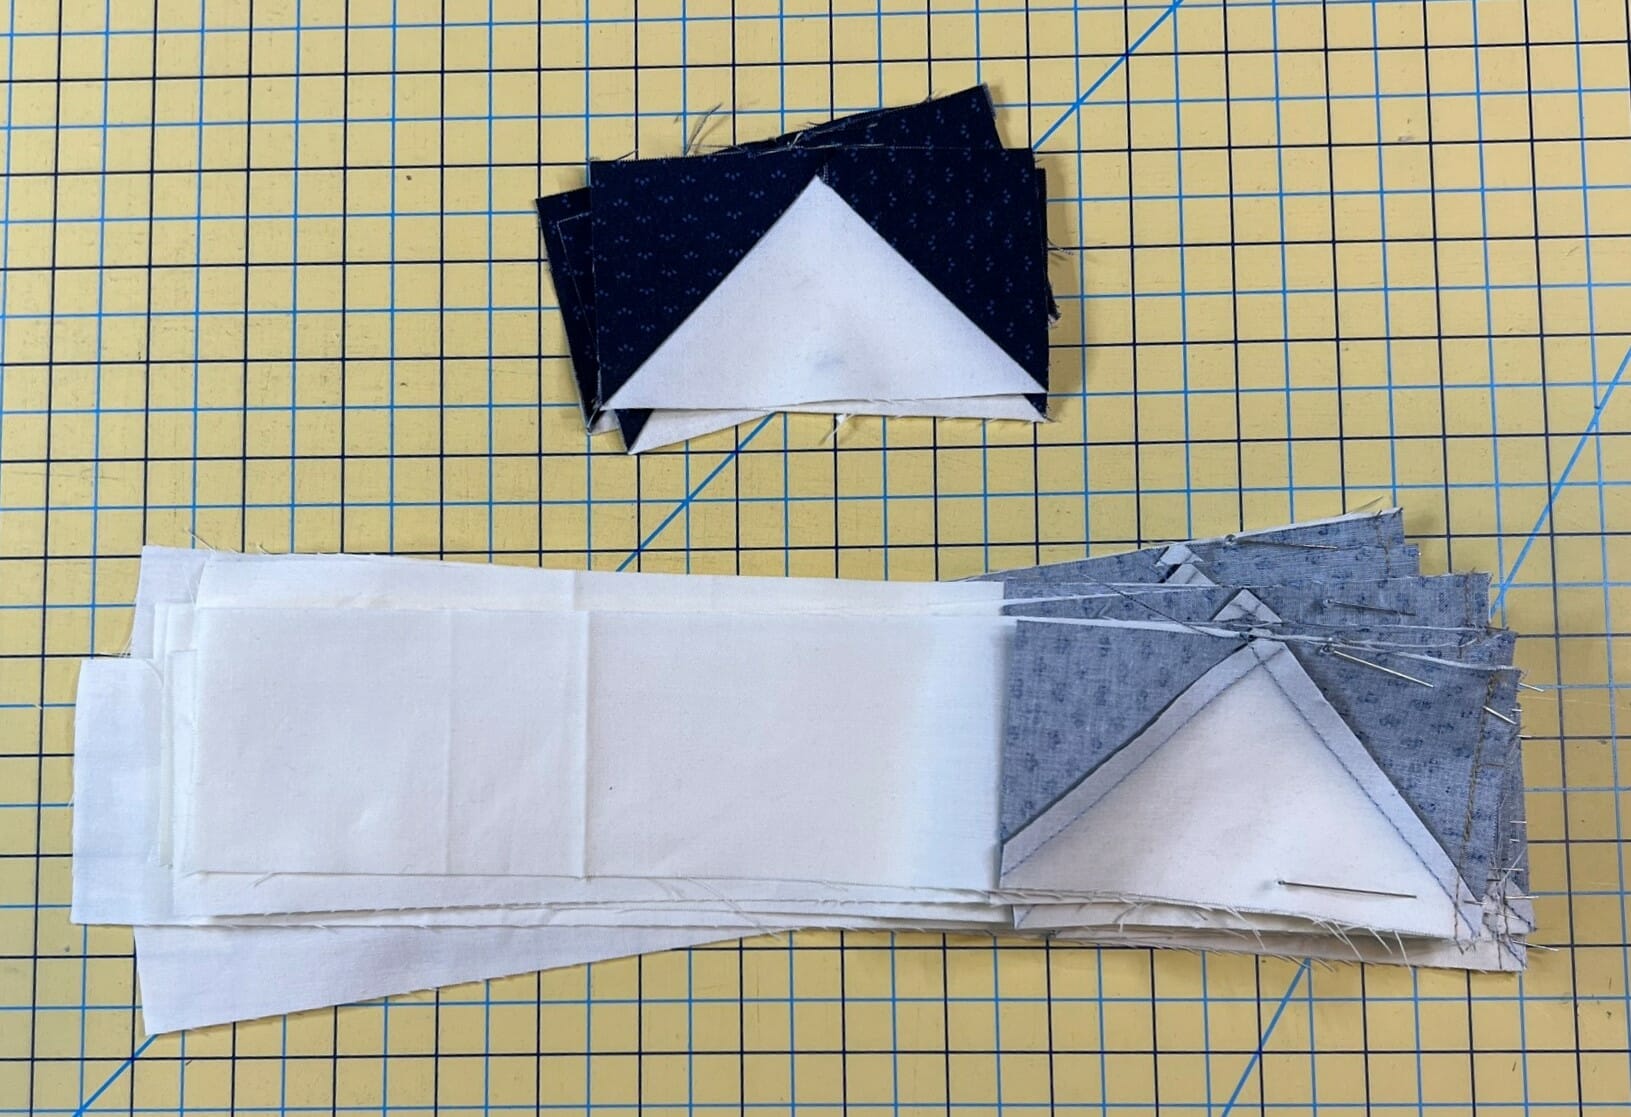
Using my lovely old living room carpet as a design wall/ pinning station, I made sure I had all my ducks, (or should I say geese!) in a row before sewing. I don’t want to end up with one of my geese flying in the wrong direction, so I always lay everything out and take a good look before pinning and sewing.
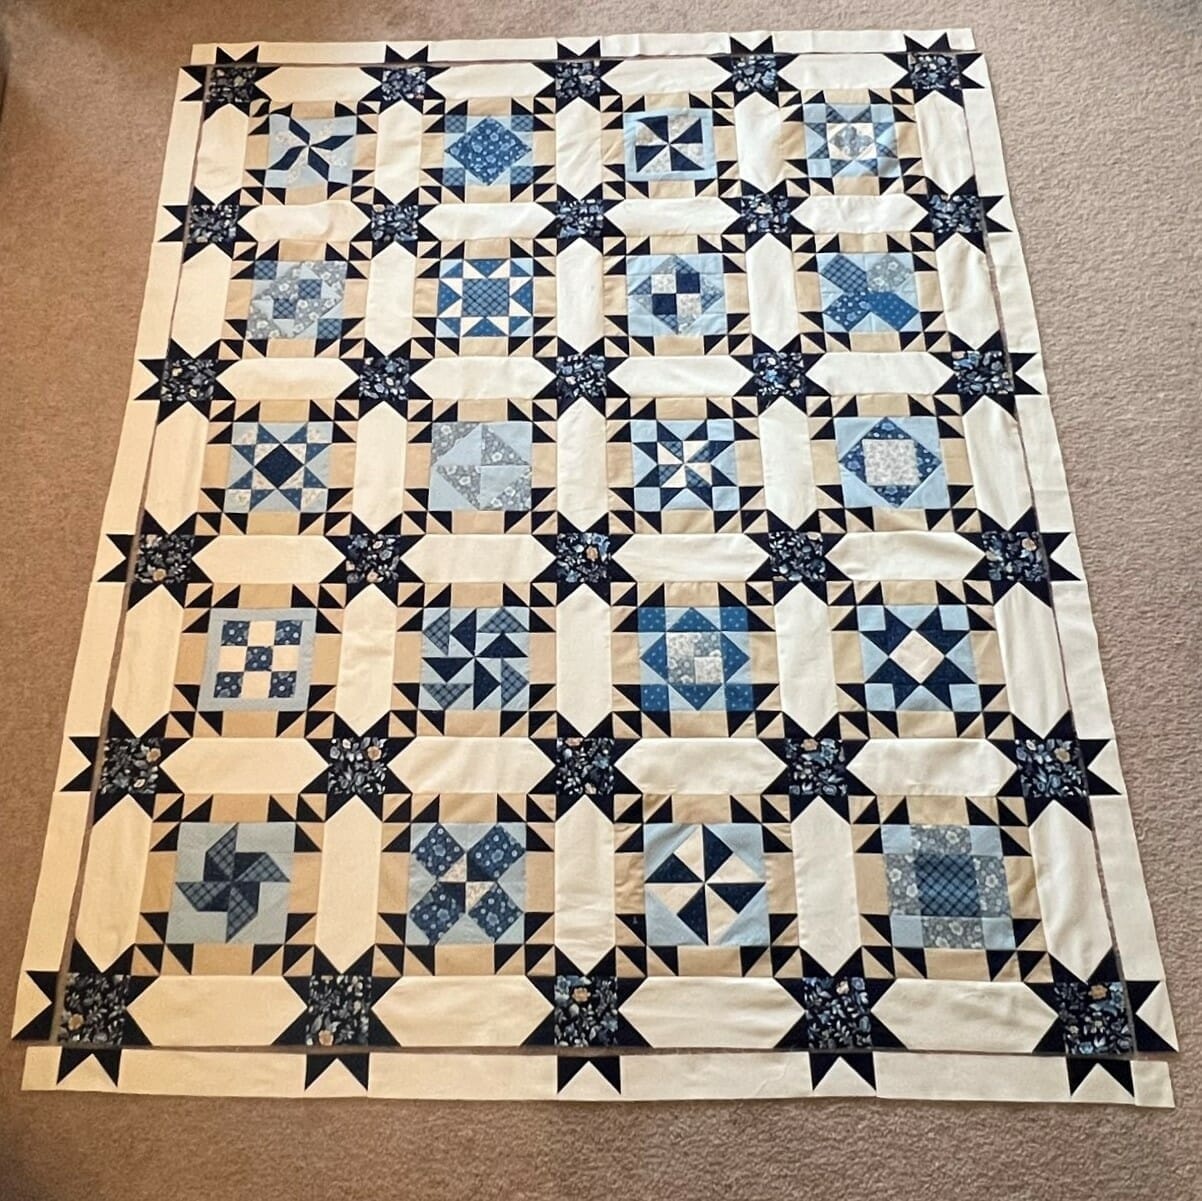
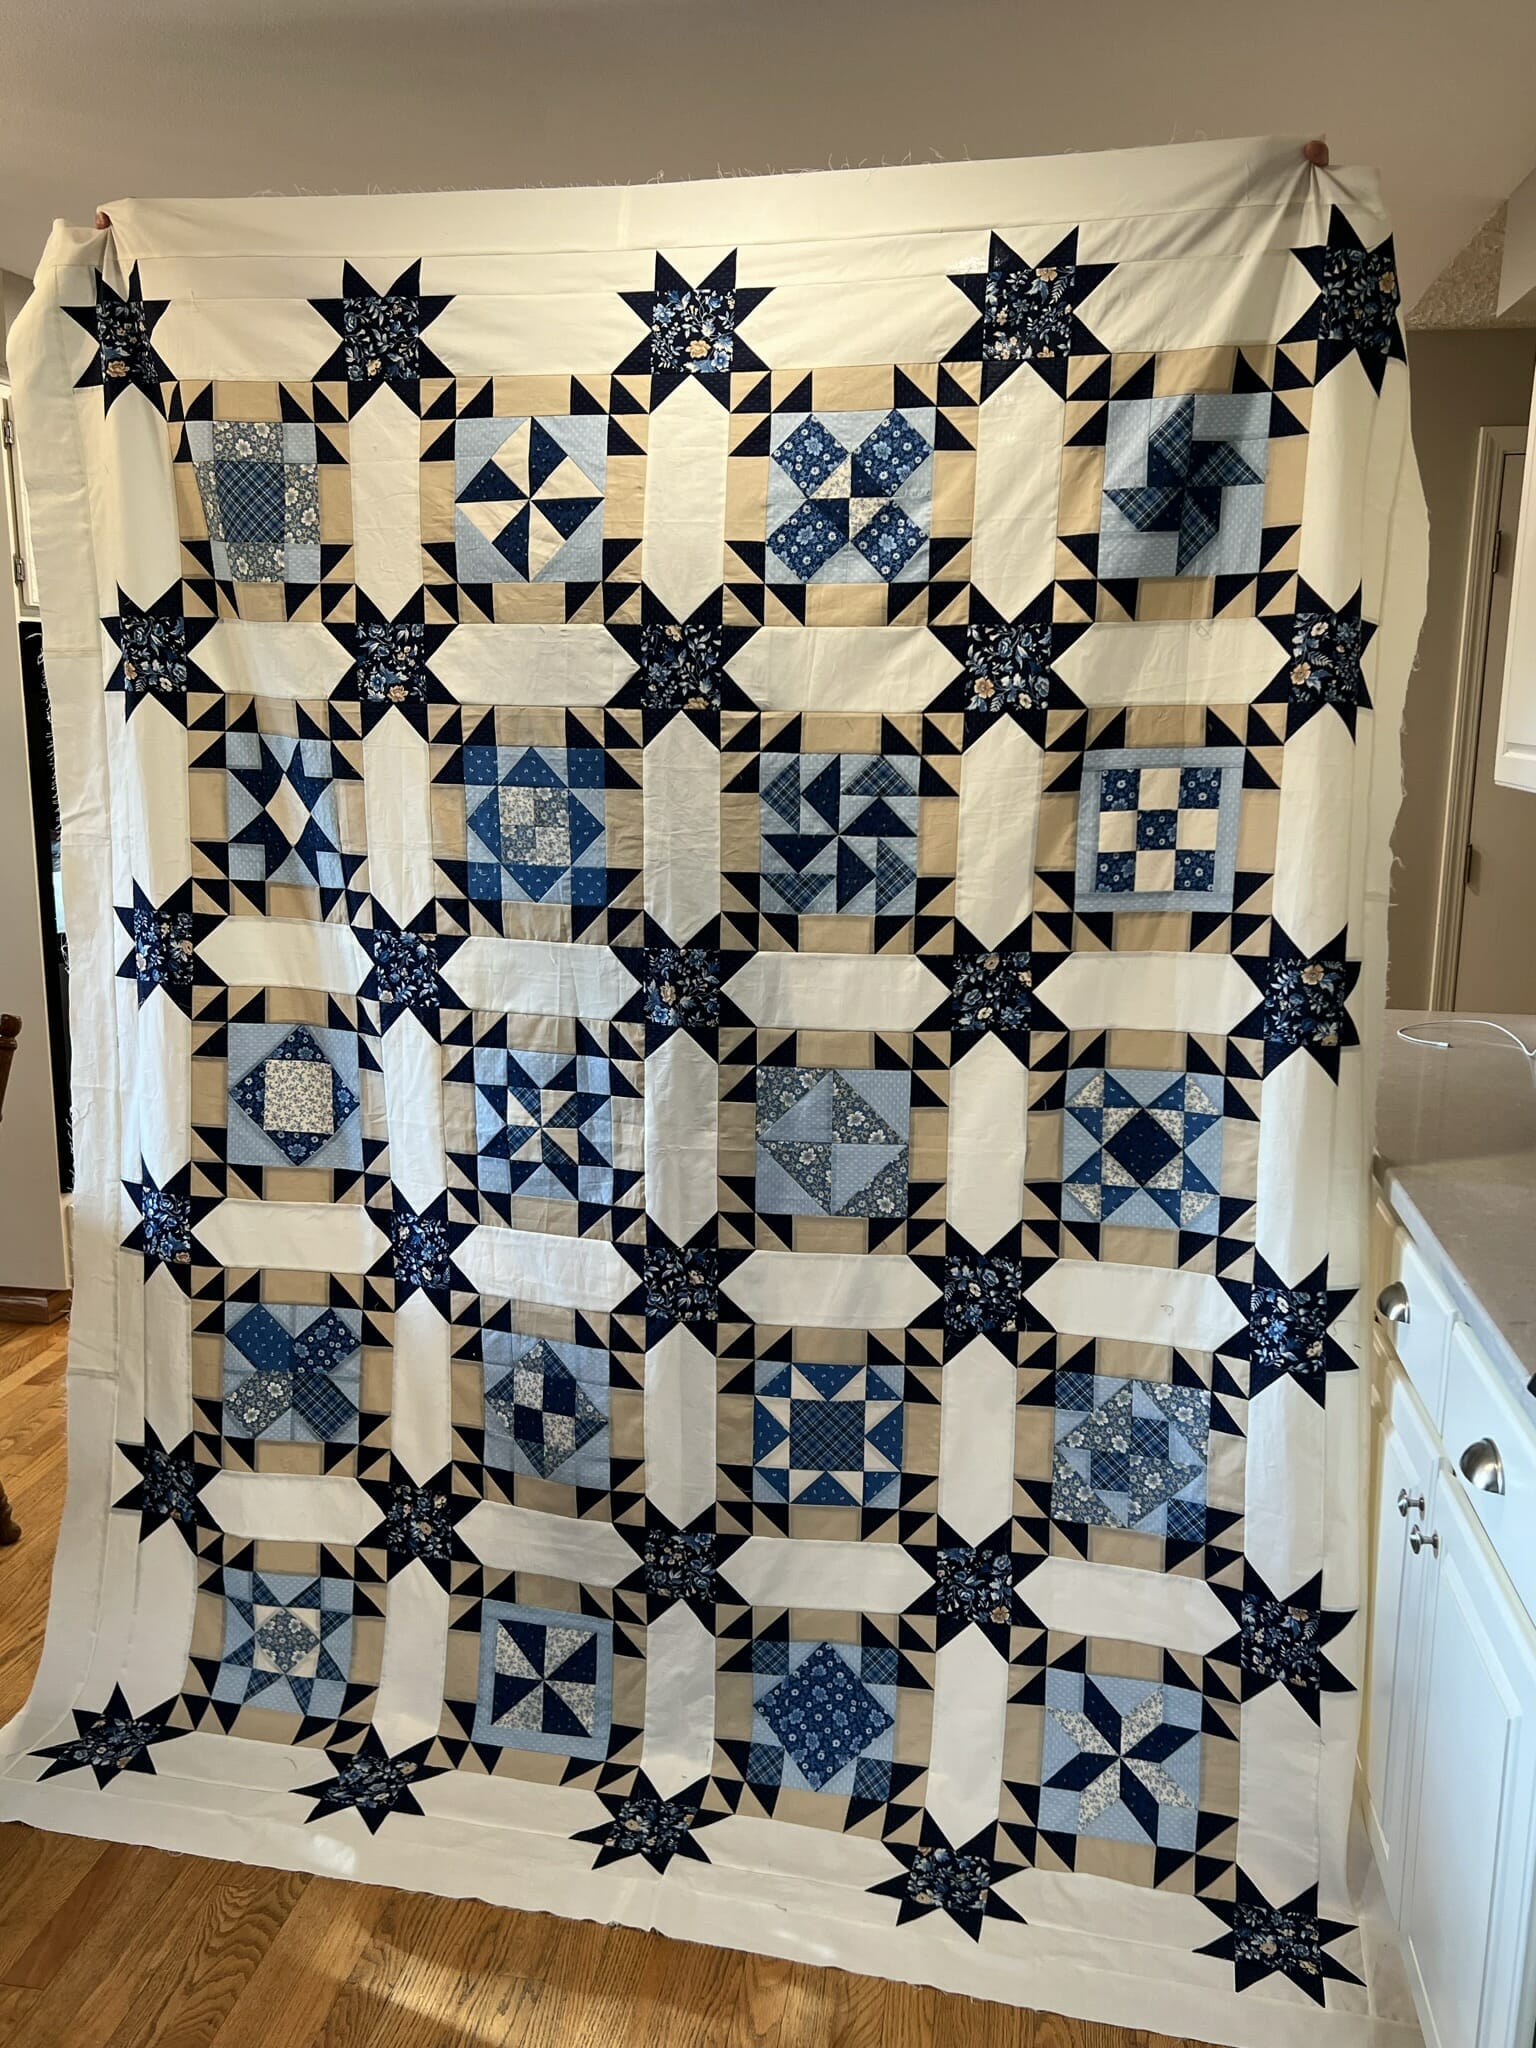
After adding the last solid borders, the quilt is finished! Here is my husband hiding behind my finished quilt top, trying desperately to hold it up. I gave up trying to take a pretty outdoor photo of it for all of you, as the weather and the wind would not cooperate. It’s one of the hazards of living in the beautiful Pacific Northwest. So you get my husband on a chair in my kitchen instead, haha!
I’ve designed a lot of quilts over the years, and I have to say, this one is a personal favorite. It’s definitely a keeper for me, and I plan on using it on my day bed in my bonus room. I’d love to see what you all do with yours!
I want to thank each of you for coming along with me on this quilt making journey over these past 9 months. I hope you have enjoyed the process, learned a thing or two, and most of all, I hope you LOVE your finished quilt!
Until next time,
Happy Quilting! – Kristin

