


 Tutorials
 7.12.2022
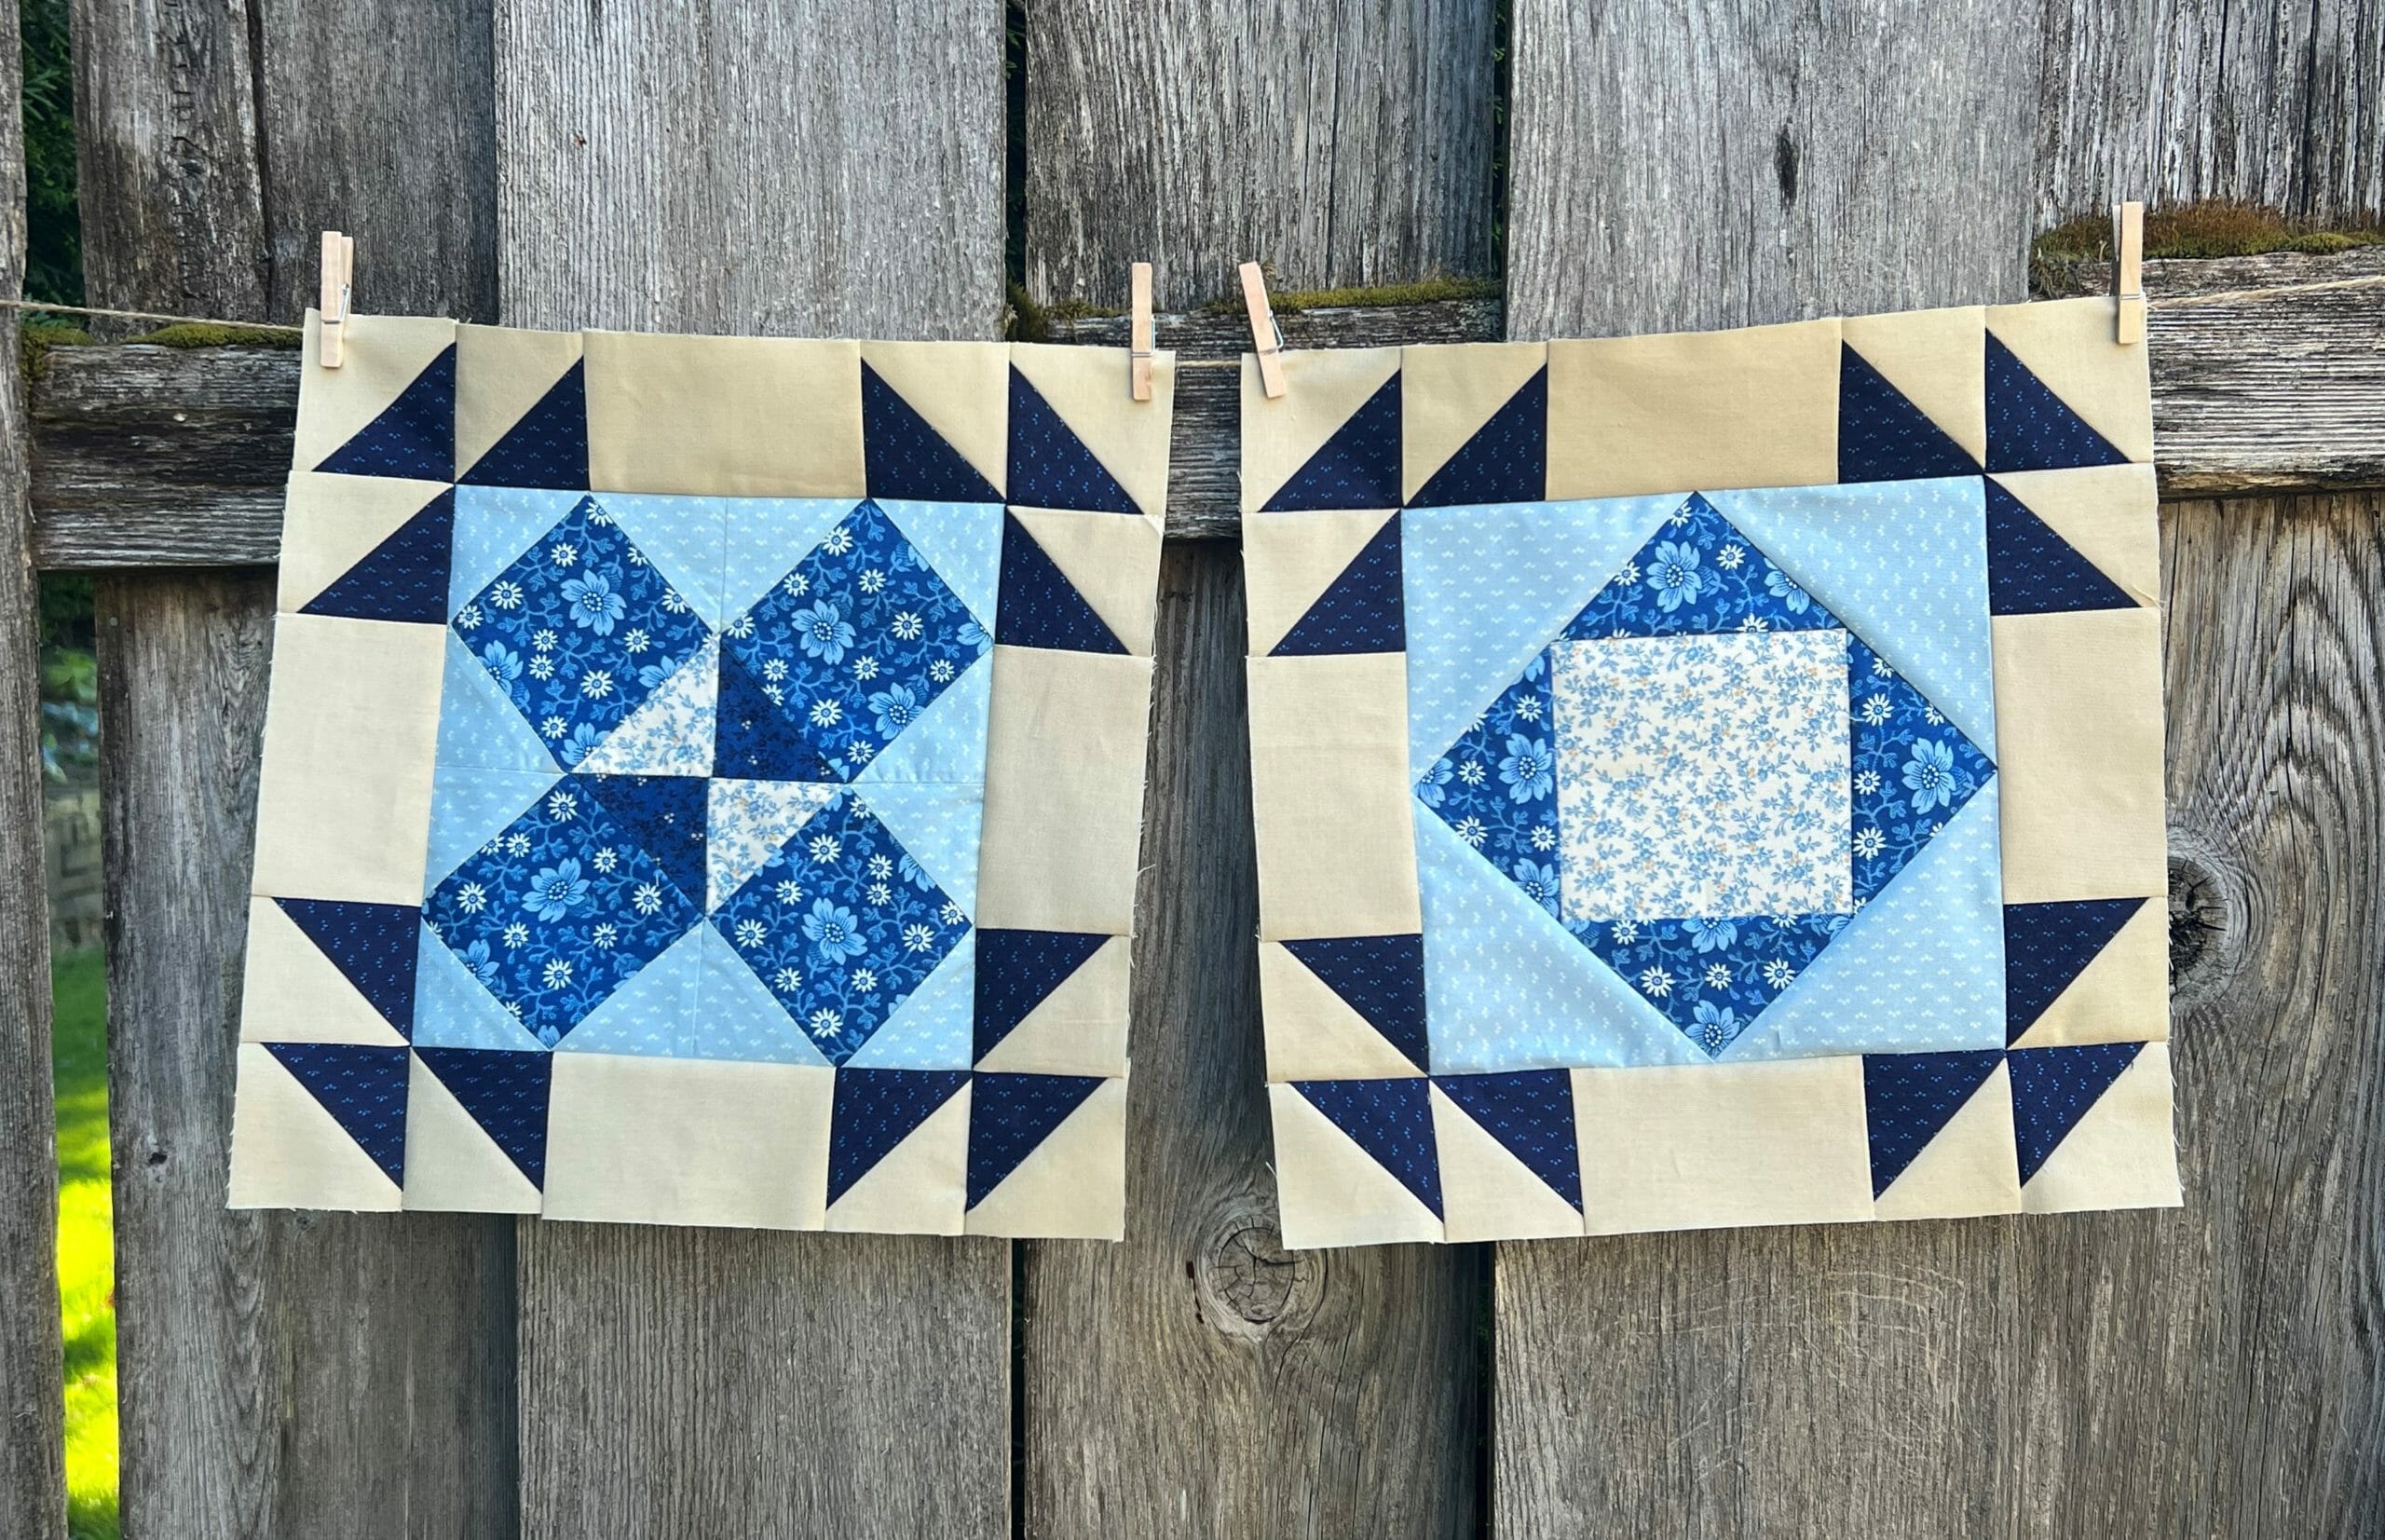
Hi everyone!
It’s been so fun to watch everyone’s progress on the Facebook group. Thank you all so much for sharing!
This month we only have two blocks, along with the sashing strips. Each block has a square in a square design. There are two methods to make these units, so wrote the instructions to showcase each one.
Let’s talk about each one.
Block #3
For this block, our square-in-a-square involves starting with the D square being cut as the size of the completed unit. It’s almost like making a traditional flying geese unit all the way around the square. You’ll simply place the G and E squares on their respective corners, stitch on the marked lines, and then trim your ¼” seam allowance.
This method allows for greater accuracy, but also creates a lot of fabric waste, especially if you are making a bunch of them for a quilt. But since we are making only four small squares, it’s not a big deal.
Make sure as you make these that you’re paying attention to the pressing arrows. As the first G square is pressed TOWARD the center of the D square, and the remaining three are pressed away from the center. This will help nest the seams when we sew all four units together.
Full disclosure: I neglected to follow my own pressing instructions and didn’t realize it until it was time to sew the four units together. Ugh!
Since I like to assembly line sew, I got all four units ready for each step at the same time and went from there.


As you’ll notice two of the blocks have the dark blue E squares as the last square to attach for this unit, and the remaining two (in step 3) have the cream F square as the last one. This makes for a fun little design in the center when sewn together. Please also note that the cream F squares are also pressed toward the D square, and not away. Again, it’s all about getting those seams to nest.
Once these are finished, I usually find that it’s helpful to measure and square up the units, just to make sure they didn’t warp or get skewed. Even with the best sewing, it sometimes happens. If you need to do a little trimming, just do your best to keep your seam allowances at the points of what now looks like a diamond in the center.
Now all we have to do is sew these together! If you find that your seams are getting bulky, it’s totally fine to press any or all of these seams open.
And of course, not block would be complete unless we added all of our usual half square triangle units we love!

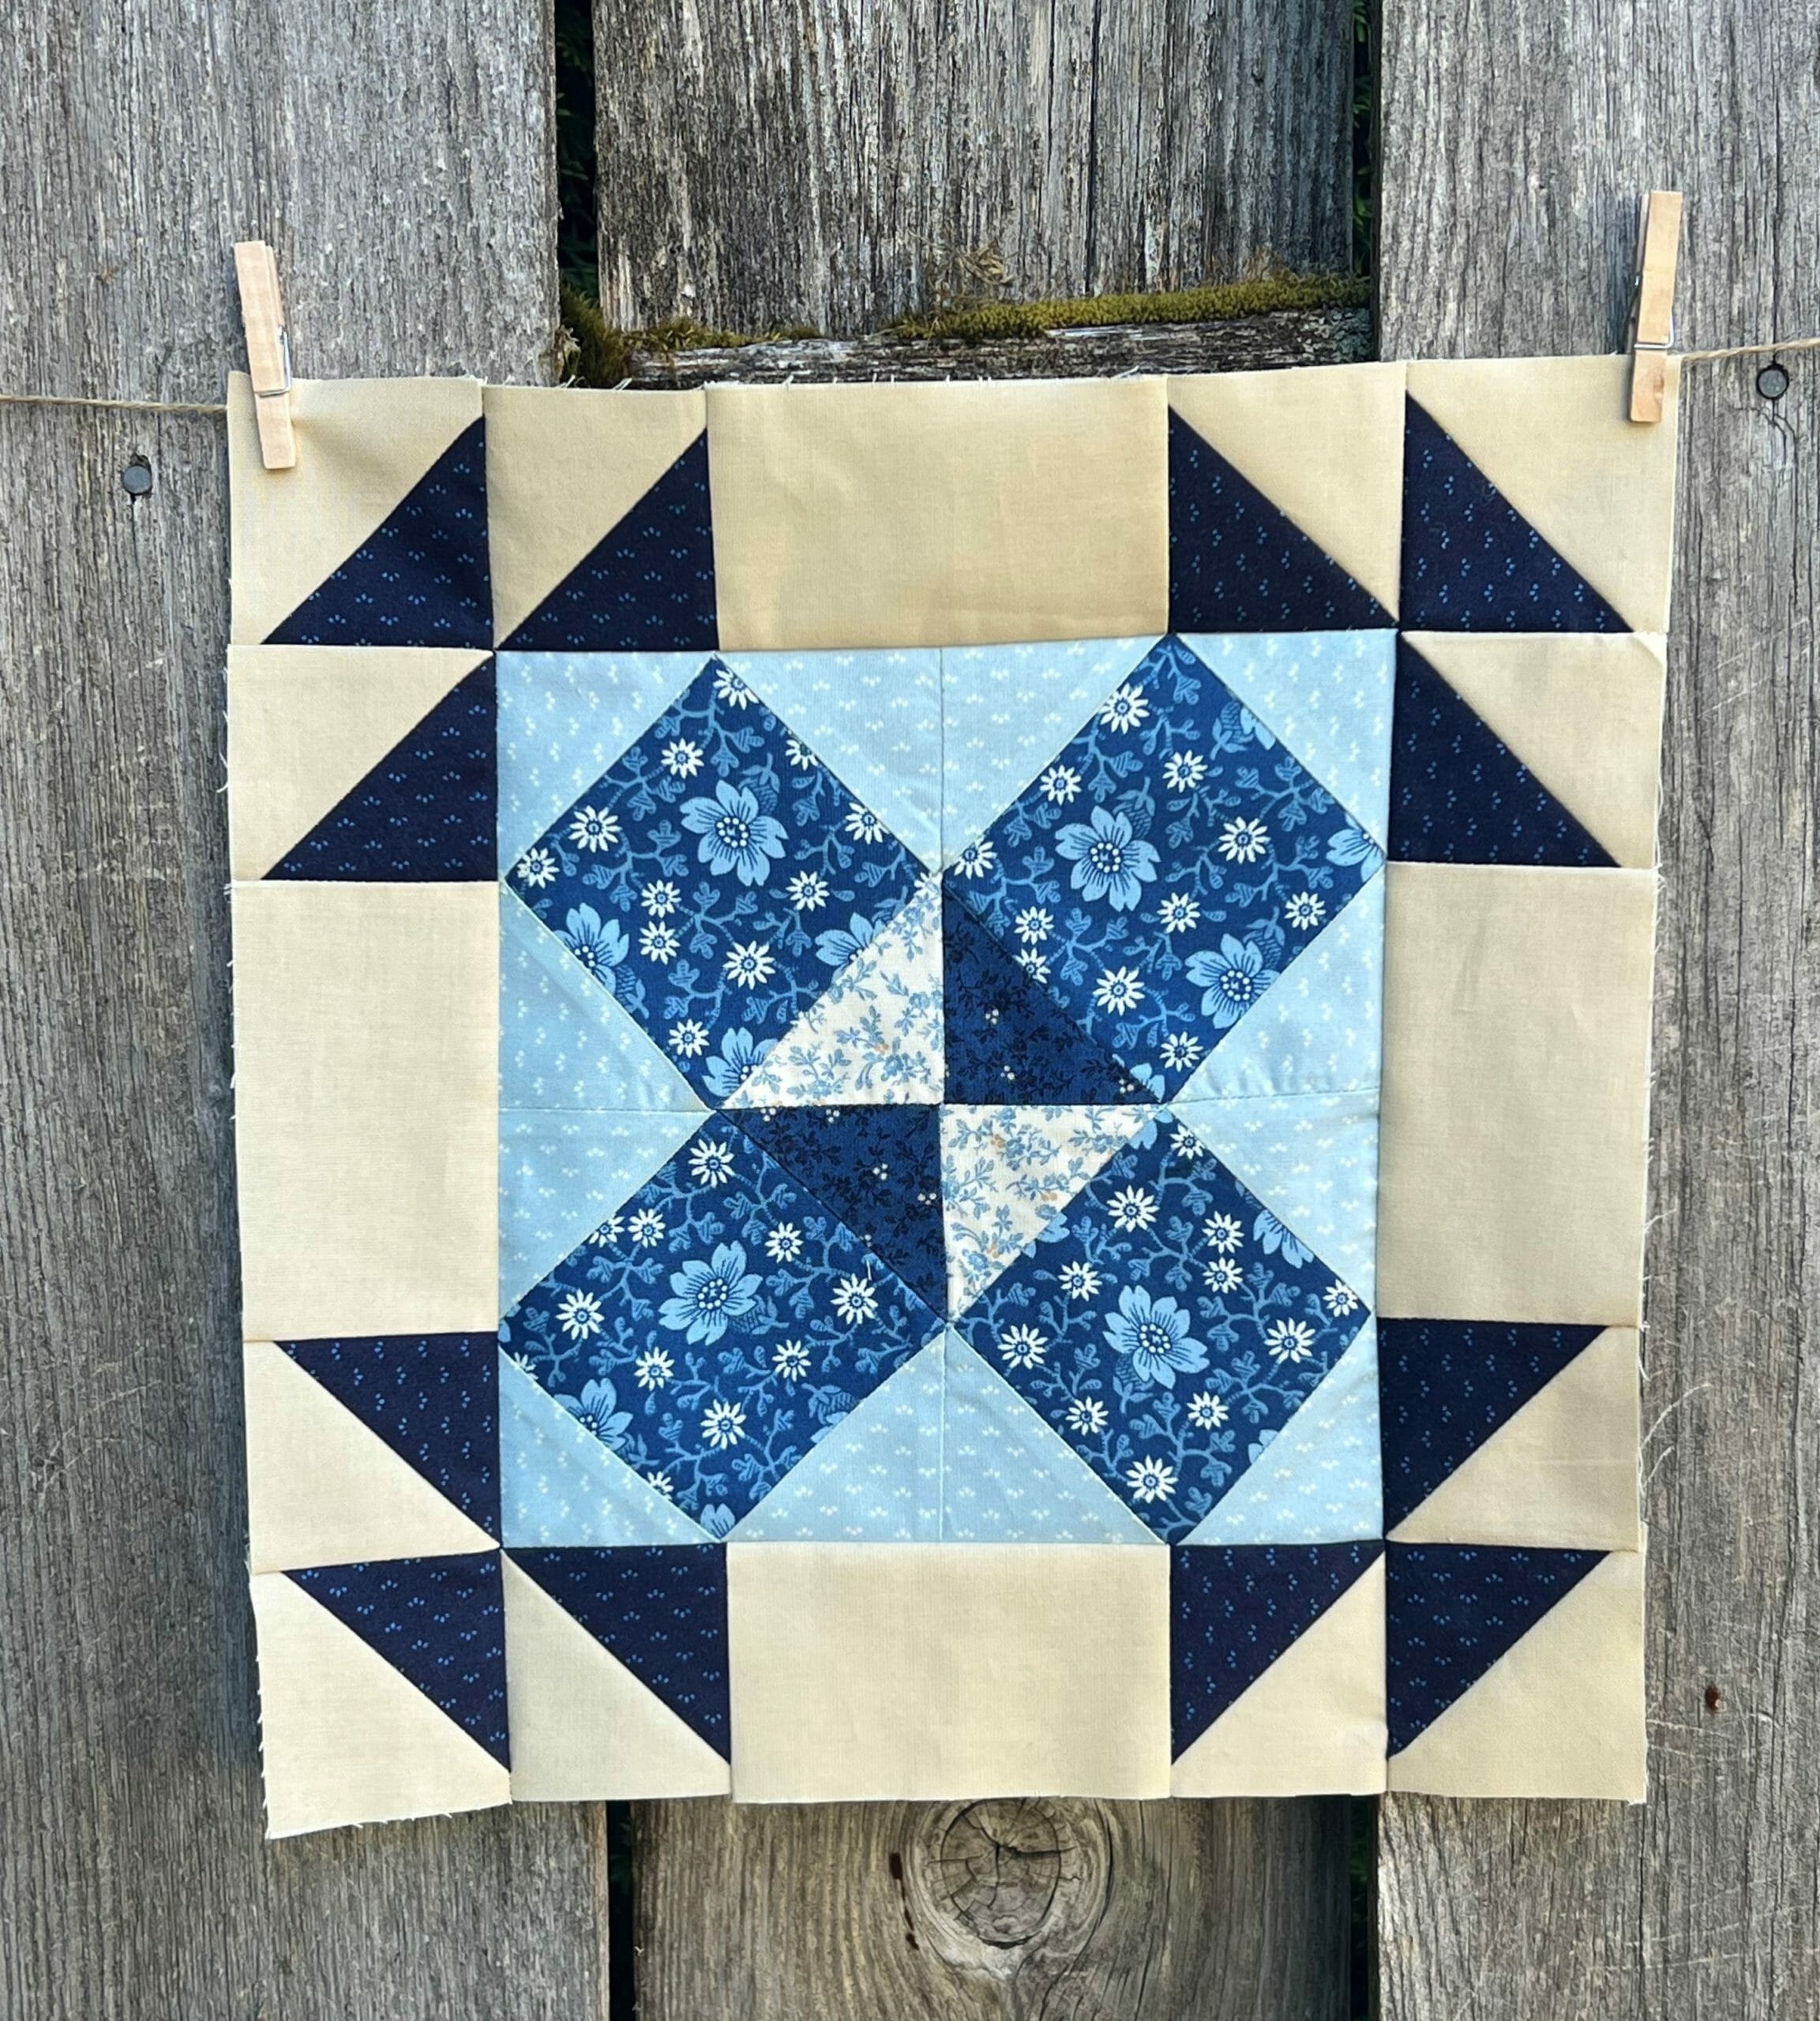
Block #9
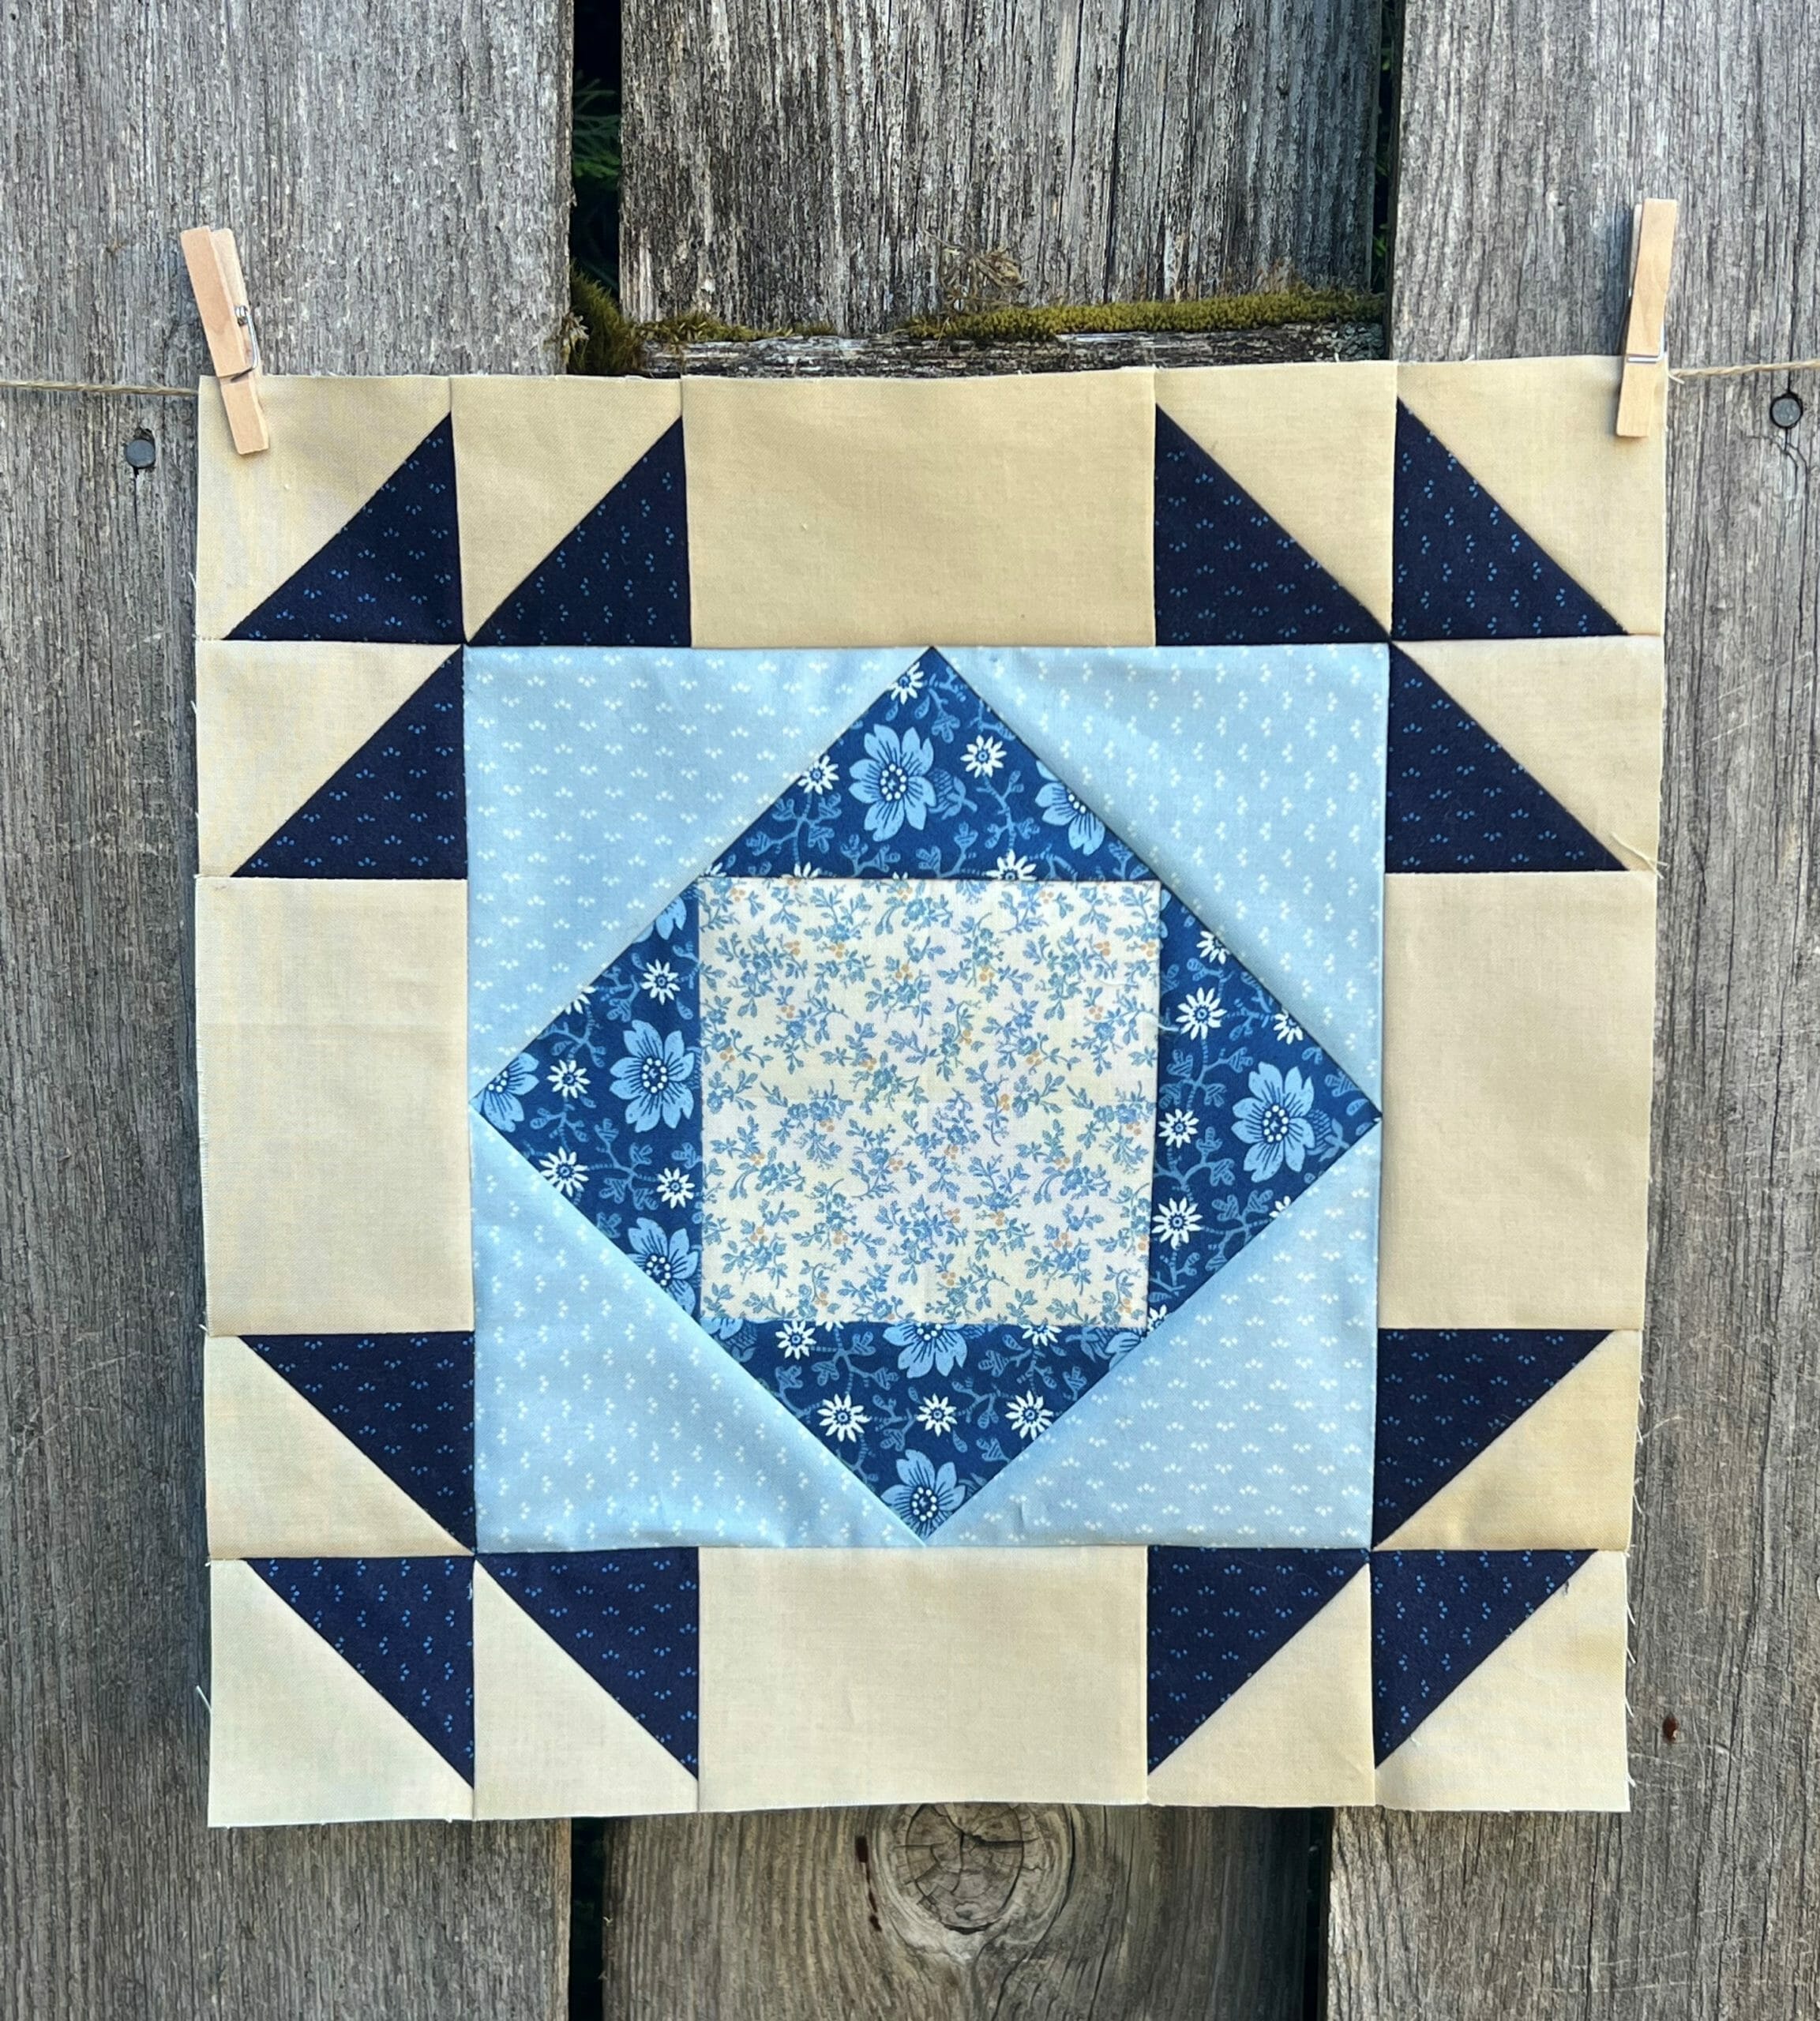
This block is a square-in-a-square…in a square! For this block, we will be making these using the no-waste method, but it can be tricky to get things to measure correctly.
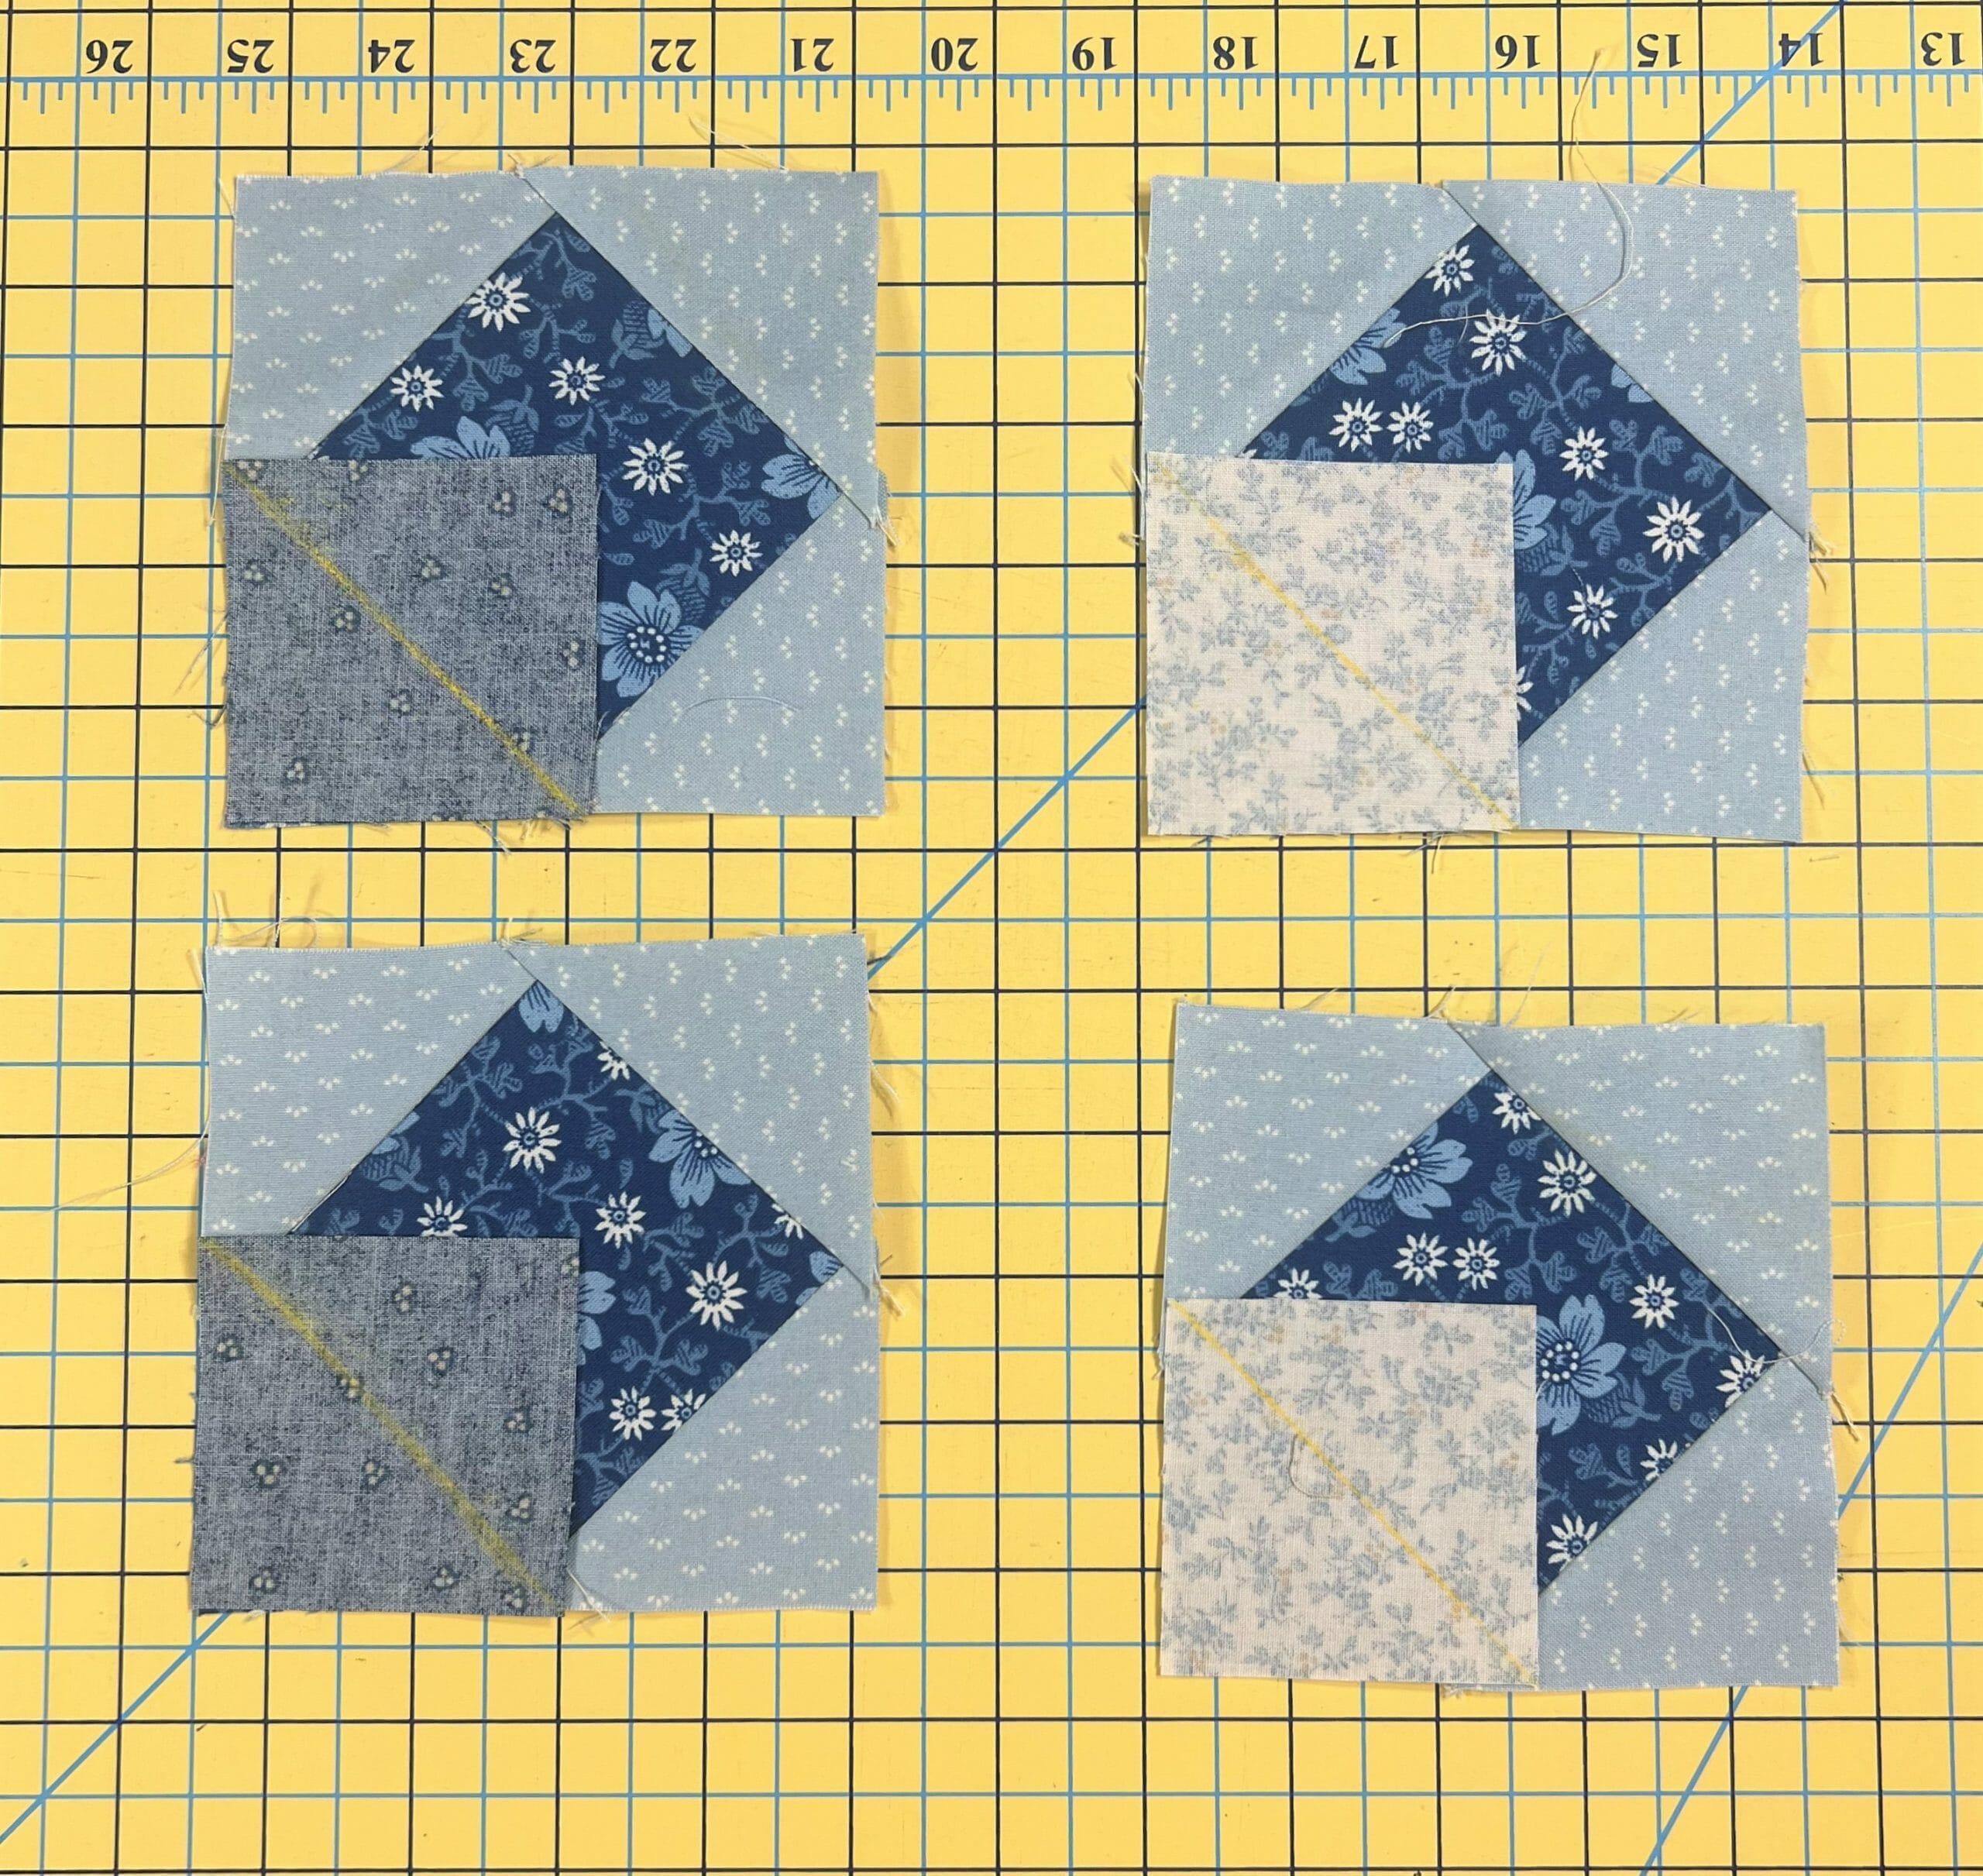
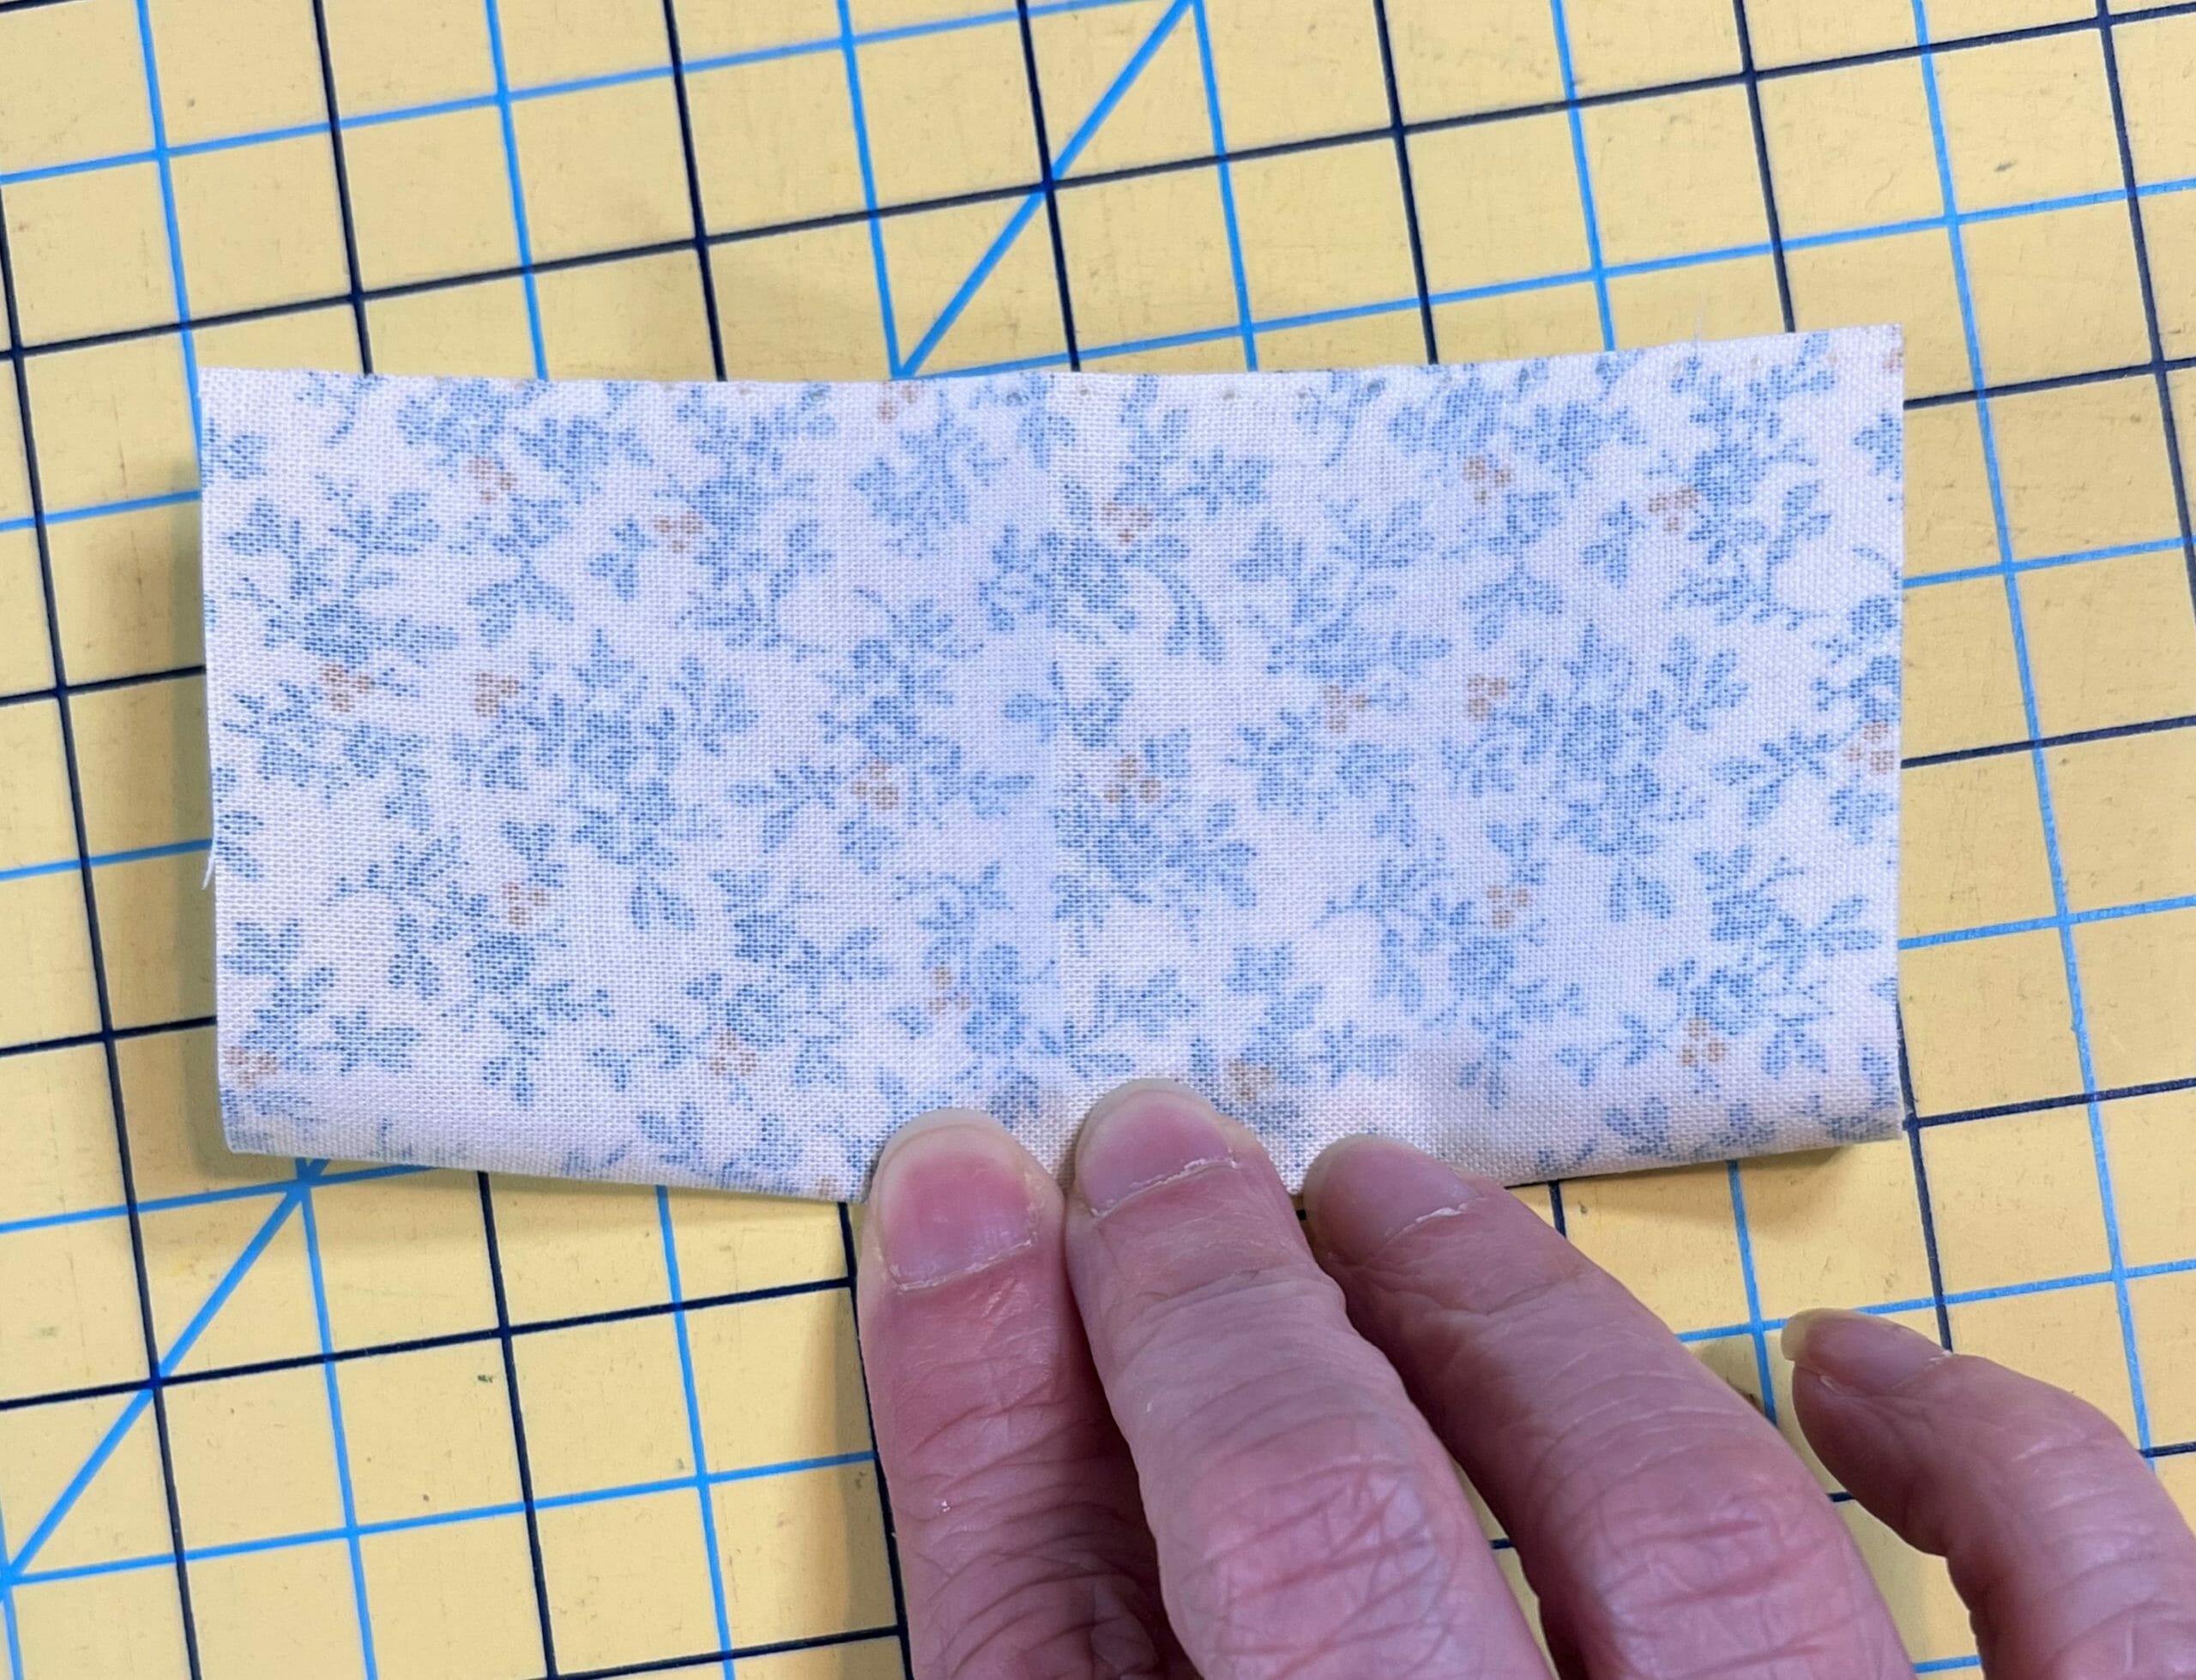
One key bit of advice I would have with these units is to starch all your pieces REALLY WELL, before you sew. This will help prevent stretching and warping, since we will be working with sewing some of these pieces on the bias.
You can also choose to cut your D and G pieces a smidge bigger, and then trim to size after each step. You’ll want to trim them anyway, just to get rid of those little triangle tails that you’ll notice as you sew. Just make sure your E square is cut accurately regardless, and also keep the integrity of the ¼” seam allowance on your points when trimming.
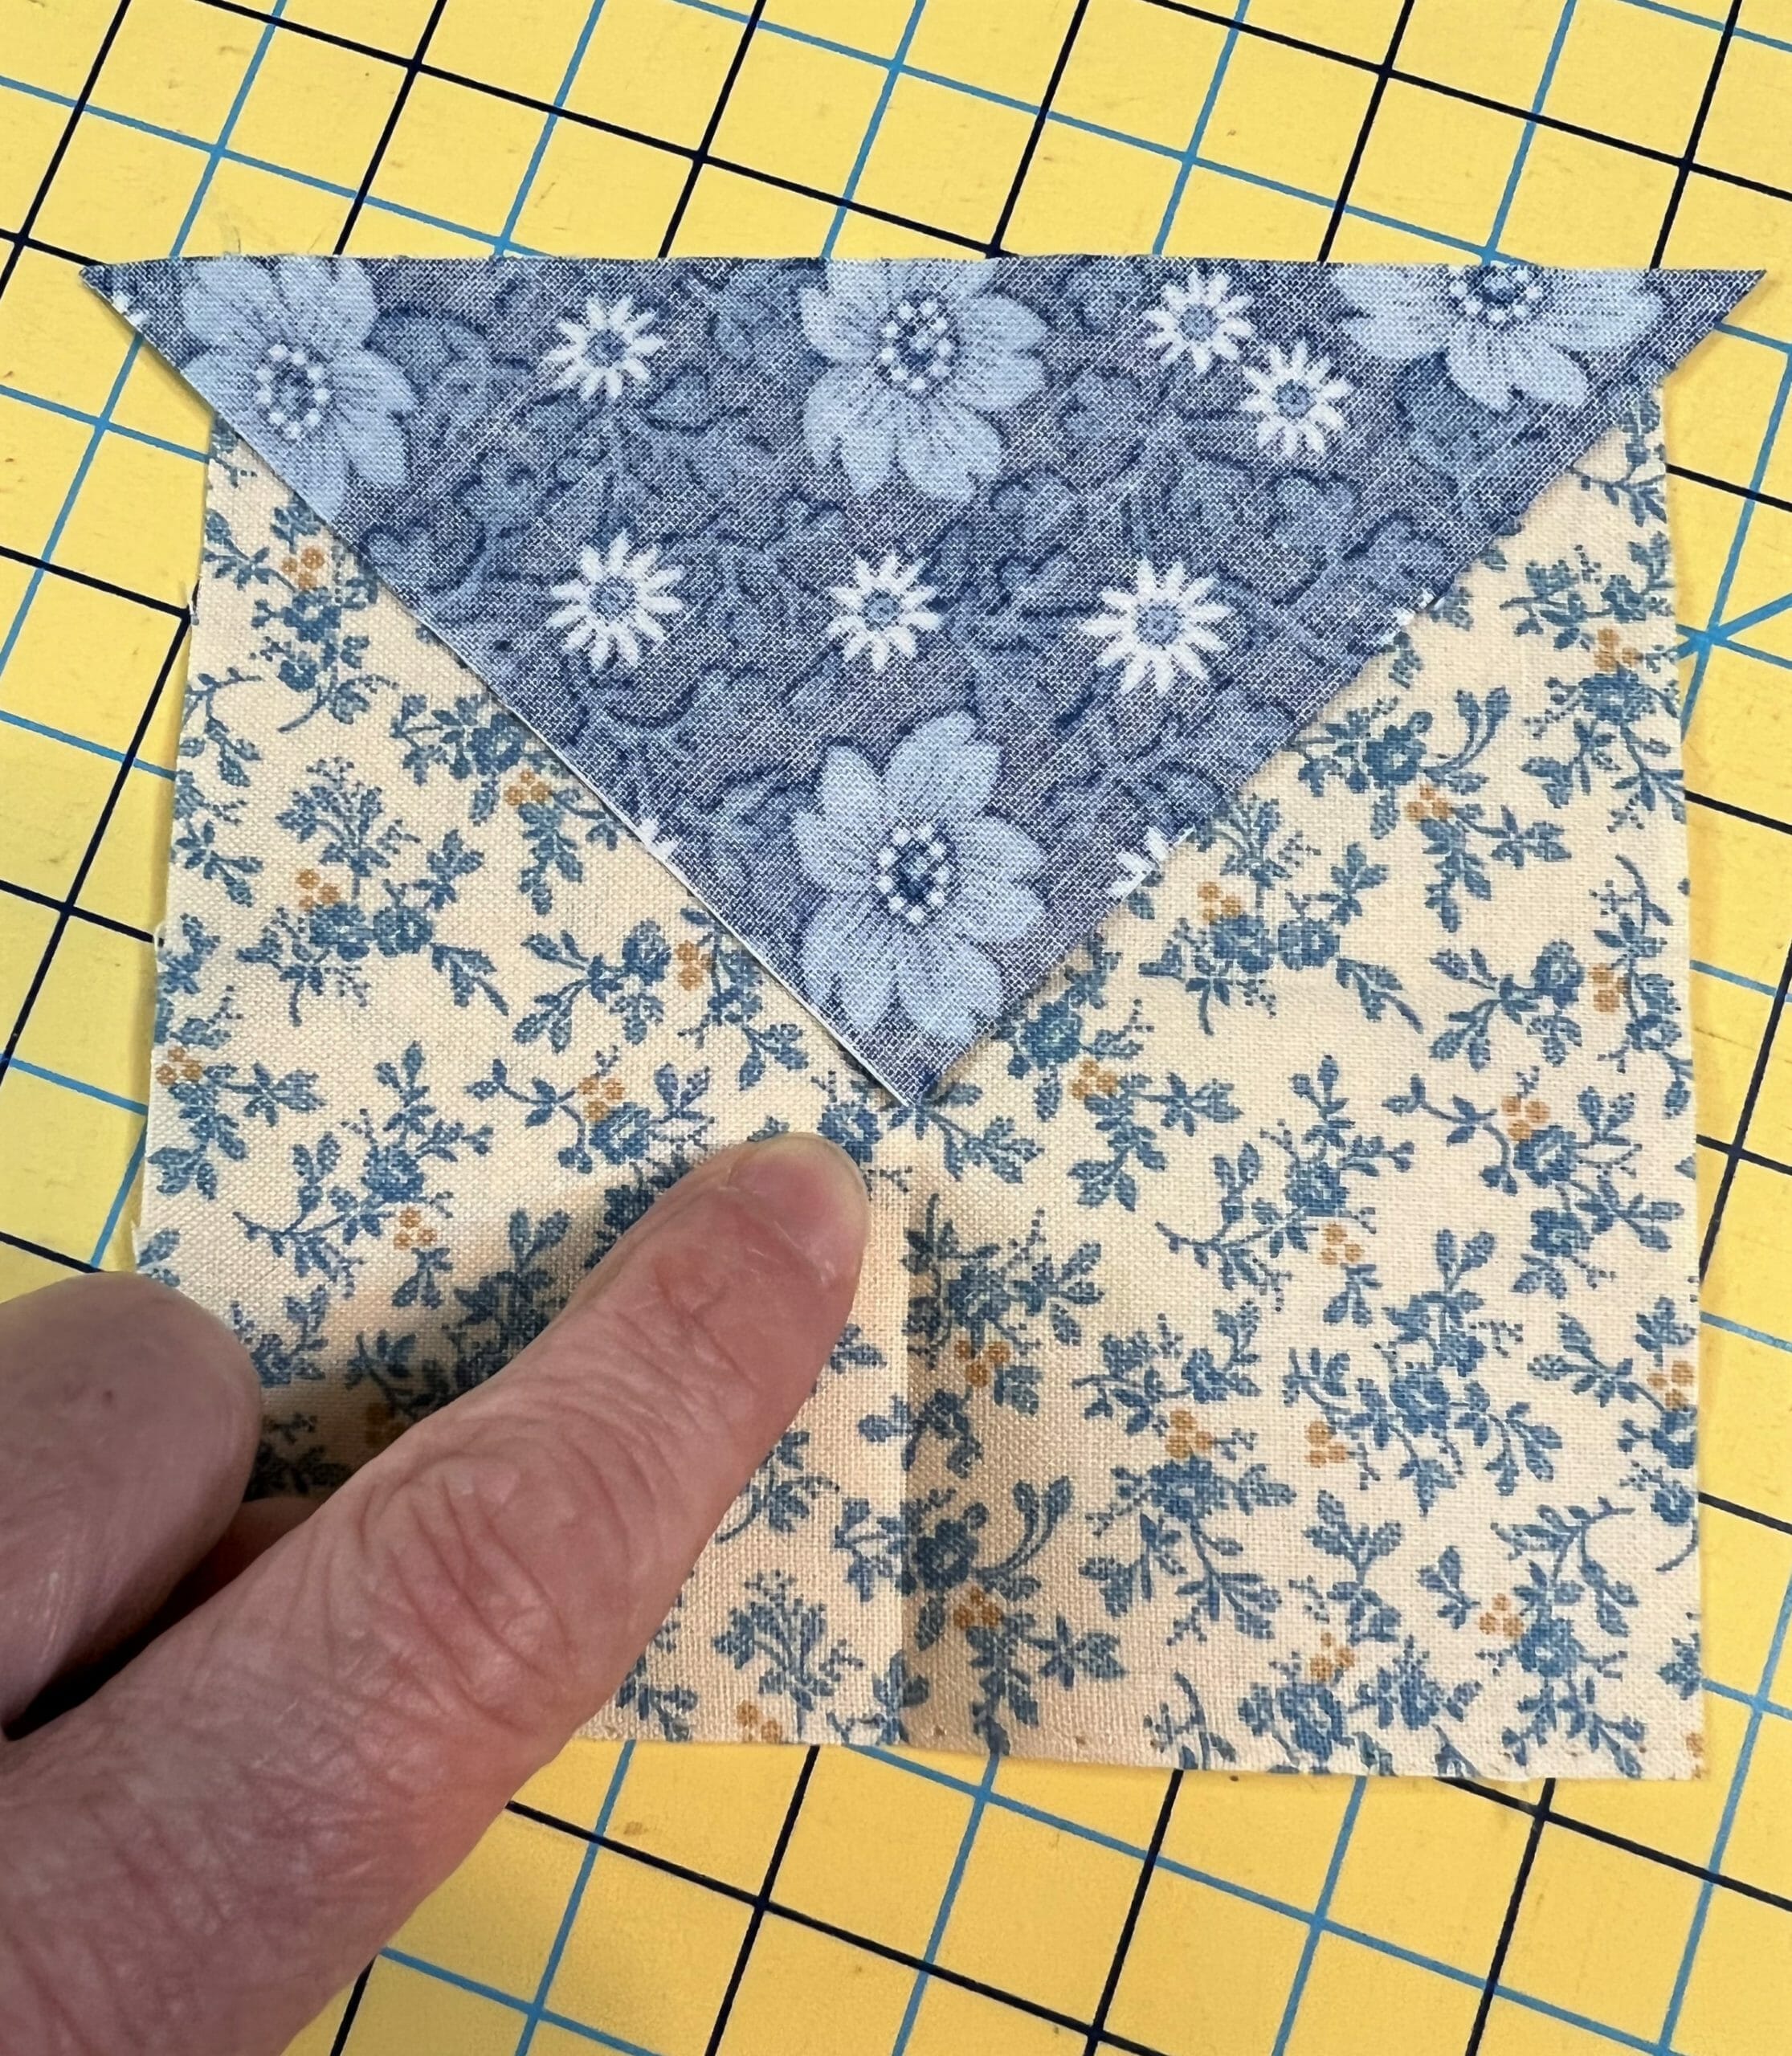
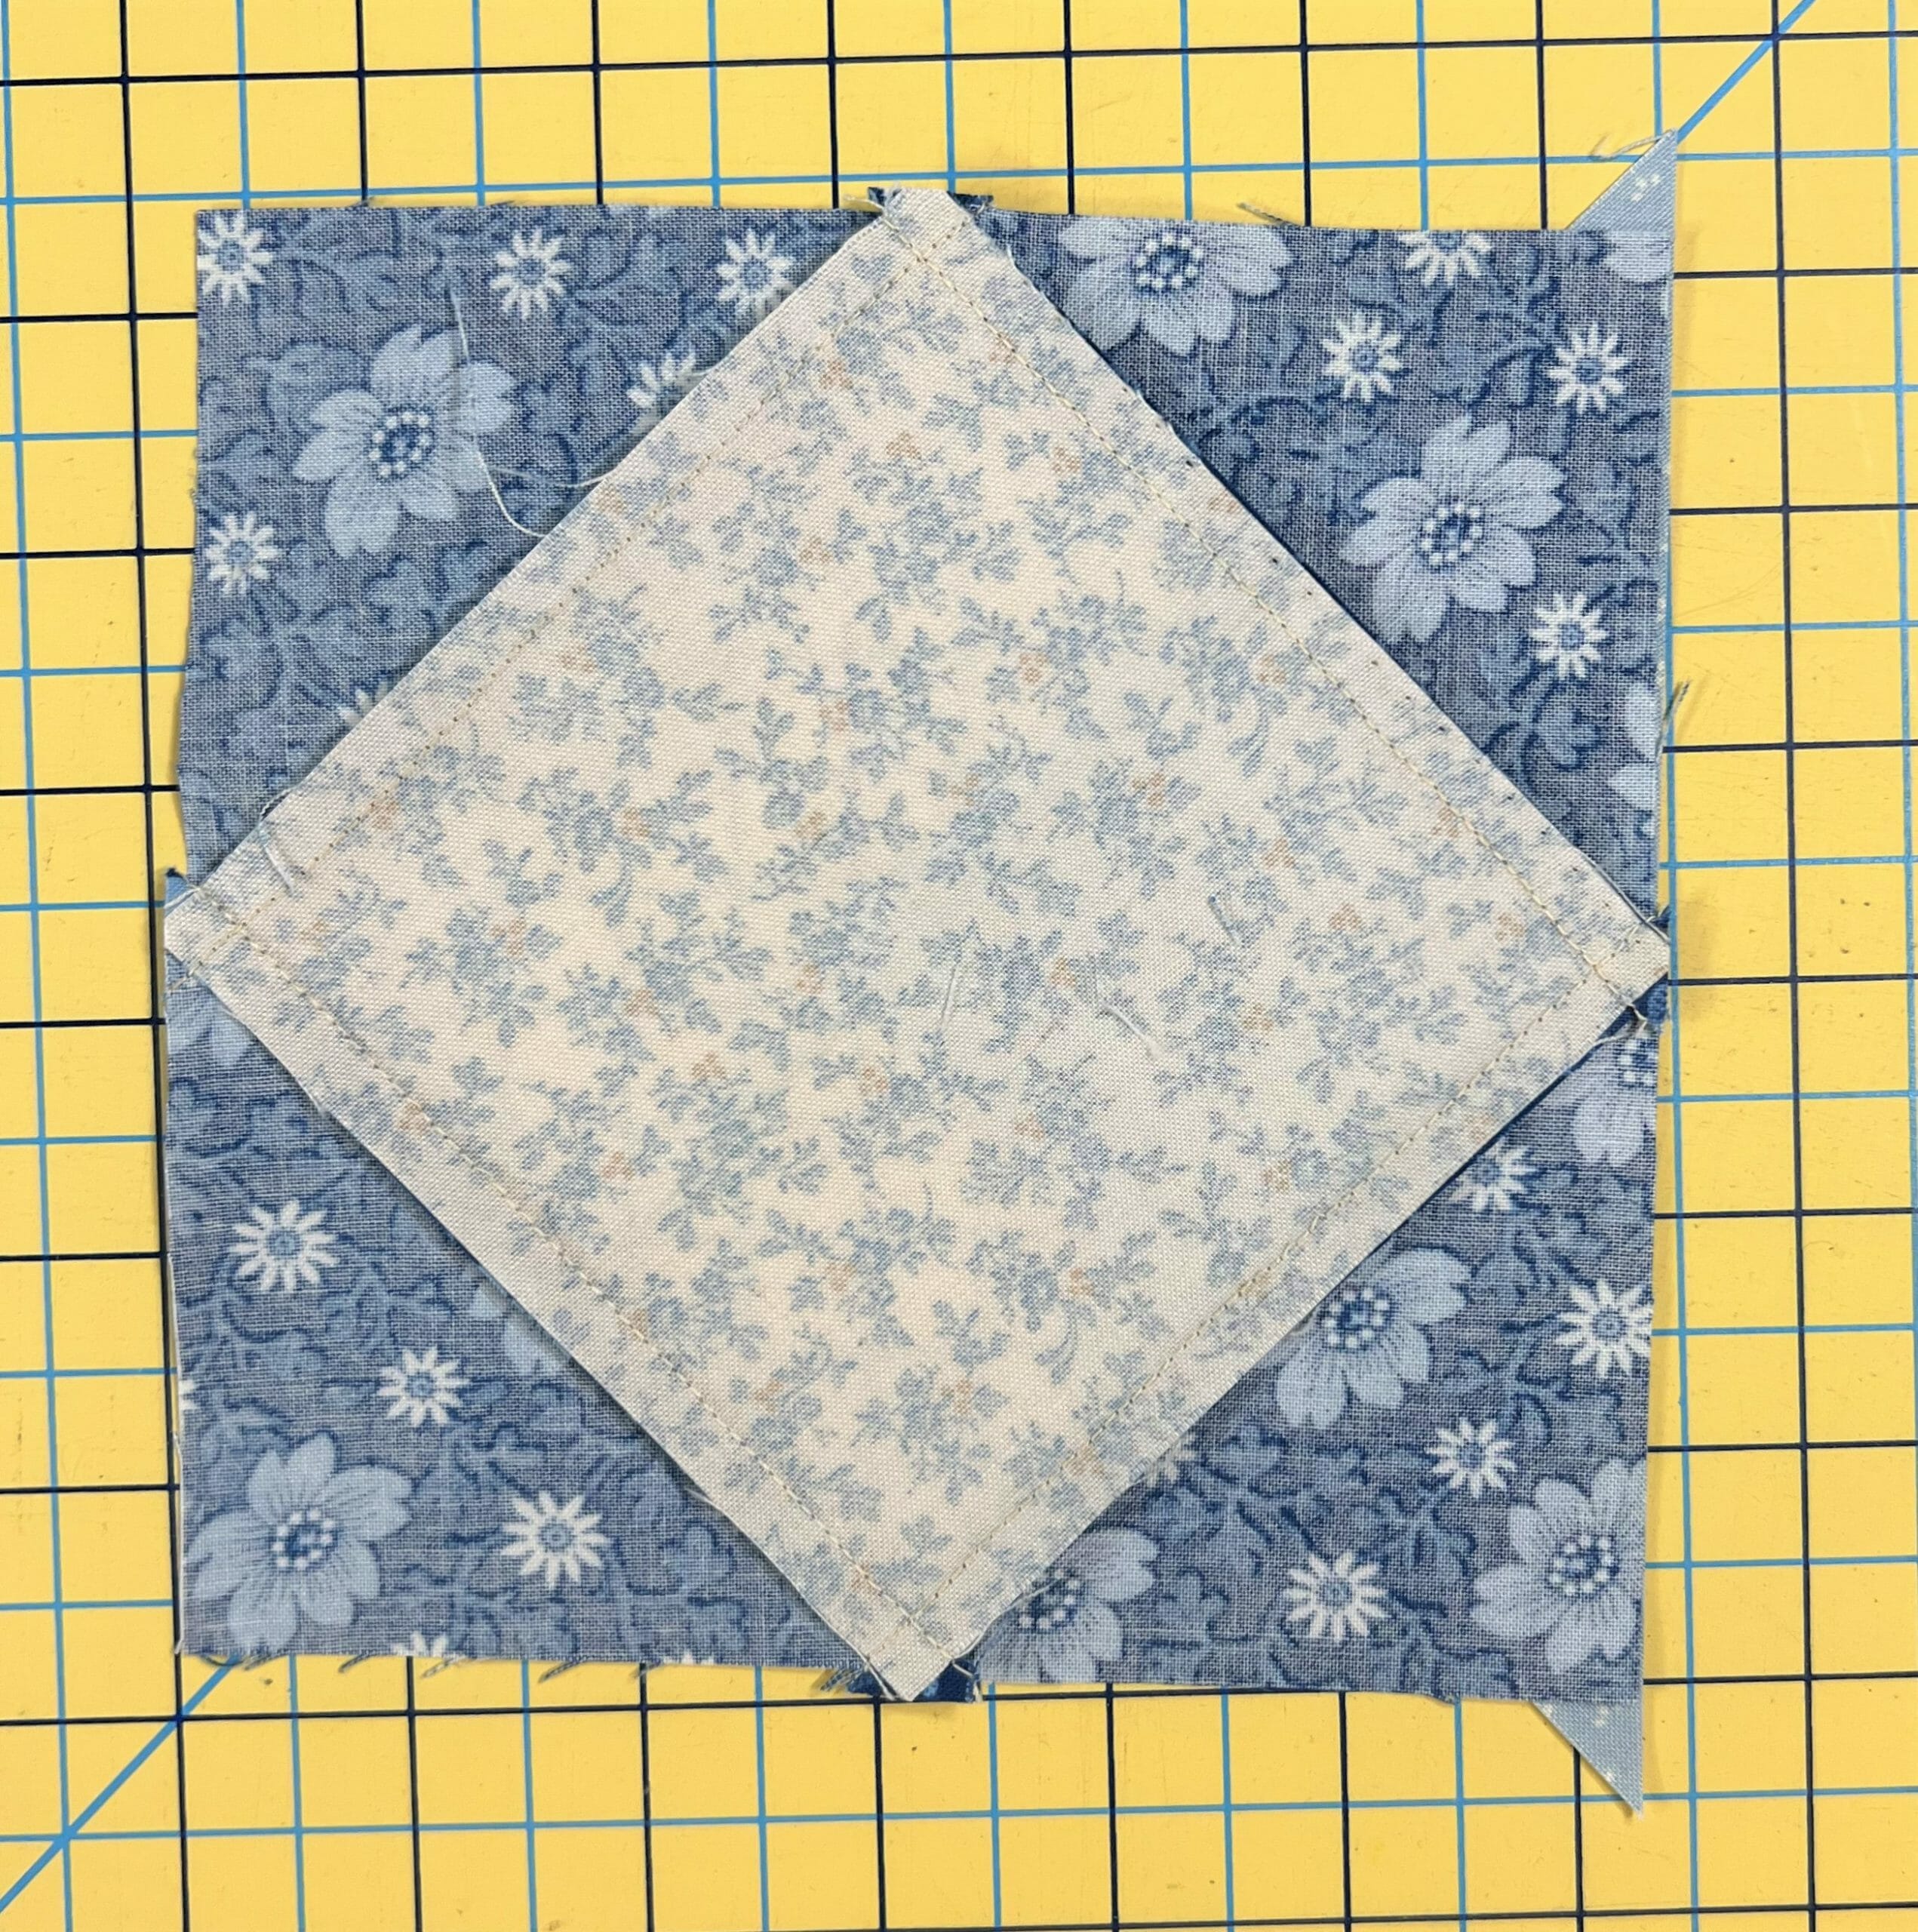
When placing your D triangles in step 1, here’s a little trick: Finger press your E square by folding it in half – both ways. You can use the folded line as a guide, and make sure the point of the triangle matches up with that line. This will keep the triangle units centered. You may need to re-finger press as you go, especially if you are ironing your triangles along the way.
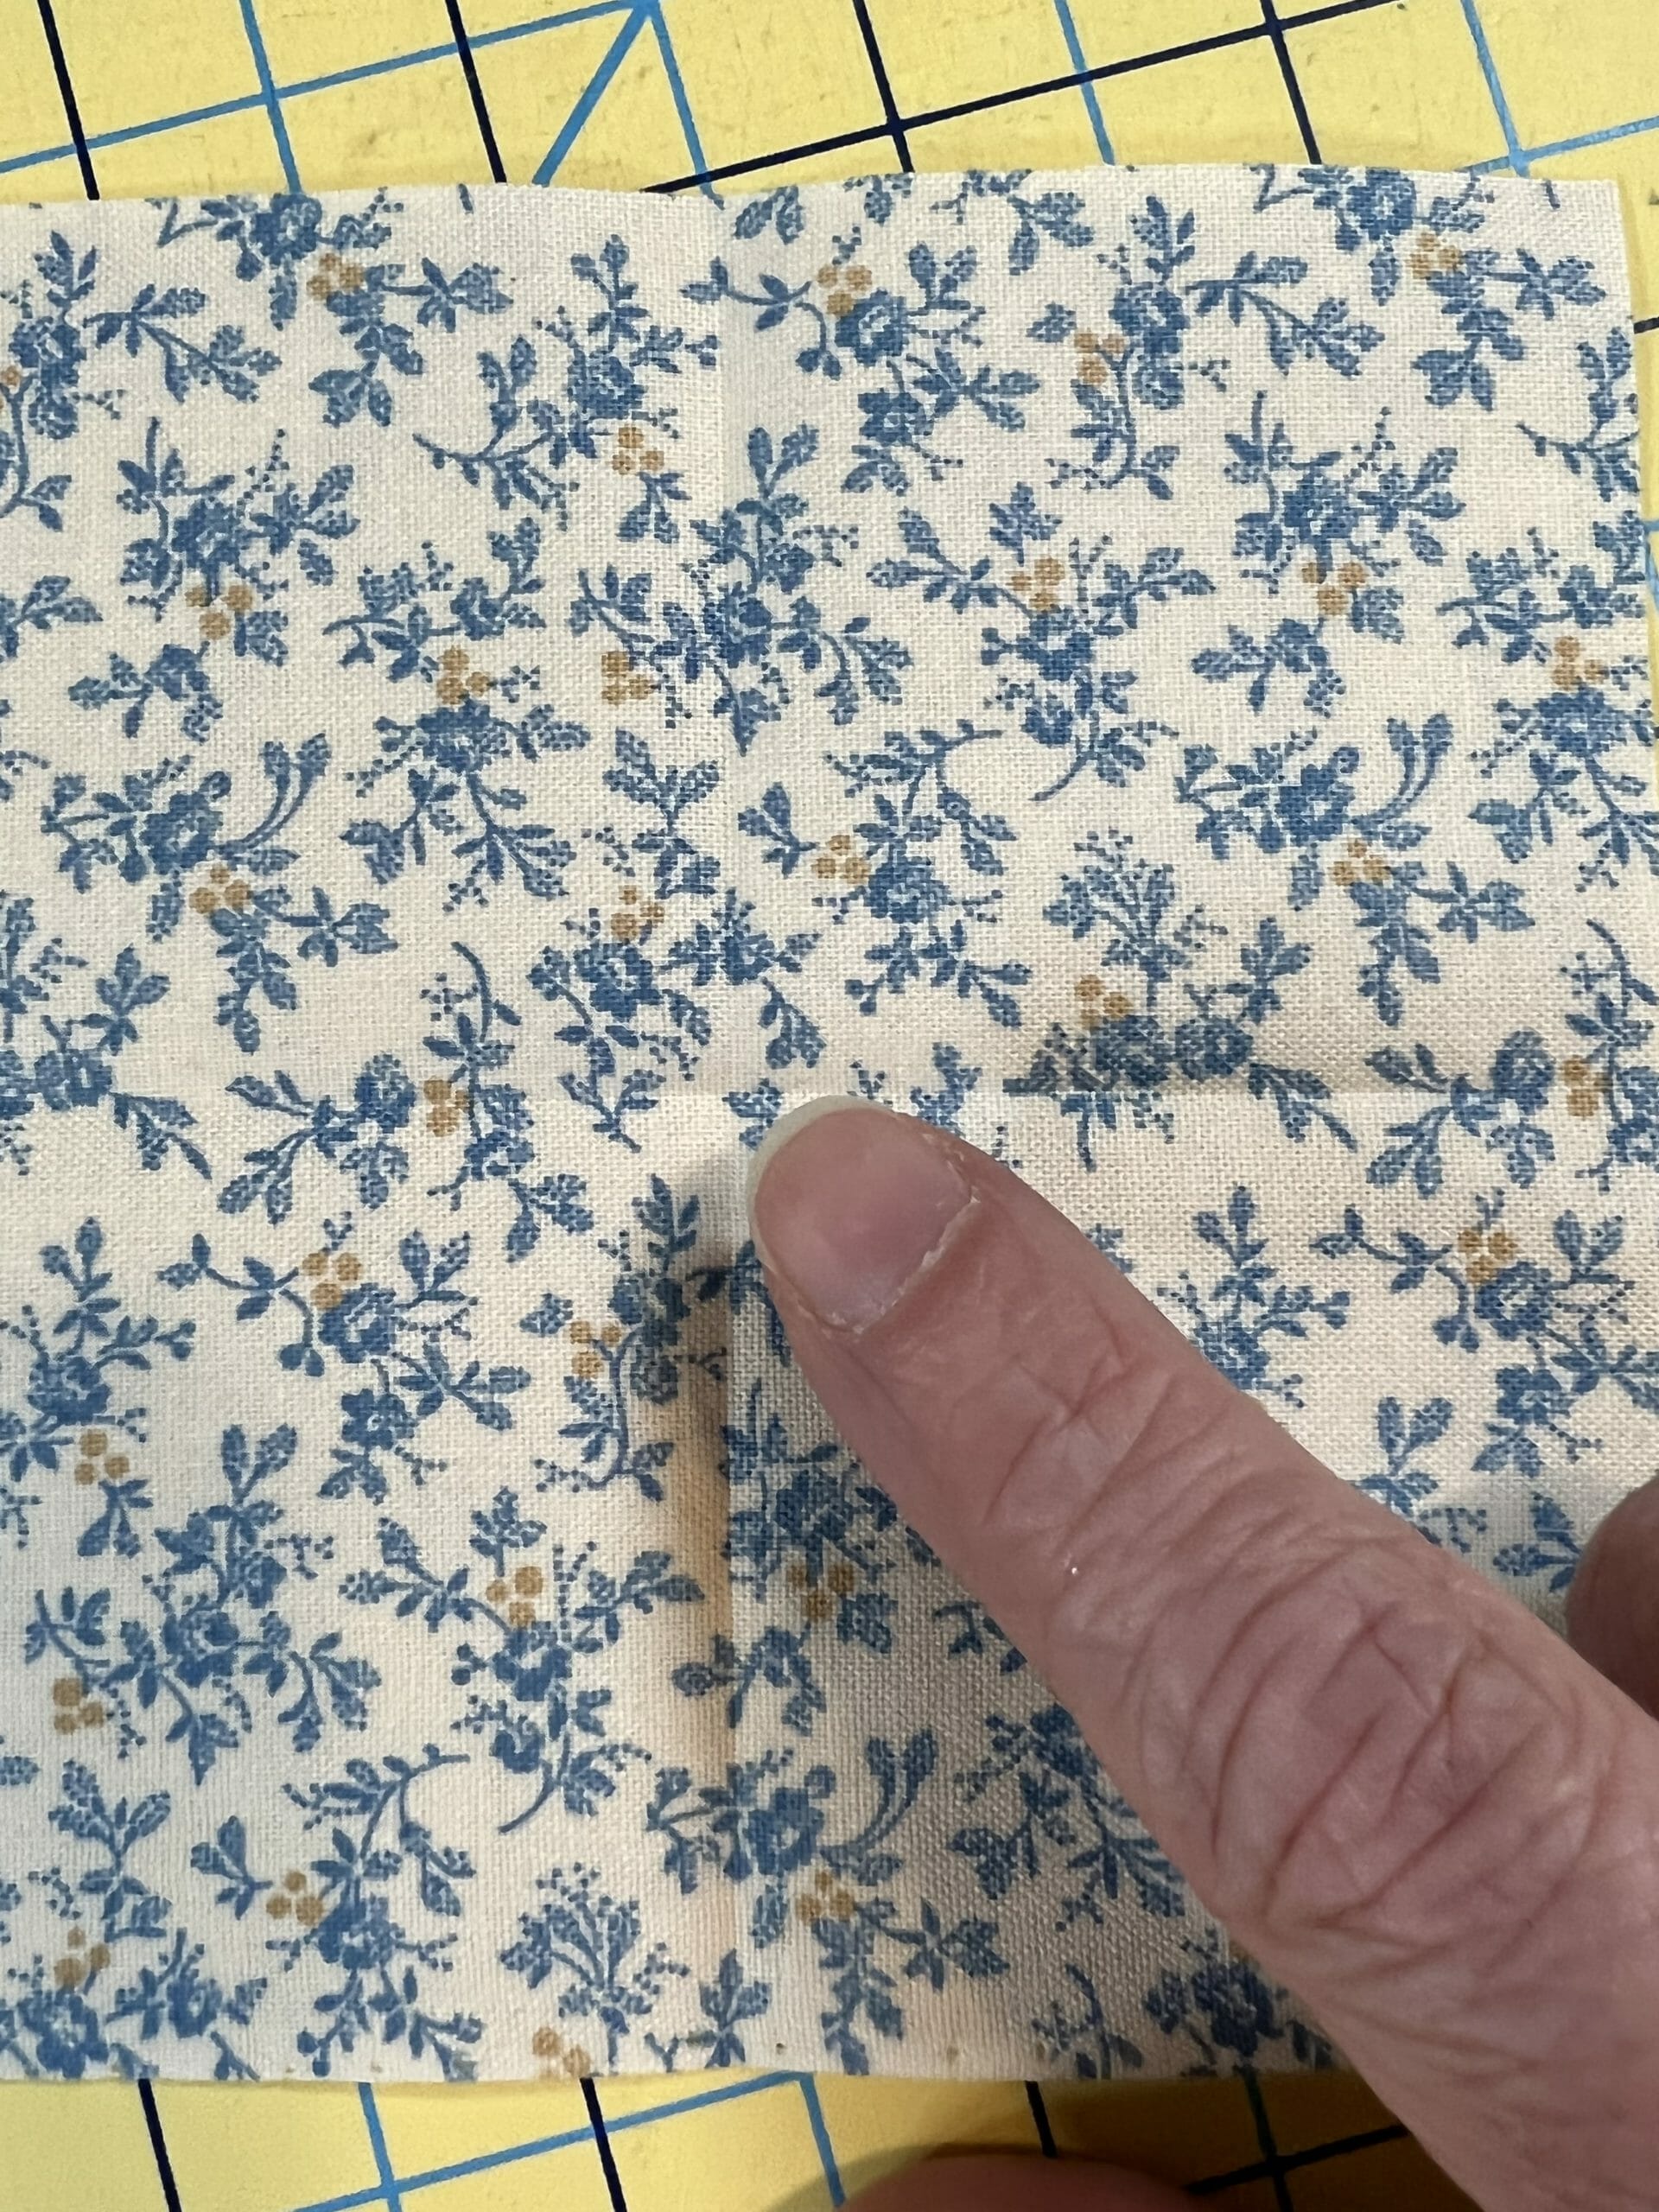
If you look closely in the picture above, you can see the finger pressed folds that can be used as a guide. Now I can line up the triangle with those markings and begin to pin and sew.

Somehow I missed taking a picture of the last triangle being pinned and sewn. Oops!
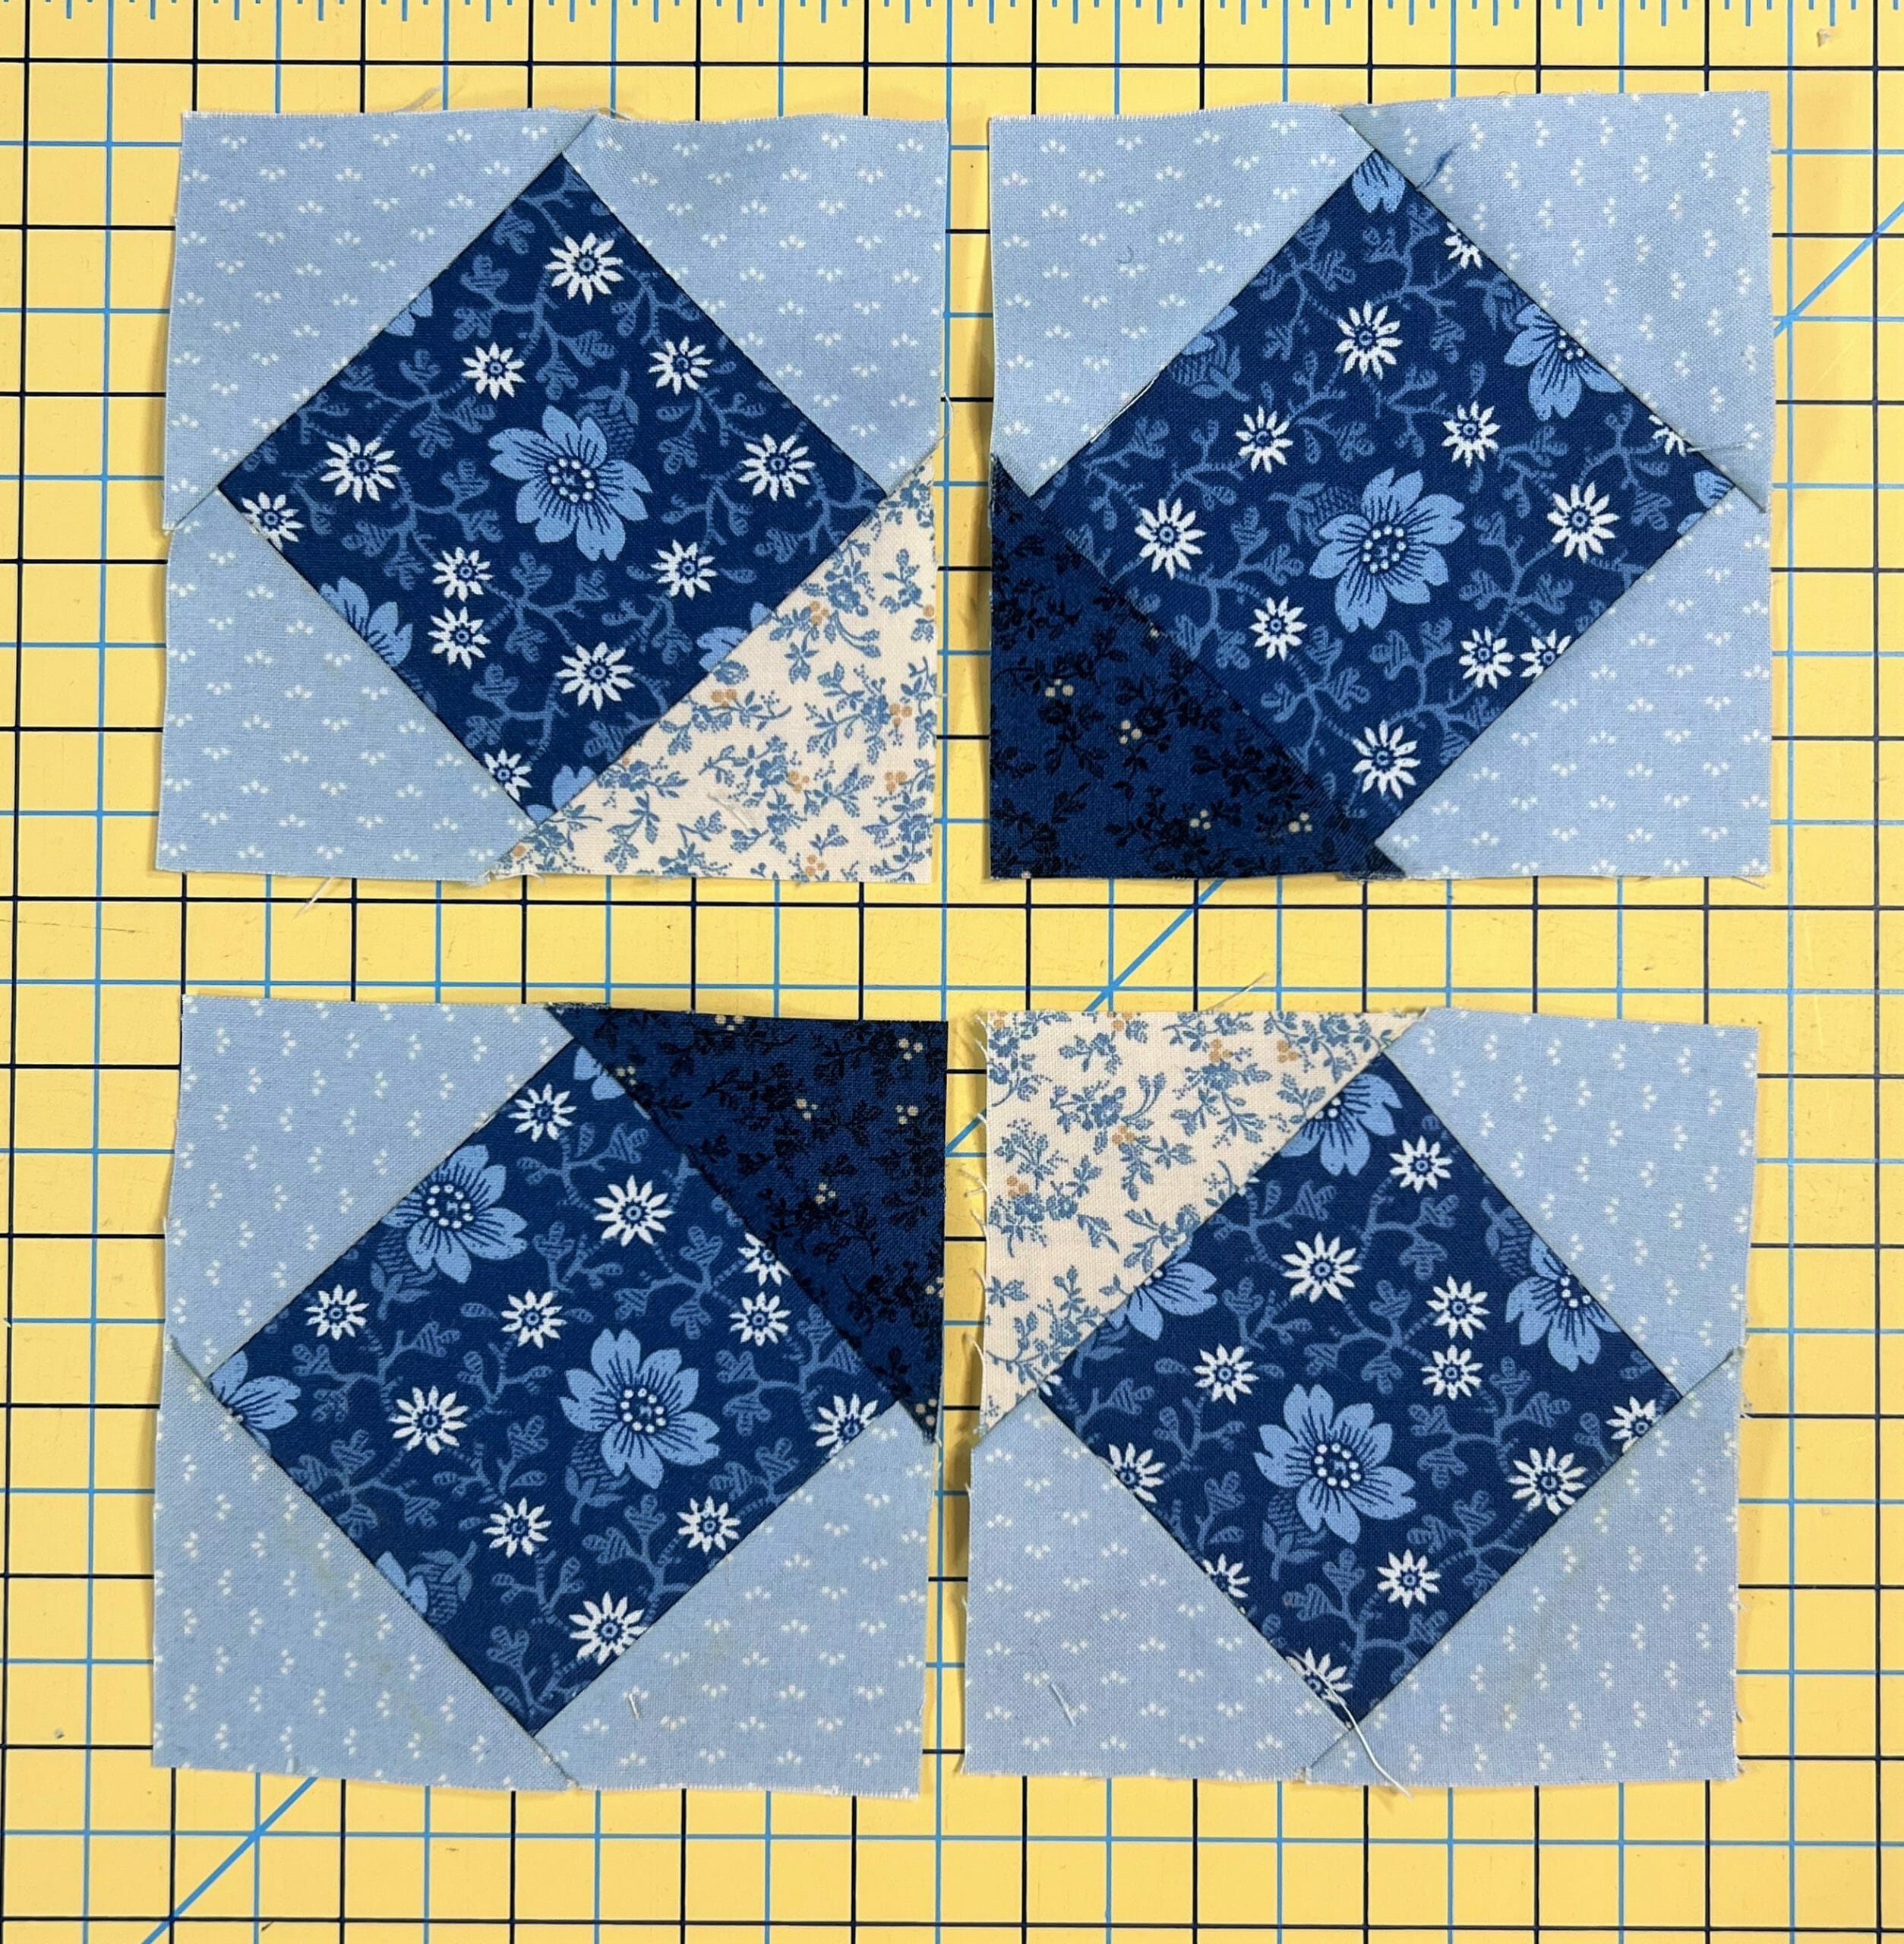
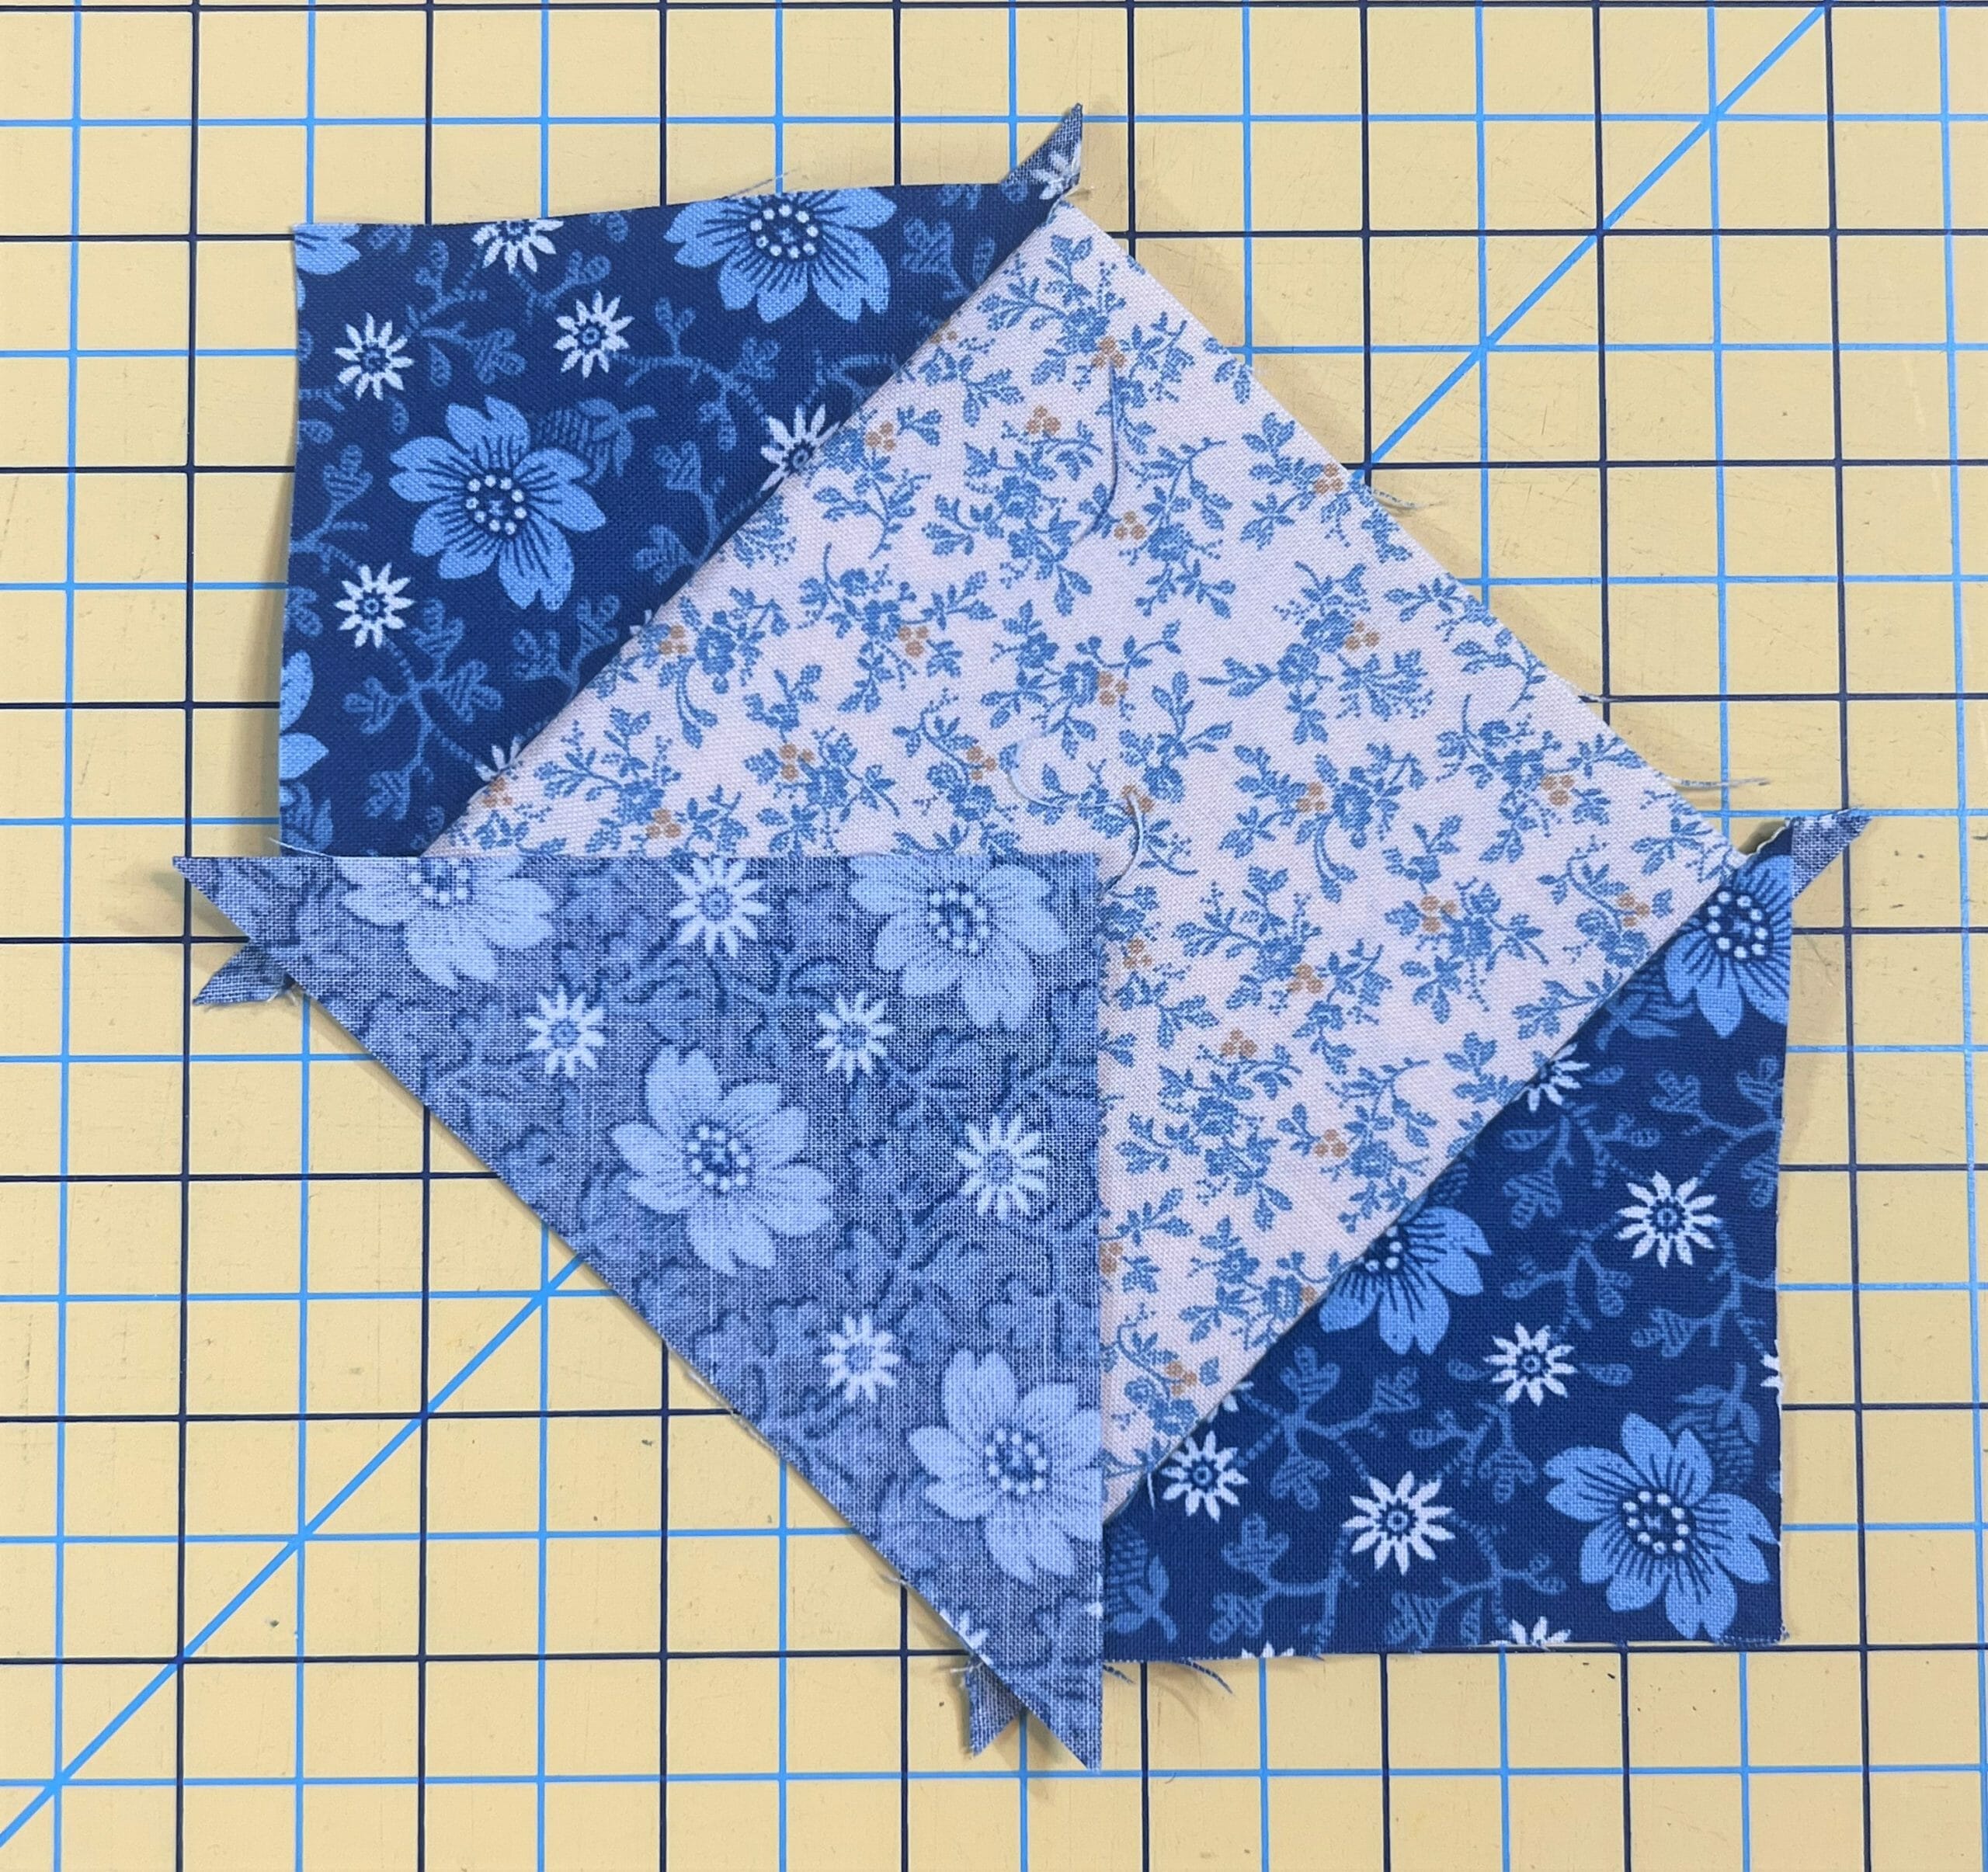
Below you can see the finished square, with the additional larger triangles placed around to get ready for pinning.
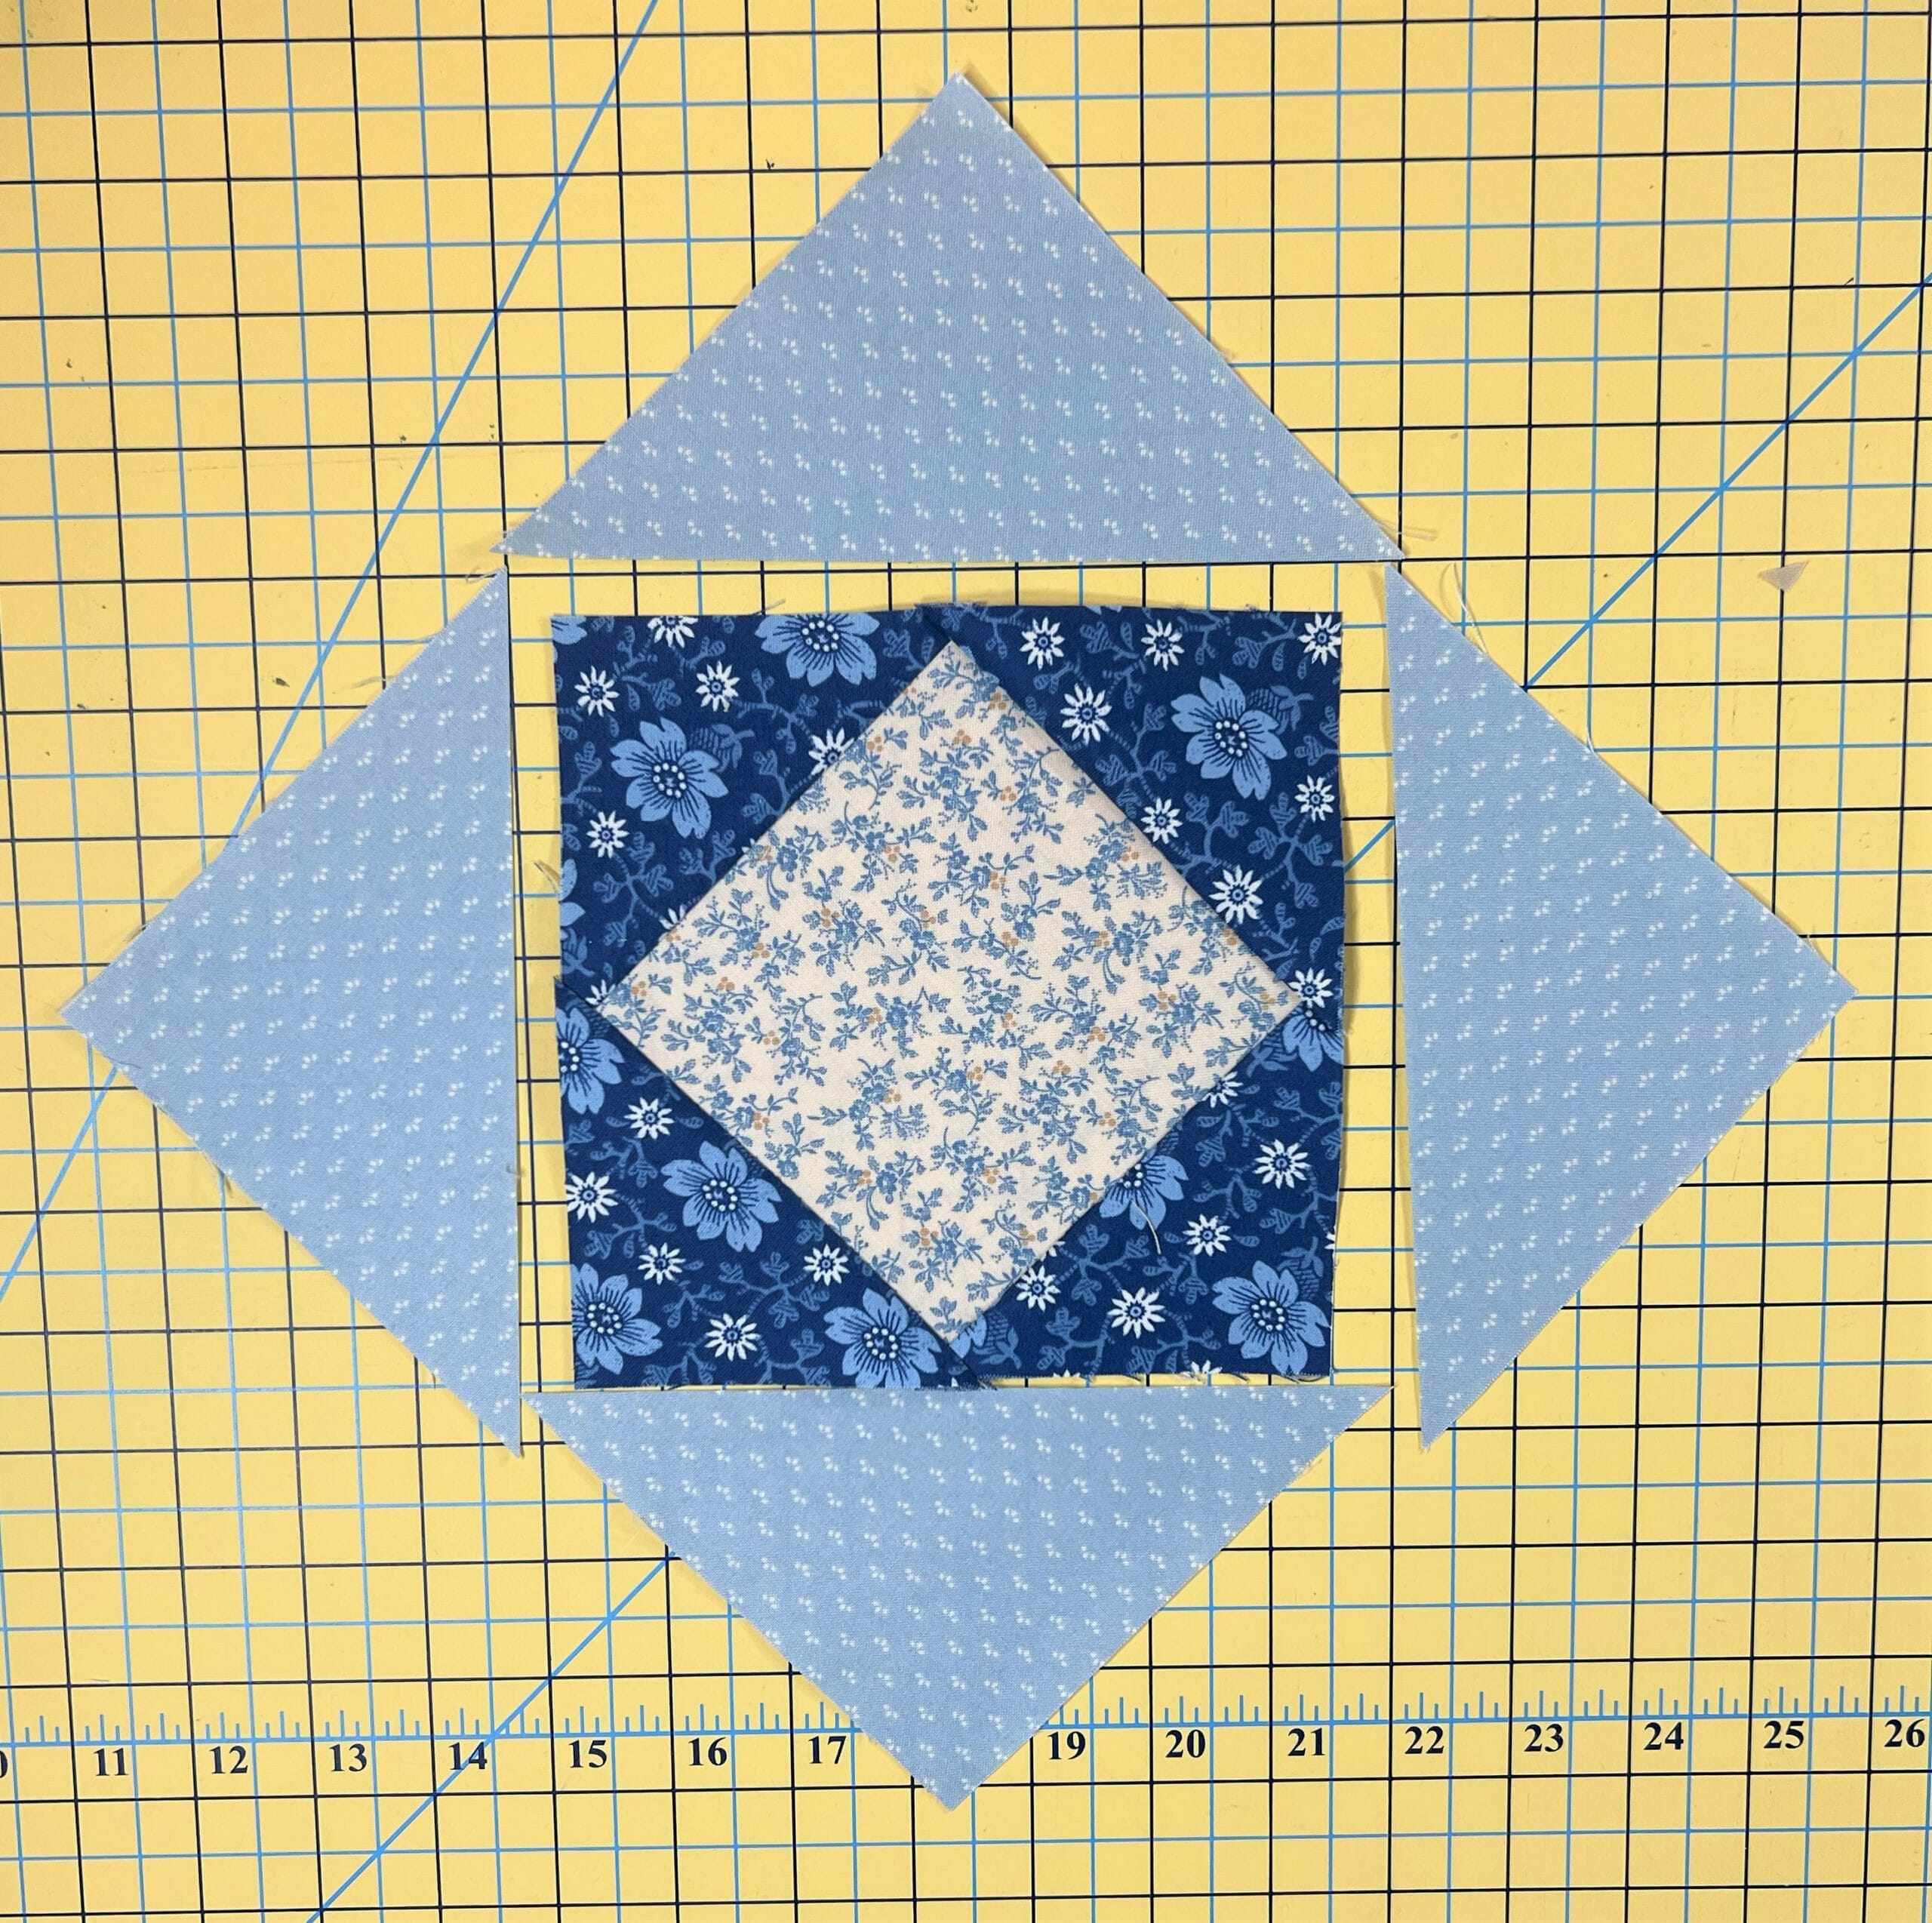
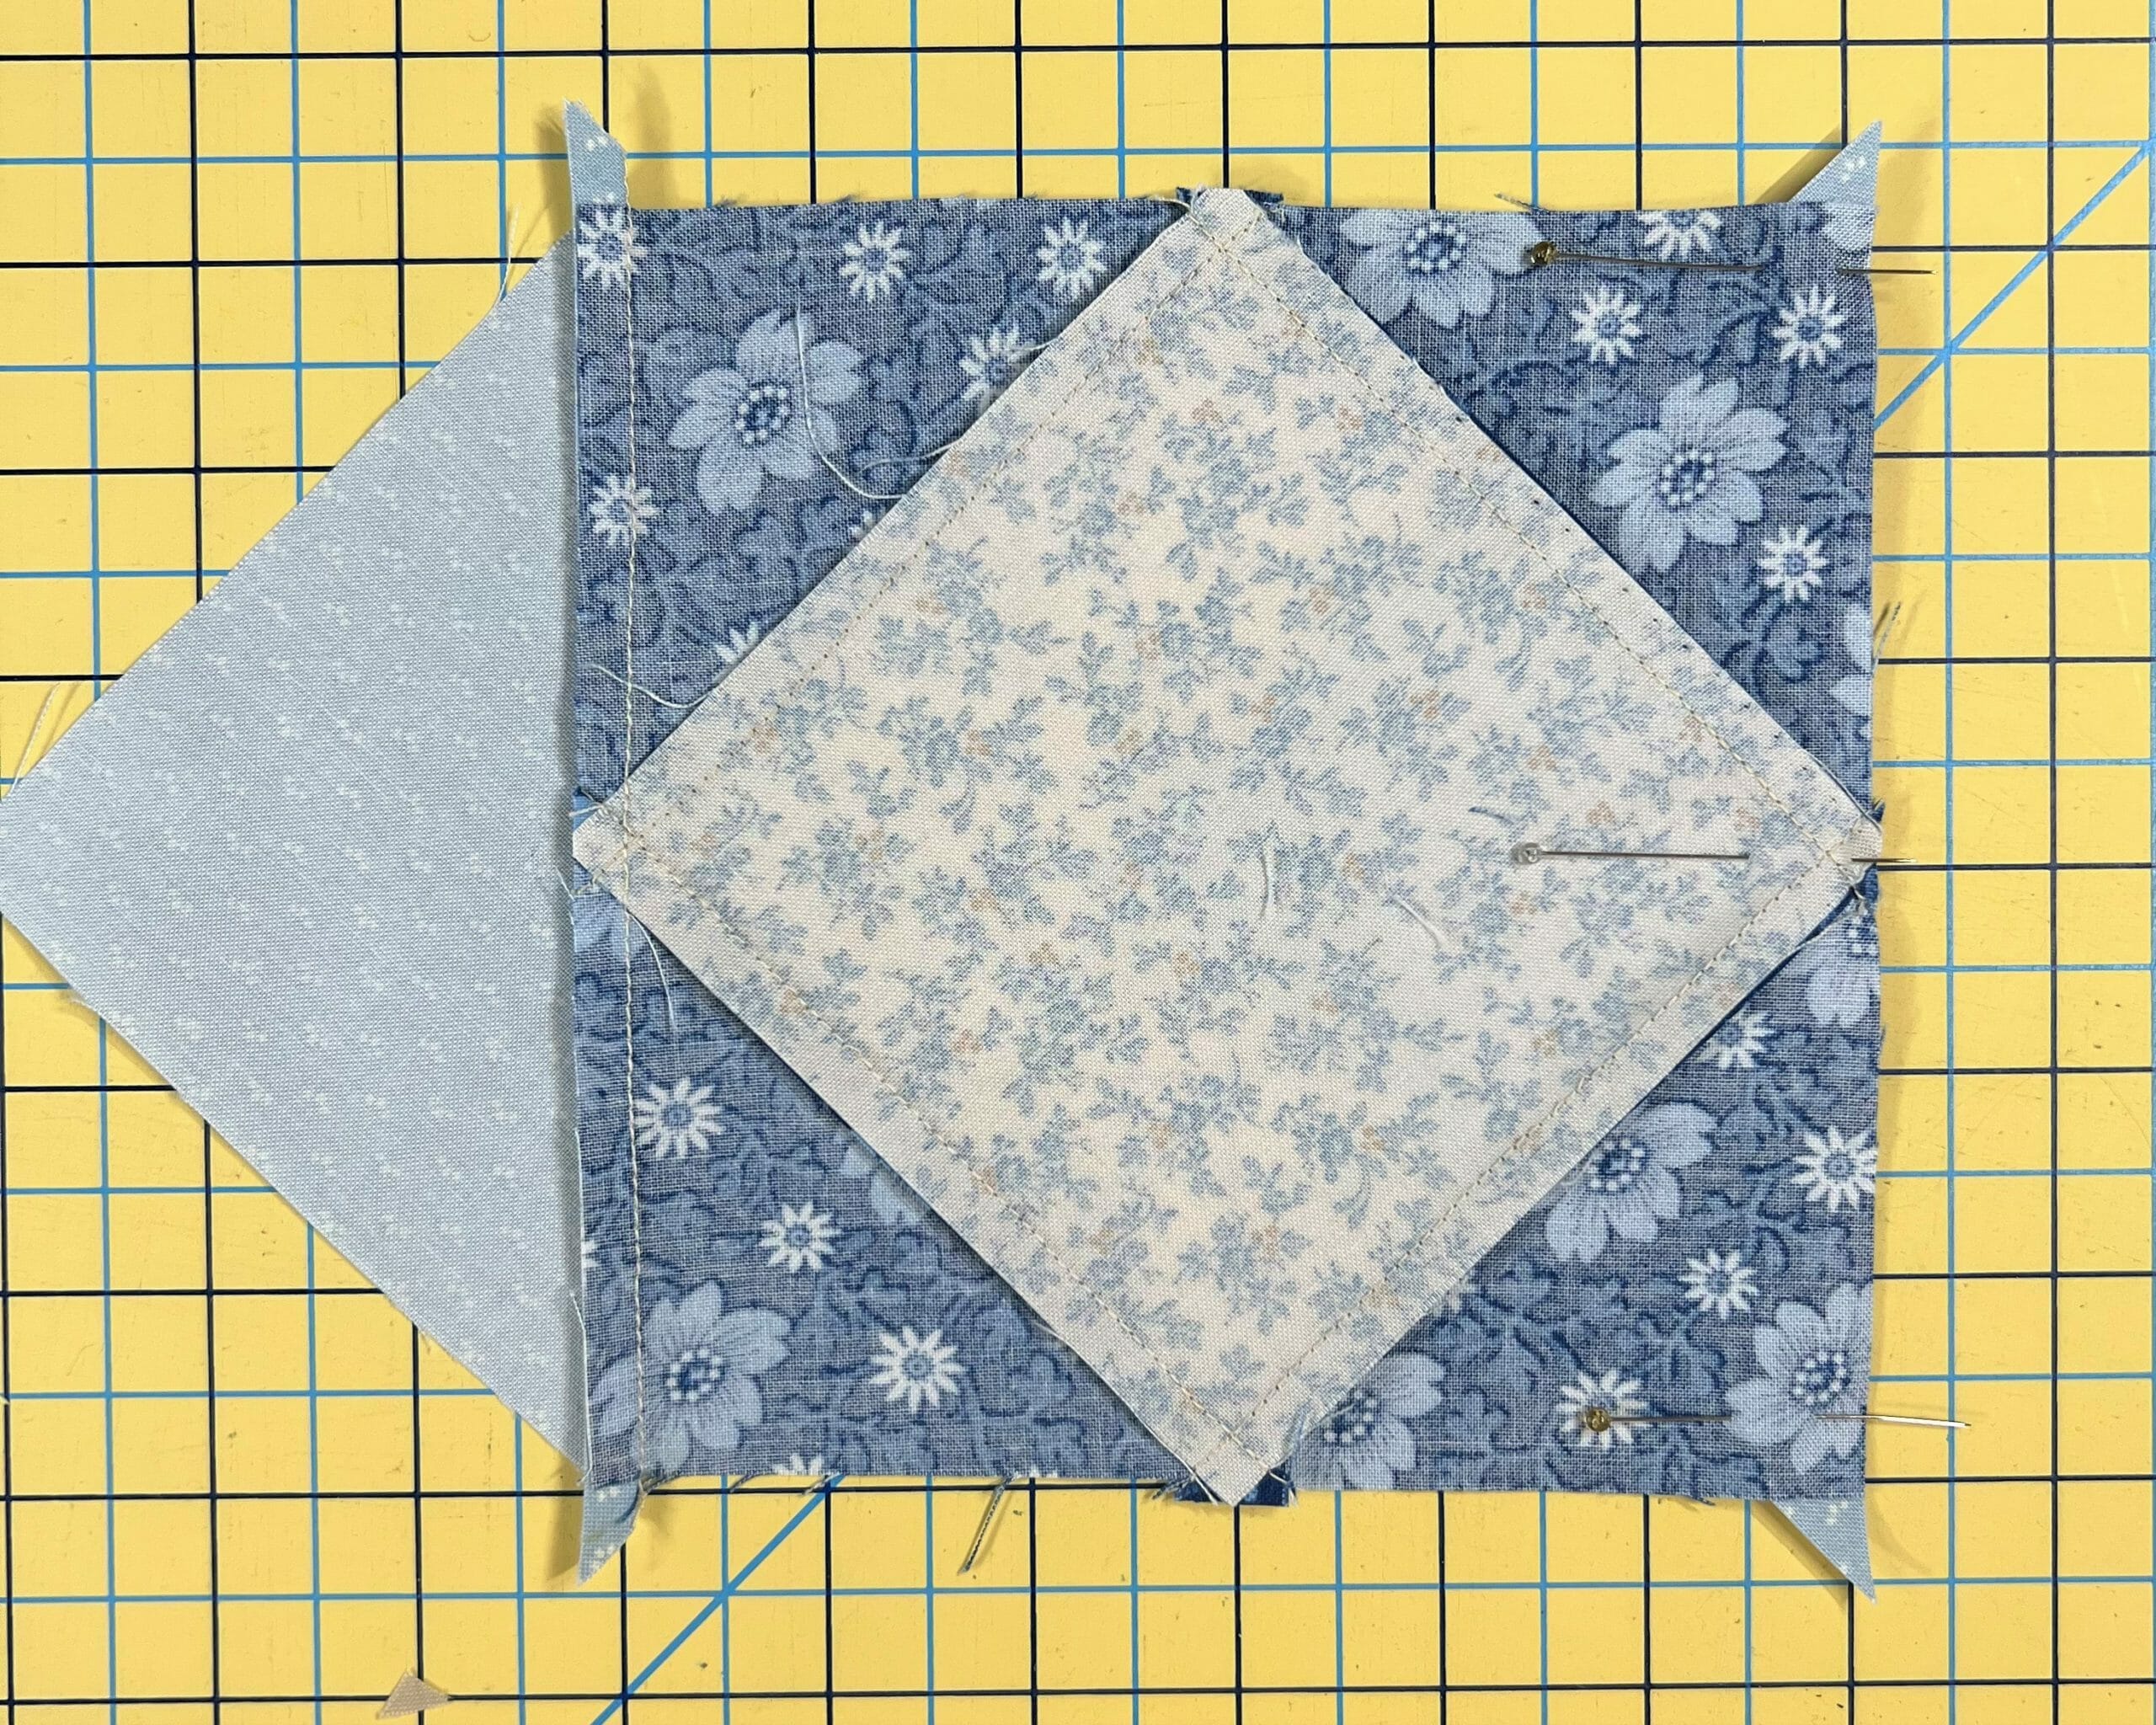
In step 2, you can choose to finger press again, as a guide for placing the G triangles, or use the corner points of the diamond as a guide for placement, as they should all line up.
When pinning and sewing these triangles, I decided to pin them with the triangles on the bottom, so that I could see where to sew at the intersection of the points on the center unit. You’ll see what I mean in the photos below.
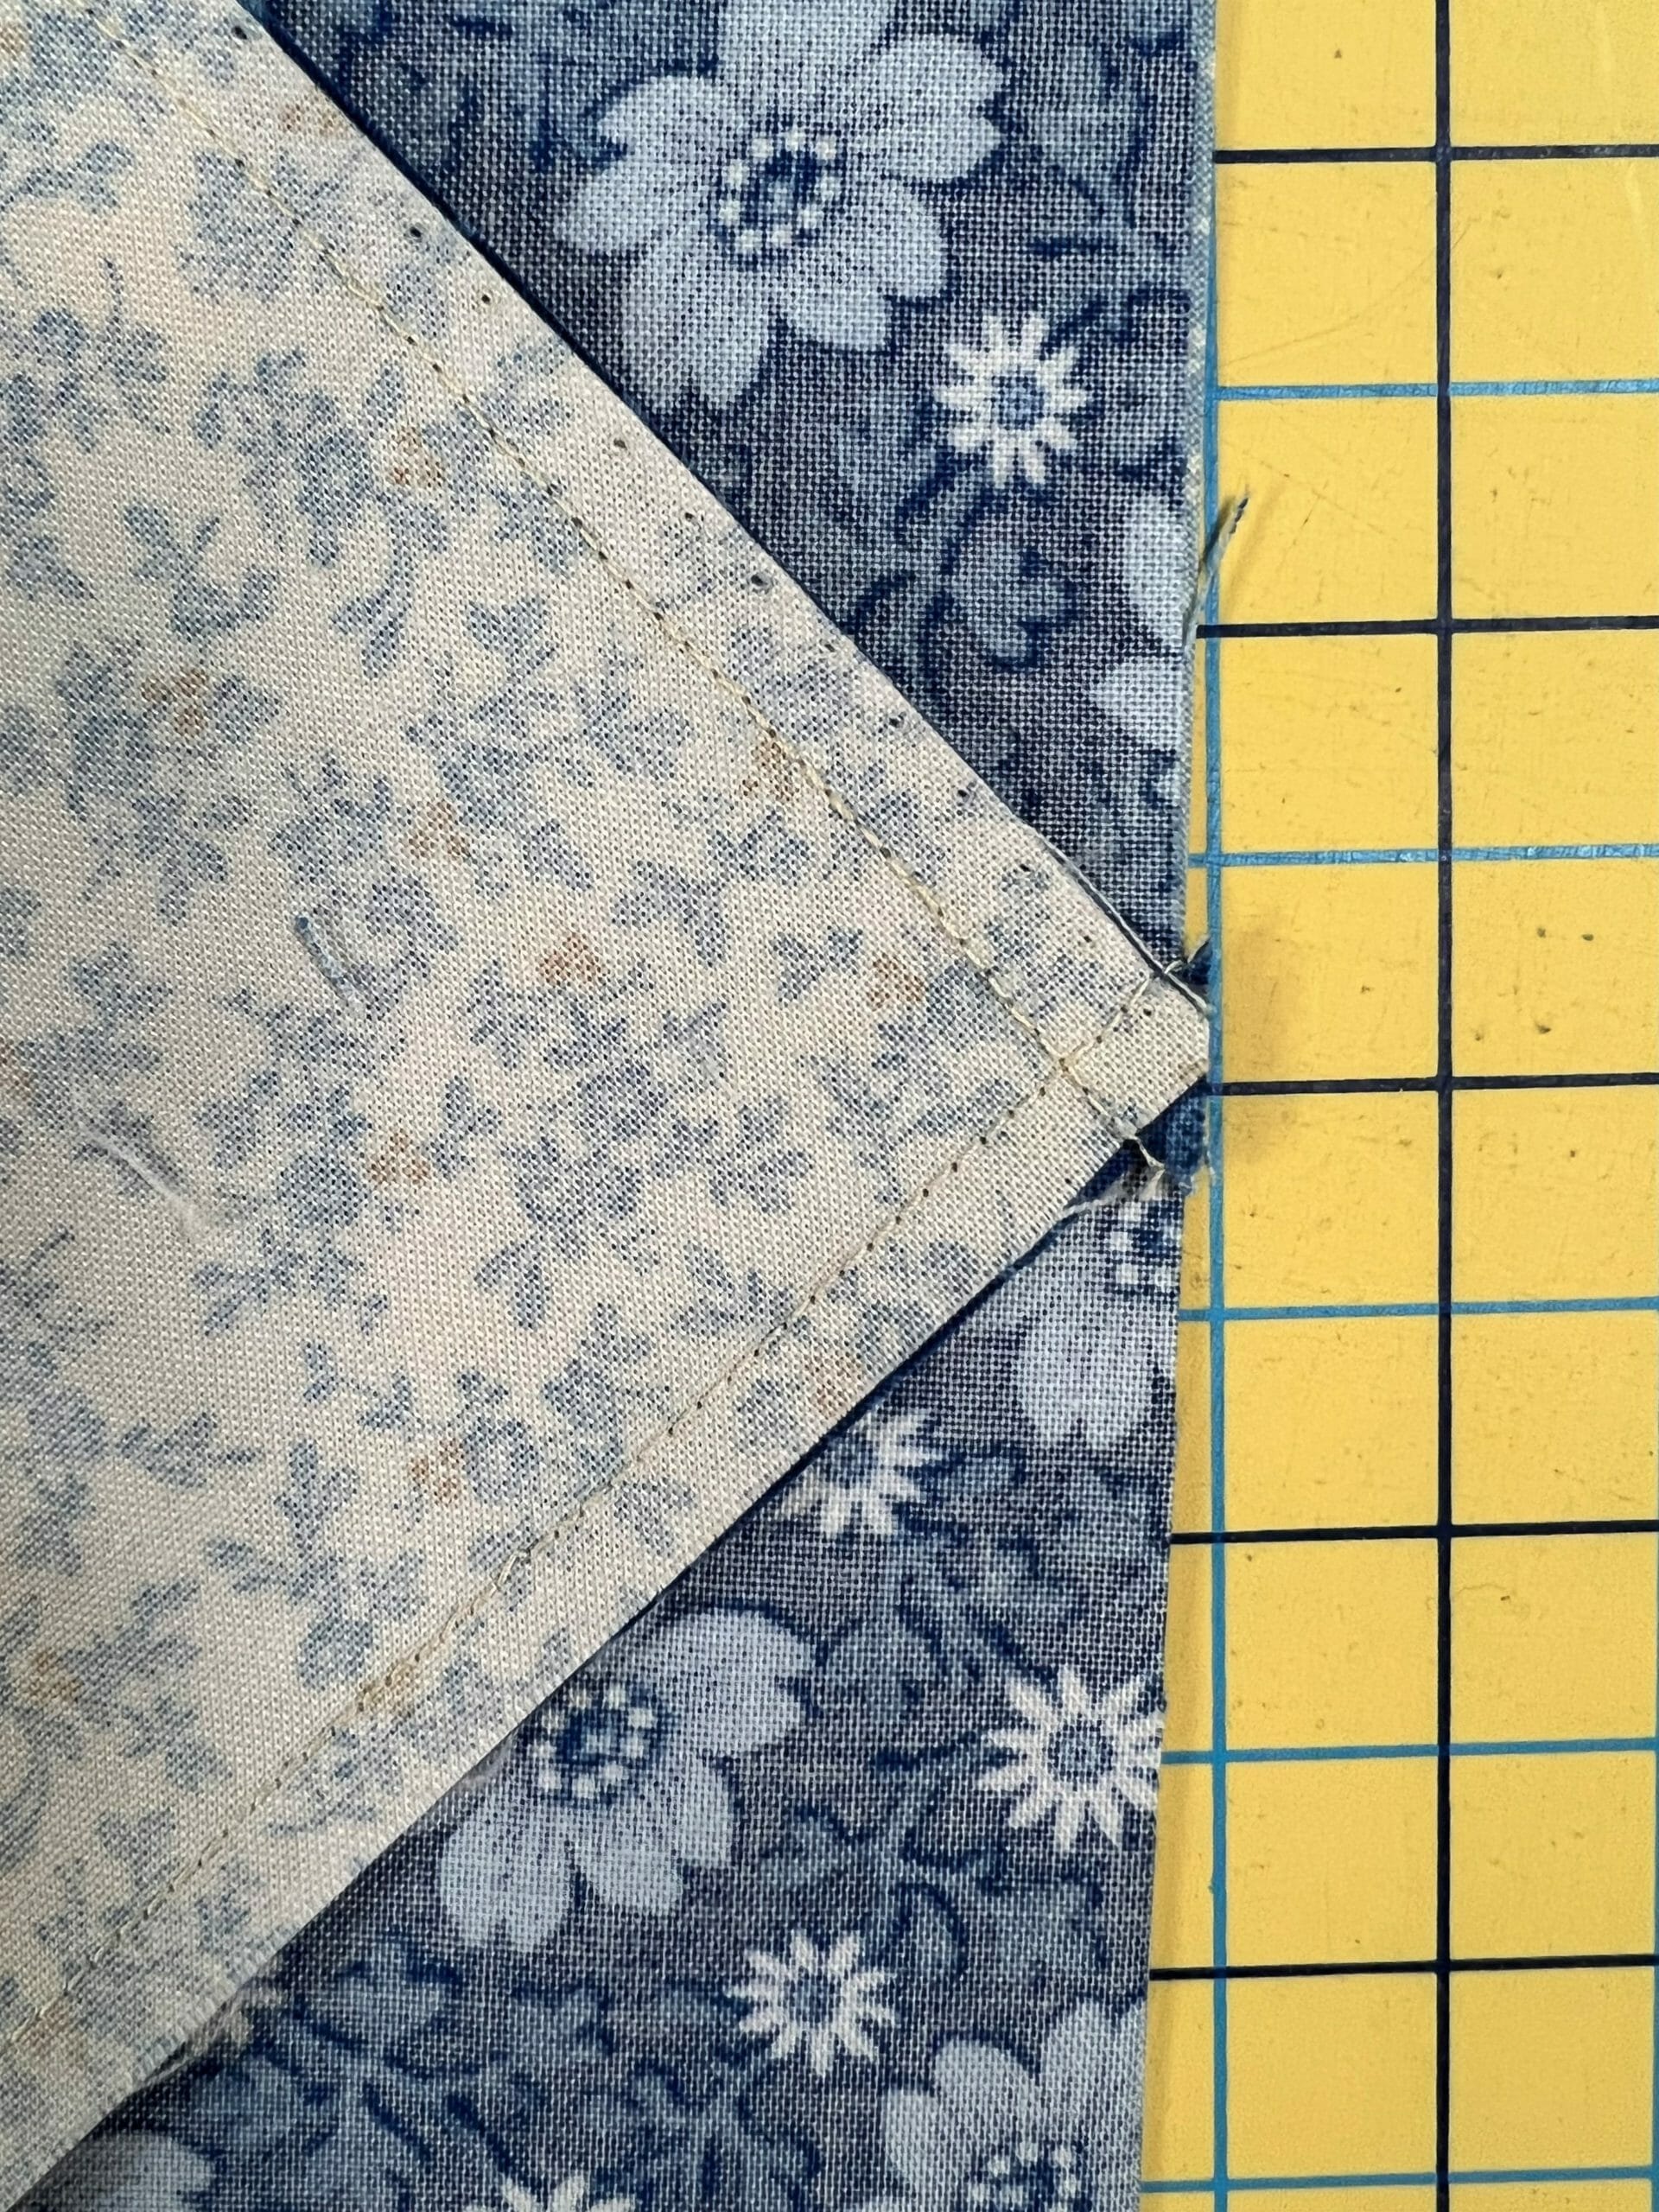
You want to make sure you are sewing right through the intersection of the two sewn lines of the triangle point, like you see above.
Below are the photos I took as I was sewing, so you can see what my process was. But somehow I missed a photo along the way. That makes twice with this block! So sorry! I clearly have a mental block when sewing on the third triangle, because I missed taking a picture both times.
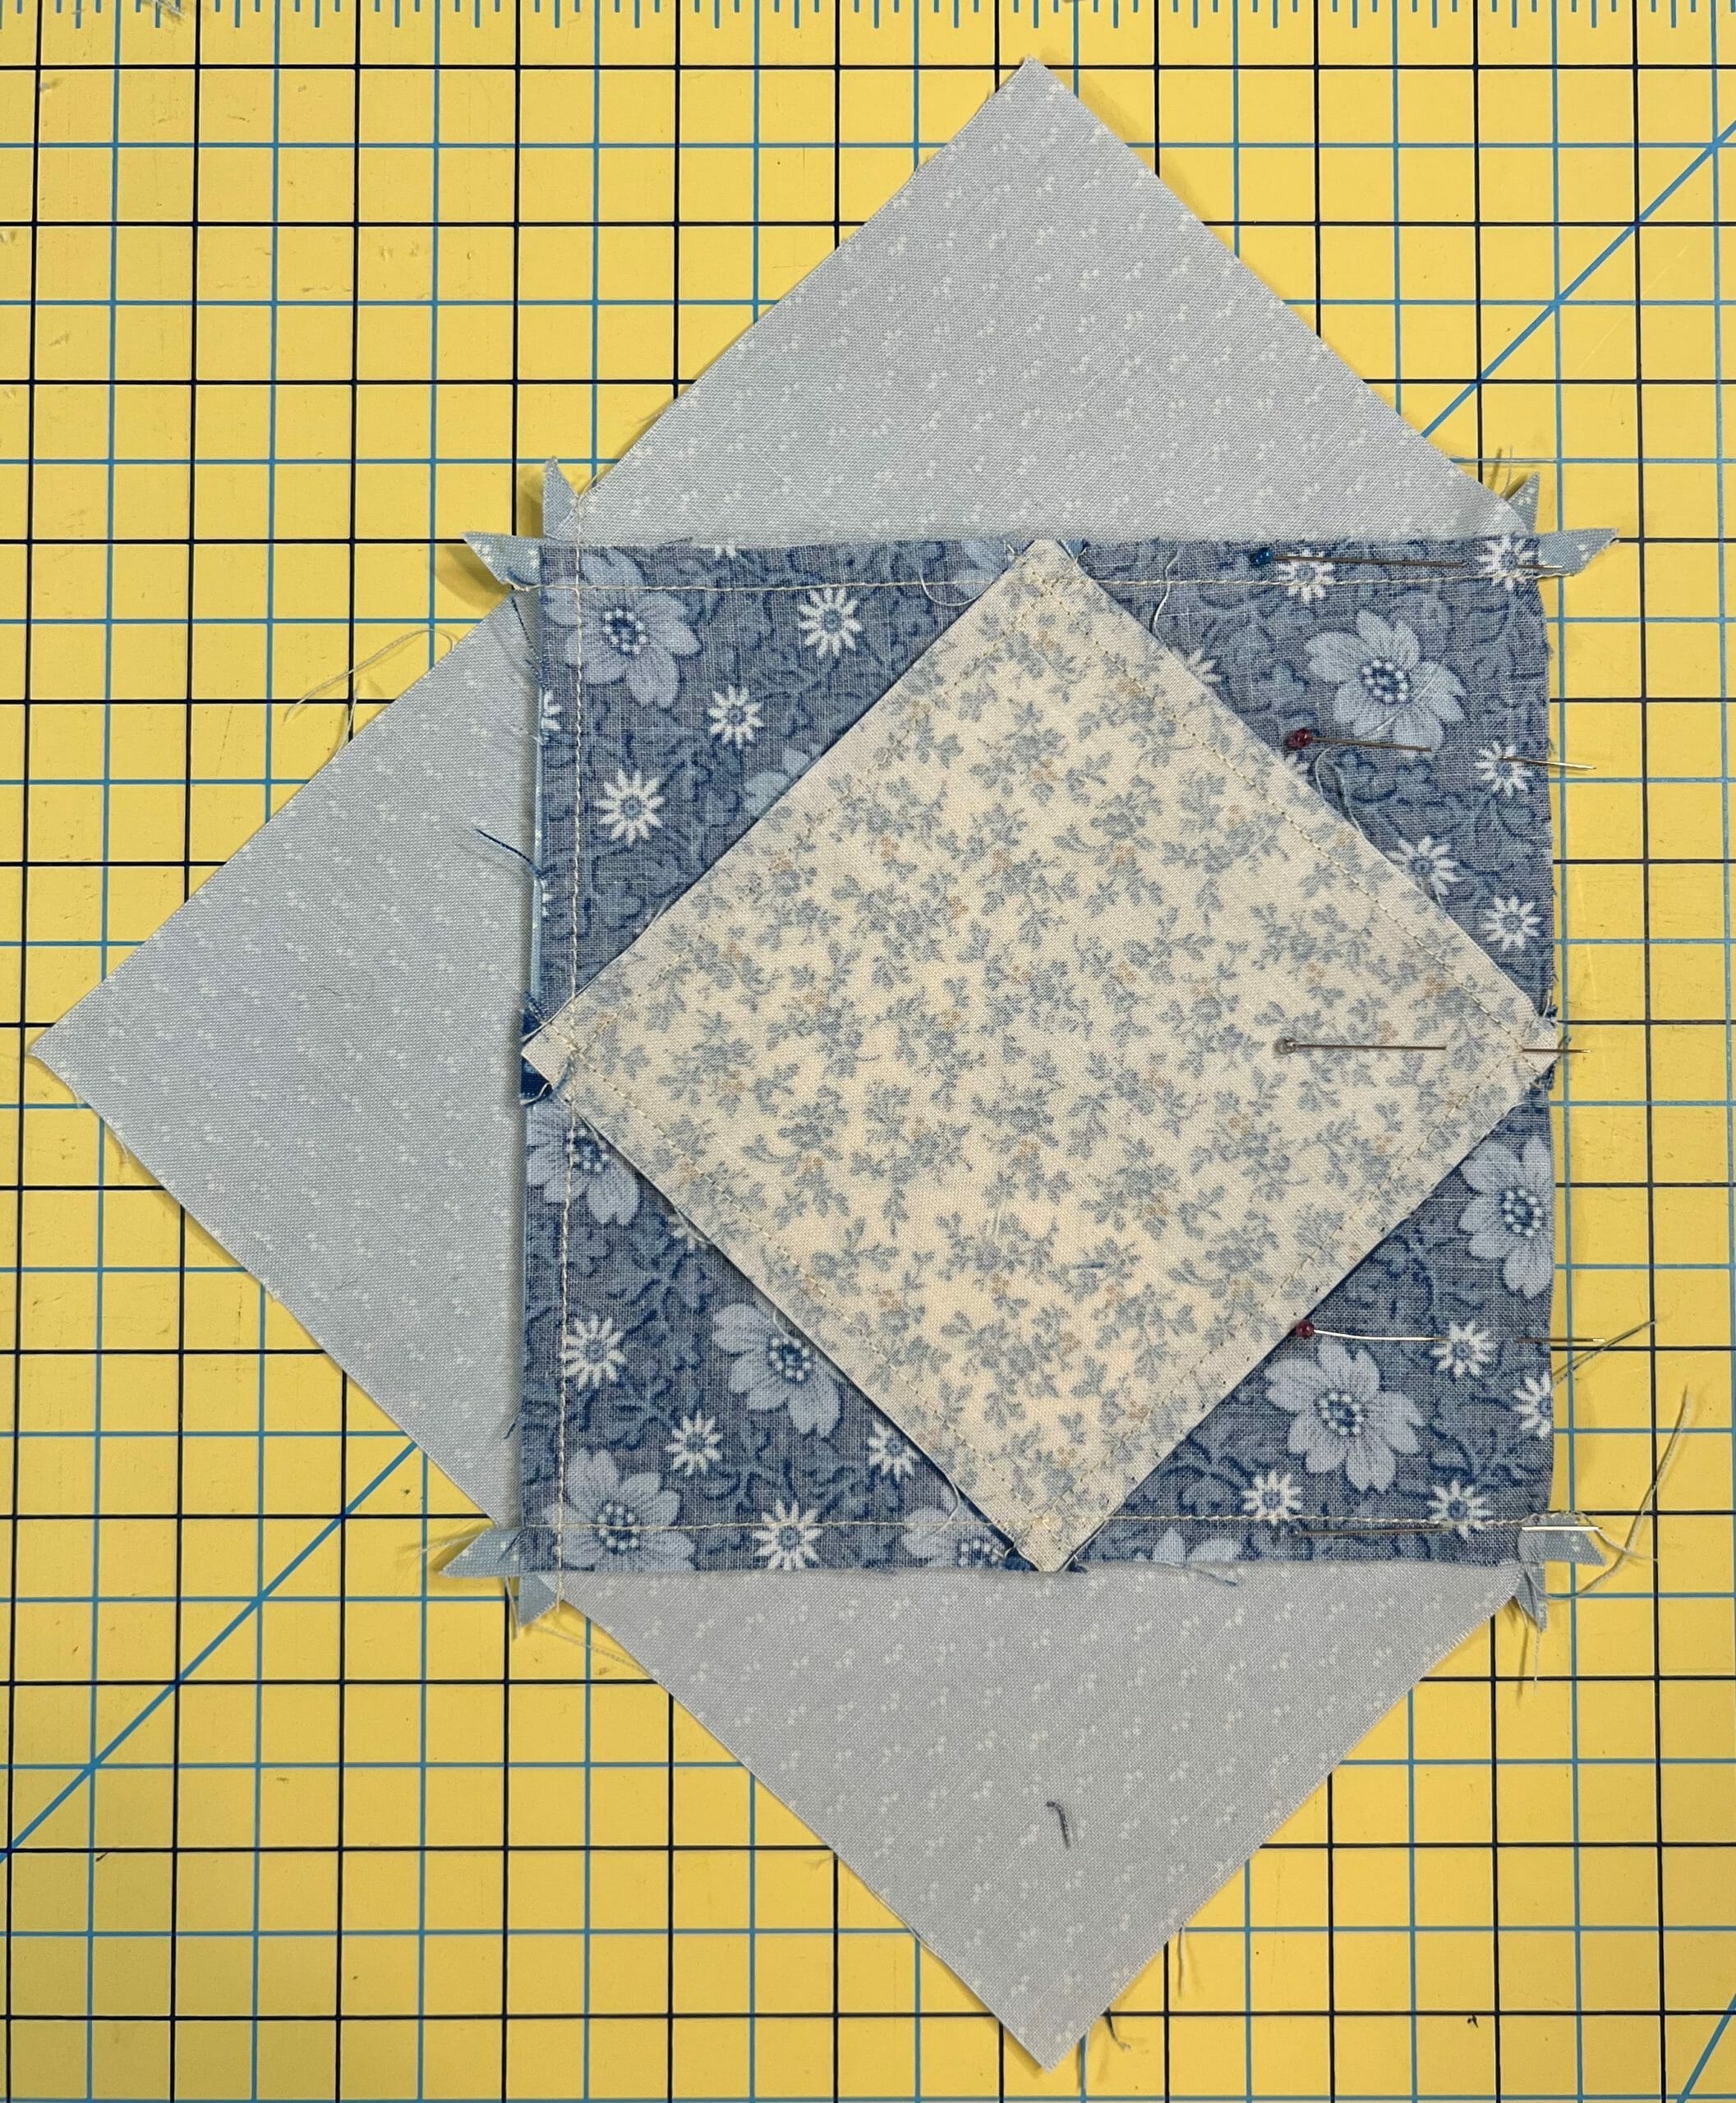
Once you are done with step 2, make sure you trim the unit to 8-1/2” square, again, minding your seam allowances. You’ll want to trim off those little triangle tails again anyway.
And now it’s time again to add those outer HST borders to complete the block.
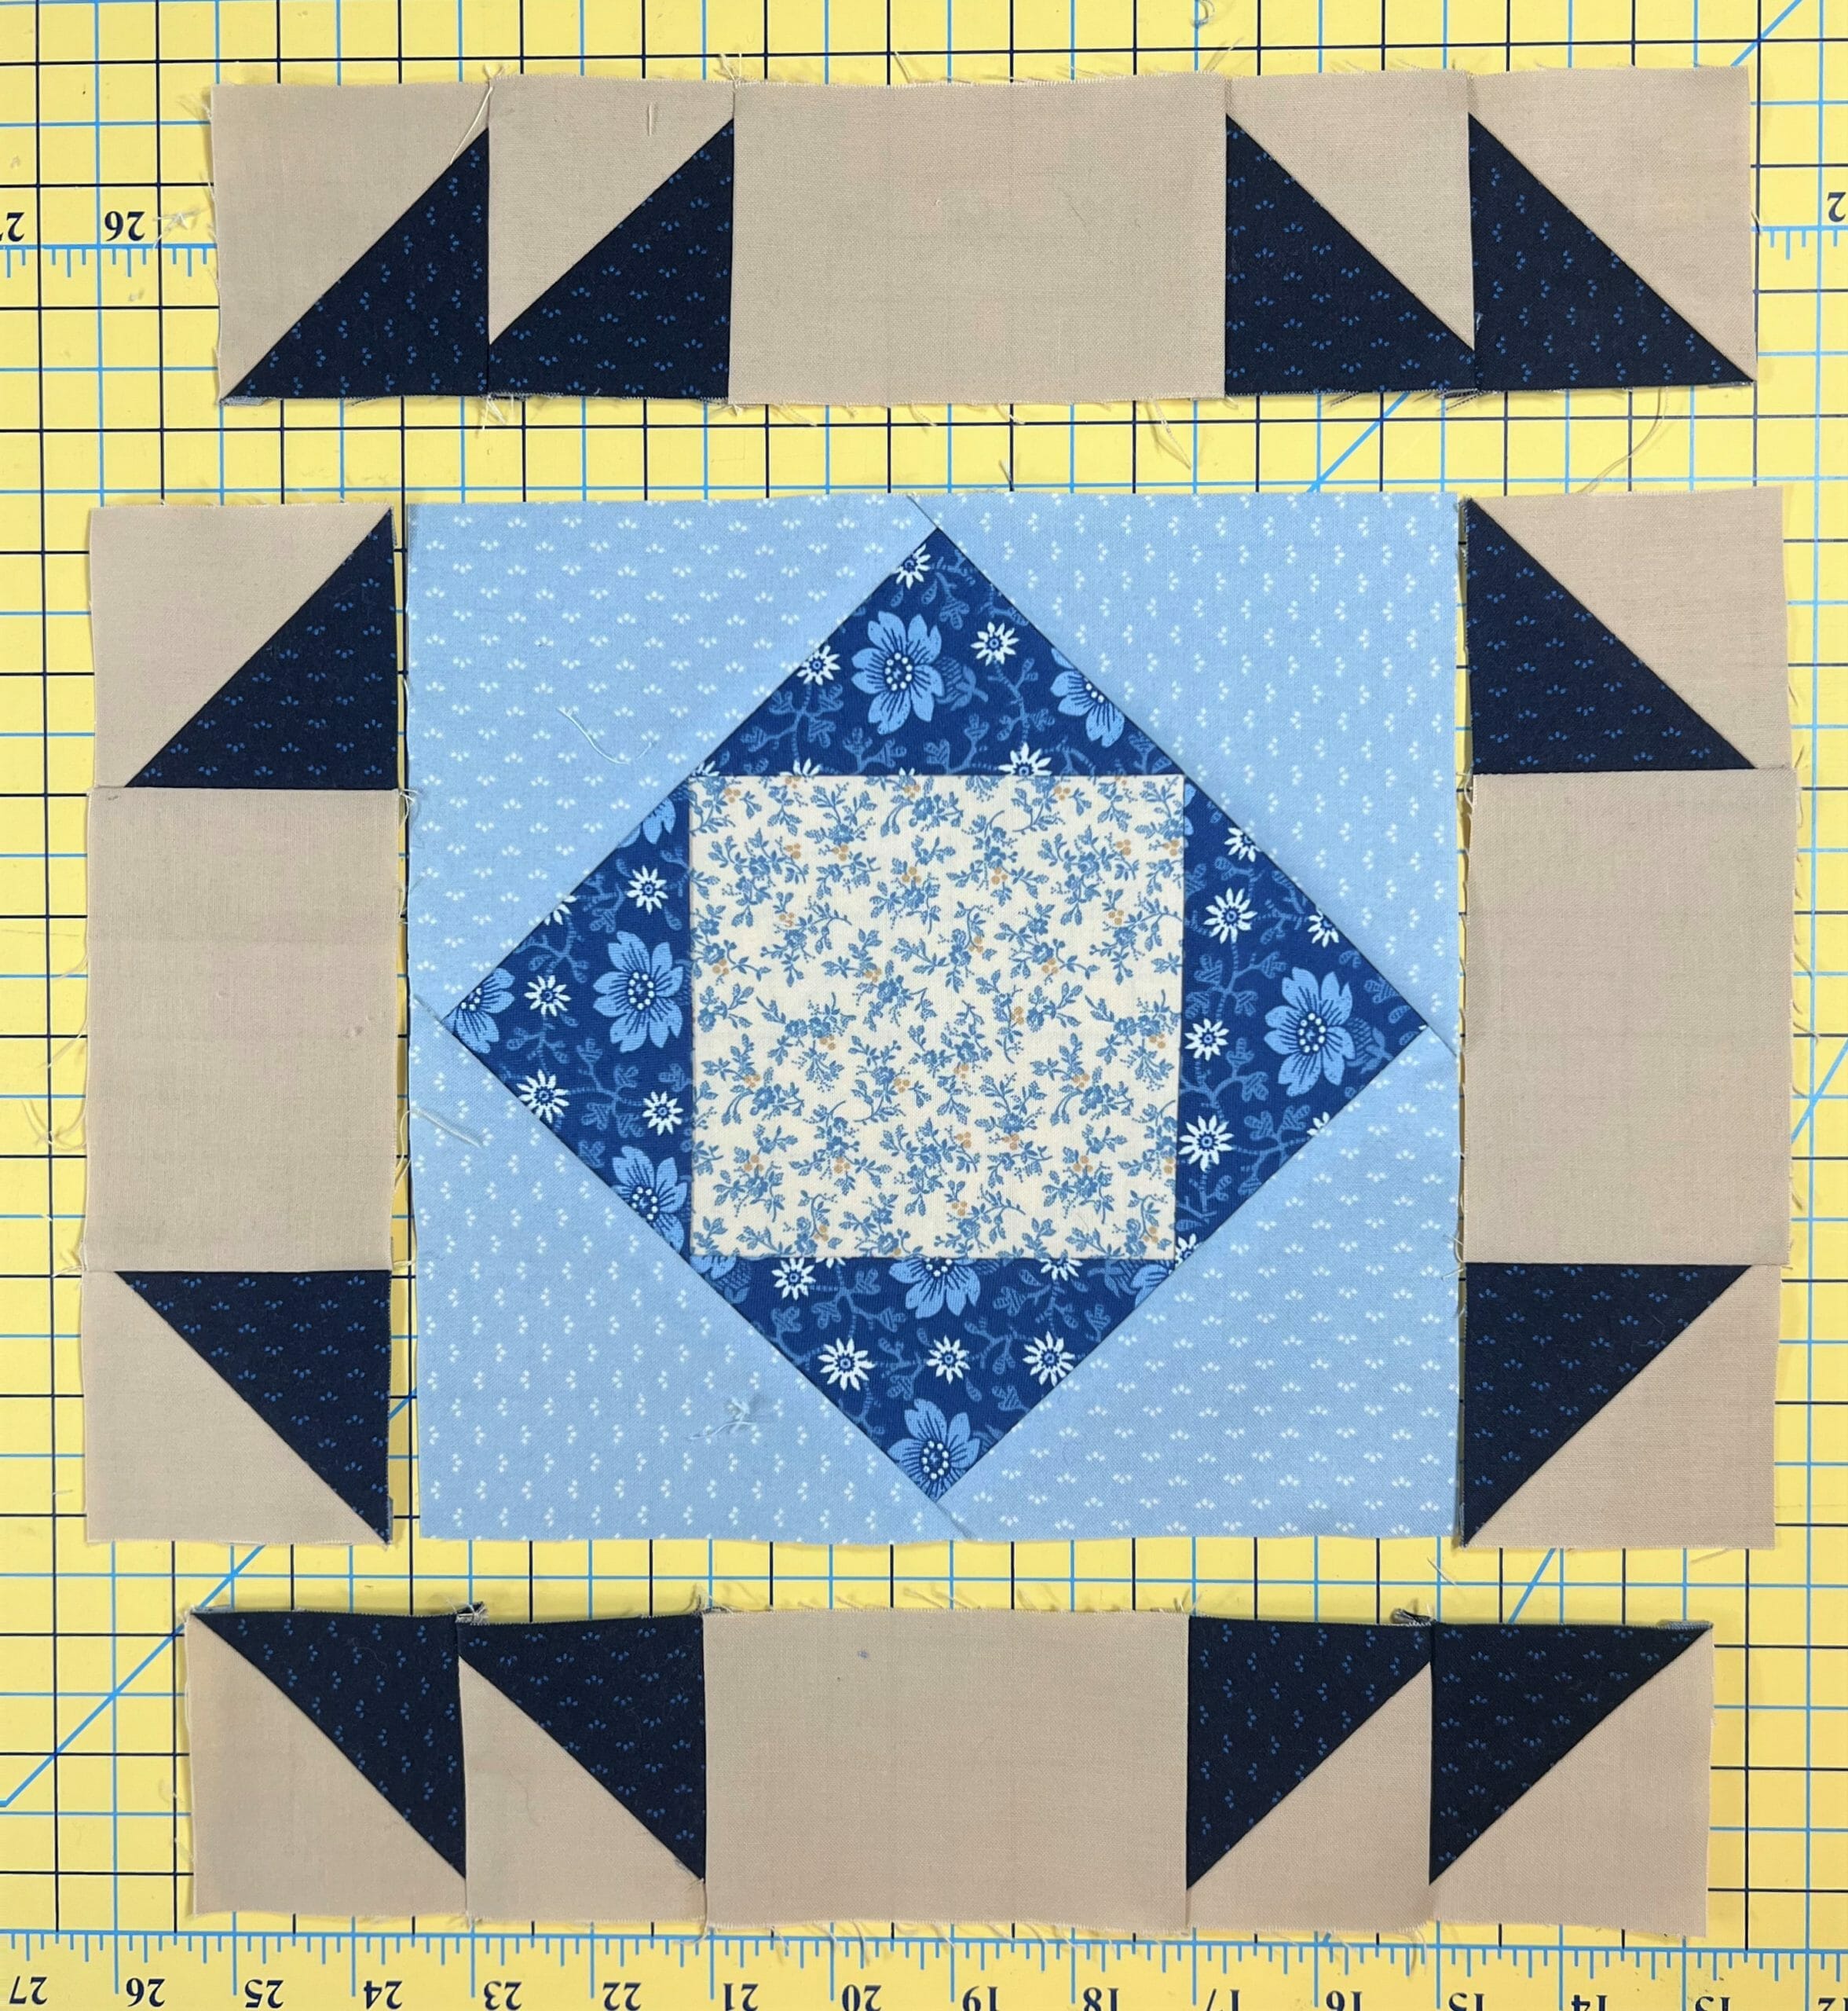
Another two blocks in the books!

I hope you’ve enjoyed this month’s blocks, or maybe learned something new. Please leave me a comment or reach out via the Facebook group or email if you have any questions.
Happy Quilting!
Kristin

