


 Tutorials
 2.11.2023
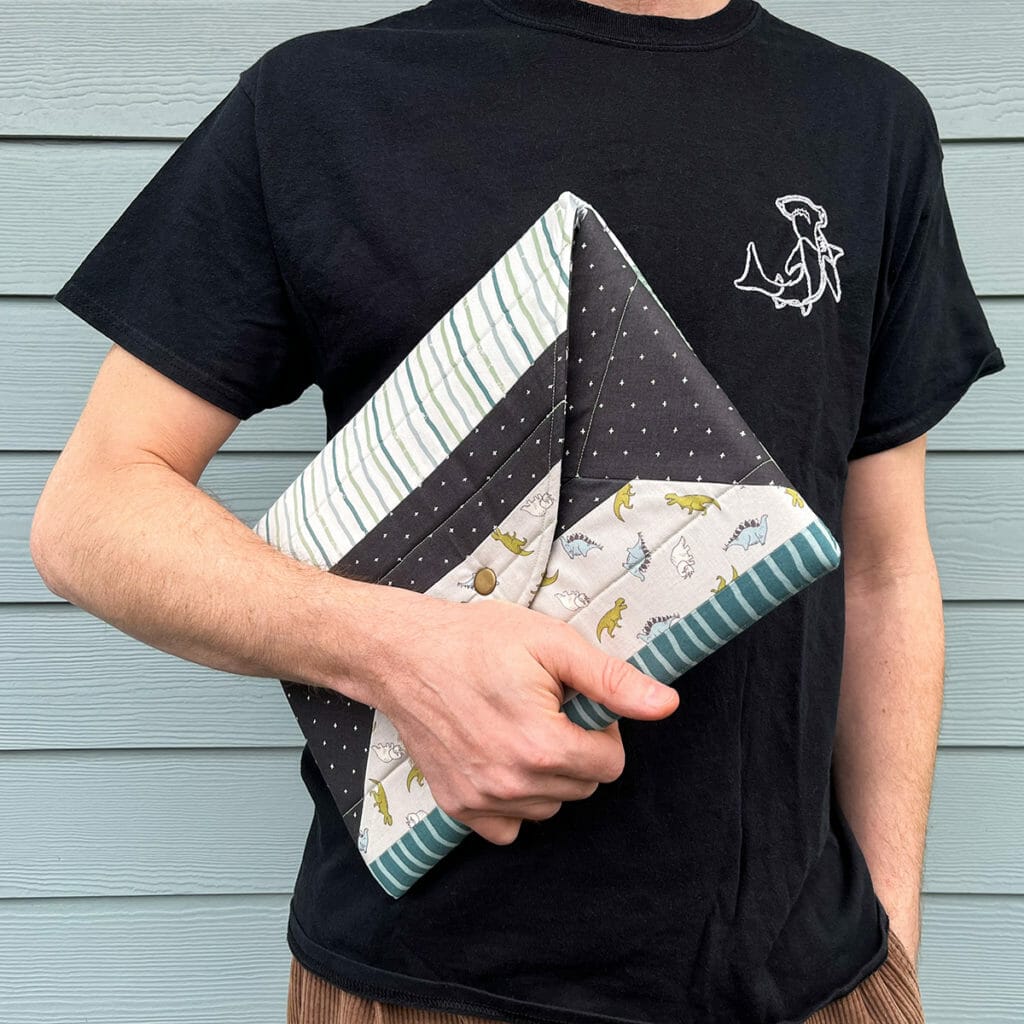
So, you’re looking for an easy project, right? One that utilizes your scraps, uses items you already have on hand, takes less than a day to make and would work as a gift for pretty much anyone?
Boy do we have the pattern for you!
The FREE Envelope Laptop Case Pattern is a gift giver’s dream – highly customizable, simple to sew and it produces a product you can give to pretty much anyone with a laptop or tablet.
Hi everyone – this is Liz and I’m a Content Creator here at Connecting Threads! I made this version of the Envelope Laptop Case for my partner, Ed, who loves dinosaurs. He works with kids at a local elementary school and I wanted to find a gift that was useful, quick to sew and would make him and his students smile. This case was whipped up in less than 5 hours and I immediately started adjusting the pattern to create one for myself!
Let me walk you through everything you’ll need and all my favorite tips that I learned while sewing this cute case!

First, let’s go over supplies. I’ll be listing everything I recommend for this pattern, plus I’ll link all the products I personally used for my dinosaur version:
- Fabric for the outside
- I used a Roar Fat Quarter Sampler and cut them up into randomly sized strips. You’ll want a piece of fabric that is approximately 18″ x 30″. You will also need an additional 12″ square for separate “flaps” that are attached part way through sewing.
- Fabric for the lining
- I used leftover Roar scraps for the lining as well, since I wanted to utilize as much of this fabric as possible. Just like the outside, you’ll want a piece of fabric that is approximately 18″ x 30″. You will not need additional fabric for the lining.
- Batting or stabilizer
- I used ByAnnie’s Soft and Stable Batting, which is a lightweight fabric stabilizer that works beautifully for bags. It’s surprisingly sturdy for such a light material, is easy to sew through, keeps its shape very well, and can be put in a washer/dryer.
- Closure of your choice
- The pattern calls for a button, which means you’ll be creating a button hole in the top flap. If you’re like me and hate creating button holes, there are tons of other options! I used a heavyweight metal snap and it worked perfectly. I’d also suggest a magnetic snap closure (modern day laptops won’t be erased by these closures, especially since many utilize magnets in their own closures), but you always want to double check if your device can be next to a small magnet. There are endless types of closures, so pick whatever you have lying around!
- Thread
- I used our Essential Cotton thread in Aloe. It’s a fabulous option and will hold up to being shoved in a backpack on a daily basis!
Let’s move onto pattern notes! While this one is incredibly easy, every pattern comes with fun little idiosyncrasies that we have to sort through. If you’re at this section, I highly recommend you have your pattern in front of you (on your computer screen, tablet or printed), as I’ll be referencing specific instructions. I like to mark up my patterns as I go with all my little notes for what to do differently next time! Let’s jump in:
- This project is perfect for scraps you have on hand! You can sew them together in strips (like I did!), which was a fabulous way to cut up some spare fat quarters or use leftover jelly roll strips. You could easily patchwork some squares or triangles together that are leftover from another project, whatever your heart desires!

- Always double check the size of your print outs to avoid sizing issues. I printed out my template and didn’t realize that I’d mis-printed them until after I taped all the pieces together – absolute rookie mistake!
- Resizing this pattern is simple, you just need to figure out your desired case size and go from there. This case is best for a 15″ laptop/tablet. I sized mine down for a 13″ laptop by trimming off 1/4″ seam allowance around the finished template – it ended up fitting well with a smidge of wiggle room.
- An important note about resizing this template: the pattern is designed to have one large piece of fabric and batting that folds into a case. That means the template piece includes the foldover flap, the back piece and the front piece. If you need to adjust the height of the case, you have to adjust the height of each section. Thankfully, the template is pieced together in those three sections, so adjusting it is very easy!

- The pattern doesn’t call for any form of quilting, but I wanted the case to have a more finished quality, so I added some straight lines. It ended up being a great idea, since without the quilting, the fabric would have slipped around while being handled. This kept the fabric and batting more secure, and it made the bag more study for everyday use.
- To help your case fold more easily, I added a line of quilting along each of the fold lines.
- The flaps you sew on Step #2 are made to keep the enclosed laptop more secure and give it more of an “envelope” look. That said, they are not mandatory and if you’re struggling with attaching them, don’t worry about it! I tried the case both ways – works beautifully with and without those flaps.
- On Step #6, you’ll be sewing the back to the front to create your envelope. The pattern calls for you to sew it with the finished edge on the OUTSIDE of the case (i.e. you’ll be sewing the seams with the lining facing RS together). I tried this and ended up not liking it, because it looked unfinished. As you can see in the image below, I sewed my case so that the finished edge would be on the INSIDE. I think it looks more polished on the outside!

That’s it! This project was extremely fun, delightfully functional, great for beginners, customizable and was the cutest gift for Ed. He’s already carting it around – I know I’ve made a great gift if he’s actually using it! – and asked for another one just for his iPad!
Thanks for joining me and don’t forget to tag @ConnectingThreads when you make your own laptop case – I love seeing all of your creative projects pop up on my social media feed!
Happy sewing ❤️

