


 Tutorials
 11.9.2023
NOTE: these blog posts for the Liberty Lane quilt top are part of a limited series for our Block of the Month subscription program. Sign-ups for the Liberty Lane BOM are no longer available. You can learn more about our upcoming Block of the Month subscriptions here.
Hello Friends!
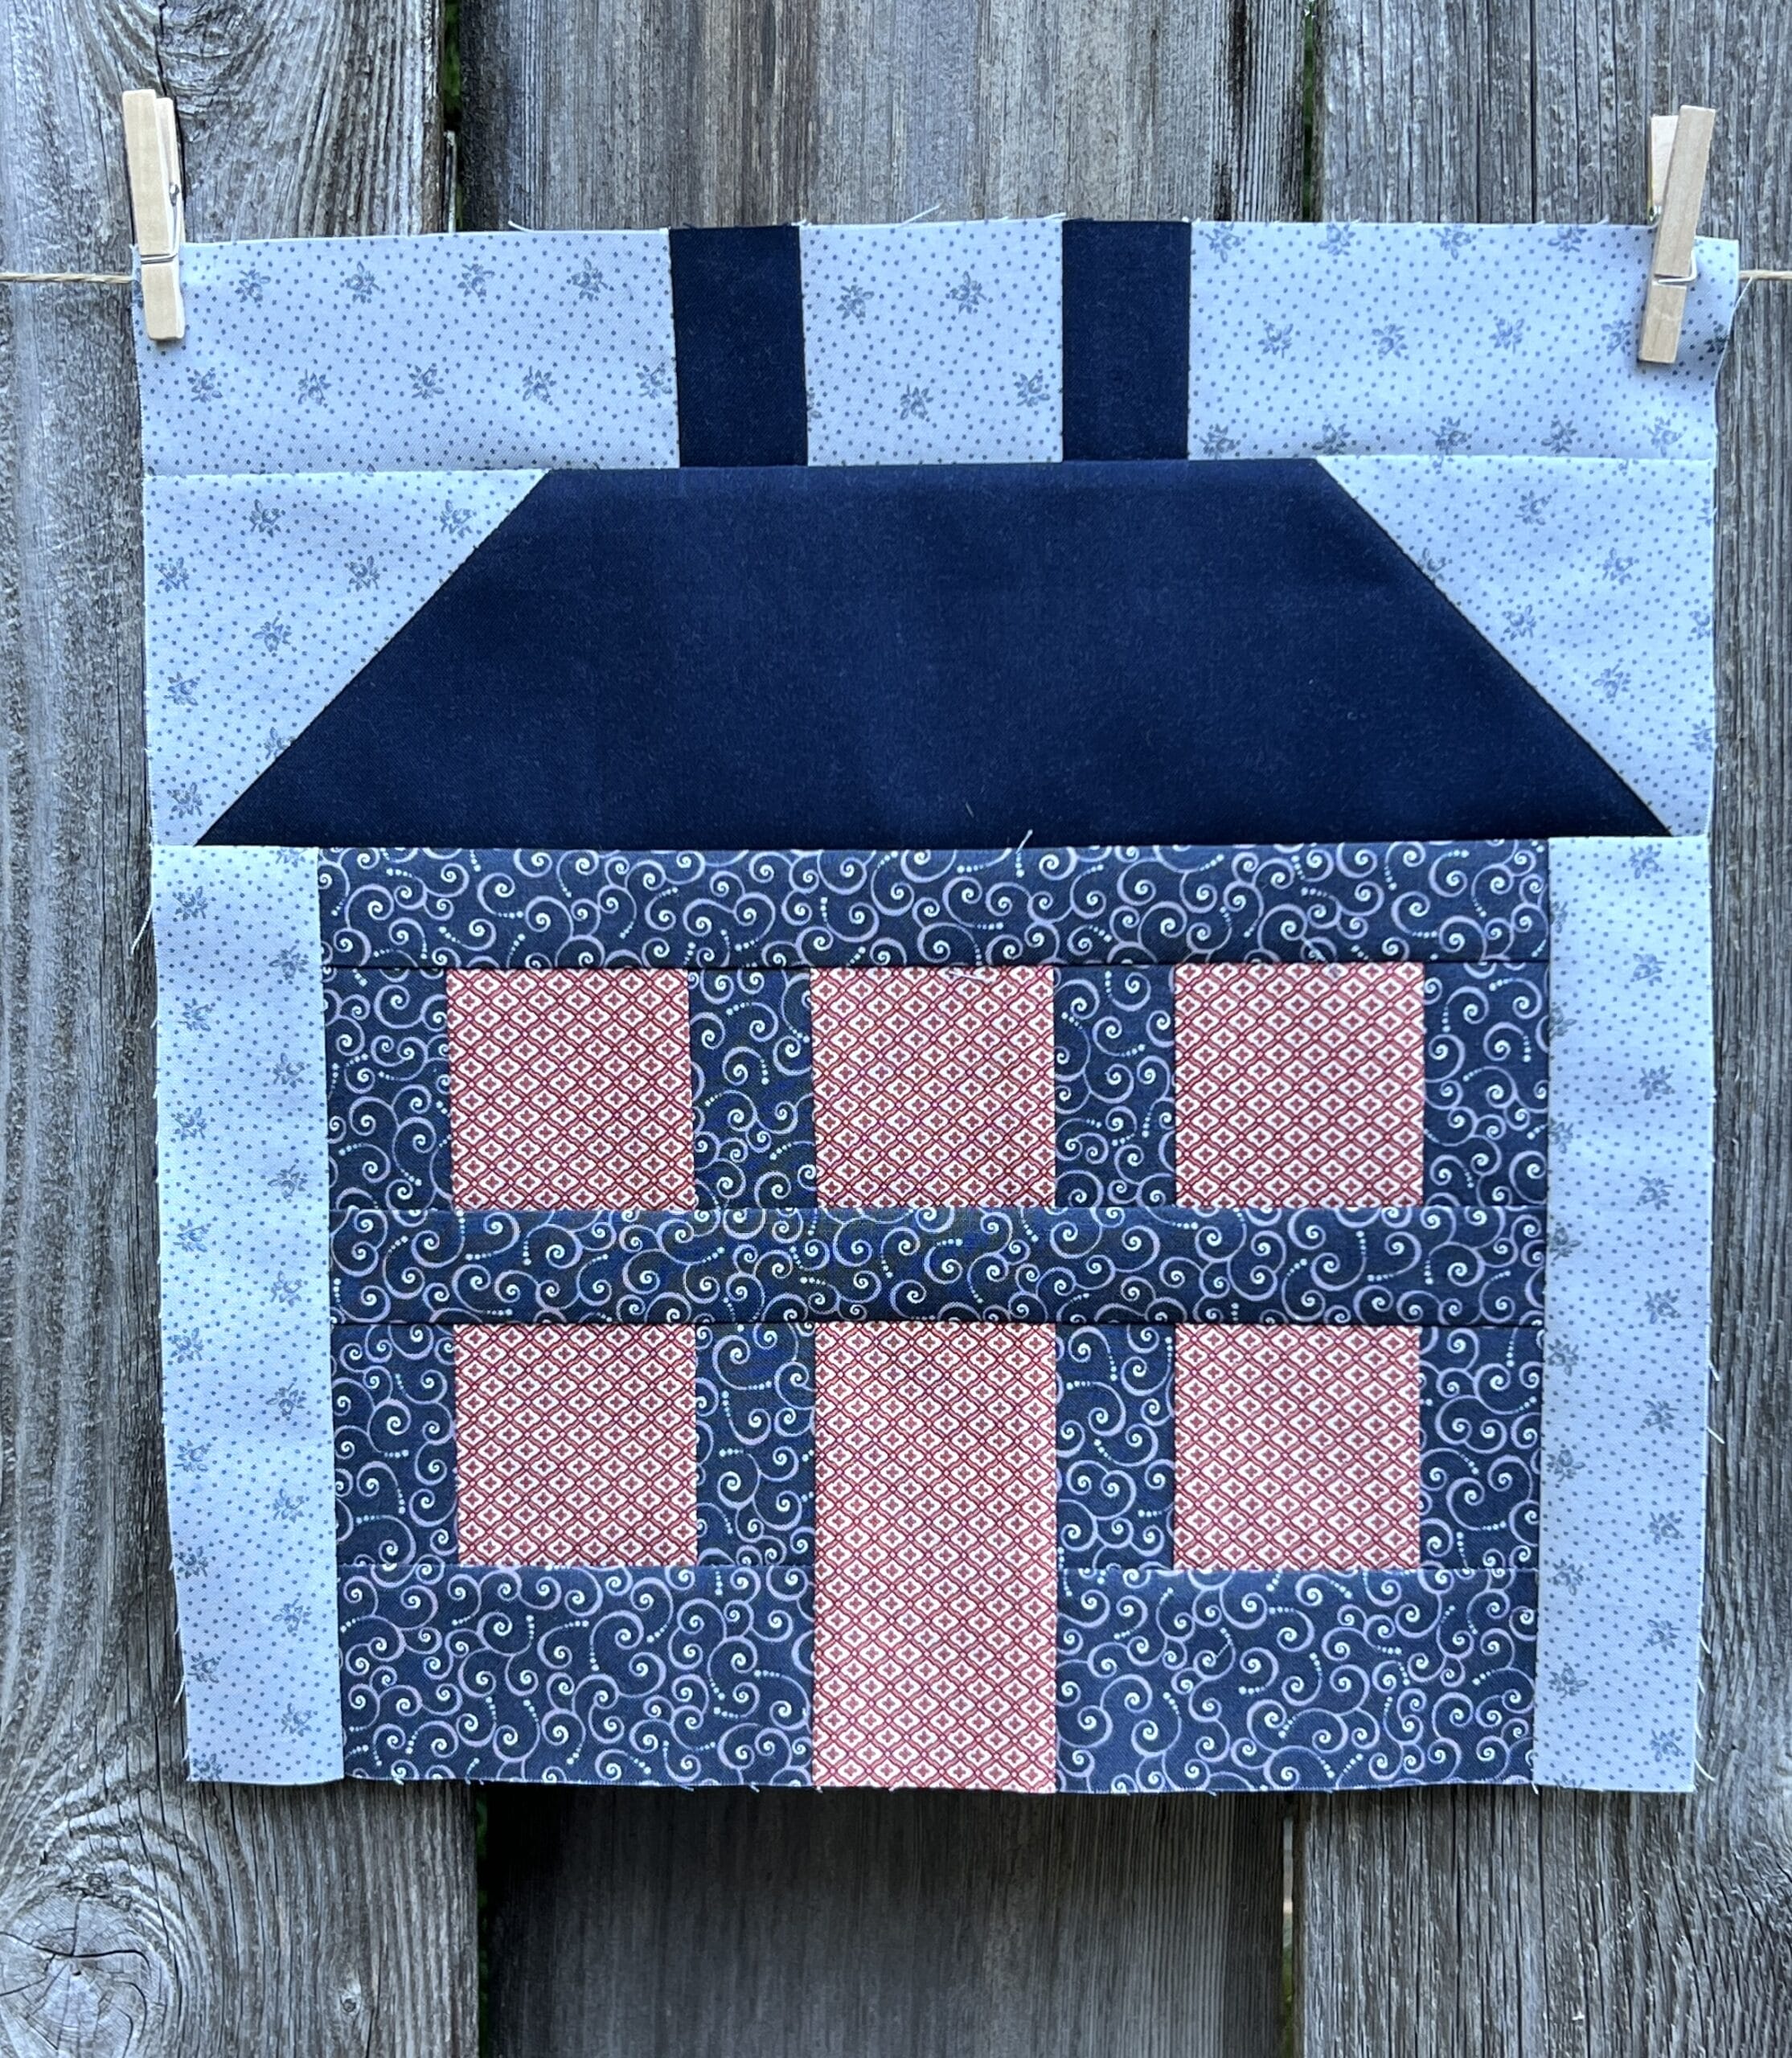
I hope you all enjoyed making our narrow house blocks last month. This month we’ll be making another house block for our quilt, and I love this one even more than the ones we just finished up. And since we are only making four blocks this month, it should go pretty fast for everyone.
Like I mentioned last month, when sewing with so many small pieces, it’s always good to starch the fabrics with a little extra. Even though we are mostly dealing with rectangles and squares, it can be easy for things to get warped if you aren’t careful, and I find the extra starch really helps to avoid that.
I also find it very helpful to measure your sewing after each step. This will help you to end up with the proper 12-1/2” square block when done. You can also cut all your pieces just a hair bigger, so that you have some wiggle room to trim everything to size at the end of each step.
We’ll start off by making the upper window section by sewing three F squares in between four D rectangles. Once those are done, sew a C strip to the top. And for some reason, I forgot to take a photo with the C strip being sewn to the top. So sorry about that!

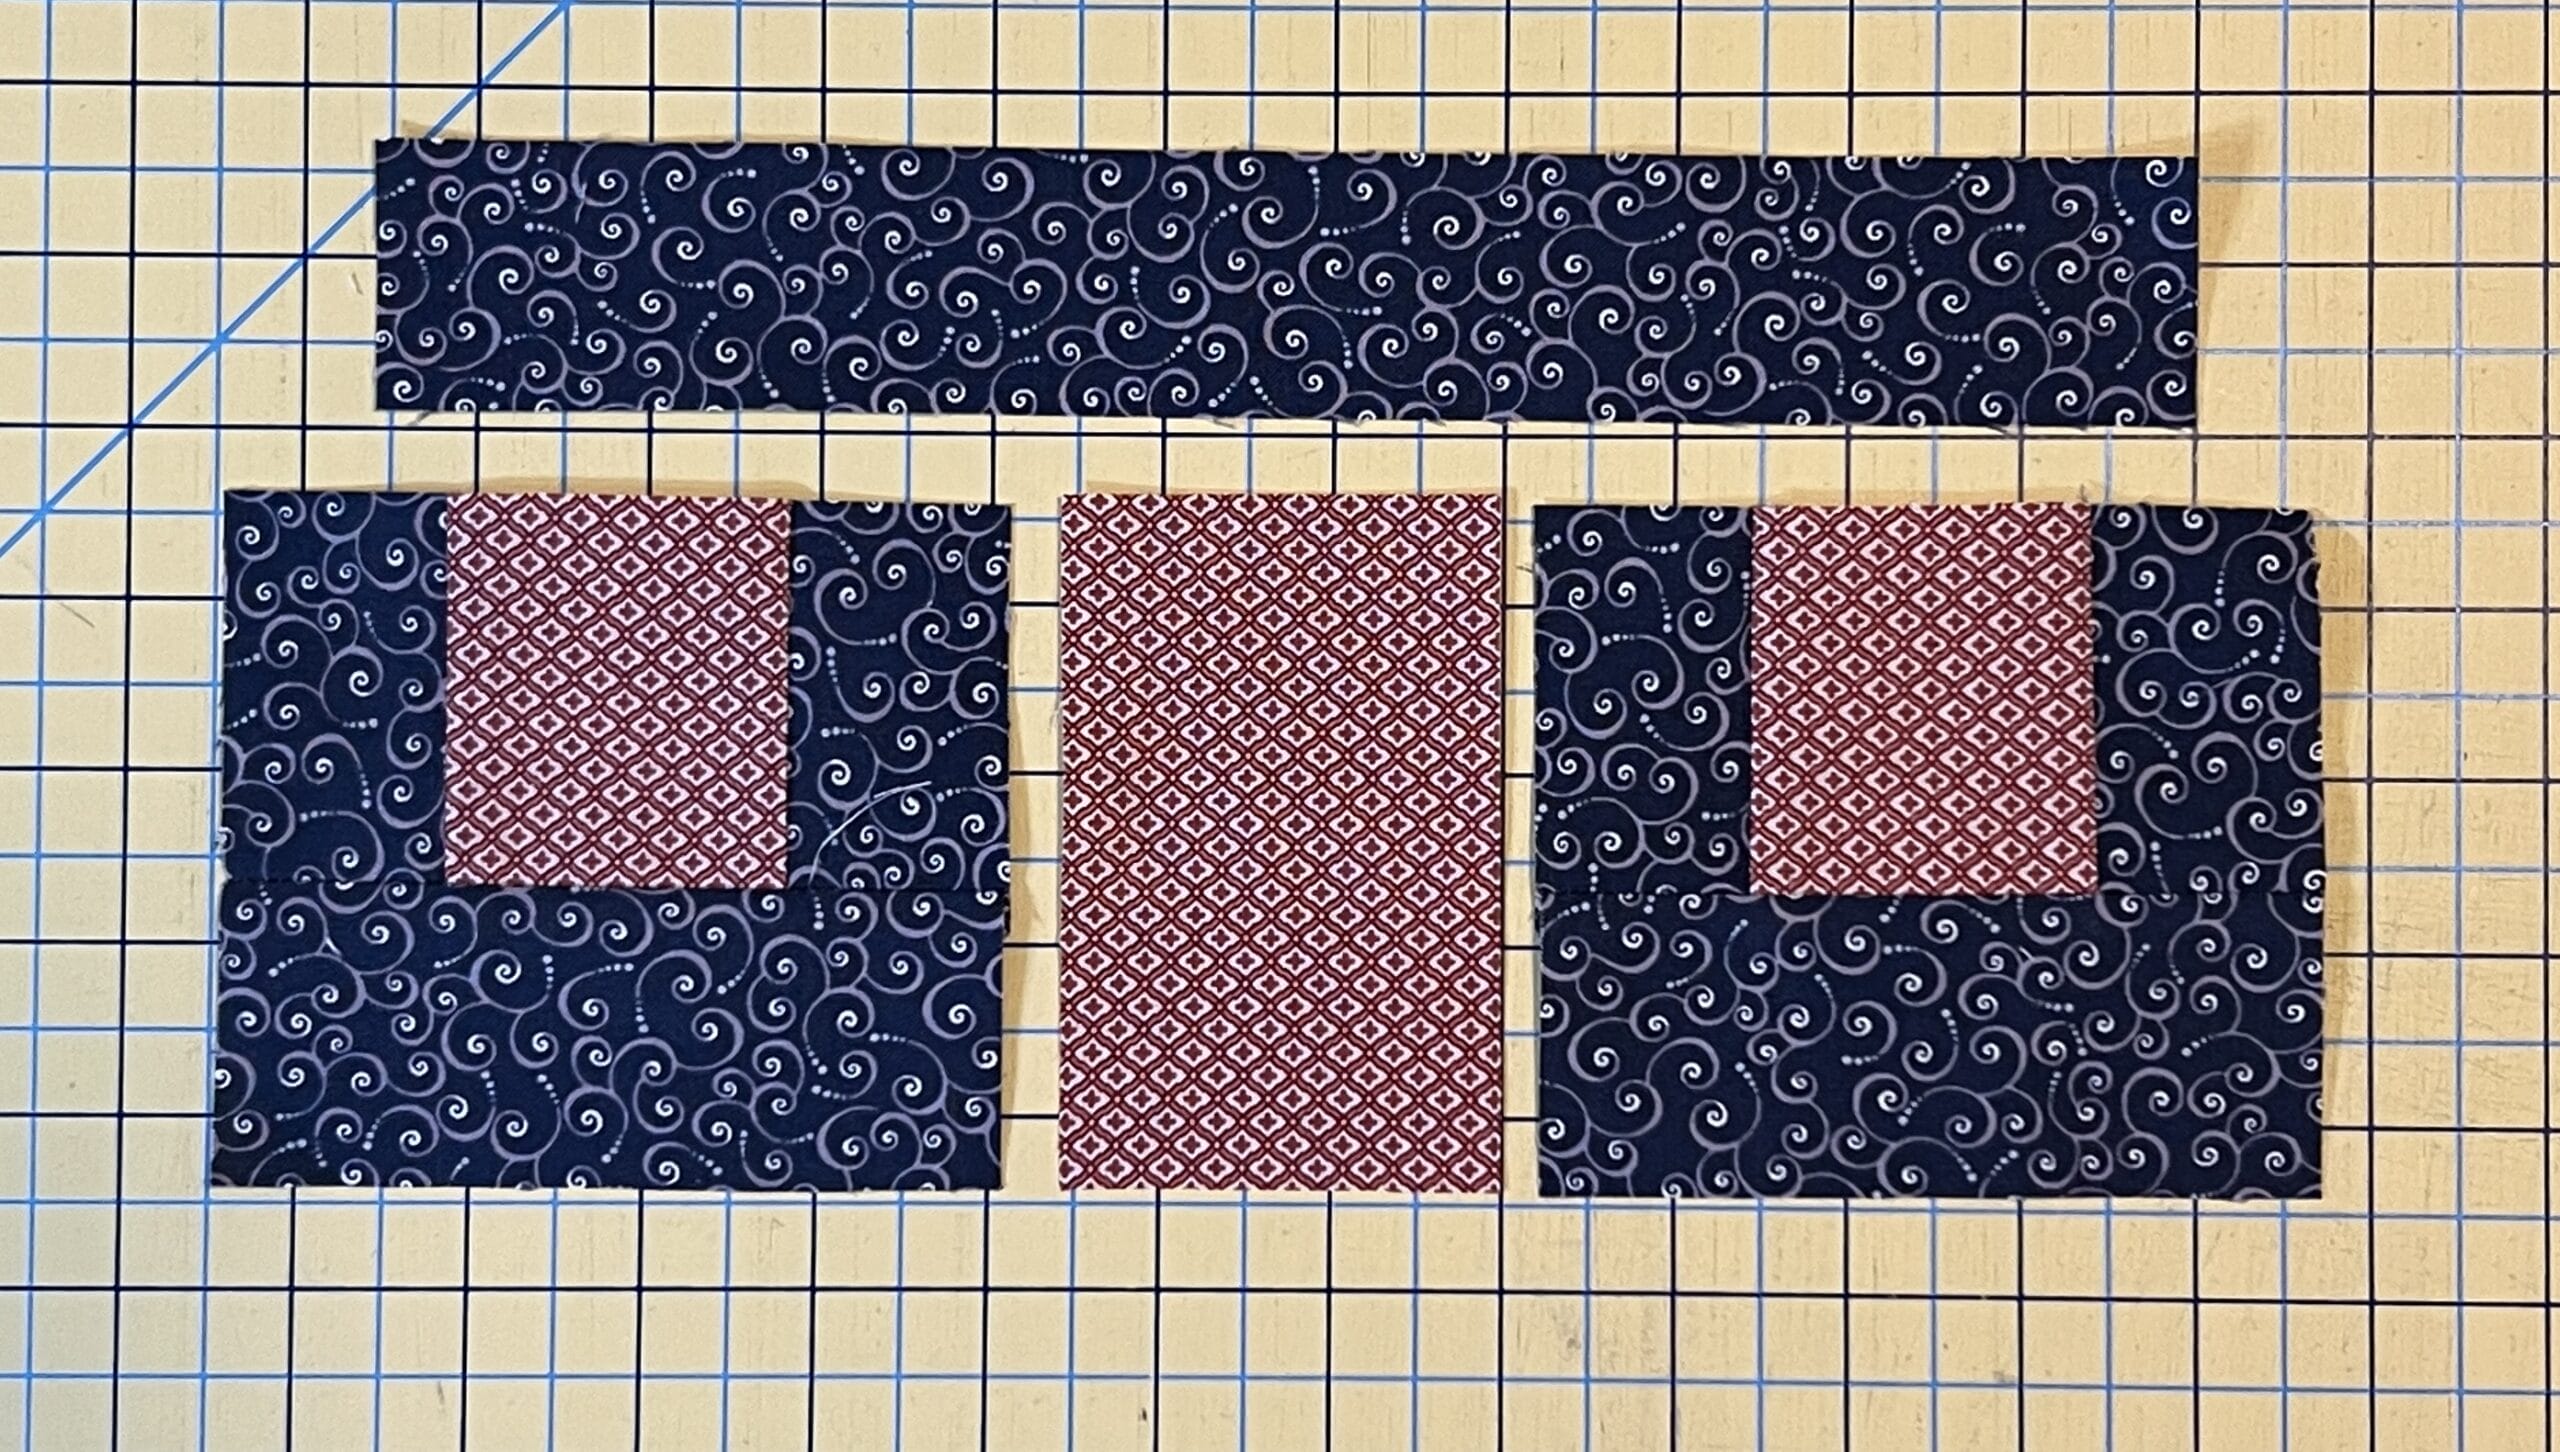
In step 2 we will make the lower window sections. There will be two of these units for each block.

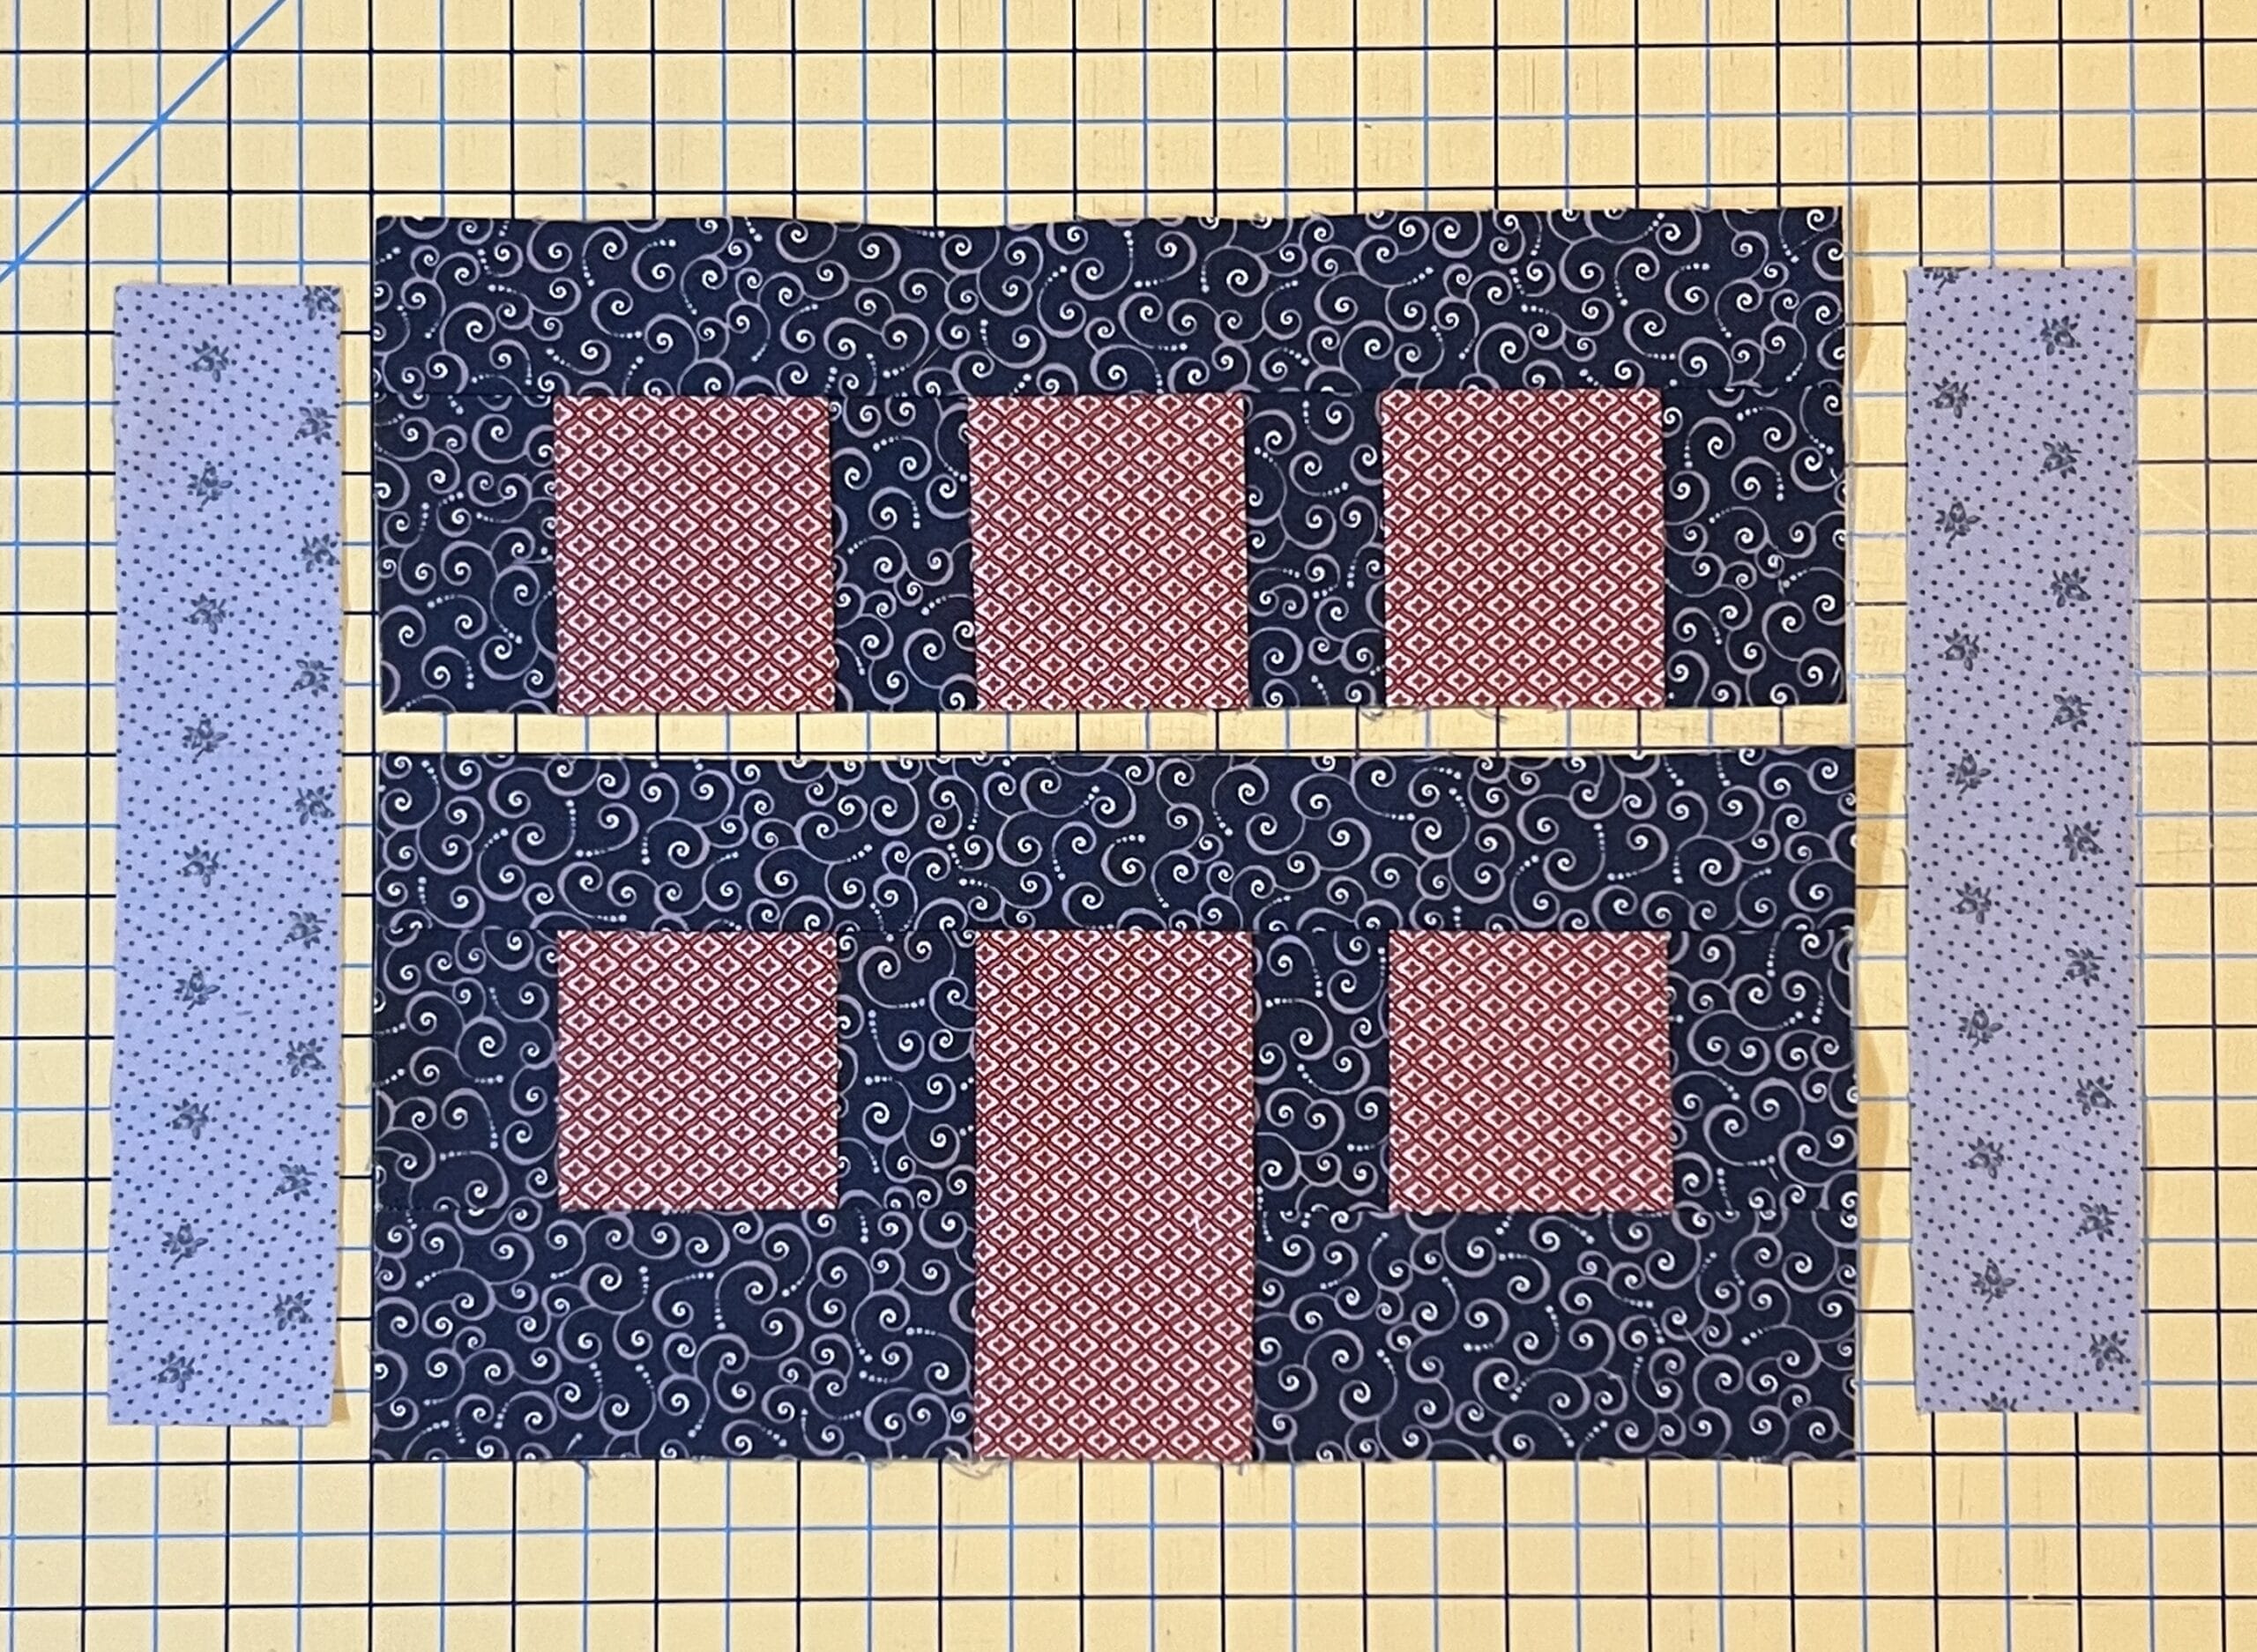
After those are done, sew a G rectangle in between two of the window units. This will become the door to the house. Finish off this step by sewing a C strip on the top of each unit.
Now sew the lower window door section to the bottom of the upper window section from step 1. Finish this off by sewing a K strip to each side.
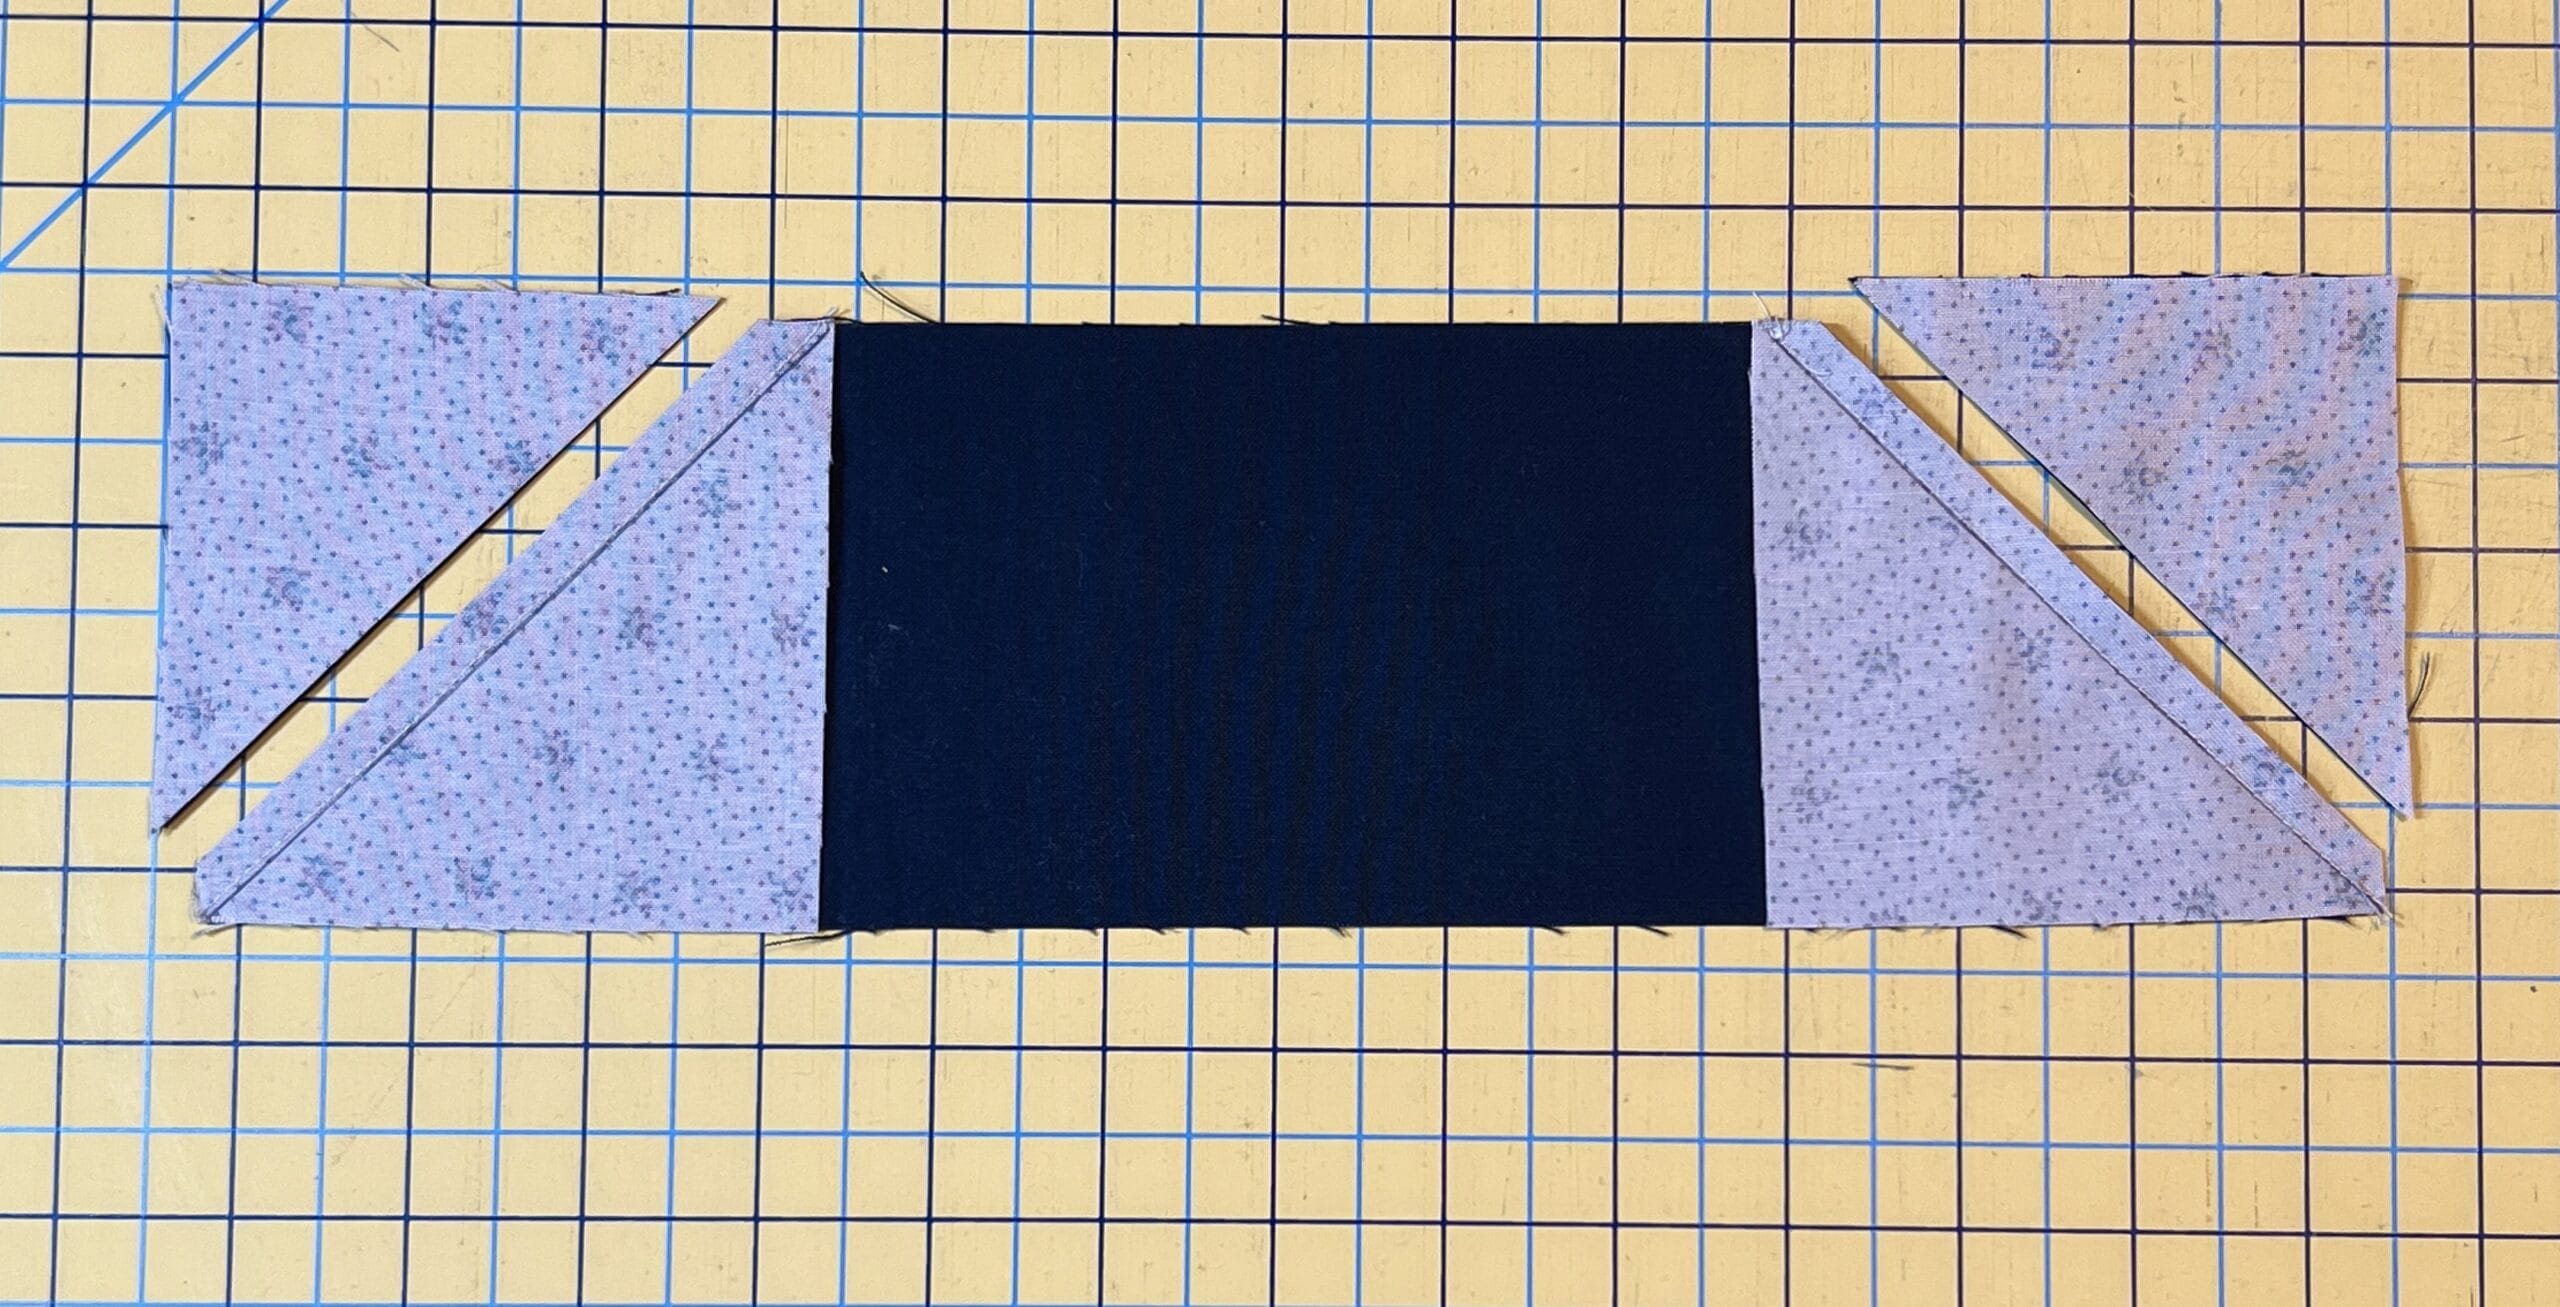
To make the roof, just place two H squares on to the ends of each A rectangle. If you’ve sewn any of my previous BOMs, one tip I’ve shared in the past is to sew just barely outside of your marked line, on the side closest to the outside corner. And by barely, I mean just a hair outside of the line. I find this prevents having these pieces come up short in the corners.
I also flip them up to the corner before cutting just to make sure it all looks good. You want all the corners to match up, so that the roof will still measure 3-1/2” x 12-1/2” when done.

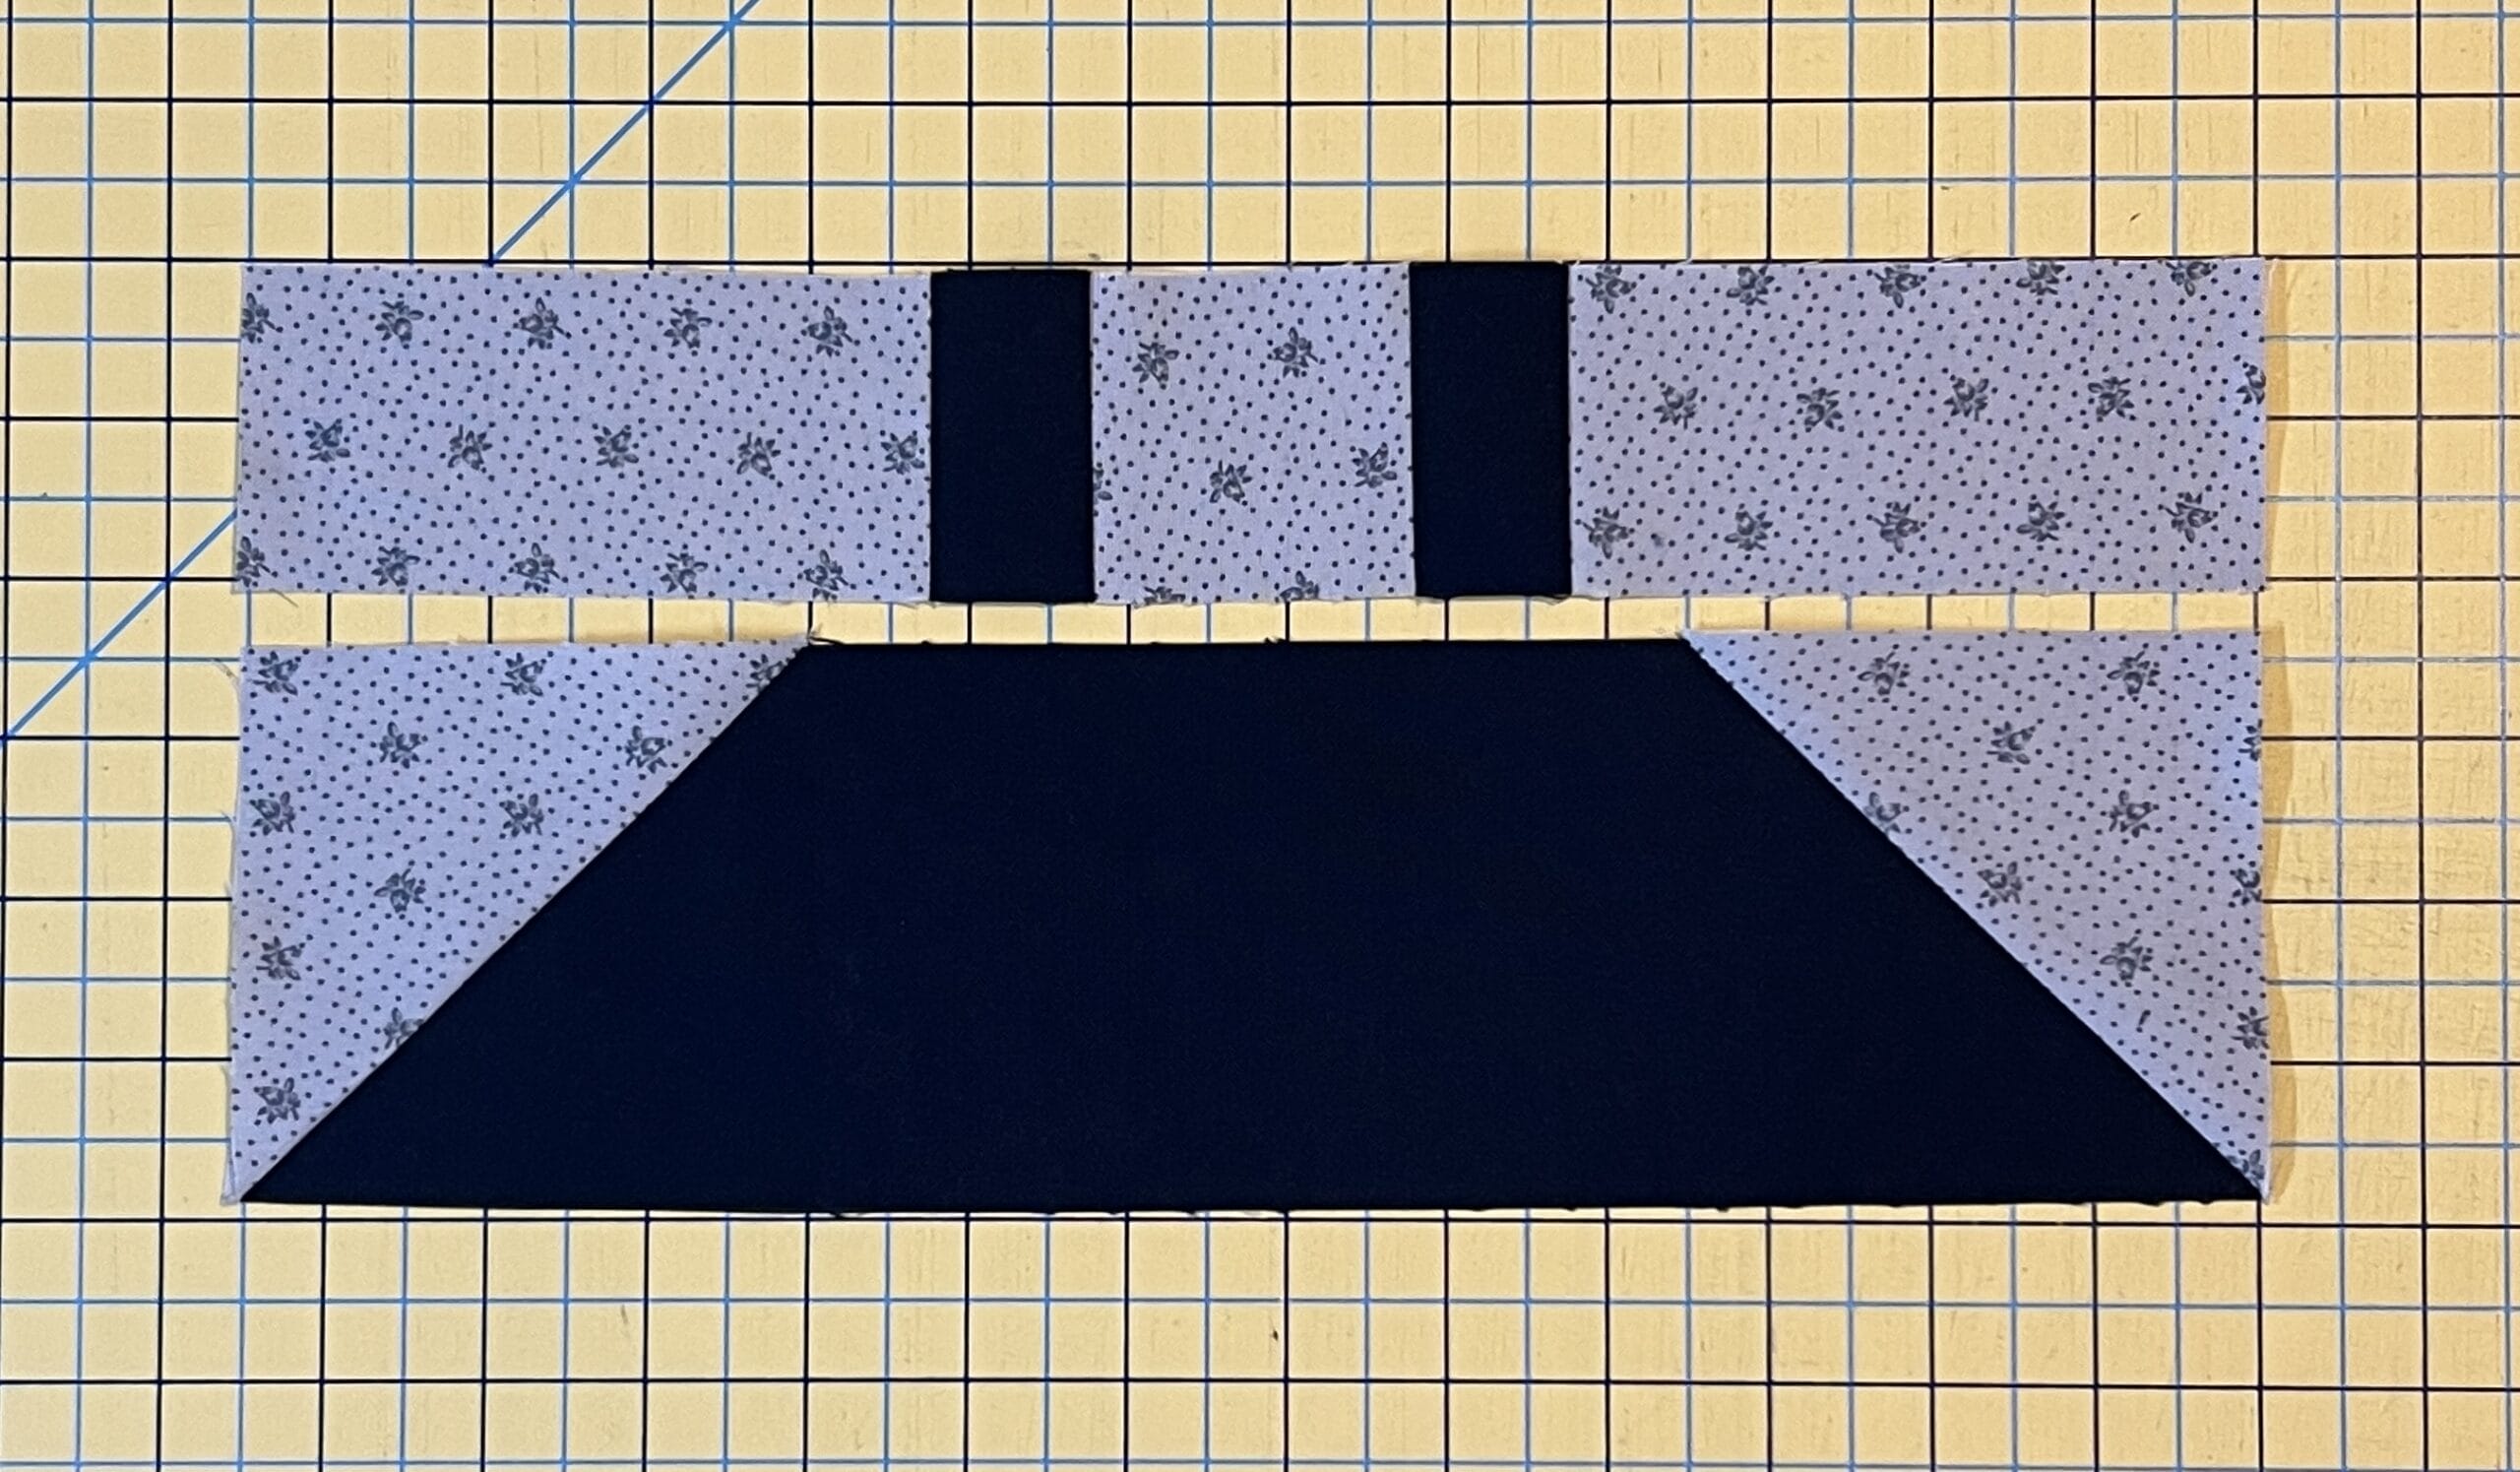
The chimney unit is made by sewing more rectangles together like you see here:

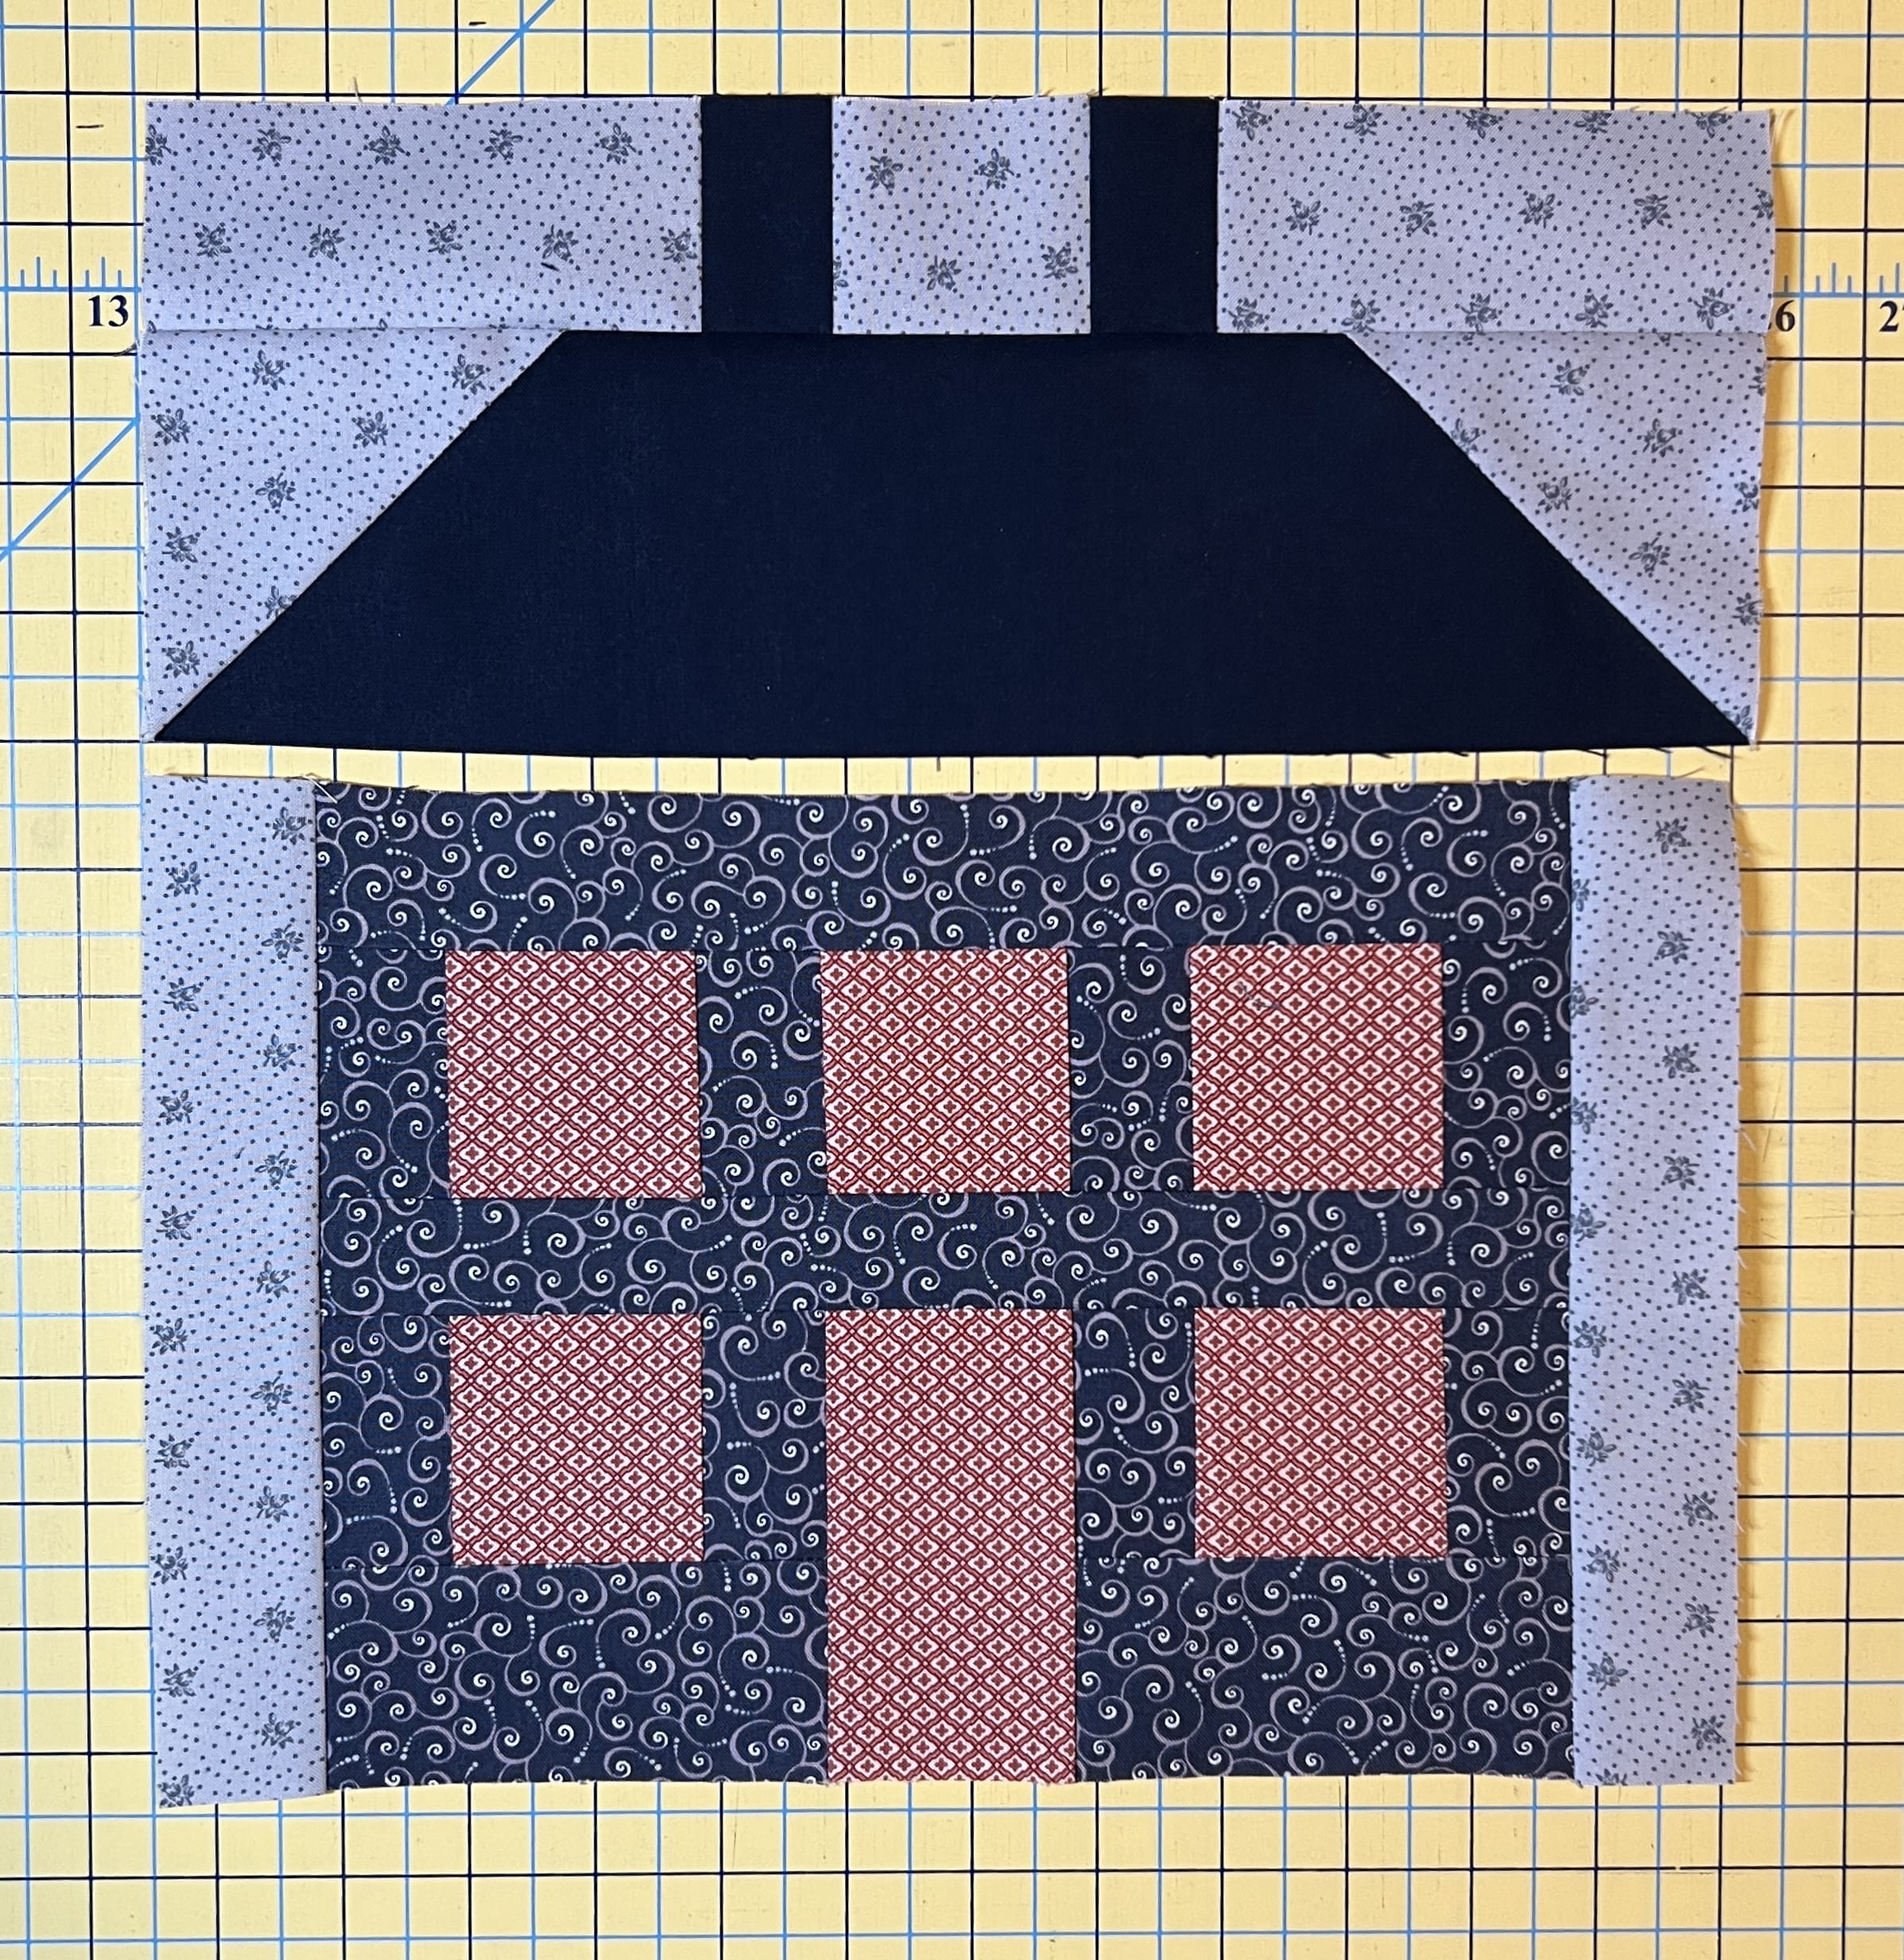
Sew each chimney section to the top of each roof section, and then sew the house unit to the bottom to complete the block.
Until next time – Happy Quilting!
Kristin

