


 Tutorials
 10.30.2023
NOTE: these blog posts for the Liberty Lane quilt top are part of a limited series for our Block of the Month subscription program. Sign-ups for the Liberty Lane BOM are no longer available. You can learn more about our upcoming Block of the Month subscriptions here.

Hi Everyone!
I appreciate everyone’s patience with this much delayed blogpost. I was dealing with a family emergency for a few weeks and it took me away from work, and connecting with all of you. I know it’s frustrating when you are counting on these blogs each month. Hopefully it won’t happen again!
This month we are making some cute little house blocks. I love adding house blocks in my quilts, almost as much as I love star blocks, which is saying something.
This block has lots of little pieces, so I strongly suggest using starch before cutting. You can also choose to cut your rectangle pieces (A, B, E, F, G, J) just a tad longer so that you can trim them perfectly after you’ve sewn each unit together. It’s not necessary by any means, but it’s an option.
You might also choose to wait before cutting out your A and B pieces until your houses are finished. All of my houses came out the correct size in step 6 (6-1/2” x 10”), but if they were to come up a bit short, which can happen to the best of us, you could make up the difference by cutting your A and B pieces larger, allowing the block to still be 12-1/2” square. Hopefully that all makes sense. Read through the entire pattern before cutting, and you’ll see what I mean.
But despite all the pieces in this block, it’s not terribly challenging to make, which is great. The piecing is pretty straightforward, and there aren’t any points to match.
We will begin by making the center window unit, by sewing two I squares in between three G Rectangles. If you’ve cut your G rectangles longer, you can trim them to match up with your I squares now.

Once that is done, sew an E rectangle to the top and bottom of each one, then trim this unit if needed to measure 4” x 6-1/2”.

In step 2 you’ll make the lower window section by sewing an I Square on top of an H square, and then add an F Rectangle to the left side of the unit like so:

Next you’ll make the door unit by simply sewing an F rectangle to each side of a J rectangle.

Now sew each F/J/F Door section to the right side of each lower window section from step 2. This will be the bottom portion, or “Door Unit” for the block.

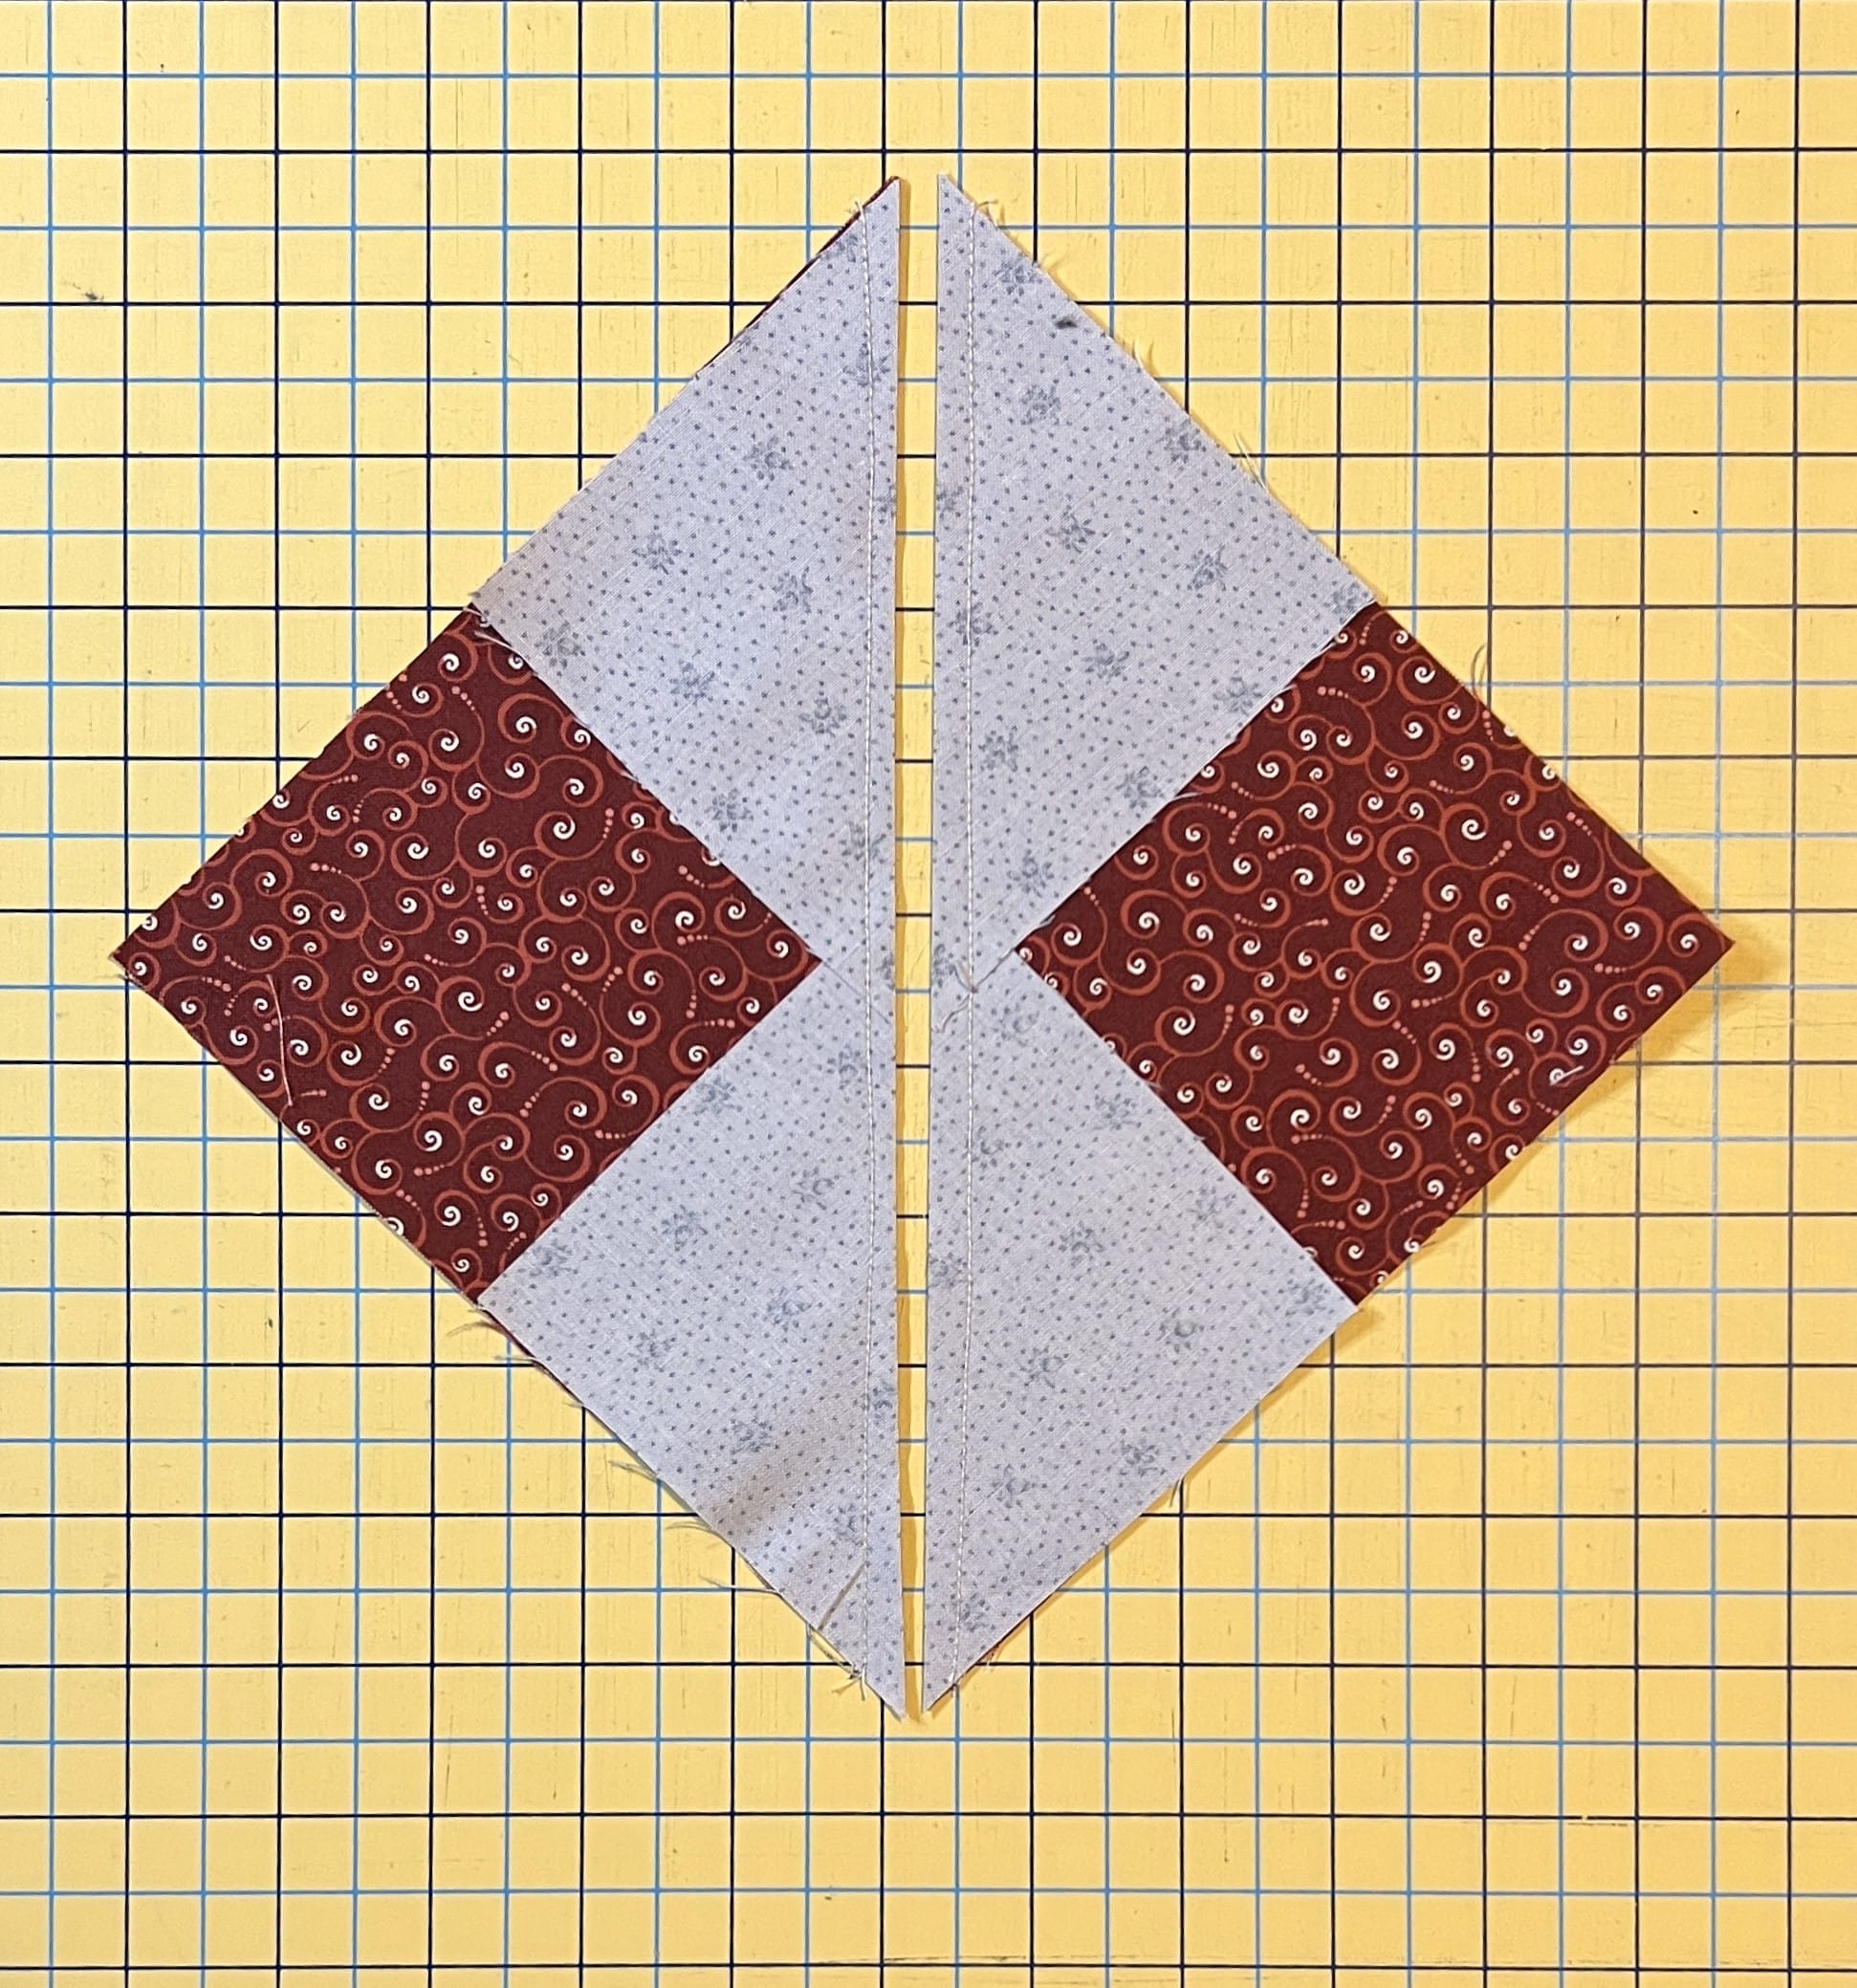
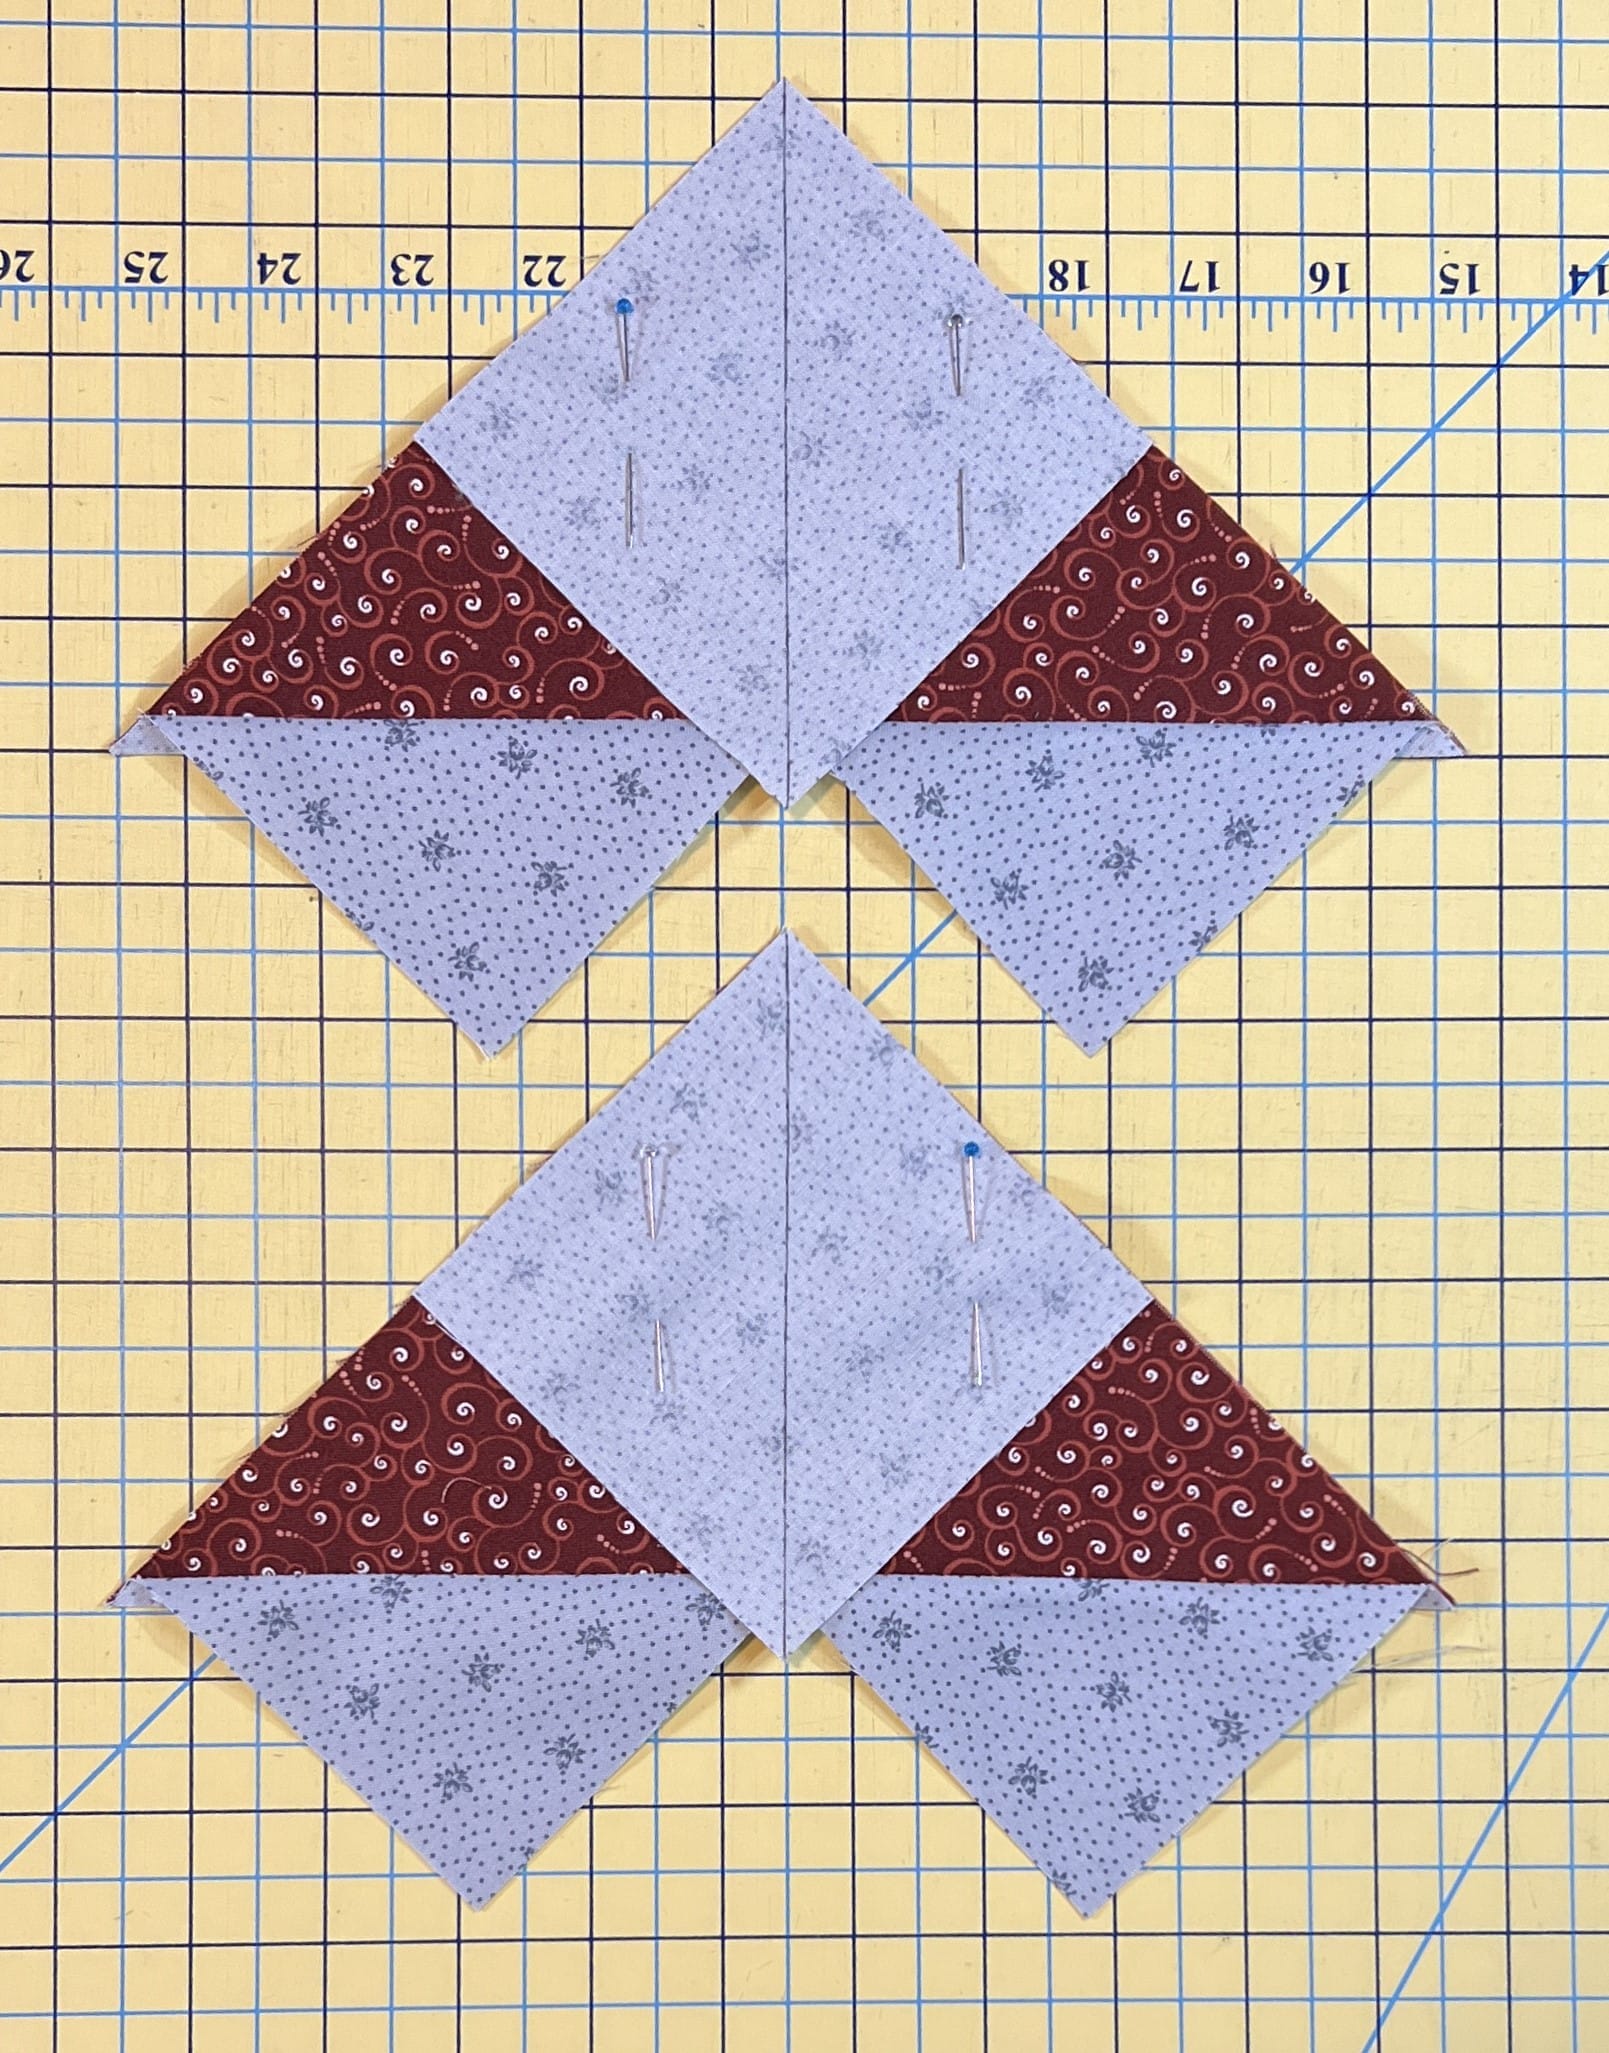
The roof for the block is just a flying geese unit, made using the no-waste method that we’ve already used the past two months for the star blocks. Here are a few pictures to remind you of the steps:

All we need to do now is sew the three units together and our house is finished and ready to add the background pieces.

Next, take two A rectangles and sew them to the sides of the house, followed by sewing a B rectangle to the top, and the block is complete.

If all has gone according to plan, the block should measure 12-1/2” square. One of the great things about this block is that having so much background fabric means that you can trim these to size quite easily if they are too big. You can also make your A and B pieces larger in case you need to compensate for a smaller house block if needed, like I mentioned earlier.
Next month we will tackle those larger house blocks you see in the quilt, so stay tuned!
Until next time, Happy Quilting!
-Kristin

