


 Tutorials
 8.7.2023
NOTE: these blog posts for the Liberty Lane quilt top are part of a limited series for our Block of the Month subscription program. Sign-ups for the Liberty Lane BOM are no longer available. You can learn more about our upcoming Block of the Month subscriptions here.
Hello and welcome! I’m excited and humbled to have so many of you joining me for my latest Block of the Month project.
Before we begin, I’d like to introduce myself. My name is Kristin, and I’m the designer for this pattern. I’ve been designing and writing quilt patterns since 2006, and I love what I do. I also love my partnership with Connecting Threads which gives me the opportunity to share my designs with all of you!
I know some of you have sewn up other patterns of mine in the past, while some of you might be new. Or perhaps for others, this is your first block of the month ever. Regardless, I want you all to have a wonderful experience sewing this quilt from start to finish.
Each month I’ll be posting a little blog tutorial like this one with some helpful tips and tricks. And of course, you can always ask questions! My email is on the pattern, so don’t hesitate to reach out if you run into trouble with the instructions. The Facebook group for this BOM is also a fantastic resource to share ideas too!
That being said, since I don’t actually work for Connecting Threads, I’m not able to help with any issues regarding the kit contents or shipping. So if you are missing fabric, or are wondering about the arrival of your next package, you’ll need to reach out to the wonderful folks at CT, and they’ll be happy to take care of you.
Before we begin, I’d like to cover a few basics. If you’ve followed any of my previous BOM blogs, you’ll know that I’m a big fan of pre-starching all my fabric. I never cut anything out until after I’ve starched and pressed my fabrics. My go-to starch is MaryEllen’s Best Press, but I’m sure any starch will do. This step isn’t technically necessary, but I feel I get much better piecing results this way. It just keeps the fabric from stretching or getting wonky when I sew.
All of my patterns are mathematically correct, so that means that if you are making a Half Square Triangle, and it’s supposed to be 2” square once it’s all finished and sewn into the quilt, my pattern will tell you to cut those squares at 2-7/8”. That being said, please feel free to cut your pieces a bit bigger to start and trim things down later if you prefer. I’ve allowed for enough extra fabric for you to do this throughout the quilt.
Truth be told, I tend to cut all my pieces just a tiny hair bigger, regardless of what I’ll be doing with them, because I’m a big fan of trimming and sizing all my units as I go. And by a hair bigger, I mean about 1/32” bigger, so not much at all. But that’s just my personal sewing style, so you all do whatever works for you. If you cut everything out just as it says in the pattern, and use an accurate ¼” seam allowance, you should be just fine.
Ok, now that all that is out of the way, let’s get sewing!
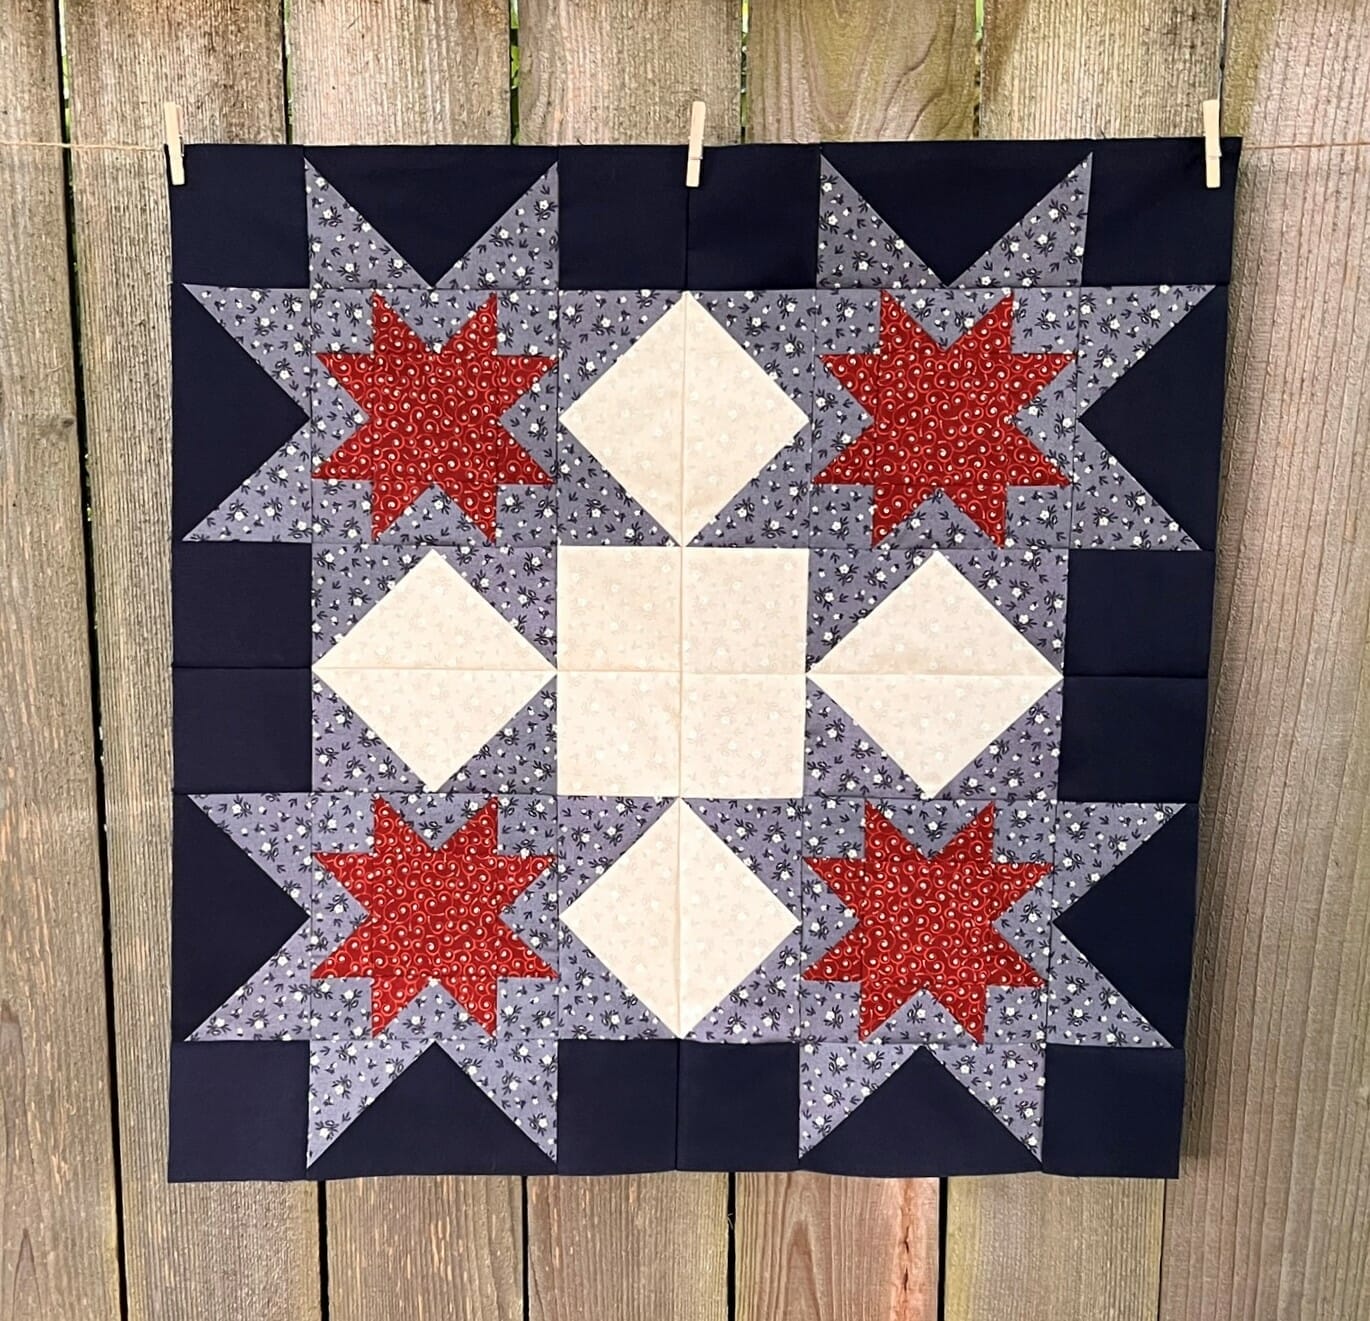
This month we’ll start by sewing the center portion of the quilt. Since this is a medallion style quilt, we’ll be working from the center outward as we go.
I love these double star blocks we are making this month! As I’ve mentioned in the past, I’m a sucker for star blocks. They are my absolute favorite.
This also means that I’ve made a LOT of flying geese in my career. I’ve tried a lot of different methods, but the no-waste method that I use throughout this pattern is my absolute favorite! I love that there is no wasted fabric (hence the name), and I just feel like I get better results overall.
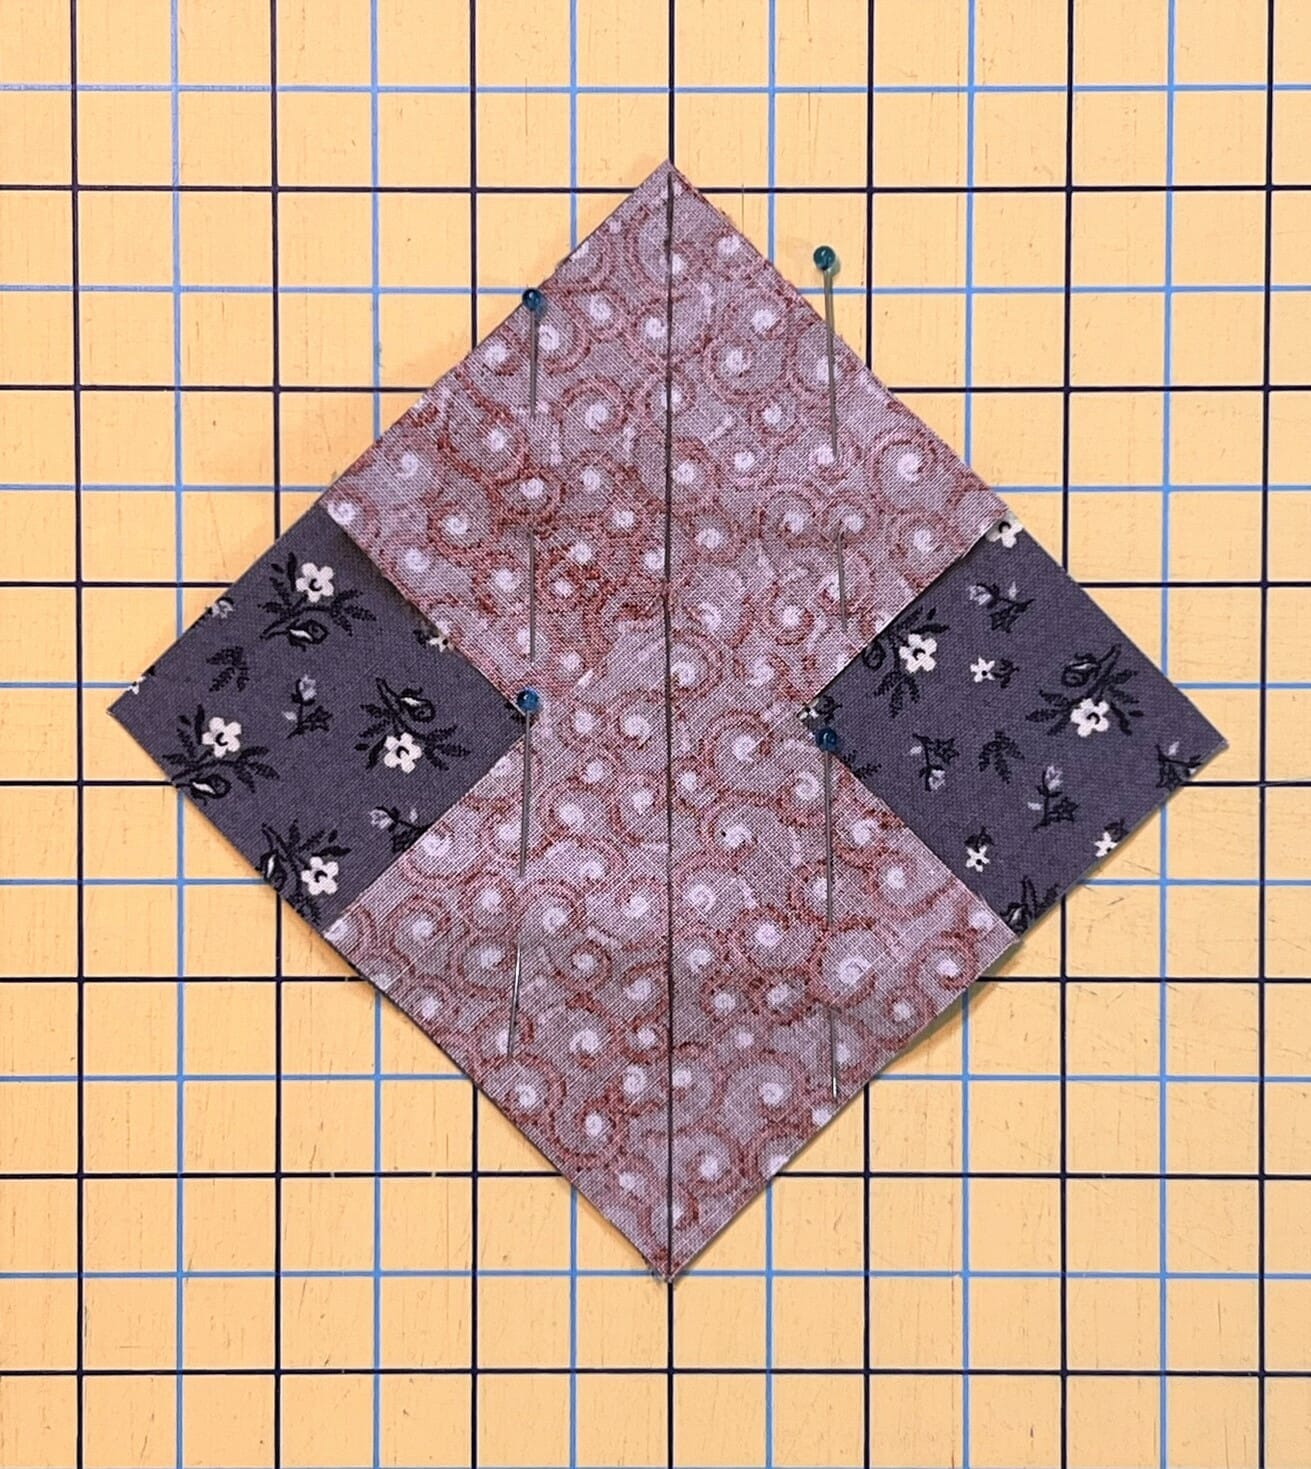
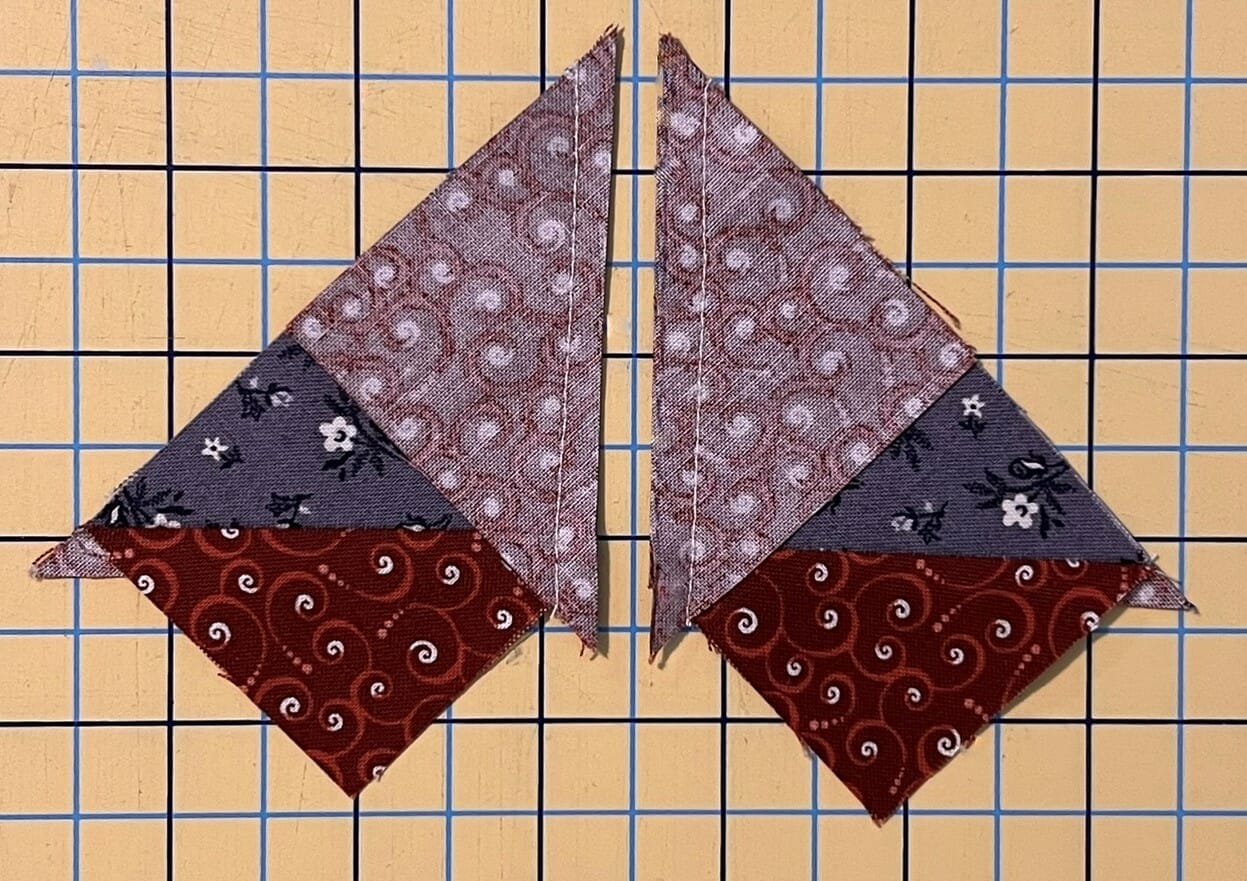
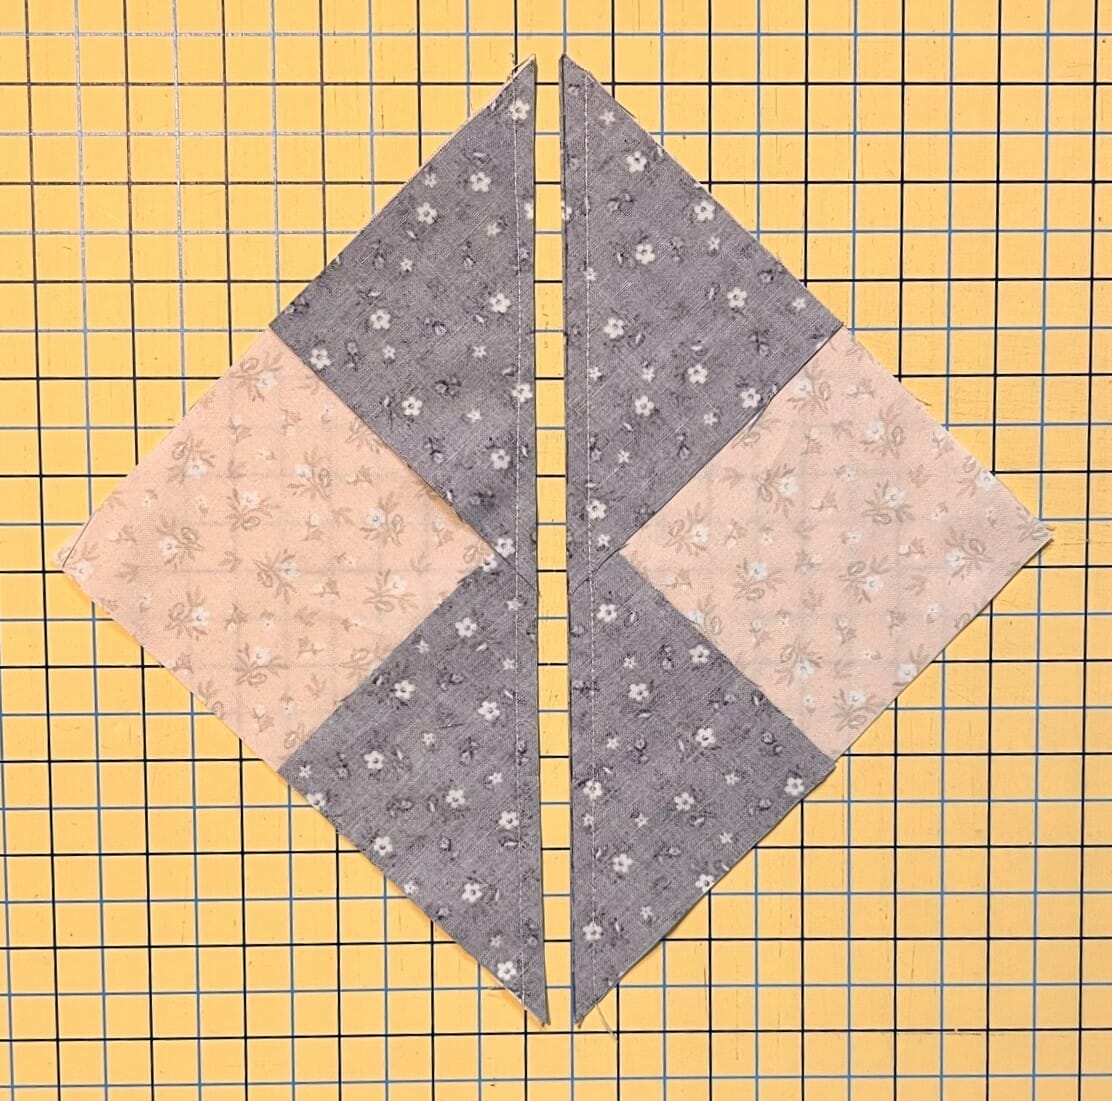
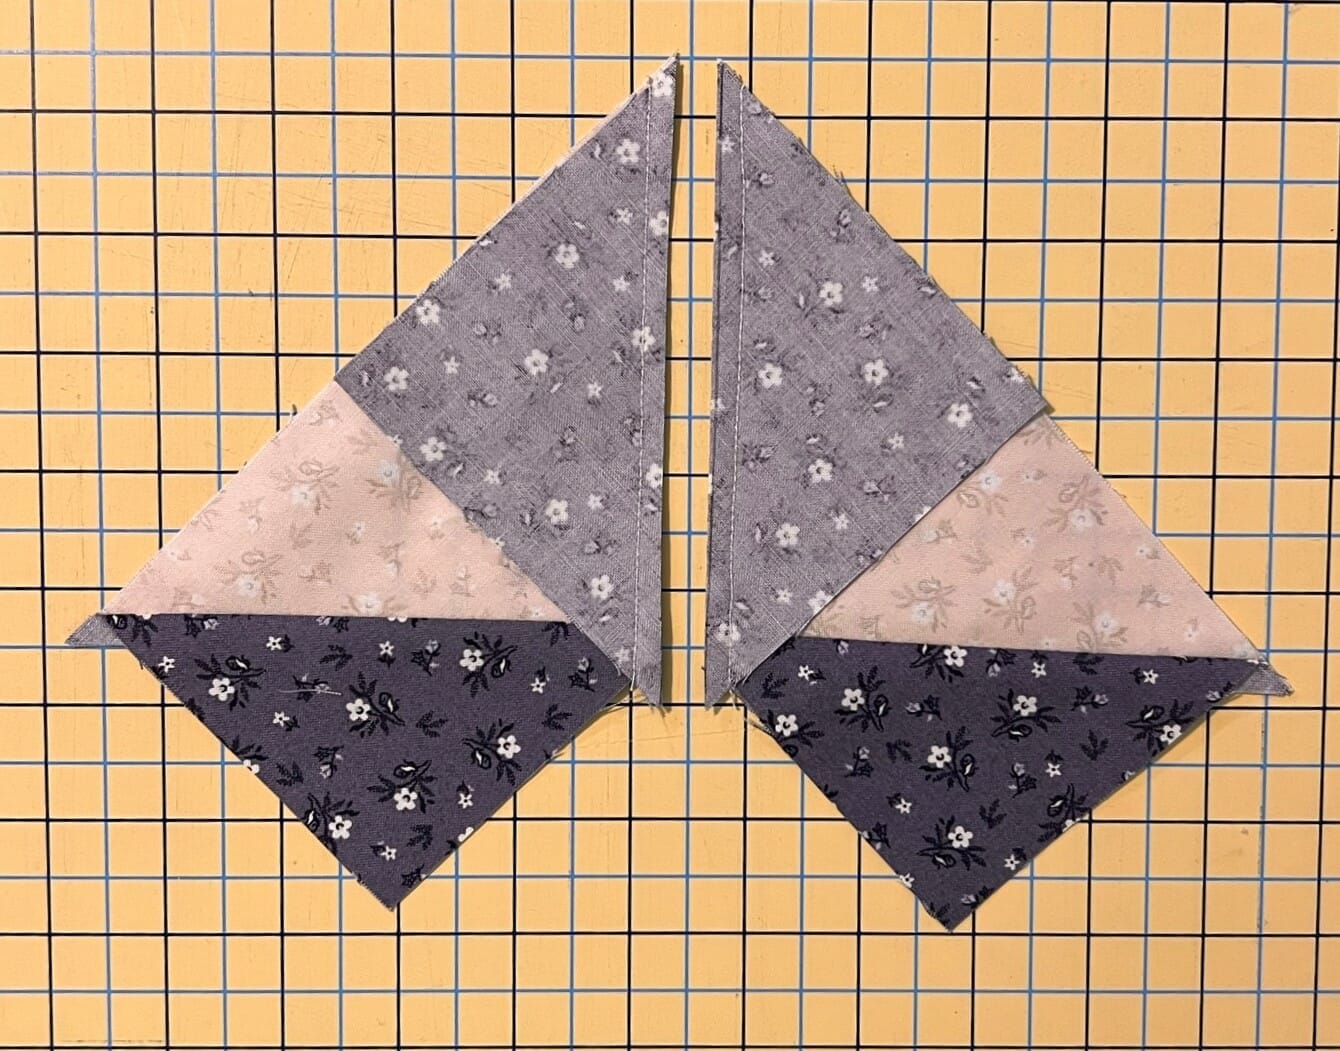
The first set of flying geese we’ll be making this month are on the smaller end of things. You’ll begin by placing two I squares on each G square, like the pattern says. It doesn’t matter which I square is on top. I usually pin my squares on first, and then draw one line down the center of both before I begin sewing.
Just don’t do what I did here in this photo below. Notice anything wrong? I accidentally pinned my I squares to an E square instead! Ack! And yes, this went unnoticed by me until I’d wrecked them all and had to start over. I kept thinking “Gosh these squares seem so big this time.” But I didn’t bother to double check my work. That’s what happens when you sew too late at night. Lesson learned.
Okay, back to business! Stitch ¼” away from the marked line on both sides, then cut ON the line. Press what have now become I triangles away from the G triangle. I promise, the rest of the photos are now the correct pieces and measurements.
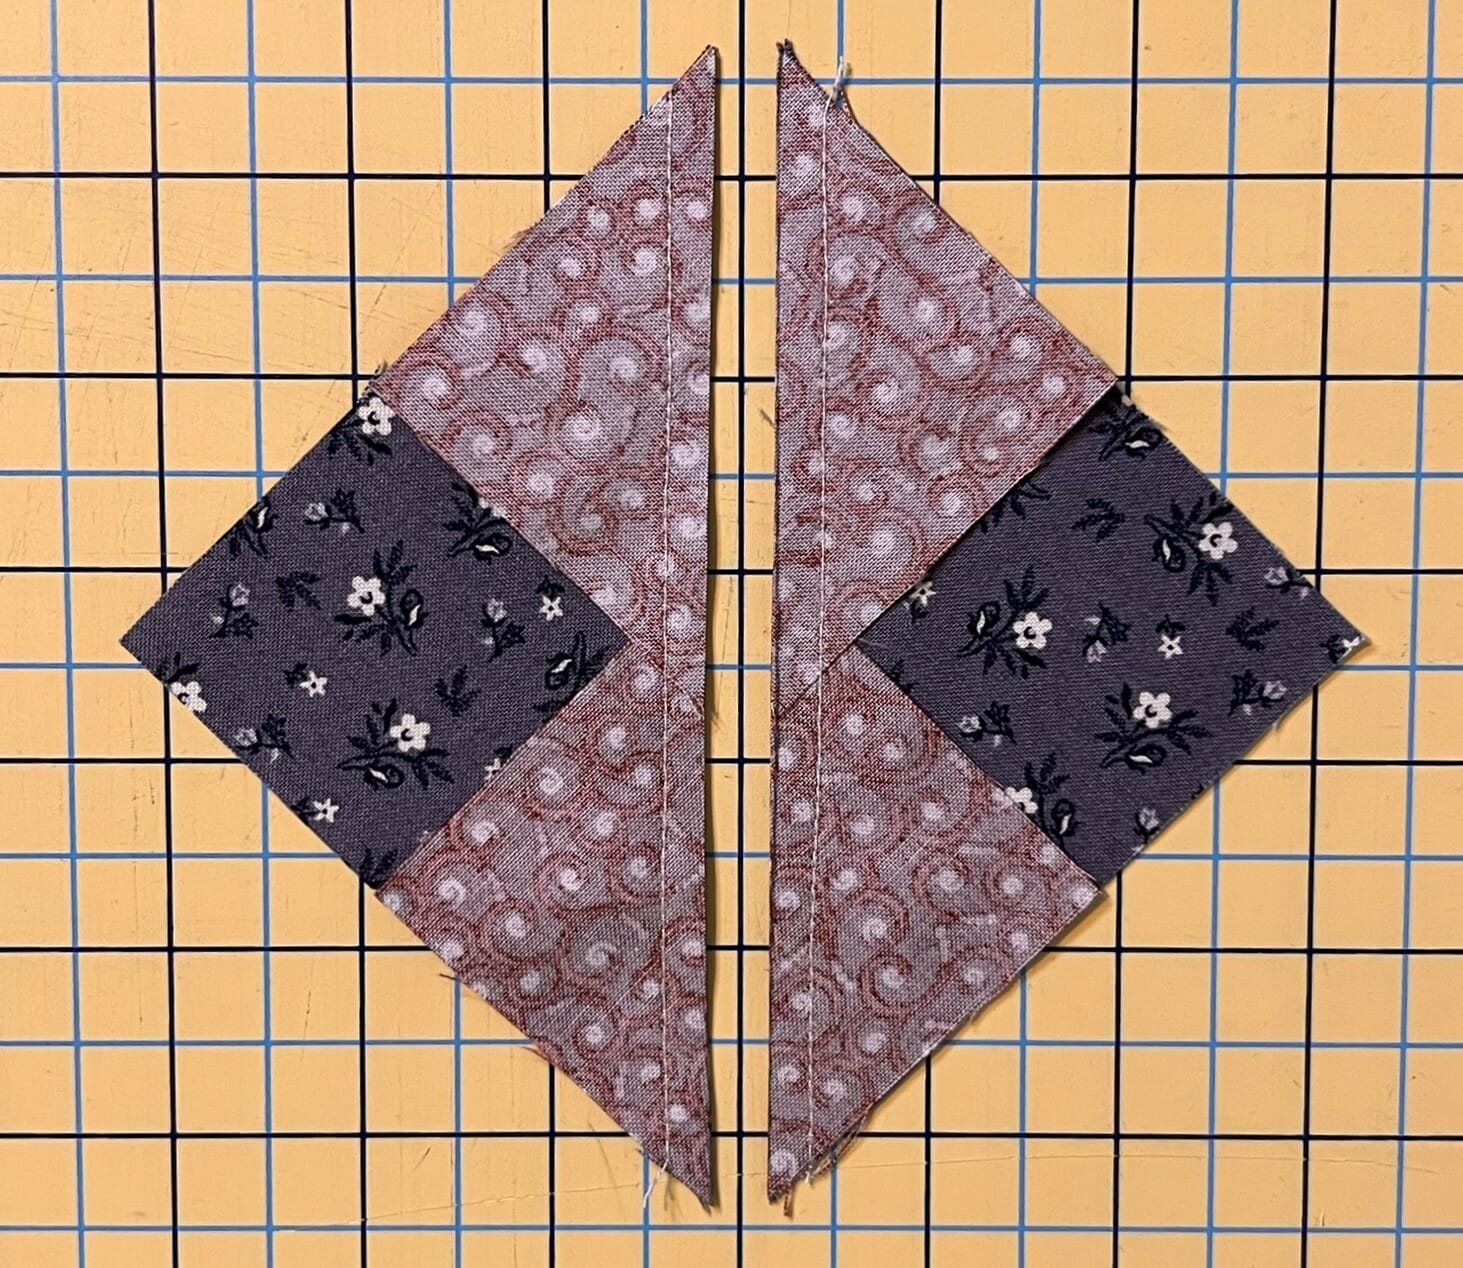
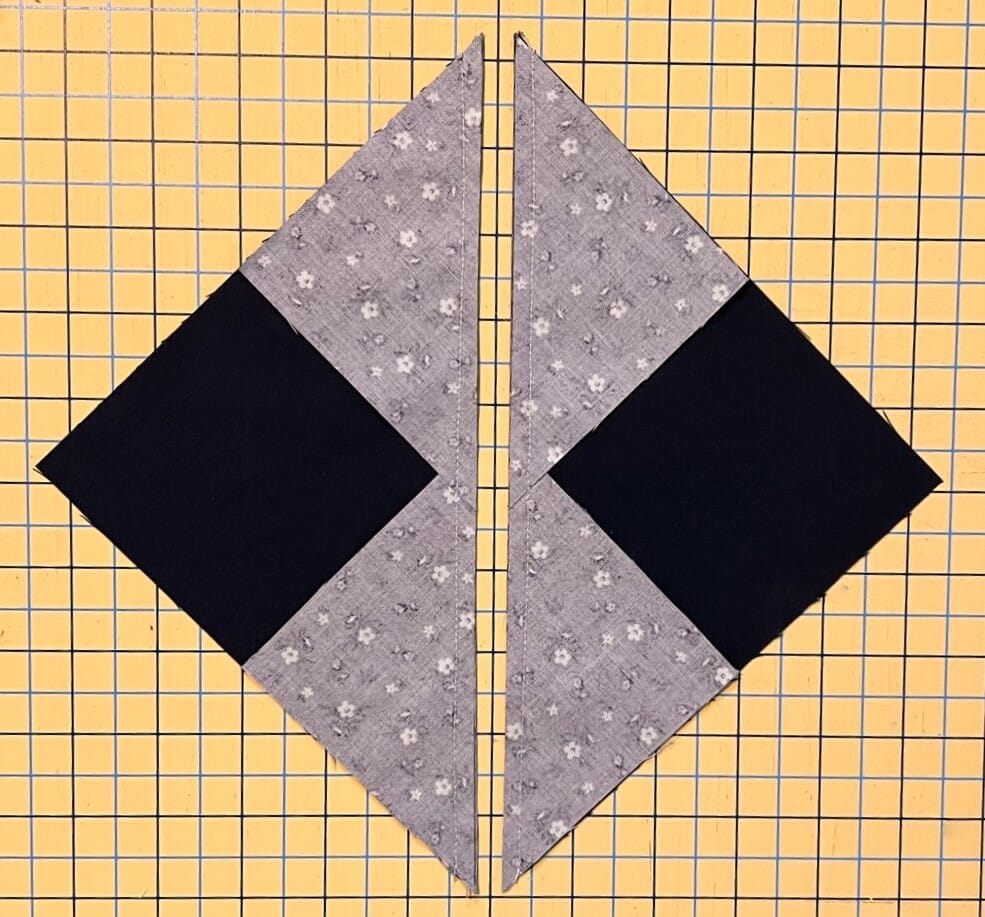
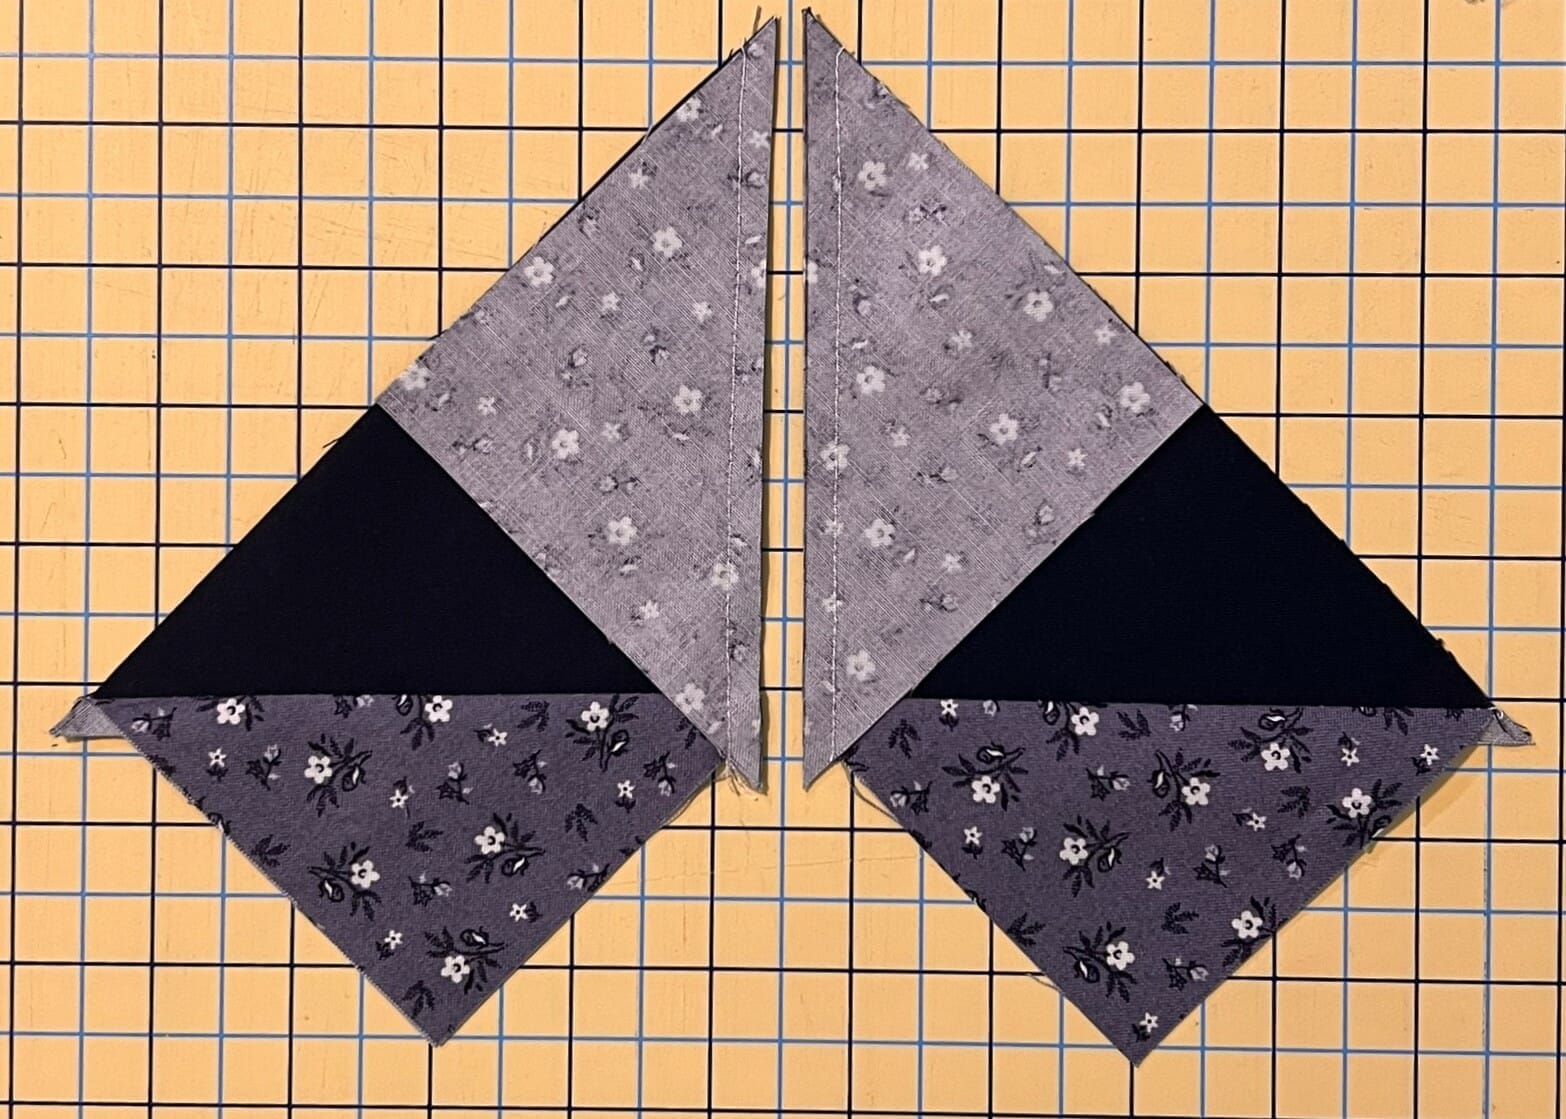
Place another I square on each unit, and repeat the same process by stitching ¼” away from each side of the marked line, then cut on the line again. All you have to do now is press these open, and you have your flying geese! Don’t forget to trim these to size, making sure you leave a ¼” seam allowance at that top point on the triangle.

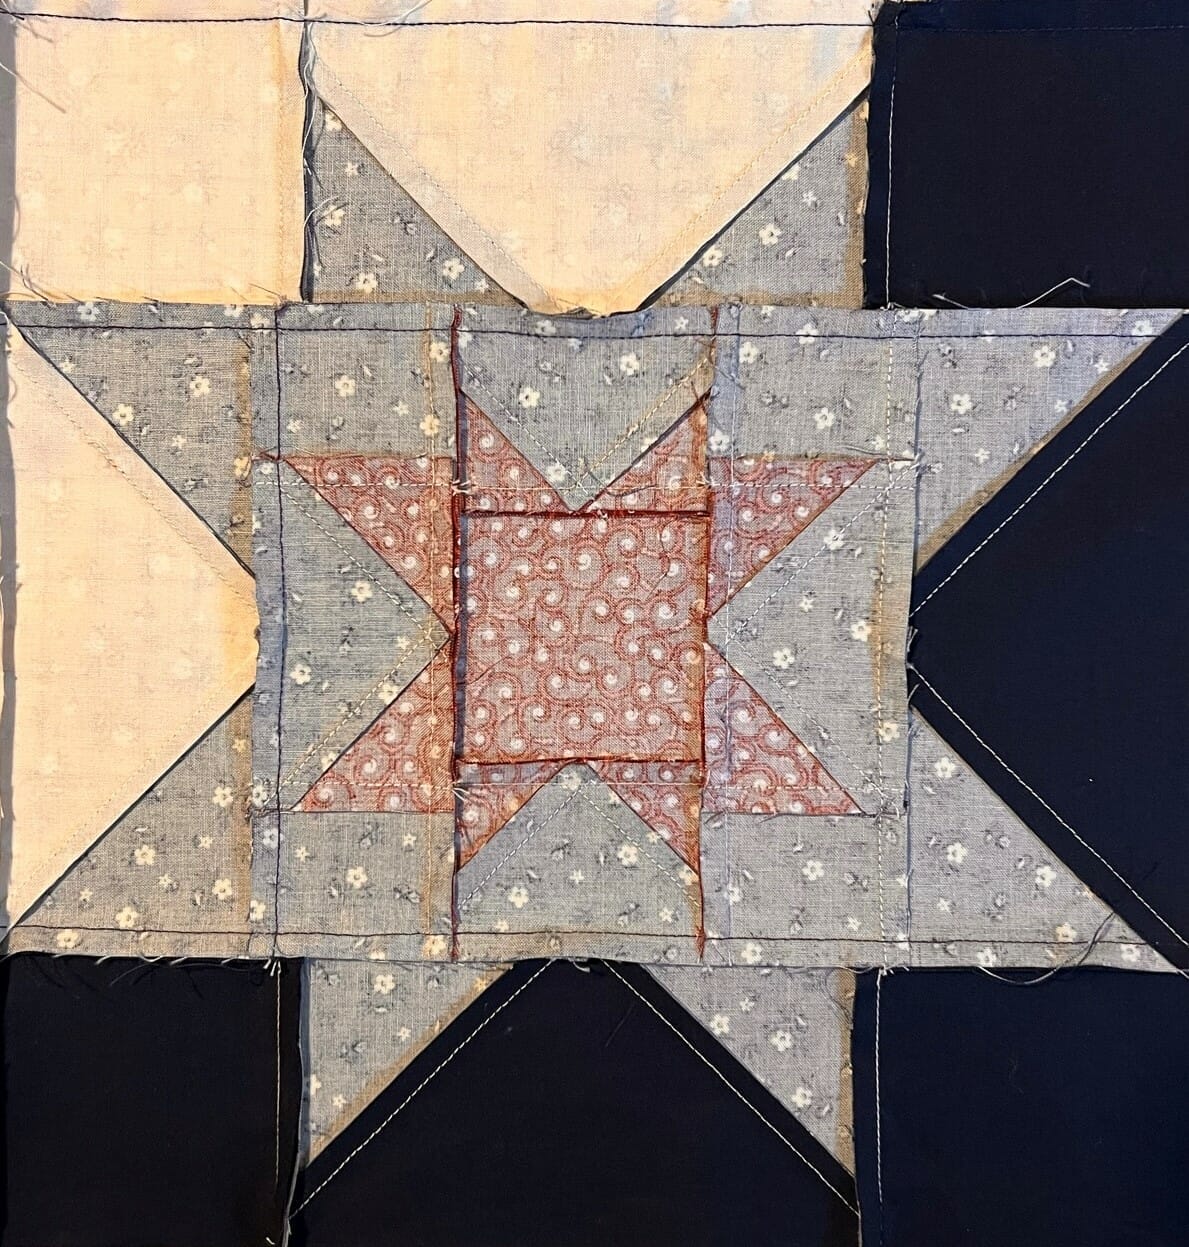
Once those are done, it’s time to assemble and sew the small center star for the block. I like to lay everything out as I pin, just to make sure I don’t accidentally turn something the wrong way. I also checked each block after sewing, to make sure they were the correct 6-1/2” square.

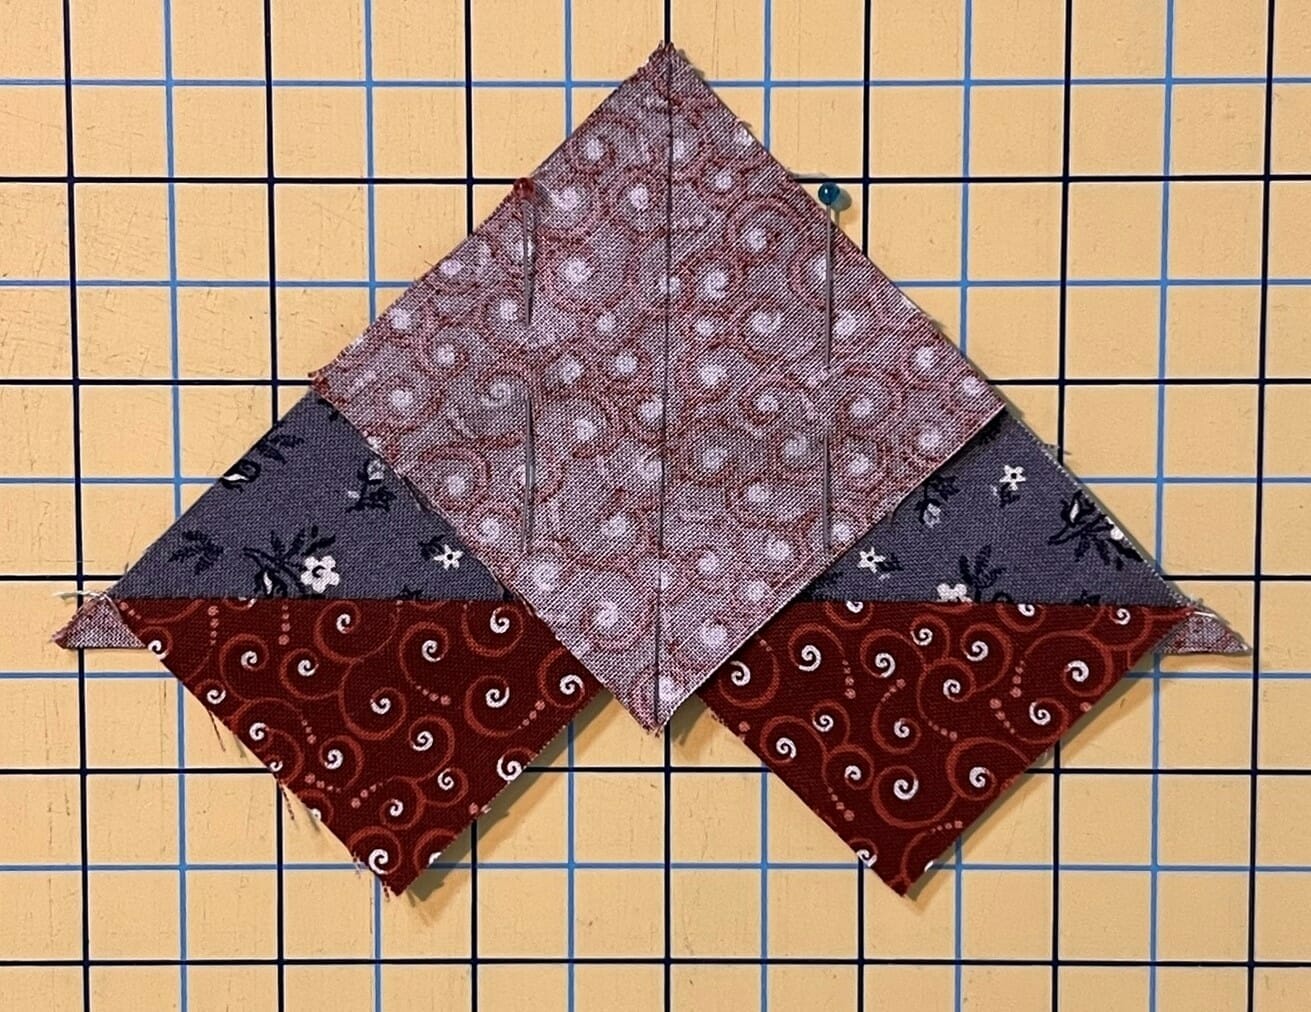
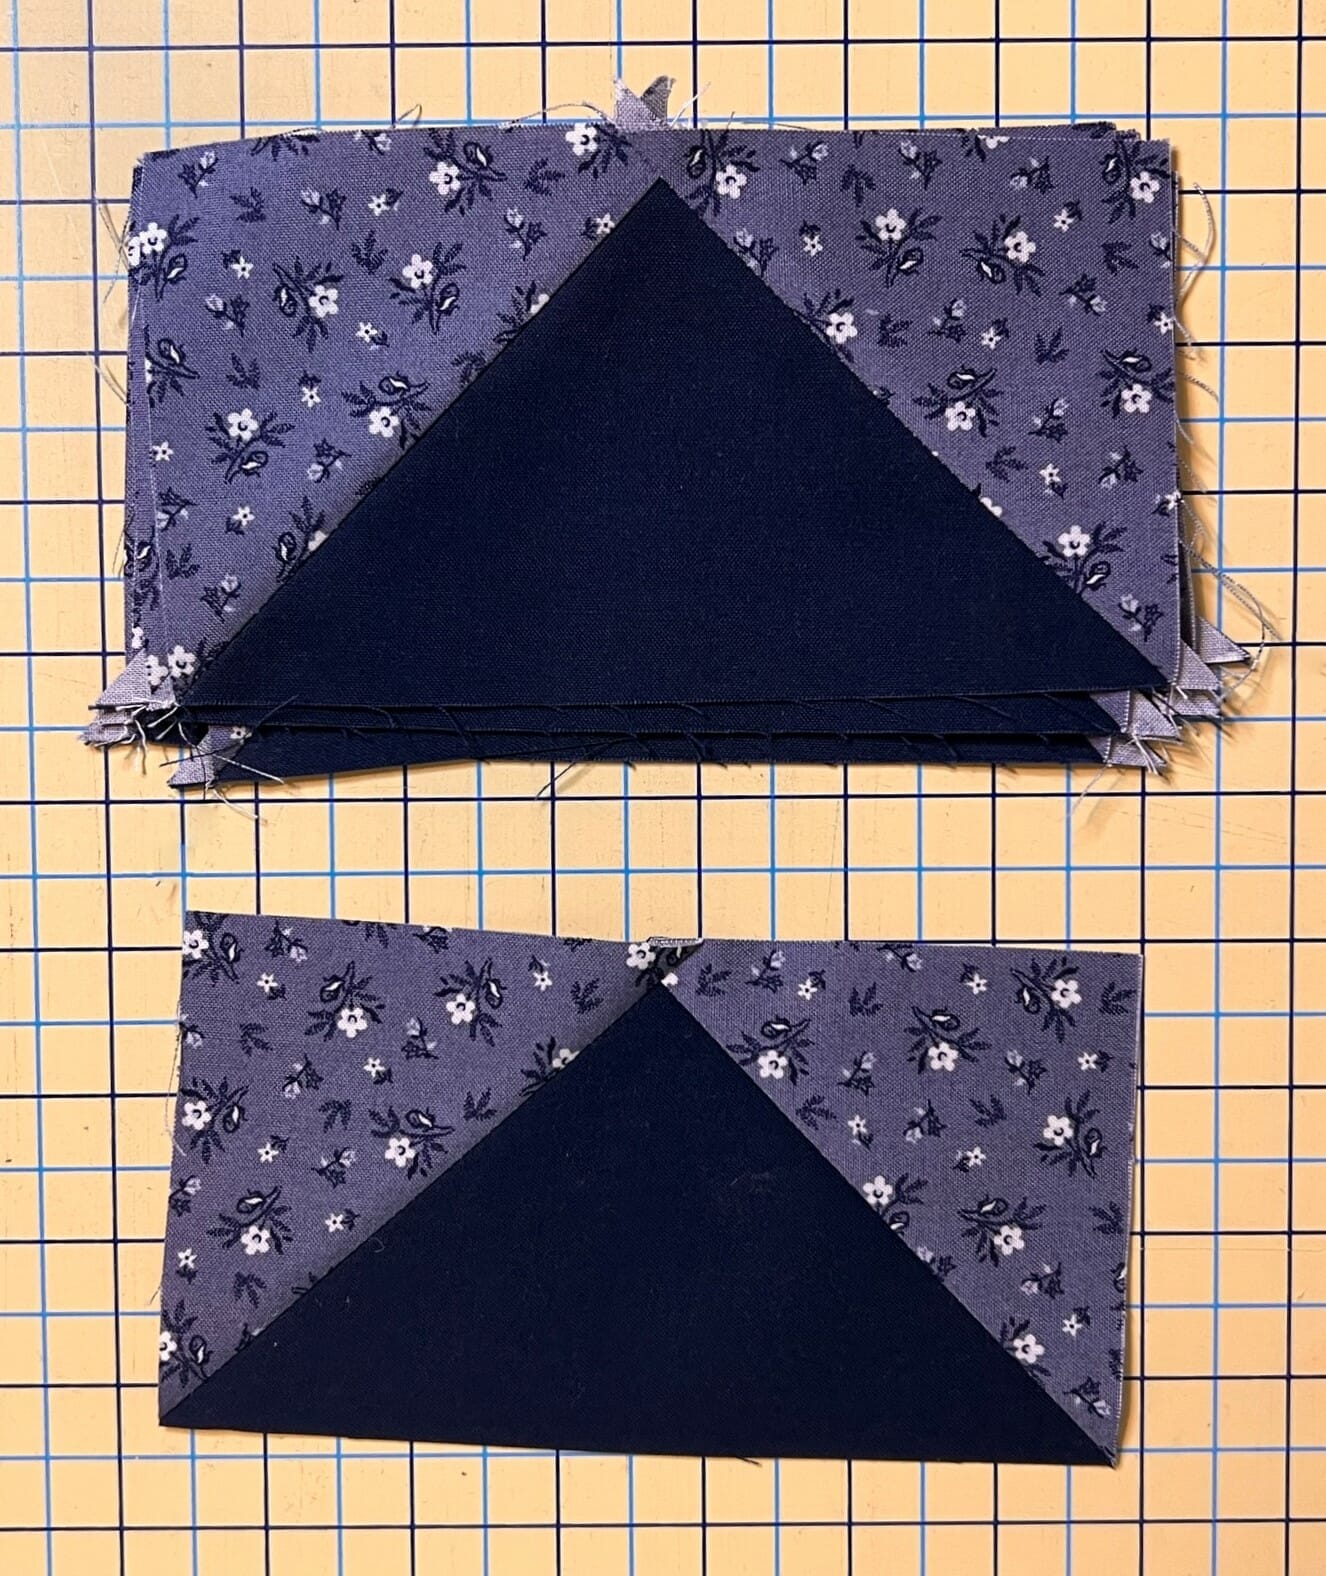
Next we’ll make even more flying geese, using the exact same no-waste method, only these are much bigger. I won’t re-hash the instructions, but here’s a few photos of what those look like, step by step. First the Navy Solid ones:
Here’s a few more photos of the Flying geese in progress with the Cream Corsage II background:

Now it’s time to put the block together. It’s the same process as the small inner star we made earlier, but placement is key for the flying geese units and outer squares, since we are working with two different colors around the outside of the block. Make sure your Navy Solid pieces are all continuous, and that your Cream Corsage II pieces are as well. It can be easy to get confused if you aren’t careful.

With regards to pressing this block: After sewing these a second time in preparation for writing this blogpost, I ended up pressing the three rows of the block differently than the directions state. I swapped arrow directions and pressed the center D/E and B/E units AWAY from the center star block, rather than towards it as the directions state. I then pressed the corner A and C squares TOWARD their respective B/E and D/E units. It probably doesn’t matter all that much, but I liked how the seams laid down this way, so you might want to make the same adjustment. Or, you can choose to press all the seams open if you prefer.
Here’s what my new and improved pressing looks like from the backside of the block, threads and all:
Let’s sew these four blocks together! You want all your Cream fabrics in the center, and all the Navy fabrics to frame the outside, just like you see below.

I didn’t include pressing arrows for this step, but like the pattern says, you can press these open, or to one side. I sewed mine into pairs and pressed the seams to one side, making sure that my top and bottom pairs had the seams going in opposite directions so that the seams would nest.

And now we’re done! Next month we’ll make a few more star blocks, along with our striped borders. It should be fun! Until next time…
Happy Quilting! – Kristin

