


 Tutorials
 1.4.2023
Hello friends, and Happy New Year! I’m excited for 2023, and hope you are too! I hope this year brings you all new beginnings, wonderful adventures, and lots of quilting!
For our third month’s blocks we will be making eight of these cute little 4-patch Sawtooth Star blocks. I just love them! After making these I thought to myself how fun it would be to use this pattern and make a scrappy quilt entirely out of these blocks, but of course I haven’t taken the time to put that thought into action yet. So many projects and so little time!

Since these blocks are on the smaller end of things, I would recommend starching your fabrics before cutting everything out.
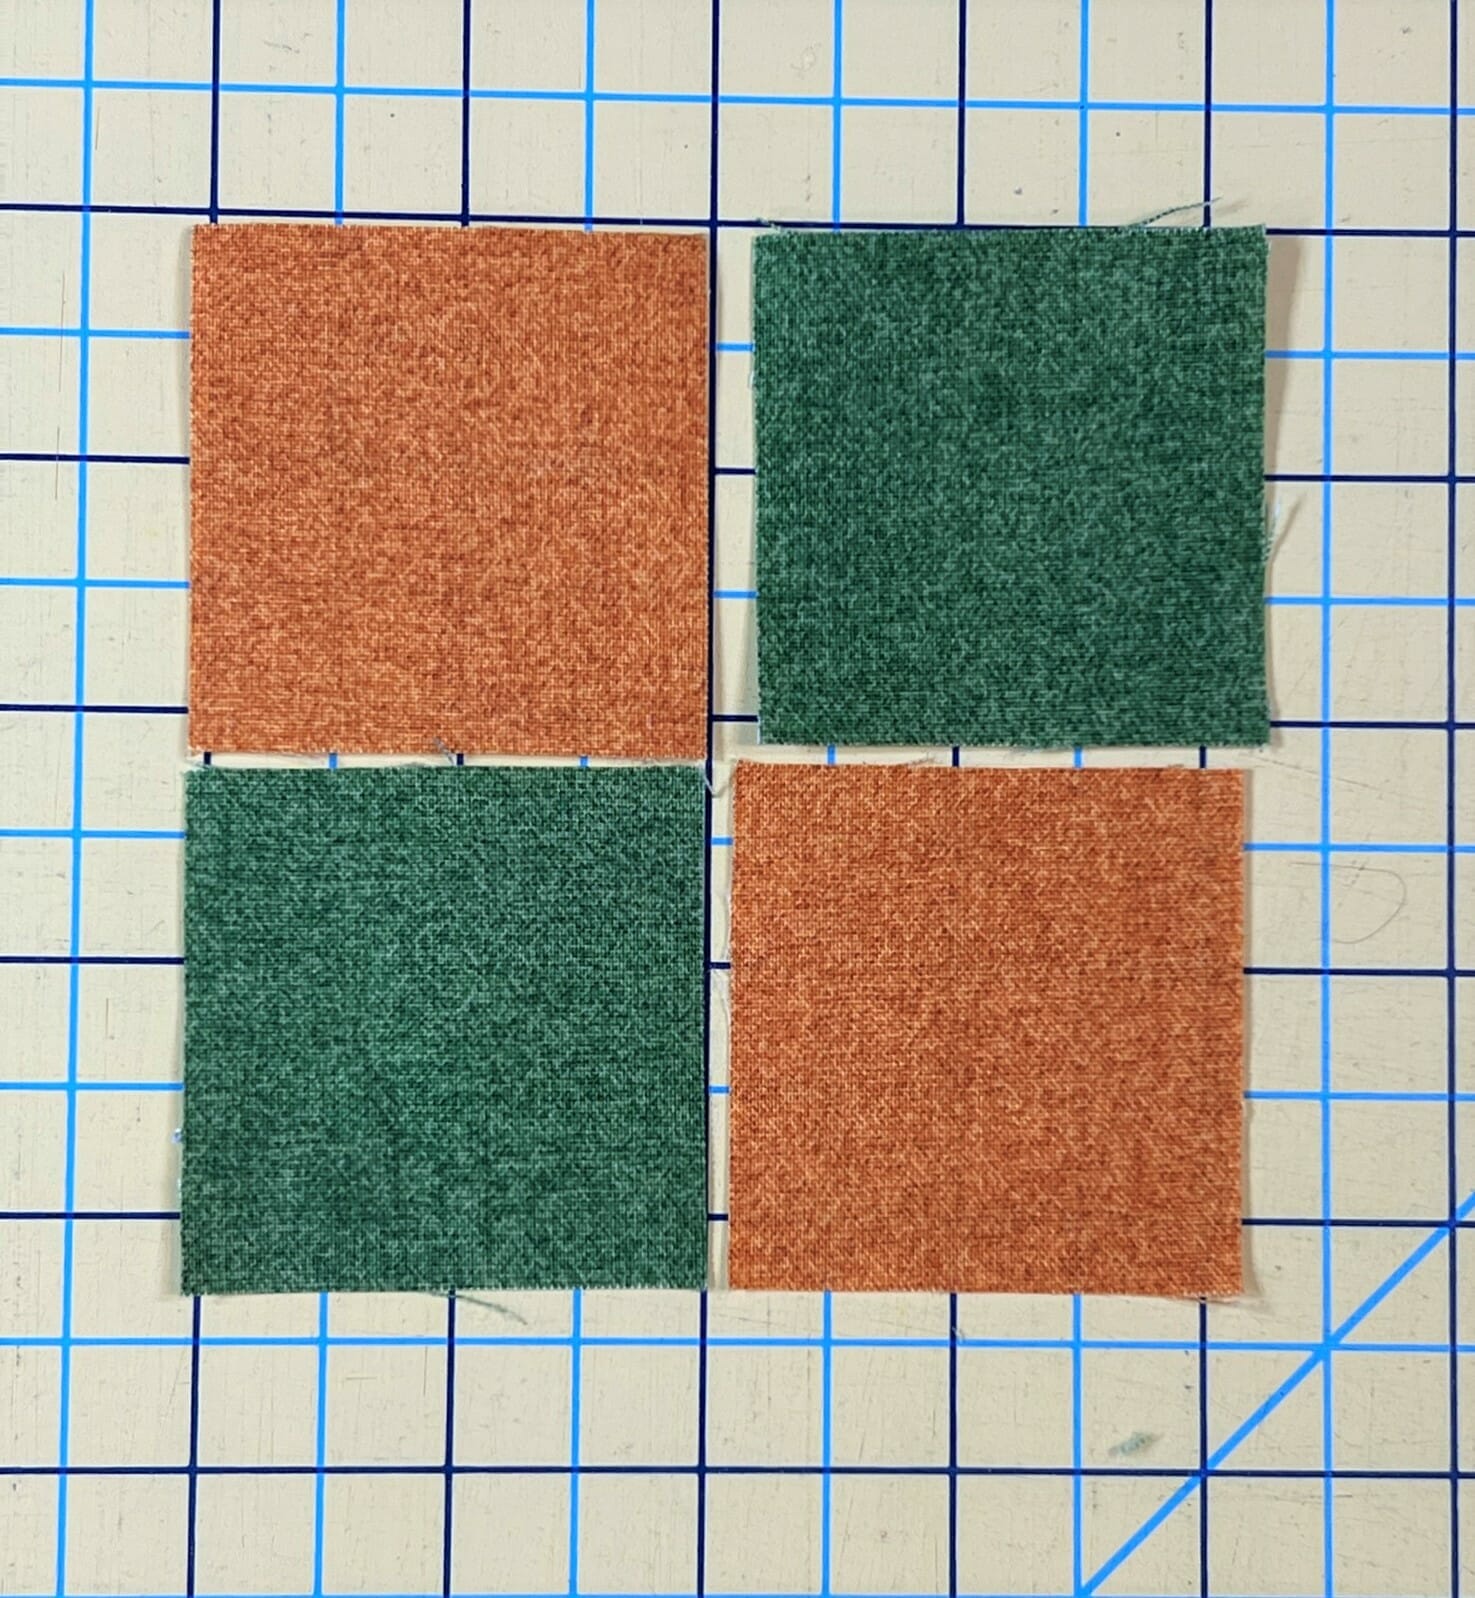
These blocks begin as just a simple 4-patch in the center. There’s nothing too challenging about a 4-patch, but I will share one little tip: No matter how ‘simple’ a component of a block is, I ALWAYS check my measurements after I’m done with each step as I am sewing. So I measured and trimmed anything that was even slightly off kilter with my 4-patch units. I just find that if I do these little extra things as I go, that I’m able to prevent things becoming too big or too small as the quilt progresses.
Also, it doesn’t really matter how these are sewn together, as long as you have the same colored squares in opposing corners. They can be rotated any which way when we sew them in the quilt.
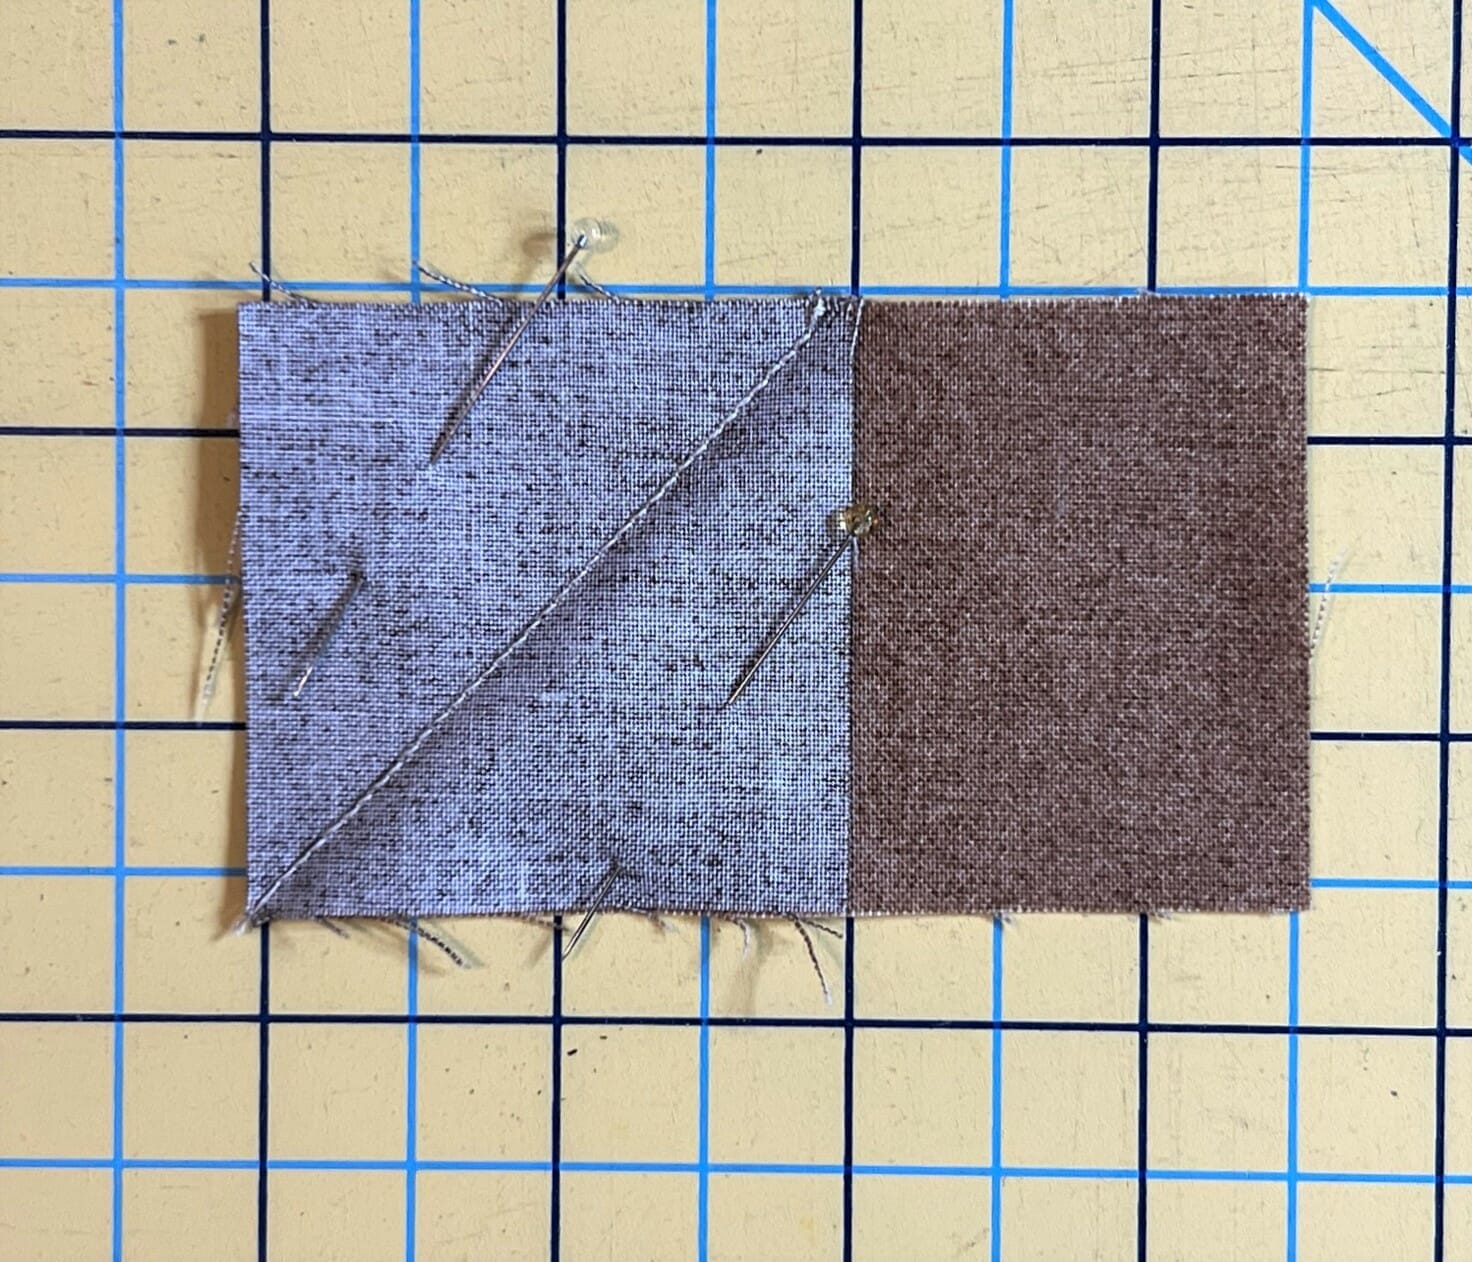
Then it’s on to our flying geese. There are quite a few this month! And – spoiler alert – there will be even MORE next month! There are a few methods you can use to make these, but throughout this pattern, I’ve used the basic stitch-and-flip method. There’s enough fabric to make these doing other methods if you choose, so feel free to adapt to your preferences.
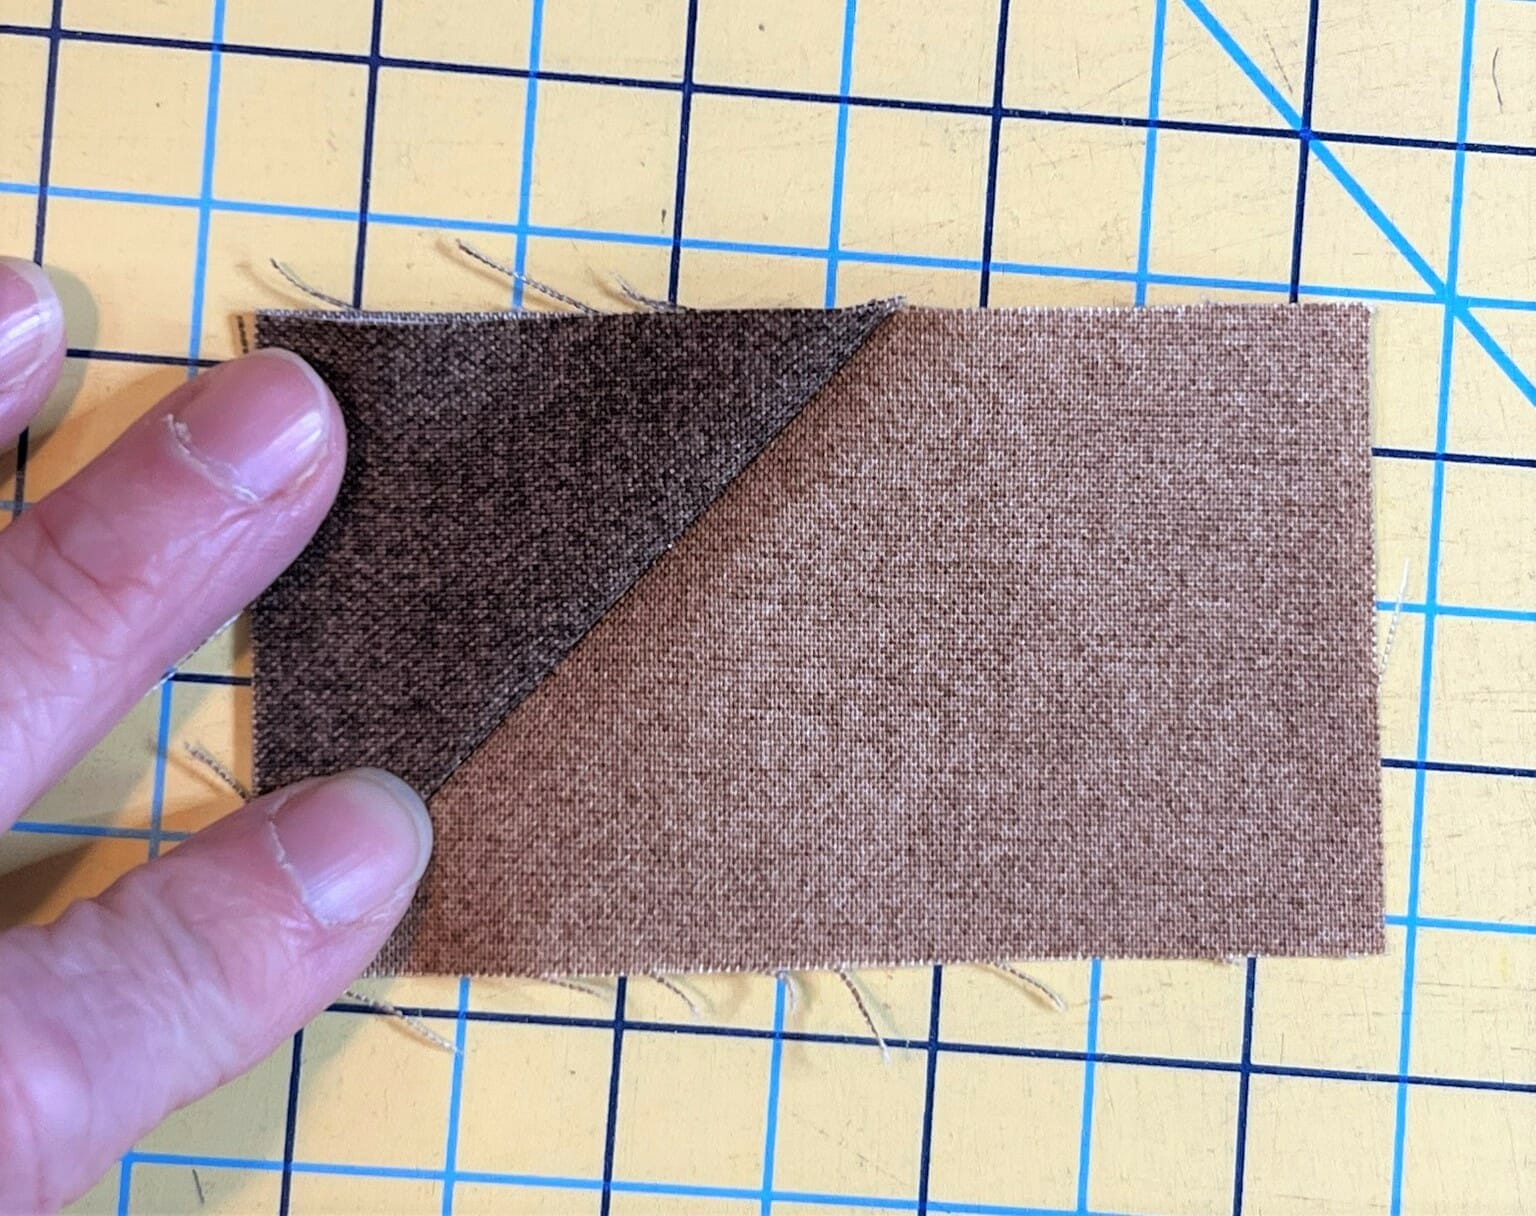
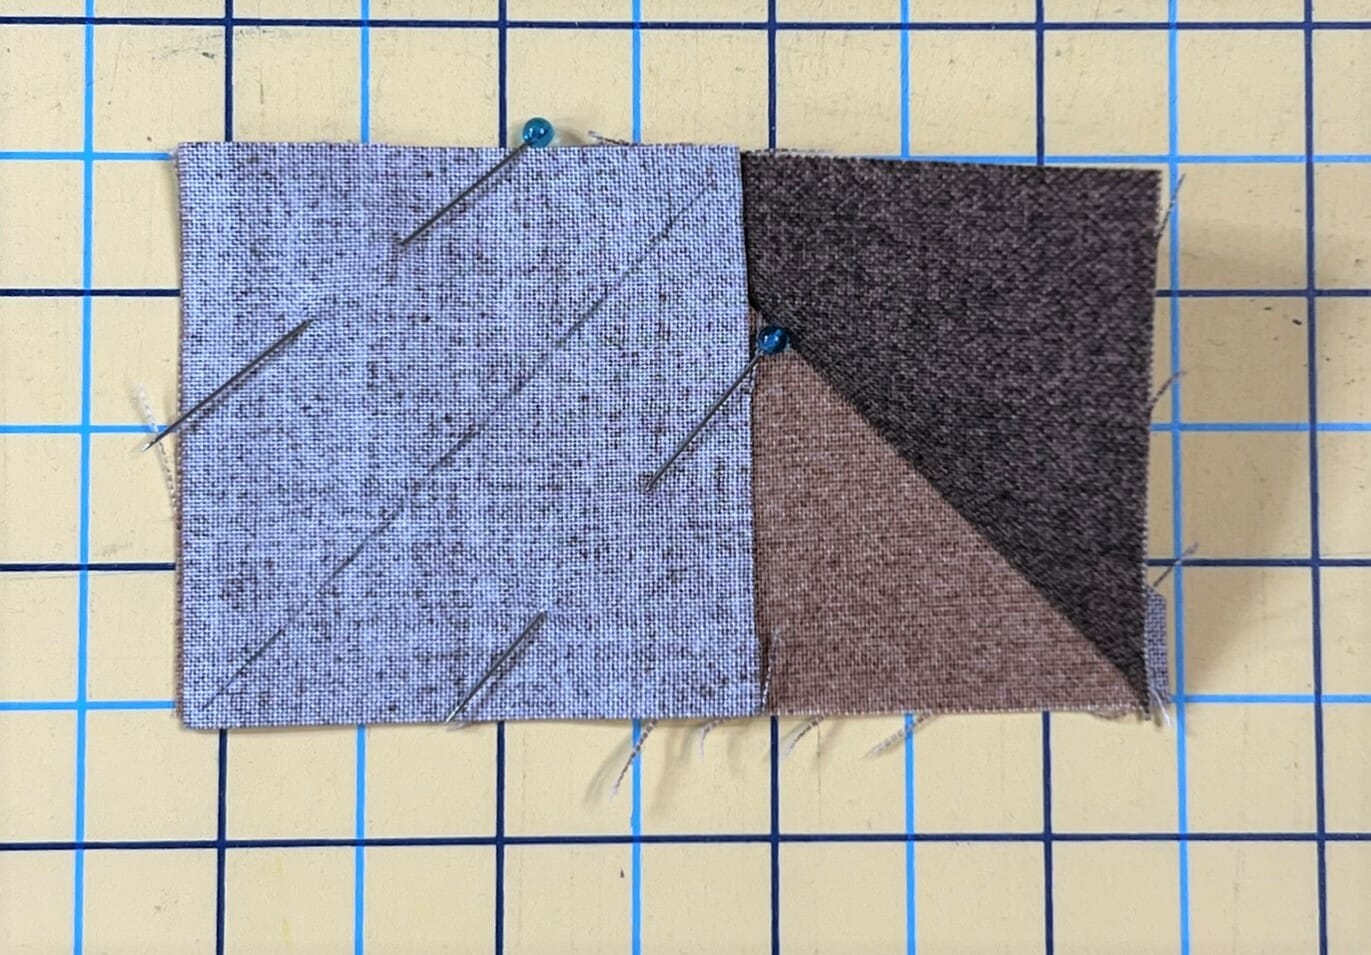
When making flying geese using the method as outlined in the pattern, after stitching on the line, I flip up the square on the sewn line to make sure the corners match up. This way I’ll know when I trim off the excess that I won’t come up short in the corners. The pictures below will show you what I mean.
See how the corners match up in the photo below? If they are way off, then I usually pick out my stitches and re-sew. Not fun, but worth it!
Below you can see I’ve got the 2nd square pinned on and ready to sew on the line.
Once you’ve sewn and trimmed all 32 flying geese to 2” x 3-1/2”, you can assemble and sew the blocks. Before I began sewing my blocks, I laid out all my pieces to make sure everything would be in it’s proper place. For the 4-patch center, again it still doesn’t really matter yet how they are oriented within the block, since you’ll be able to rotate the blocks as needed next month when we incorporate them into the quilt.
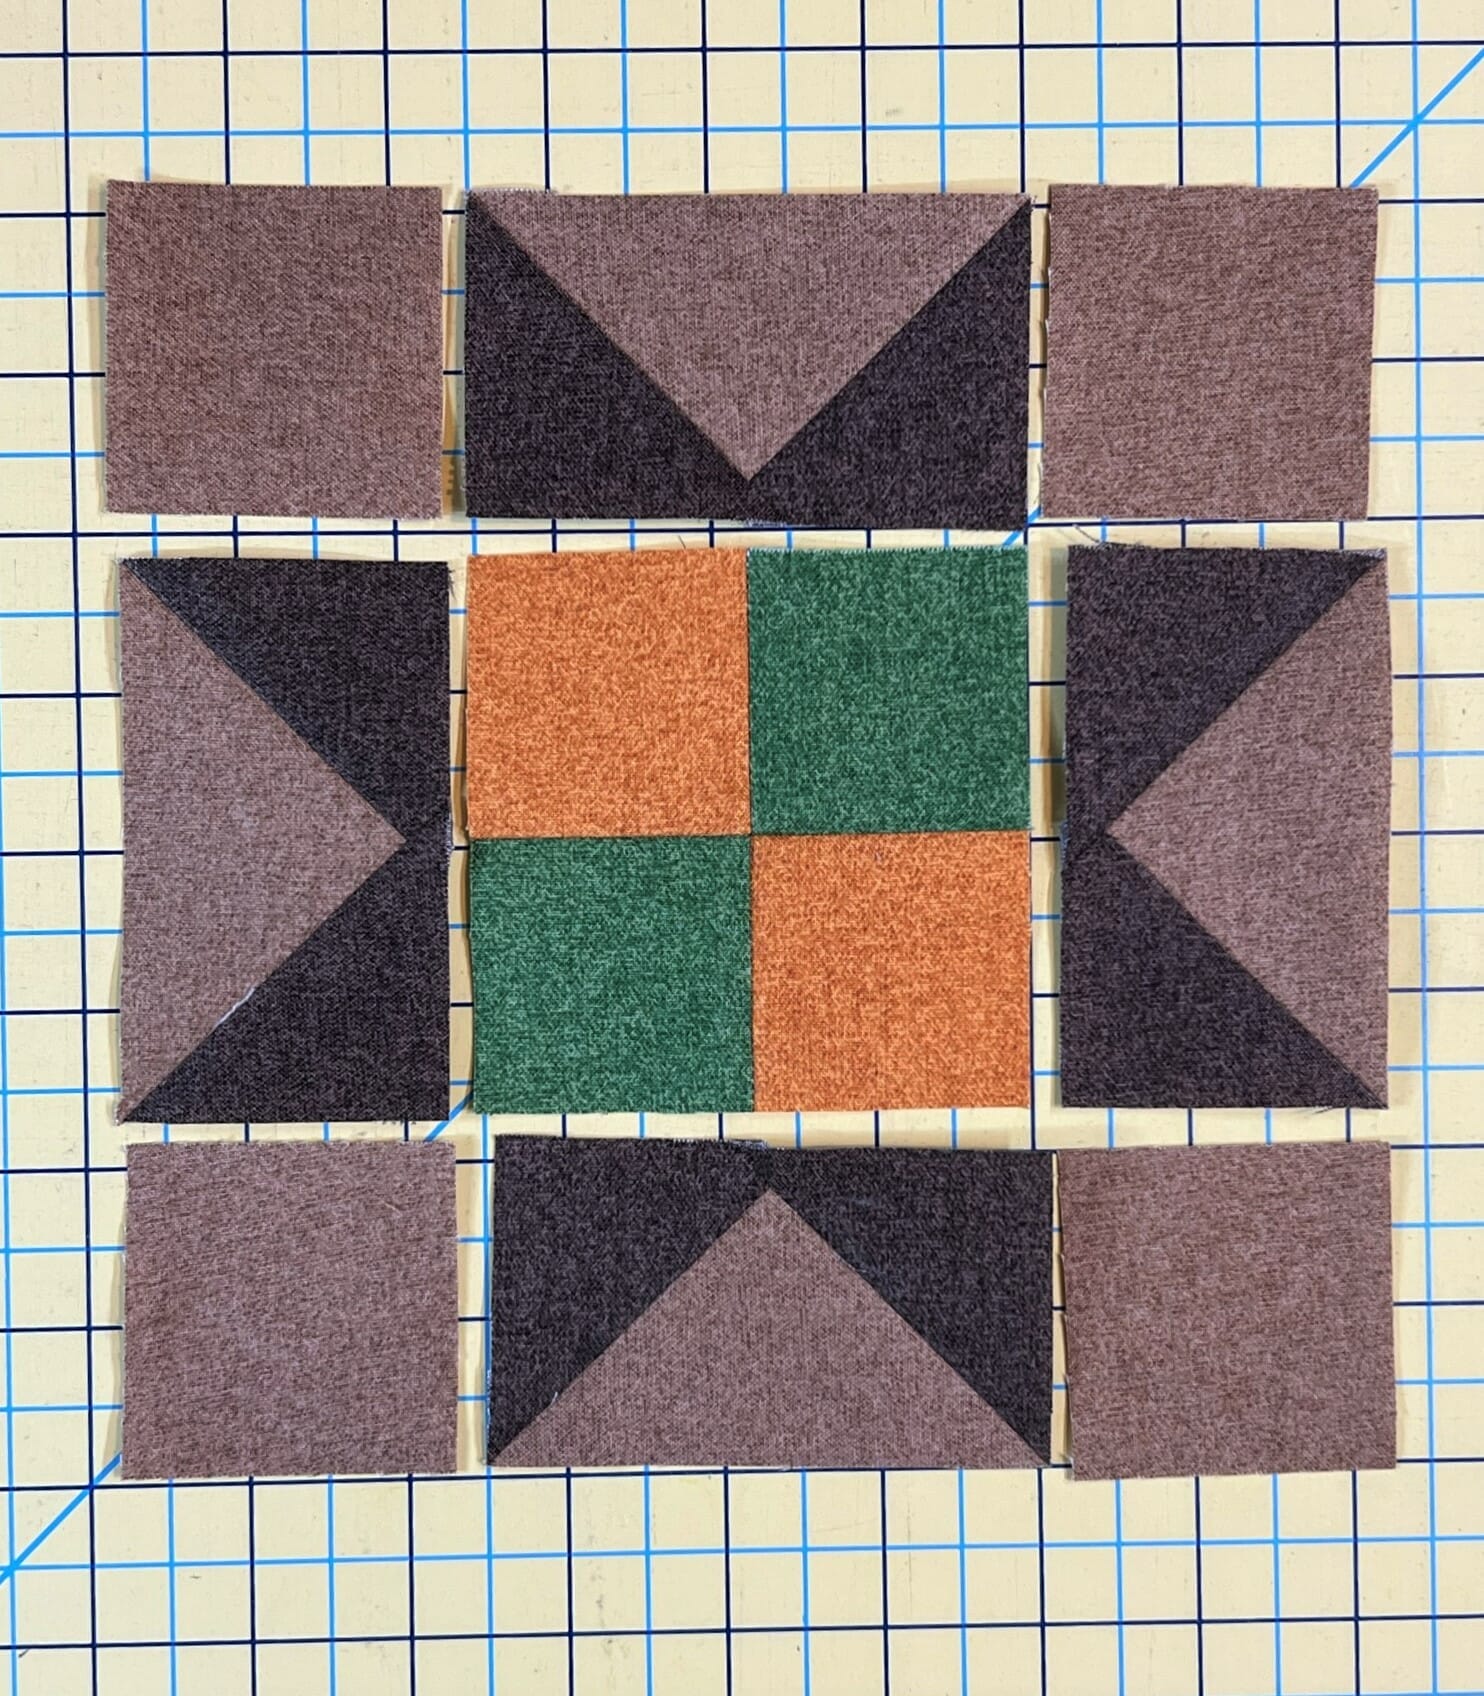
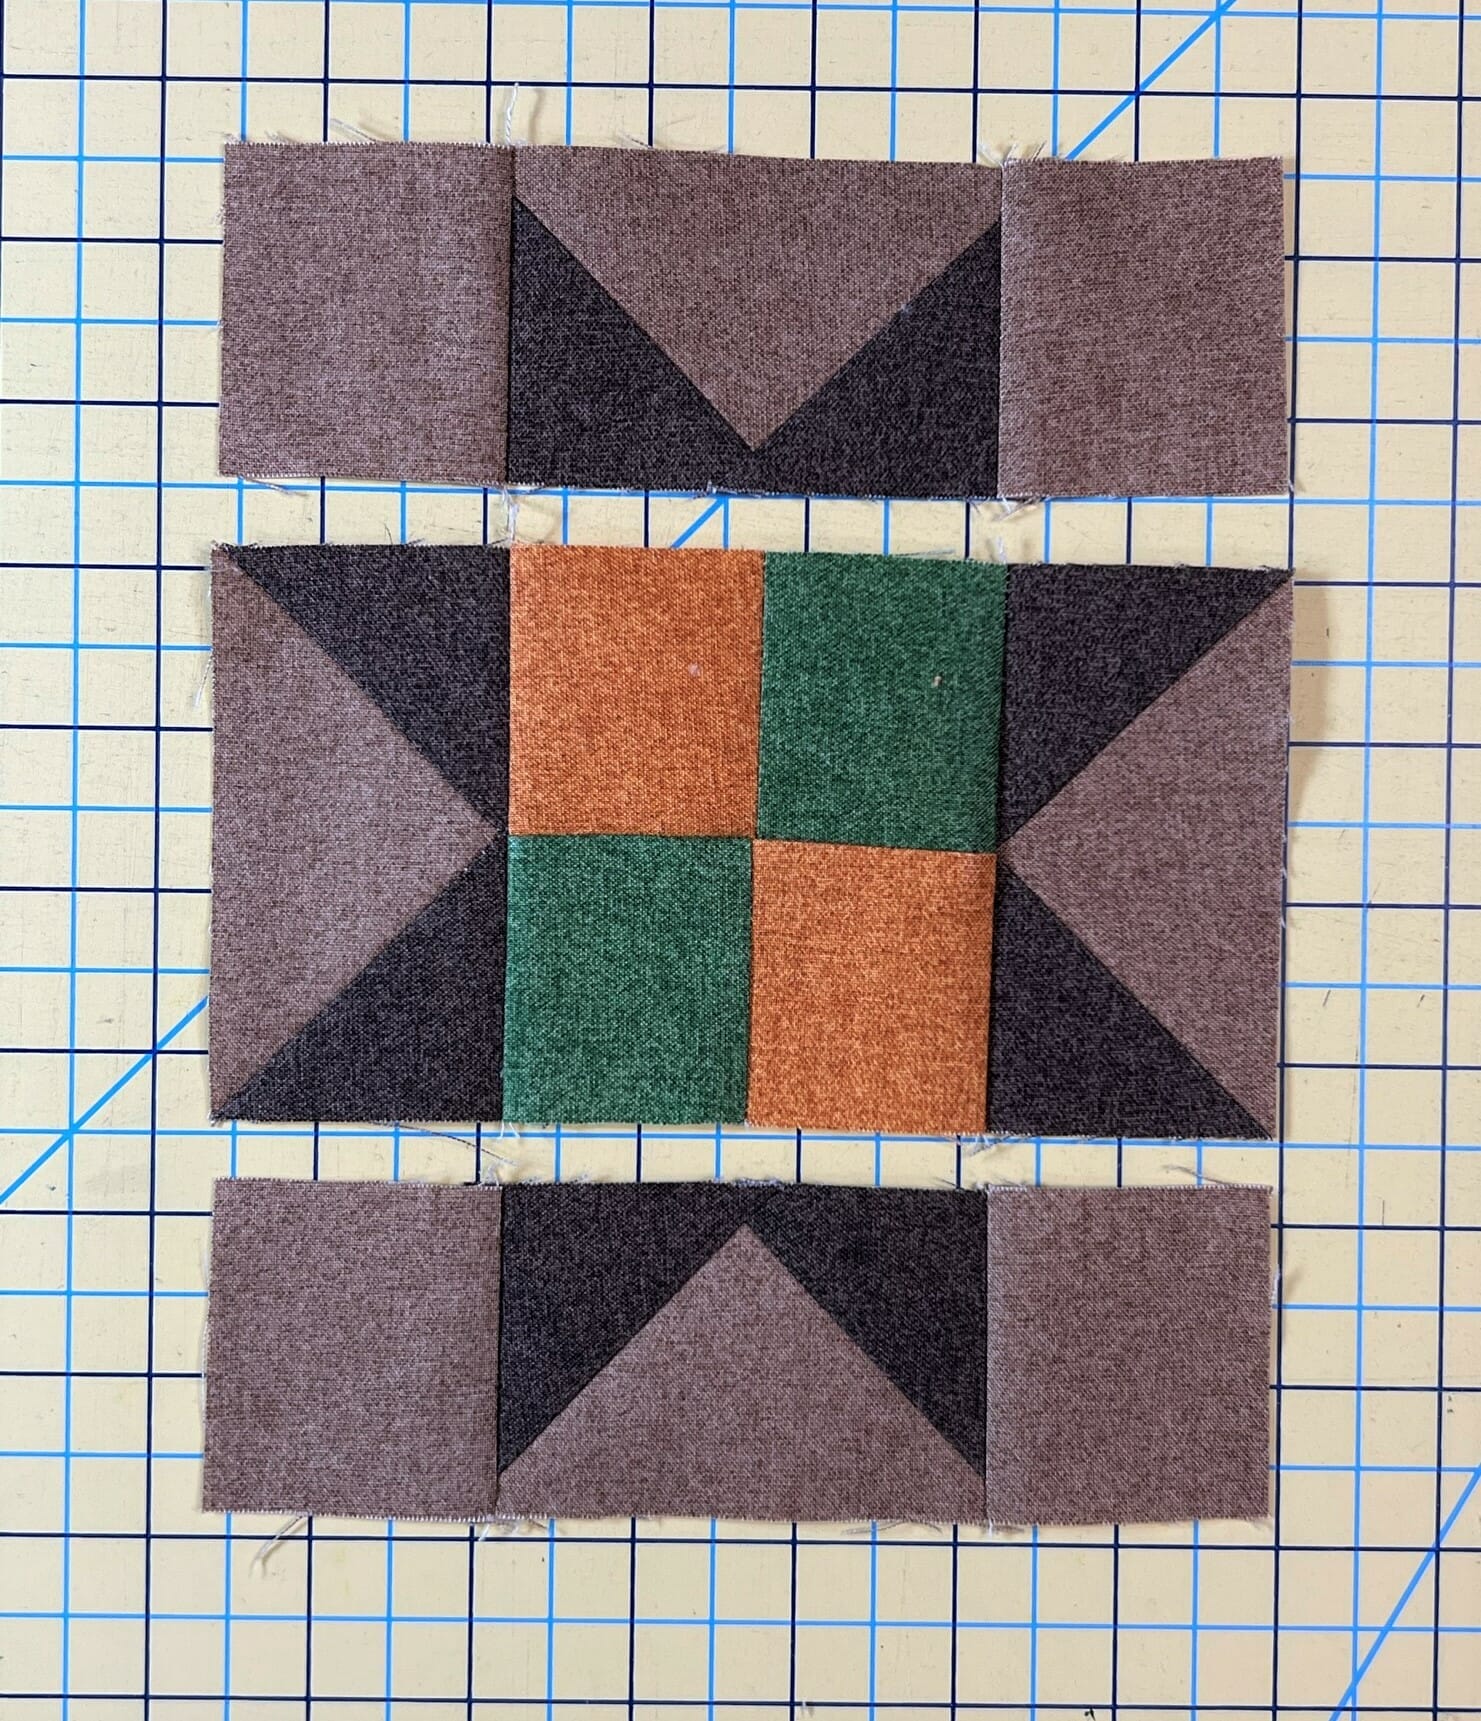
Once my blocks were done, I pressed and measured them again to make sure that each one measured accurately at 6-1/2” square. Be mindful when you do this that you don’t cut off your star points though. You want to keep the integrity of having a 1/4″ for your seam allowance all the way around.
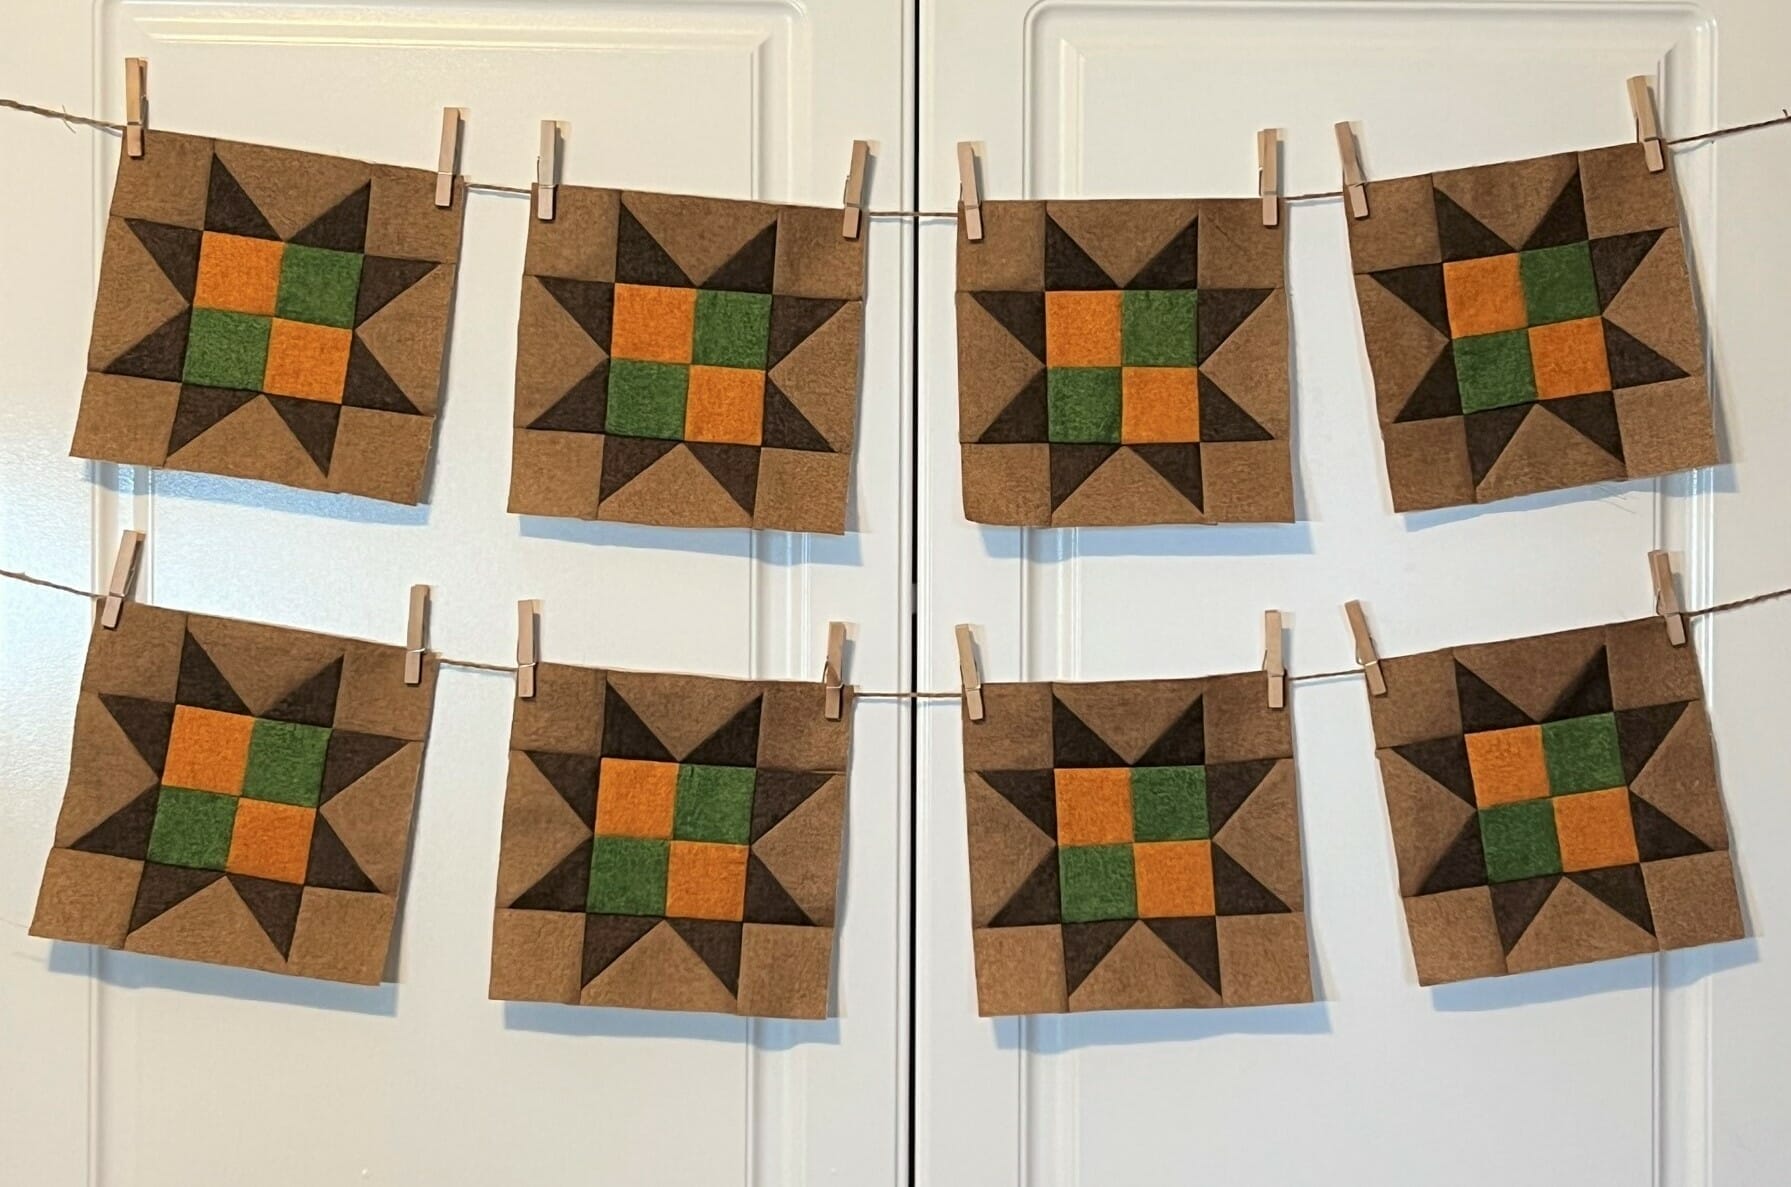
Don’t they look so cute? I hope you’ve enjoyed making these blocks. Like I said earlier, next month we will be adding them into our quilt top, and I can hardly wait!
Until next time, Happy Quilting!
Kristin

