


 Tutorials
 11.30.2022
Hello Friends!
I’ve enjoyed seeing everyone’s first blocks on the Facebook group. If you haven’t joined yet, it’s not too late!
This month we’ll be making just one block, five times over. We’ll begin by making a square in a square center for the block. These can sometimes be tricky, especially because they involve some unusual fractions when cutting. But I promise that if you cut and sew carefully (this is key!) the center portion of this block will turn out just as it should.
Whenever I’m working with cut triangles, I always starch my fabrics before cutting. This will reduce the stretching that tends to happen when you sew those diagonal seams. Actually, I generally starch all my fabrics regardless, but that’s just me. I find that my fabric frays less and I get more accurate results with my piecing whenever I starch my fabrics first. So even if you aren’t a regular starch-er, I would highly recommend starching the A, B, and C fabrics before you cut them.
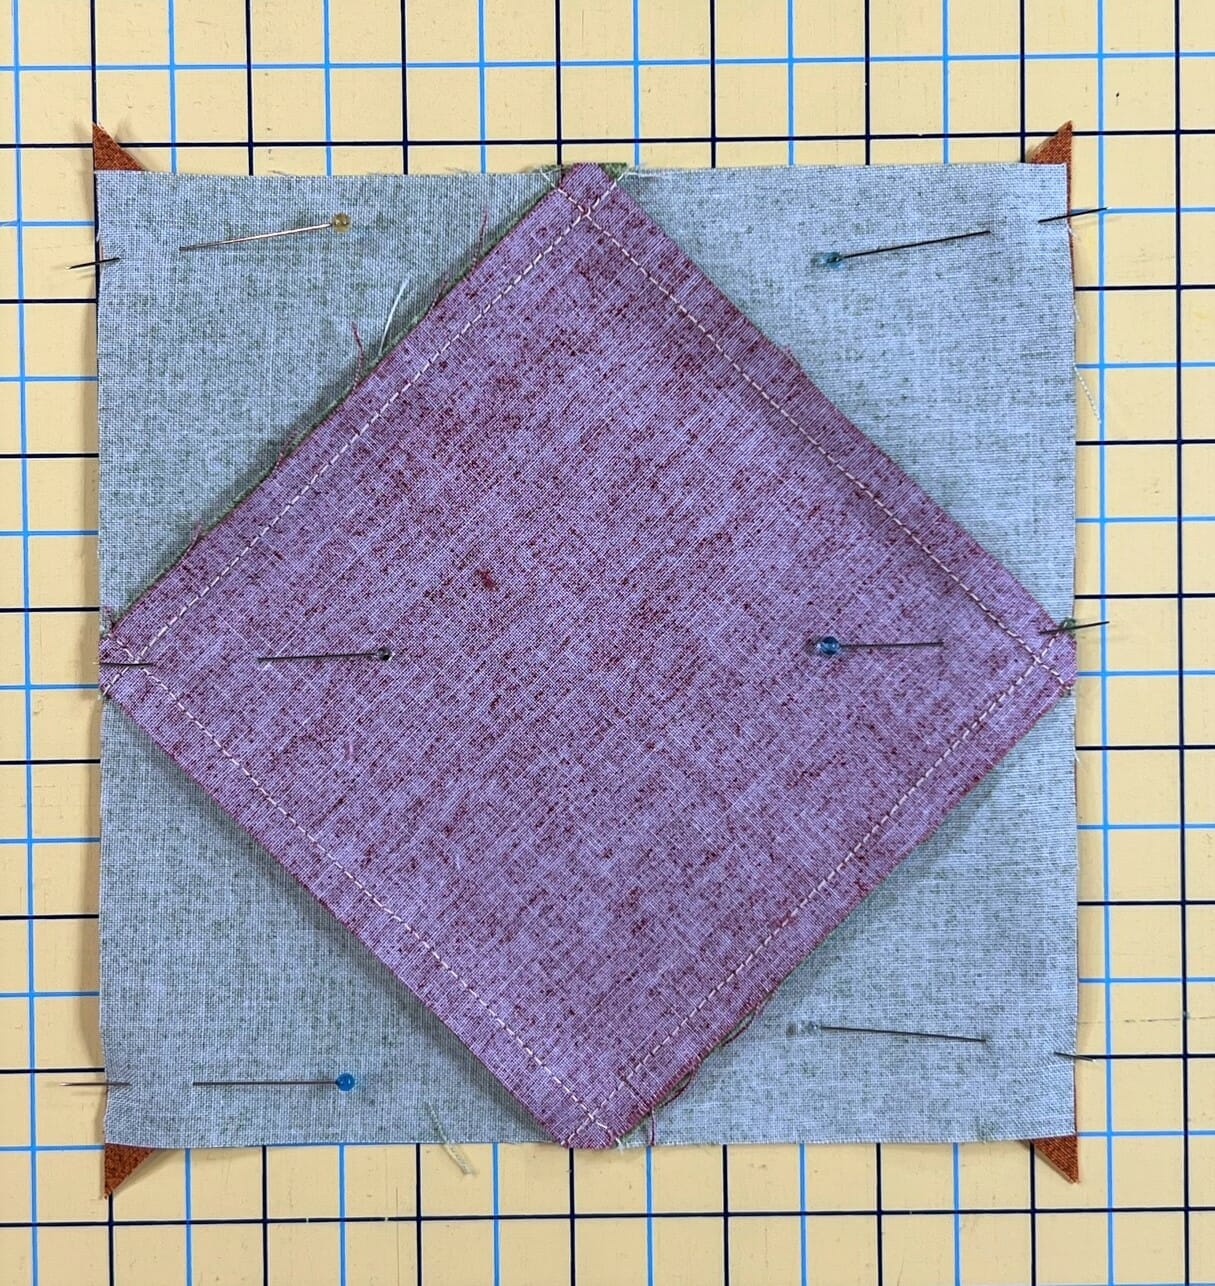
Once you’ve cut everything out, you’ll sew the B triangles, one at a time to each of the four sides of the A square. I find it helpful to finger press the square down the middle to use as a guide for placing the triangles. You want the point of the triangle to align with the fold. In the photo below you can make out the fold line down the center. Once you sew on the first two triangles, you can finger press another fold going the other way as a guide for the remaining two triangles.
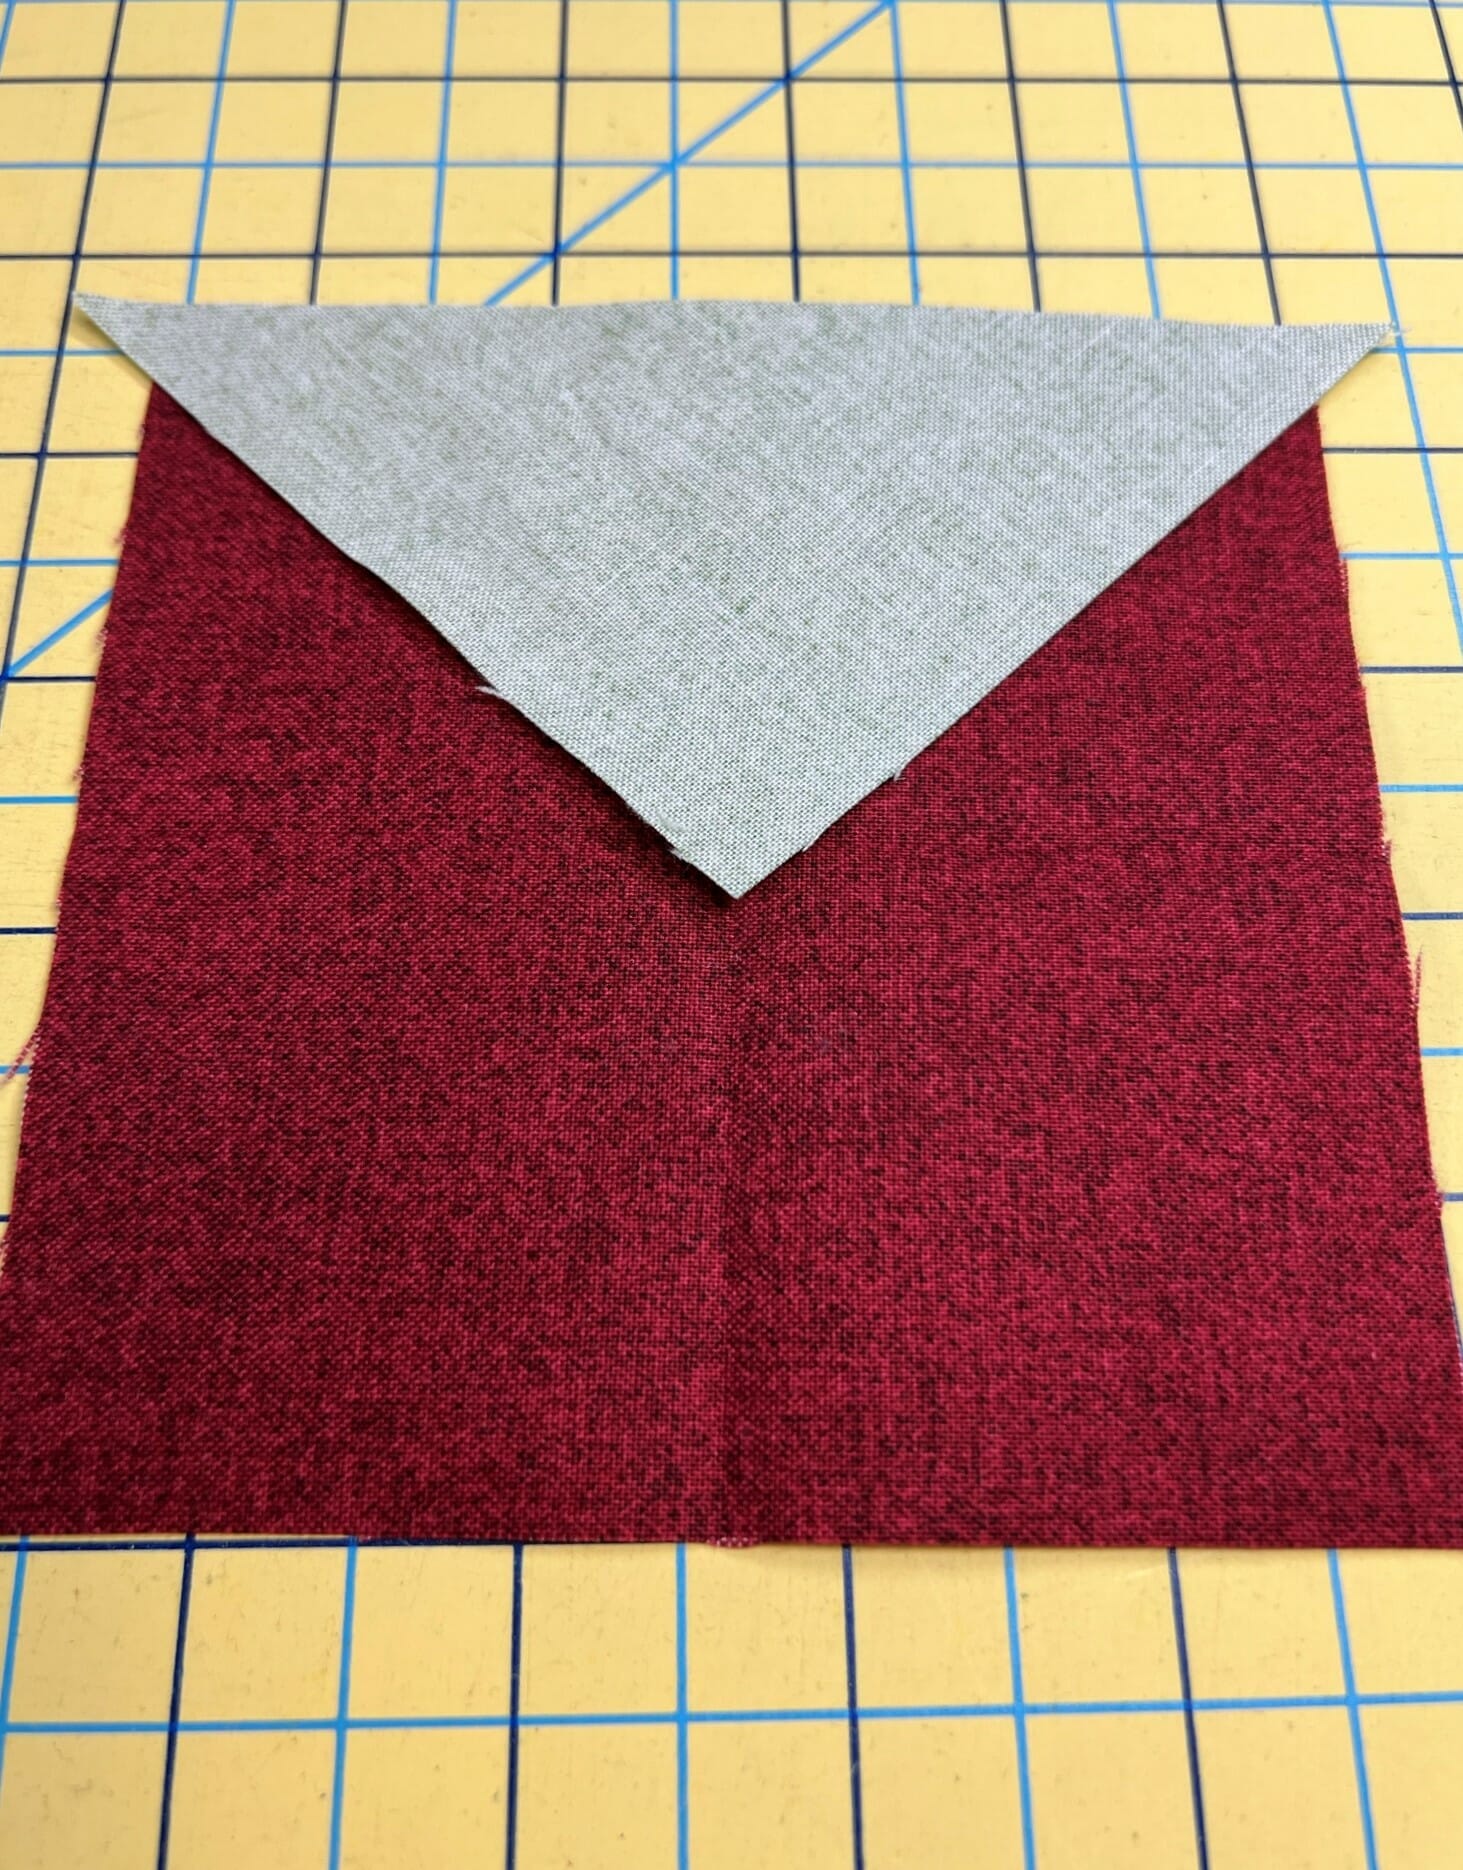
I always cheat a little when sewing these square in a square units. I like to pin the triangles on two at a time, rather than one at a time, like you see in the photo. This way I can sit at the sewing machine and sew longer. I also recommend trimming off the little tails that will hang out, once you finish each step. Make sure you square measures 6-1/4” square at the end of step 1.
I’ve got all my units pinned and ready for the next two triangles…
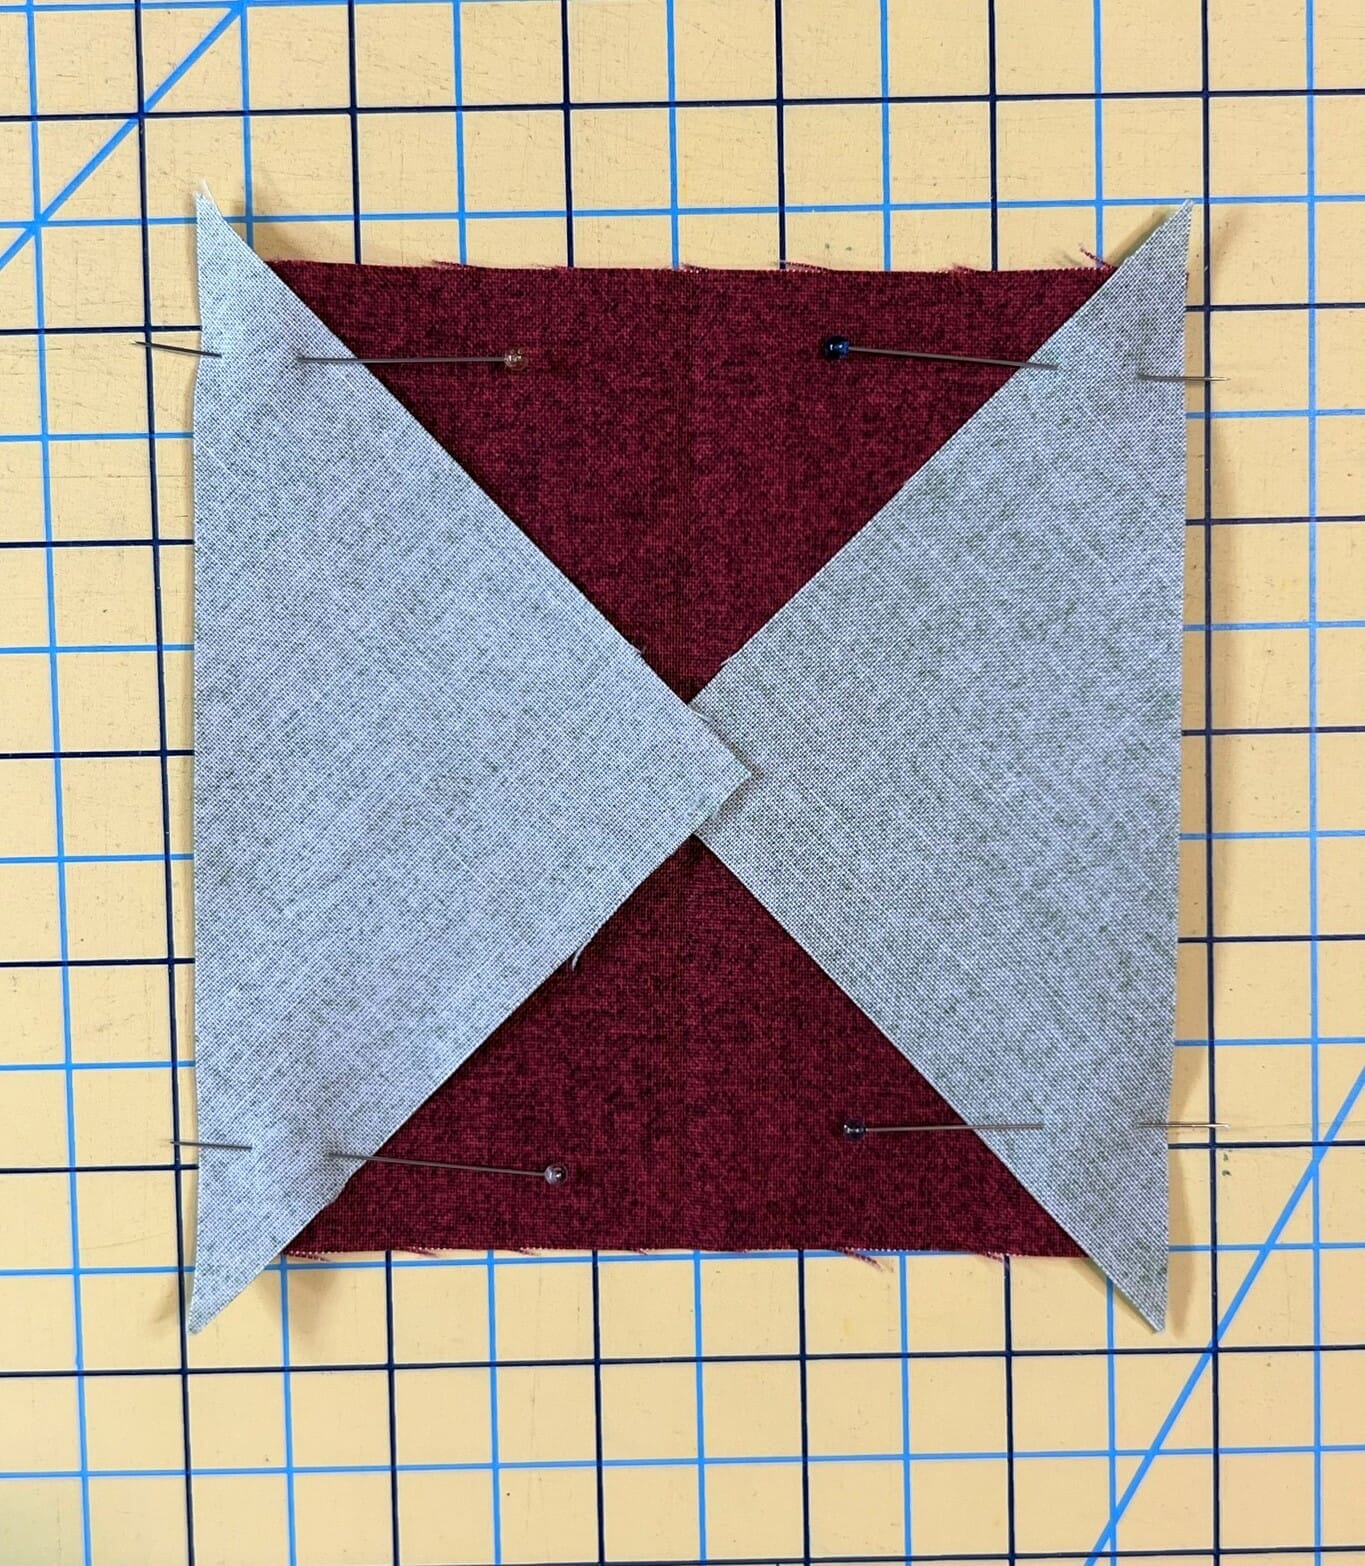
Step two is just a repeat of step 1. I like to pin my triangles on the underside before sewing. This allows me to make sure that I’ll be stitching right through that triangle point perfectly. At the end, you hopefully have a square that measures 8-1/2”. Please make sure that if you do any trimming, that you maintain a ¼” seam allowance at those points. Sometimes things can get wonky, no matter how hard we try. When this happens to me, I still make sure I keep those points at a ¼” seam when I’m trimming, and then I adjust my sewing in the subsequent steps.
Two triangles sewn, two more to go…!

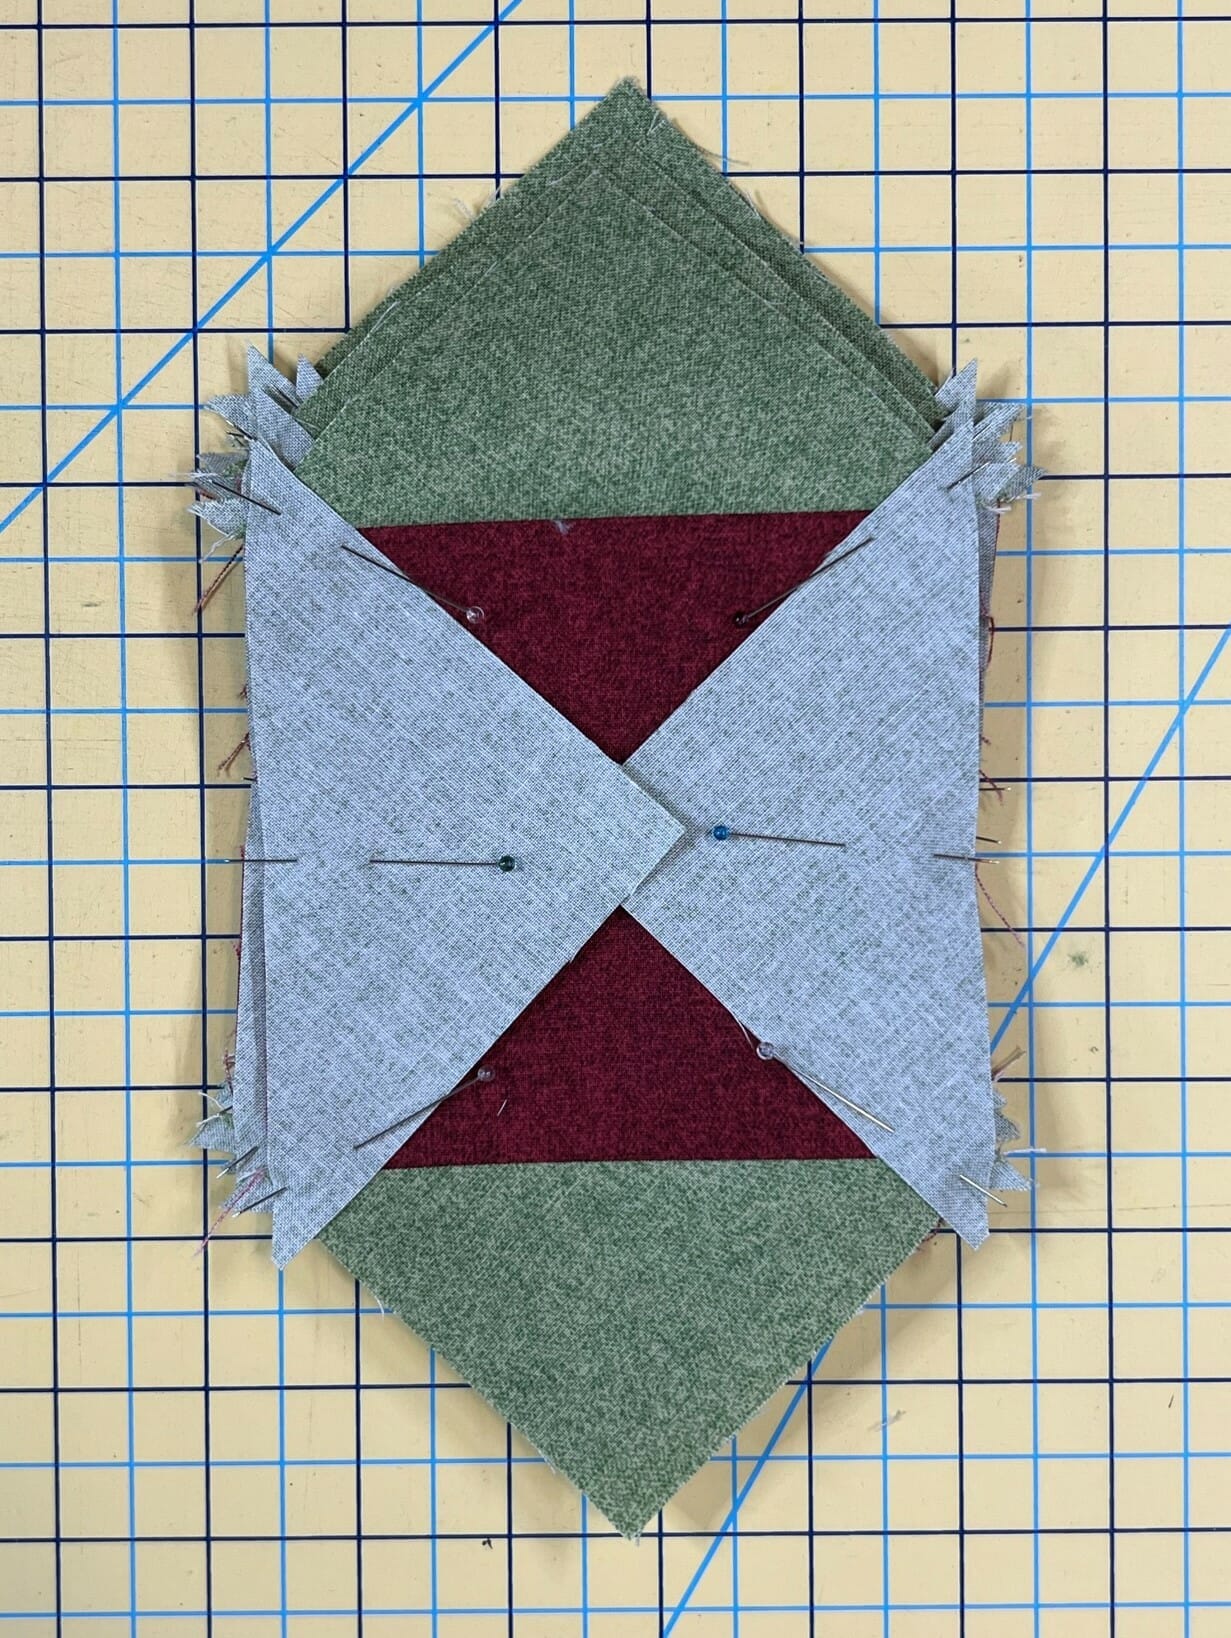
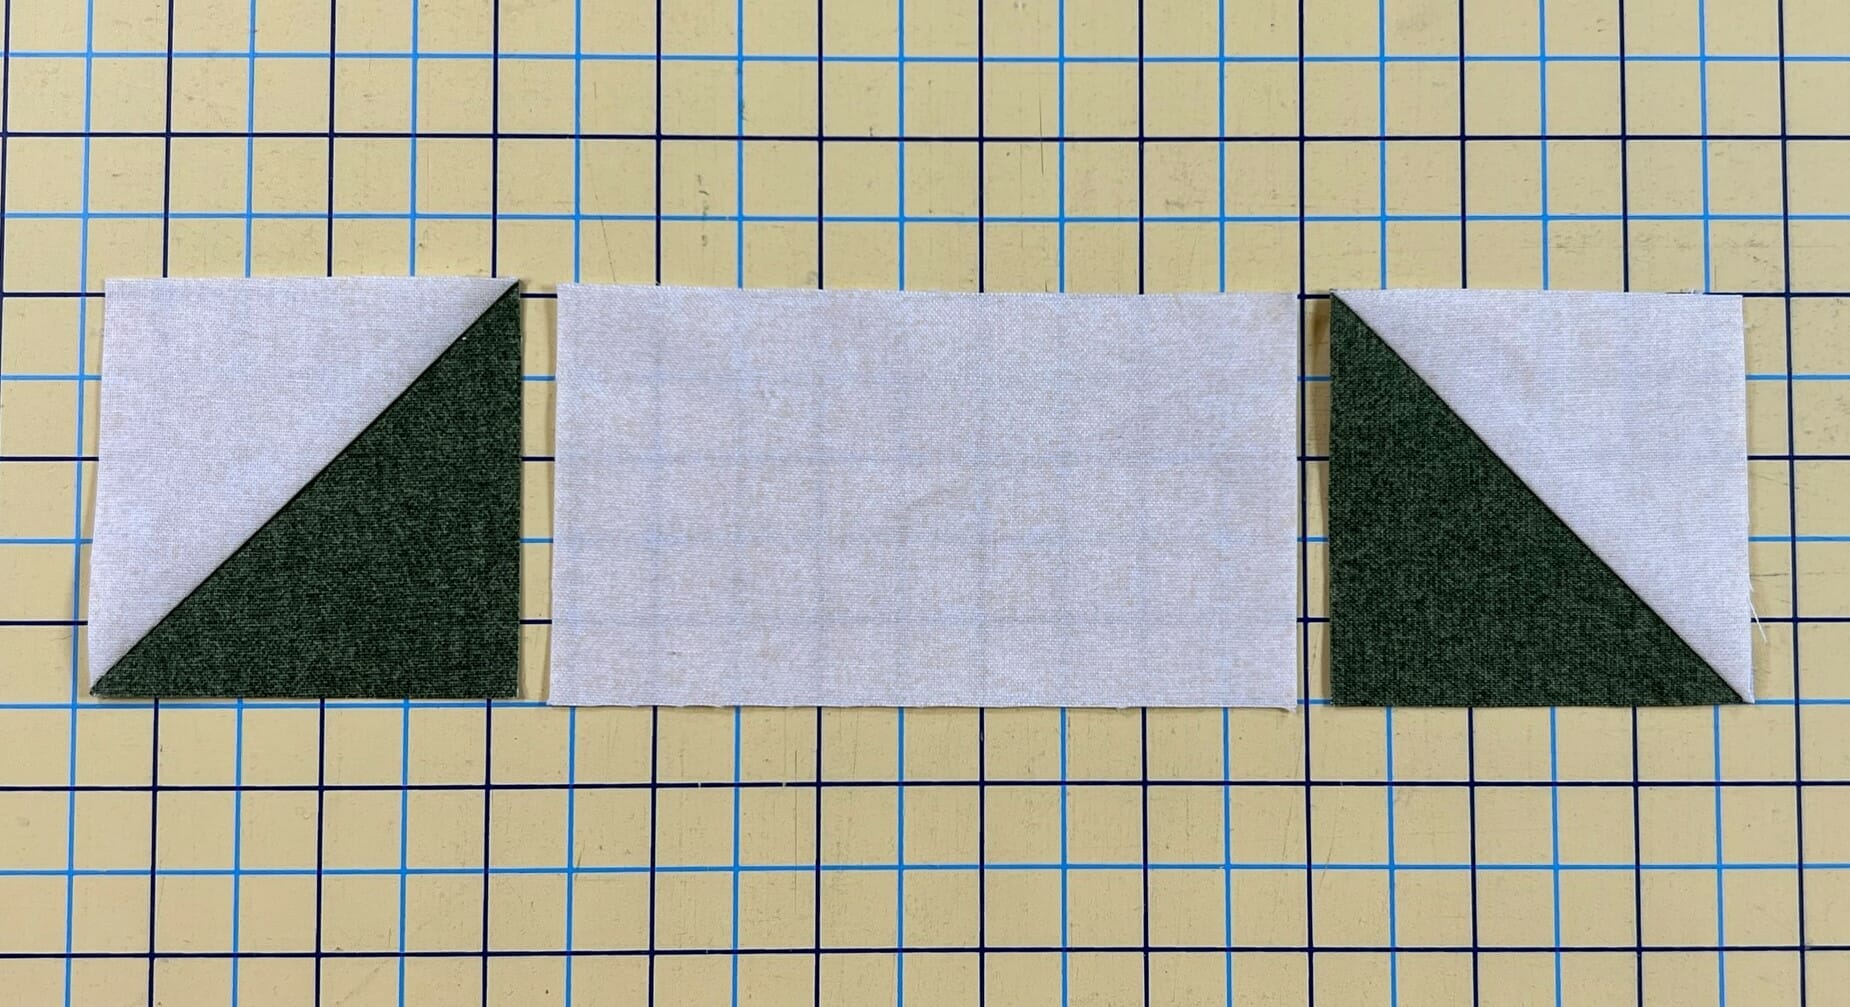
Next, we’ll make A LOT of Half Square Triangles. If you are concerned about having enough wiggle room to trim your squares accurately, feel free to cut the D, E, and F squares a little larger than I’ve suggested in the pattern. I have them cut mathematically accurate at 2-7/8” square, but there’s not harm in cutting them all at 3” square and them trimming them after they’ve been sewn. There is enough fabric, and it’s entirely up to you. Below is a photo of the step by step process for the HSTs, minus the trimming.

I did steps 3 and 4 simultaneously (perhaps while watching a Christmas movie a little earlier than is socially acceptable). I always try to assembly line my piecing and sewing whenever possible.
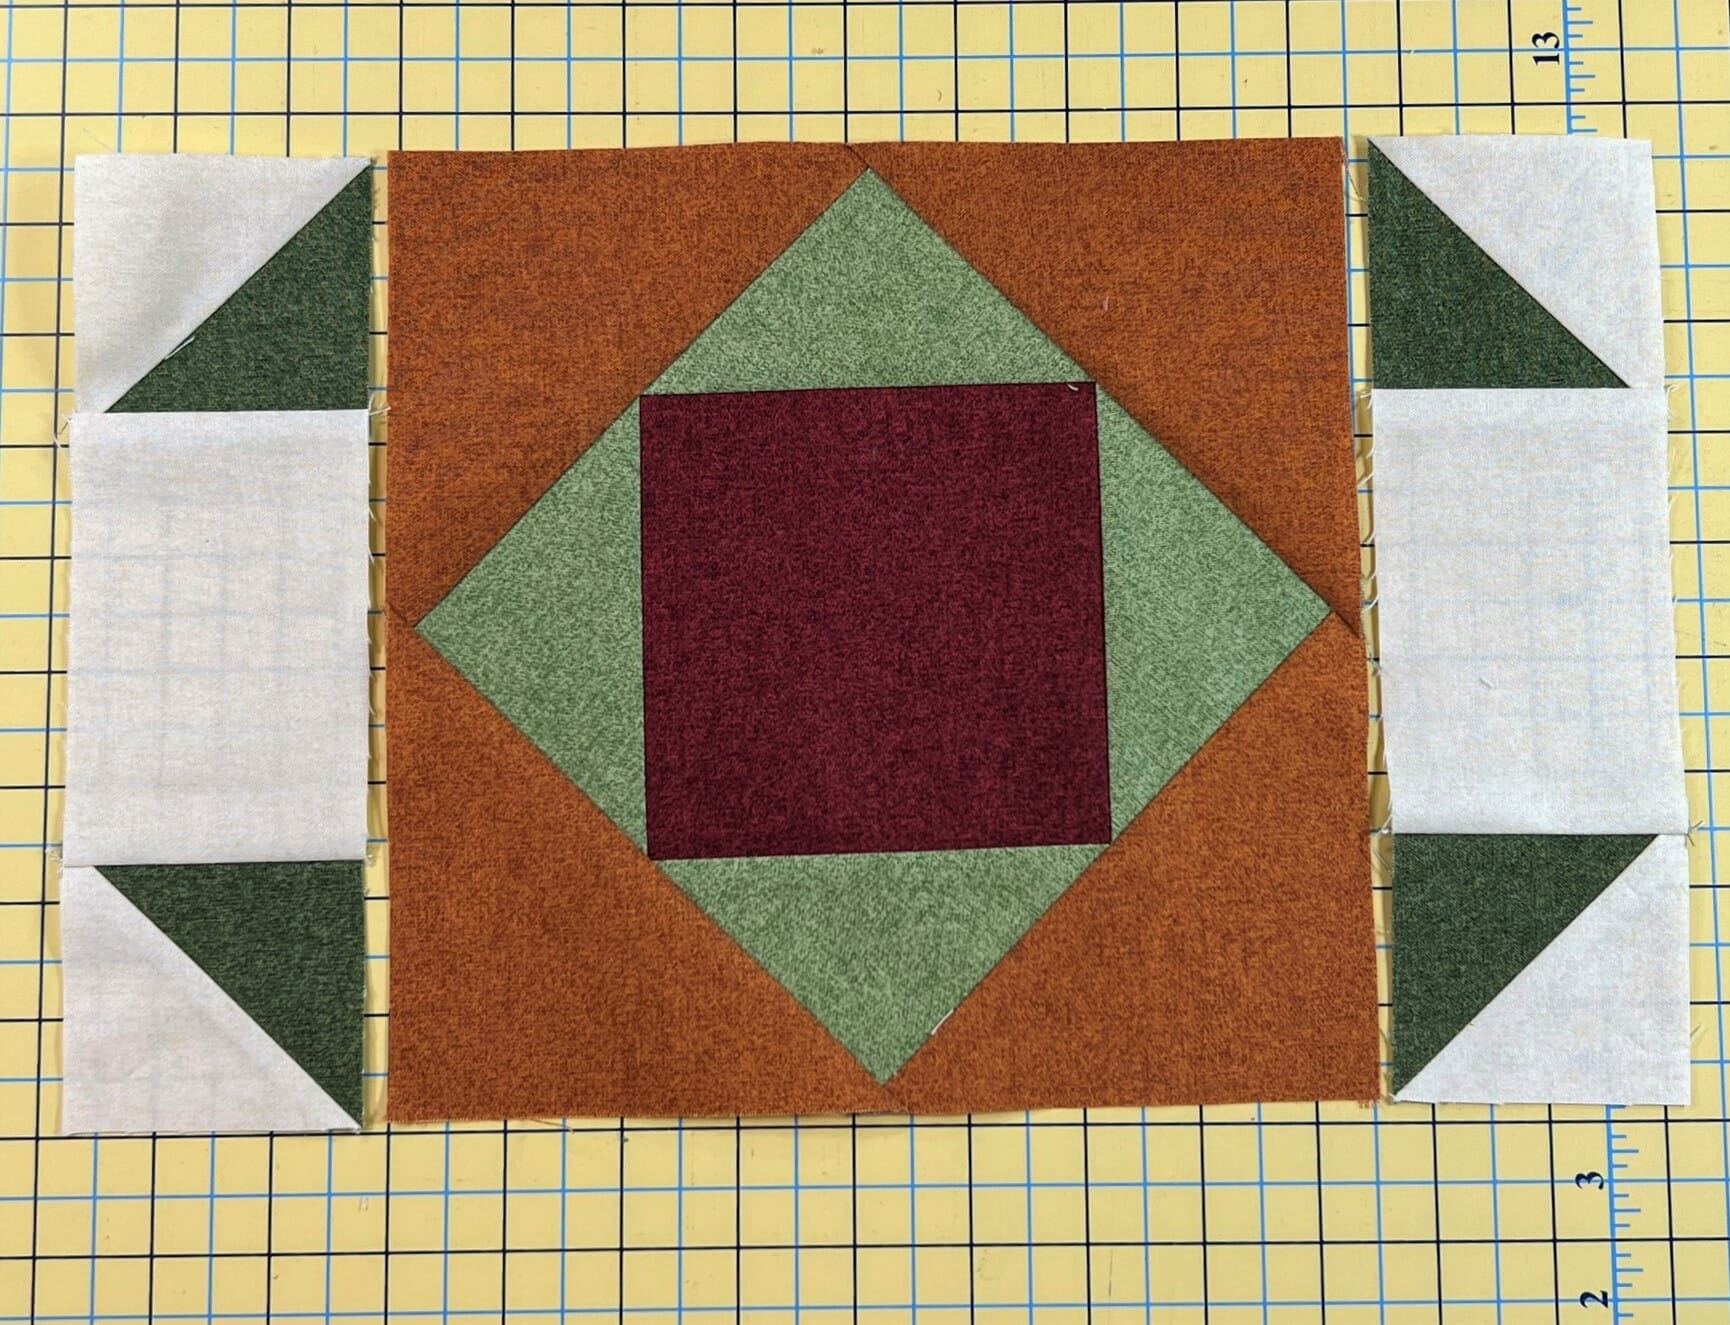
Once we have all those HSTs finished and trimmed to size, we can assemble our blocks. After sewing the D/F squares to each end of a G strip, we will take half of them and sew them to two sides of the center block. You might want to pin them so that the Square in a Square block is on top, so that you can see your triangle points for sewing accuracy.
After that’s done, we’ll sew the D/E squares to the ends of the remaining strips from step 5, and then sew them to the top and bottom to complete our blocks.

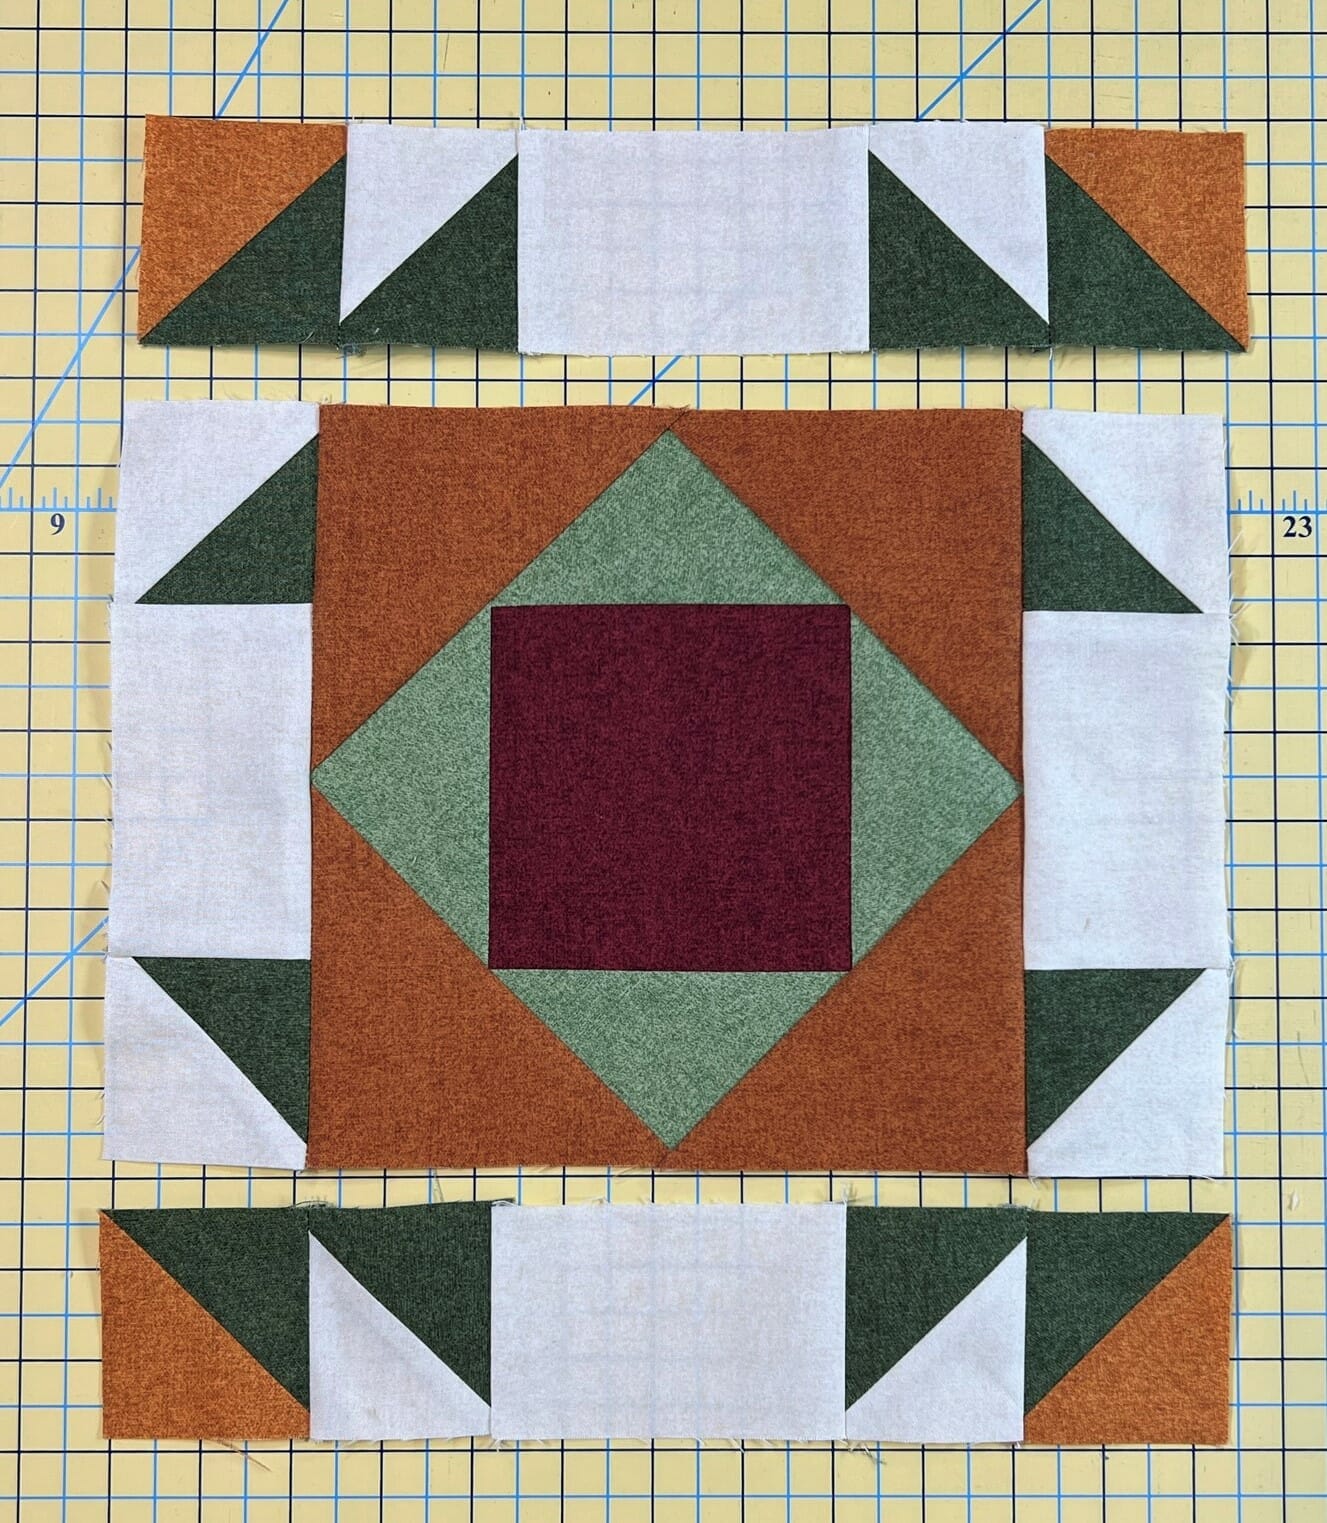
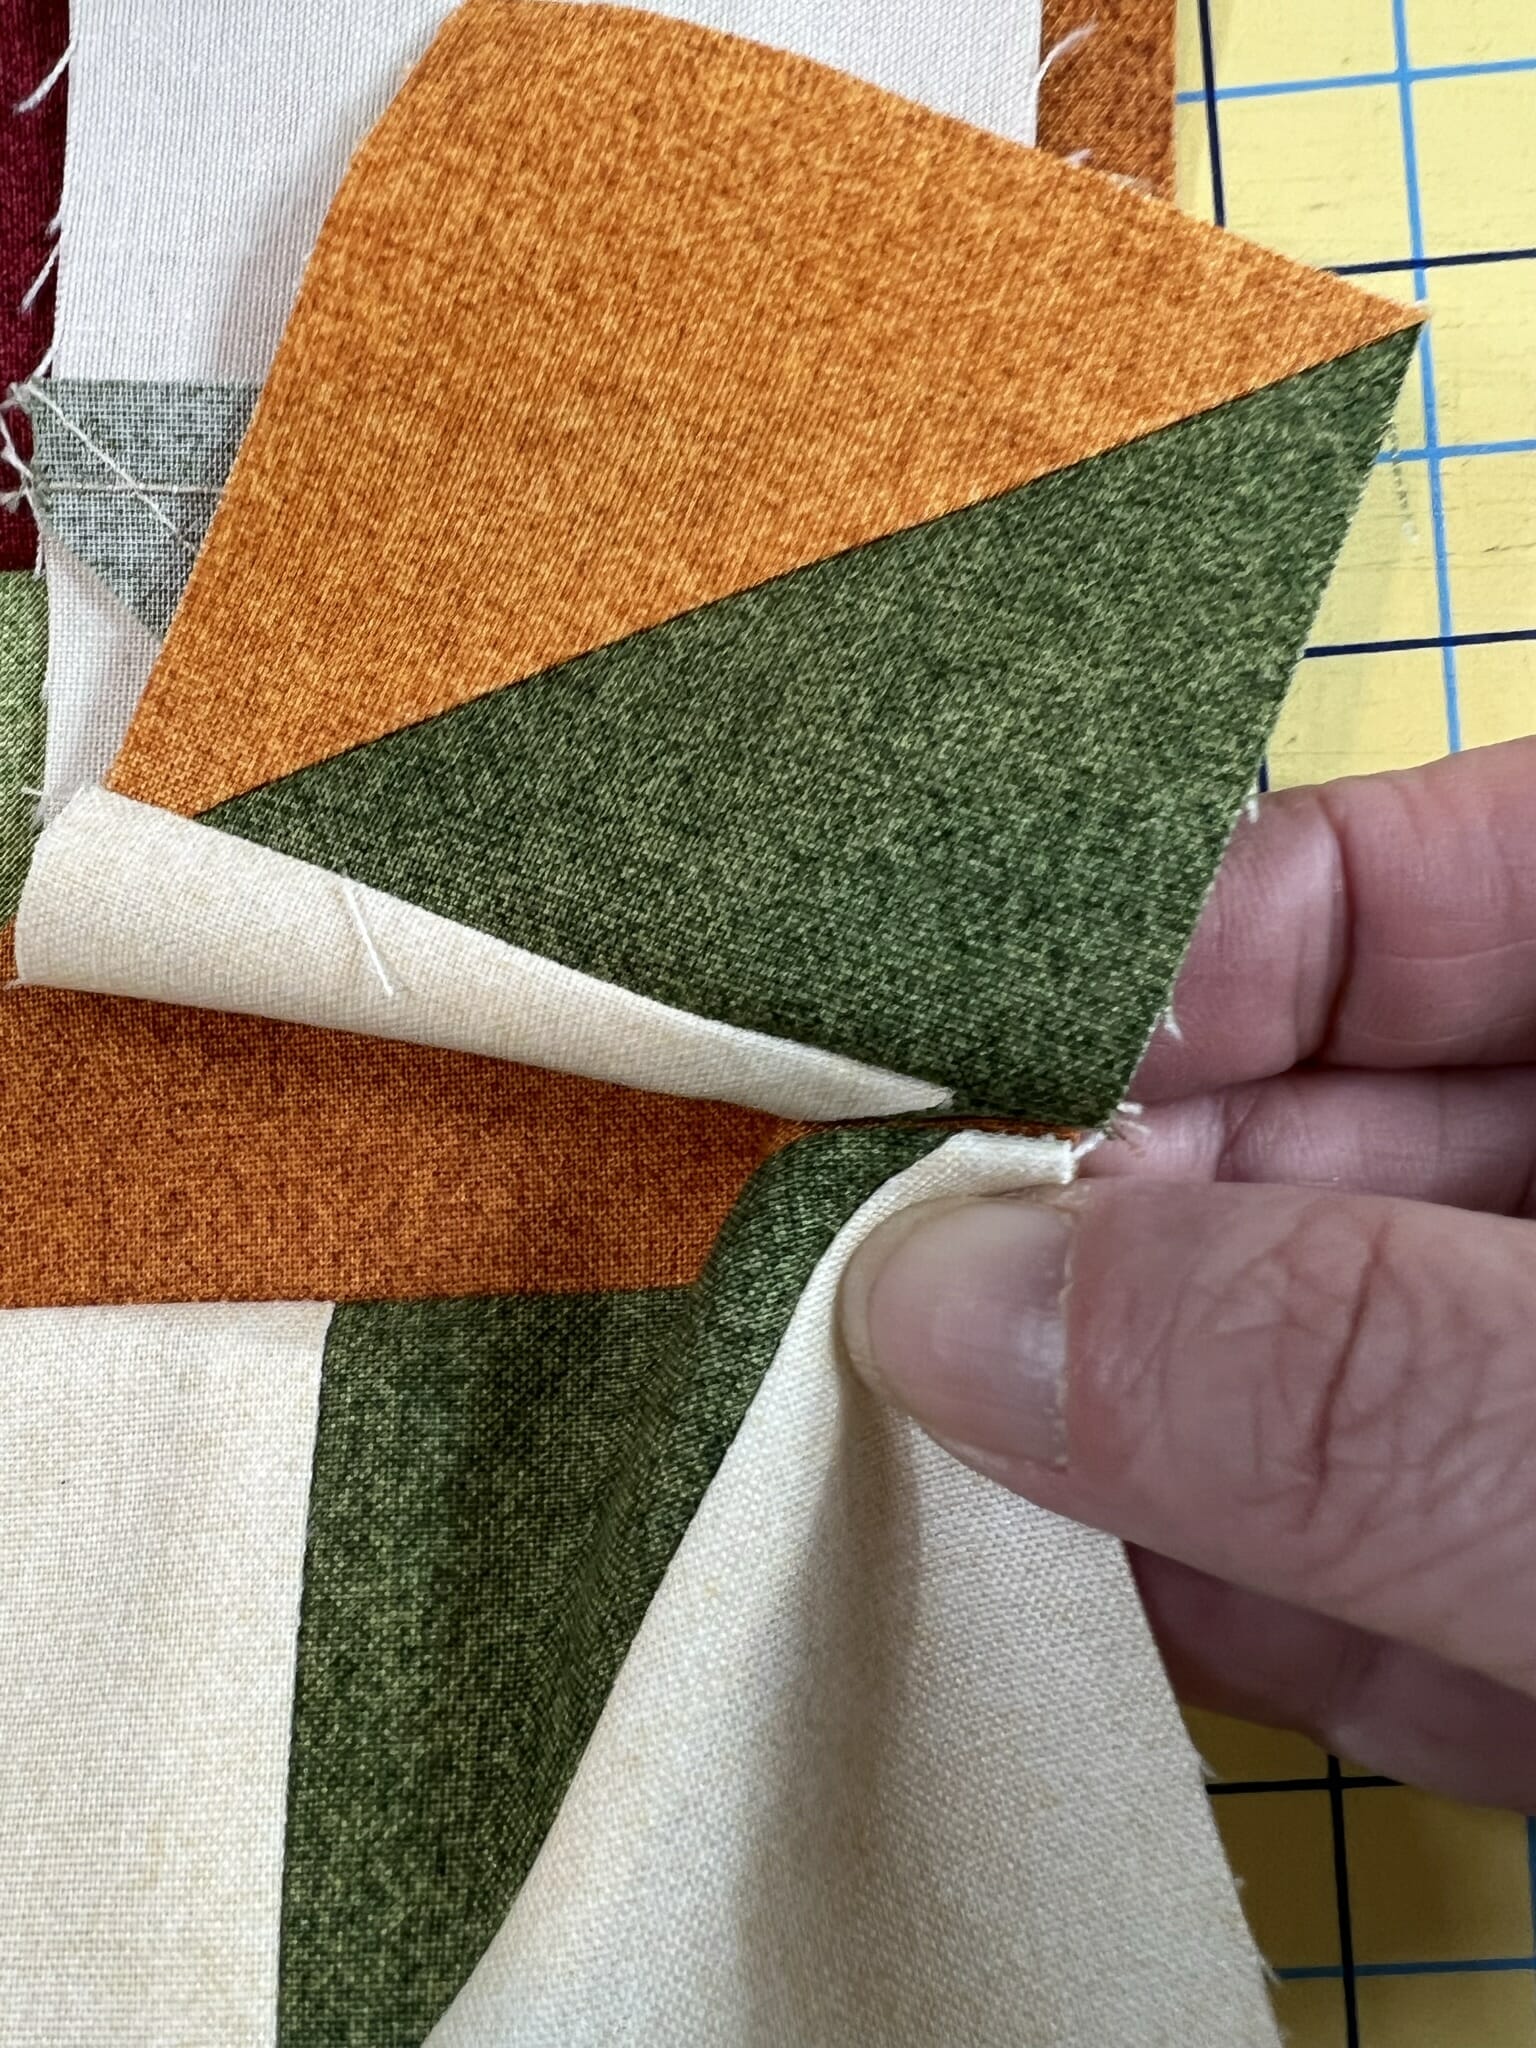
I know it can be tricky to get your triangle points to be accurate around the perimeter of the block. I always try to line up my triangle points before pinning. Here is a photo of what I’m talking about. You can also use the trick of putting a pin through both points and then pinning the units together from there. This is one of those things that would be much easier to explain in a video, so I hope this makes sense.
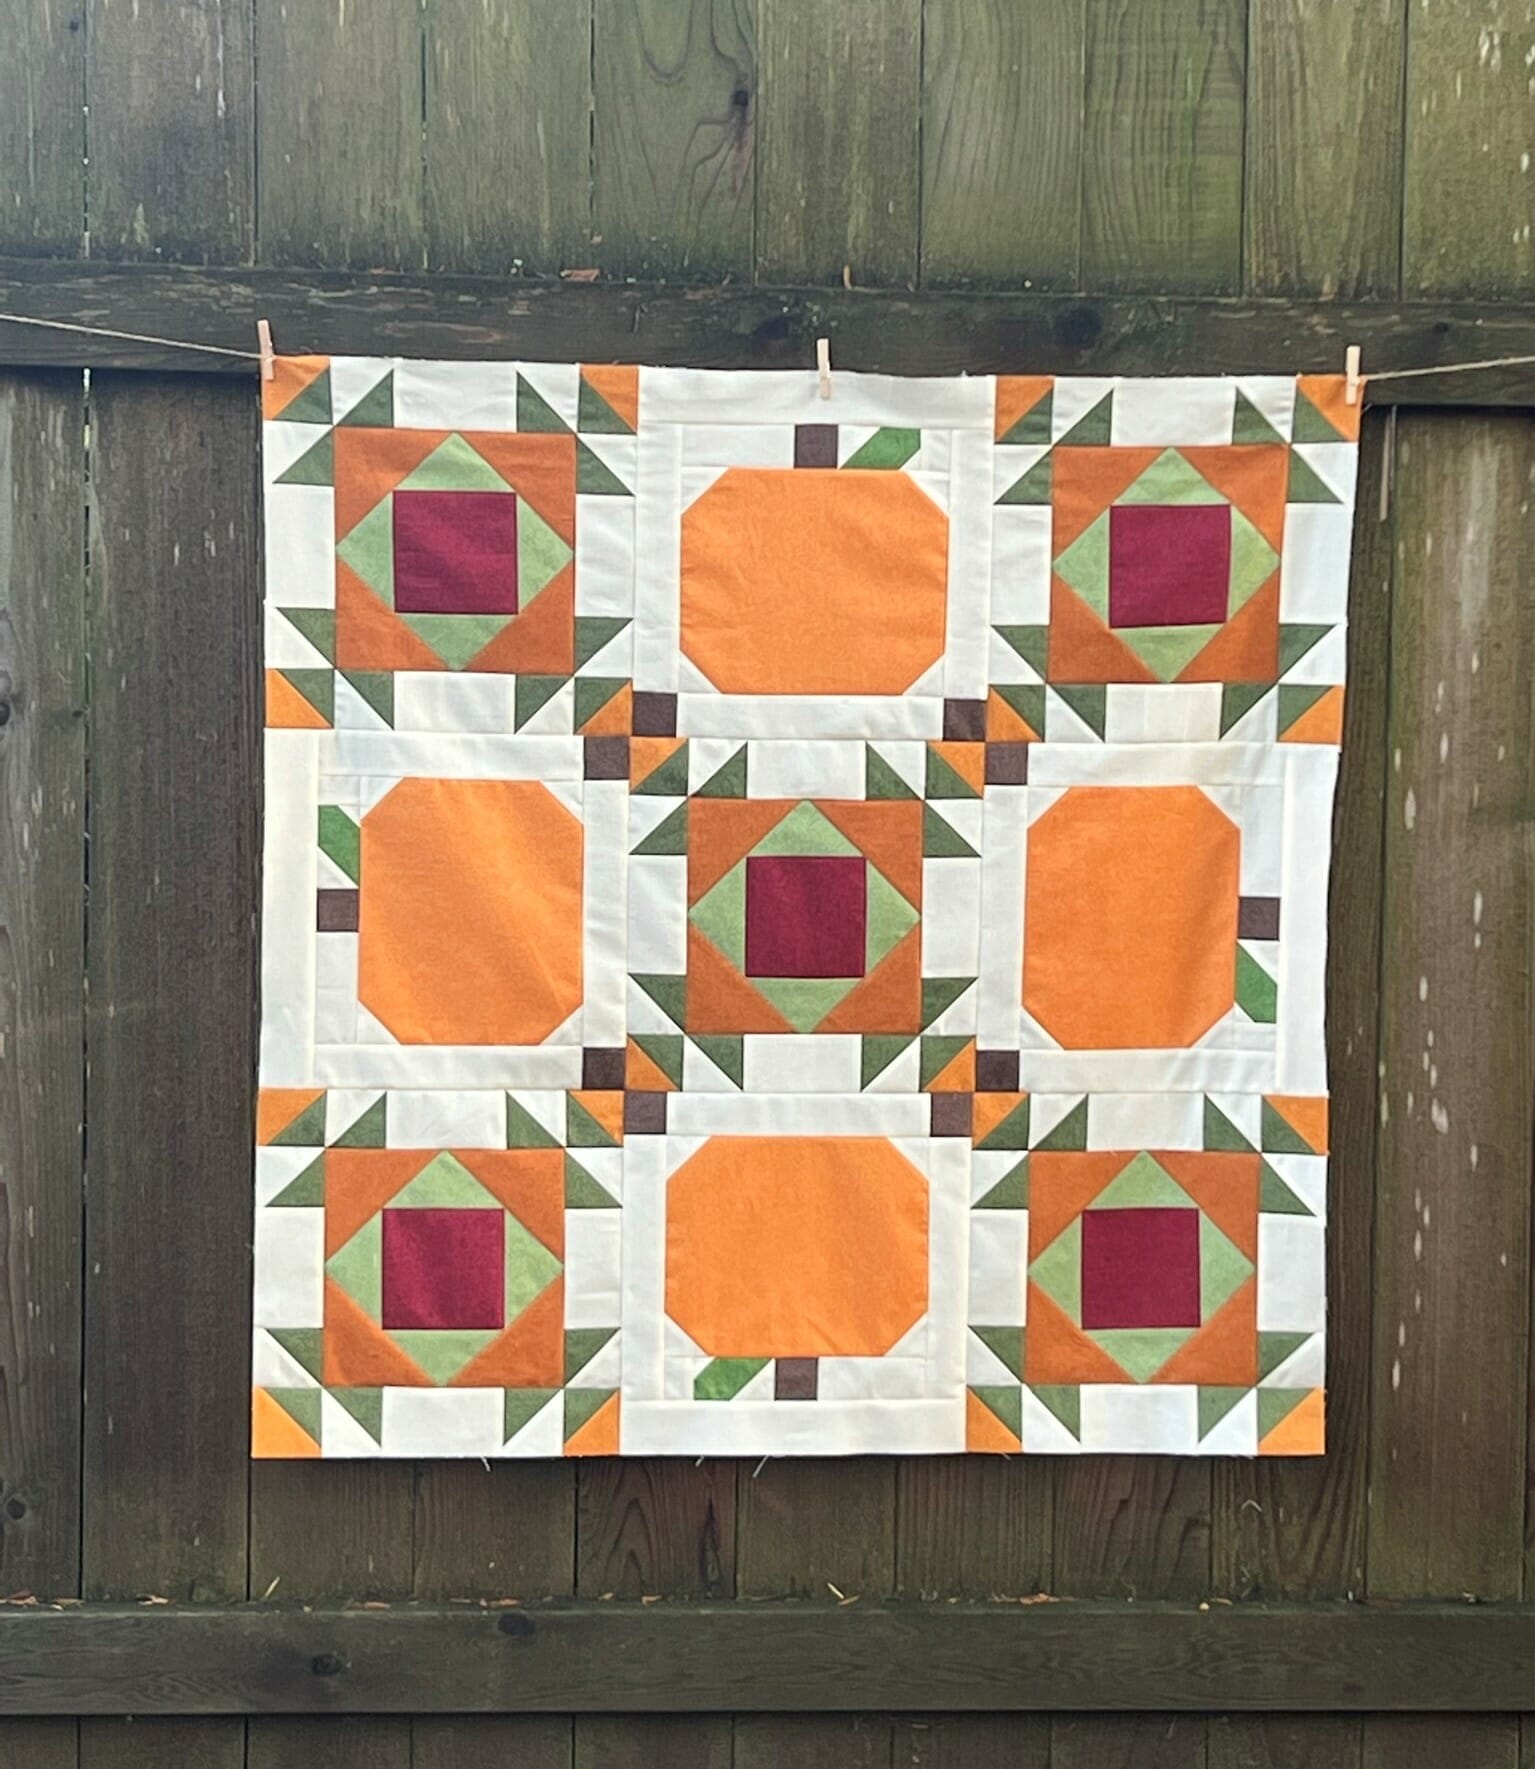
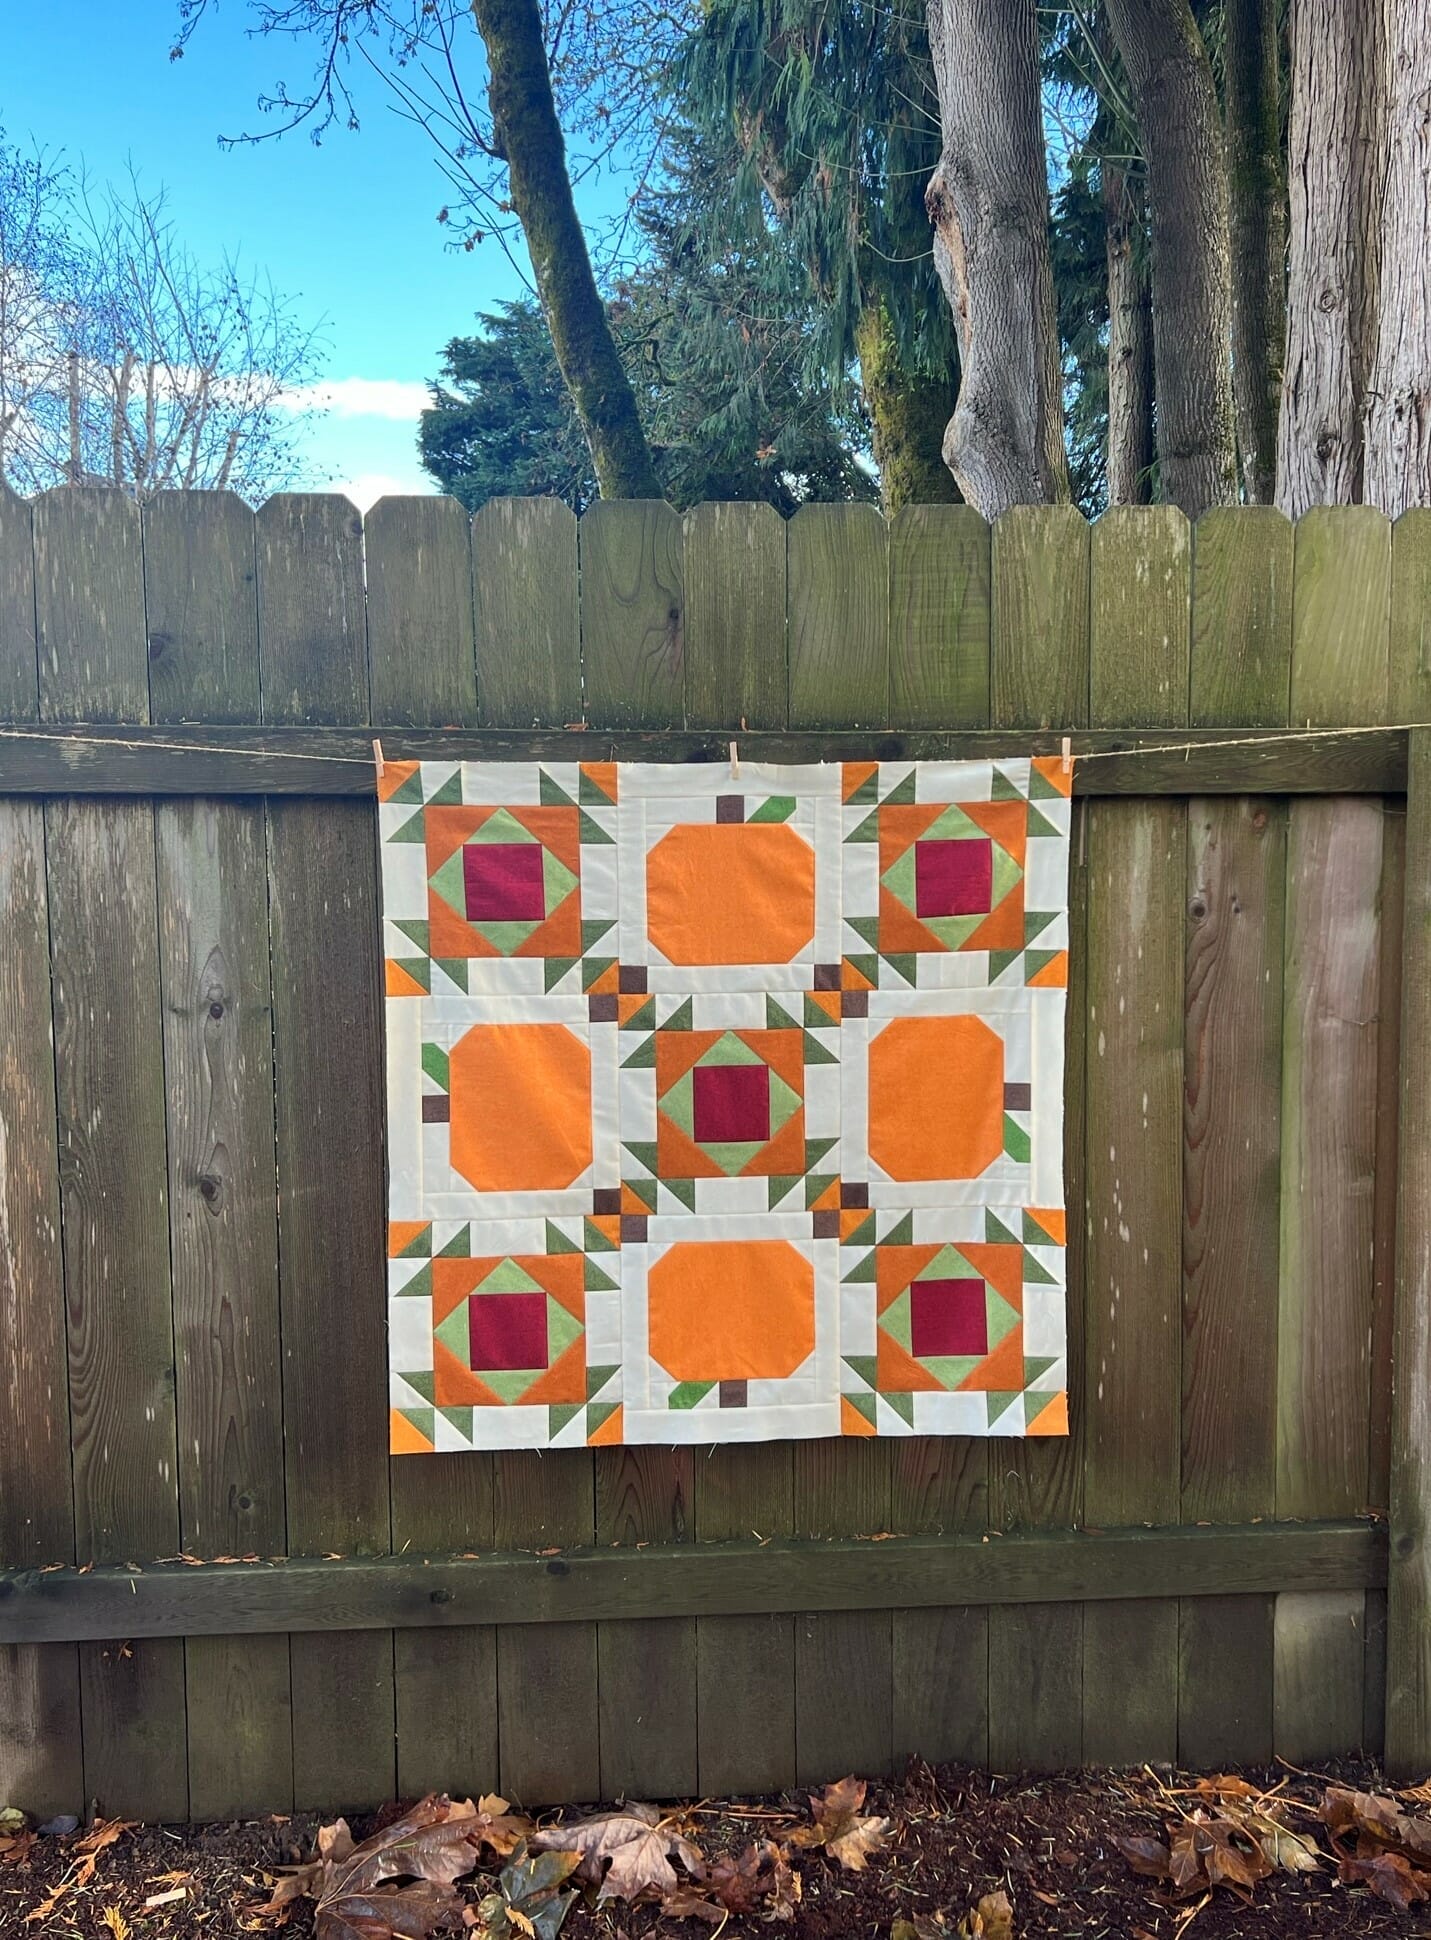
Now that our blocks are finished, we can sew the center portion of our quilt! It’s basically a giant 9-patch, using this month’s blocks and the pumpkin blocks from month 1. Our Acorn blocks we made last month are just going to hang out on their own for a while. I sewed the three rows together first.

Make sure that you pay attention to the orientation of the pumpkins as you sew these blocks together. The pumpkins should all be facing away from the center. When it’s done, the quilt top should now measure 36-1/2” square. I couldn’t resist taking mine outside for a photo on such a beautiful fall day!
Two months down, only seven more to go!
Happy Quilting everyone!
Kristin

