


 Tutorials
 11.14.2022
Hello friends, and welcome to my latest Block of the Month! I’m so happy to have you all join me over the next 9 months as we sew up this fun fall quilt. I’ll be writing these blog posts each month to offer you some extra tips and visuals to correspond with each installment.
Connecting Threads was kind enough to send me all the fabric ahead of time, so here’s a little photo of all the fabrics we will be using in this quilt. In case you haven’t realized it already, Connecting Threads makes the BEST basics and blenders fabrics! They are such great quality, and they feel amazing! This quilt is made entirely with their Faux Linen Basics collection, which has a lovely subtle texture to it. I love incorporating this line into my quilts whenever I can.

Okay, let’s talk about the blocks we will be making this month. To start things off, we’ll be making the four pumpkin blocks that go in the center of the quilt, along with four of the acorn blocks that will be in the top and bottom borders.

Pumpkin Blocks
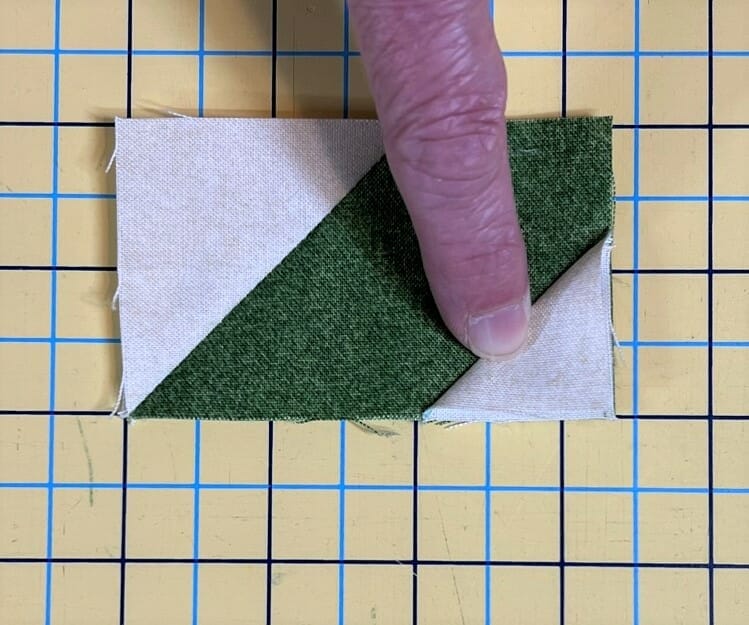
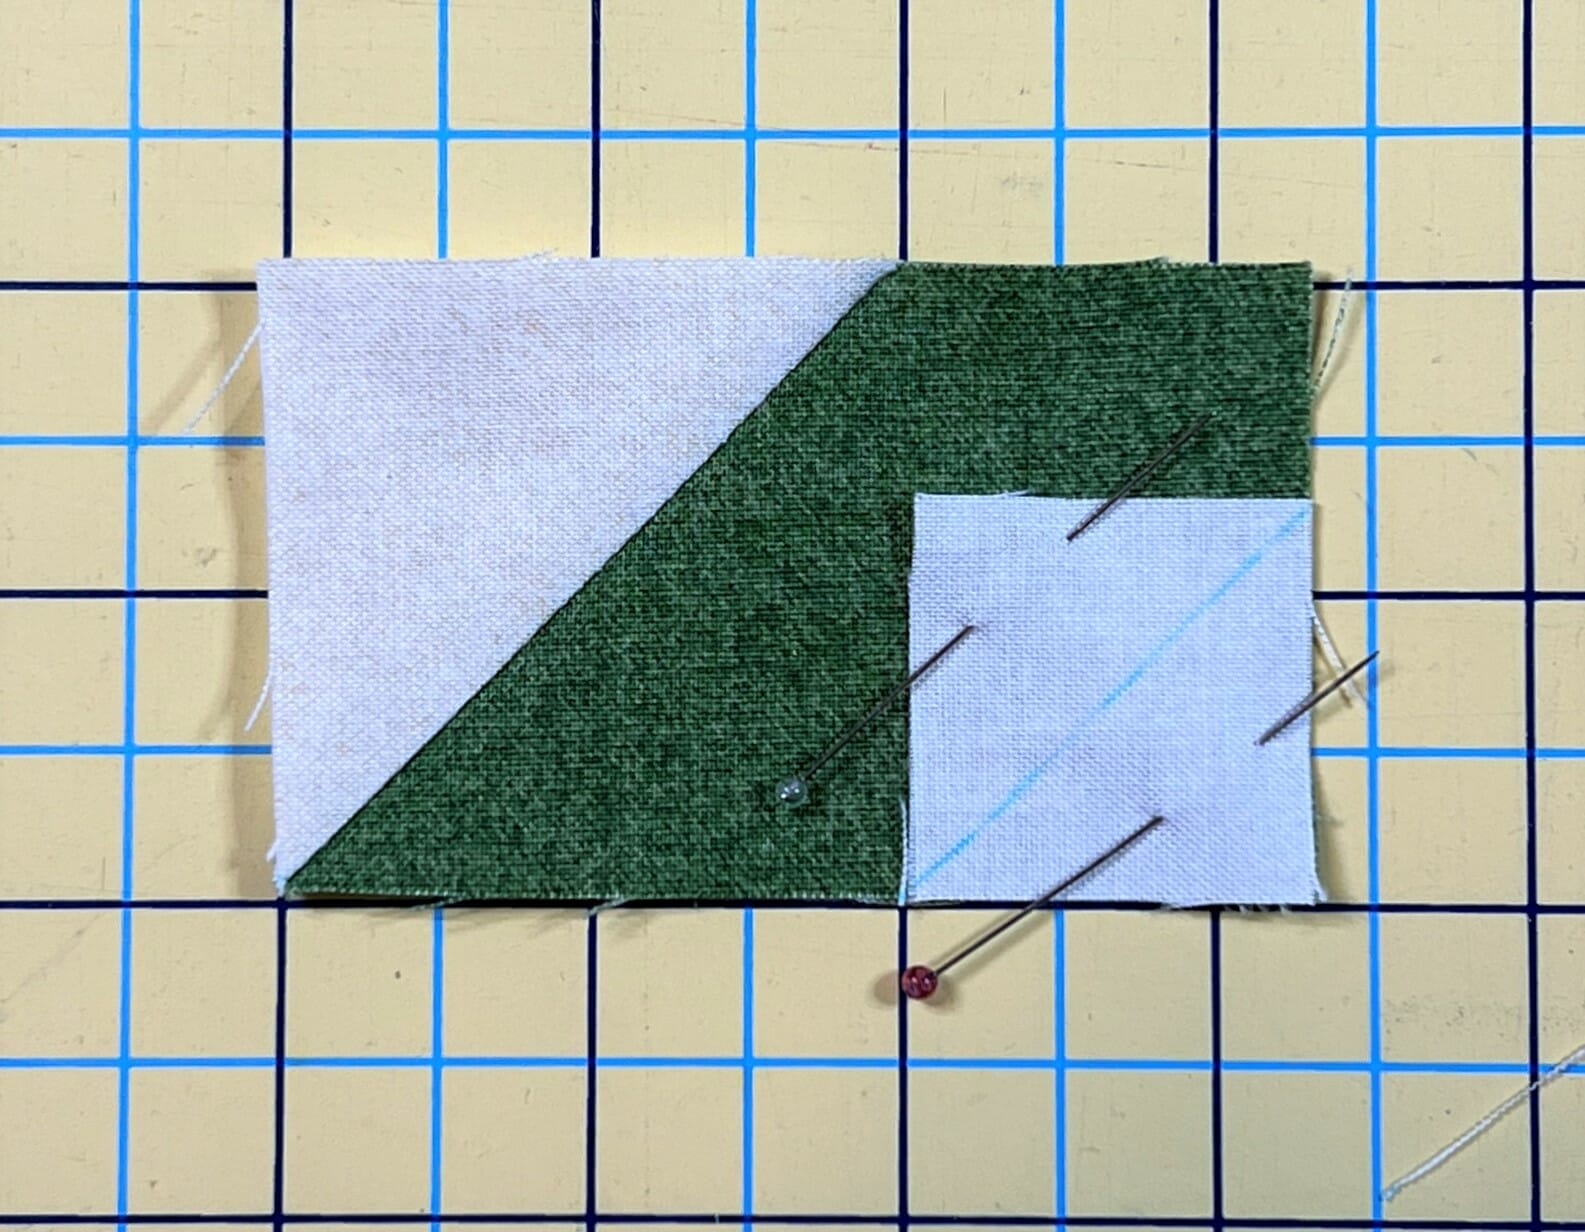
We’ll begin by placing and pinning the diagonally marked H squares in each of the four corners of the A rectangles. Stitch on the marked lines as directed. I always like to flip up the squares along the seam I’ve just sewn to make sure that the corners match up. If they come up too short, then I’ll rip out my stitching and re-sew. I tend to stitch just barely a thread outside the marked line in order to avoid this. The blocks this month use a lot of these corner square units that are later trimmed, so you are going to get real good at this!
I took a picture of my finger pressing one of the sewn corner squares on the Leaf unit below so you can see what I’m talking about. Once I’m happy with my results, then I’ll trim at the ¼ seam allowance and press.
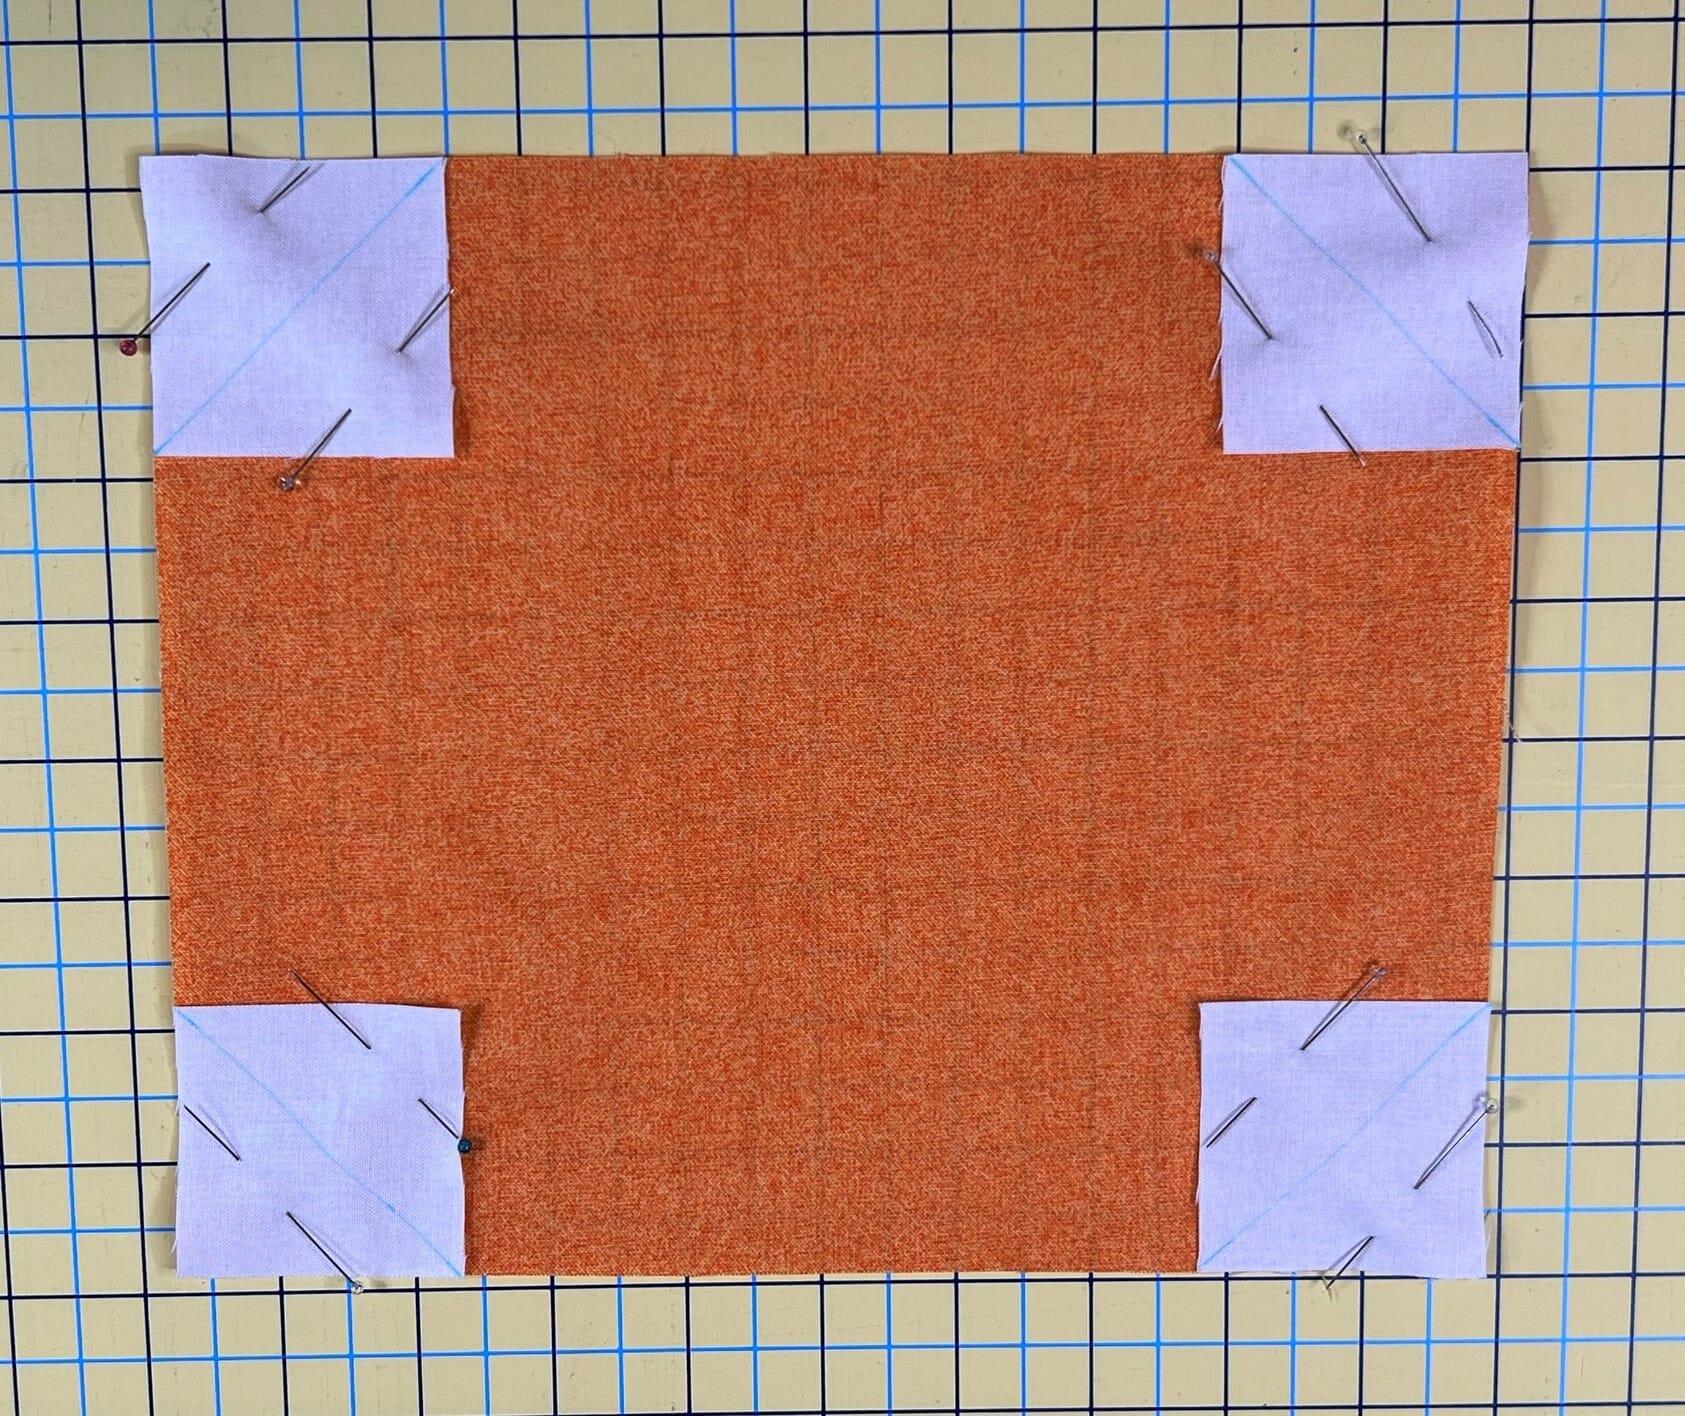
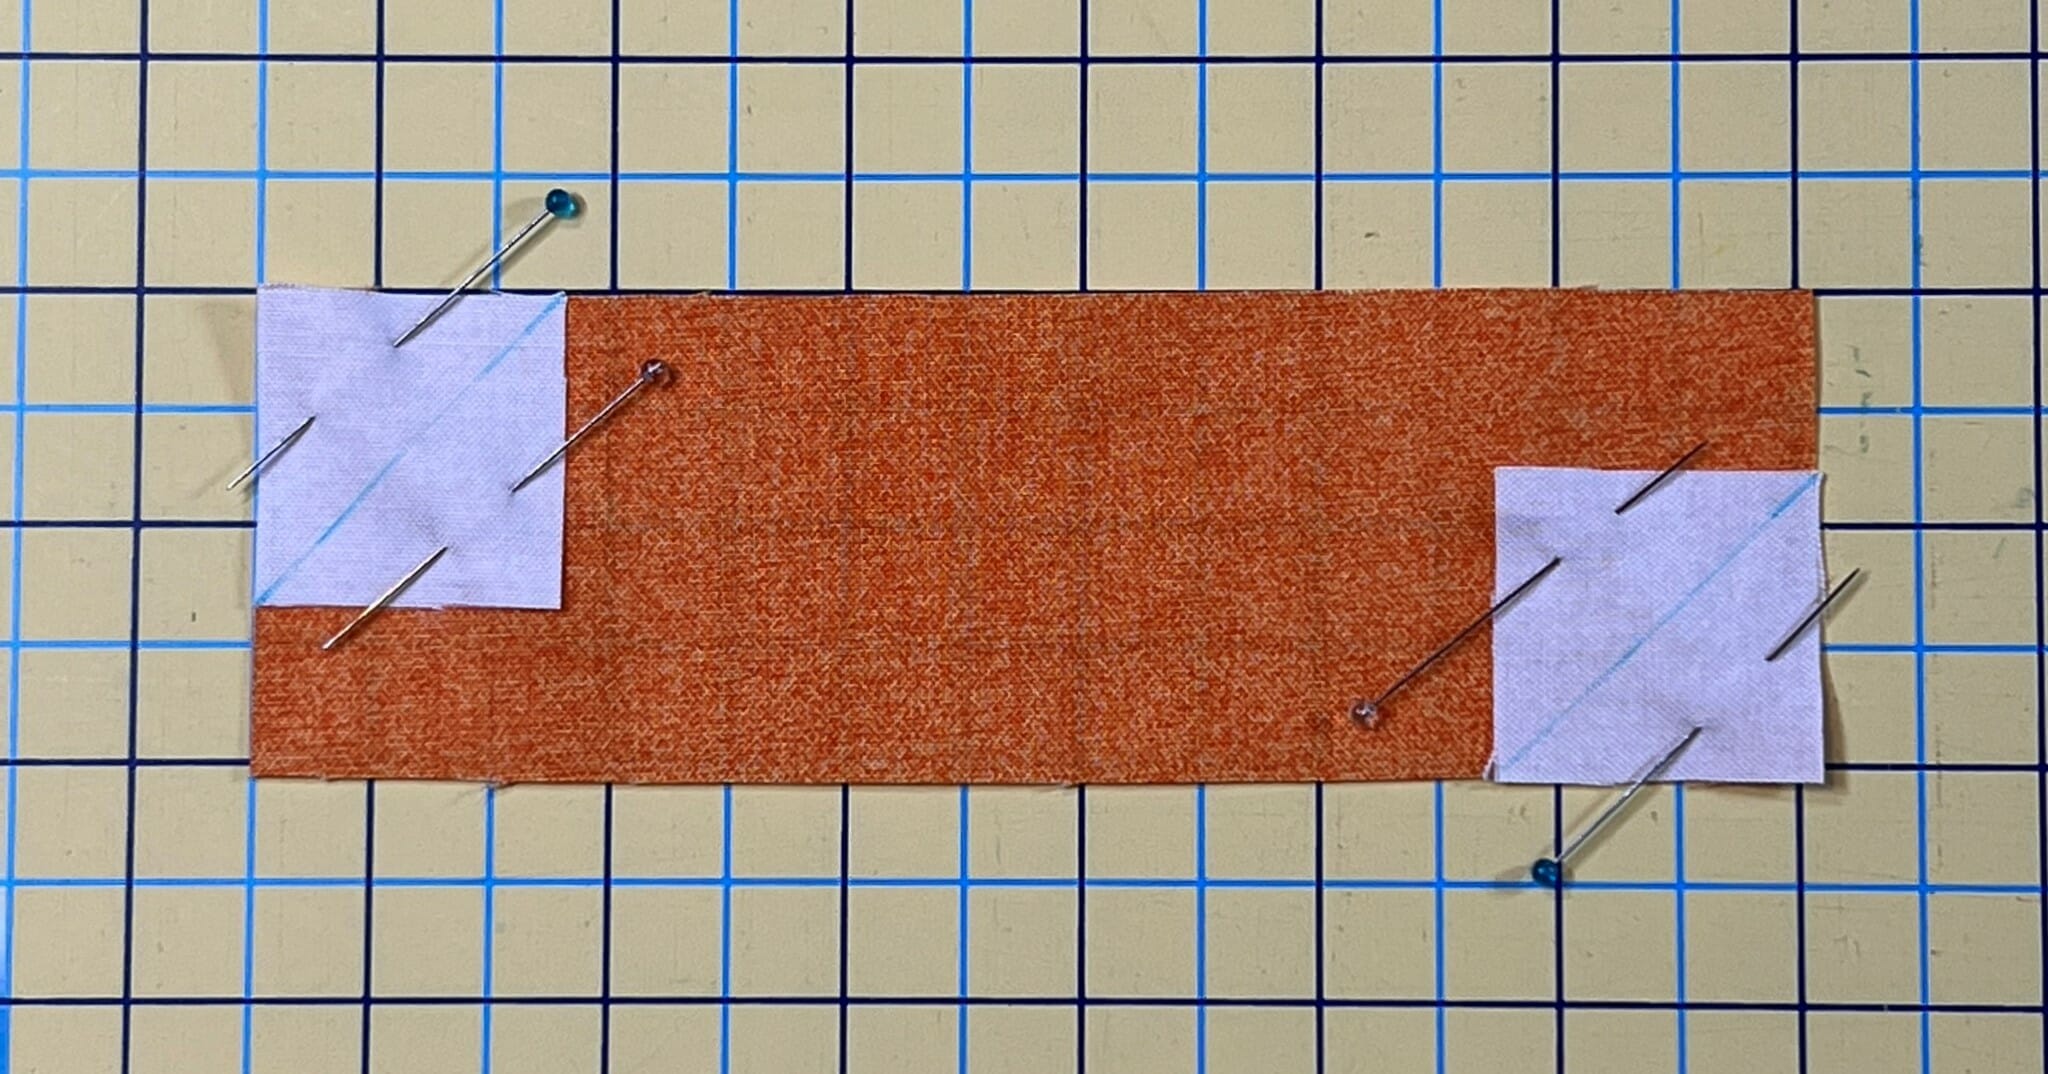
Below you can see that I’ve marked and pinned all of the corner squares for the pumpkin at the same time. This allows me to stay at the sewing machine and get everything sewn at once.
After all the corner squares are sewn, trimmed, and pressed, it’s time to make the stem and leaf unit. Step 2 uses the same sewing technique as step one, by stitching on the marked lines, then trimming and pressing. Below you can see that I’ve sewn and trimmed off the excess for the H square on the Leaf unit.
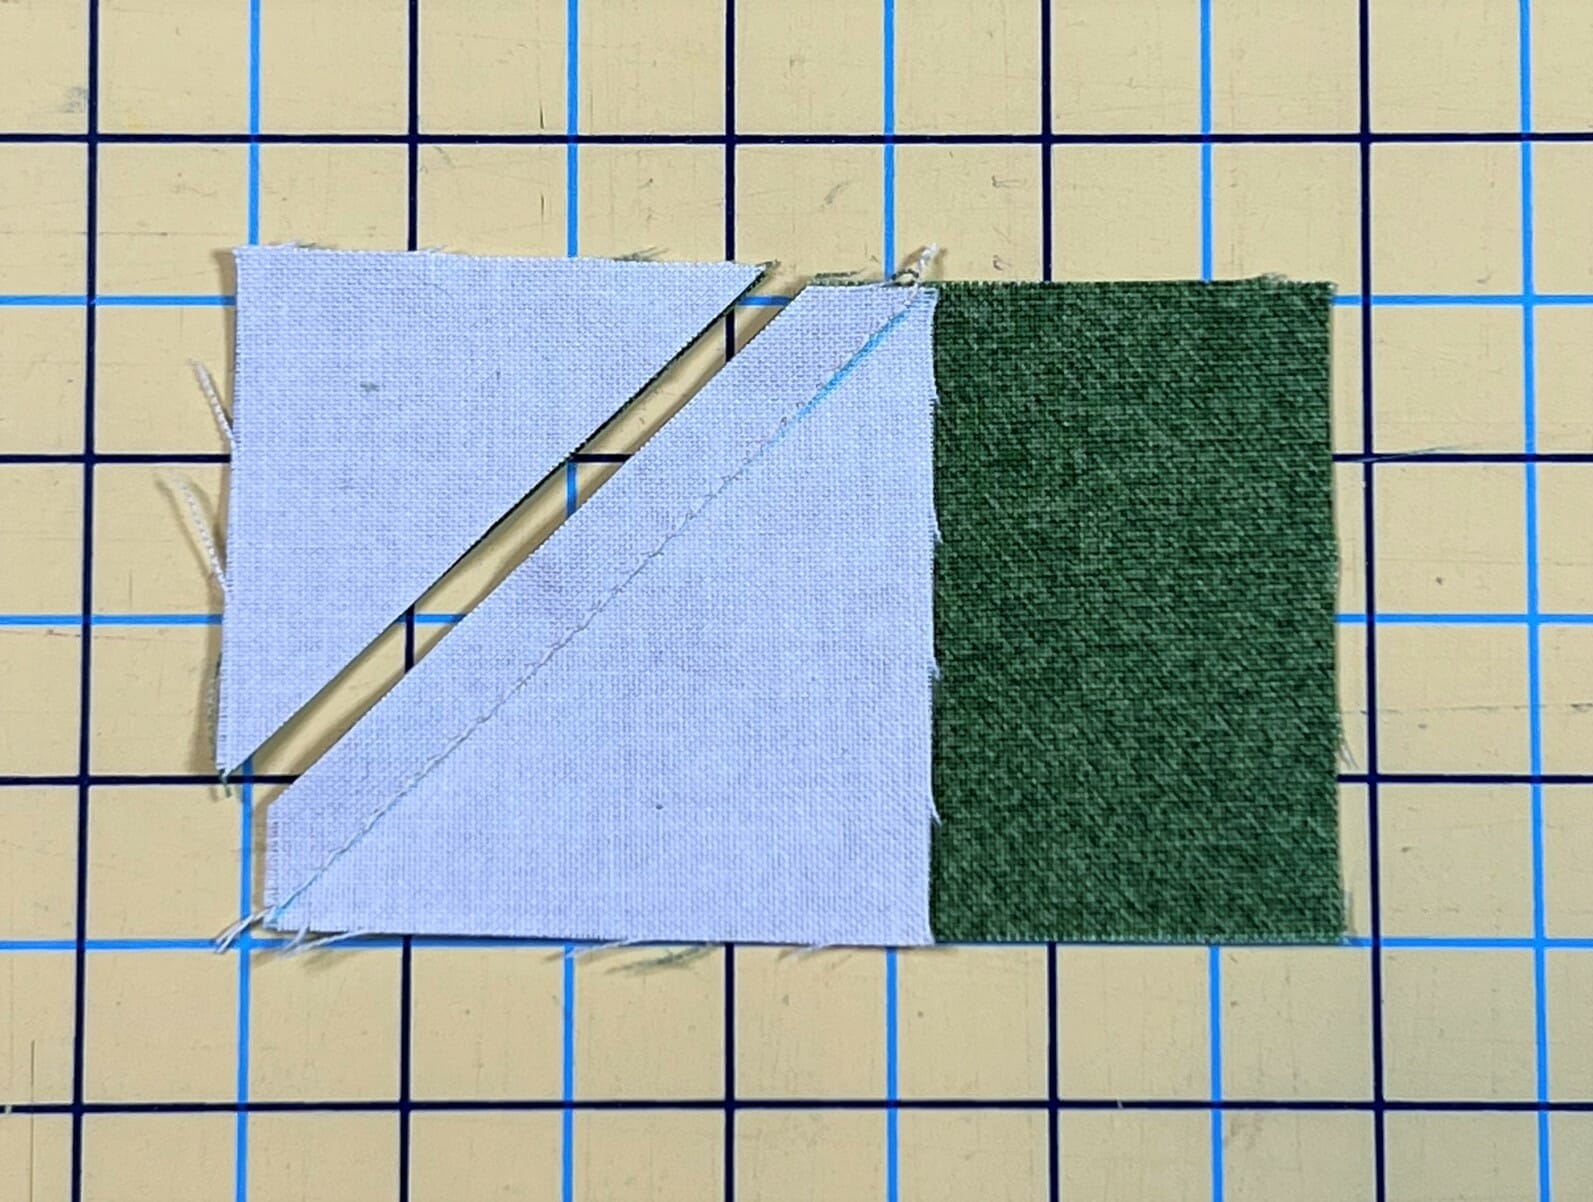
After the H squares are sewn, trimmed, and pressed onto each C rectangle, it’s time to repeat this process by attaching the I squares to the lower left of each Leaf unit. Remember to sew on or just BARELY outside the marked lines.
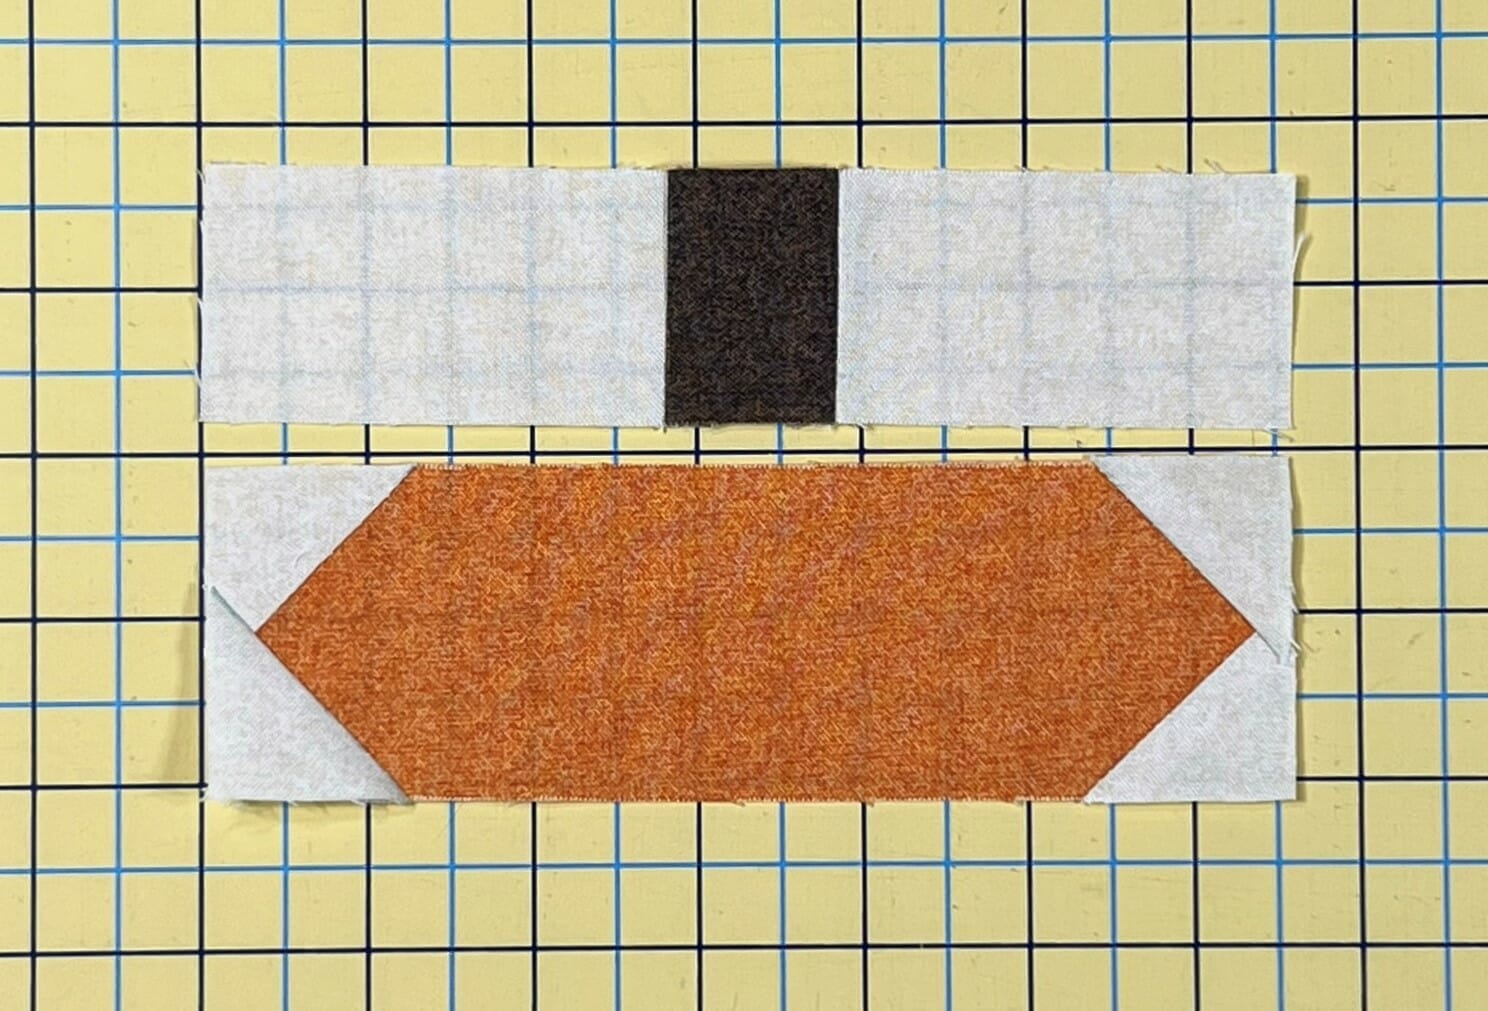
In step 3 we’ll complete the leaf and stem unit by sewing the pieces together as directed in the instructions. Make sure it measures 2″ x 9-1/2” so that it will match up with the pumpkin base.
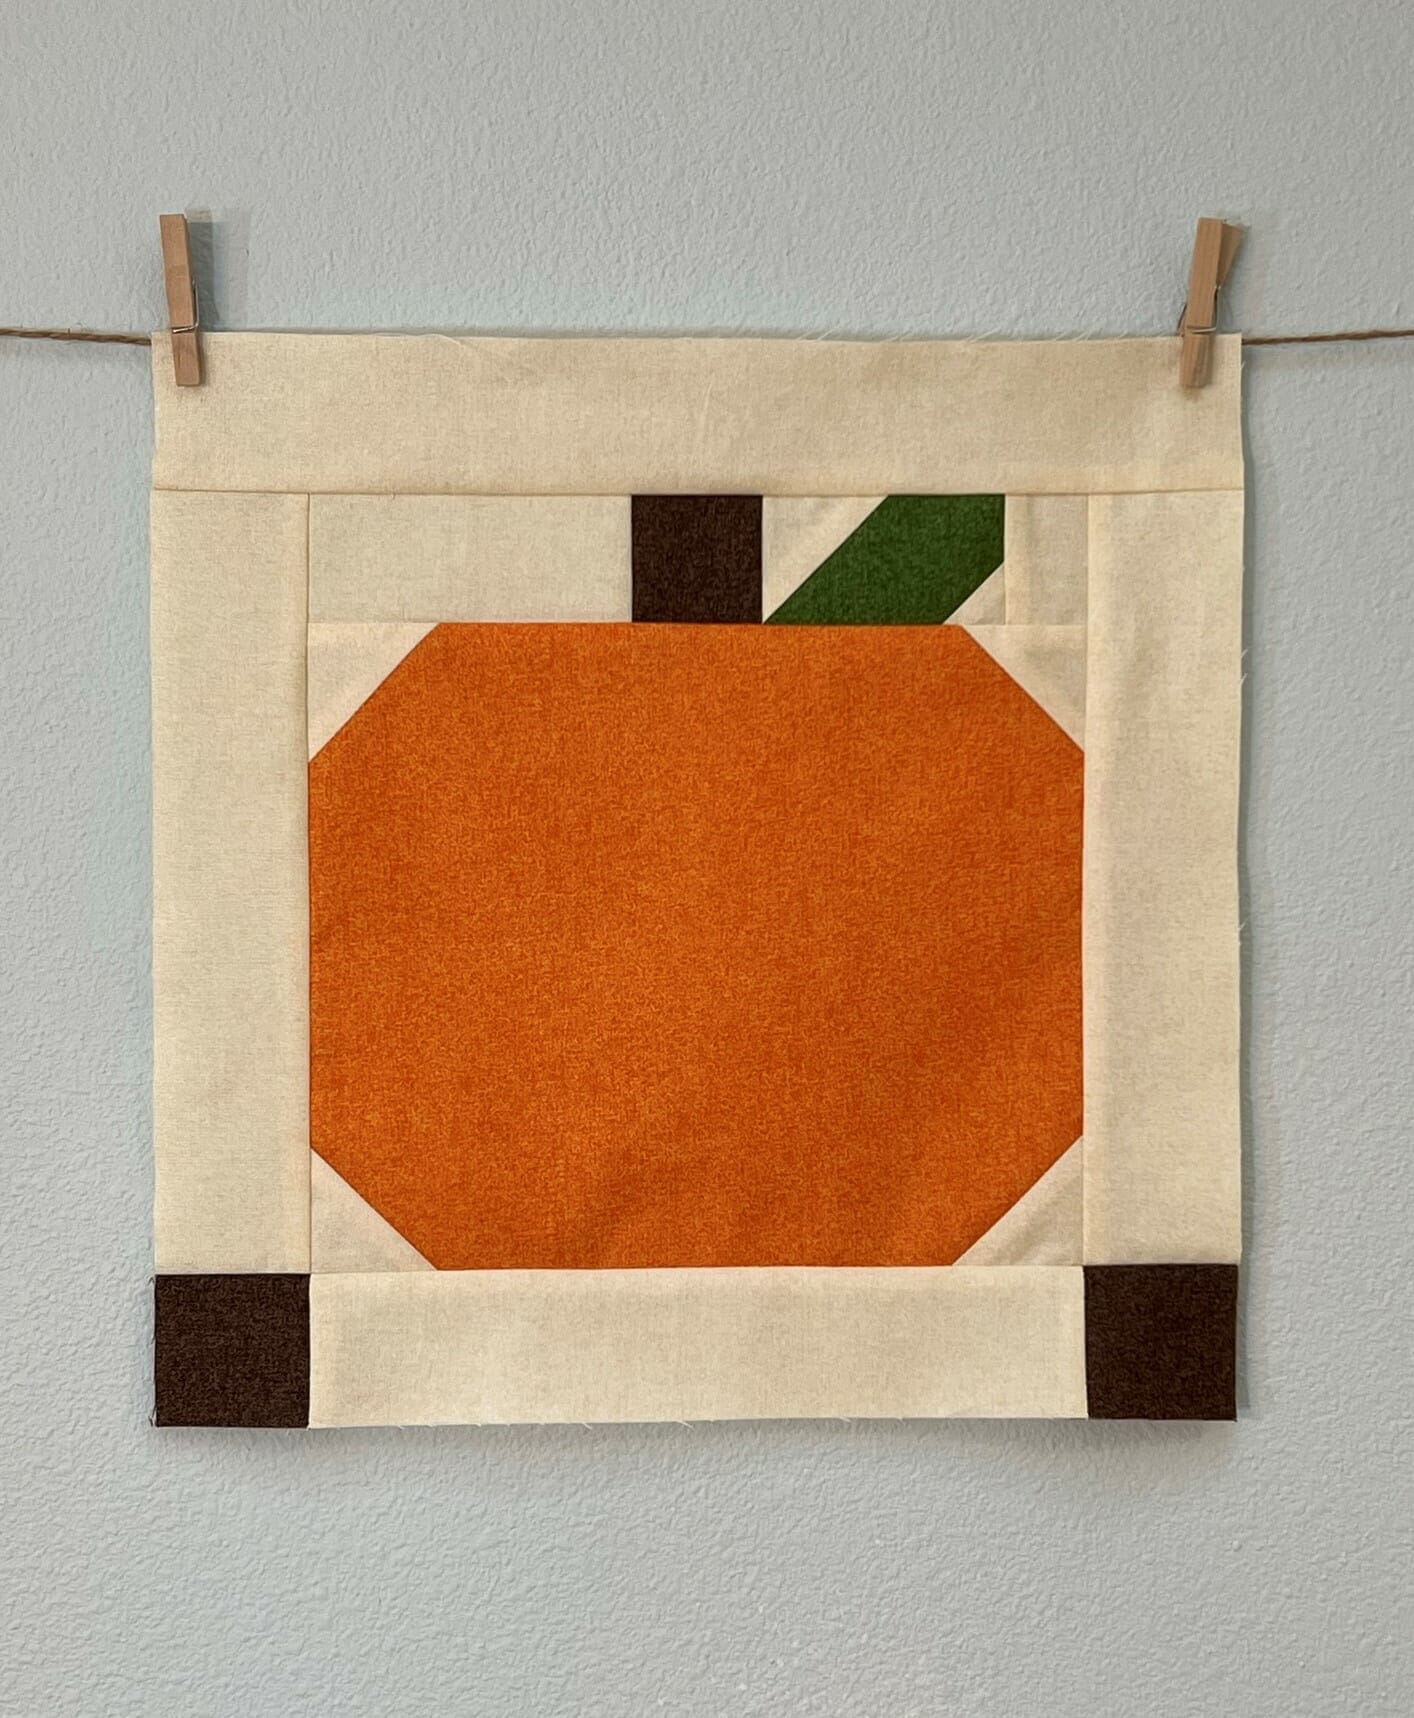
Now sew the leaf/stem unit to the top of the pumpkin. Remember that the pumpkin unit from step 1 is wider than it is long. If your pumpkin base doesn’t match up with the leaf/stem unit, it could be that you have your pumpkin oriented the wrong way. Once you’ve sewn the two together, the pumpkin block should now measure 9-1/2” square.

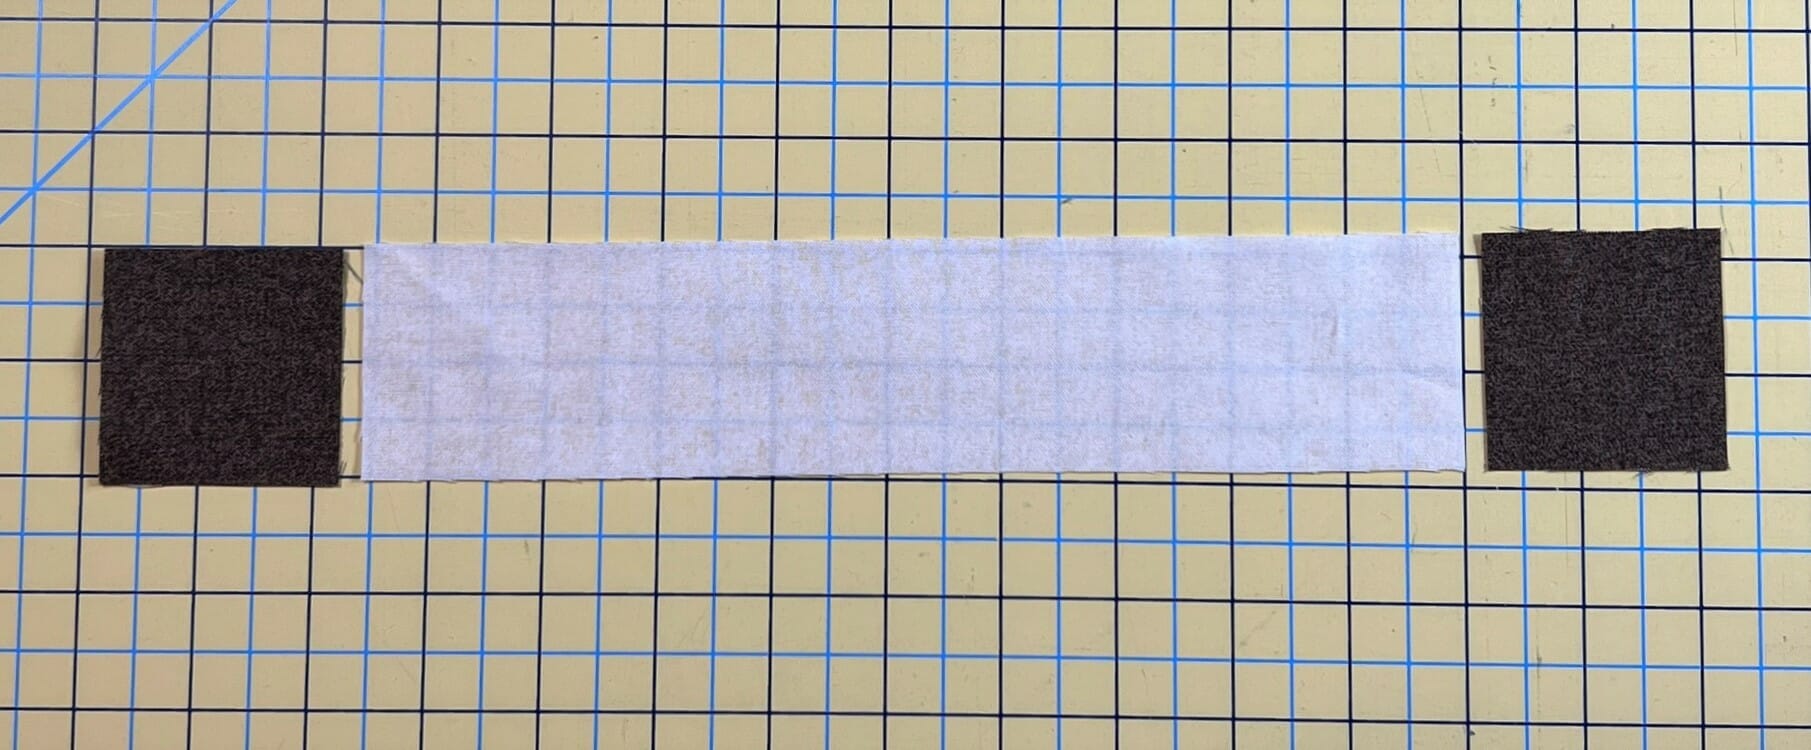
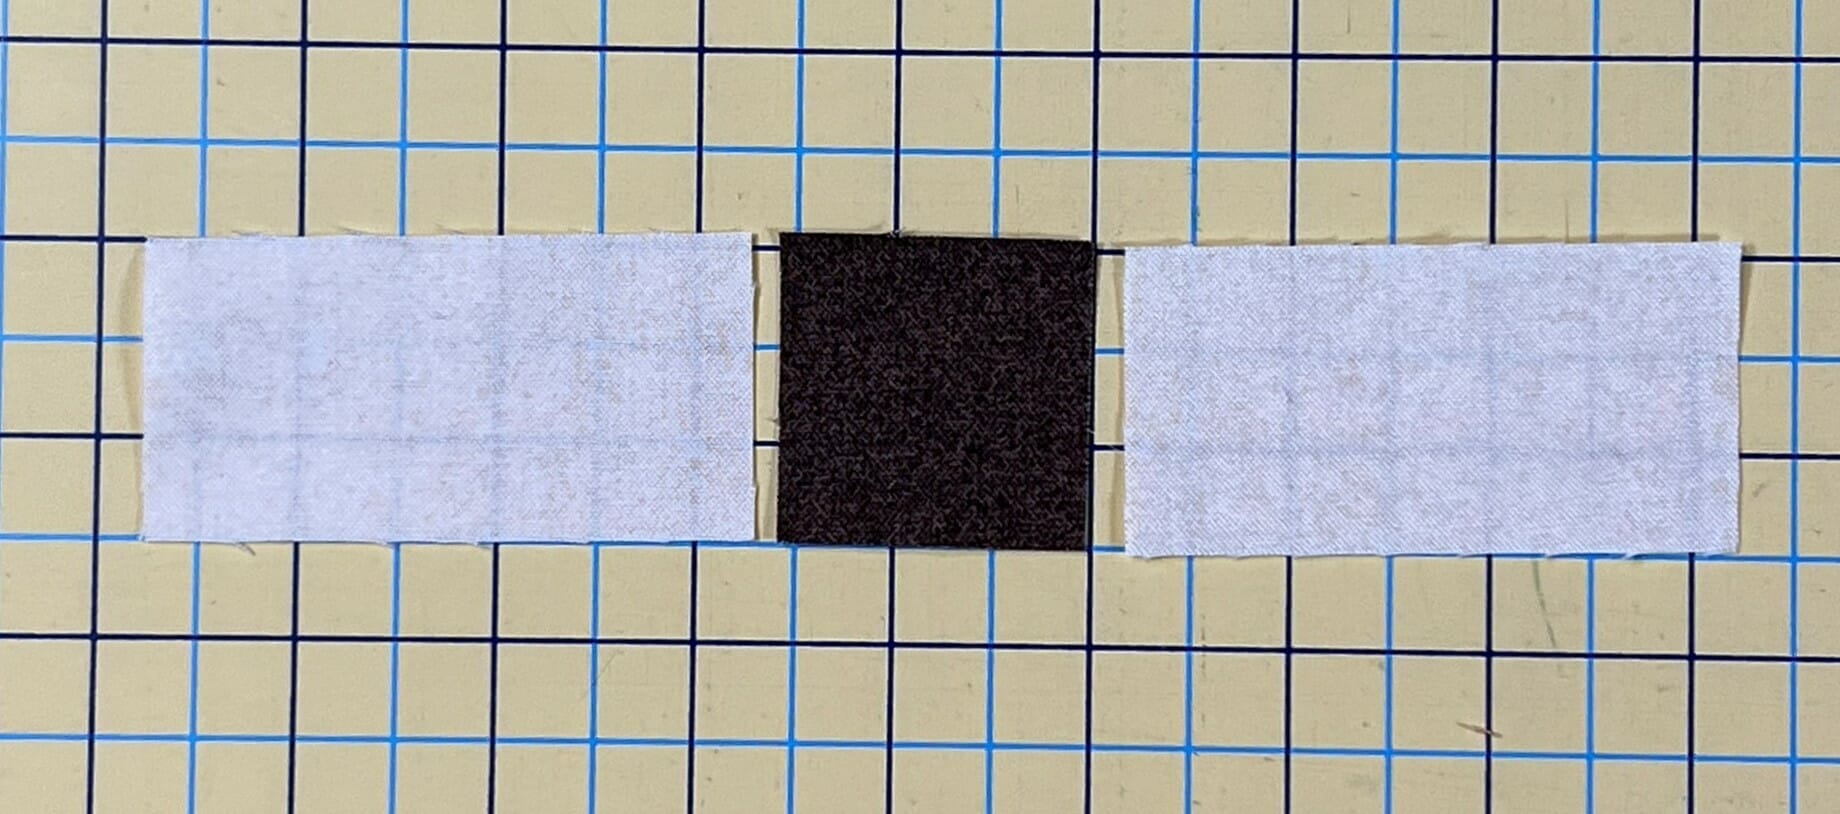
Next we are going to add some border strips to the pumpkin unit, and we’ll begin by sewing the bottom border strip in step 5. You’ll simply sew two B squares to each end of a D strip.
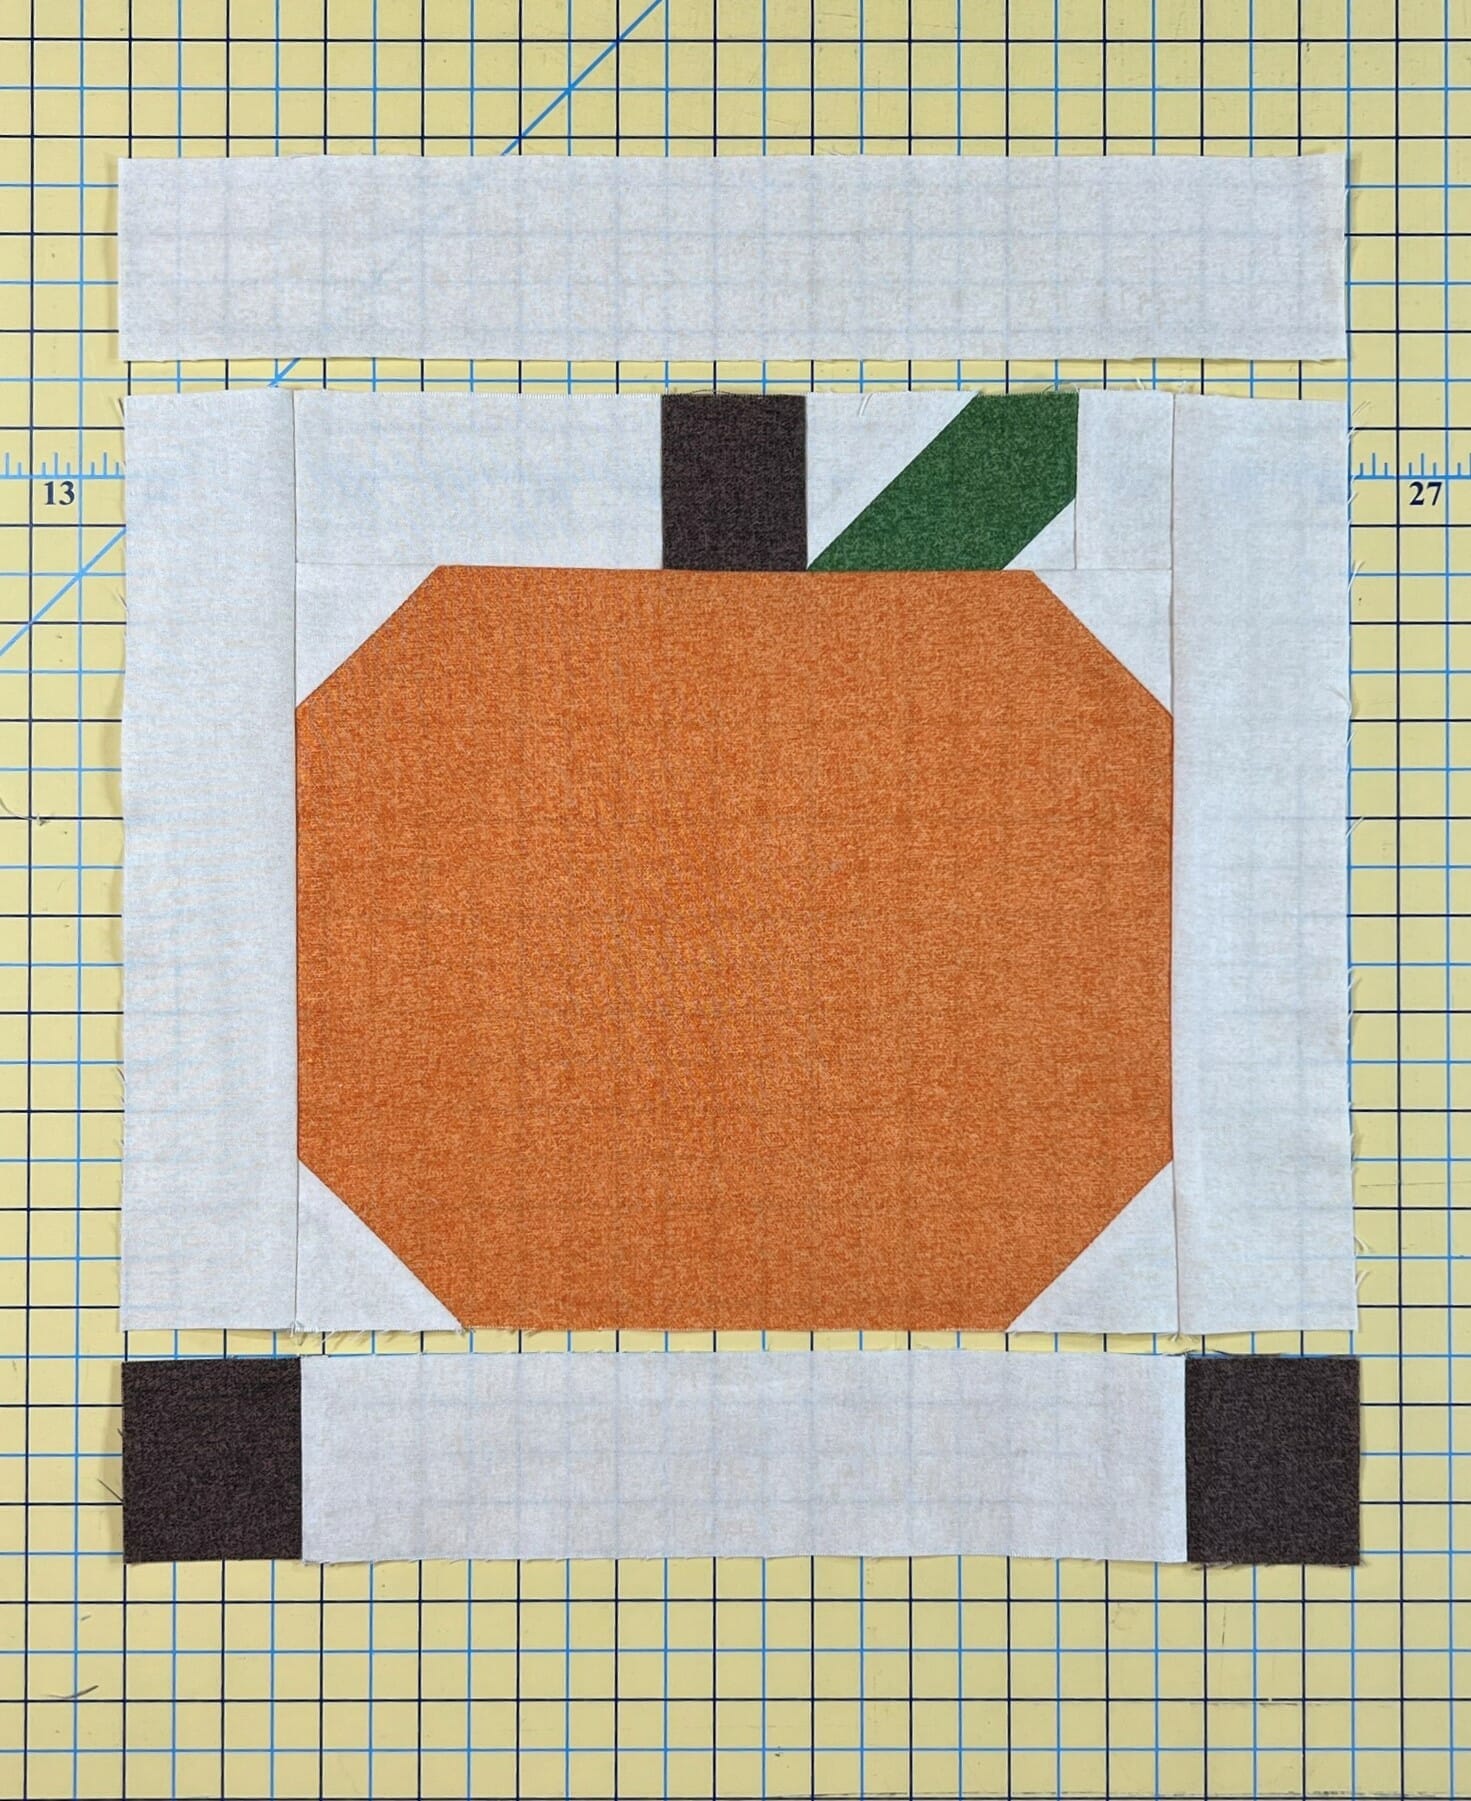
Once that’s ready to go, you can go ahead and sew the remaining D strips to the sides of each pumpkin. You’ll finish it off by sewing the B/D unit from step 5 to the bottom, and then attach the E strip to the top. I know it seems strange to have those brown B squares at the bottom of each block, but I promise it will all come together next month when we sew a few more blocks and get the center portion of the quilt sewn. If all has gone according to plan, your completed blocks should measure 12-1/2” square now.

Acorn Blocks:

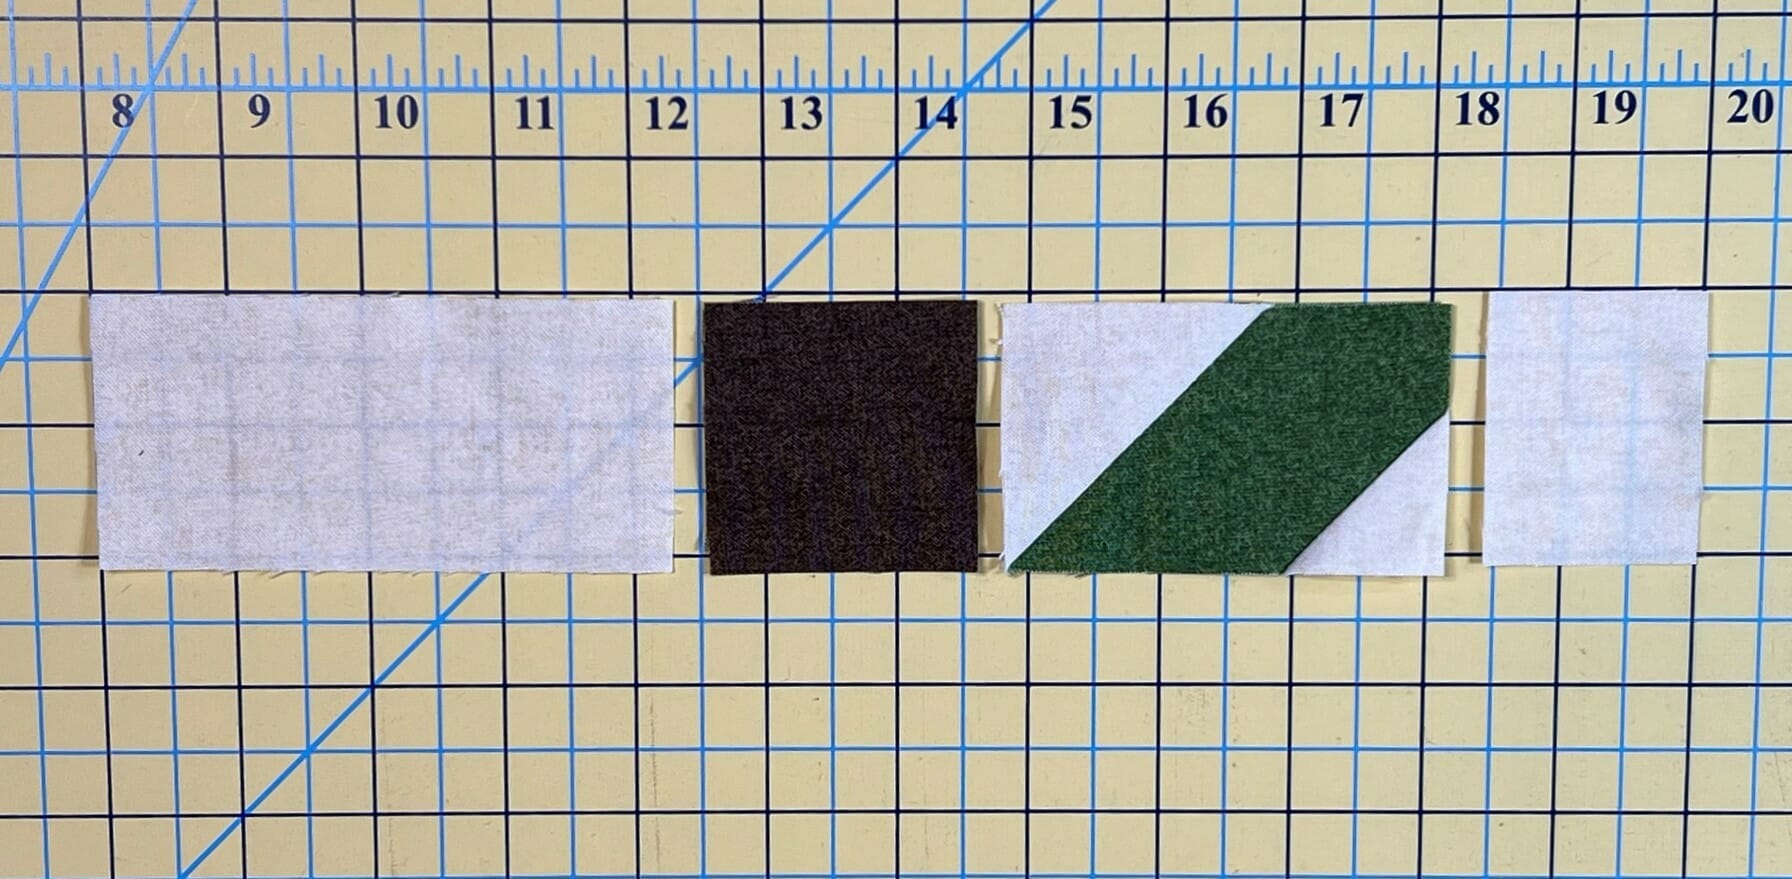
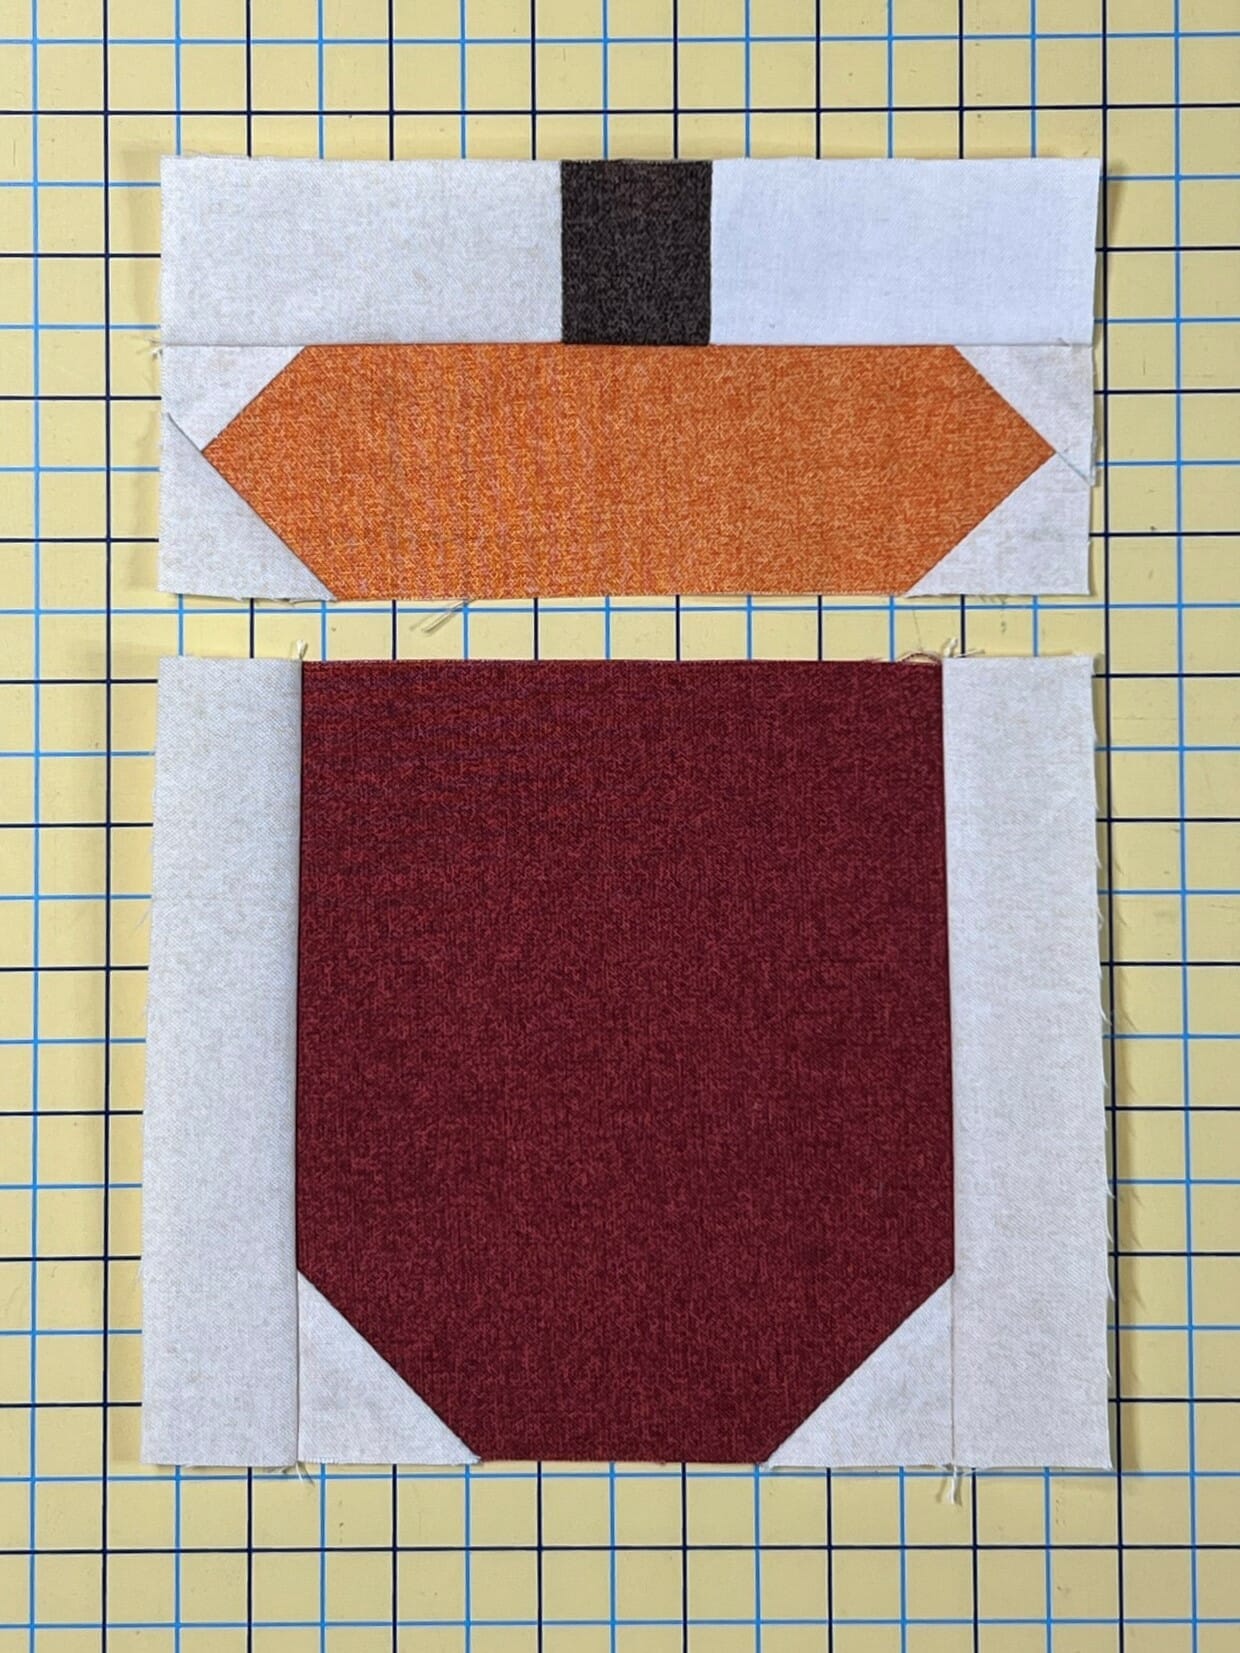
These little Acorn blocks use the same sewing techniques as the pumpkin block. We’ll start in reverse order this time though, and make the stem unit first. This part is pretty straightforward, but here’s a photo below of the pieces that will get sewn together to make this unit:
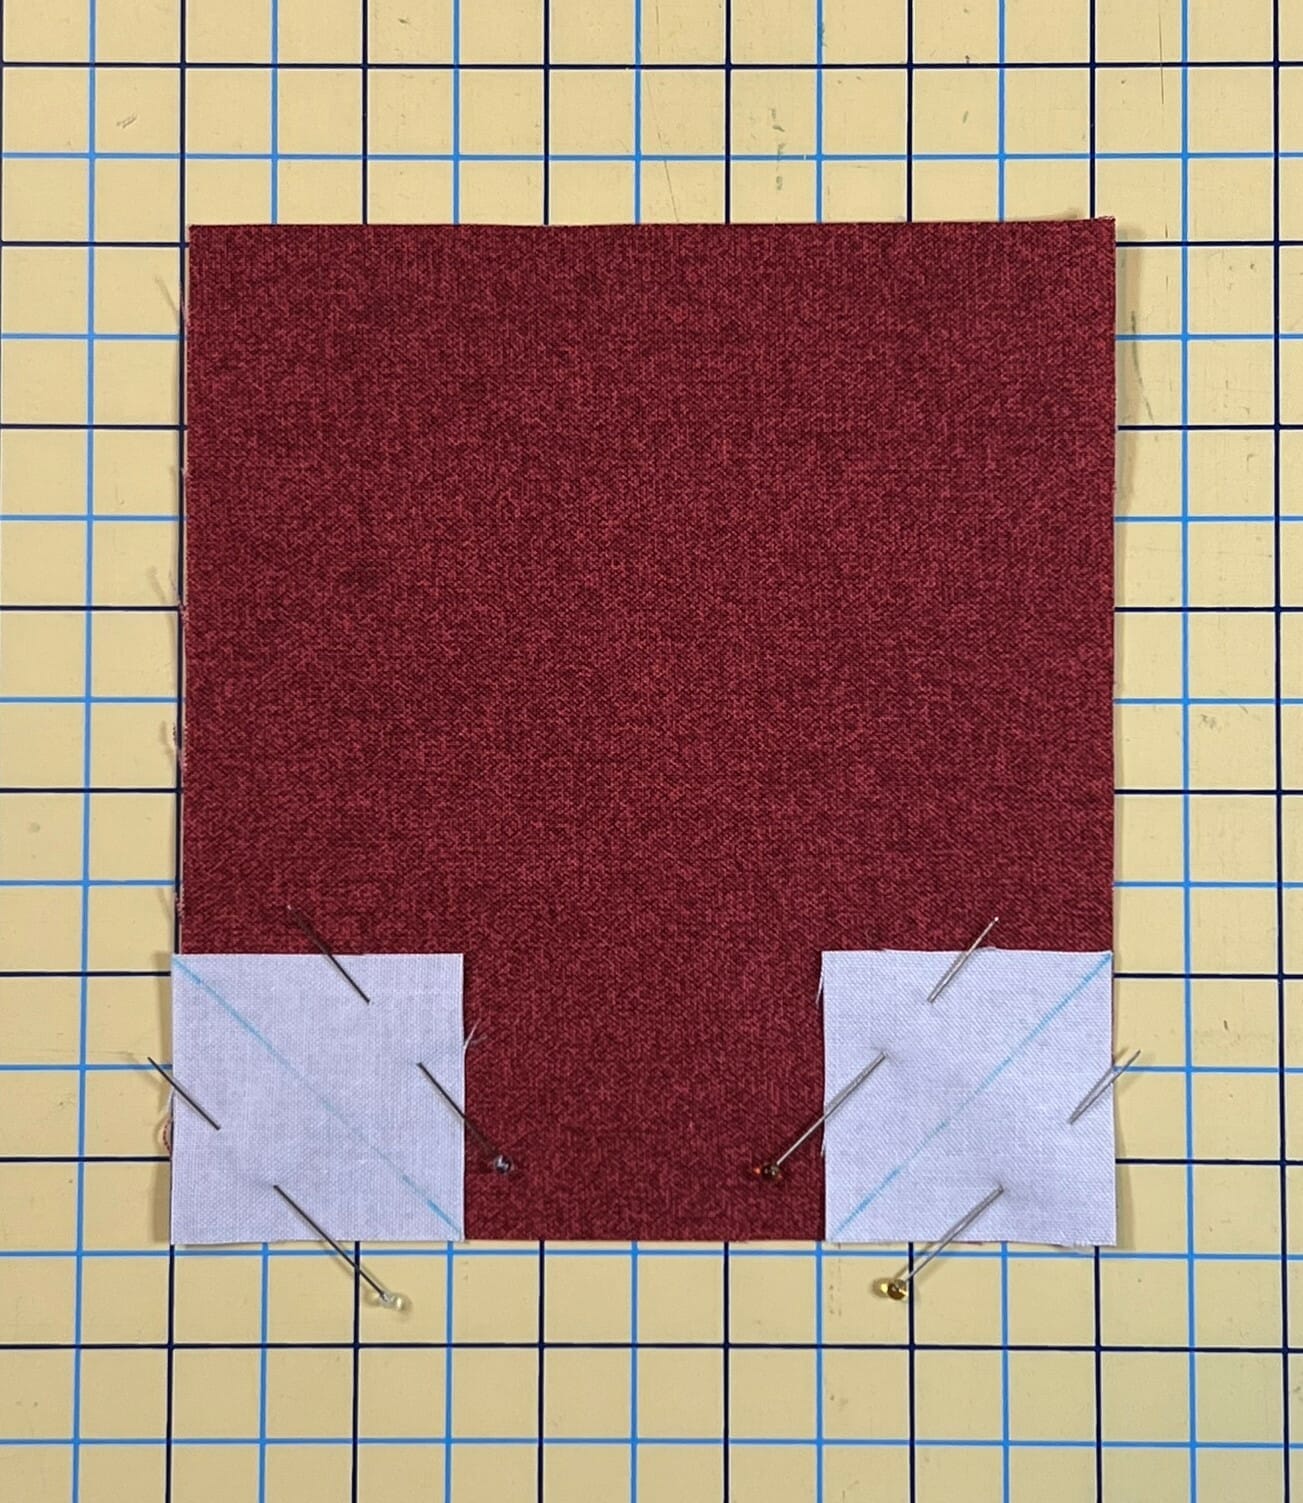
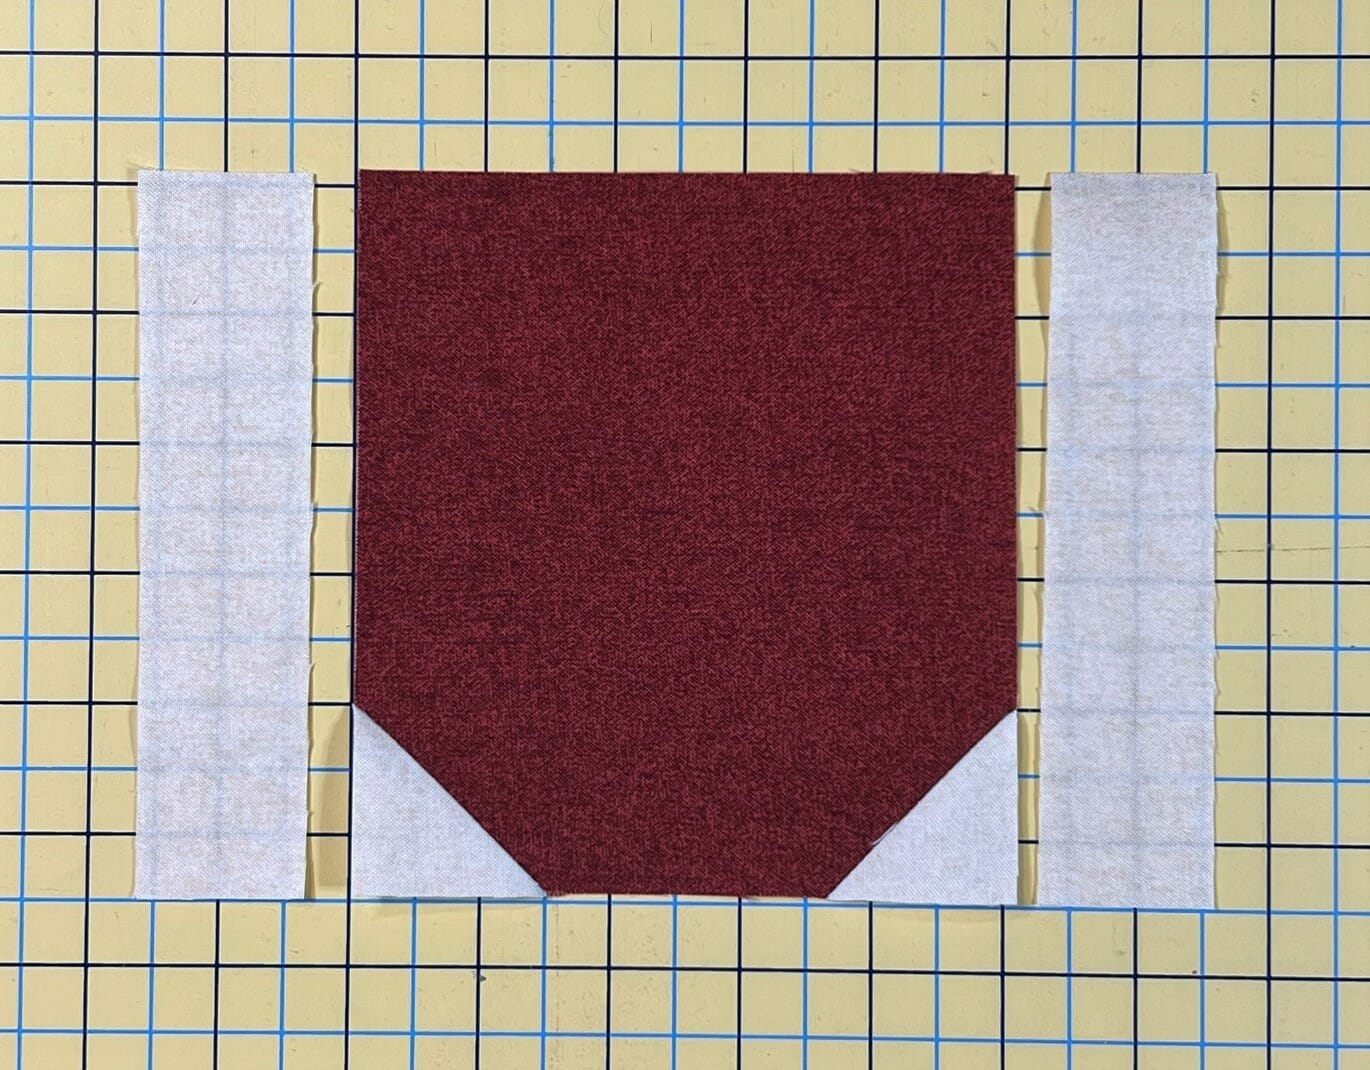
Now it’s time to place the E squares in the outer corners and stitch on the diagonally marked lines just like we did with the pumpkin. I like to pin and sew the squares on two at a time, trimming as I go.

Once that’s finished up, we can attach the stem unit to the top.
The base unit of the Acorn block is more of the same.
HOWEVER, I just noticed a small error in step 4. The written directions are correct, but I made a goof on the diagram! YIKES! The diagram says “cut on the marked lines.” That is INCORRECT! It should say SEW on the marked lines. Please DO NOT cut on the marked lines, especially after you’ve just sewn on them. That would make no sense! I’m so sorry I didn’t catch that in the testing or editing process. As hard as I try to make sure my patterns are error free, I’m human, and occasionally one slips through. So these little F squares a the bottom of the B rectangle will get sewn and trimmed to a 1/4″ seam allowance just like everything else you’ve done so far.
Okay, now that we have that out of the way, lets, get this acorn block finished up. After finishing step 4, you’ll sew the G strips to the sides of each block. Once that’s all done, you can attach the Acorn top unit, and you’re done!
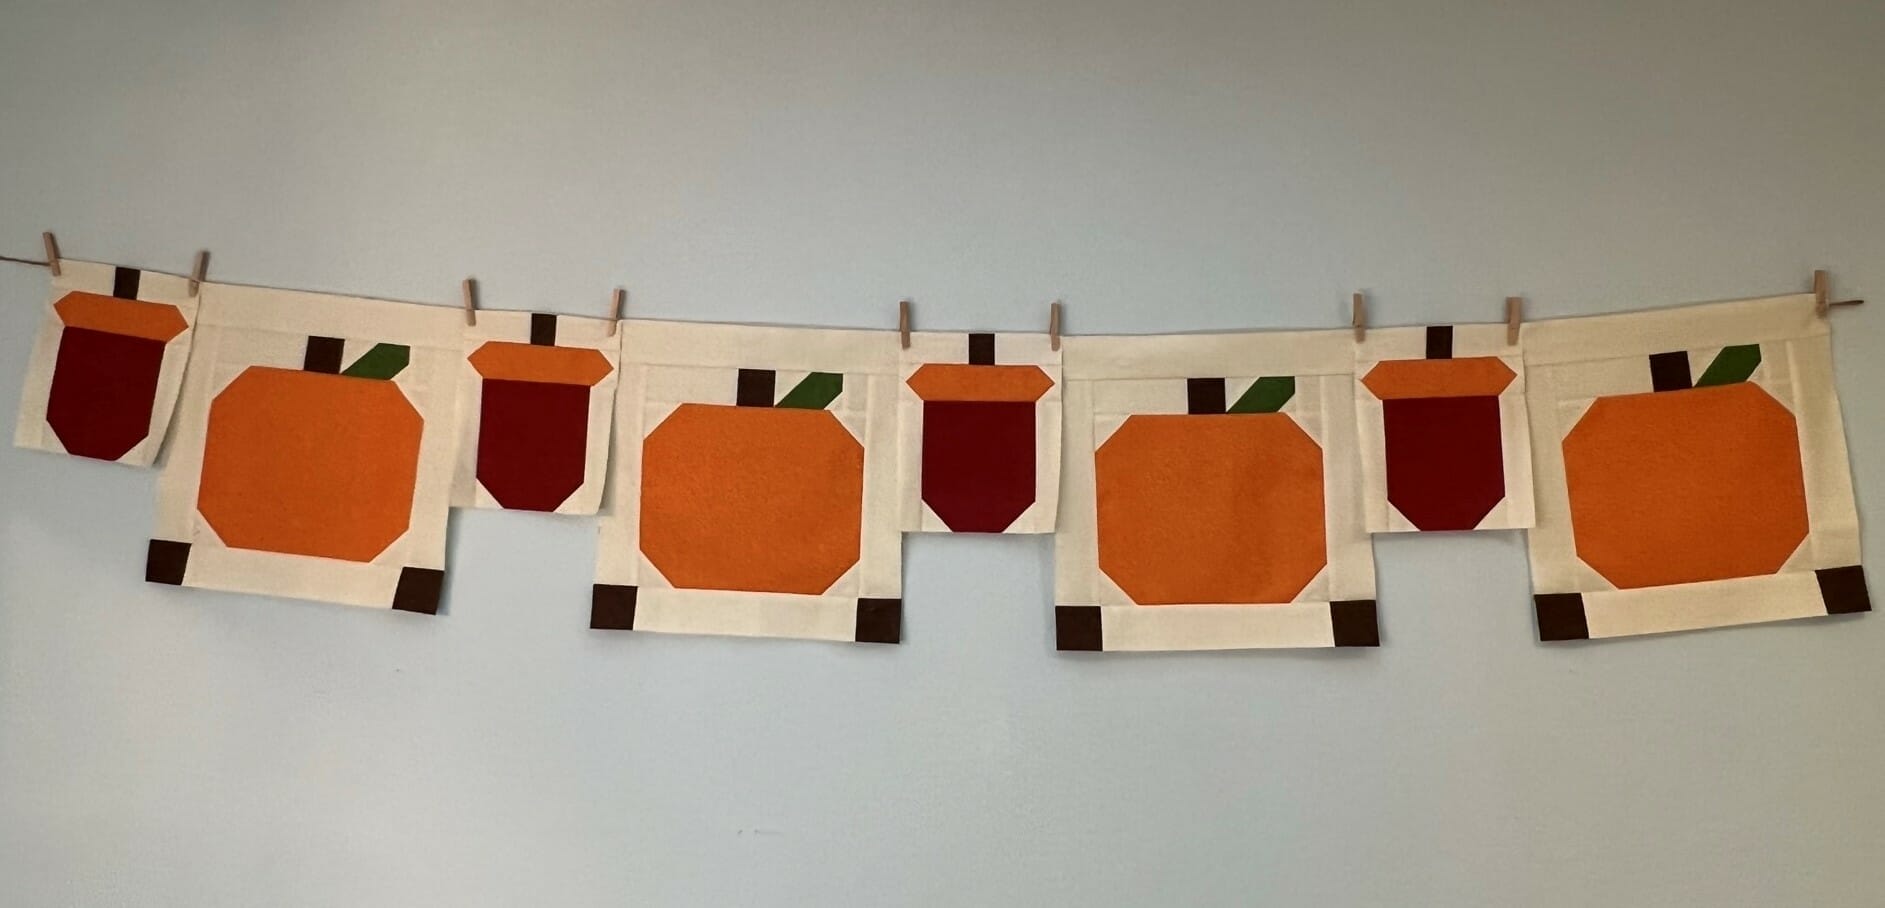
We won’t be using the Acorn blocks for quite a while, but I thought it would be nice to get a head start on some of the blocks we’ll need down the road. I couldn’t resist hanging all the finished blocks on my little quilt clothesline. Don’t they look cute?
That’s all for this month! I hope you’ve enjoyed making these blocks, and I hope you will find these blog posts helpful. Please leave a comment or send me an email if you have any questions.
Until next time, Happy Quilting!
-Kristin

