


 Tutorials
 10.30.2023
NOTE: these blog posts for the Aurora quilt top are part of a limited series for our Block of the Month subscription program. Sign-ups for the Aurora BOM are no longer available. You can learn more about our upcoming Block of the Month subscriptions here.
Hello Friends!
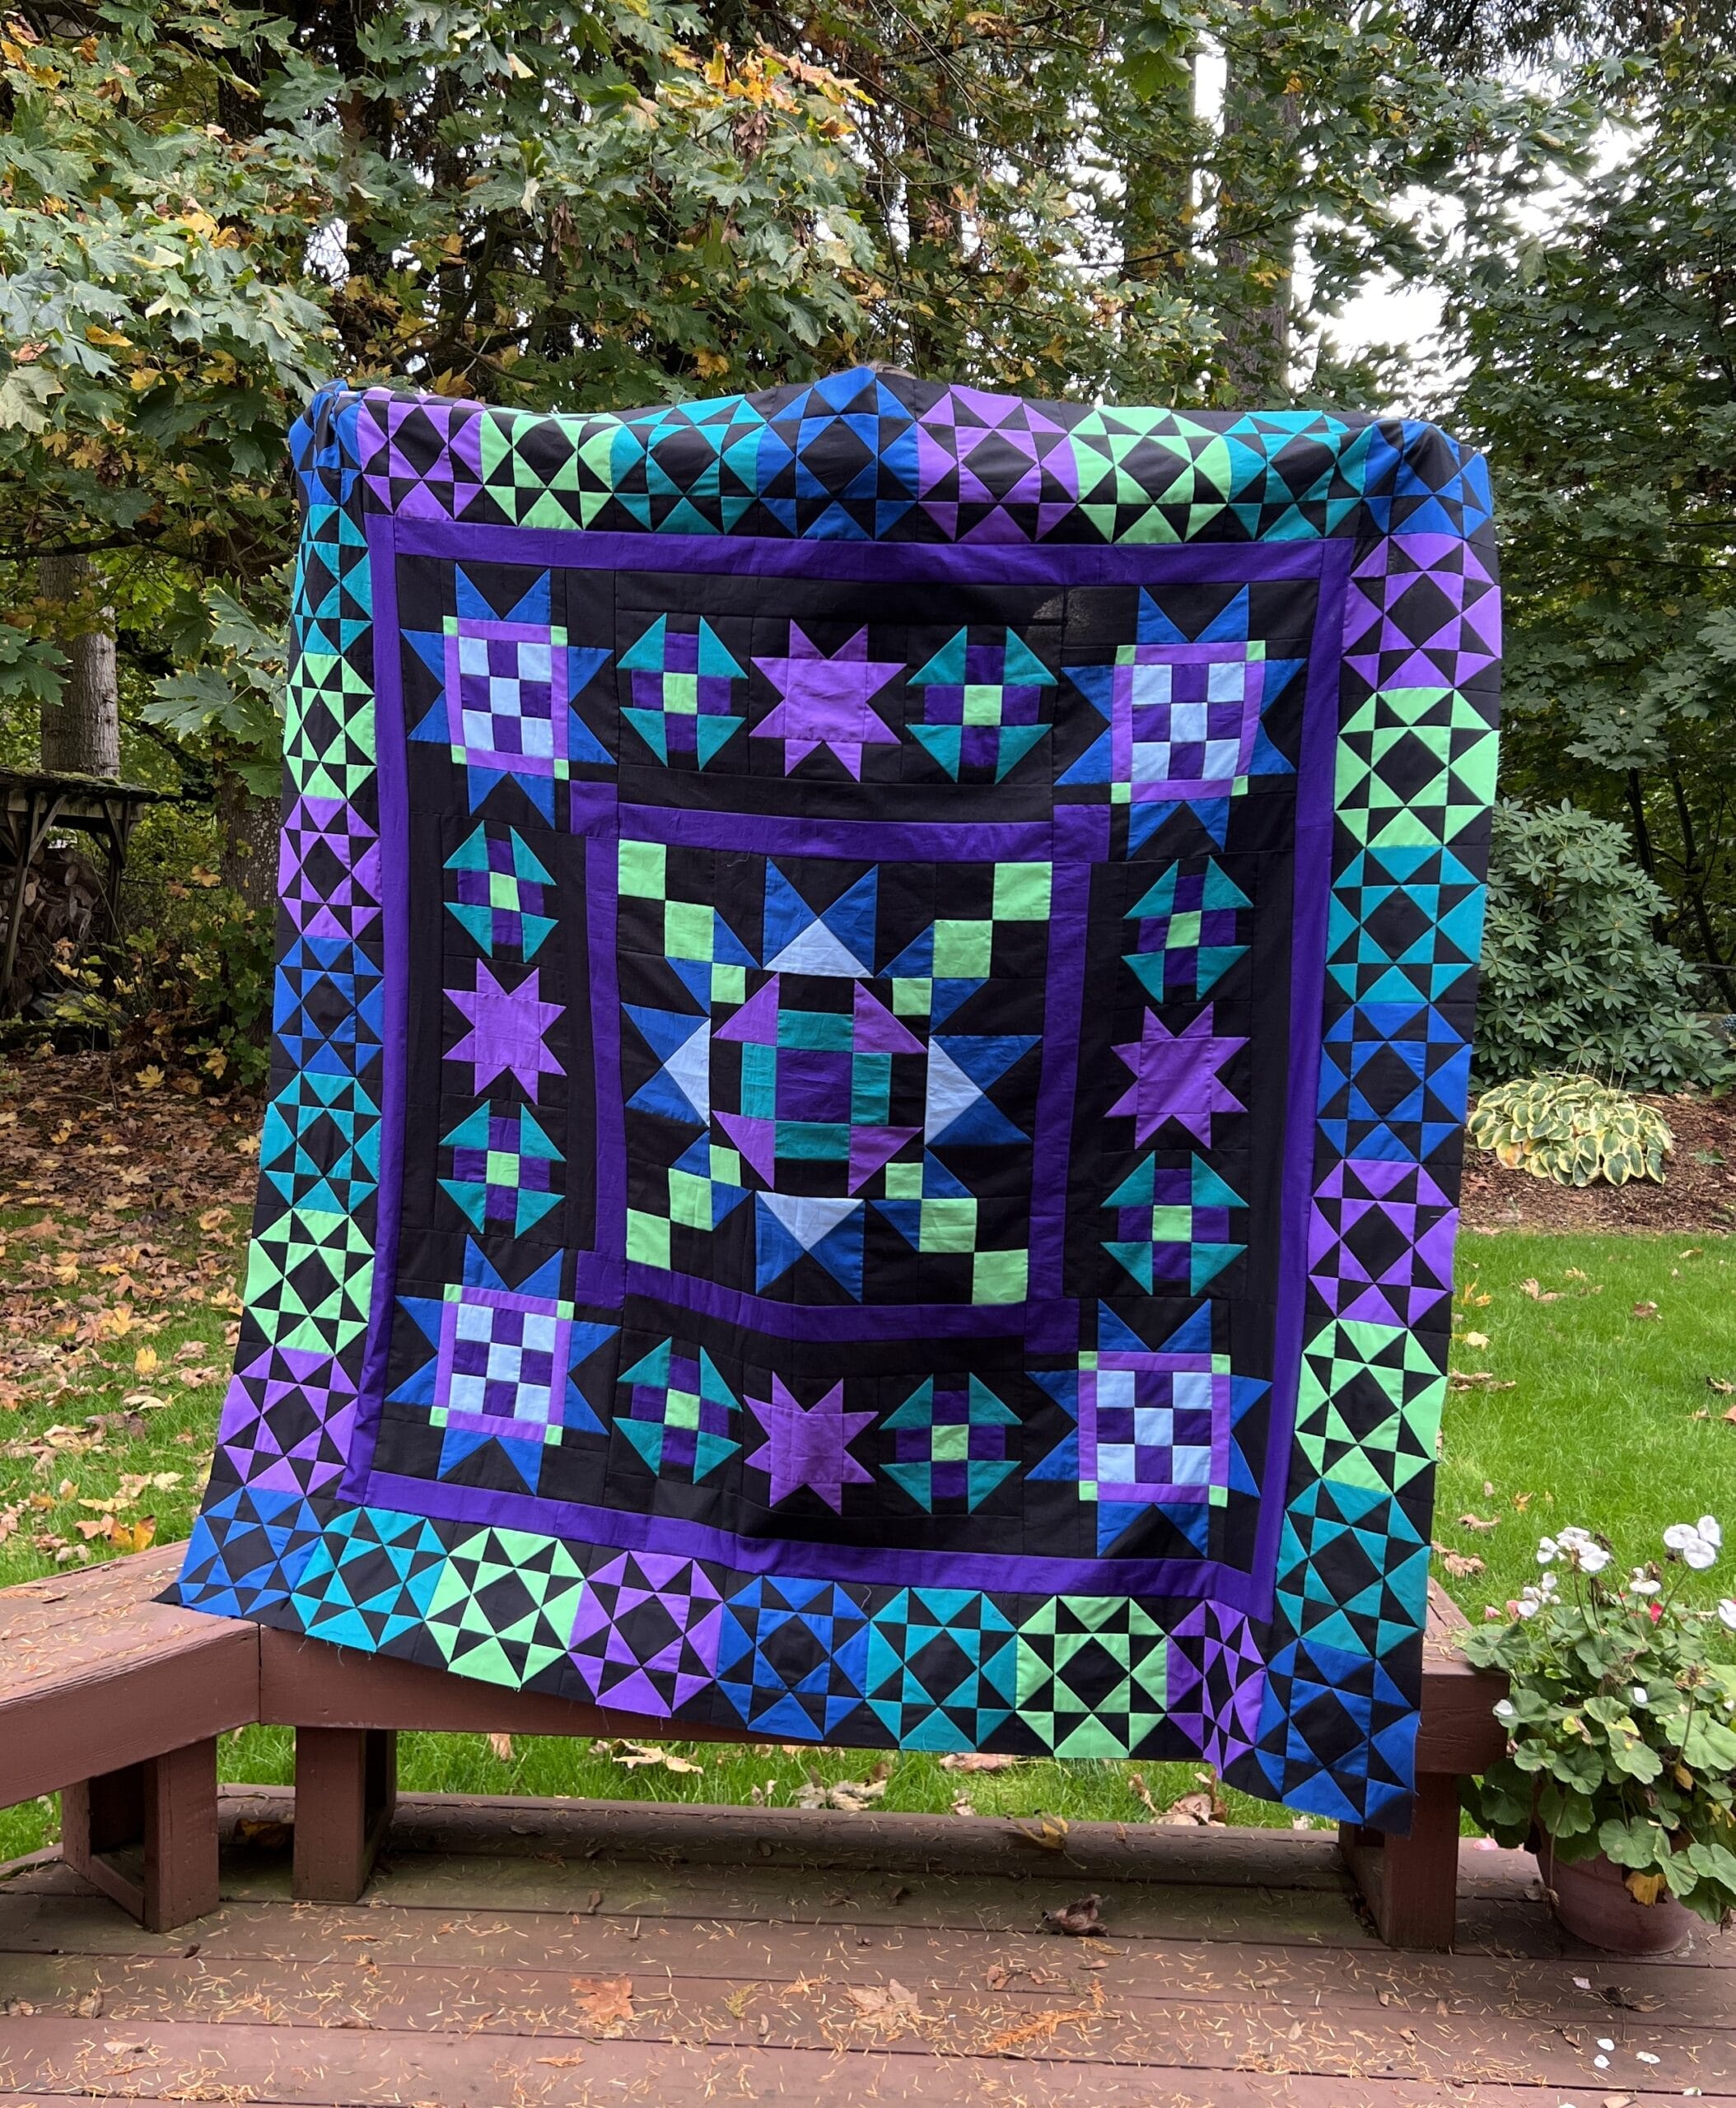
Things are winding down, and we are finally making the last of our Star blocks this month. We will make the purple Amethyst ones this time. I don’t know about all of you, but it feels good to get these wrapped up and have all our hard work come to fruition.
Since you are all experts at putting these star blocks together, I won’t take any more time on this blog by re-hashing their construction. But here’s a little picture of all mine stacked together, as I’m getting ready to trim them. I always check each block and make sure it’s the correct size. I also like to trim off all the loose threads regardless.

Now that we’ve got all our star blocks finished, let’s talk about how we are going to sew these together:
If you’ve been following my pressing instructions on these, you should now be able to turn the blocks as needed and have the seams nest together between each block.
I started by sewing each Amethyst block to the left side of each Peapod block. It was easy to just rotate the Peapod block as needed in order to have the seams nest.

Once I had those pairs sewn together, I then added a Lagoon block to the right side of each unit. Also, in case any of you are wondering, I usually wait until the entire row is sewn together before pressing the seams. I don’t think it matters one way or the other, but that’s just what I do.

Next, I took two of those units and sewed an Admiral Blue block in the center, like you see here:

You should have four identical rows. The directions say to take two of these and sew them to the sides of the quilt center. I somehow skipped ahead and sewed on my Admiral Blue blocks on the ends of two of my rows before sewing on any of the rows to the quilt, as you can see in the photo below. It all works out in the end, right?
Regardless of what order you sew, you still need to pay close attention to the placement of the blocks, and rotate as needed. You want the Amethyst block at the top on the right side, and at the bottom on the left side.
Once you have the sides sewn, simply add an Admiral Blue block to each end of the remaining two Star borders, (unless you jumped ahead like me), and then sew these to the top and bottom. If sewn correctly, there should be a continuous pattern going around the perimeter of the quilt.

I know it’s been a lot of sewing this month, but it’s so nice to have all these blocks sewn to our quilt! It’s looking SOOOO pretty!
Next month we will work on the outer diamond borders and get this quilt completely finished. It’s going to be great!
Happy Quilting! – Kristin

