


 Tutorials
 6.5.2023
NOTE: these blog posts for the Aurora quilt top are part of a limited series for our Block of the Month subscription program. Sign-ups for the Aurora BOM are no longer available. You can learn more about our upcoming Block of the Month subscriptions here.
Happy June everyone!
I’m excited to share this month’s sewing with all of you. After a couple months of making blocks, we finally get to use them to add to our center medallion. But I’m getting a head of myself. We have a few more blocks to make first.
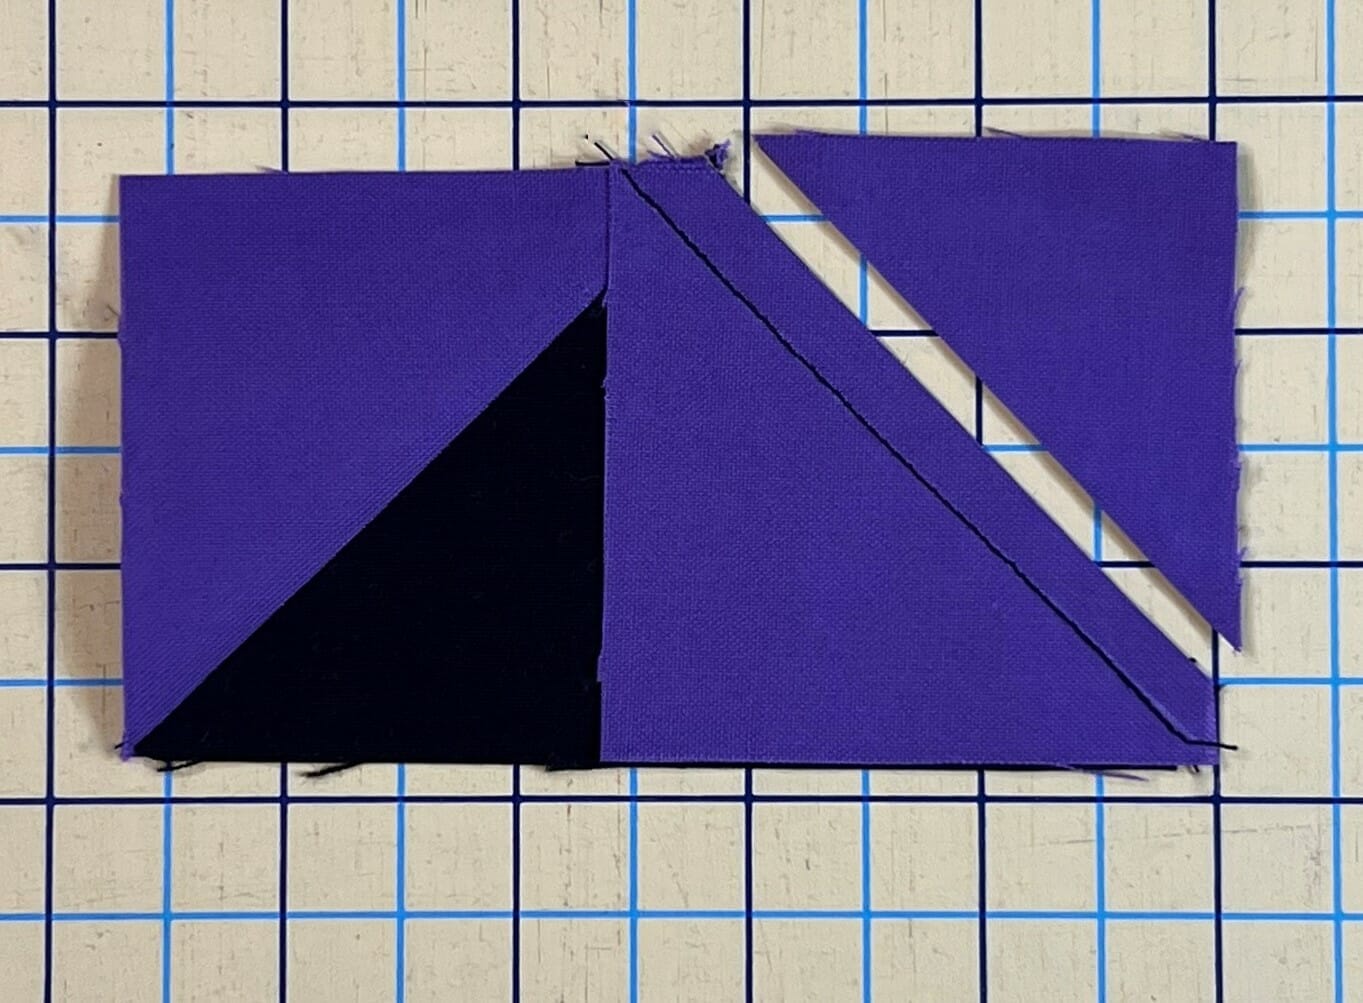
Let’s get these Sawtooth star blocks made! We’ll begin by making a bunch of flying geese. There are lots of methods to make these, so feel free to use what works best for you. I’ve used the stitch and flip method in this pattern.
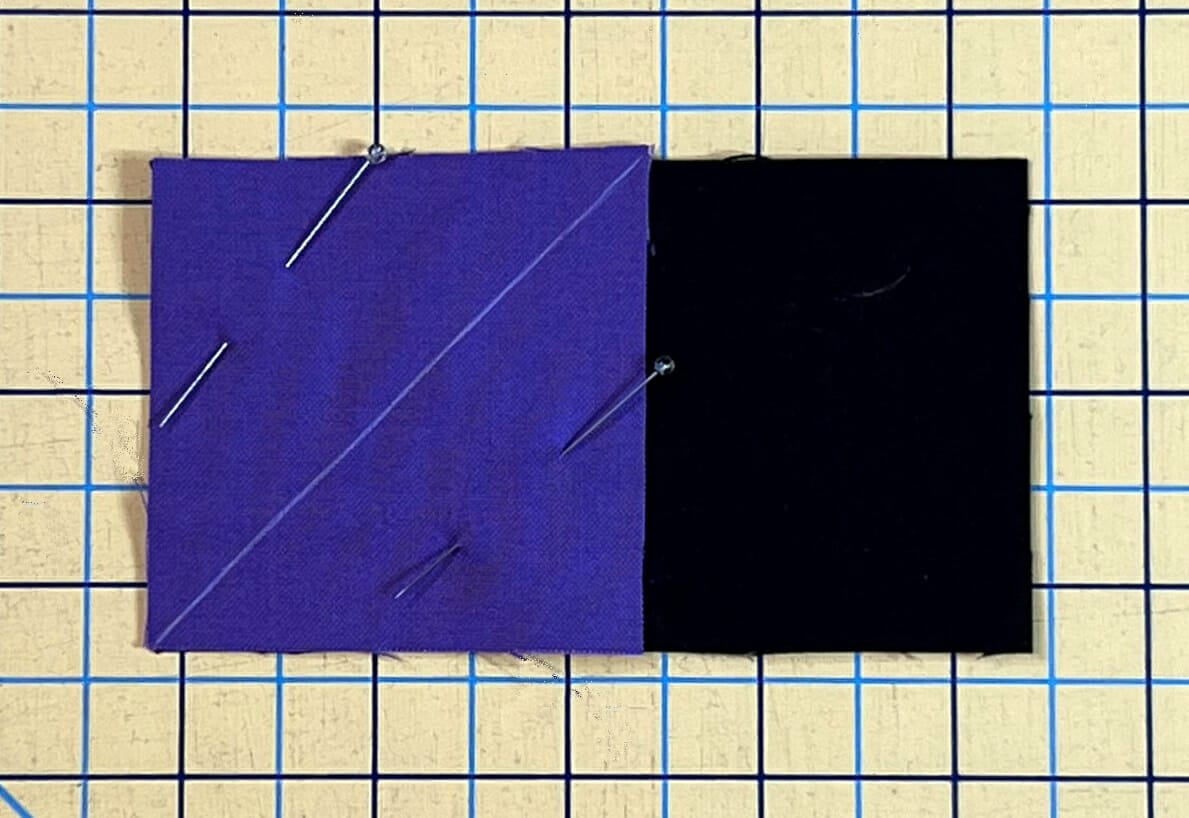
Because this method has some fabric waste involved, it means that there is plenty of yardage to allow for other methods of people’s choosing. In the coming months we’ll be making a lot more of these, so I’ll be covering some different methods as we go along.

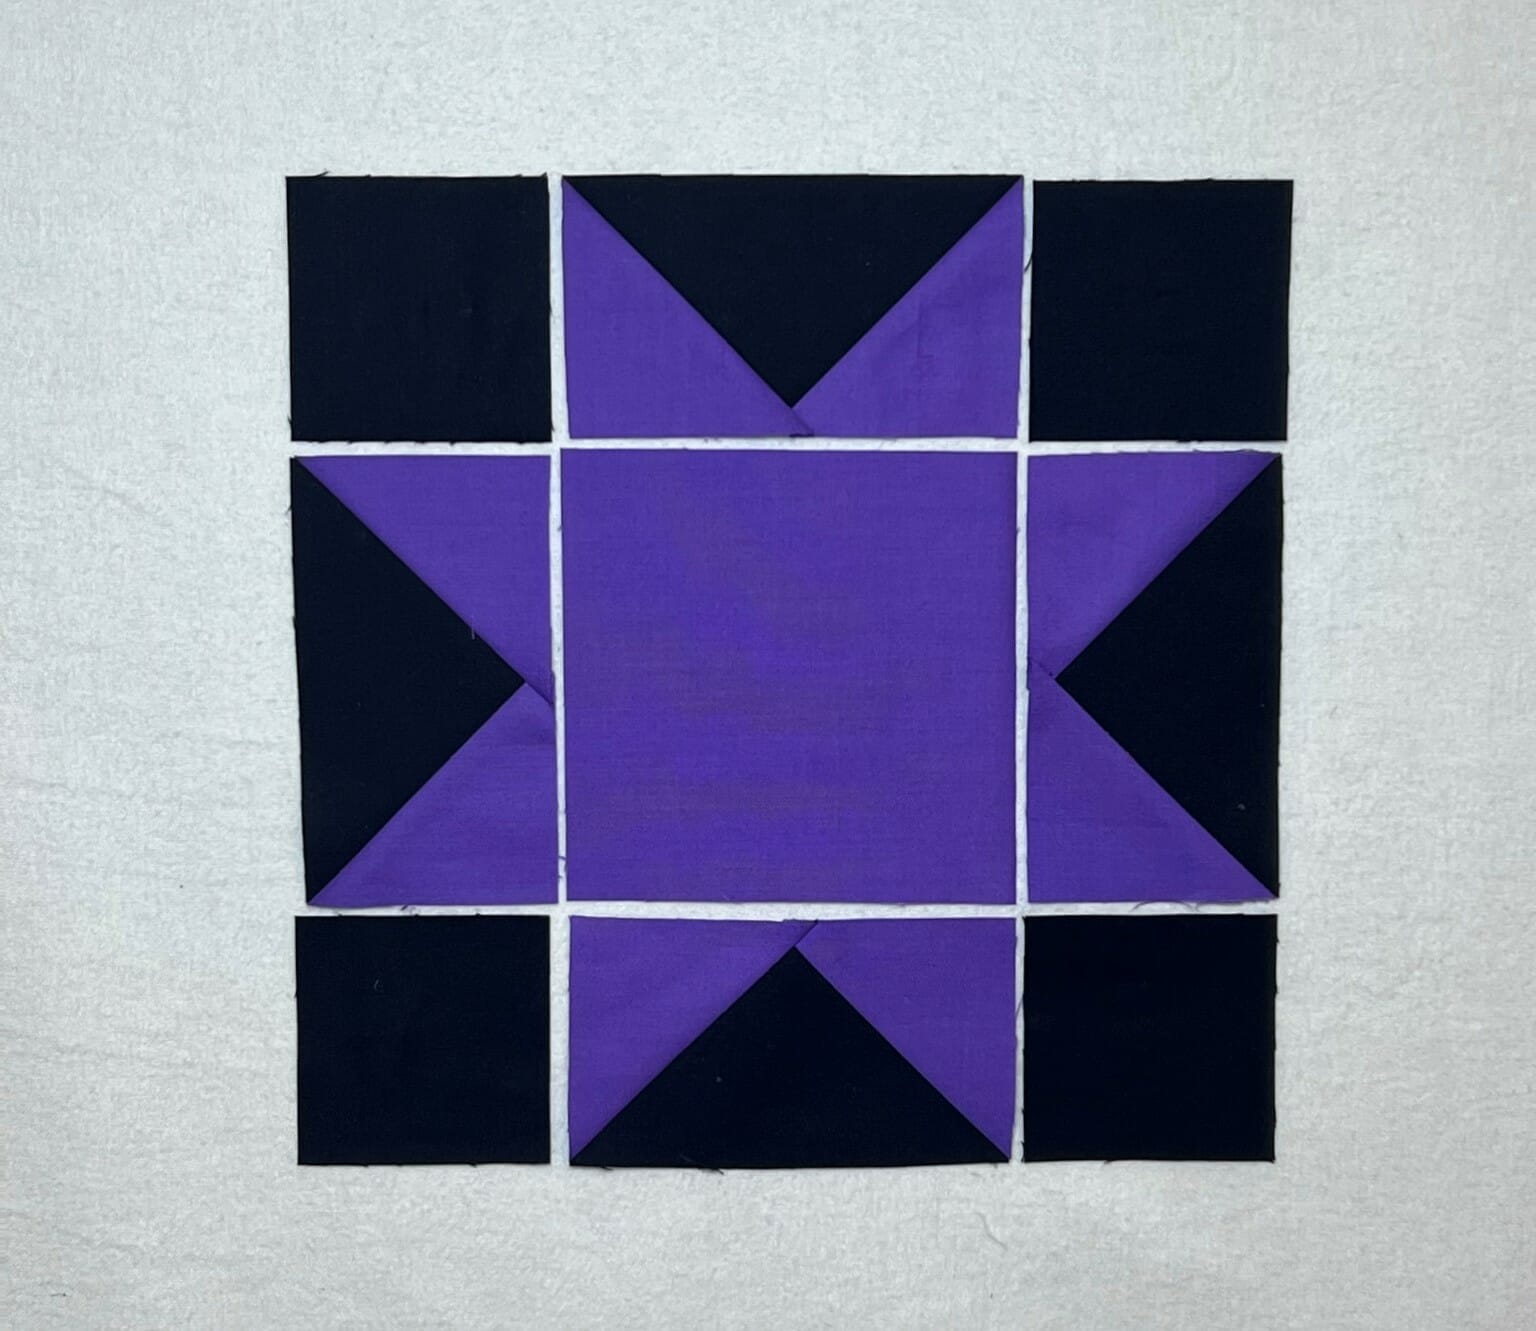
Once the flying geese are finished, we can assemble the blocks like so:
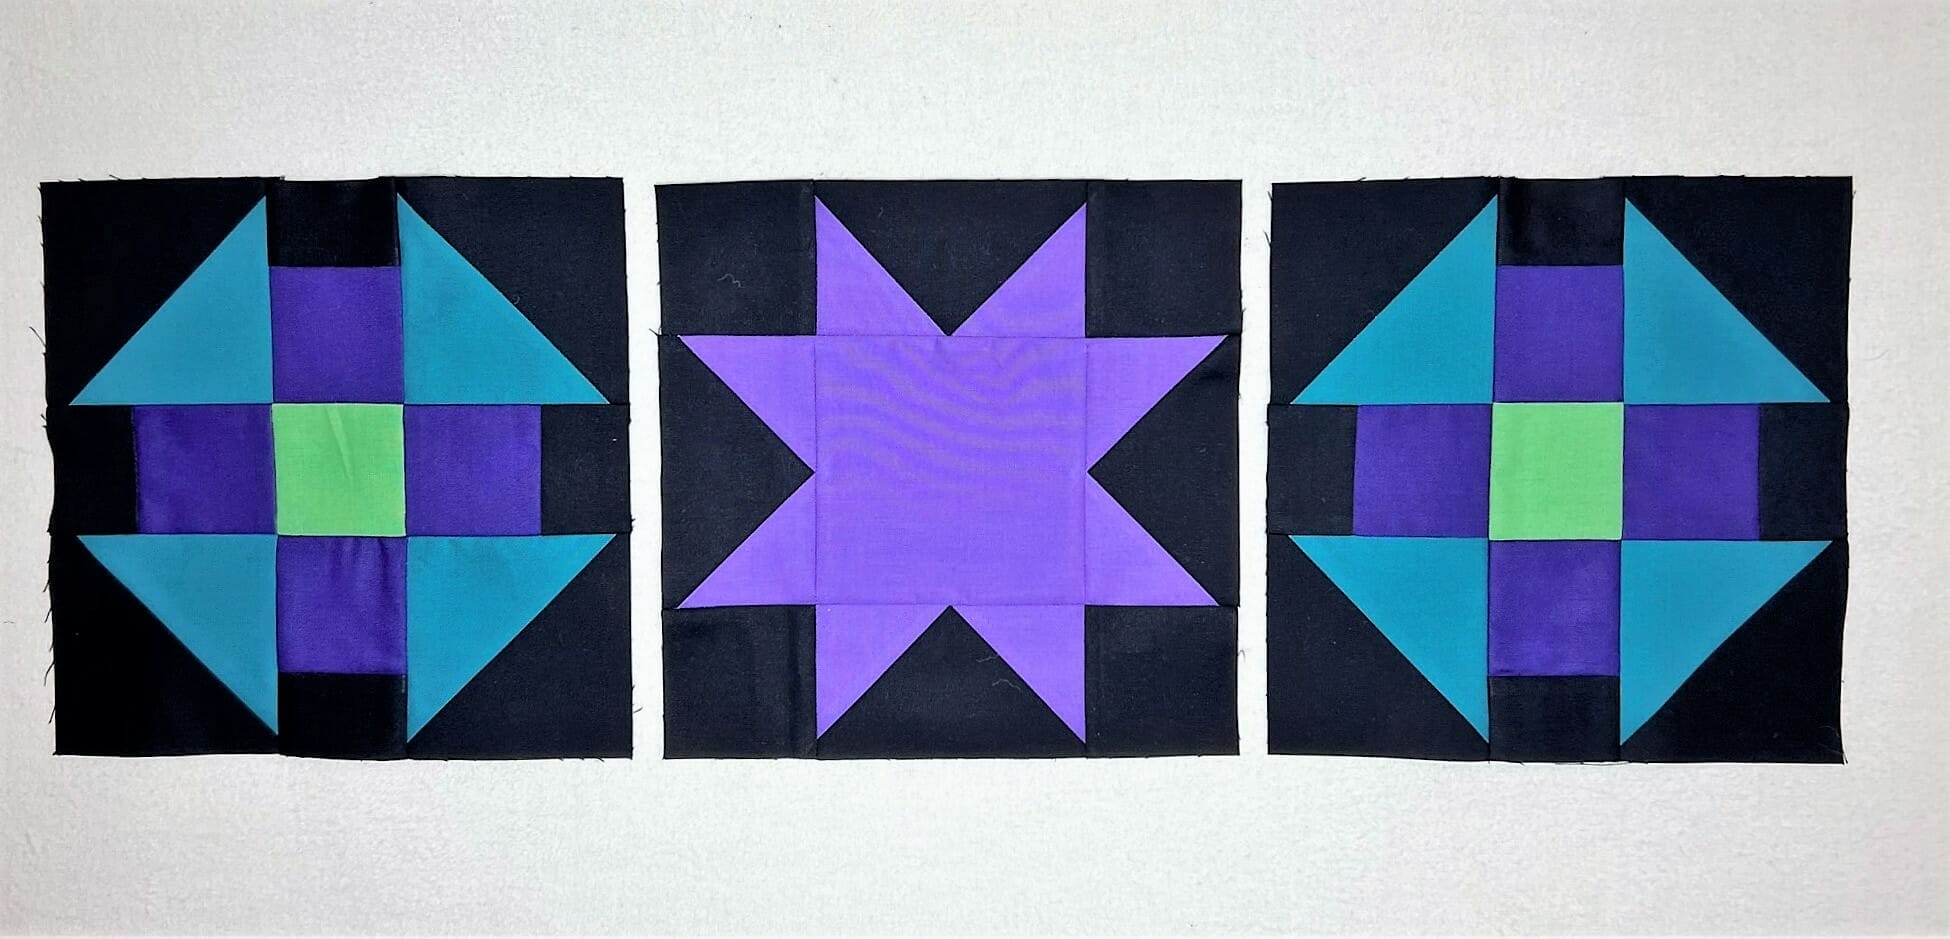
Now the fun part! You’ll want to take four of the Sawtooth star blocks you just made, and sew each one in between two Churndash blocks that we made back in month 2. (The remaining four will be used in our last month for the border of the quilt, so put them in a safe place.)
After that’s done and you have four units, you’ll sew a Black H strip to the top and bottom of each unit, followed by a Royal Purple C strip on the bottom only. As you can see from the photo below, all my strips are cut a bit longer than I’ll need. I always do this and then trim them later. I feel like I get better results this way.

Next, take two of the units and sew them to the sides of the center medallion we made in month 1. Make sure the Royal Purple strips are on the inside, sewn against the medallion.

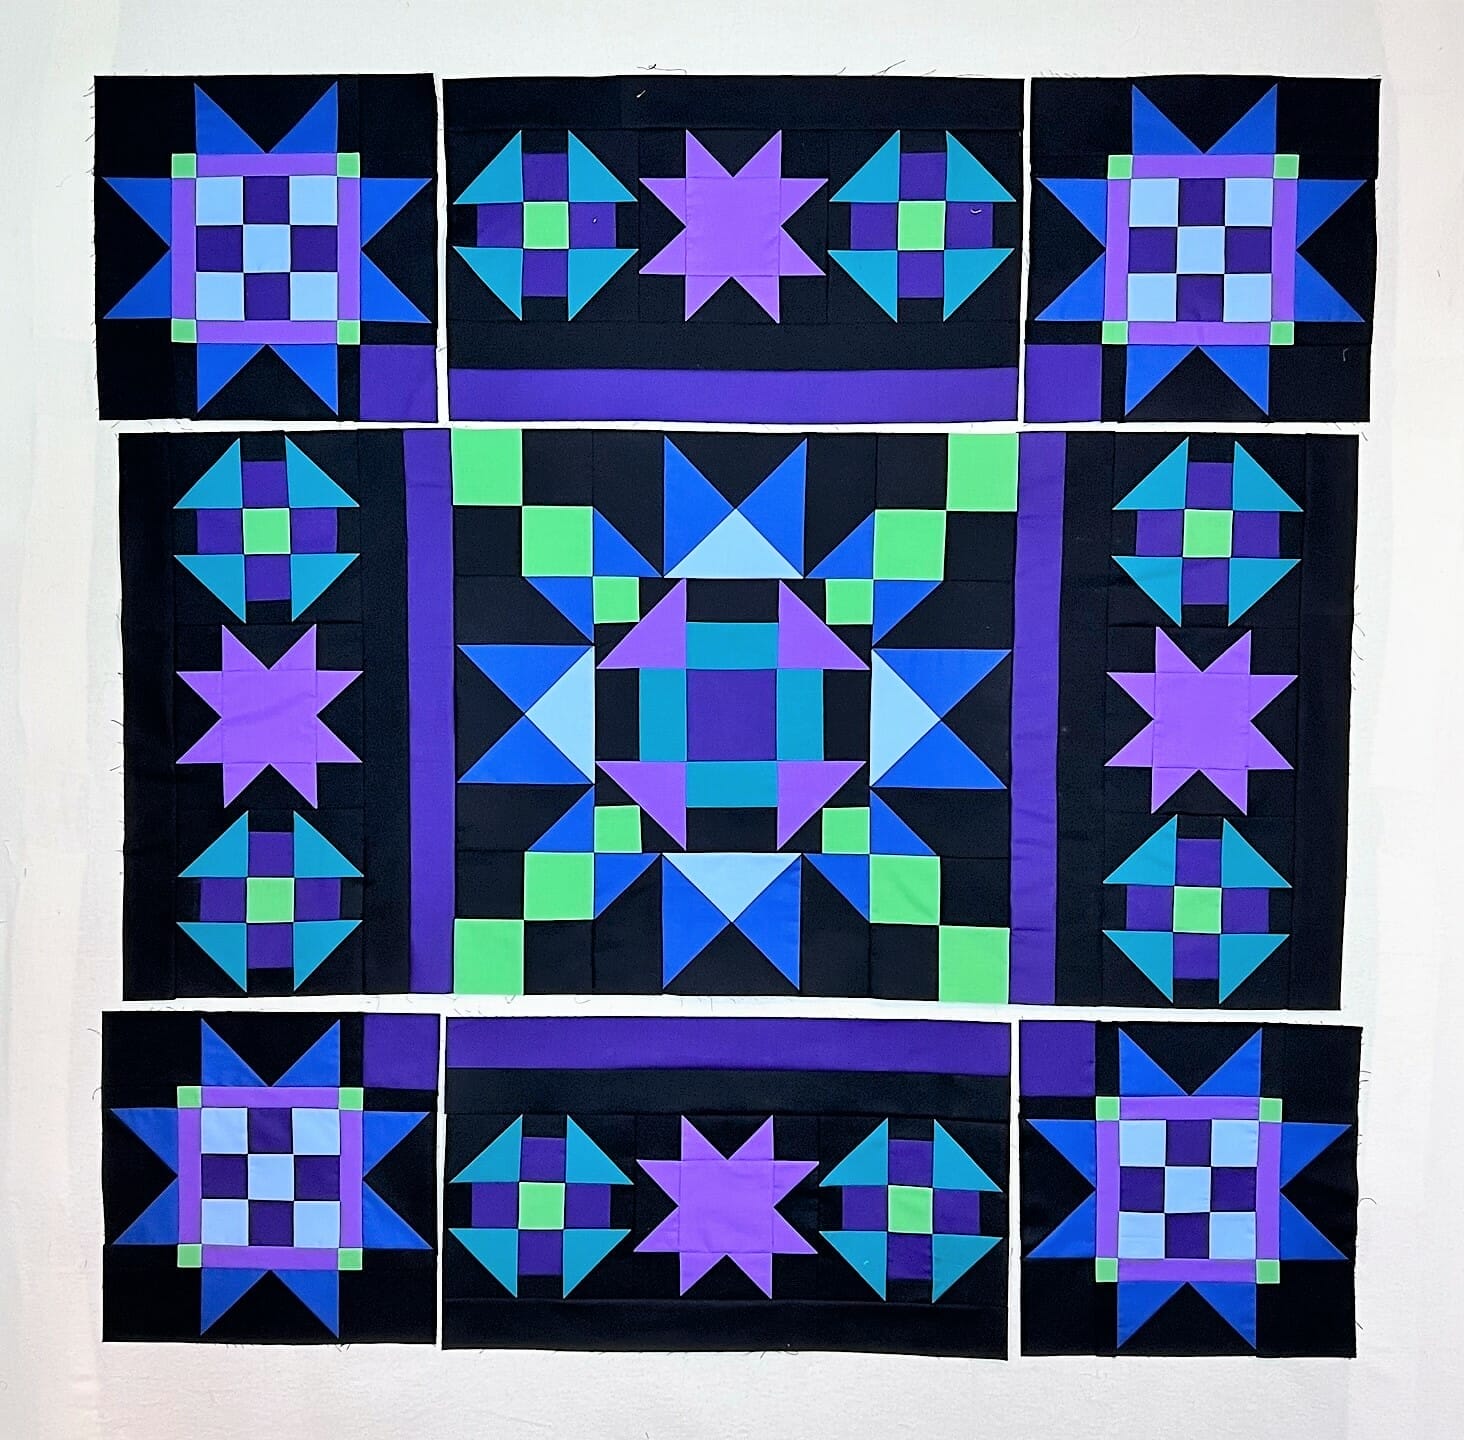
Remember those 9-patch star blocks we made last month? Sew one to each end of the remaining two units (from step 4). Make sure the purple E squares from the 9-patch blocks are touching the purple C strips at the base of each unit, just like you see below. As usual, I put everything on my design wall first, just to make sure I haven’t turned anything the wrong way.
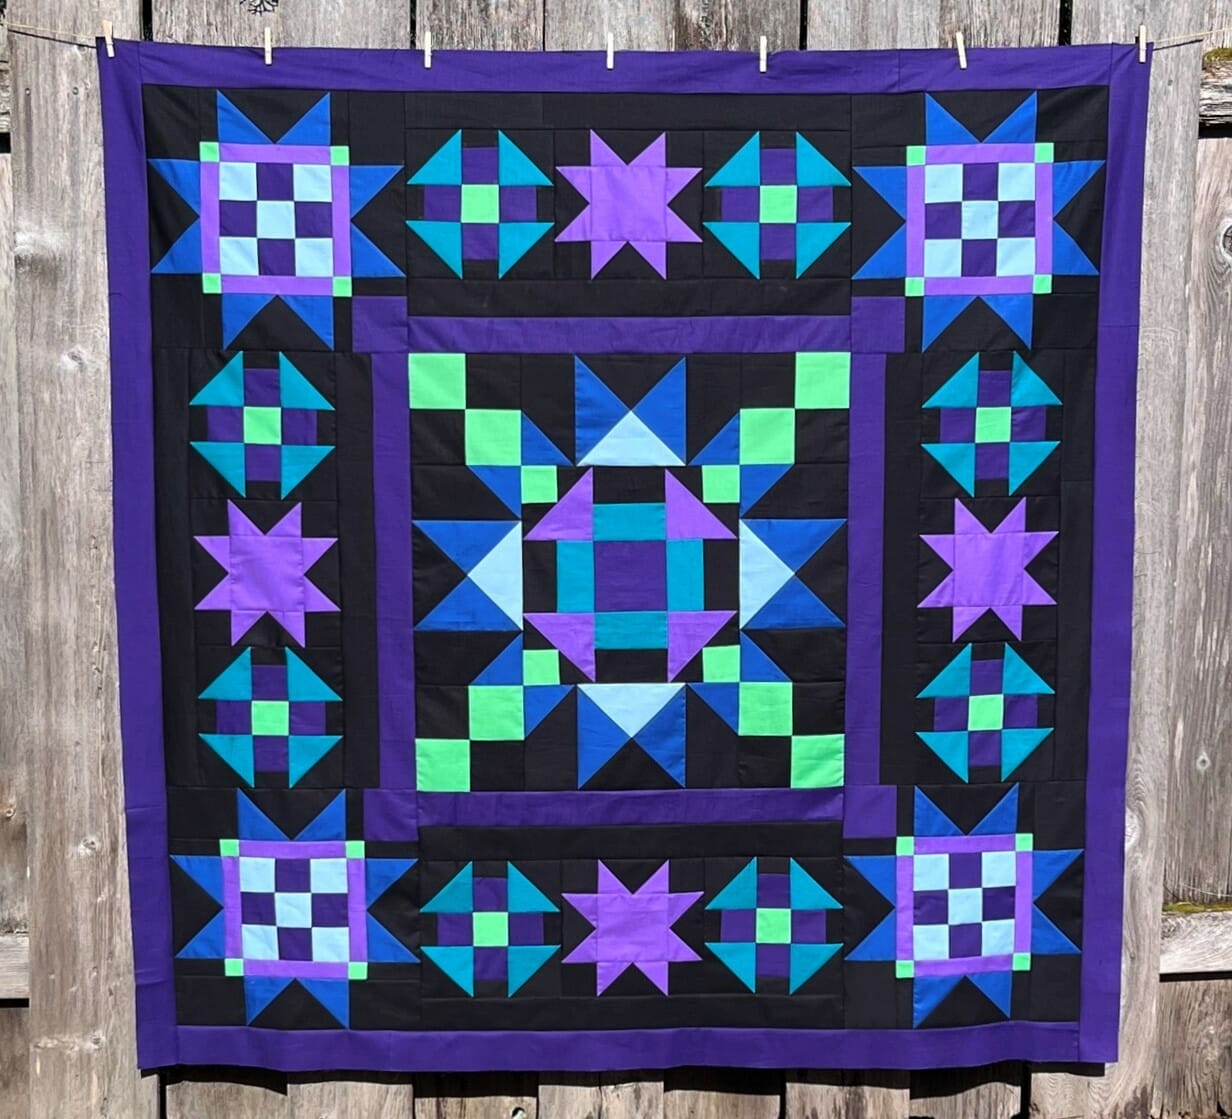
Now sew these to the top and bottom of the center medallion unit. There should be a Royal Purple frame around the center medallion now.
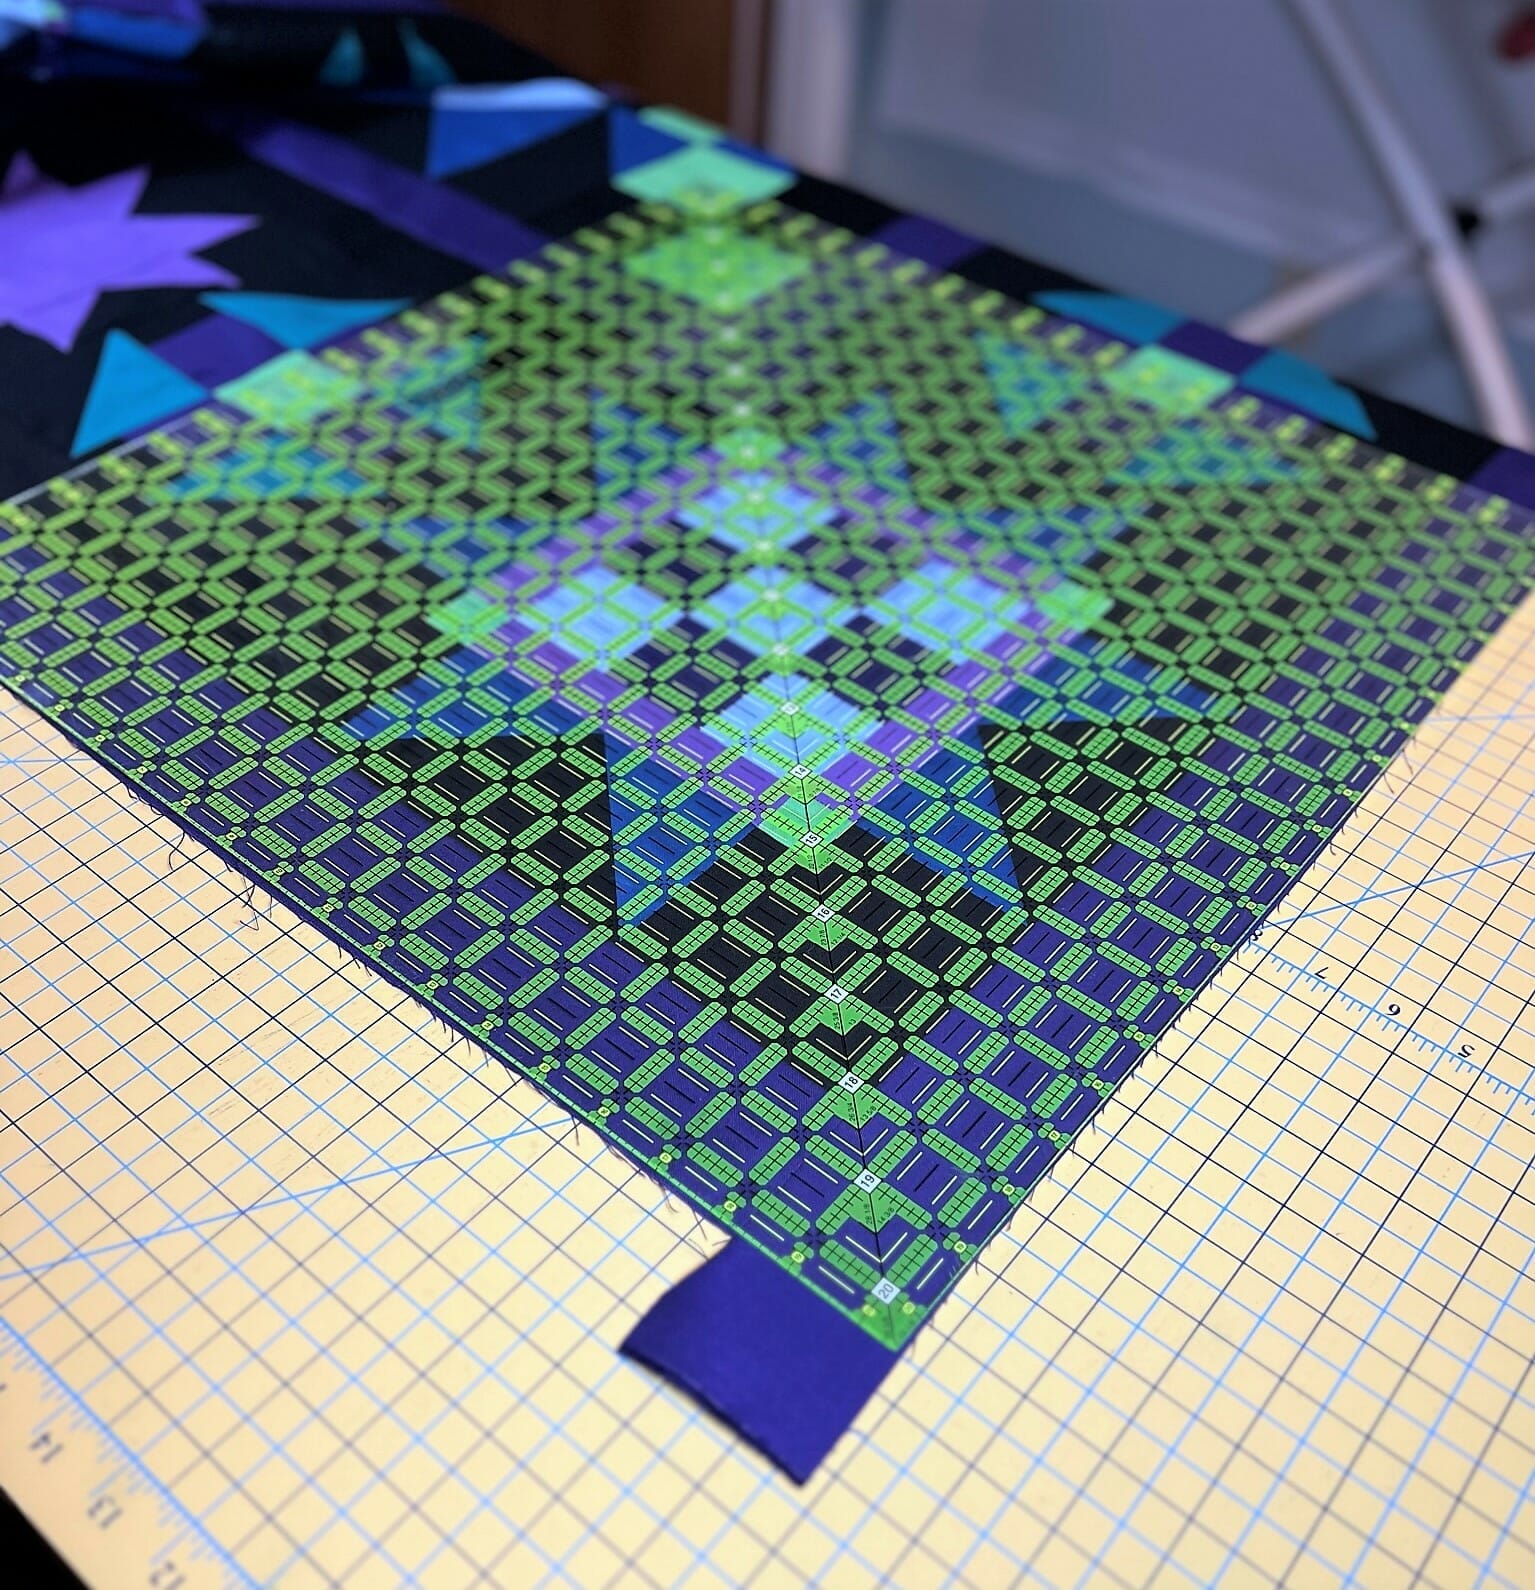
Lastly, we just have to add the D strips to the sides, then sew the E strips to the top and bottom, and we are done! Of course I made these strips longer than necessary too. Whenever I’m trimming up border strips at the corners, I always use my extra large 20-1/2″ square ruler. This helps me to see that my quilt is still square, and if it isn’t, then I can make some adjustments.
Well, at least for this month anyway. Doesn’t it look so pretty?
I hope you are all loving this quilt as it comes together. Over the next few months we’ll be making lots of Star blocks so get ready!
Until next time, Happy Quilting!
Kristin

