


 Tutorials
 3.15.2023
NOTE: these blog posts for the Aurora quilt top are part of a limited series for our Block of the Month subscription program. Sign-ups for the Aurora BOM are no longer available. You can learn more about our upcoming Block of the Month subscriptions here.
Hello everyone!
I’m so excited to have you all join me for our Aurora Block of the Month quilt. This quilt will be sent to you in NINE installments, so to go along with that, I’ll be posting a little blogpost with some tips and tricks to help you as you sew each section. Here is what we’ll be working on this month:
Before we get started, I’ve got a couple general tips:
For those of you who have followed my blogposts from previous BOMs, you know I LOVE to starch my fabrics before cutting. I starch EVERYTHING. It keeps my fabric from fraying and stabilizes all the pieces that I cut. I also feel like my piecing is more accurate because the stiffer fabric doesn’t get warped as easily. This is especially true for some of the triangle pieces we will be sewing together this month. Some people don’t bother to starch, and of course it’s entirely up to you, but I will just say that I’m a big believer in it.
I will also let you know that I keep my patterns mathematically correct. So if the pattern calls for making HST’s with a finished size of 2”, the pattern will tell you to cut the squares at 2-7/8”. If this makes you uncomfortable please know that there is plenty of fabric to cut your pieces a little bit bigger and then trim down later. I promise you will not run out of fabric by adding an extra 1/8” to your cut pieces, and trimming to size after sewing if you’d rather.
Speaking of fabric, when I’m figuring out the yardage needed for each month, I always try to give you some extra for mistakes, or for using other piecing methods that you might prefer over my directions. So please don’t fret if you make an occasional oops. Of course you should always cut carefully to maximize your fabric, but don’t freak out if you have to do something over. Hopefully it won’t happen, but we are all human and it’s okay!
Alright, now let’s get sewing!
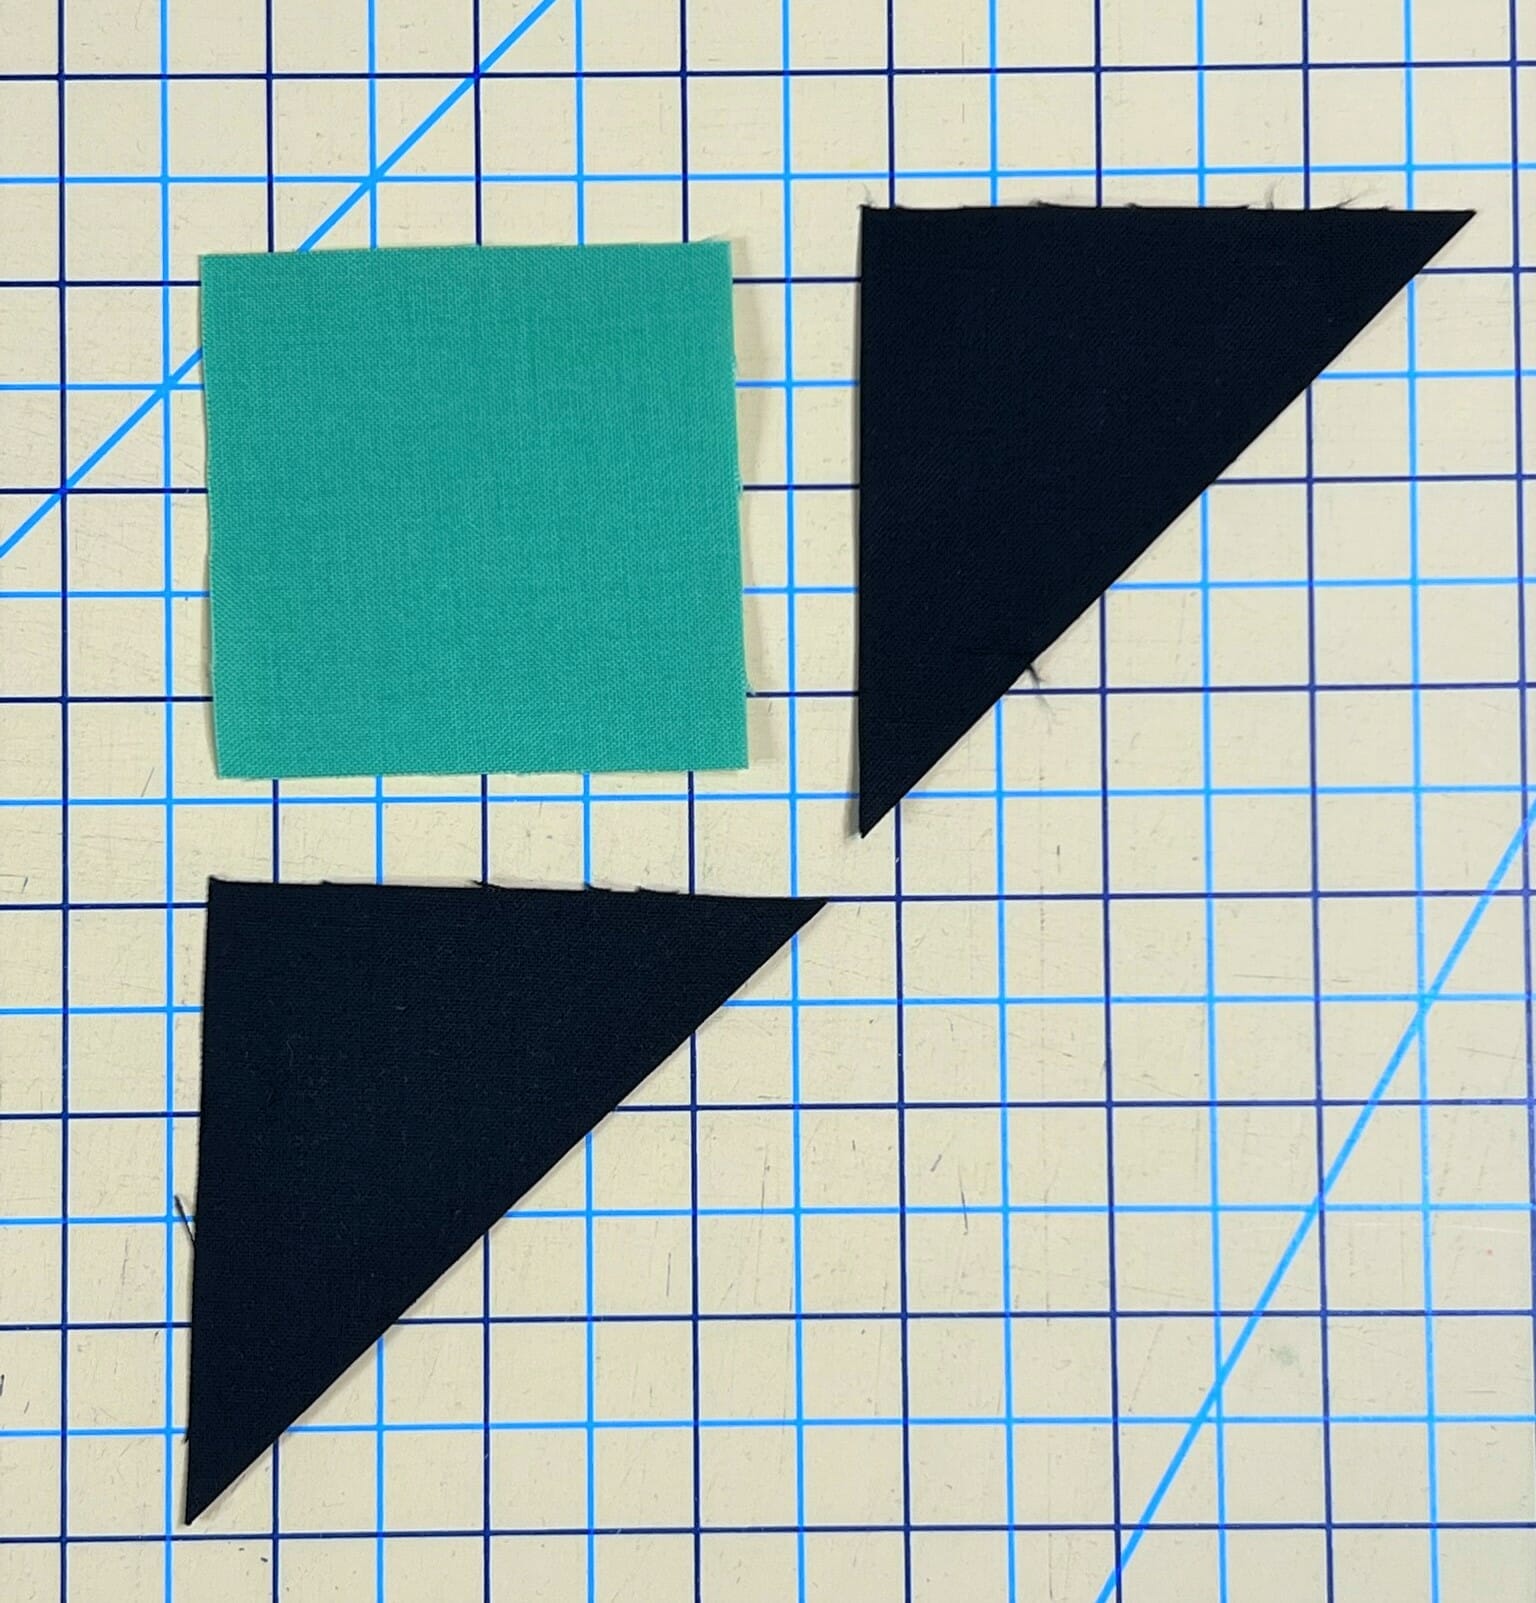
In step 1, we’ll begin by attaching two black J triangles to each A square, one at a time.
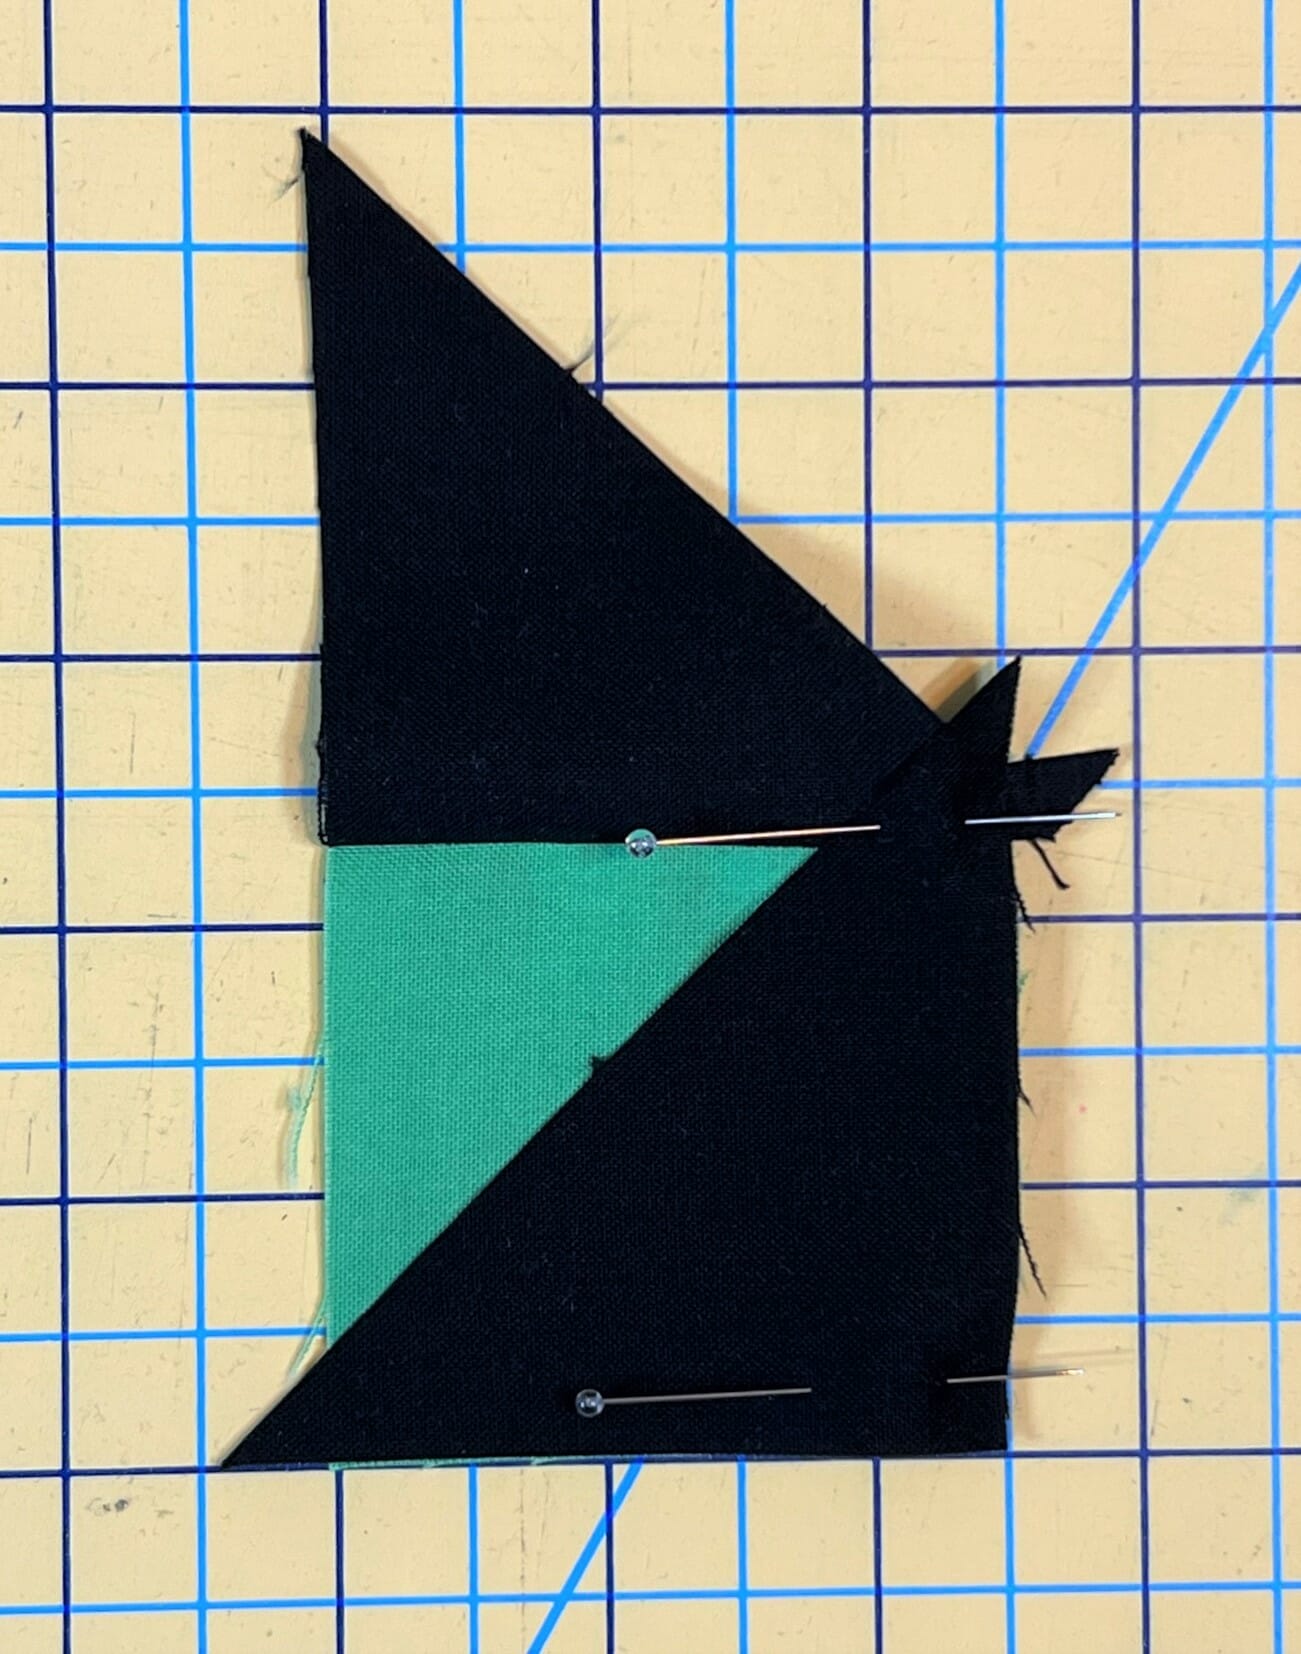
When you sew the first J triangle on, it should be pinned to look like this:

Here is the second triangle being pinned and sewn.
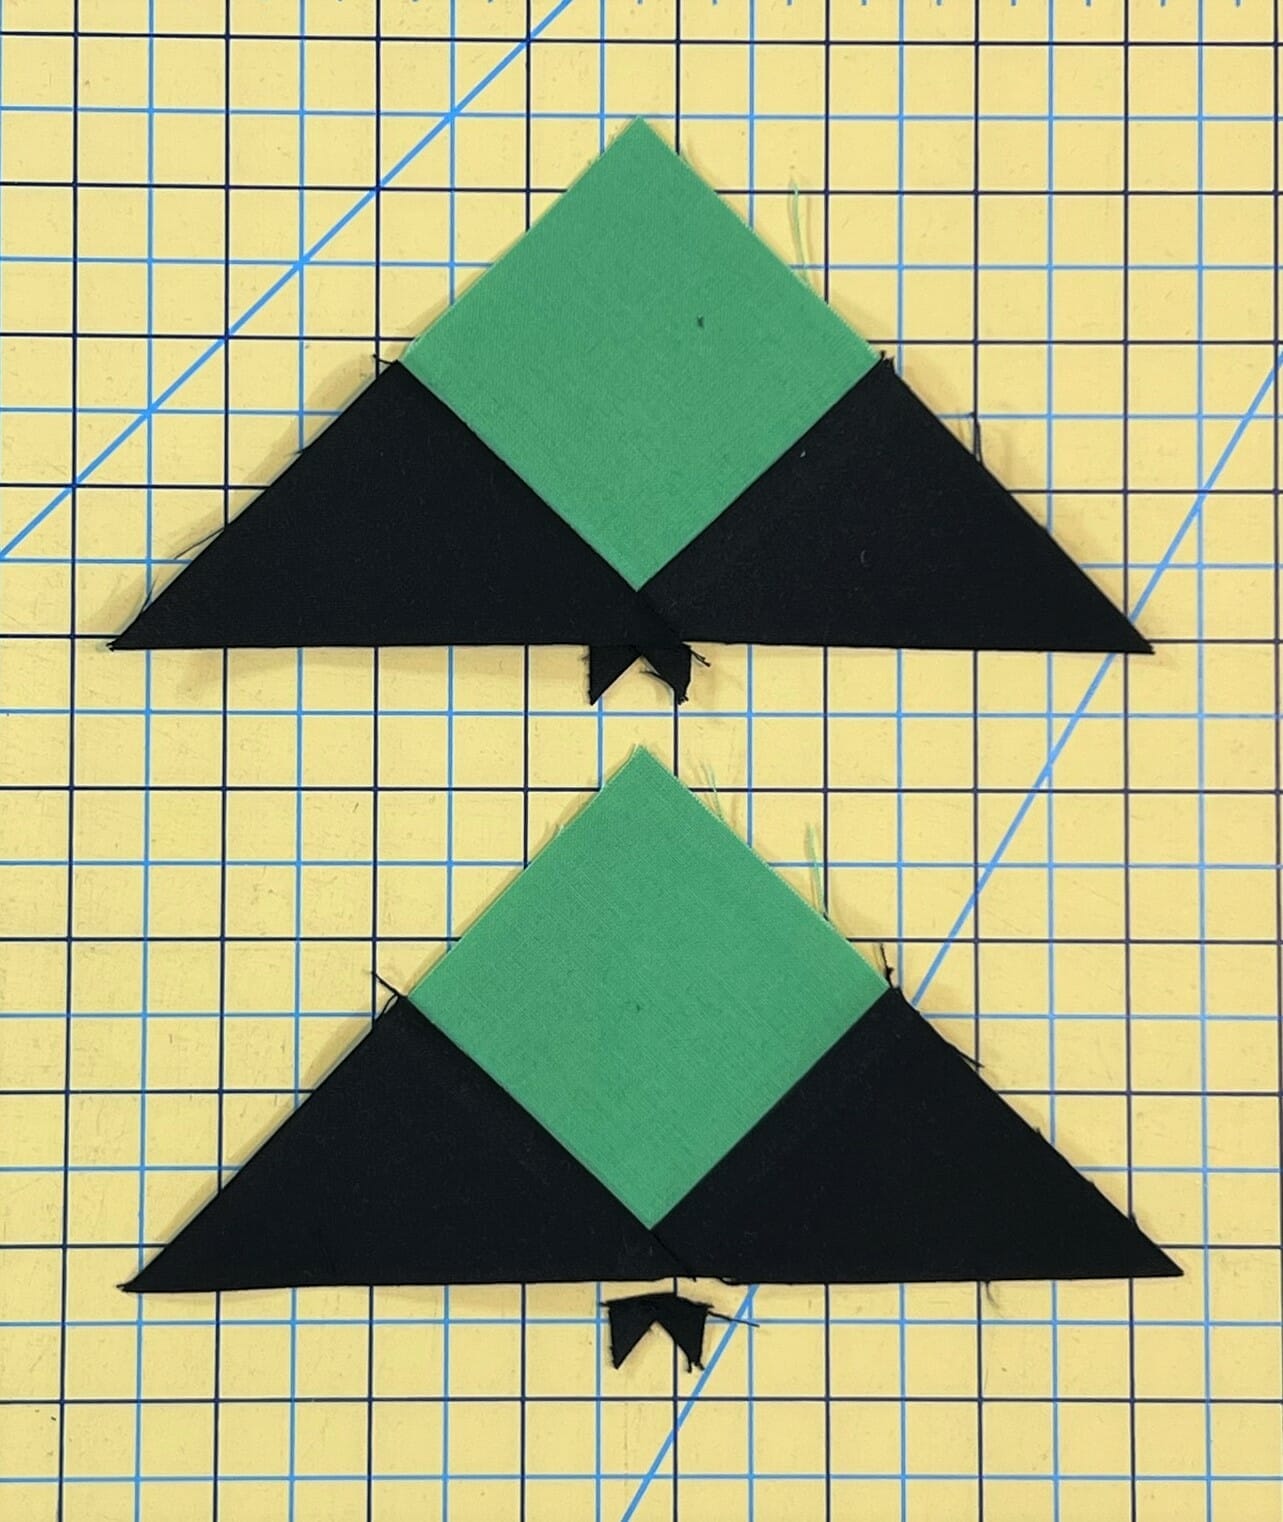
Once you iron them, you can trim off the triangle tails.
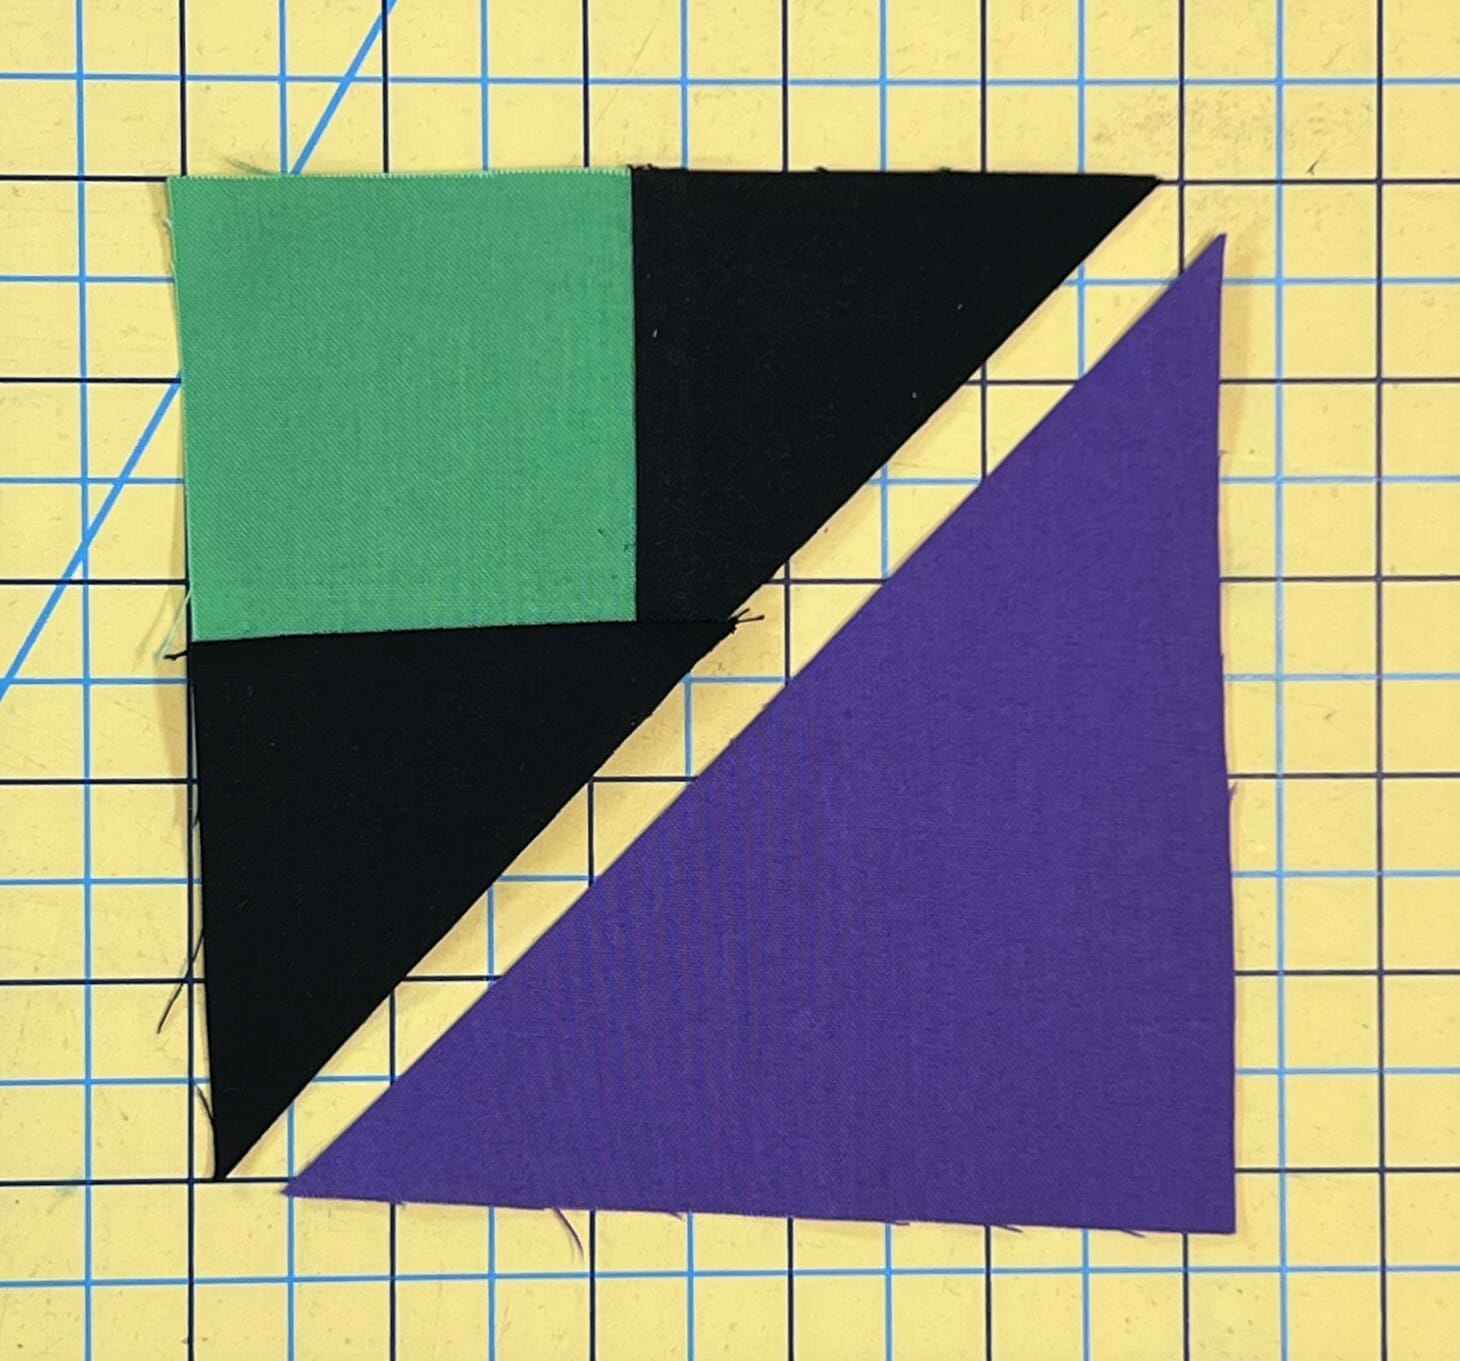
Sew the purple H triangle to each one. I sewed mine together with the black/green side up, so that I could make sure I was sewing right through the intersection where the green square meets up with the black triangles. This will help ensure that your points are perfect. Once this was sewn together, I measured each one to make sure it was 4-1/2” square and set them aside.
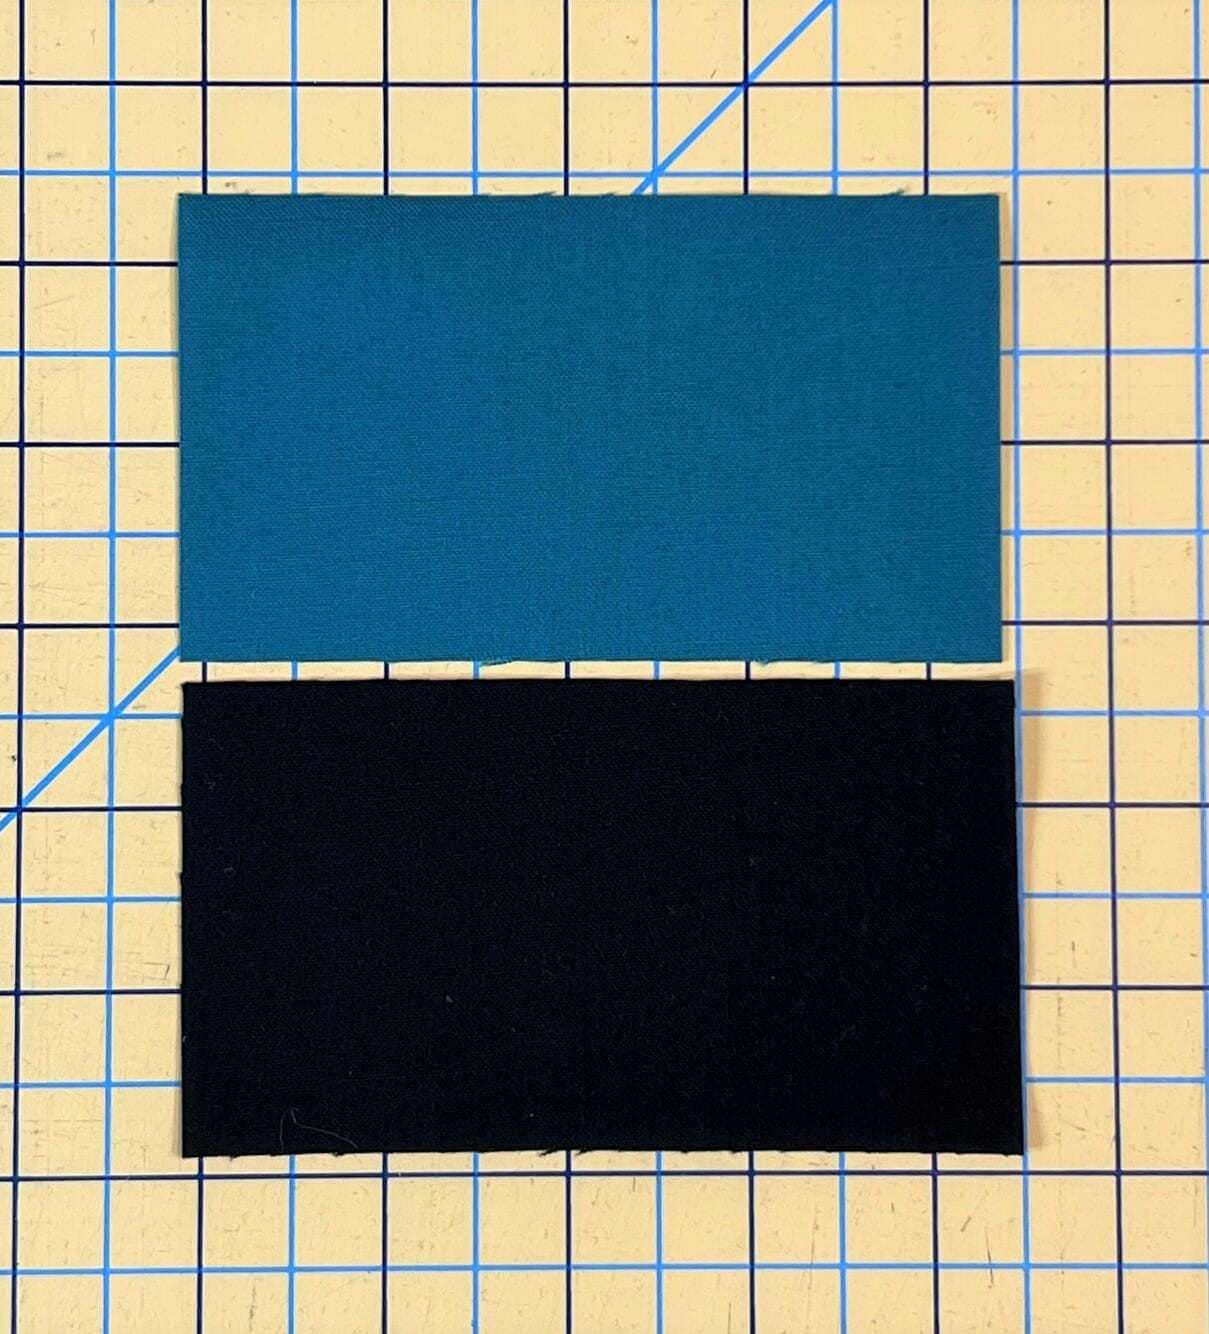
Next you just have to sew each C and I strip together to make four more 4-1/2” squares.
Now we are ready to put the center portion of our block together. It’s just like sewing a 9-patch together. I lay my pieces out before I pin to make sure I’ve got everything in its proper place. I find that doing this keeps me from having to use my seam ripper later!
Next we’ll make some Half Square Triangles in preparation for making our Quarter Square Triangle units. This is one of those times that you can cut your D, F, and M squares a smidge bigger if you prefer.

In steps 5 and 6 it tells you that your pieces should measure 6-7/8” square when done. Since I know that I’ll be sewing these pieces together in the next step, I choose not to trim anything until after I’m done with step 7.
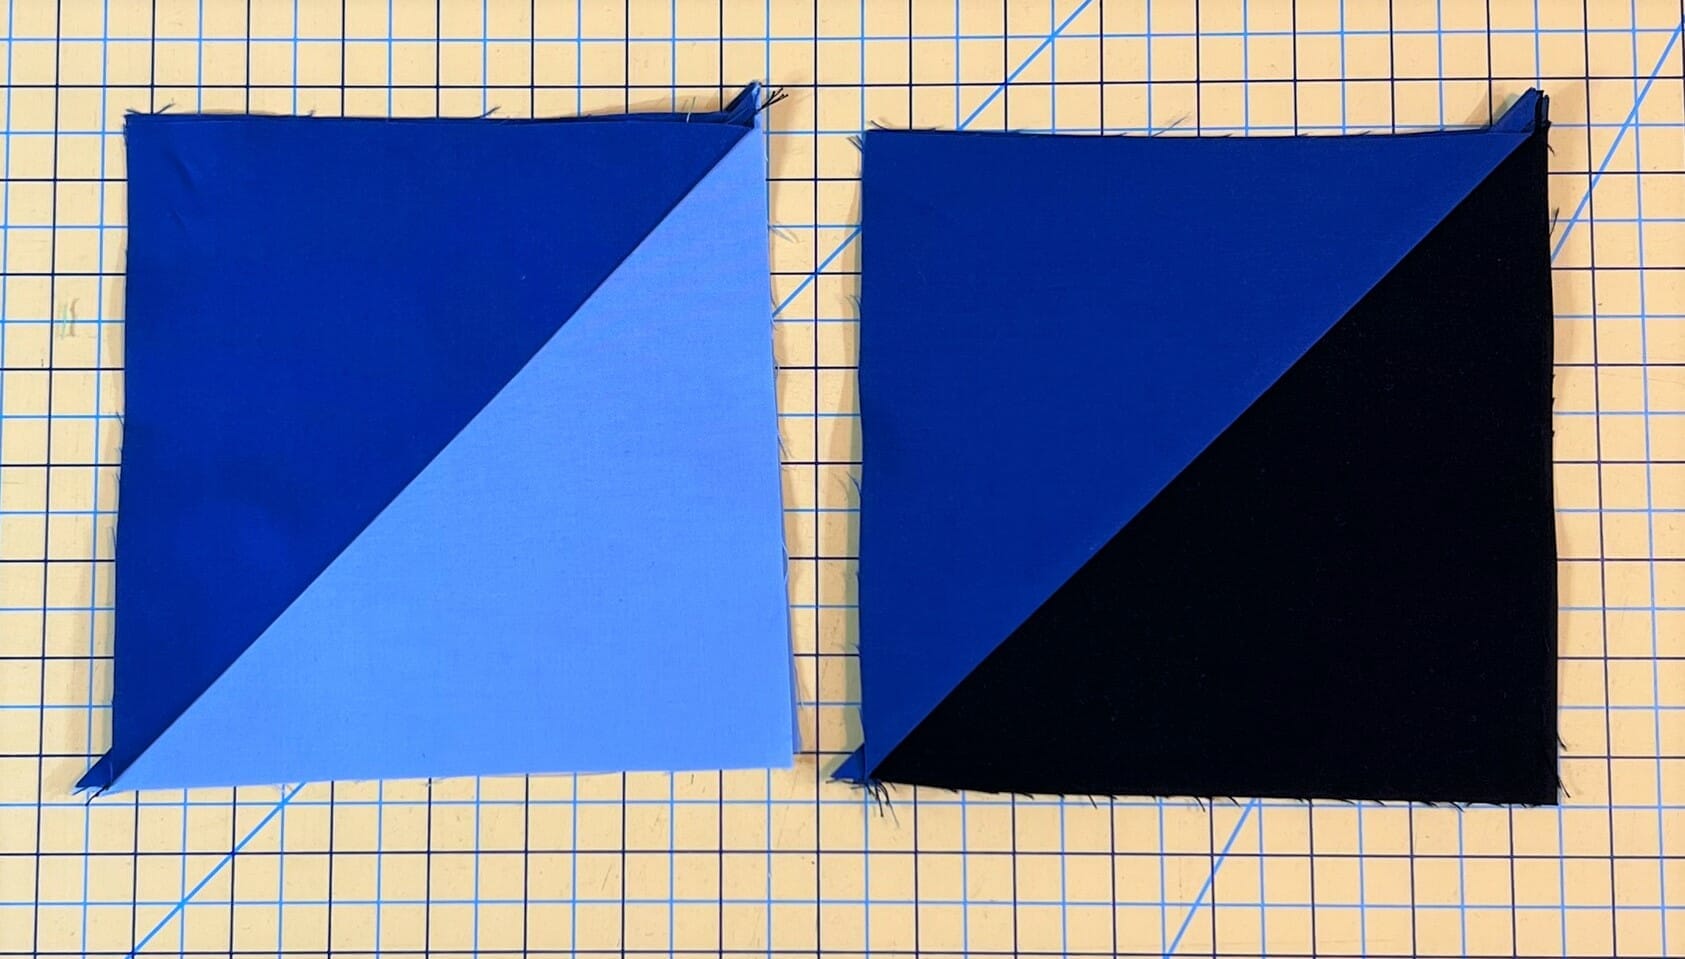
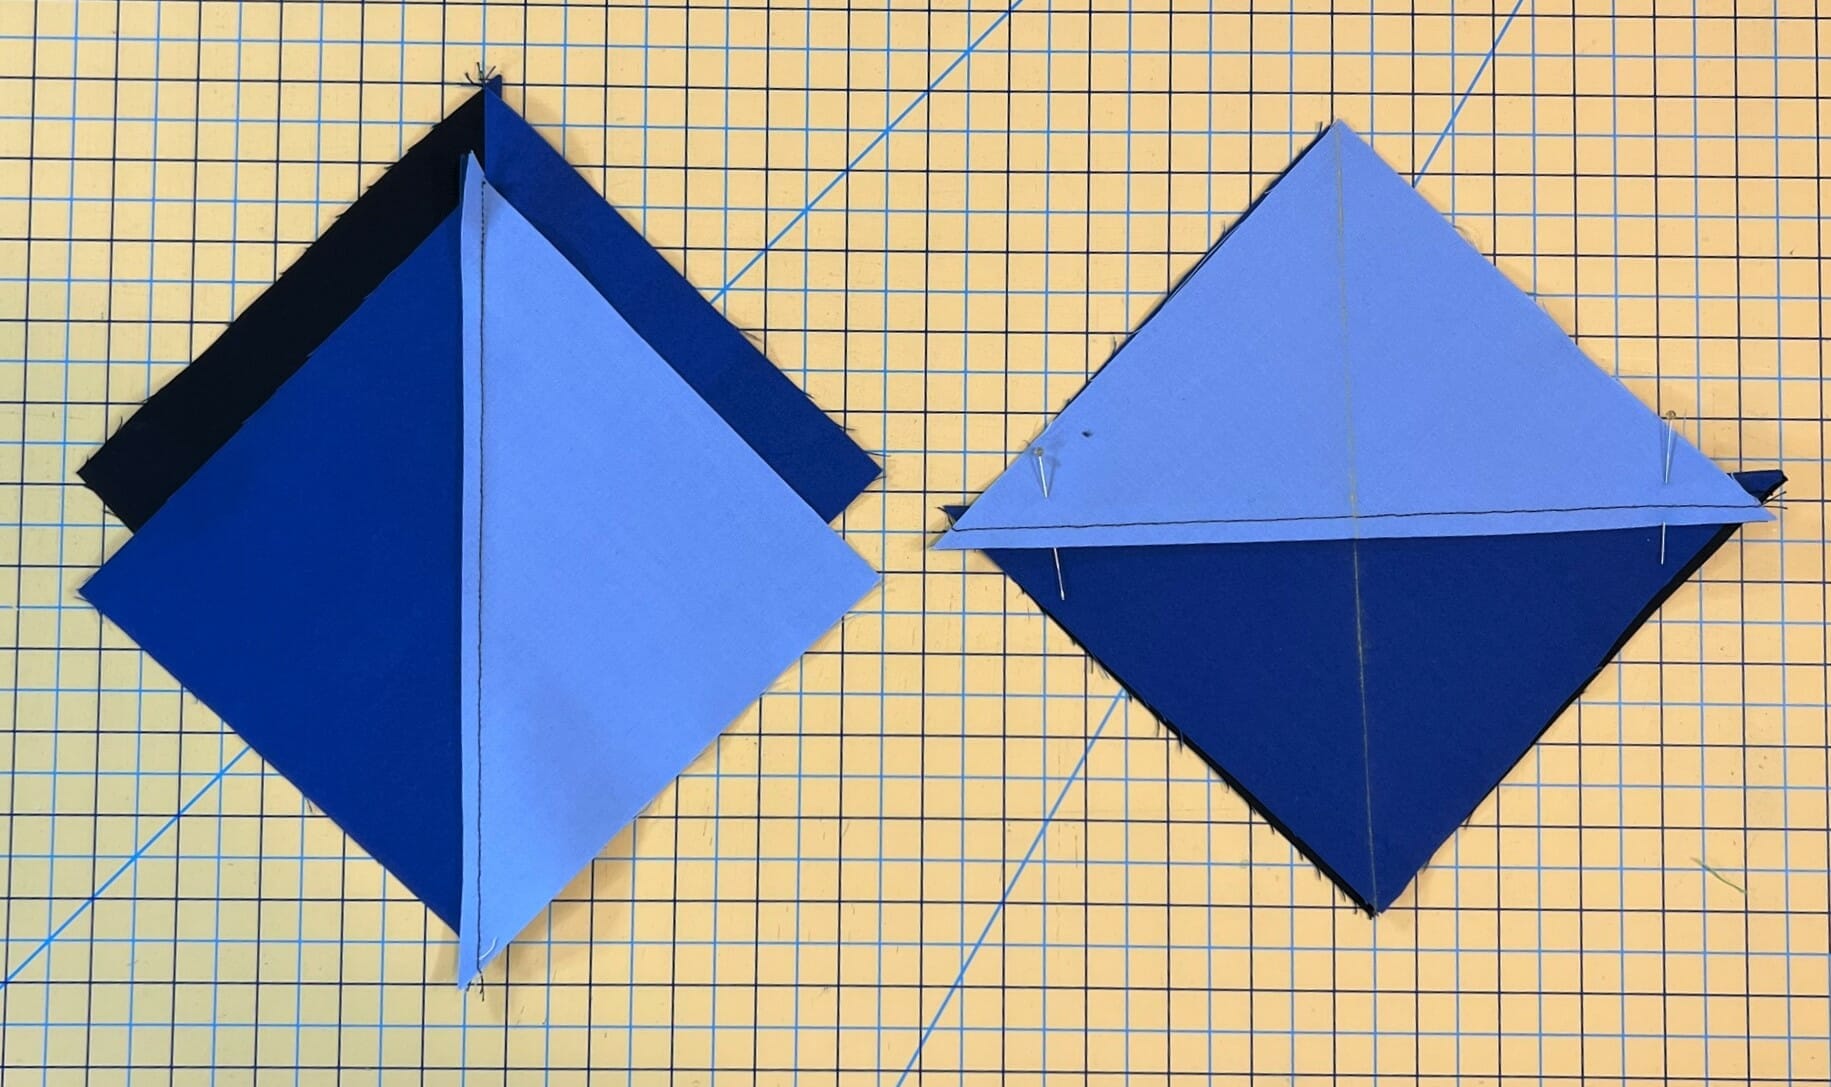
In step 7, after marking each D/F square with a marker or chalk liner, you’ll take each D/F square and place it on a D/M square. The picture below shows you how the Admiral Blue triangles should be oriented on the left, and the square on the right has everything pinned, with the chalk line marked. You want the D triangles to be opposing one another, NOT right on top of each other.
Now stitch ¼” away from both sides of the drawn lines, and then cut on the line when done. This will give you four Quarter Square triangles. This is when I trim and square them up to measure 6-1/2” square.
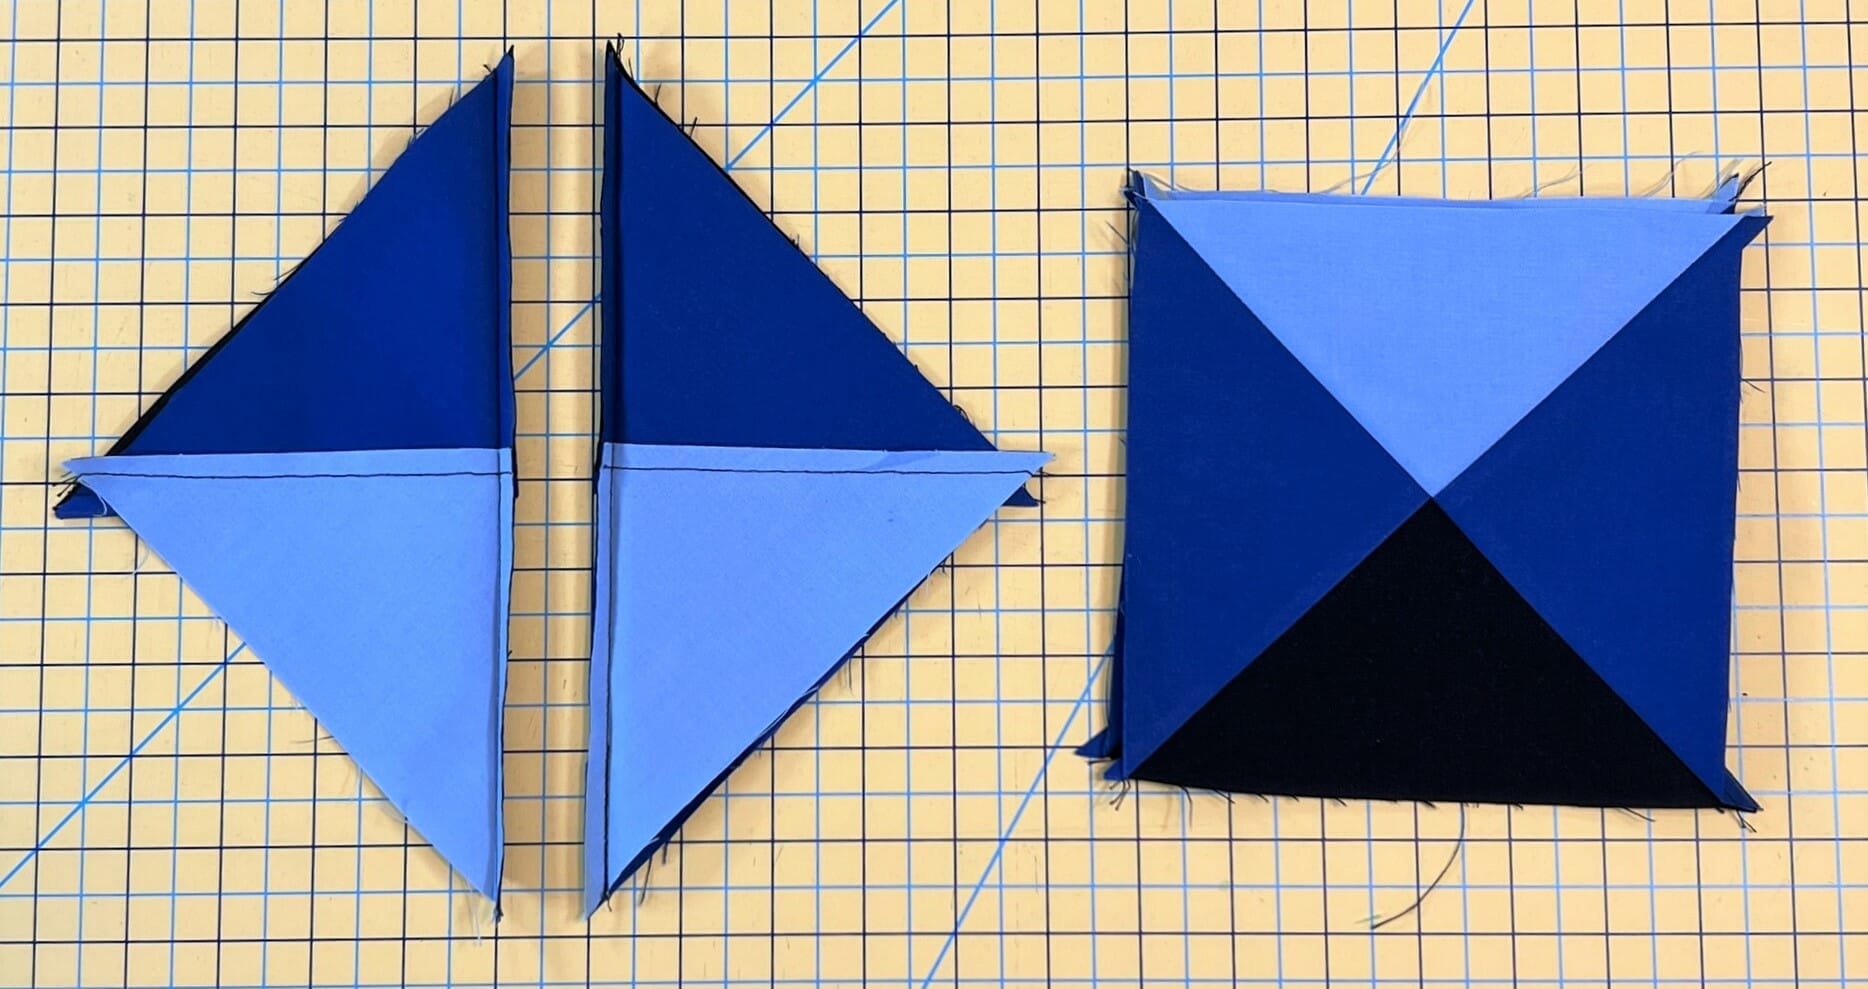
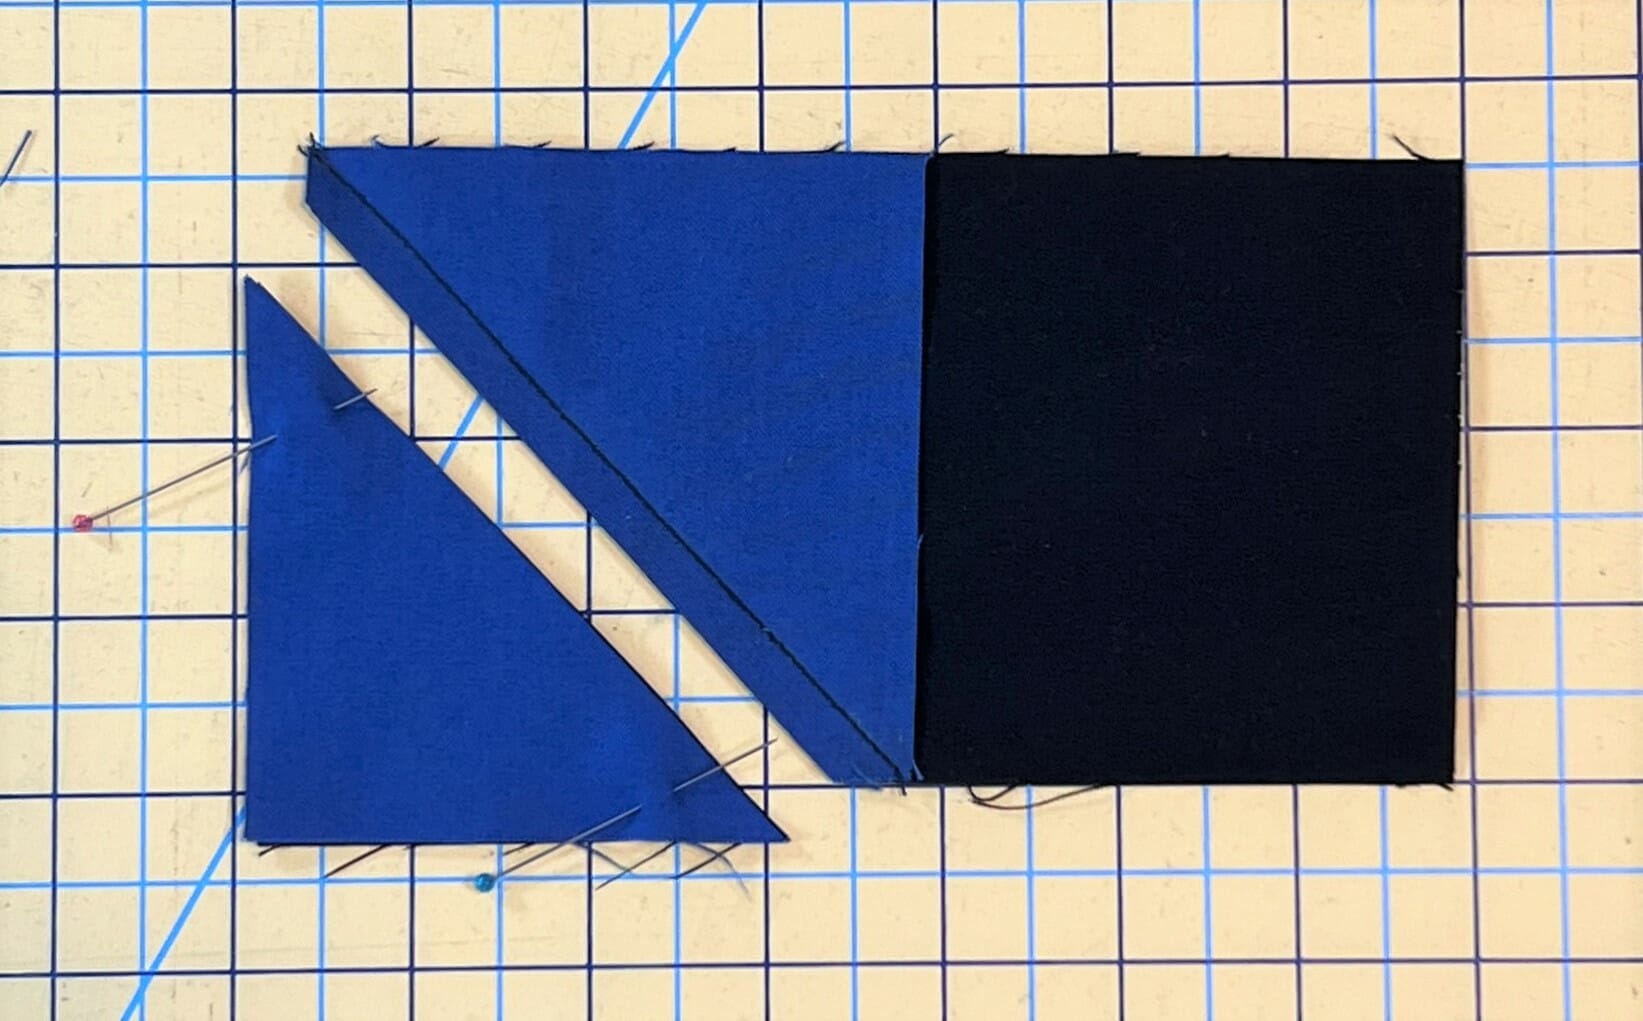
Now we’ll make some units that are basically half of a flying geese. Half of these will have the Admiral Blue square placed on the right side of the black rectangle, and the other half will place those squares on the left. These are large enough that if you really want to, you can pin the leftover triangles that you’ve cut off, and sew a ¼ seam on them to make additional HSTs to use for something else, like I did in the second photo below.

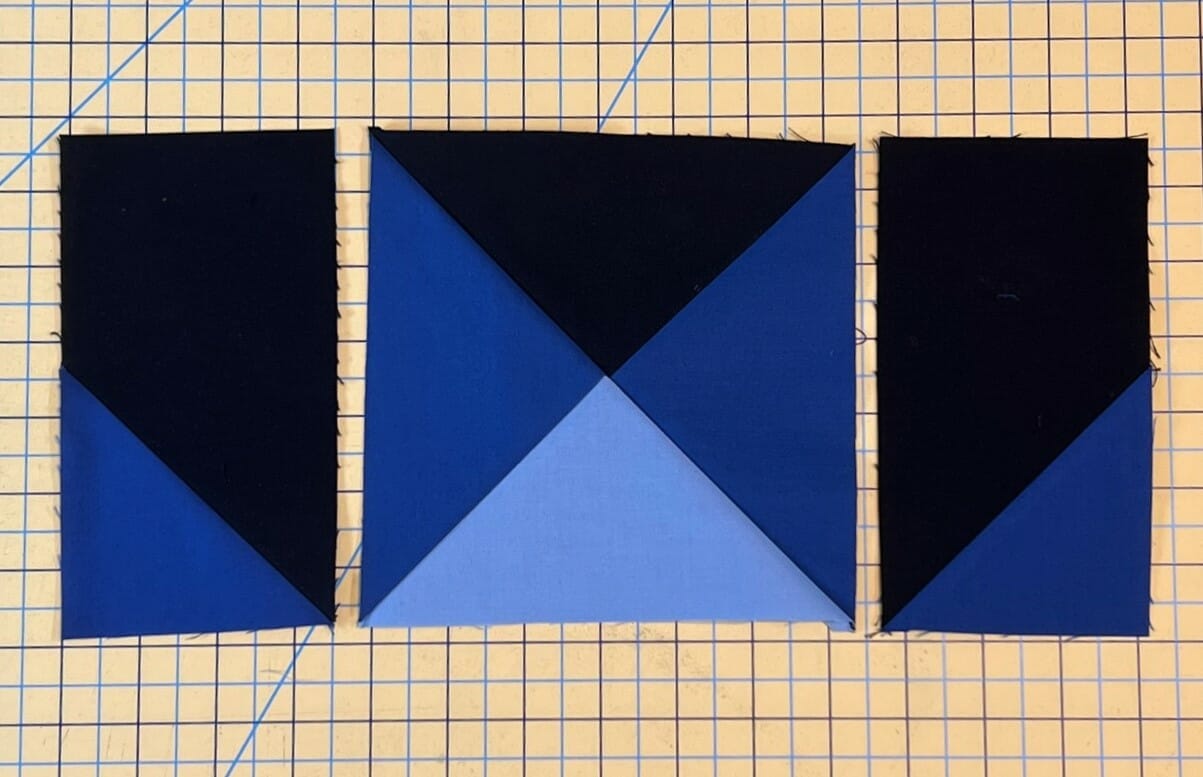
Once those are finished and pressed, take one of each and sew them to the sides of the QST you made in step 7. Make sure you pay attention to the diagram on the pattern or the photo below to get everything in it’s proper place.
Somehow I completely forgot to take any pictures of the green and black 4-patch units that are sewn in step 8. Sorry about that!
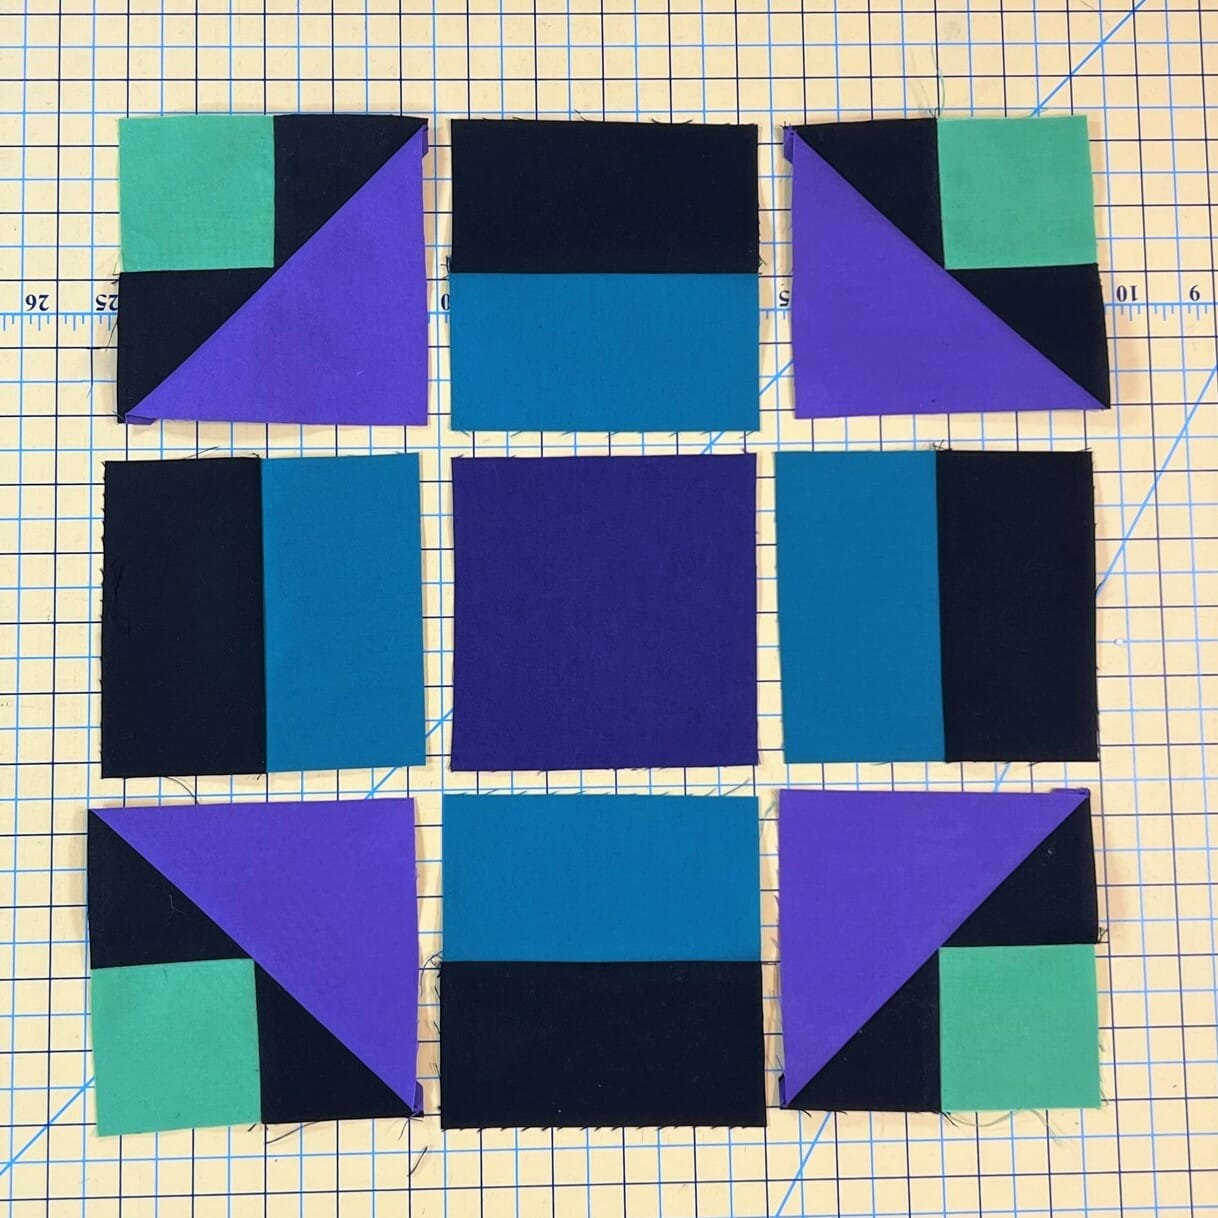
But here you can see below that they are finished, along with all the other components for the center portion of our quilt. Again, I set everything out in its proper place before I begin pinning and sewing.
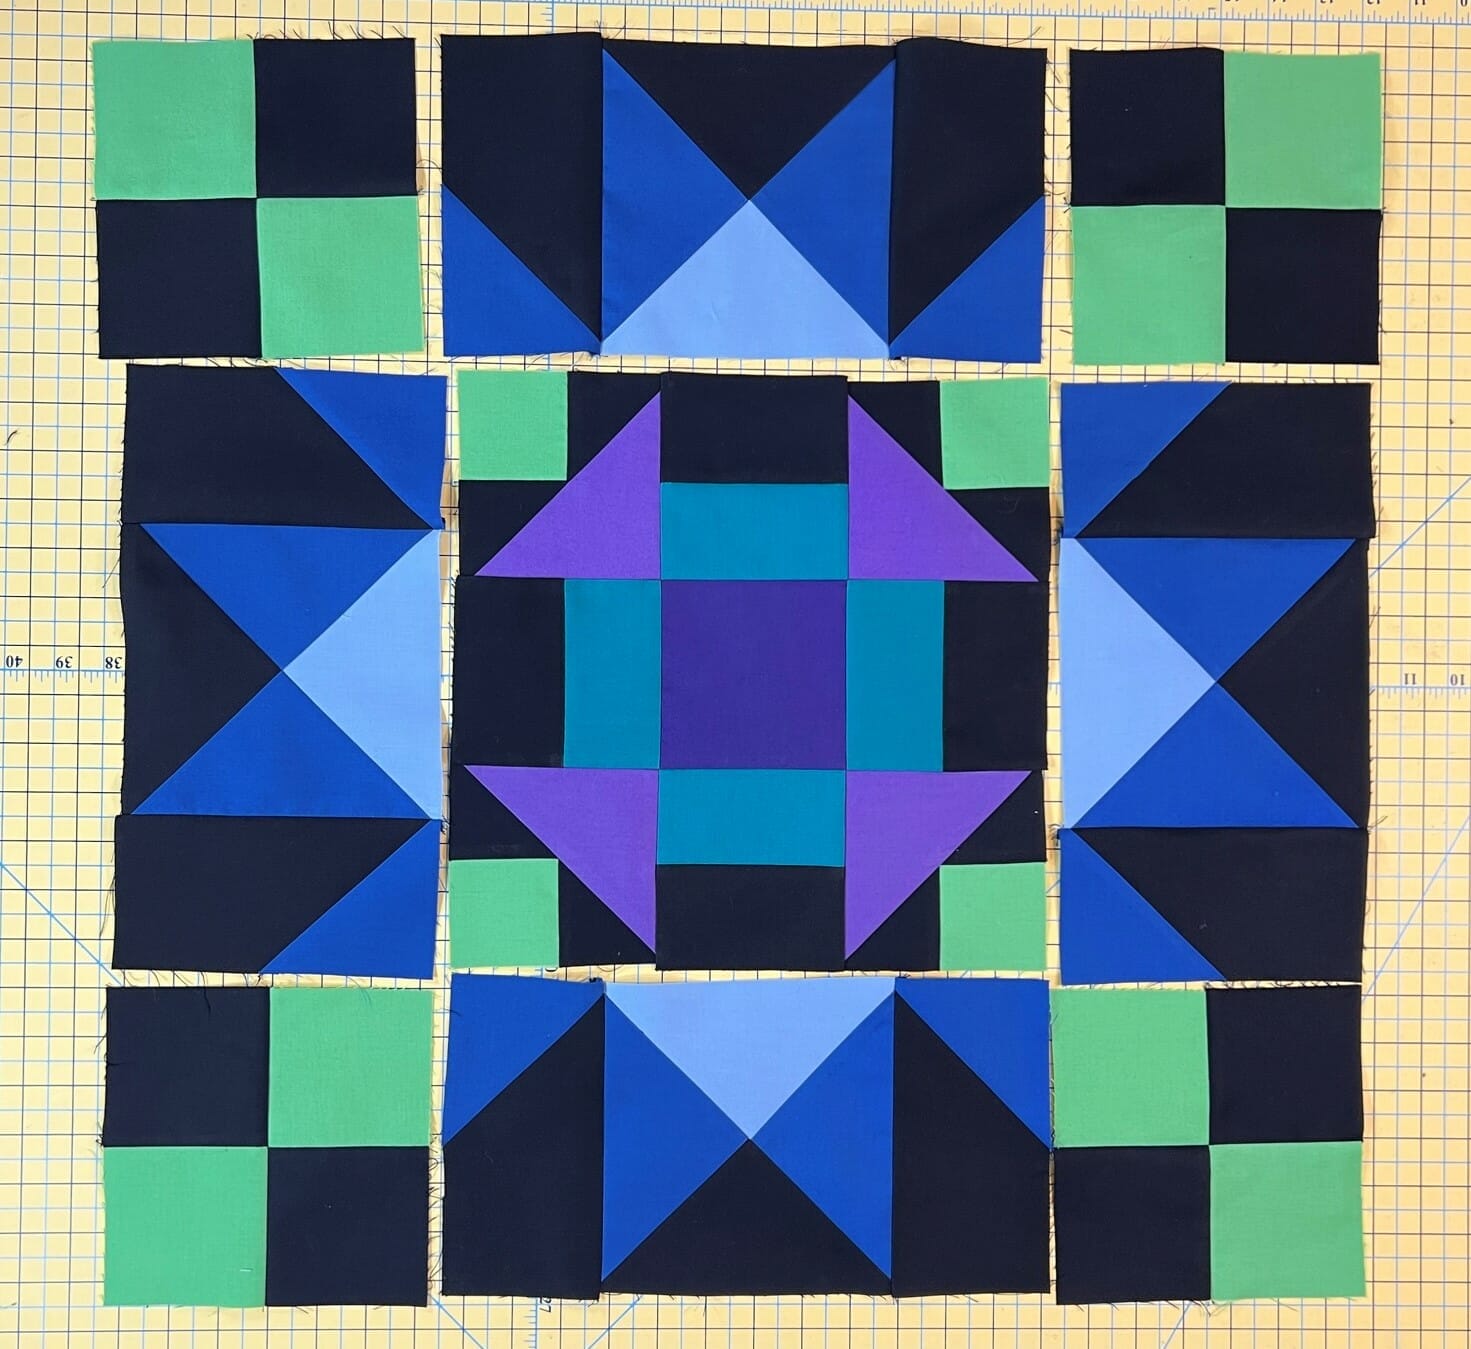
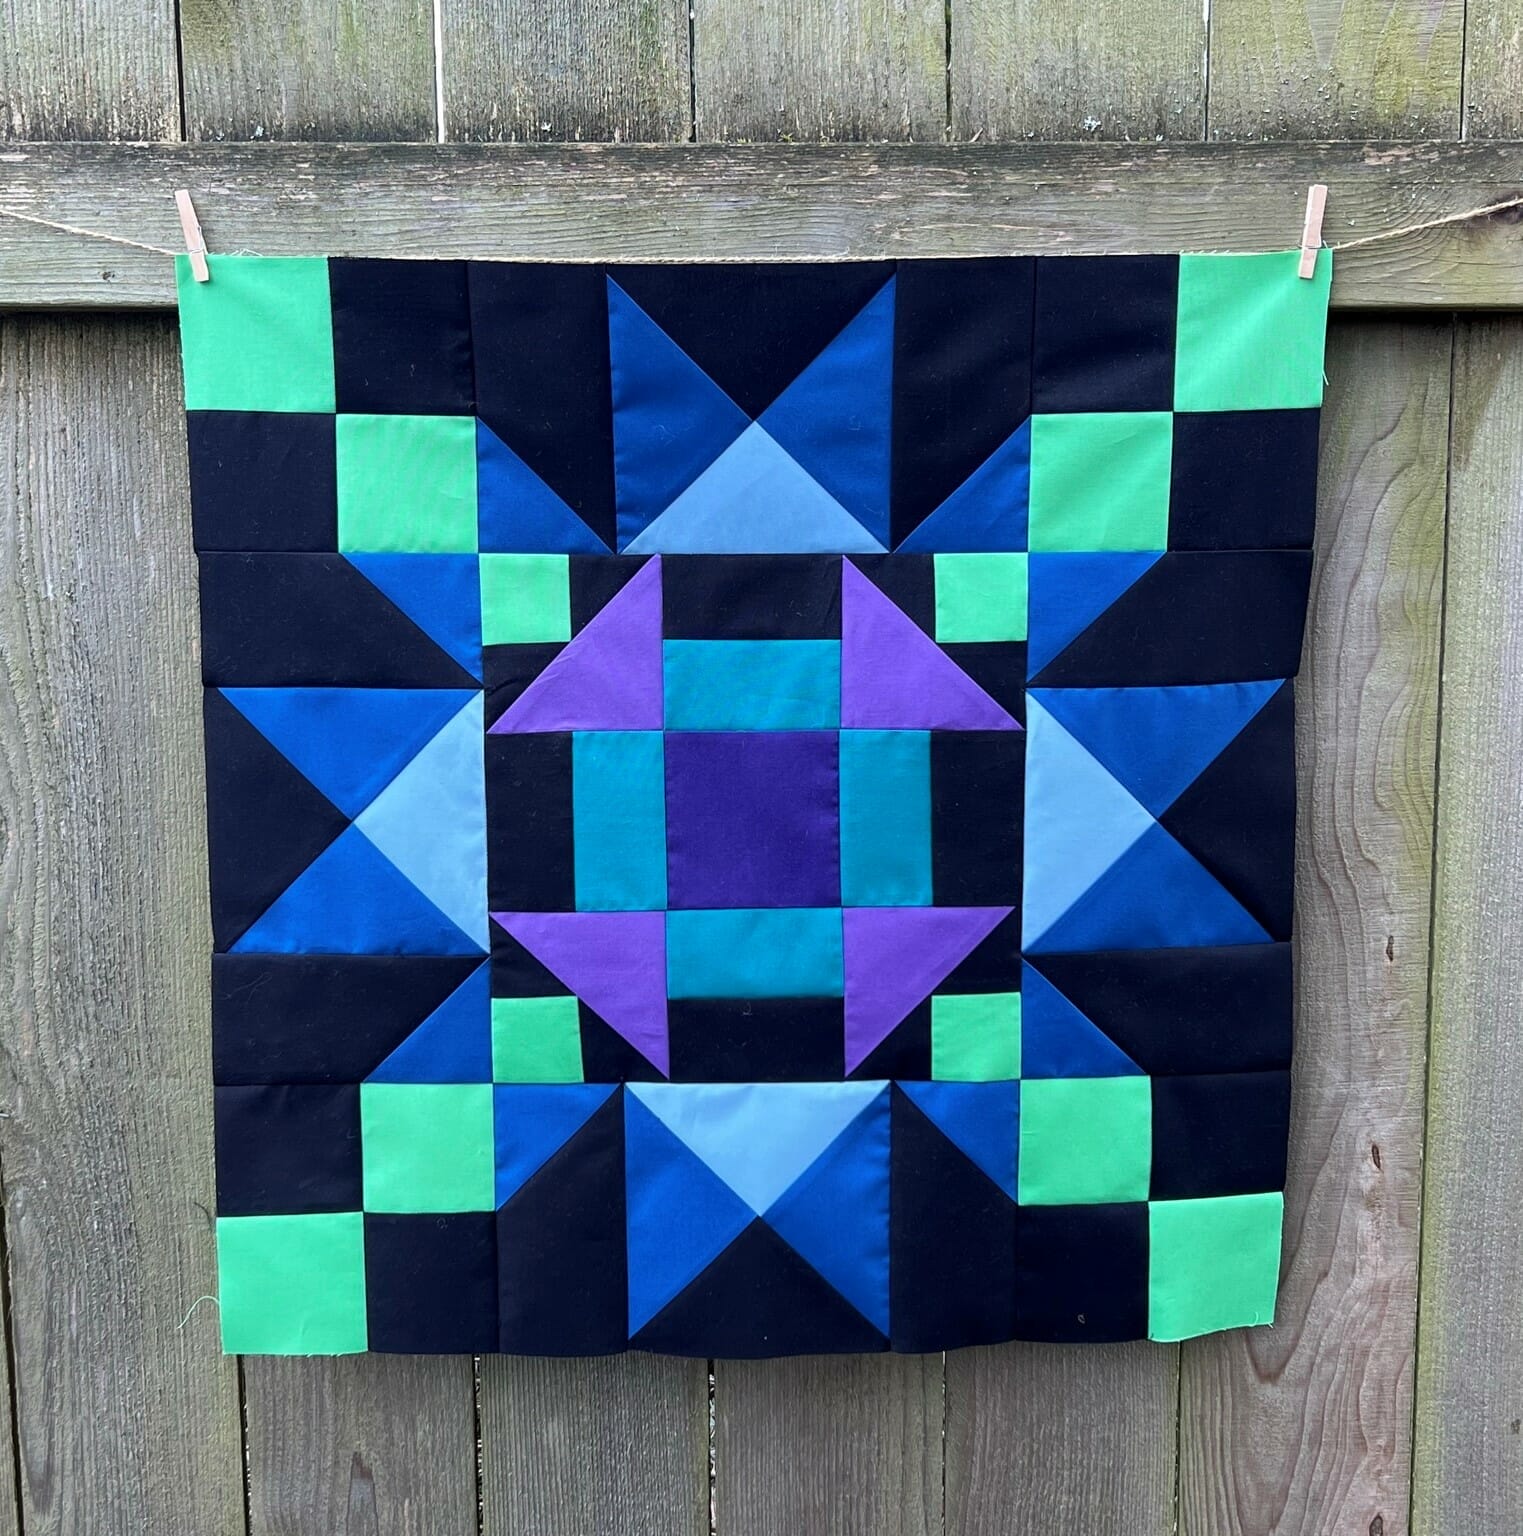
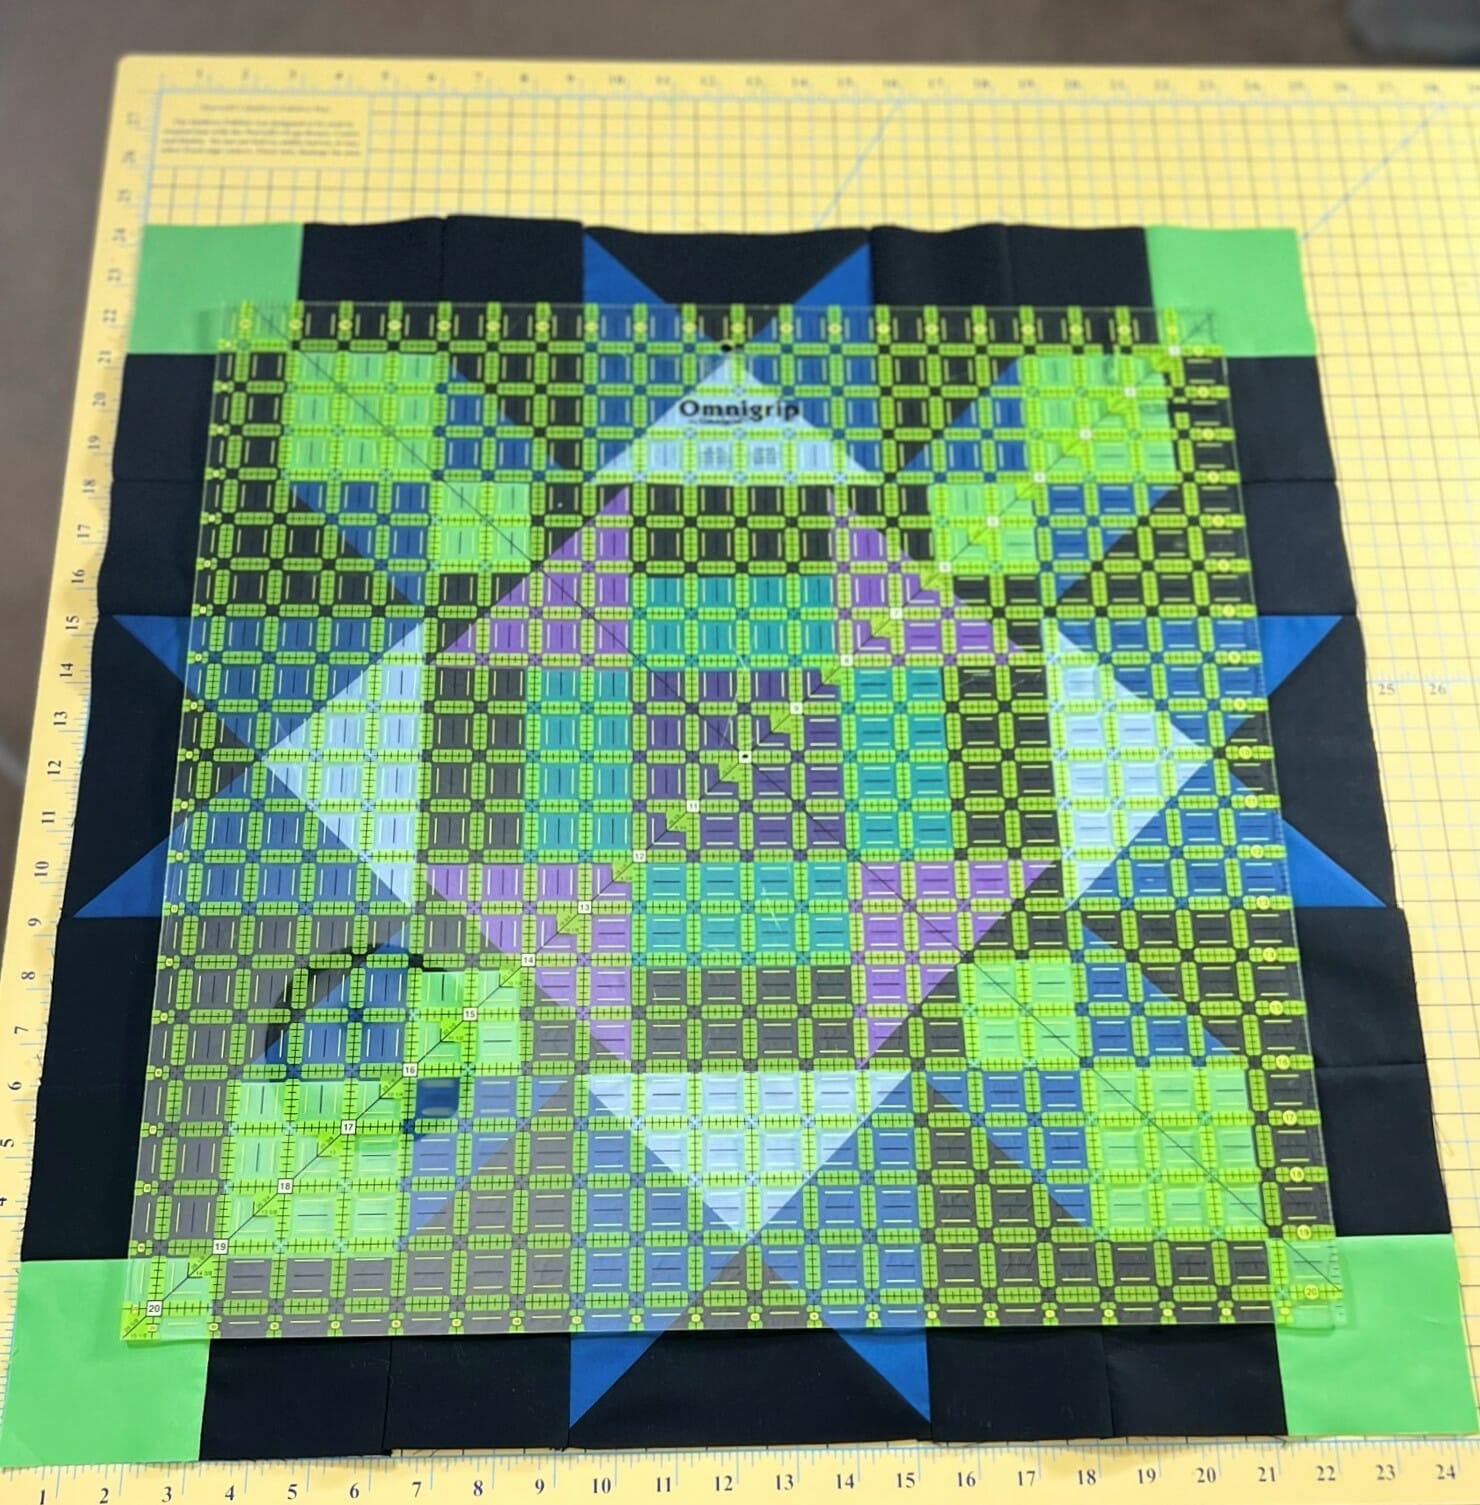
And now our block is done! If all has gone according to plan, this should now measure 24-1/2” square. Since my largest square ruler is 20” x 20”, I used that to flatten my quilt, and then placed it on my cutting mat table to make sure it measured correctly. So far SEW good! I tried to get a decent photo, however, the lighting in my studio kept reflecting off the ruler, so this was the best I could do. But you all get the gist.
I hope you’ve found this information helpful. If there’s anything you’d like me to talk about in the coming months, drop a comment below.
Until next time, Happy Quilting my friends!

-Kristin

