


 Tutorials
 11.9.2023
NOTE: these blog posts for the Amherst quilt top are part of a limited series for our Block of the Month subscription program. Sign-ups for the Amherst BOM are no longer available. You can learn more about our upcoming Block of the Month subscriptions here.
Hello everyone!
Welcome back! Can you all believe we are now on month 7 already? We are really getting close to the end.
If you guessed that we’d be making another four blocks this month, you’d be right. I feel like a bit of a broken record, saying that each month. Speaking of sounding like a broken record, I’ll add another friendly reminder to starch your fabrics before cutting. There are a couple of blocks this month that will really benefit from having your fabrics starched ahead of time.
As I post this blog, I’m at Quilt Festival in Houston, having a fantastic time at the Connecting Threads booth. So if you’re in the neighborhood, please stop by and say hi! This also means that I’m sending this from my laptop, and I don’t have the software to spiff up my photos, so please excuse them this month. I figure it’s better for you to have the information now, rather than wait until I return home to my regular computer. I know many of you already have your kits for the month, and are probably anxious to get going.
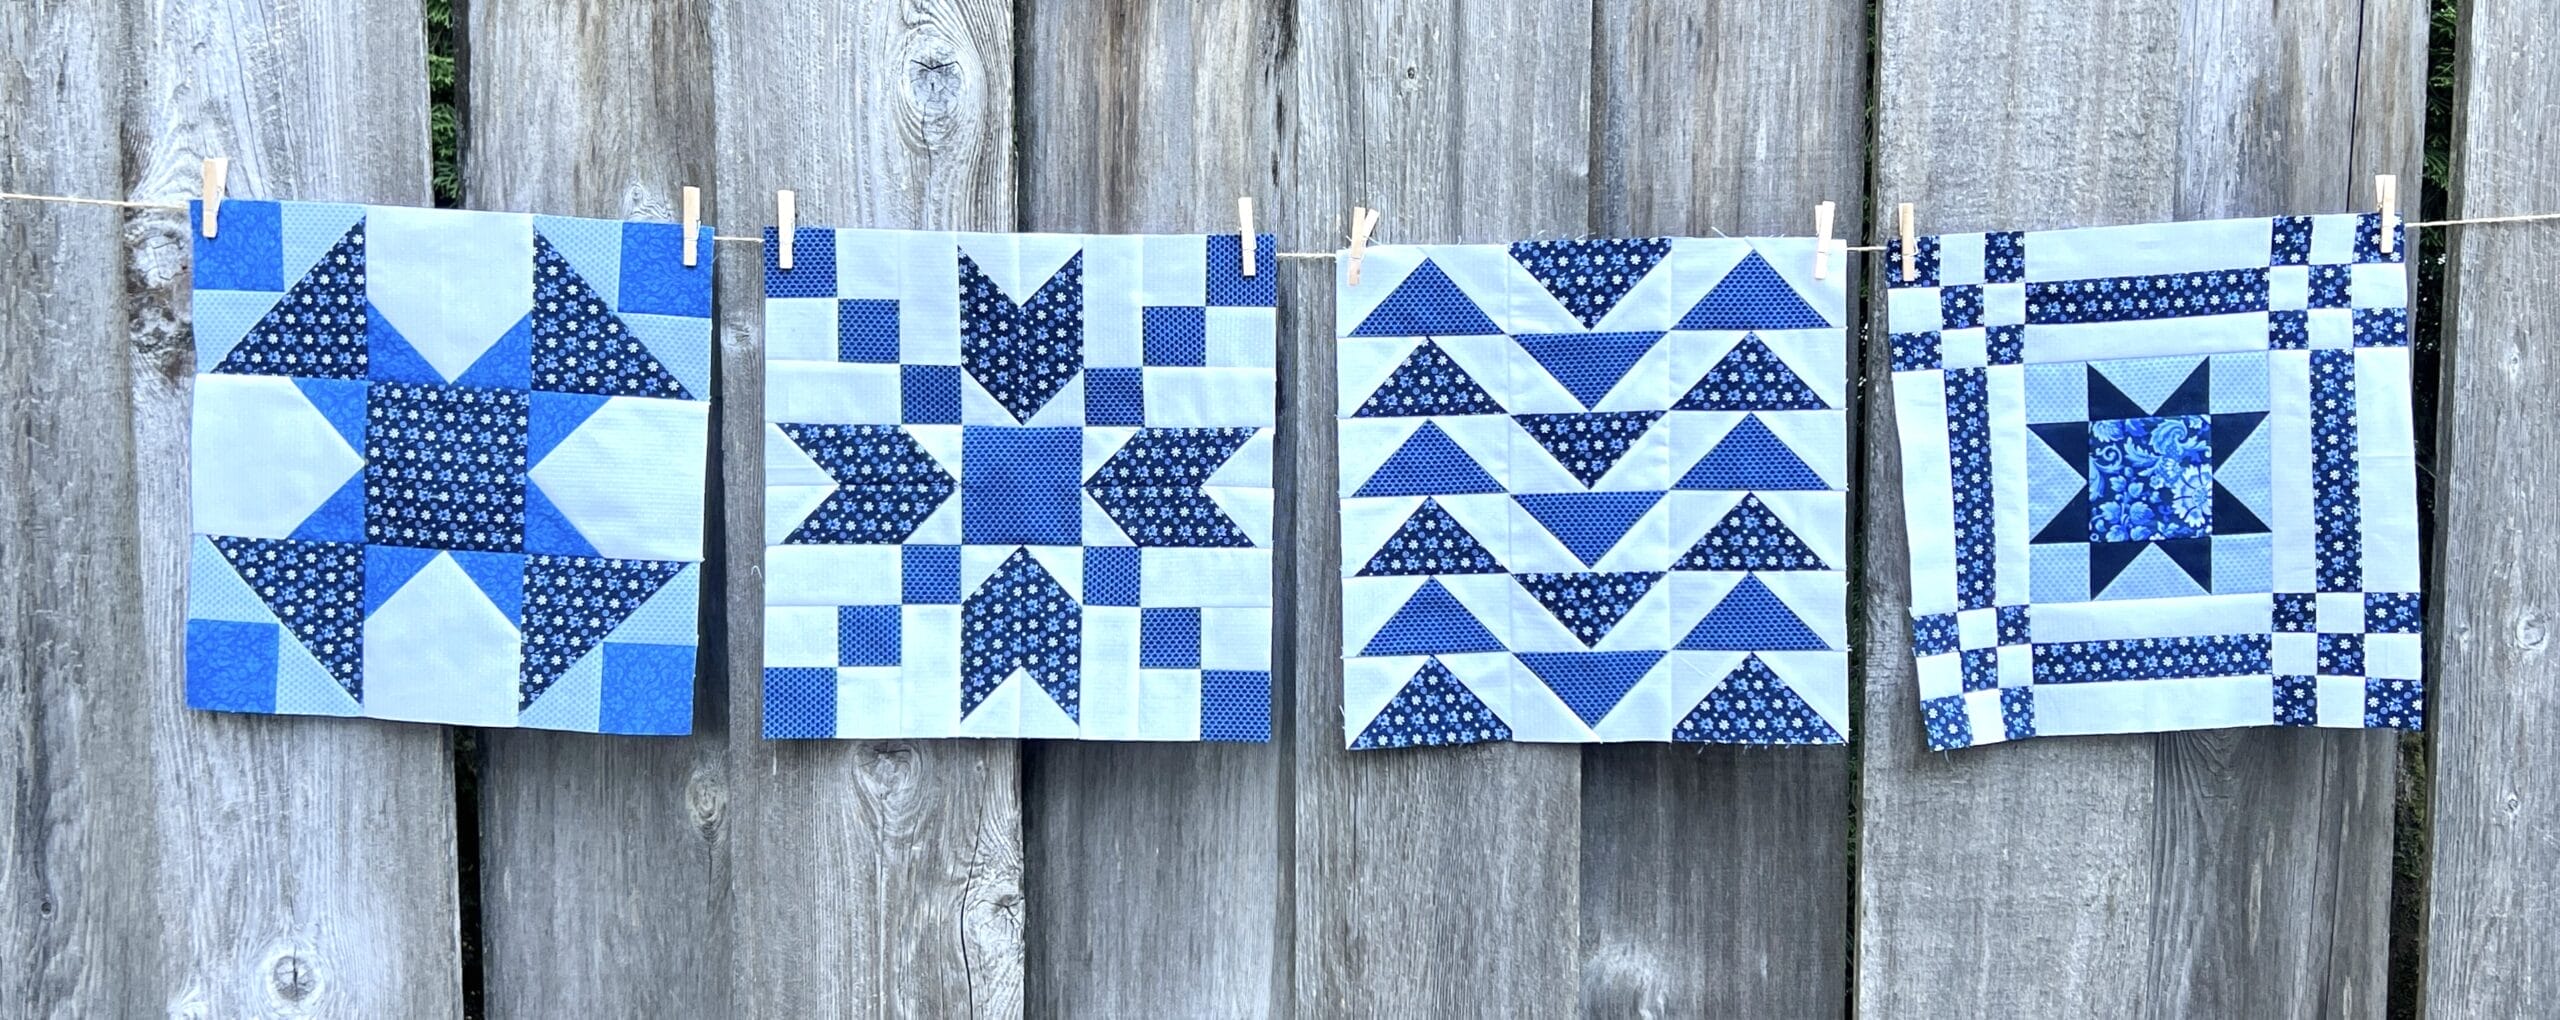
Let’s talk about this month’s blocks!
Block #4
One of the things I love about this particular block is that there are only two units to make before we can put it together. It’s basically a semi-fancy 9-patch.
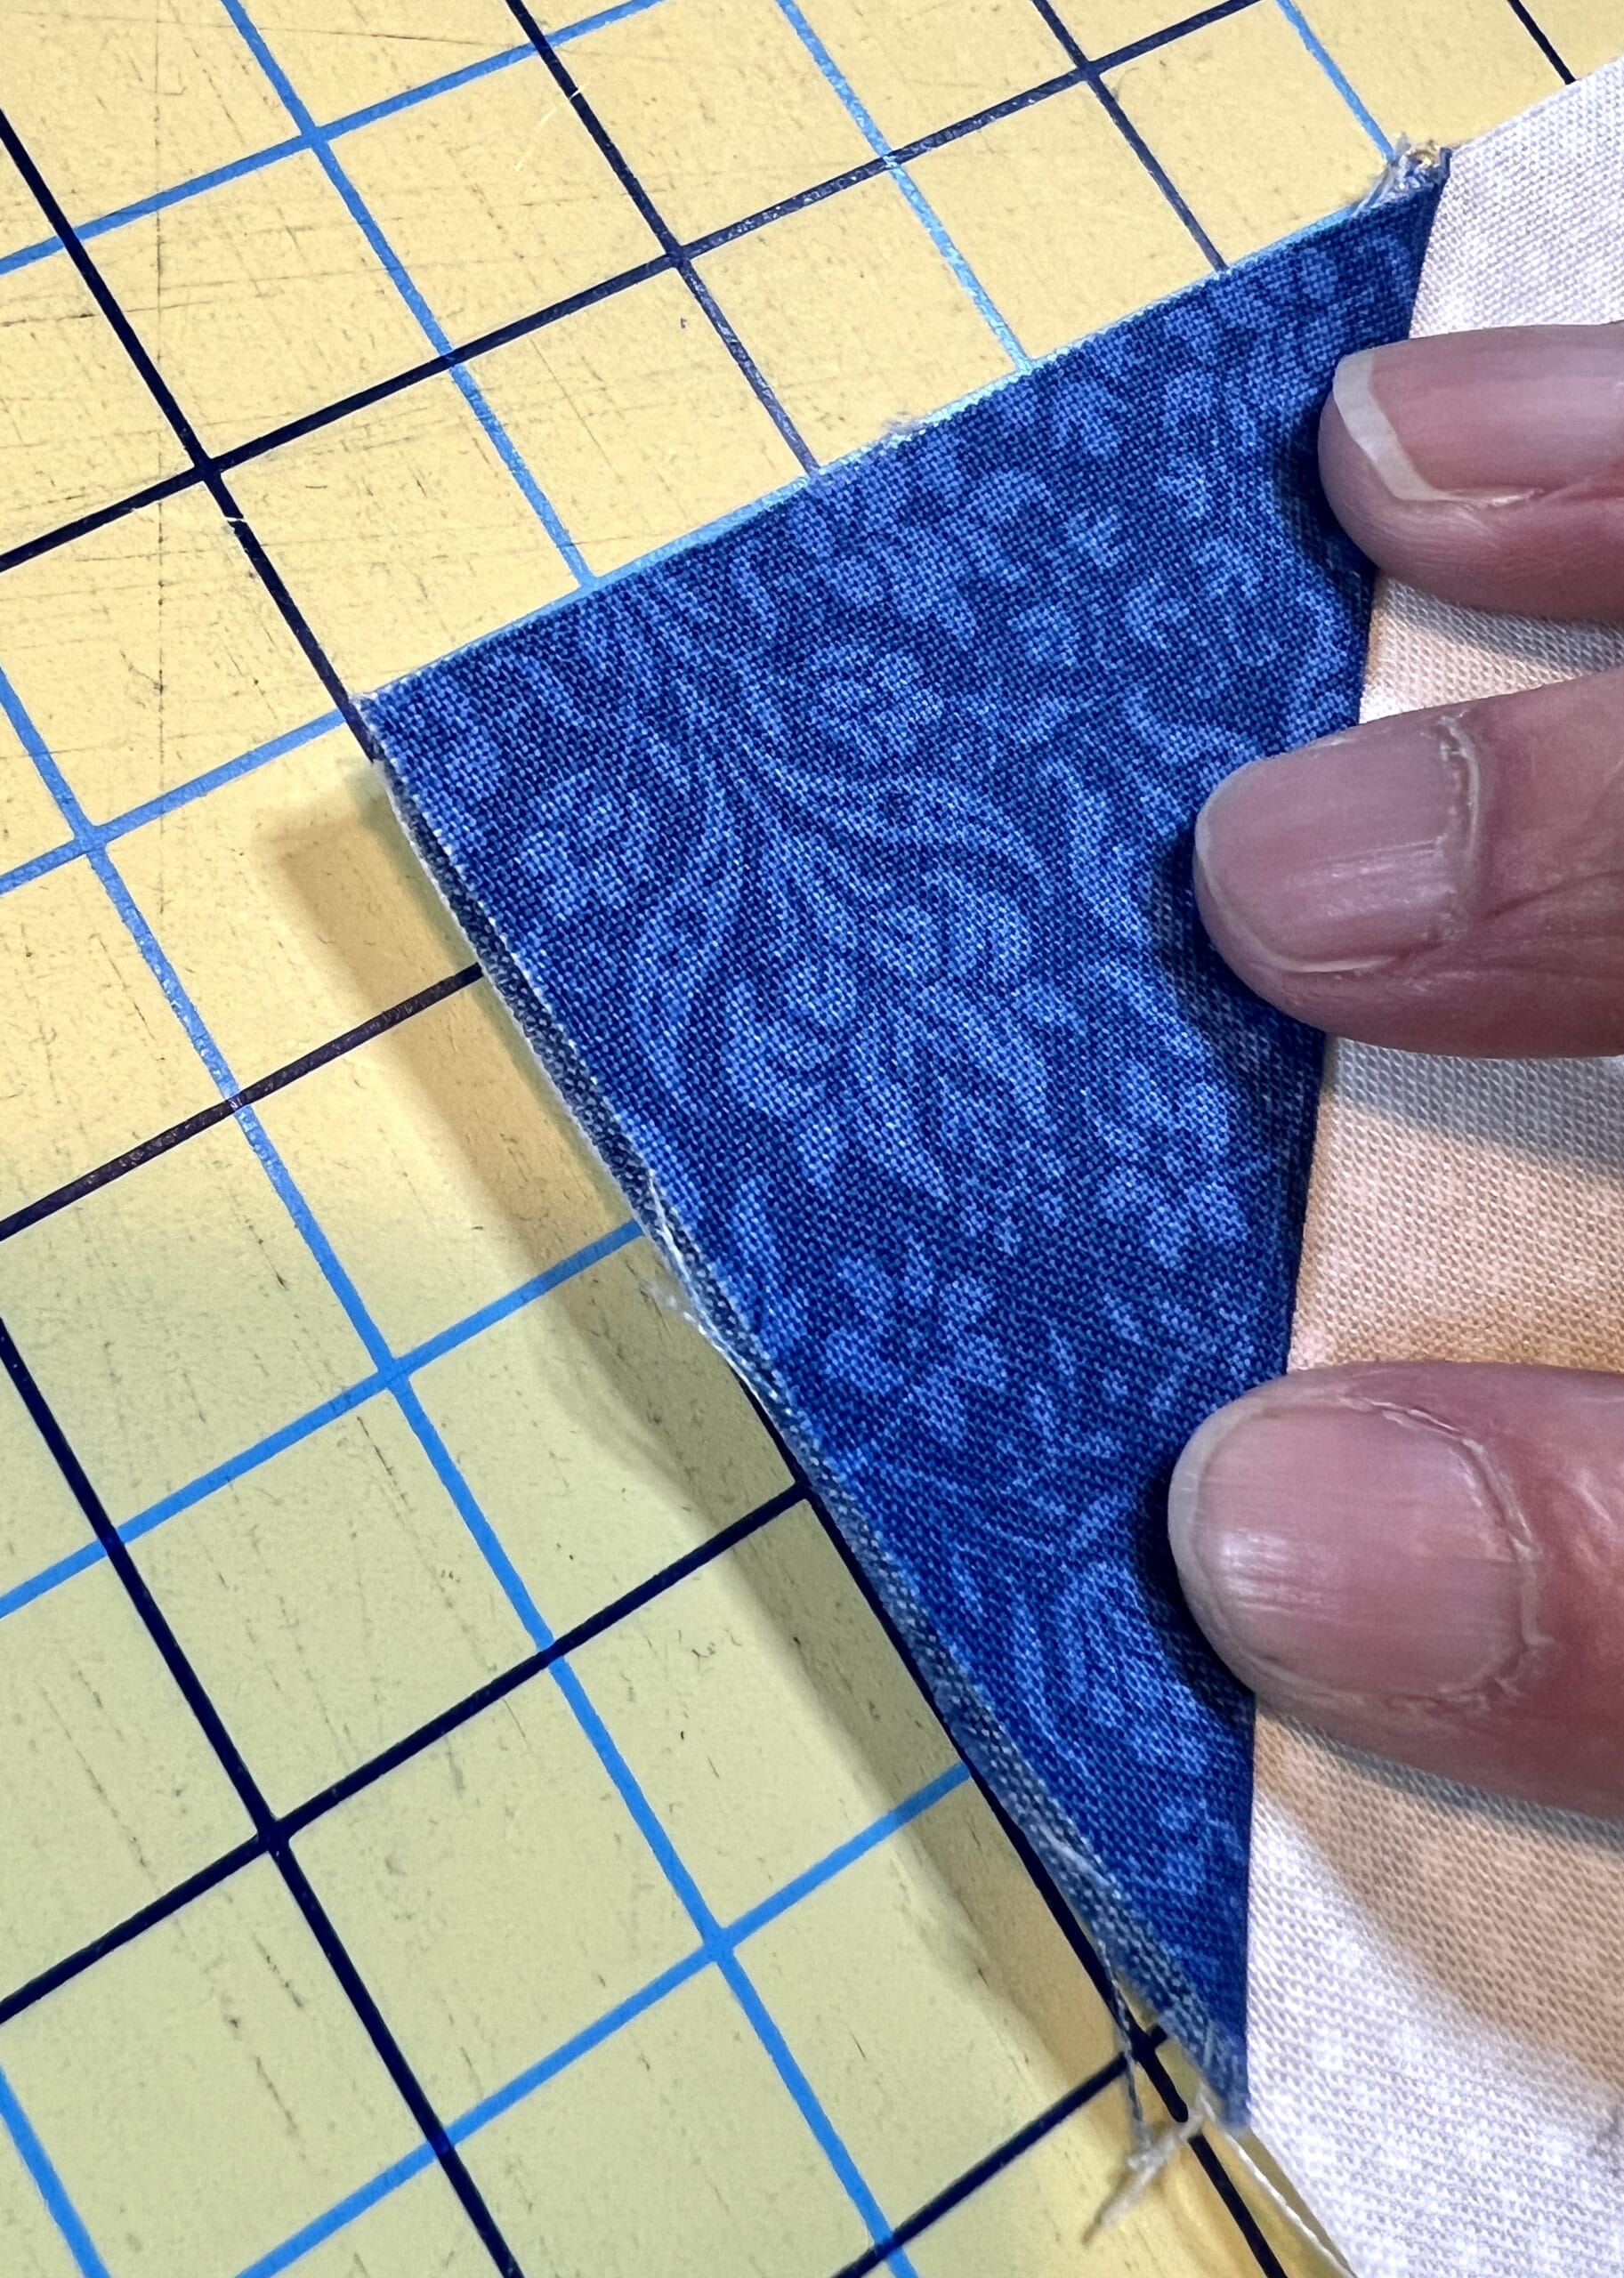
The first unit begins by sewing two E triangles, one at a time to each D square.
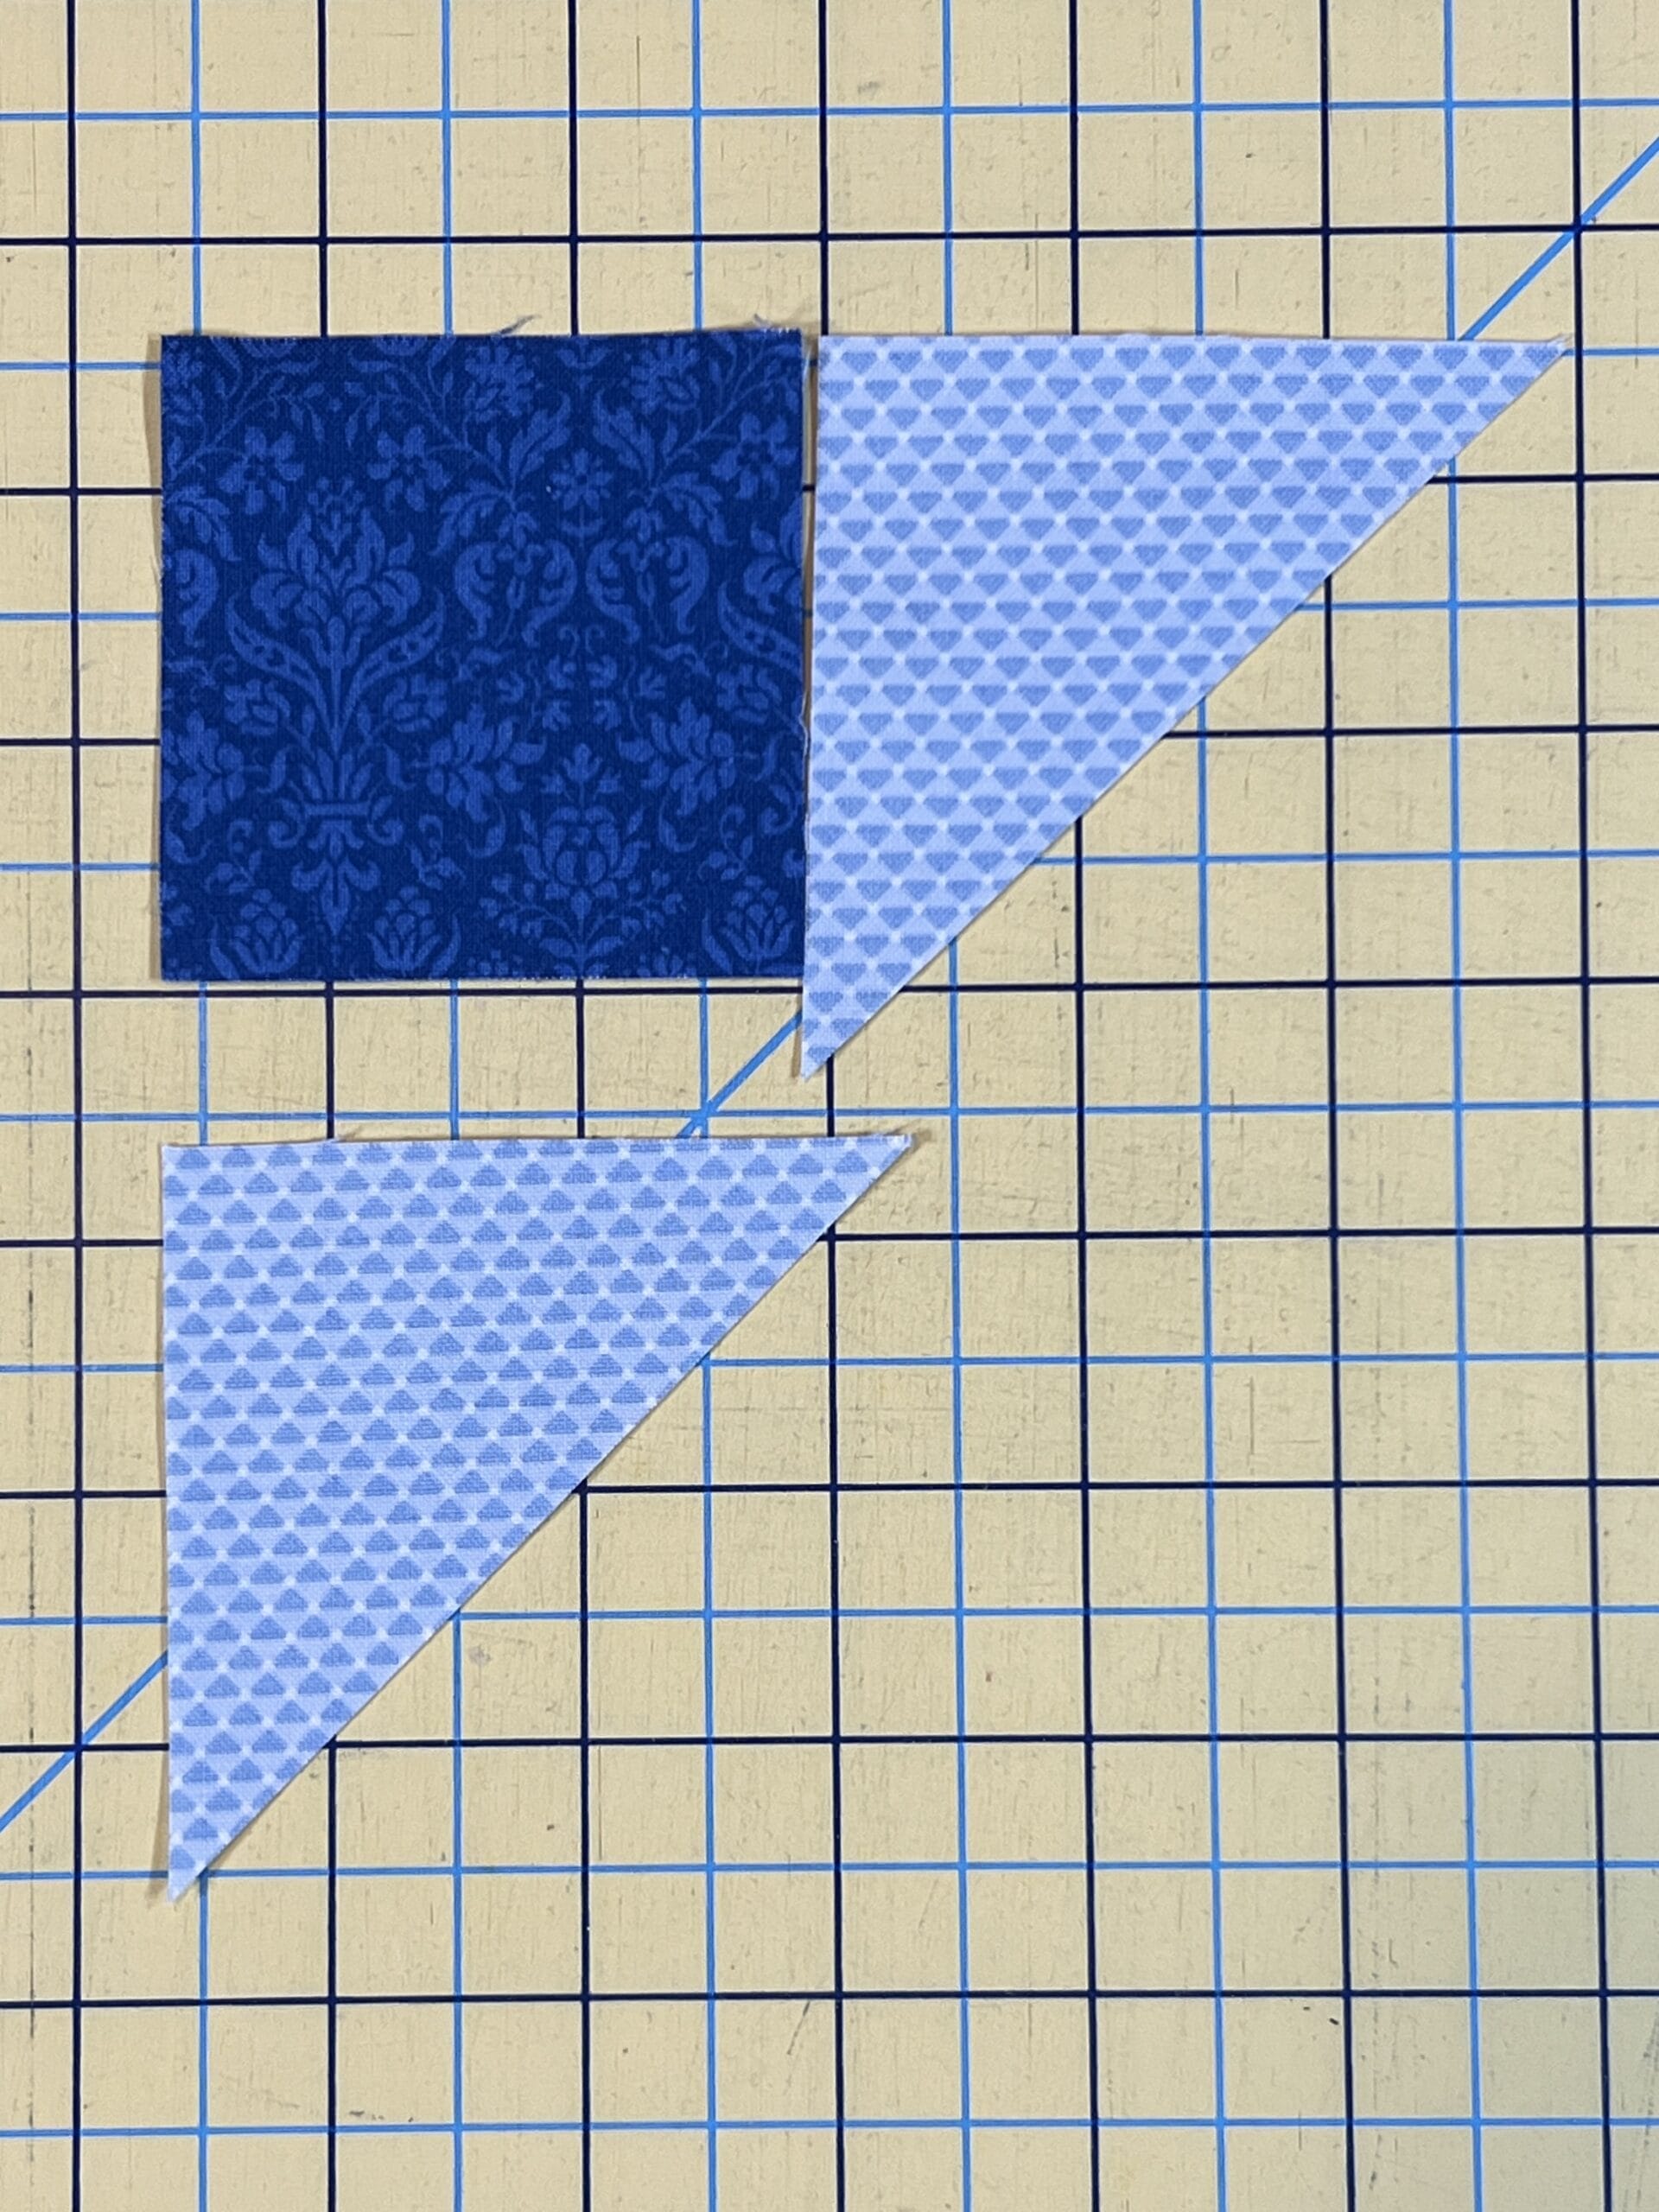
You want to line up the D and E pieces at the top, so that the E triangle will have a bit off a tail hanging down at the bottom. Once you sew on the first E triangle, trim off the tail so that it’s even with the bottom of the D square.
Repeat this with the second E triangle, lining up the D and E pieces on the side. You’ll have another tail to trim off when done.

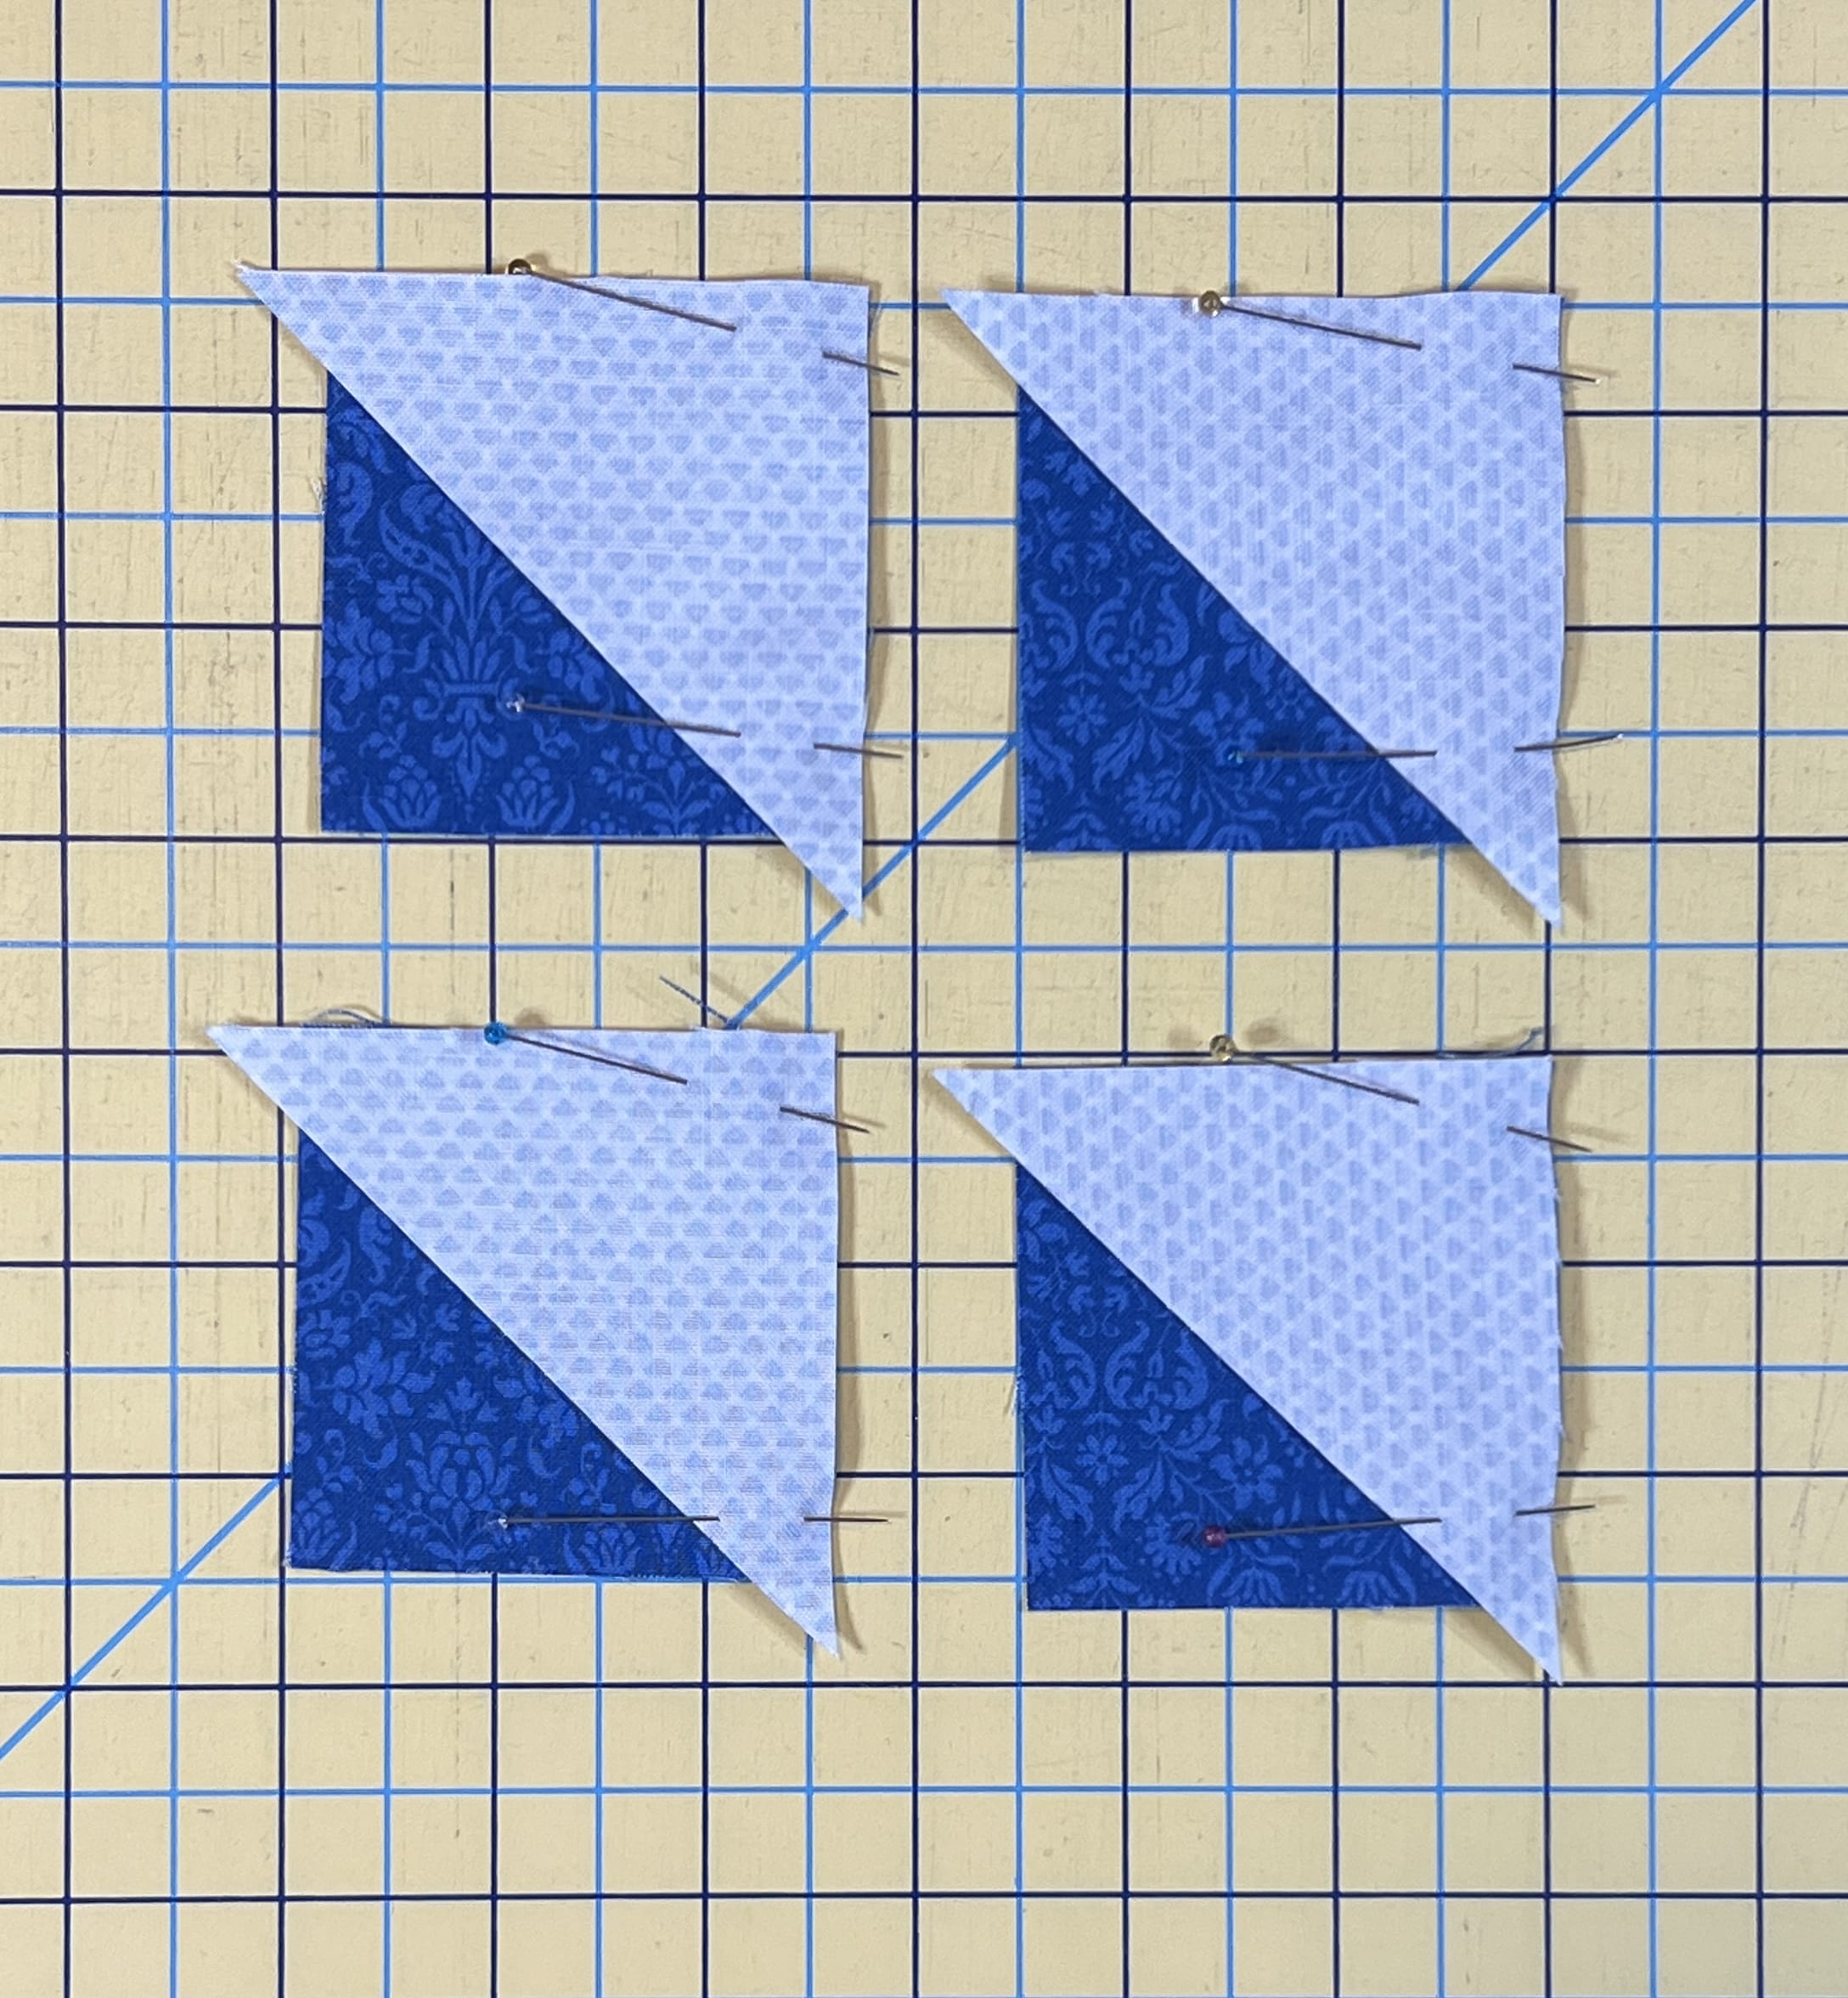
Now sew each of these triangle units to the larger B triangle. I always find it helpful to pin and sew these with the pieced triangle unit from step 1 on top. This way I can make sure I’m stitching accurately at the point where the corner of the square is.

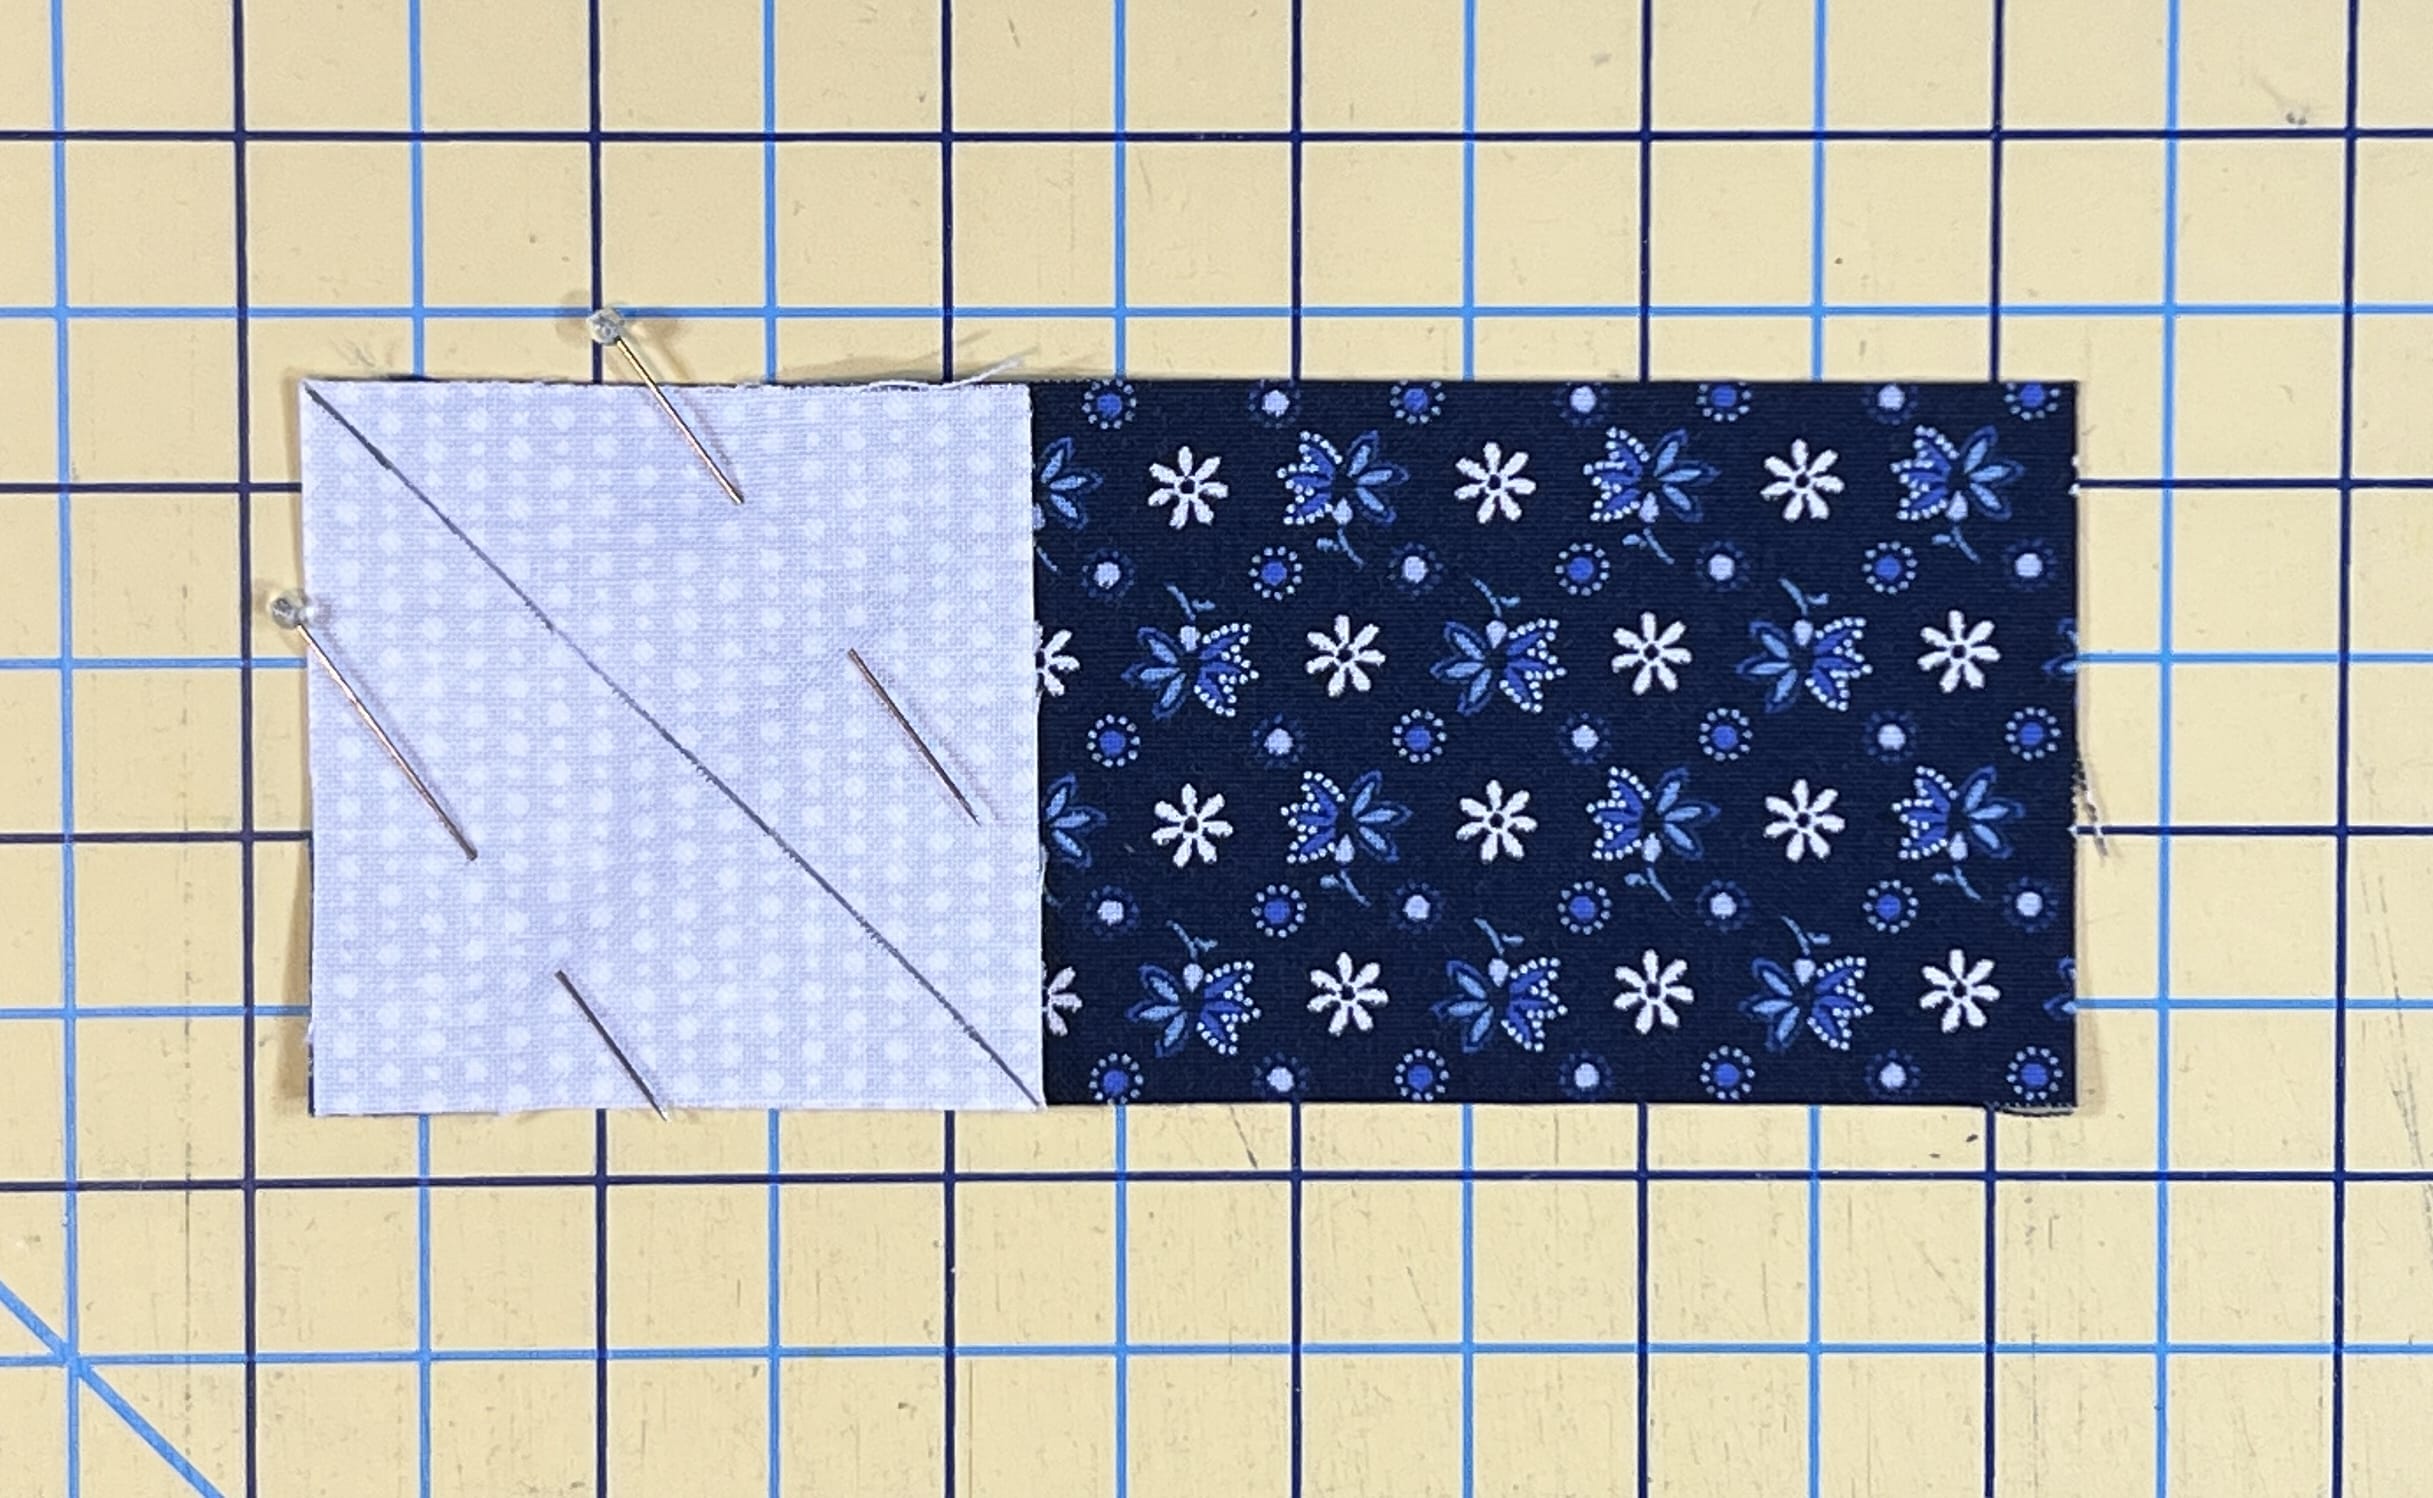
The next unit is made by placing two C squares on to each F square, one at a time, and stitching on the marked lines. It’s basically the same as the stitch and flip method commonly used in making flying geese (which we will do later for another block this month). I sewed mine assembly line style like you see below:

As I’ve mentioned in previous blog posts for this quilt, before I cut off my excess to the 1/4″ seam allowance, I always flip them up to make sure they line up at the corners.

All we have to do now is sew everything together and the block is done.
Block #12
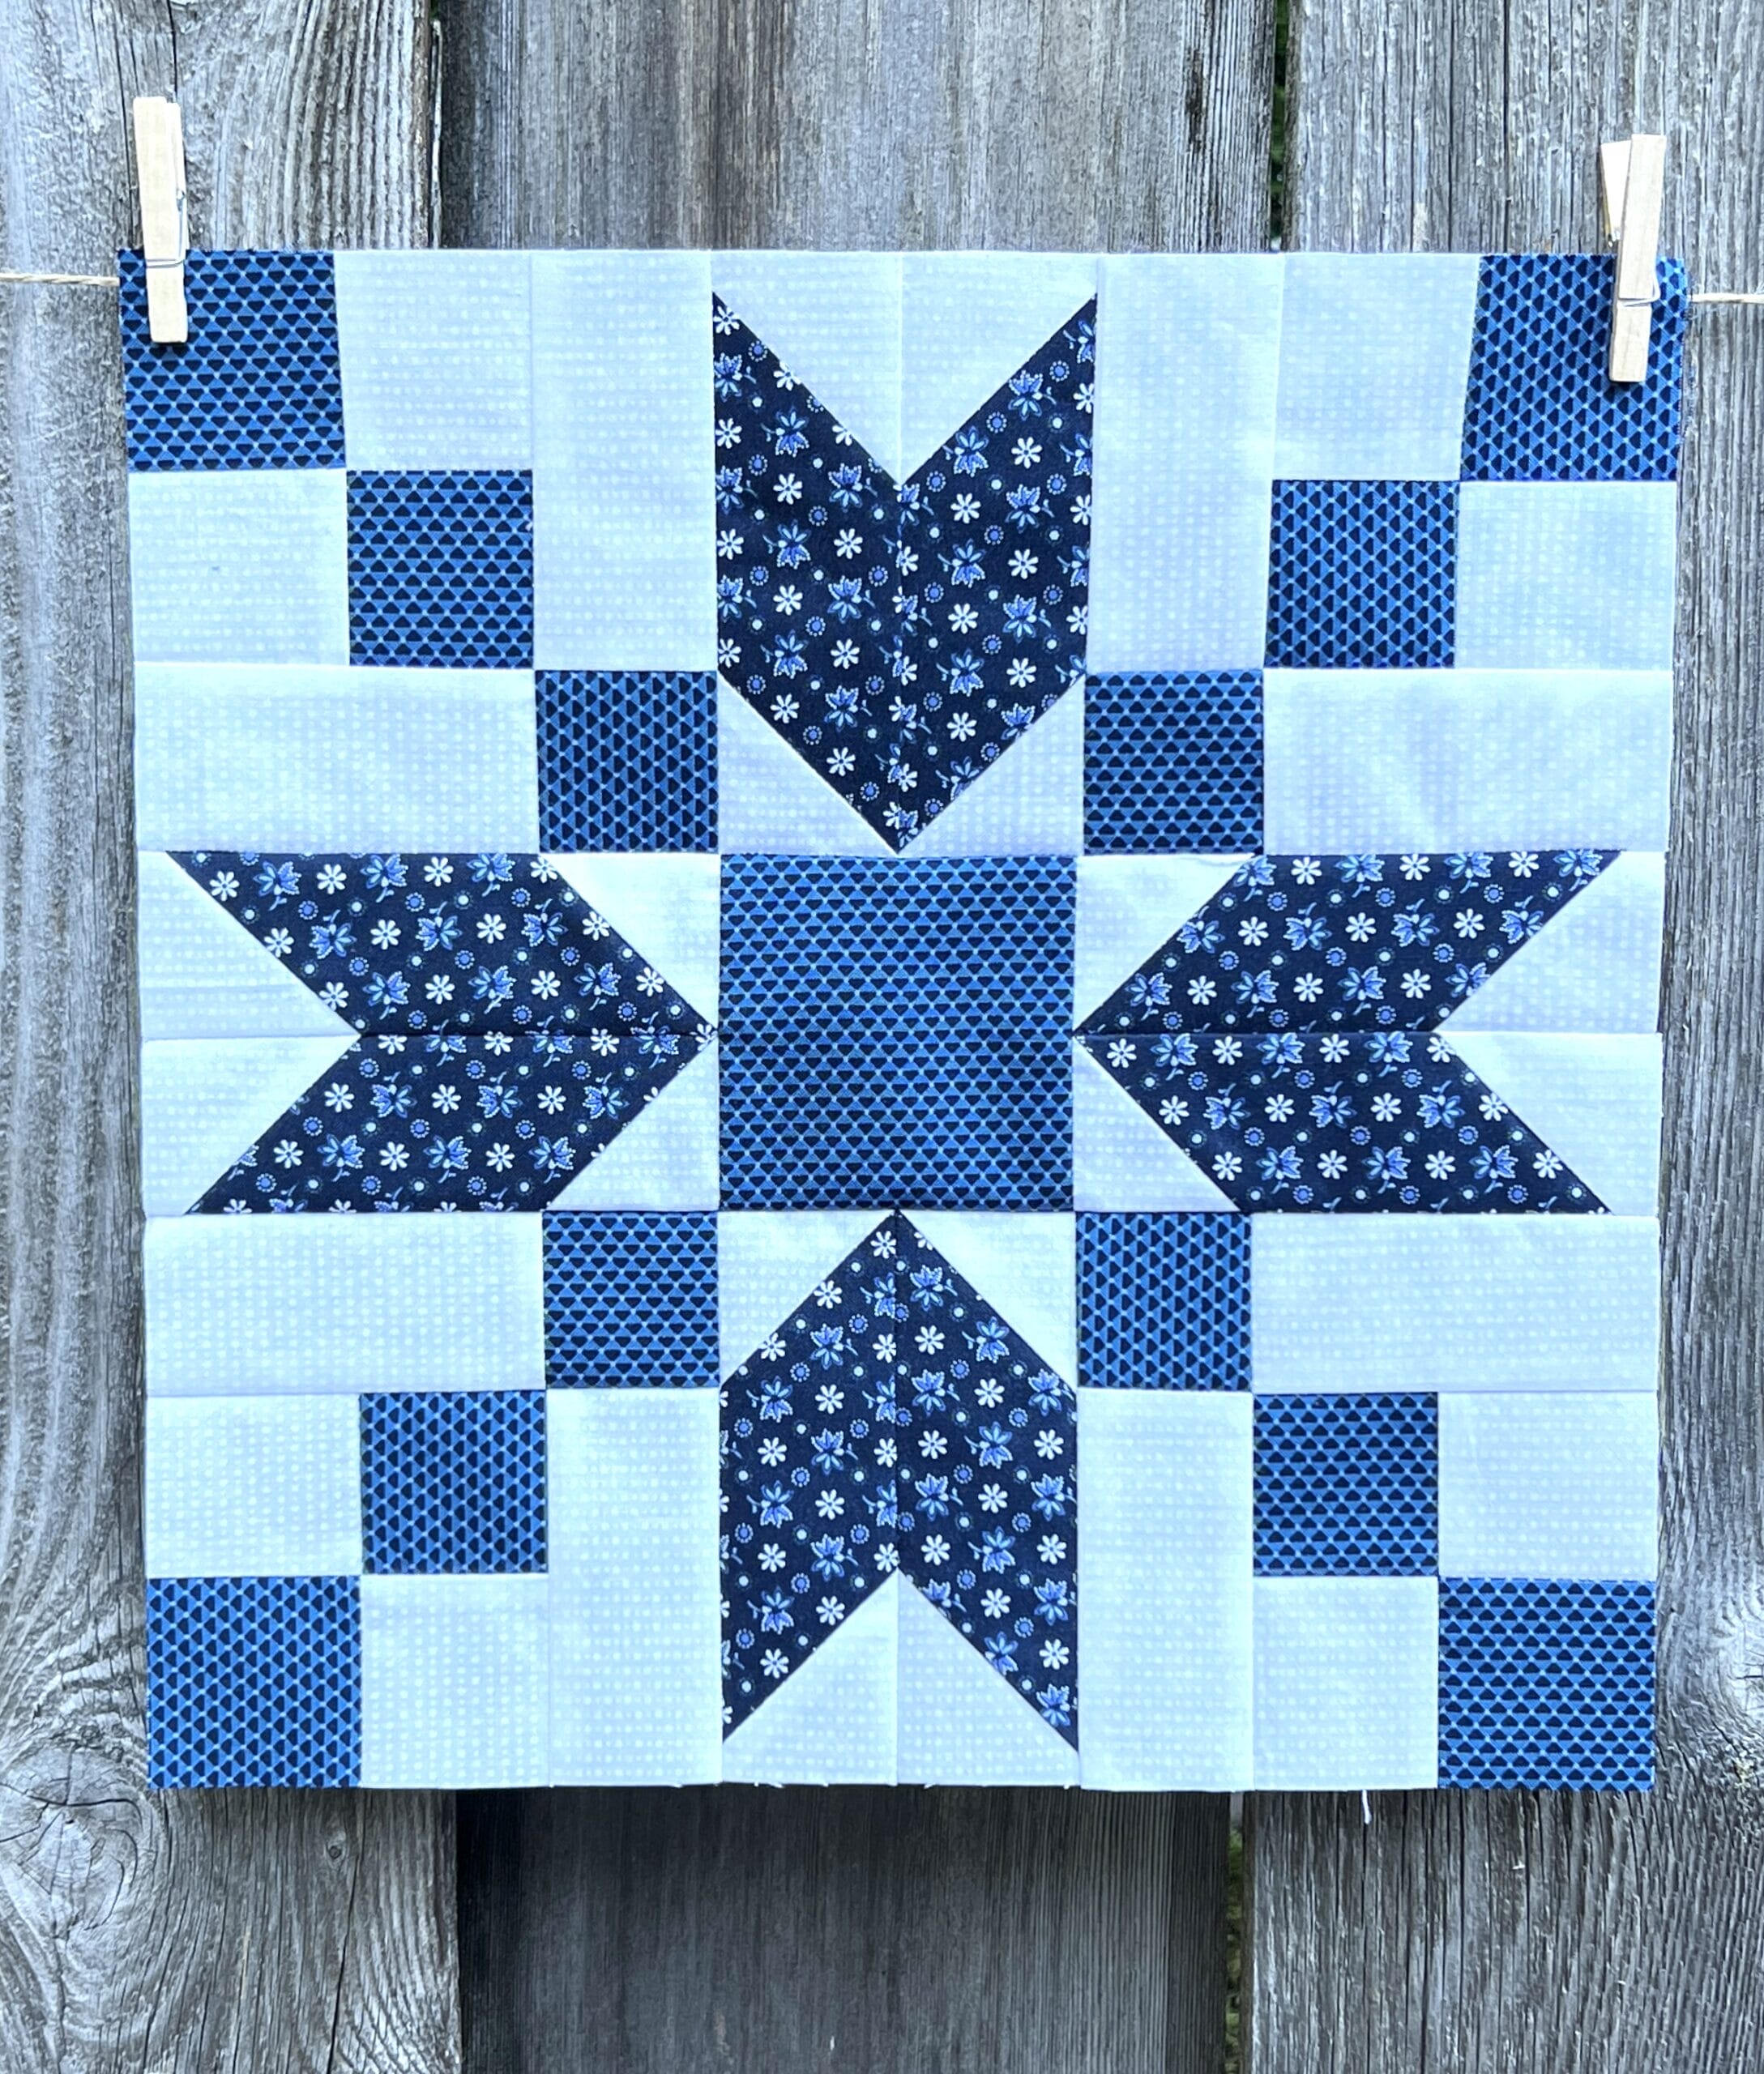
I love this block! It would be so cute to make a bunch of these out of some Christmas fabric and put together a festive holiday snowflake quilt.
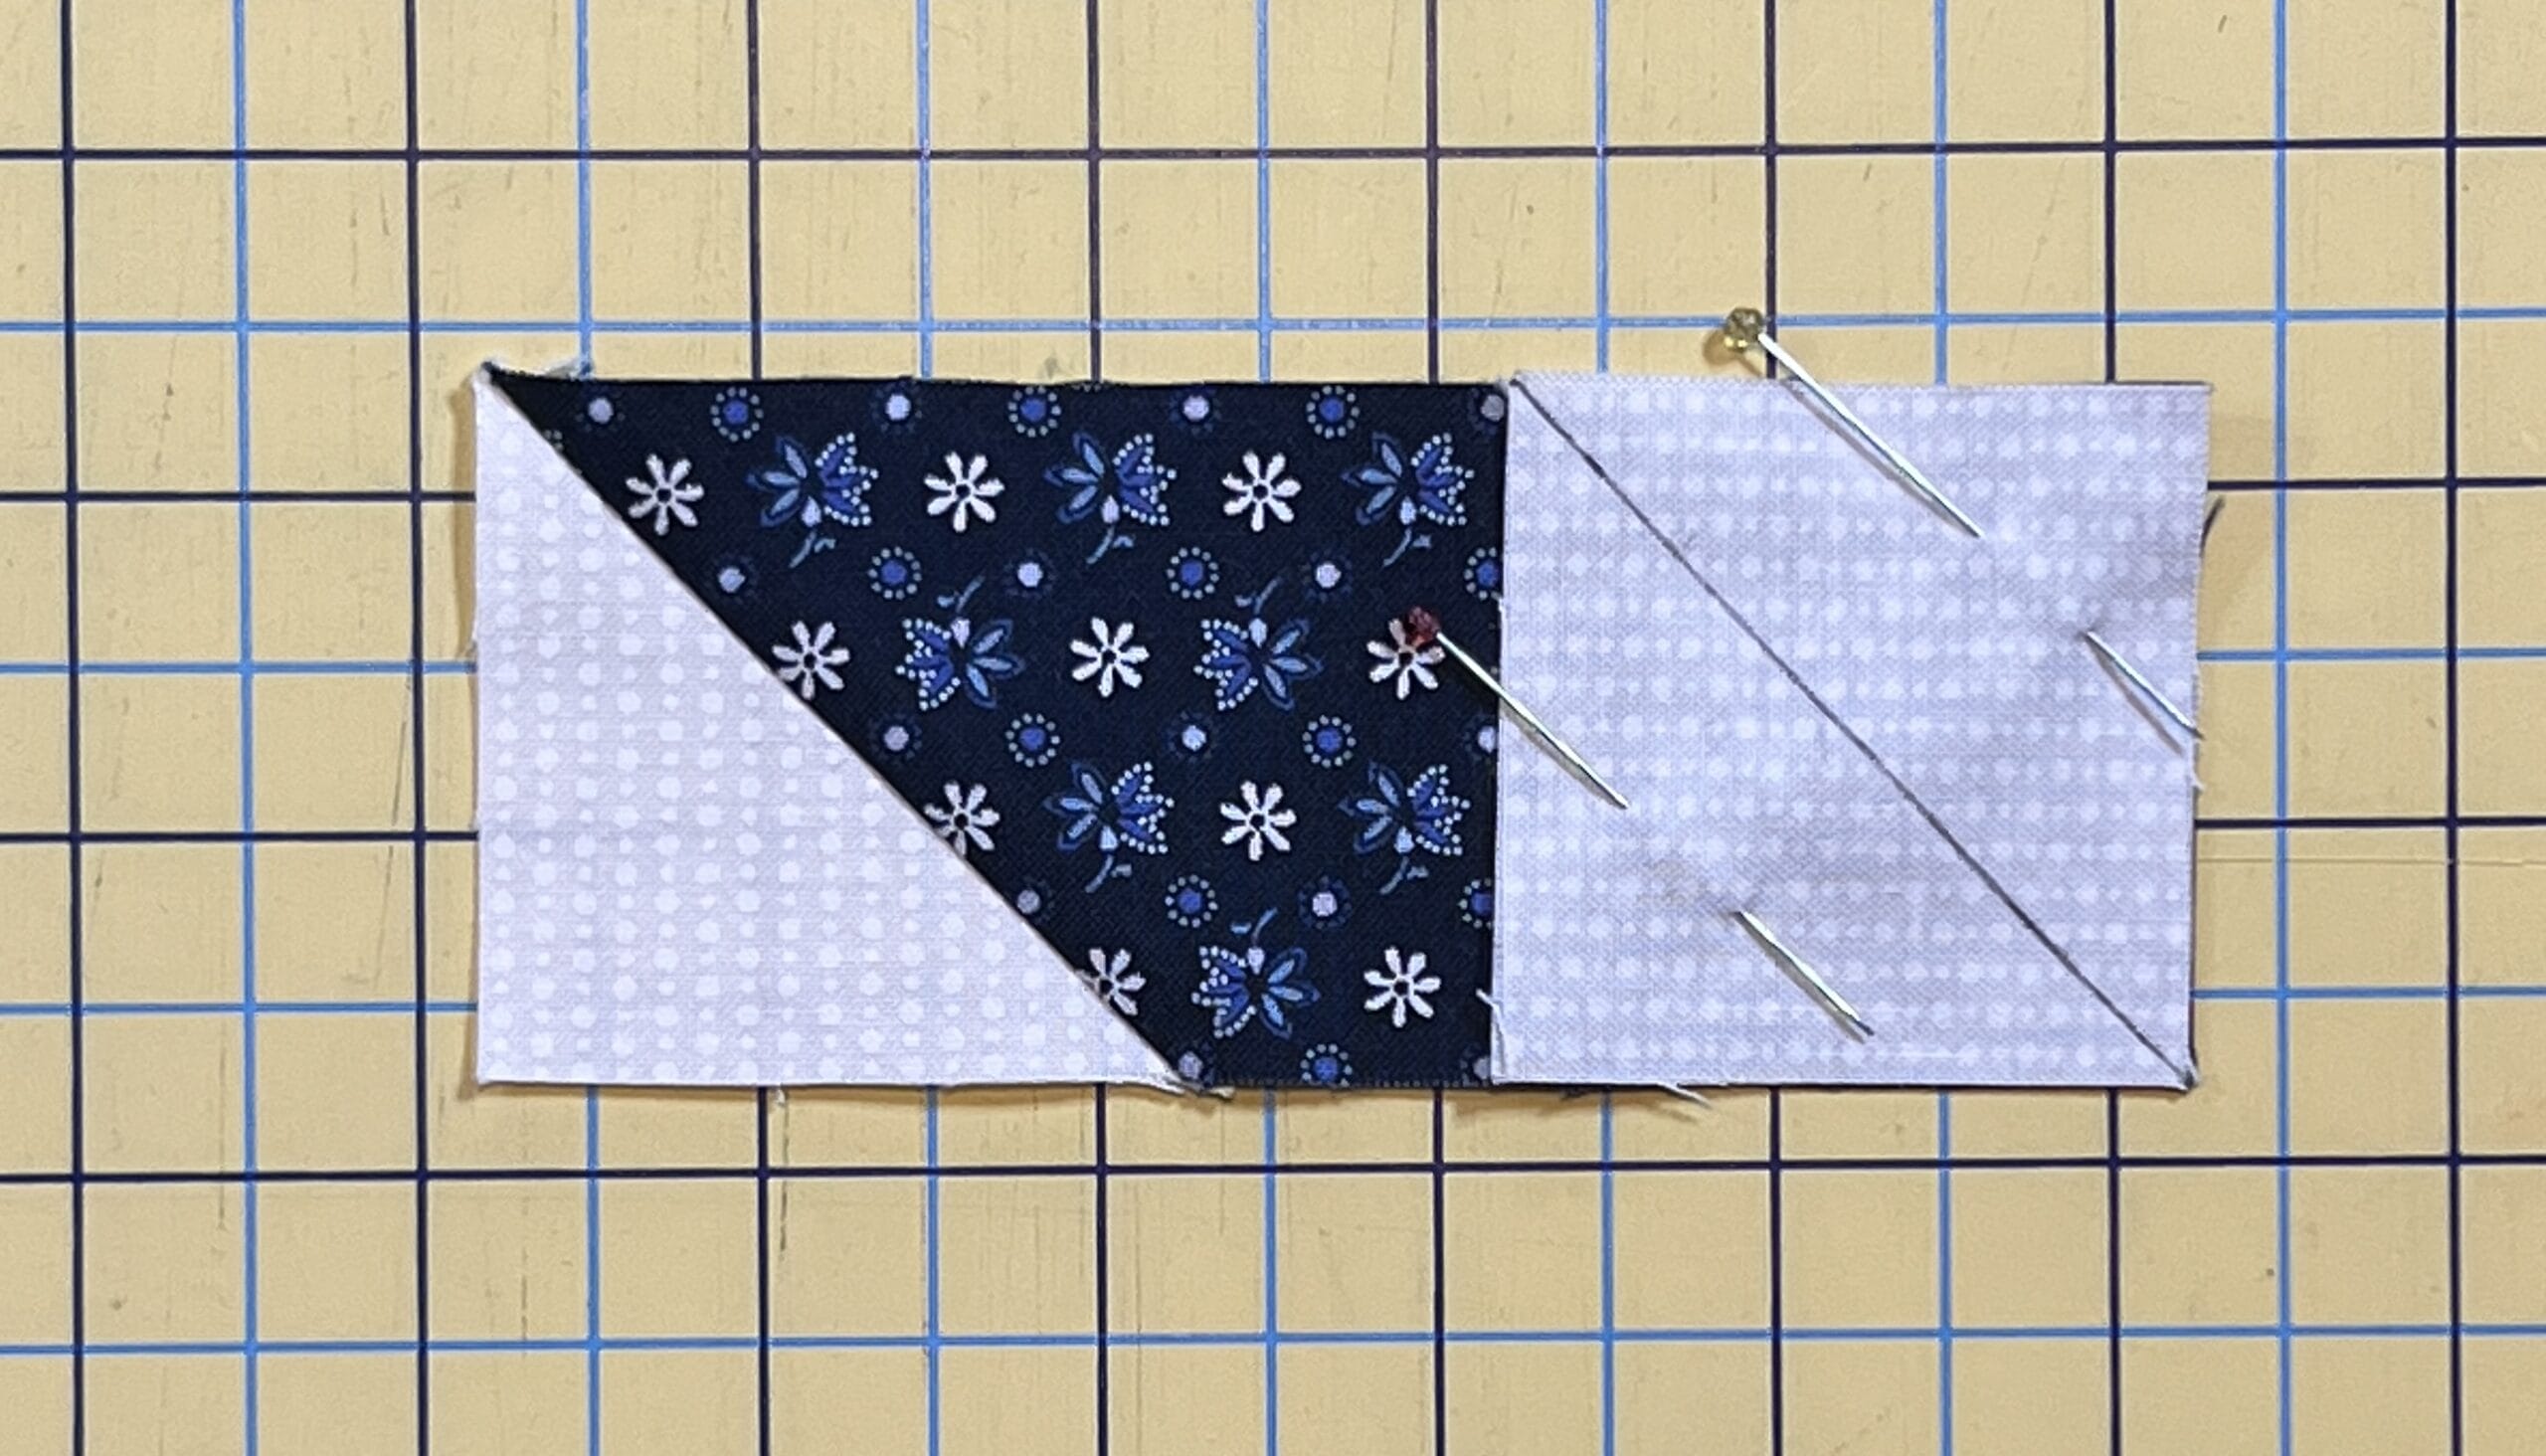
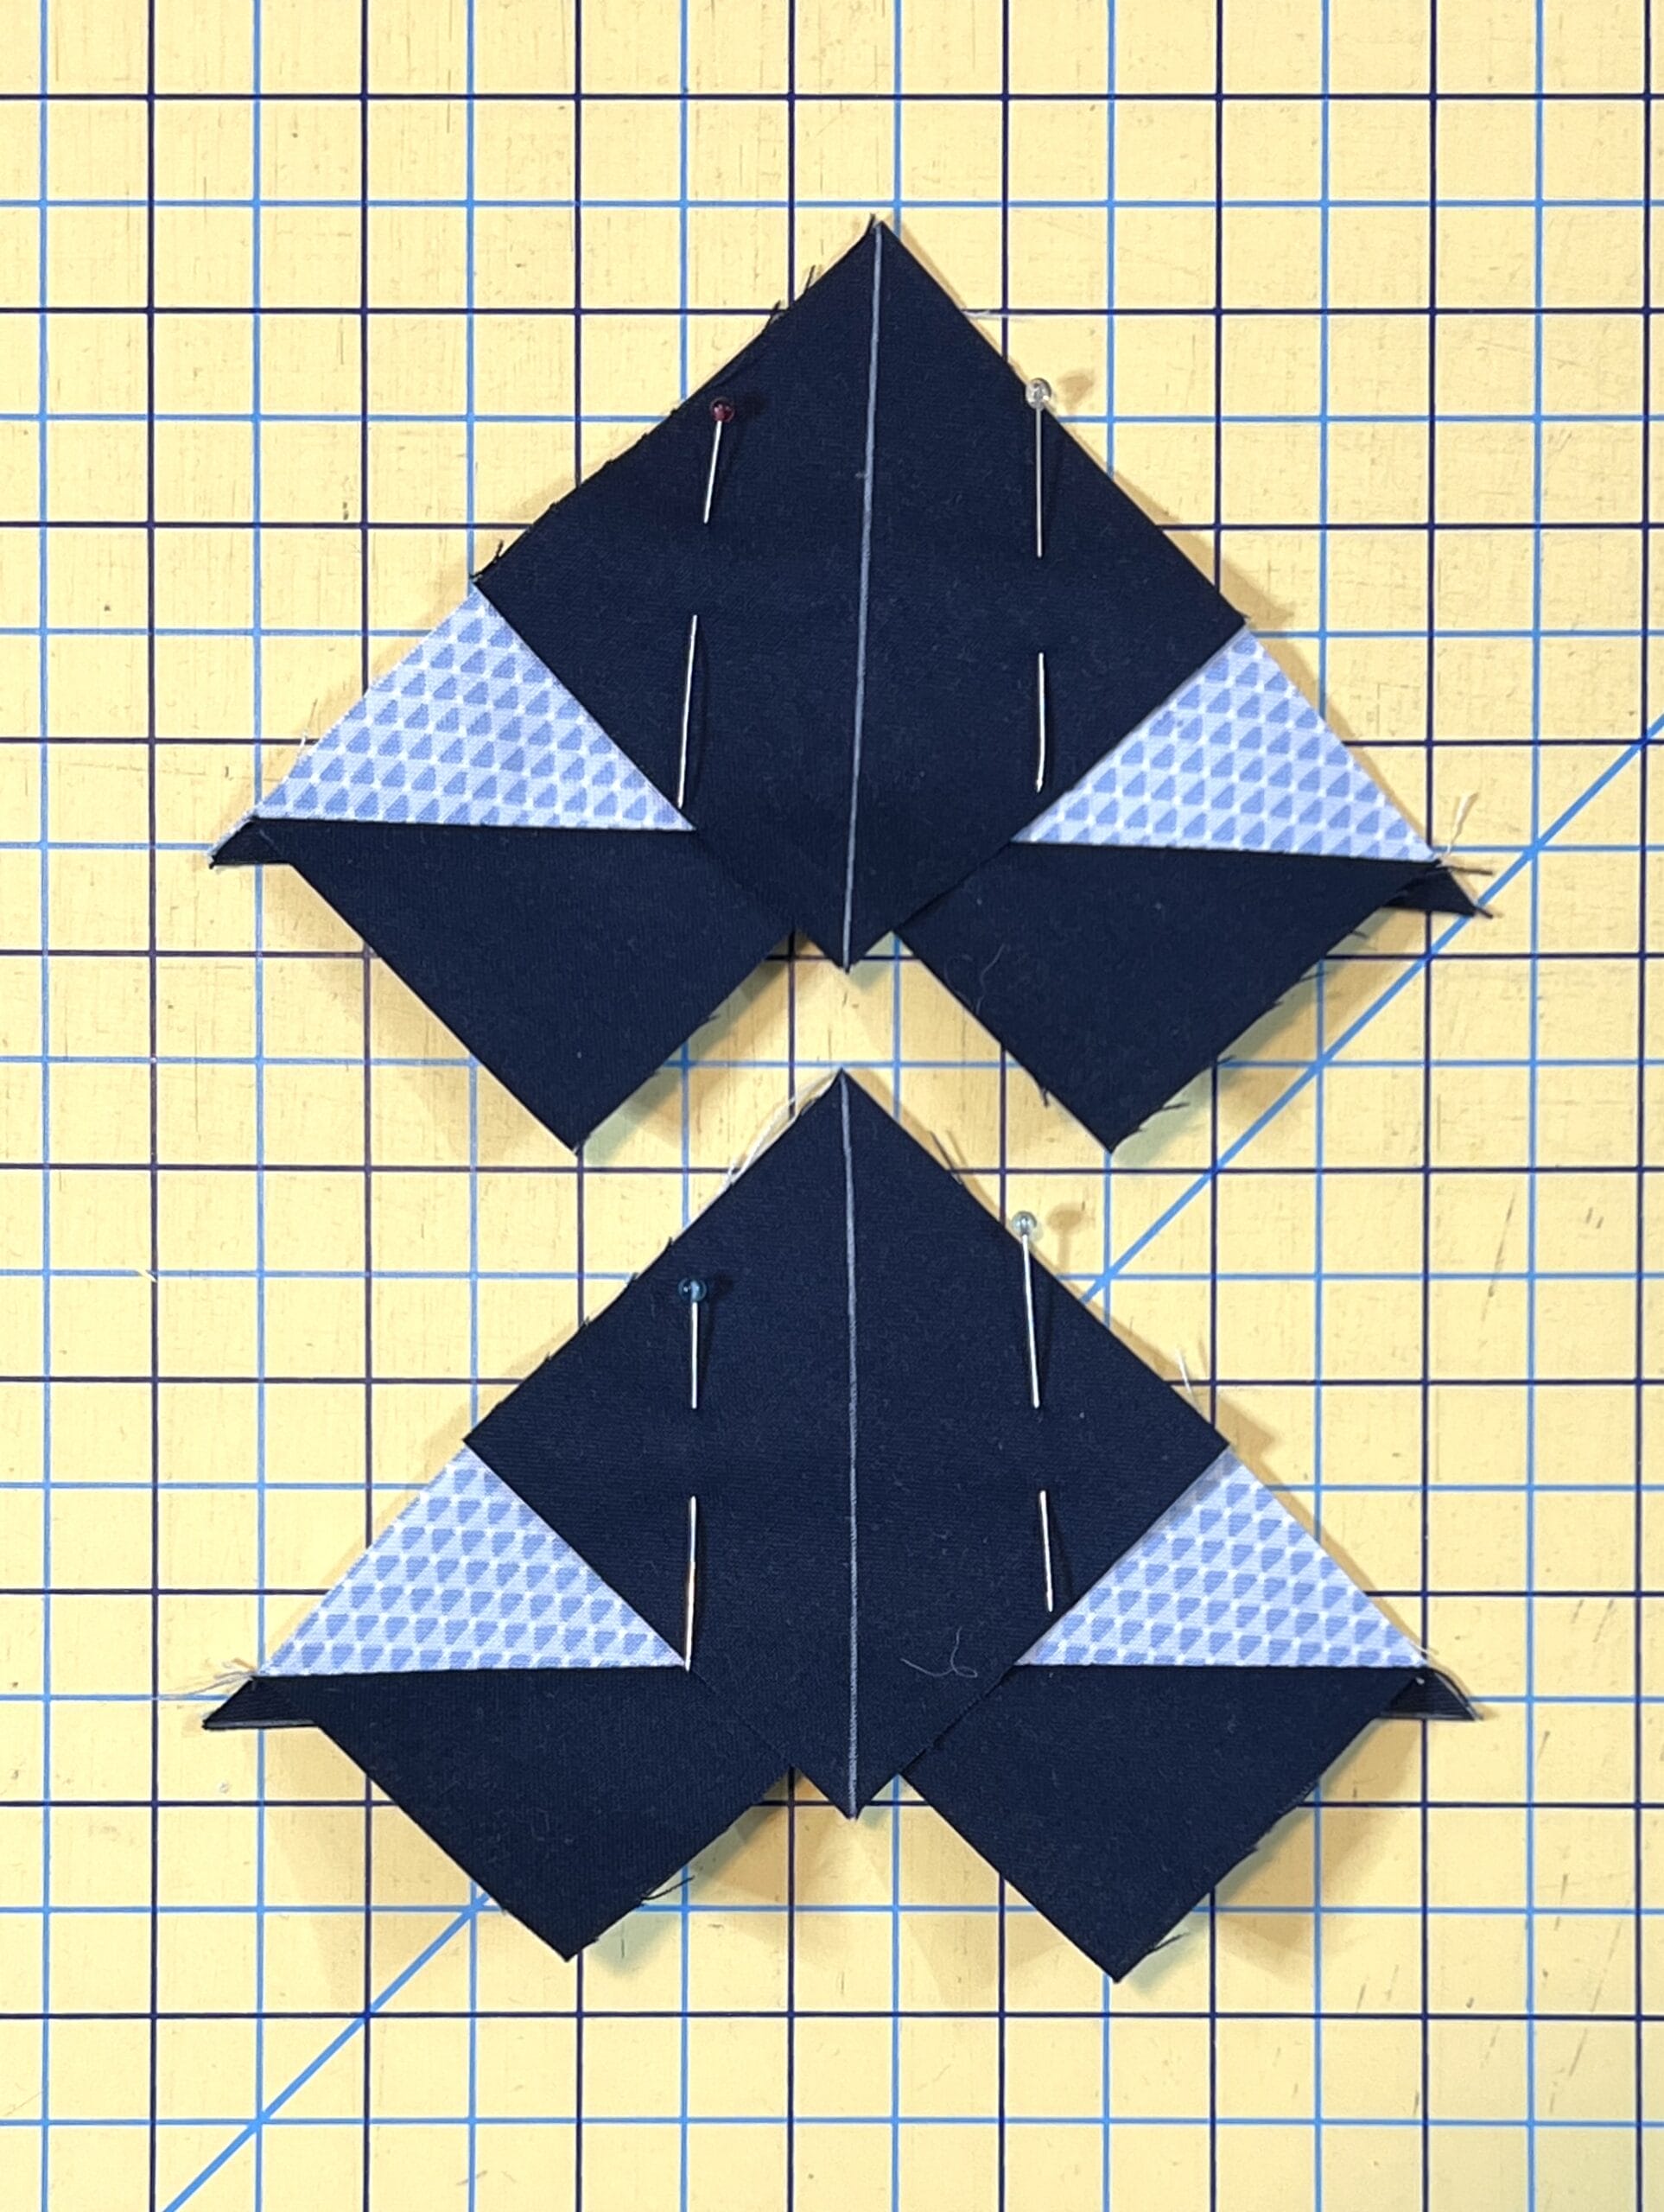
The first thing we will make are the star points. It’s very important to pay close attention to the placement and direction of the drawn lines on the C squares. The first set of four we will make begins by placing a C square on the left side of the D rectangle, with the marked line going from the upper left to the lower right. Stitch on the marked line (or just a hair outside of it, as I’ve suggested before), trim to a ¼” seam allowance, and then press TOWARD the blue fabric.
Place another C square on the opposite end of D, also with the marked line going from the upper left to the lower right. After sewing and trimming, you want to press toward the white fabric.
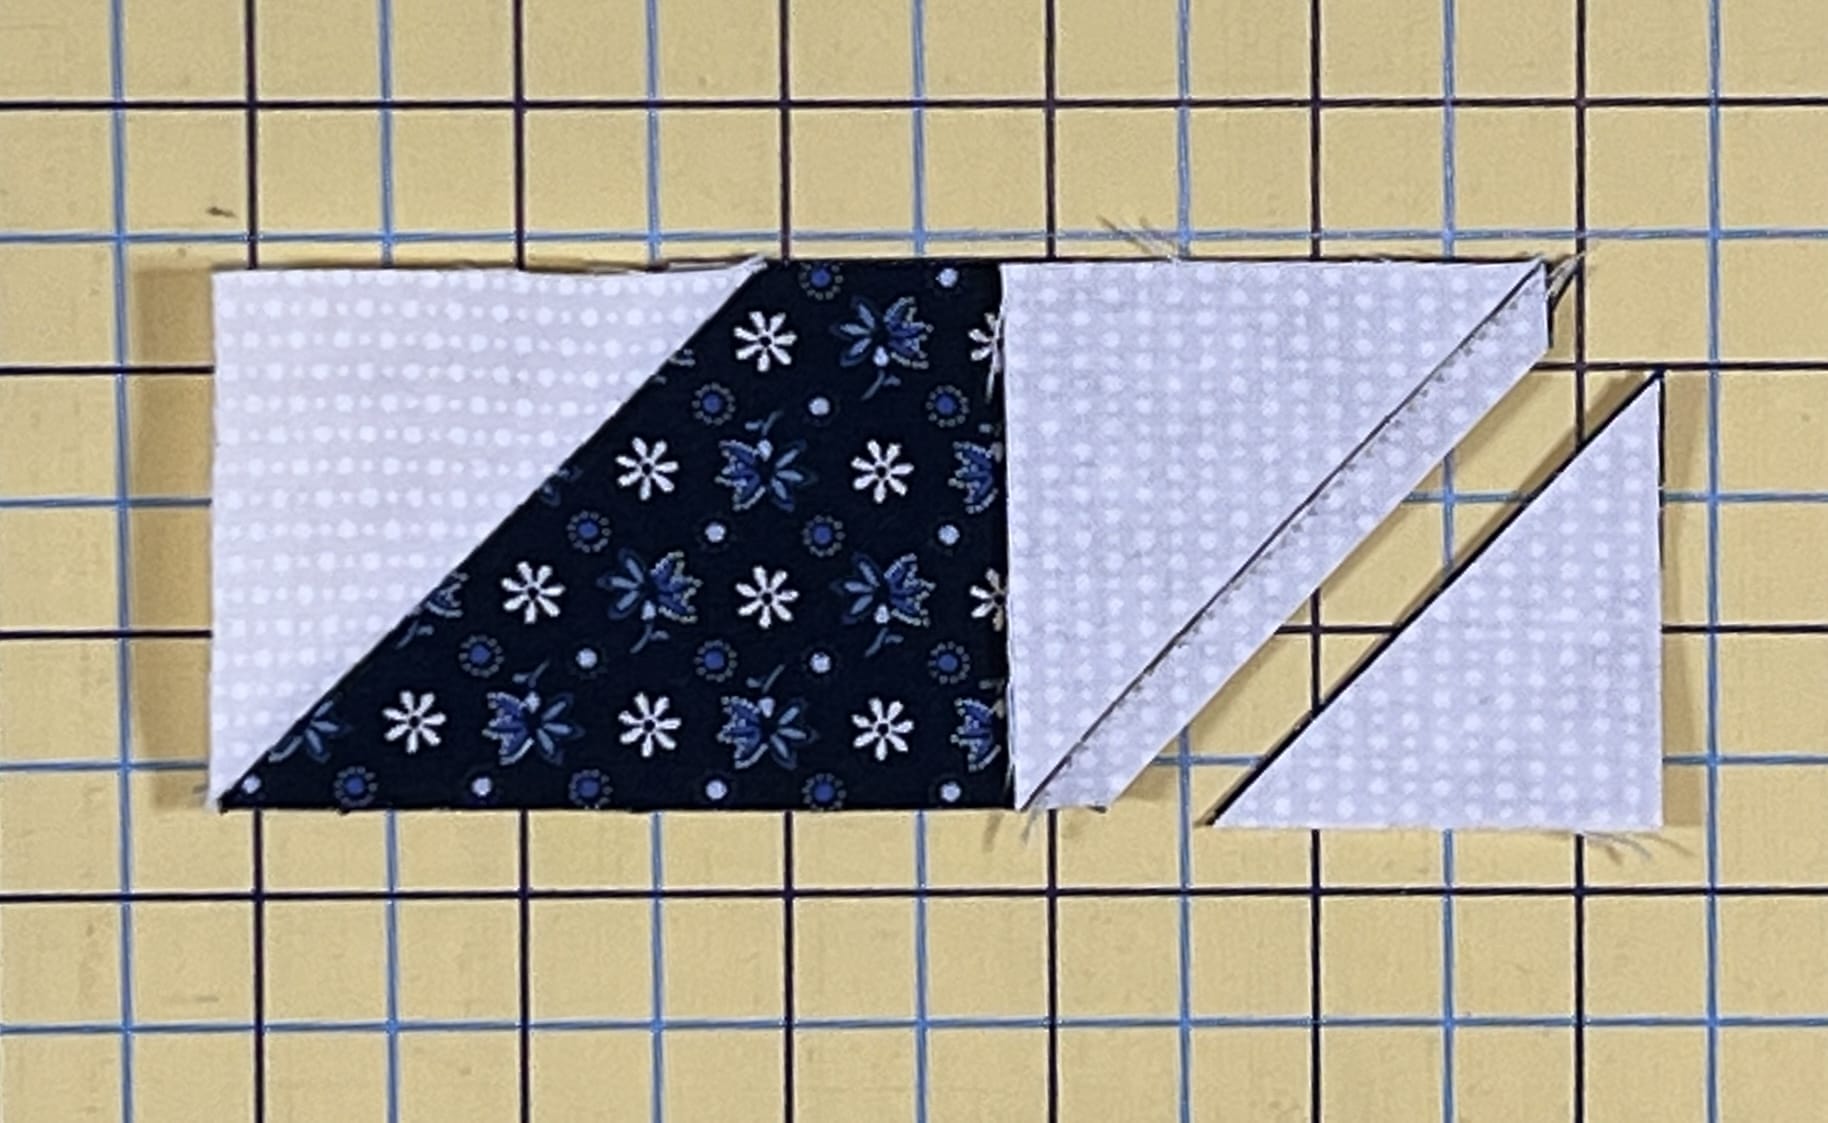
Step two is basically the identical but reverse of step one. Does that make sense? The only difference is that you’ll place the C squares with the marked lines going from the upper right to the lower left on both squares this time. You will also press these opposite of the ones you made in step one.
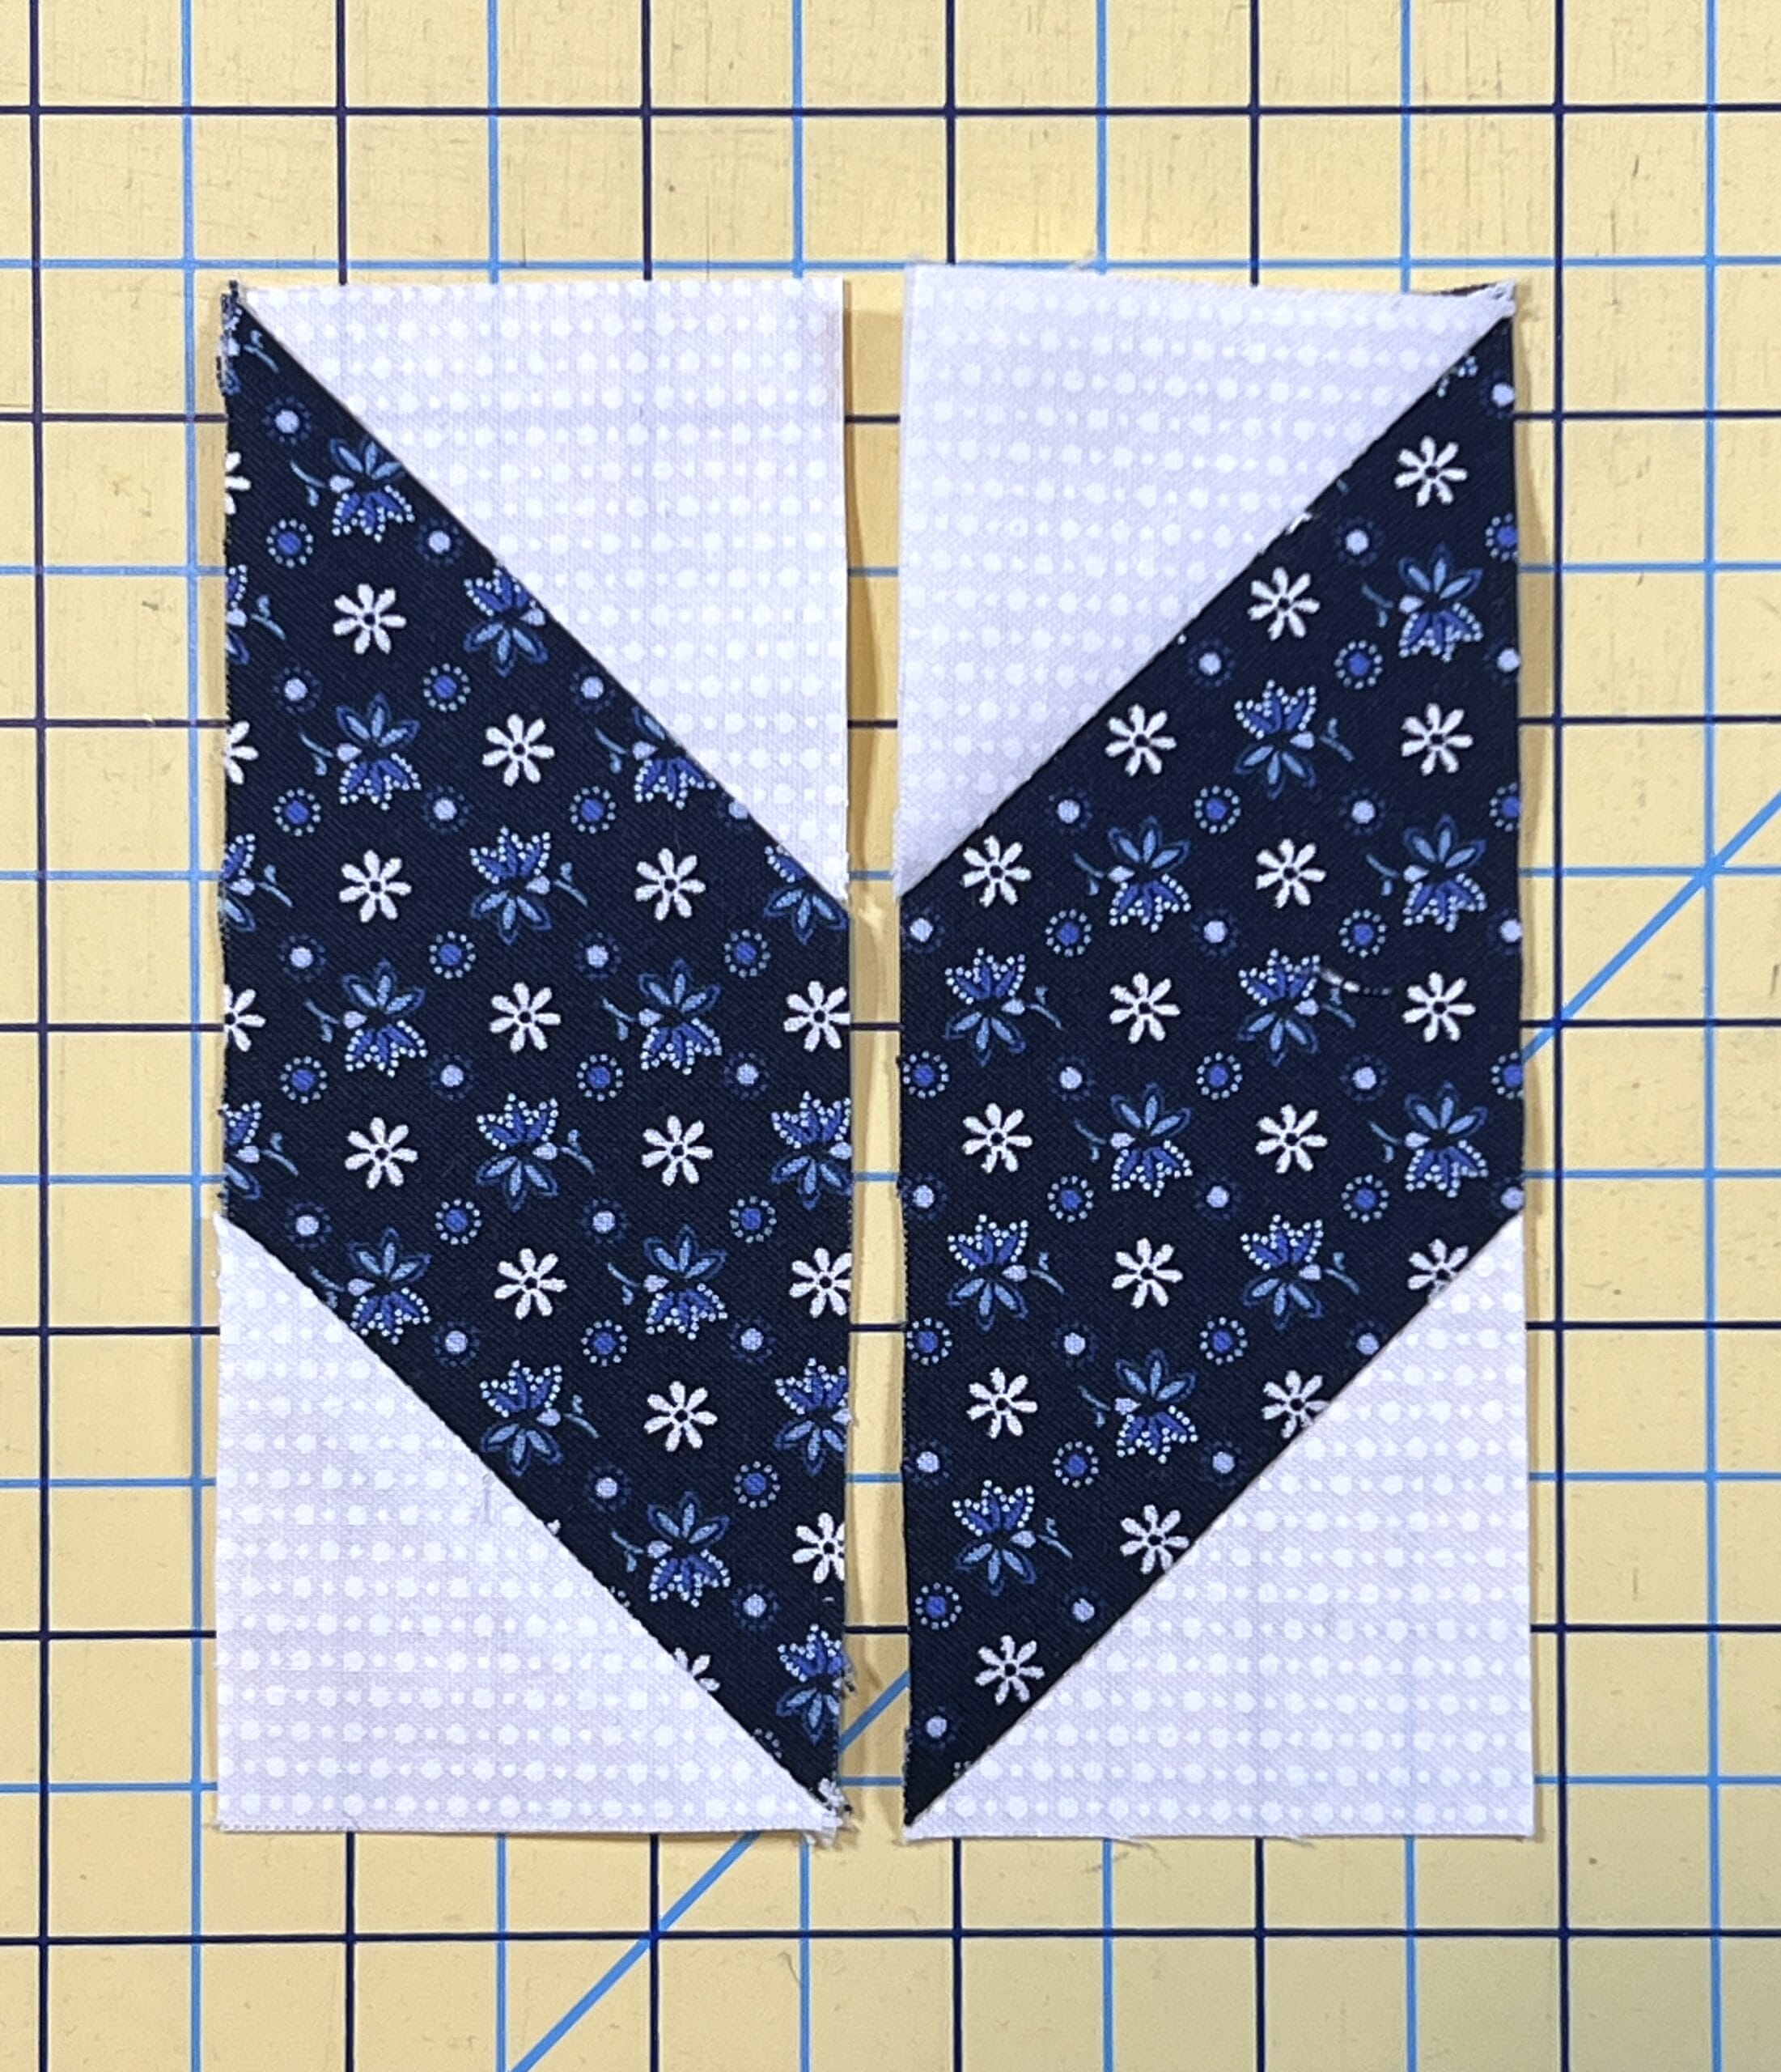
In step 3, you simply sew one of each version together as a pair. If these have been pressed correctly, the seams will nest together.
Next we make a 4-patch unit.

Once those are done, add an A rectangle to the bottom of each unit. Take the remaining A rectangles and sew an F square to the bottom of each one, then sew these to the sides of the 4-patch unit.

Now it’s time to assemble our block. Two of the star point units (step 3) are sewn to the sides of the E square. I recommend sewing with the star point unit on top, so you can make sure you sew accurately and not cut off the tip of your points as you attach the E square.
Then simply sew the corner pieces to each side of the remaining two star point units, then attach these to the top and bottom to finish the block.
Block #19
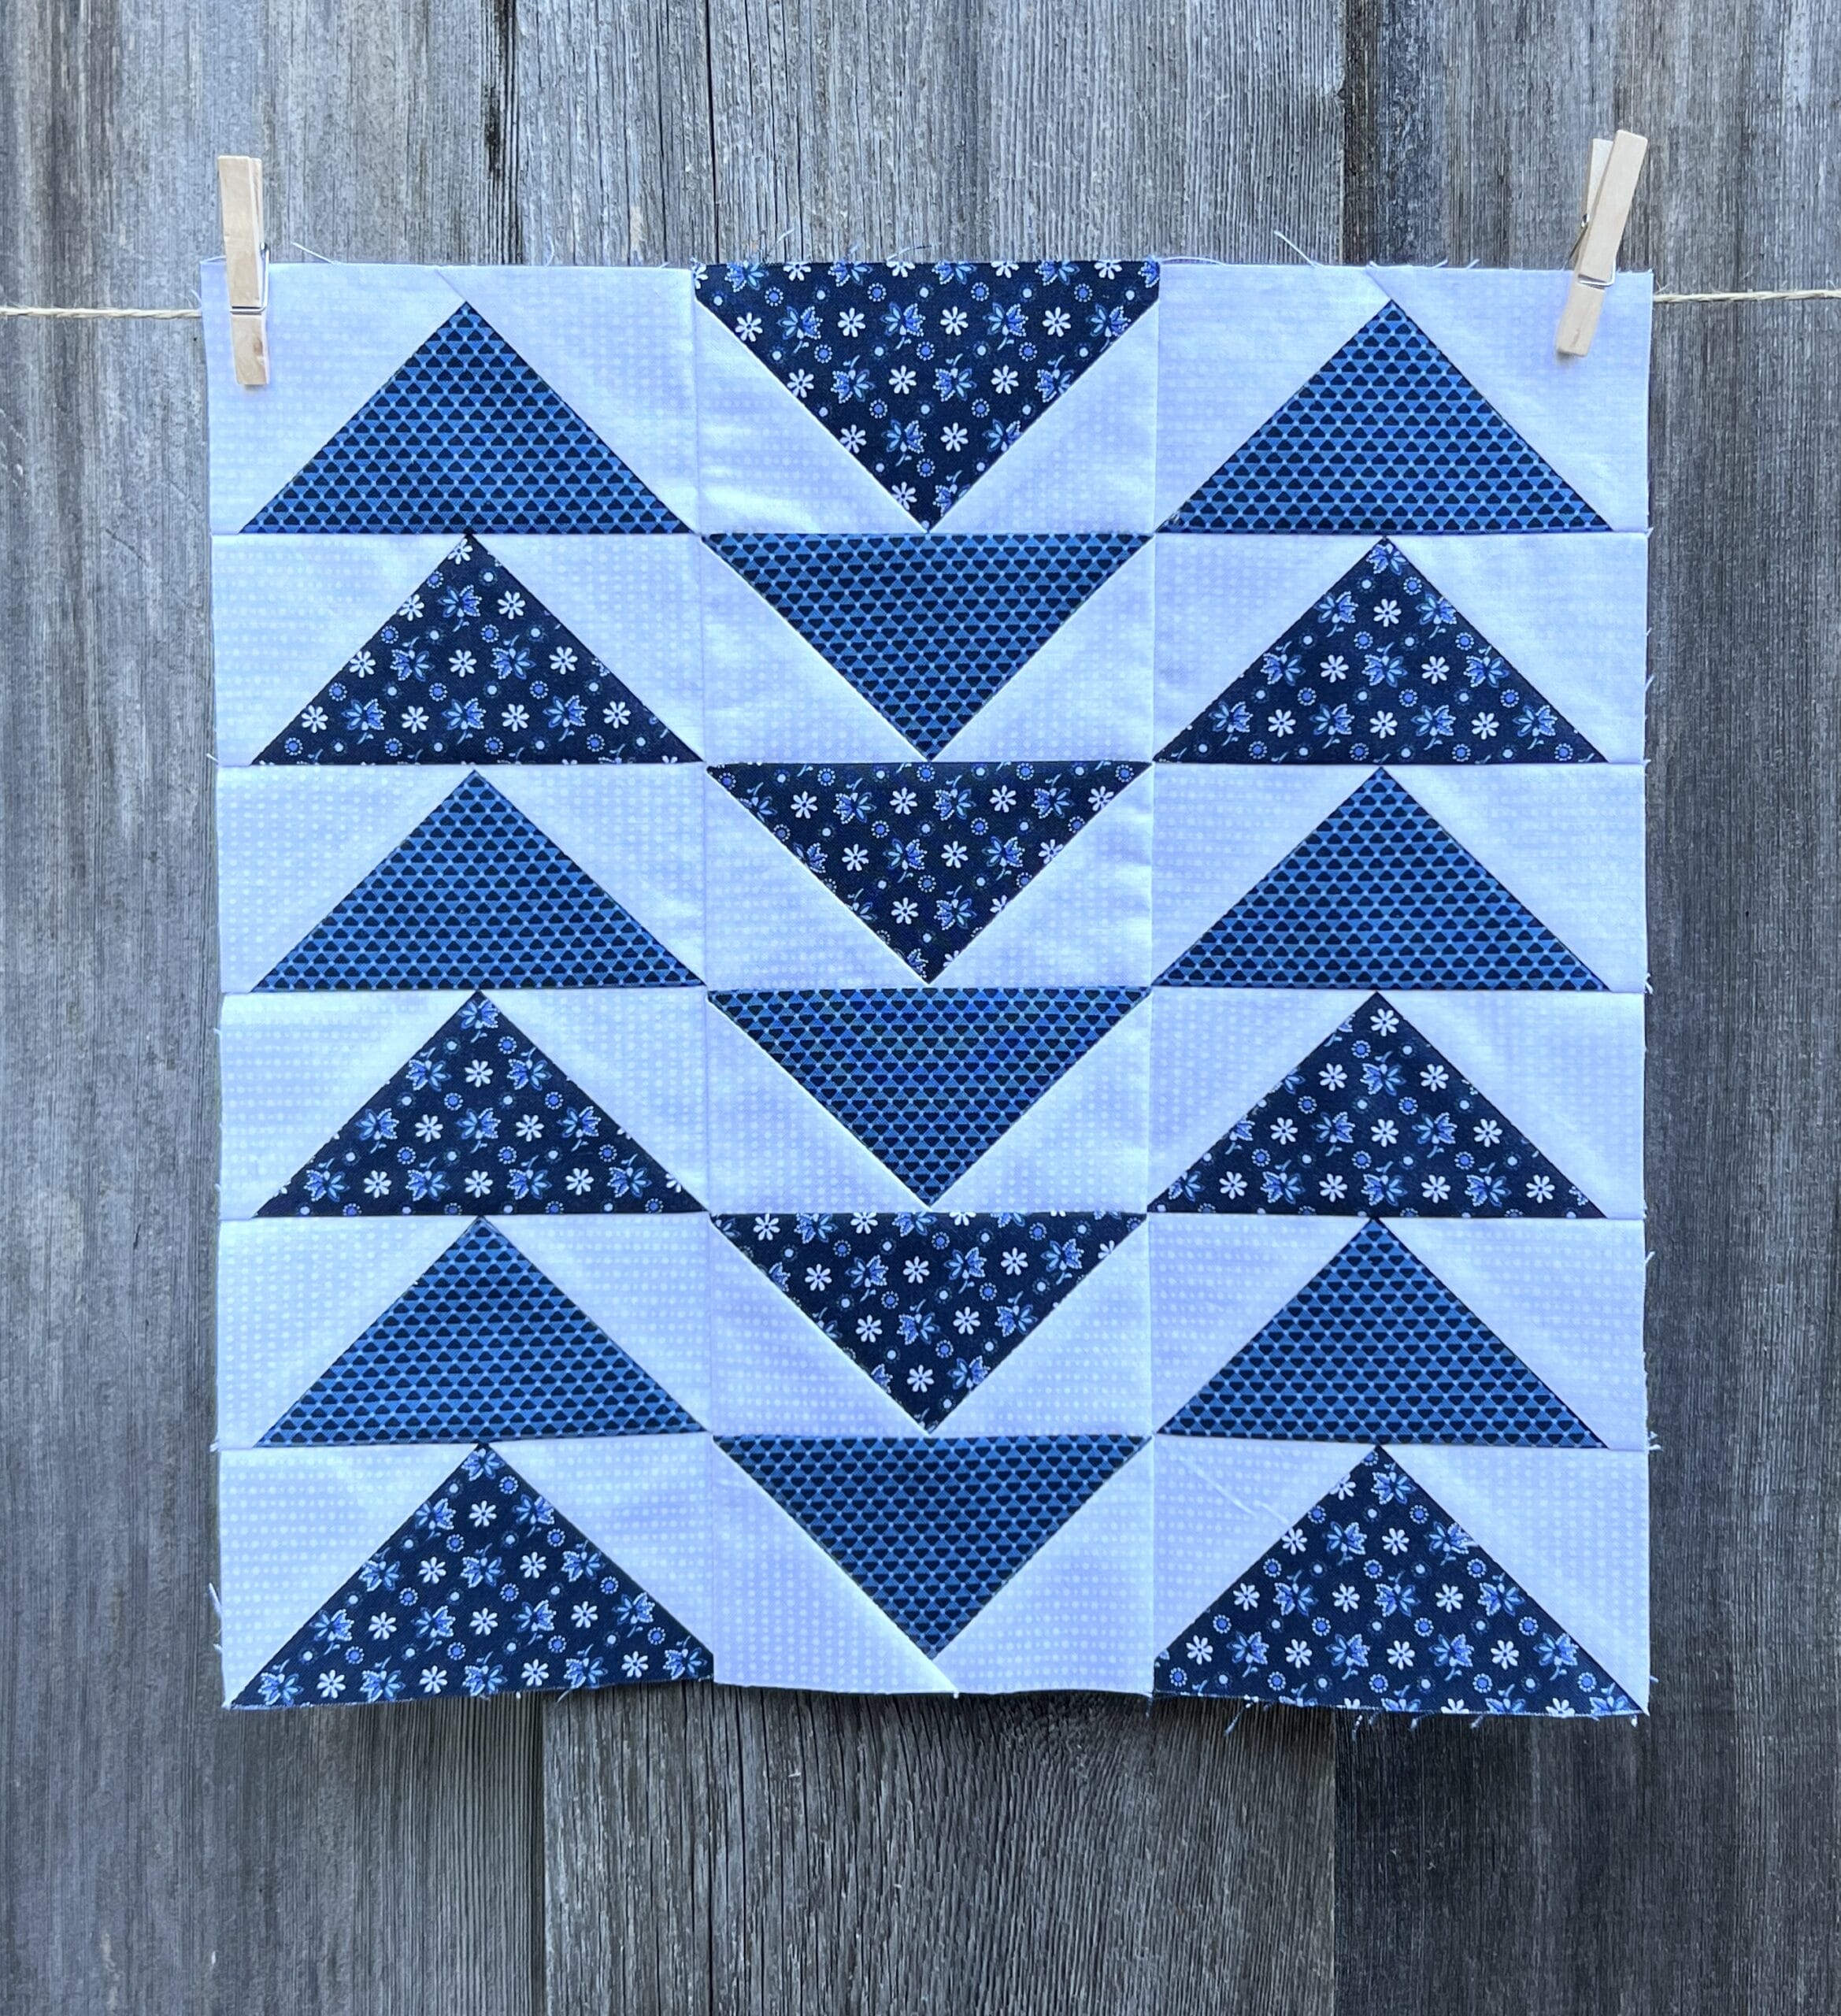
Those of you with eagle eyes will notice that the fabric listed in the instructions for C (Four Points, Med. Admiral Blue), does NOT match the fabric shown in the diagram at the bottom of the page. We had to make a fabric adjustment in the pattern, and apparently I forgot to change the image to match the instructions. I’m sorry for any confusion! Just cut what the pattern says, and ignore my picture.5
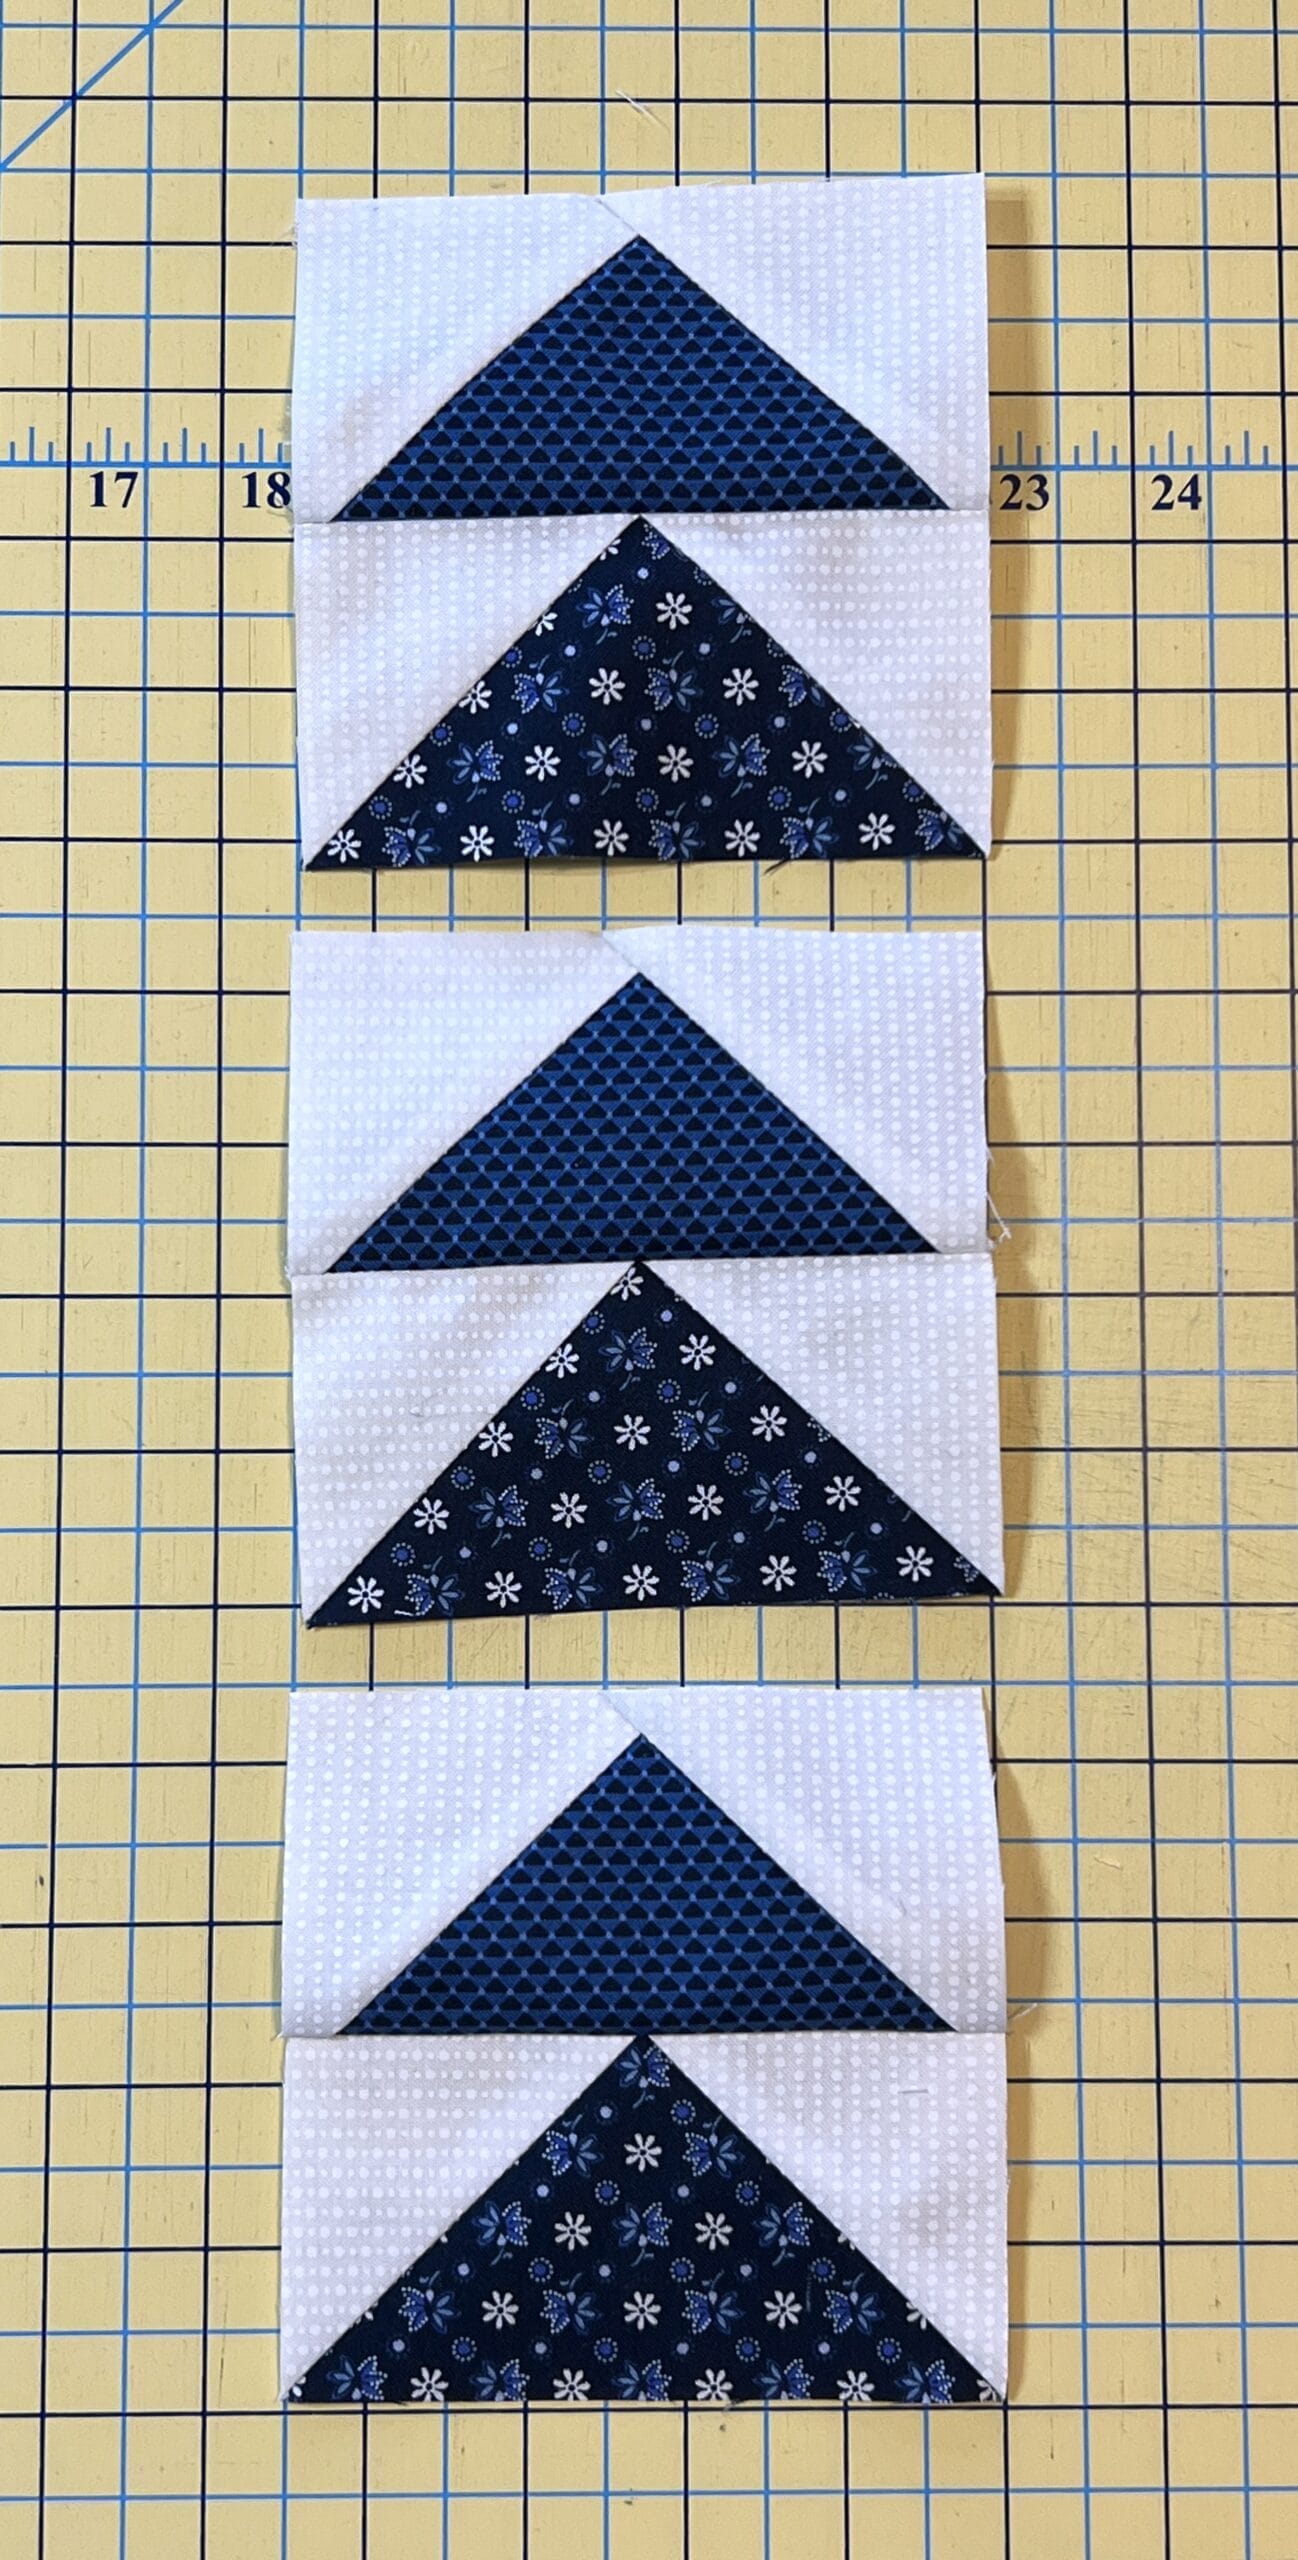
This block is SO MANY flying geese! I decided to use the stitch and flip method, because we are making 9 of each. The no waste method makes flying geese in batches of four, so we would have ended up making way more than we needed if we made them that way, which kind of defeats the purpose of “no waste”.
Sewing these flying geese is pretty straightforward. I made all mine at the same time, so some of the photos will show both versions together.
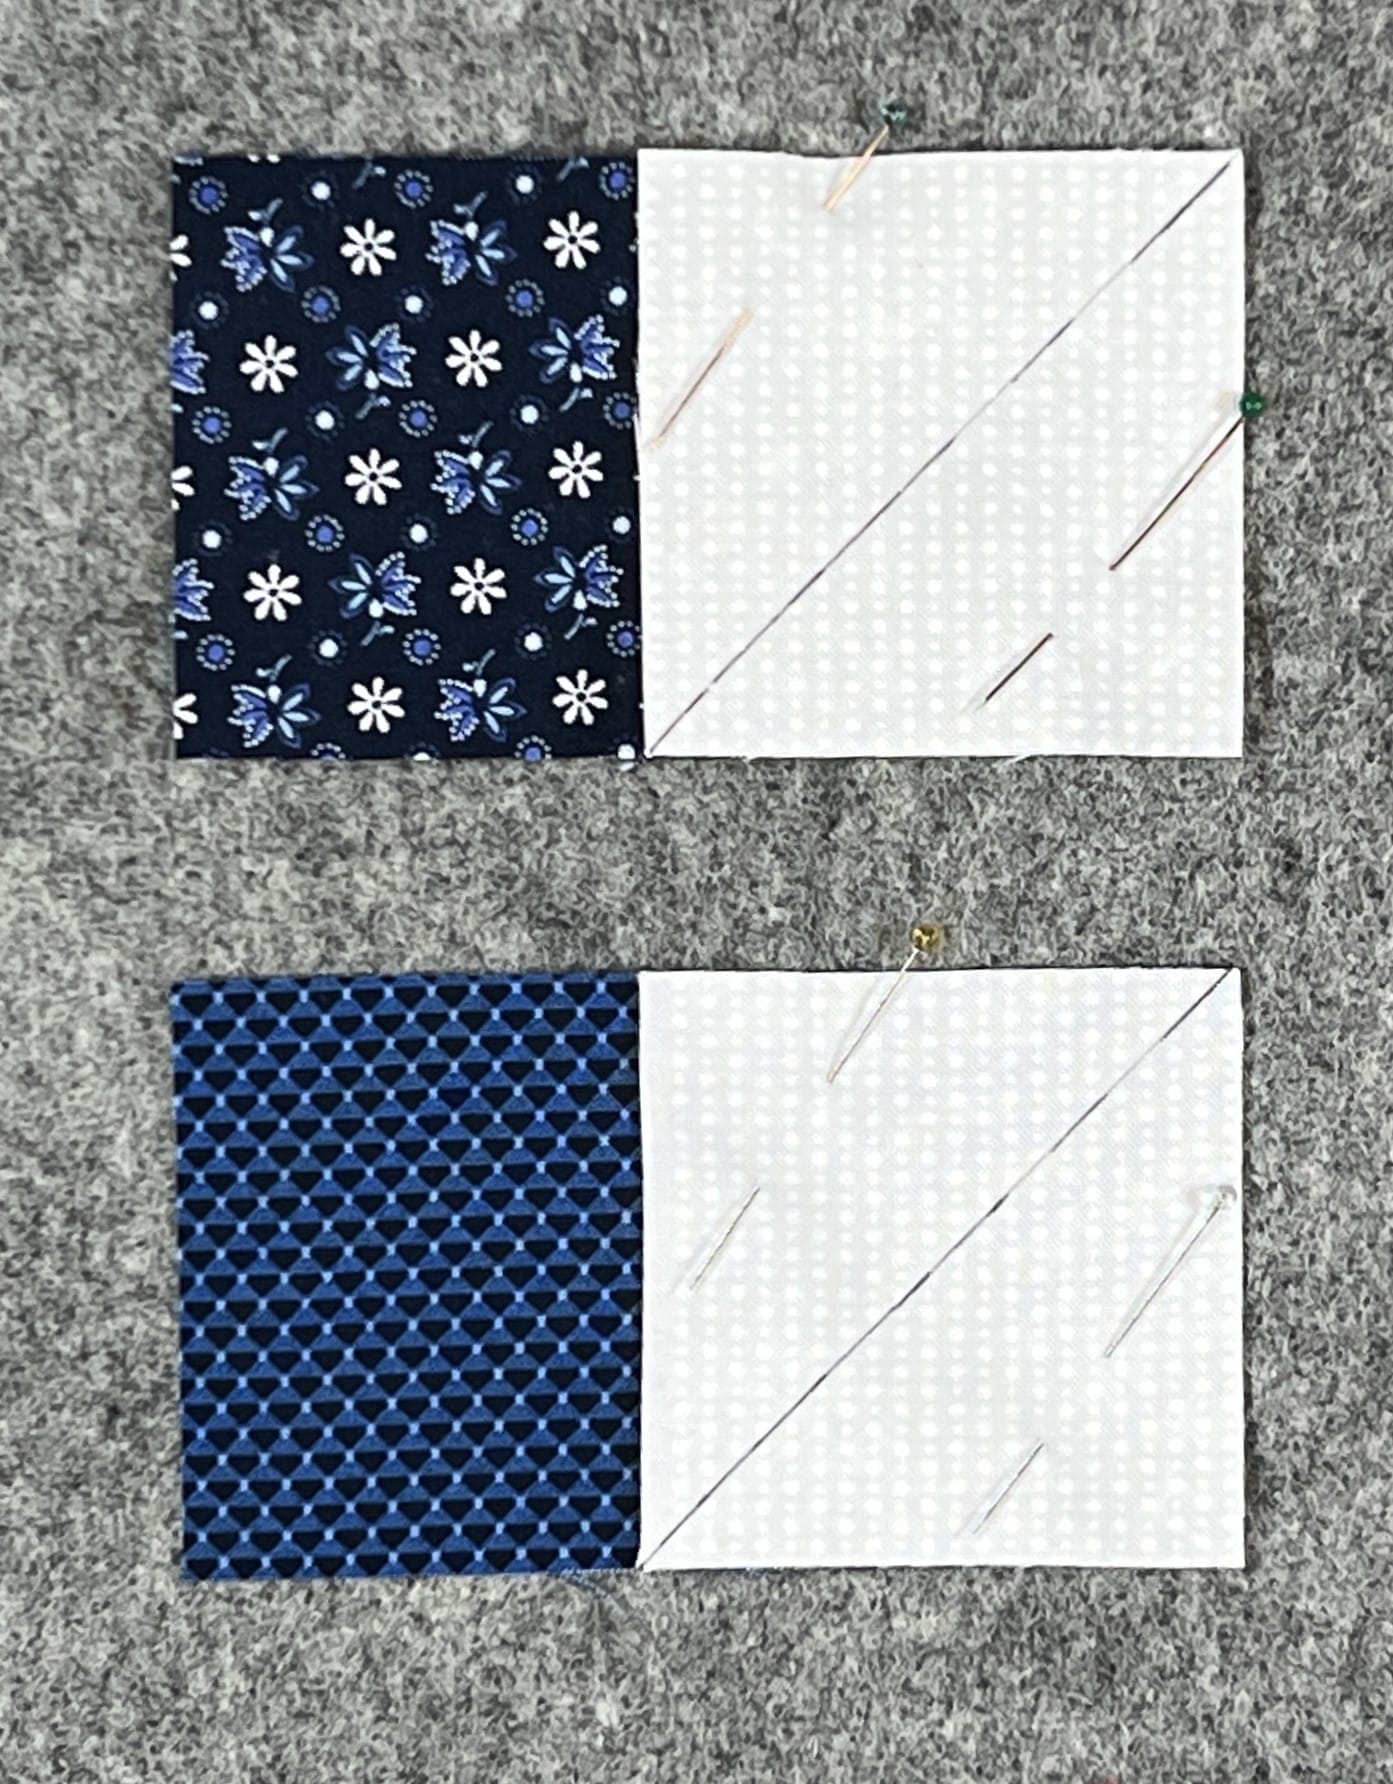
Simply place the A squares, one at a time, onto the B and C rectangles, stitch on the marked lines, and then trim to a ¼” seam allowance after sewing each one as shown.
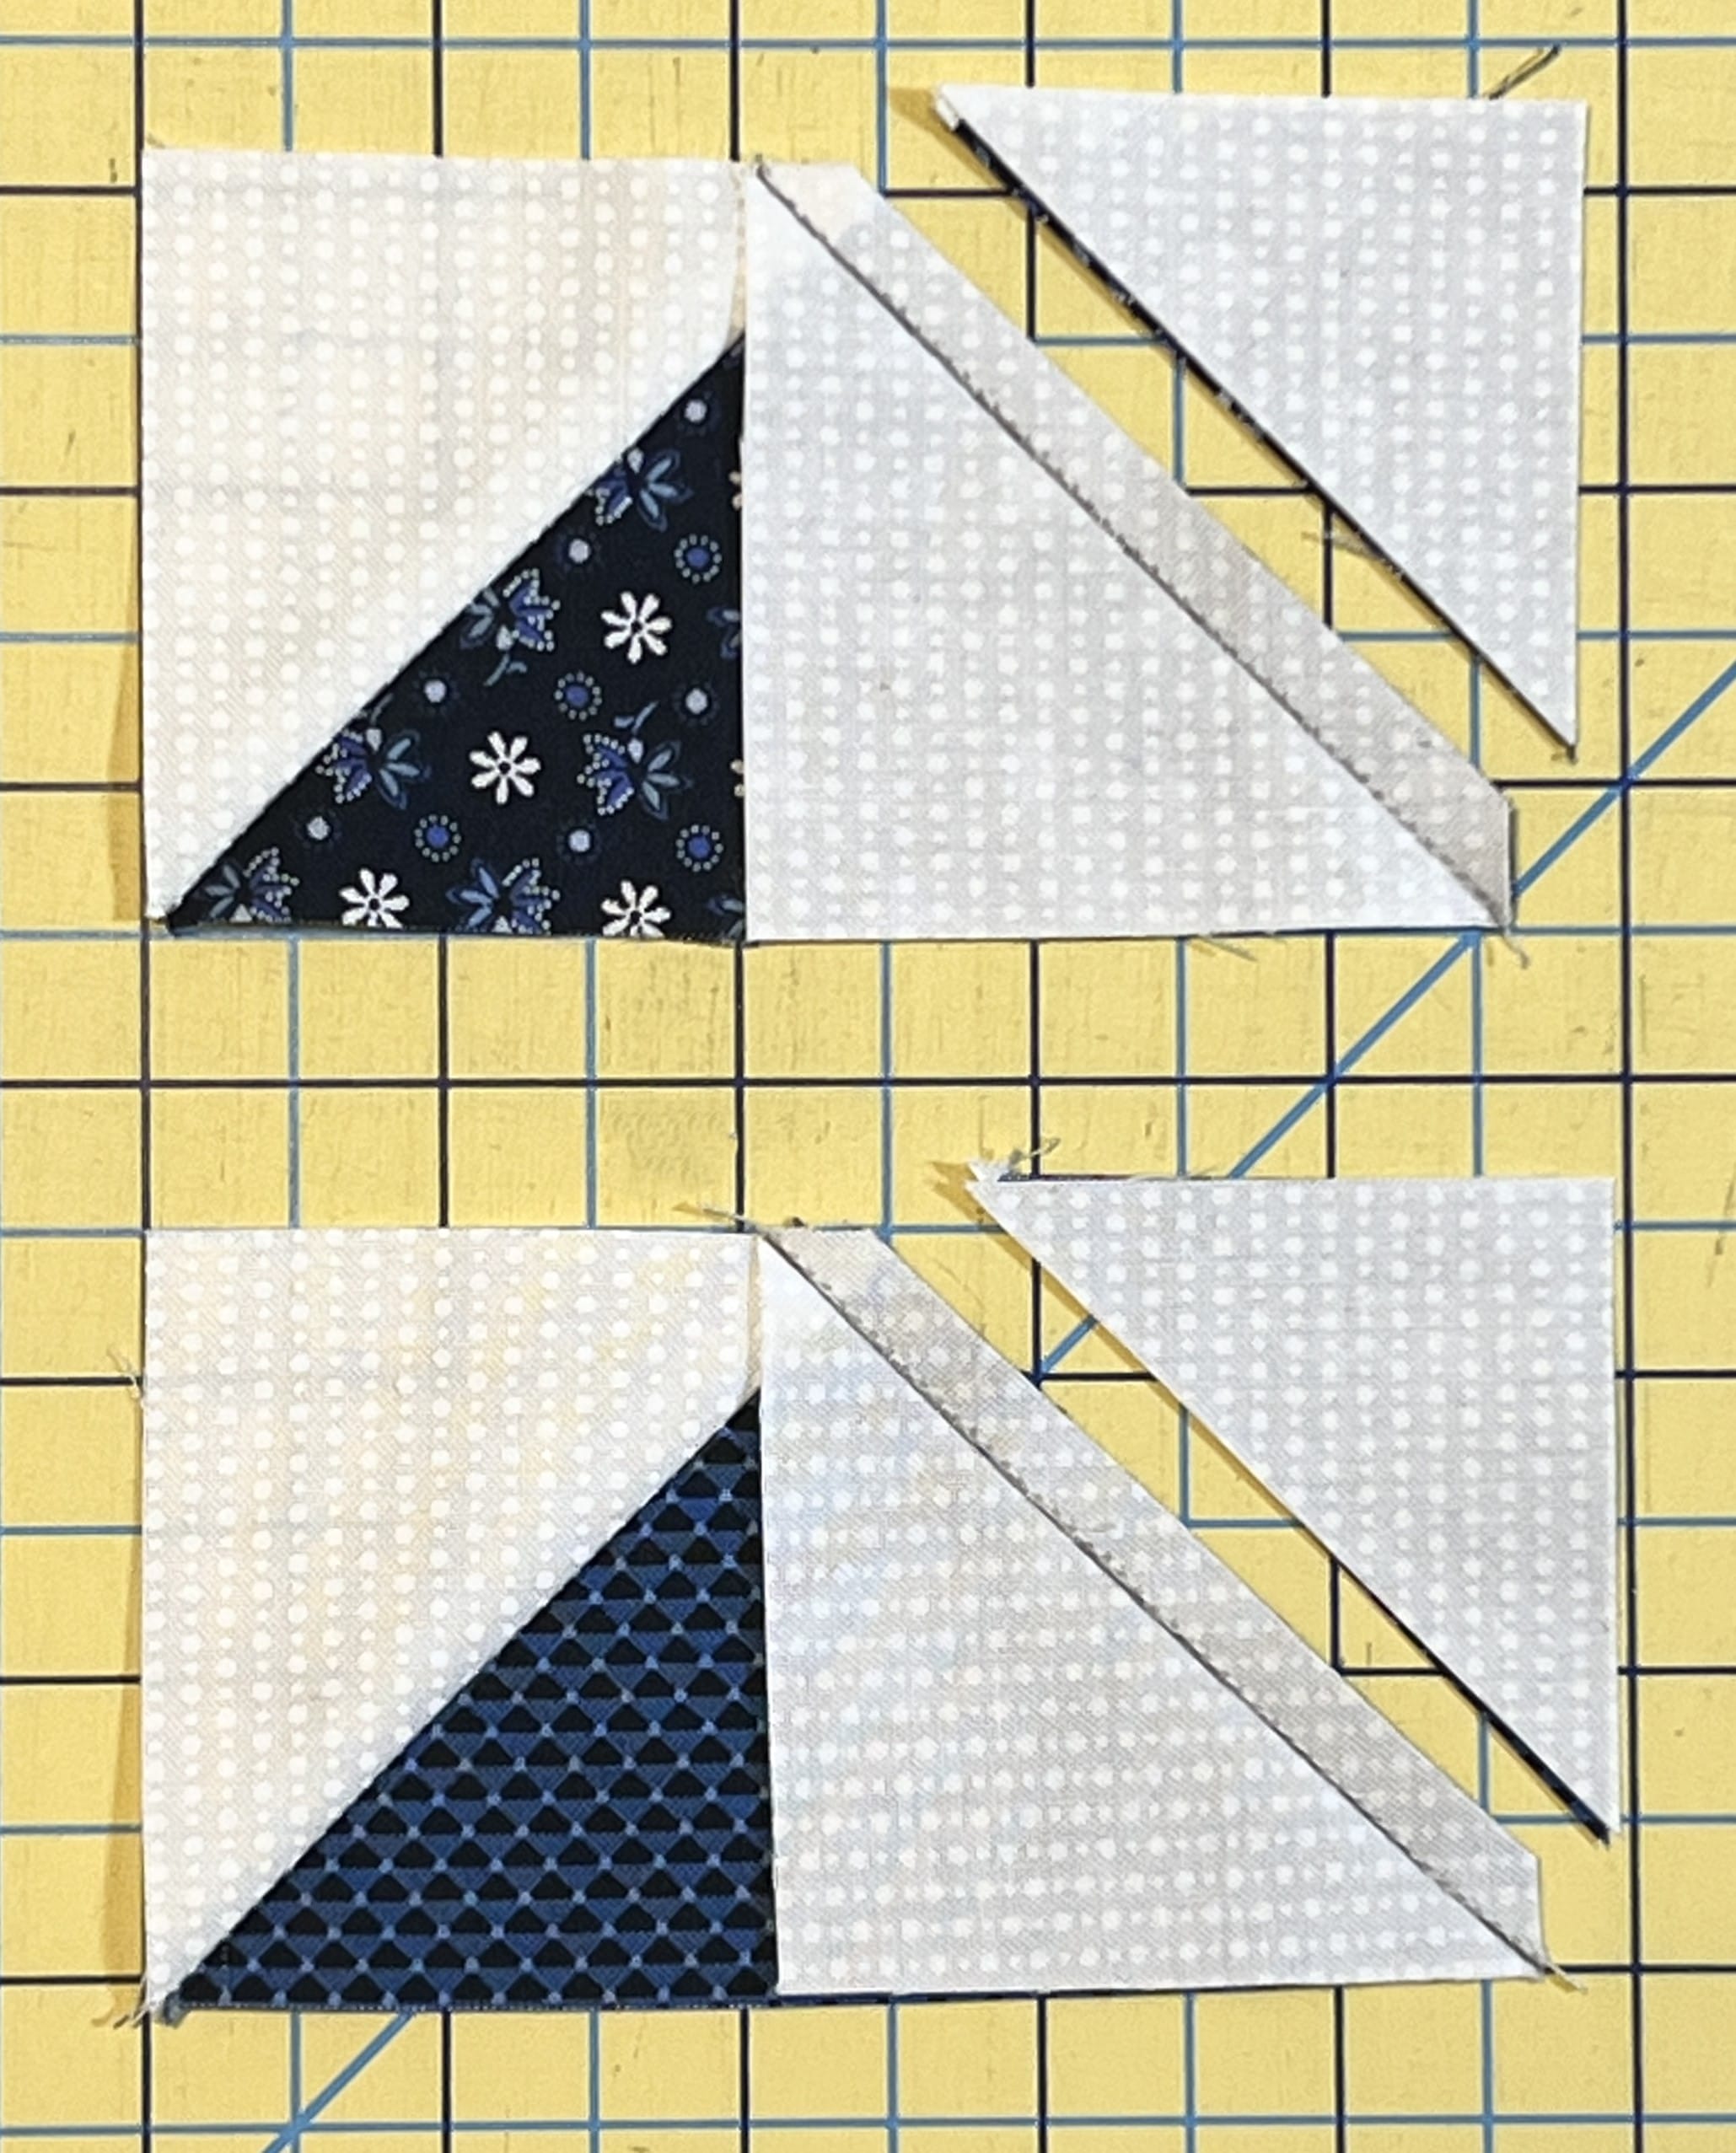
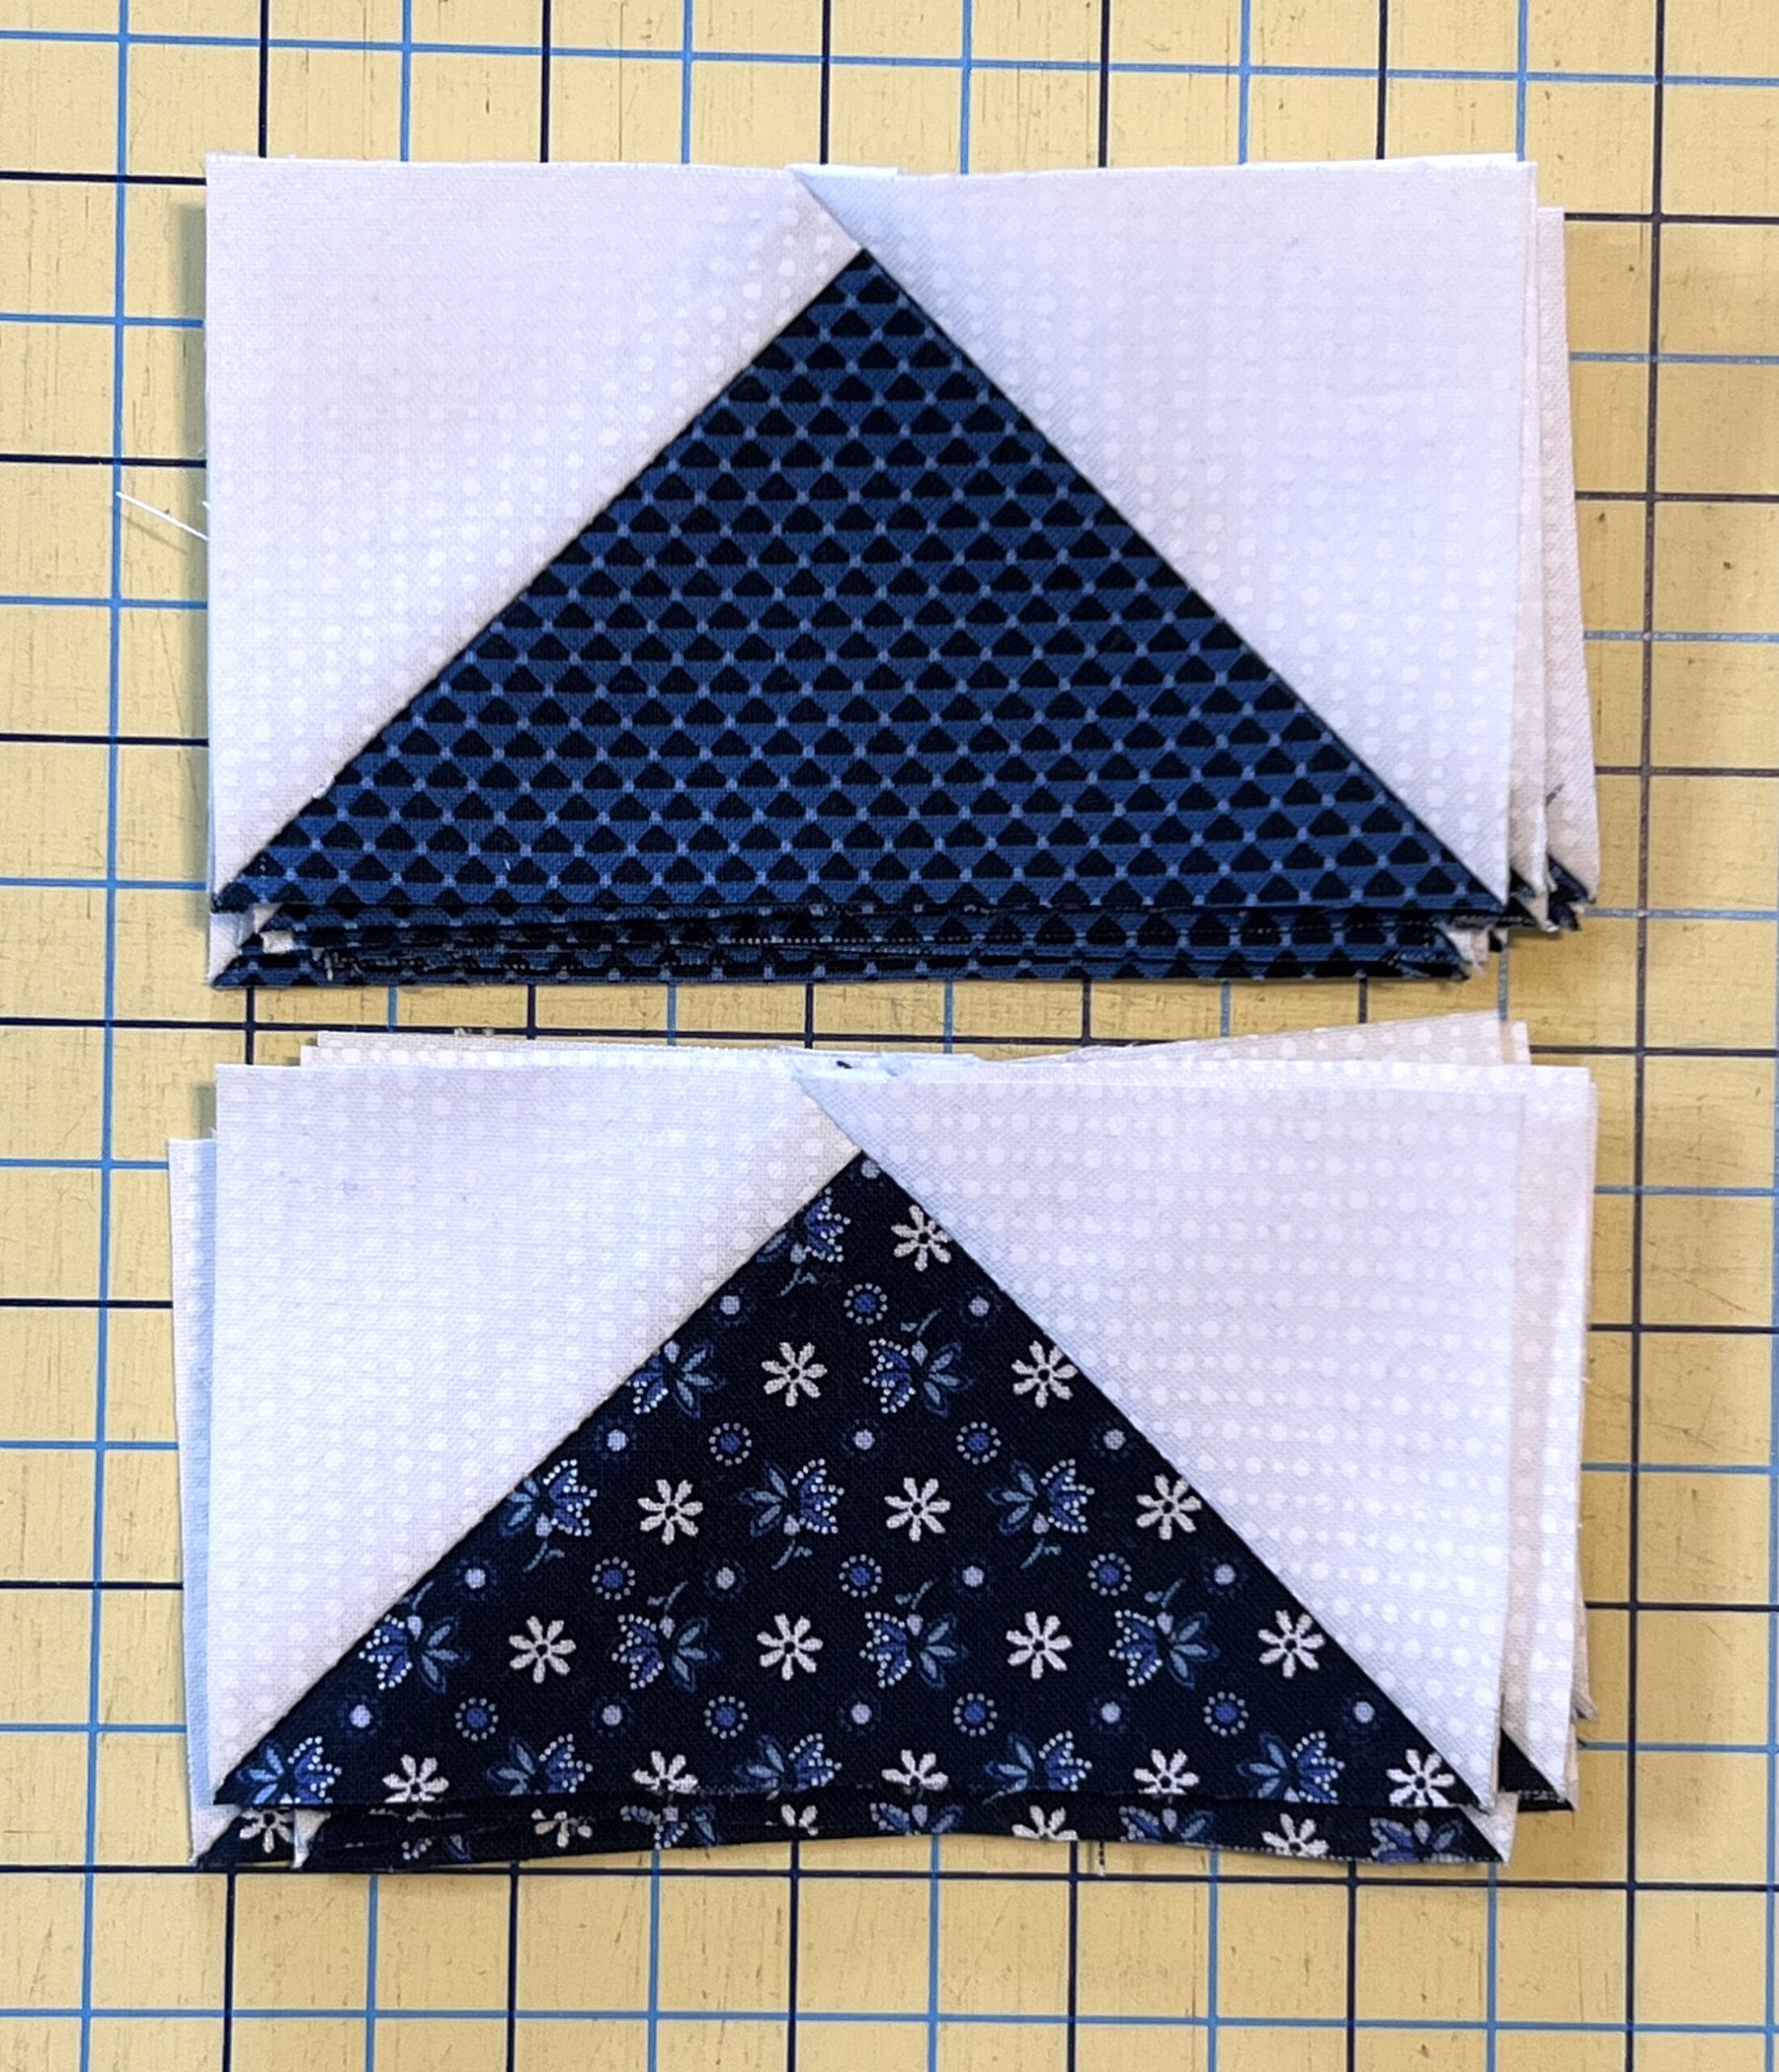
After these are all sewn and trimmed, it’s time to sew the rows. I started by sewing each A/B unit to the bottom of an A/C unit.
When all the pairs are sewn together, then I divided them into the three rows and sewed them together.
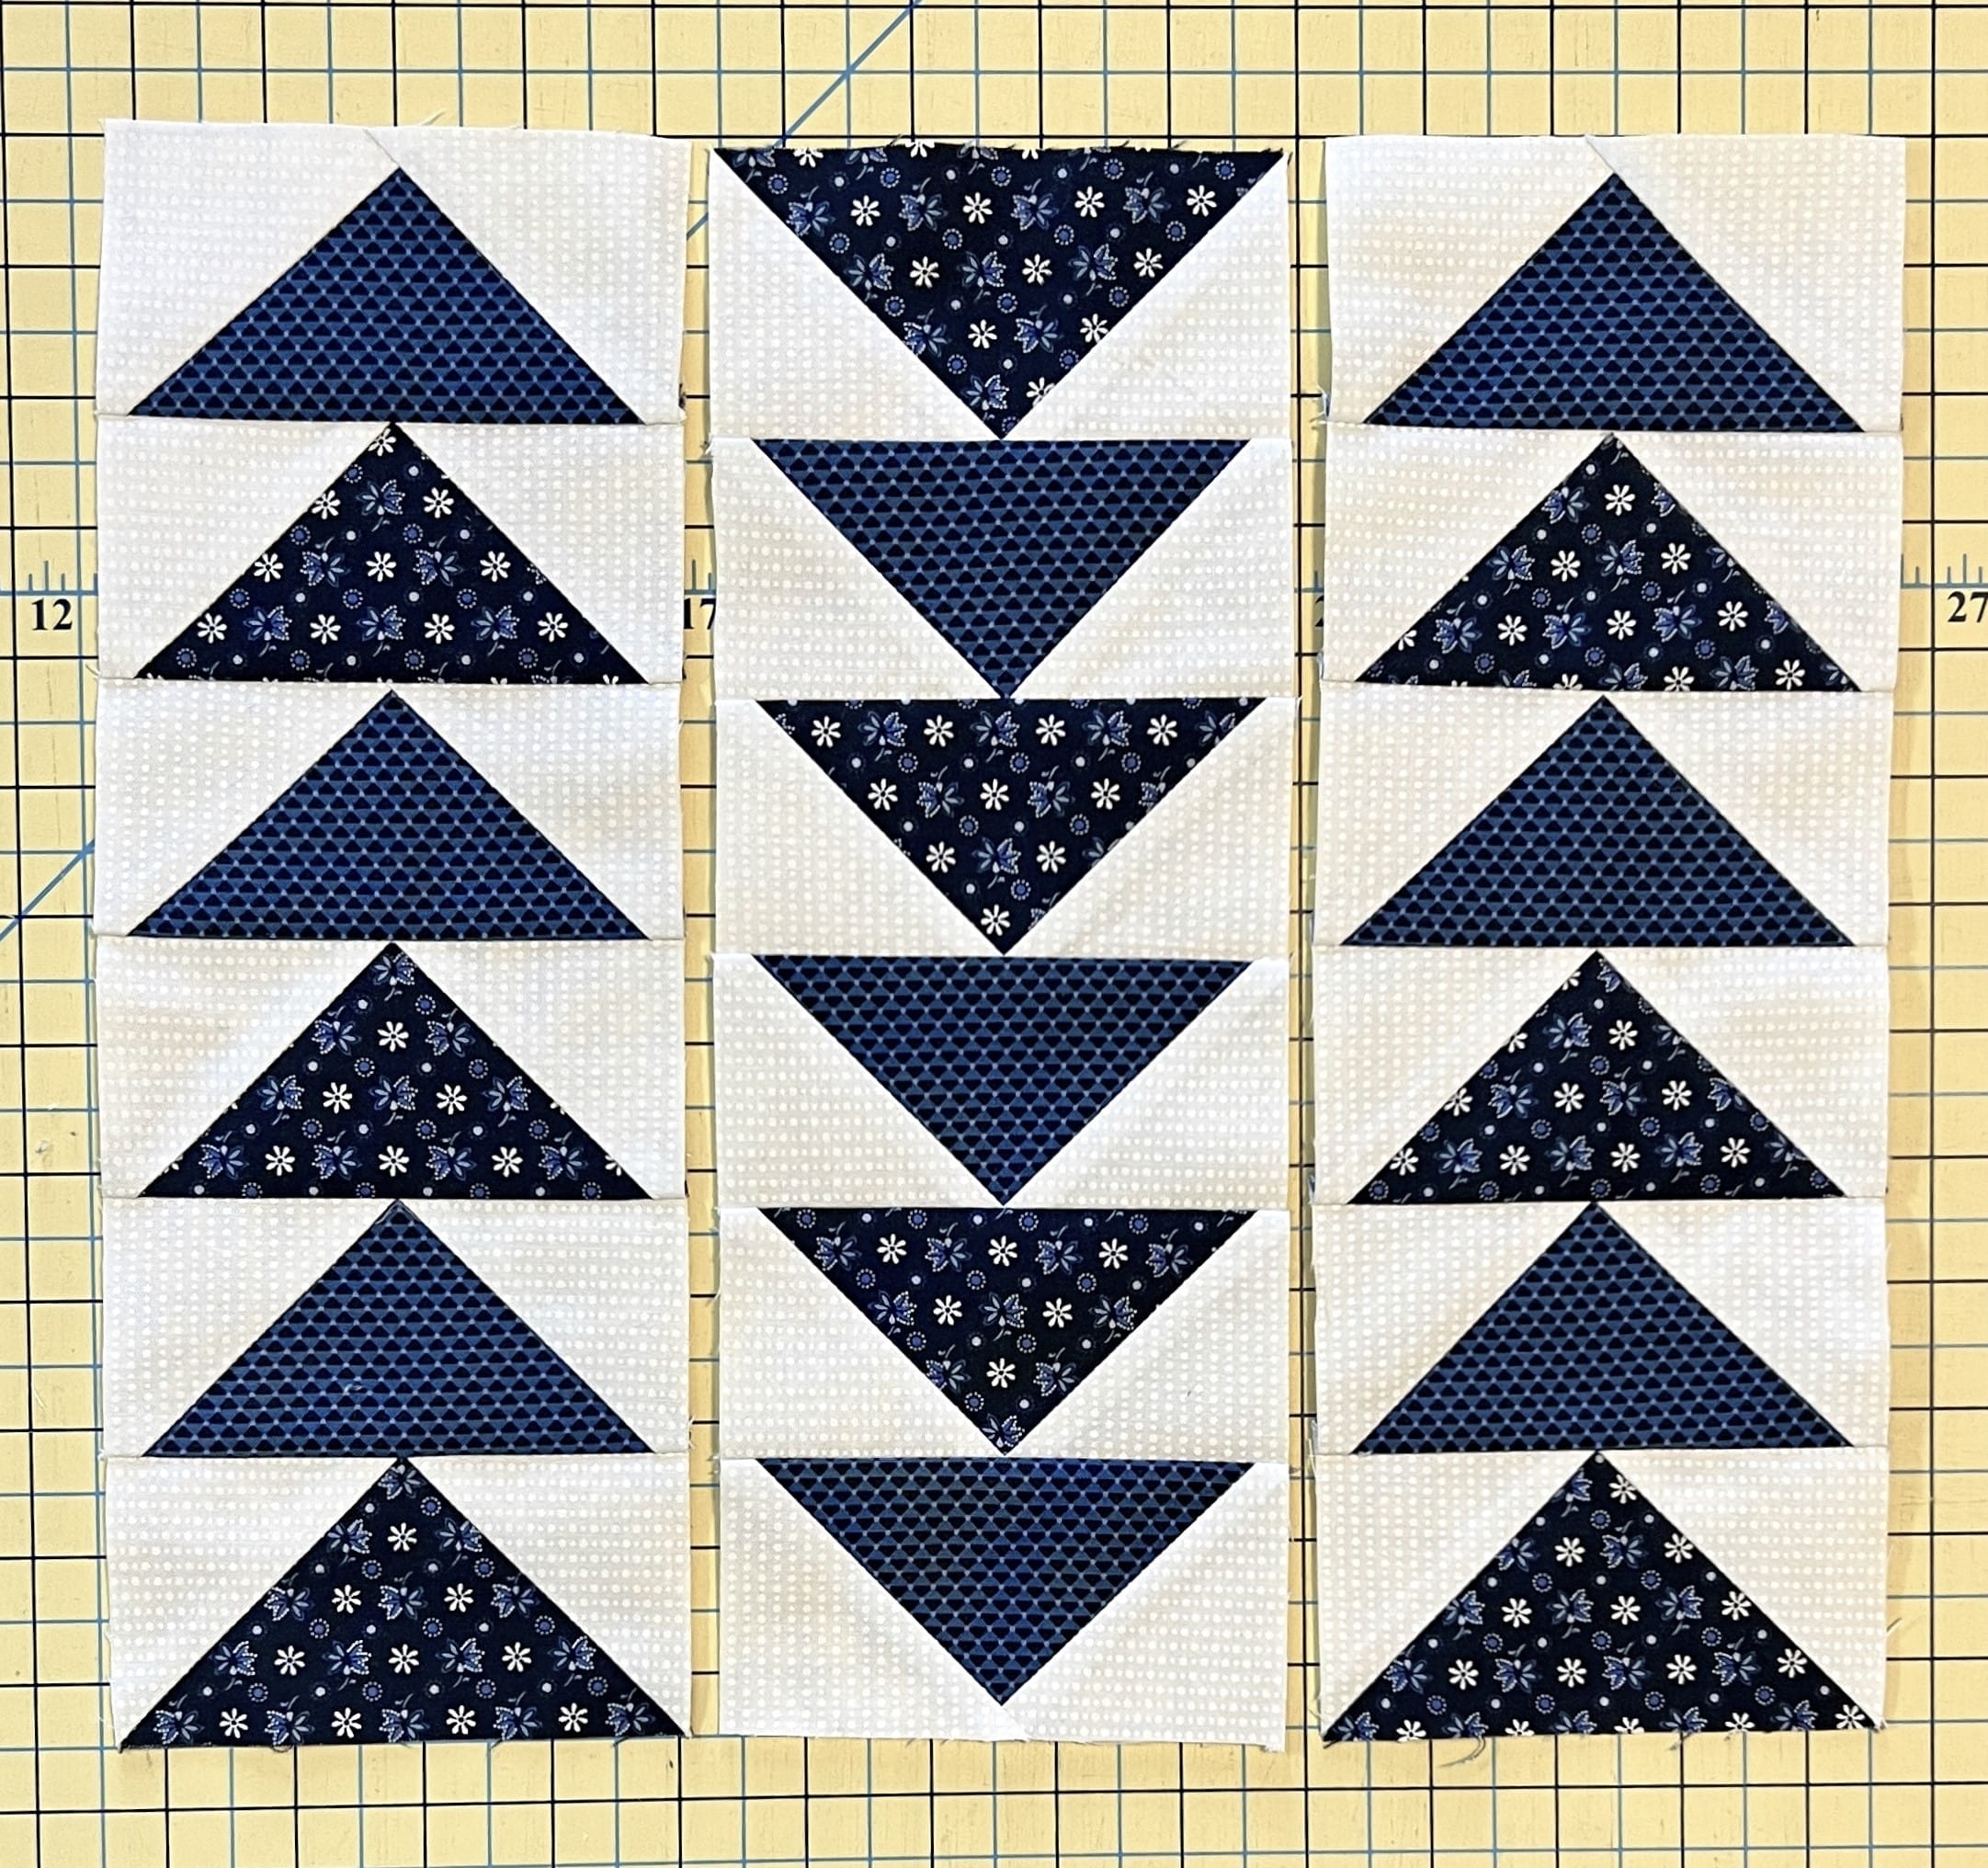
Each of the three vertical rows will have a total of 6 flying geese in it – three of each kind.
When sewing the three rows together, I matched up the side points on the flying geese first when pinning to prep for sewing. You can do this by putting a pin through the point on the top flying geese, and then continue pinning through the point on the flying geese underneath. This should naturally line up the points. I usually take a peek just to make sure. I used a LOT of pins when lining up these rows. It can be easy to have things get a little bit off. Don’t stress if yours aren’t perfect. If you look closely at the image I posted earlier, mine aren’t either. Most people won’t notice, so don’t fret too much.
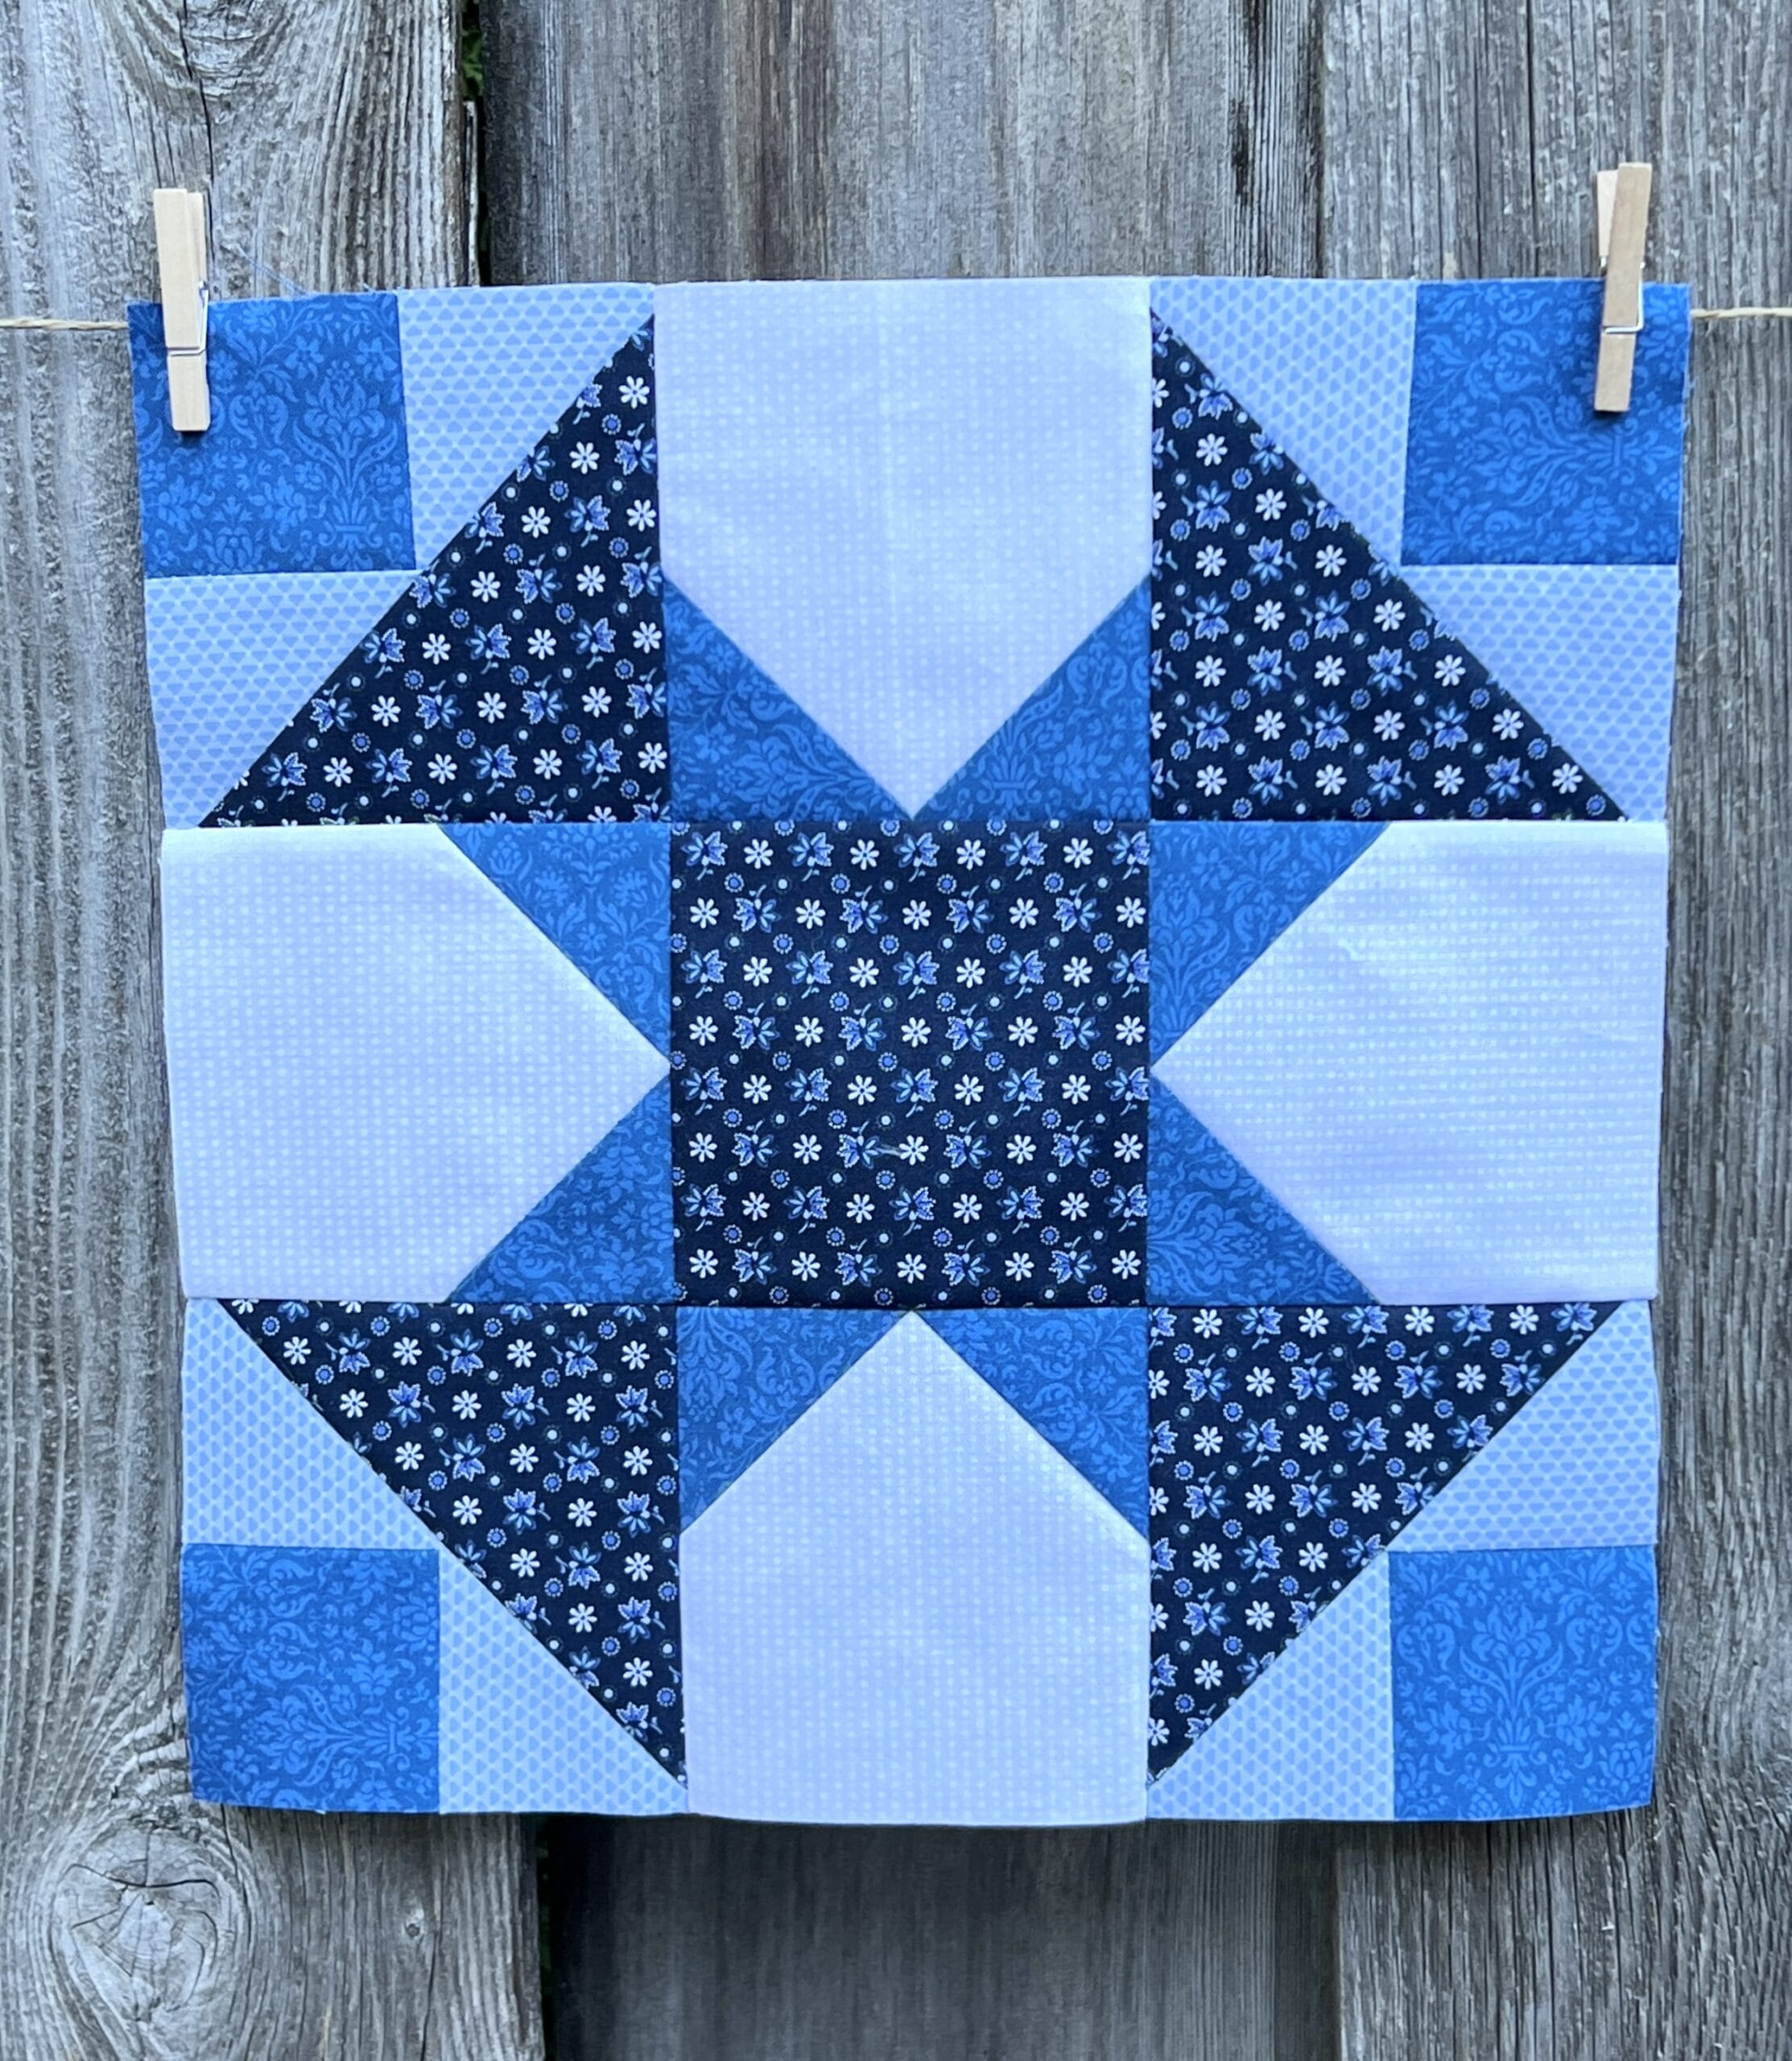
Block #22
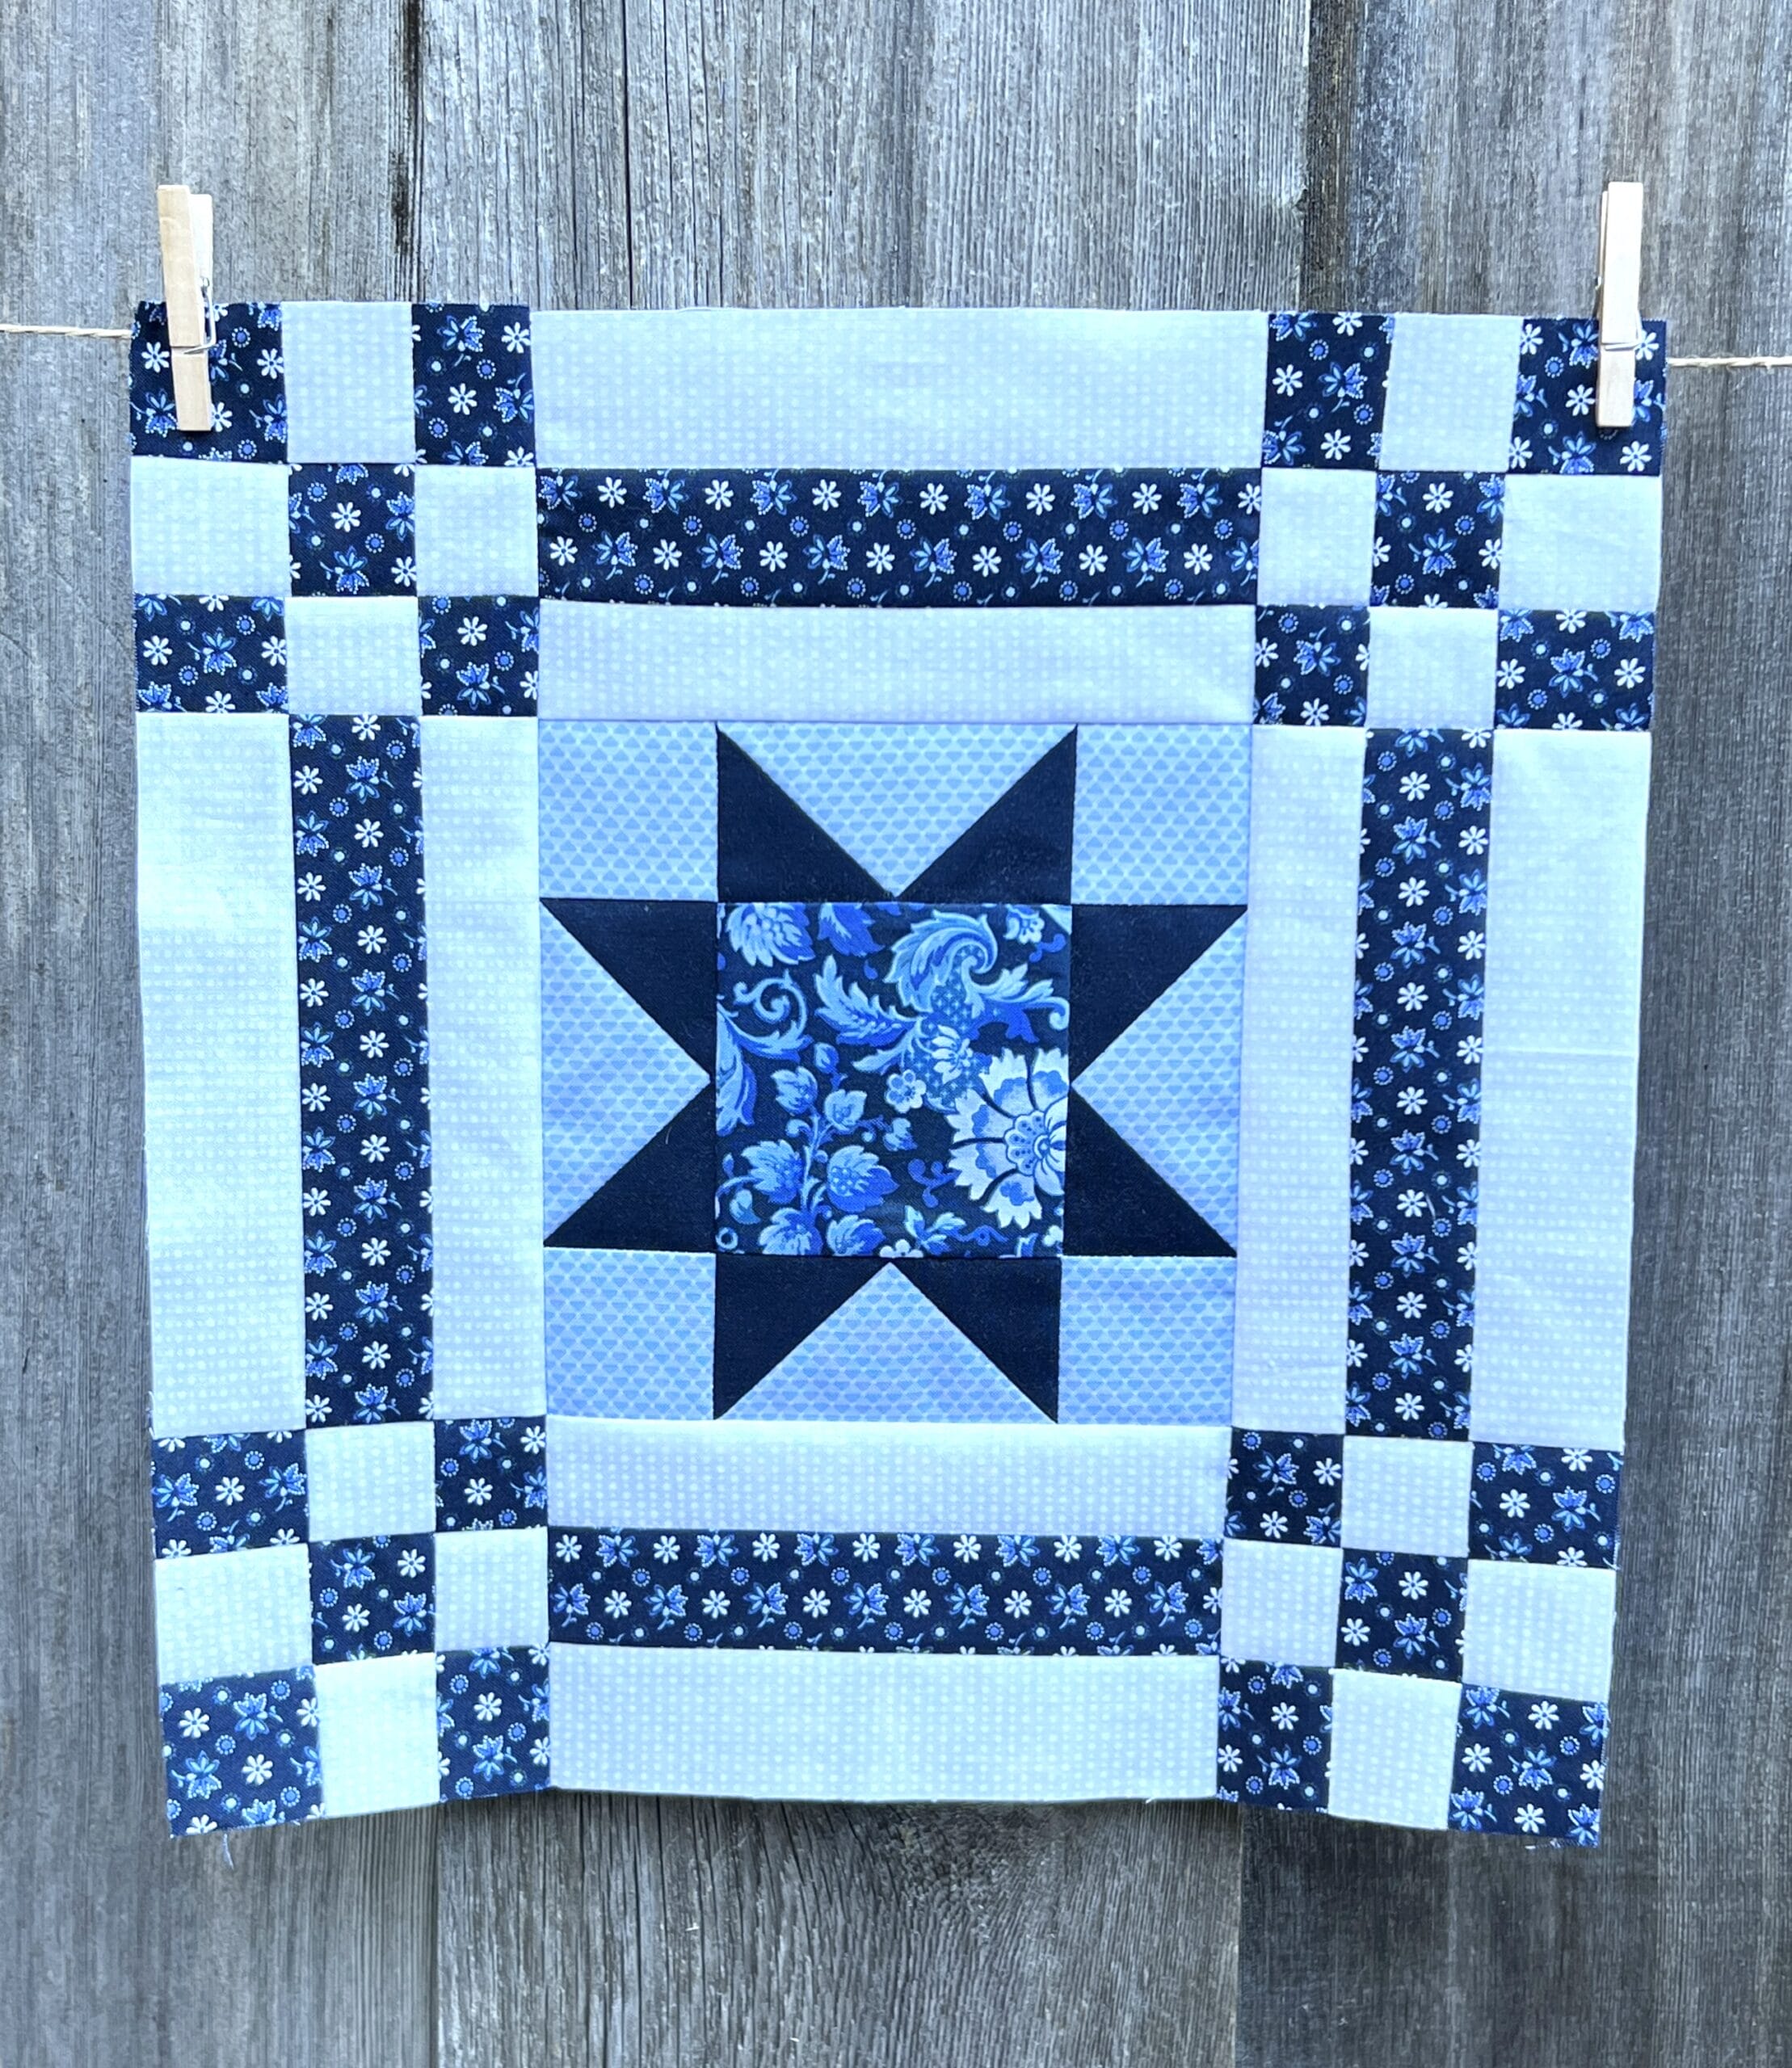
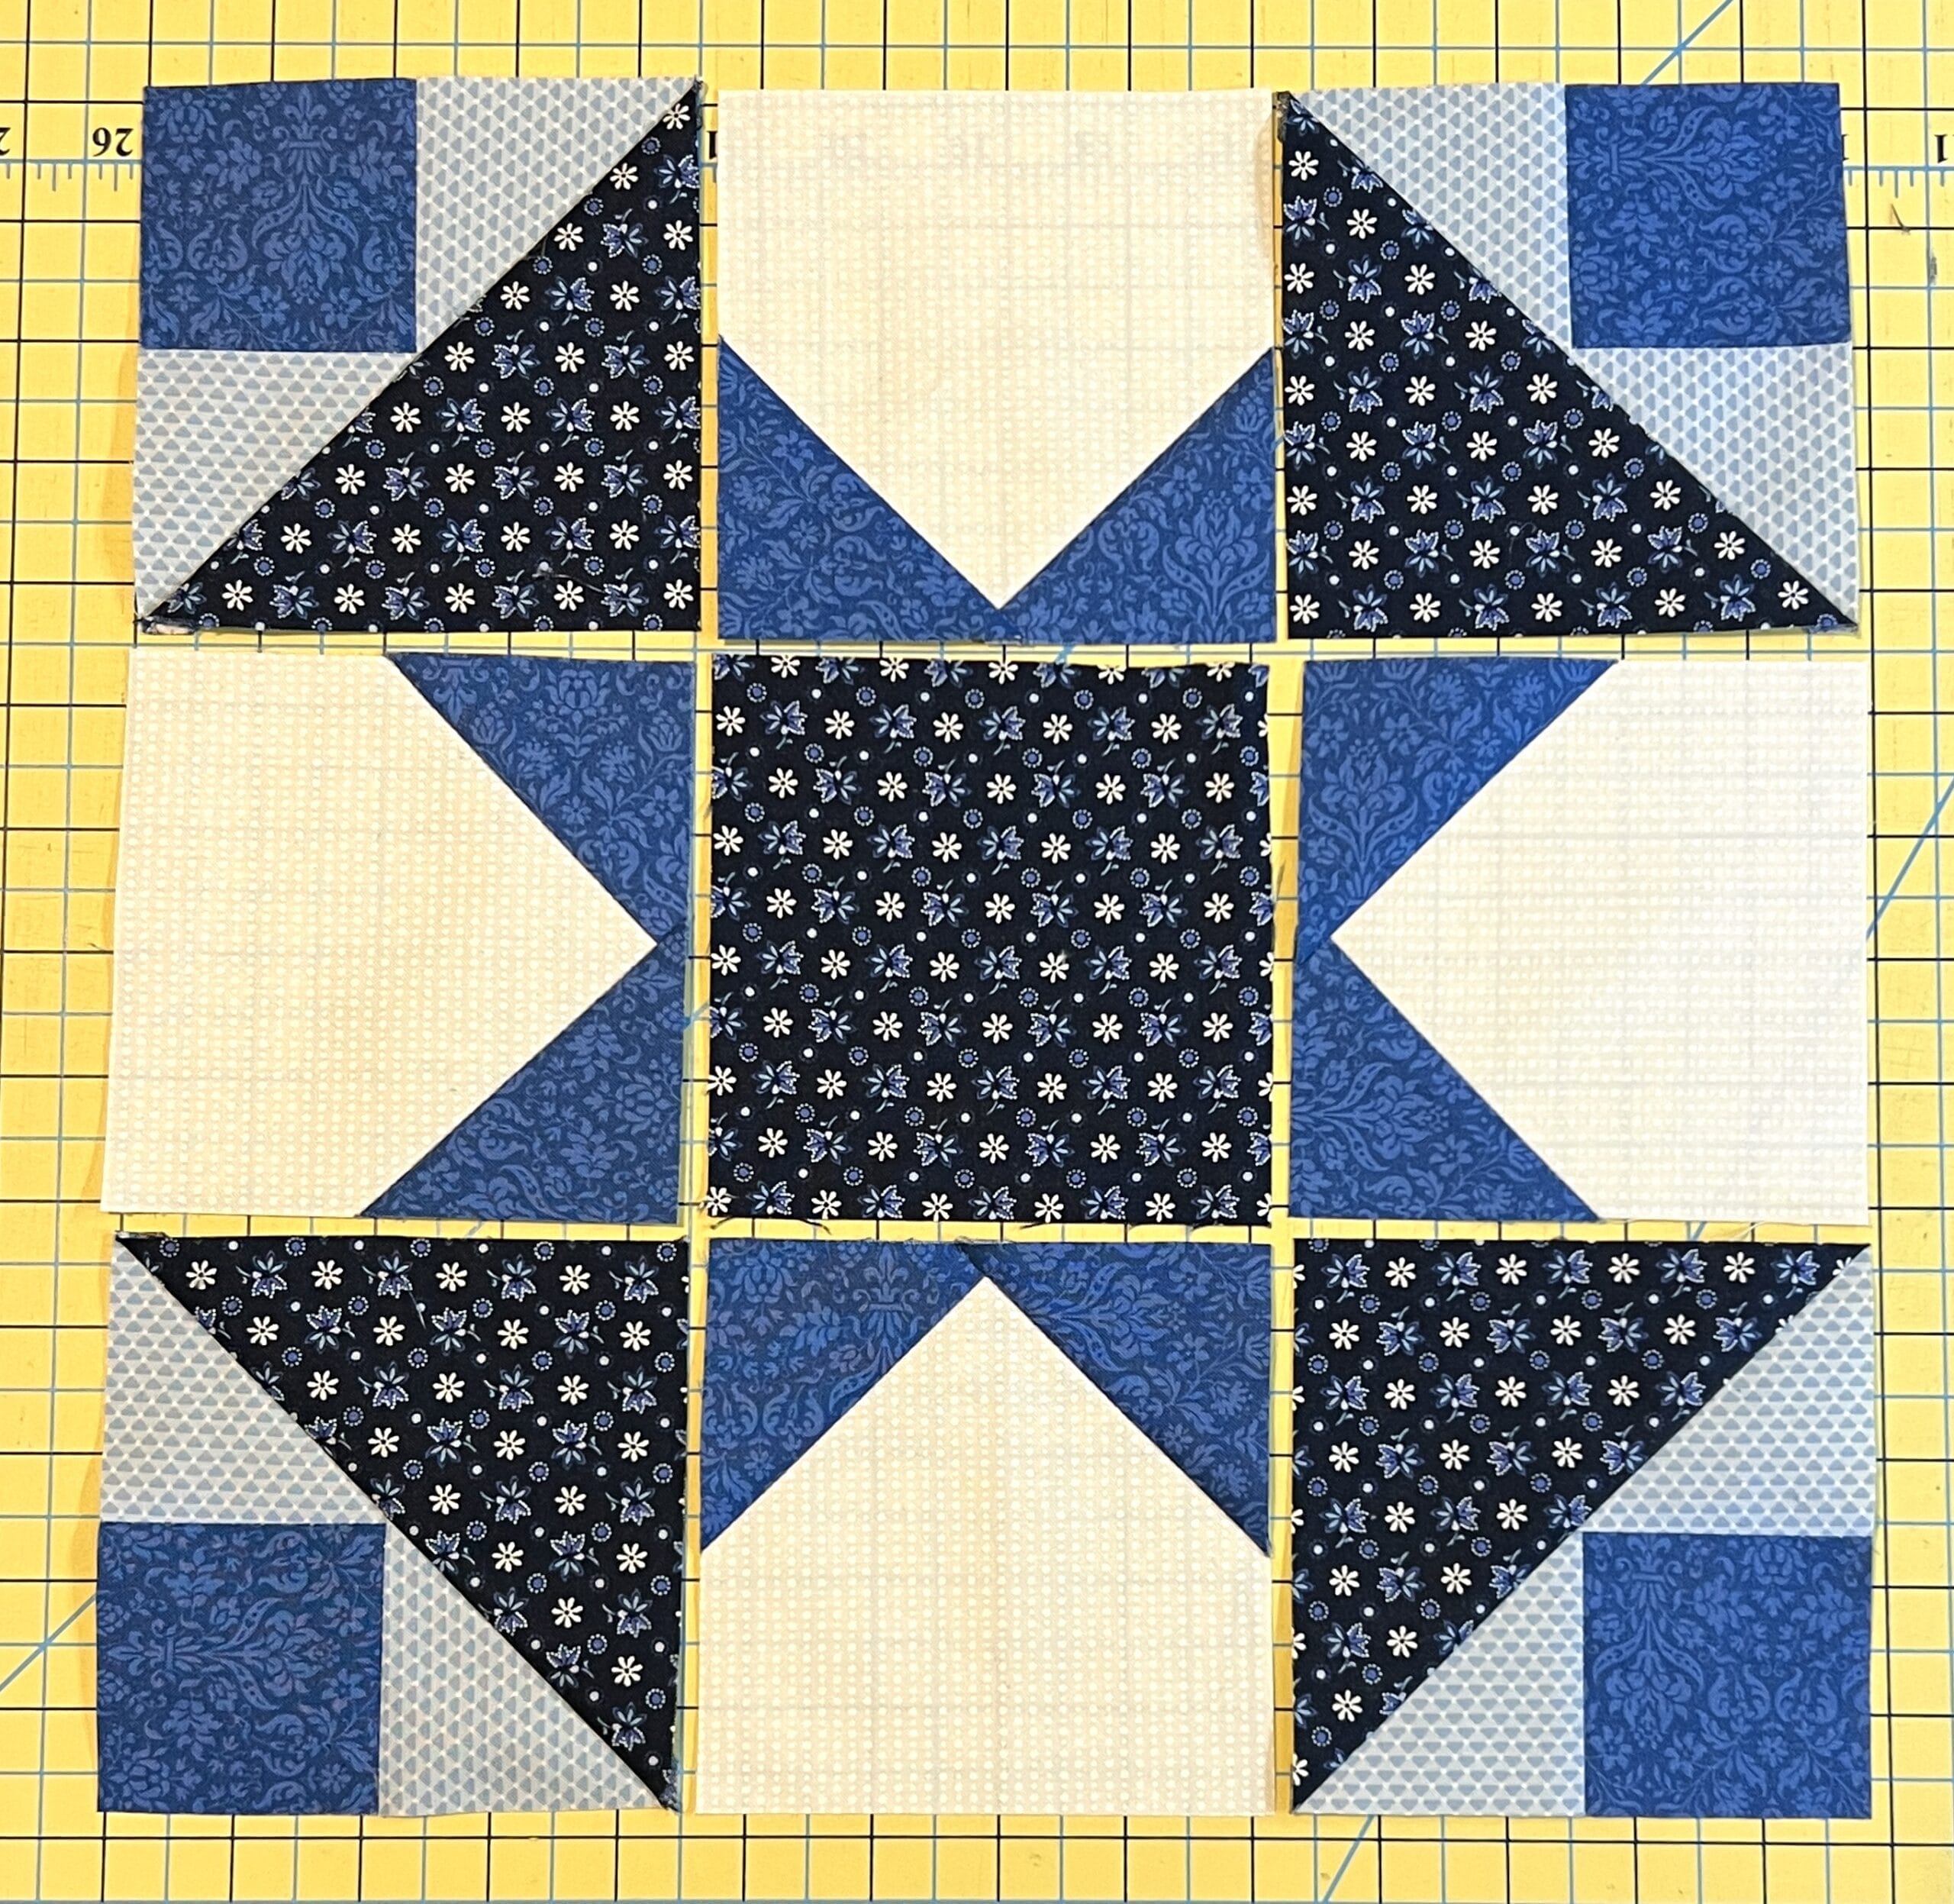
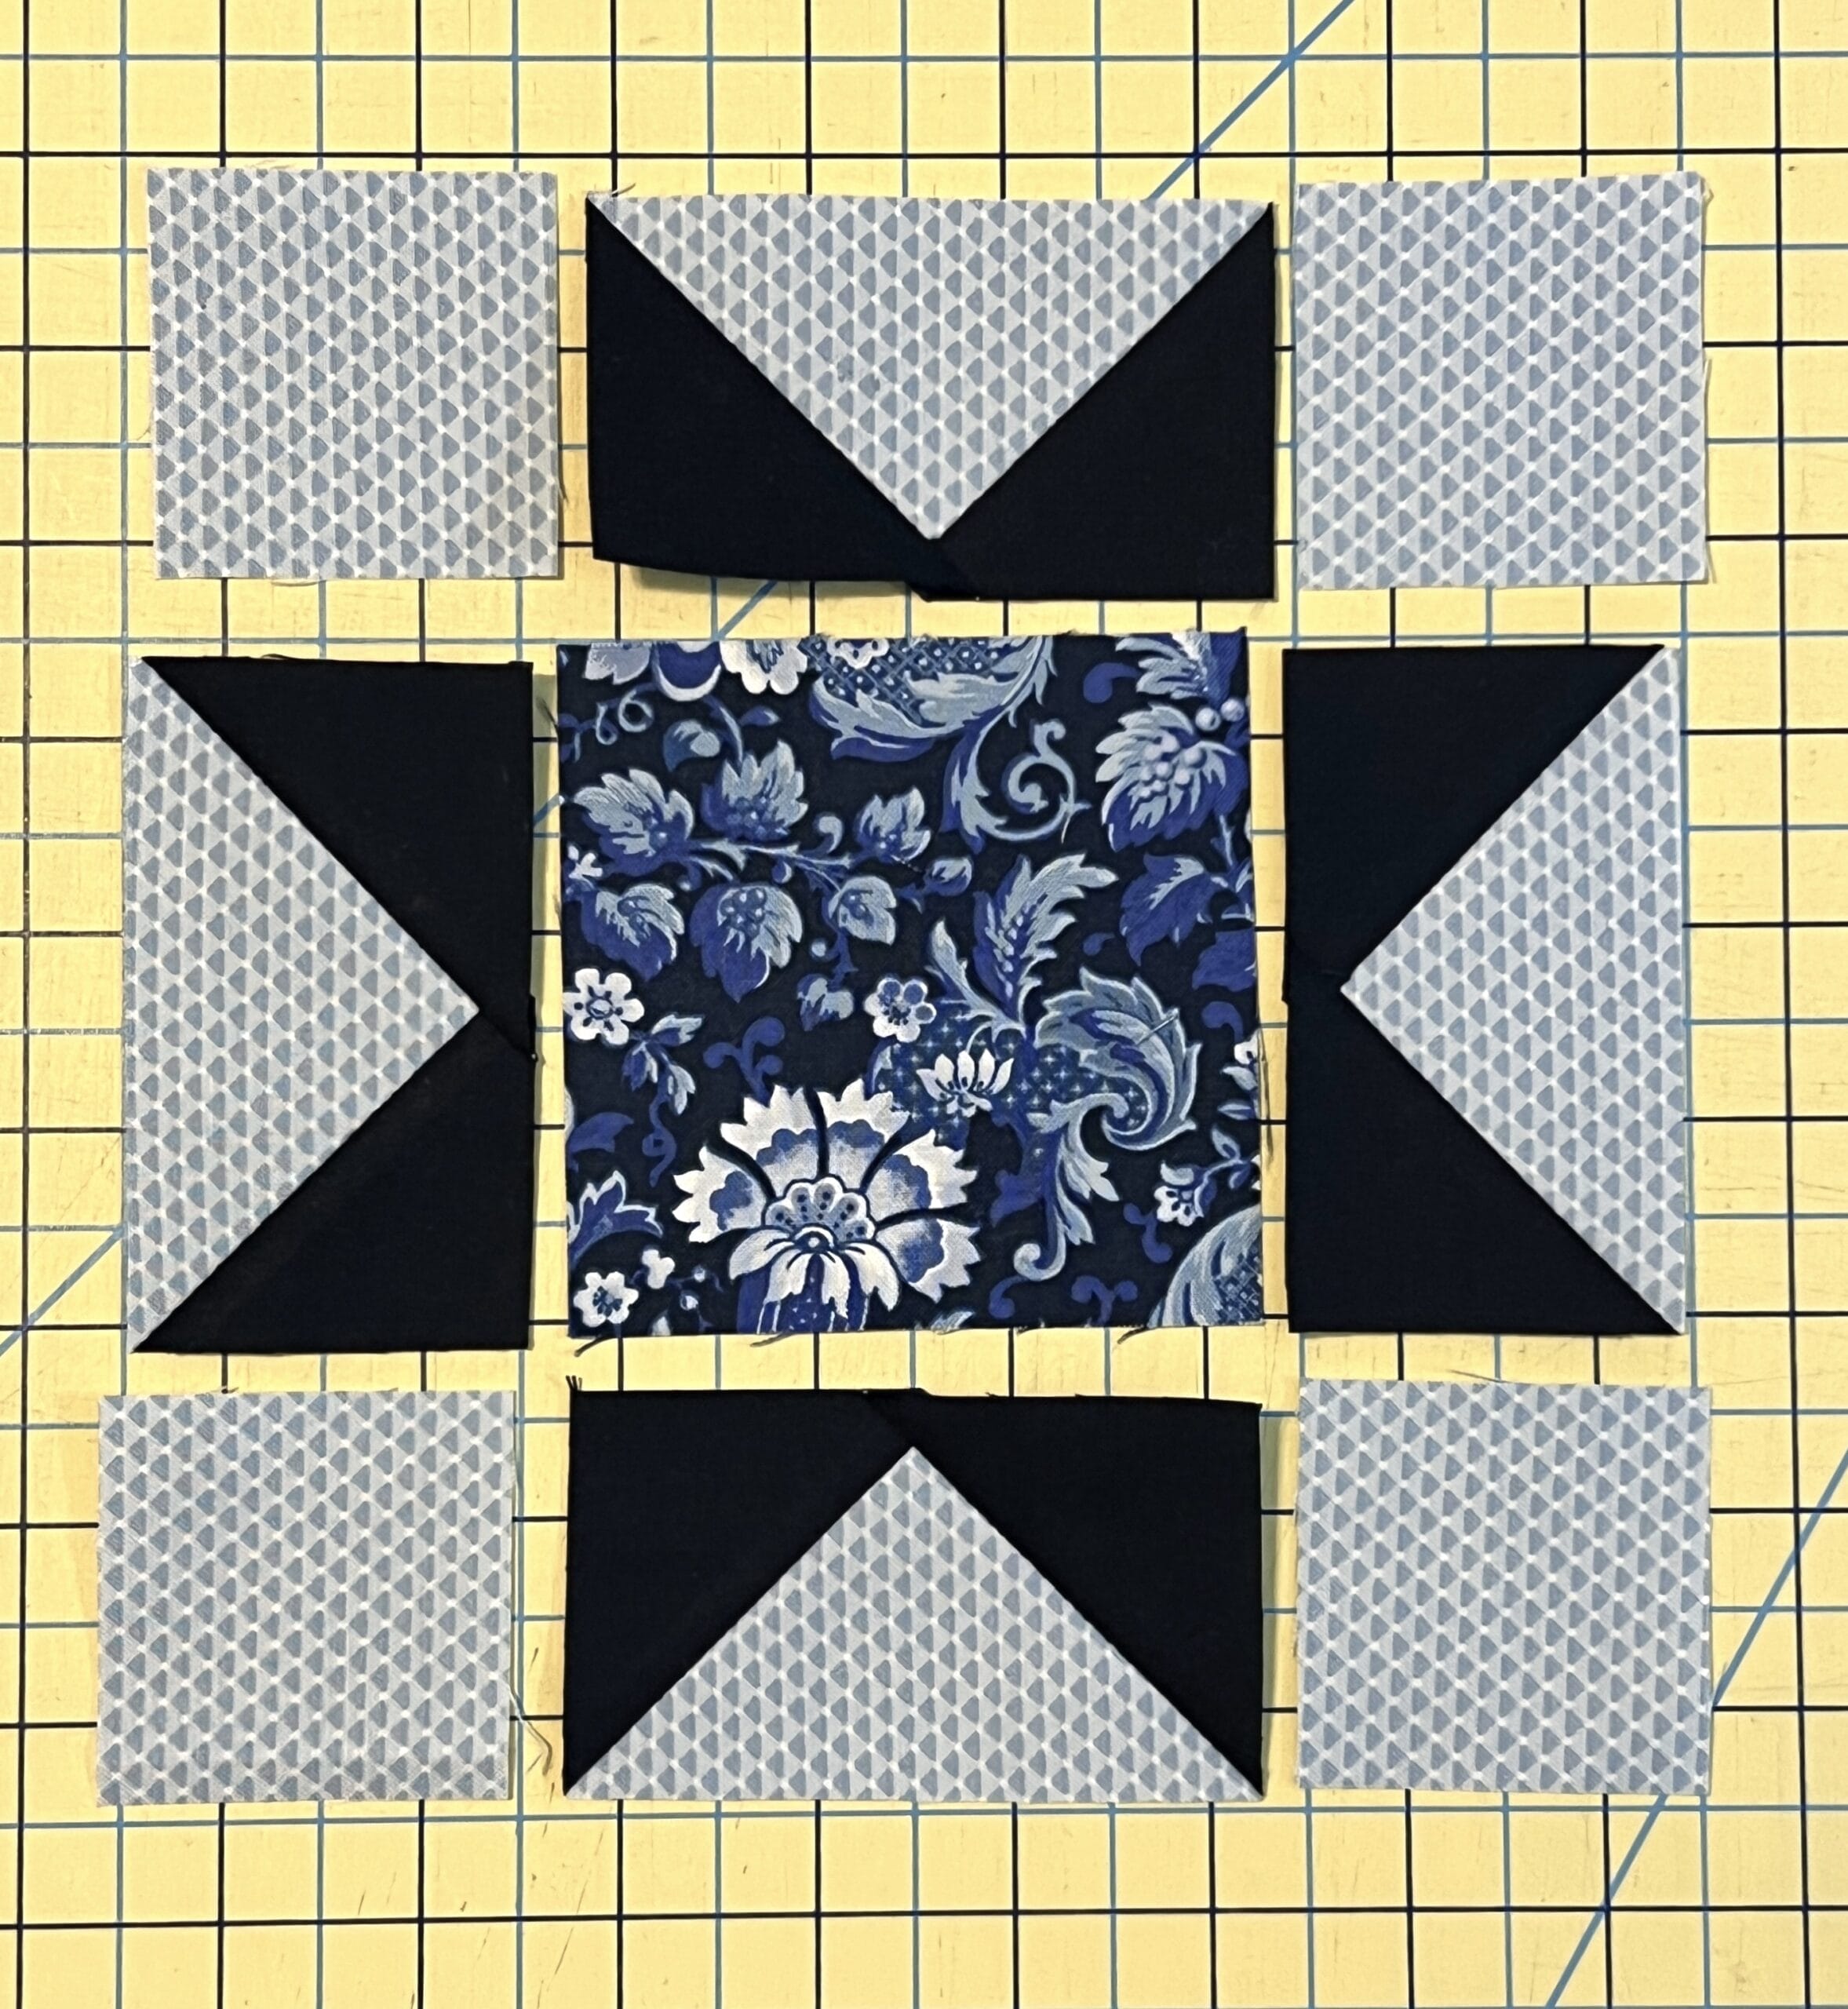
Our last block for the month combines two of my favorite things – Star blocks and checkered 9-patches.
We will make the star block first, and begin by making some more flying geese, only this time we WILL use the no-waste method. You’ve don’t this many times already in this quilt, but the steps will look like this:

Now we just have to assemble the star block for the center like so:
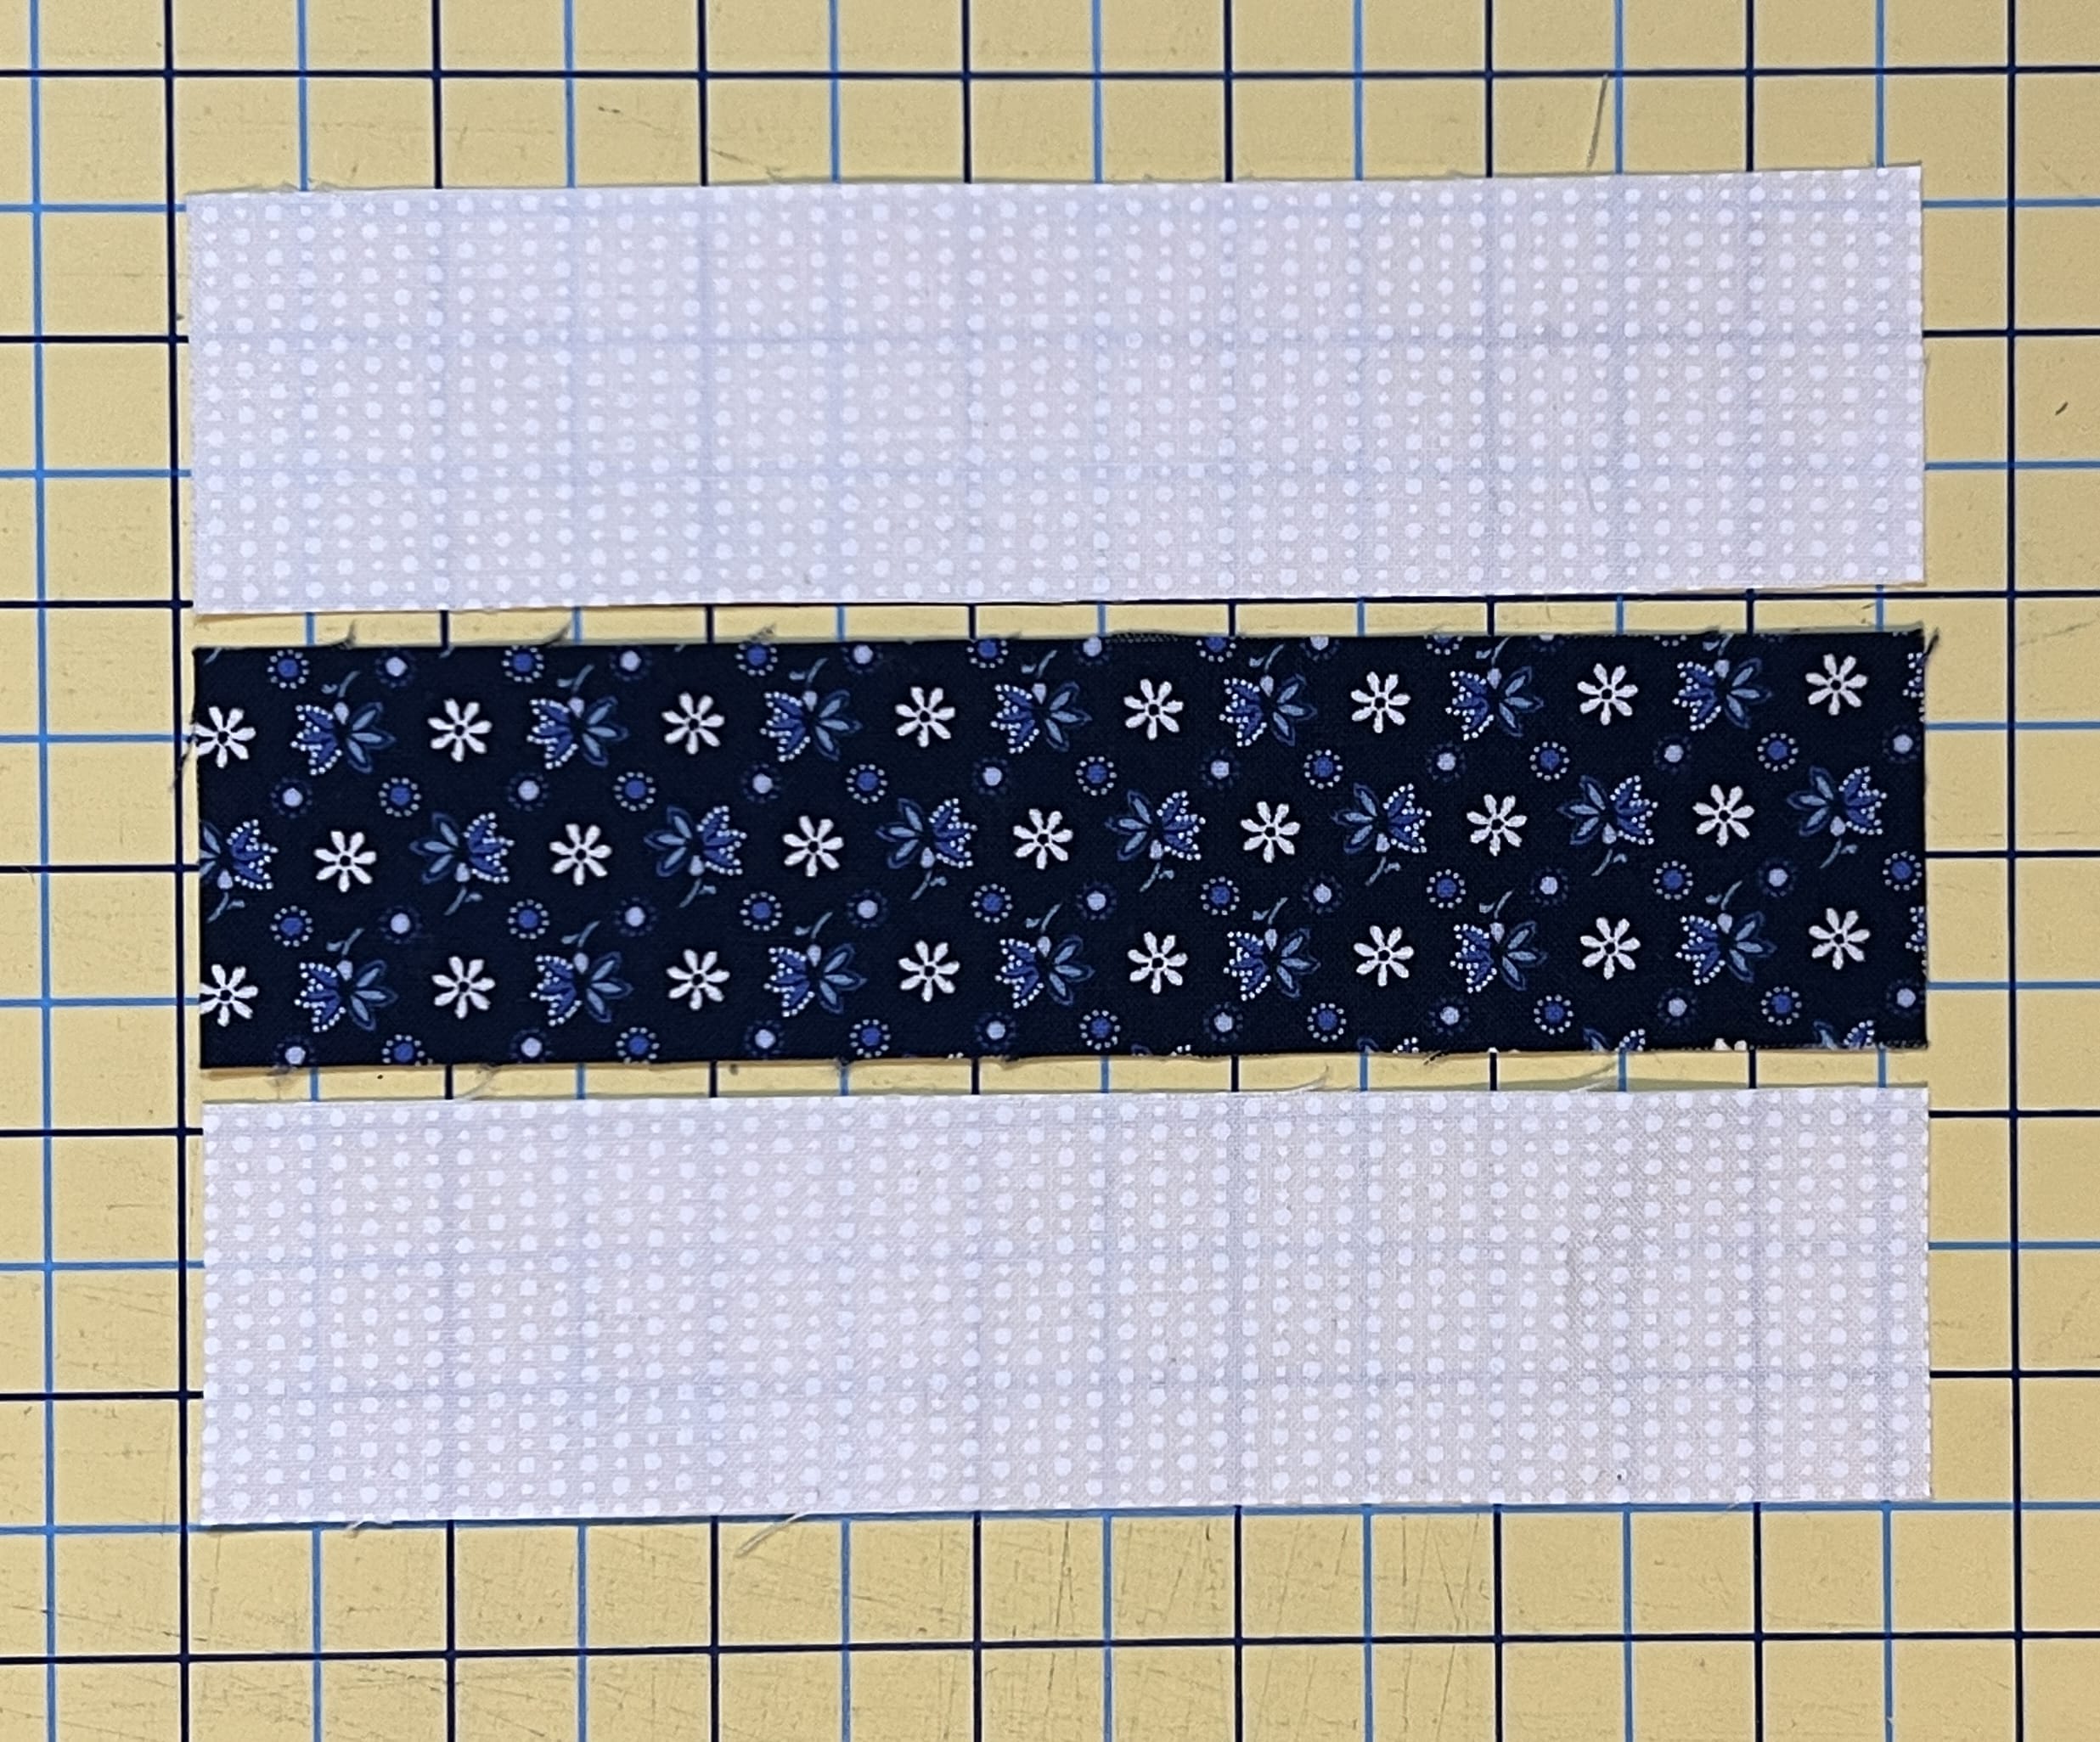
In step 4 we will sew an F strip to the top and bottom of each B strip. This will give us the borders for the star block.
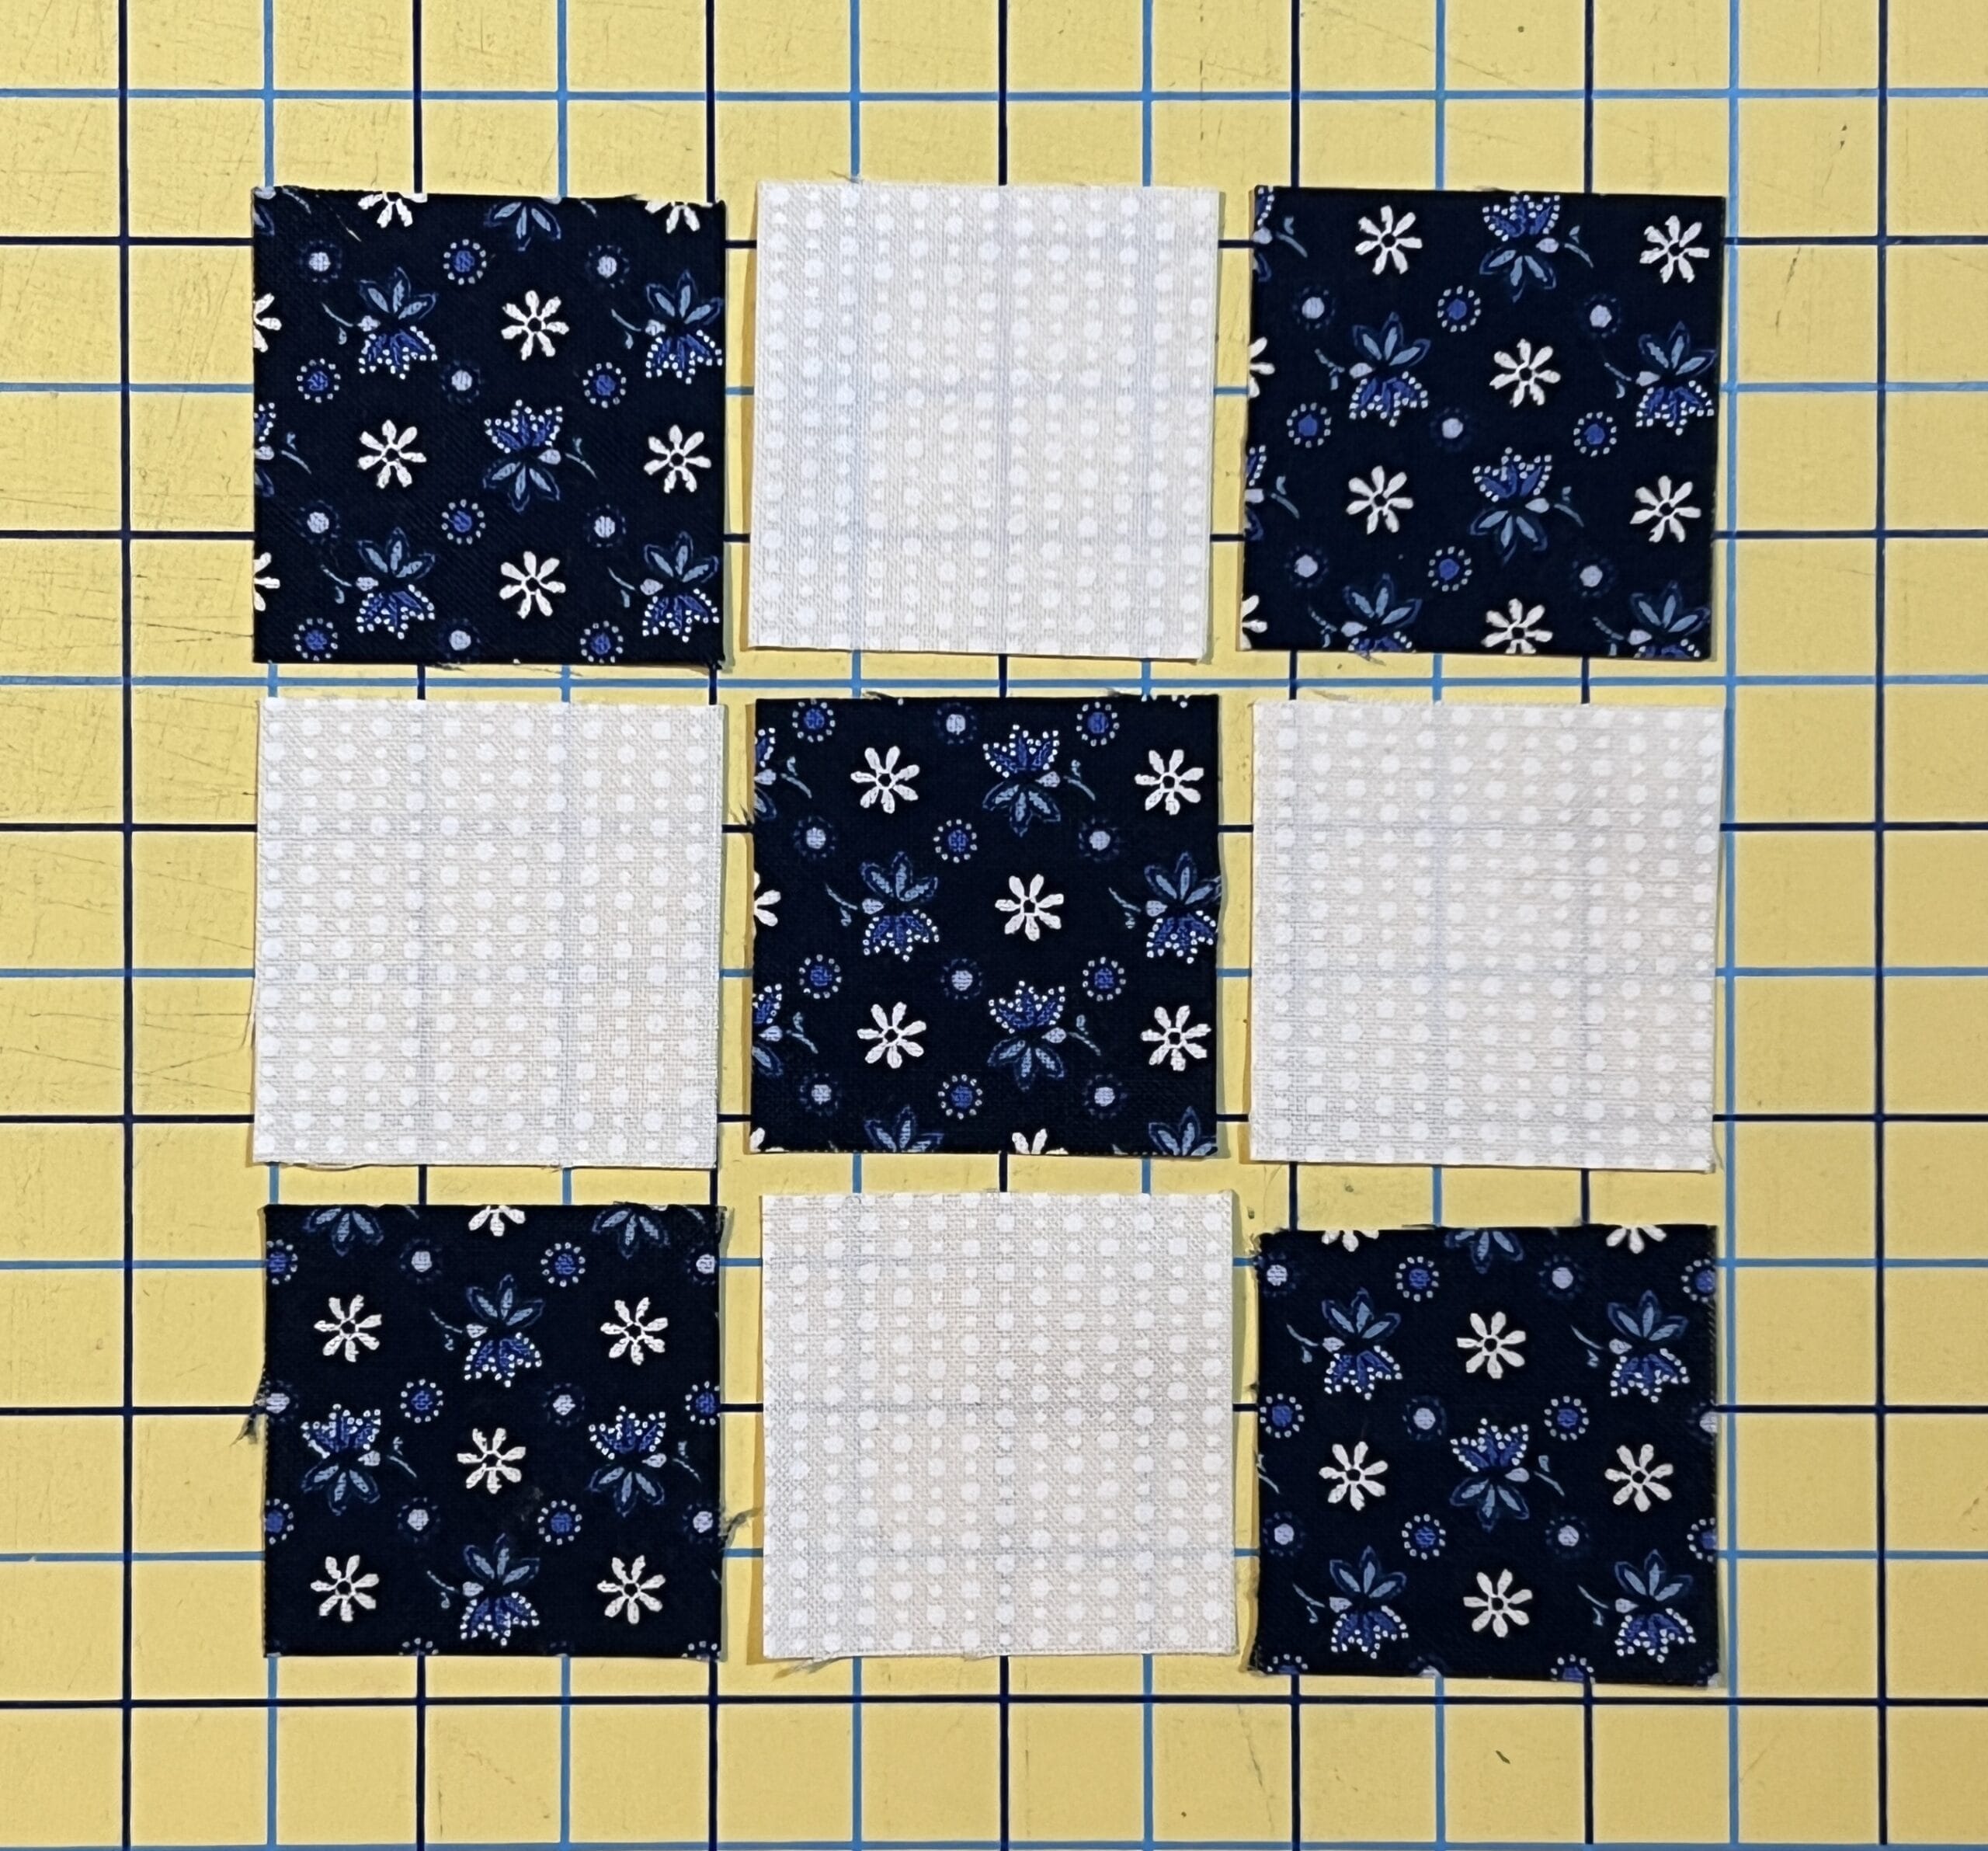
Our last component for the block is our little 9-patch units for the corners. These squares are pretty small, so starching is a must as far as I’m concerned.
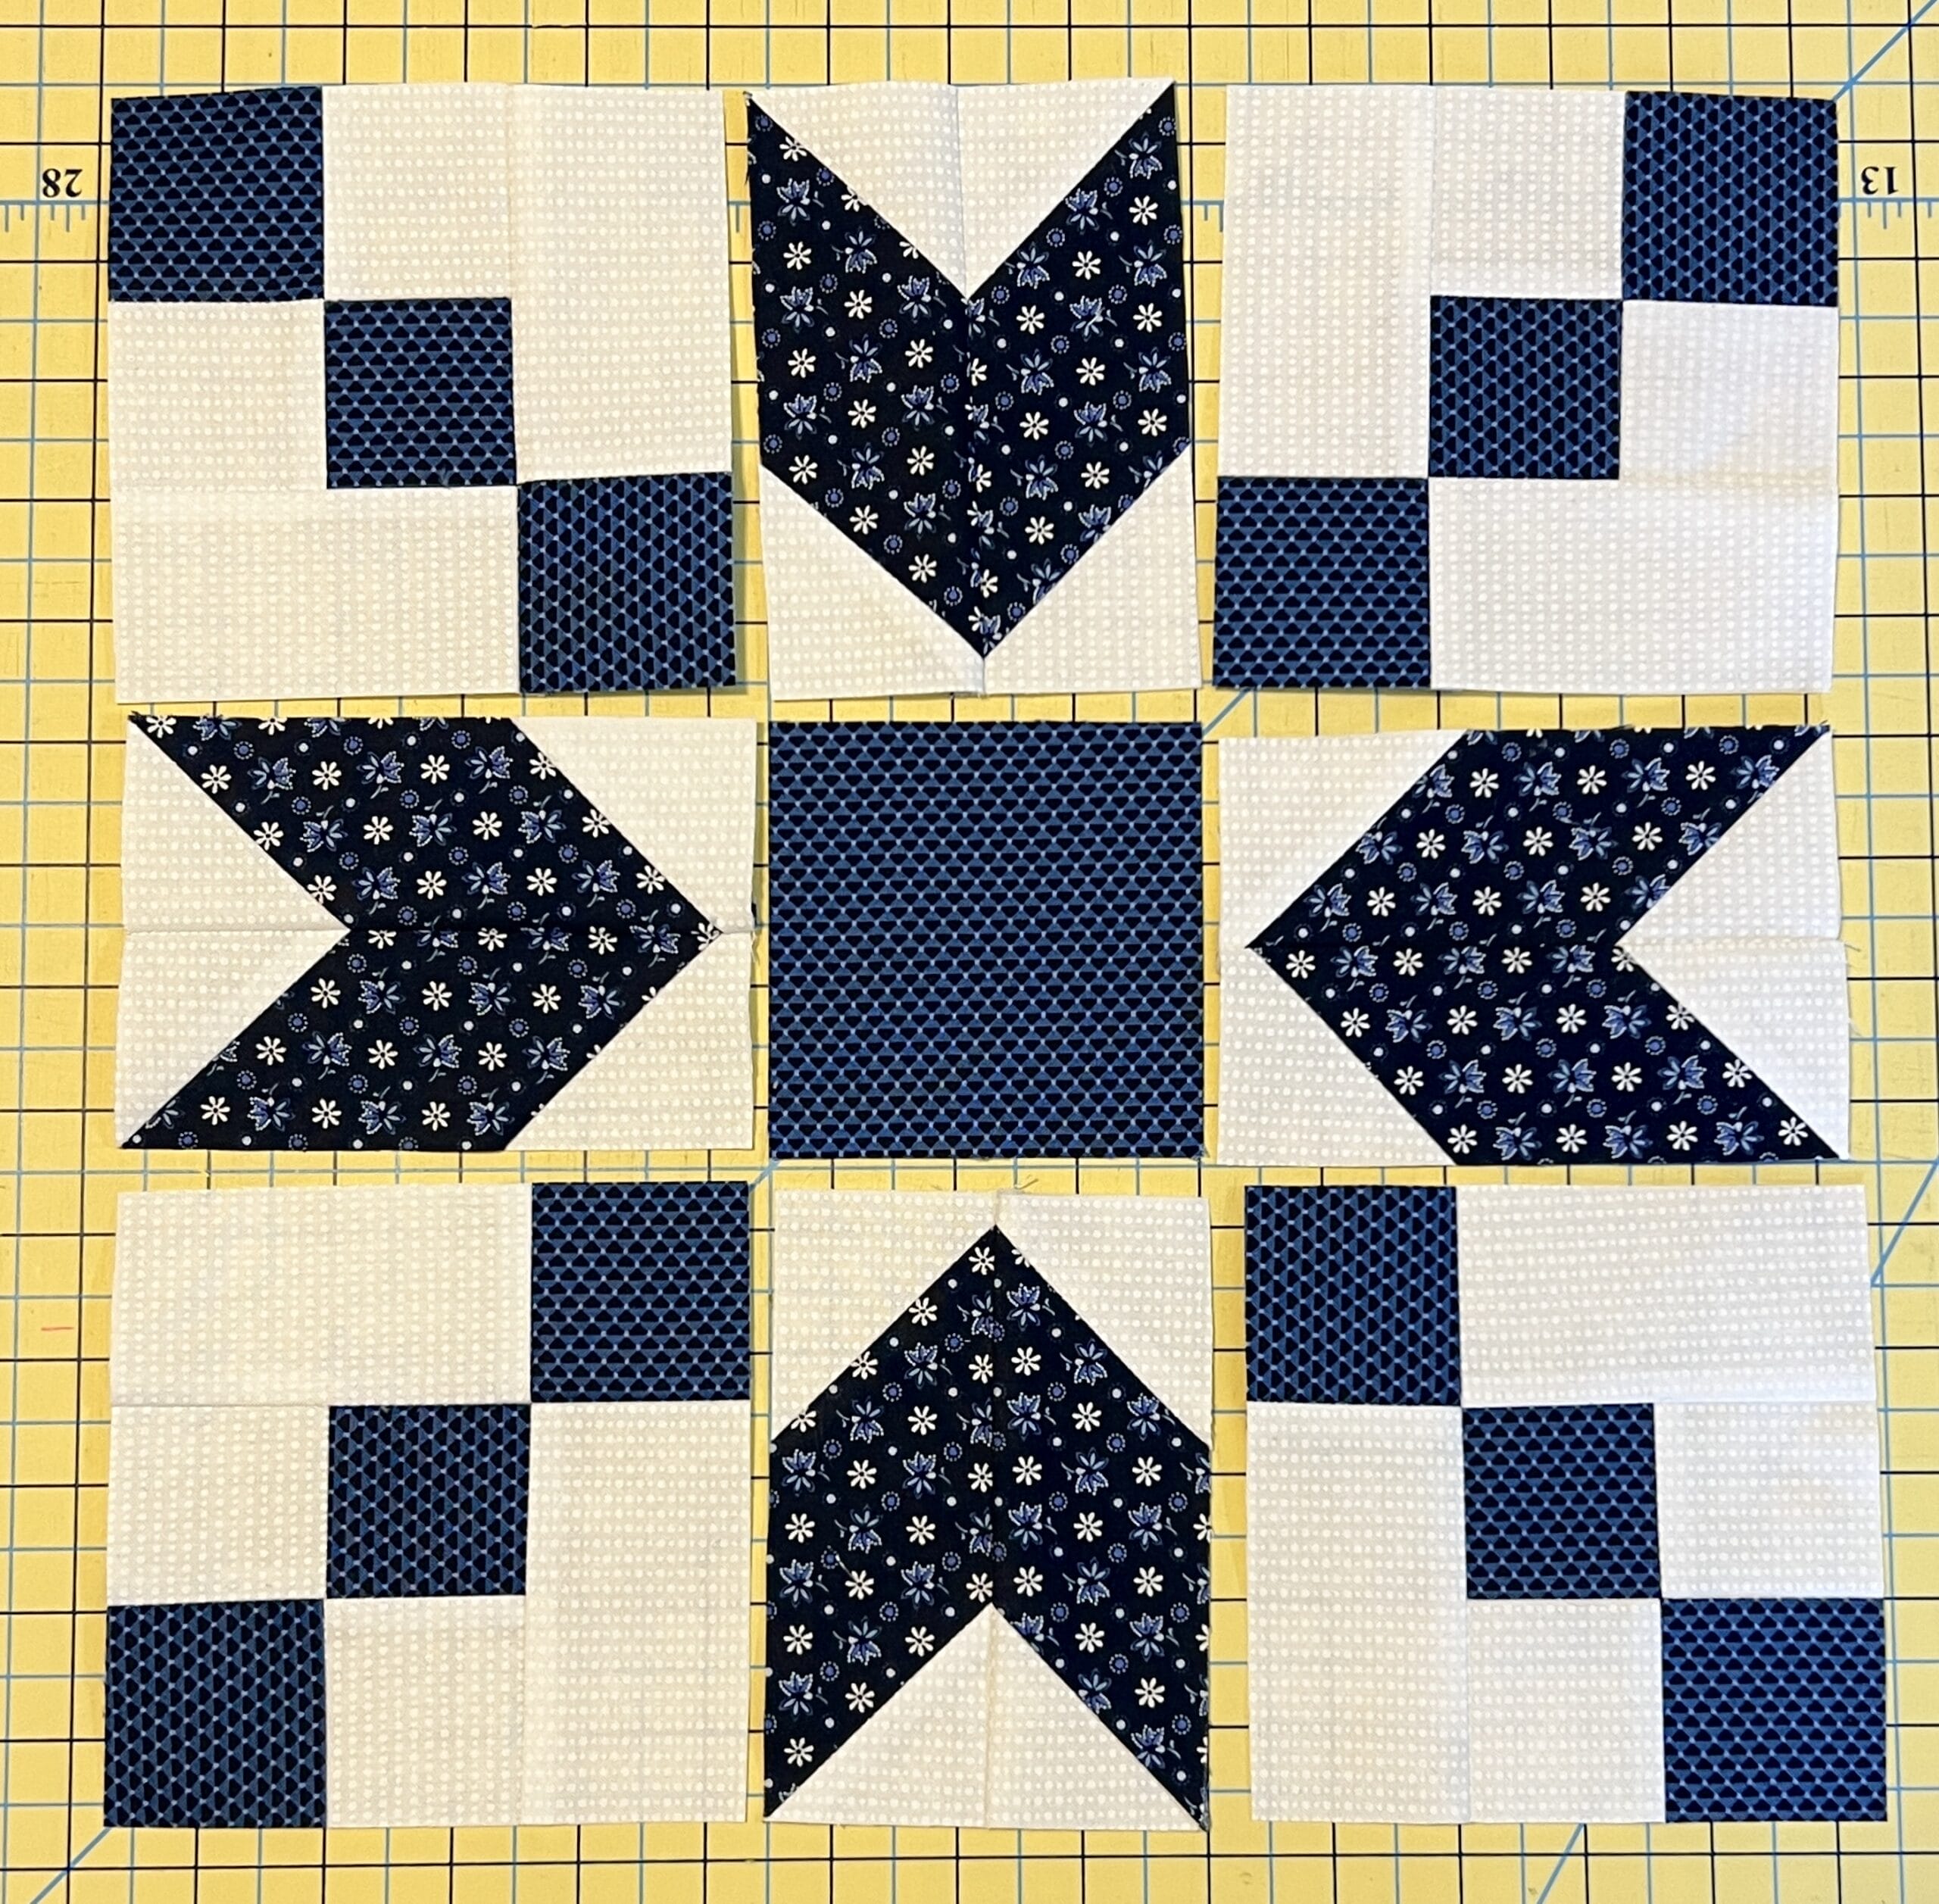
All we have left to do now, is to sew all the units together, like this:
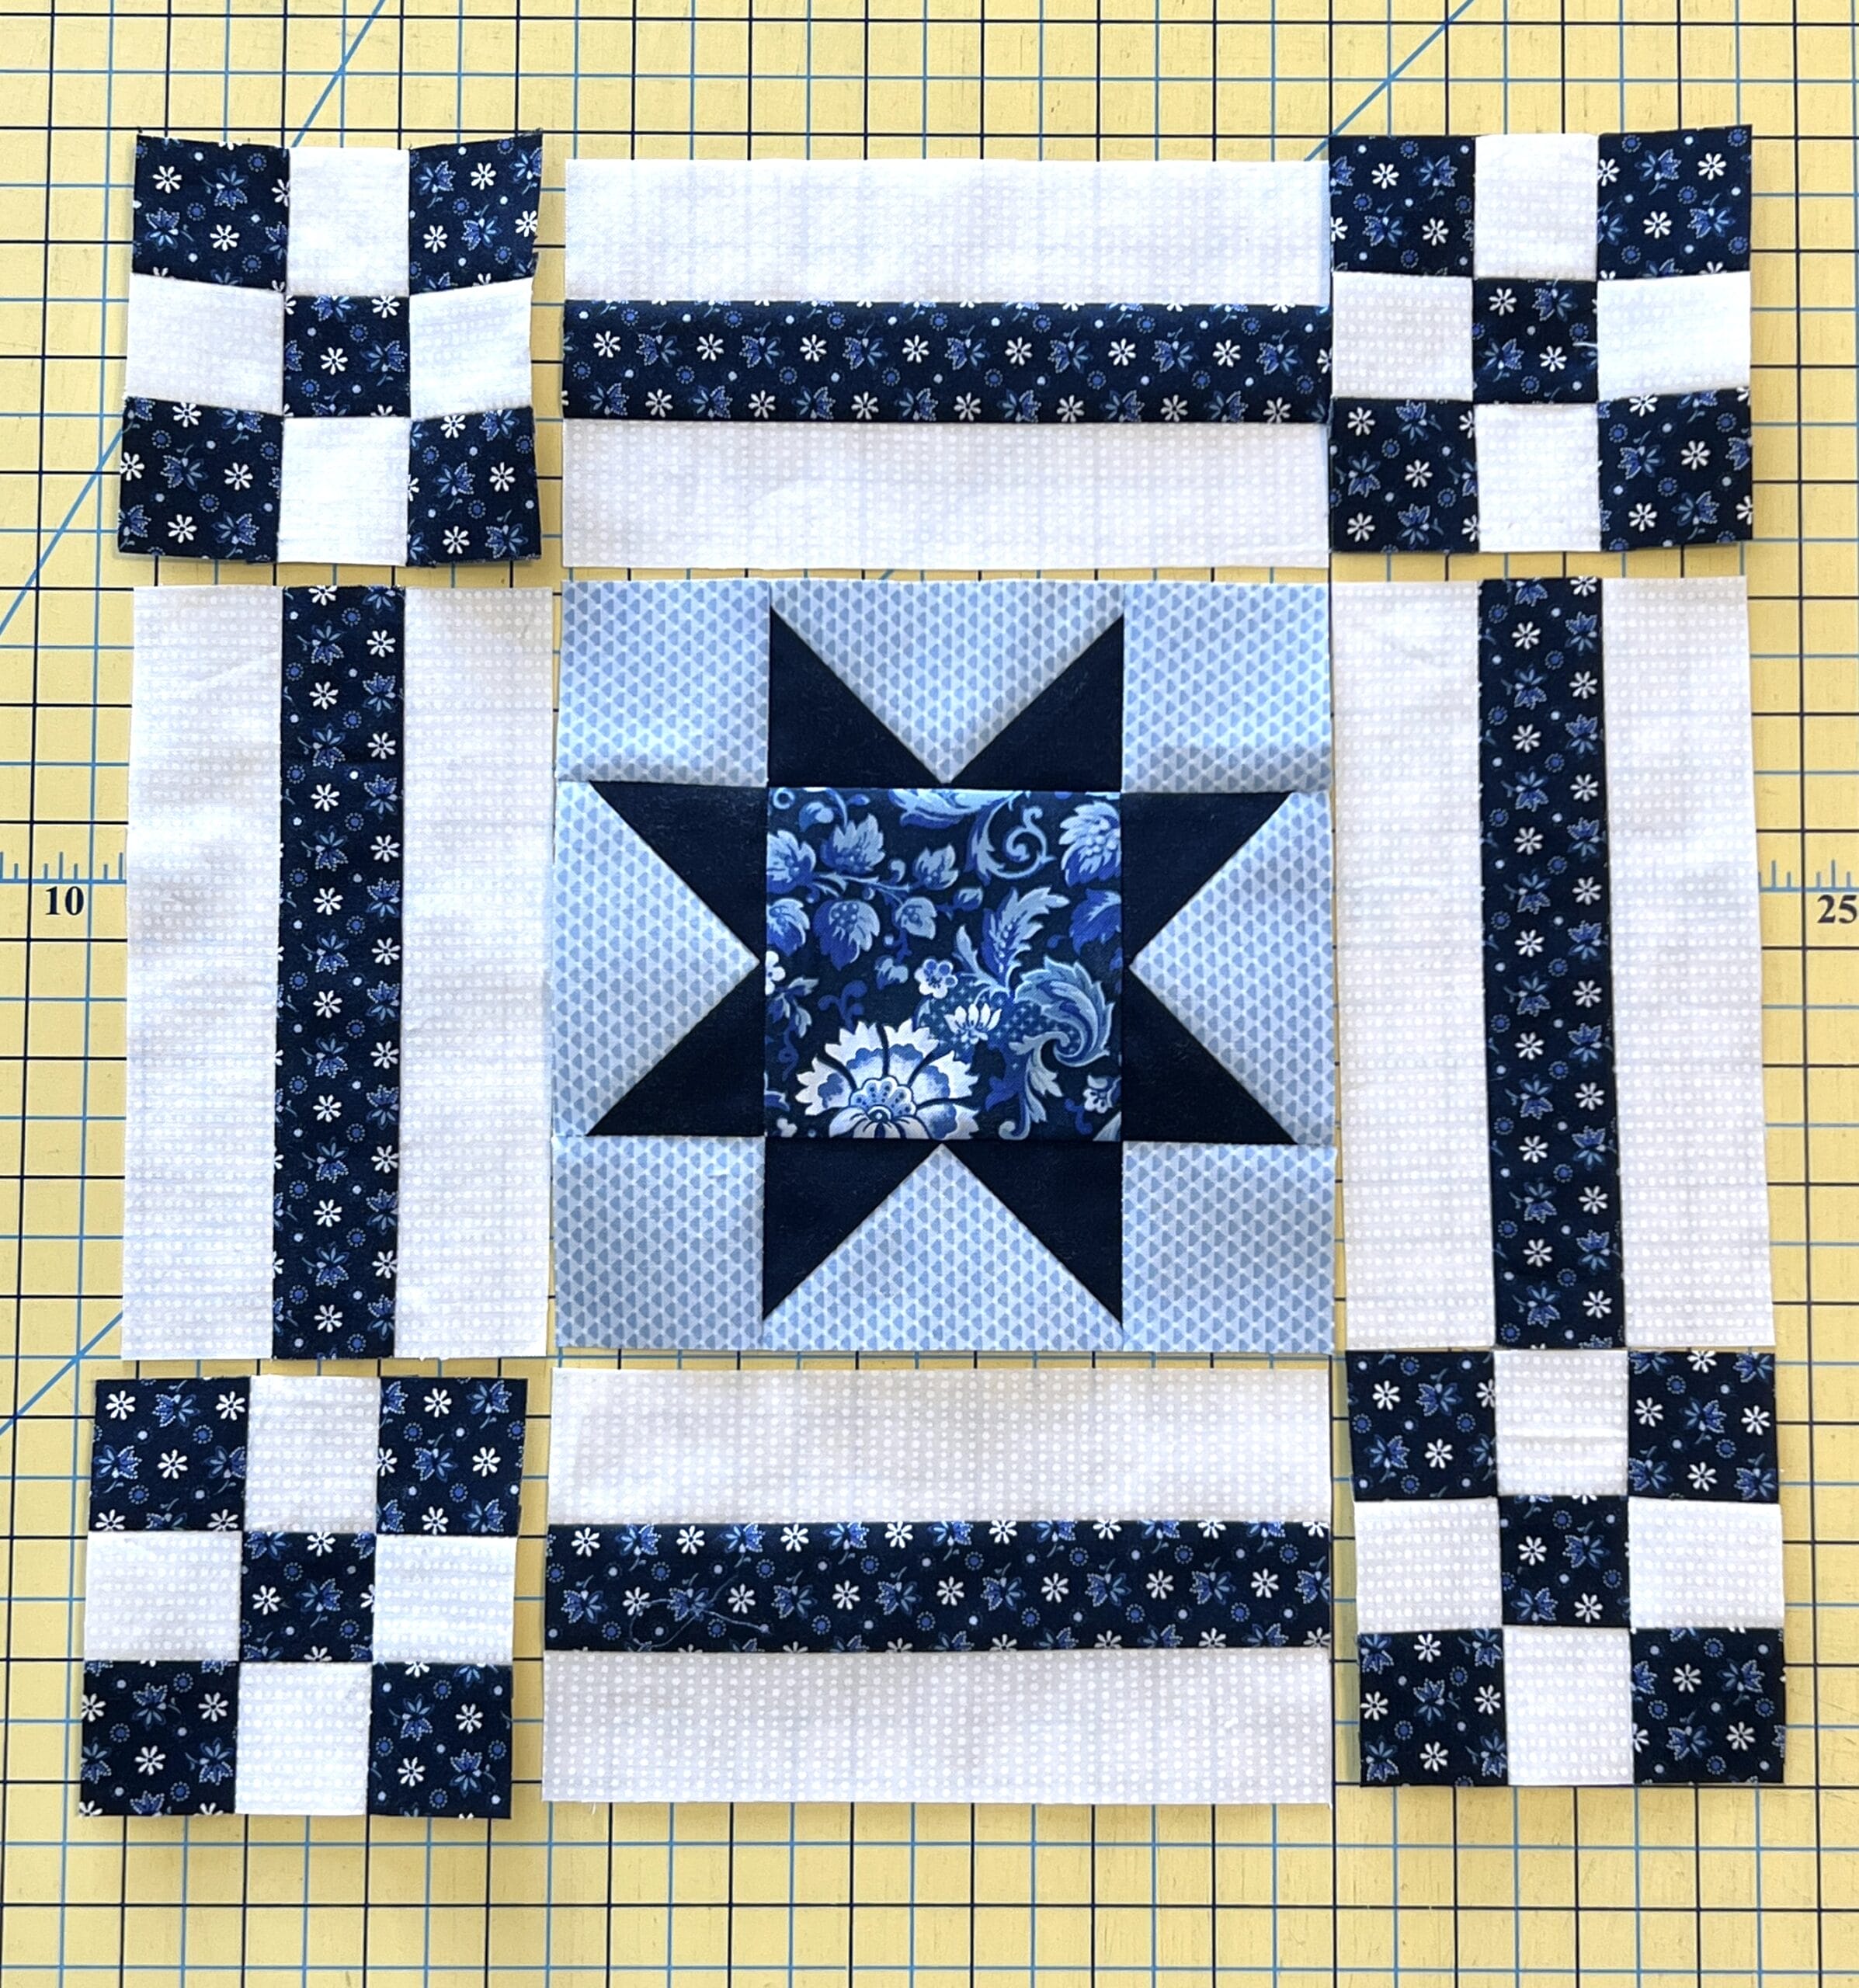
If you’ve pressed according to the directions, the seams should all come together nicely for you.
Like I already mentioned, we just have a few more blocks left to make for this quilt, and we’ll take care of those next month. I don’t know about all of you, but I’m so excited to start putting this quilt together soon!
Until next time, Happy Quilting!
-Kristin

