


 Tutorials
 10.30.2023
NOTE: these blog posts for the Amherst quilt top are part of a limited series for our Block of the Month subscription program. Sign-ups for the Amherst BOM are no longer available. You can learn more about our upcoming Block of the Month subscriptions here.
Hello friends,
I hope you are all enjoying Fall, and carving out some time for doing things you love, like quilting! As I mentioned on the Facebook group, I was dealing with a family emergency for the last little while, so I apologize that you are getting this little tutorial so late. Sometimes there are things beyond our control. Thankfully, most of the dust has now settled and I’m able to get back to work. And by work, I mean fun, because let’s face it, I have a pretty fun job!
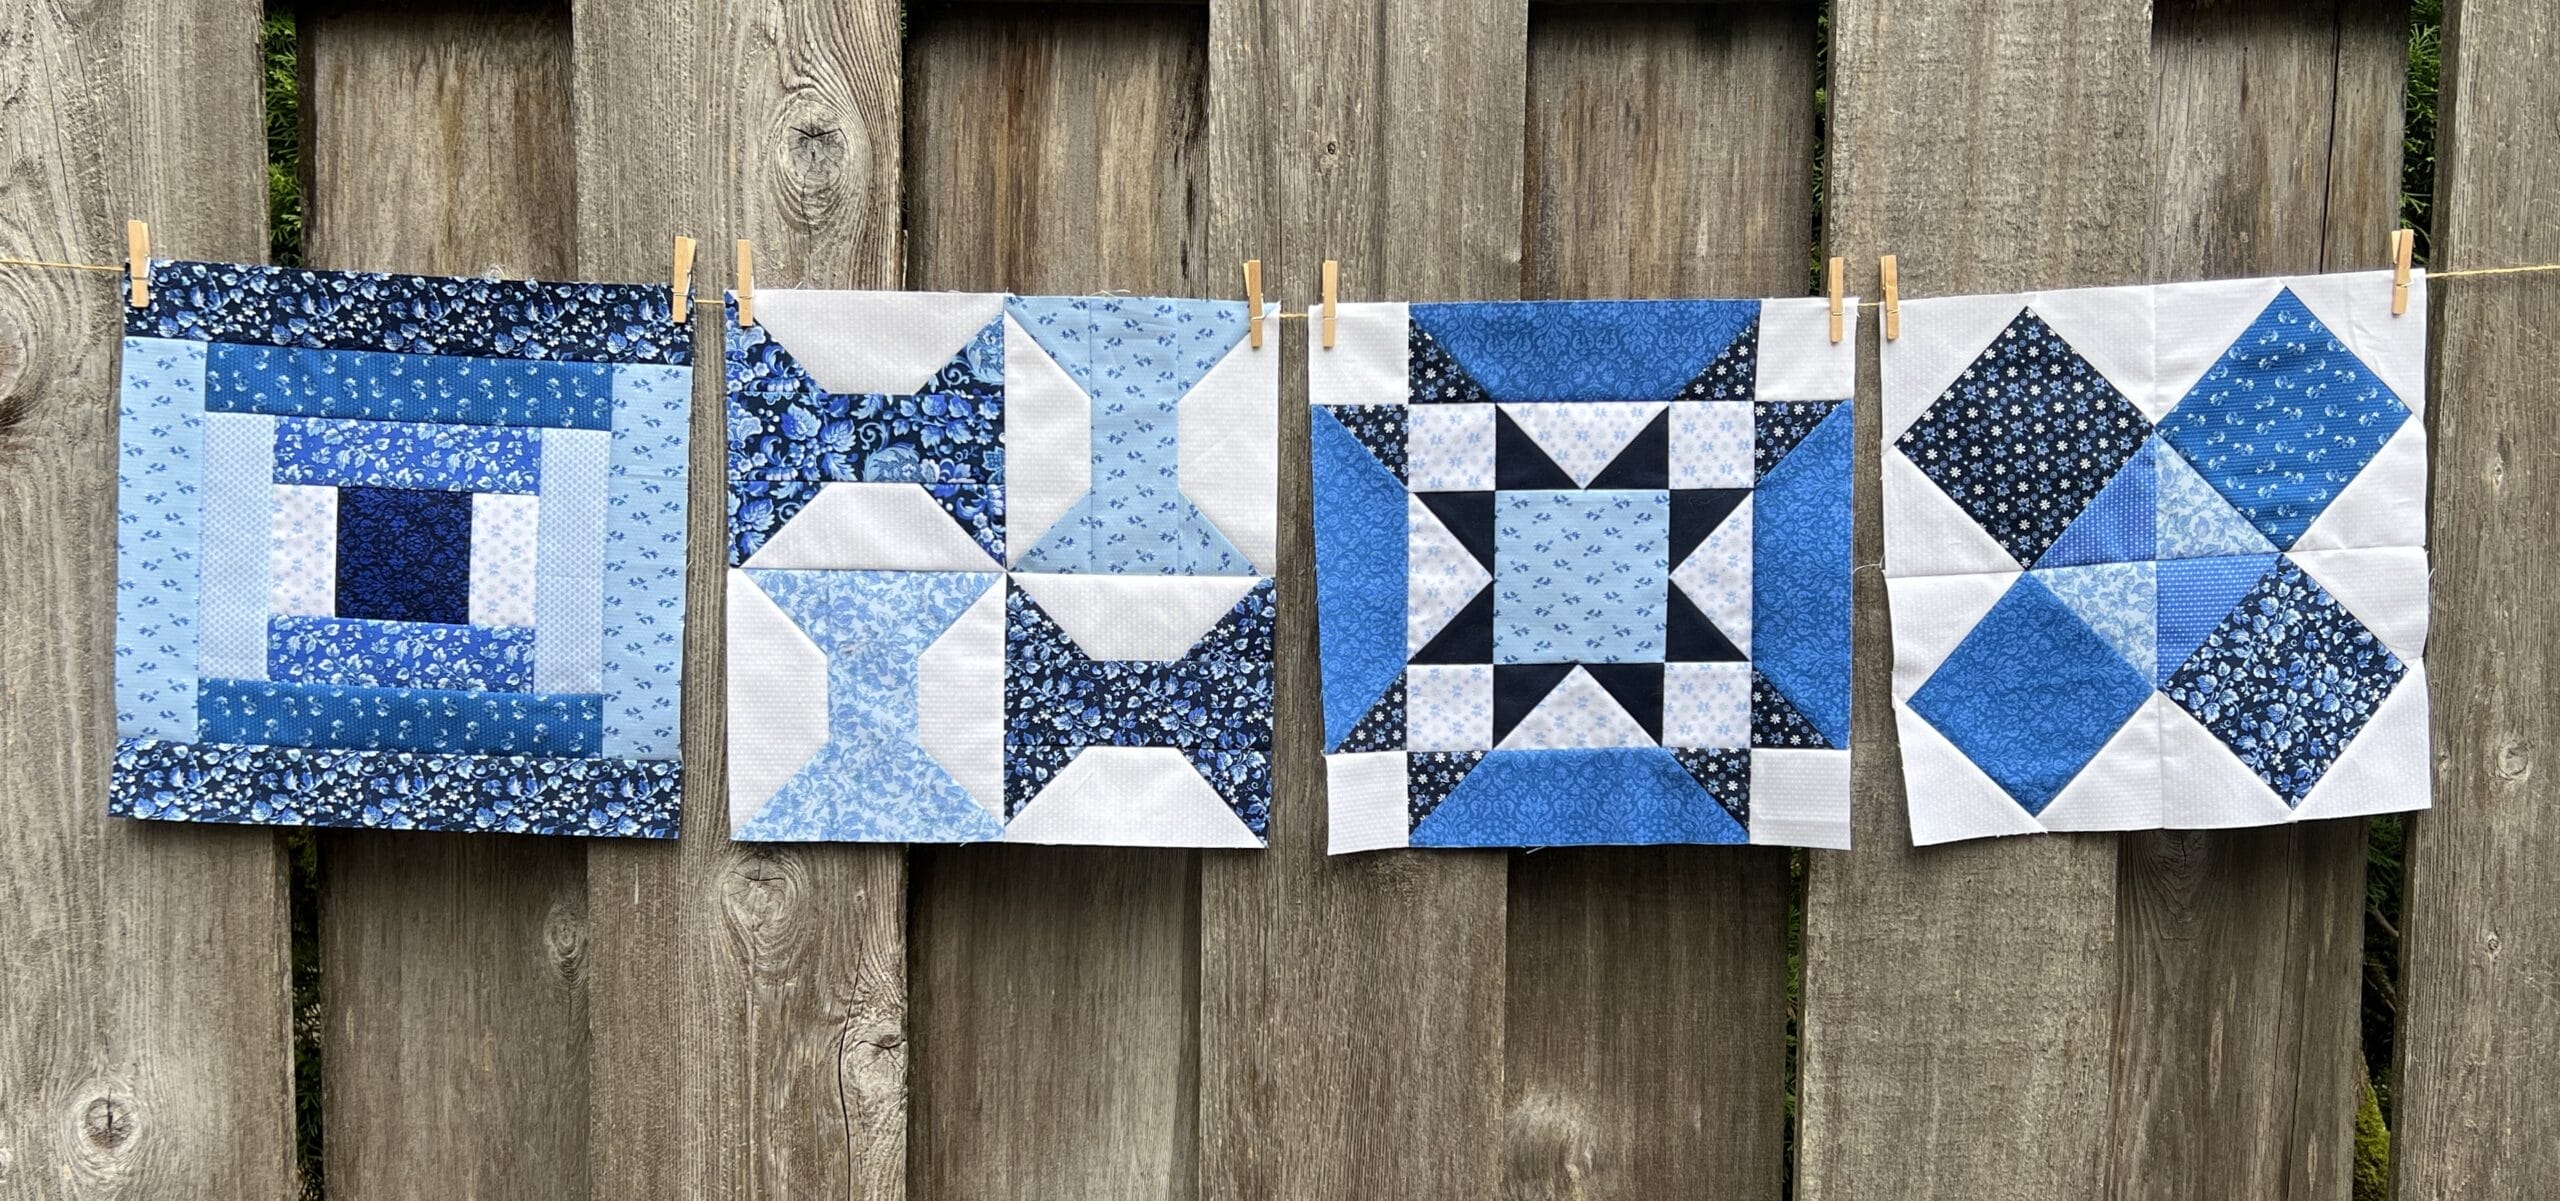
This month we are adding another four blocks to our growing collection for this lovely quilt.
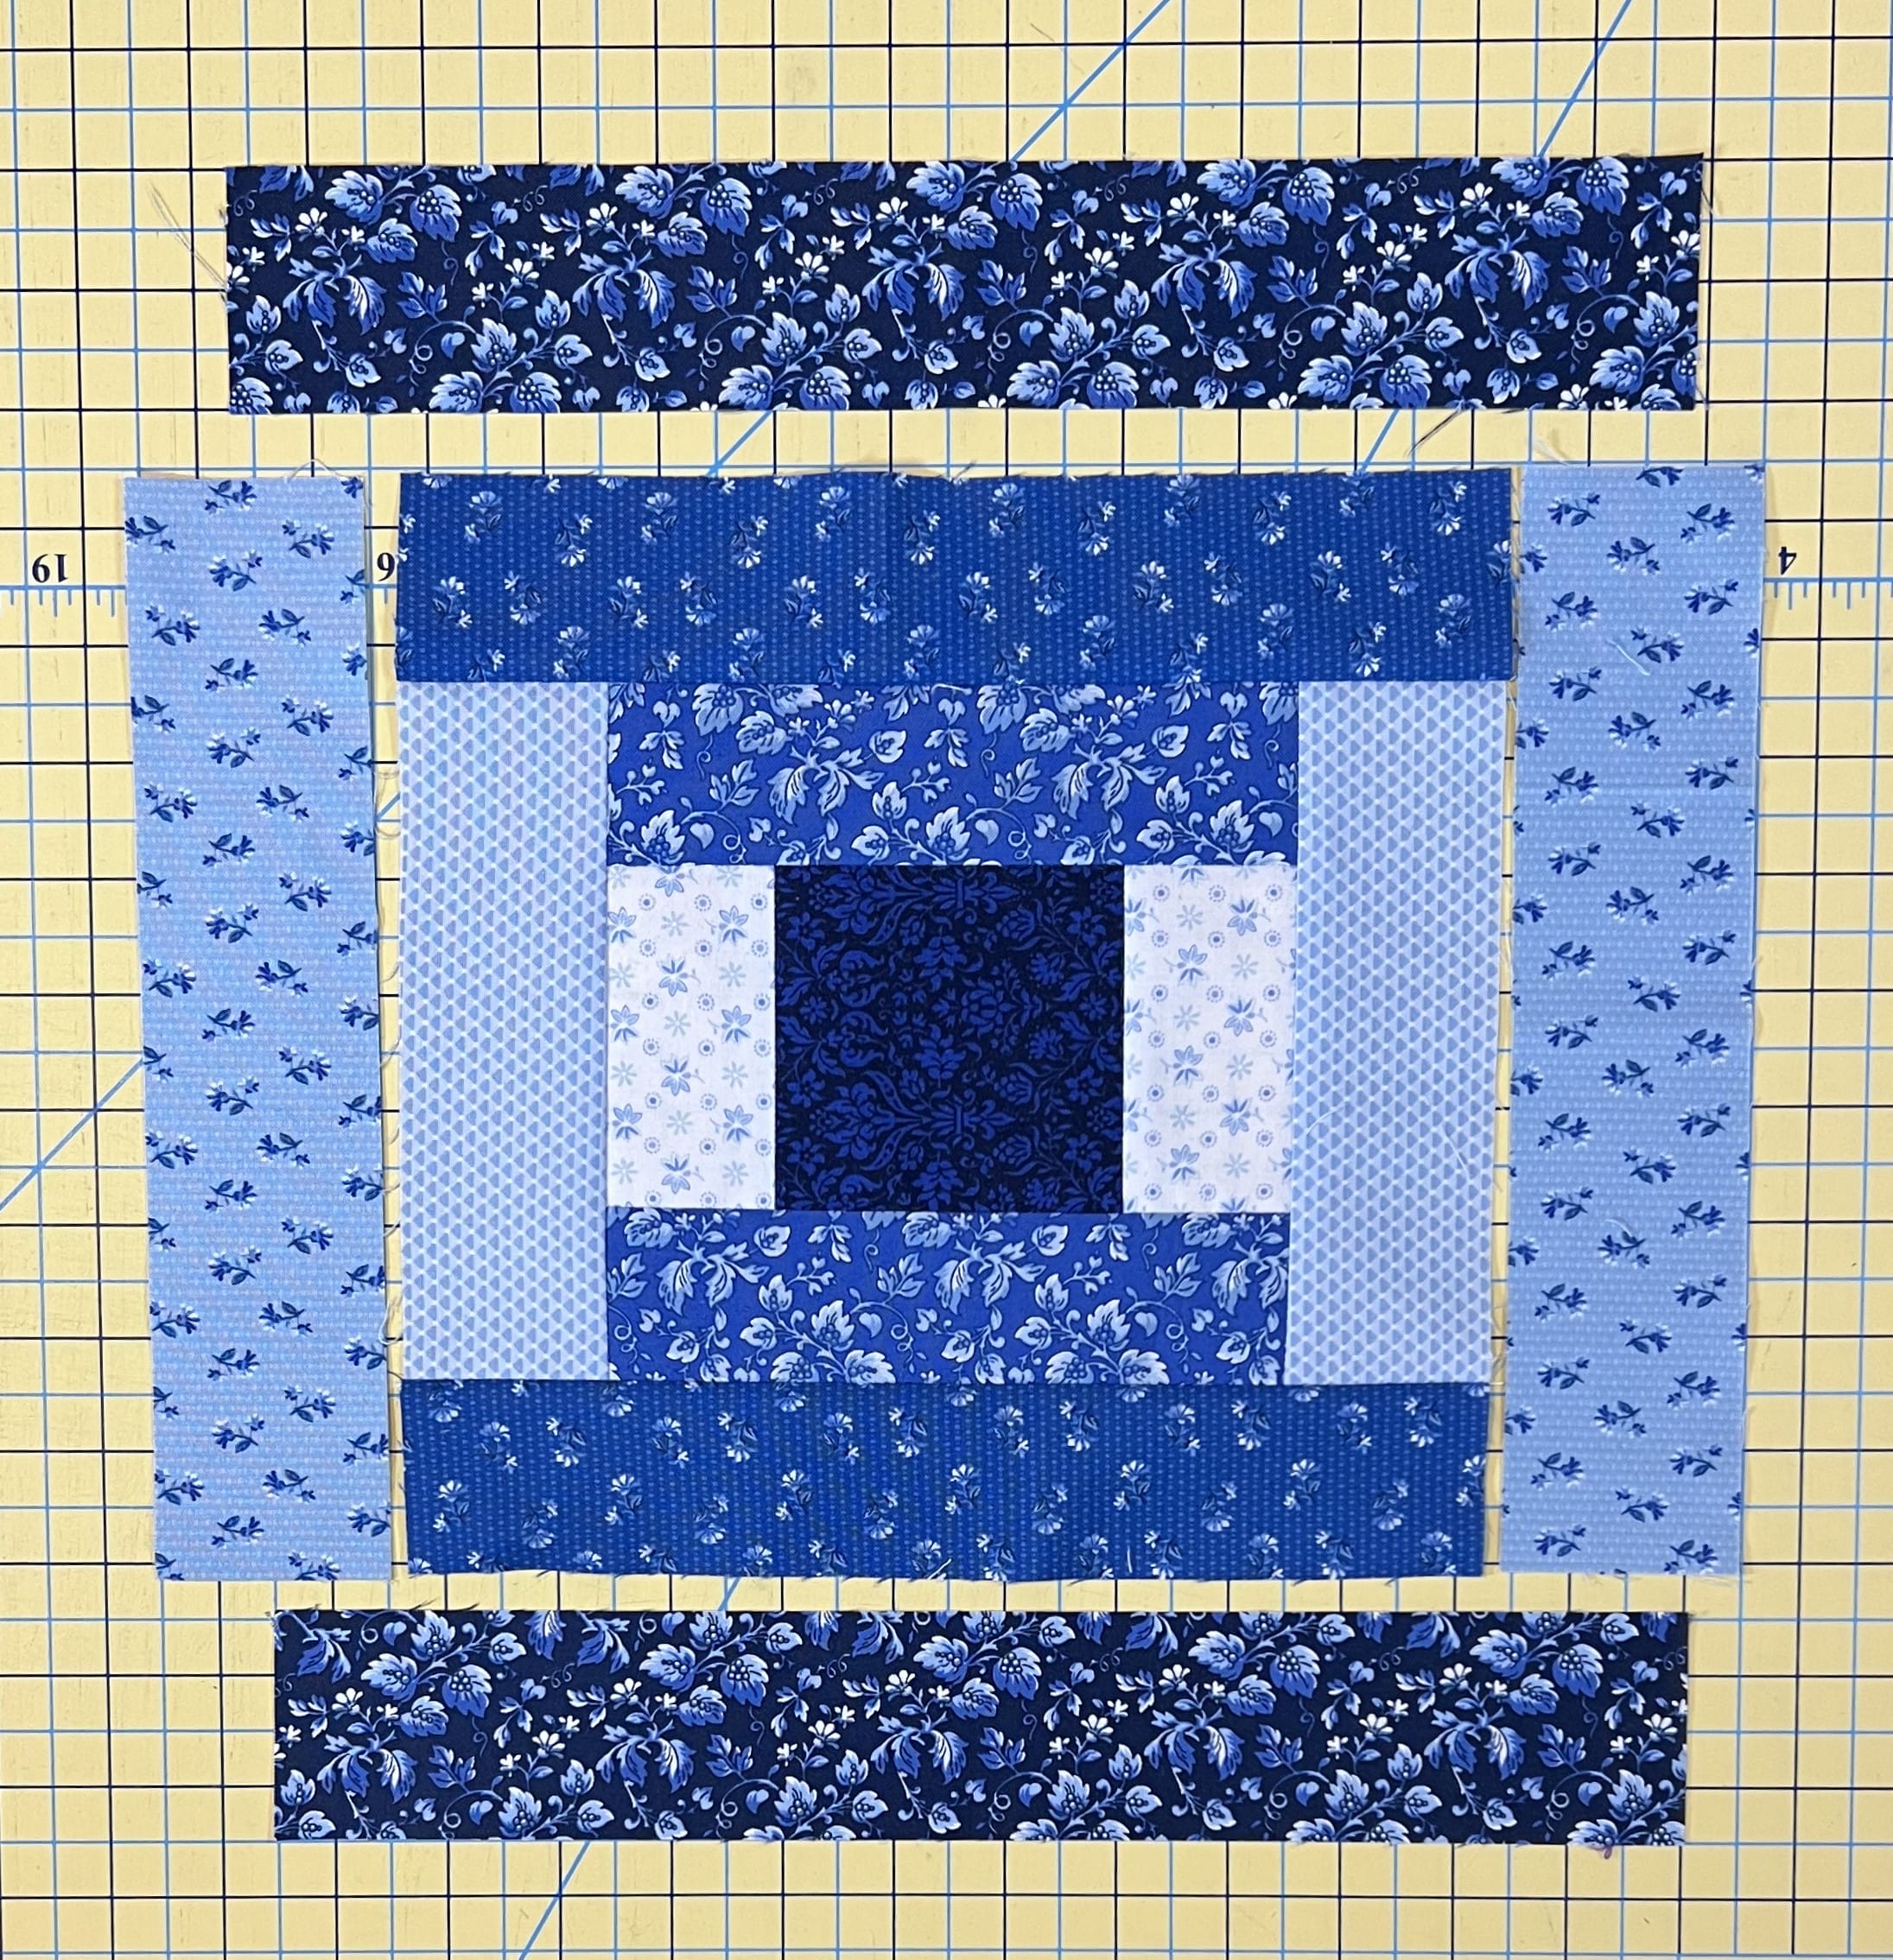
Block #23

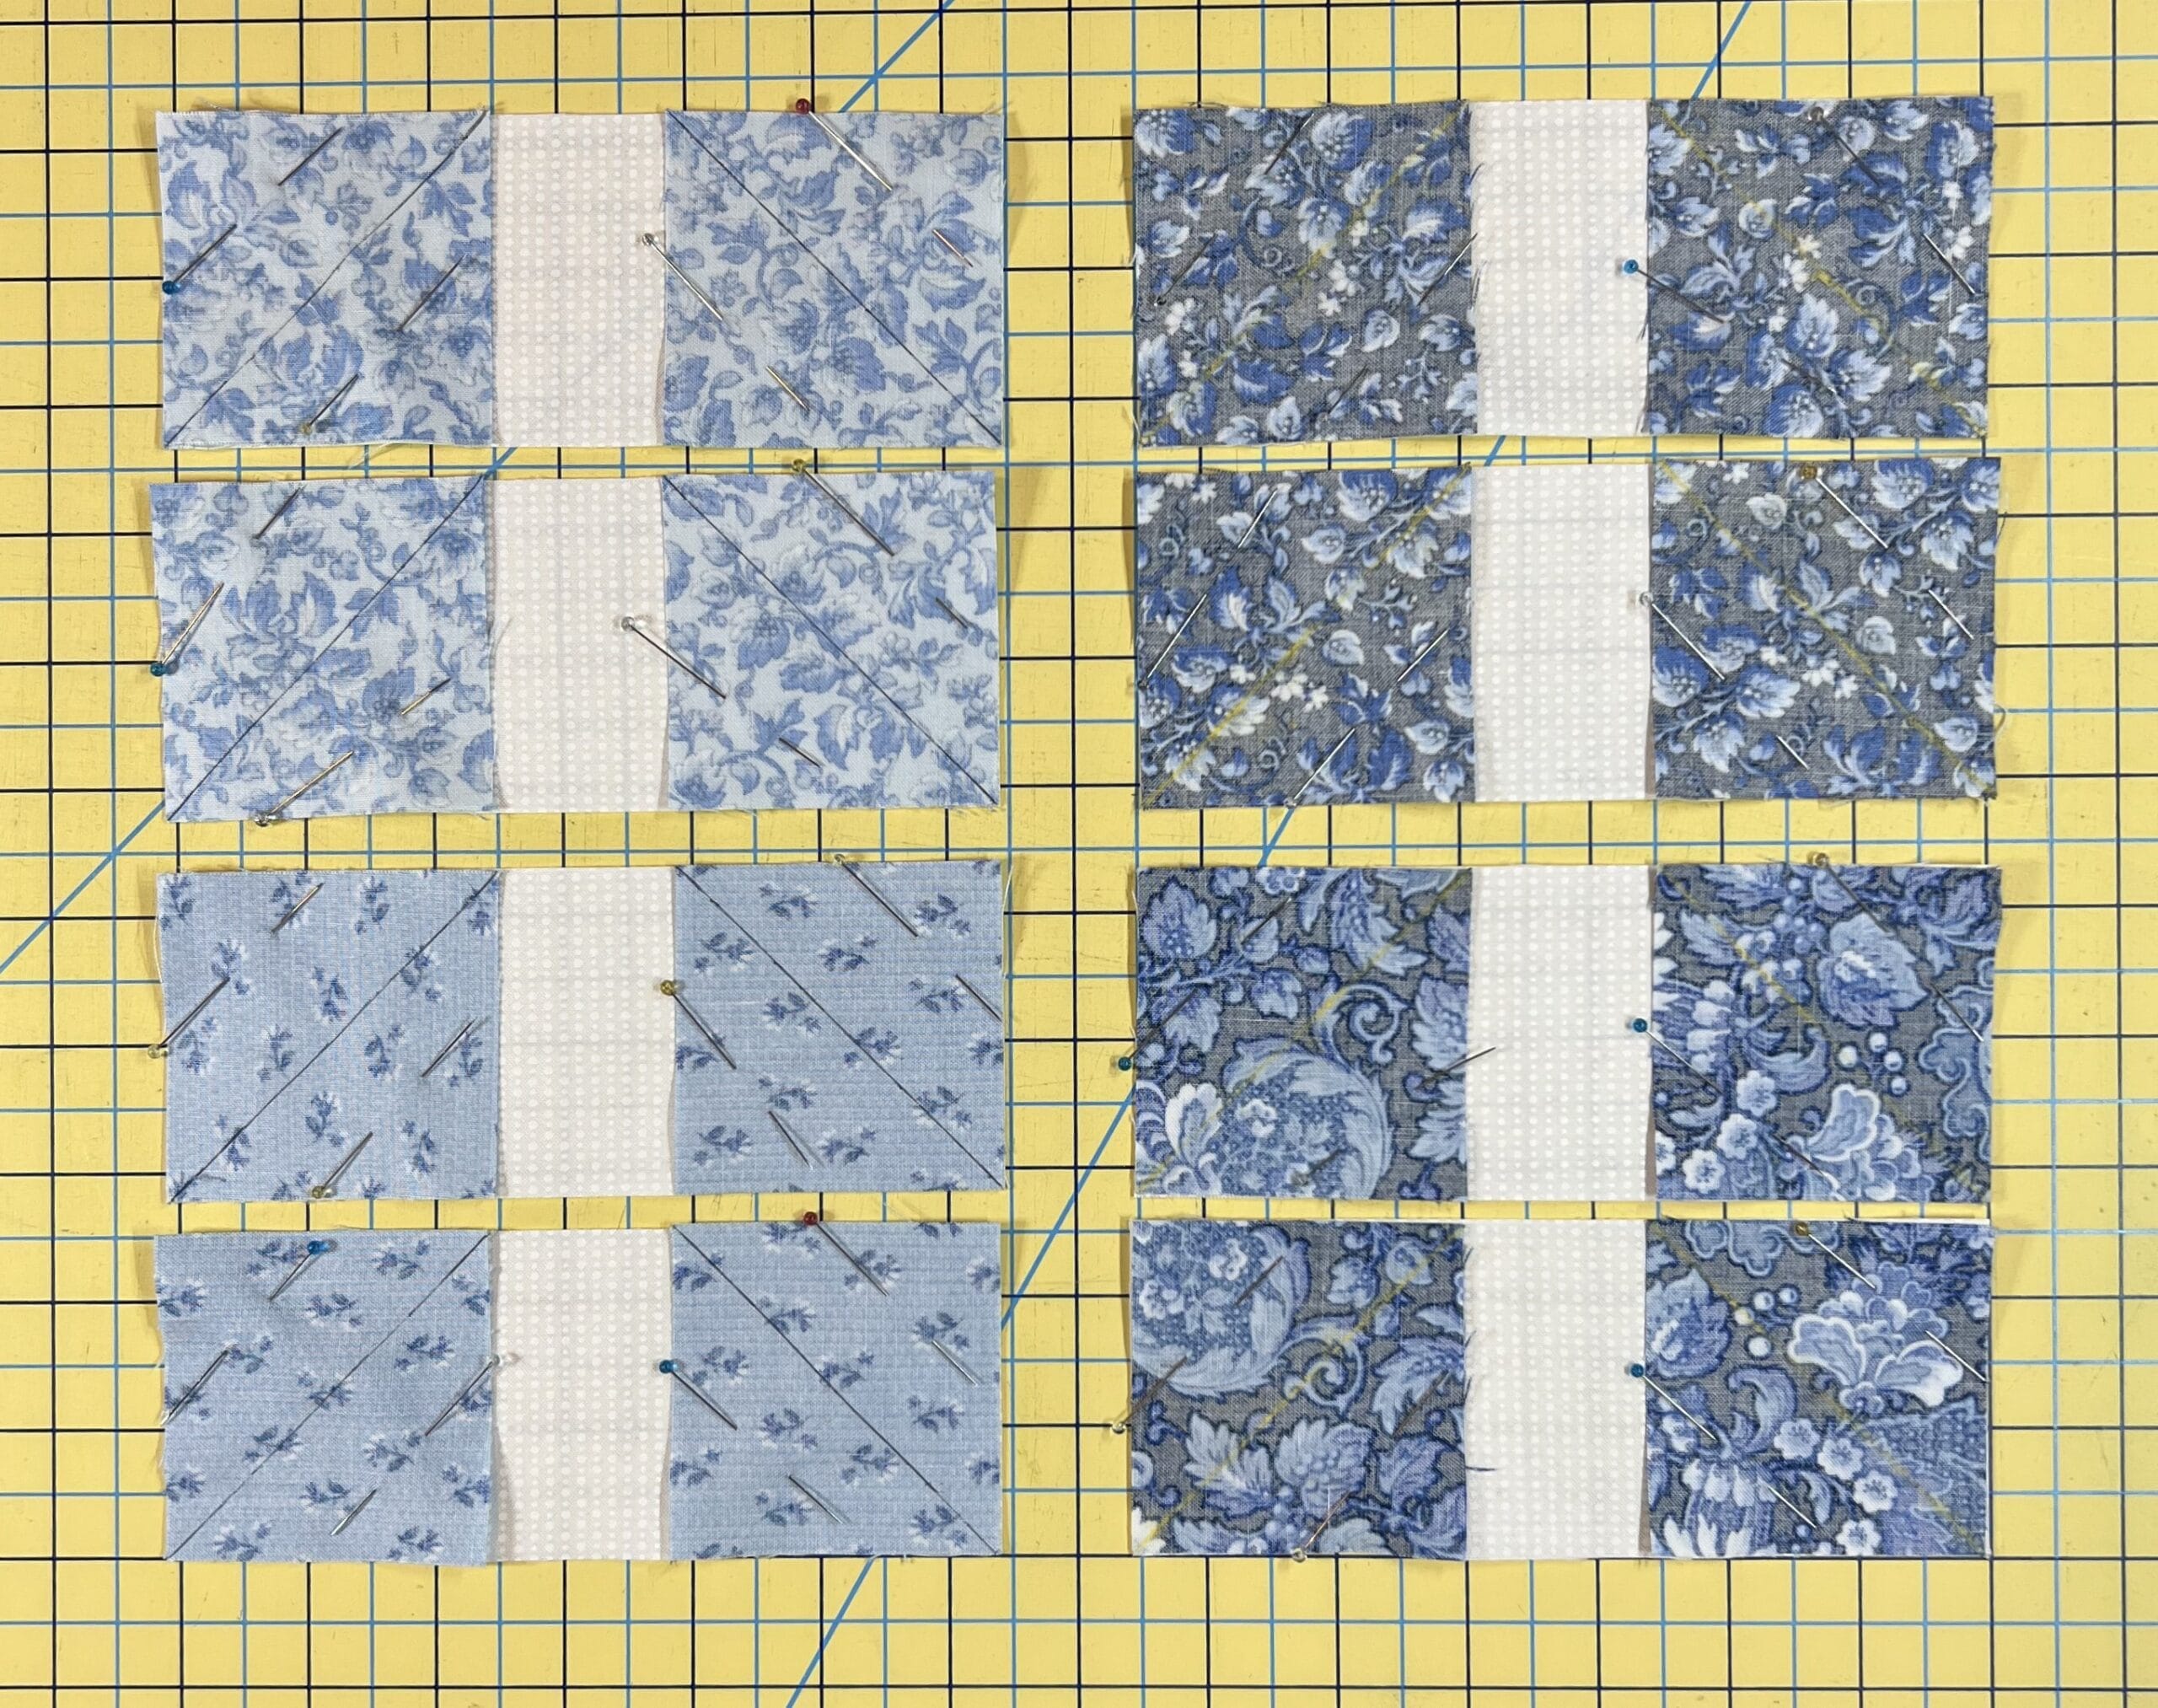
Our first block this month is traditionally known as Courthouse Steps, which really just means it’s a symmetrical Log Cabin block. This block is quick and simple, because it’s all rectangles. However, since you are dealing with narrow strips, I would highly recommend starching the fabrics before you cut everything. You just start by sewing your B strips to the sides of the center A block, followed by sewing the C strips to the top and bottom.

Each step builds out the block by adding more strips. All you need to remember is the lighter prints are sewn to the sides, and the darker prints go on the top and bottom.
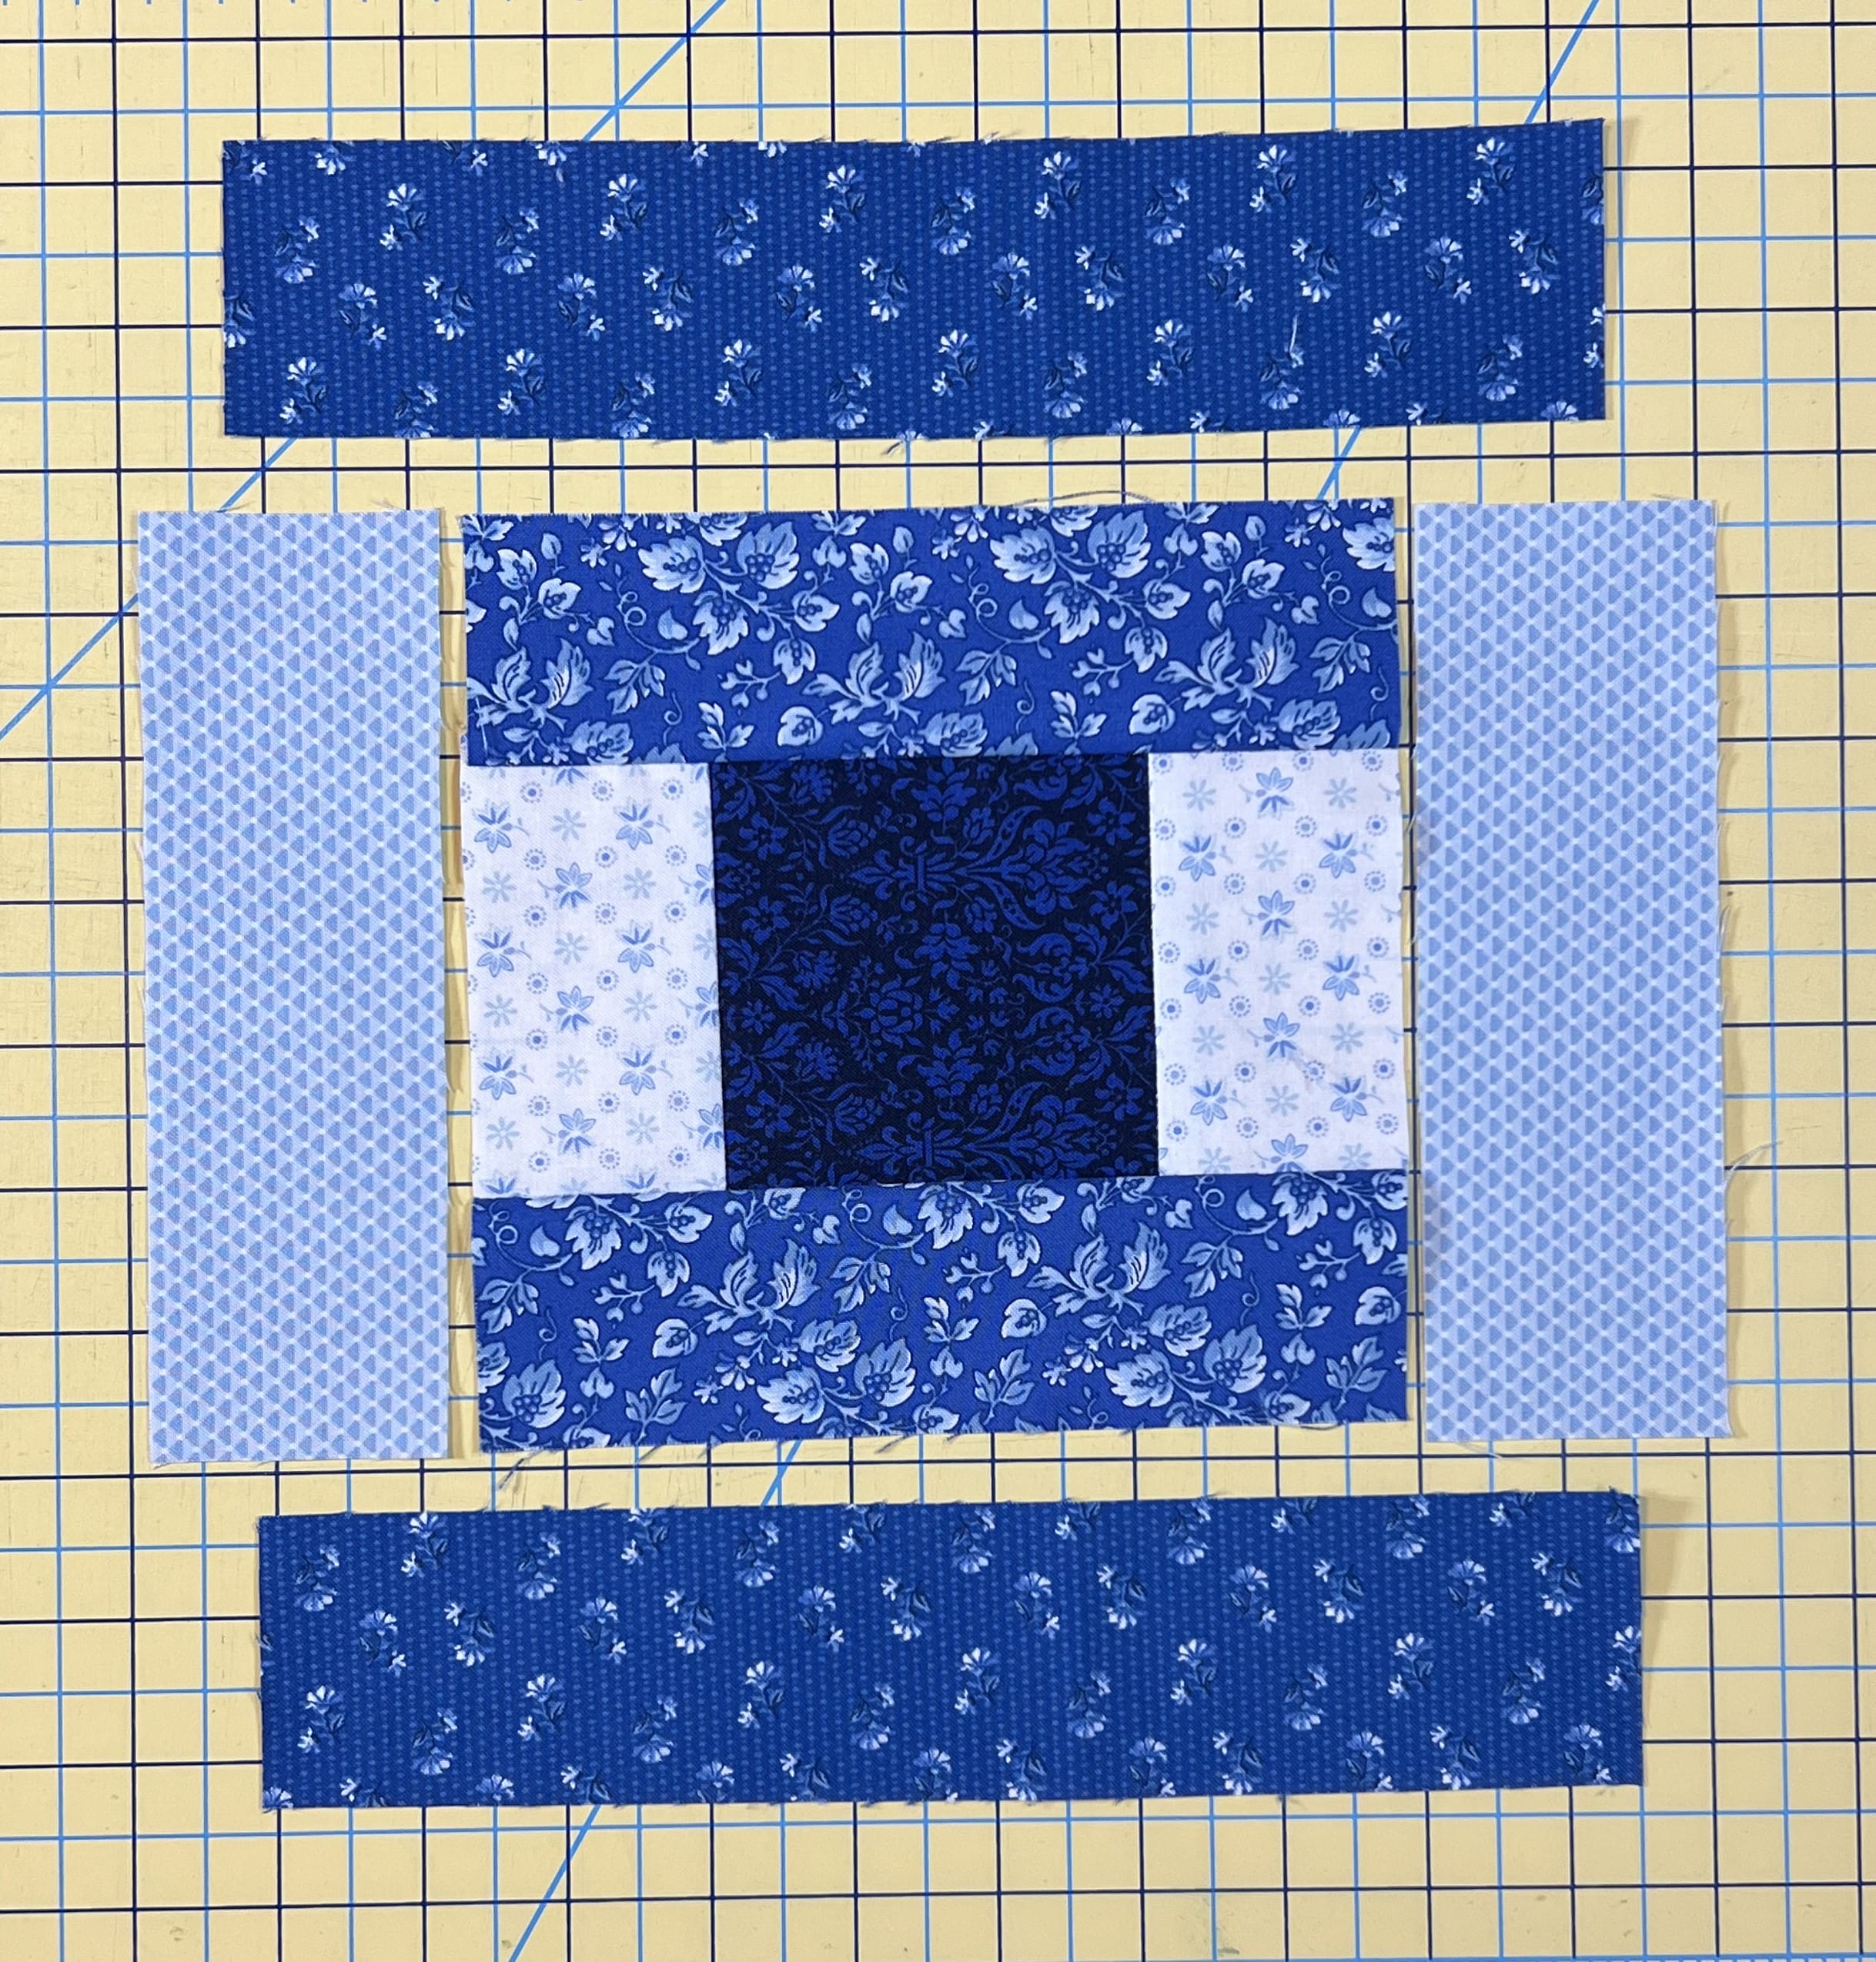
I love that this block comes together fast!
Block #24
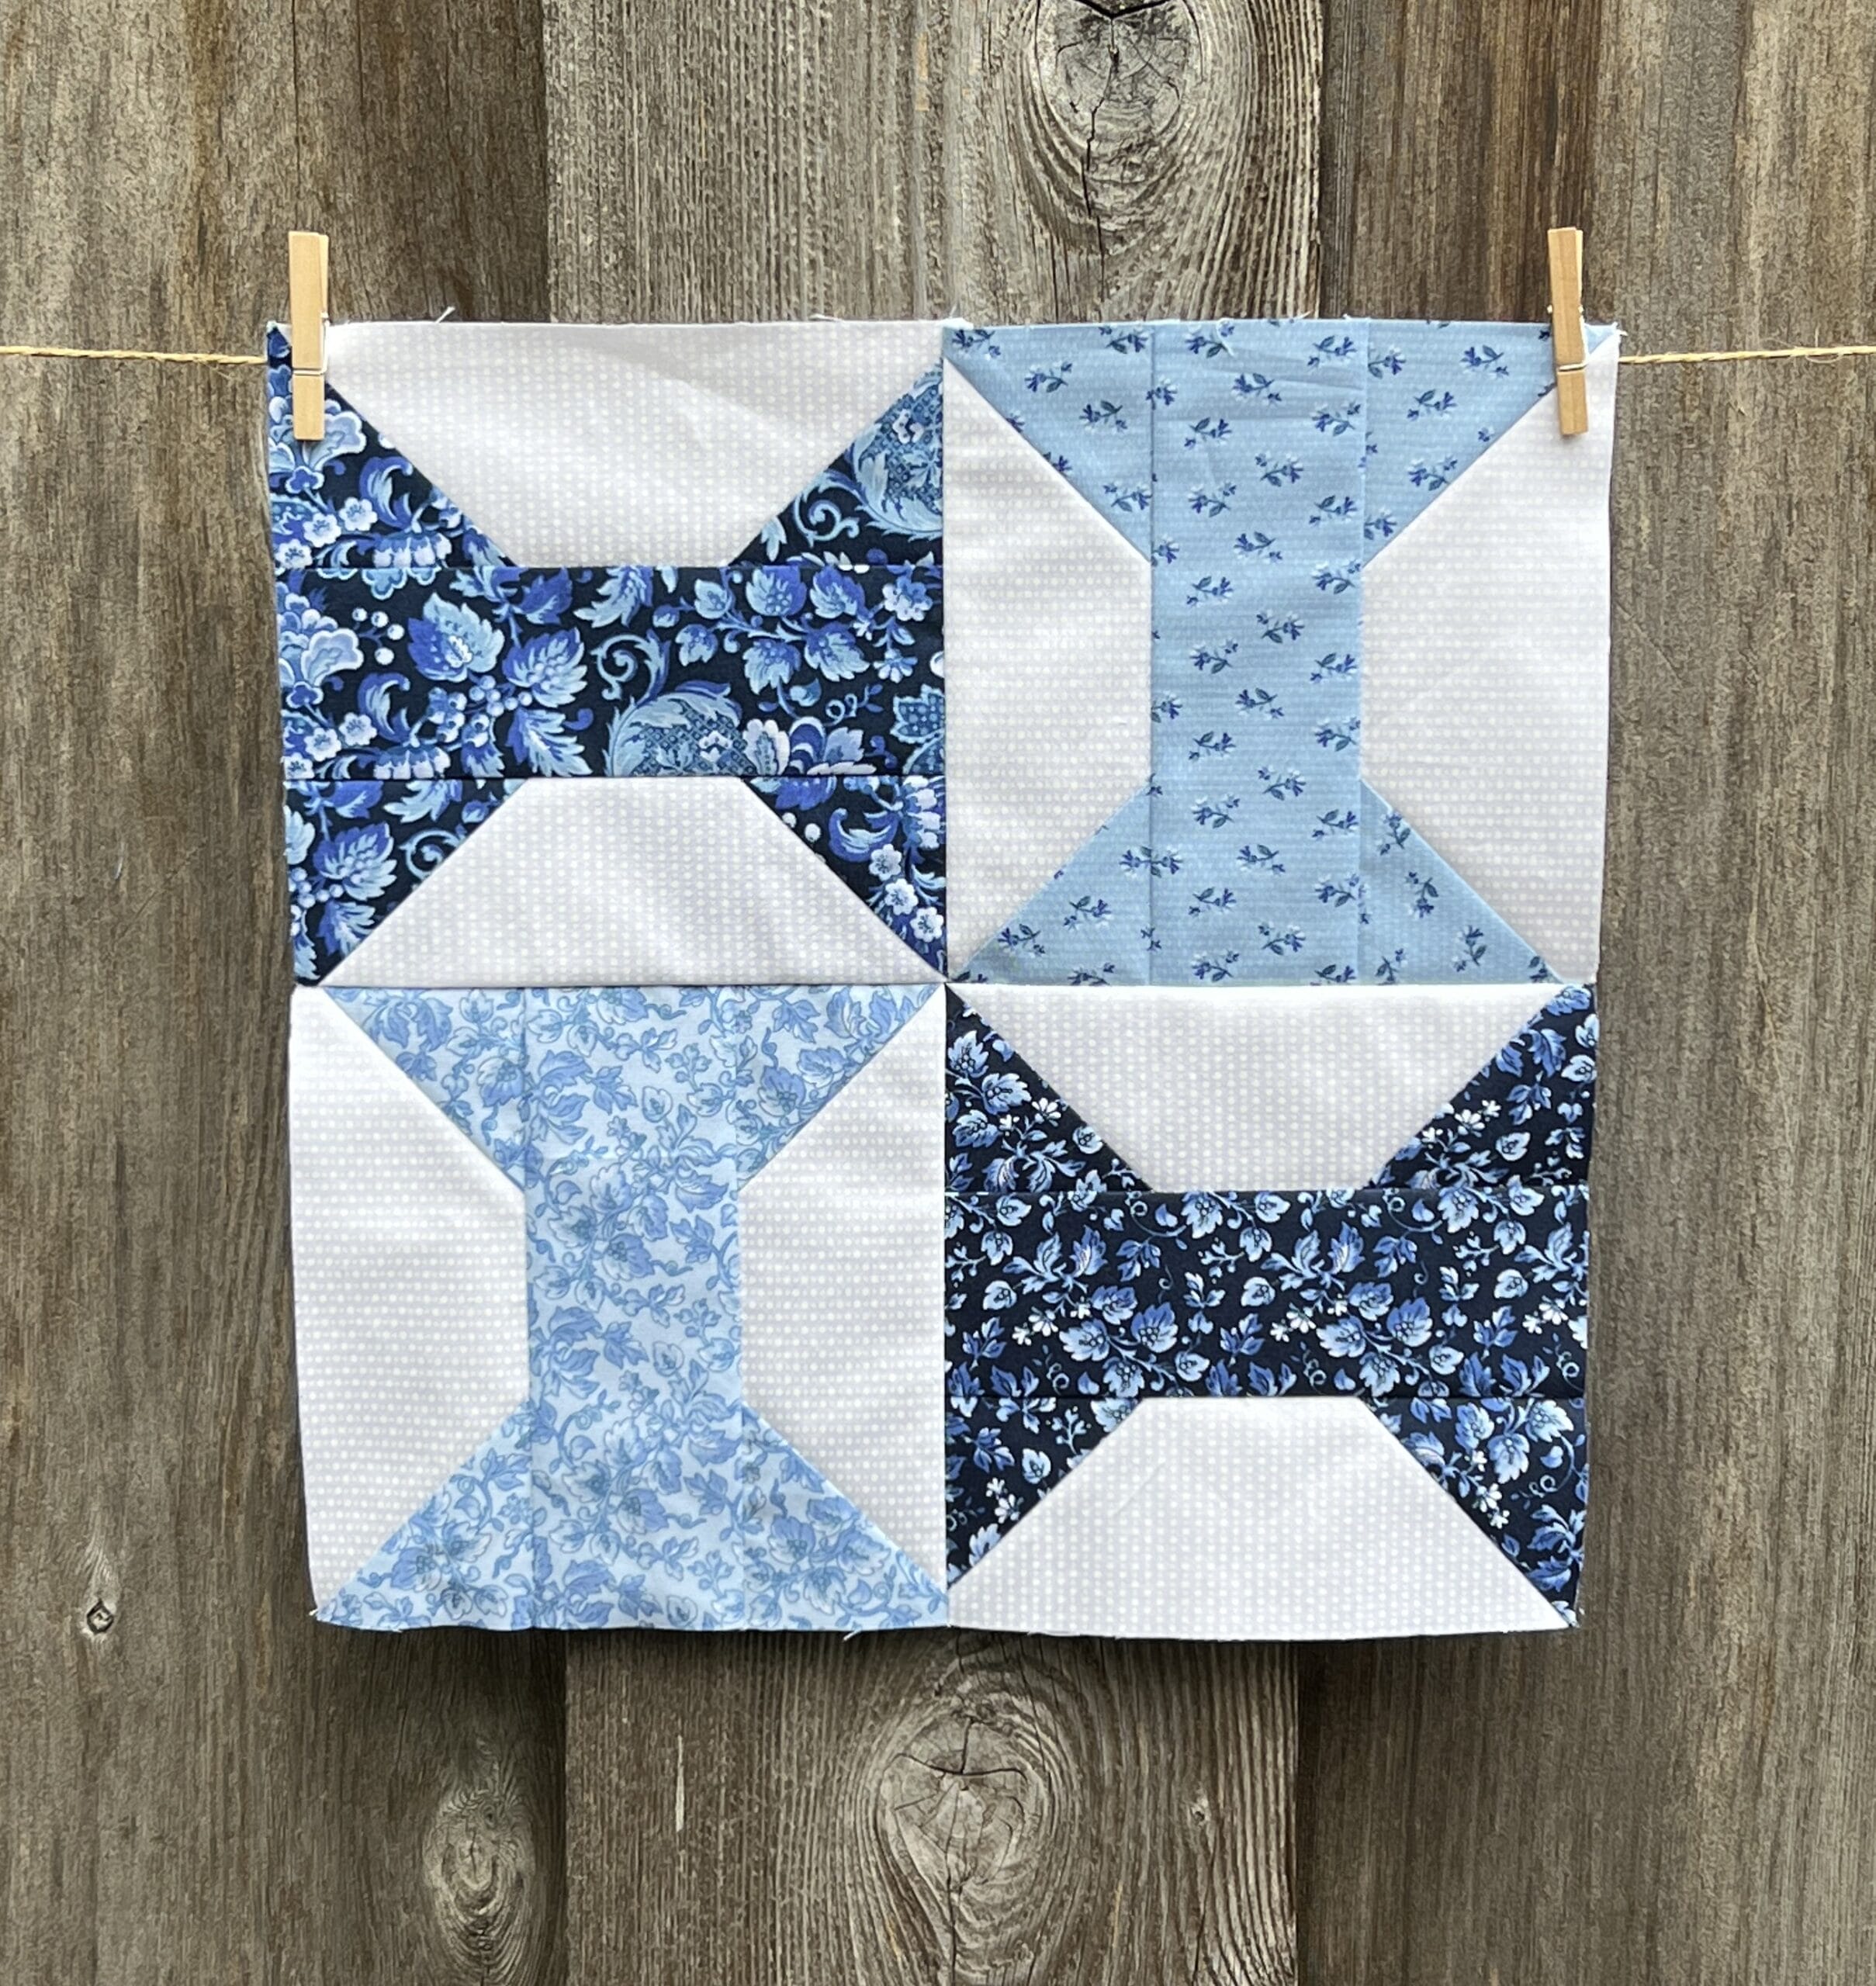
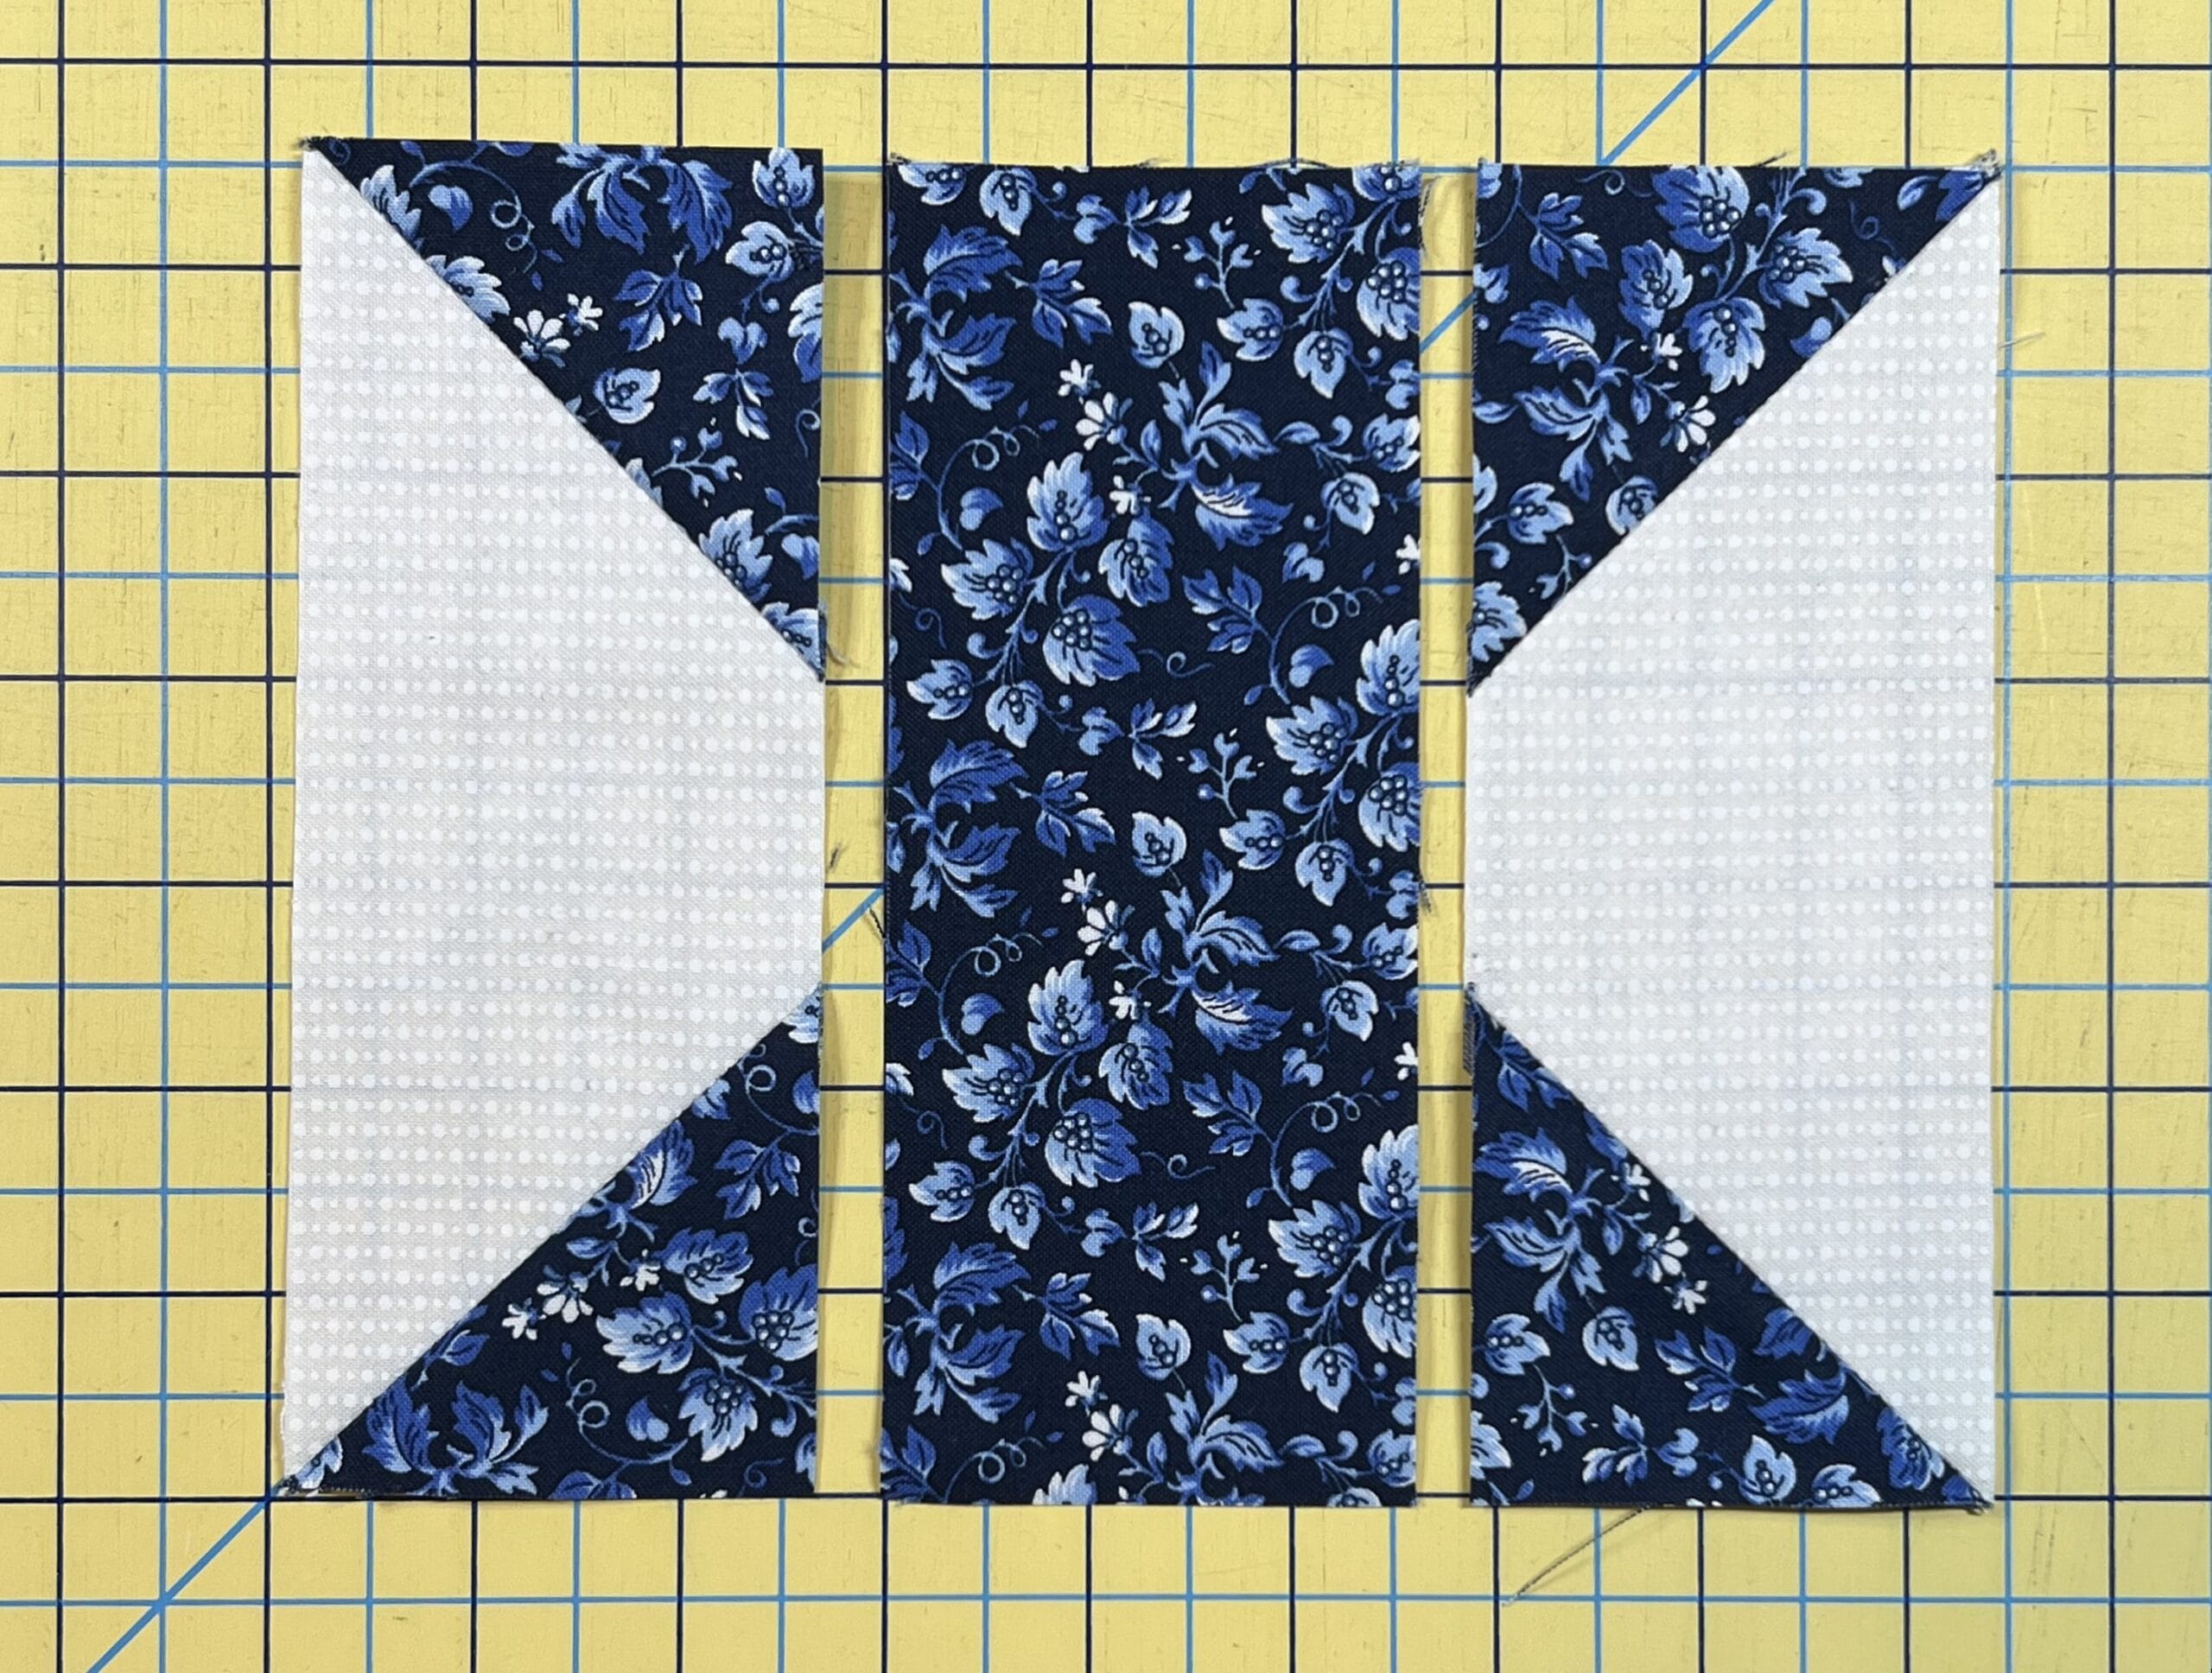
Spinning bowties are what we’ll make next. I know that’s not the proper name, but that’s what this block looks like to me.
Begin by placing two matching B squares onto each A rectangle. Follow the directions by stitching on the marked lines and trimming to leave a ¼” seam allowance. What you’re really making are sort of elongated flying geese unit. As you can see below, I did mine assembly line style. Don’t forget, you can stitch just a hair outside of the marked lines in order to ensure that your corners will match up nicely.
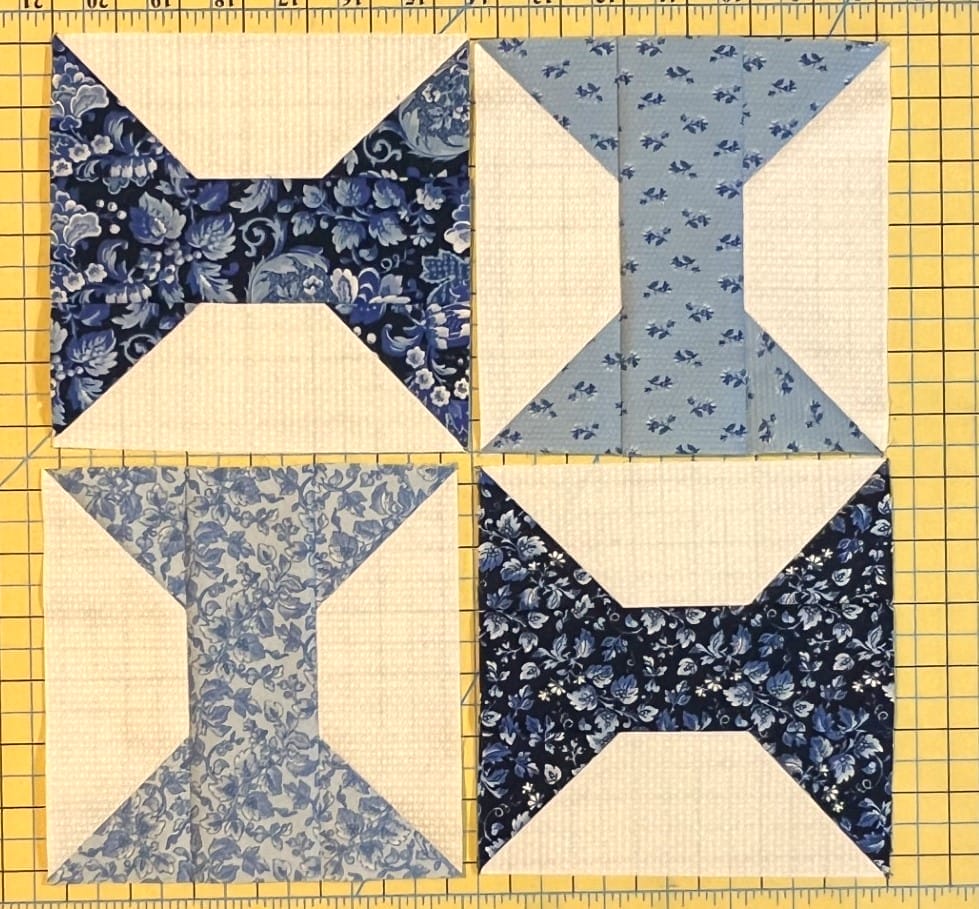
When these are all done, take the matching units and sew them to the top and bottom of their matching C strip.
You’ll have four bowtie units that you’ll sew together – two will be horizontal, and two are vertical. It doesn’t really matter which way you sew them, or which fabric is where, as long as you are happy with the end result.
Block #25
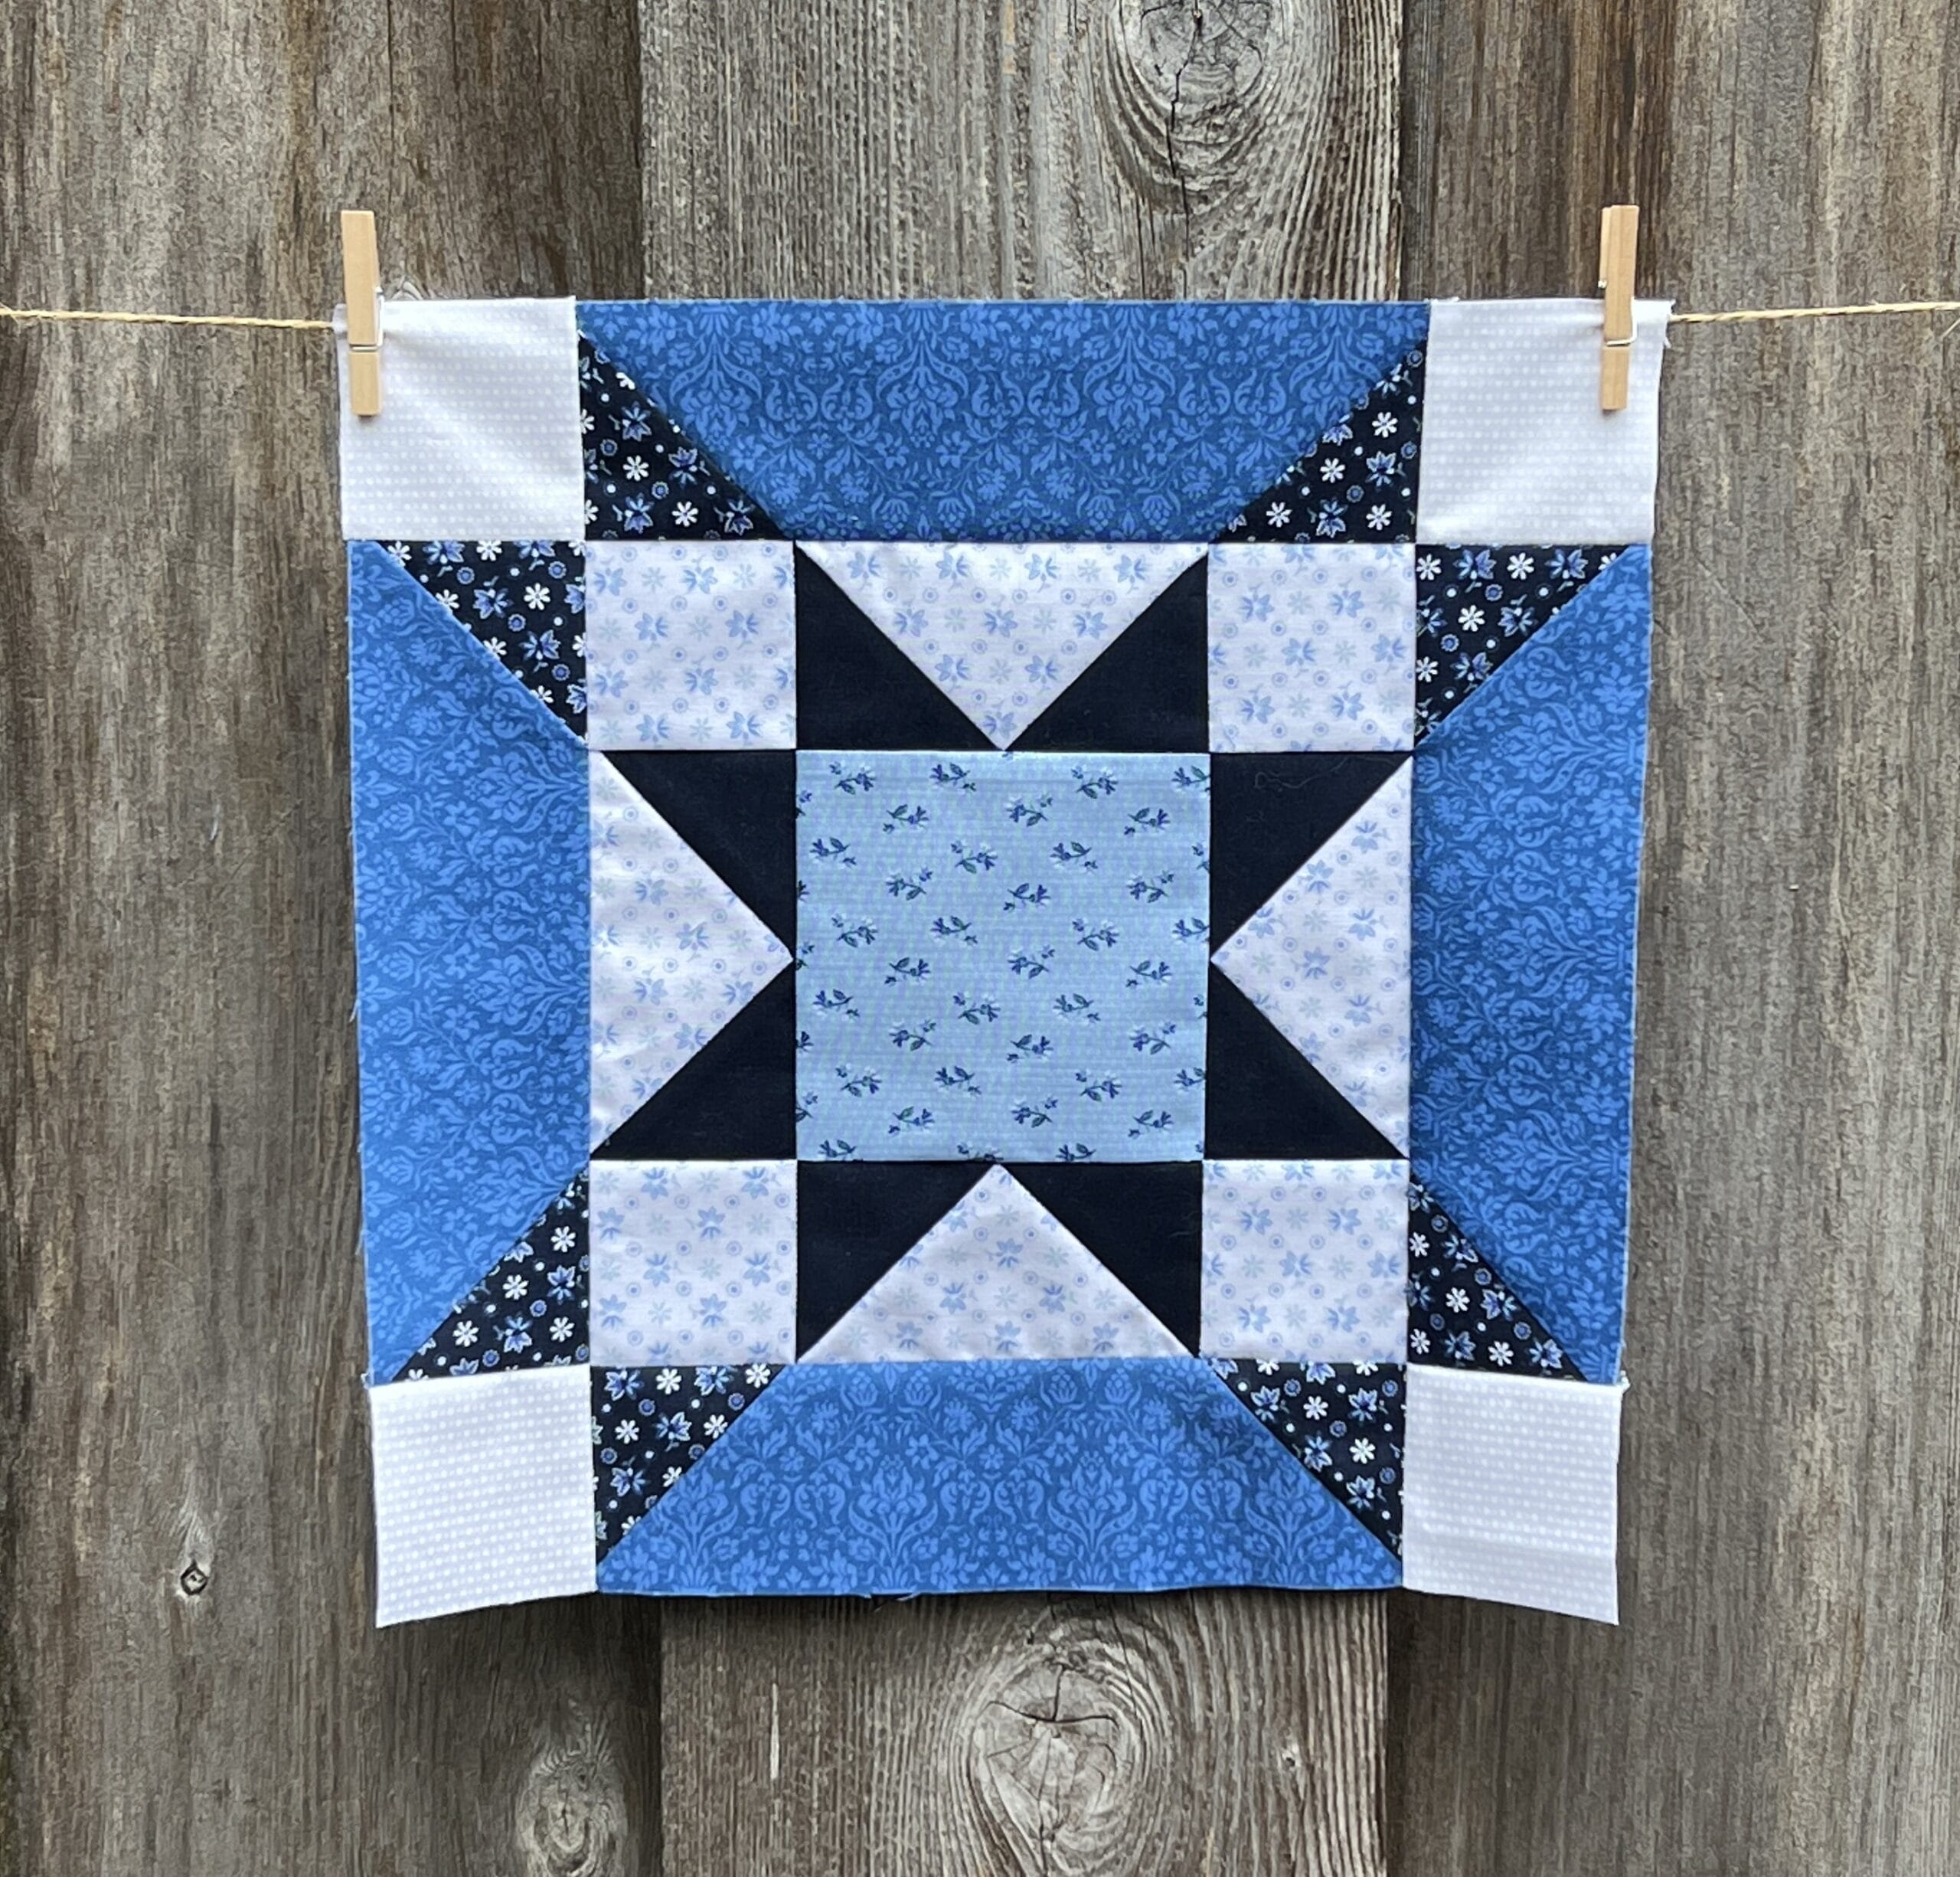
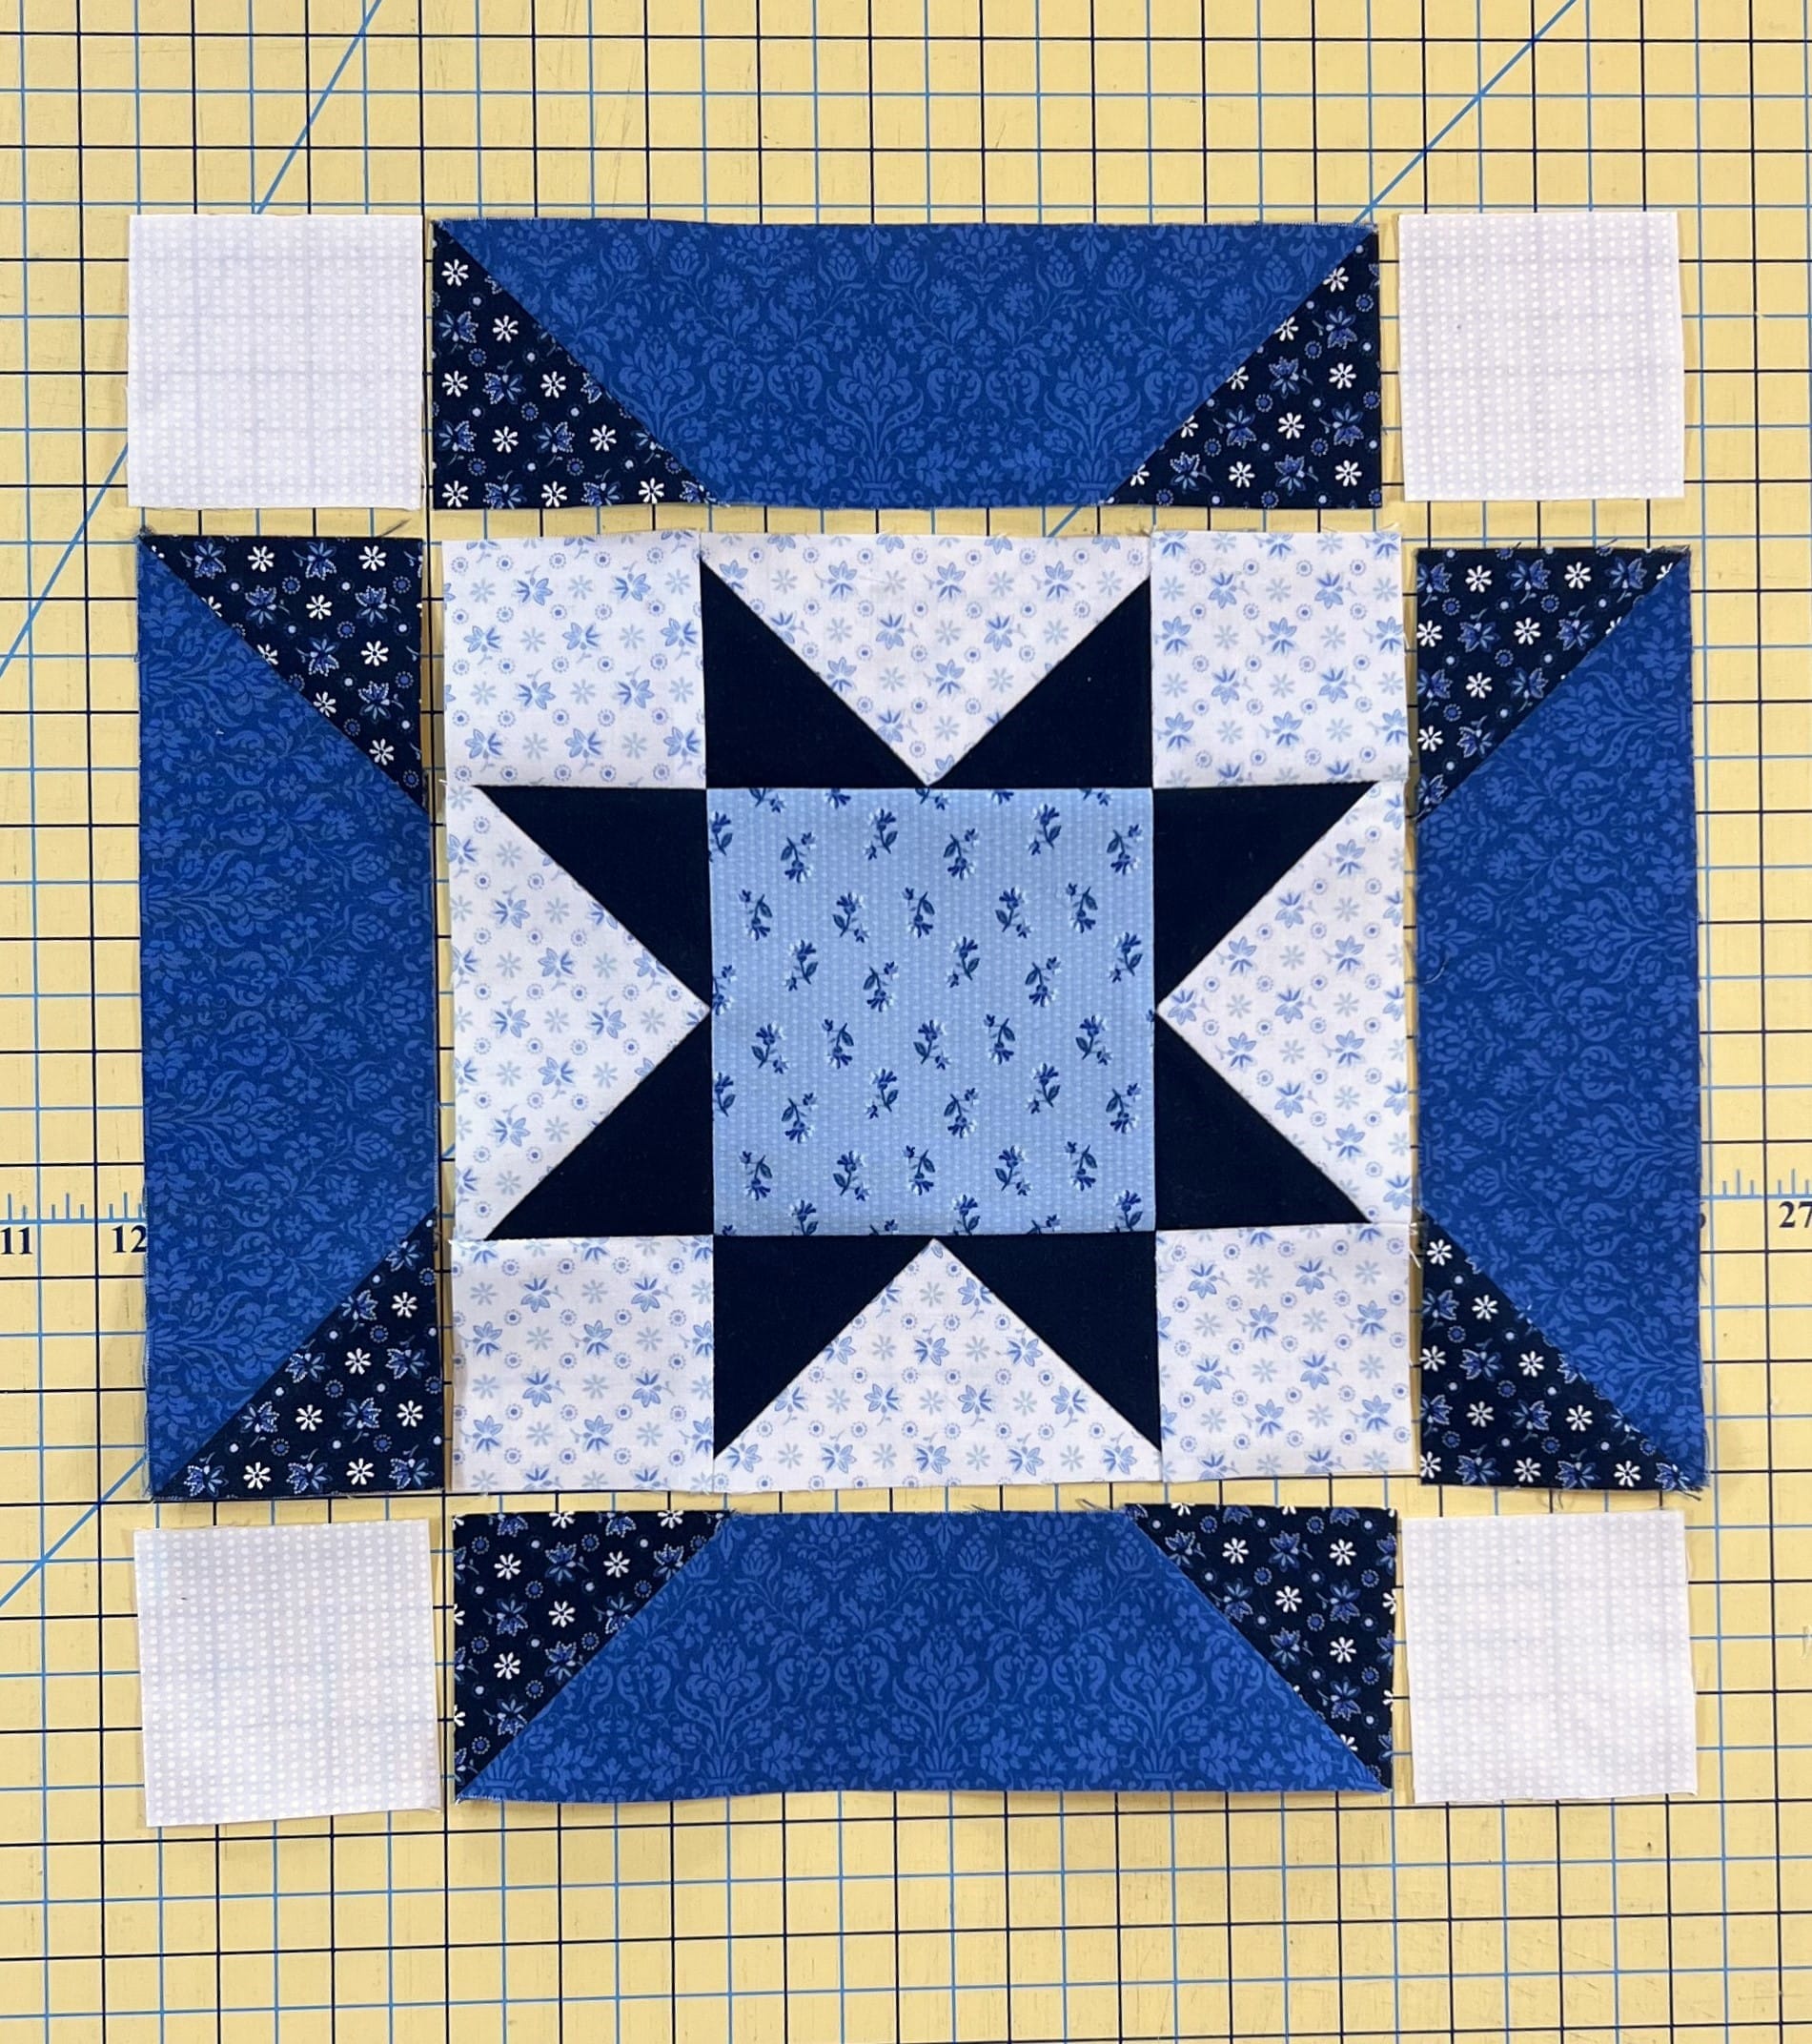
The next block in the line-up is another Star block. If any of you have sewn previous BOMs of mine, you’ll know that Star blocks are my favorite! We’ll first make a Sawtooth star for the center, which begins with the usual flying geese, using my favorite no-waste method.

After those are sewn and trimmed, follow the directions by attaching two units to the sides of A, followed by sewing a couple E squares to the ends of the remaining flying geese, and then attaching those units to the top and bottom. This center Sawtooth Star unit should measure 8-1/2“ square.
Now we will make some more of those elongated flying geese type units like we did for the bowtie blocks.
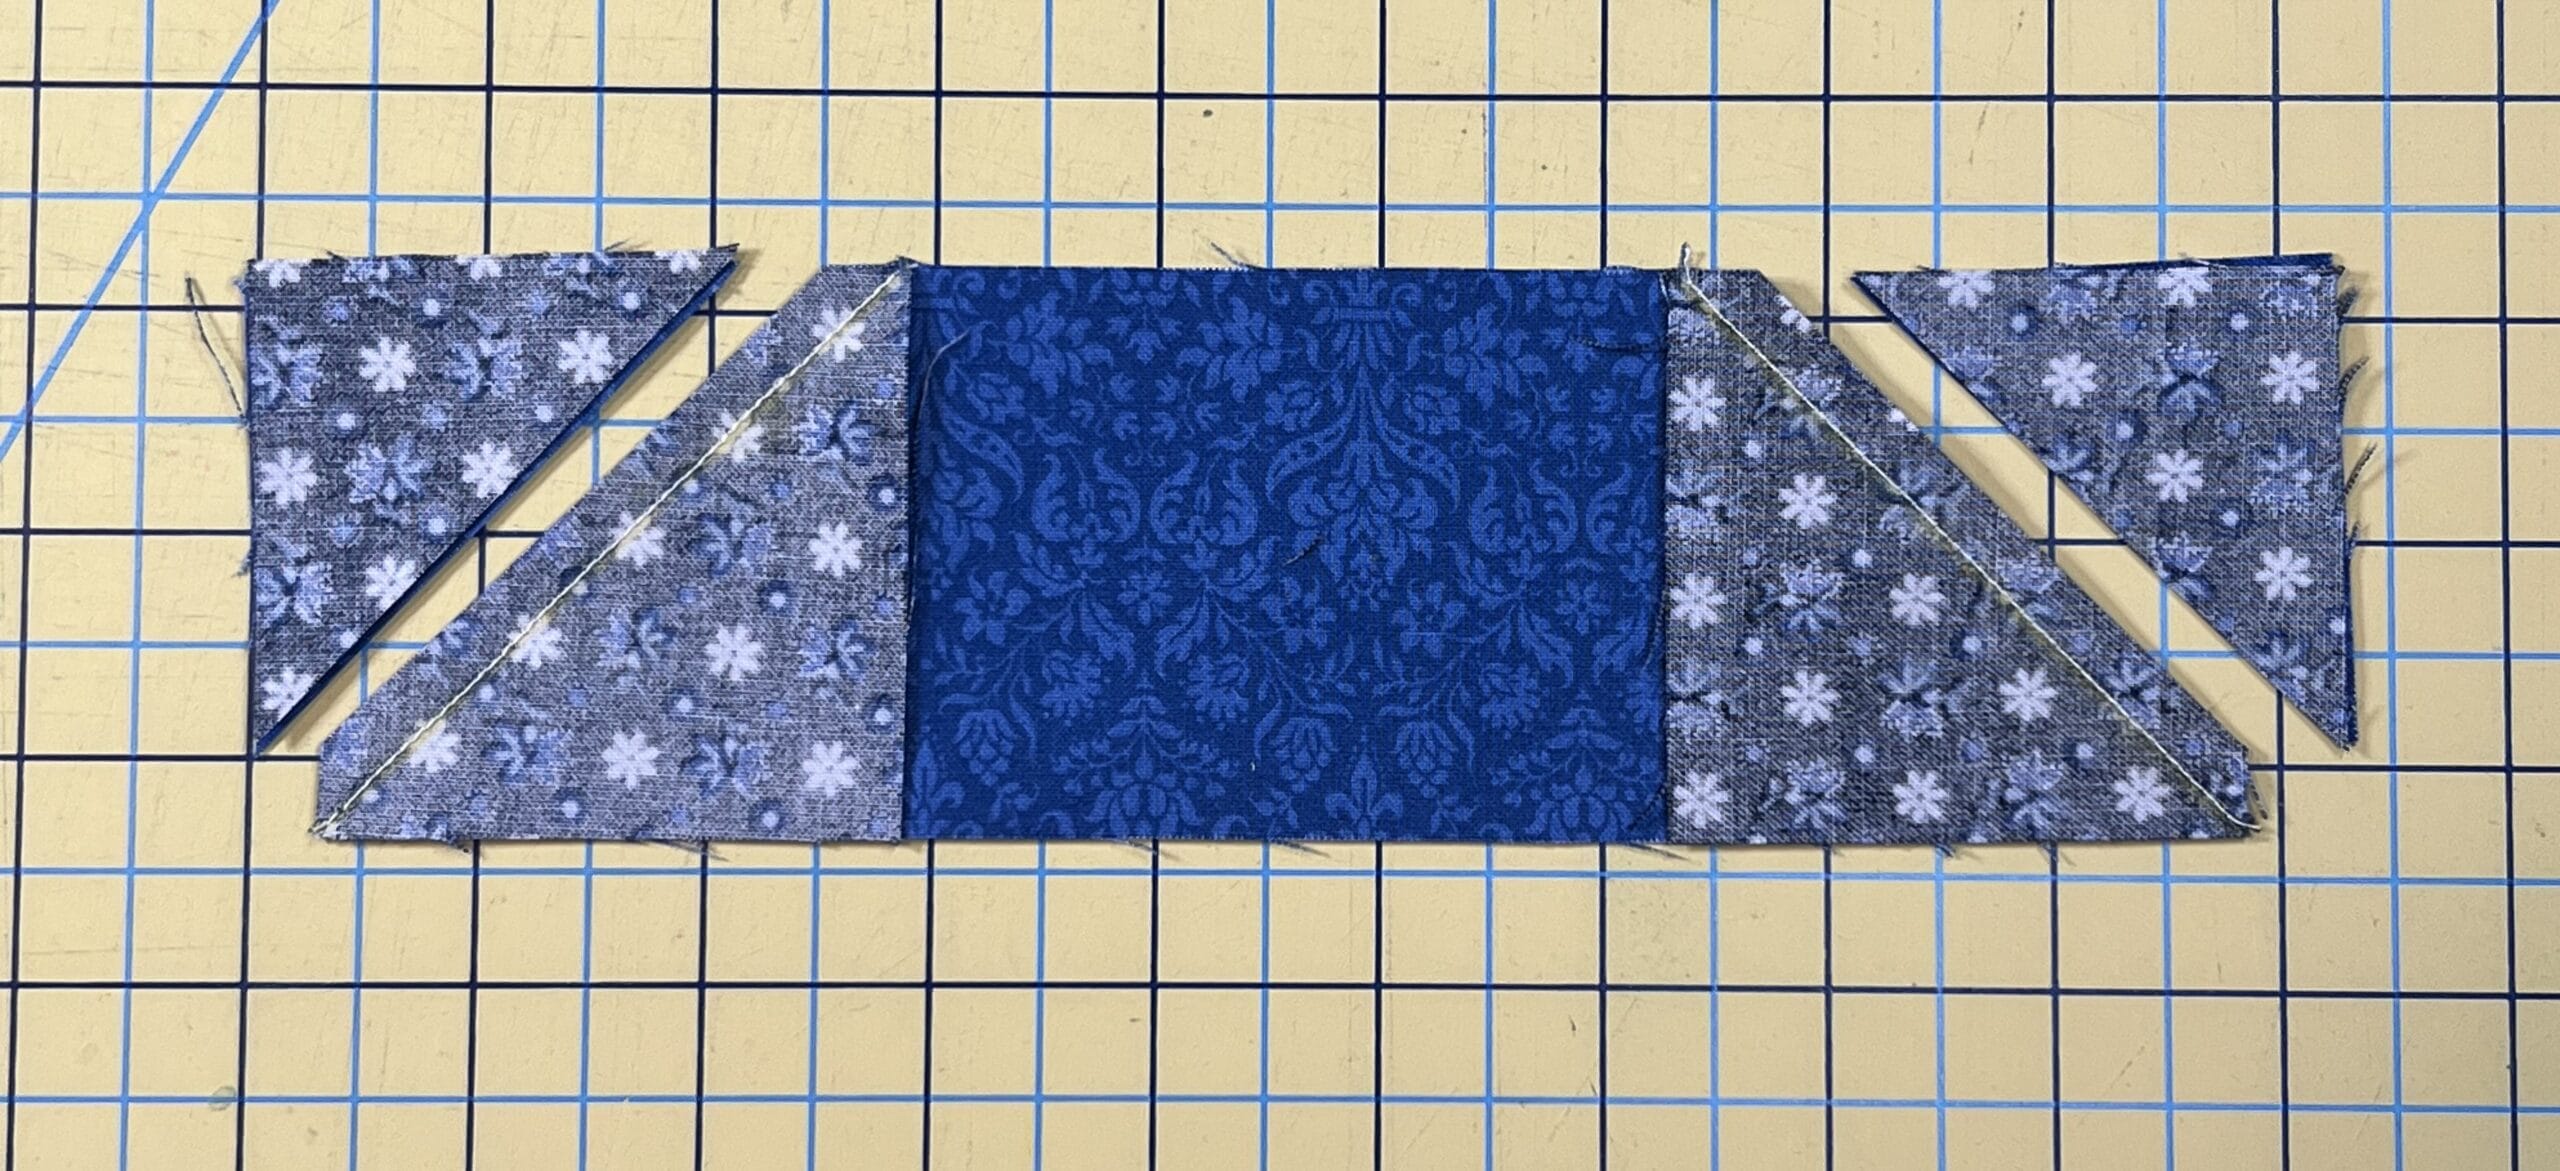
All we need to do now is assemble the block like you see here and sew it together following the directions in step 5.
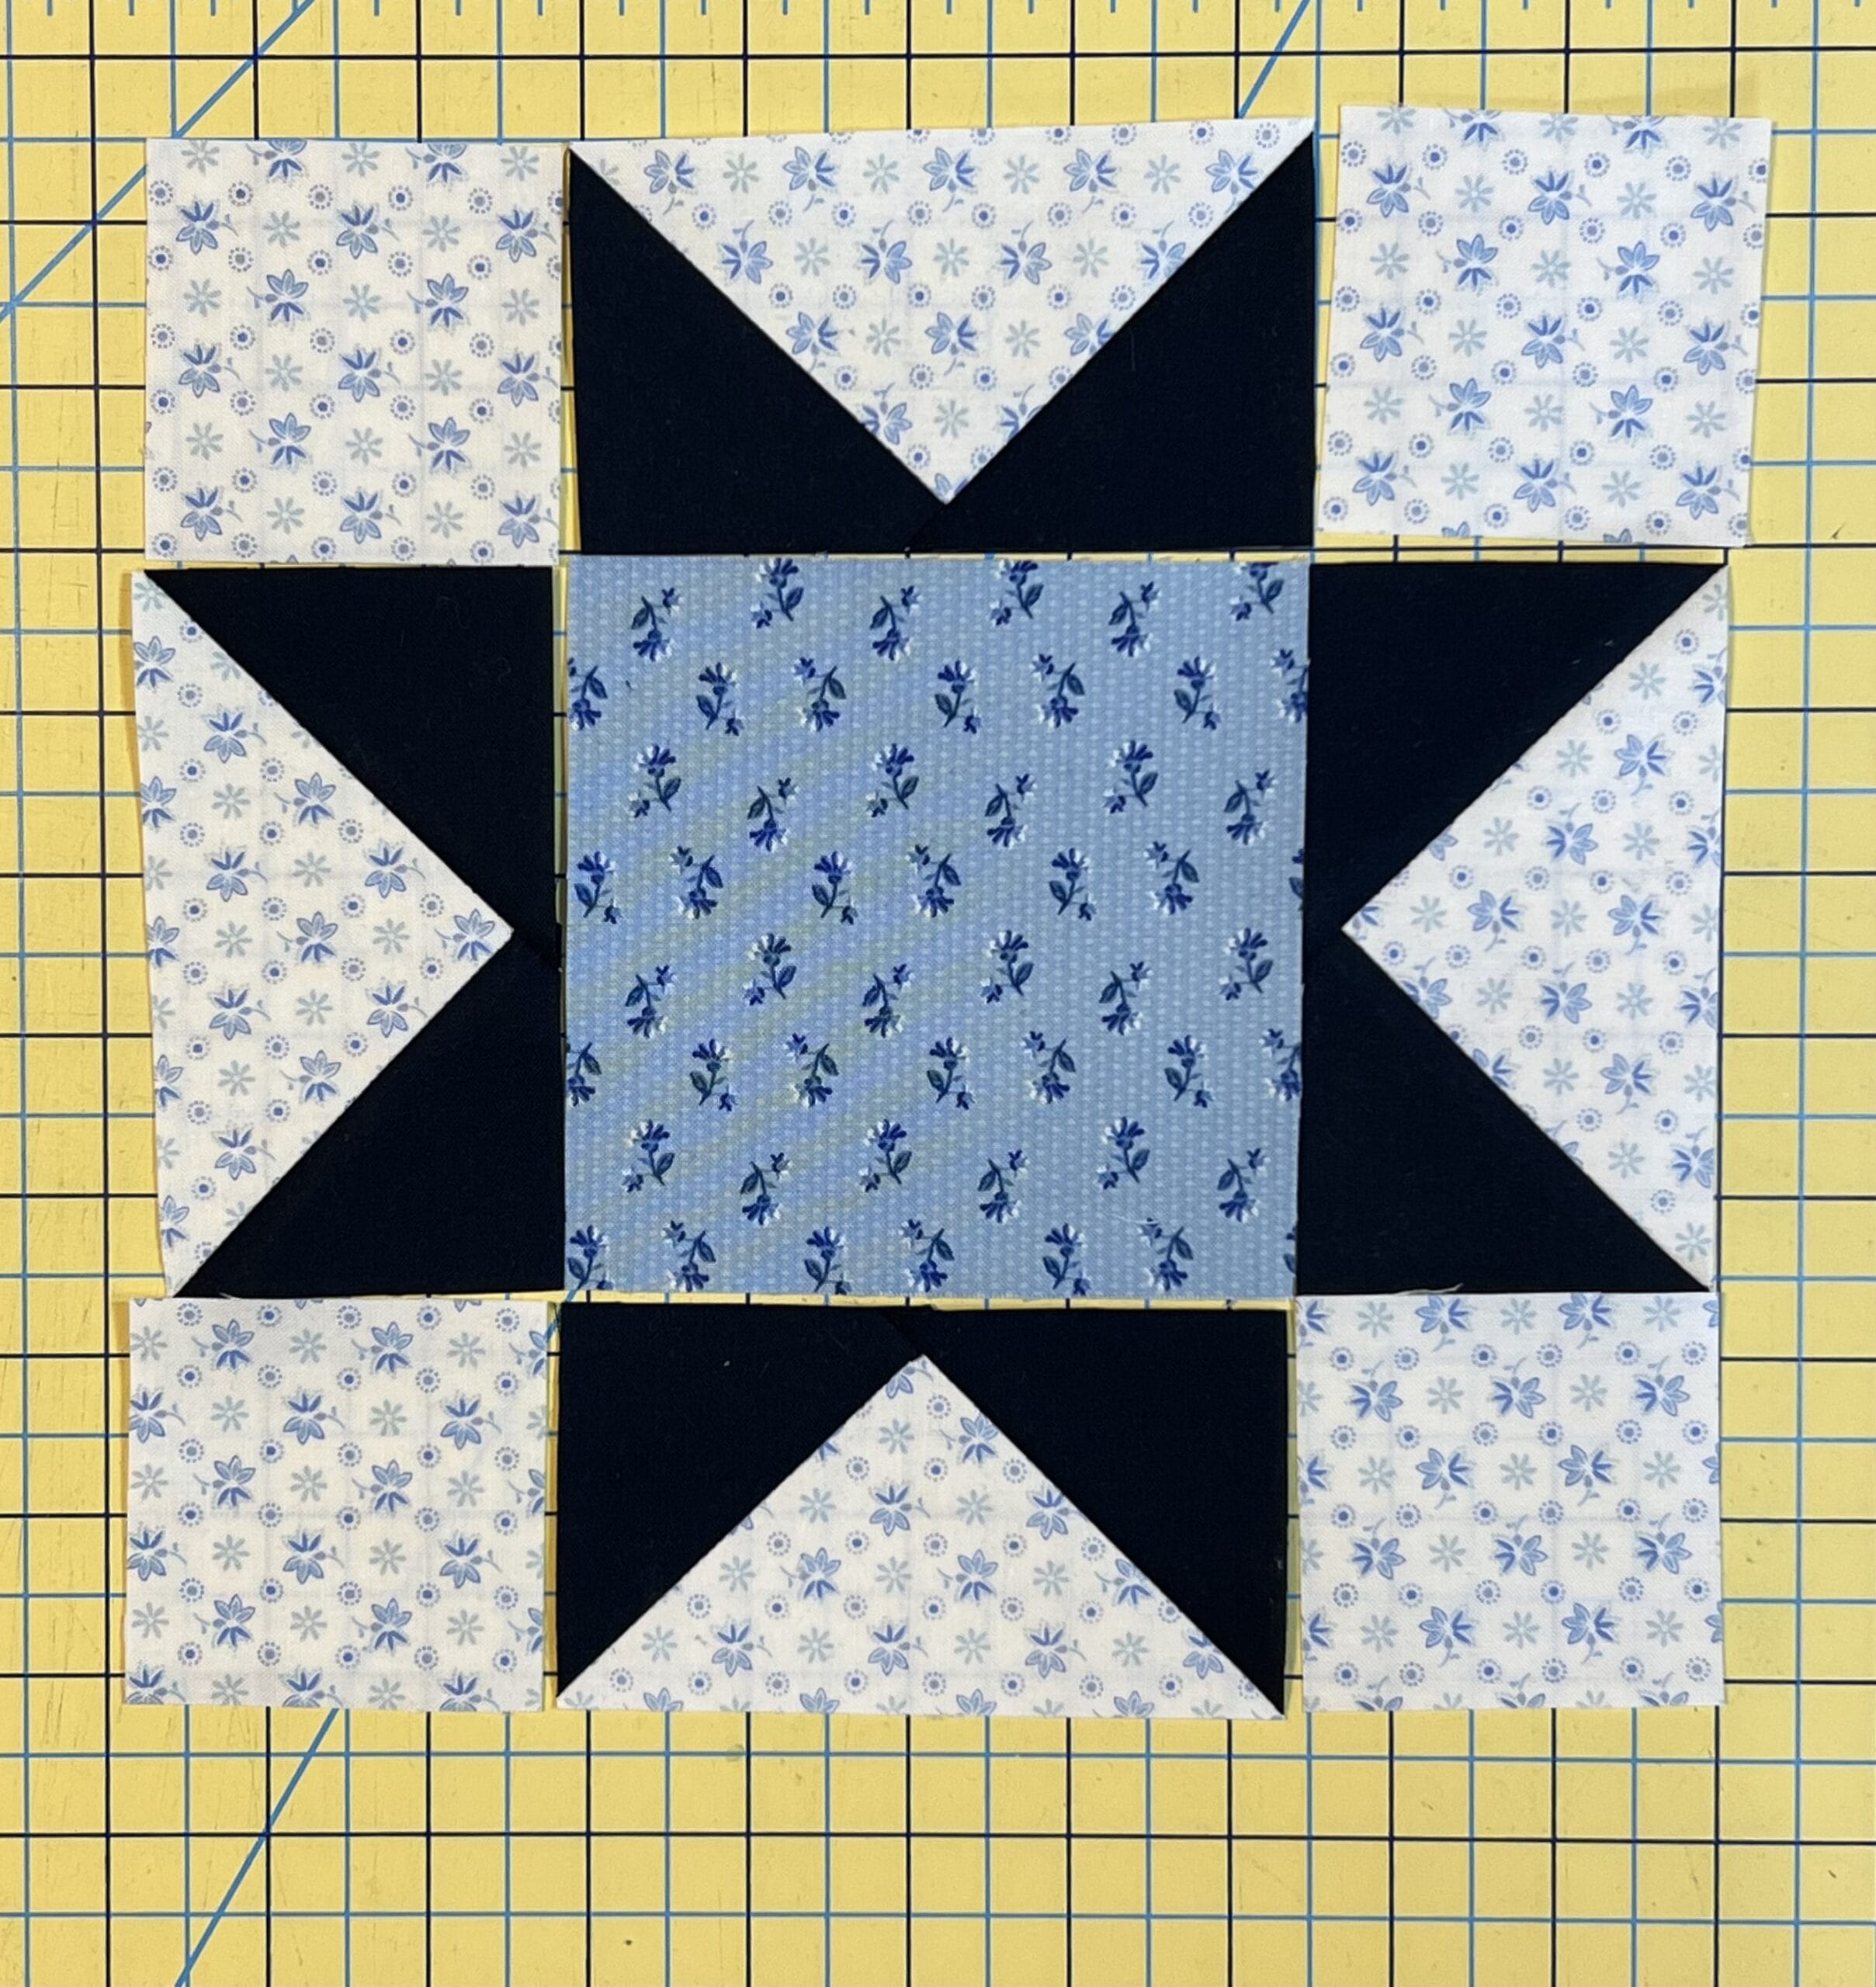
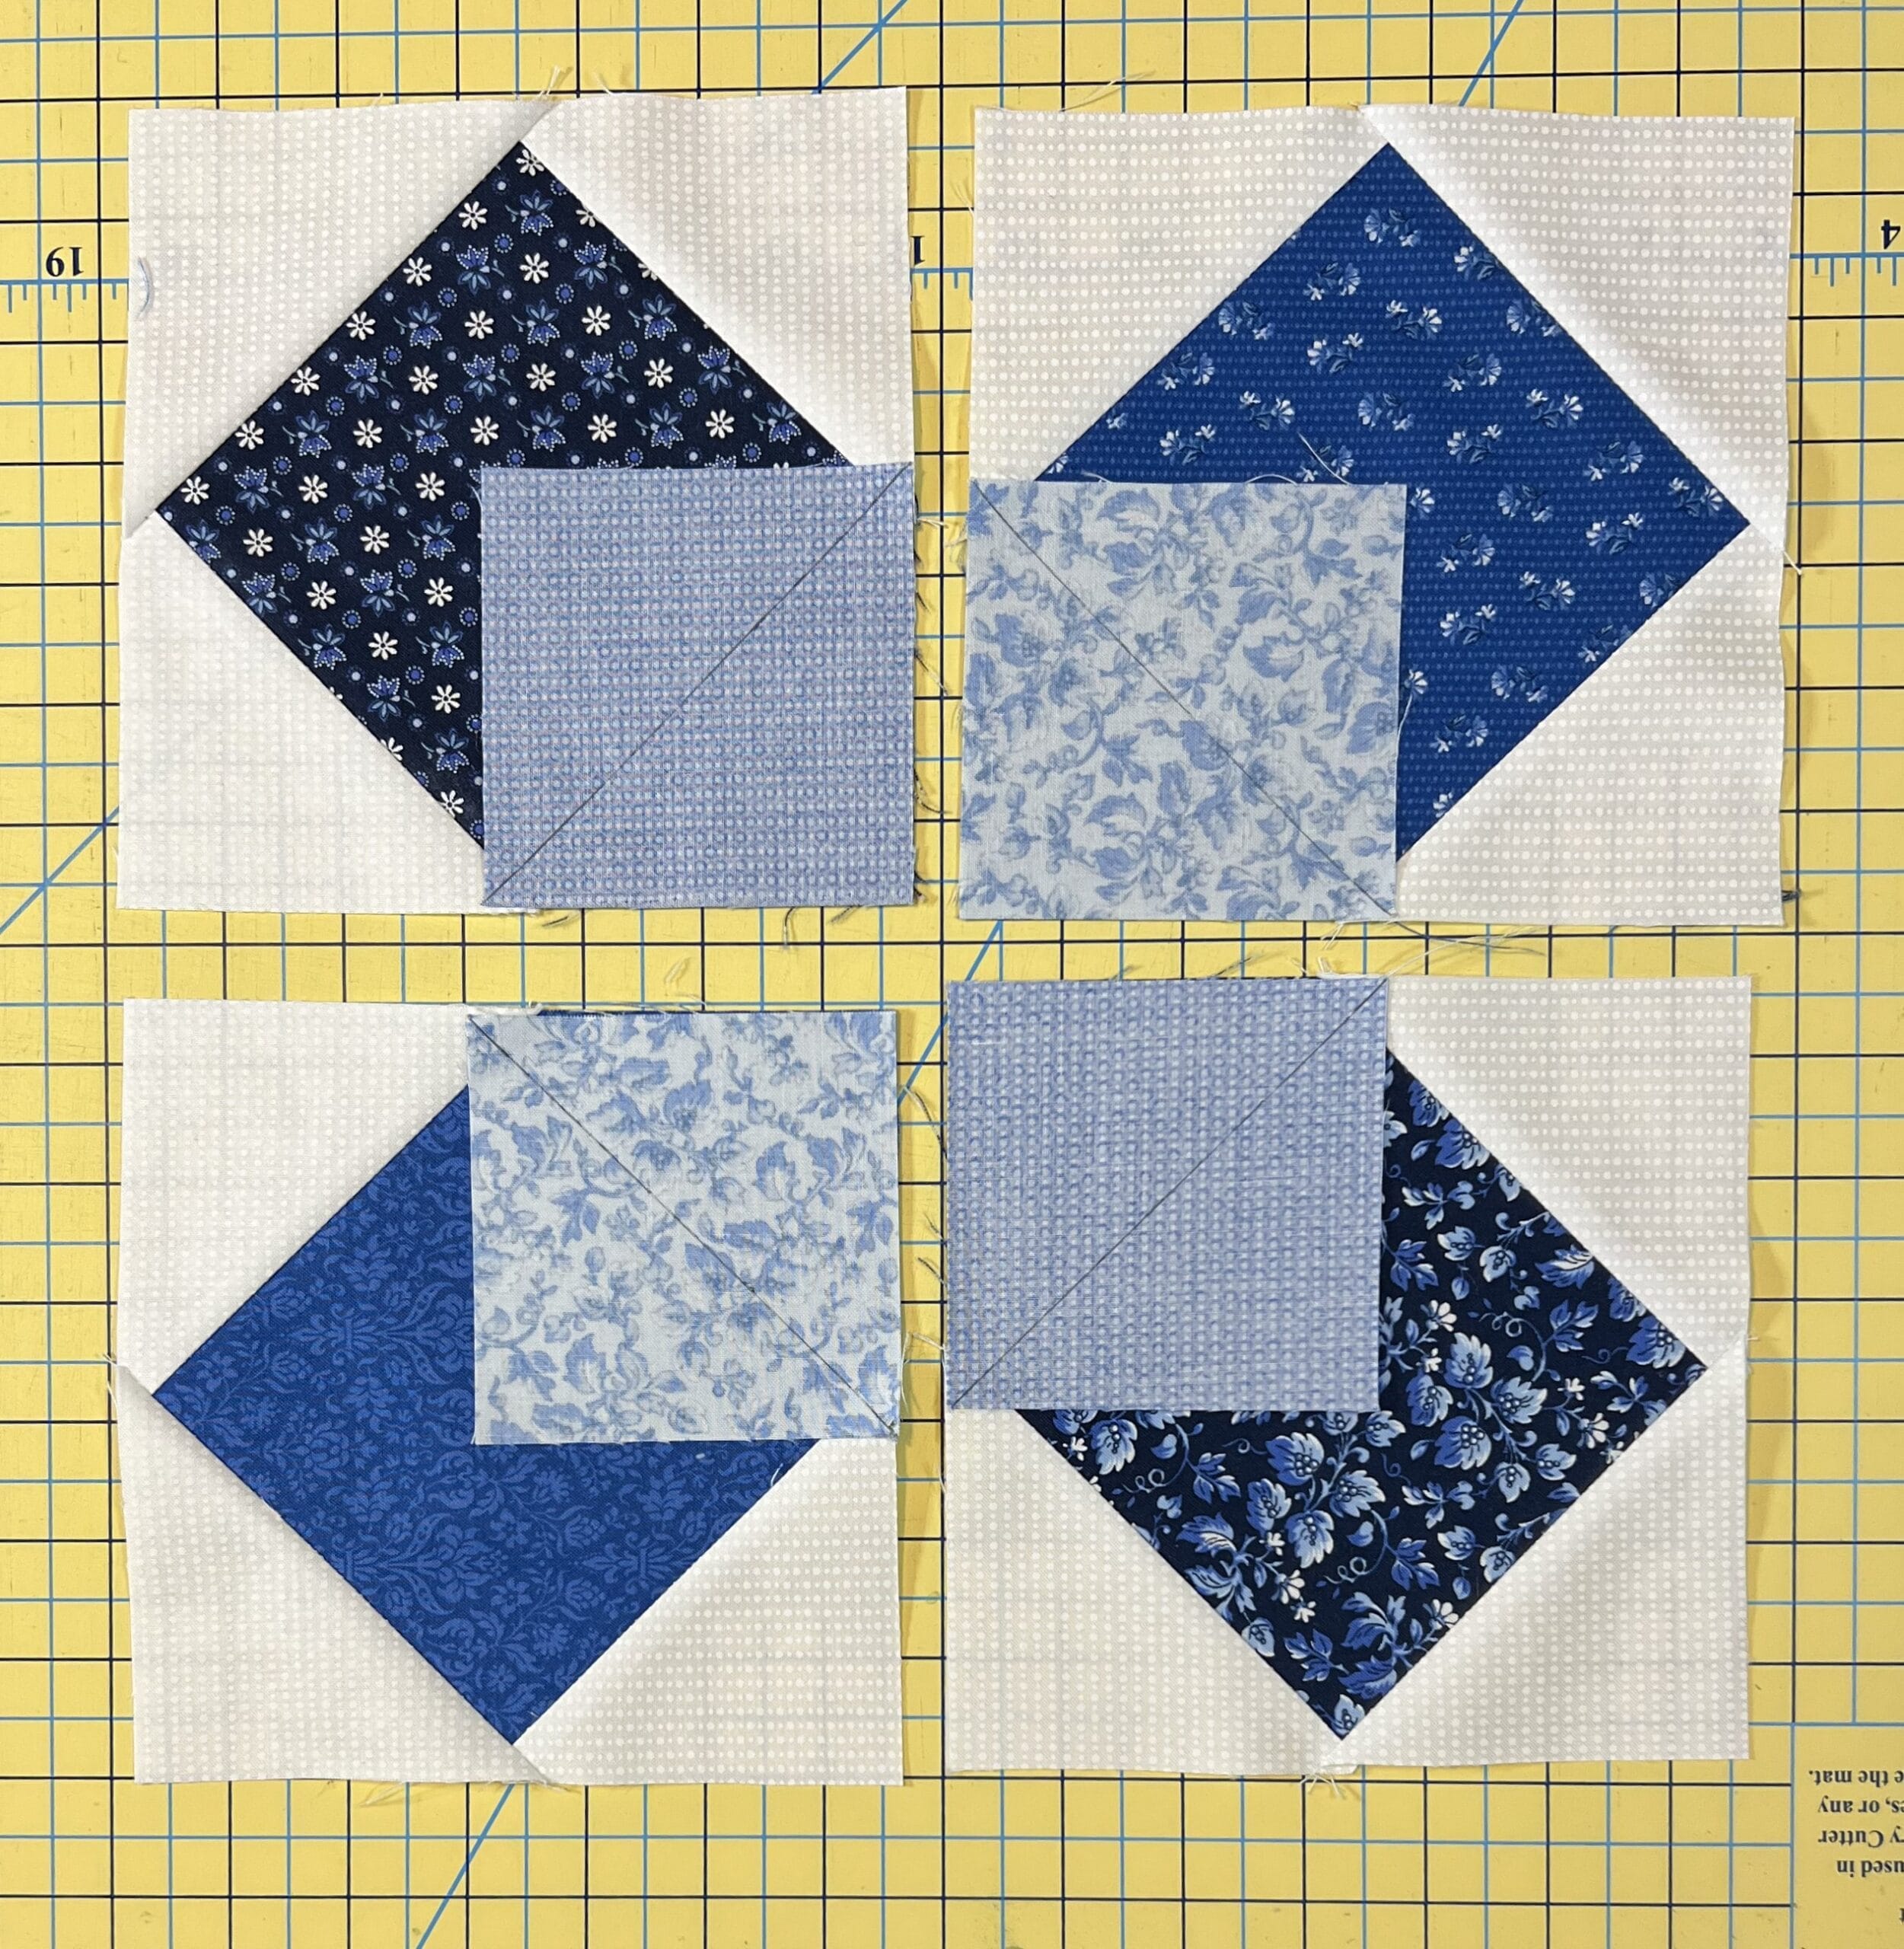
Block #29

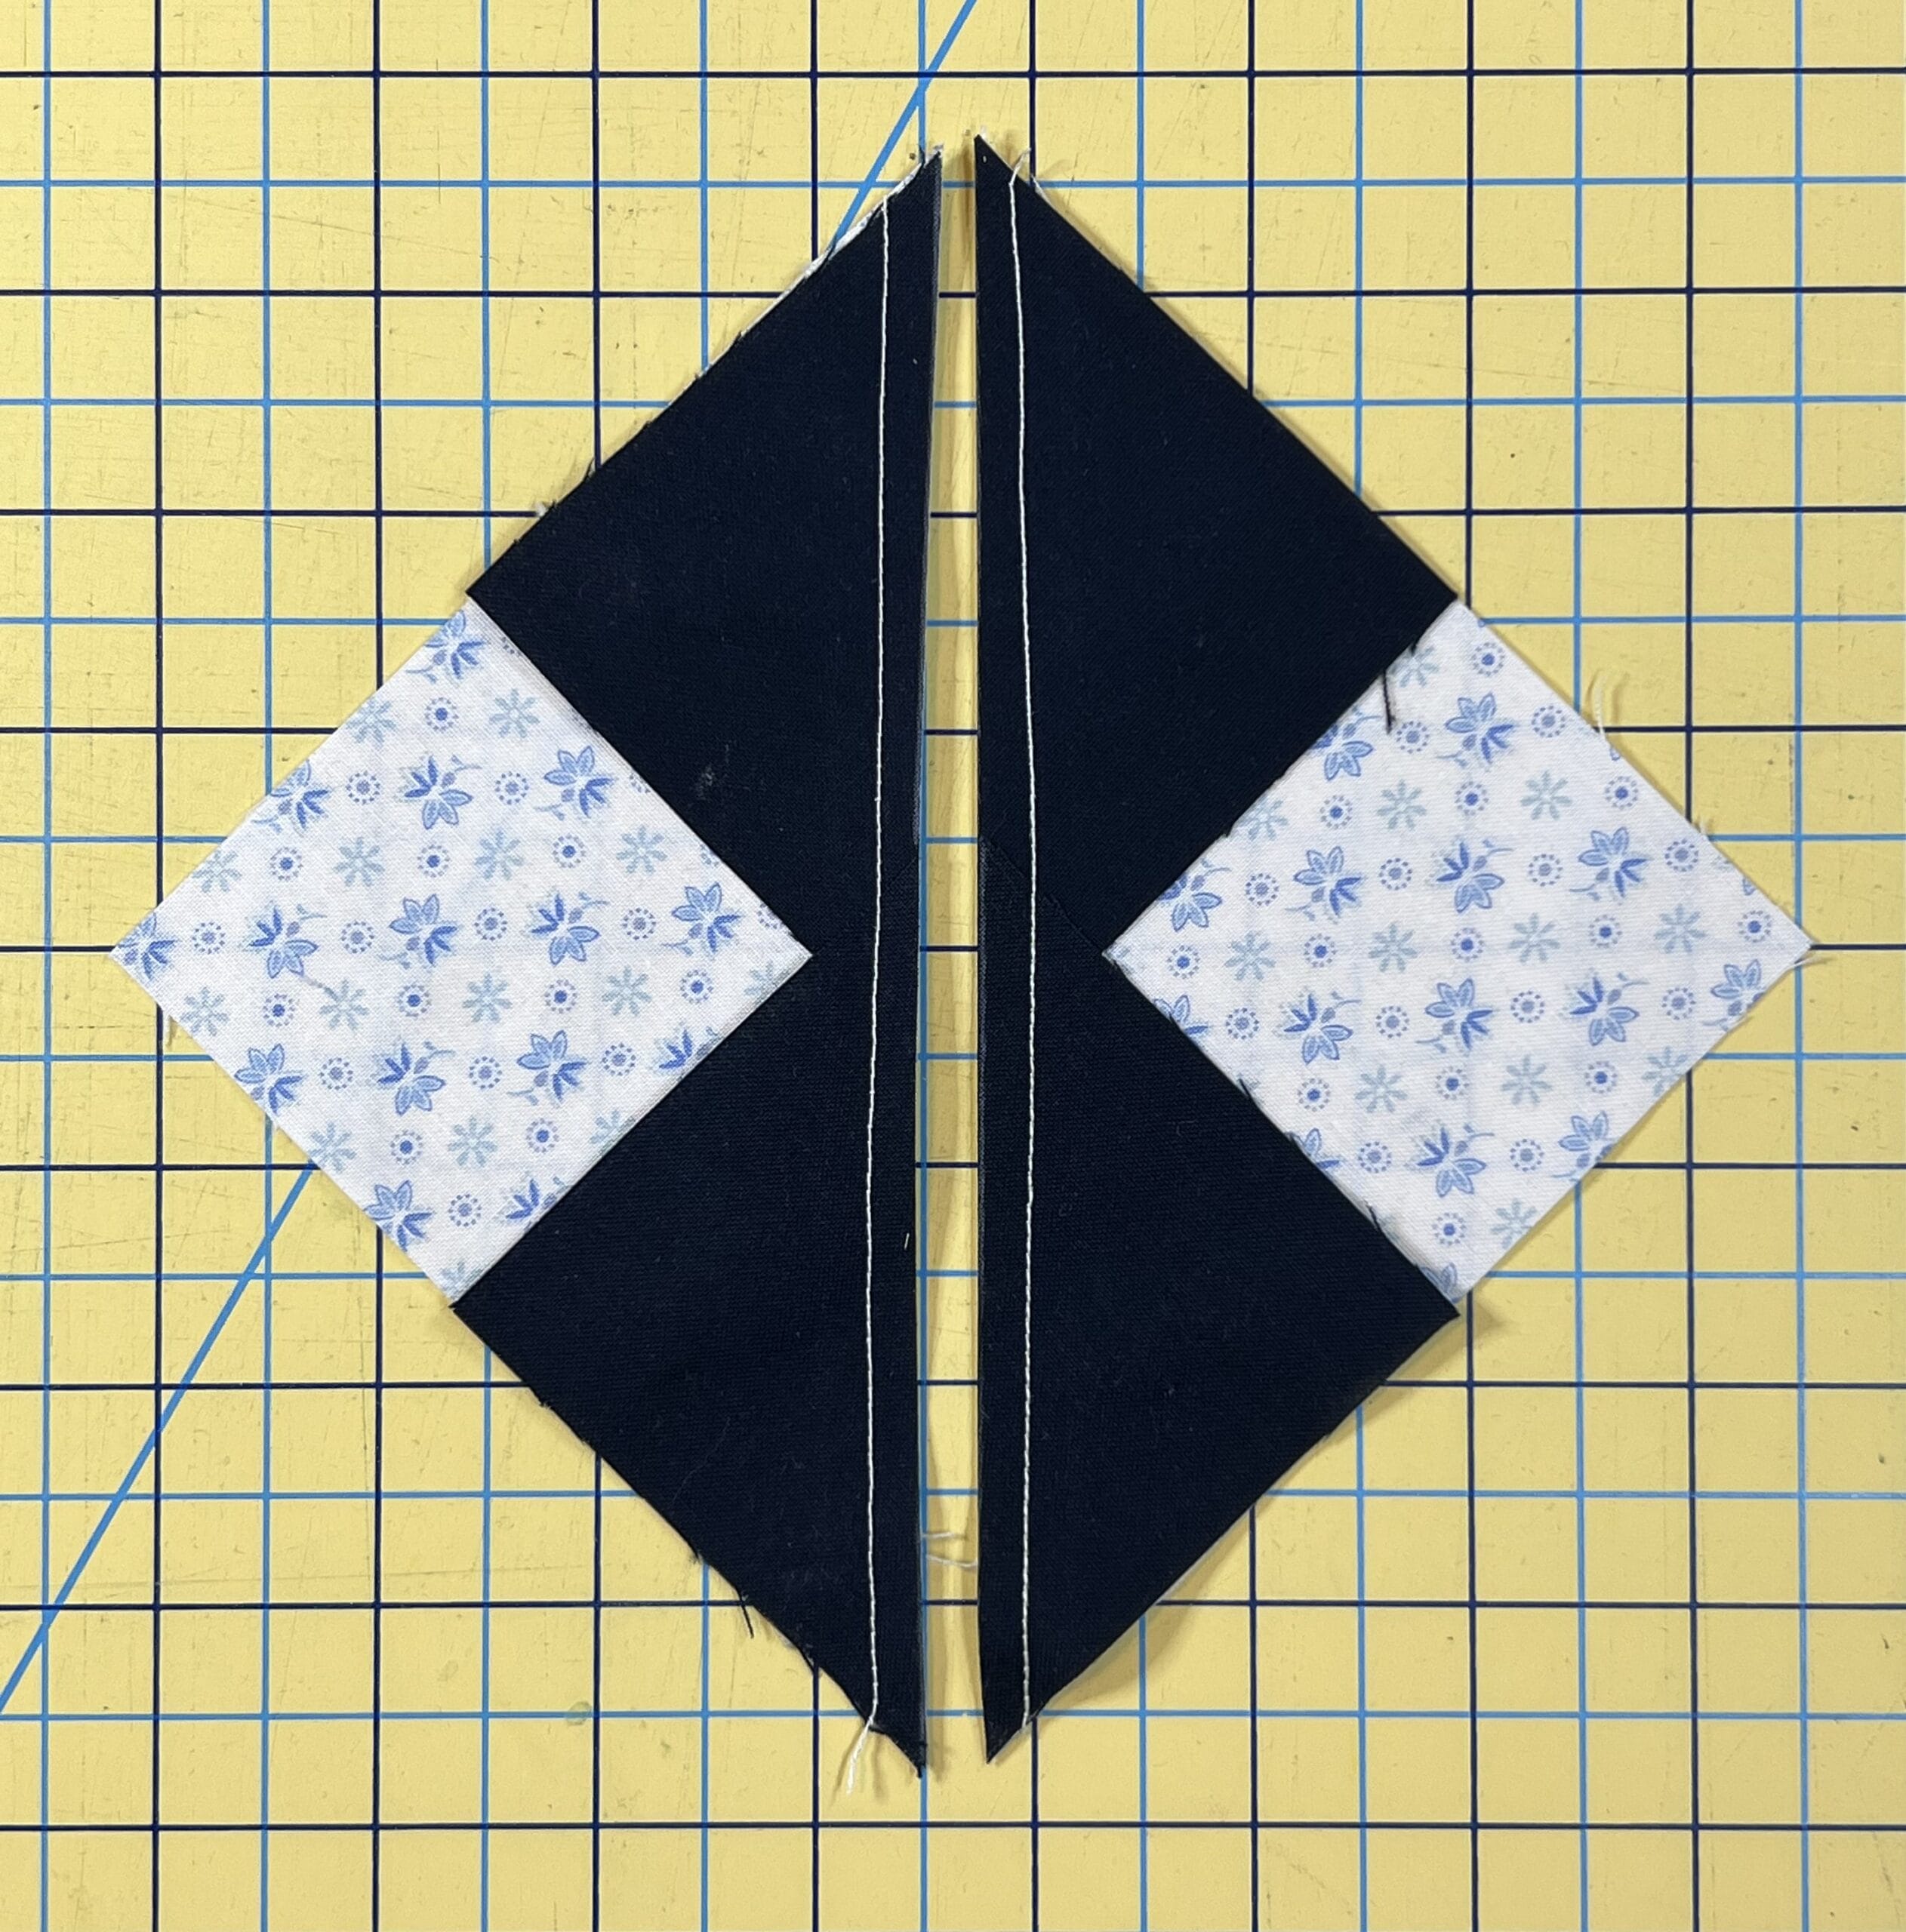
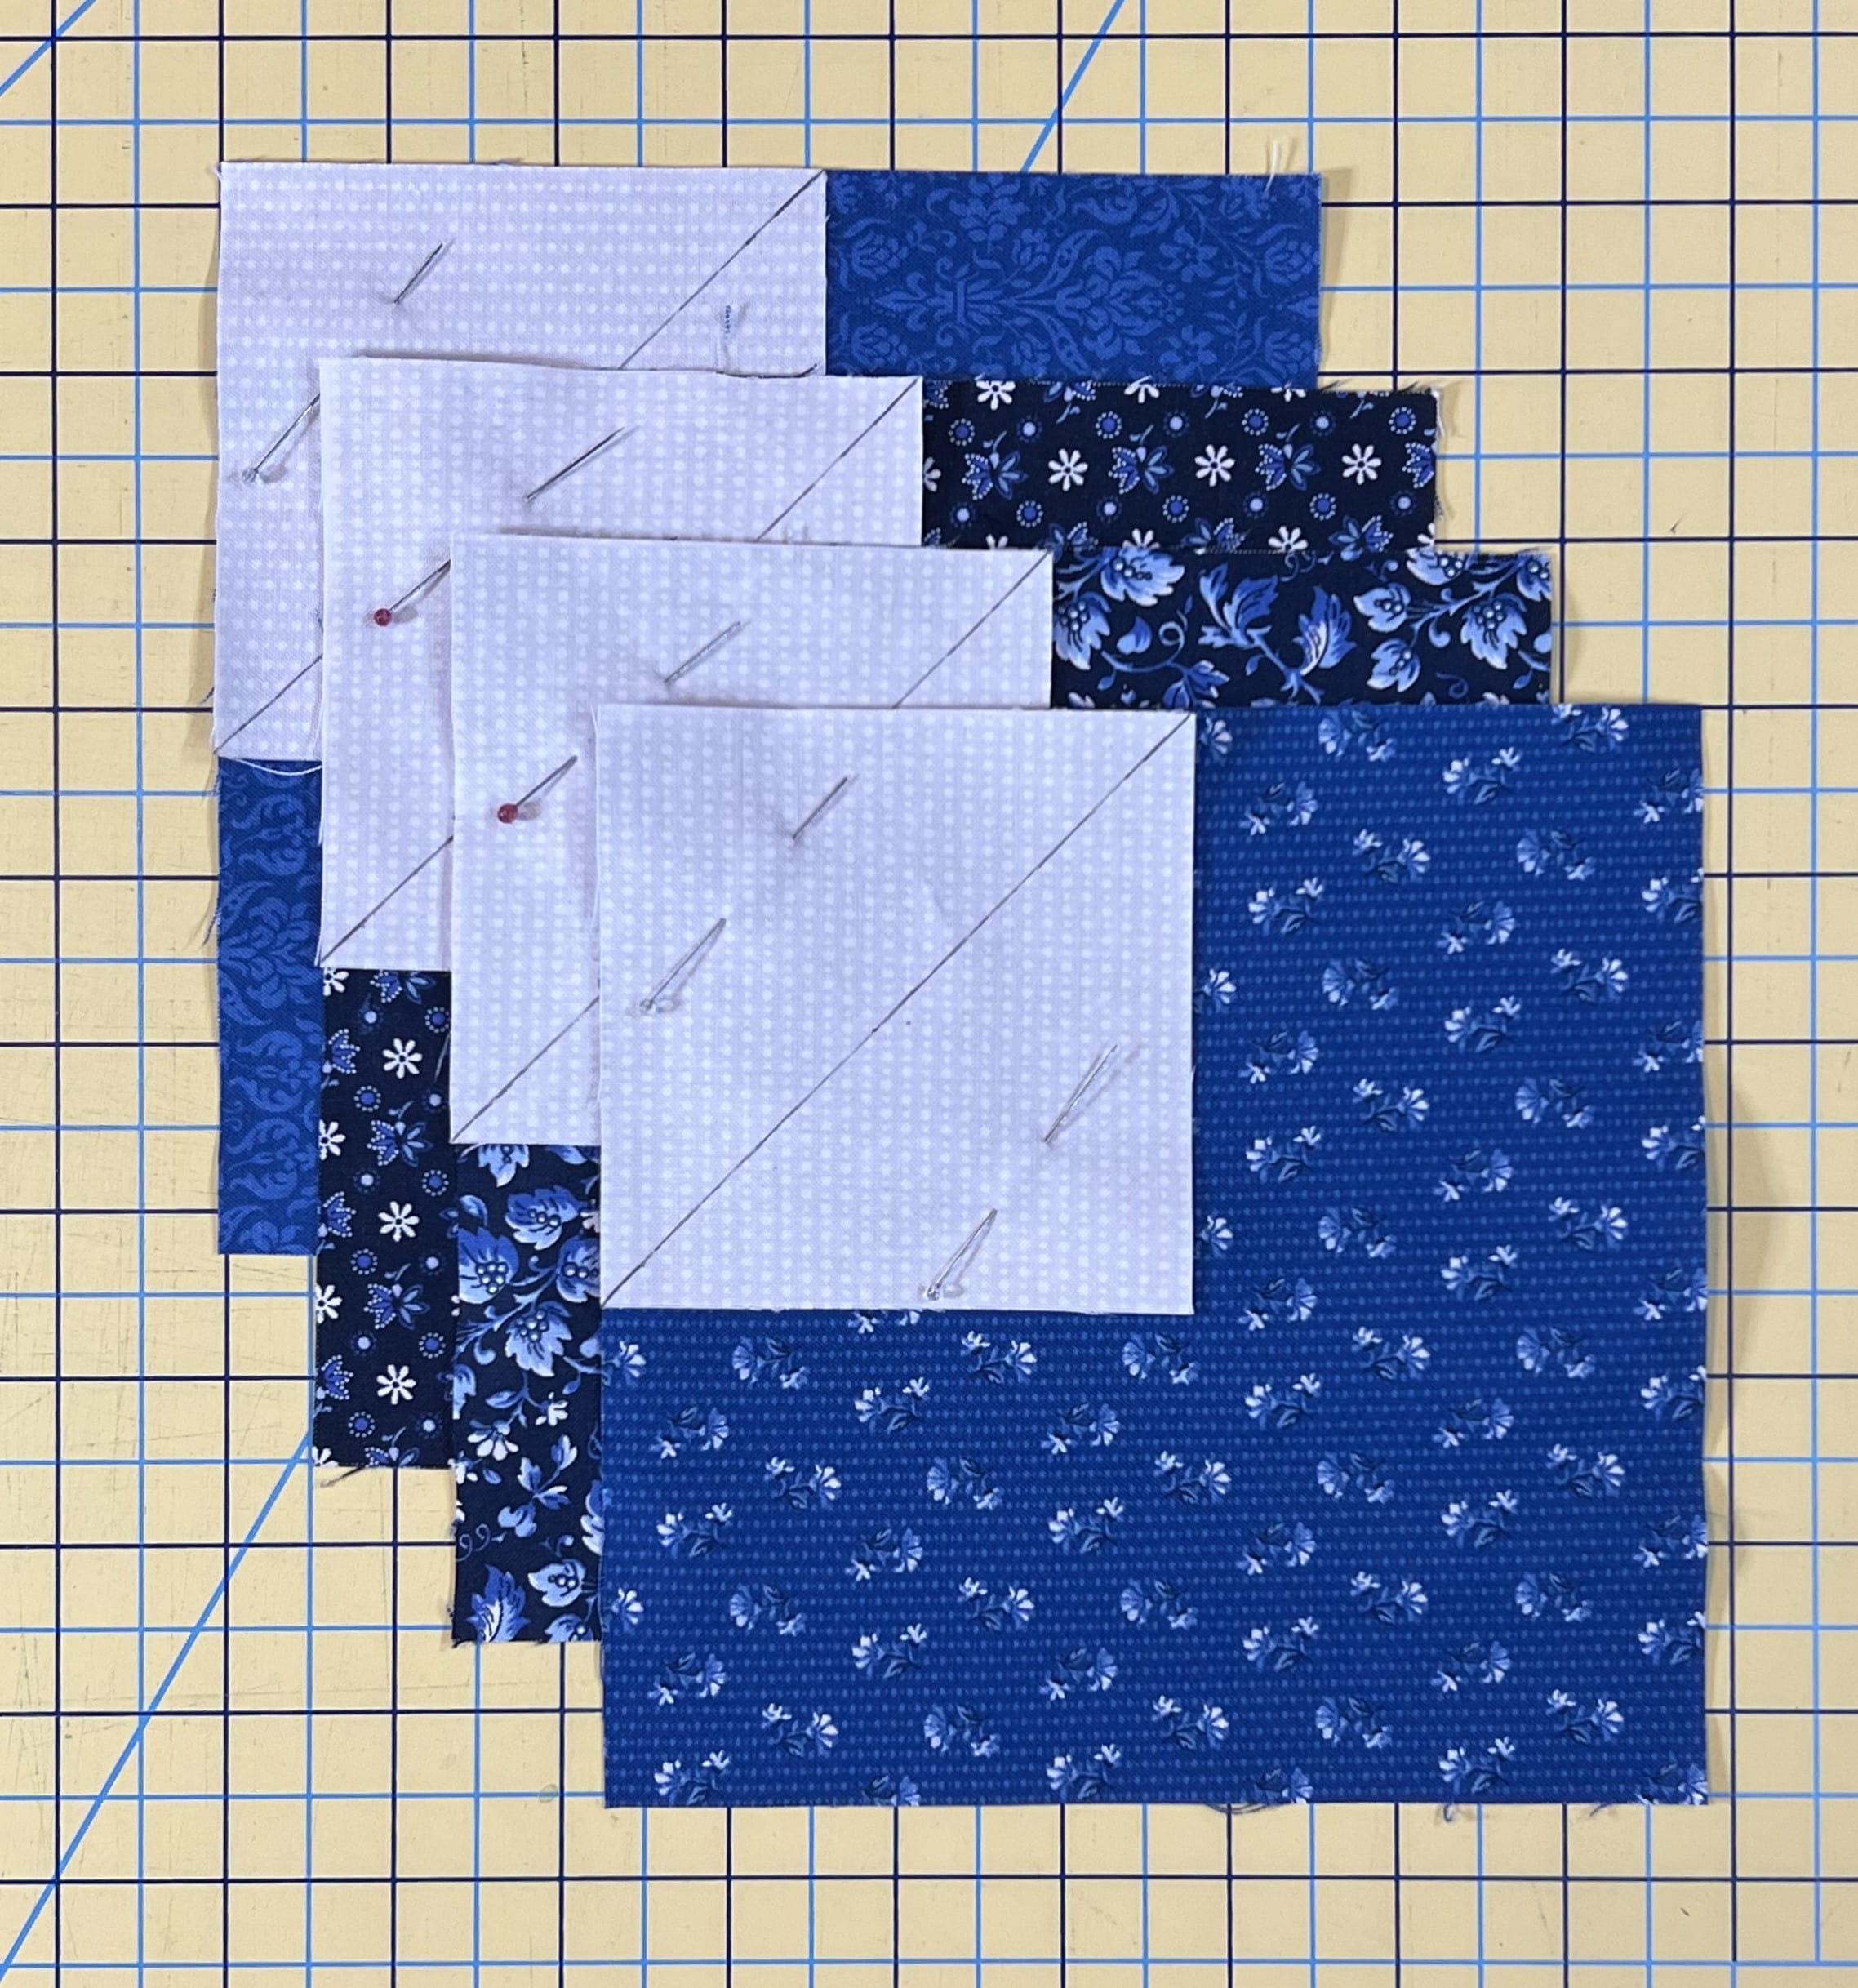
Our final block for the month is comprised of four diamonds, or square-in-a-square units. One of the biggest tips I have for making these is to sew just a hair outside of the marked lines (on the side closest to the outside corner). This will ensure that your corners don’t come up short after you trim and press them.
Another tip for this block is to pay close attention to the pressing arrows. Normally when making these units you’d want to press all the seams outward, but for this one, you’ll want to press a few of them inward. This will allow the seams to nest once you sew them together. Once again, I sewed these all at the same time.
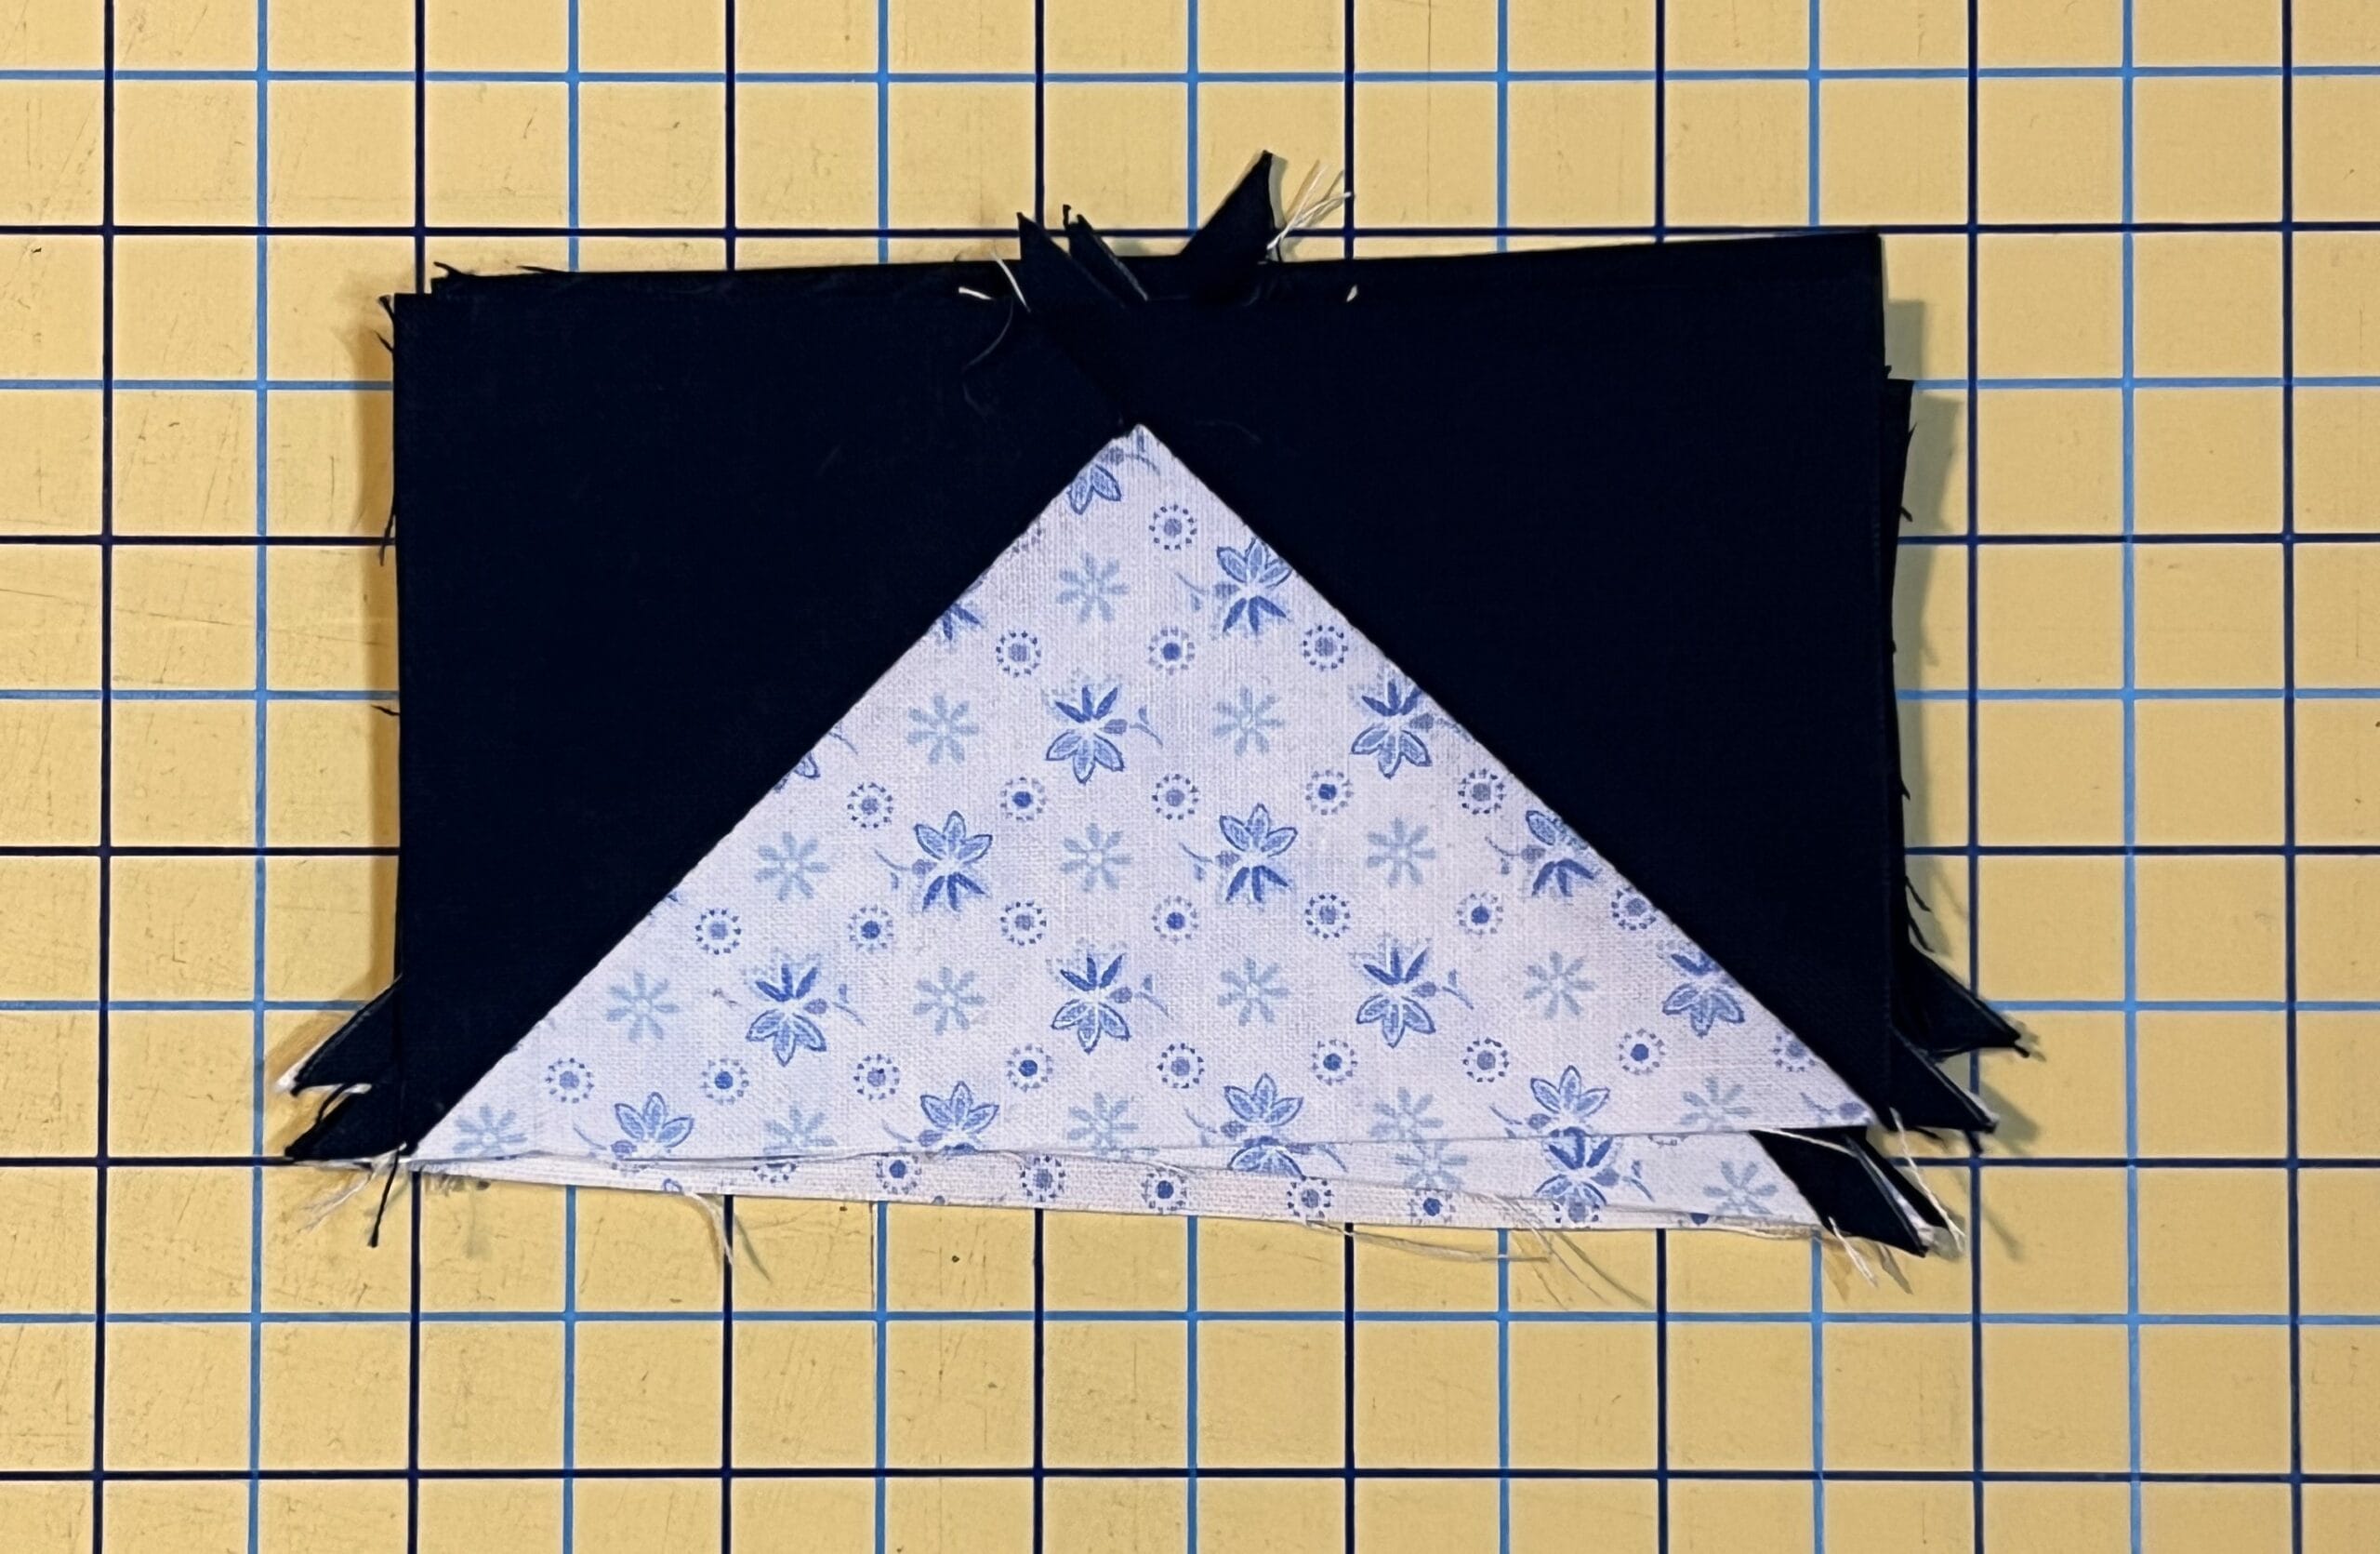
I’ll just show you the one block for the next few photos, so you can see the process of sewing and trimming the first three white squares.
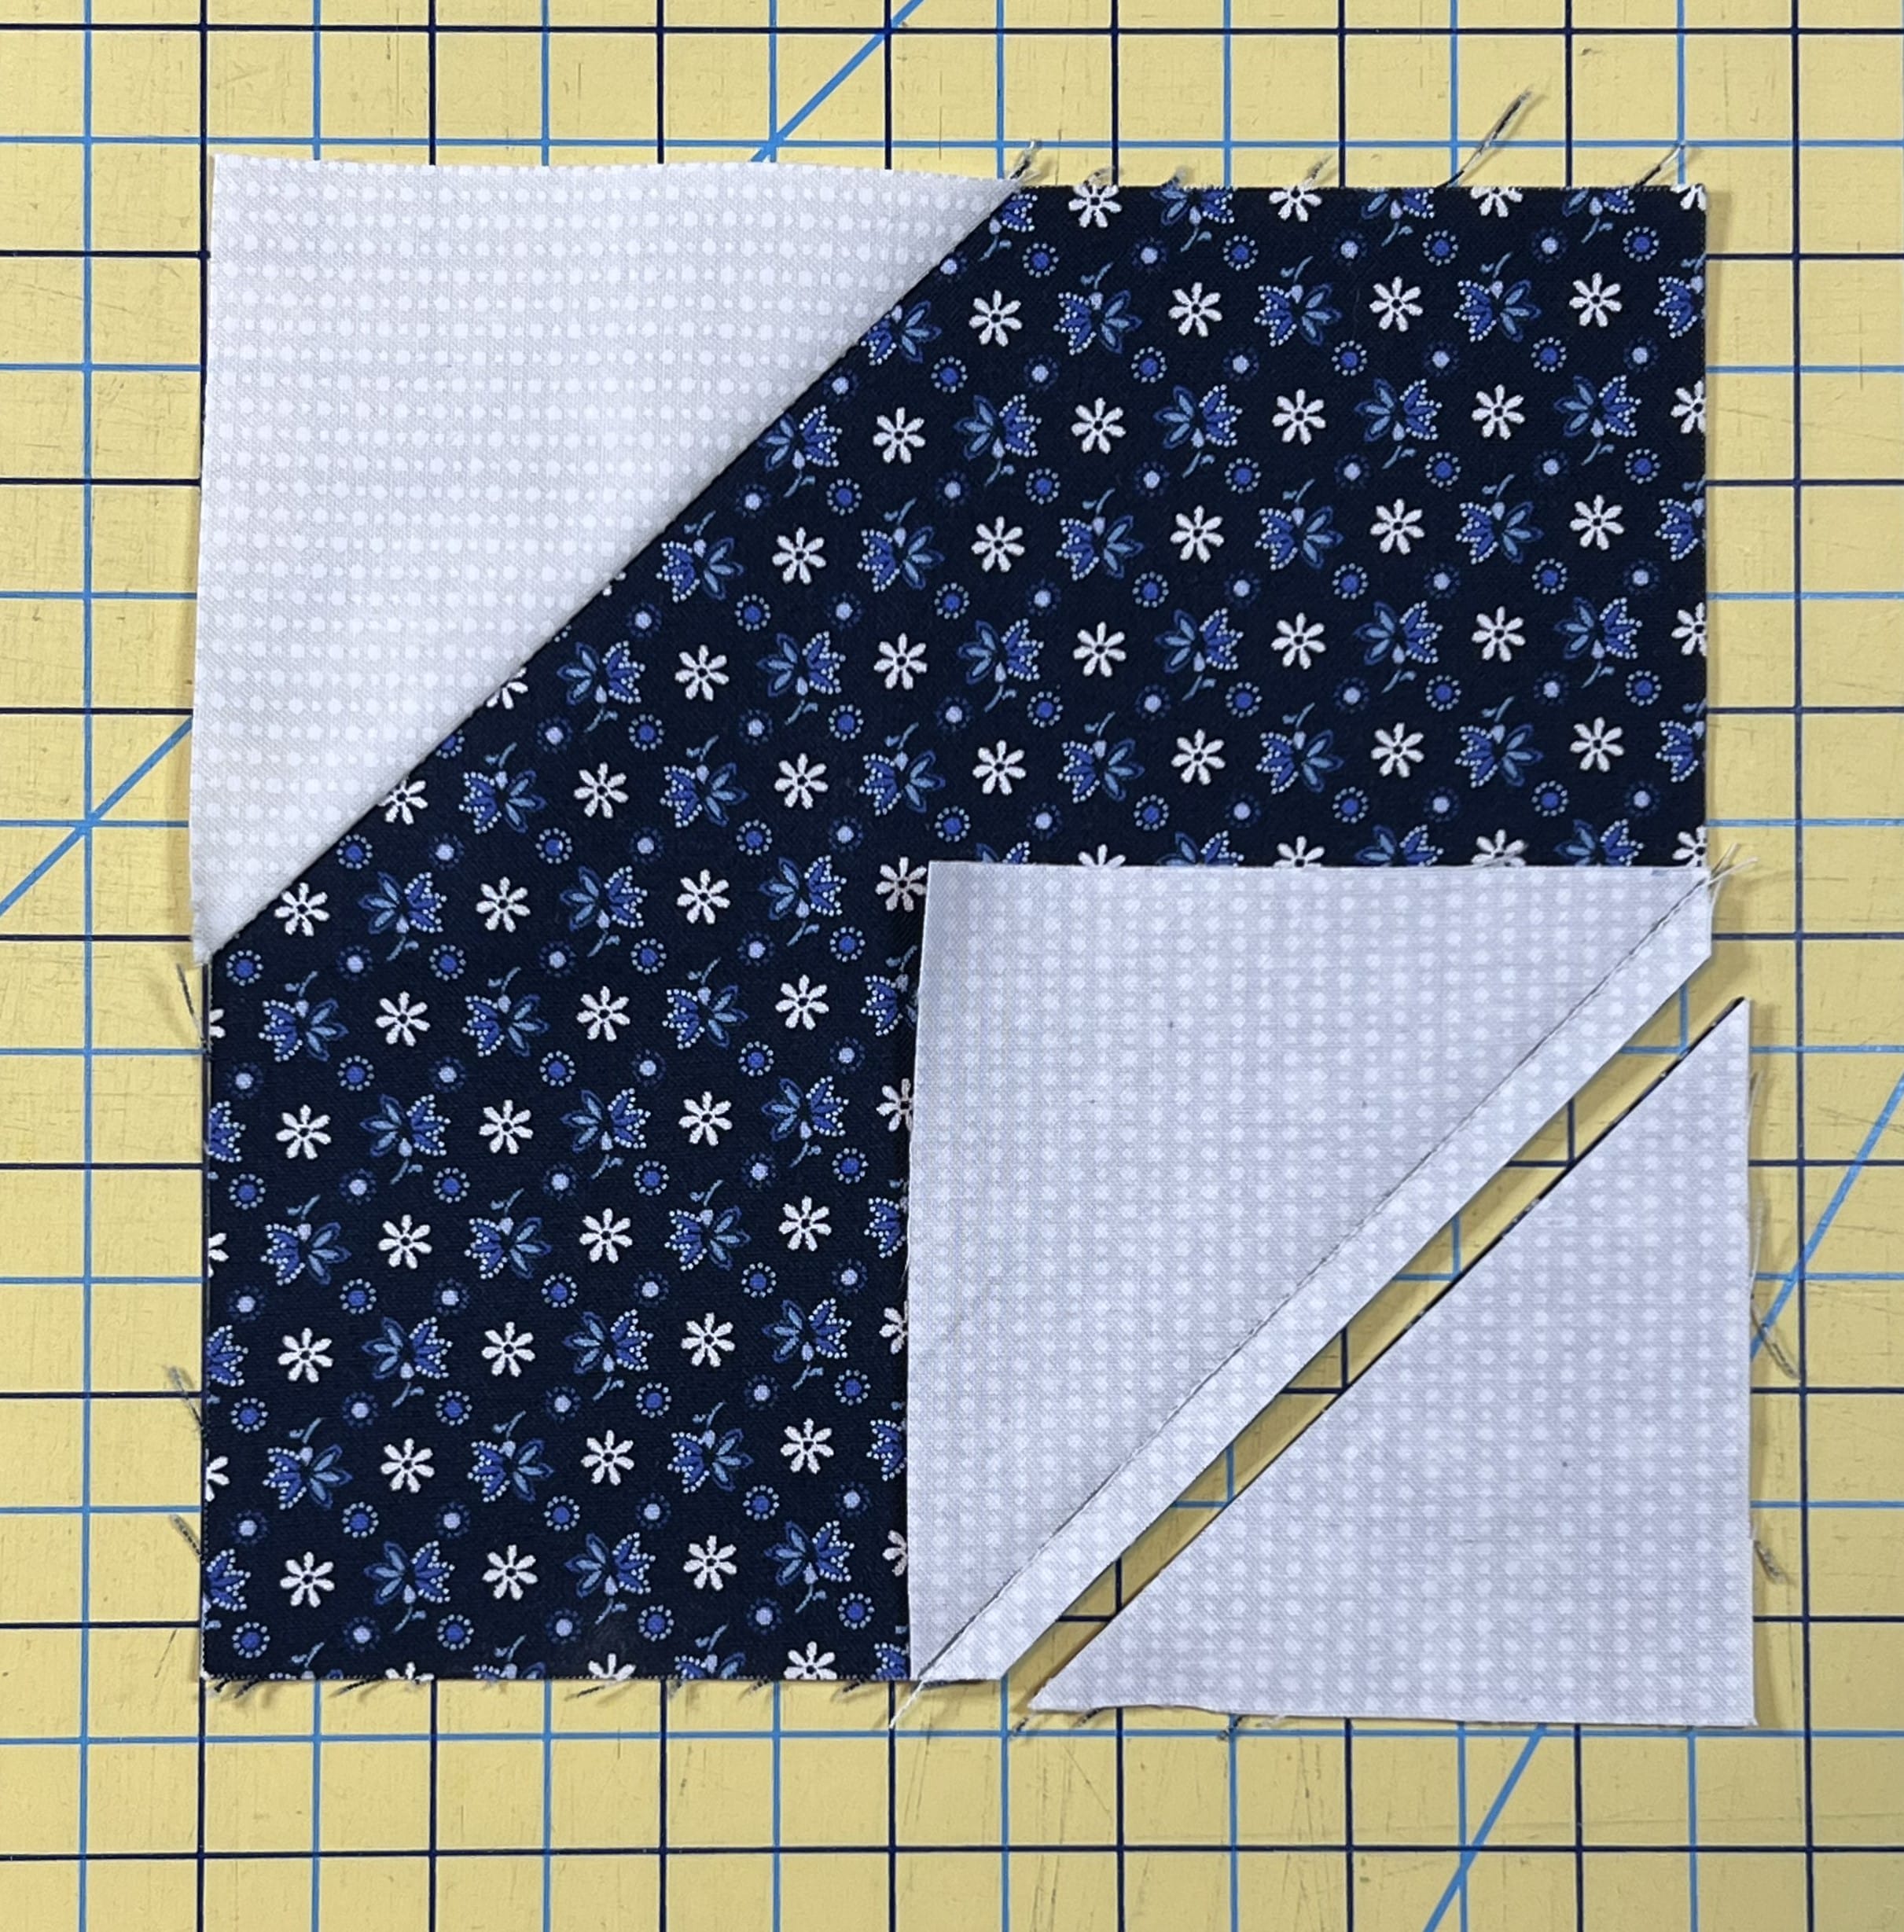
I realized that I took photos of different squares each time, so hopefully that doesn’t confuse you. The process is the same for each one.
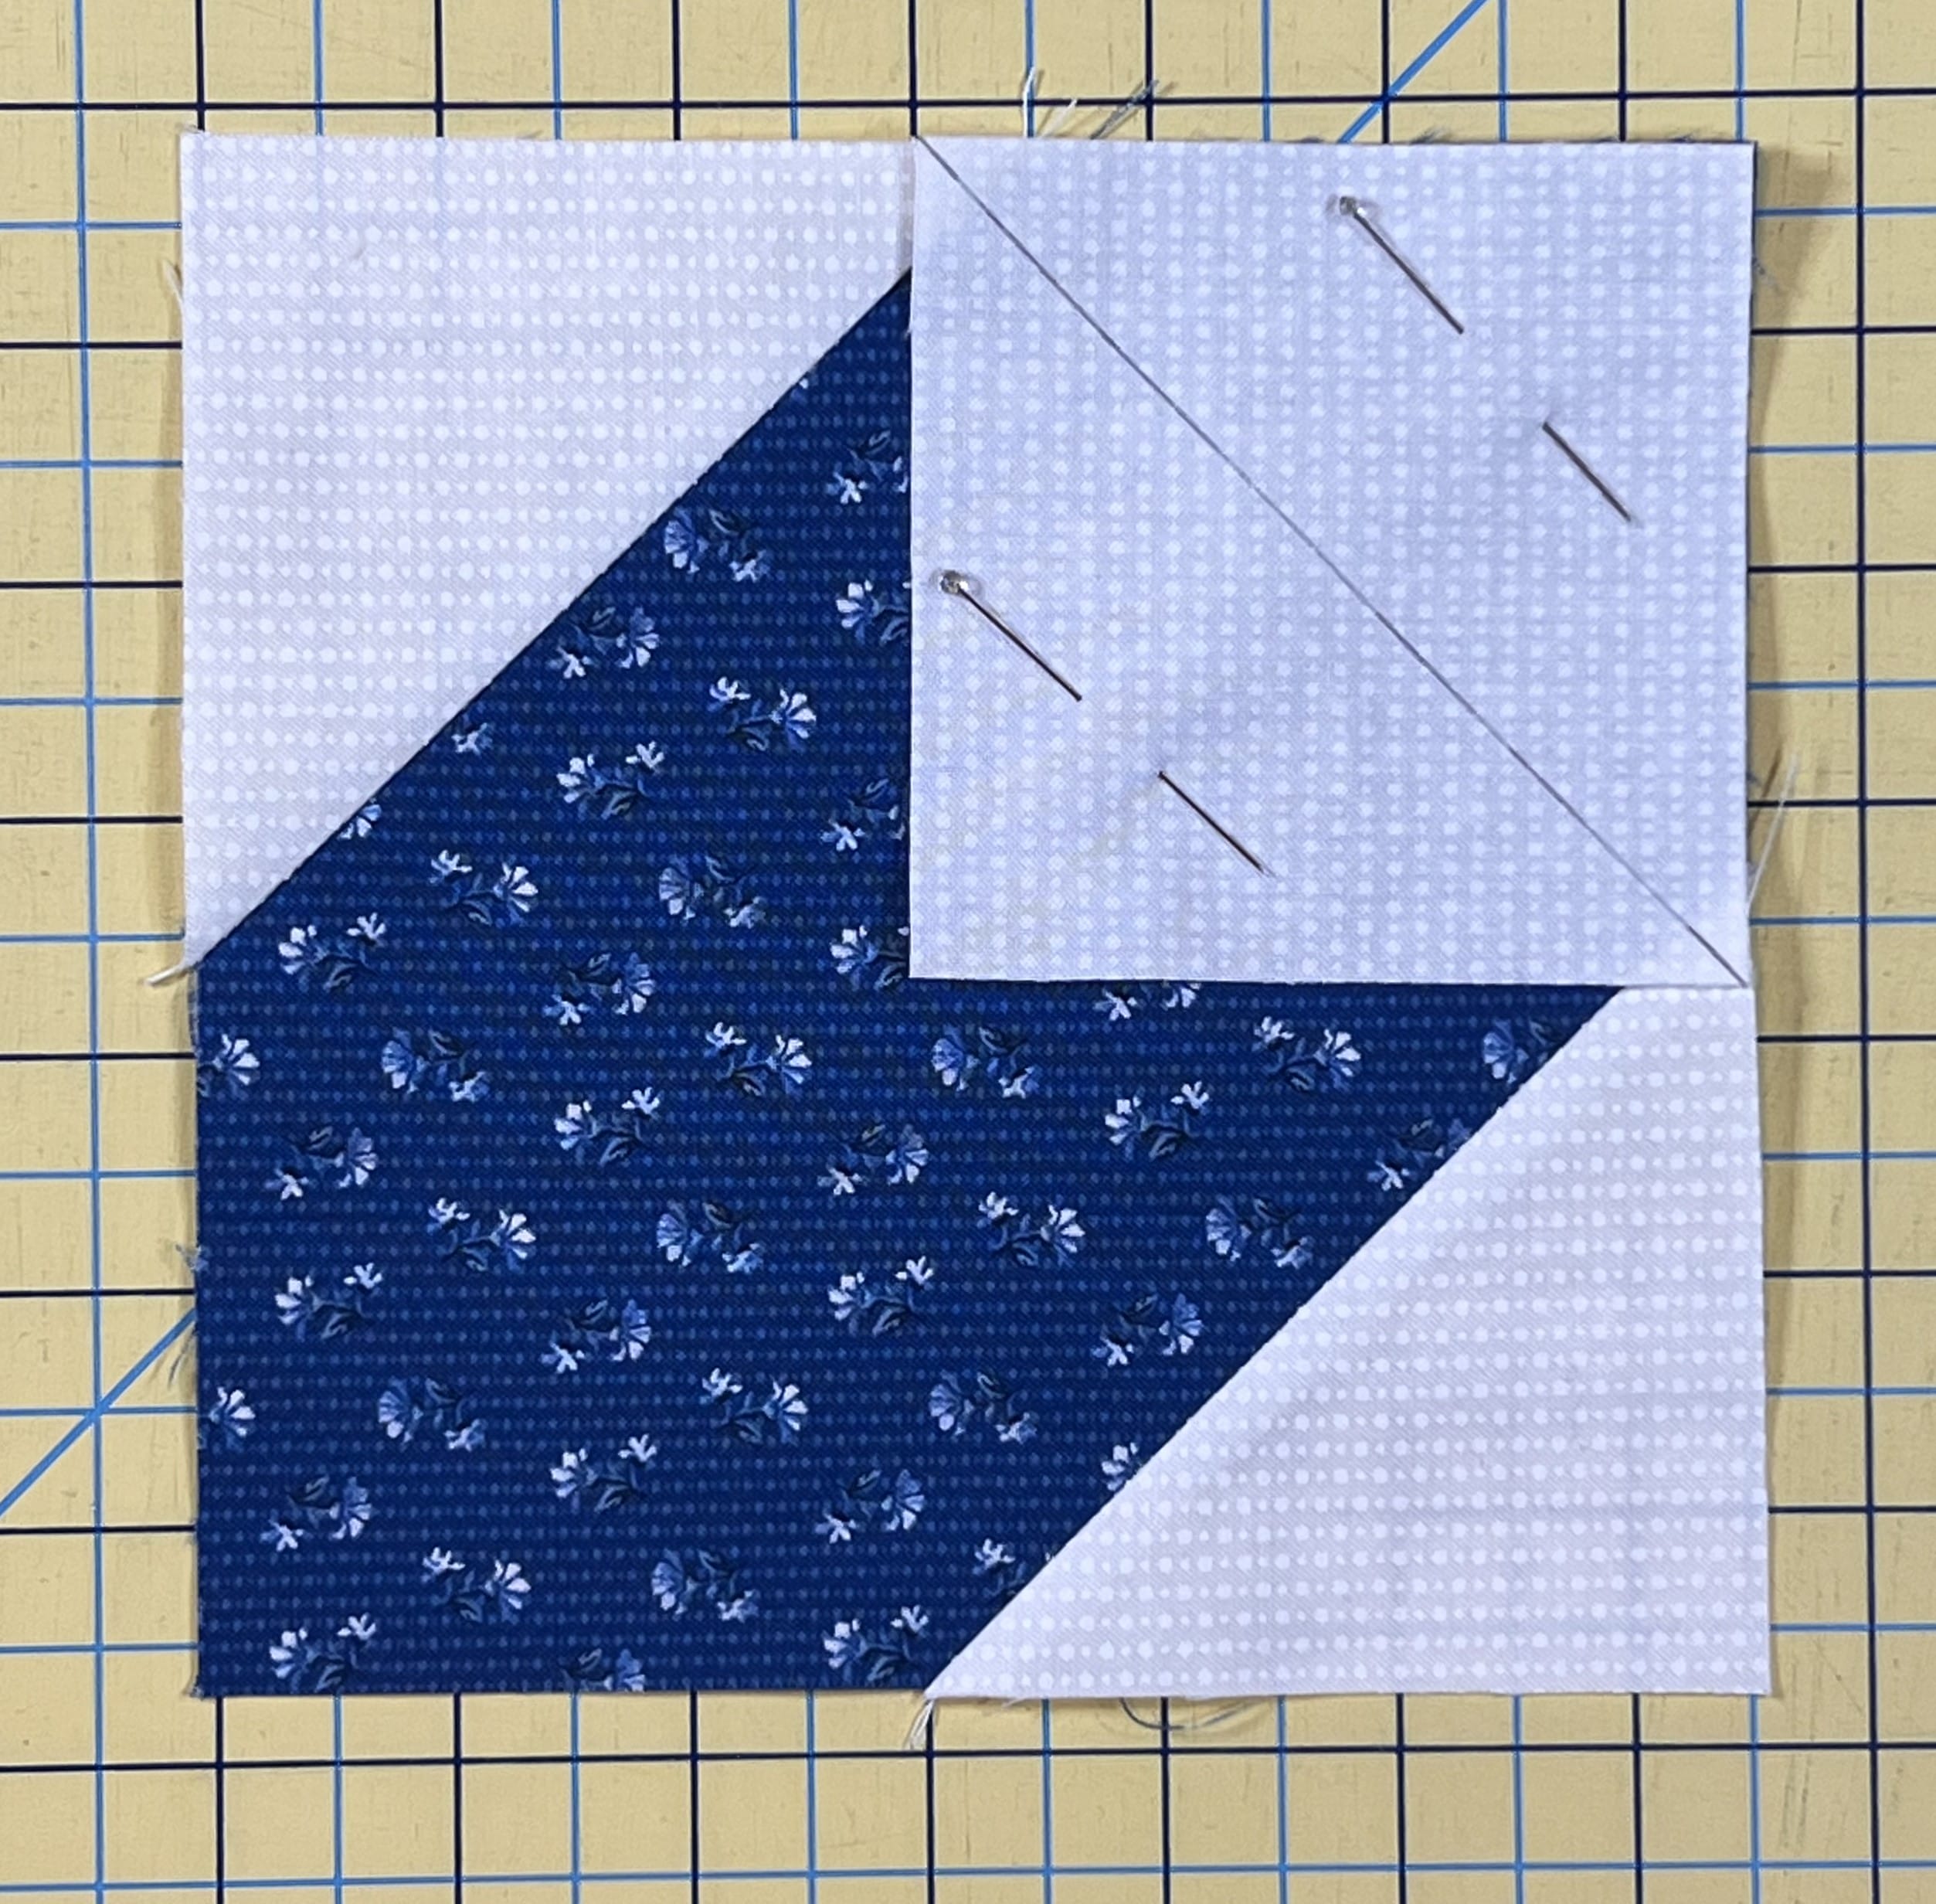
After you’ve sewn and trimmed the three D squares to each A square, you’ll take two of them and sew a B square to each one, following the same technique as you did with the D squares. The other two units will be completed by sewing a C square to each of the last corners. It doesn’t really matter which units have the B and which units have C as the final corner. That being said, I wanted to make sure that I liked the fabric placement for the larger squares too, so I was intentional with choosing which units got the B fabric, and which ones got C, since the need to be in opposing corners when the four units are sewn together.
Now we just sew these together, and the block is done. If you’ve pressed your seams according to the instructions, things should nest together properly. And if you didn’t remember, don’t sweat it. You can always press seams open if you prefer.

Until next time, Happy Quilting!
-Kristin

