


 Tutorials
 7.5.2023
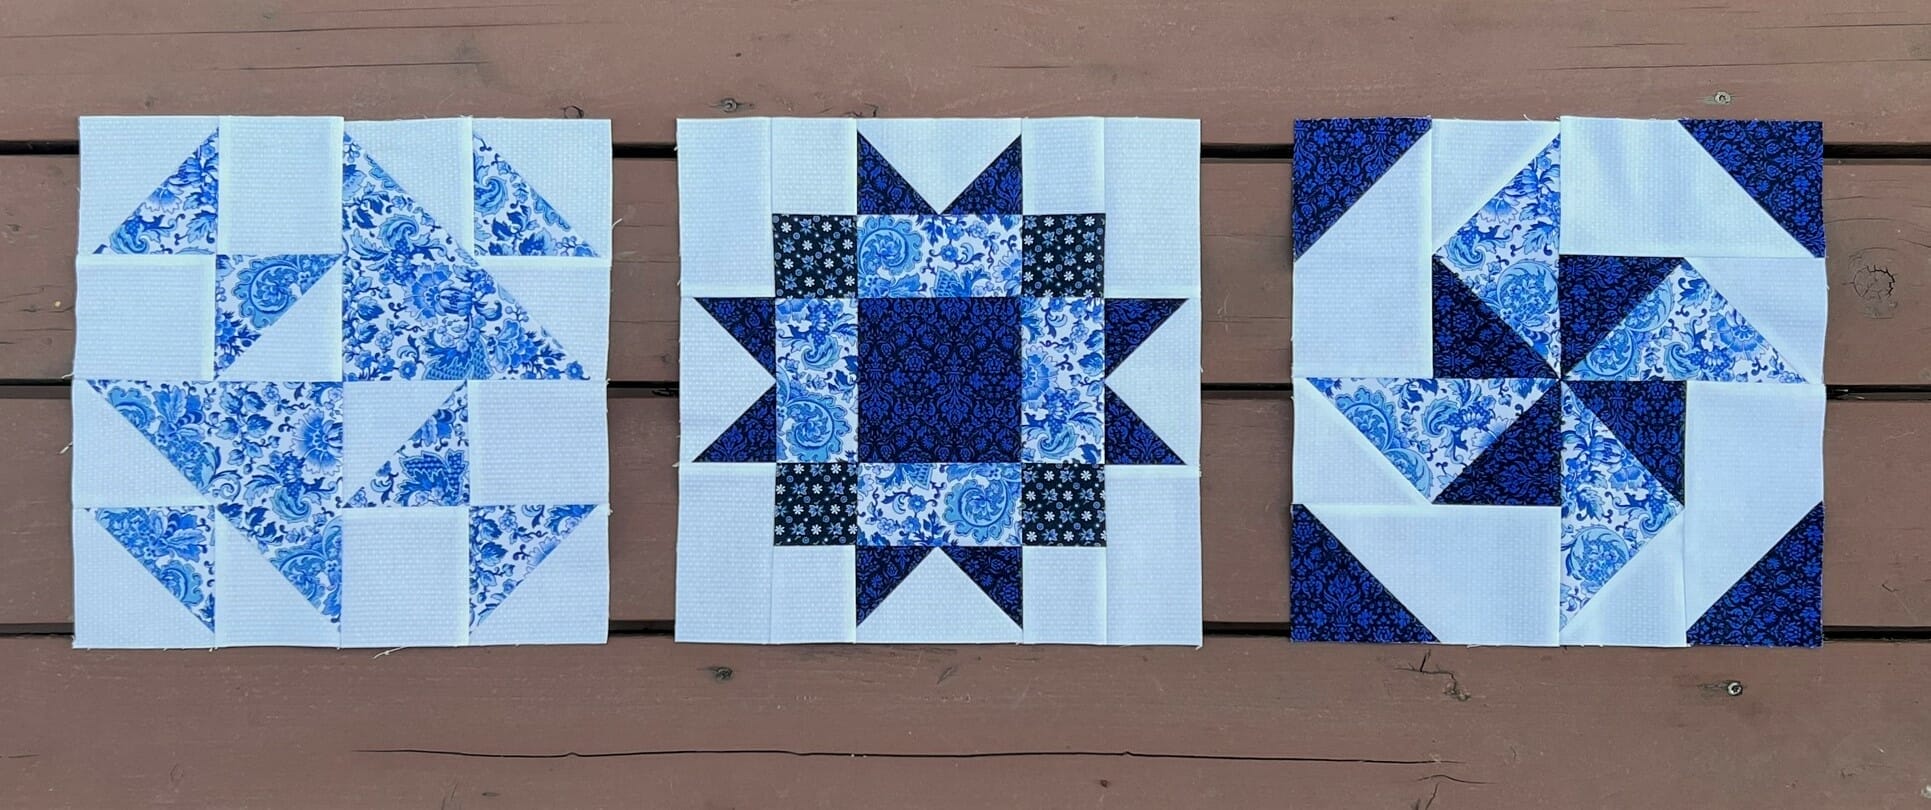
NOTE: these blog posts for the Amherst quilt top are part of a limited series for our Block of the Month subscription program. Sign-ups for the Amherst BOM are no longer available. You can learn more about our upcoming Block of the Month subscriptions here.
Hello again! I hope you all enjoyed making our four blocks last month. For this month, we only have three blocks to make, which is probably a good thing. I don’t know about you, but as much as I adore quilting, and sew almost every day, in the summertime, I also want to be outside enjoying the sunshine.
So it’s perfect timing that we have a lighter sewing month for July. Let’s talk about these blocks!
Block #3
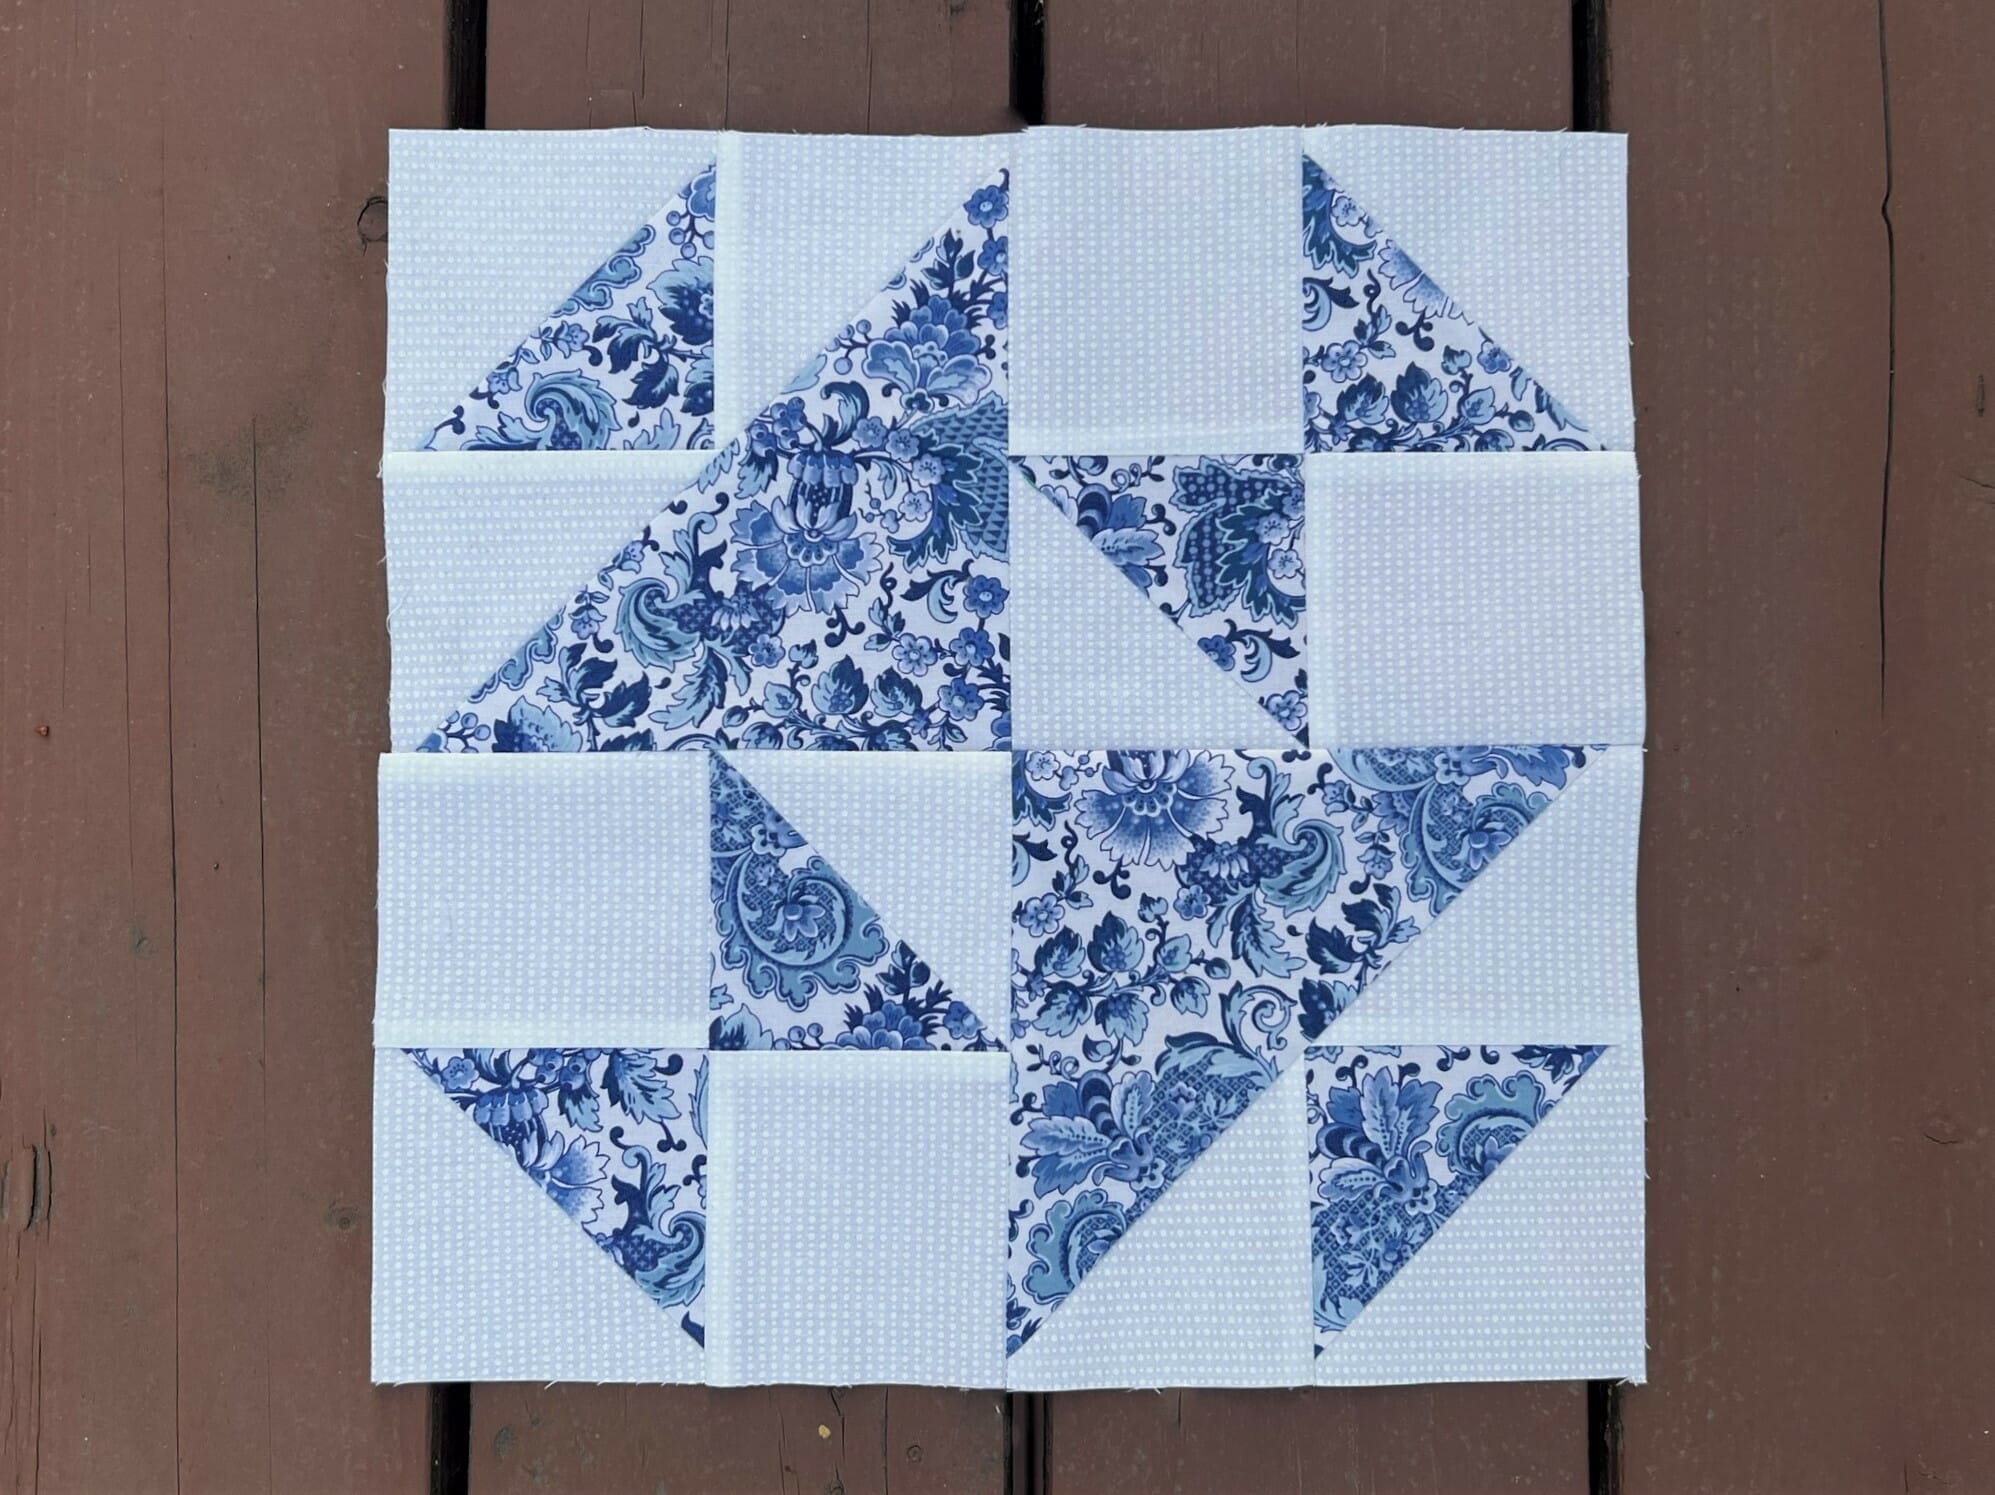
This block is all about the triangles – big and small. Since we will be sewing on the bias for this block, I again will recommend starching everything before you begin cutting.
To begin, we will make six half-square triangles. You can cut your B and D squares a bit bigger so you can trim them down if you prefer.
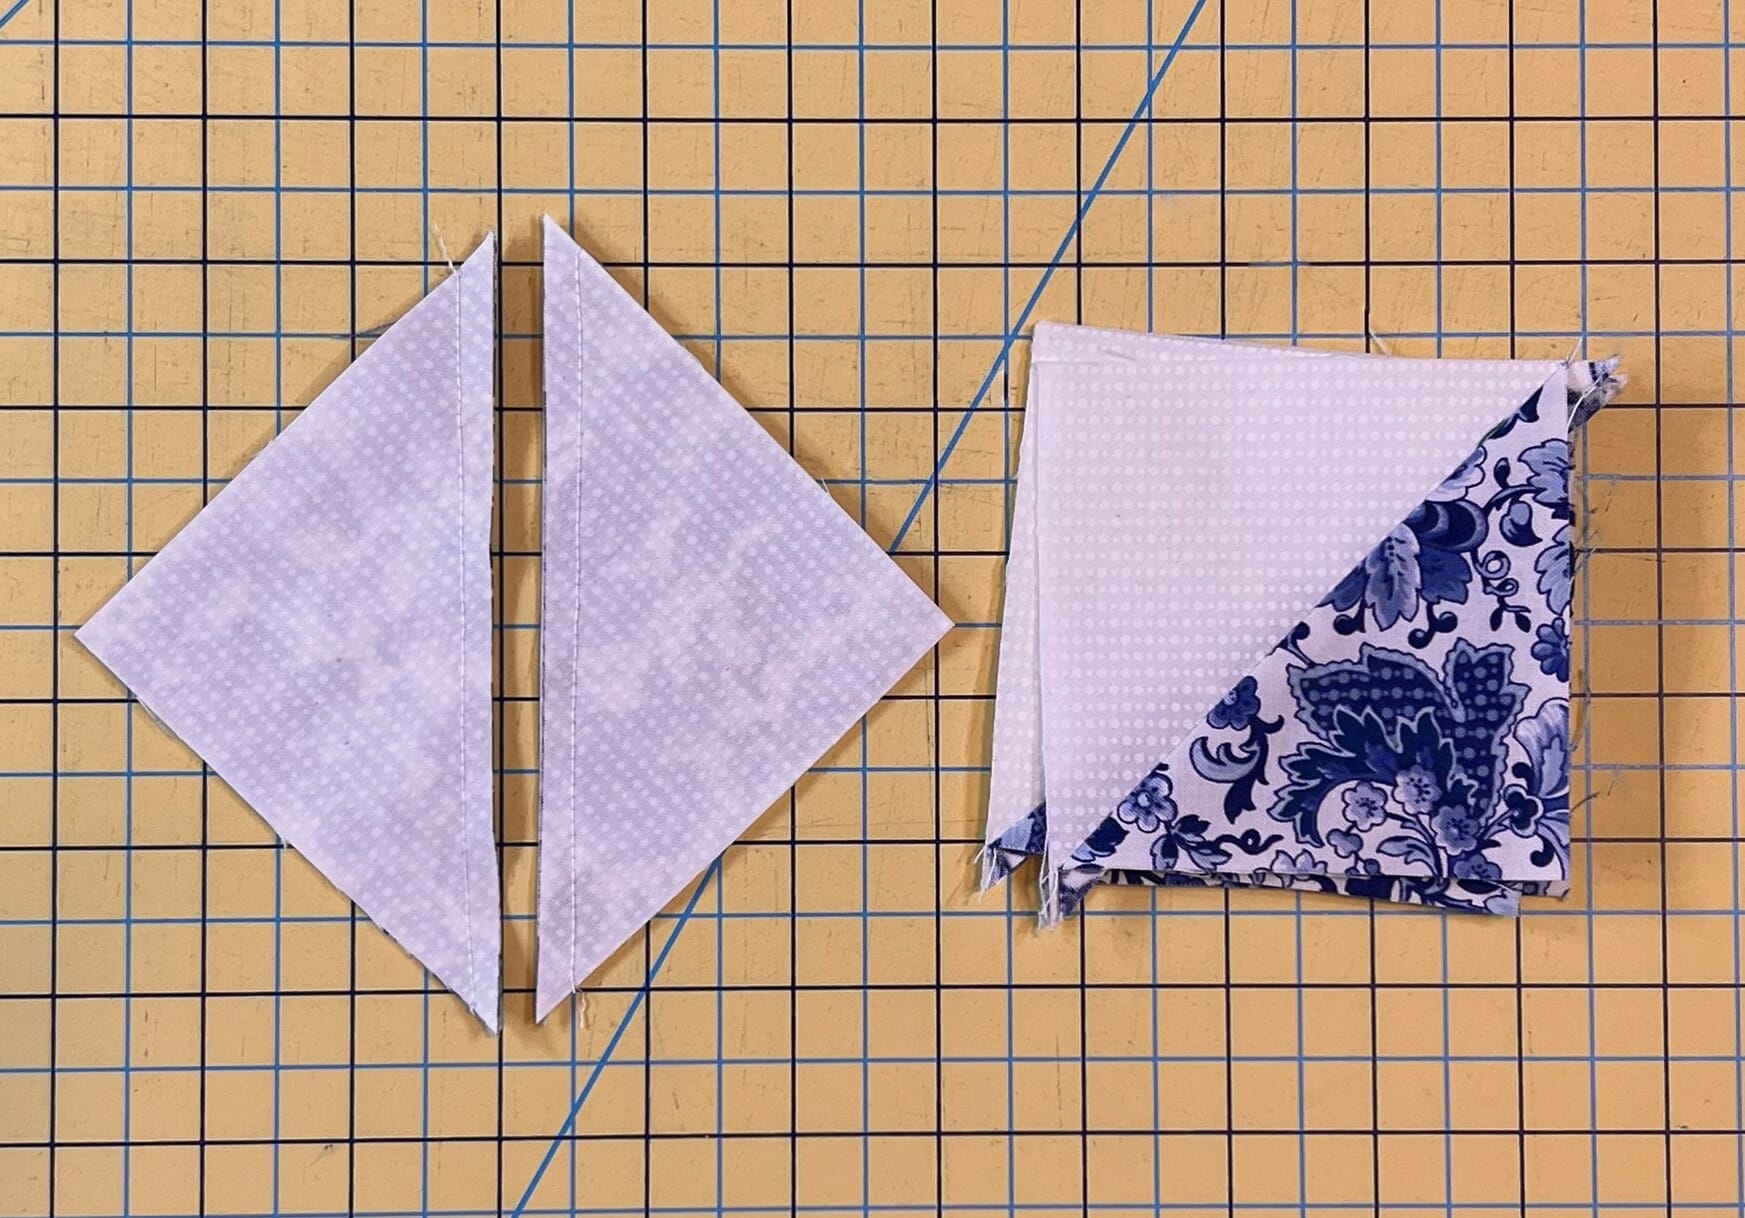
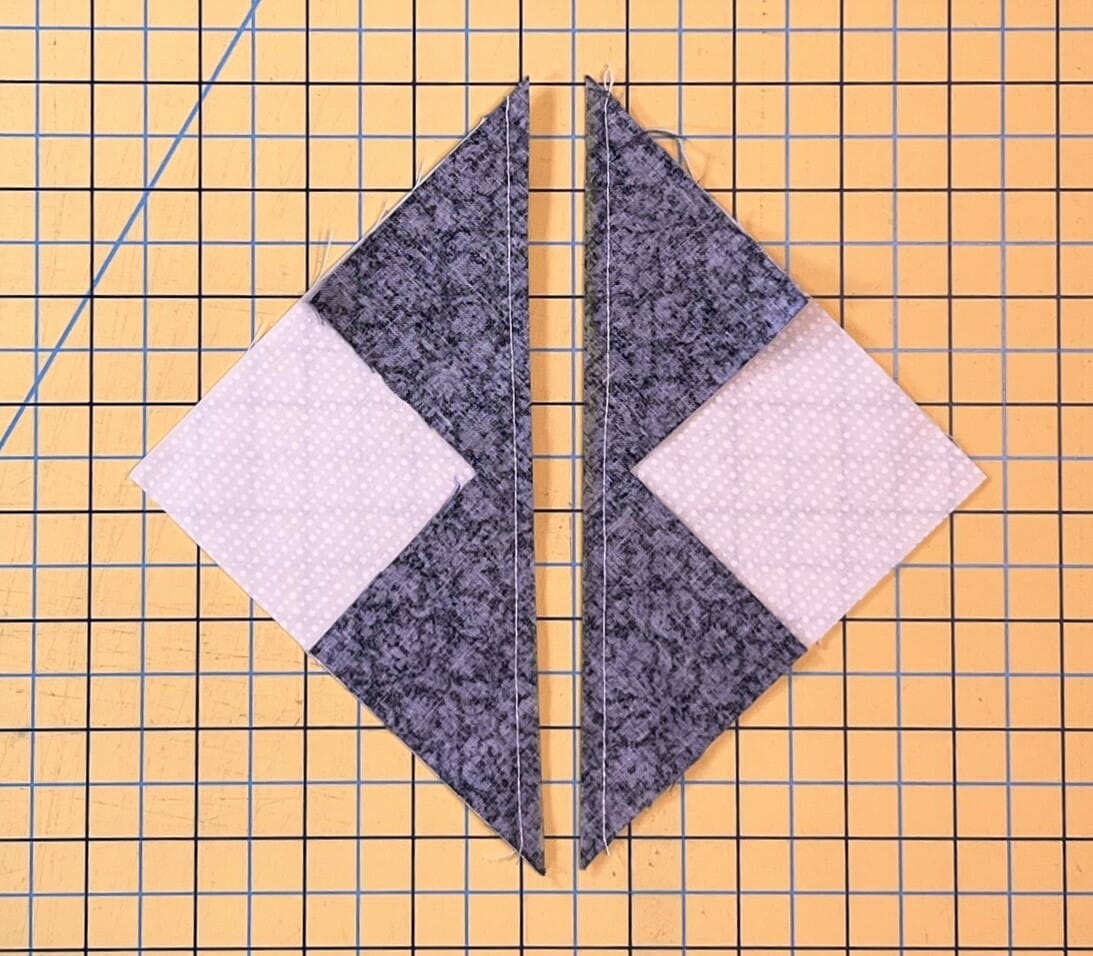
Once those are done, we need to take two of them, and sew a couple of C triangles to each one. Make sure you line things up so that the straight side of the C triangles line up with the edges of the B/D square.
You’ll have a little triangle tail hanging from the bottom, which you can trim after you sew each one on.
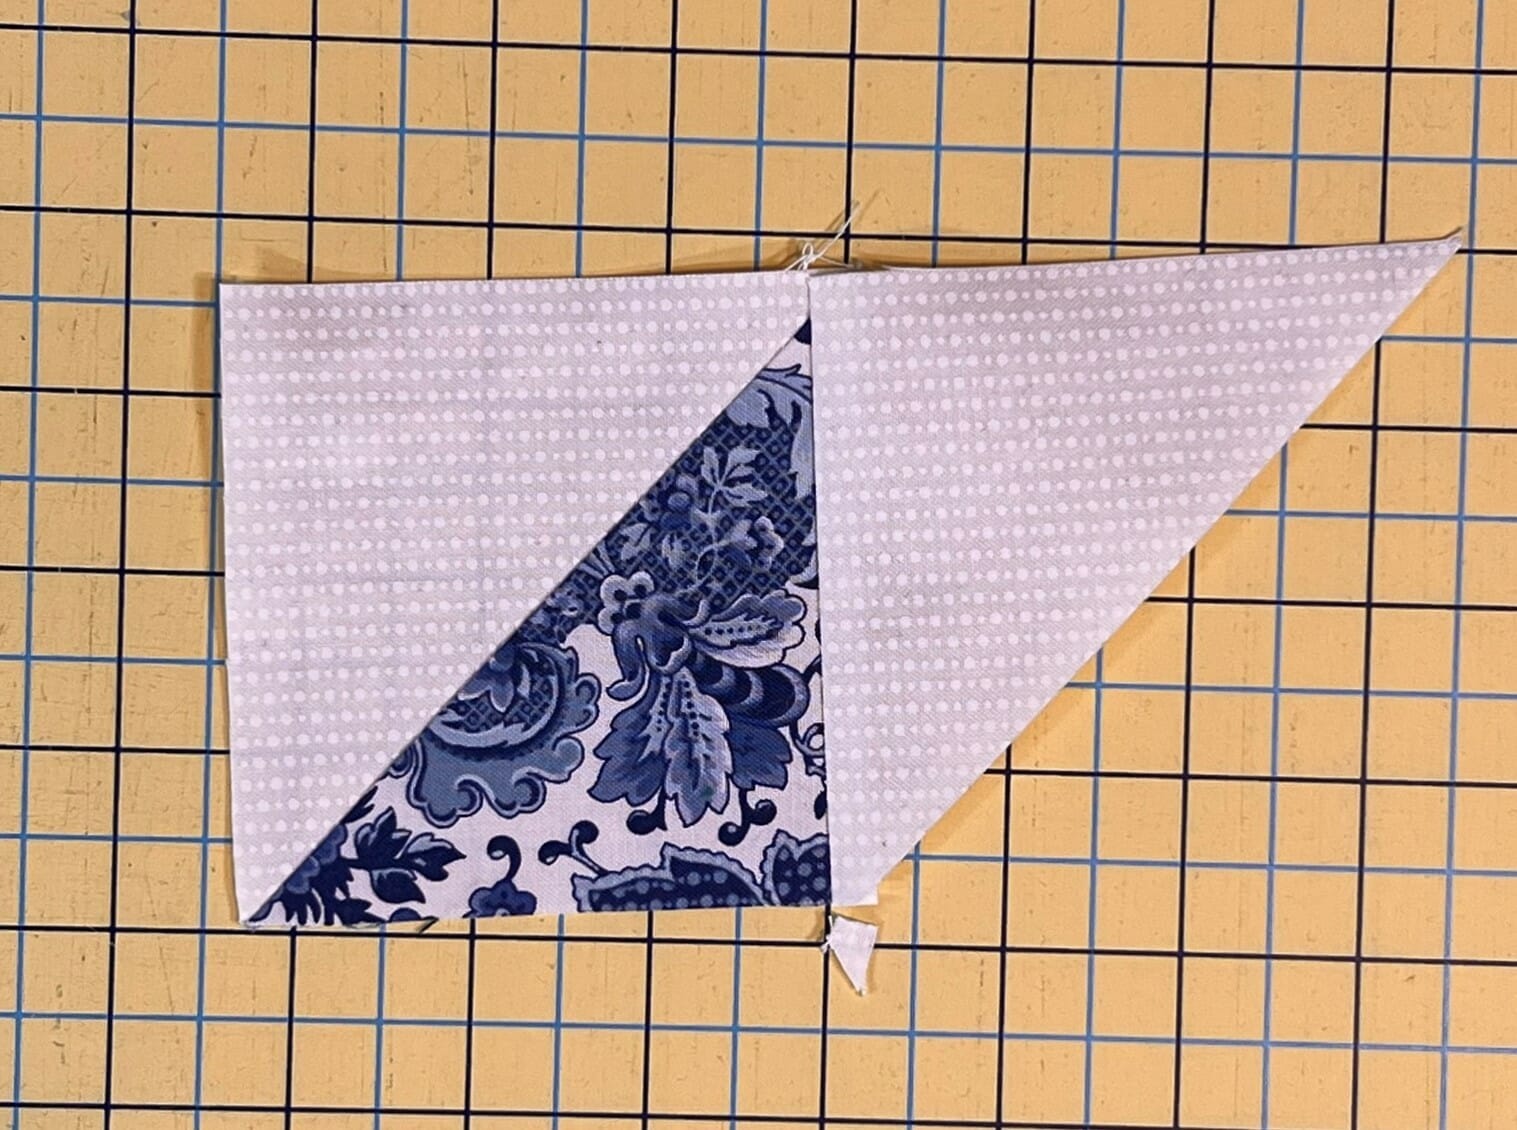
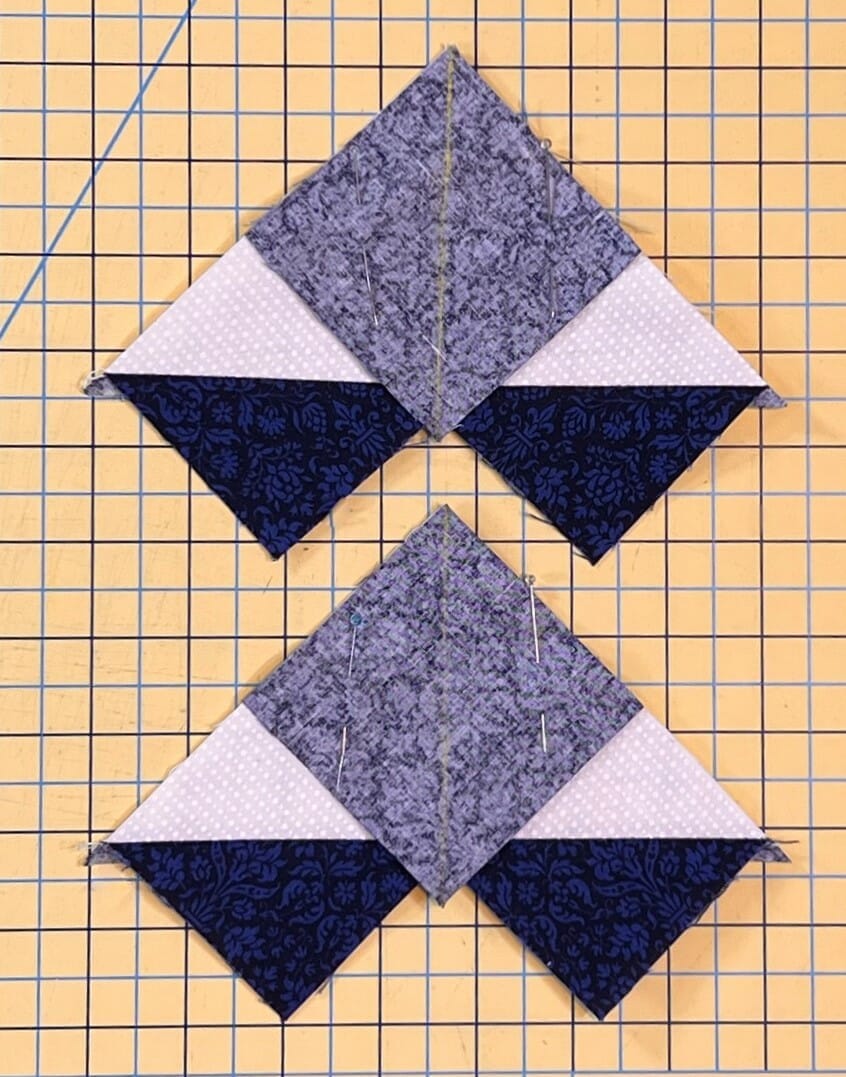
Below you can see on the left that I’ve trimmed off the tail and am ready to pin on the next triangle. On the right is how the second triangle is placed for pinning and sewing.

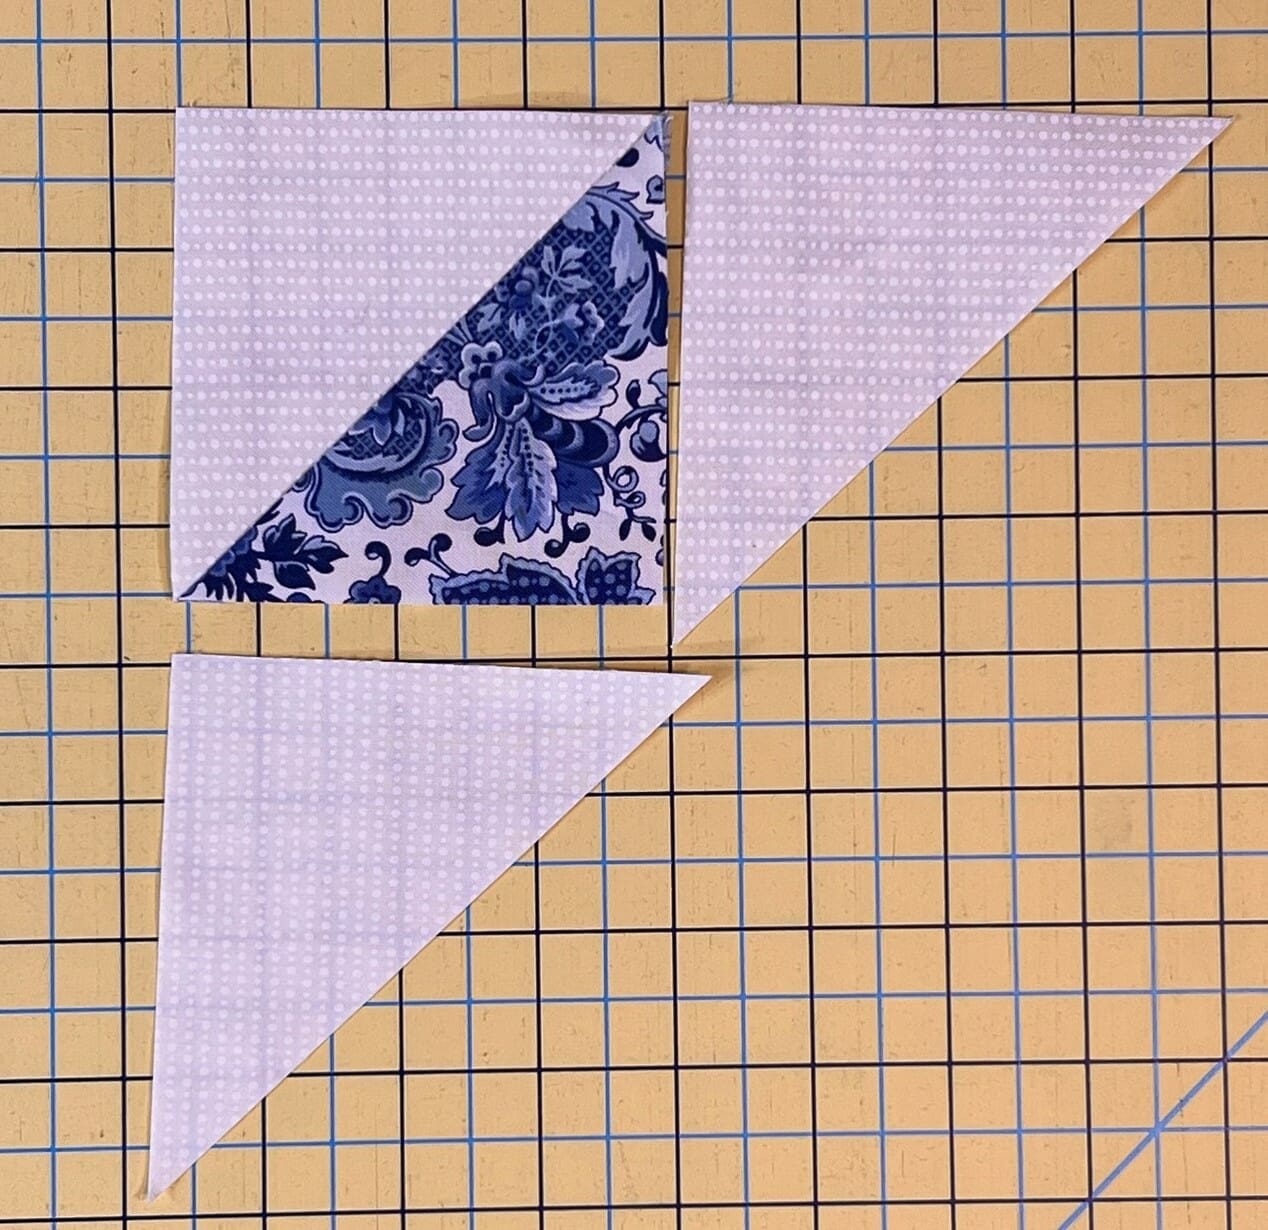
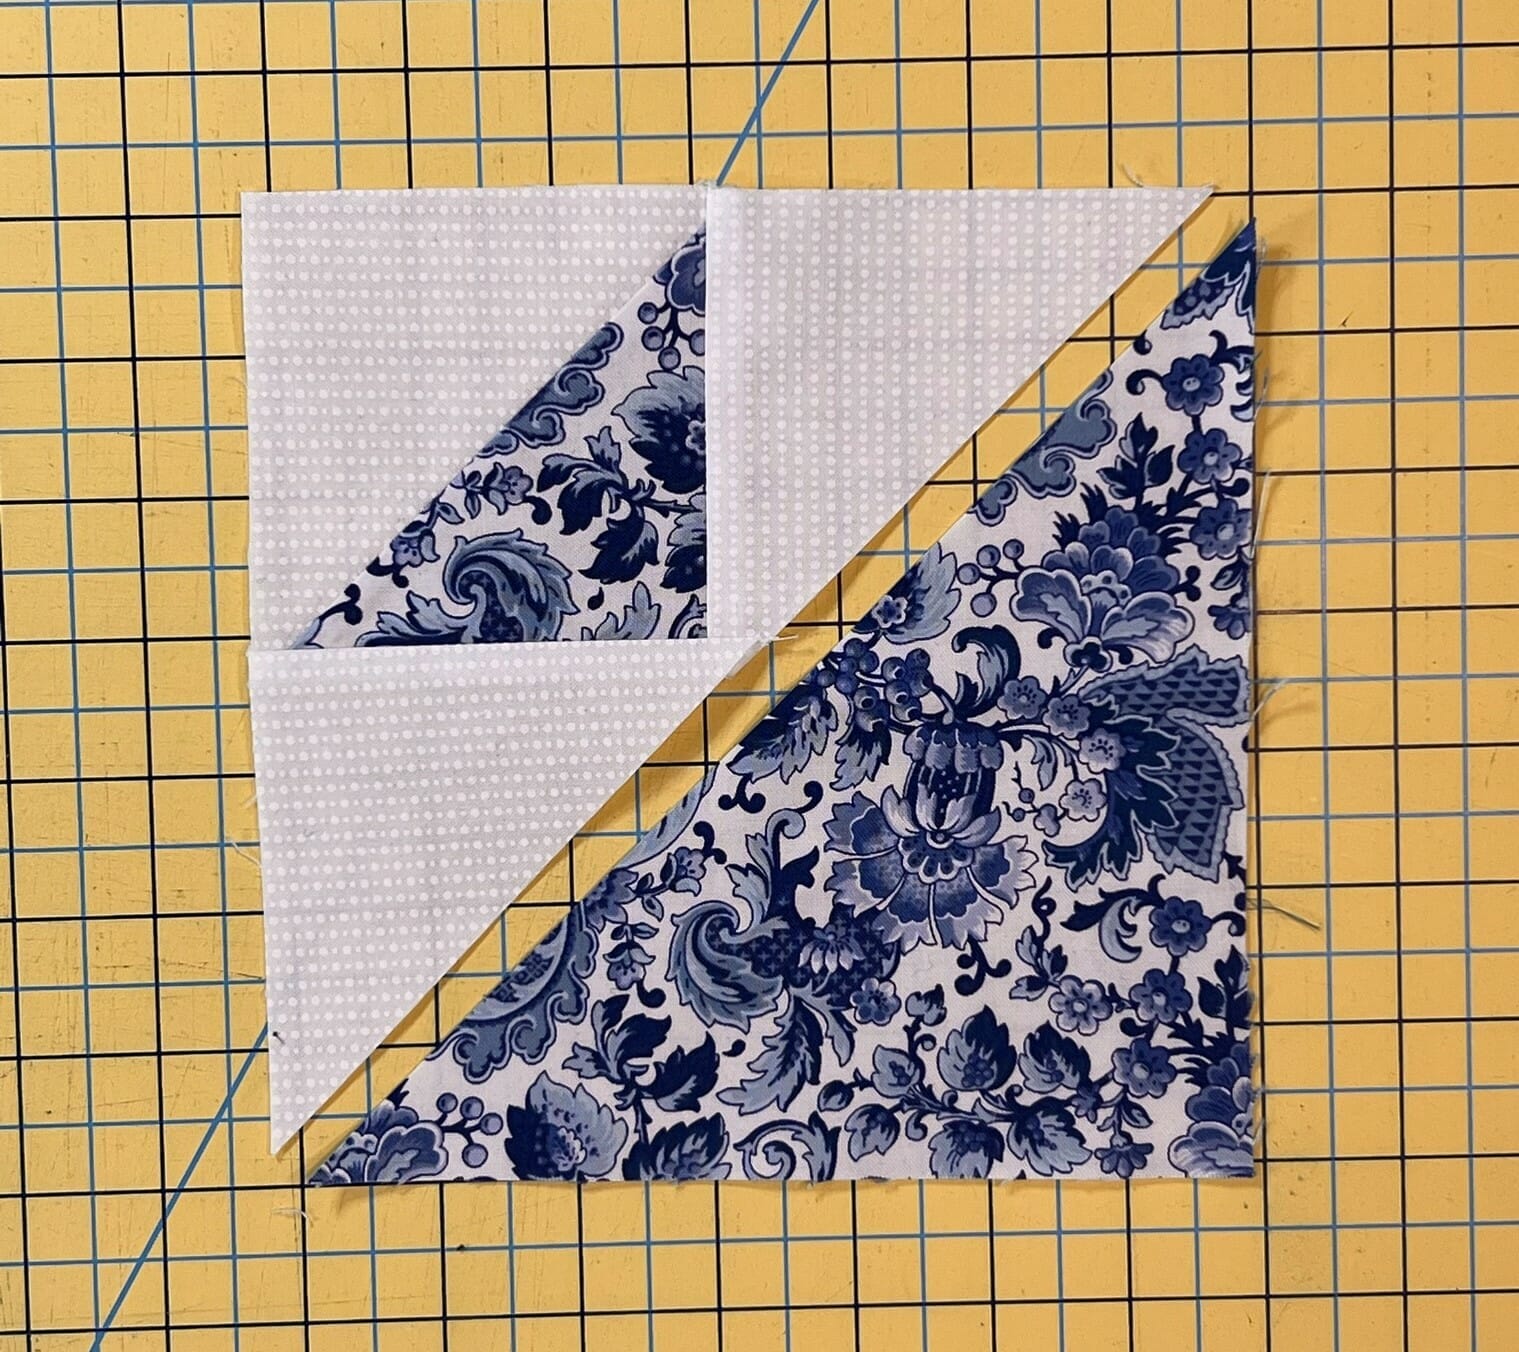
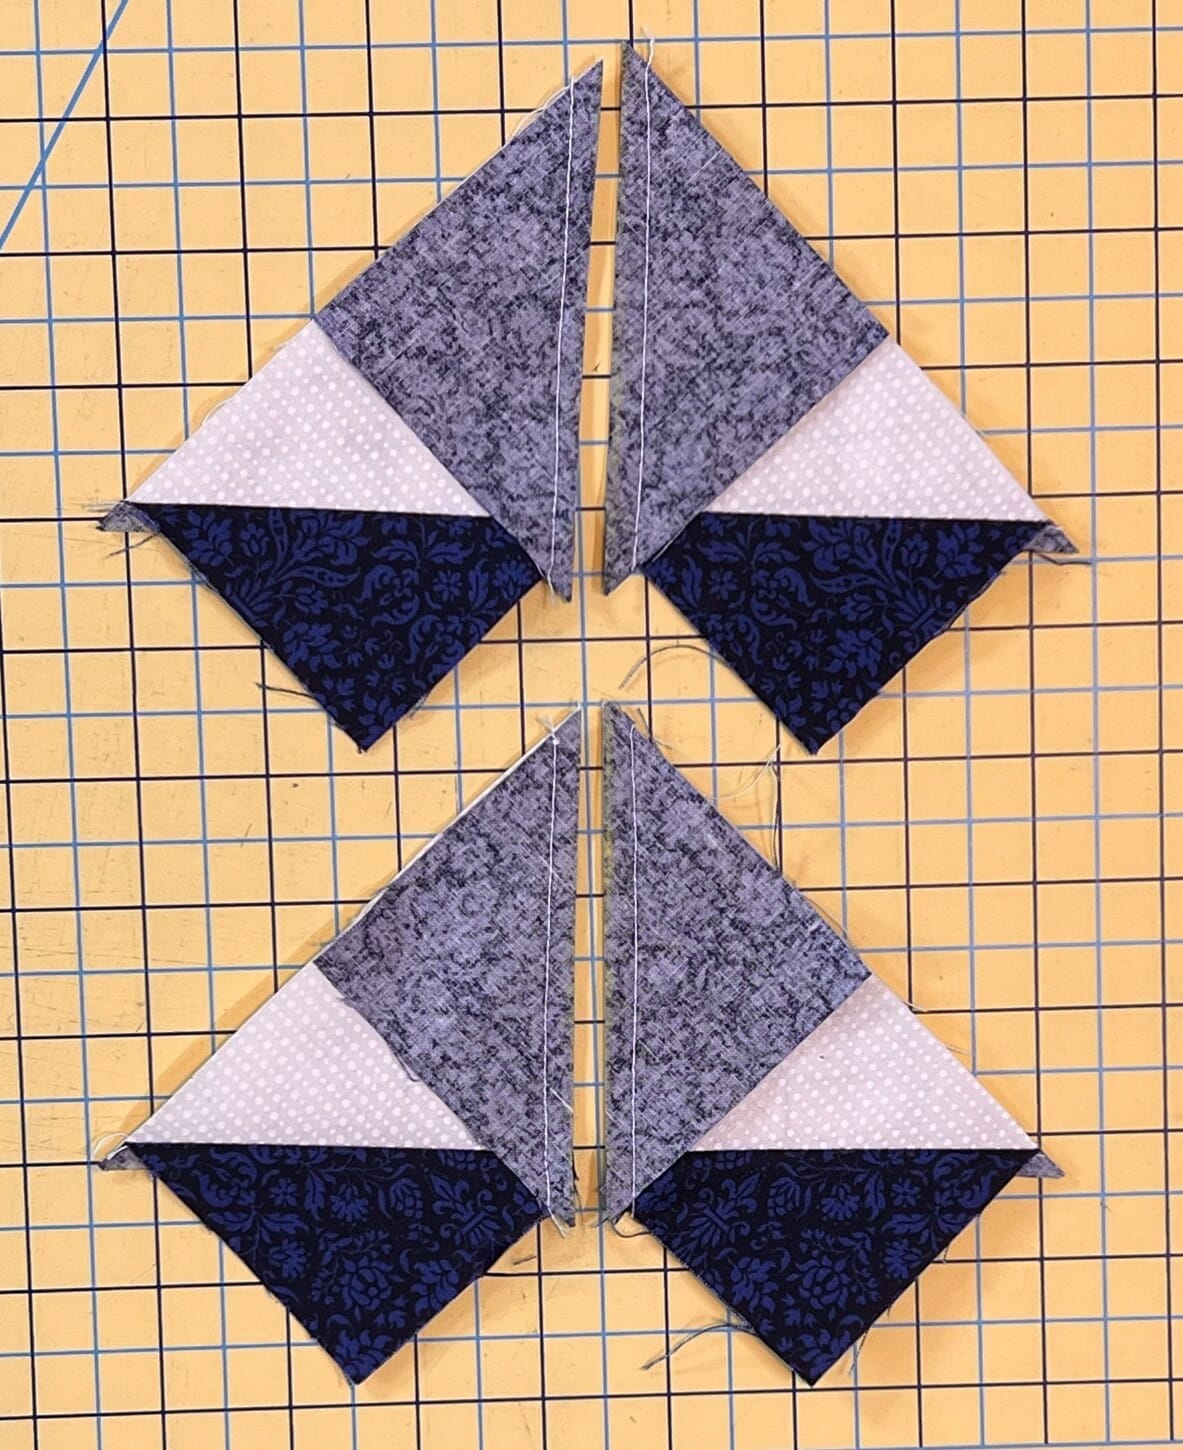
After those are completed, you will sew an E triangle on to each one, just like it says in the directions. These should measure 6-1/2” square. We’ll set these aside for now.
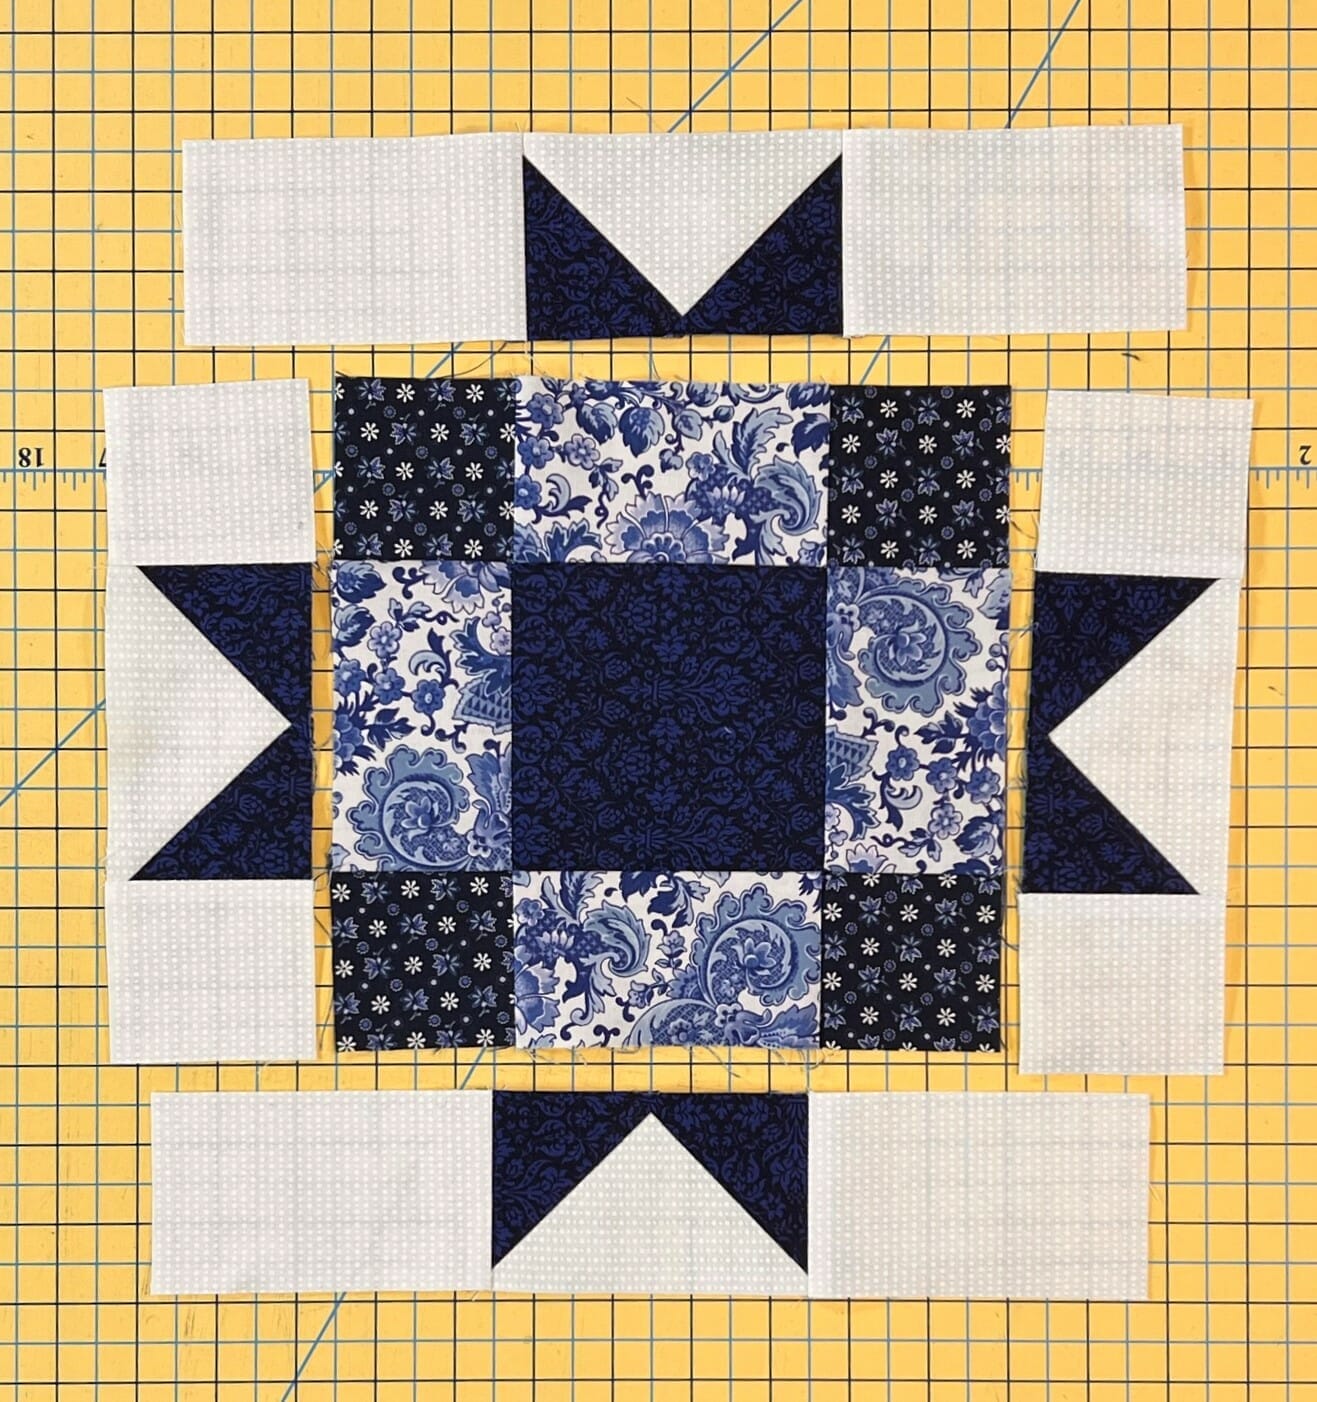
Next, we will take the remaining B/D units and sew them to an A square. Then we will use these to make a couple of 4-patch units, also measuring 6-1/2” square when done.

Now all we have to do is sew the 4-patch units and the triangle units together to complete the block. Make sure you pay close attention to the diagram in the pattern, so that you have all your triangles in the right spot.

Block #20
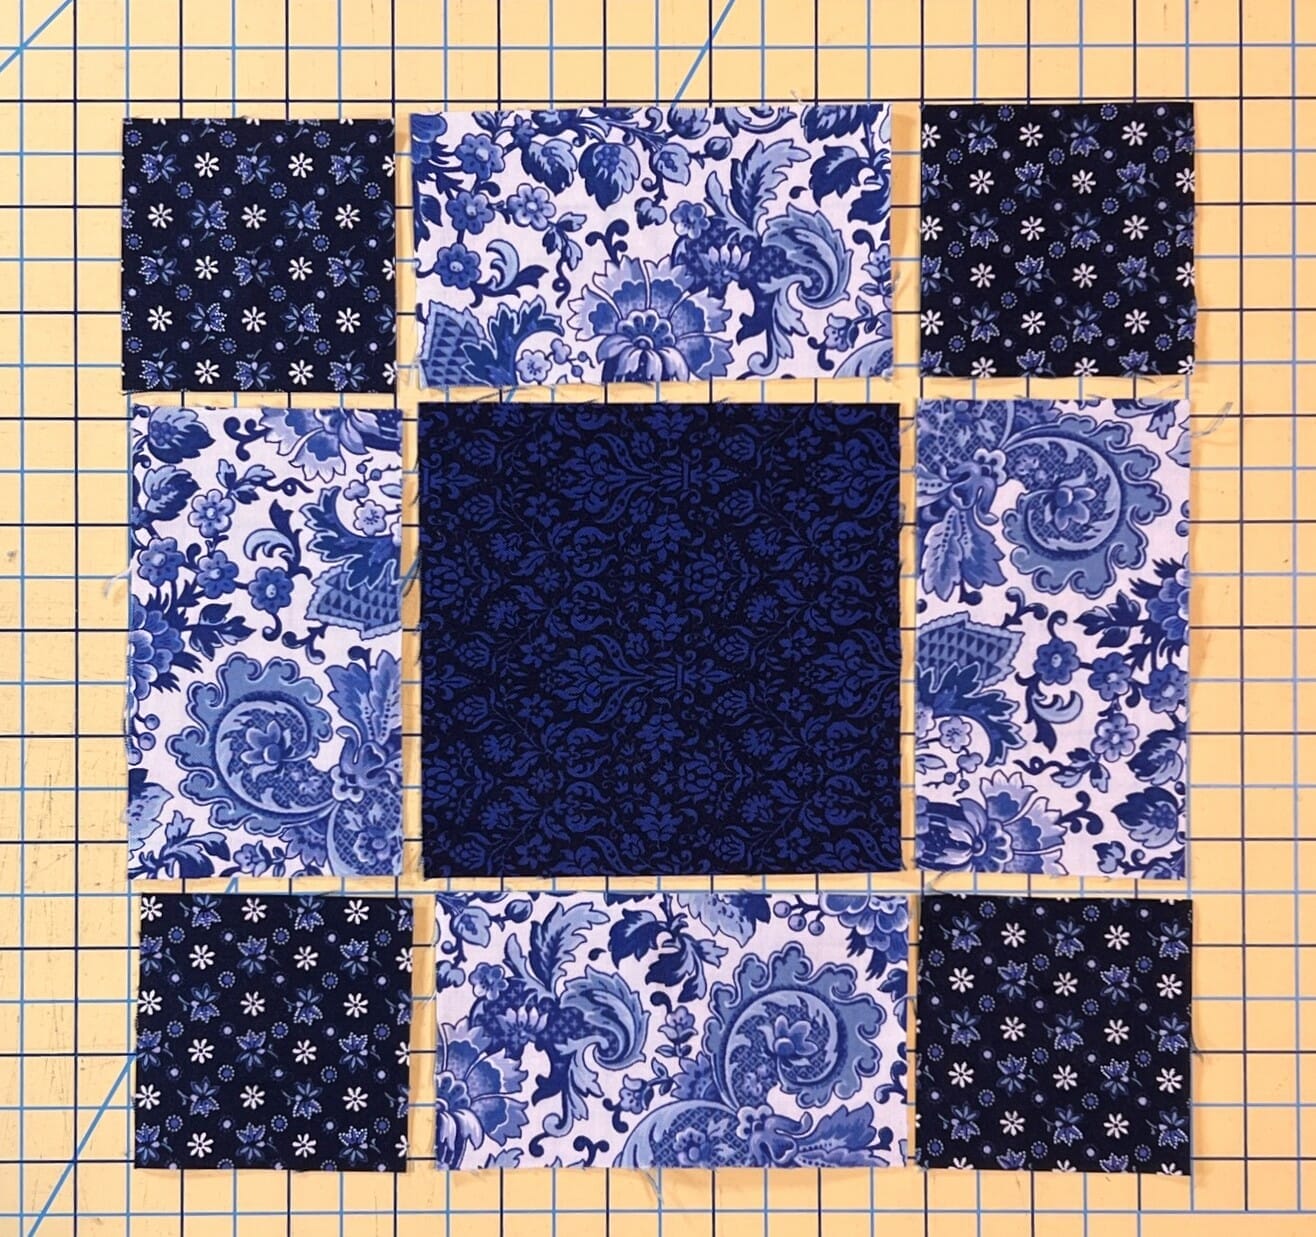
We begin this block by making a 9-patch unit for the center. Nothing too tricky here. Just make sure you follow the pressing arrows so that things will fit together later.
Then we will make four flying geese units using my favorite no-waste method. I also like to cut these pieces just a smidge bigger so there’s room for trimming to perfection once everything is sewn. Here’s a few photos of what this process actually looks like.

After sewing on each side of the marked line, I’ve cut on the line. Actually if you look closely, I didn’t do a perfect job, and the right side has a bigger seam allowance than the left. But it’s OK. No one will ever know…except everyone who reads this blog, haha!
Below you can see that I’ve pressed the triangles down, and have added another marked square to each one. Now all I have to do is repeat the same process as before.
Here they are after being sewn and cut on the line again. Now all I have to do is press and trim them to size.
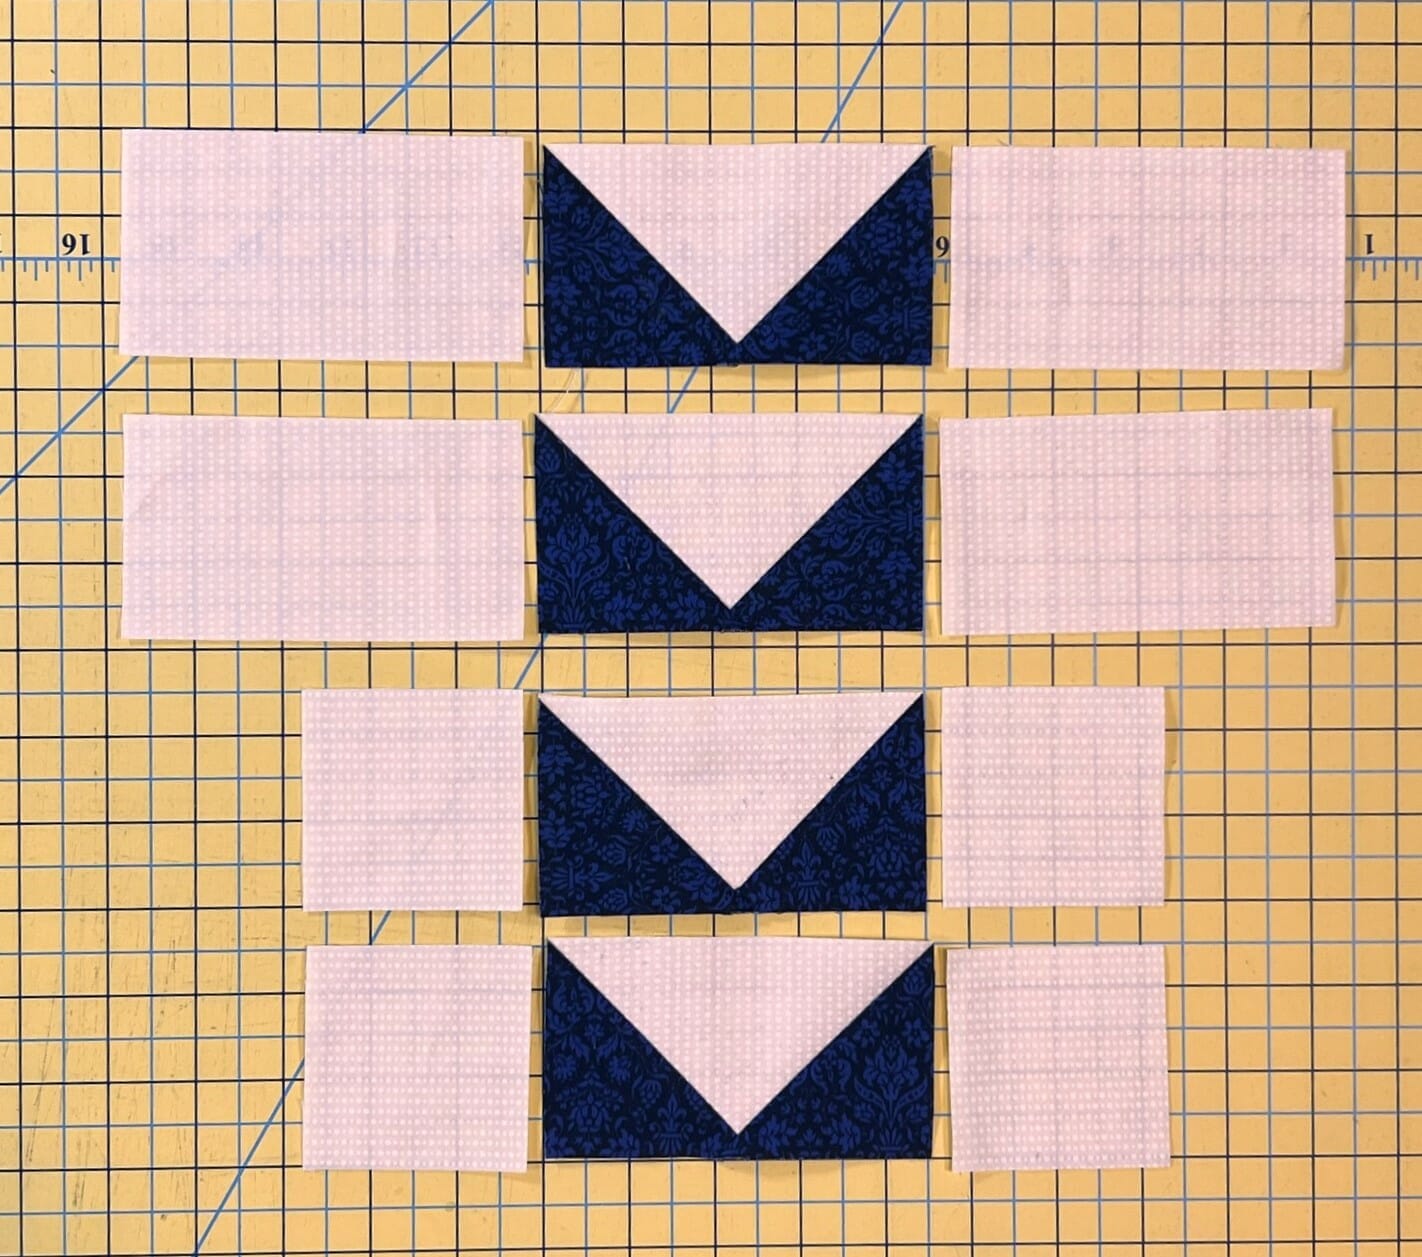
After making these, you’ll take two of them and sew an F square to each end. The remaining two will have a G rectangle sewn to the ends, just like you see here:
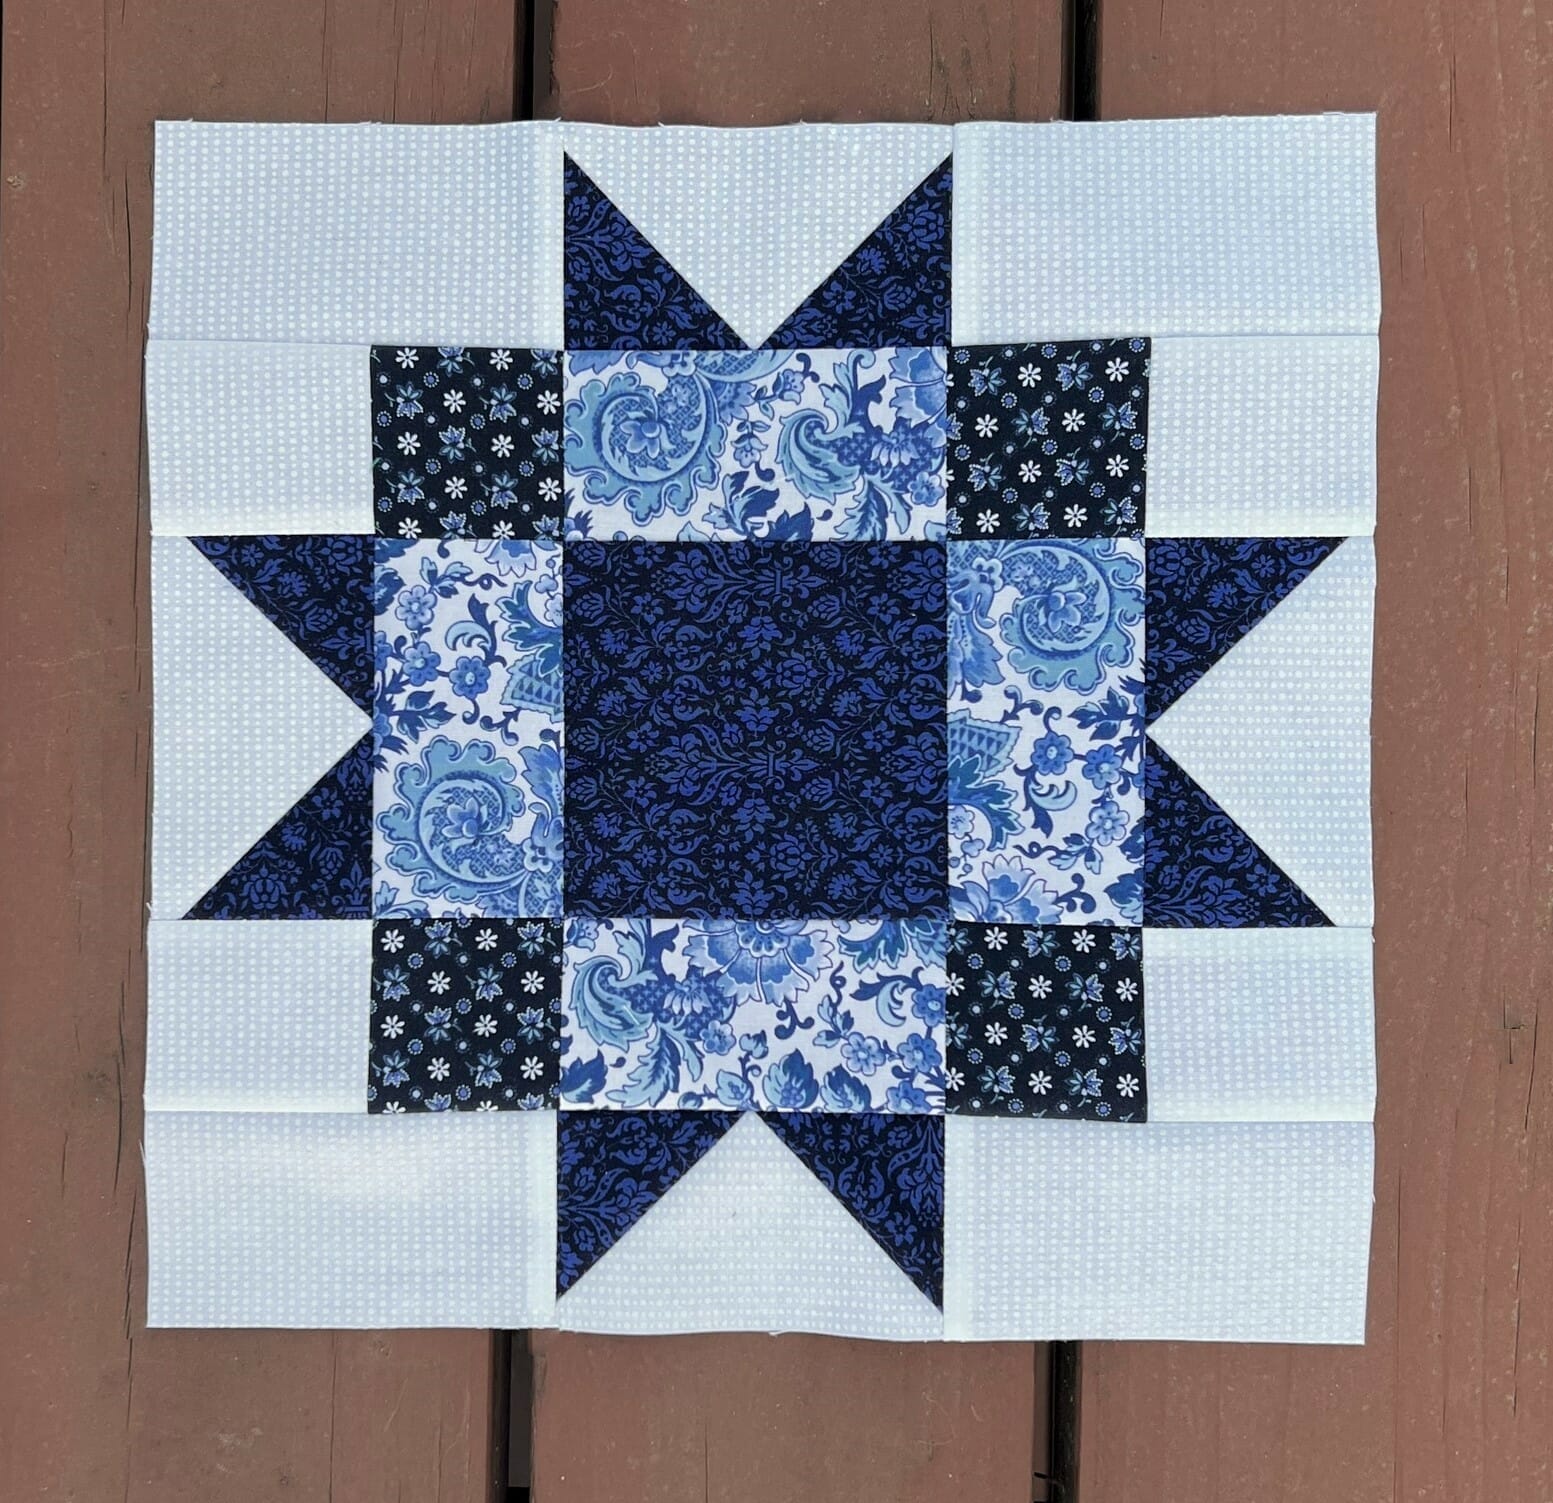
Once we’ve sewn those ends on, all we have to do is attach these units to the side, and the top and bottom of the center 9-patch unit, and the block is complete!
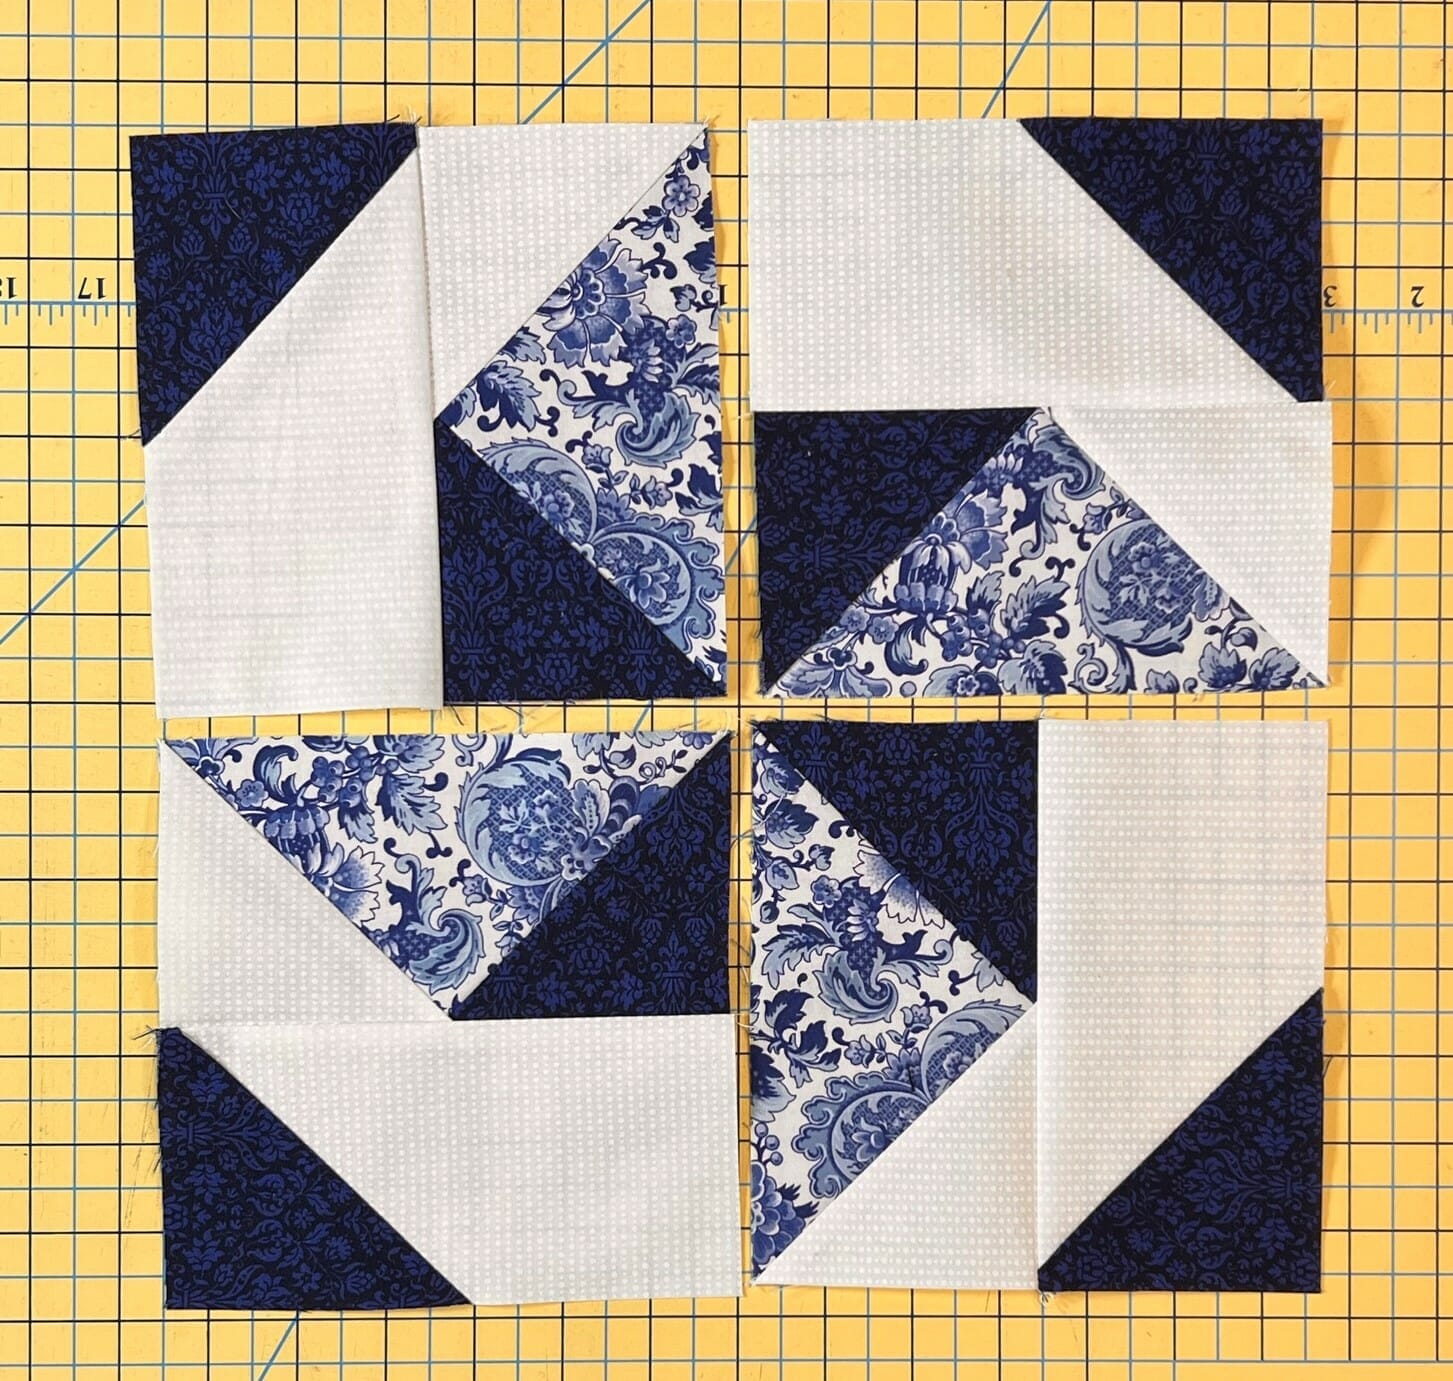
Block #21

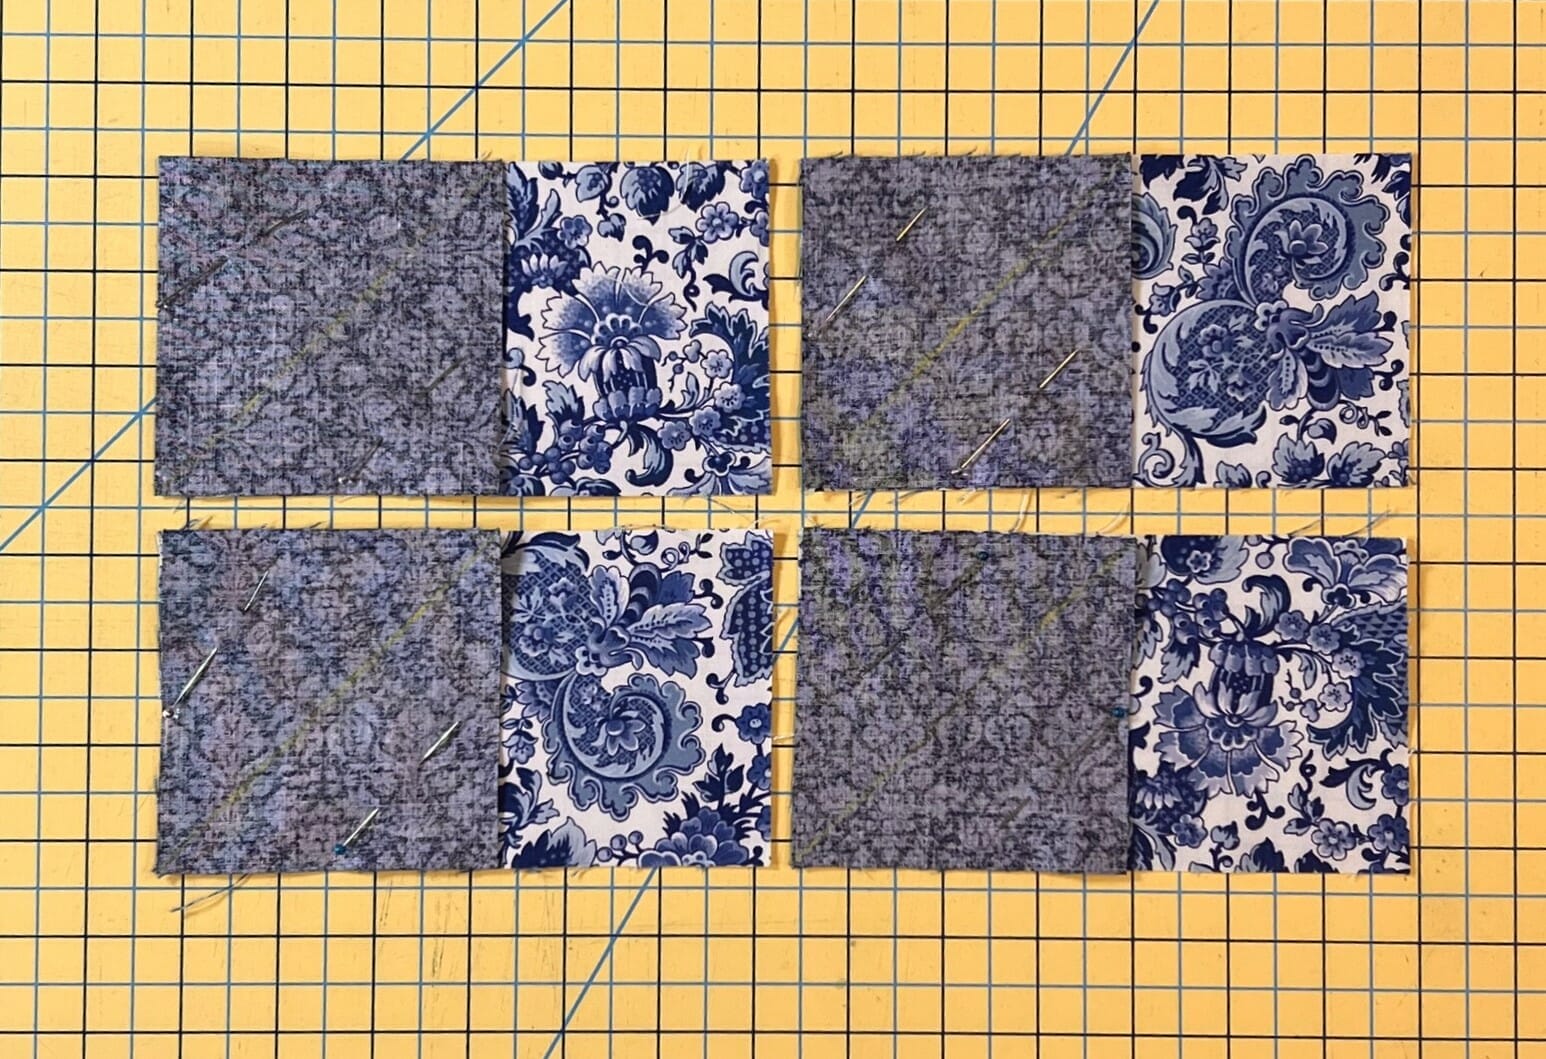
Our last block for this months is a fun pinwheel design, which starts by making four flying geese. Since we are using three different fabrics instead of two, we will use the traditional stitch and flip method to make these. Start by attaching an A square to the left end of each B rectangle, then stitch on the marked diagonal line, and trim, leaving a 1/4” seam allowance. I used a yellow chaco liner to mark these, since my usual white mechanical pencil wasn’t showing up. For some reason the camera didn’t pick up the markings real well, but I promise they are there.
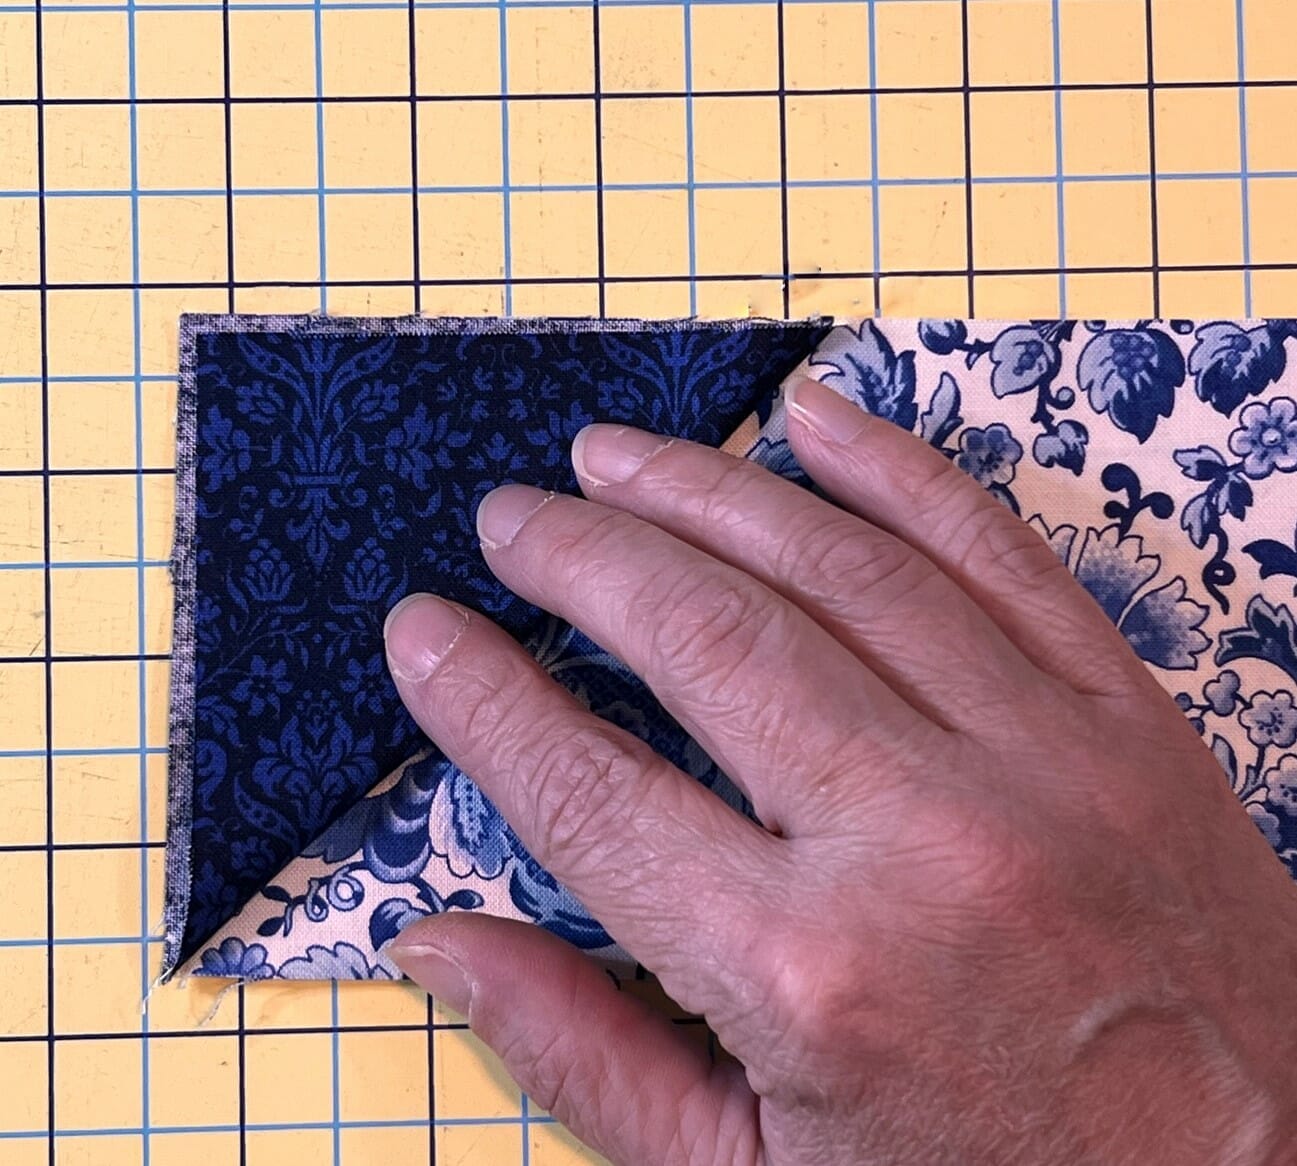
I always flip these stitched squares up after sewing on the line before I’ve trimmed things, just to make sure the corners will line up, like you see below.

If I’m a bit short, then I know I need to rip out my stitching and start again, otherwise my flying geese will be a bit wonky. The photo below shows what you DON’T want your corners to look like when you flip up that square. See how they don’t line up?
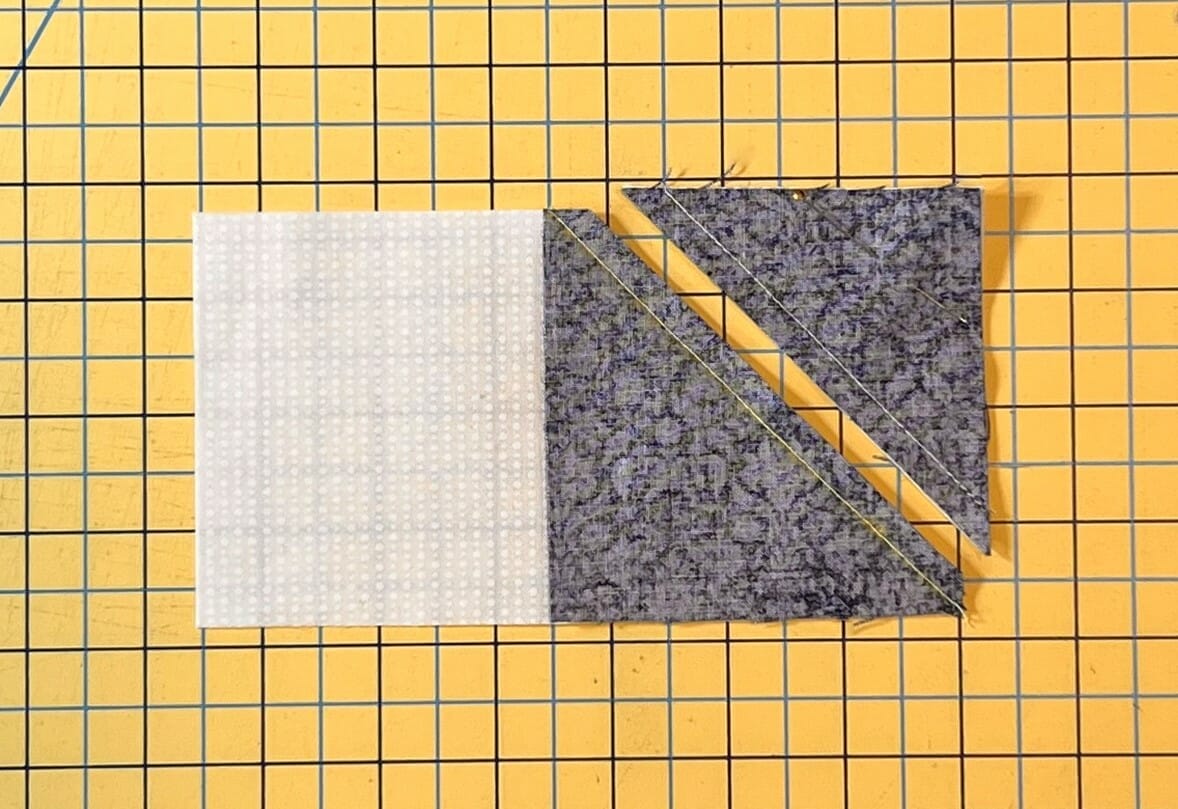
To prevent this, I usually sew just a hair outside of the line I’ve drawn. Here’s a close-up of my stitching on the white C squares to show what I mean.

Since these flying geese are so large, I also left my pin in the part that I trimmed off, and then stitched them again to make some extra half square triangles. I’m not sure what I’m going to do with them yet, but I’m sure I’ll think of something!
Once you’ve sewn and trimmed the A squares to the left side, it’s time to do the same with C squares on the right side to finish the flying geese units.

Next, we will make a 1/2 flying geese of sorts, using the stich and flip method as before, only this time we only need to sew an A square to the right side of each D rectangle.
Once those are finished you want to sew each of them to the top of a flying geese unit like so:

To finish the block, simply sew the four units together like the photo shows below. Make sure you rotate them as outlined in the instructions so that you end up with a pinwheel in the center.
Well friends, that’s all for this month! Next month we’ll be back with another four fabulous blocks to add to our lovely quilt.
Until then, Happy Quilting!

