Tutorials
 2.7.2017
Featured Tool: Embroidery Hoop by Clover, Item #82034, 82035
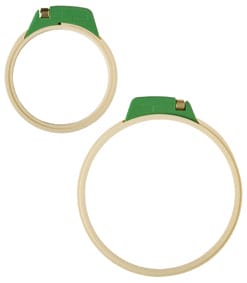
What is this tool typically used for?
Keeping your fabric taut while you embroider. There is both a small (4-3/4″) and large (7″) size.
Upon first glance, what were your initial thoughts?
It has a very sturdy appearance; it’s made of thick plastic with a bulky, metal screw.
How did you use it?
I loosened the metal screw to separate the two hoops, which left me with an inner and an outer hoop. Then, I placed my fabric evenly over the inner hoop. The outer hoop was placed around the inner hoop and I pulled my fabric to tighten it. I adjusted the screw to keep the hoops and fabric tight and in place. Once it was set up, I was able to embroider a design onto the fabric.
How long did it take you to learn how to use it?
It took no time at all to learn to use. It is used exactly like any other embroidery hoop except it is sturdier and more solid.
What did you like best?
I liked how easy it was to tighten the screw, it is a very large metal screw. And I liked how it kept my fabric very secure and in place.
What did you like the least?
I was hesitant to use a plastic hoop, because I thought the fabric would slip – but it did not! I liked everything about this embroidery hoop.
Why do you NEED a Clover Embroidery Hoop?
You need it because it takes out all the problematic tension issues I’ve experienced with inferior hoops. It also made transporting my embroidery work easy because I could throw it in my bag and not worry about the hoop falling apart. It kept my work in place and very secure.
Who would appreciate a Clover Embroidery Hoop most?
These are perfect for:
- Embroiderers
- Someone acquiring the basics