


 Tutorials
 10.23.2022
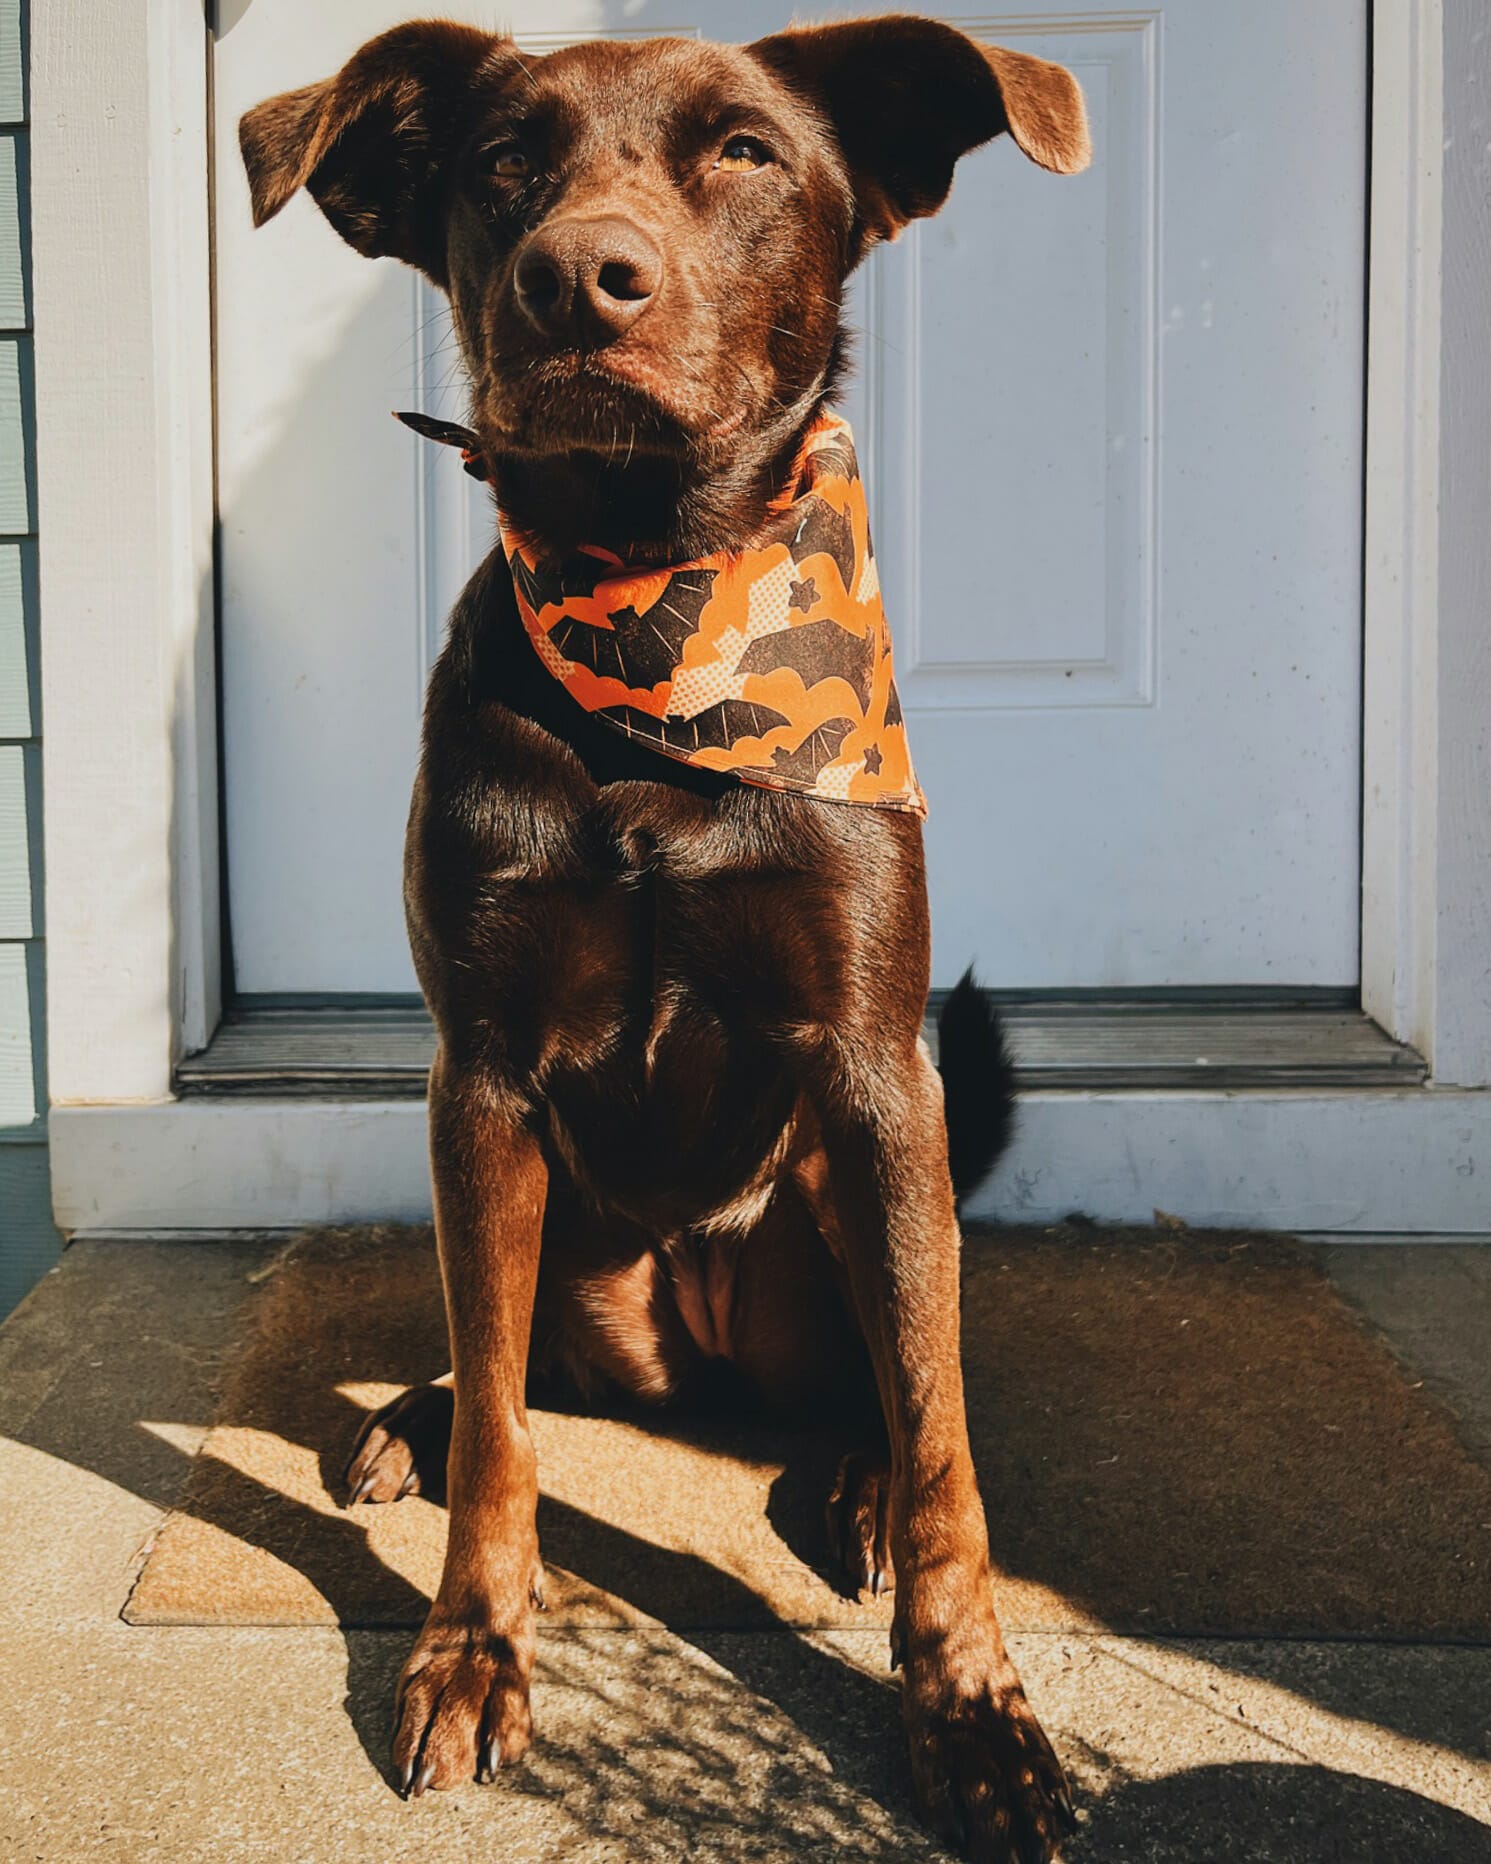
This pup is very excited to tell you all about the easiest 20-minute tutorial ever!
Made from one piece of fabric and the shortest supply list you’ll ever see, creating a bandana for your dog is so simple that it’ll feel like magic. Seen here on scream queen Piper, a medium sized rescue with a penchant for swimming and soccer balls, these pup accessories make any moment festive and extra adorable. (Also, if you’ve ever made a plain cloth napkin, this is the exact same sewing method!)
Grab your rotary cutter, load up some thread and let’s get sewing!

To create a doggie bandana, you’ll only need these supplies:
- Fabric of approximate size (more sizing details in a moment)
- Thread
- Rotary cutter, ruler, sewing machine
And that’s it: I told you, it’s the shortest supply list I’ve ever written out!

Once you’ve grabbed your supplies, the first thing to do is to figure out the correct size for your dog. Here’s how I sized mine:
- Measure you dog’s neck circumference. I measured Piper’s at 15″.
- Since this is just a giant square folded in half, the measurement you need to pay attention to is the diagonal of your square – this is what will wrap around the dog’s neck and tie in the back. You’ll want to pad that neck circumference with a few inches on each side for tying:
- For smaller dogs, I added 3-4″ on each side (for example, a neck measuring 12″ came out to 18″).
- For medium and large sized dogs, like Piper, I added 5-6″ on each side (for example, Piper’s neck measured at 15″, so the final measurement comes out to 27″).
- Use your discretion here – if you want more tying length, add some extra inches! If you’ve got a pretty small pup, like a chihuahua, you may only need to add an extra 2-3″ total.
- Equipped with the diagonal measurement of your square, there are lots of ways to figure out the length of the sides. My favorite secret quilting tools are online geometry calculators, because all you do is input a few numbers and you’ve got your block size! Omni Calculator is my favorite and I love using the “Diagonal of a Square” calculator: I put in Piper’s final measurement at 27″ and the size come out to 19.09″. I’ll round that to 19″ to keep things easier on my brain!
- Pad that number with 1/2″ to cover your seam allowance and voila! You’ve got the final size of your square.
[If you hate this method, which is completely valid, I have a non-computerized way! Fold your fabric in half, measure 27″ along the fold and mark. Take a ruler with a 45 degree diagonal line like this Omnigrip Neon Ruler and use that diagonal line along the fold. Now you can either mark your edges or just start cutting, no side measurement needed!]
Now that you’ve got the size of your square, cut out your fabric. For Piper, I cut a 19.5″ x 19.5″ square.
Next, we’re going to fold over our seam and sew it down. Since this is a dog bandana, the seam doesn’t have to be perfect: if your dog is anything like mine, this bandana will be dirty in less than 20 minutes! I highly recommend a very simple, single fold hem with mitered corners. It sounds fancy – and looks nice! – but it’s easy as pie.
Here’s a very straightforward way of creating single fold hems with mitered corners:
- Fold over 1/4″ hem on one side and iron down.
- Fold over 1/4″ hem on a neighboring side and iron down.
- Unfold both hems.
- In the intersecting corner, fold over that corner. The spot where the two seams intersect should be right on the fold line. Iron down.
- Re-fold over one hem and iron it down.
- Re-fold the other hem and iron it down. Boom, you have a mitered corner!
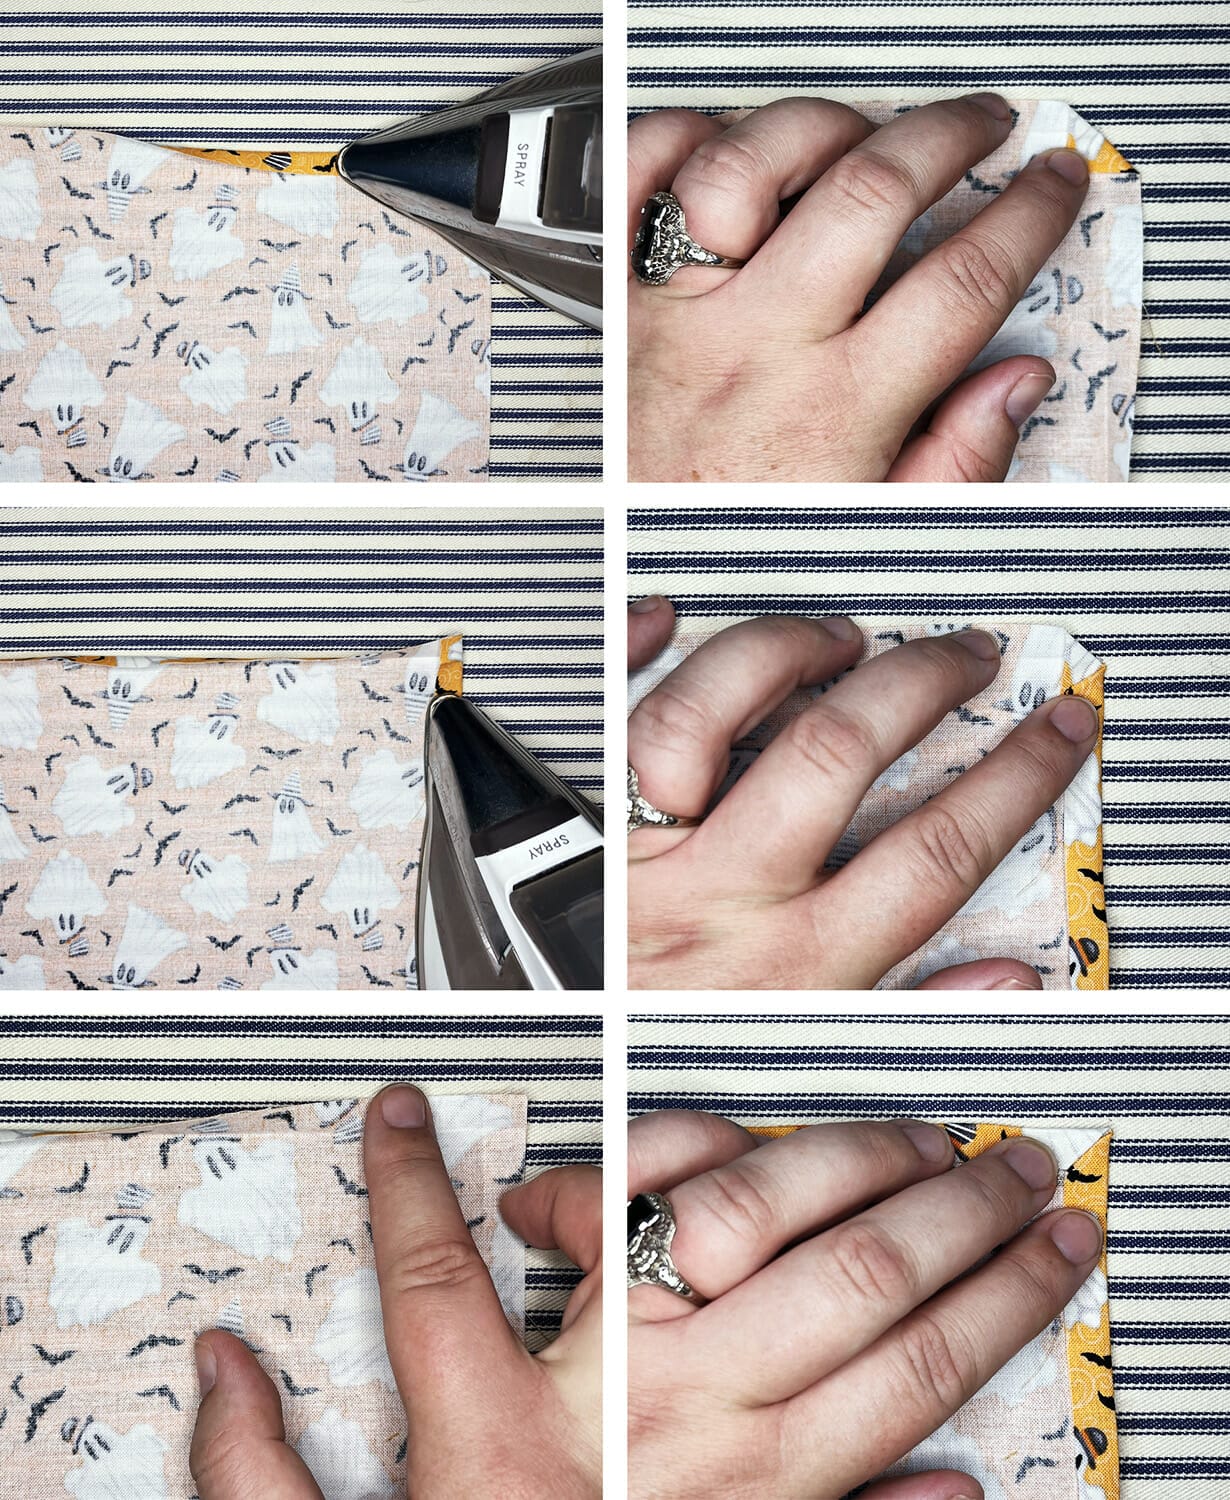
This is a wildly simple way of creating a crisp corner, so sometimes you have to finagle that corner into place. Again, don’t worry too much if it’s not perfect!
The last thing to do is sew your hem down. Sew along the raw edges of your hem and drop your needle to turn at each corner.

Fold your bandana in half along the diagonal, iron down the fold and tie it on your pup! Here’s my dog Roxie with her bandana (I made Roxie and Piper a matching pair 😊):
You can use this tutorial with any type of fabric, they make fabulous gifts and they’re so easy to customize! If you’re making one as a gift, here’s a very general neck size guide for dogs:
- Extra-Small Dogs: up to 20lbs, neck size typically 8″-11″
- Small Dogs: 20-30lbs, neck size typically 10″-15″
- Medium Dogs: 30-50lbs, neck size typically 14″-20″
- Large Dogs: 50-90lbs, neck size typically 18″-26″
- Extra-Large Dogs: 90lbs and up, neck size typically 20″-28″
These are broad measurements, so if you have the option to measure the dog’s neck, I highly recommend it. If you’re unsure, sizing up is always helpful: longer ties are always better than shorter ones!
Happy sewing and don’t forget to tag us on Facebook and Instagram with photos of your creations! 🐶

