Tutorials
 6.24.2021
A quick sewing tutorial for a quilted sleeve for your laptop, with adjustable sizing calculations for a simple tablet, laptop, or digital device.

I’m a sucker for any quick design that uses up my scraps instead of requiring yardage.
Recently, I stumbled upon precisely the perfect project – a tablet or laptop sleeve – with a simple way to adapt its size to fit an array of devices. Constructing the outer pieces from quilted blocks offered extra cushion when it inevitably jumbles against whatever else I have crammed into a tote bag.
By patchwork piecing blocks and quilting with scrap batting, this project became a fun way to spend an afternoon while also using up some leftover bits from other projects.
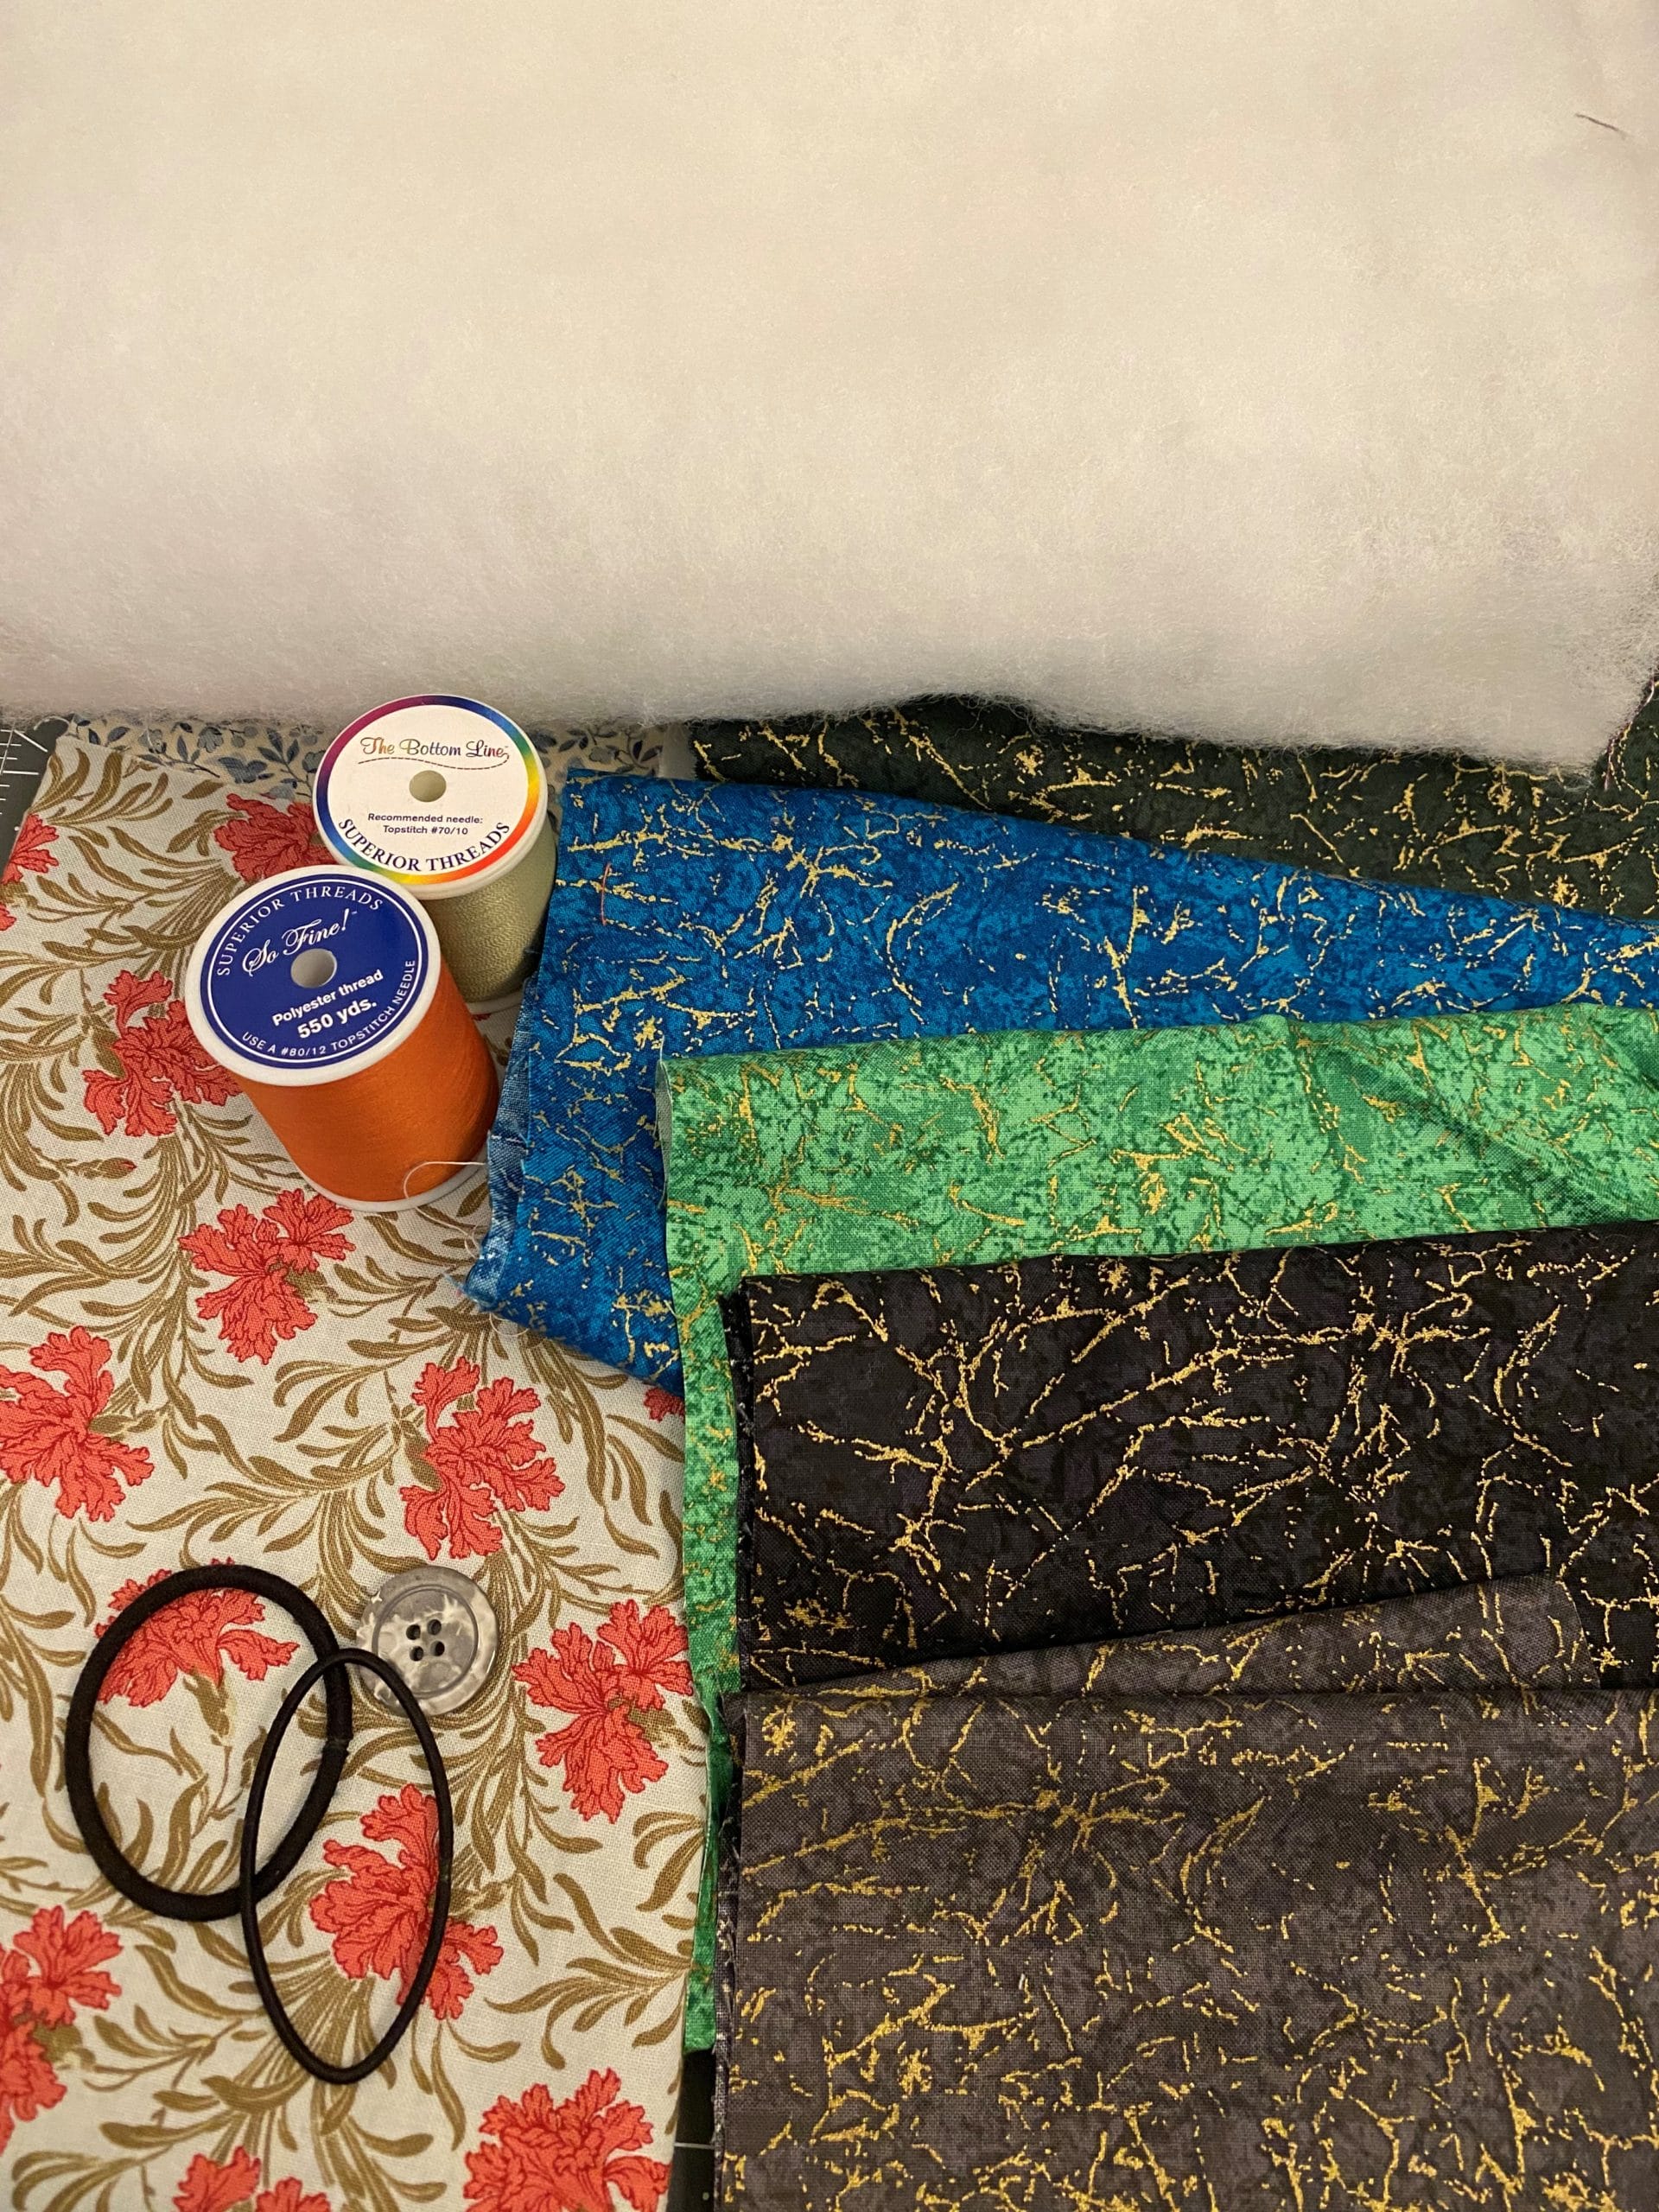
For this project I used:
Scrap fabric in coordinating colors (I used leftover Quartz Metallic Tonals)
Spare fabric I’m not particularly fond of (it won’t be seen)
Batting off-cuts pieced together (see below)
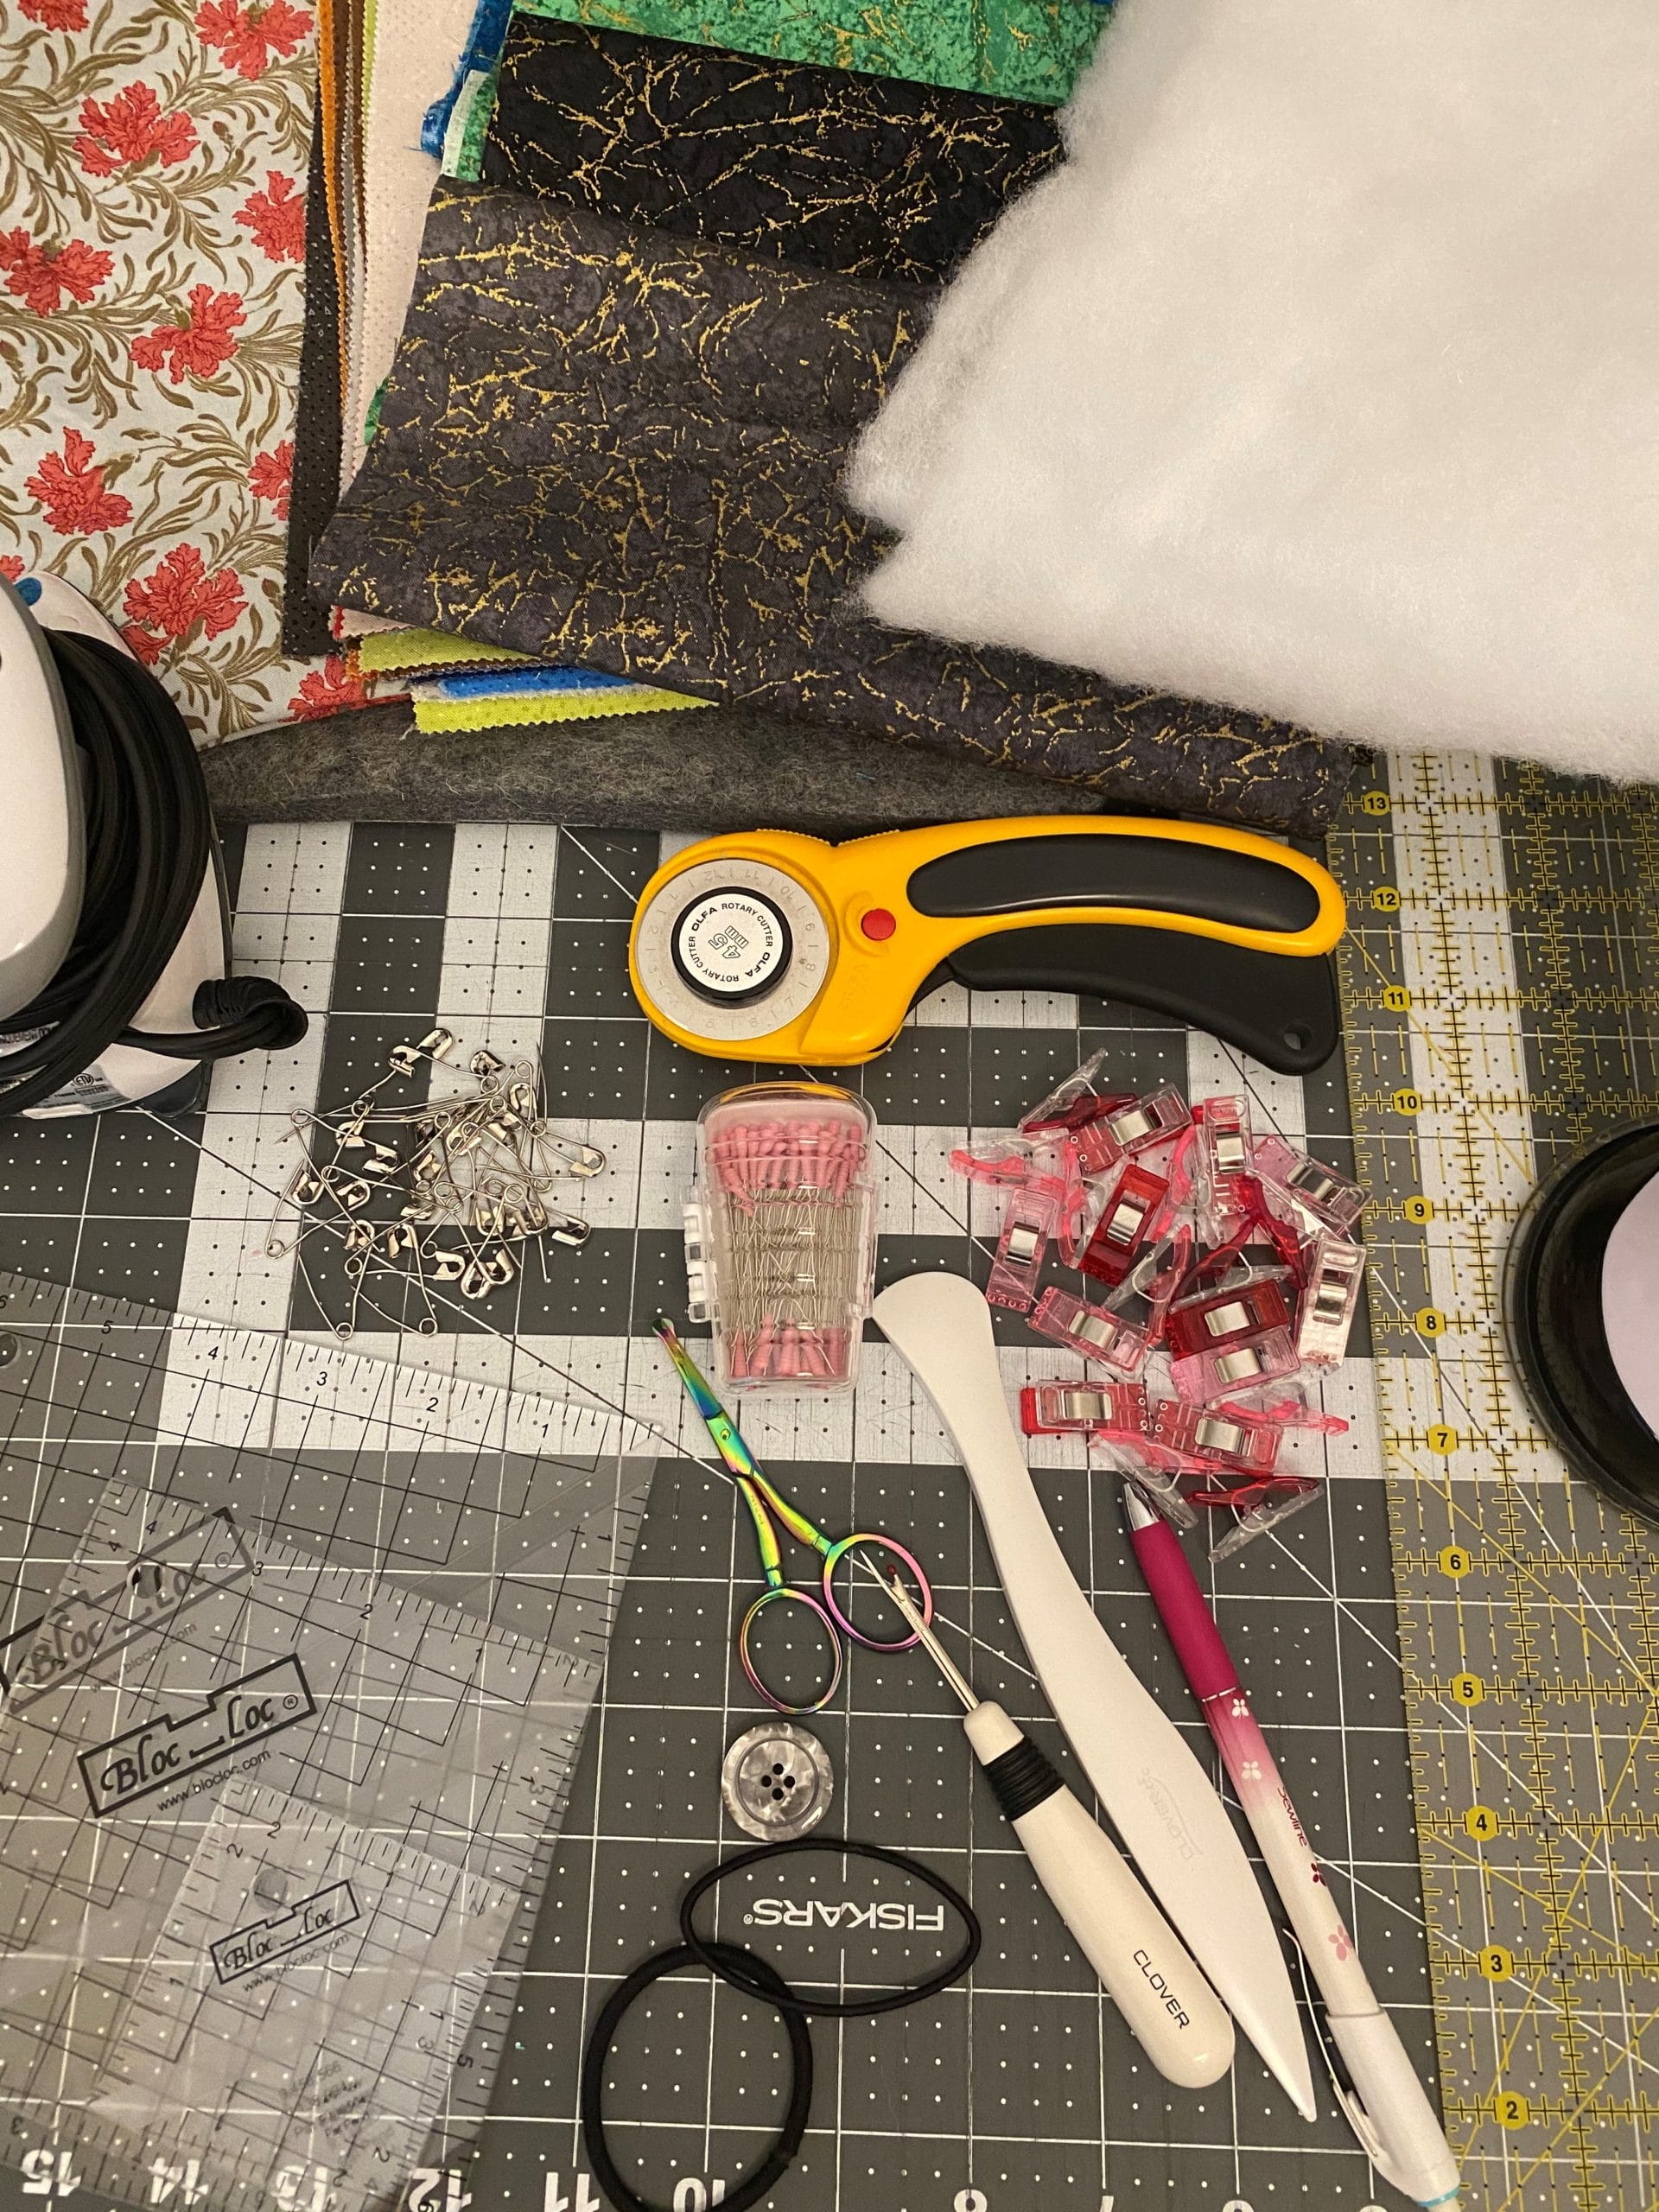
Rotary cutter
Cutting mat (mine is 18”x24”)
Quilting ruler (mine is 6”x24”)
Iron and pressing mat
Wonder clips and/or pins
Point 2 Point tuner
Seam Ripper (just in case)
Fabric-safe marking pencil
Thread snips
Basting pins
Button
Sewing Needle
Fabric Scissors
Unused hair-tie
Thread (for piecing and quilting)
Calculating Size
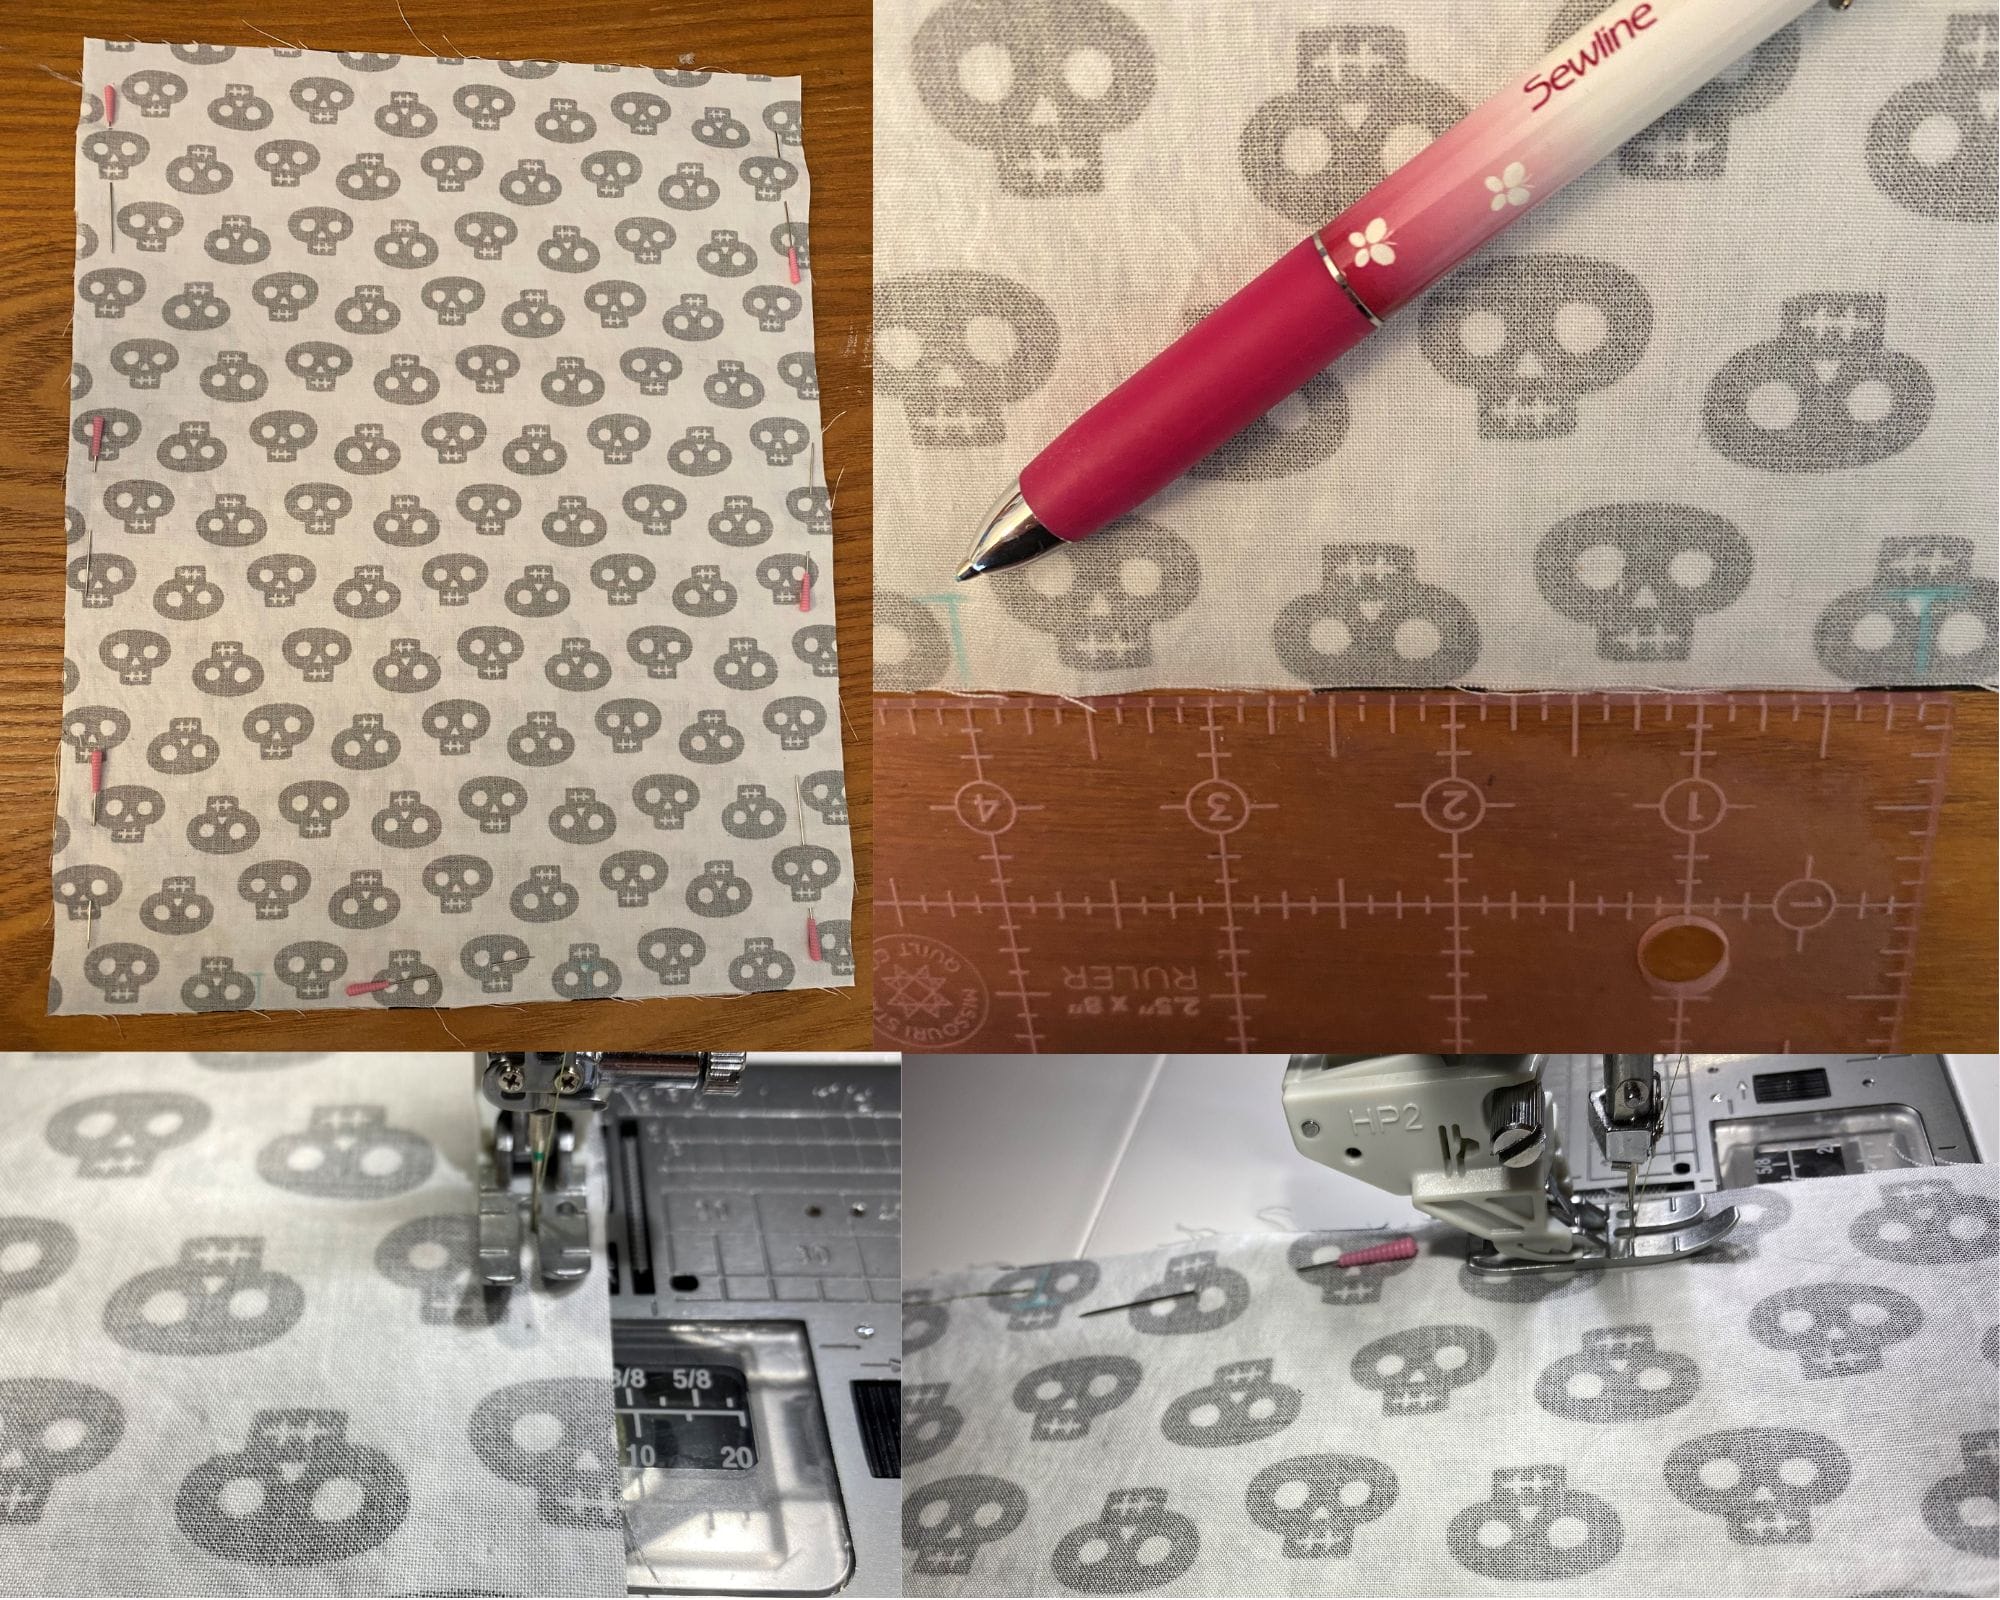
To begin, I measured my tablet with its keyboard case attached, precisely as I was going to be using it with the sleeve, to calculate my fabric size.

Once measured, I added 1.5” to each side. Knowing my seam allowance would eat up .25” on each side, the extra inch allowed for the nearly half-inch bulk of the thick tablet case with an additional half inch of wiggle room. Thus, for my 8” x 10.5” device, I needed two outer pieces and two lining pieces measuring 9.5” x 12”.
This is the part that should be customized to whatever device you’ll be using the sleeve for. For example, for a laptop measuring 8.5” x 12”, you would need outer and lining fabrics measuring 10” x 13.5”. Add extra ease for devices thicker than roughly half an inch.
To add a slip pocket, I used the same width measurement and decreased by roughly 3” for the height. The slip pocket can be as deep or shallow as you want, but the goal of mine was to add a notepad and possibly some spare accessories like headphones.
Creating Each Outer Piece
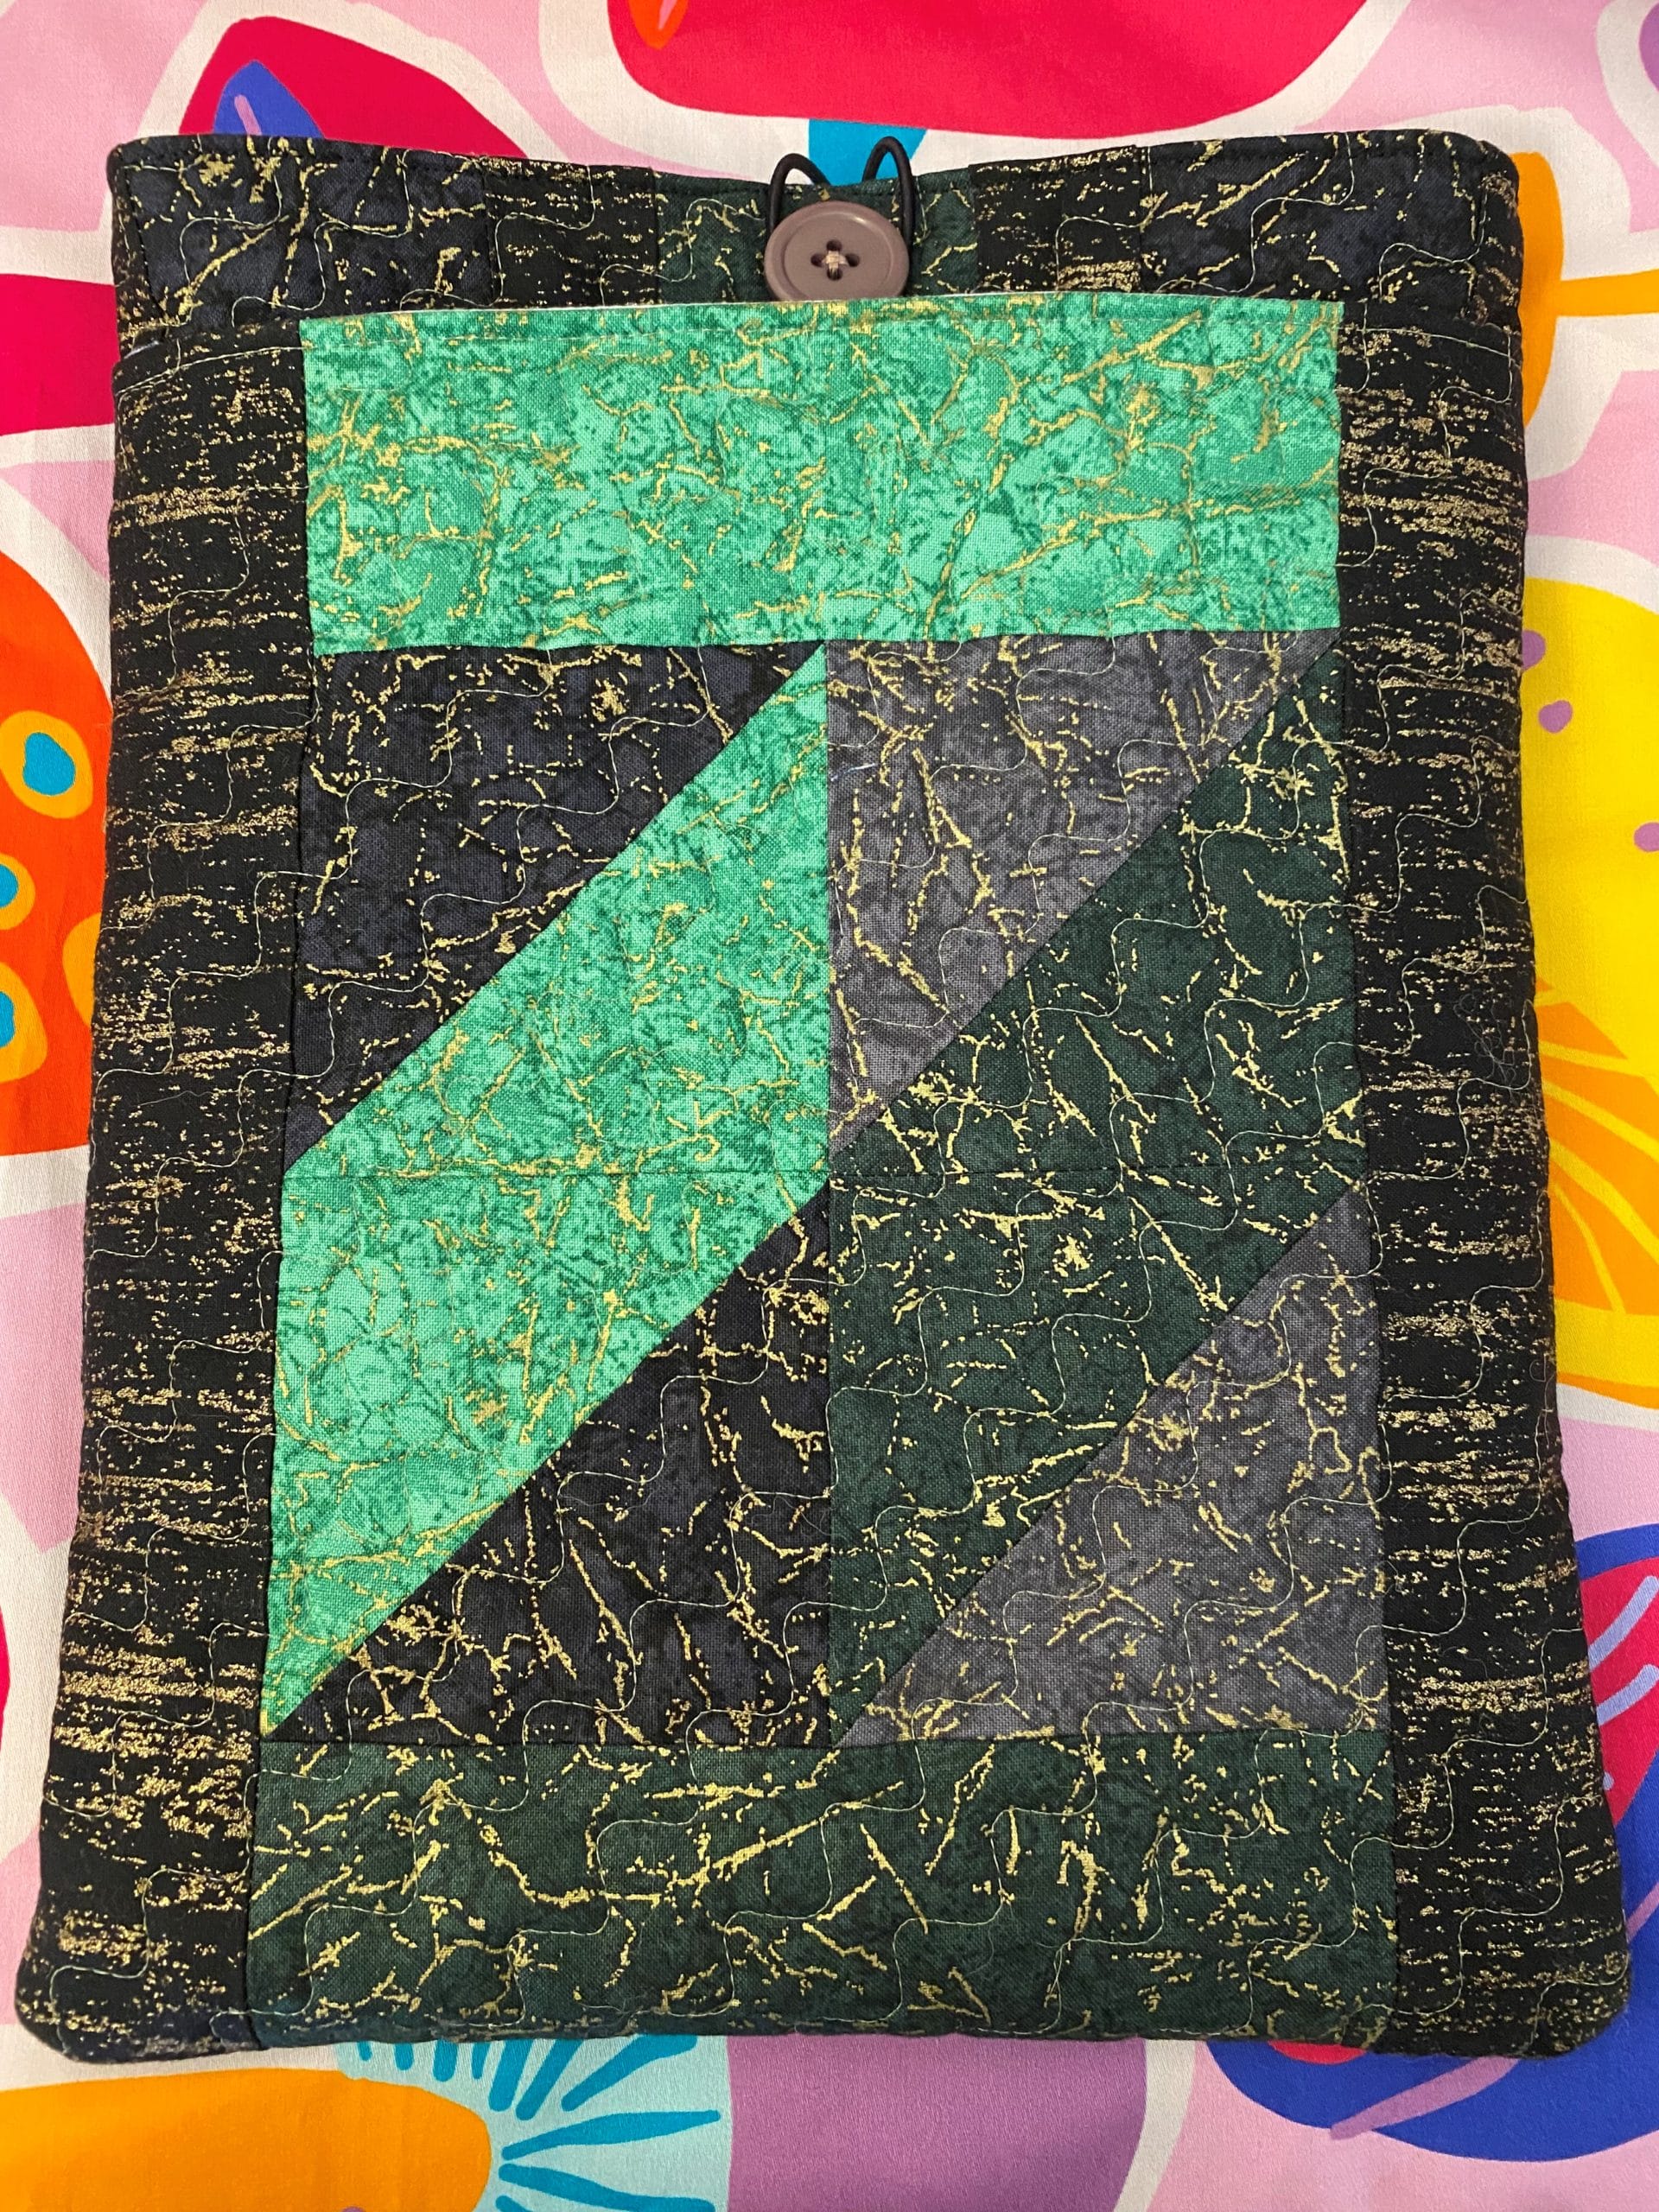
The outer blocks can be pieced in any basic block or intricate pattern you choose. I opted for a simple checkered pattern with sashing for the main body with an extra slip pocket of HSTs. Please feel free to skip over the piecing example if opting to create something of a different pattern, or full cuts of fabric. The only thing to keep in mind is the goal measurements for your outer, lining, and pocket pieces!
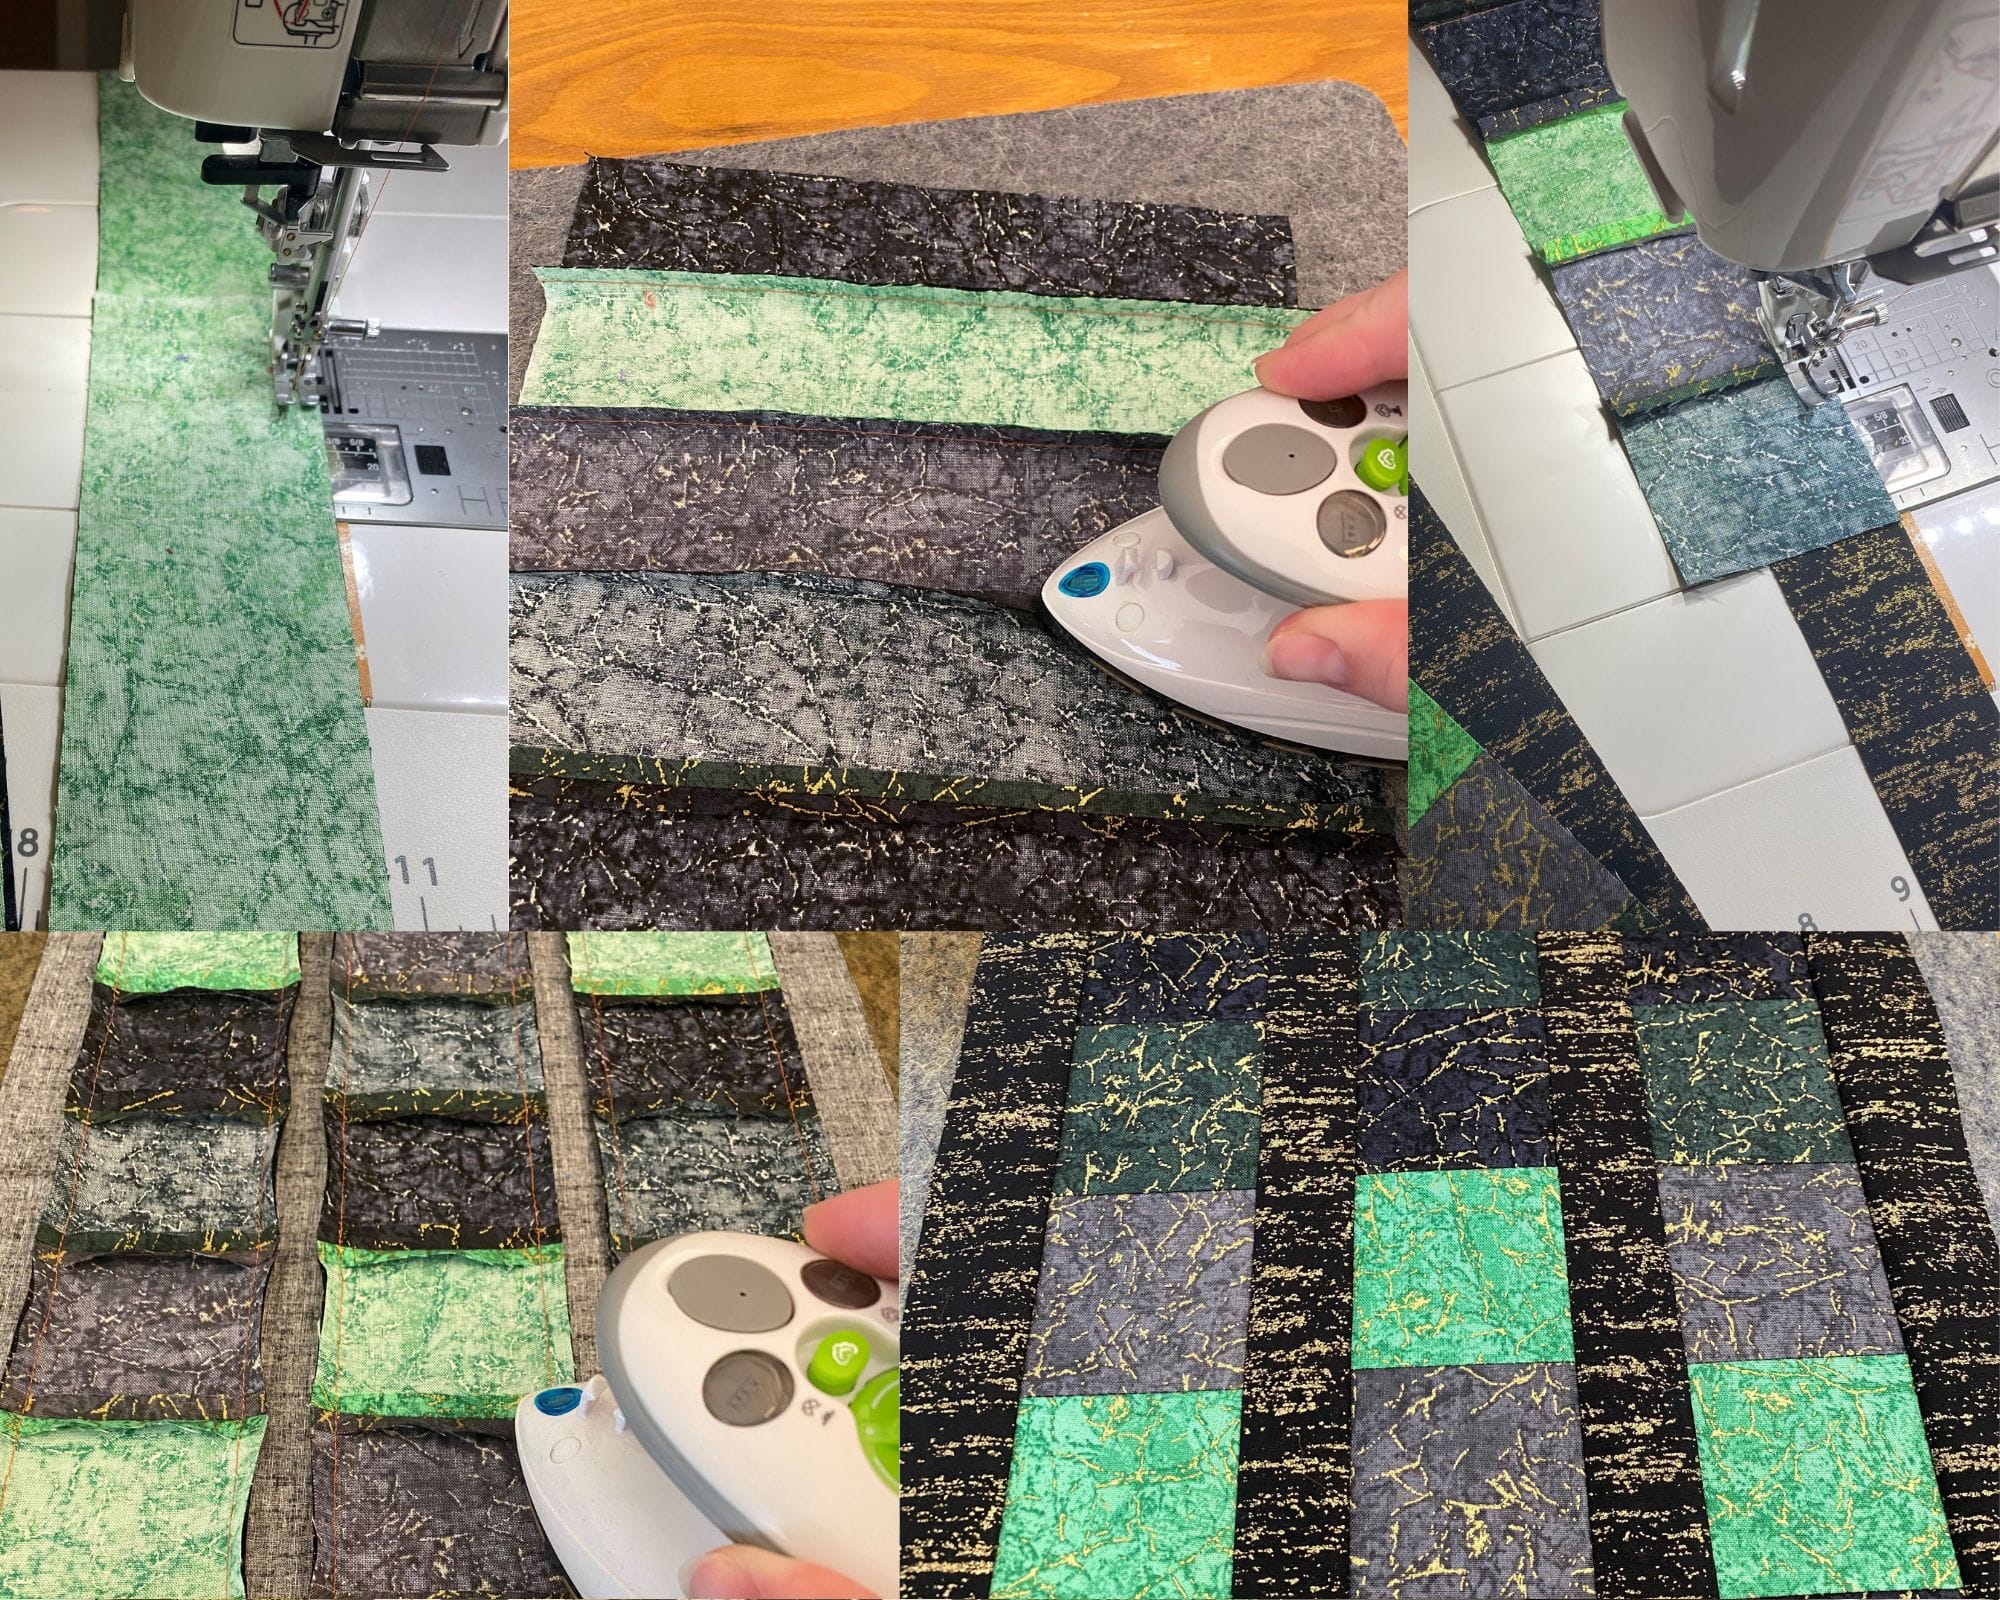
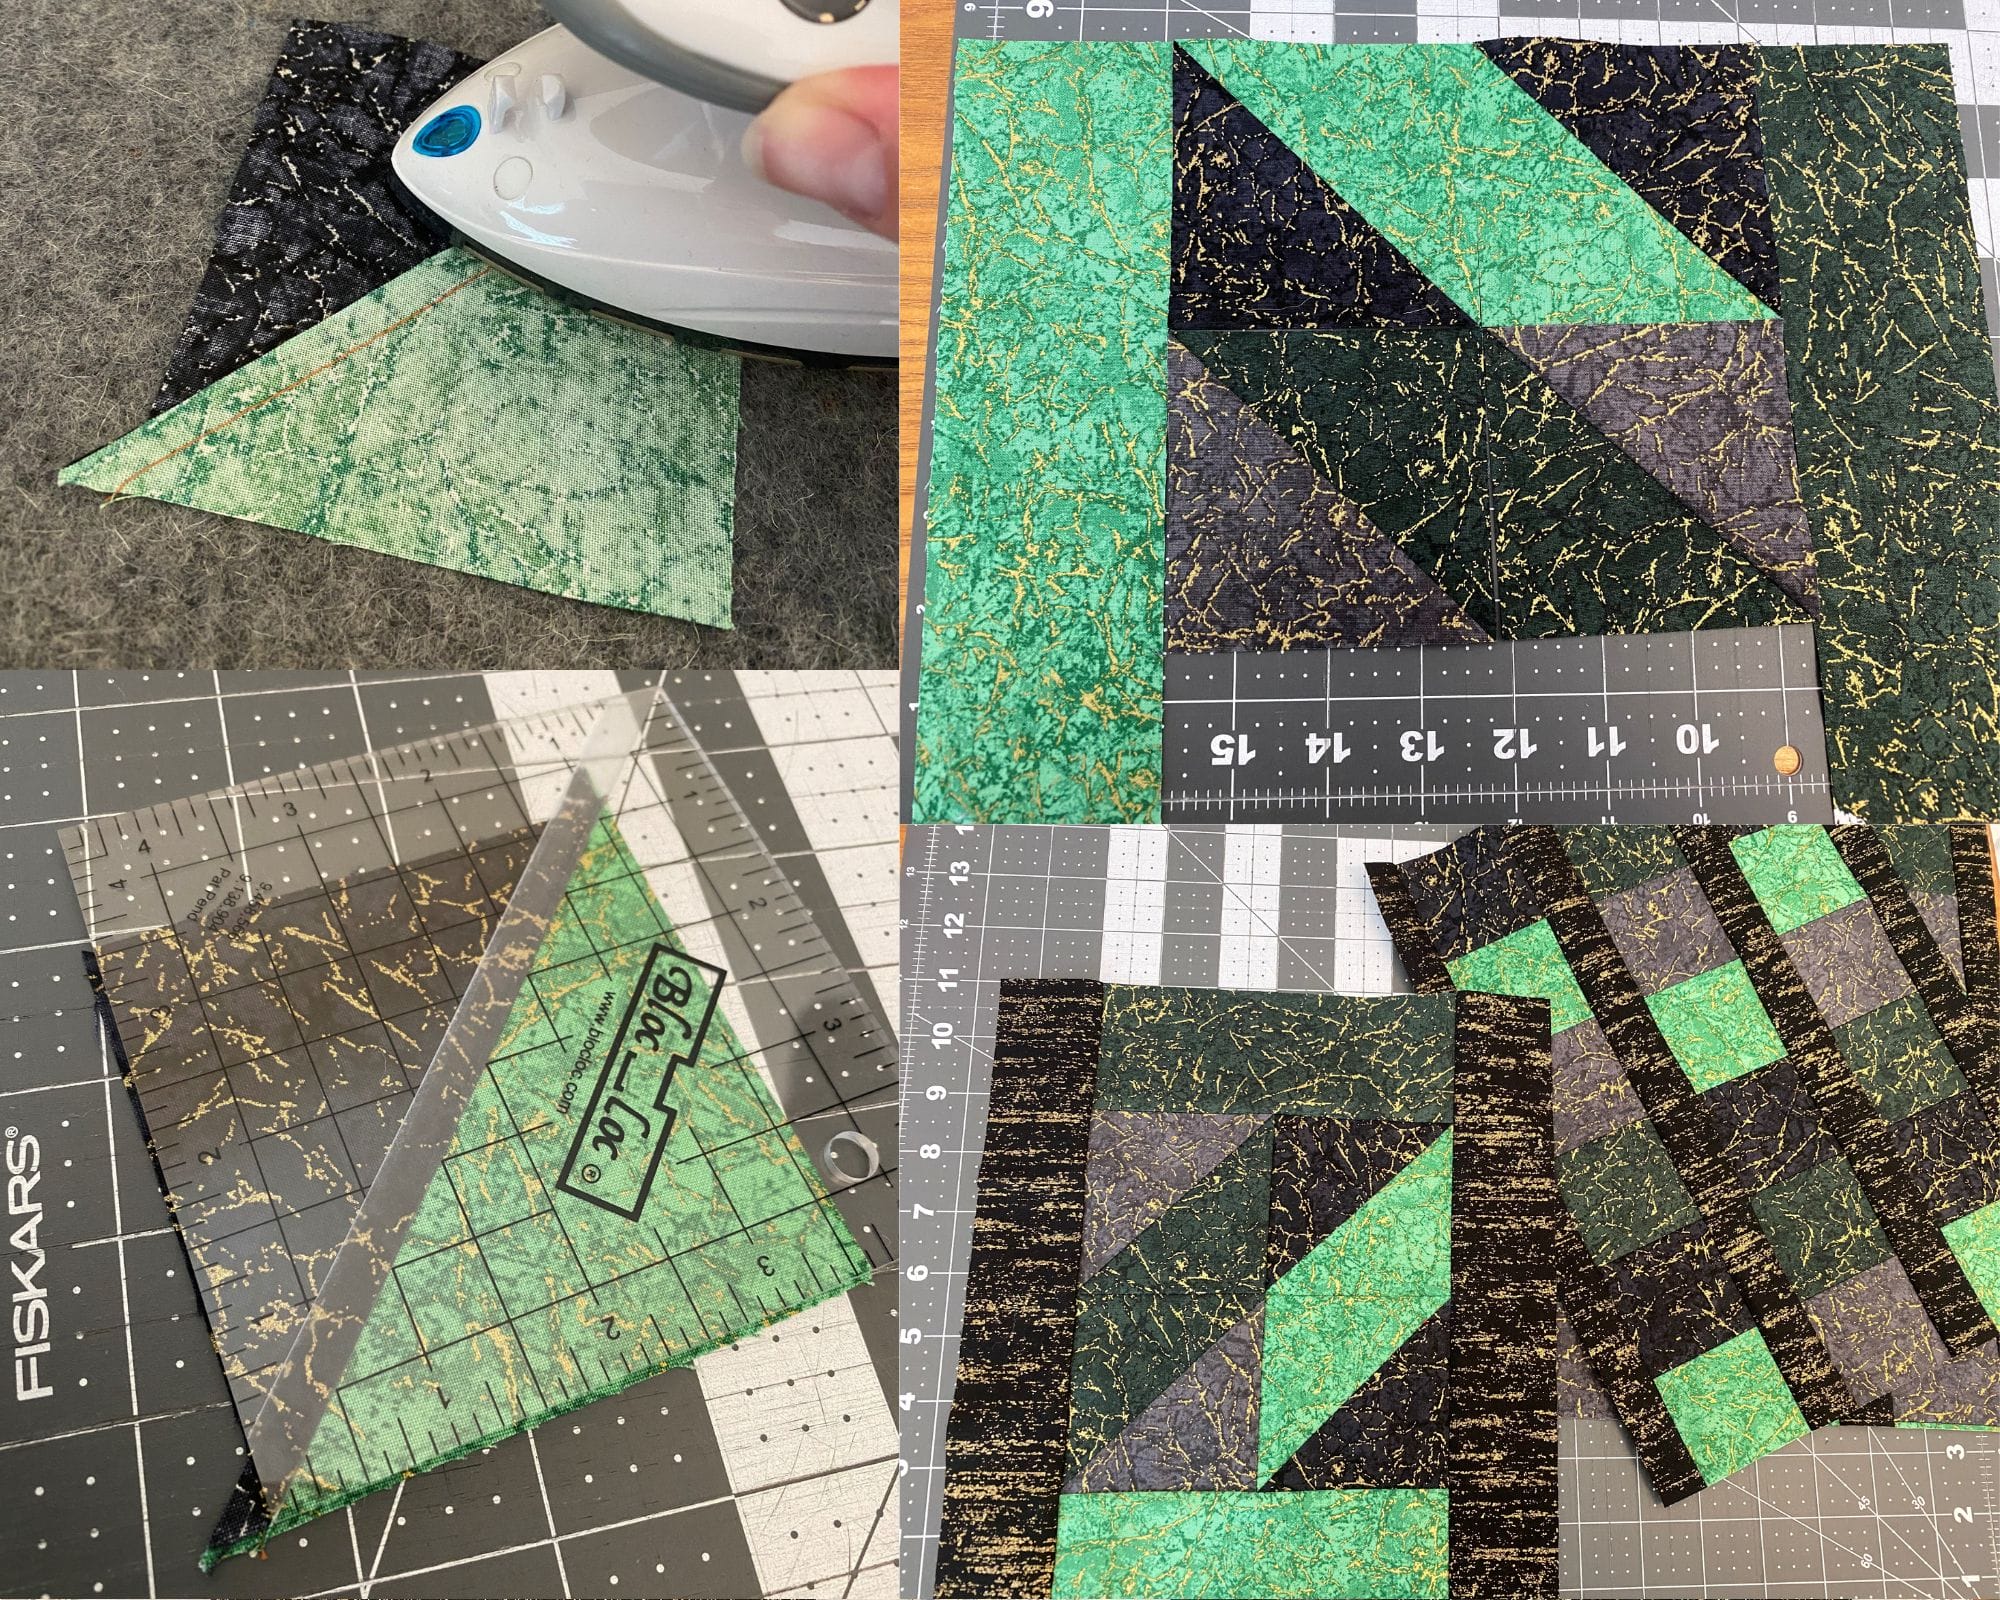
From my scrap fabric, I cut 2.5” strips and sewed them together for some quick strip piecing. Once sewn together, I pressed and rotated, to trim 2.5” wide strips perpendicularly to my stitch lines. I paired those up with some coordinating 1” wide sashing and rotated each checkered 2.5” strip so my colors would flip back and forth.
Keeping my goal size in mind, I stopped piecing when I knew I was a hair bigger than needed, then pressed and trimmed each front and back piece to 9.5 x 12”.

To keep my slip pocket from blending entirely into the main body of the sleeve, I decided to use my remaining handful of scraps to make some HST’s. I didn’t have the precise 3” Bloc Loc ruler I would have preferred, but my 4.5” one worked just fine with some slight maneuvering.
I sewed the HSTs together and added some 2.5” sashing to each side until it measured roughly what I needed, then pressed and trimmed the whole piece to 9.5” x 9”.
Batting Prep
Because my main focus was using up scraps and bits left from other projects, I used the same idea for my batting. With two long strips of batting that had been cut from a recent quilt, I set my machine to an extra wide and short zig-zag stitch and paired the straightest edge of each piece up against each other.
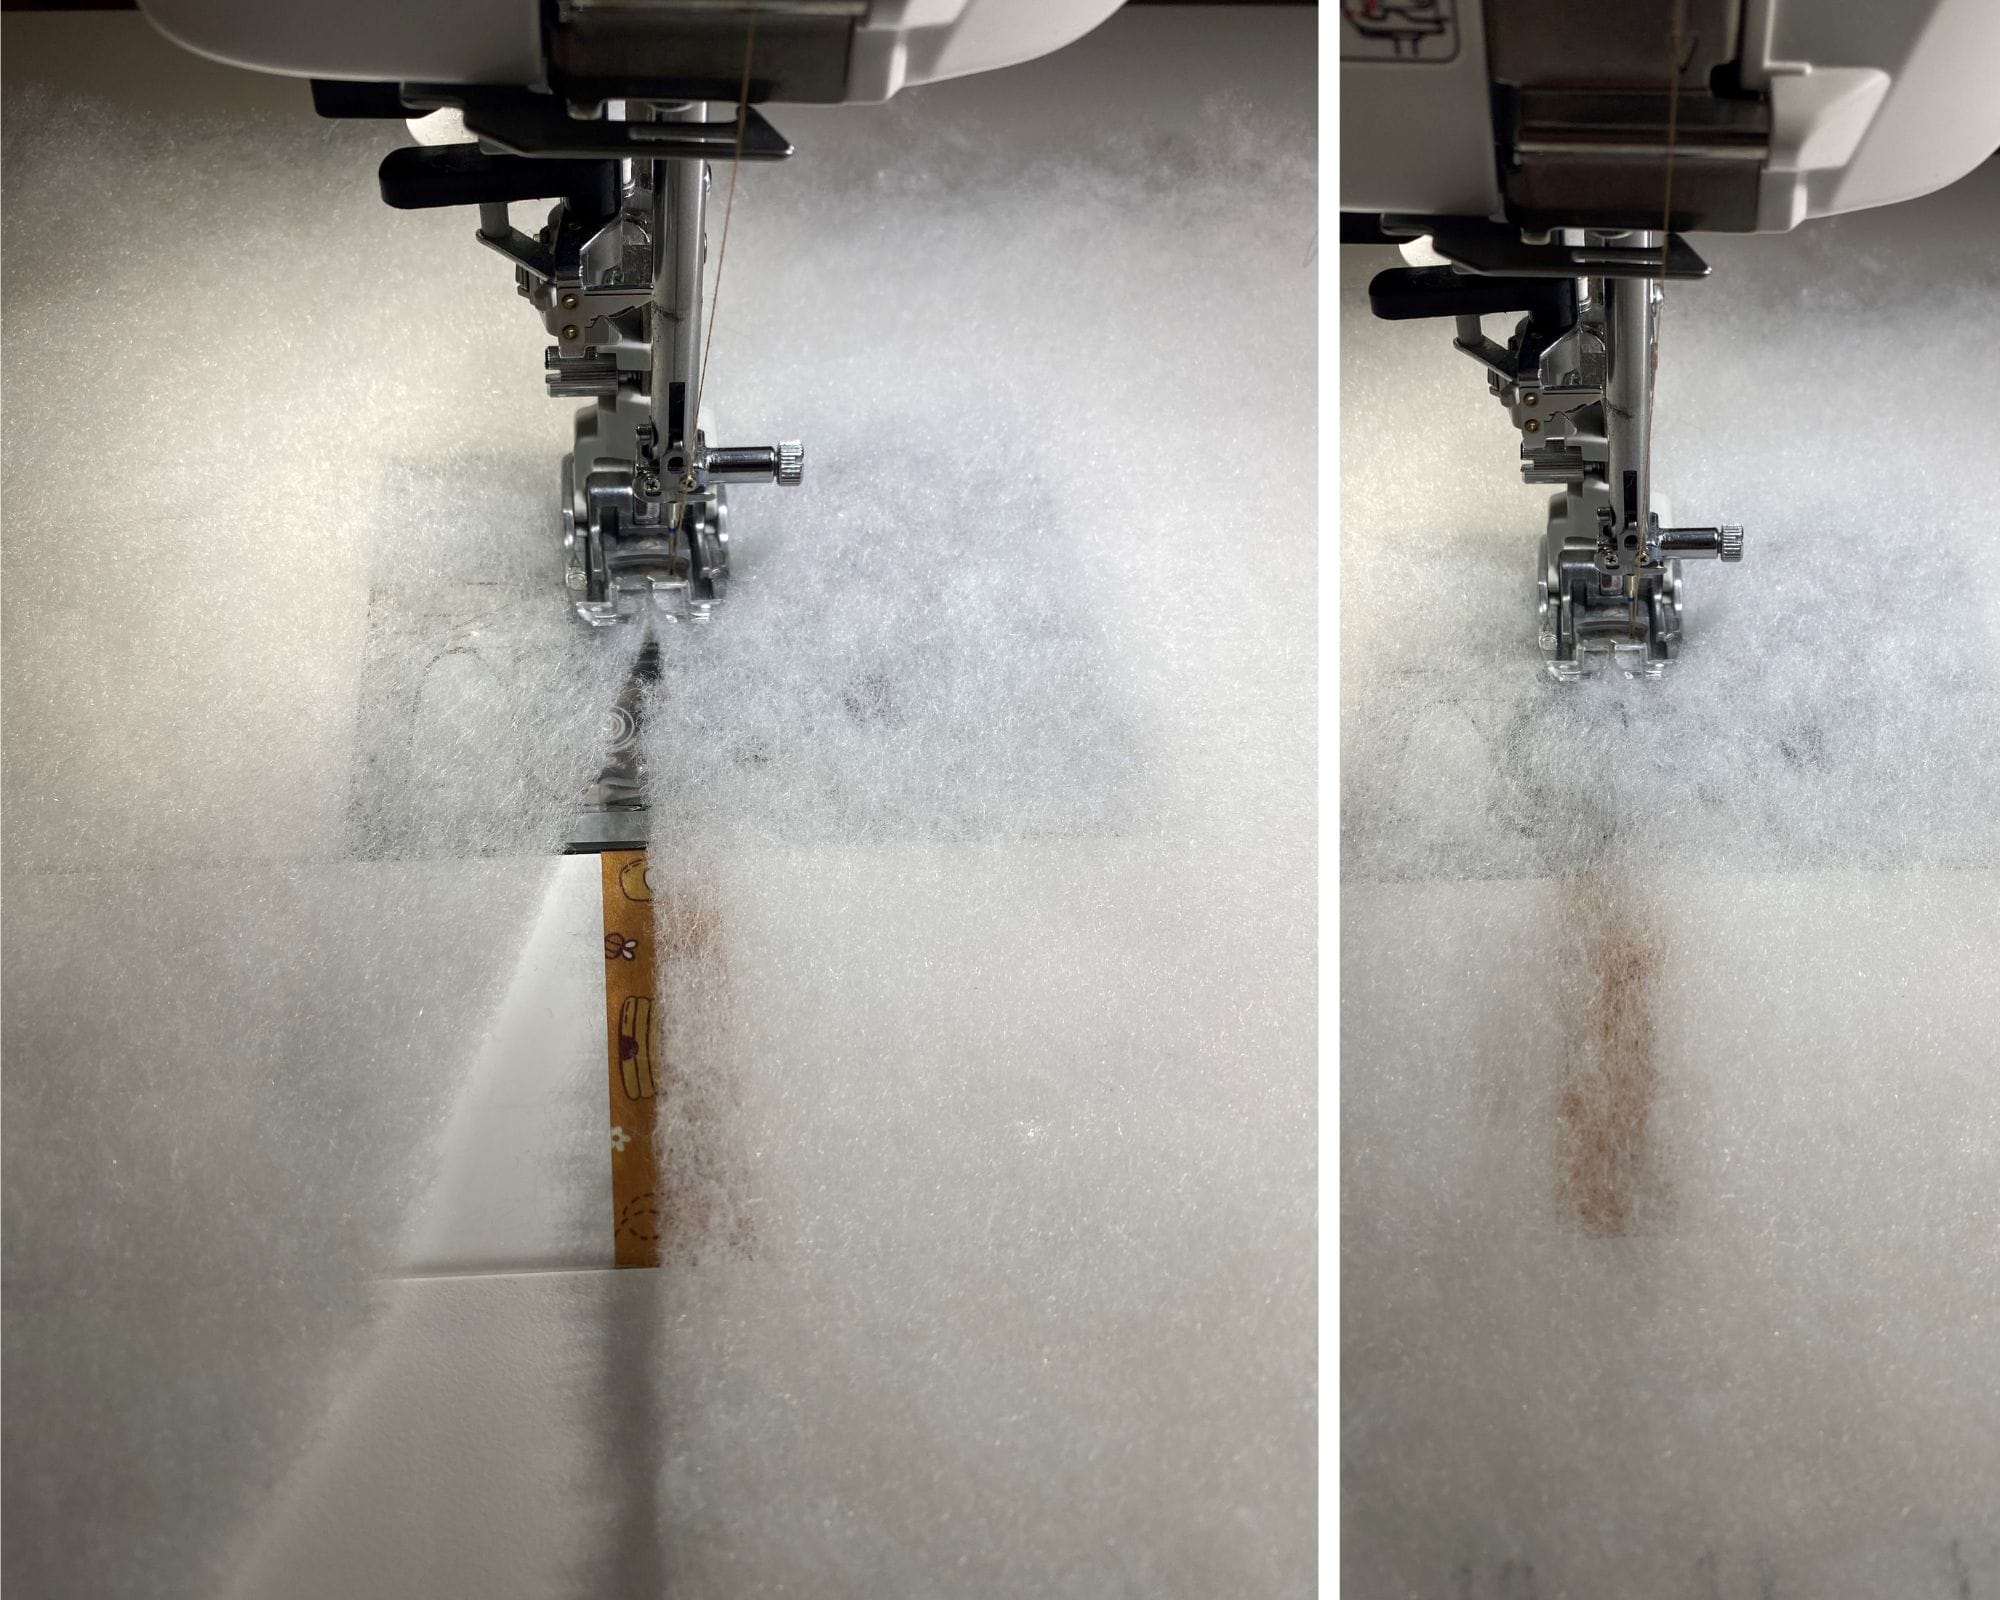
Using a small scrap of fabric to start the first few stitches will help keep your batting from catching against the feed dogs and getting stuck in the needle plate. Once the first few stitches are caught, a quick line of zig-zag stitches across the length of batting is all that is needed. Be sure not to overlap the batting or it’ll cause uneven bumps of doubled thickness.
Depending on your own batting scraps, this process can be repeated several times until you’ve created large enough pieces for the project. Because I chose to breeze through some edge-to-edge quilting, I aimed for batting about 1” bigger on each side than the three primary sleeve pieces (front, back, and pocket).
Quilt Sandwich
This was where the fabric I’m not overly fond of came into play. This layer can be pieced from scraps as well, though I find it is easier to just grab a few spare fat quarters that I don’t have a use for but never had the heart to just get rid of.
This extra fabric can be skipped if you prefer to have just a layer of batting with the pieced fabric, but I like the extra buffer to help keep my stitches smooth and extra fluff out of my feed dogs and bobbin housing.
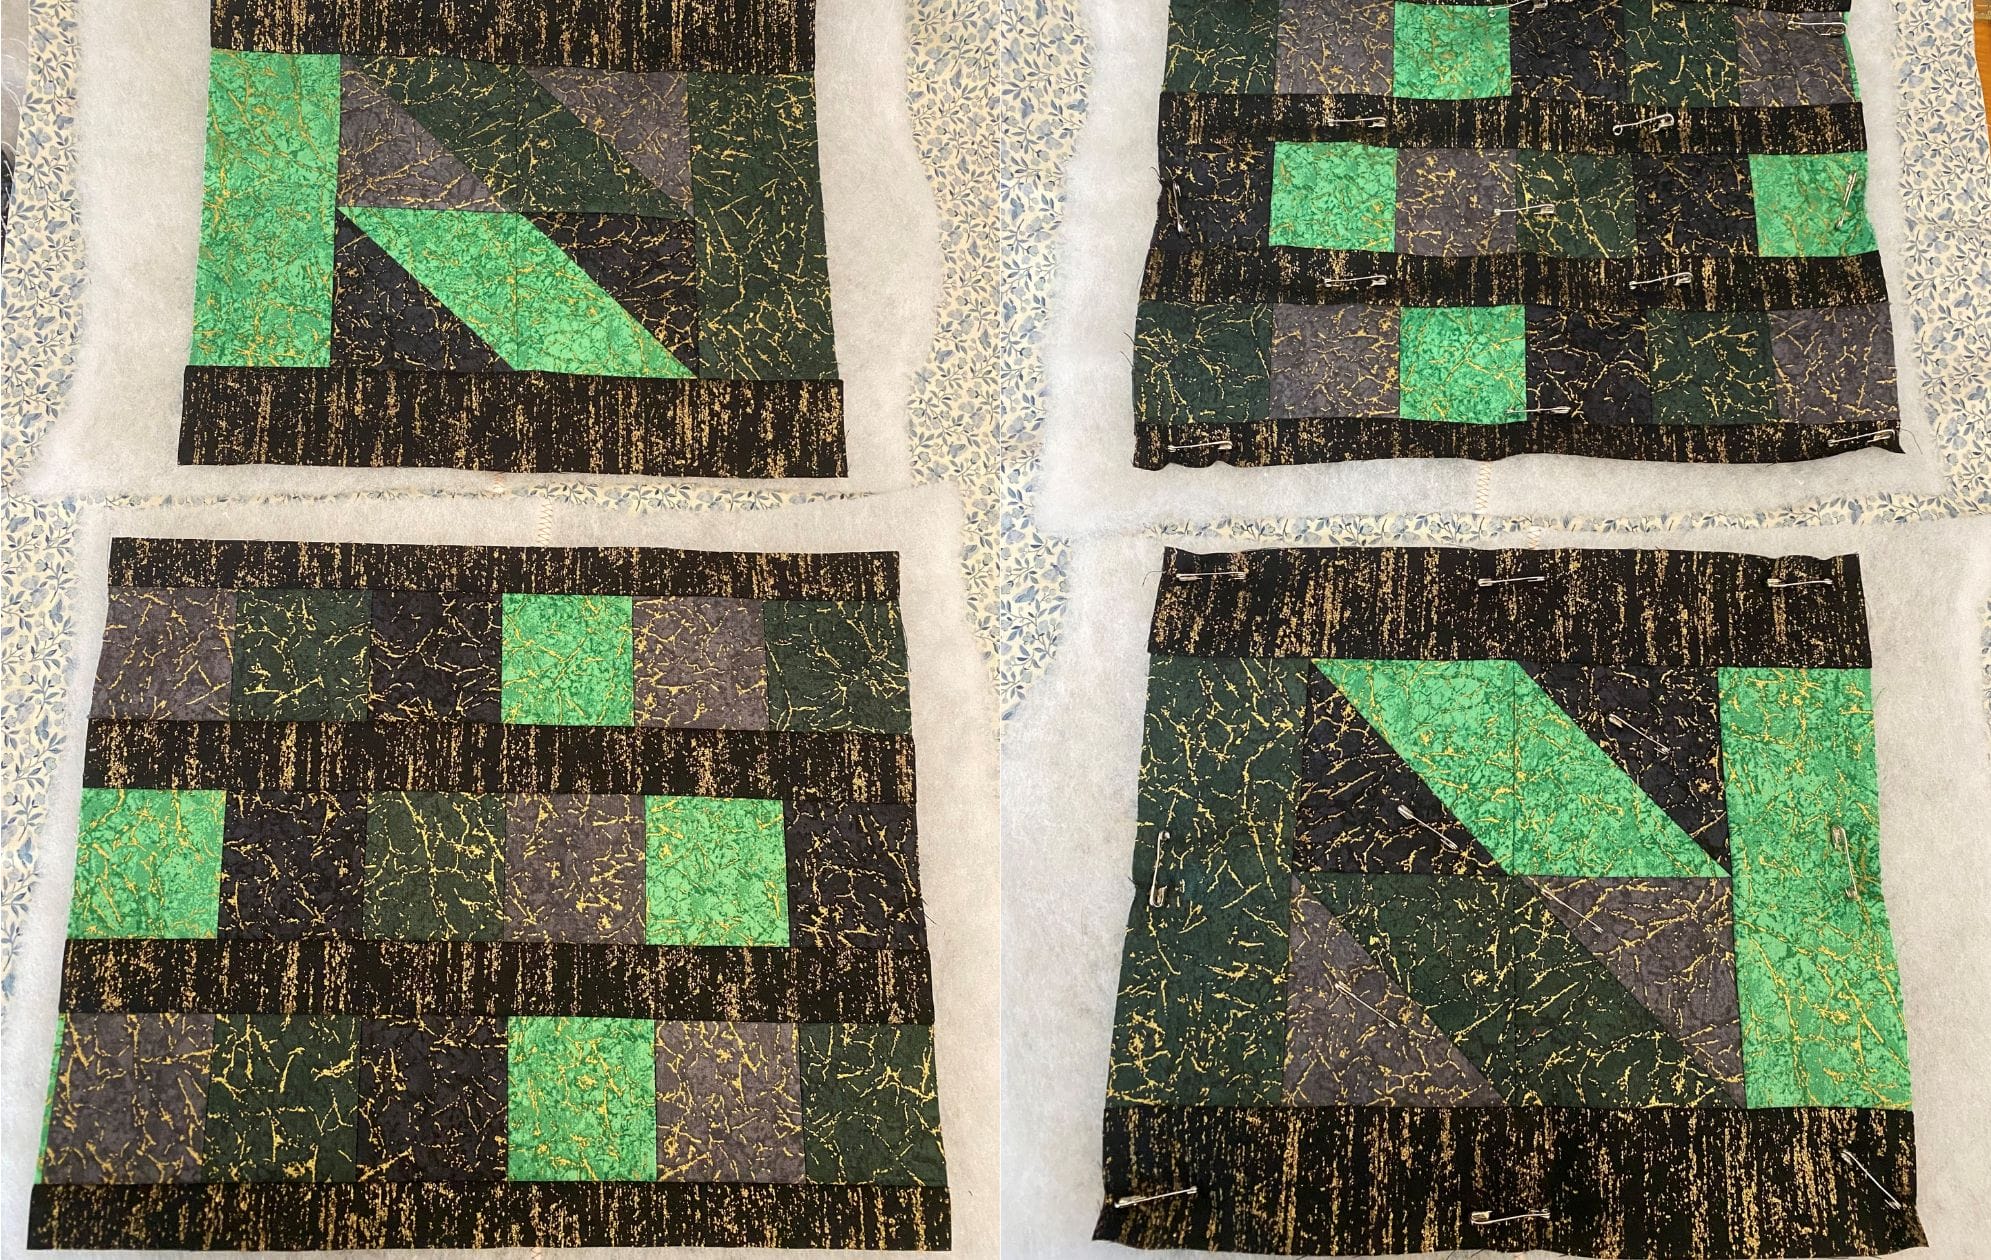
I sandwiched the batting between my front piece and extra fabric, then basted with pins. Just as with a quilt, it is best to have the batting and backing fabric a bit larger on each side than the primary fabric.
I also used this backing fabric with right sides facing inward toward the batting to minimize the chance of the print showing through the lining fabric.
This was repeated for the back and pocket pieces.
Quilting
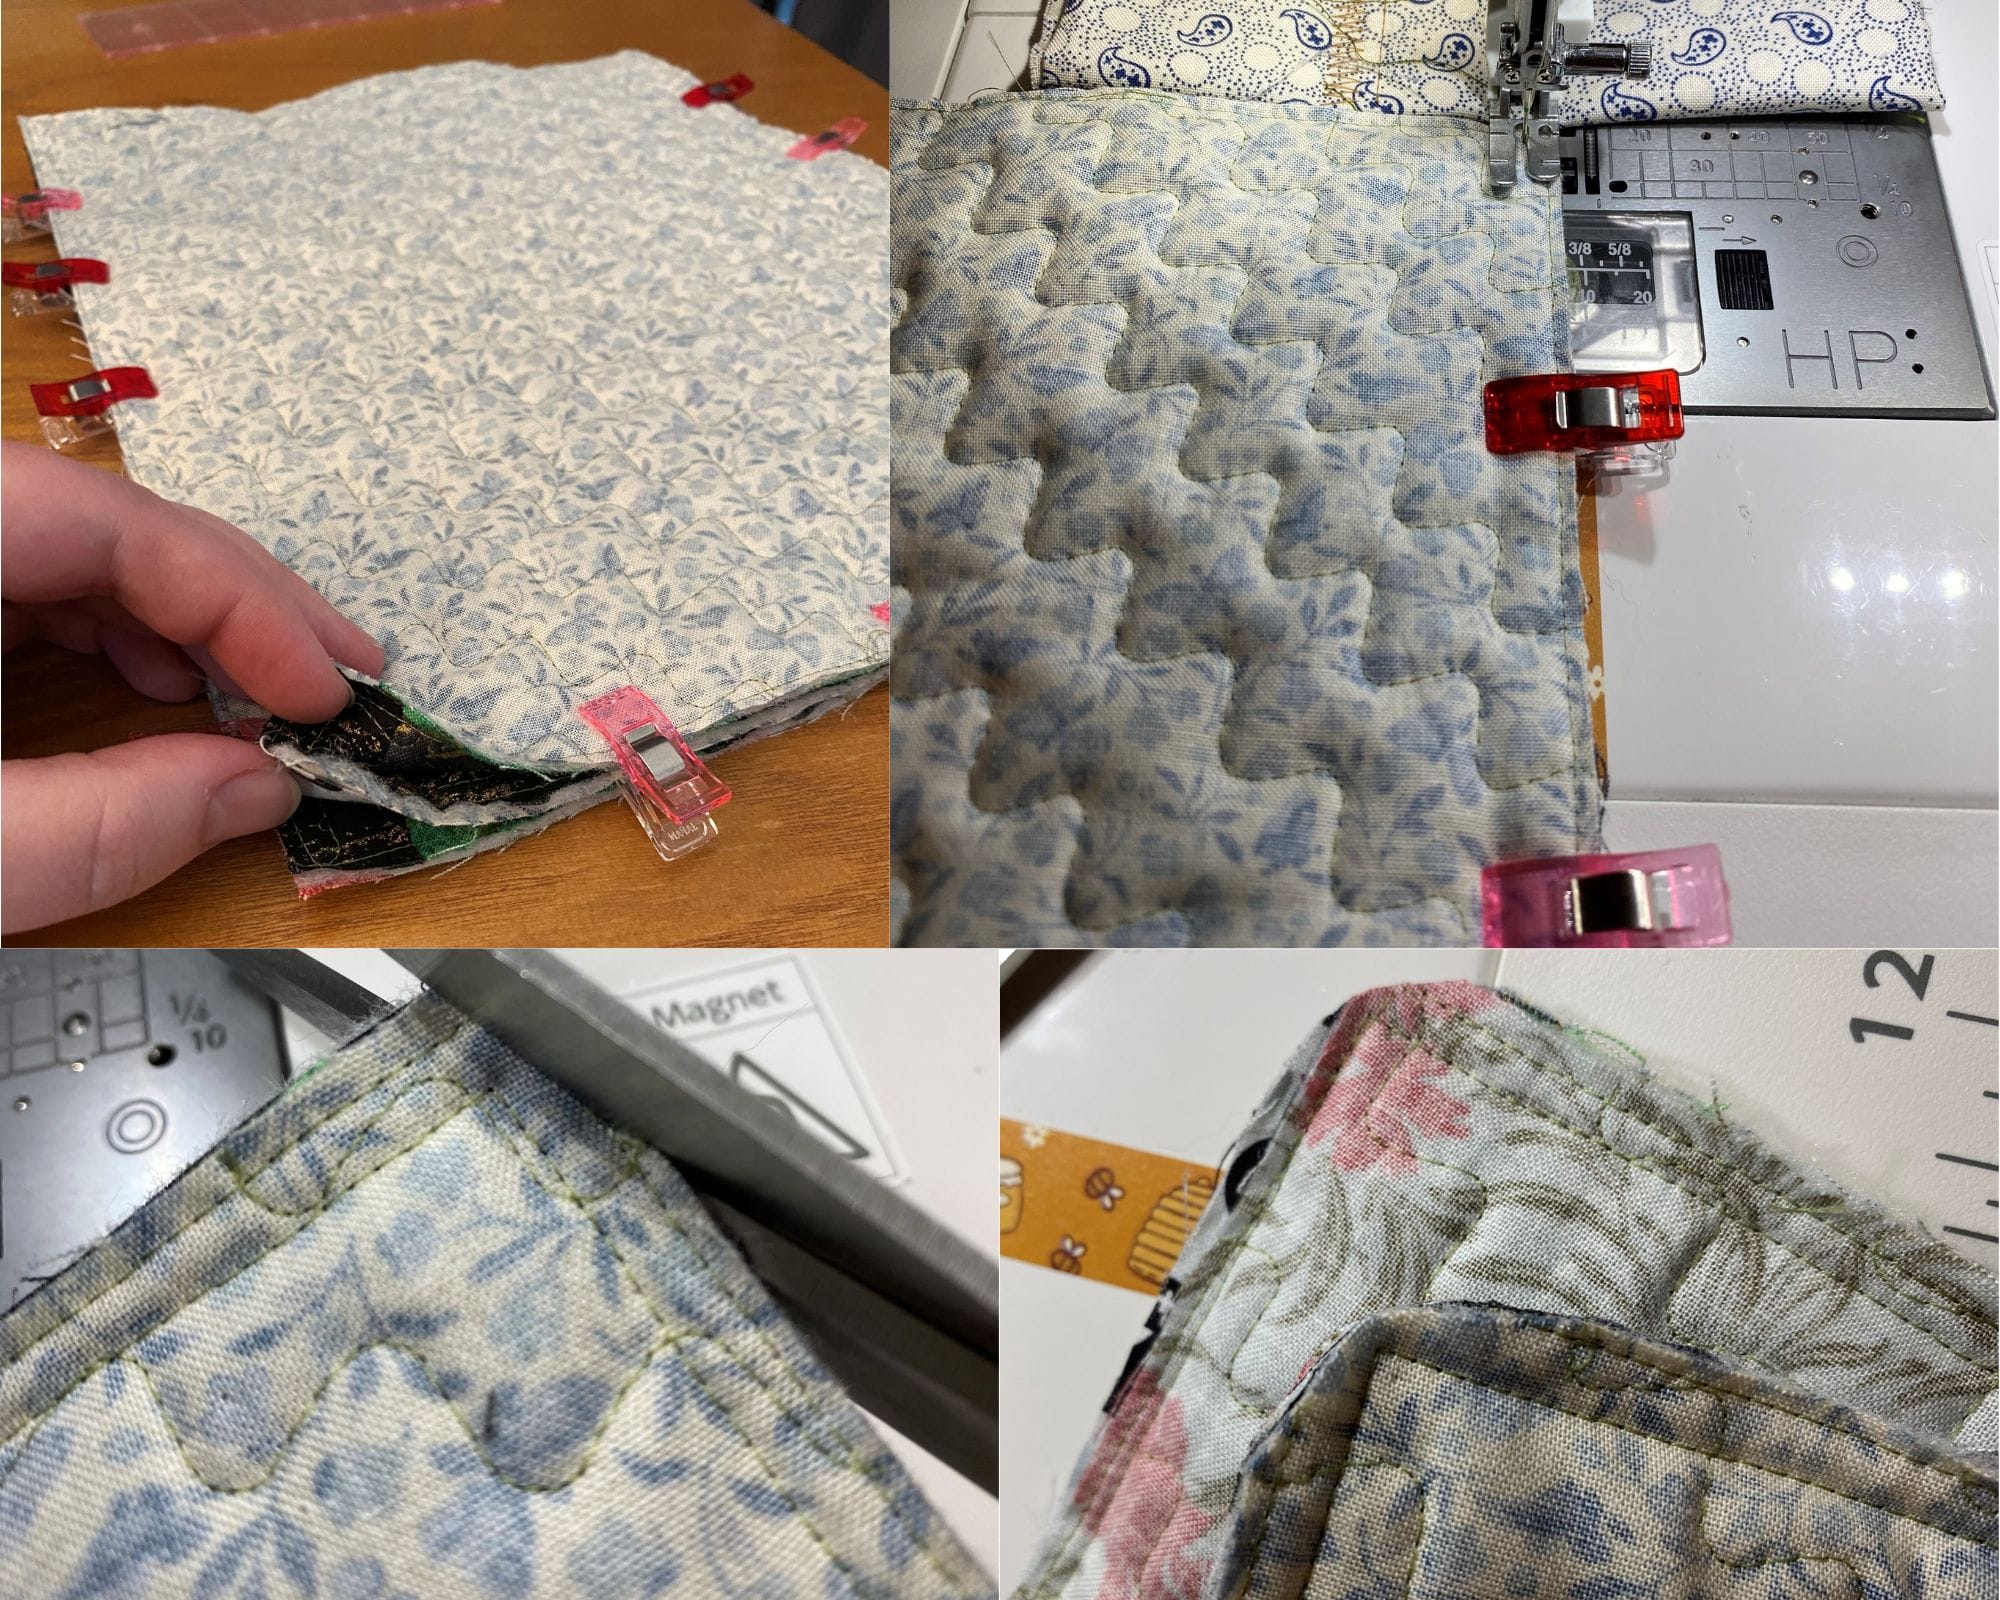
I chose to diagonally squiggle-quilt each of my sleeve pieces to save some time, but this project would be a great excuse to flex some hand-quilting skills or a mix of both! Because the pieces are so small, the options are vast.

I prefer to use a walking foot for this step to minimize puckering and keep all the pieces moving smoothly under the needle.
Be sure to remove basting pins as you go to keep them out of the way of your needle.
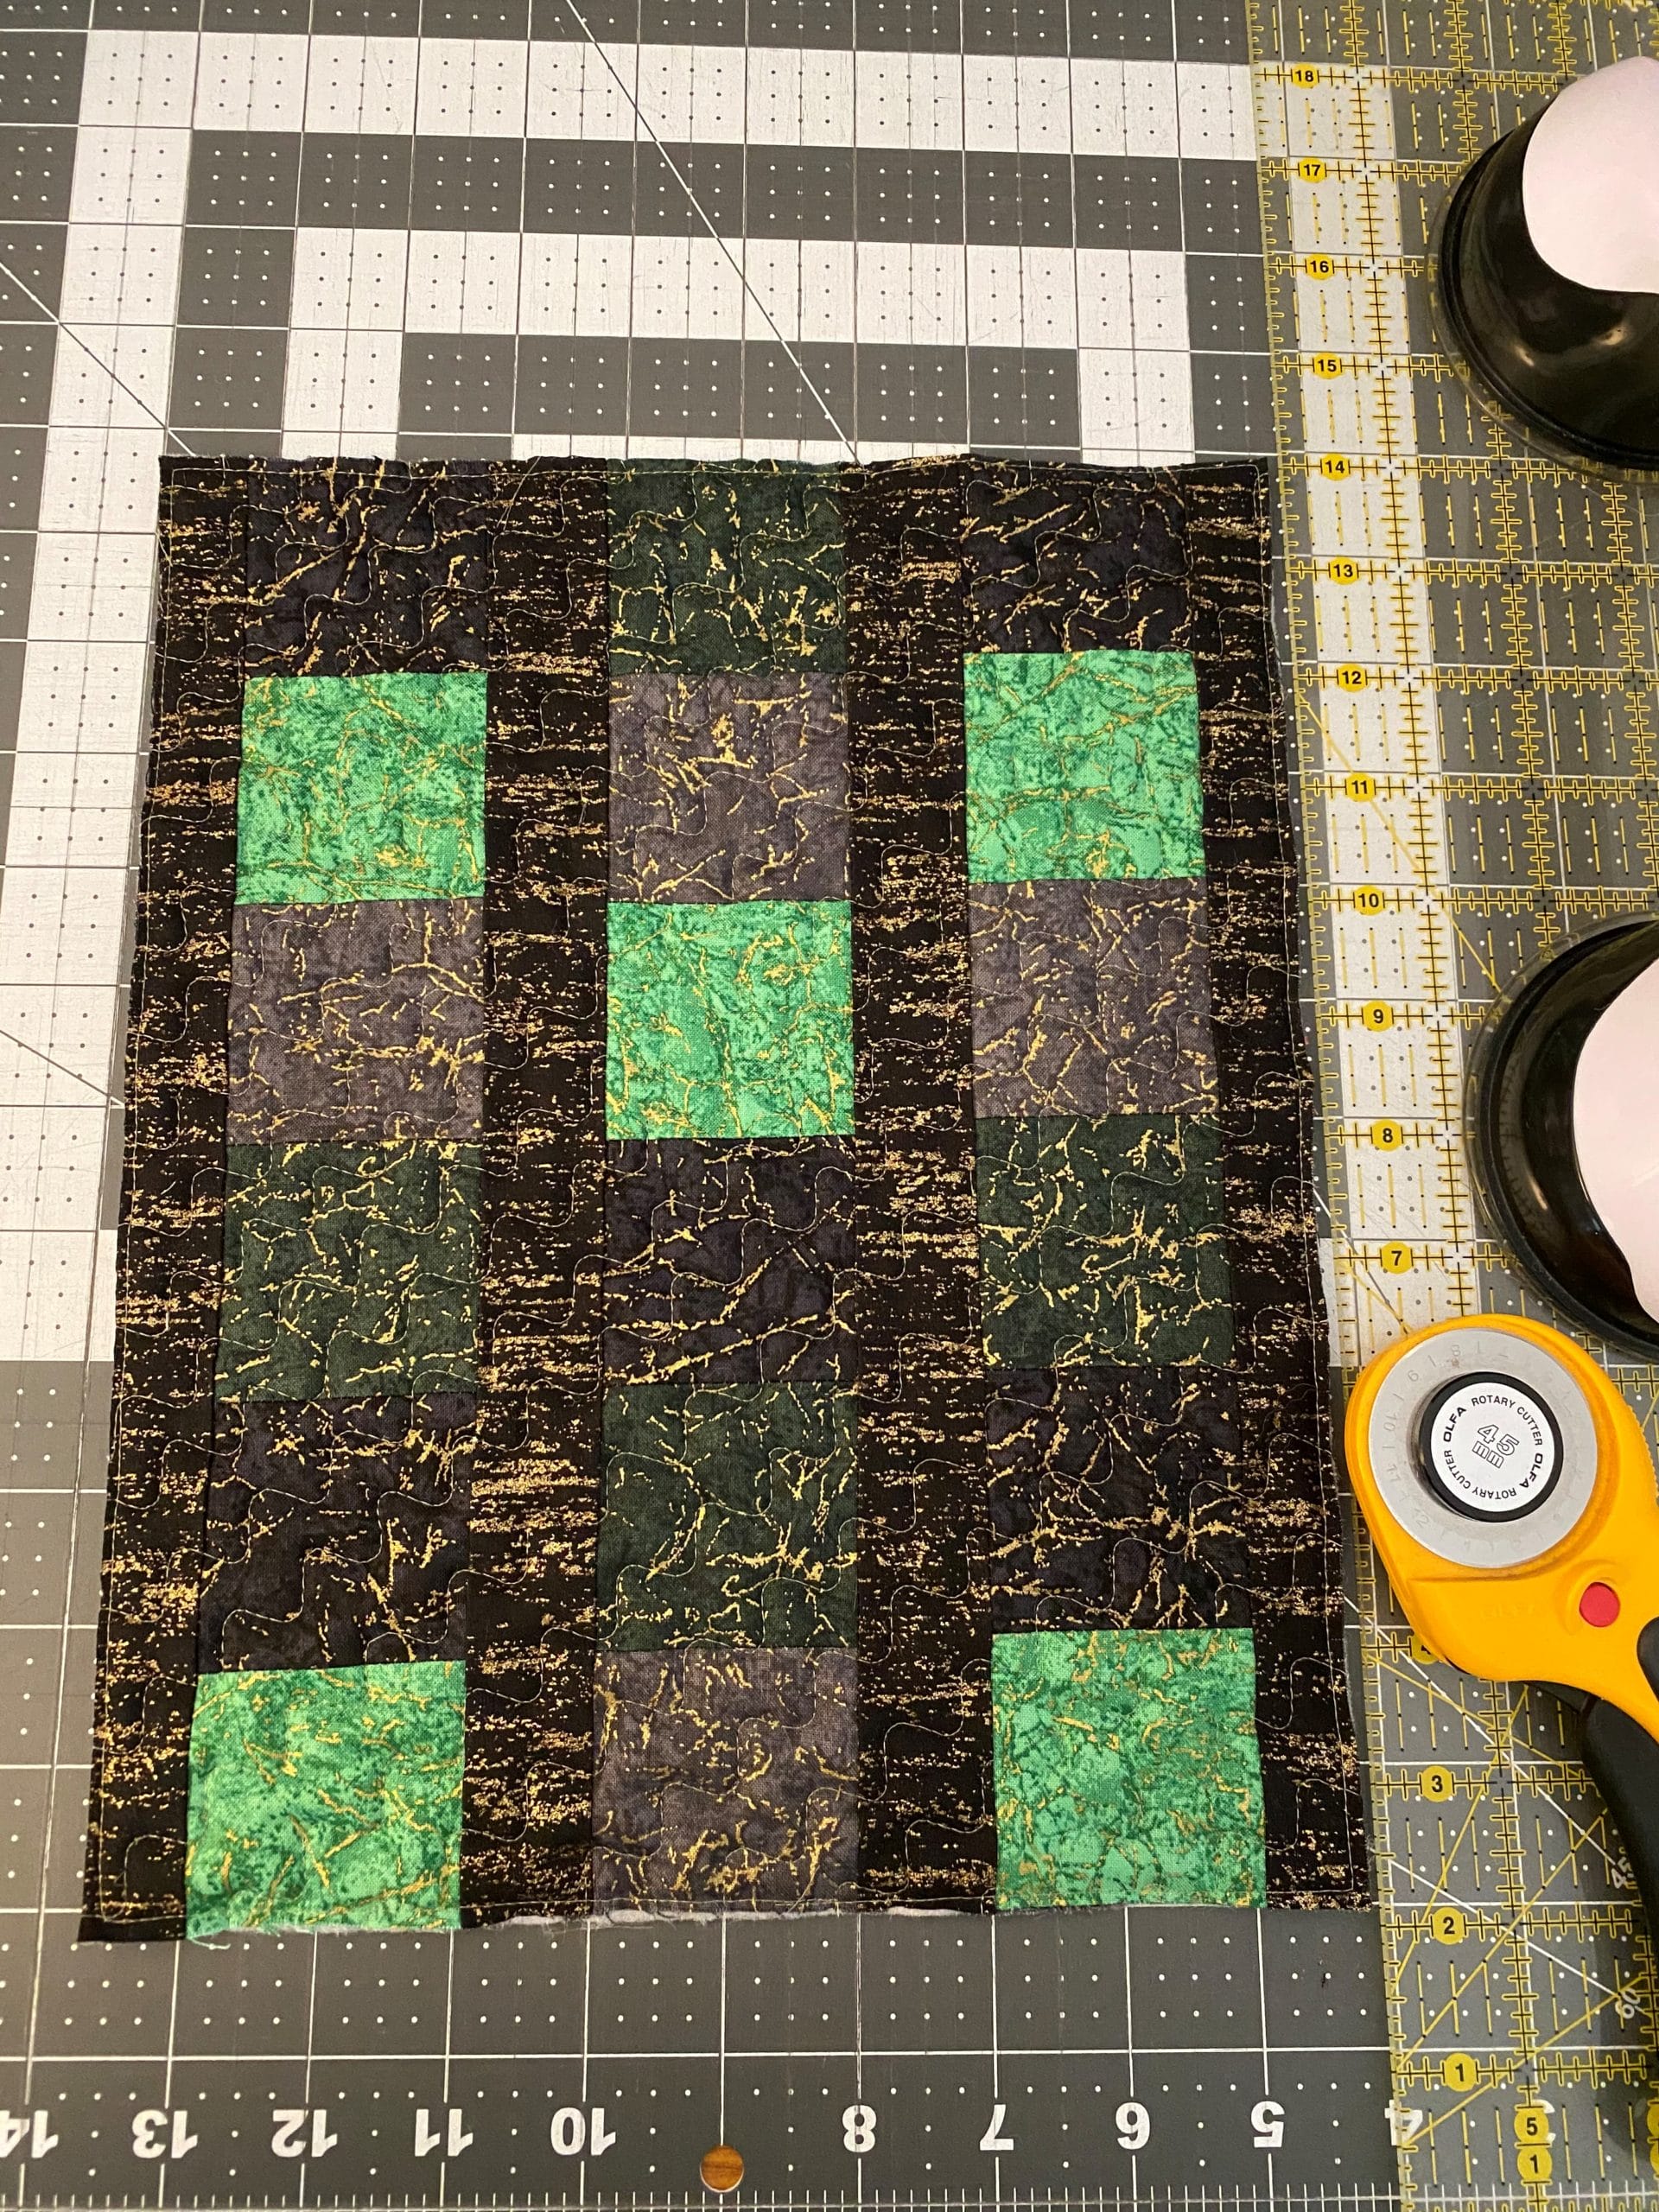
After quilting, I stitched close to the edge, all the way around, to keep all the pieces extra secure.
Trimming

Back at the cutting table, I trimmed each piece a final time to square any edge that might have gotten wonky during quilting and to remove the excess batting and backing fabrics.
Lining
From my scrap pile, I selected some large chunks that had been leftover from a different project but weren’t big enough to keep with the rest of my yardage. These, I trimmed to mirror the front, back, and pocket pieces.

The lining can easily be pieced for a scrappy look or cut from yardage. The focus is getting the correct dimensions, not where the fabric is from.
Assembly of Inner and Outer layers
Matching the lining front and lining back right-sides together, I pinned in place around the sides and bottom edges, leaving the top edge open.
Using my fabric pencil, I marked a 3-4 inch opening at the bottom. This will be left unstitched for turning the assembled project right-side-out at a later step.
With ¼” seam allowance, I sewed along the left, right, and bottom – remembering to back stitch at the beginning and end, and left the bottom 3-4 inch opening unstitched.
*Do not repeat for the outer layers as the slip pocket must be assembled first.

I then matched the quilted pocket pieces to the pocket lining piece, facing right sides together, clipped around the top, and stitched a ¼” from the edge. The left, right, and bottom edges remained unstitched. Then, I flipped the pocket so right sides were facing out, and top stitched back over the top edge to leave a nice, finished look.
The assembled slip pocket was then clipped atop the quilted outer front piece, lining up the bottom and sides. I added a quick basting stitch around the edges to hold these two pieces in place.
Once basted, the slip pocket and front unit were clipped right-sides together with the quilted back piece. With a ¼” seam allowance, I sewed along the left, bottom, and right sides, being sure to back stitch and the beginning and end.
To reduce bulk, I trimmed each of the corners, but careful not to cut into the stitches.
Finishing Touches
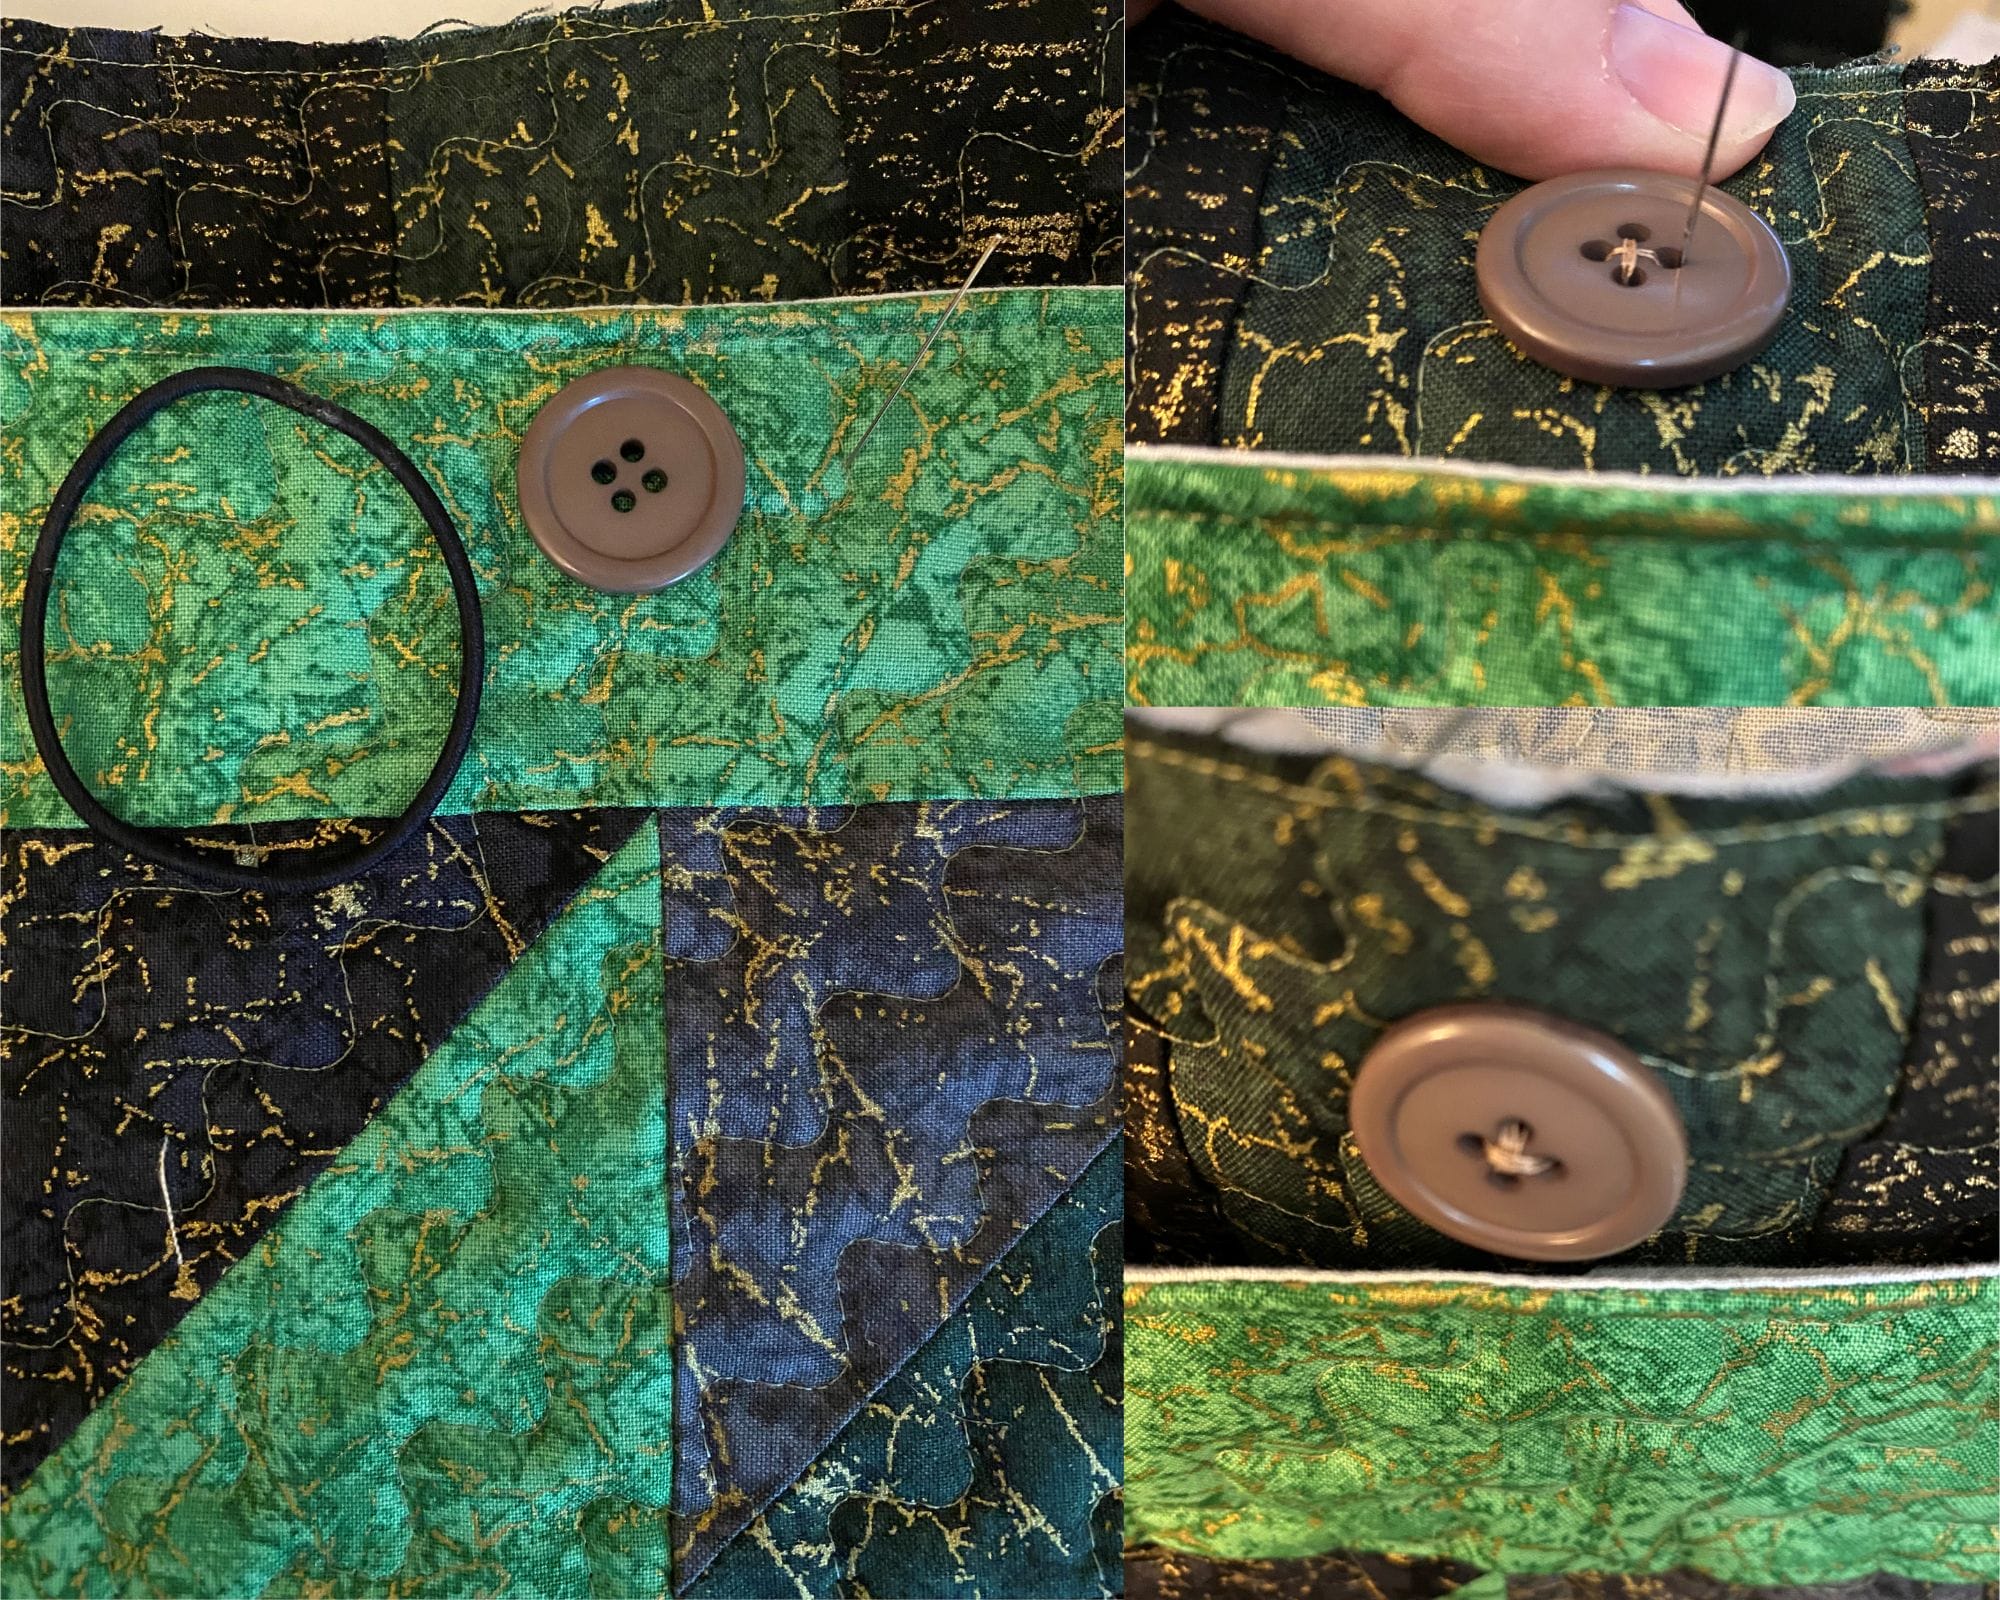
I determined button placement and hand sewed it in place, above the pocket but below the top edge, careful to leave enough room for my presser foot during the final top stitching. I choose to sew the button on before adding the lining so the back stitches are hidden between the layers. However, this step could easily be completed after the full sleeve is assembled for those who prefer to select placement once the elastic loop (hair tie) is fully secured in place.
Flipping the lining right side out, I inserted the assembled lining inside the assembled outer/pocket unit, right sides together and clipped in place.

Right: clipping the hair tie, against the back panel, between the outer and lining pieces.
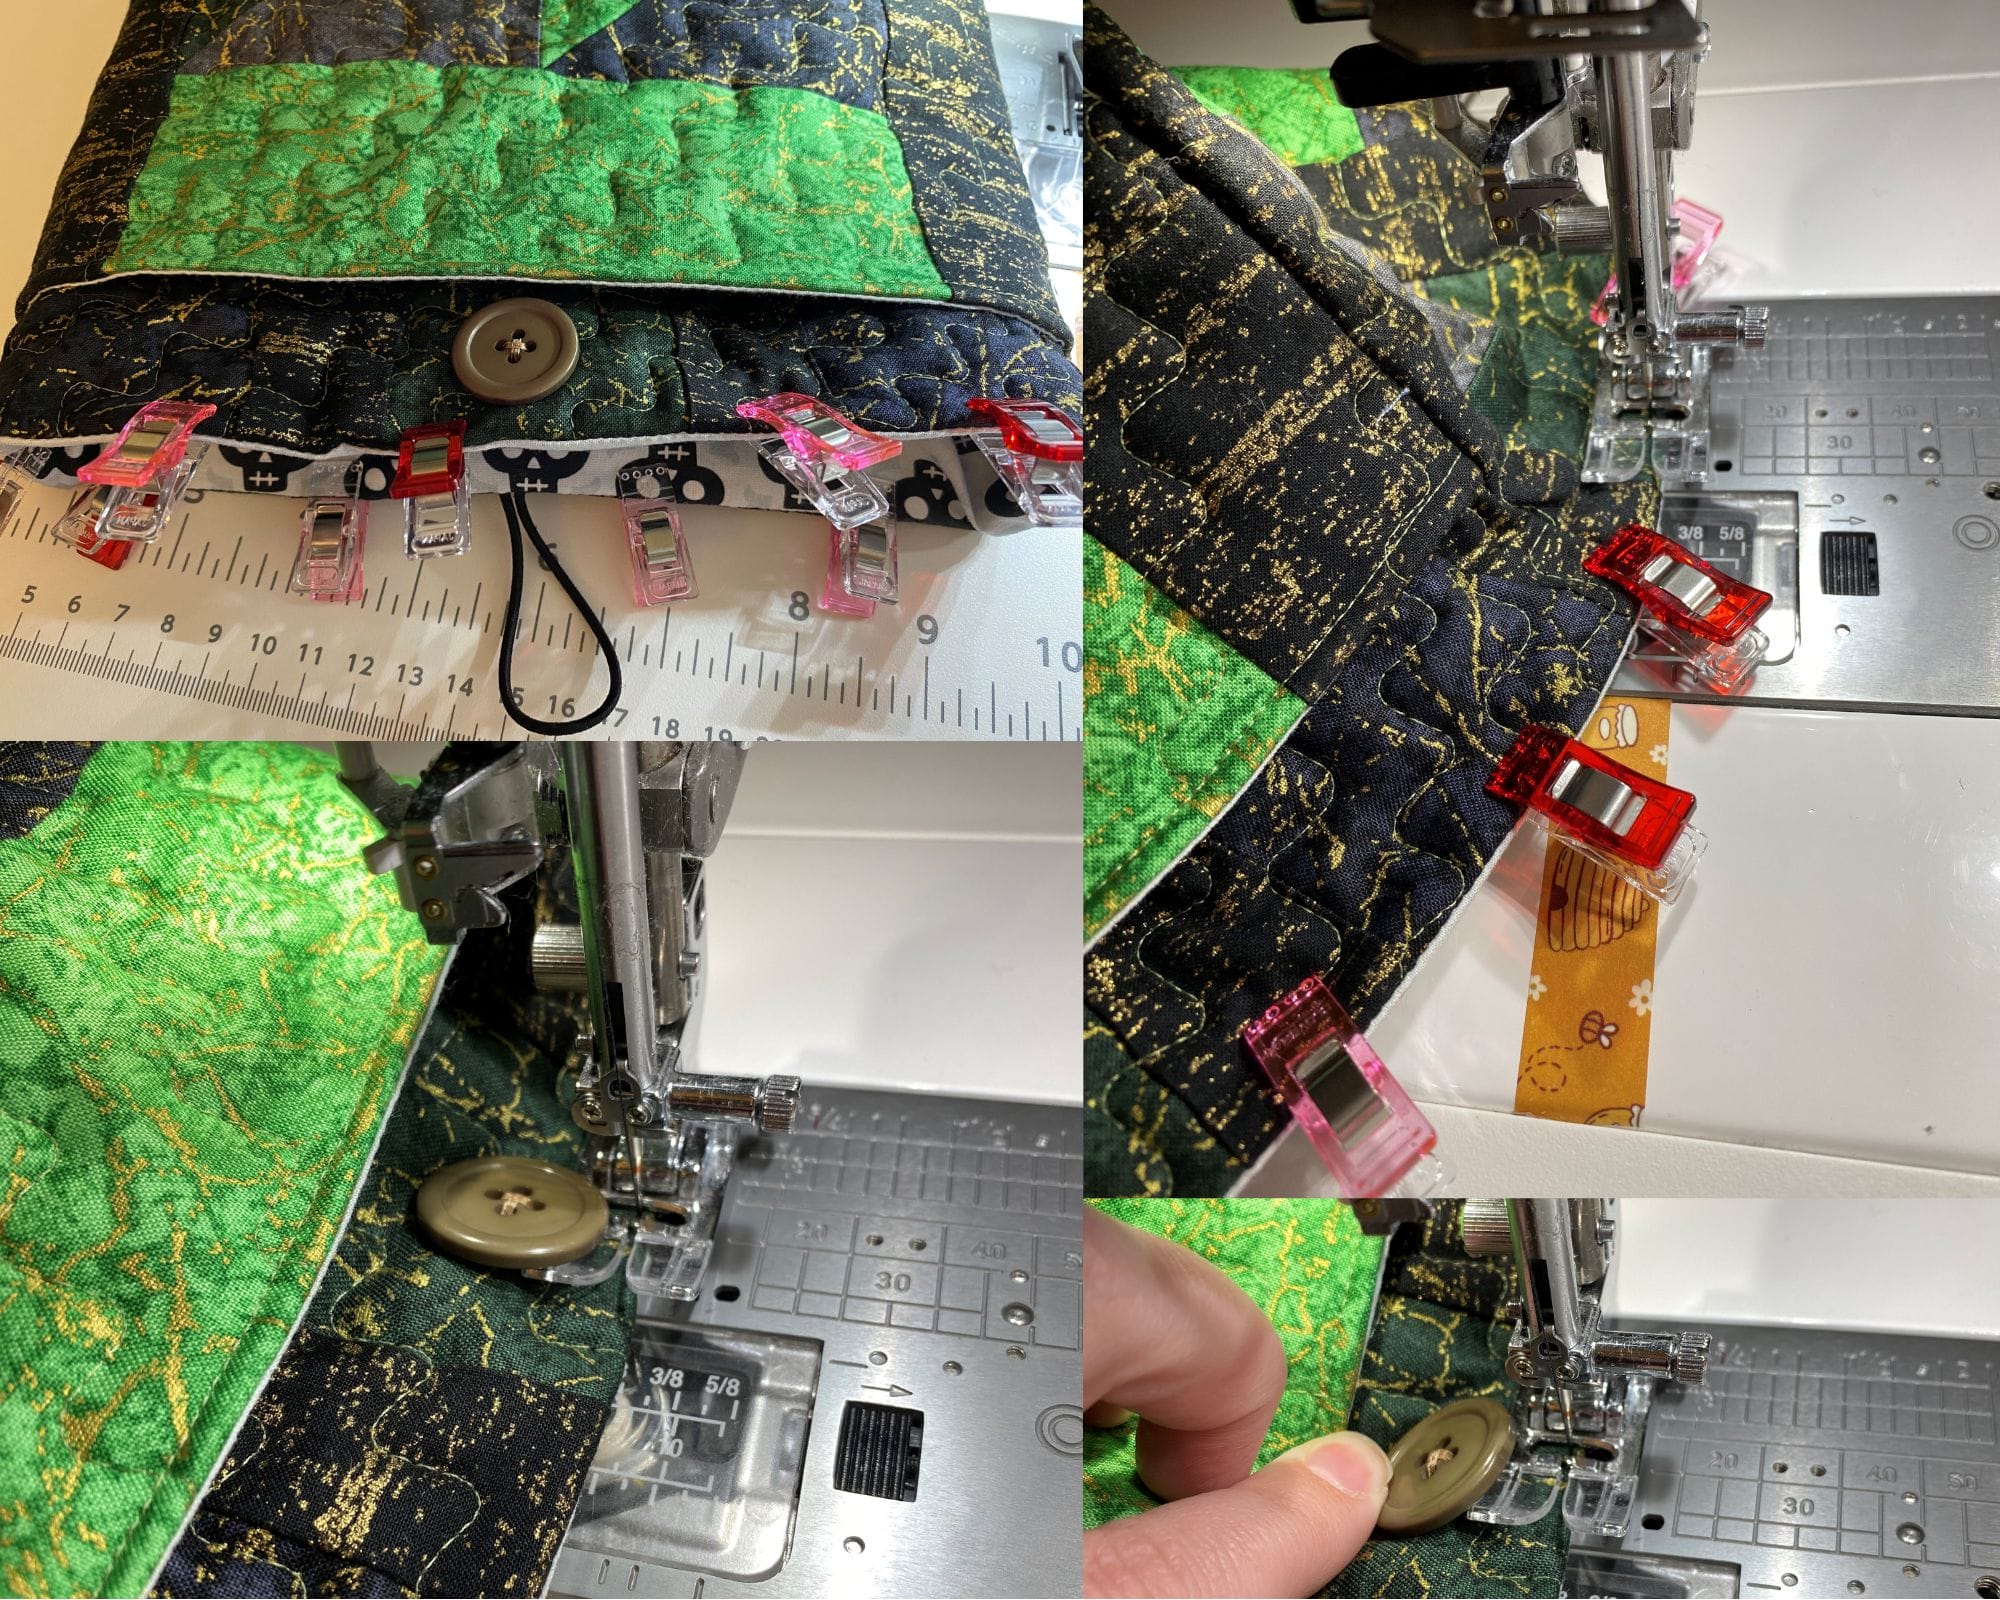
Opposite from the button, between the lining and outer layer, I slipped in an unused hair tie and clipped it in place. Then, careful to only catch one side at a time, sewed around the top edge with a ¼” seam allowance, removing clips as I went around. When approaching the hair tie, I was mindful to pinch the two sides together (to minimize gapping) and back stitched over it to keep it extra secure.

Sewing around the top edge can be tricky, so it is important to go slowly and make sure that the pouch isn’t accidentally being sewn shut! Depending on the machine being used, it can be helpful to remove the drawer/table portion of the machine to get closer to the presser foot. I chose to keep my table in place and just made sure to fold back the opposite sides out of the way as I sewed around.

Then, using the opening in the lining, I flipped the whole piece right side out.
Folding in the seam allowance, I pinched shut the lining opening and sewed across it with a small seam allowance.
Tucking the lining in, I rolled and finger pressed the top edge to make sure the lining was tucked inside and the edge was nice and even.
Then, for the very last finishing touch, I added a final row of top stitching along the tip. While passing by the button, I was mindful to keep it tucked out of the way of the presser foot so as to avoid jostling my stitches by bumping up against it.