Tutorials
 9.8.2020
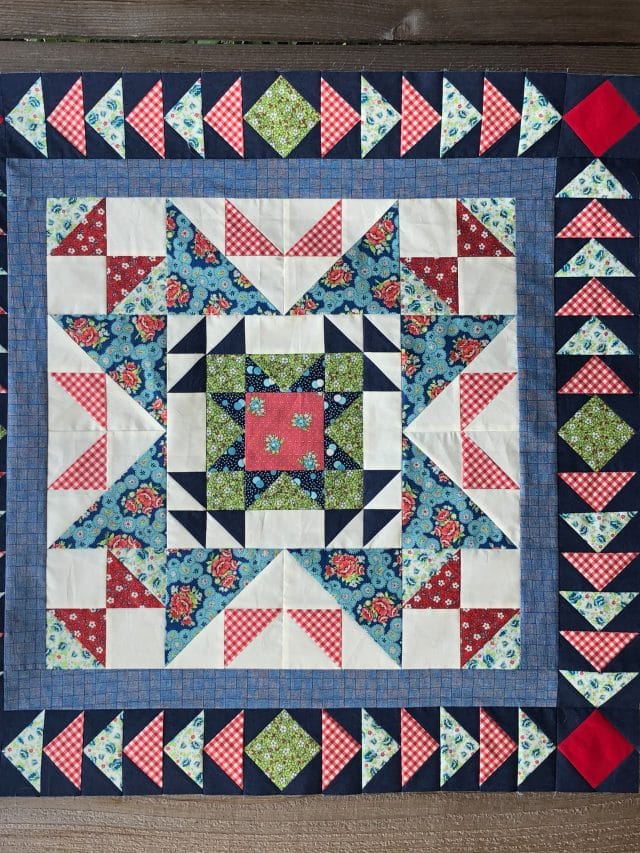
Hi Everyone!
I’ts been so fun to see everyone’s photos from month 1 on the Facebook Group. It always makes me happy to see people enjoying my designs! This month we will be adding a couple of borders to our center medallion. It’ll be a breeze compared to all the piecing we did last month!
The first part of this month’s directions is easy-peasy! Just sew on the border strips as directed. And just so you know, it’s perfectly okay to add at lease 1/4″ or so in length to all your border strips before cutting. I ALWAYS do this every single time I’m adding borders to any quilt. I like having the wiggle room to make sure it’s all going to fit, and then I trim things up as I go.
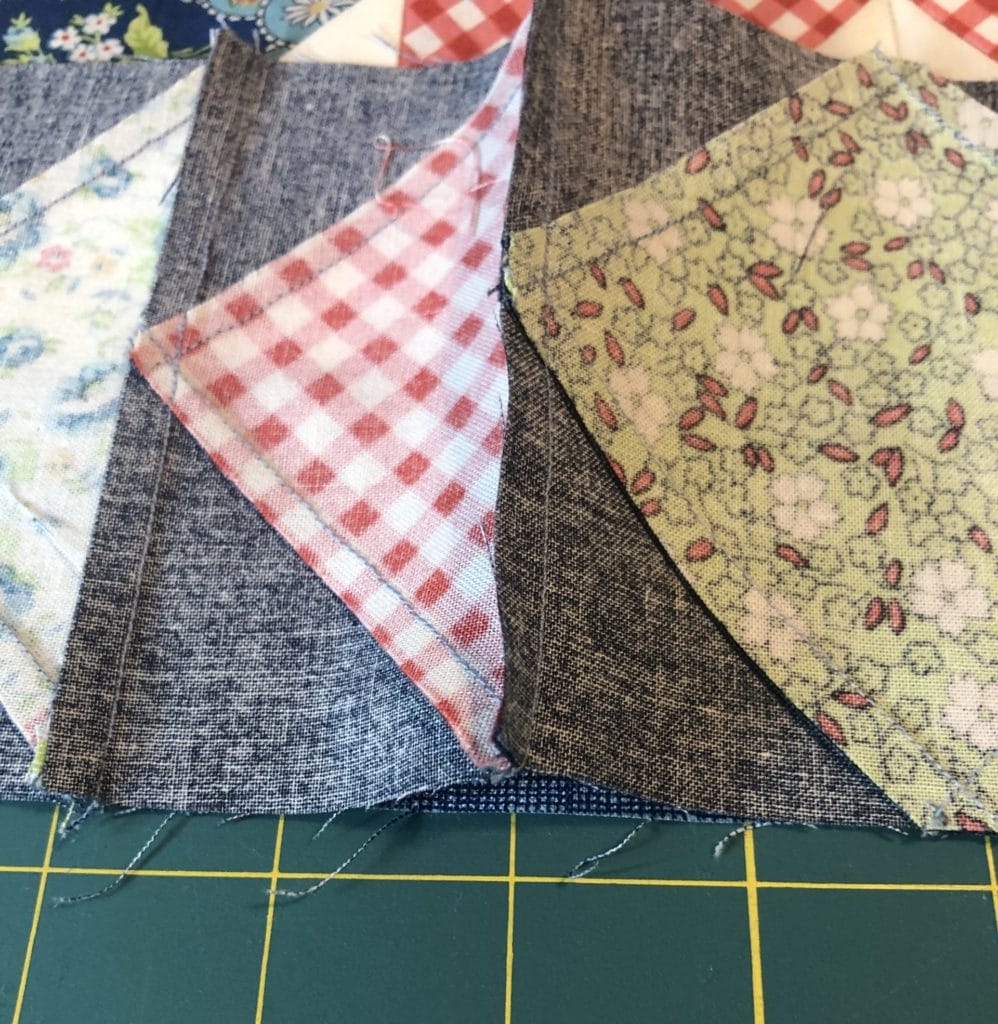
Remember last month when I showed you all how to make no-waste flying geese? Well, we are going to be doing a lot more of that for month 2. (And in later months too!) When I have a lot of identical units to make, I like to do what I call ‘assembly line’ sewing as much as possible. Probably most of you do the same thing already. I basically cut everything and prep my pieces and then I sew like crazy!

I always chain piece as I sew too, which means I don’t cut my threads in between pieces. I just keep feeding more units through my machine and then clip the connecting threads after I’m done. It goes SO much faster that way!
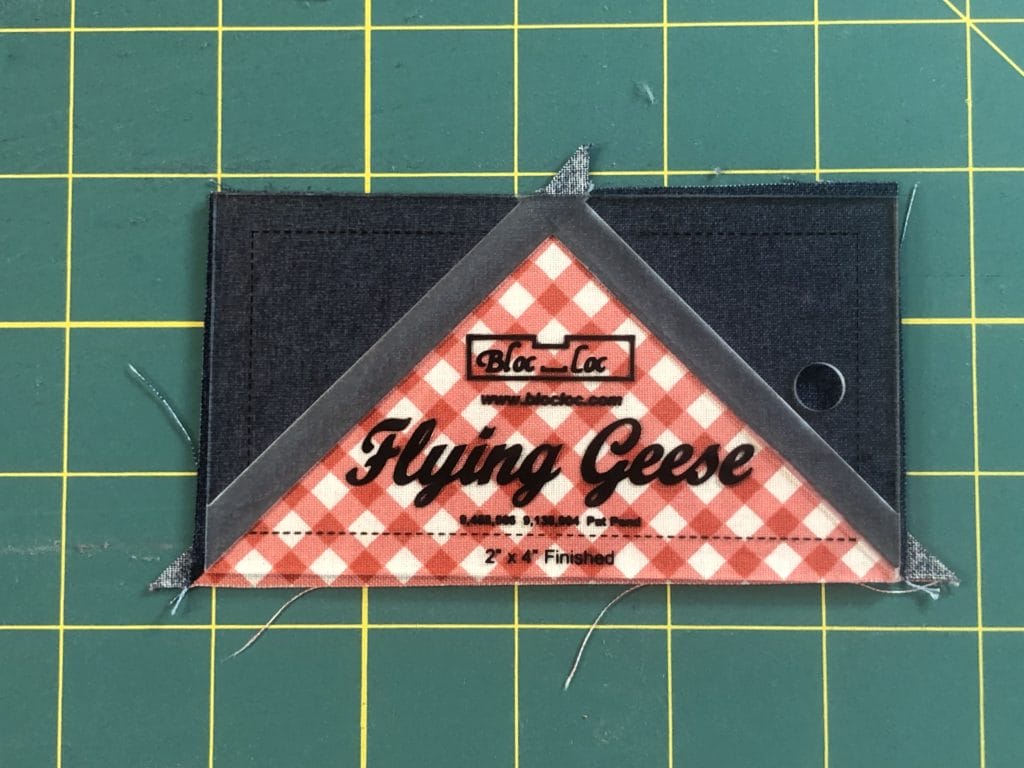
And as usual, I used my Bloc-Loc tool to do all the trimming. I love how the tool just locks in to place at the “V” so I can make quick work of using my rotary cutter to cut around the edges and true them up.
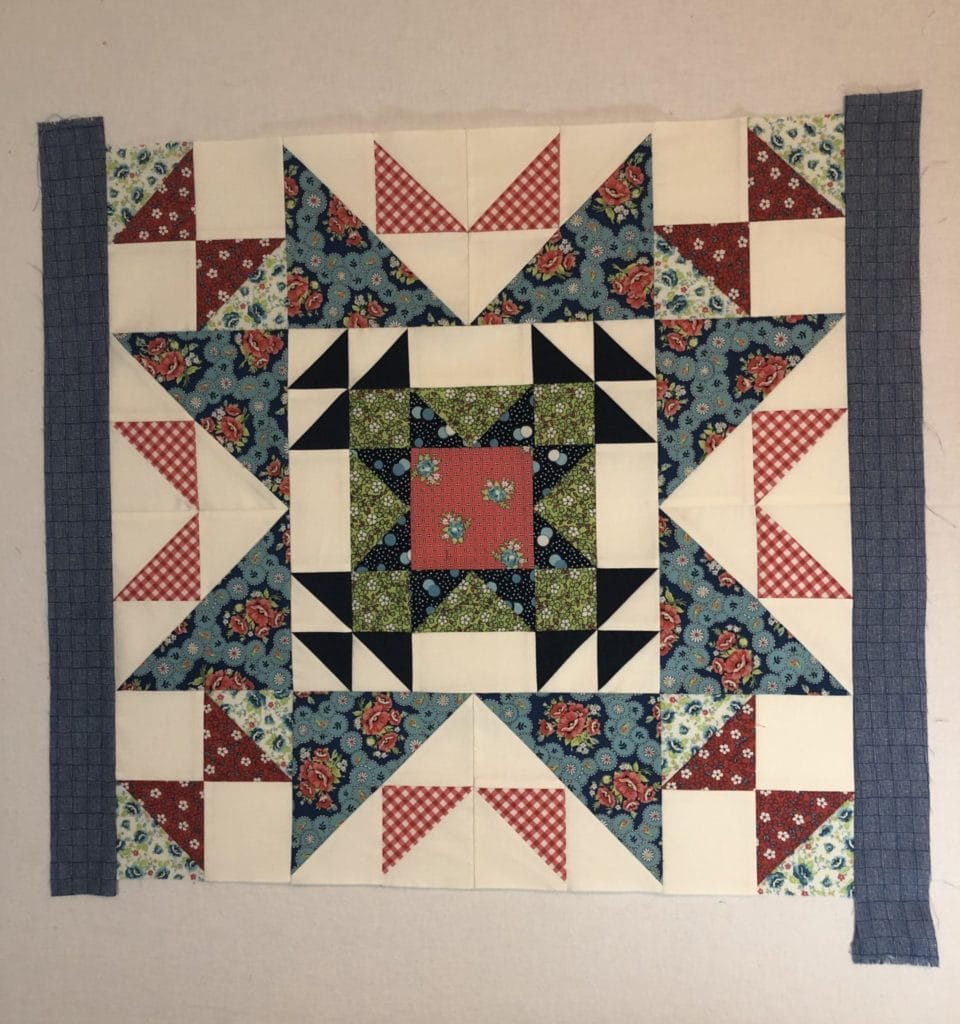
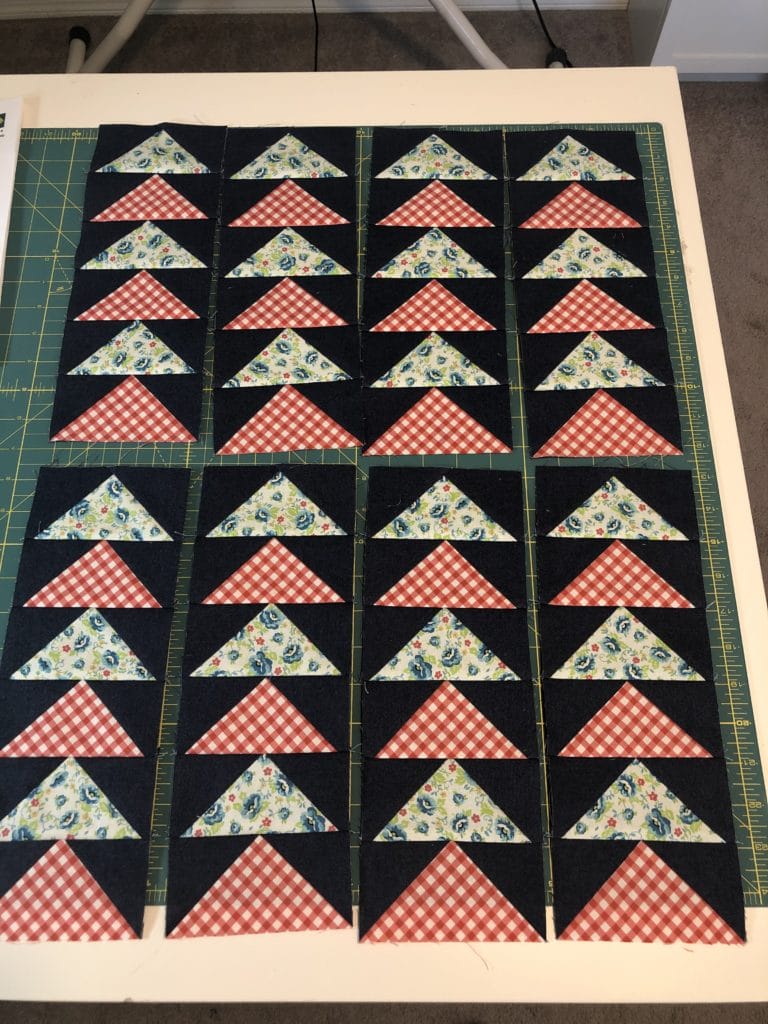
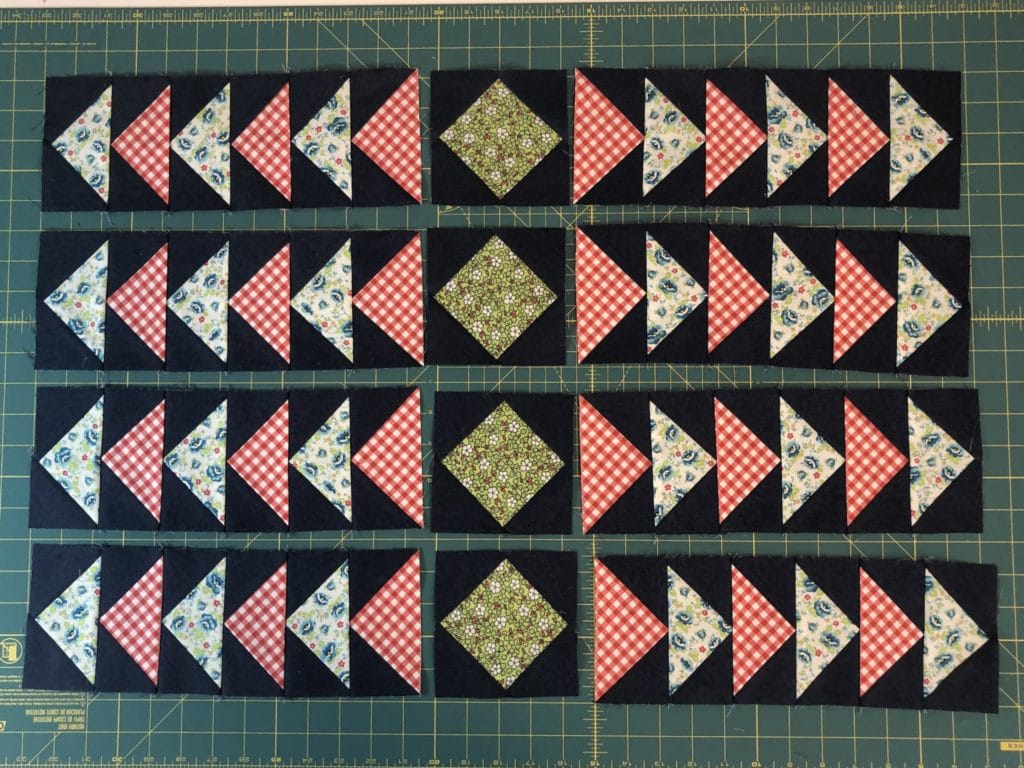
Once I had my flying geese all trimmed it was time to lay them out to sew into the rows as outlined in the pattern instructions.
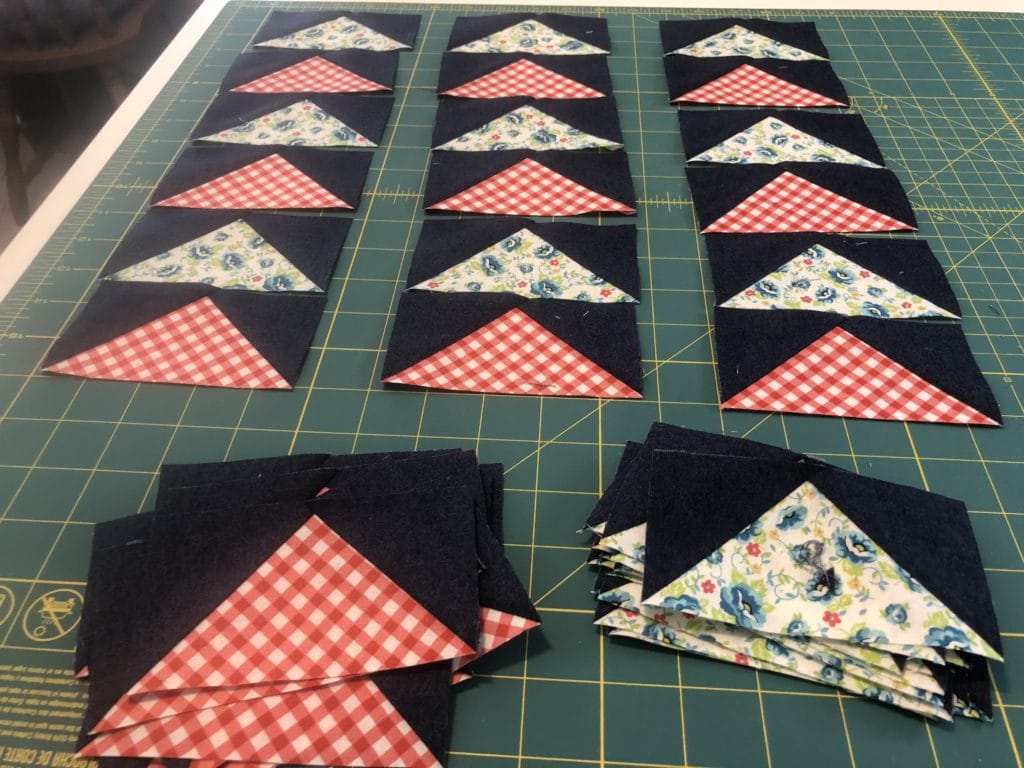
I laid out all the units at once to make sure I had everything correct before sewing each of the 8 strip sets together.
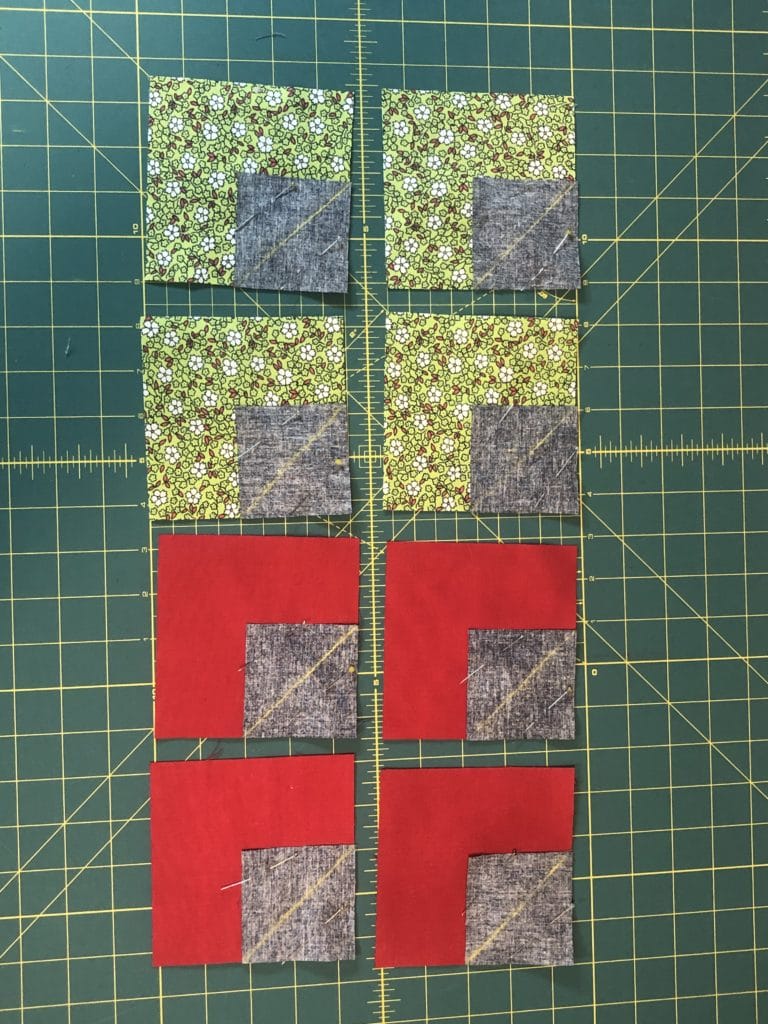
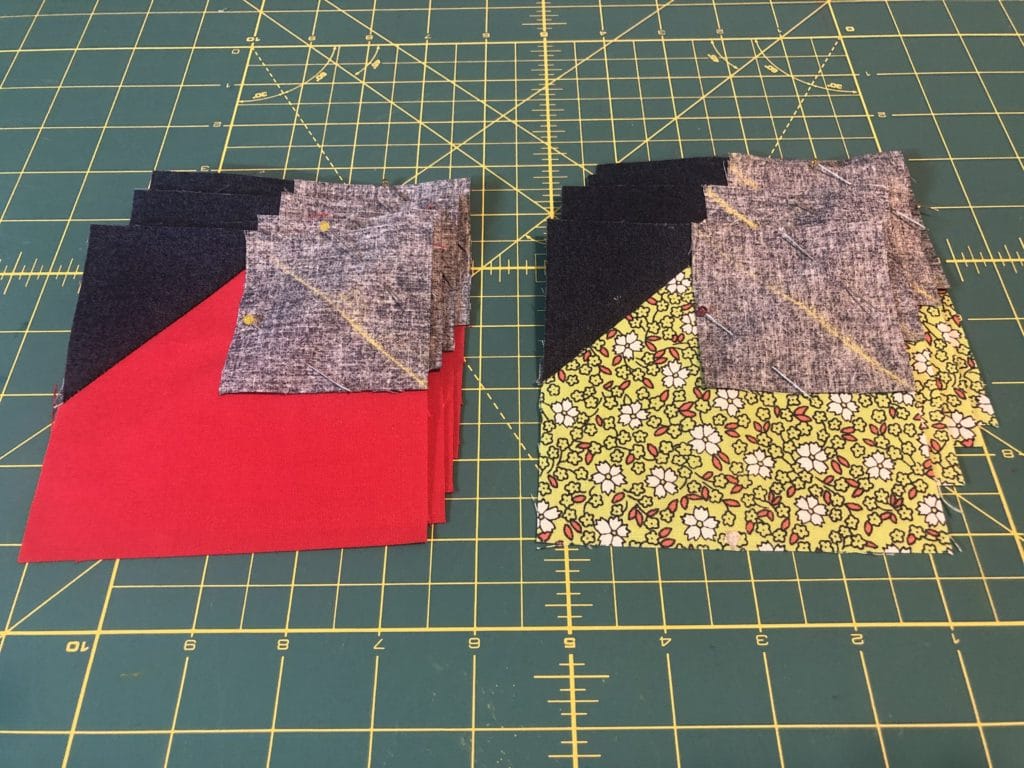
Now it’s on to make the Square-In-A-Square blocks which are in centers and corners of the flying geese borders.
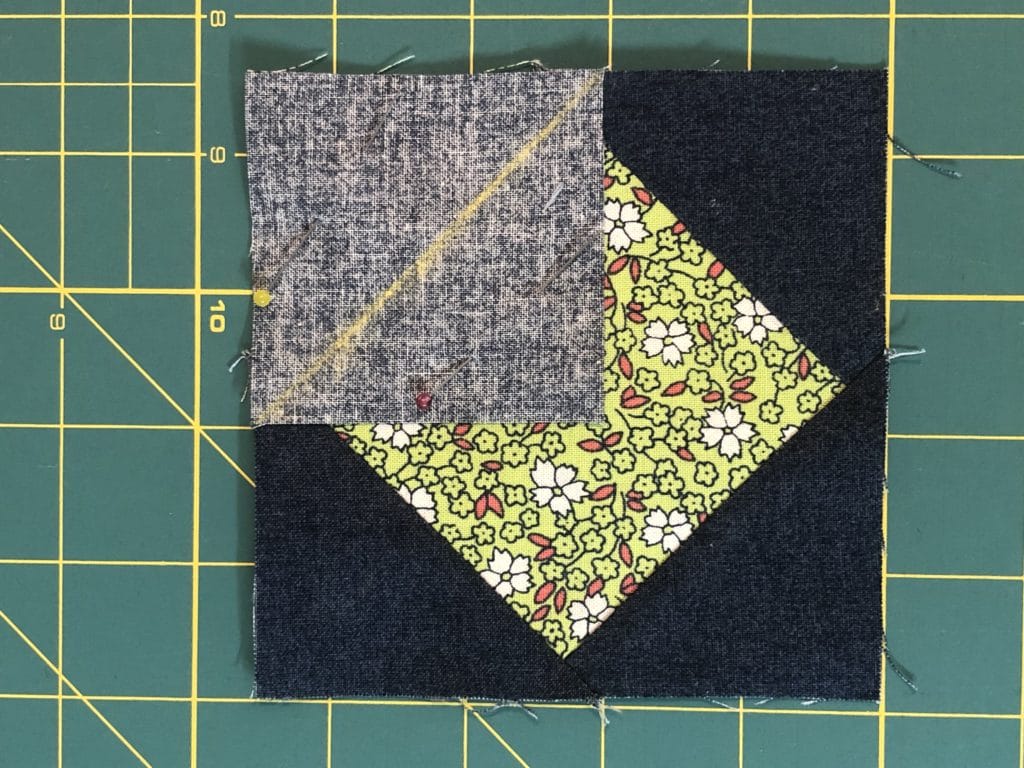
There are basically two different methods to make the Square-In-A-Square blocks: One method is to cut a smaller center square and then attach triangles around the edges. I have some patterns where I’ve done it this way, but I find that sometimes it’s harder to get things to measure correctly in the end. So for this pattern I decided to do the method that gives more accurate results (in my opinion), but the downside is there is a bit of wasted fabric. Since we are only making 8 of these blocks, I figured I wasn’t committing a huge crime with a small amount of waste. haha.
I made these square-in-a-square blocks by using the stitch and flip method, which is also commonly used to make flying geese units. This way we know we can end up with an accurate 4-1/2″ square when we are done, and that each unit has the required 1/4″ seam allowance. And yes, I made all mine at the same time to make quick work of it.
Now it’s on to attach the 2nd square to each unit.
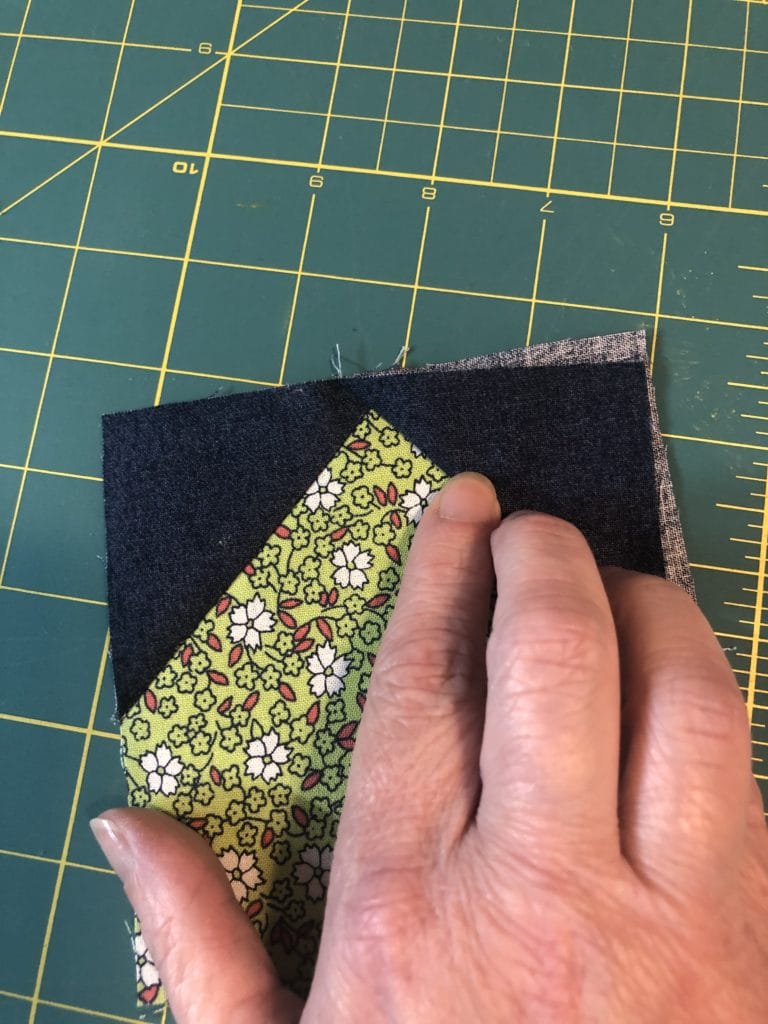
When doing any stitch and flip method, here is something I find helpful: Sometimes after we’ve stitched, trimmed, and pressed we end up with corners that come up short or wonky. I’ve found that after I’ve sewn on the marked line, if before trimming I first flip the square up at the seam and it doesn’t match up at the corner, then I know I need to rip it out and re-stitch. Not my favorite thing to do! To avoid this, I generally sew just BARELY – and I mean just a hair – outside if my marked line, on the side that is closest to the corner. This way I don’t end up with shortened corners and things squaring up much better.
Here is a photo below of me flipping up the square and it NOT matching up in the corner. See how it looks all wonky?
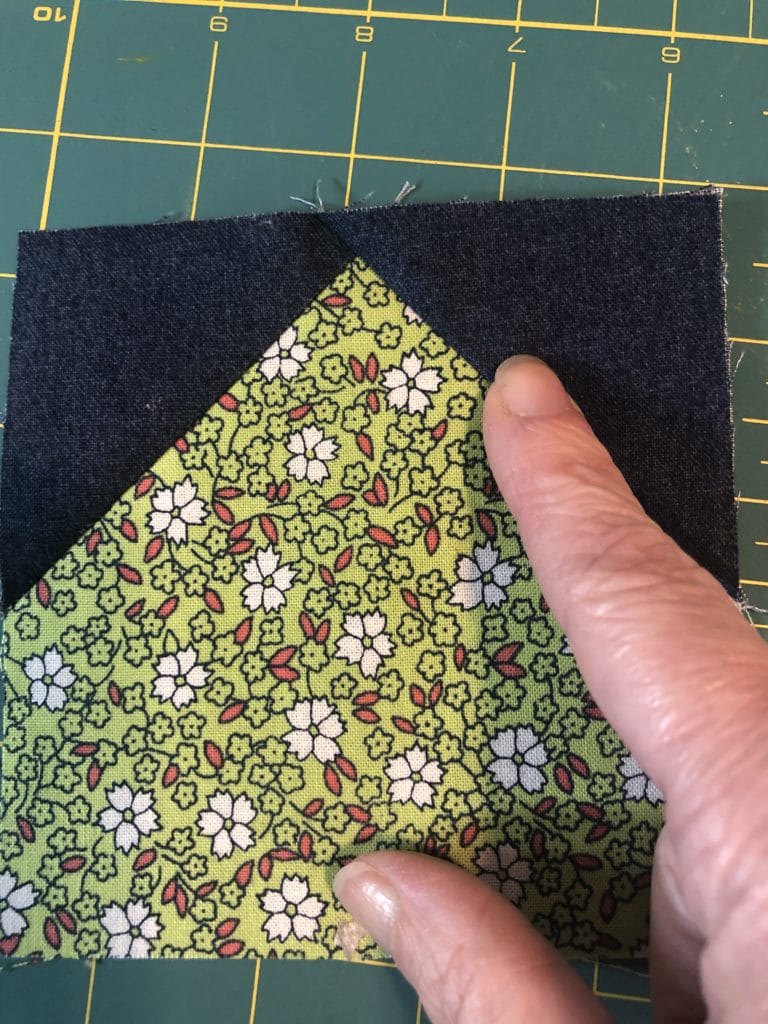
Below is what your corner SHOULD look like after you’ve flipped up the square on the seam you just sewed.
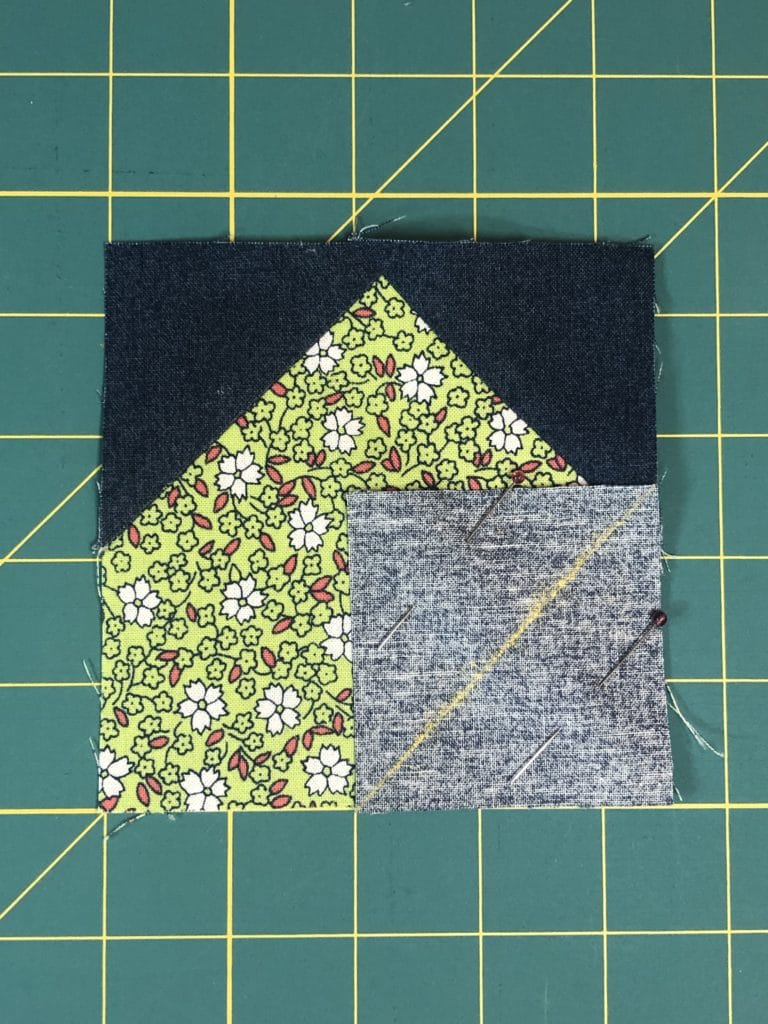
Once you have all your Square-In-A-Square blocks finished up you can sew the green floral ones in between each of your flying geese strip sets.
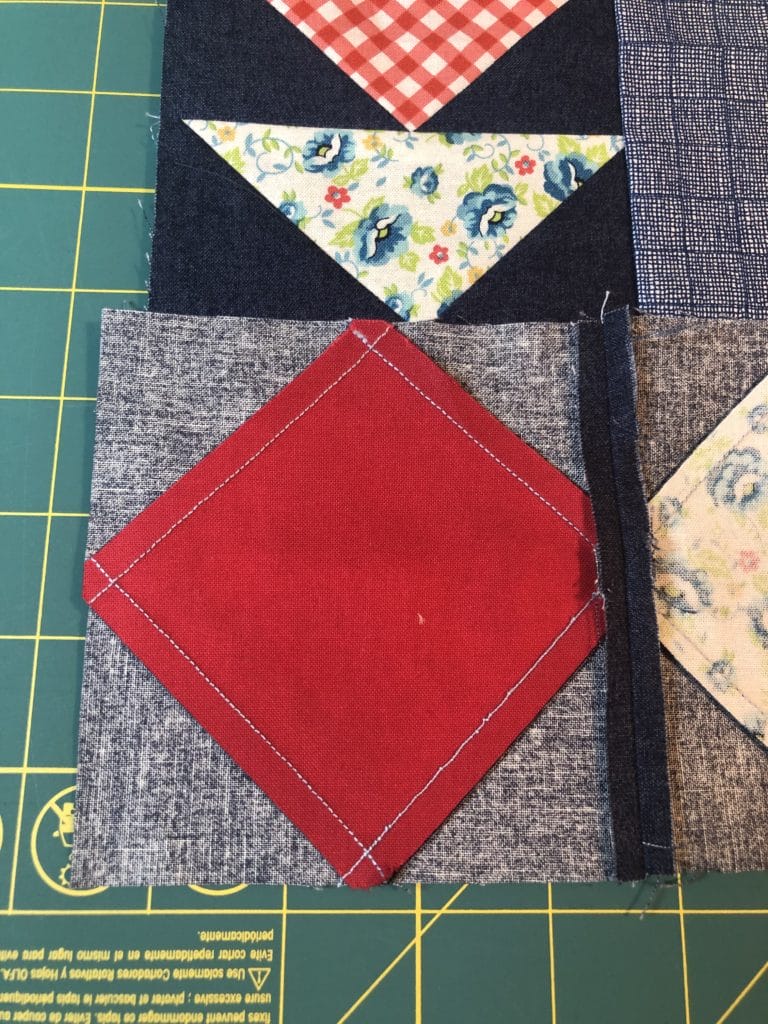
Below you can see I’ve sewn the red squares on to the ends of two of the strips sets I just made and am ready to sew everything on to the quilt.
When sewing the red square-in-a-square blocks to the ends of the flying geese units I changed my mind from the directions and decided to press the seams open to reduce the bulk where the triangle points all come together. You can still press them as directed, and it will work, but I thought I’d try it this way too. I talked about seam pressing a bit in the last month’s blog, but basically you do what you think works best for you.
Sometimes sewing pieced borders to your quilt can be tricky. Fabric tends to stretch so we can end up with borders that don’t seem to match up correctly. So here is one tip that has worked well for me.
If I notice my pieced borders have stretched and are a bit too big, I simply give the longer ones a good spray with Mary Ellen’s Best Press, which is my personal go-to starch. (I use it on EVERYTHING. But I’m sure any other starch product you are using would probably work fine too.) For some reason, my pieced borders almost magically shrink back up, usually just enough for me to gently re-press in their smaller size, and then they fit much better. This way I don’t have to do quite so much “easing” things together with my sewing.

If you were to look VERY closely at this picture below you will notice that there is a red square that doesn’t quite match up perfectly with the flying geese at the points. I re-did it twice and finally decided it was time to say UNCLE. I’m just as human as any other quilter, and sometimes good enough is good enough!
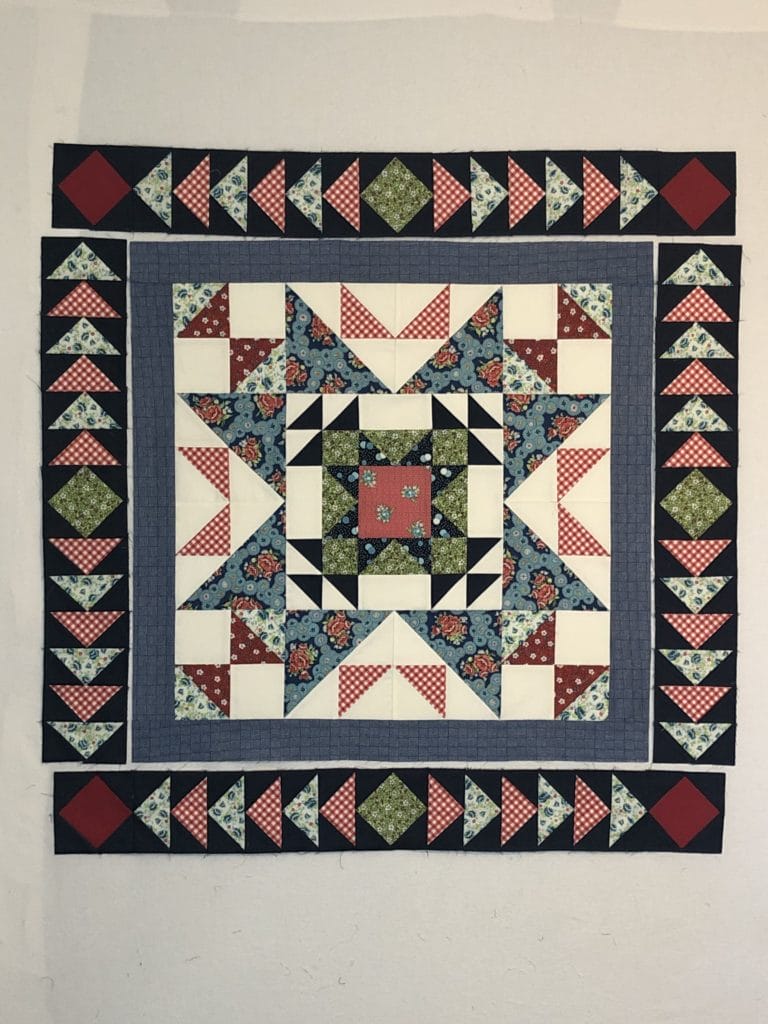
And now everything fits together. I love this center portion of the quilt so much just as it is. My son actually saw the quilt top in its current form and thought it was a table topper that is finished and ready for quilting. (Wouldn’t that be so cute?!) But this quilt is just going to keep getting bigger and bigger!
I hope you’ve enjoyed this month’s installment of our Annabelle quilt. I can’t wait to show you Month #3, so stay tuned!
Happy Quilting! – Kristin