Tutorials
 10.9.2020
Hi there friends!
Can you believe we are already on month 4? Time flies when you are having fun! This month we will be making FOUR blocks (which I guess is fitting since we are on our fourth month of this BOM).
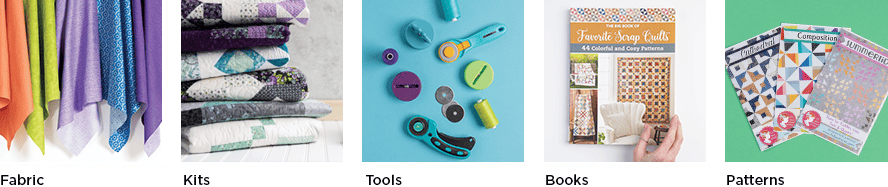
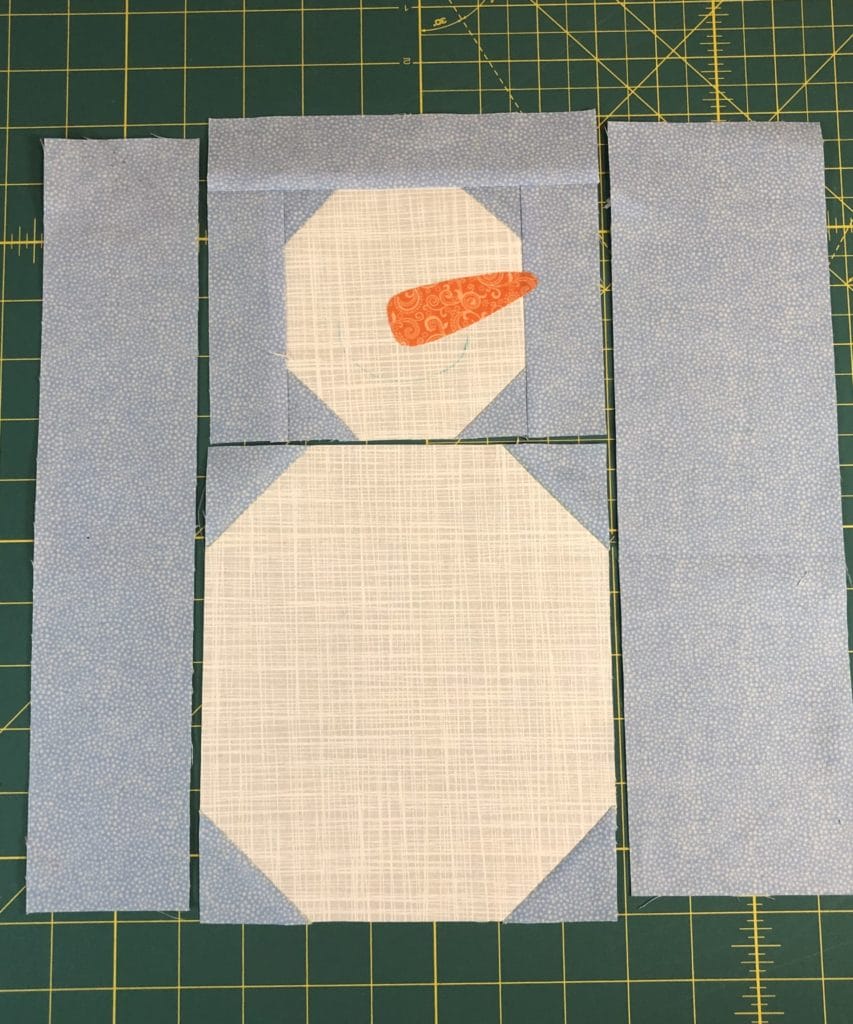
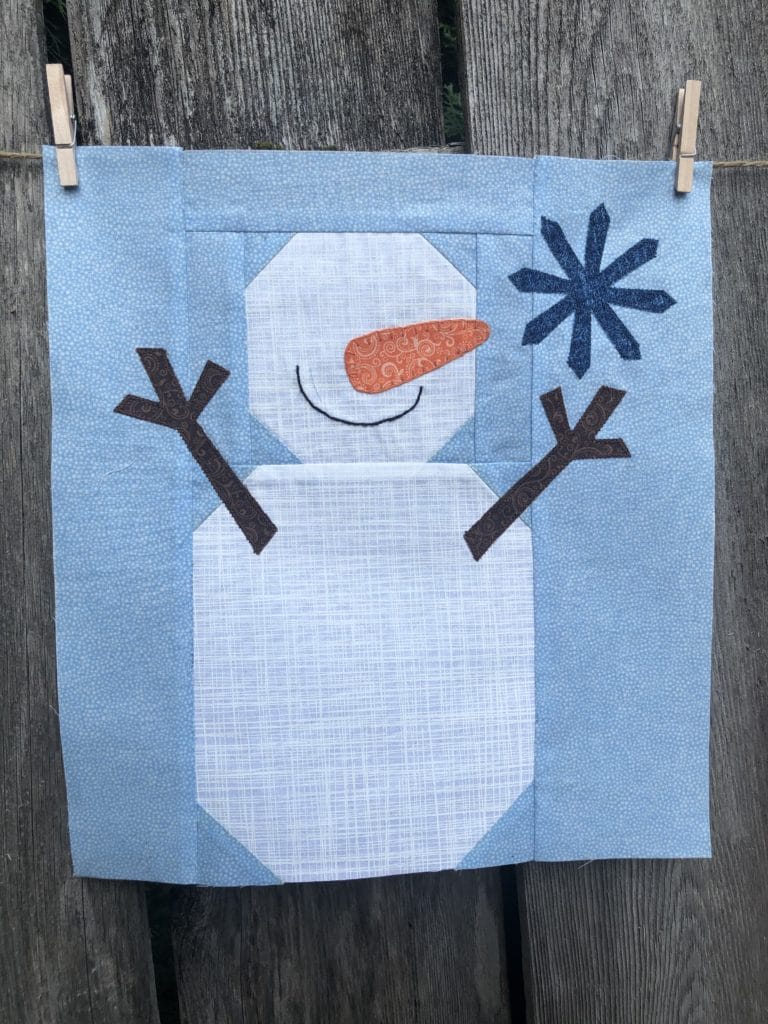
Our first block is a cute little Snowman trying to catch a Snowflake.
First we are going to make the snowman’s head. I know some of you don’t like those tiny little corner pieces, but as I’ve said before, sometimes it’s a necessary evil in order to get the correct proportions. But fortunately these little corners don’t need to match up with anything, which makes it a bit less frustrating. Just sew on the marked lines and you will be fine.
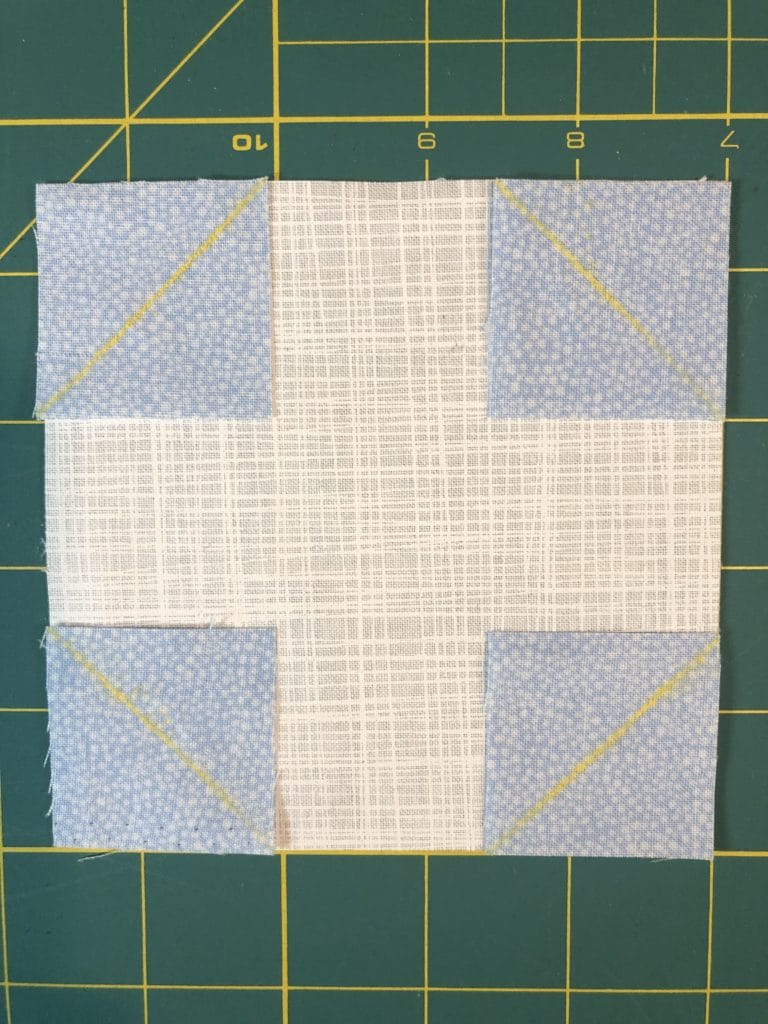
After you’ve made the head, we will add on the side pieces, and then add his nose.
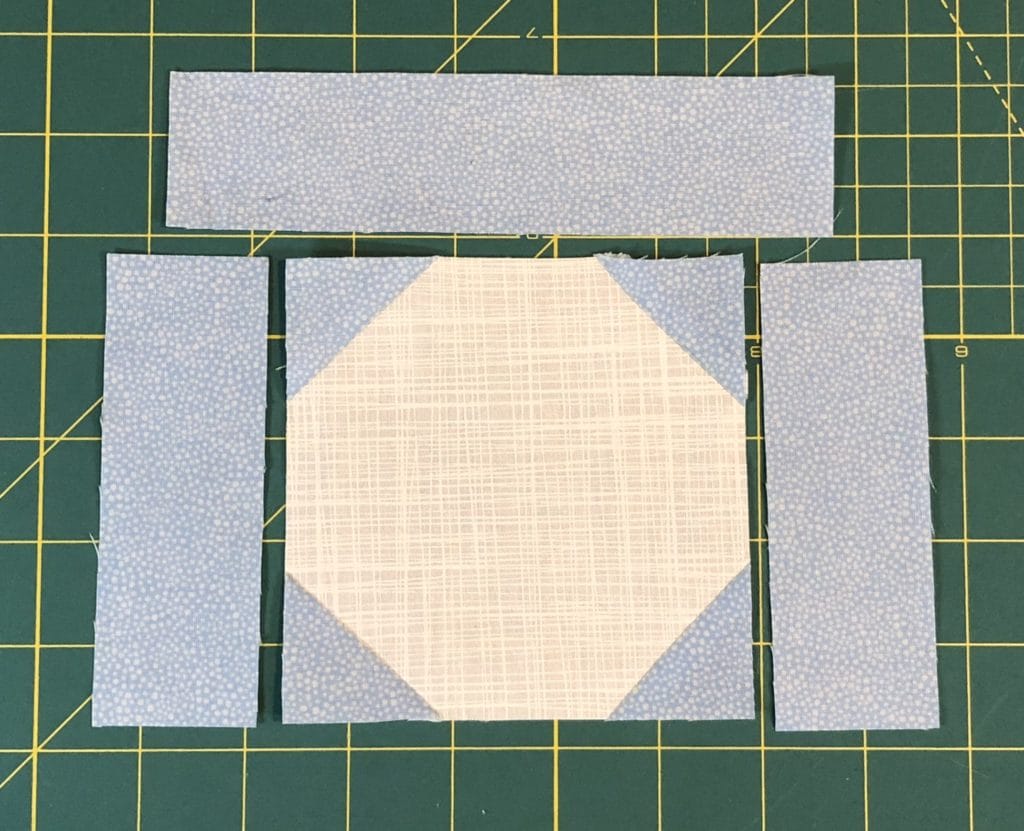
In order to get the nose where I wanted, I also drew in the snowman’s smile and placed the buttons where they will eventually be sewn on. Once I felt happy with everything, I ironed on the nose and stitched around it. You can also go ahead and backstitch the snowman’s smile at this time too. But for some reason I didn’t actually do that until the end. I’m not very good at following directions, even my own! The snowman’s eyes and buttons will be added after the top is totally finished and quilted.
It’s hard to tell from this picture, but there is a faint blue line where I will sew on the mouth later.
Once you’ve added the snowman’s body and sides, you can applique his arms and snowflake. Make sure you account for your seam allowances as you place these. You don’t want to end up with some of your snowman’s fingers being cut off down the road.
Since this isn’t the first time we are doing applique for this project, I won’t bore you again with the details of how I applique. In case you forgot, please go back to the Month 1 blog post and re-read.
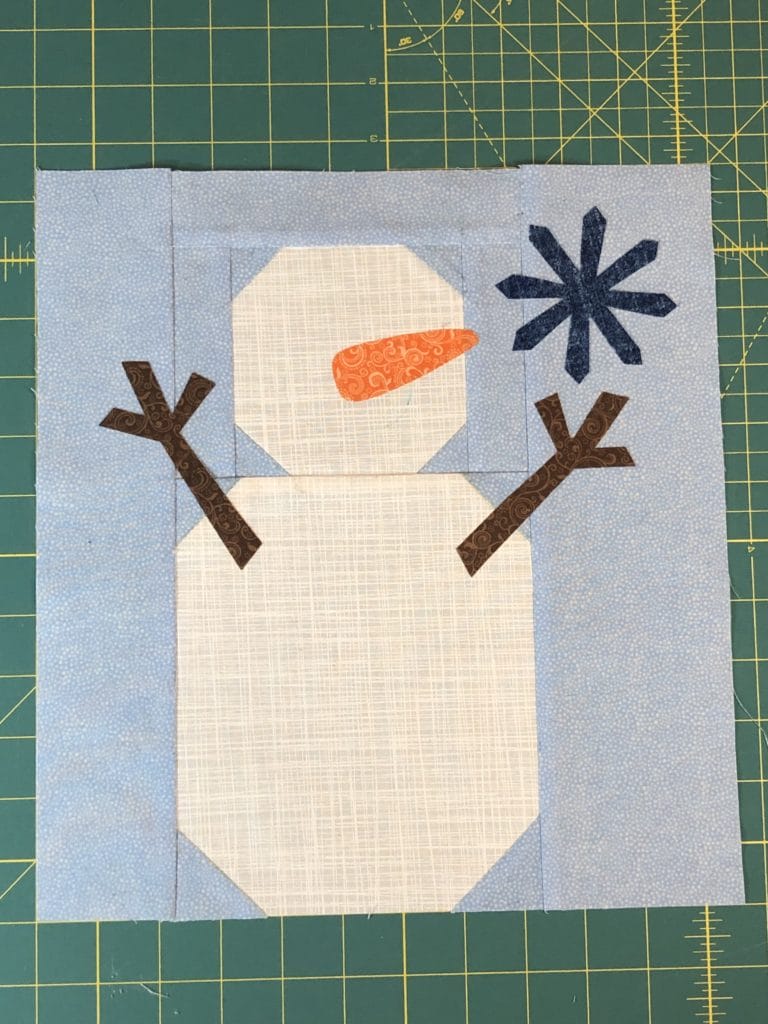
Sometimes it can be intimidating, especially if you are new to sewing machine applique, to try and navigate some of these smaller pieces. There is nothing wrong with hand sewing a blanket stitch with some embroidery thread if you are a little nervous about using your machine. In fact, I did just that with my snowman’s nose, simply because I wanted the look of the extra lines on the carrot. I also think it would be darling to use some silver embroidery floss and hand stitch a simple snowflake instead of the applique. Or maybe even add a few of them! My point is, you do what you feel comfortable doing, and don’t be afraid to think outside the box.
Now he’s all done! I know he looks a little unfinished right now without his eyes and body buttons, but your long-armer will thank you later. My snowman smile turned out a little crooked, but I decided to leave it. My little snowman just has extra character!
FLAG BLOCK:
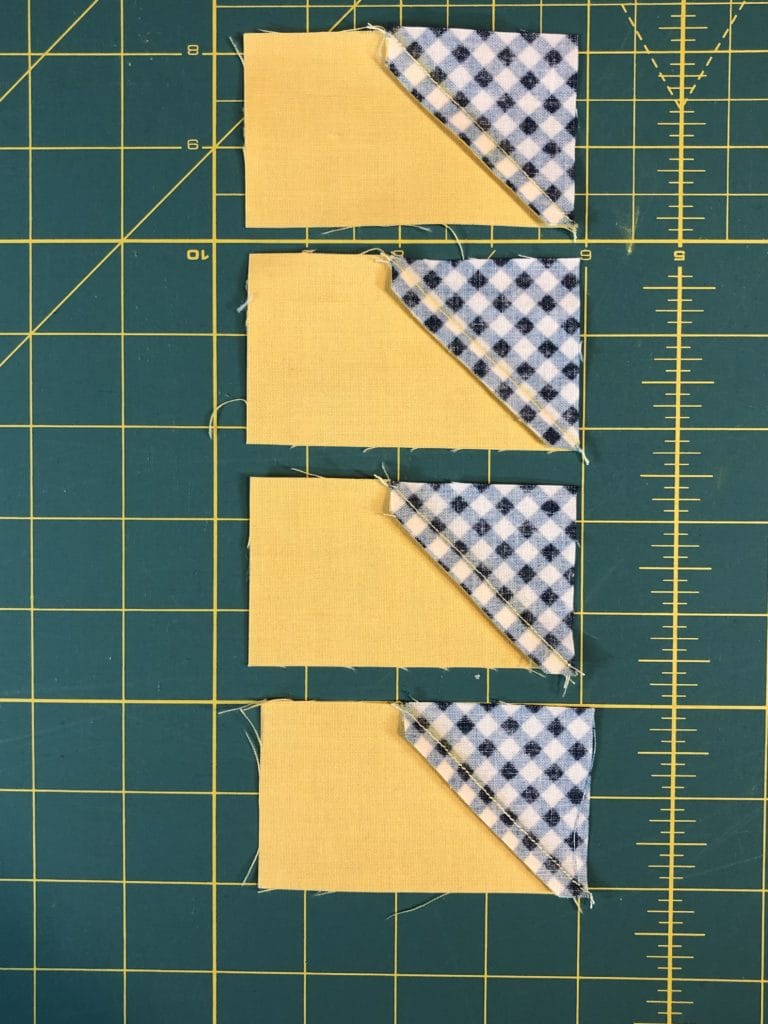
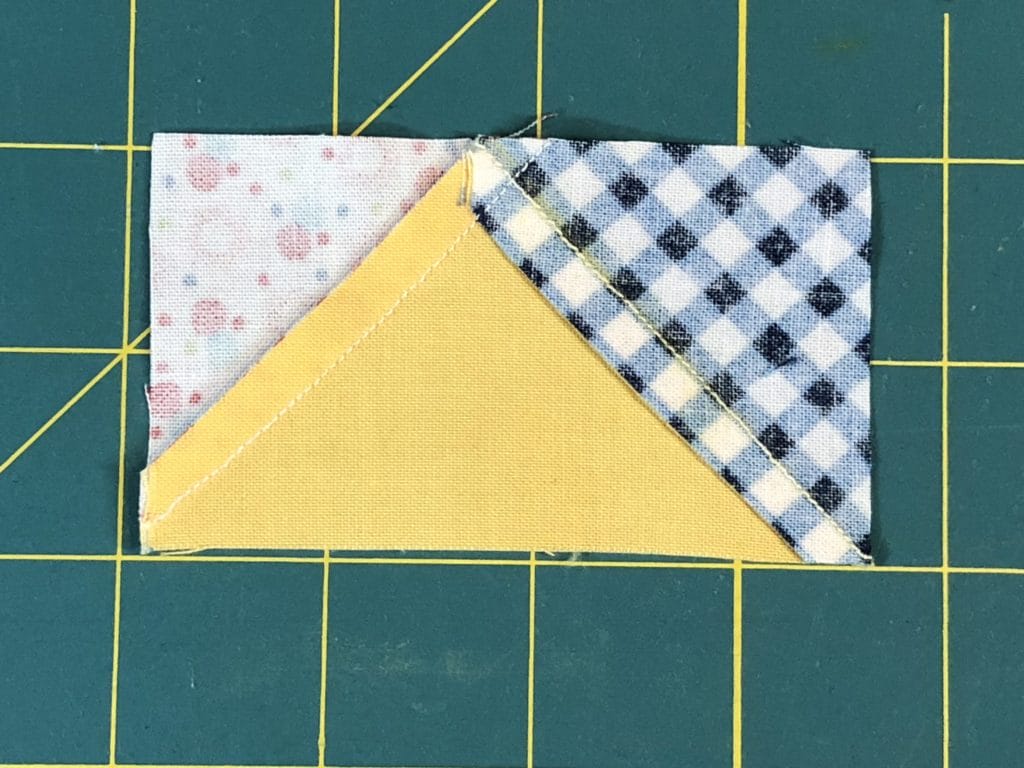
For this block we will be using the traditional method of making flying geese, also known as stitch and flip. I used to use this method for all my patterns until I discovered the joys of no-waste flying geese. But there are times that the no-waste method just doesn’t work, and this is one of those times. Since we are using two different fabrics for our corner triangles, we need to sew these cuties on one at a time.
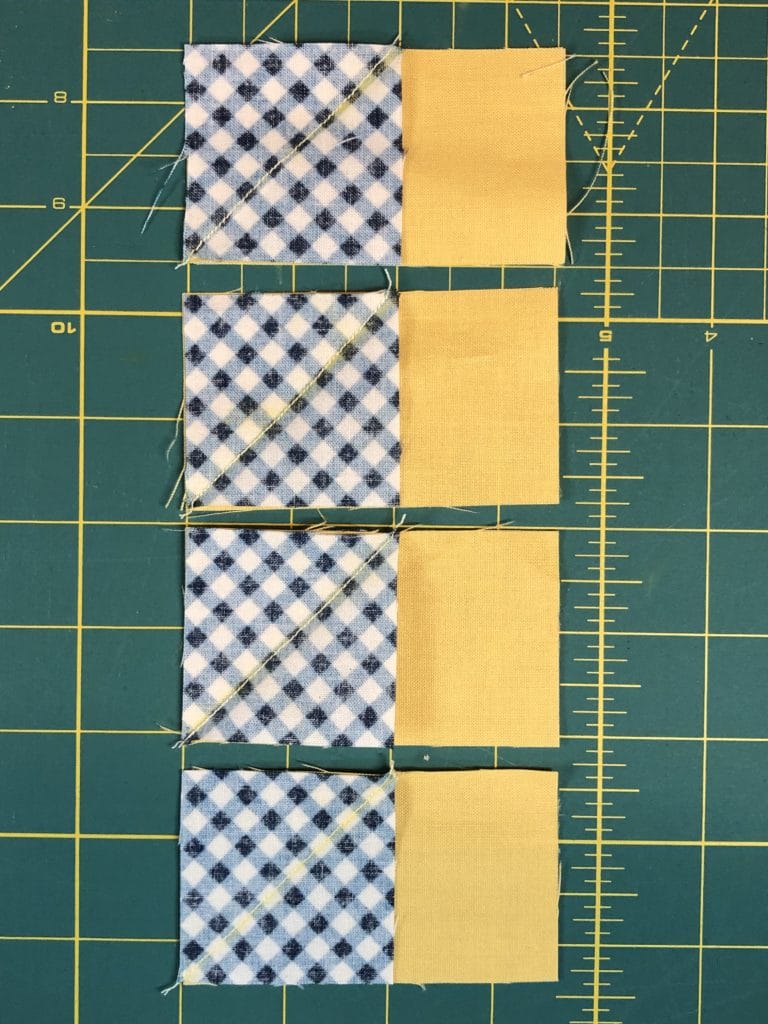
Please make sure that your first triangles (the blue gingham) are pressed down toward the yellow, not away from it as is customary. This will enable you to nest your seams together later. However, white bubble fabric triangles are pressed away from the yellow. So one corner is ironed down, and the other is ironed up. Make sense?
Now you can add the C rectangles, and then the flying geese units can be sewn together to make the star for our flag block, and all the points should nest together.
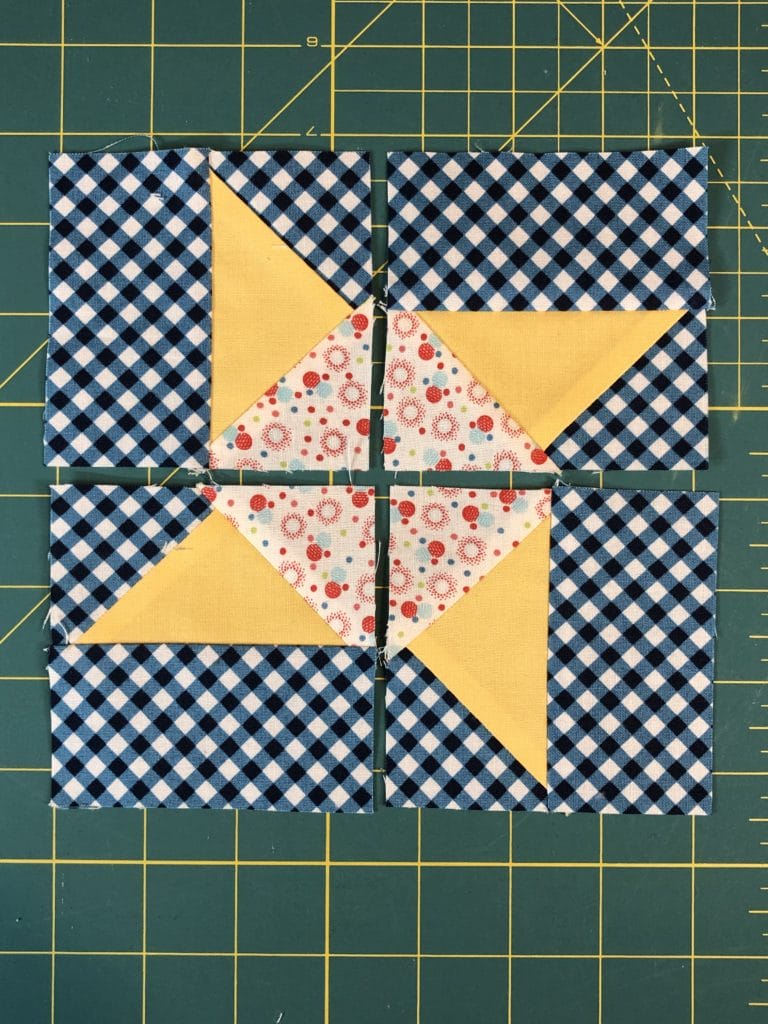
Sew on a few stripes, and you’re all done!

WATERMELON BLOCK:
VERY IMPORTANT TIP: Before you begin cutting, please know that you will need a 6-1/2” x 12-1/2” piece of the Solid Lime Green fabric for next month’s Easter Eggs block. You should easily have enough for this, but I just want you to keep that in mind. As you can see from mine, I have PLENTY left over, and I even made two Green Snowflakes for my Stocking block with this piece.
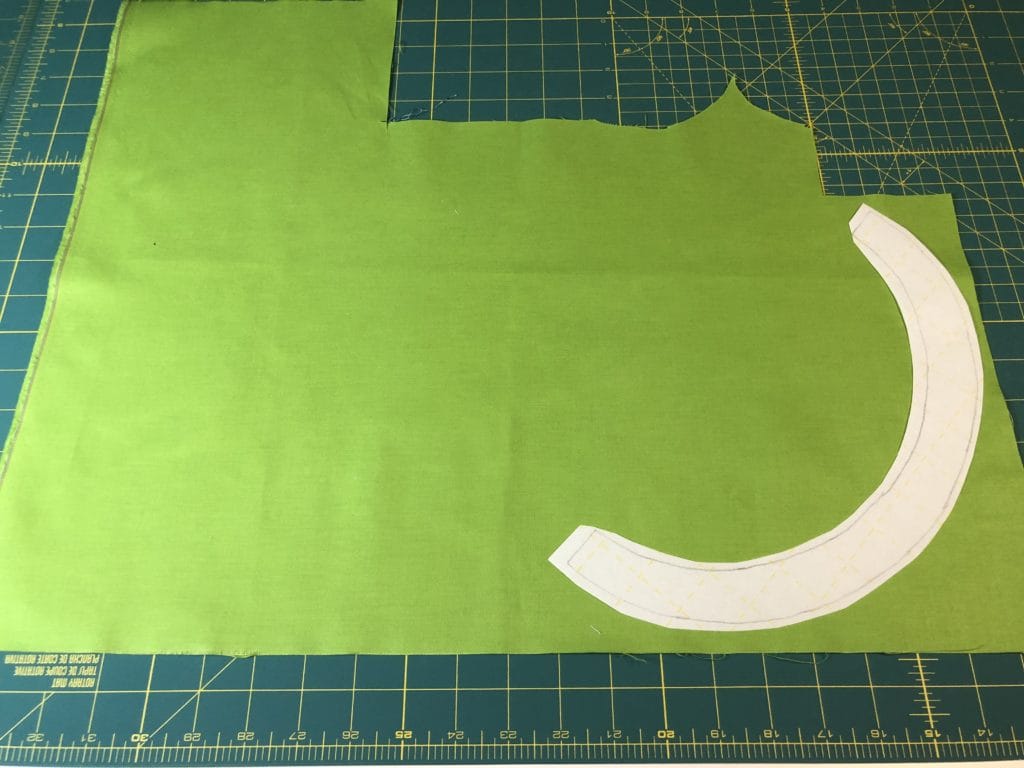
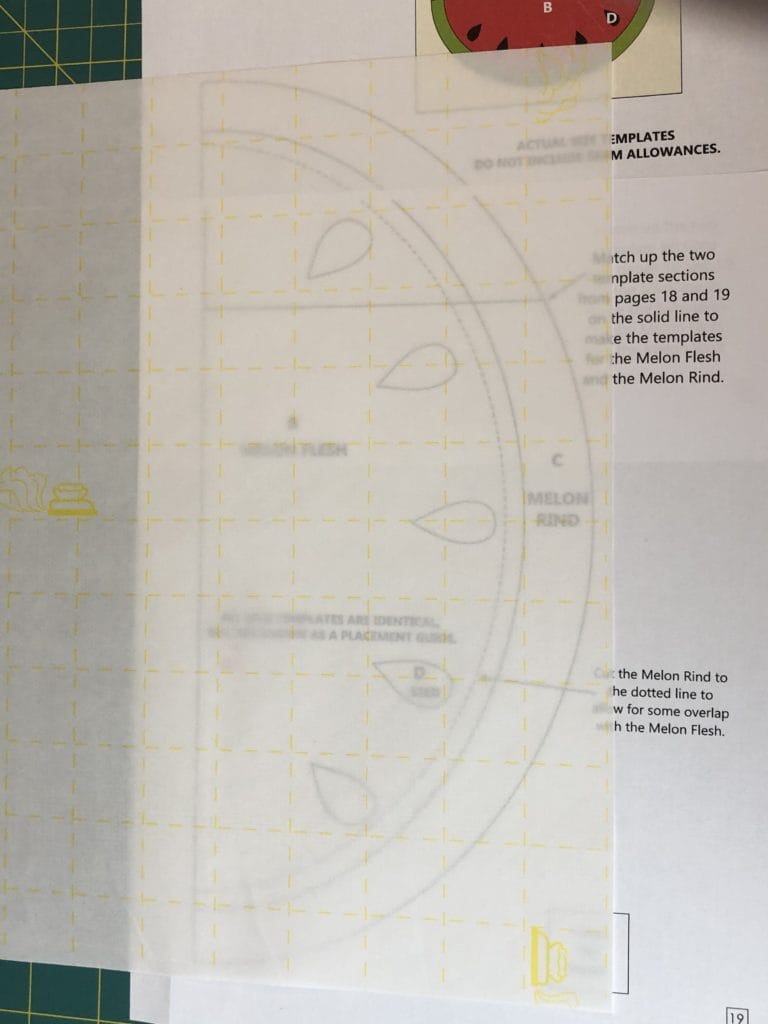
Since the applique template comes in two pieces, you will need to match up the images before you can trace them out. First I matched up the vertical solid line, then I made sure the top of the watermelon and the curved bottoms lined up.
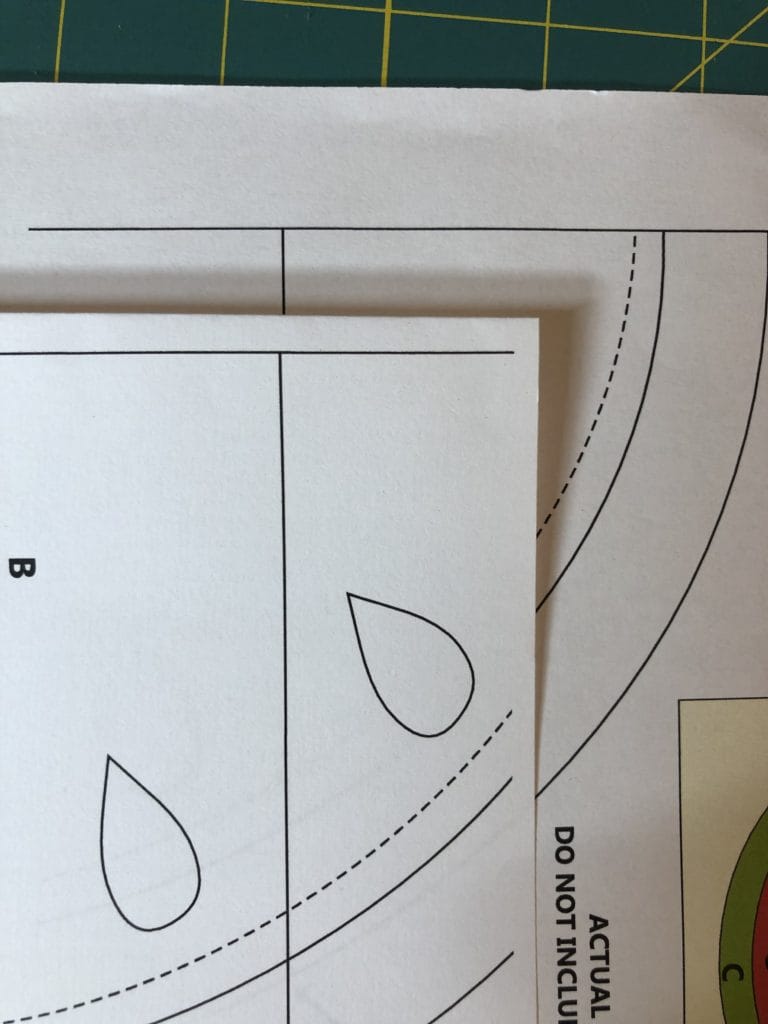
As you can see below, my pattern has been secured with with a piece of scotch tape and I have a sheet of the Seam-A-Seam Lite laid over the top ready for tracing. This pattern JUST fits onto one sheet.
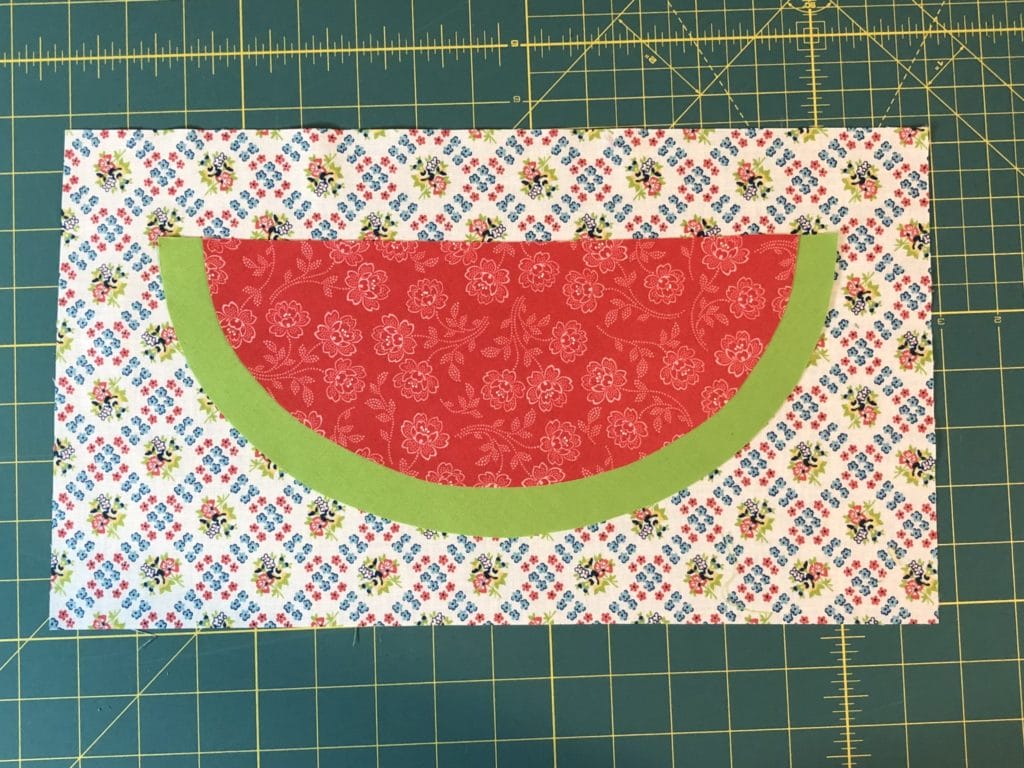
This block is entirely applique, and most of it is pretty easy. Usually when sewing bigger applique pieces, like the watermelon flesh, I like to only use my Steam-A-Seam around the edges. This helps to keep things more supple and easier to quilt later. But I wasn’t thinking while making this block, and before I knew it, I’d ironed on the whole piece to my fabric. Oops! Fortunately the Seam-A-Seam Lite that I use is pretty light weight. (I guess that’s why they call it LITE, haha!)
Make sure you have your pieces centered before you iron them in place. I usually just eyeball mine, but will sometimes take out a ruler to measure around the edges just to make sure. Once I ironed on the flesh and rind, I applique’d the rind first using matching Lime Green thread, and then went around my flesh with matching red thread.
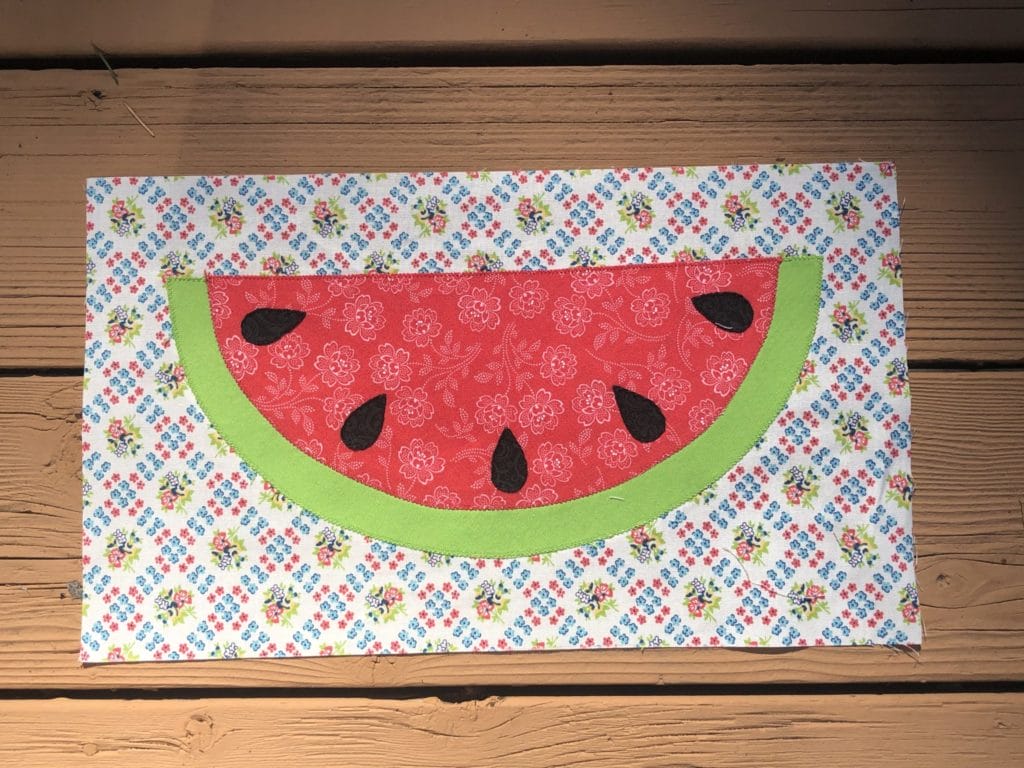
So, remember at the beginning of this blog post I talked about doing applique for small pieces? Well these seeds are, shall we say, a bit on the small side too! Just like with the snowman, if you are nervous about getting your applique stitching to cooperate, you may want to hand stitch these, but it’s entirely up to you. When I was designing this, I looked hard for some seed buttons to use, because how cute would that be?! But alas, I couldn’t find any that would work. If any of you come across some, let me know. Again, you do what works for you.
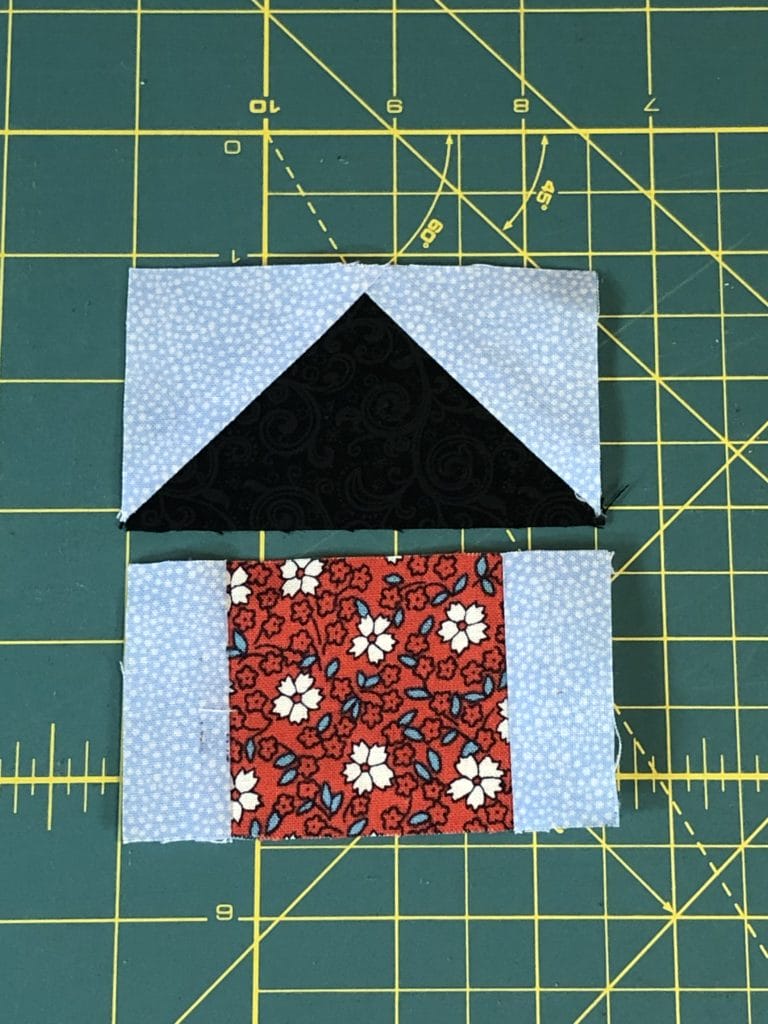
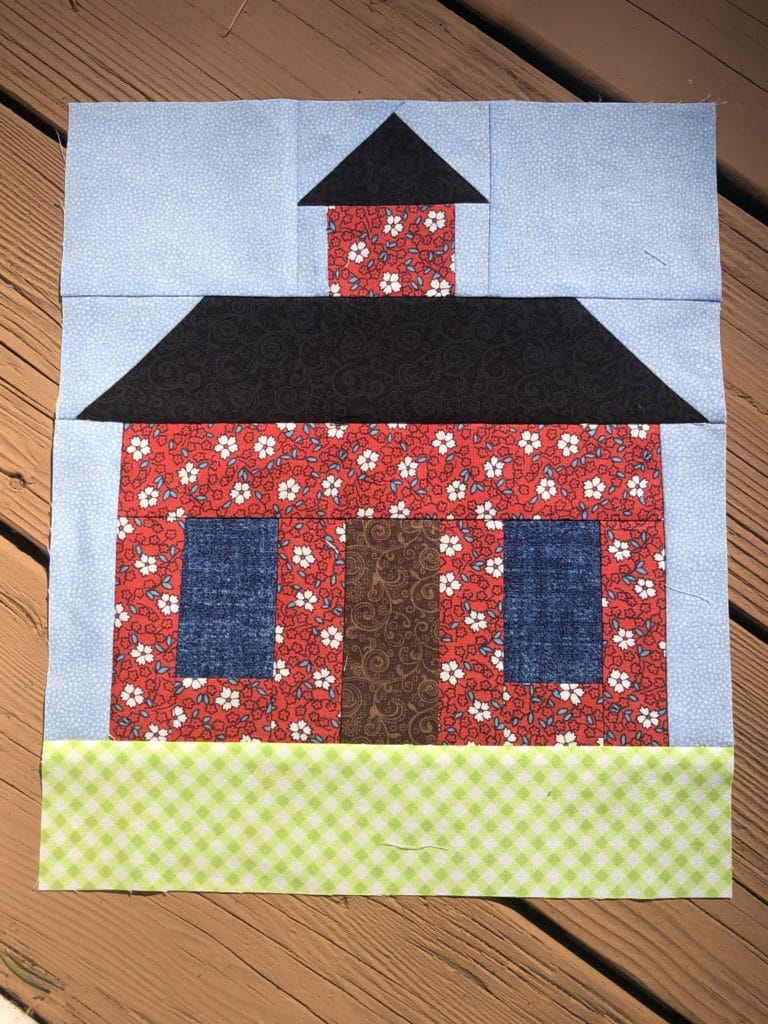
SCHOOLHOUSE BLOCK:
I designed this school house block to honor my heritage. My father grew up in North Dakota, and the little school he attended growing up looked very much like this one. And near my house is the cutest little red two-room school house from the 1800’s that is now someone’s residence. How fun would that be? In any case, I just love how this block turned out.
This block is pretty easy, since most of it is squares and rectangles, except for the roof. Here are a few pictures of the block coming together.
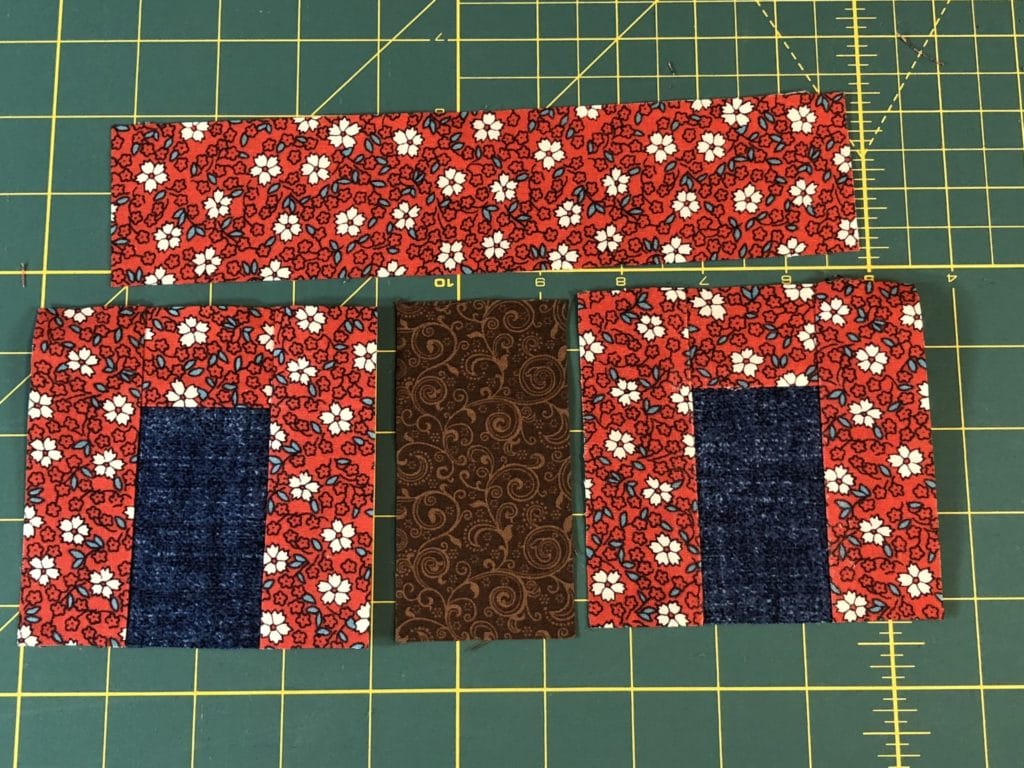
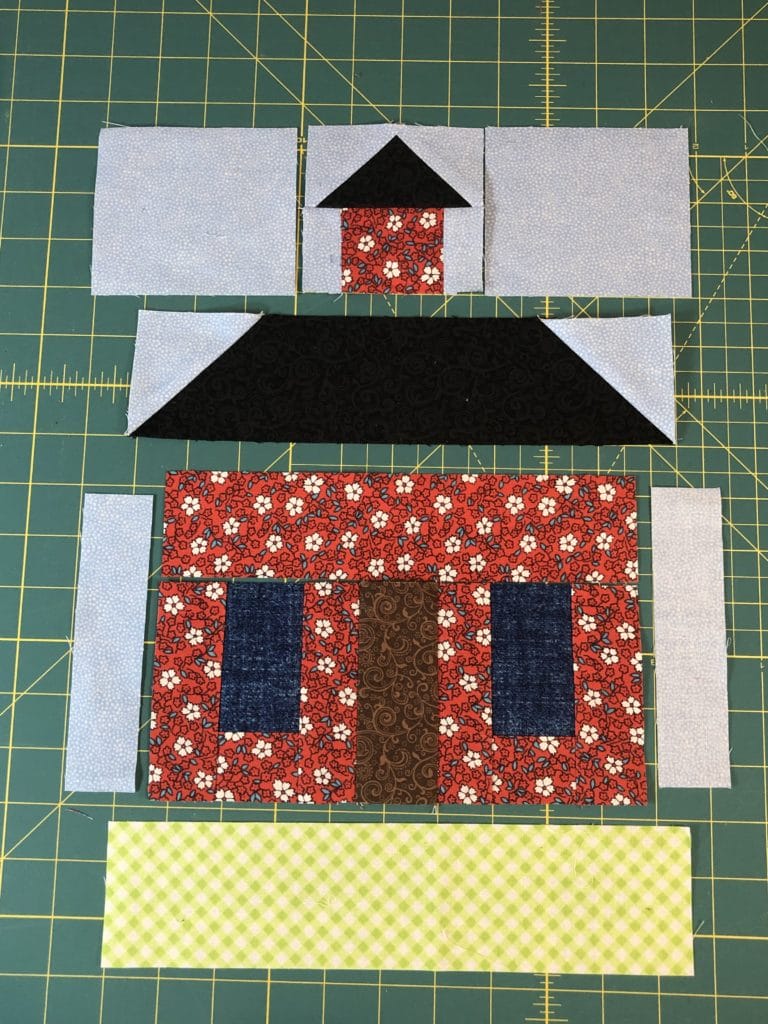
Now look at the picture below- Does anyone see what I’ve done wrong here? Yep, the door section is upside-down. And the dumb thing is, I even laid it out properly! Ugh. So, I got to spend some quality time with my seam ripper and fix it.
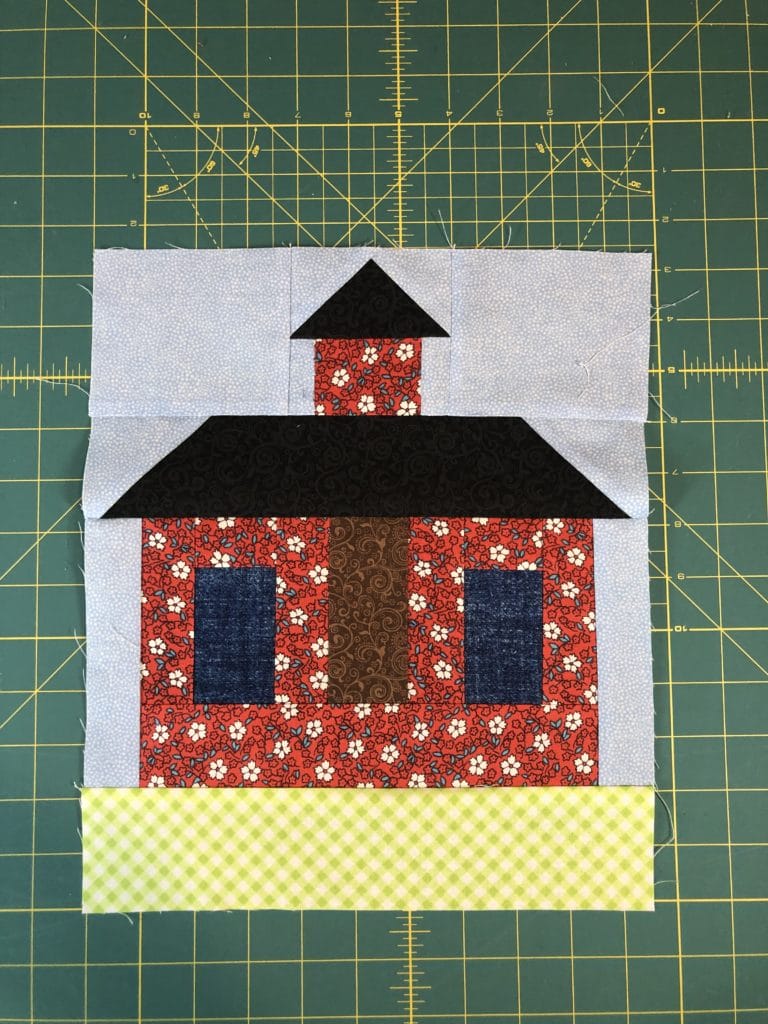
This looks MUCH better!
I hope you’ve enjoyed making these blocks. Four months down, and only two more to go!
Happy Quilting! – Kristin