Tutorials
 5.2.2022
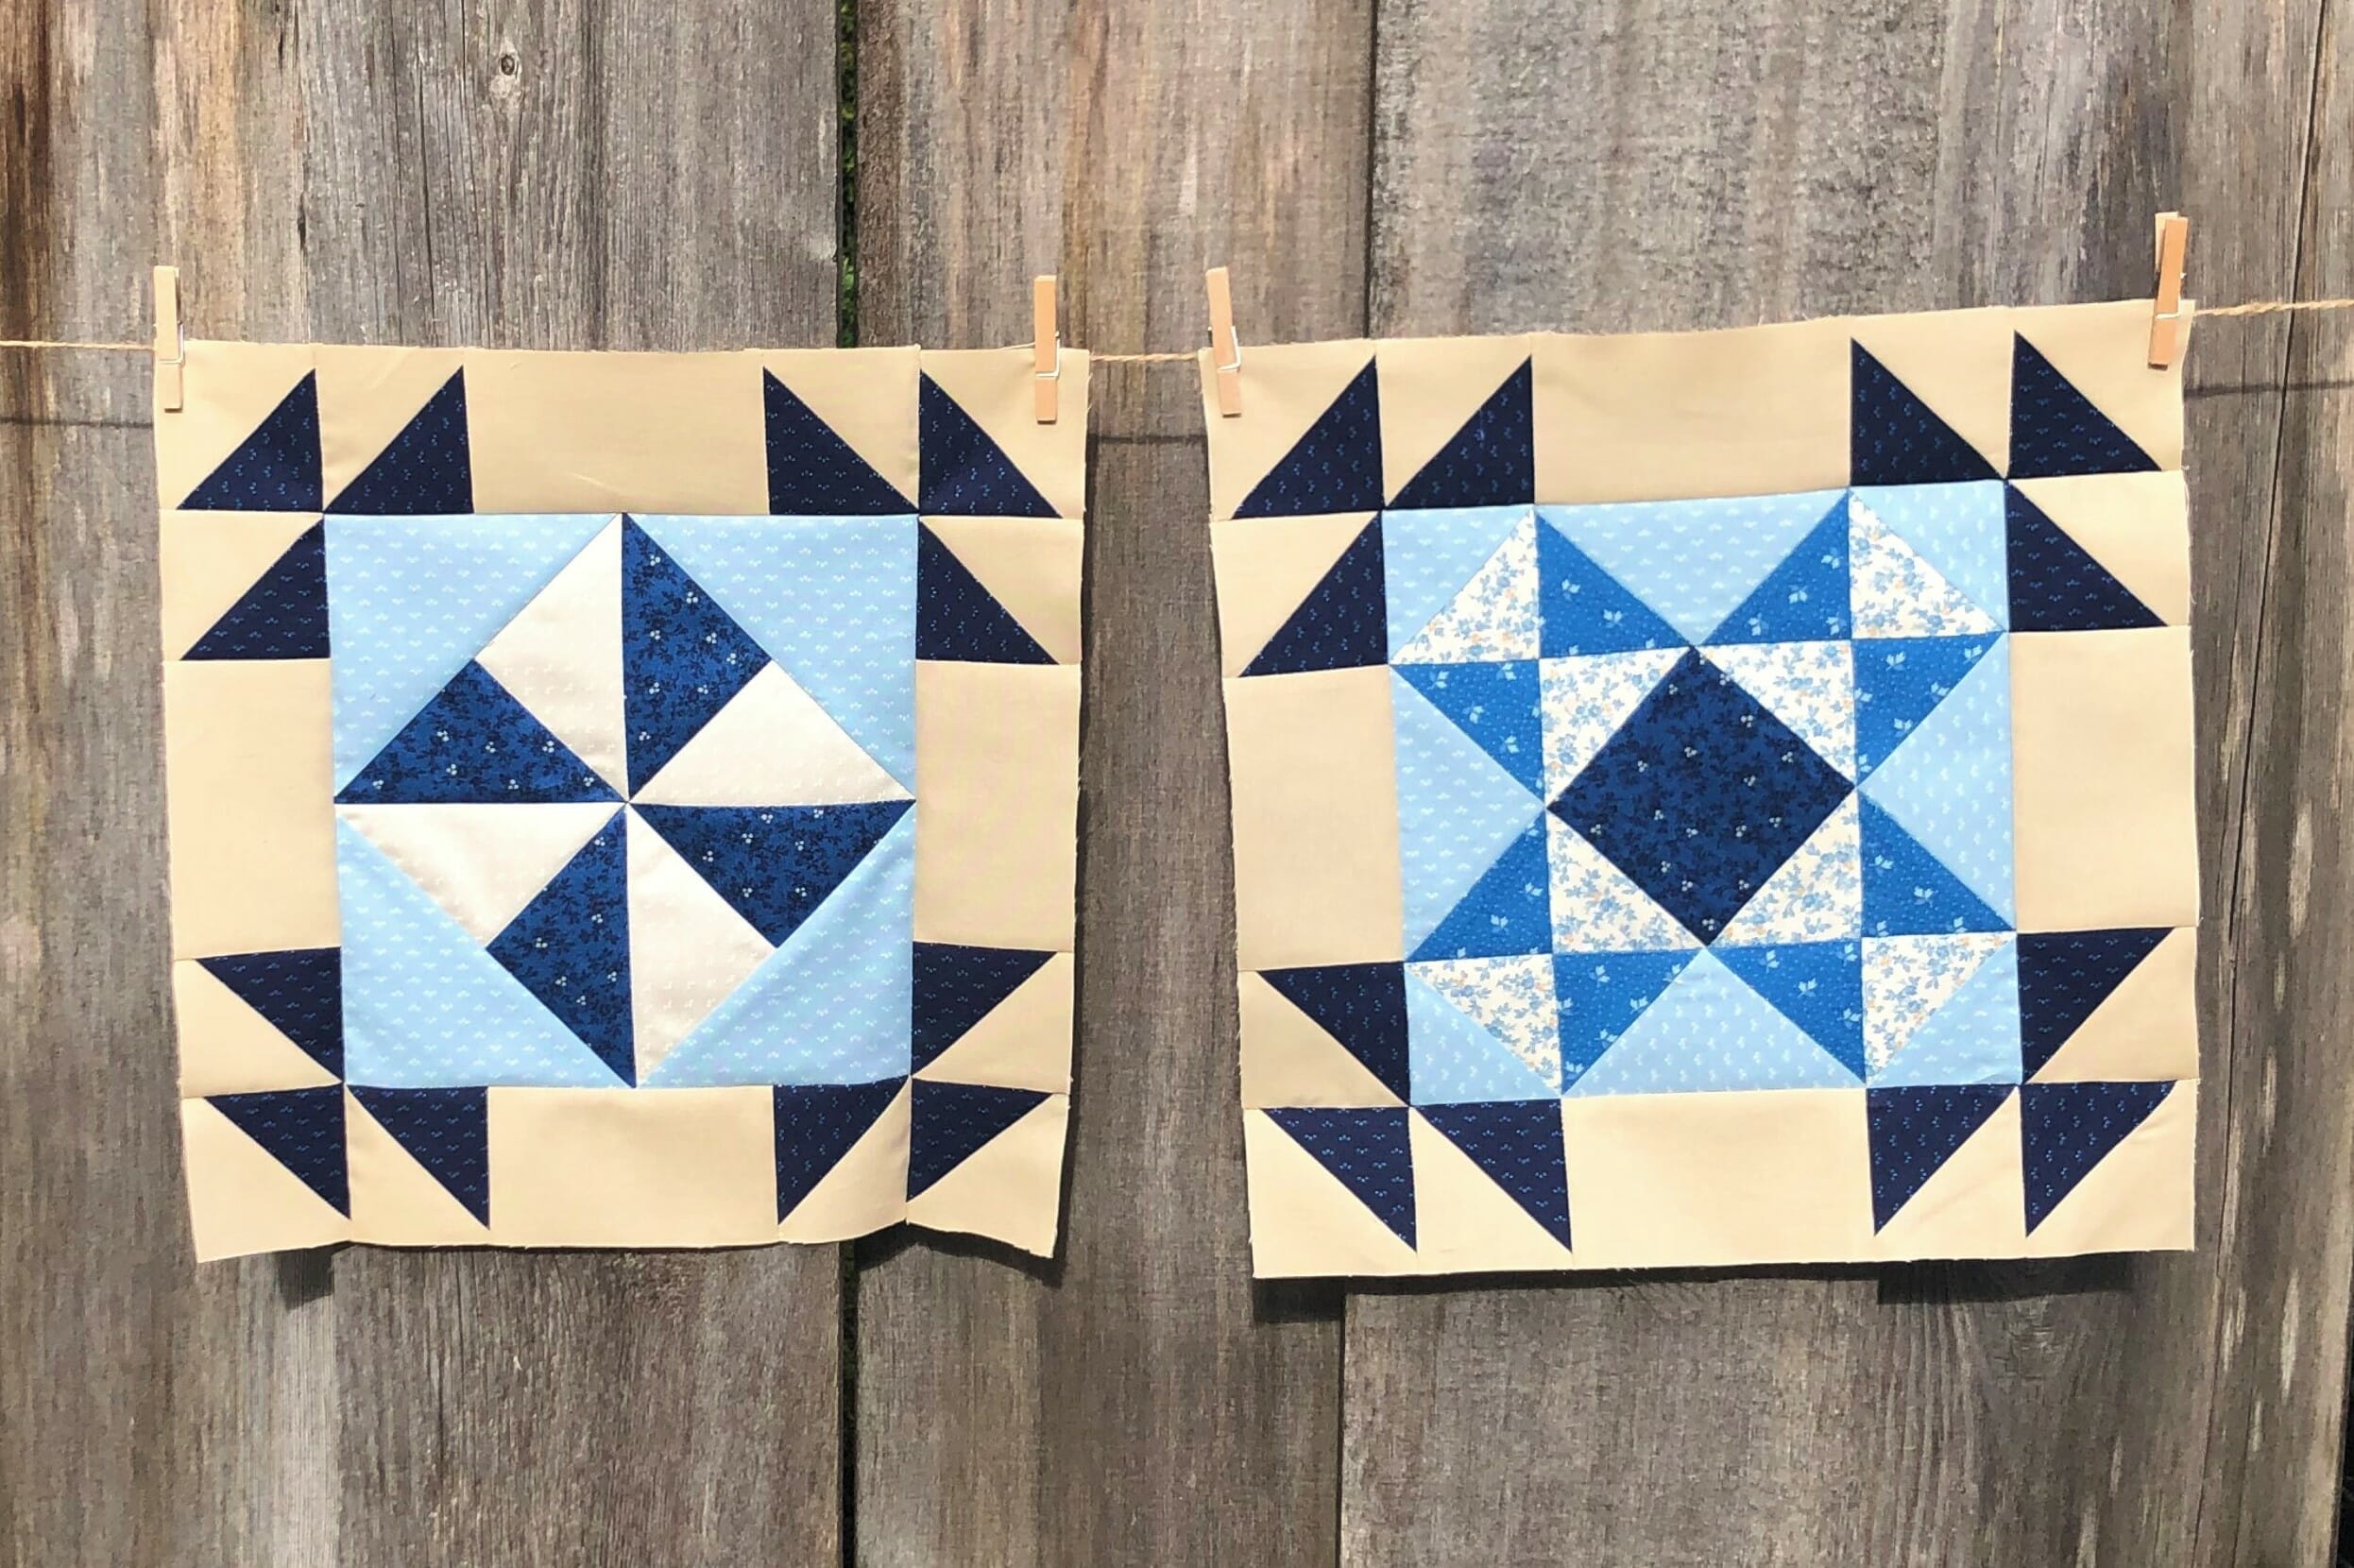
Hey friends!
It’s been so fun to see everyone’s first blocks on the facebook group. Keep up the good work!
This month we will be doing just two blocks, and 8 sashing strips.
Our two new blocks have one thing in common – Square in a square units. Personally, I have a love/hate relationship with these little guys. I love how they look, but getting them the right size can be tricky. In fact, as I was sewing up these blocks I was seriously questioning my design choices, and wondering what on earth possessed me to do this to all of you. But it’s skill building, right?!
If I have one piece of advice for making these it’s this: Accuracy in cutting the center square is crucial, but the outer triangles that you’ll attach can be cut bigger than needed, and then trimmed to size after they are all sewn on.
Another tip – STARCH! Any time I’m sewing pieces that have been cut on the bias, using extra starch just helps to keep them from stretching or getting wonky.
Ok, let’s get started!
Block #2
We’ll begin by making a pinwheel unit from four Half-Square triangles. Again, feel free to cut your D and E squares a bit bigger if you like, so that you can trim these down to size. And I know that 3-3/8” HSTs is a weird size! Trust me, it works out.

Make sure your completed pinwheel measures at 6-1/4” square. This is key.
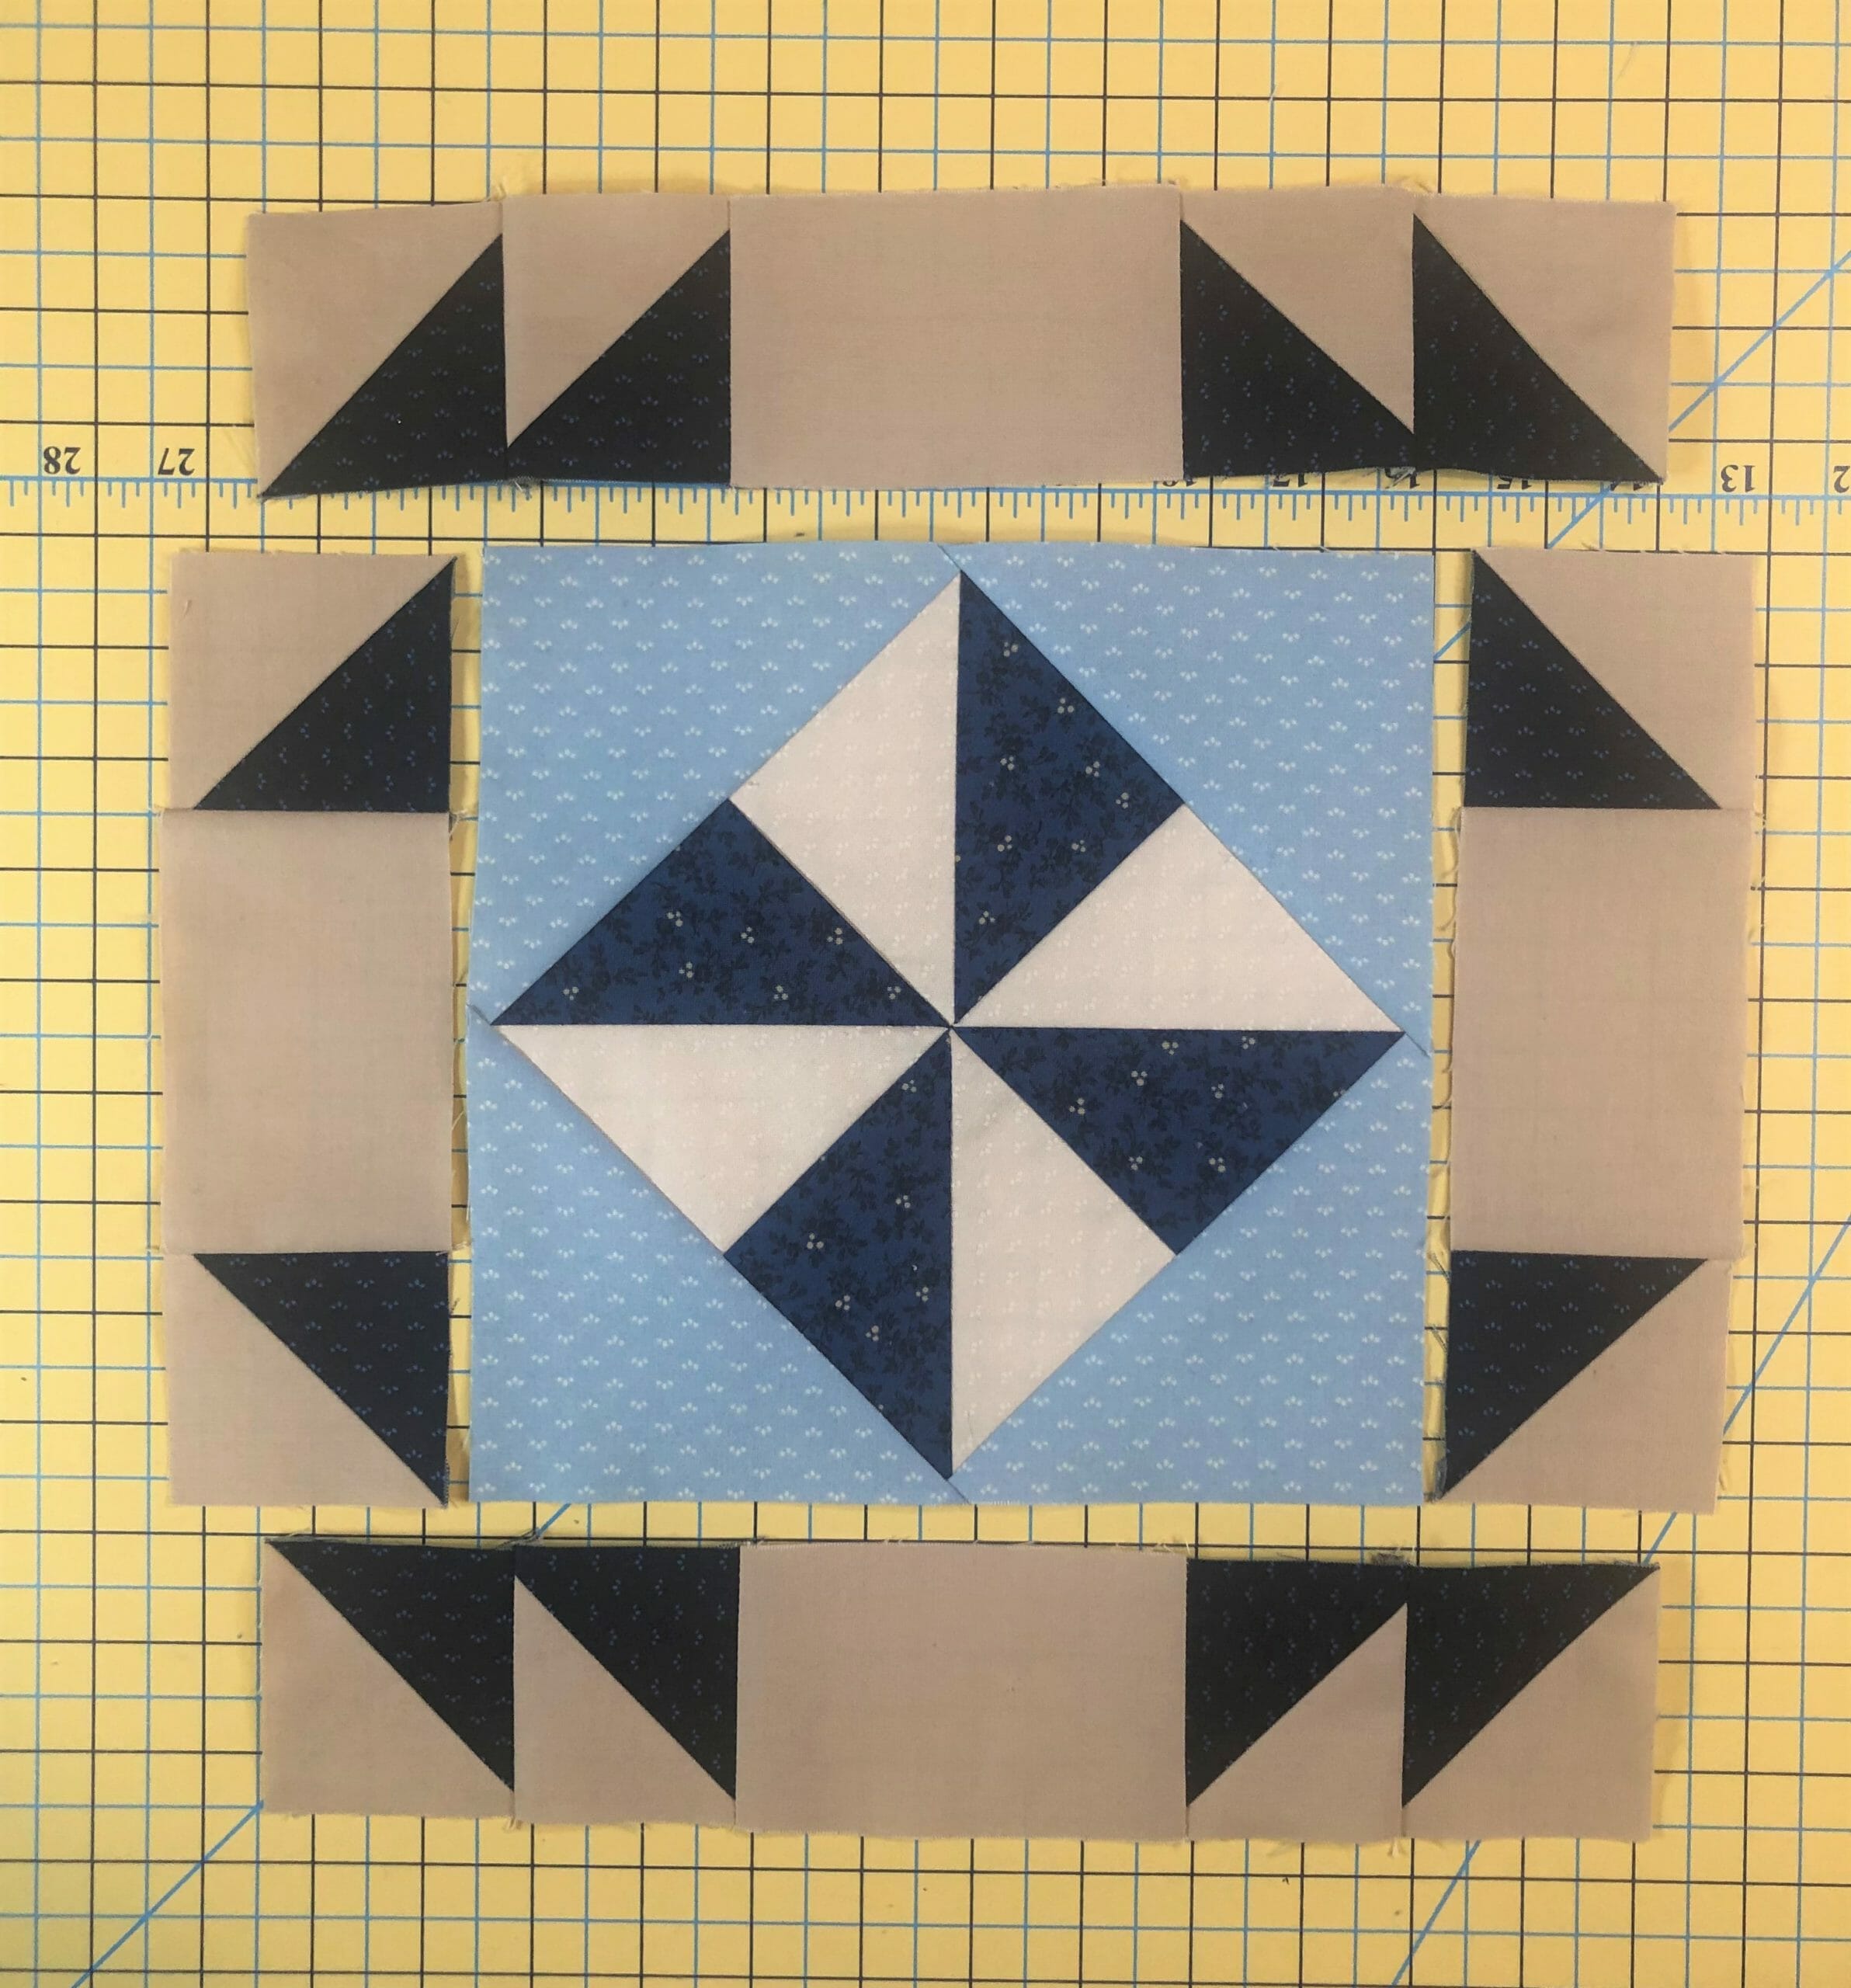
Next, you’ll sew on those well starched triangles. If you are having trouble figuring out where to line up your triangles, use the pinwheel as a guide. The point of the triangle should line up with the seam of the pinwheel, like you see in the photo below:
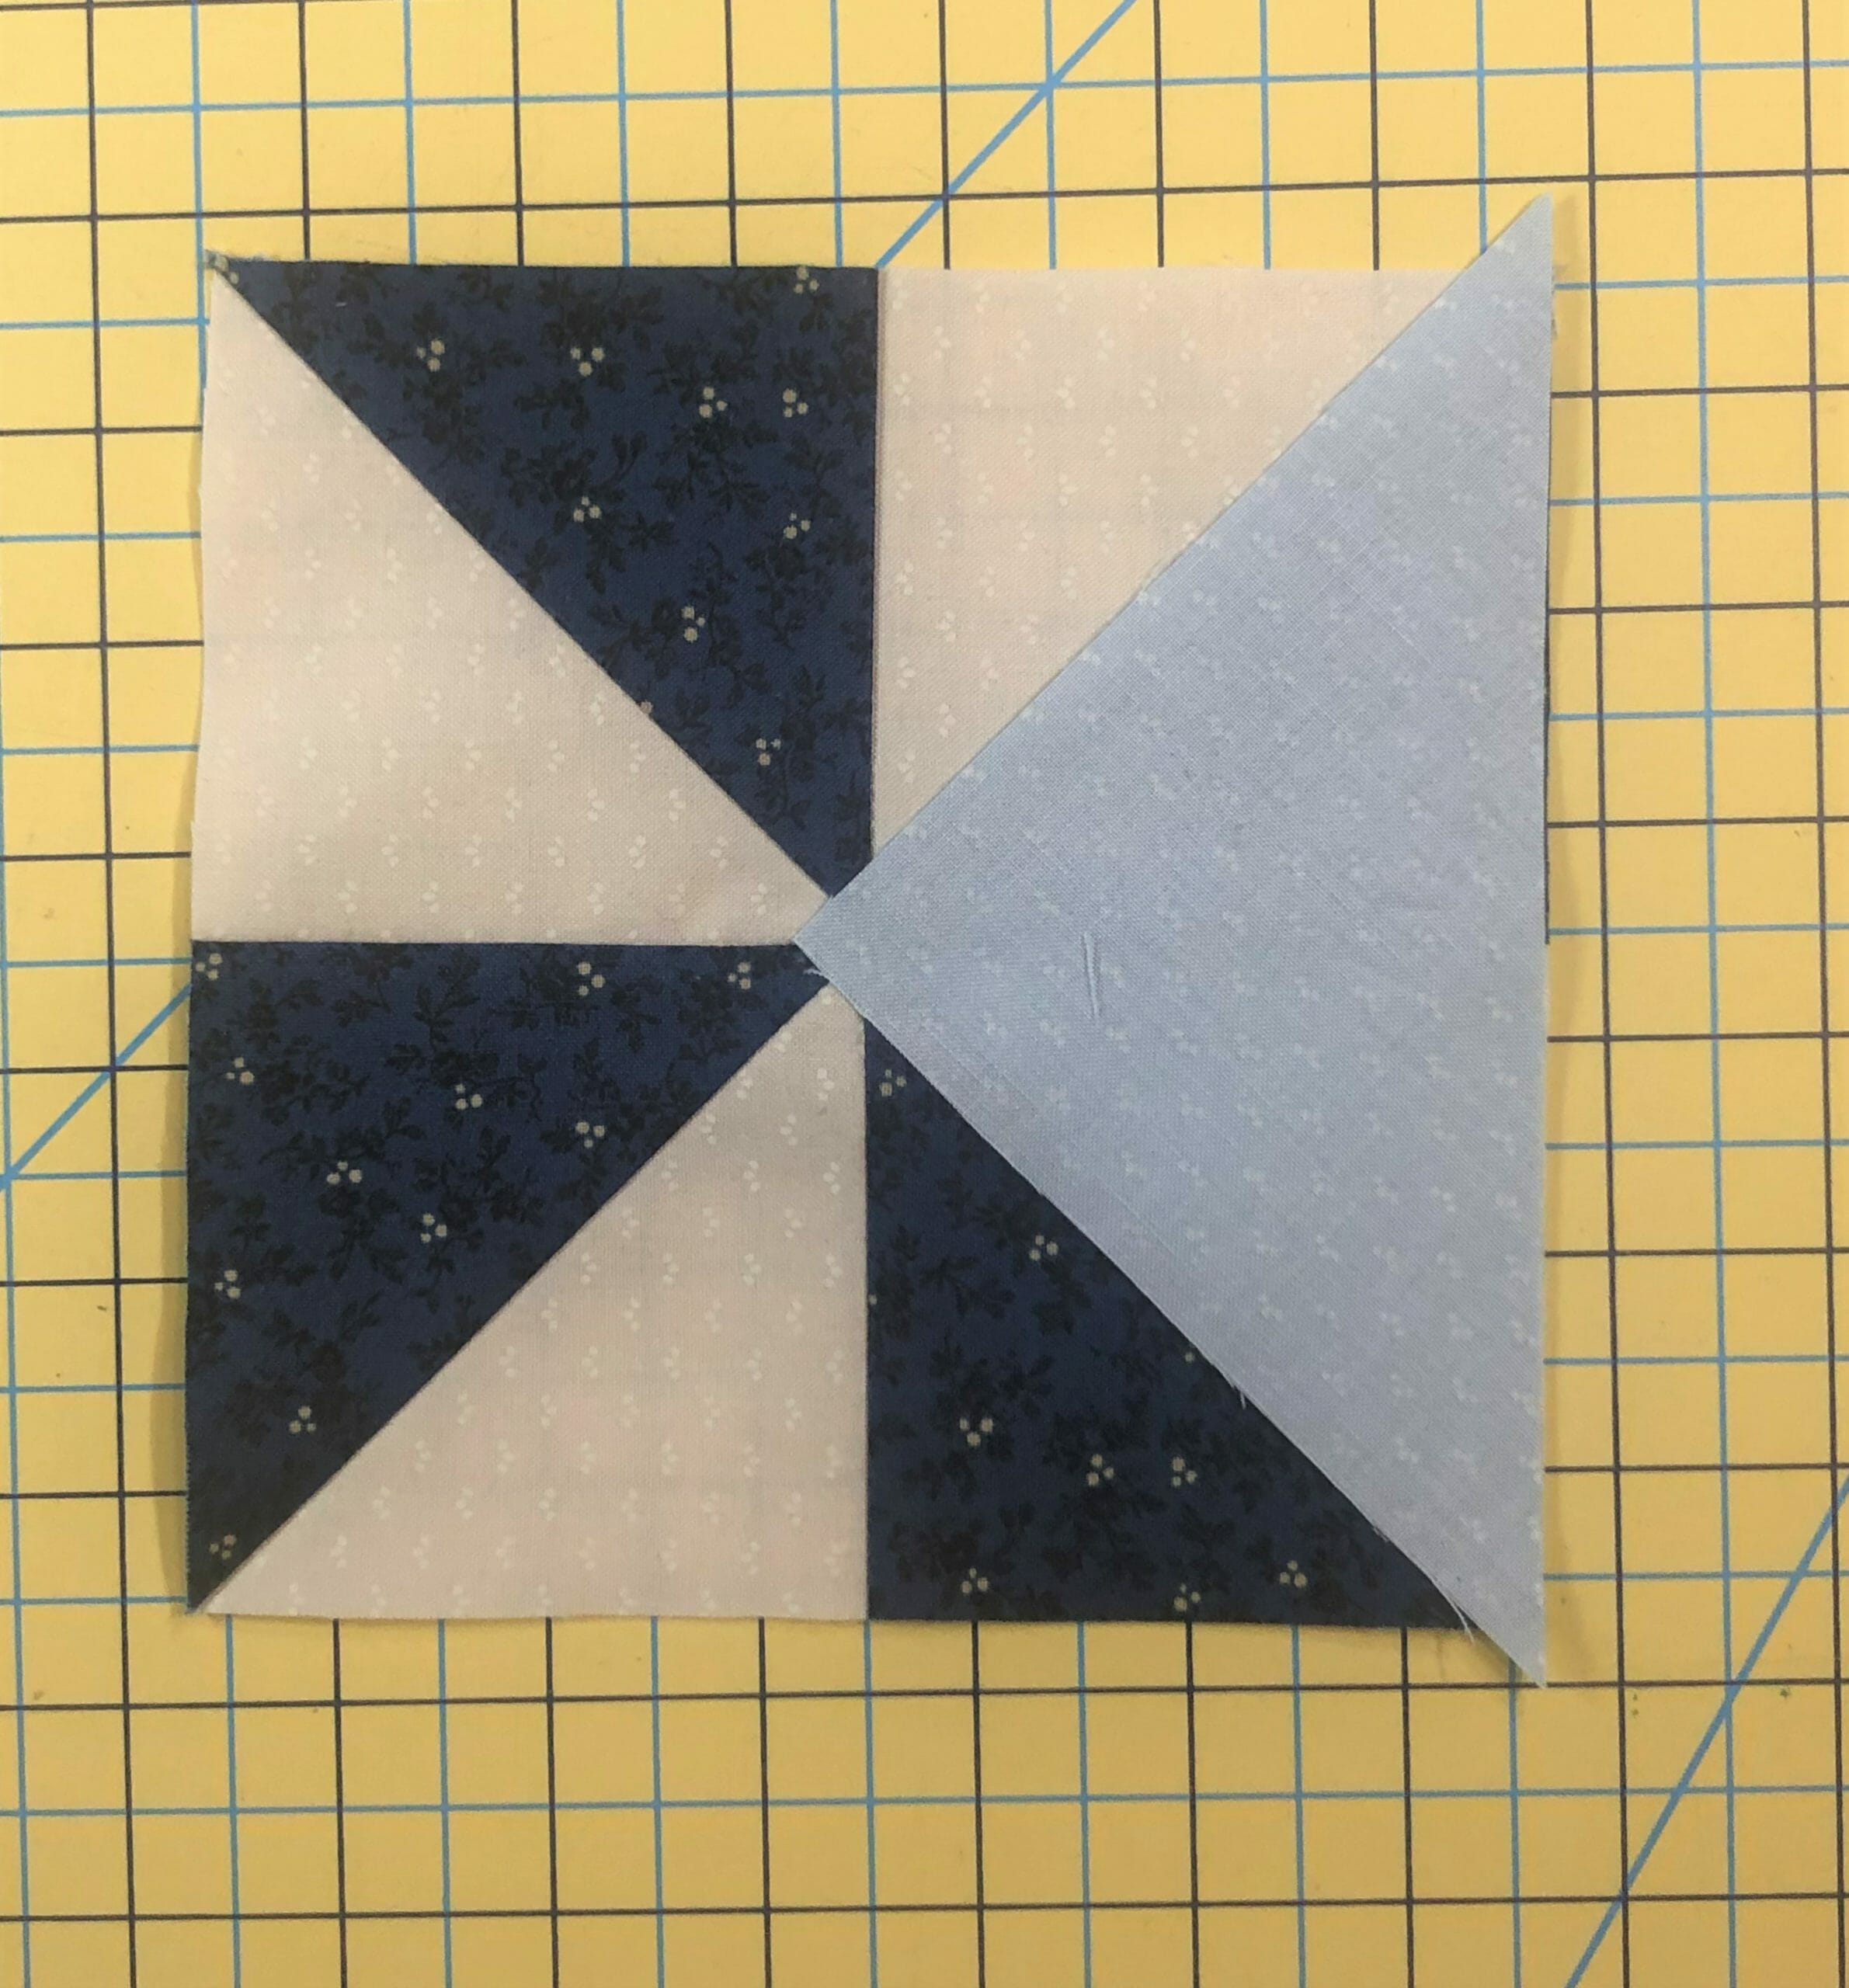
Do this for all four triangles as you sew them on, one at a time. Acutally, I usually pin mine on two at a time and sew accordingly, even though the directions say otherwise.

Once all the triangles are sewn on, then trim the unit to 8-1/2” square. If it’s done correctly, you should have the proper ¼” seam allowance to make sure you don’t sew off any of your pinwheel points.
Now all we have to do is sew the same border pieces as we did last month, and then attach them to the pinwheel unit to complete the block. If you need a refresher for how this is done, please take a gander back at the month 1 blog post. I also found it helpful to pin the border pieces on the under side so that I could see where the pinwheel intersects on the edges. I always find this helpful so that I can avoid sewing off my points.
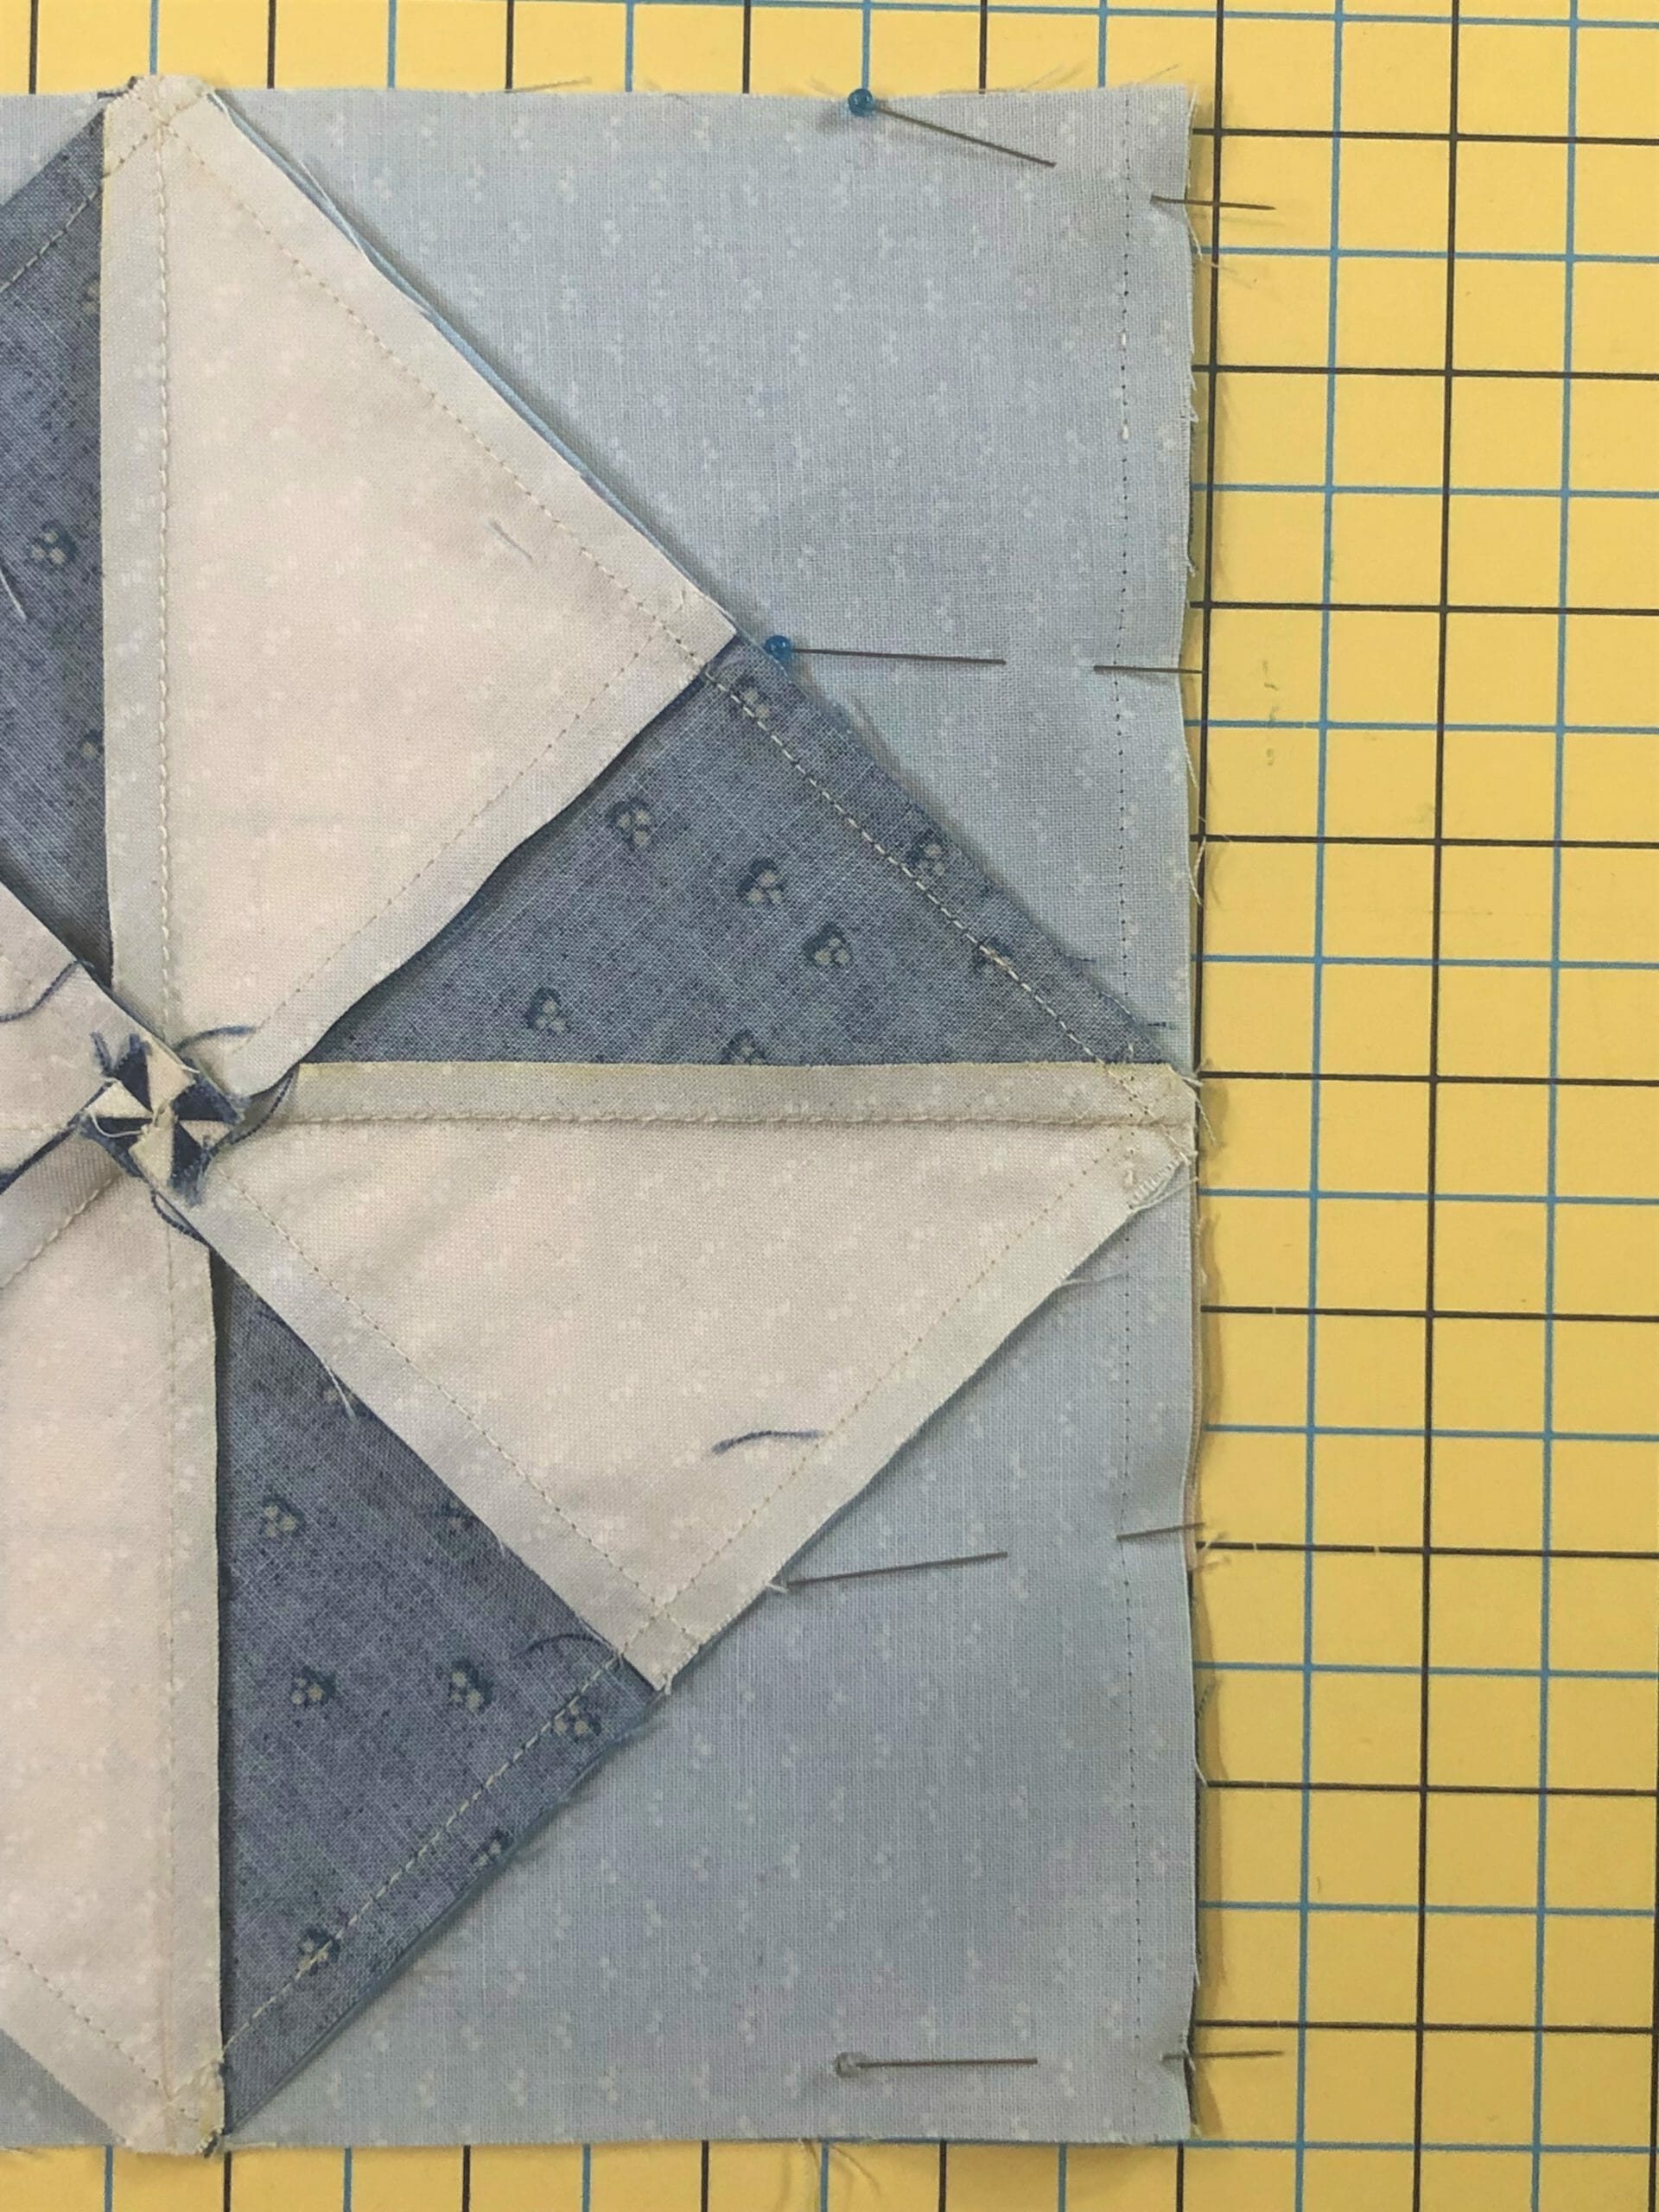
In fact, if you look closely at the photo above, you can see that I had to rip out my first stitches and re-do them, because I had, in fact, cut off the point on this side. Ugh!

Block #12
This block is just a sawtooth star that has a diamond (square in a square) unit in the center. Since there are so many triangles coming together in this block, things can get a bit bulky at the seams. If you don’t like all the bulk, feel free to press all your seams open. Personally, I’m kind of obsessed with nesting seams, so I ironed according to my directions, which created a bit of bulk around the center diamond square. I just starched and pressed the heck out of it, and mined turned out pretty flat. But it’s whatever you prefer. Remember, it’s YOUR quilt, and there are no rules, only suggestions!
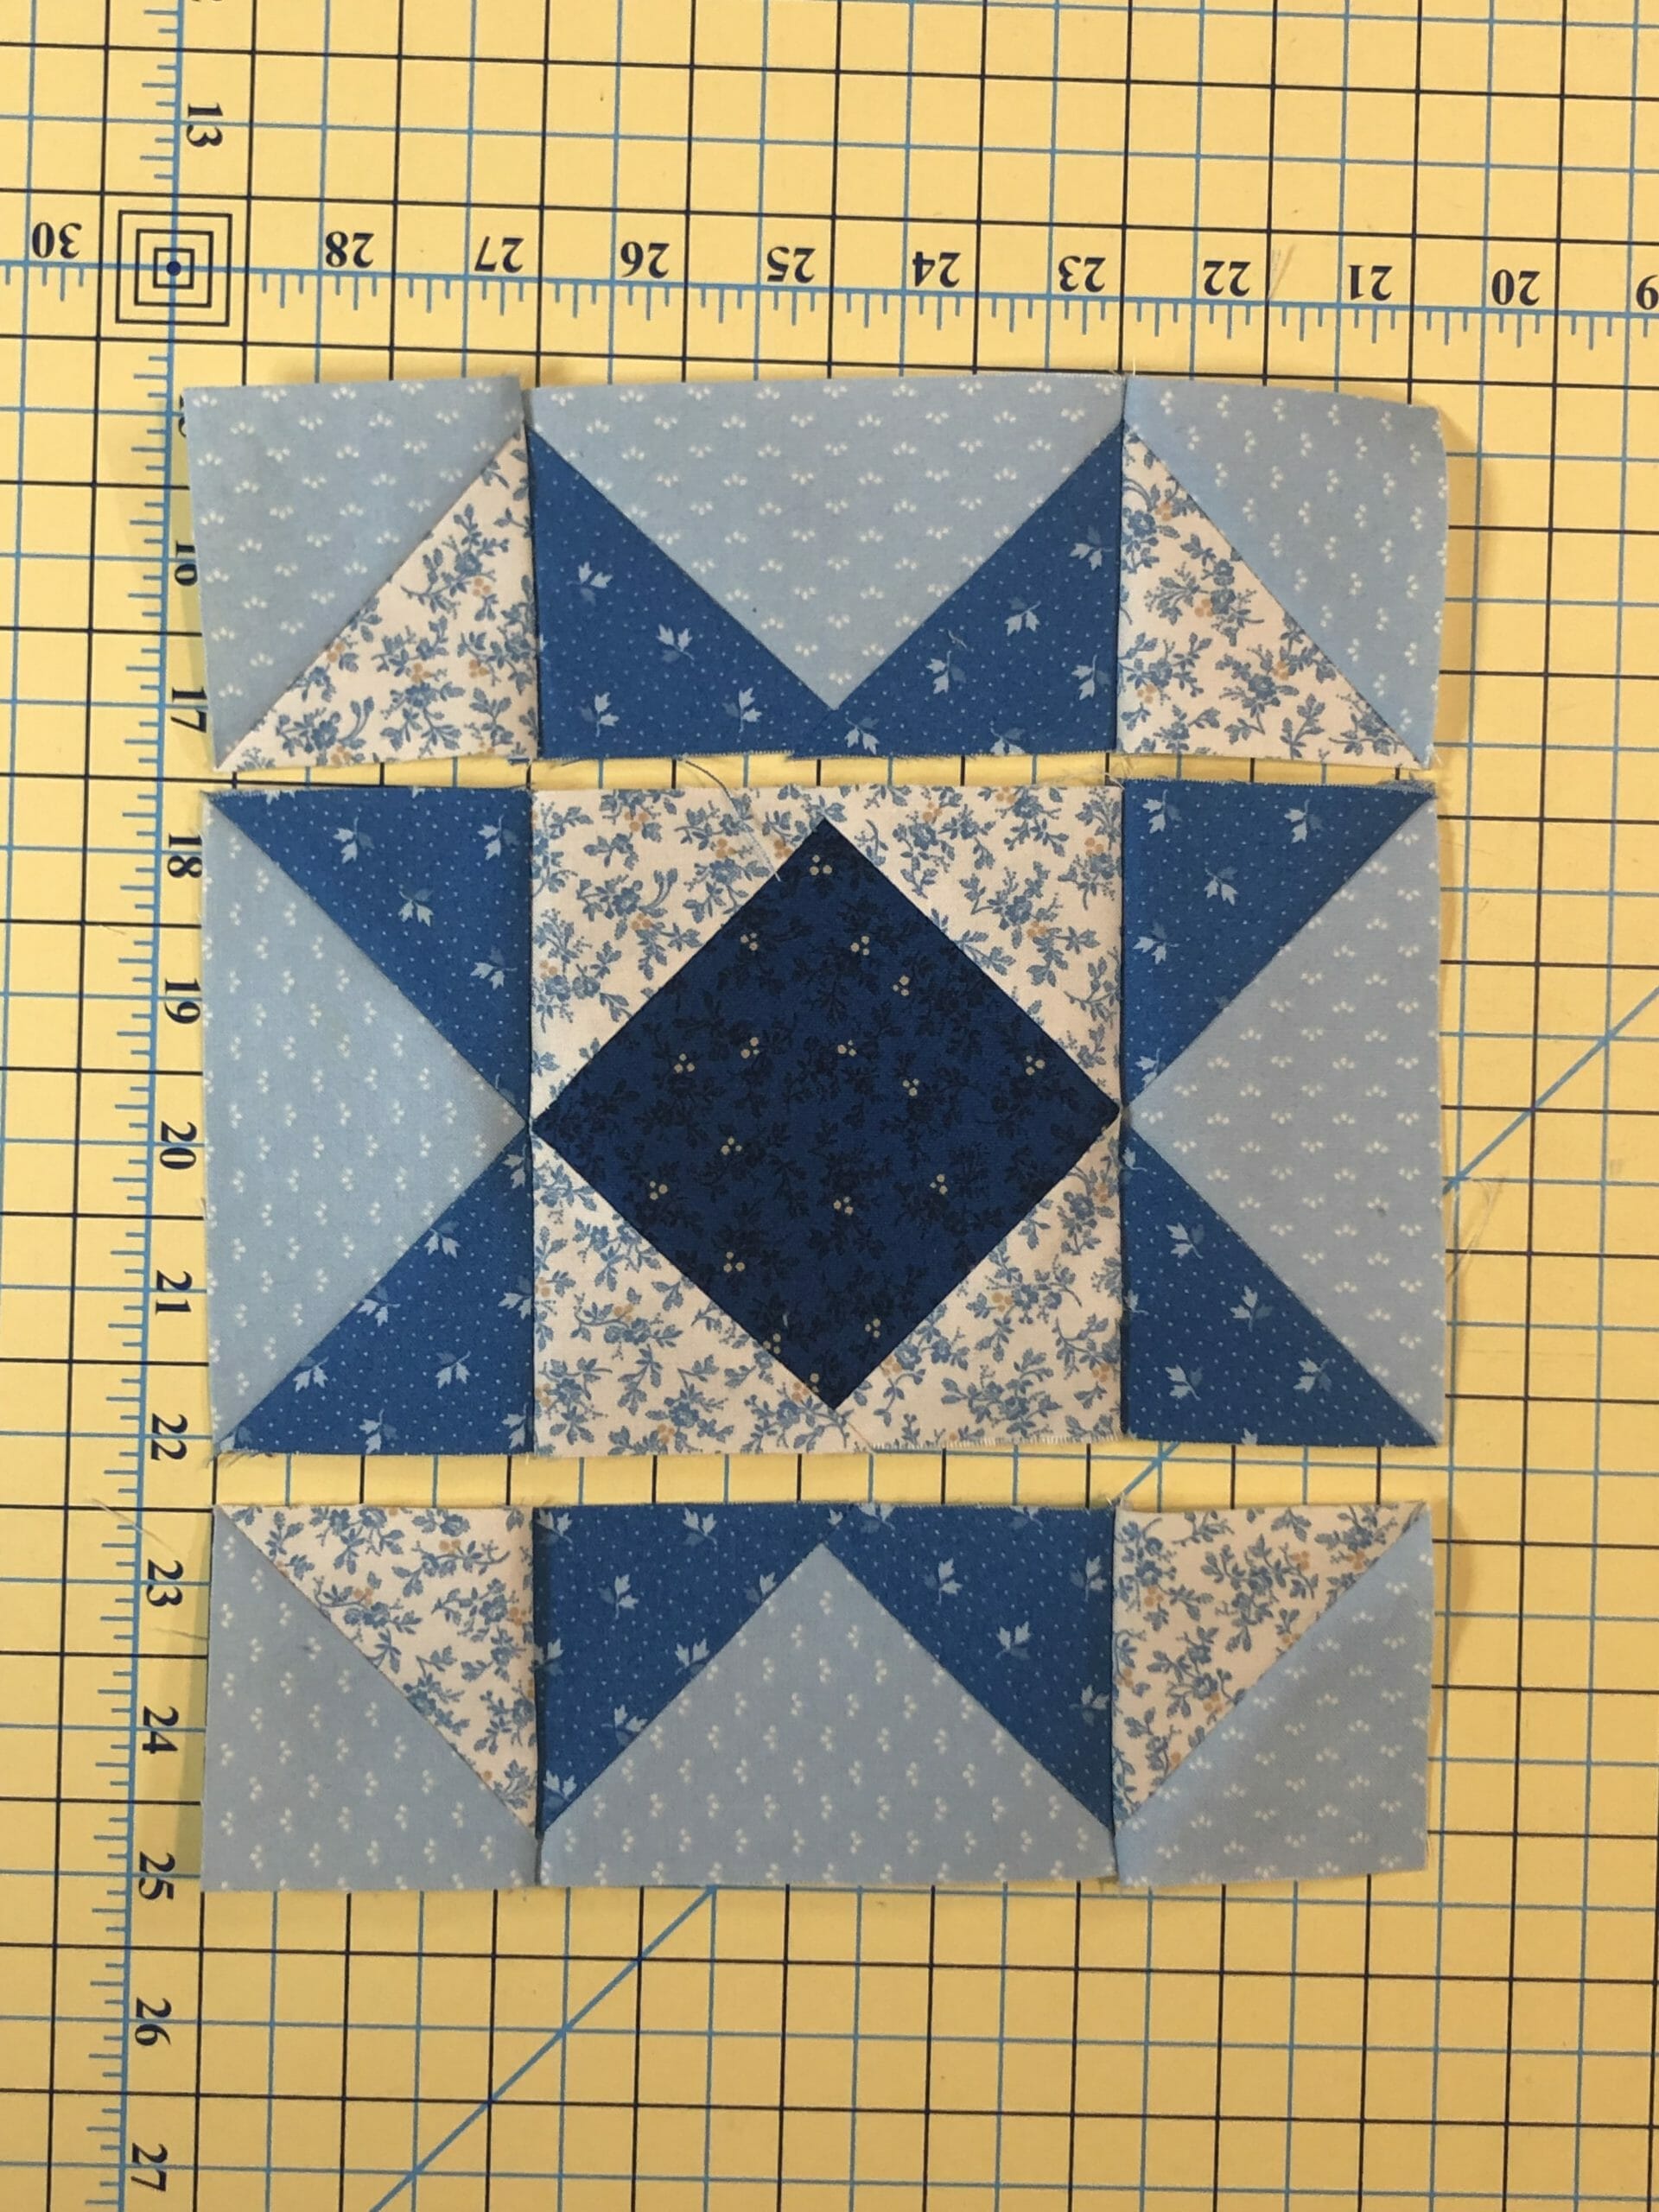
First we will make that square in a square unit as I mentioned earlier, making especially sure that your center D square is cut accurately. You could cut your E squares at 3” and then trim the unit after sewing all the triangles on, if you prefer.
I always find it helpful to fold the center square in half and finger press a seam down the middle, so that I can have a guide to line up the point of the triangle before pinning.
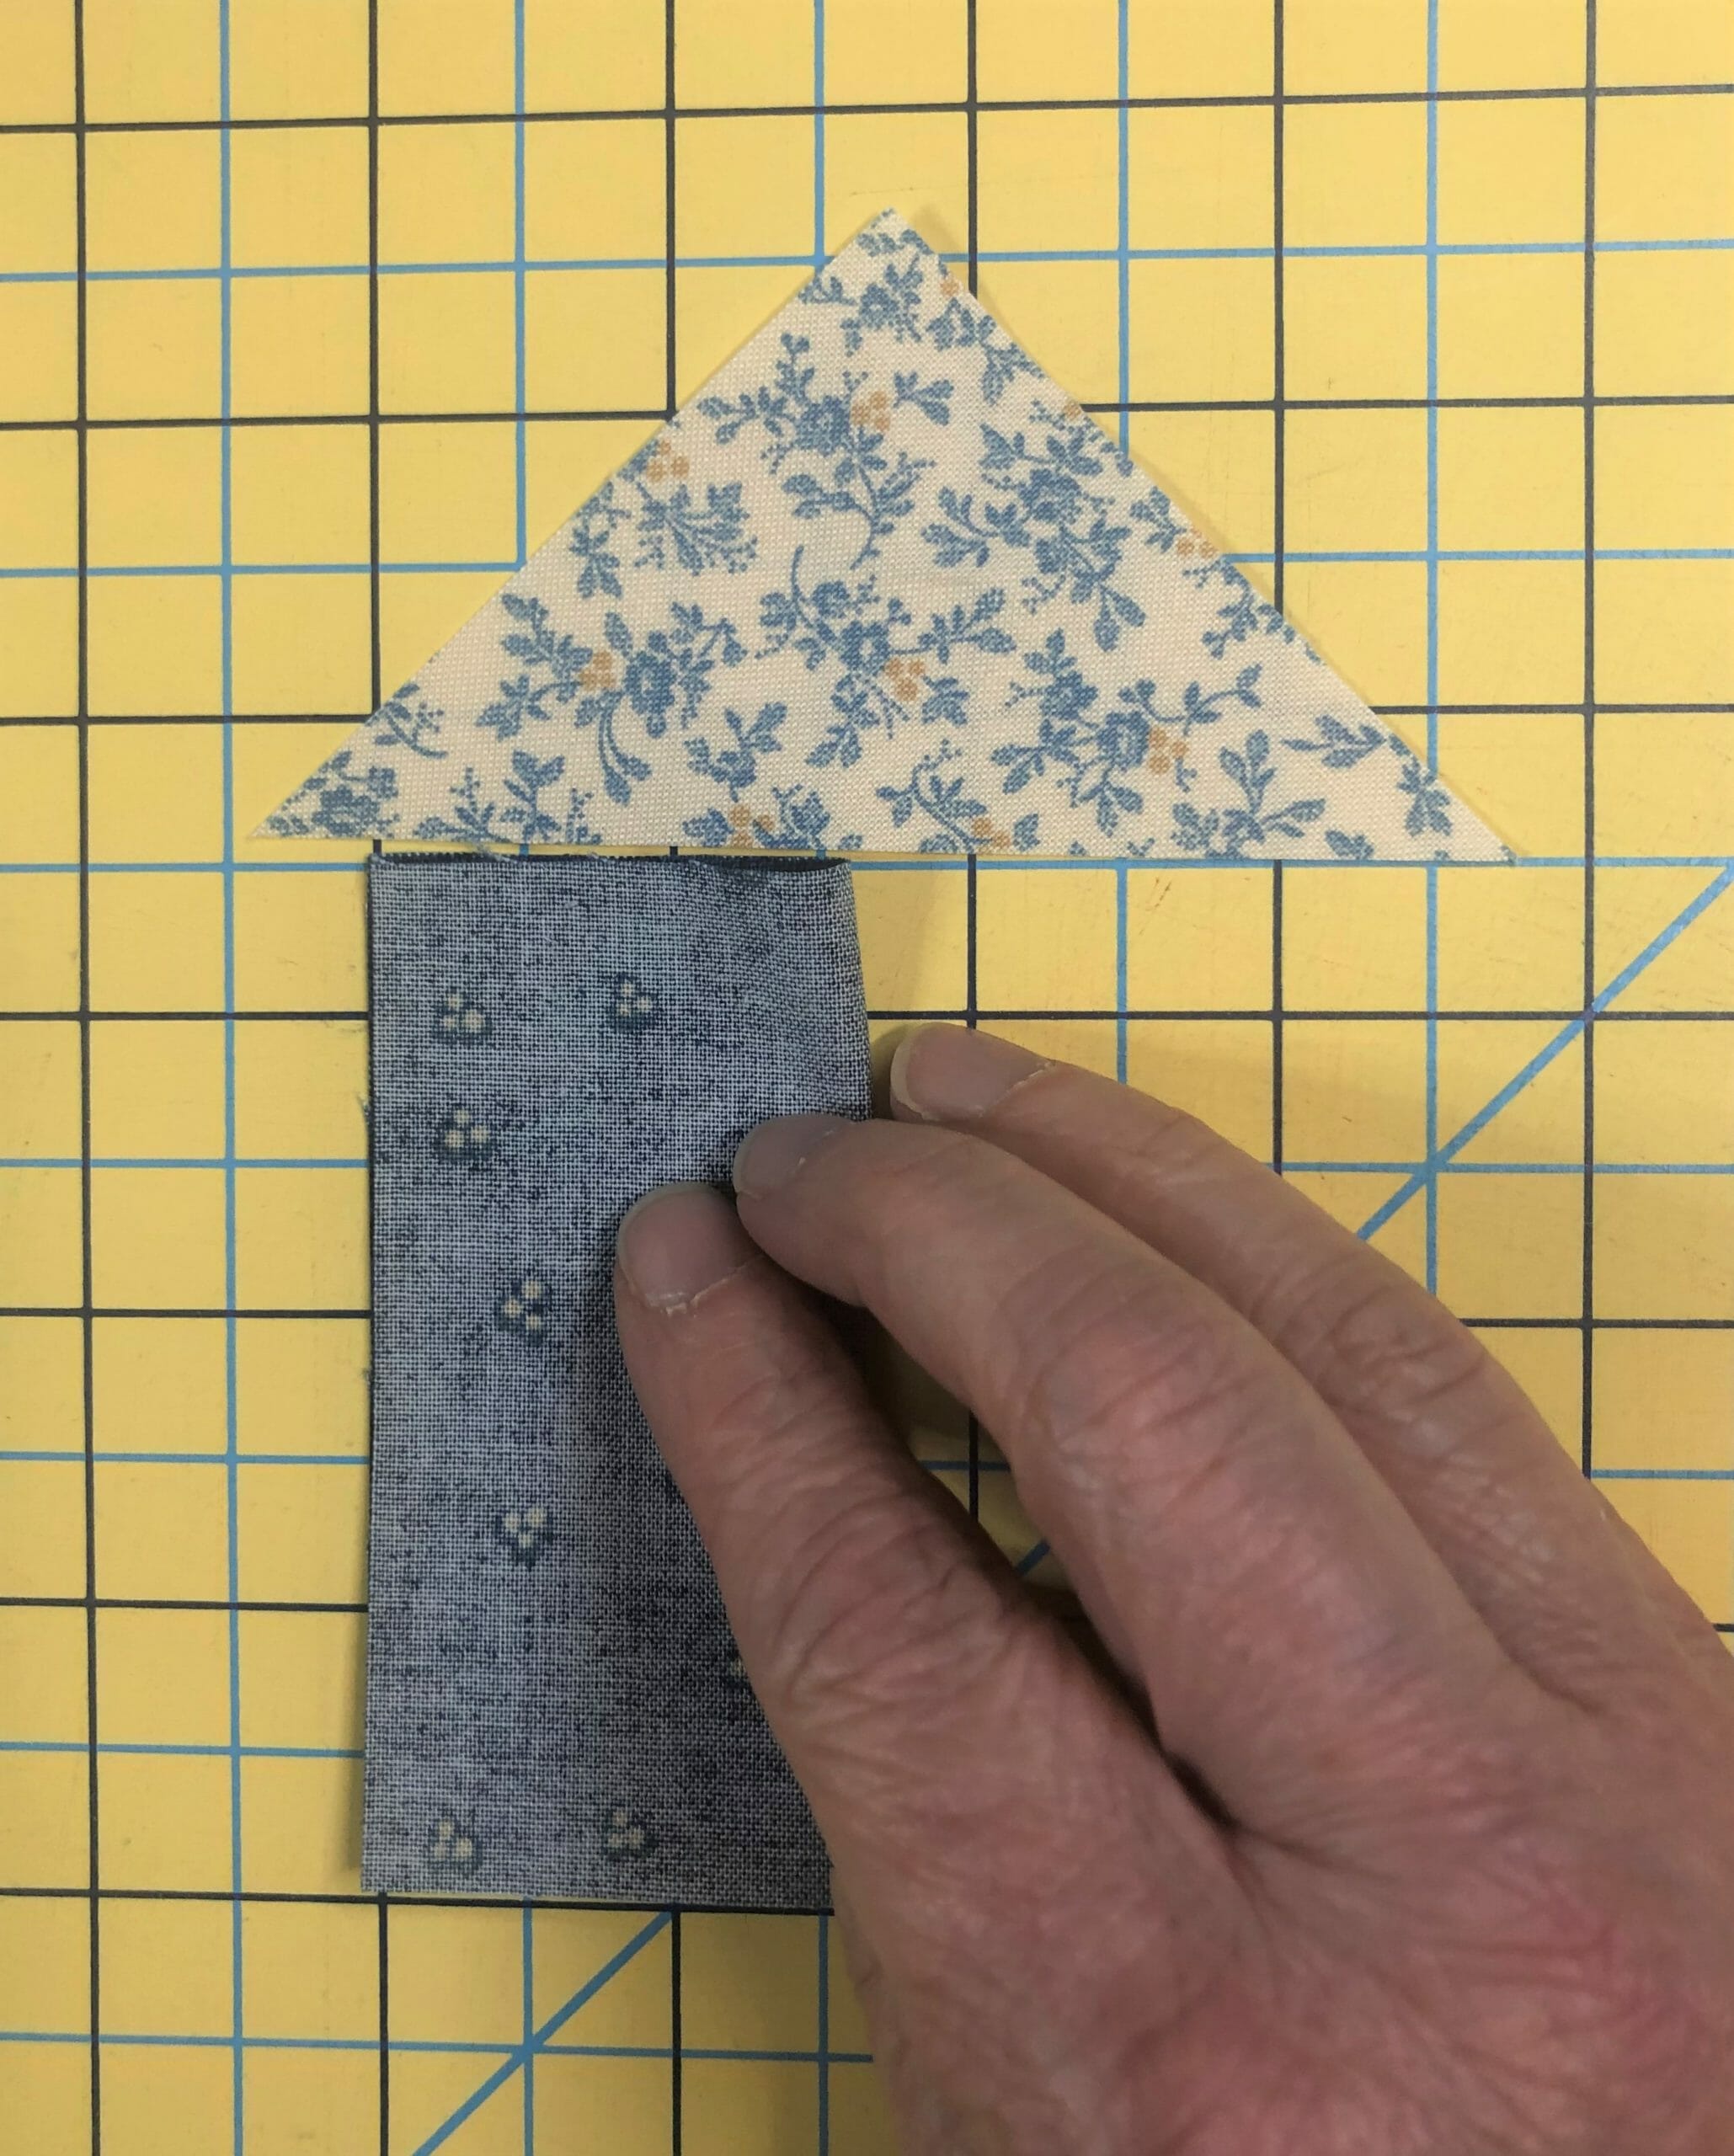
You can’t see it in the photo above, but I promise there is a folded line down the center of the square that I’ve used as a guide to place the triangle before pinning. You want the point of the triangle to be on that line.
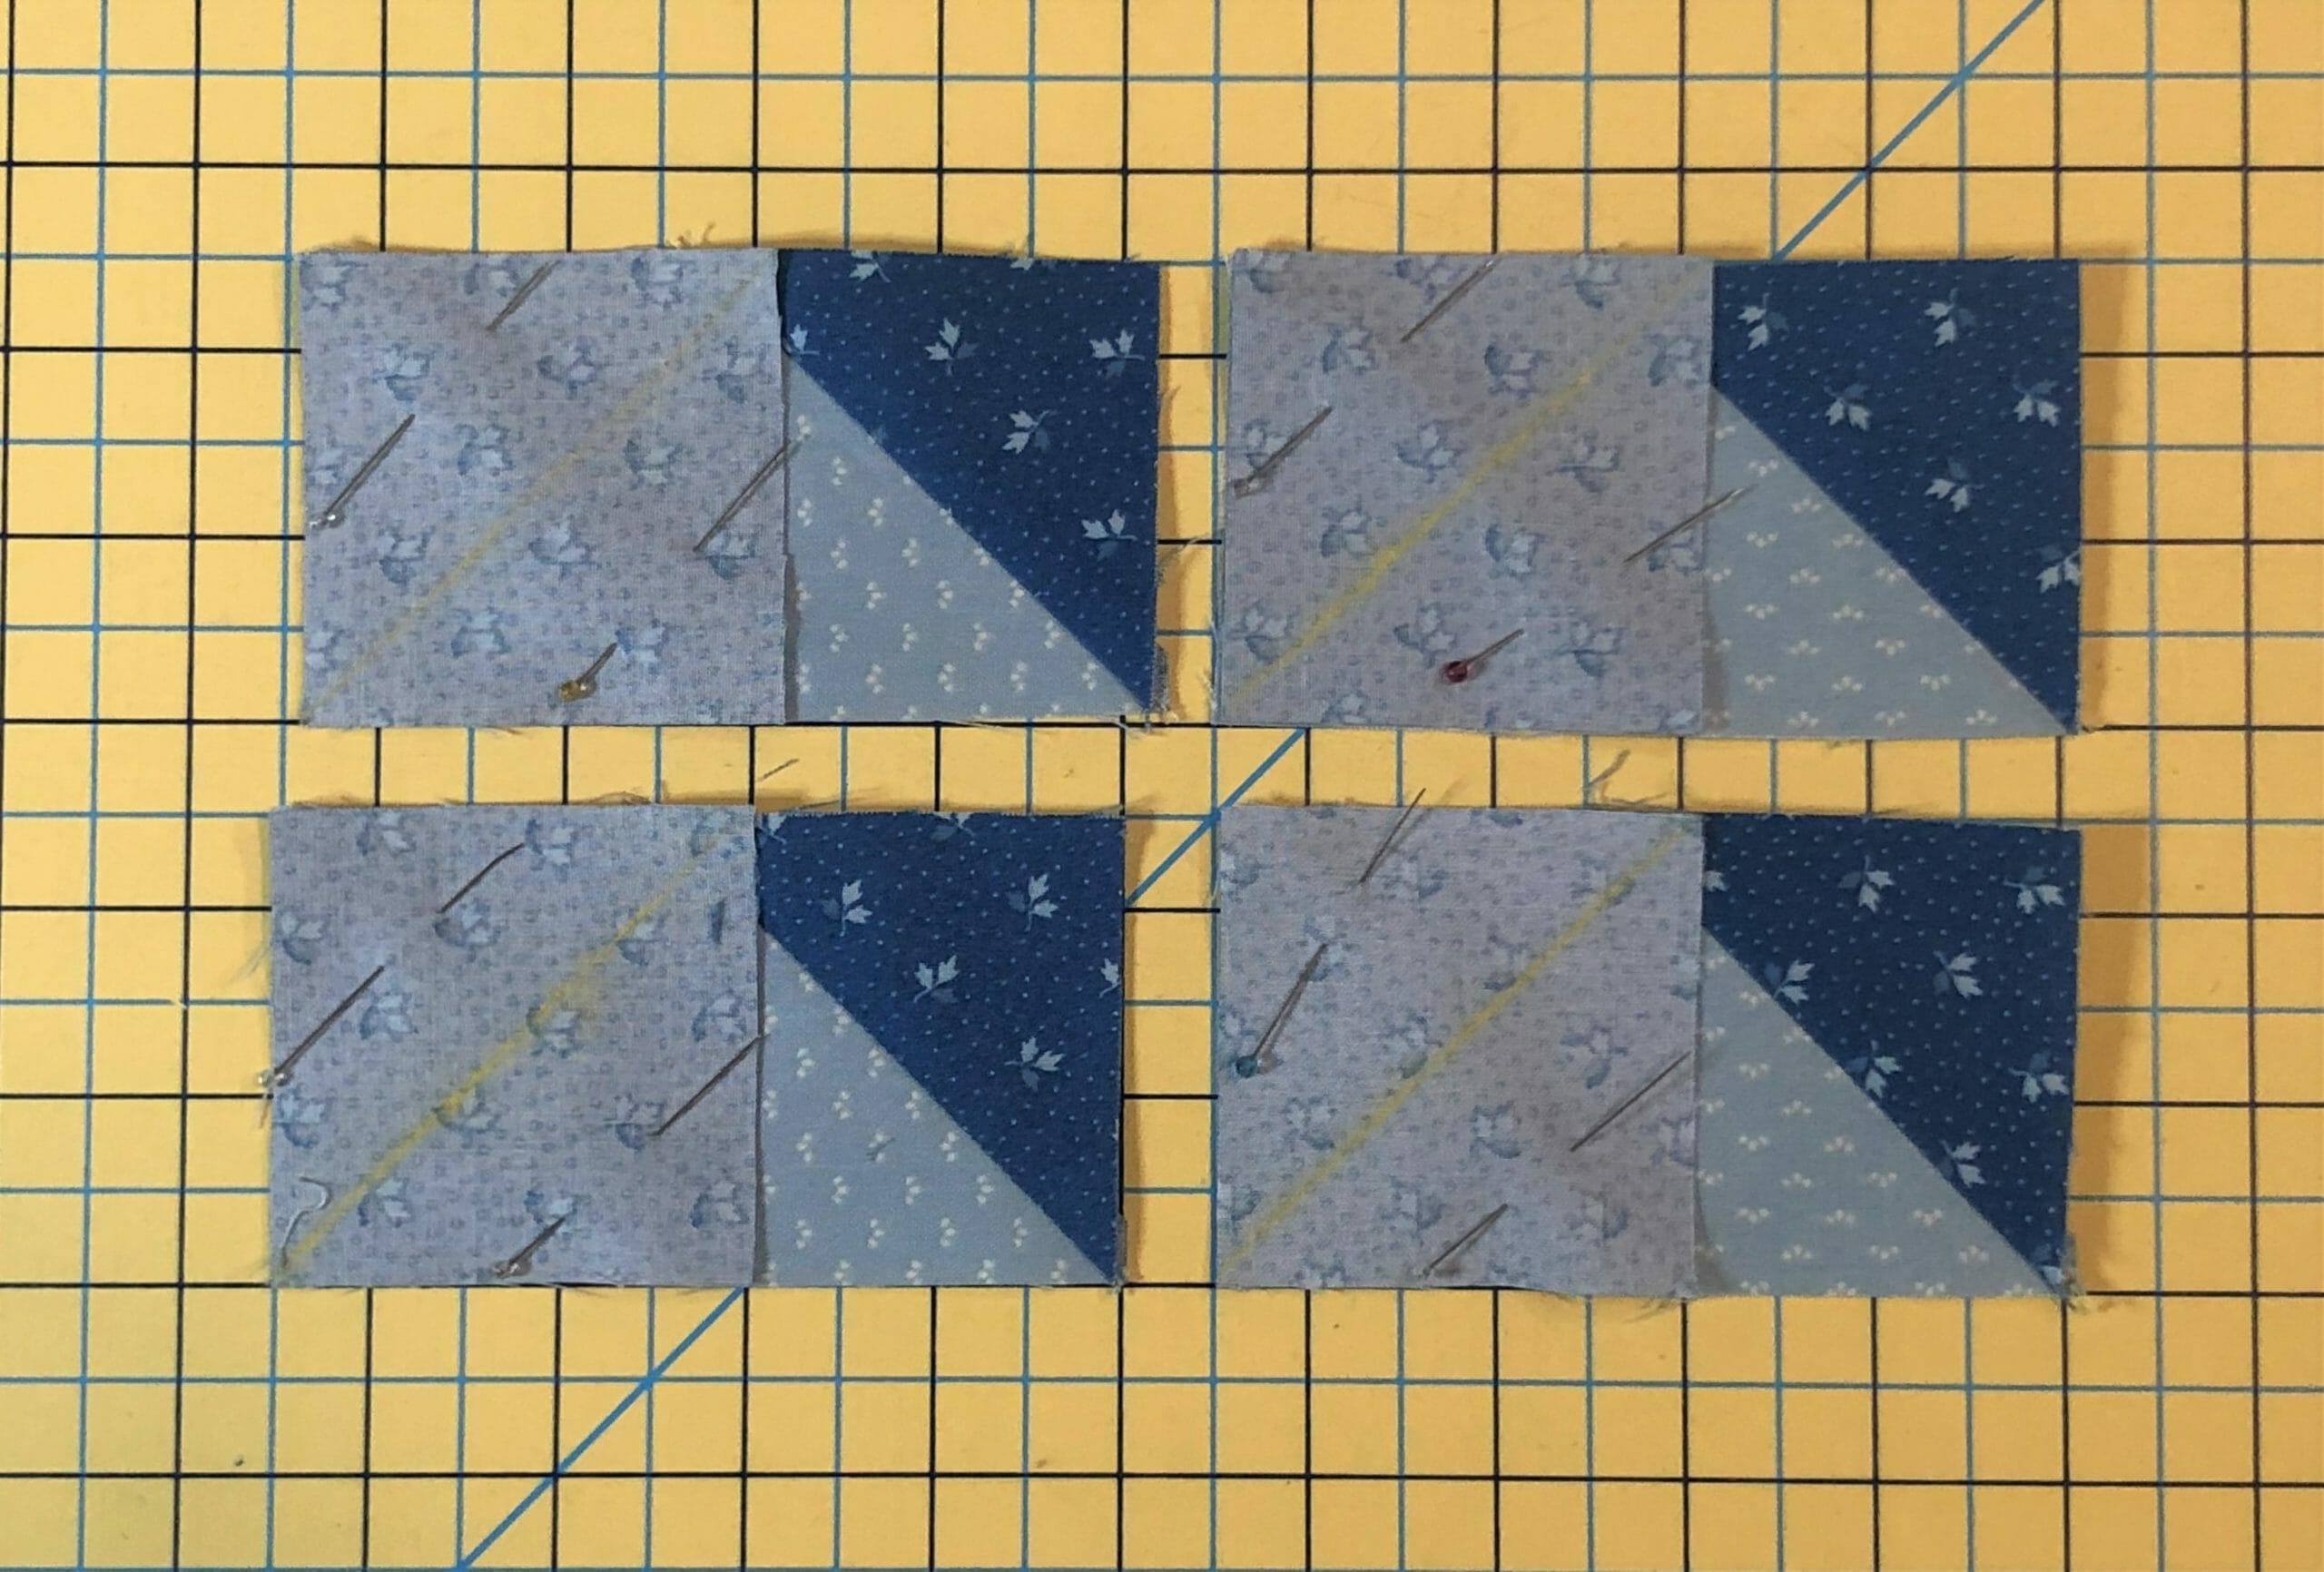
Next we will make four HST’s. Apparently I neglected to take a photo of these, but I think you all know how to make them.
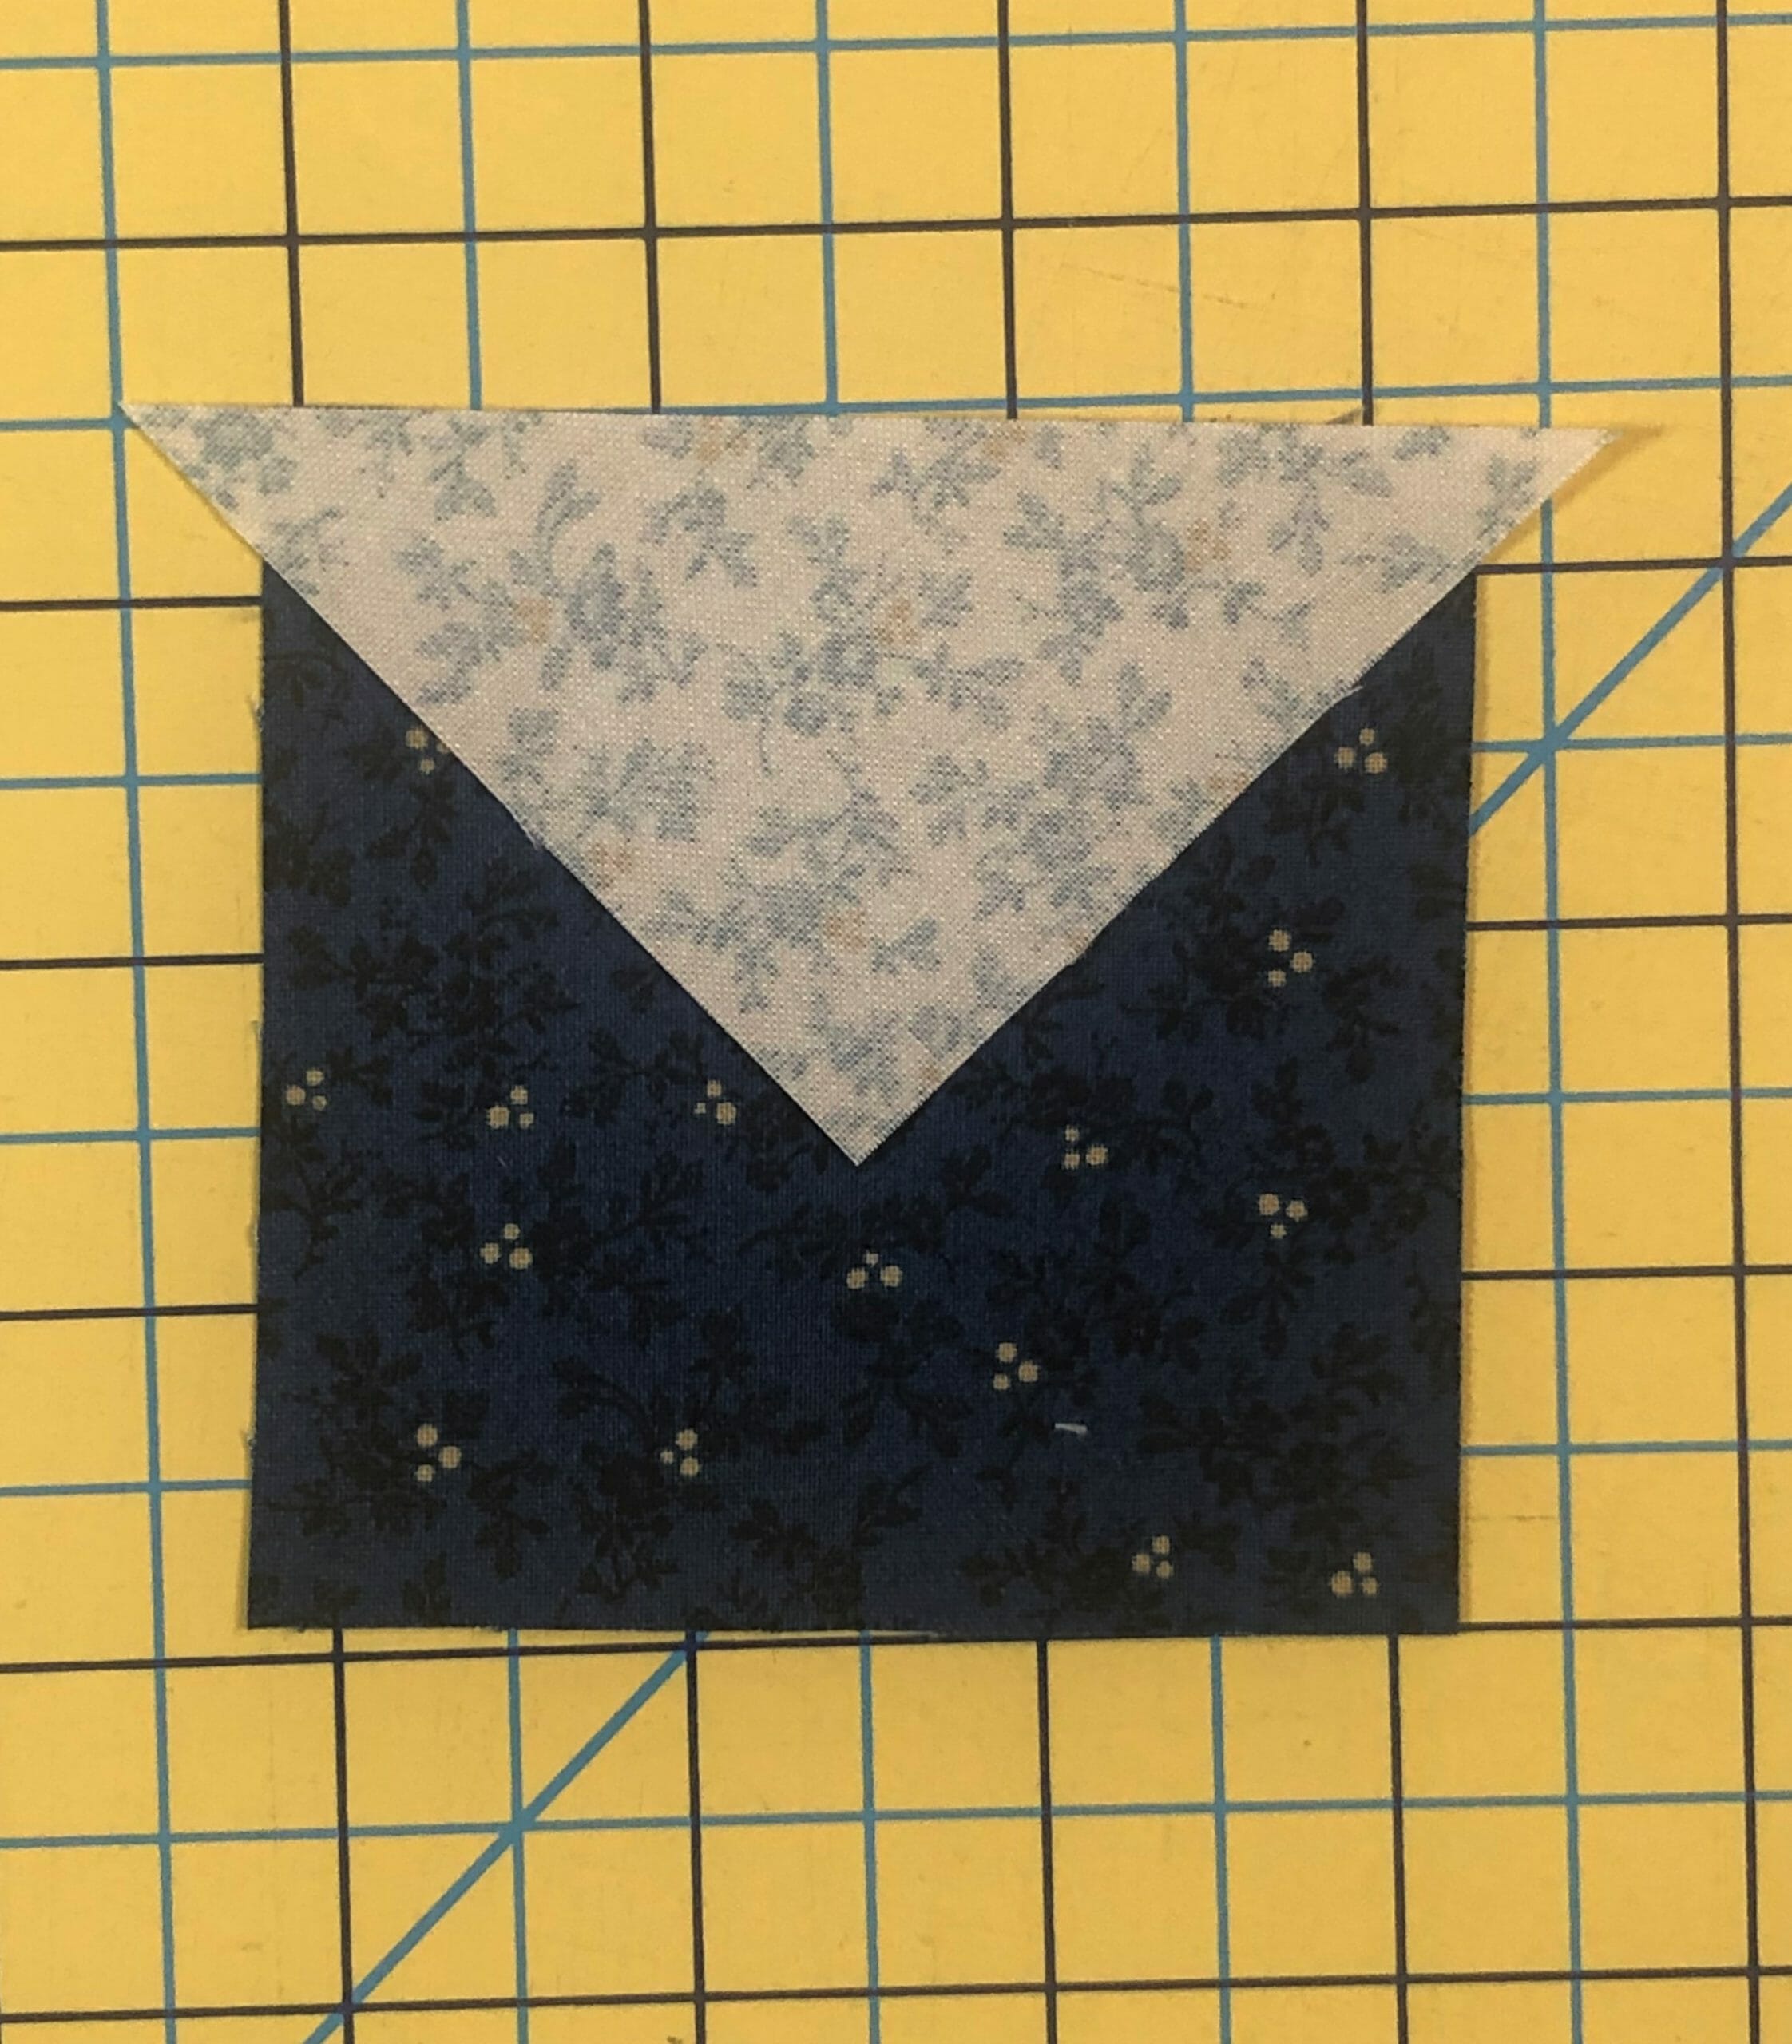
Last, but not least, we will make some flying geese. Usually my patterns have directions for no-waste flying geese, since they are my FAVORITE! But after getting a lot of feedback from customers, I decided to just use the simpler stitch and flip method with this pattern, especially since we don’t make that many in the quilt. And to be honest, I felt a little out of practice!
For those wanting to do the no-waste method, you’ll need to cut one 5-1/4” square from the Droplet, Lt. Denim fabric, and four 2-7/8” squares from the Soaring Leaves, Prussian Blue fabric. For anyone unfamiliar with this method for making flying geese, just look up No Waste Flying Geese on the internet, and you’ll find multiple tutorials.
A little tip for the stitch and flip method: I find it helpful to sew just BARELY outside (the side closest to the corner) of the line, so that I don’t end up with my corners coming up short. And by barely, I mean a thread or two. But again, it’s a suggestion, so you do you!

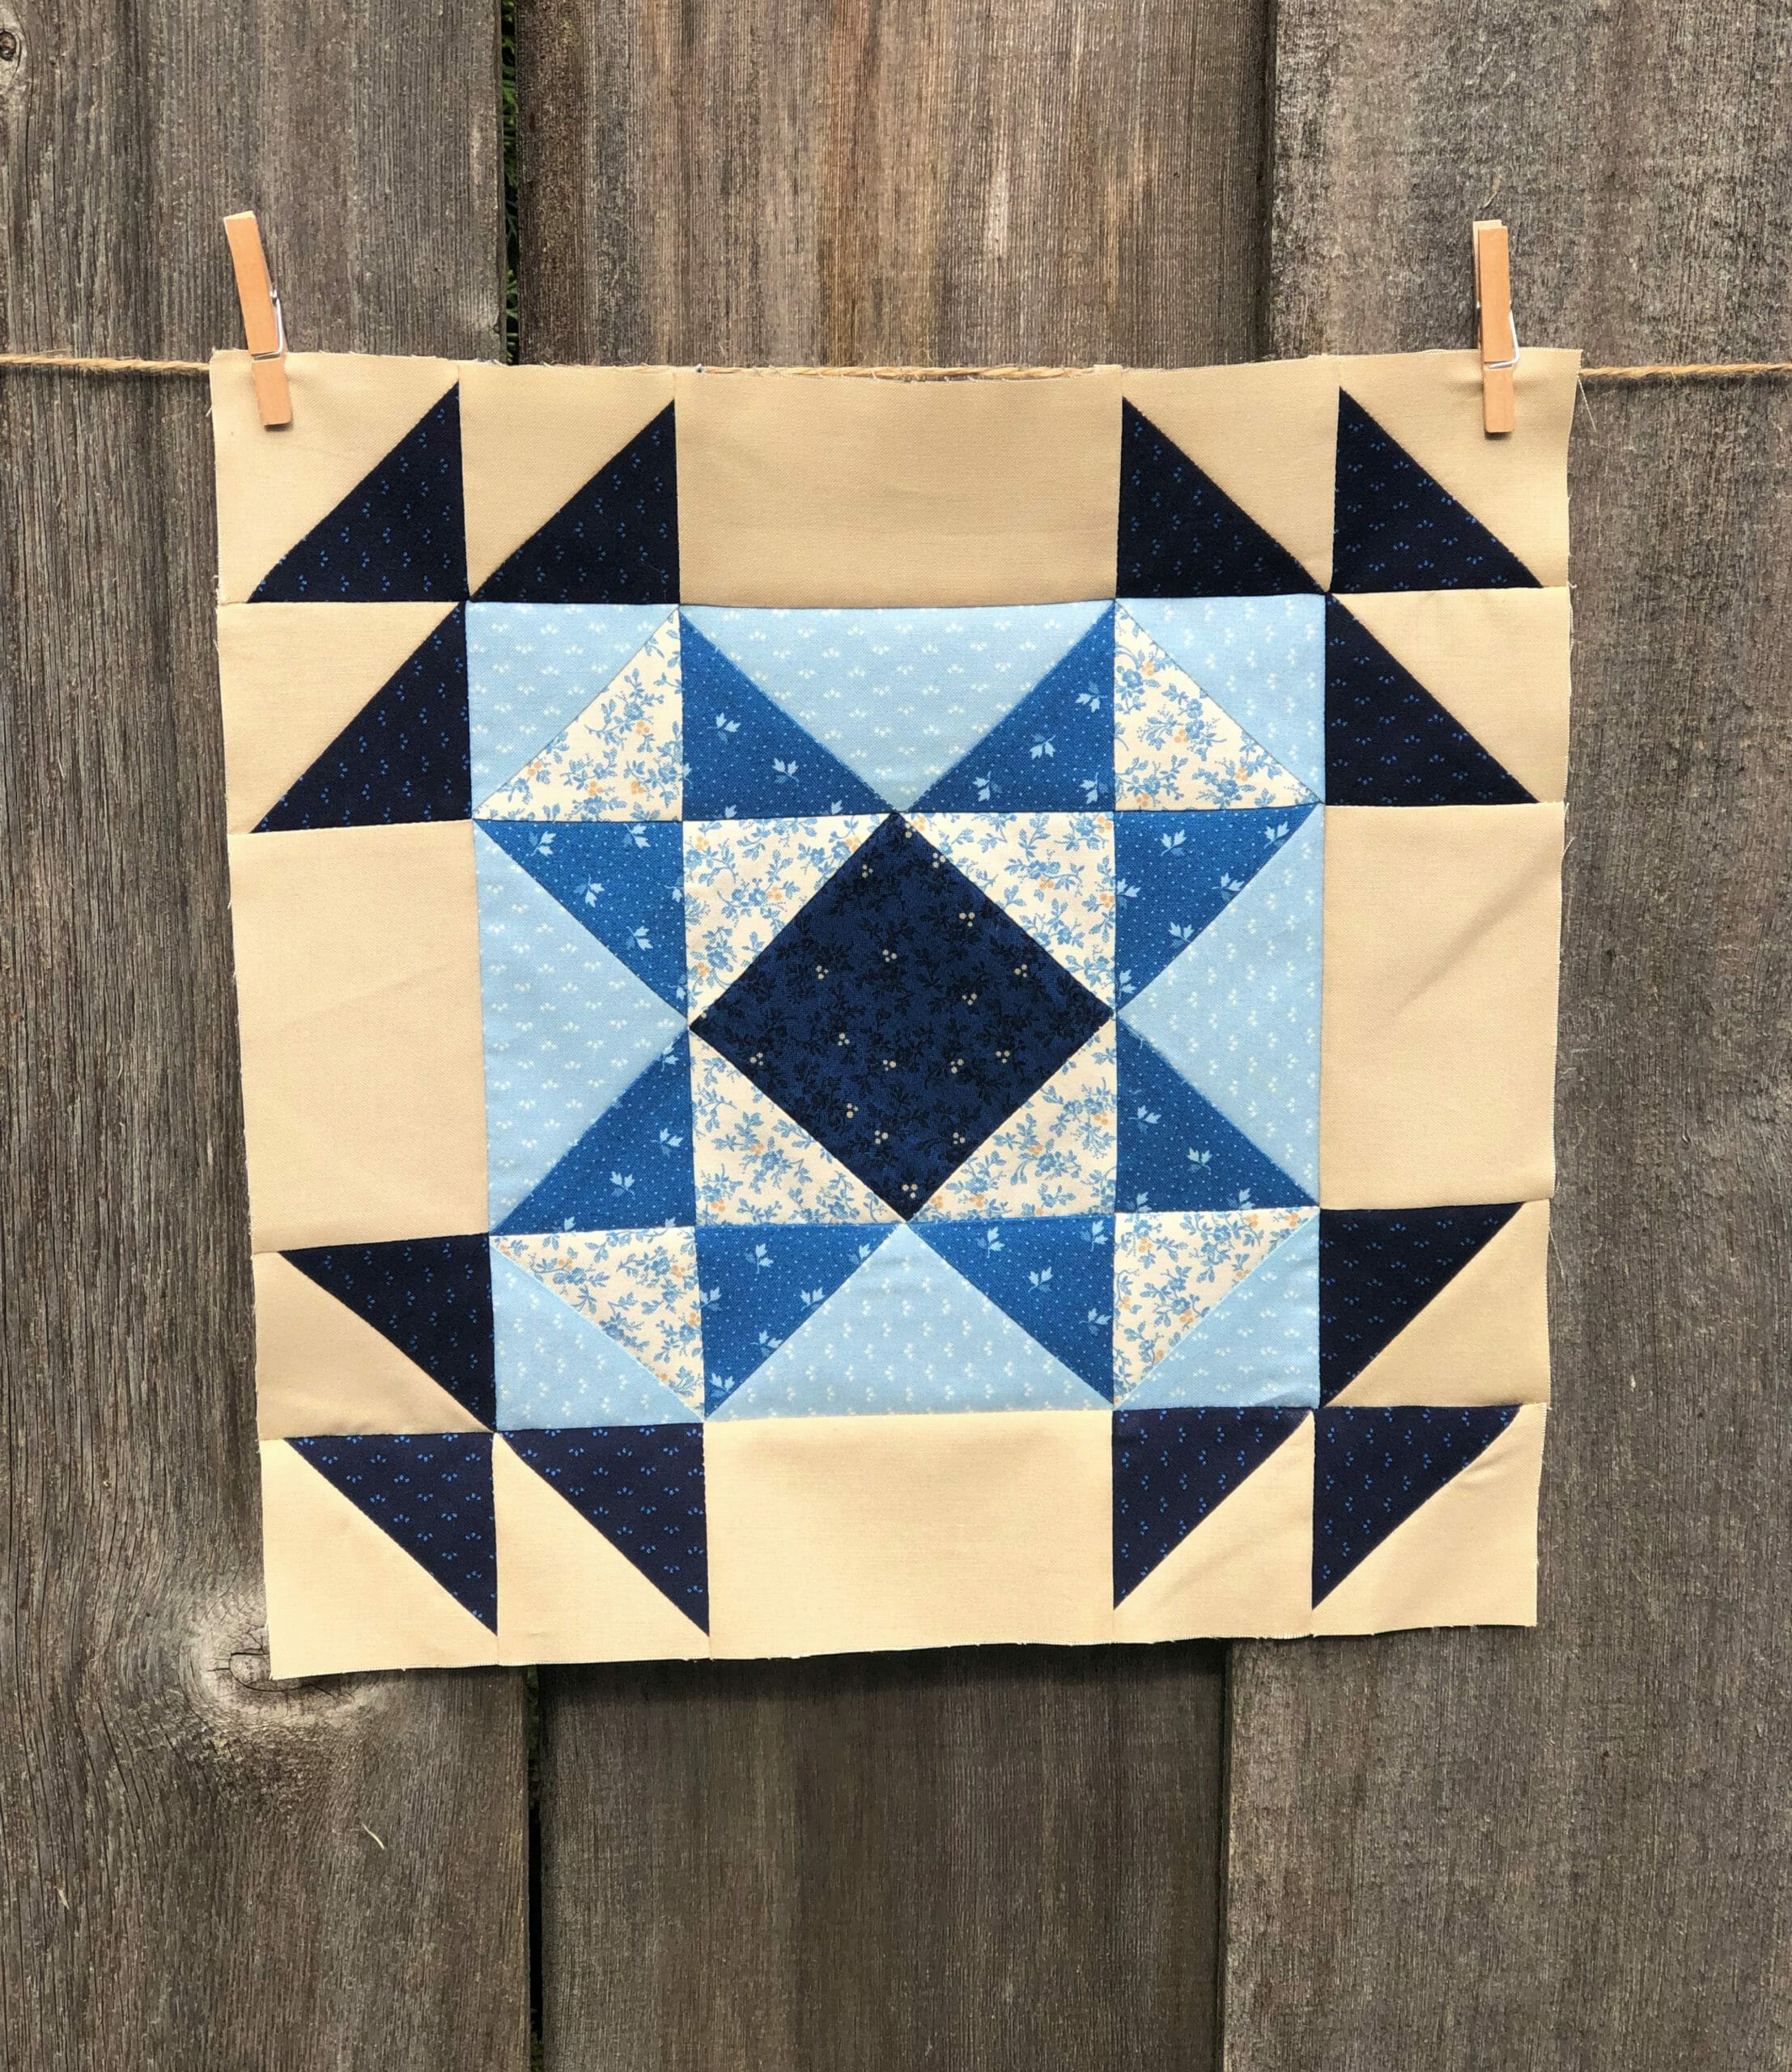
Now it’s time to assemble the block. I always lay everything out and double check that I haven’t flipped something the wrong way before I pin and sew.

As I was sewing and pressing, I continued to spray starch on this block, so that I could have better accuracy with getting my points to line up. I’m not sure I was entirely successful, but I decided it was good enough for me. I used to be really uptight about getting all my points to be PERFECT, and would rip and re-sew things multiple times sometimes, just to get everything to line up. In the past few years I stopped doing that so much, and now just enjoy!
This is also where you might choose to press the seams open, since there is quite a bit of bulk where the flying geese and the center diamond meet up. I pressed mine to the sides like a mad woman, lol!
Hopefully if all went well, this center unit should measure 8-1/2” square, and is ready to sew on our border pieces. We are going to get SO good at making these quilt block borders!

And, of course, we have an additional eight sashing strips to make…

If you want to be sneaky, you could even use your extra fabric to make a few extra, since you know that you’ll be making more anyway. I promise I won’t tell!
Well, that’s all for this month. Yay, we did it! Thanks for stopping by, and please either comment below, or shoot me an email if you have any questions.
Happy Quilting everyone!
Kristin